24 Winter Crafts for Adults You Can Finish in One Evening

Snow gathers on the windowsill, the air smells like cinnamon and pine, and your hands crave something to do. These quiet winter evenings are perfect for making small, meaningful things that warm your space and spirit.
Each of these crafts fits neatly into one cozy night. You’ll use simple tools and clear steps to create pieces that feel personal and intentional.
1. Frosted Pinecone Wreath
Easy
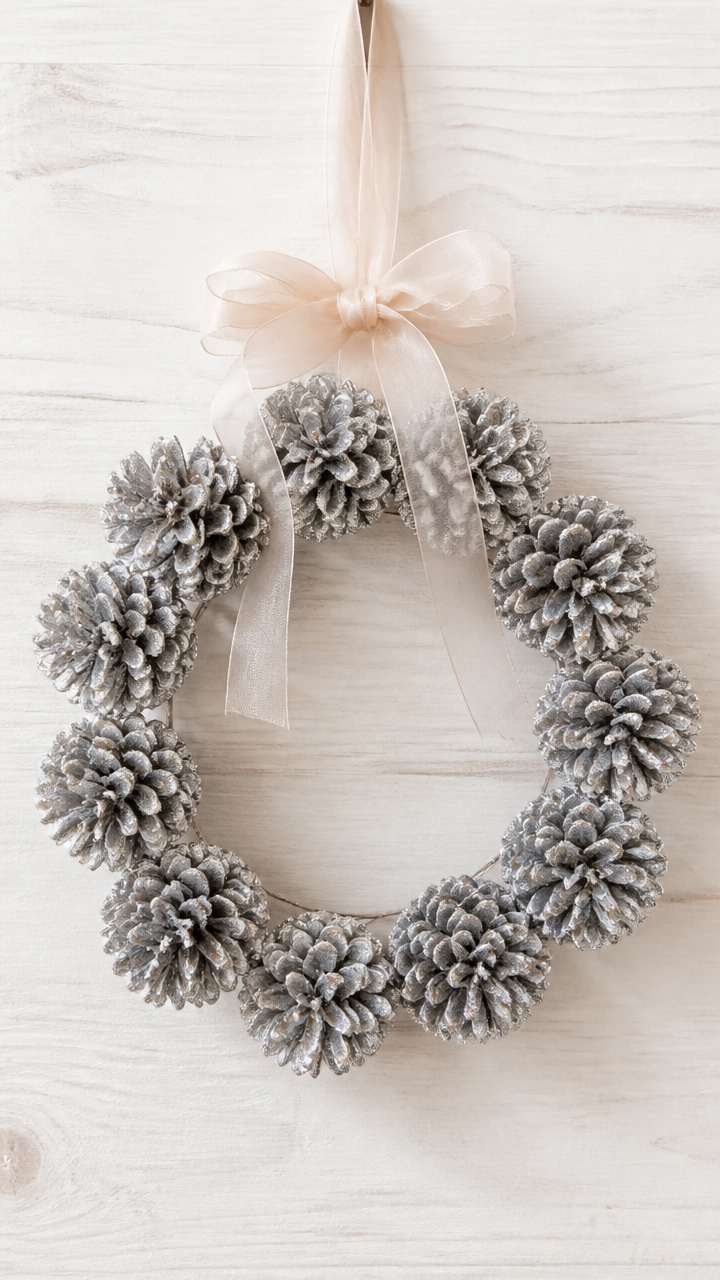
Delicate silver-dusted pinecones form a luminous ring that catches candlelight and sparkles like frost. This wreath brings subtle woodland magic to any front door or mantel.
Materials Needed
- 12 medium pinecones, cleaned and dried
- 12-inch wire wreath frame
- Silver glitter spray paint
- Hot glue gun with glue sticks
- Ribbon for hanging, 18-inch length
How to Make It
- Lay pinecones on a protected surface outdoors or in a well-ventilated area. Spray evenly with silver glitter spray paint. Let dry for 30 minutes.
- Apply hot glue to the base of each pinecone and press firmly onto the wire frame. Space them evenly around the circle.
- Glue ribbon to the top back of the frame for hanging. Let glue cool completely before displaying.
2. Knit Mug Cozy
Moderate
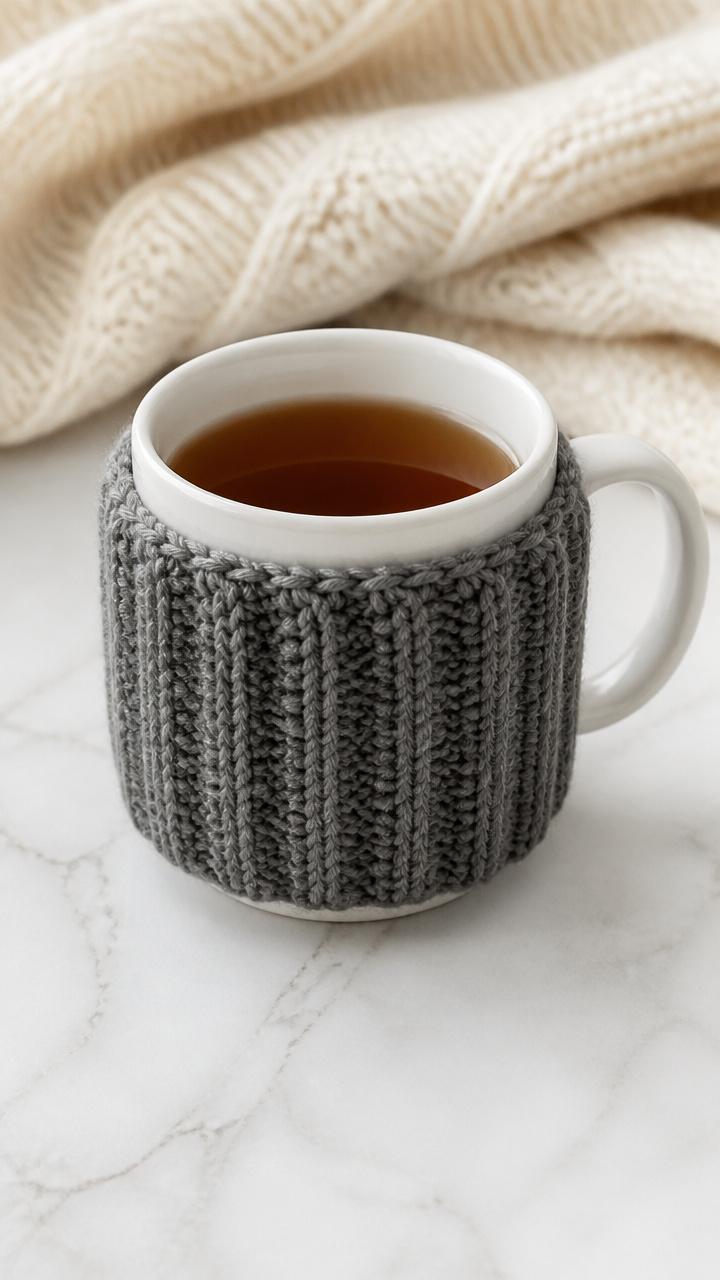
Soft merino wool wraps your coffee cup snugly, keeping drinks warm while adding texture to your desk. You can wear it like a bracelet when not in use.
Materials Needed
- 100 yards fingering weight merino wool yarn in heather gray
- US size 6 (4 mm) double-pointed knitting needles
- Stitch marker
- Yarn needle
How to Make It
- Cast on 24 stitches and join in the round, placing a stitch marker. Knit every round for 7 inches.
- Switch to k2, p2 ribbing for the next 1.5 inches. Bind off loosely.
- Weave in ends with a yarn needle. Slide onto a standard ceramic mug to check fit.
3. Pressed Spruce Branch Art
Easy
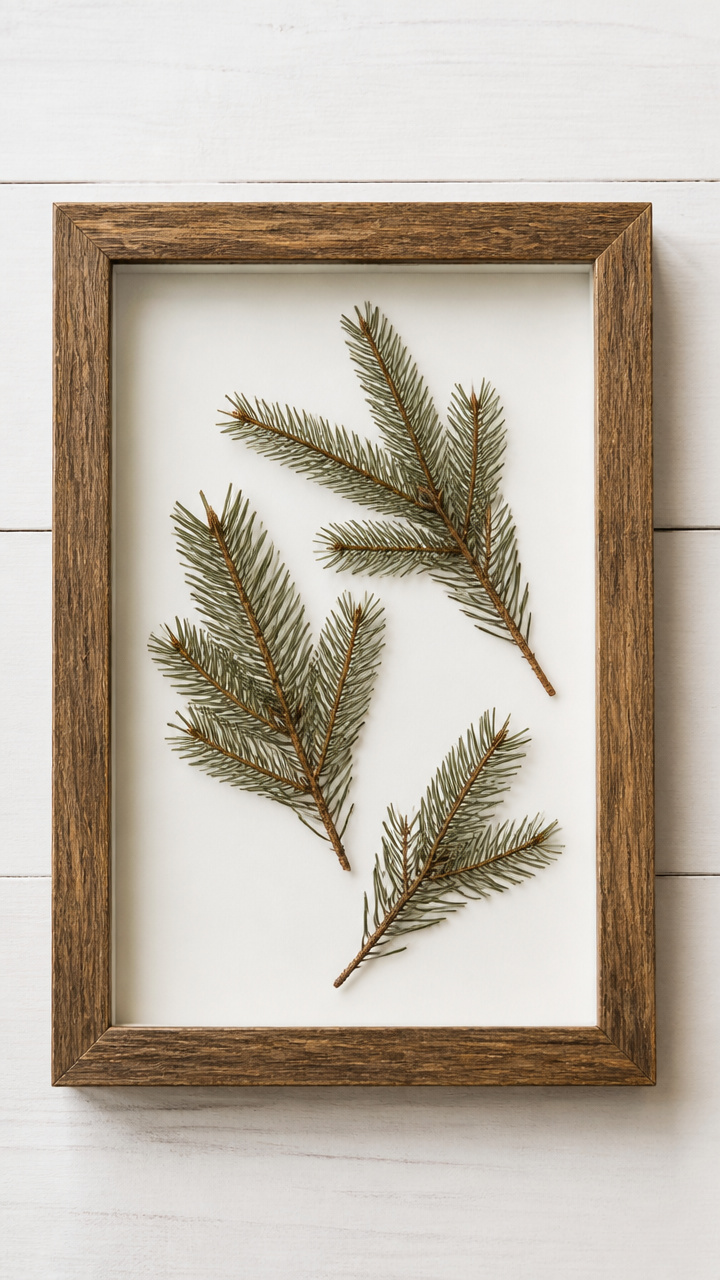
Flat spruce cuttings pressed between glass capture the sharp scent and fine detail of evergreen boughs. Frame them to make rustic wall art with seasonal depth.
Materials Needed
- Fresh spruce branches, 4-inch lengths (3 pieces)
- Heavy book or plant press
- 8×10-inch picture frame with glass front
- White cardstock, cut to 8×10 inches
- Double-sided tape
How to Make It
- Place spruce branches between two sheets of paper inside a heavy book. Press for 24 hours.
- Arrange the flattened spruce pieces on the cardstock in a diagonal line. Secure with small pieces of double-sided tape.
- Insert the cardstock into the frame behind the glass. Close and hang immediately.
4. Cinnamon Stick Candle Holder
Easy
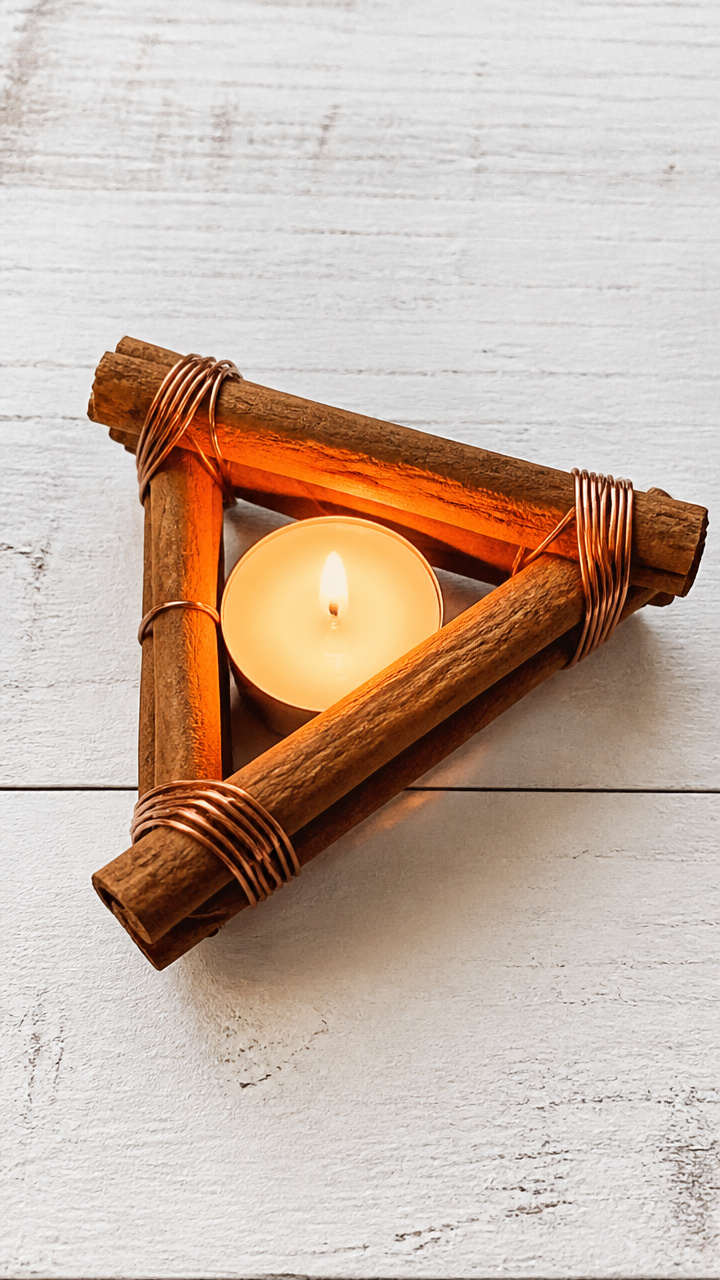
Three cinnamon sticks bound with copper wire cradle a tea light, releasing warmth and spice as it burns. The flicker through the gaps casts dancing shadows.
Materials Needed
- 3 whole cinnamon sticks, 6 inches long
- 24-gauge copper wire, 18 inches long
- Tealight candle
- Wire cutters
How to Make It
- Lay the three cinnamon sticks side by side. Wrap copper wire tightly around one end, twisting the ends together at the back.
- Repeat the wrap at the opposite end. Trim excess wire with cutters.
- Slide in a tealight. Place on a heat-safe surface before lighting.
5. Wool Felt Snowflakes
Moderate
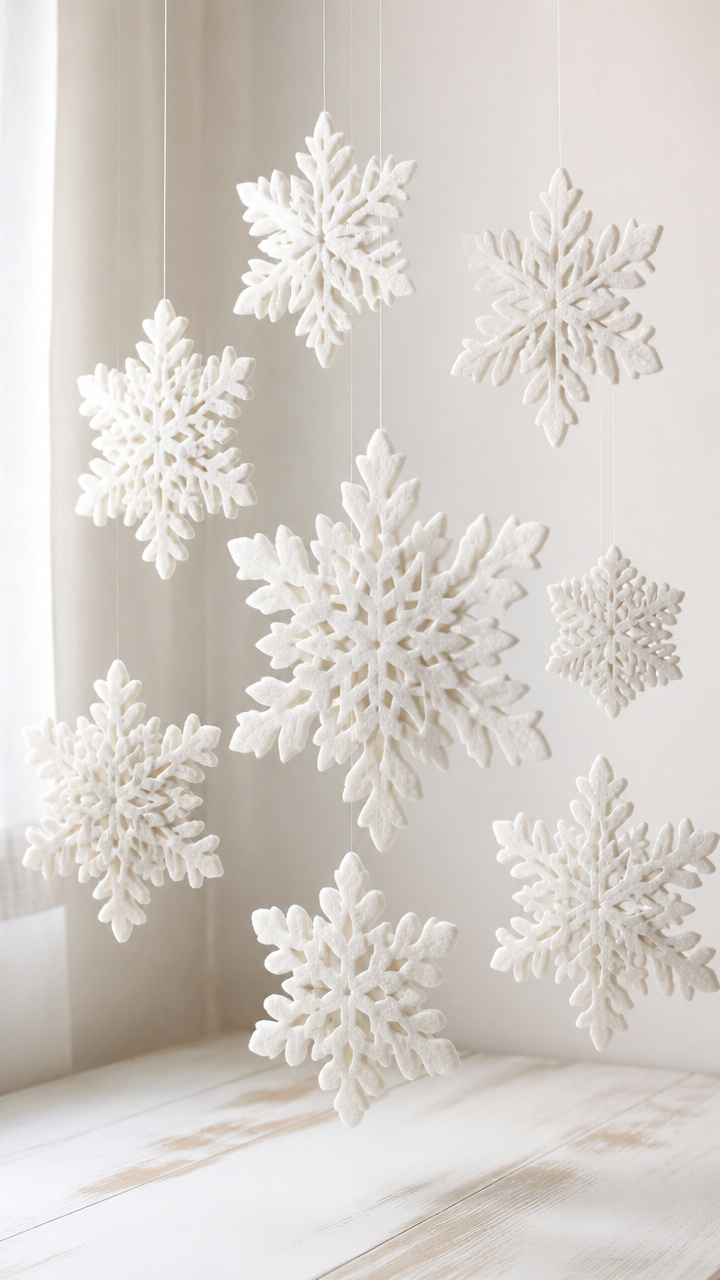
Laser-cut precision meets handmade charm in these layered felt snowflakes. Hang them in a cluster from the ceiling for a floating winter sky.
Materials Needed
- White wool felt sheet, 9×12 inches
- Paper snowflake template (printable, 4-inch diameter)
- Fabric scissors
- Fabric glue
- Clear fishing line, 2 feet
How to Make It
- Trace the snowflake template onto the felt twice. Cut out both shapes carefully with fabric scissors.
- Apply a thin line of fabric glue around the edge of one snowflake. Press the second on top to sandwich them.
- Let dry for 20 minutes. Thread fishing line through the top point and knot securely for hanging.
6. Maple Syrup Soap Bars
Advanced
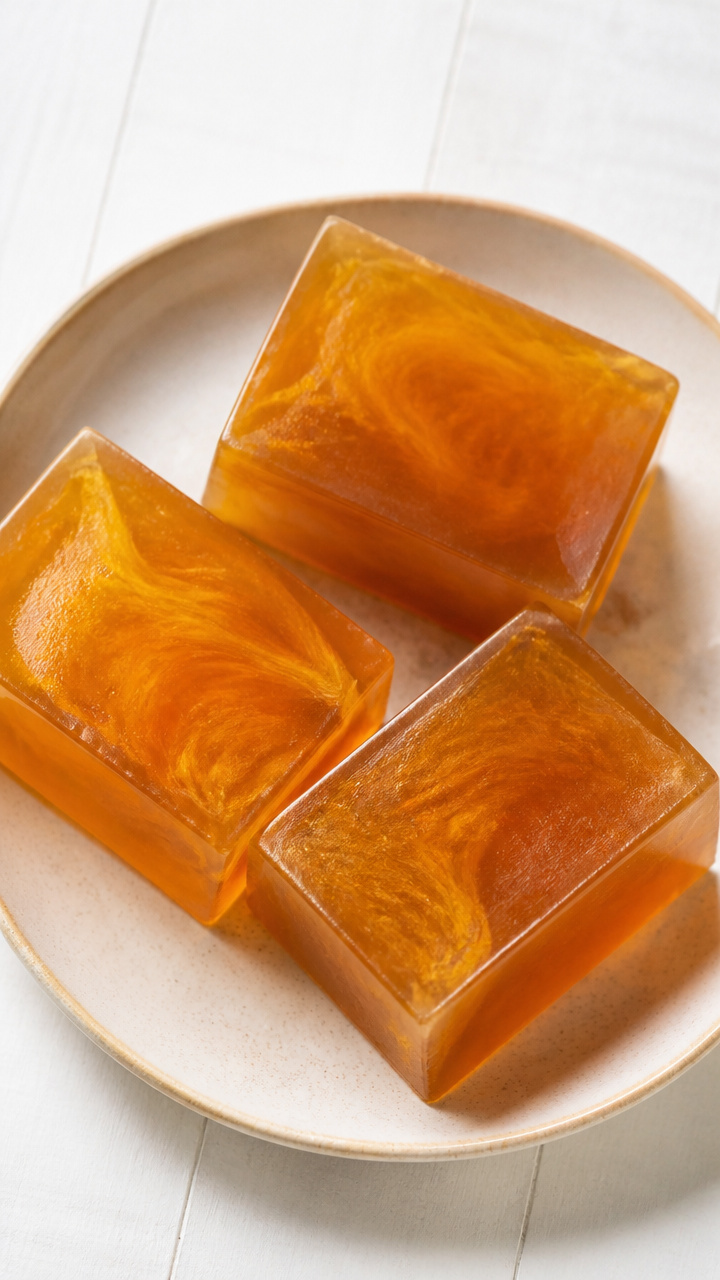
Amber-hued soaps swirled with real maple syrup smell like breakfast on a snowy morning. They lather richly and leave skin softly scented.
Materials Needed
- 1 pound glycerin soap base, clear
- 2 tablespoons pure maple syrup
- 10 drops vanilla essential oil
- Silicone loaf mold
- Heat-safe glass measuring cup
- Rubbing alcohol in spray bottle
How to Make It
- Cut glycerin base into cubes and melt in the measuring cup using a double boiler. Heat until fully liquid, about 8 minutes.
- Stir in maple syrup and vanilla oil. Pour slowly into the silicone mold.
- Spritz the top lightly with rubbing alcohol to remove bubbles. Cool for 2 hours before unmolding.
7. Twine-Wrapped Votive Holders
Easy
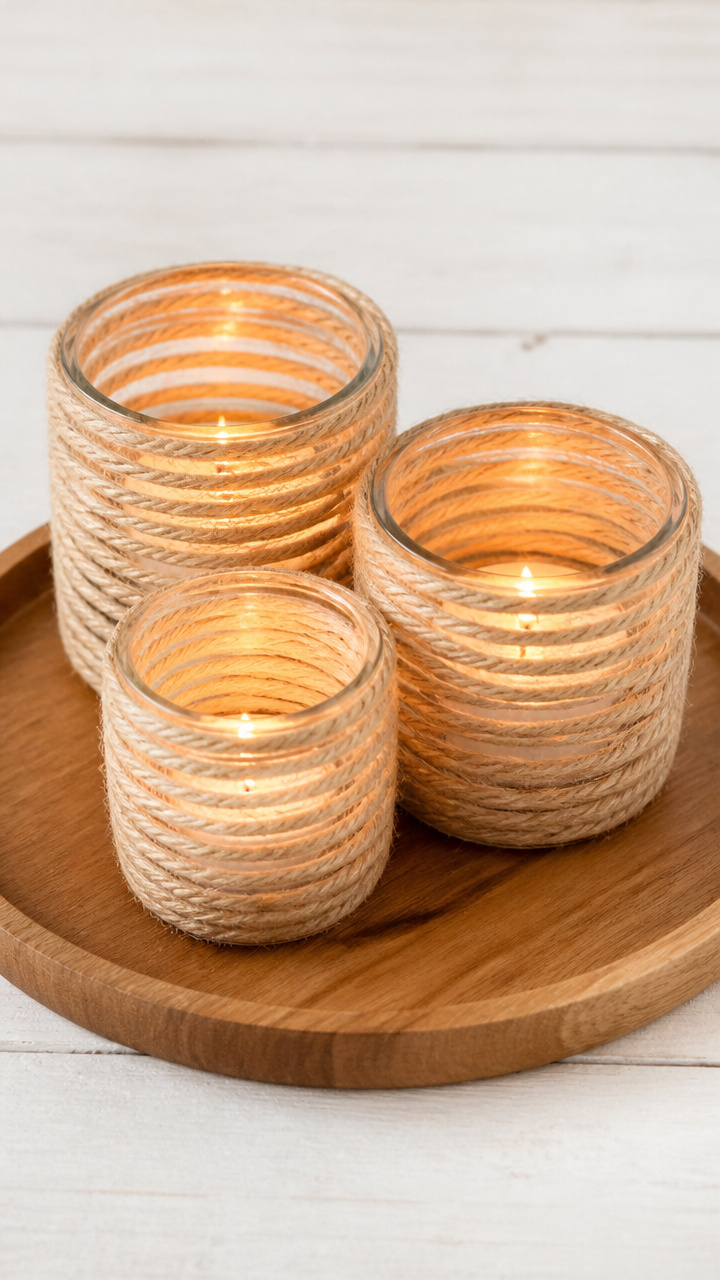
Natural jute twine spirals up clear glass votives, softening the flame within. Group them on a tray for a centerpiece that feels earthy and inviting.
Materials Needed
- 3 clear glass votive holders
- Jute twine, 1/8 inch thick, 15 feet total
- Craft glue
- Scissors
How to Make It
- Apply a small dot of craft glue to the bottom outside of a votive. Press the end of the twine into it and hold for 10 seconds.
- Wrap the twine tightly around the glass, adding a dot of glue every inch to secure. Overlap slightly for full coverage.
- When you reach the top, cut the twine and glue the end down. Repeat for all three holders.
8. Mini Cross-Stitch Ornaments
Moderate
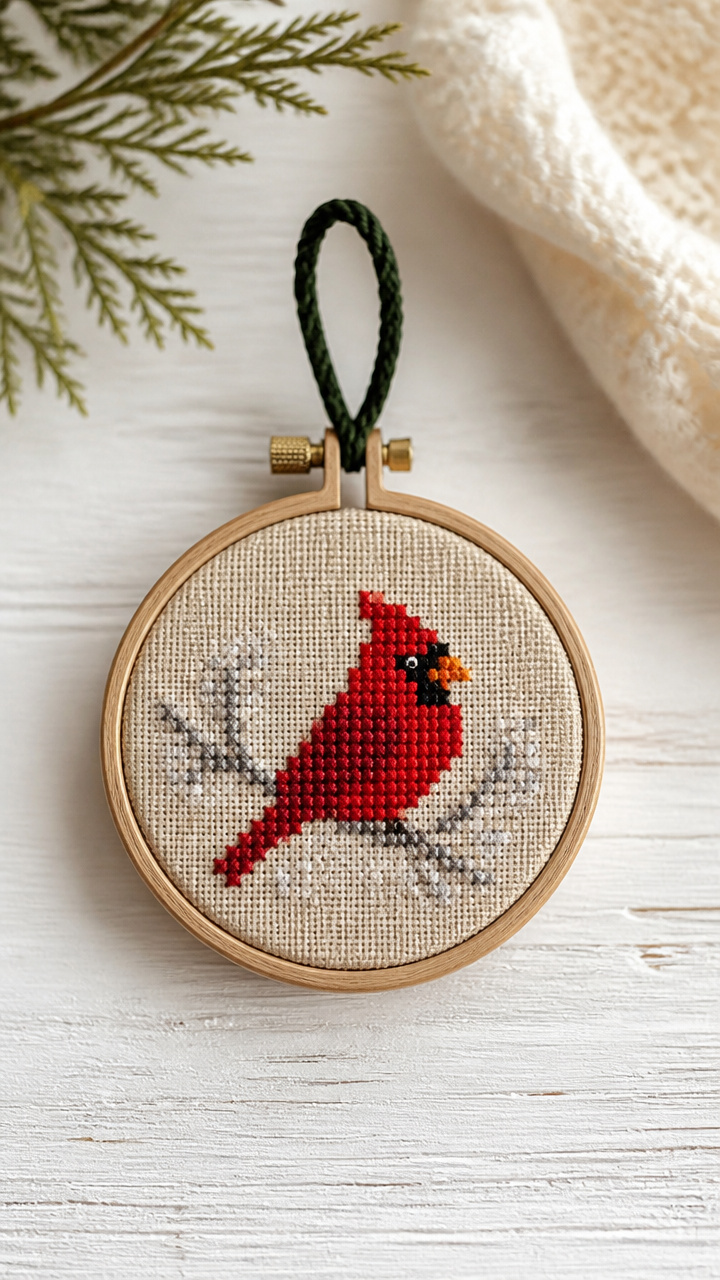
Tiny red cardinal designs stitched on linen become keepsake tree decorations. Each one takes under two hours and fits in the palm of your hand.
Materials Needed
- 10×10 cm Aida cloth, 14 count
- Embroidery hoop, 4 inches
- Red and gray embroidery floss (6 strands each)
- Tapestry needle
- Green embroidery floss for loop, 12 inches
- Scissors
How to Make It
- Secure the Aida cloth in the hoop. Stitch the cardinal design using cross-stitch technique, following a printed pattern.
- After completing, trim the fabric to 3 inches square, leaving a border around the stitching.
- Thread green floss through the top corner and tie a loop for hanging. Knot securely.
9. Salt Dough Ornaments
Easy
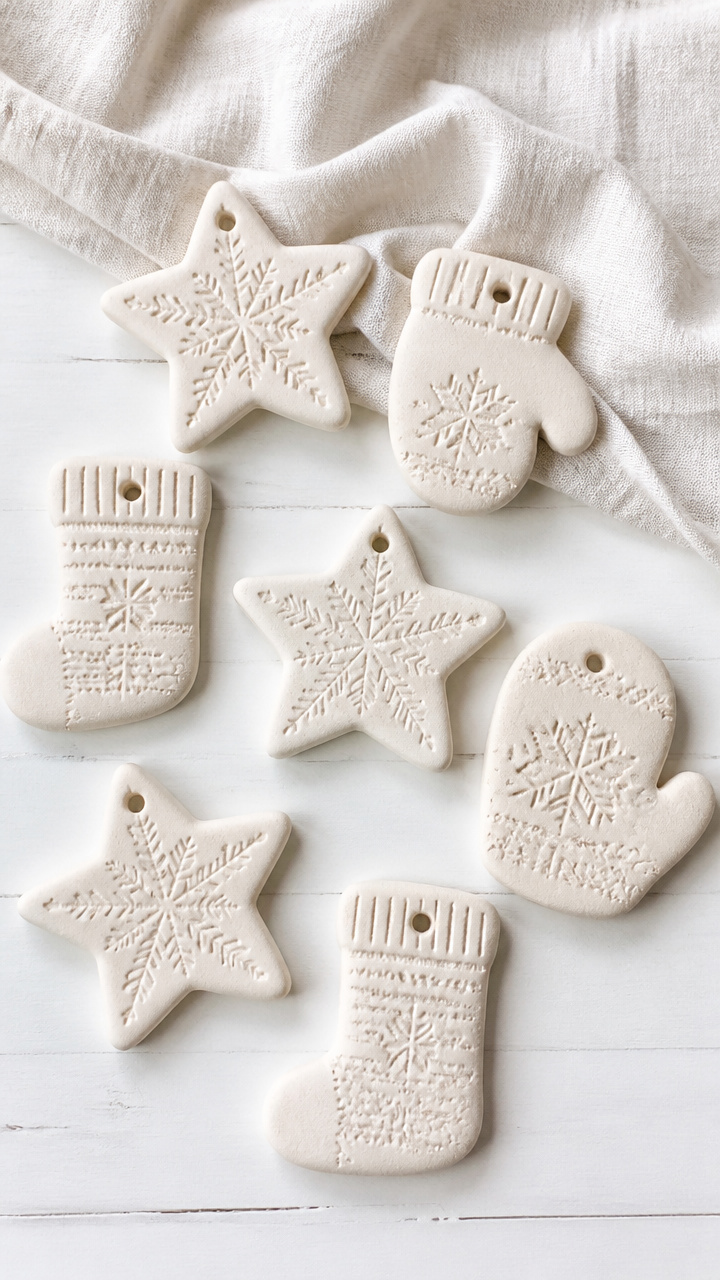
Hand-shaped stars stamped with mittens and boots preserve the season in a keepsake that lasts years. Kids love helping, but adults enjoy the nostalgic process too.
Materials Needed
- 1 cup all-purpose flour
- 1/2 cup table salt
- 1/2 cup warm water
- Cookie cutters (star, mitten, boot)
- Straw
- Baking sheet
- Parchment paper
- Acrylic paint and brush set
- Ribbon, 6 inches per ornament
How to Make It
- Mix flour, salt, and water in a bowl until a smooth dough forms. Roll to 1/4 inch thickness on a floured surface.
- Cut shapes with cookie cutters. Push a straw through the top edge of each to make a hanging hole.
- Bake on a parchment-lined sheet at 200°F for 3 hours. Let cool completely.
- Paint each ornament with acrylics. Let dry, then thread ribbon through the hole.
10. Dried Orange Garland
Easy
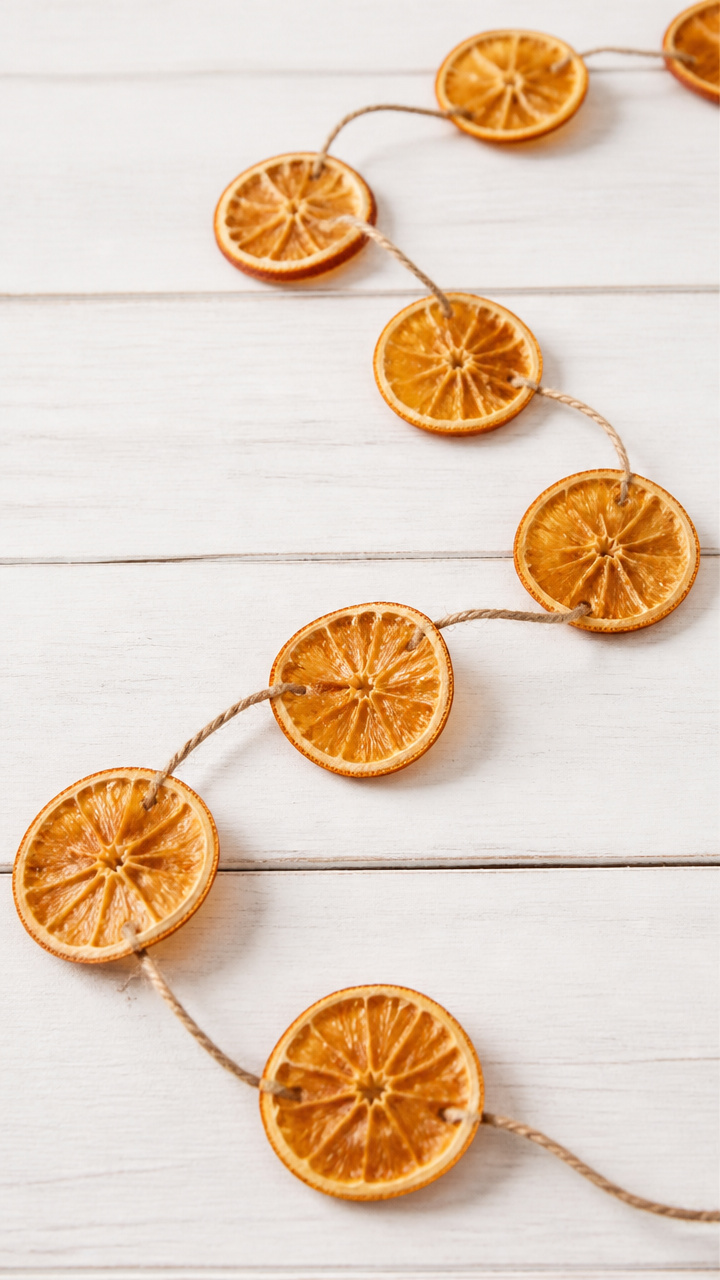
Thin slices of orange baked until crisp dangle on twine like tiny suns. Their citrusy warmth brightens dark corners and holiday tables.
Materials Needed
- 4 large navel oranges
- Chef's knife
- Baking sheet
- Parchment paper
- Oven
- Jute twine, 3 feet
- Needle with large eye
How to Make It
- Slice oranges into 1/4-inch rounds using the chef's knife. Arrange on a parchment-lined baking sheet.
- Bake at 200°F for 3 hours, flipping halfway. Let cool completely.
- Thread the needle with twine and pierce through the top edge of each slice, spacing them evenly. Tie ends to hang.
11. Quilled Paper Snowflake
Moderate
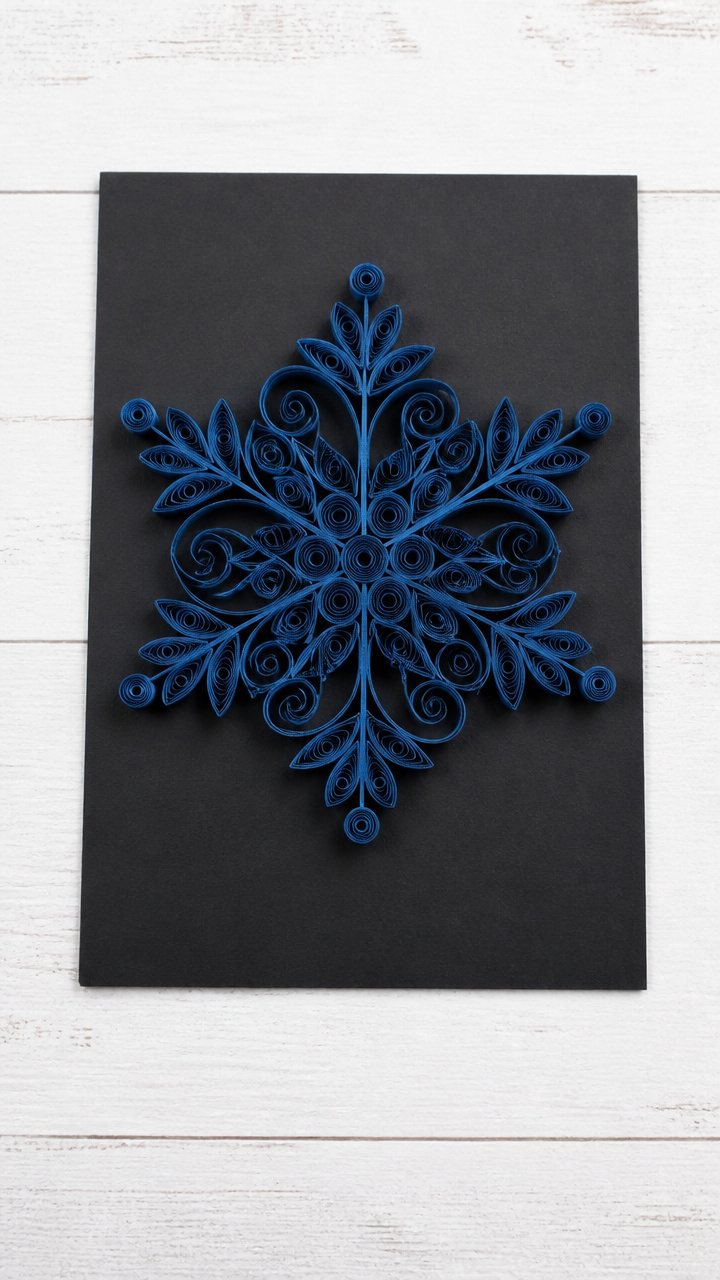
Tightly coiled strips of deep blue paper form a symmetrical snowflake with elegant dimension. Mount it on matte black for dramatic contrast.
Materials Needed
- Blue quilling paper strips, 1/4 inch wide, 12 inches long (12 pieces)
- Quilling tool
- White glue
- Black mat board, 5×7 inches
- Tweezers
- Clear drying glue pen
How to Make It
- Roll each strip tightly around the quilling tool to form a tight coil. Secure the end with a dab of white glue.
- Let five coils relax slightly into loose circles. Pinch each at one point to make teardrops.
- Arrange six teardrop shapes in a star pattern on the mat board. Glue tips together at center and outer points using the glue pen.
- Let dry flat for 30 minutes before touching.
12. Scented Cedar Drawer Liner
Easy
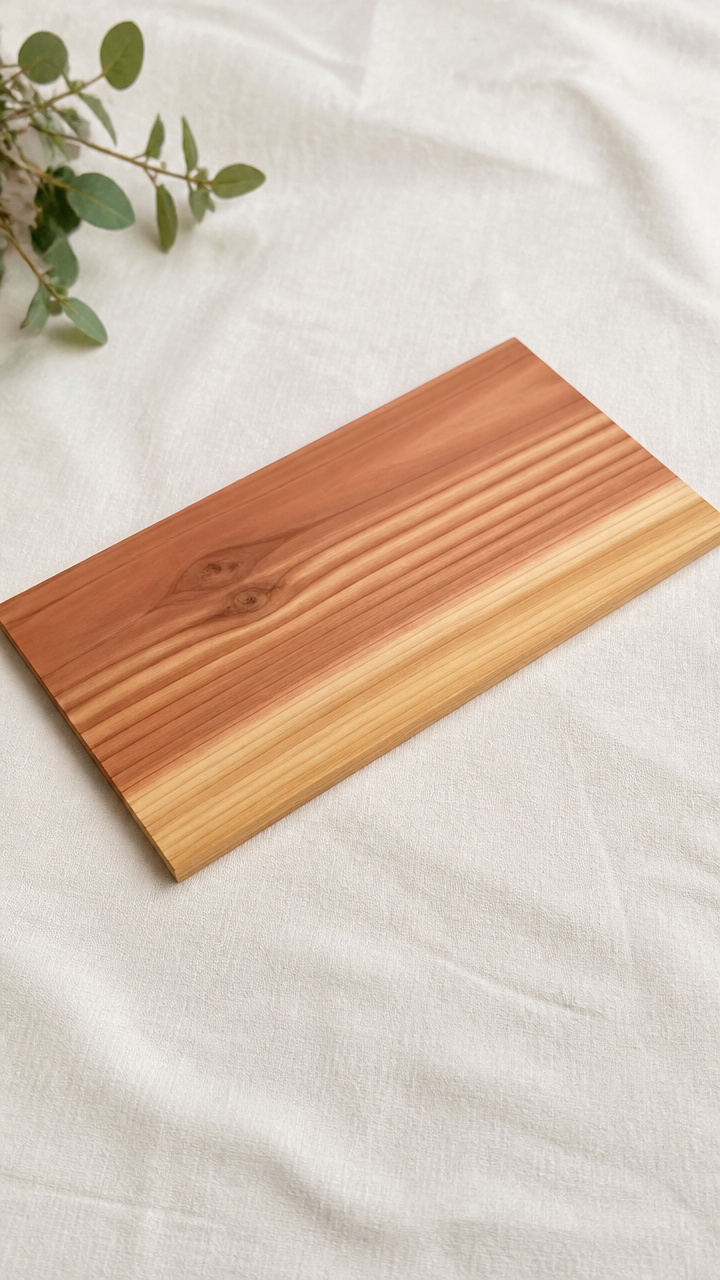
Shavings from aromatic cedar planks deter moths and perfume folded sweaters. Cut it to fit any dresser drawer for instant freshness.
Materials Needed
- Cedar plank, 12×6 inches
- Orbital sander with 120-grit sandpaper
- Ruler
- Utility knife
- Drawer liner template (measured to your drawer)
How to Make It
- Sand the cedar plank thoroughly until fine shavings collect on your work surface. Gather the shavings into a pile.
- Measure your drawer interior and mark the liner shape on the plank with the ruler.
- Cut along the lines with the utility knife. Place the cut piece in the drawer, scattering shavings on top.
13. Copper Wire Bookmarks
Easy
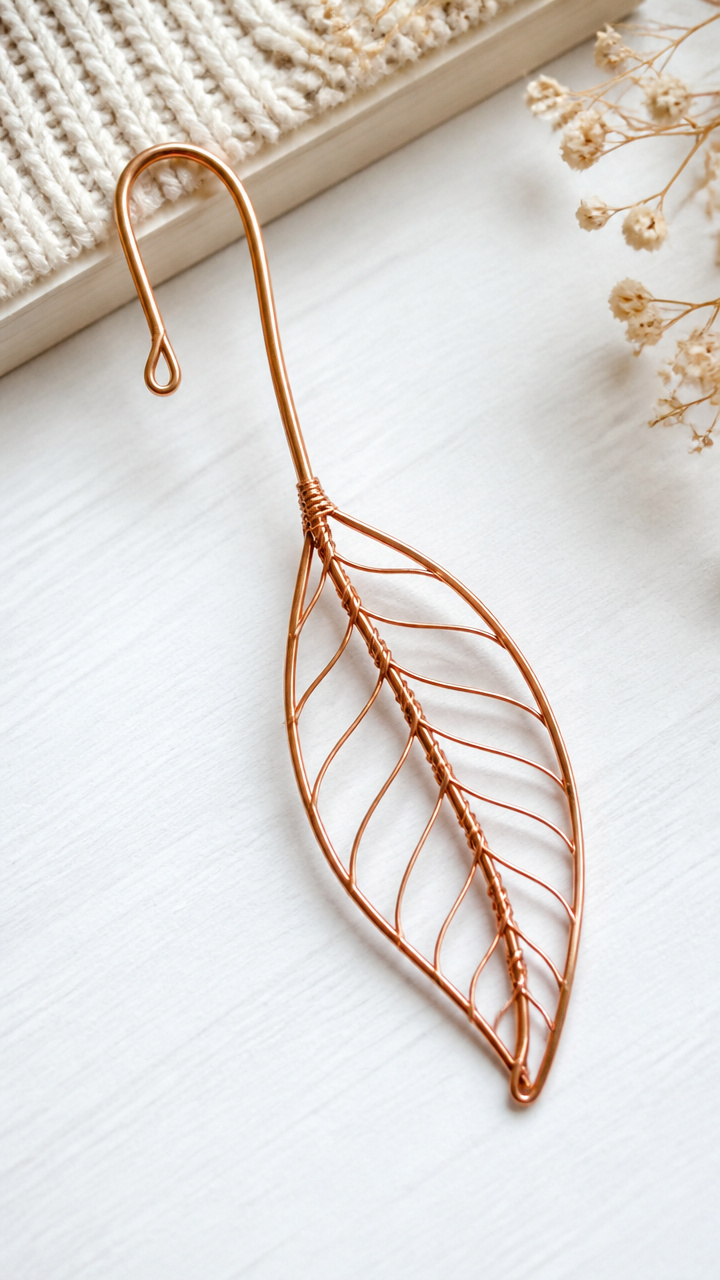
A single twist of copper wire curls into a leaf shape that won’t dog-ear your pages. It catches the light and slides easily between pages.
Materials Needed
- 20-gauge copper wire, 8 inches long
- Chain-nose pliers
- Round-nose pliers
How to Make It
- Use the round-nose pliers to curl the first inch of wire into a small spiral at one end.
- Bend the remaining wire at a 90-degree angle 1 inch from the spiral.
- Shape the long end into a gentle leaf curve using the chain-nose pliers. Smooth any sharp ends by rolling between fingers.
14. Beeswax Food Wraps
Moderate
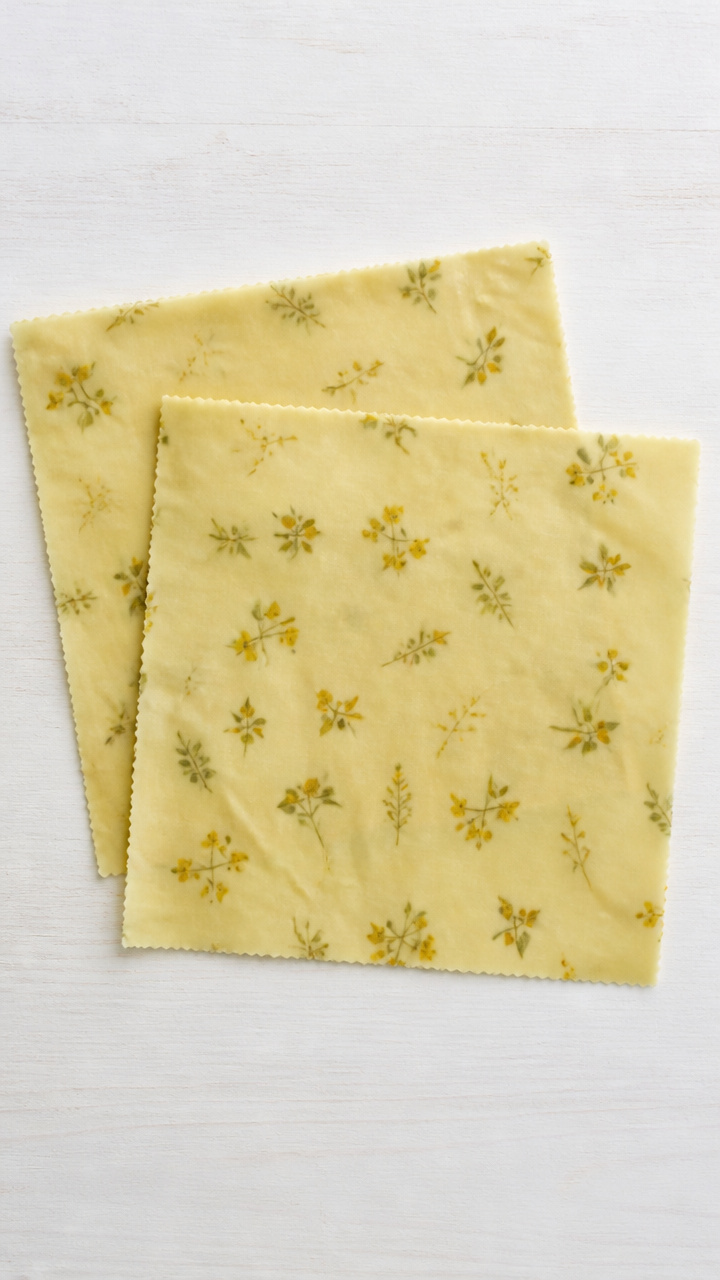
Cotton squares infused with beeswax seal bowls and wrap cheese without plastic. They’re washable, reusable, and smell faintly of honey.
Materials Needed
- 100% cotton fabric, 12×12 inches (2 pieces)
- Grated beeswax, 3 tablespoons
- Jojoba oil, 1 teaspoon
- Parchment paper
- Baking sheet
- Pastry brush
How to Make It
- Preheat oven to 200°F. Lay one fabric square on parchment paper on the baking sheet.
- Sprinkle 1.5 tablespoons grated beeswax and 1/2 teaspoon jojoba oil evenly over the fabric.
- Bake for 5 minutes. Remove and brush melted mixture across the surface to coat fully. Bake 2 more minutes.
- Cool completely on the counter. Repeat for second wrap.
15. Ice Lantern with Berries
Easy
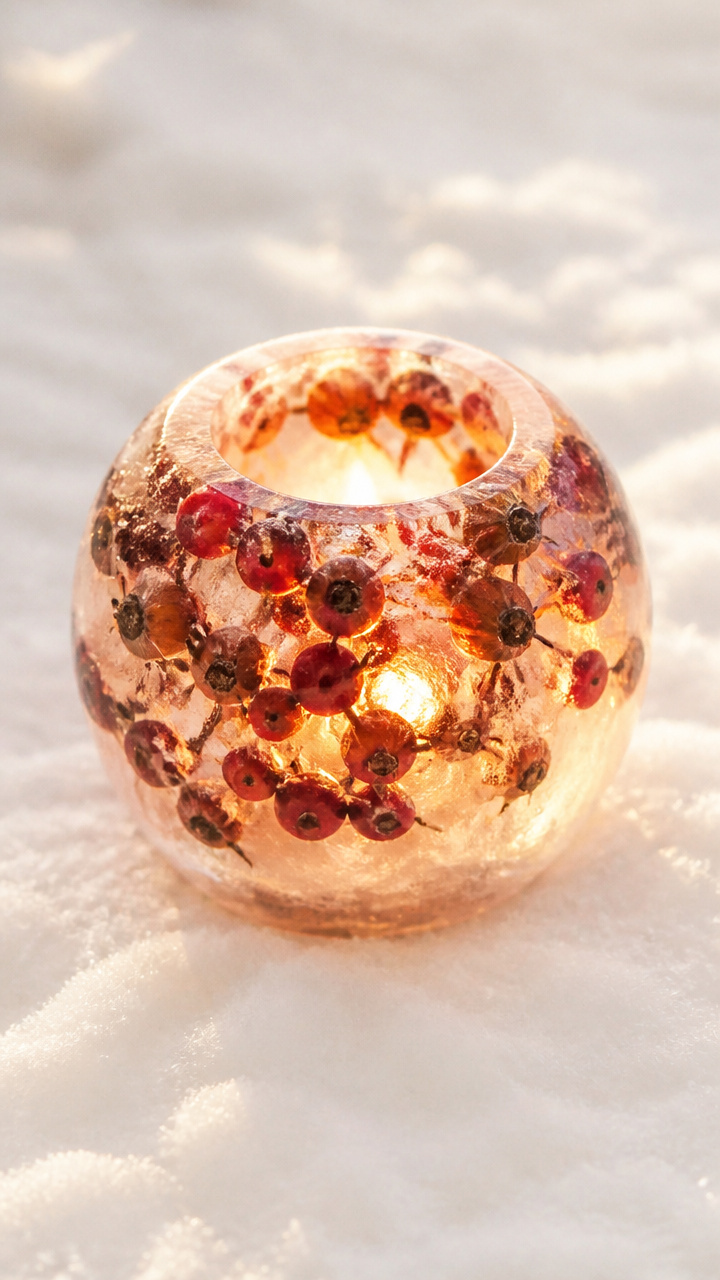
Frozen water balloons filled with cranberries and rosehips glow like rubies when lit from within. Set it outside to anchor your winter nightscape.
Materials Needed
- Large balloon, 12-inch inflated diameter
- Water
- 1/2 cup fresh cranberries
- 1/4 cup dried rosehips
- Outdoor string light or battery lantern
How to Make It
- Fill the balloon with water using a funnel. Add cranberries and rosehips before tying the neck.
- Place the balloon in a bucket outside. Freeze solid overnight.
- Run warm water over the balloon to peel away the rubber. Place a string light inside the ice cavity.
16. Loom-Knit Infinity Scarf
Moderate
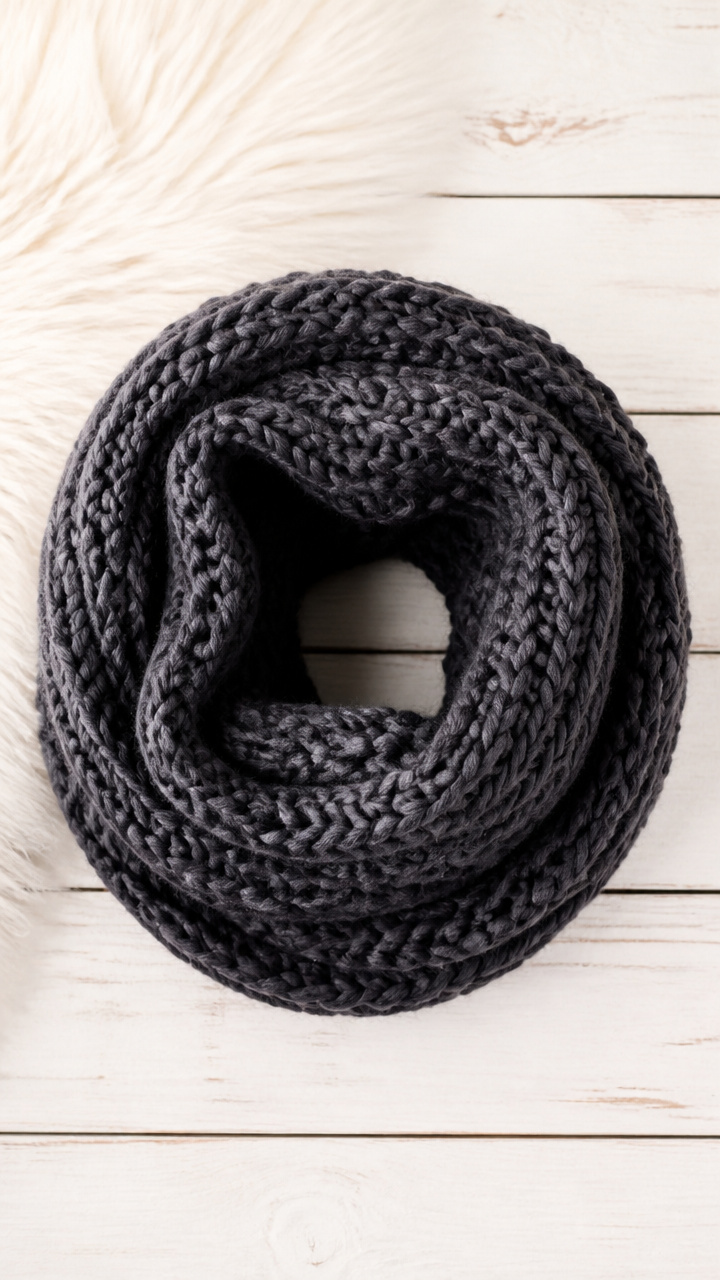
Rows of stretchy knit loops build quickly on a rectangular loom. Choose bulky yarn for a plush scarf that wraps twice with ease.
Materials Needed
- Rectangular knitting loom with 24 pegs
- Bulky weight yarn, 150 yards in charcoal gray
- Loom hook
- Yarn needle
How to Make It
- Cast on by looping yarn around each peg in a clockwise direction. Complete one full row.
- Use the loom hook to lift the bottom loop over the top on each peg. Add a new row of yarn across all pegs.
- Repeat the knit row process until the scarf measures 60 inches. Bind off and weave ends with the yarn needle.
17. Gilded Twig Coasters
Easy
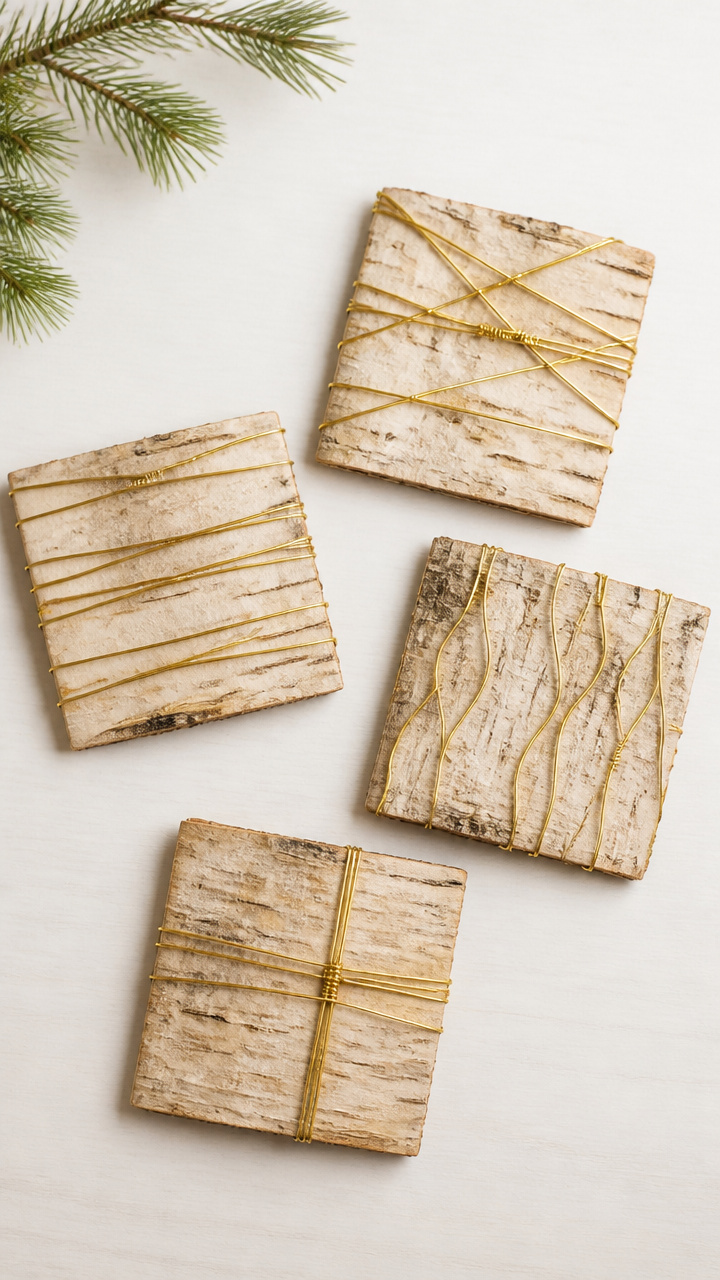
Slivers of birch bark wrapped with gold wire become rustic coasters that protect surfaces in style. They feel organic yet refined.
Materials Needed
- 4 birch bark pieces, 4×4 inches
- Gold wire, 20-gauge, 12 inches per coaster
- Wire cutters
- Round-nose pliers
How to Make It
- Cut four 12-inch lengths of gold wire. Wrap one around the edge of a bark square, bending it at corners with pliers.
- Overlap the ends neatly at one corner and press closed. Ensure the wire hugs the bark tightly.
- Repeat for remaining coasters. Use immediately or store flat in a dry place.
18. Embroidered Denim Patches
Moderate
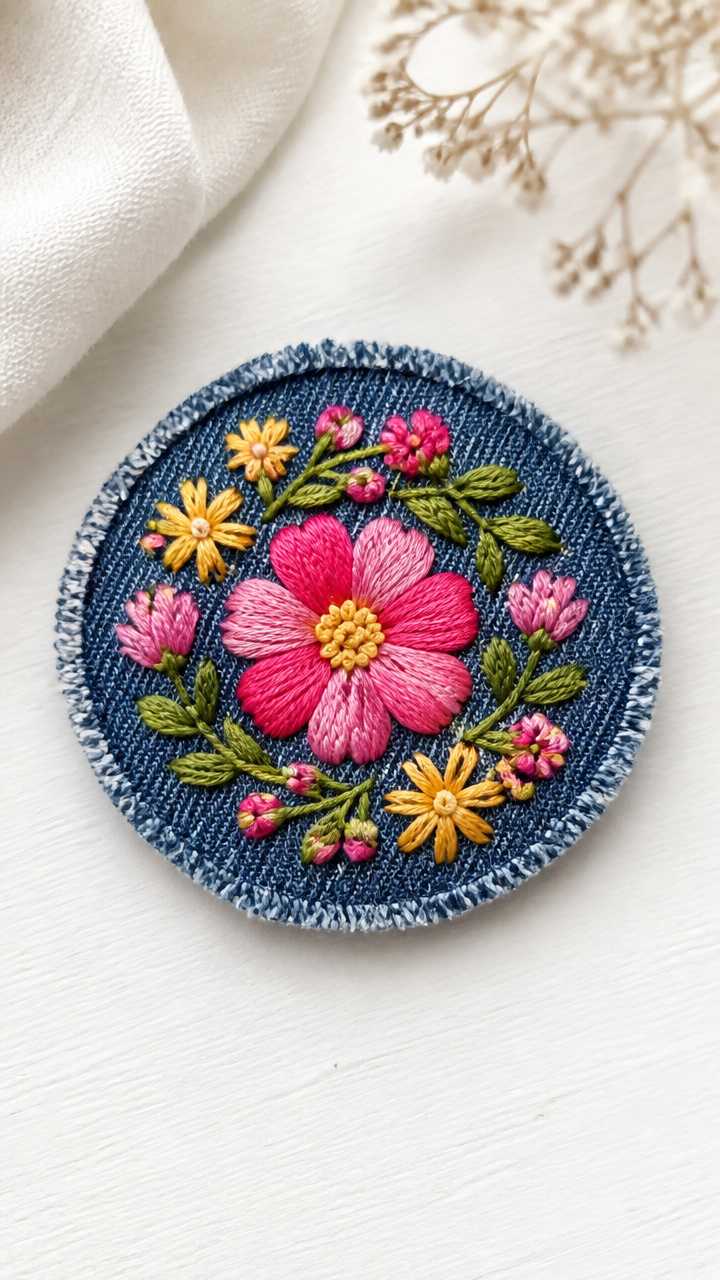
Floral motifs stitched in satin stitch revive old jackets and bags. These patches add color and handwork pride to worn favorites.
Materials Needed
- Denim fabric scrap, 4×4 inches
- Embroidery hoop, 6 inches
- Assorted embroidery floss (pink, green, yellow)
- Embroidery needle
- Fabric marker
- Sharp scissors
How to Make It
- Draw a small flower shape on the denim with the fabric marker. Secure the fabric in the embroidery hoop.
- Thread the needle with two strands of pink floss. Fill petals using satin stitch, working from edge to center.
- Switch to green floss for leaves. Use stem stitch along each vein. Trim excess fabric close to stitching.
19. Clay Scented Wax Melts
Moderate
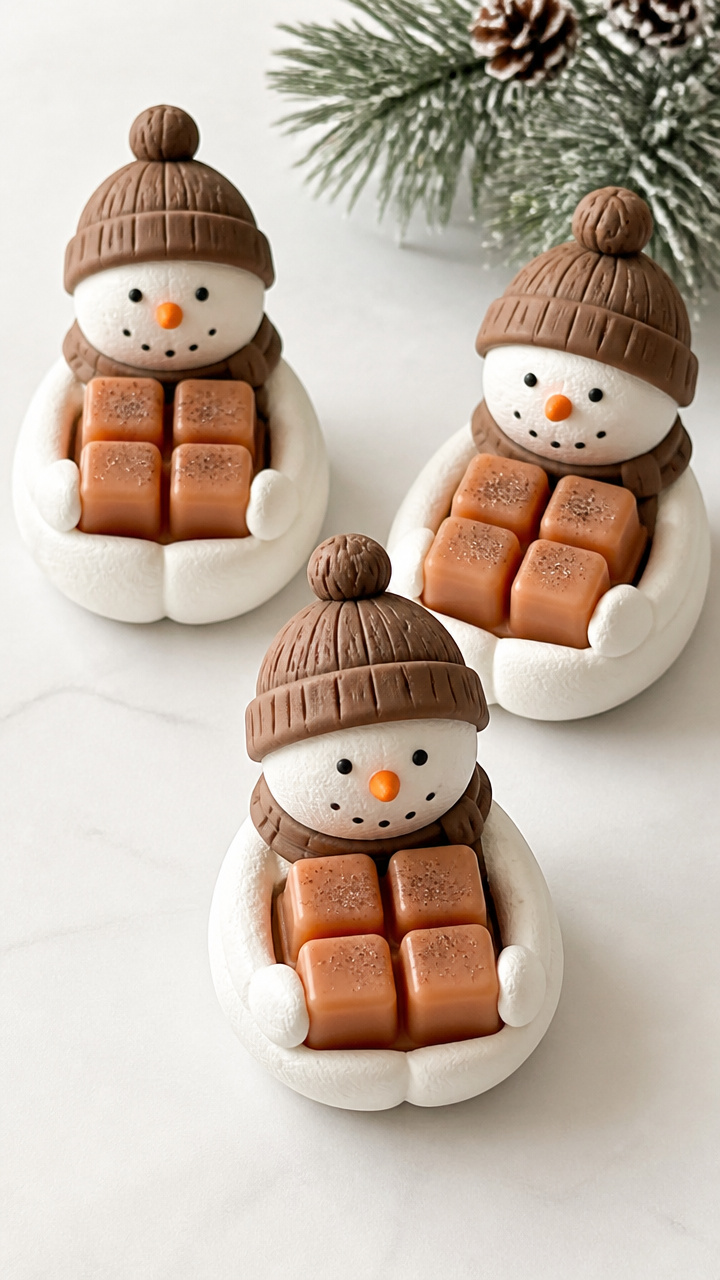
Petite snowmen molded from polymer clay hold dots of spiced apple wax that melt slowly in warmers. They're whimsical and functional.
Materials Needed
- White polymer clay, 2 ounces
- Clay sculpting tools
- Almond-shaped brown clay piece for hat
- Toothpick
- Spiced apple wax melts, 4 cubes
- Oven
How to Make It
- Roll clay into three balls: large base, medium middle, small head. Stack them on a baking sheet.
- Press in a toothpick between layers to secure. Shape arms from thin clay rolls.
- Bake at 275°F for 15 minutes. Cool, then press one wax cube into the top of each snowman’s head.
20. Calligraphy Holiday Tags
Moderate
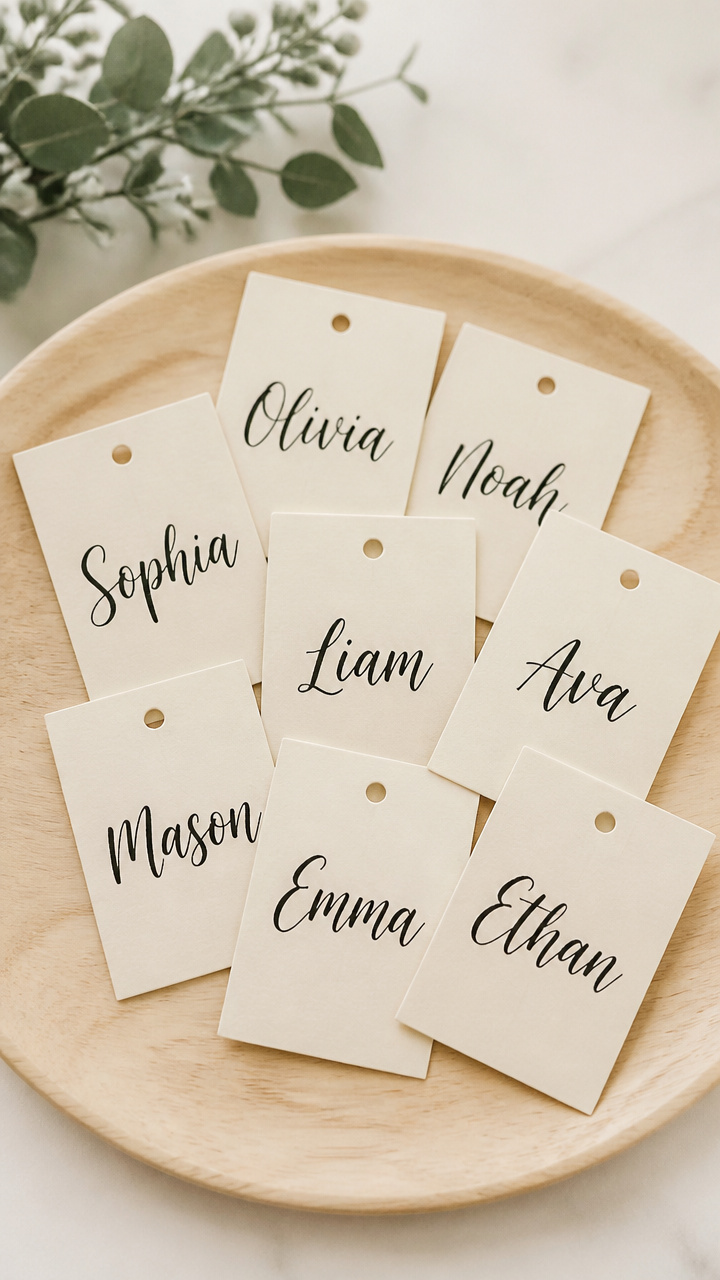
Brush-lettered names on cream tags turn plain packages into gifts worthy of display. The fluid strokes feel festive and personal.
Materials Needed
- Cream cardstock, 2×3 inches (6 pieces)
- Brush pen with black ink
- Ruler
- Pencil
- Eraser
- Hole punch
- Twine, 6 inches per tag
How to Make It
- Lightly draw a center guideline on each tag with pencil and ruler. Write the name using the brush pen, pressing down on downstrokes.
- Let ink dry for 2 minutes. Erase the guideline gently with the eraser.
- Punch a hole at the top. Thread twine through and knot for attachment.
21. Pine Needle Basket
Advanced
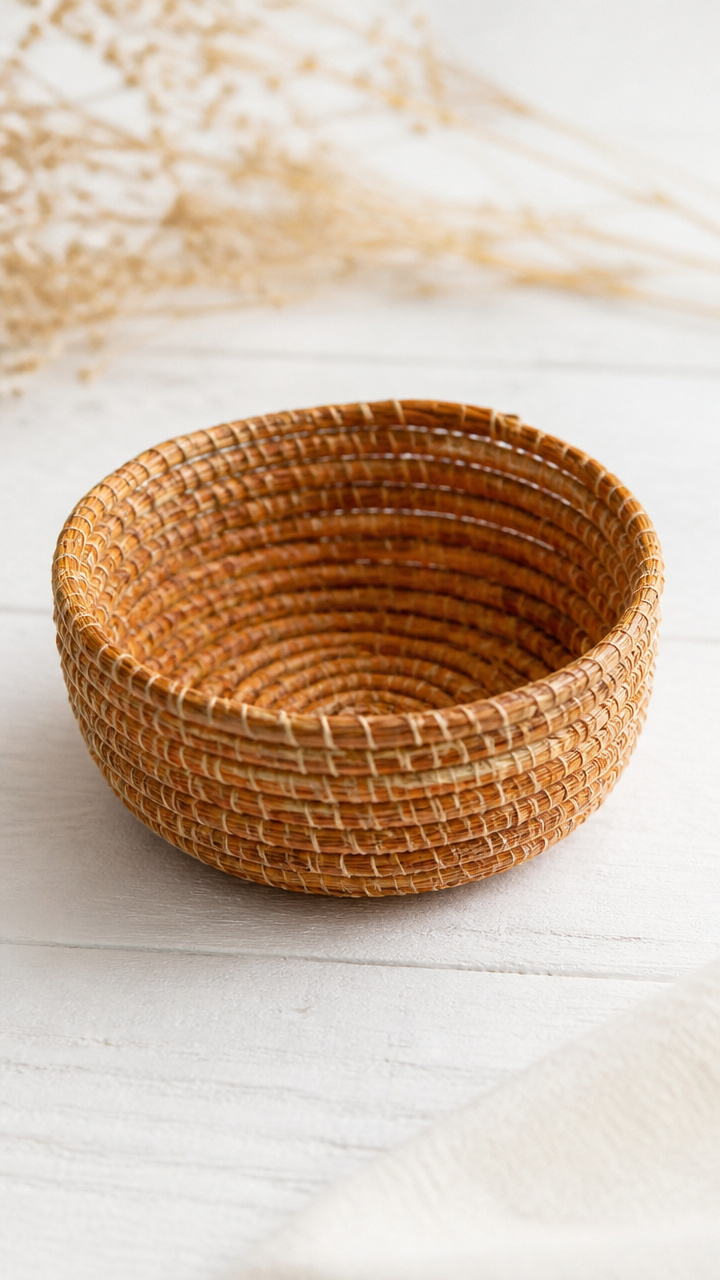
Coiled bundles of long pine needles stitched with waxed thread form a tiny vessel perfect for trinkets or matches. It smells subtly of forest floor.
Materials Needed
- Long pine needles, 20 pieces, 8 inches long
- Waxed linen thread, beige, 3 yards
- Needle with large eye
- Small binder clip
How to Make It
- Bundle five needles together and clamp the end with the binder clip. Begin wrapping thread tightly around the base 10 times.
- Add new needles one at a time to the coil, overlapping ends. Sew through the center with the needle every quarter turn.
- Build up three layers, shaping gently. Knot thread securely on the underside when basket reaches 2 inches wide.
22. Layered Tissue Pom-Poms
Easy
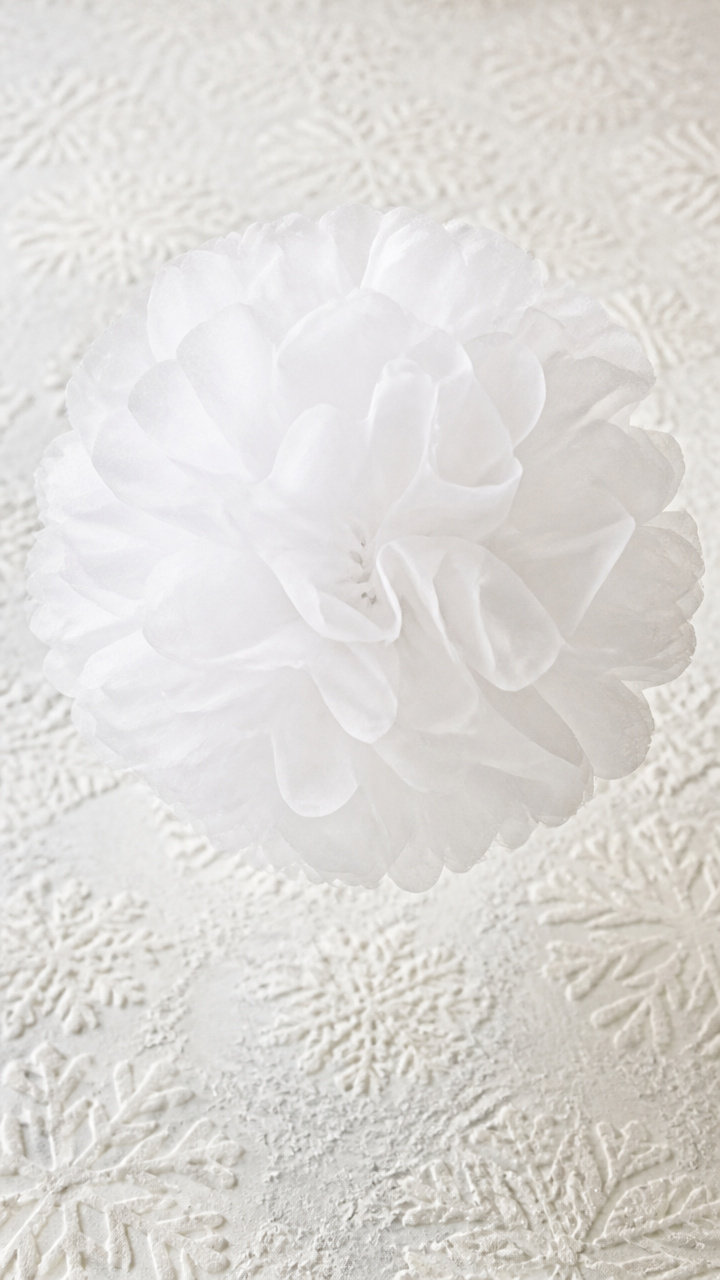
Dozens of tissue sheets stacked and pleated bloom into a fluffy pom-pom that floats above a console table. Soft white mimics fresh snowfall.
Materials Needed
- White tissue paper, 20 sheets, 20×28 inches each
- Embossed cardboard strip, 1.5 inches wide, 12 inches long
- Floral wire, 6 inches
- Scissors
How to Make It
- Stack all tissue sheets evenly. Fold accordion-style using 1-inch pleats across the 20-inch width.
- Center the cardboard strip over the middle of the folded stack. Wrap floral wire around and twist tightly underneath.
- Fan out layers one side at a time. Pull each tissue sheet gently toward the center to puff the pom-pom.
23. Stenciled Doormat
Moderate

Bold lettering cut from freezer paper adheres to coir and accepts outdoor paint. Your welcome message withstands snow and boots.
Materials Needed
- Plain coir doormat
- Freezer paper, 8.5×11 inches
- Craft knife
- Cutting mat
- Iron
- Outdoor-grade black paint
- Stencil brush
How to Make It
- Print and trace 'Welcome' onto the dull side of freezer paper. Cut out letters with the craft knife on the cutting mat.
- Iron the shiny side of the stencil onto the doormat. Press firmly to seal edges.
- Dip the stencil brush lightly in paint. Dab over the open areas. Let dry 1 hour before peeling stencil.
24. Miniature Knit Stockings
Moderate
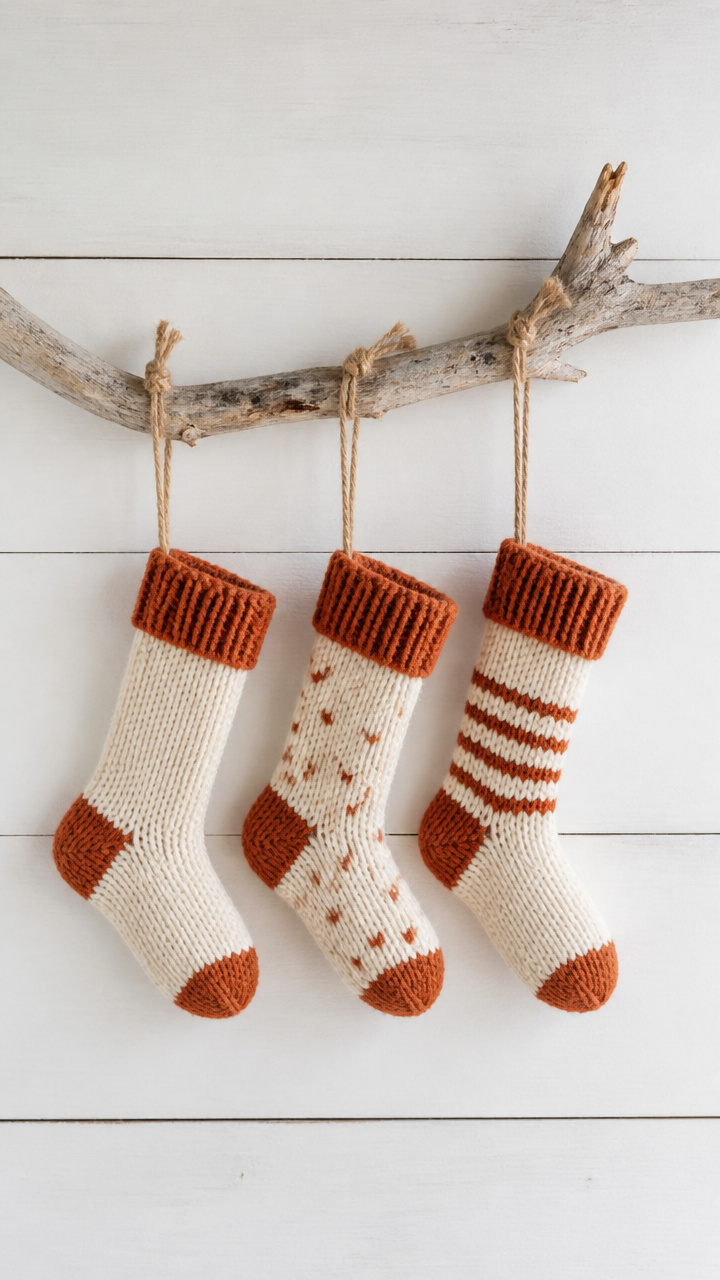
Three tiny stockings in cream and rust hang from a driftwood branch as a mantle vignette. They’re charming enough to stay up all season.
Materials Needed
- Fingering weight cream yarn, 50 yards
- Fingering weight rust yarn, 30 yards
- US size 4 (3.5 mm) straight knitting needles
- Yarn needle
- 6-inch piece of driftwood
- Twine, 12 inches
How to Make It
- Cast on 20 stitches with cream yarn. Knit 2 inches in garter stitch. Switch to rust yarn and knit 1 inch.
- Bind off. Fold stocking in half and seam up the back and toe with yarn needle.
- Cut three 4-inch twine pieces. Loop each through the cuff and tie to the driftwood branch.
Grab your favorite mug, turn on a soft light, and pick one of these crafts to start tonight. You’ll be surprised how much beauty you can make before the evening ends.