18 Cozy Winter Craft Ideas for Kids Using Recycled Materials

Crisp air, soft blankets, and the quiet hum of a home settling into winter—this is the season for making things that feel warm in both hands and heart. Crafting with kids using what you already have around the house turns ordinary moments into something special.
These projects use everyday recycled items to create cozy keepsakes. Each one invites little hands to shape, glue, paint, and build, all while keeping clutter out of landfills.
1. Toilet Paper Roll Owls
Easy
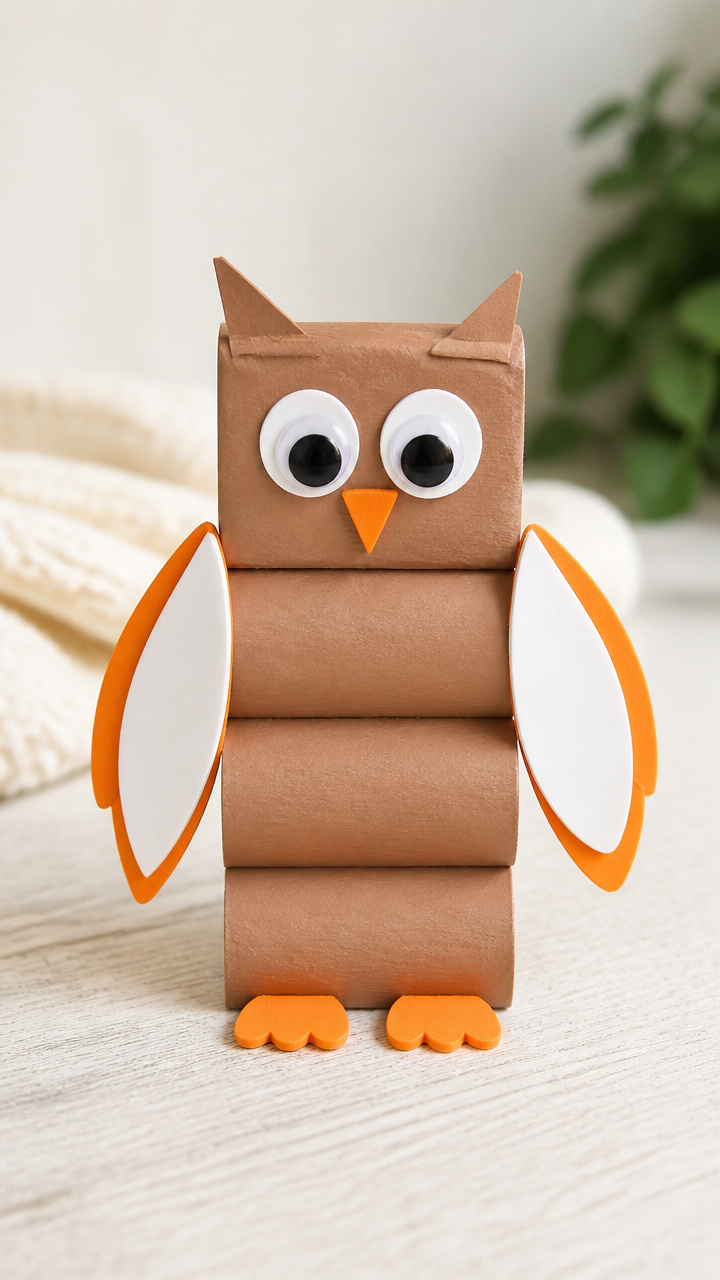
Soft-feathered owls with wide eyes perch on shelves or desks, made entirely from cardboard tubes. These little forest friends bring gentle charm to any child's room.
Materials Needed
- 4 empty toilet paper rolls per owl
- Brown acrylic paint
- Paintbrush size 4
- White craft foam sheet (9 x 12 inches)
- Orange craft foam sheet (9 x 12 inches)
- Googly eyes, 15mm diameter, 2 per owl
- School glue
- Scissors
How to Make It
- Cut one toilet paper roll in half horizontally to make two short pieces for the wings.
- Glue the two full-length rolls vertically side by side to form the body and head base.
- Attach the short roll halves at a slight angle on each side using school glue to create wings.
- Paint the entire owl brown with the paintbrush and let dry completely for 20 minutes.
- Cut two large circles from white craft foam for the eyes and glue them over the top of the head roll.
- Glue googly eyes onto the center of each white circle.
- Cut a small triangle beak from orange craft foam and glue it below the eyes.
2. Milk Jug Igloos
Moderate
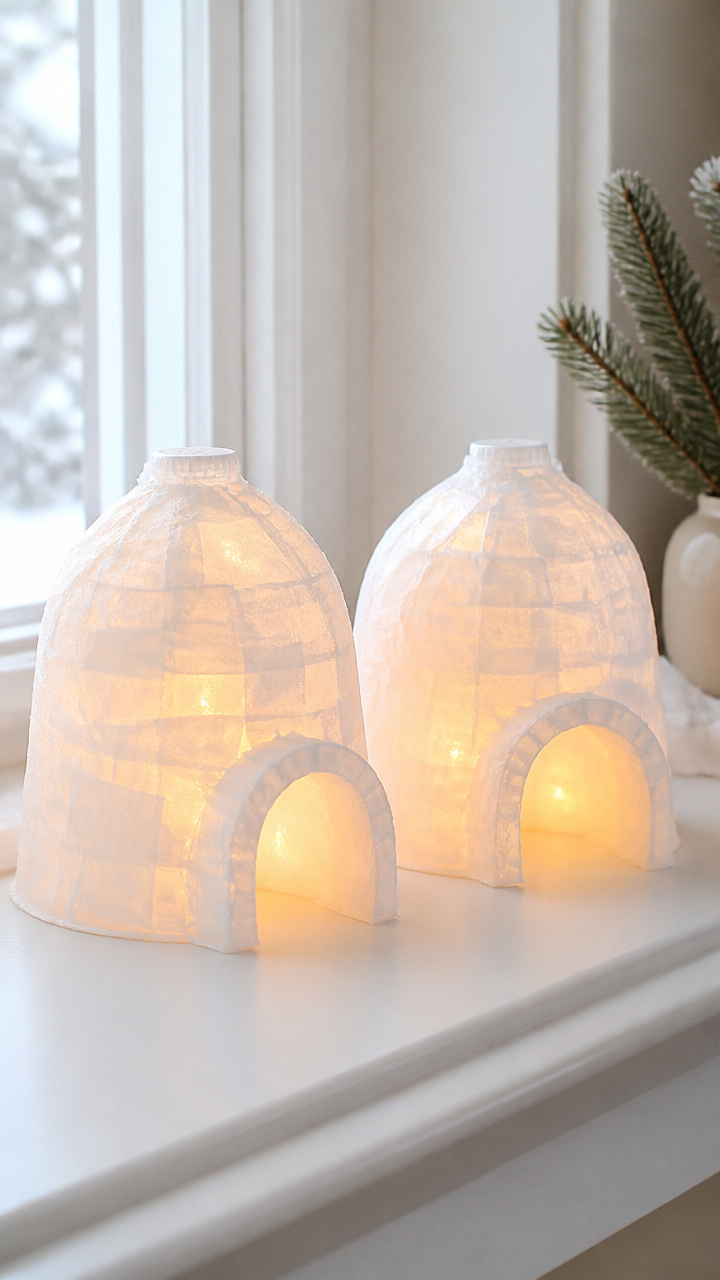
Translucent domes glow softly when lit from within, mimicking real snow shelters. These mini igloos turn a windowsill into a polar scene.
Materials Needed
- 2 clean plastic milk jugs, 1 gallon each
- White tissue paper sheets, 10 x 10 inches, 6 per igloo
- Mod Podge Matte
- Foam brush, 1 inch wide
- Battery-powered tea light
- Scissors
- Pencil
How to Make It
- Draw a semicircular door opening on the front of one milk jug and cut it out carefully with scissors.
- Cut both jugs just below the handle line to remove the top portion.
- Cut tissue paper into 2-inch squares and set aside.
- Brush a thin layer of Mod Podge onto the outside of the jug.
- Press tissue paper squares onto the glued surface, overlapping slightly, until the entire jug is covered.
- Repeat coating with Mod Podge over the tissue paper and let dry for 1 hour.
- Place the second jug inside the first to create double walls and stability.
- Set the tea light inside and turn it on after dark.
3. Egg Carton Snowmen
Easy
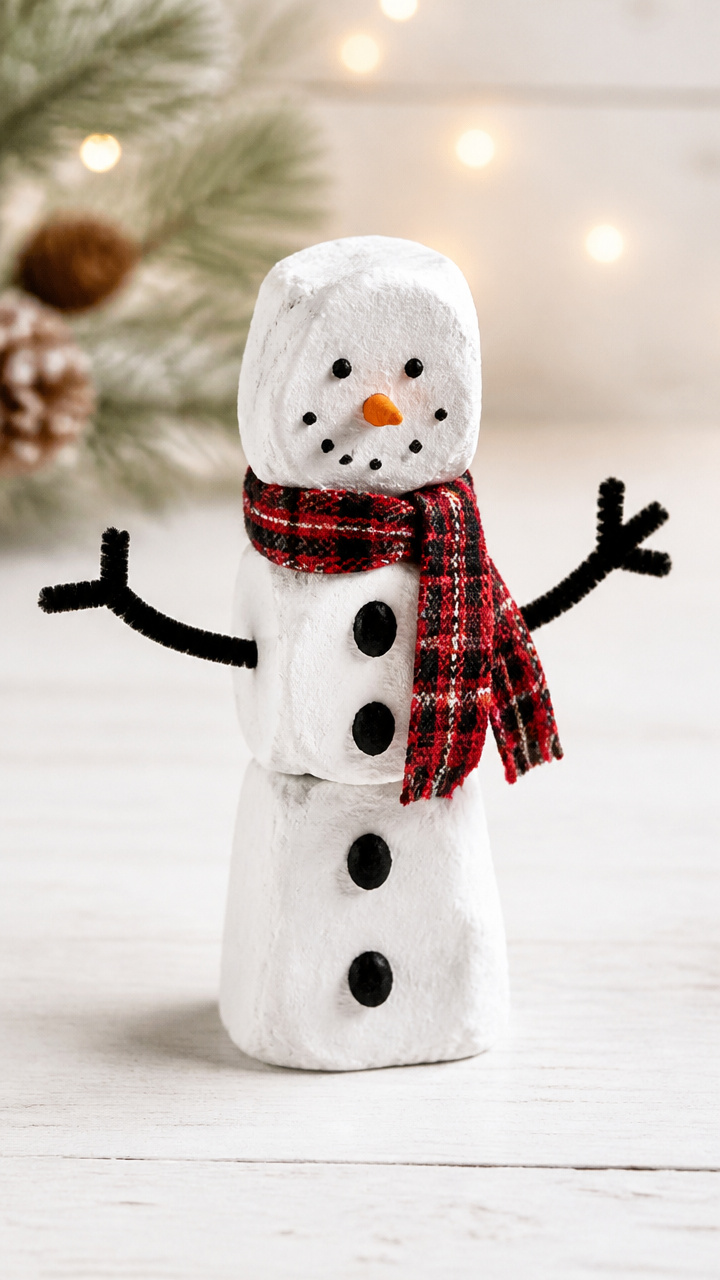
Bumpy-textured snowmen rise from repurposed egg cups, each with a tiny scarf and coal-button belly. These stand-alone figures are perfect for holiday tablescapes.
Materials Needed
- Cardboard egg carton, 12-cup
- White acrylic paint
- Black pipe cleaner, 12 inches long
- Orange chenille stem, 6 inches long
- Small black buttons, 6 mm, 3 per snowman
- Fabric scrap, 2 x 6 inches (for scarf)
- School glue
- Paintbrush size 3
- Scissors
How to Make It
- Cut three connected egg cups from the carton to form the snowman’s stacked body.
- Paint the entire piece white using the paintbrush and let dry for 15 minutes.
- Cut the black pipe cleaner into three 1-inch pieces and press one into each side of the middle cup for arms.
- Twist the orange chenille stem into a carrot nose and glue it near the top edge.
- Glue three black buttons down the front of the bottom cup.
- Wrap the fabric scrap around the neck area and secure with a dot of glue at the back.
4. Cereal Box Calendar
Moderate
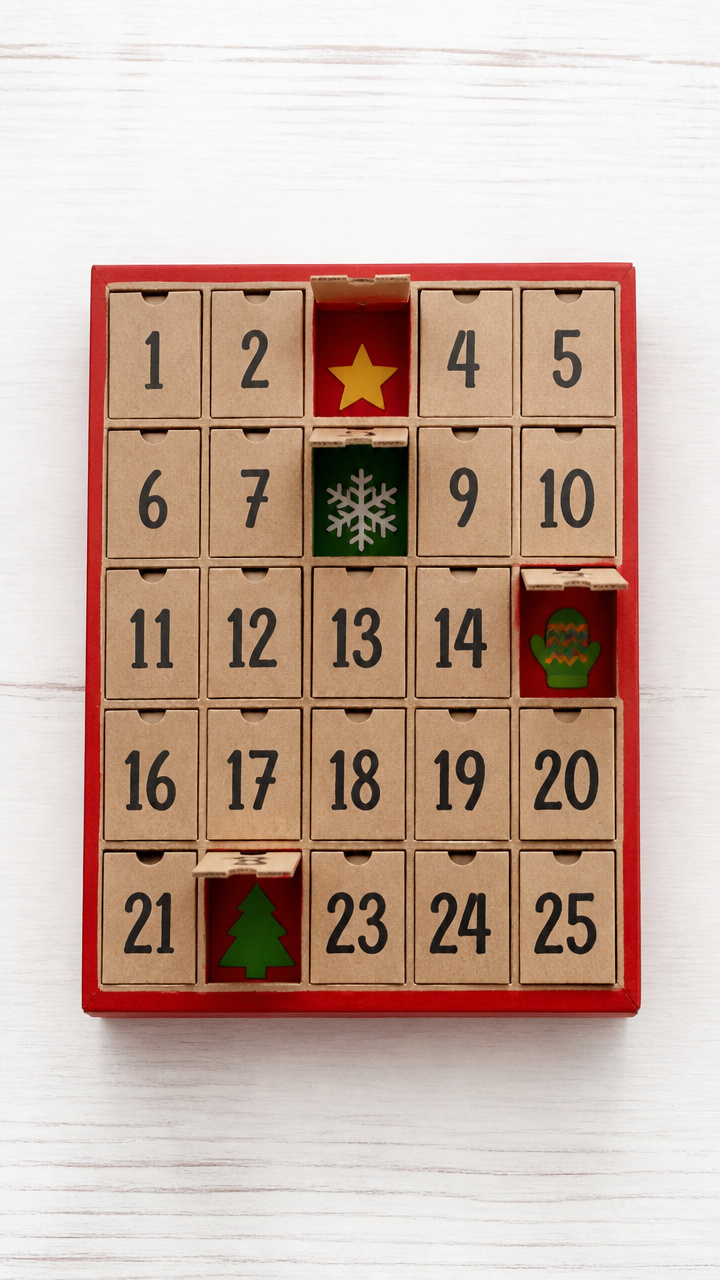
A bright monthly tracker helps kids count down to events using flaps that lift with a satisfying snap. This functional art piece teaches time in a tactile way.
Materials Needed
- Empty cereal box, standard size
- Ruler
- Craft knife
- Cutting mat
- Black marker, fine tip
- Red acrylic paint
- Paintbrush size 2
- Hole punch
- Yarn, red, 12 inches
- Glue stick
How to Make It
- Lay the cereal box flat and cut off the top flaps, then slice down one side seam to open it into a single panel.
- Measure and draw a grid of 7 columns and 5 rows using the ruler and black marker, each cell 1.5 inches square.
- Use the craft knife on the cutting mat to cut along the top and two side lines of each cell, leaving the bottom edge attached to create a flap.
- Write numbers 1–31 under the flaps in order, using the marker.
- Paint the outer border red with the paintbrush and let dry for 20 minutes.
- Glue the blank back of the panel to stiffen the calendar.
- Punch a hole at the top center and thread yarn through to hang.
5. Plastic Lid Snowflakes
Easy
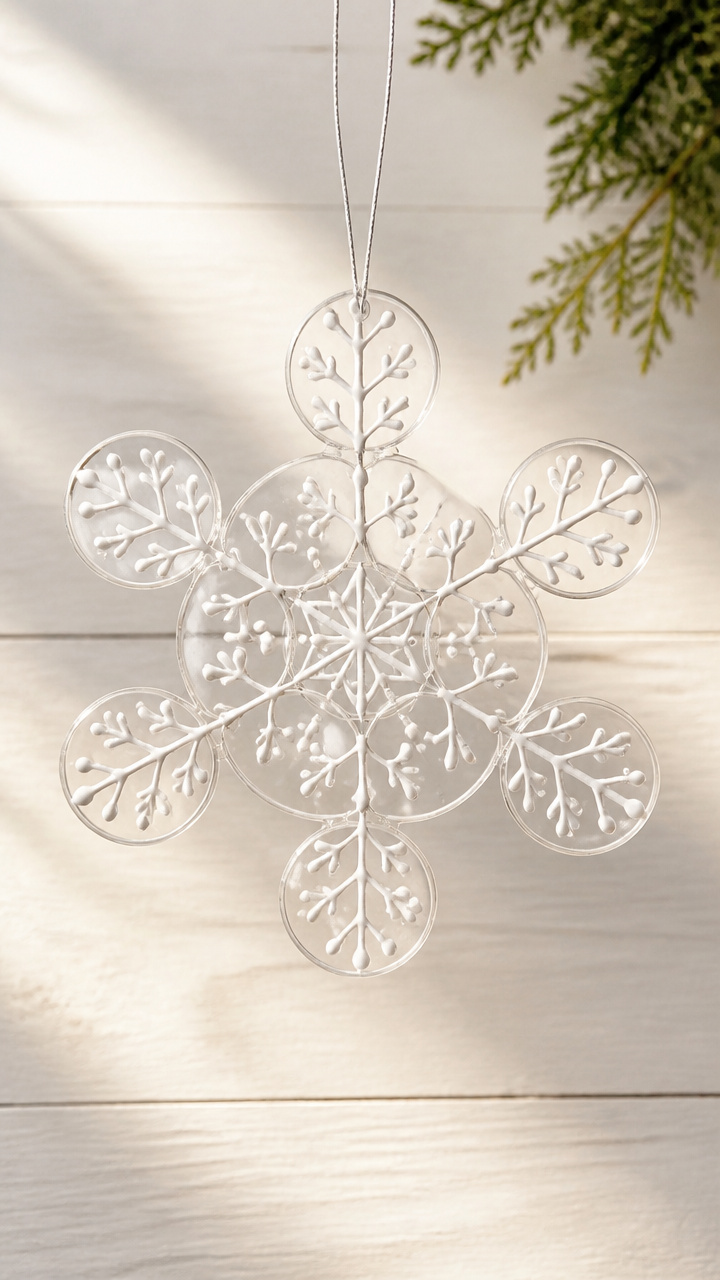
Interlocking clear circles catch light like ice crystals, forming symmetrical decorations. Hang them in sunny windows for dancing reflections.
Materials Needed
- Clear plastic bottle lids, 20 count (from water or soda bottles)
- White puffy paint
- Fine-tip applicator nozzle
- String, 8 inches per snowflake
- Hole punch
How to Make It
- Arrange five lids in a star pattern, one in the center and four around it, touching edges.
- Squeeze white puffy paint along the seams where lids meet, creating connecting arms.
- Add swirls or dots on each lid using the puffy paint and let dry upright for 3 hours.
- Punch a hole in one outer lid and thread string through to hang.
6. Tin Can Lanterns
Moderate
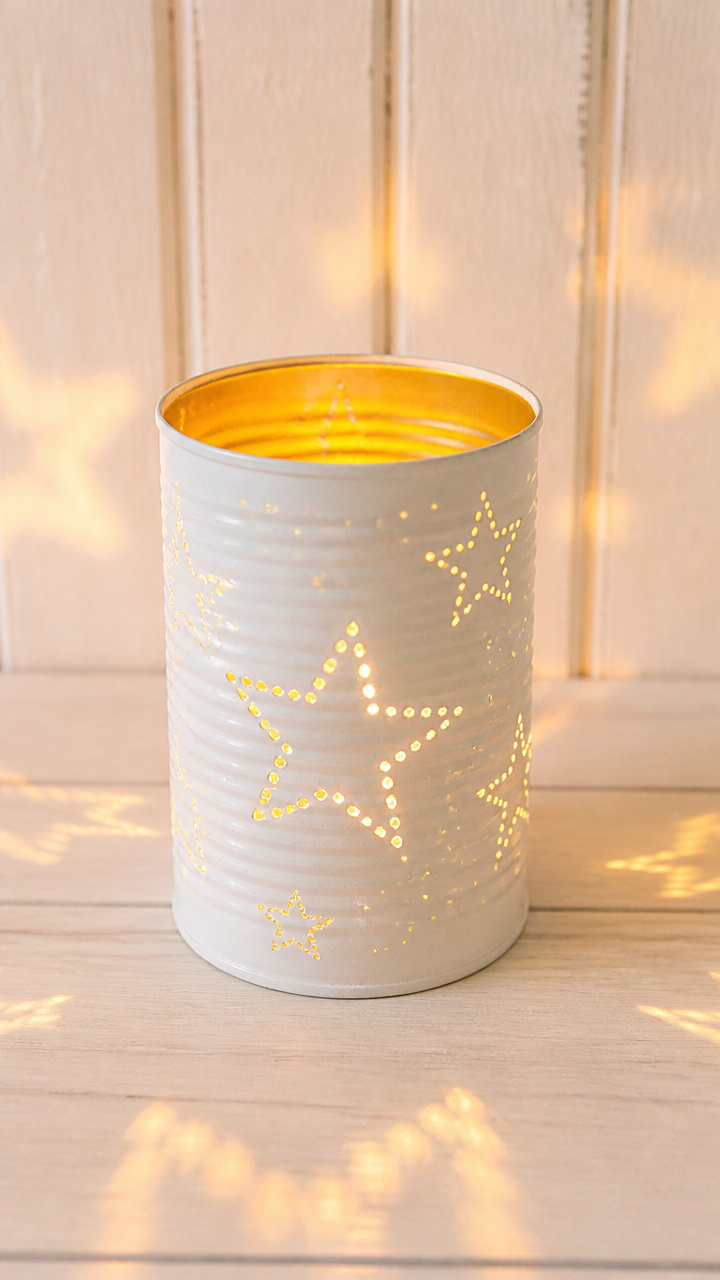
Metal cans punched with starry patterns cast flickering shadows when lit. These sturdy lanterns hold battery candles safely outdoors or indoors.
Materials Needed
- Empty soup can, 10.5 oz
- Hammer
- Nail, 1 inch
- Work gloves
- Cloth rag
- White spray paint
- Spray paint booth or outdoor space
- Battery-powered tea light
How to Make It
- Wash and dry the can thoroughly, removing label and adhesive residue with the cloth rag.
- Put on work gloves and place the can on a stable surface covered with the rag.
- Use the hammer and nail to punch holes in a star or snowflake pattern around the can.
- Shake off metal bits inside and rinse again.
- Spray the entire can with white paint in a ventilated area, let dry 1 hour between coats, apply two coats.
- Place the tea light inside and turn on at dusk.
7. Newspaper Weaving Mats
Moderate
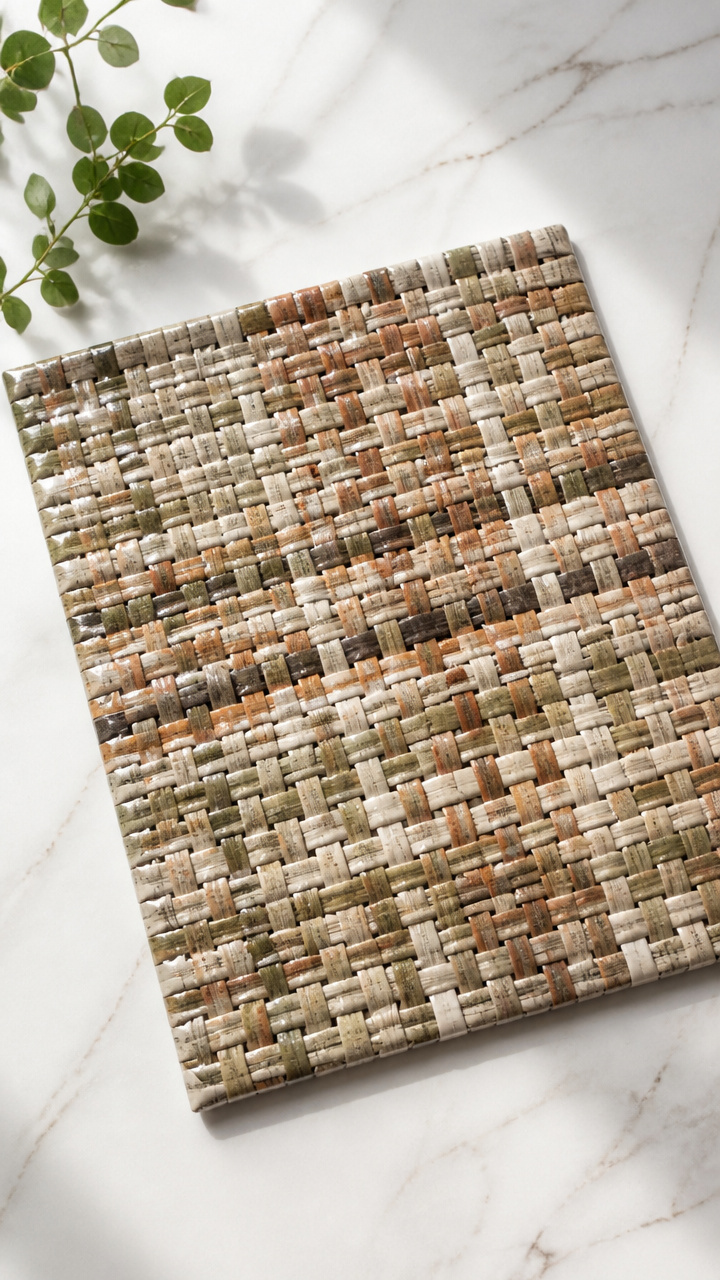
Warm-toned mats with crisscross patterns protect tabletops during cocoa breaks. Woven from rolled paper strips, they’re lightweight and easy to clean.
Materials Needed
- Old newspaper sheets, 6 pages
- Ruler
- Pencil
- Scissors
- Glue stick
- Clear contact paper, 12 x 18 inches
How to Make It
- Cut newspaper into 1-inch-wide strips lengthwise, 11 inches long, making 20 strips for weft and 20 for warp.
- Lay 10 strips vertically on a flat surface, spaced 1 inch apart, taping ends lightly to table.
- Roll each horizontal strip tightly from one end to the other and secure with a dot of glue.
- Weave rolled strips over and under the vertical ones, alternating pattern each row.
- Glue the end of each horizontal strip to the last vertical strand it touches.
- Cover both sides of the finished mat with contact paper, smoothing out bubbles.
8. Sock Snow Dolls
Easy
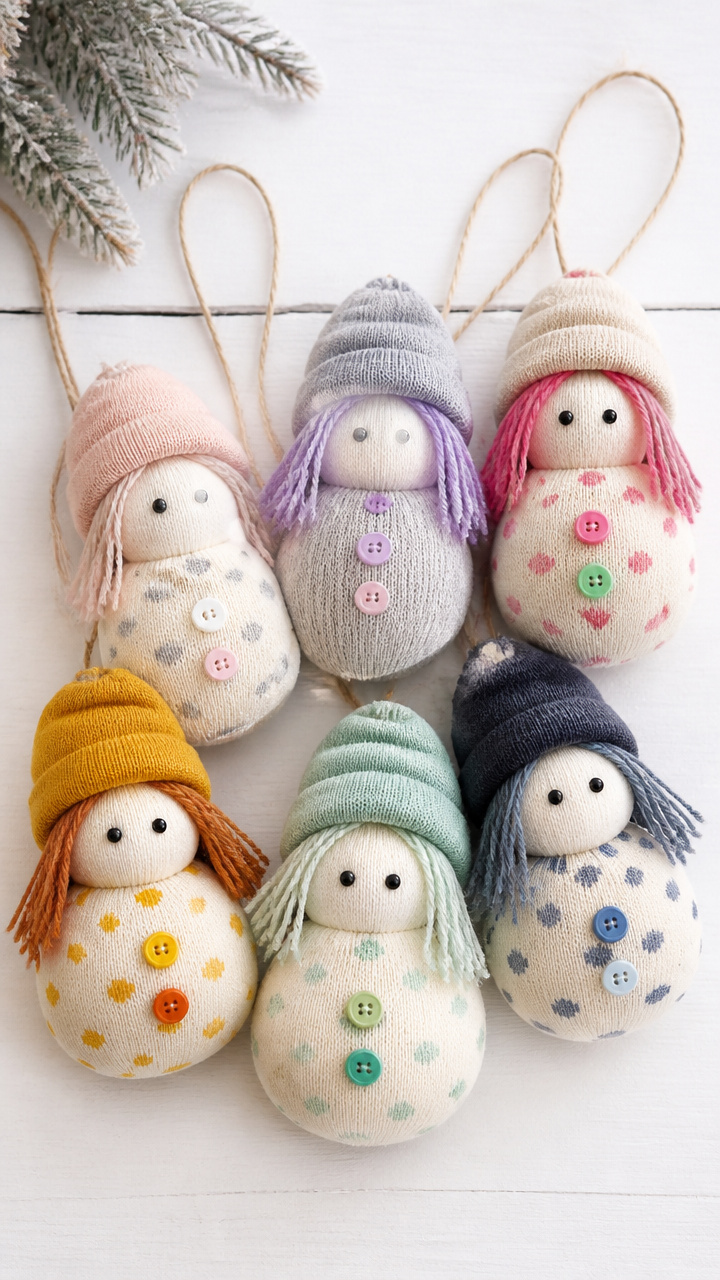
Fuzzy-faced dolls with yarn hair dangle from bedposts or tree branches. Made from mismatched socks, they carry whimsy in every stitch.
Materials Needed
- Clean mismatched sock, ankle height
- Uncooked rice, 1/2 cup
- Funnel
- Rubber band
- Embroidery floss, black, 12 inches
- Yarn, assorted colors, 6 inches
- Needle
- Polyester fiberfill
How to Make It
- Fill the toe of the sock with rice using the funnel, packing it firmly to form a round head.
- Secure the opening just above the rice with a rubber band.
- Thread the needle with black embroidery floss and stitch a simple face: two dots for eyes, one curved line for mouth.
- Pull small bundles of yarn through the top knot of the rubber band to create hair.
- Fluff fiberfill around the base of the head to form a puffy body and tie closed with another rubber band.
9. Cardboard Tube Reindeer
Easy
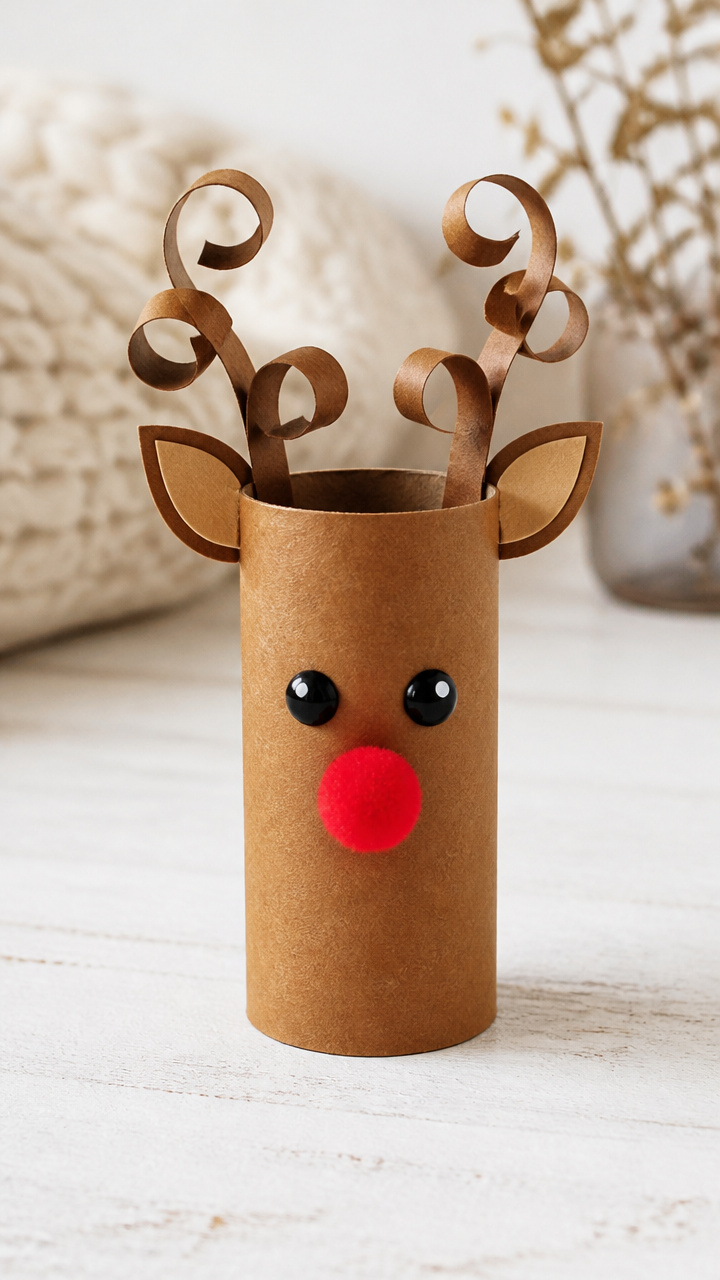
Curled antlers and glossy eyes give these reindeer a playful gallop. They stand proudly on mantels or desks as part of a winter herd.
Materials Needed
- Paper towel roll, 1
- Brown acrylic paint
- Paintbrush size 4
- Black construction paper, 6 x 6 inches
- Red pom-pom, 1/2 inch diameter
- Googly eyes, 10mm, 2
- White craft glue
- Scissors
- Brass fastener, 1 inch
How to Make It
- Paint the entire tube brown with the paintbrush and let dry for 20 minutes.
- Cut two antler shapes from black construction paper, each 4 inches tall with curled tips.
- Poke two small holes near the top of the tube and insert the antler ends.
- Secure the antlers from inside with the brass fastener opened flat.
- Glue the red pom-pom below the antlers for the nose.
- Glue googly eyes above the pom-pom.
10. Bottle Cap Magnets
Moderate
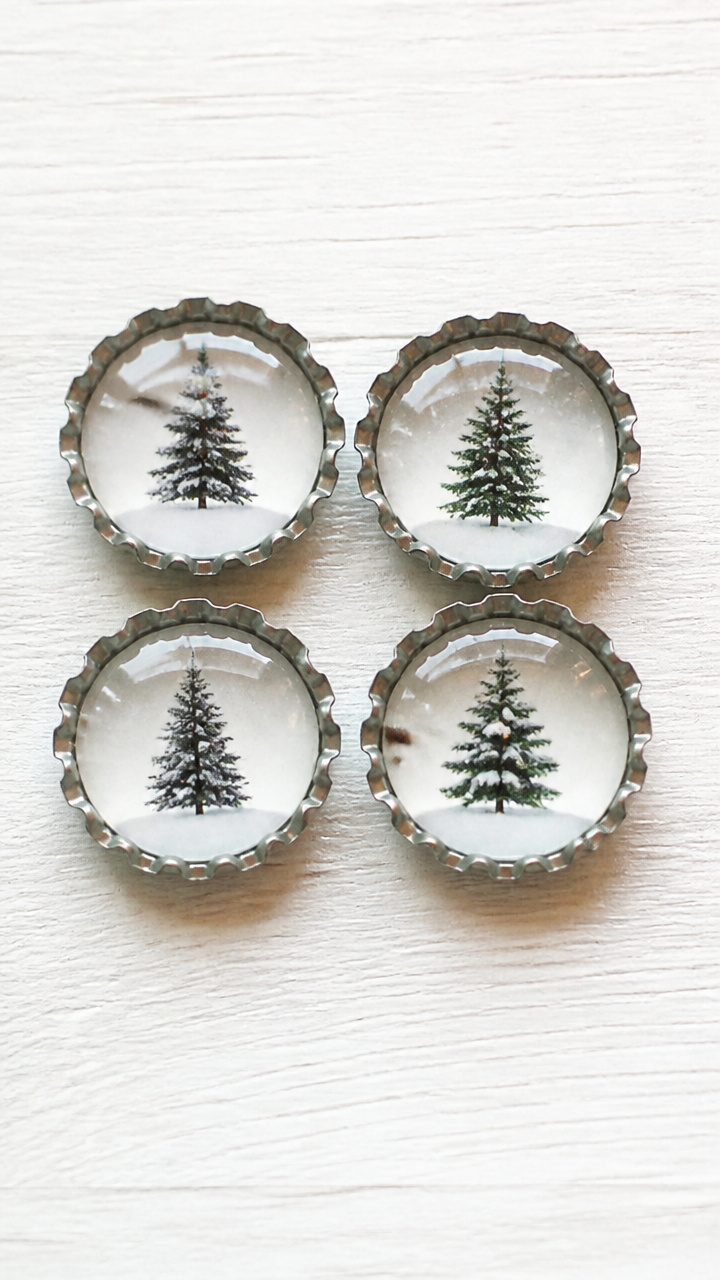
Tiny winter scenes sealed under glass-like caps stick firmly to fridges. These miniature artworks show snow-covered trees or icy ponds.
Materials Needed
- Steel bottle caps, 20 mm, 4 per project
- Craft resin kit (includes resin and hardener)
- Silicone mold tray
- Disposable gloves
- Toothpicks
- Miniature pine tree charms, 1/2 inch, 4
- White glitter
- Round magnet discs, 20 mm, 4
- Glue gun
How to Make It
- Put on gloves and mix equal parts resin and hardener in the silicone tray according to package instructions.
- Place one pine tree charm in each bottle cap and sprinkle a pinch of white glitter around the base.
- Pour mixed resin into each cap slowly, filling to the top without overflowing.
- Use a toothpick to reposition any elements and pop air bubbles.
- Let cure undisturbed for 6 hours.
- Glue a magnet disc to the back of each cap using the glue gun.
11. Magazine Strip Coasters
Easy
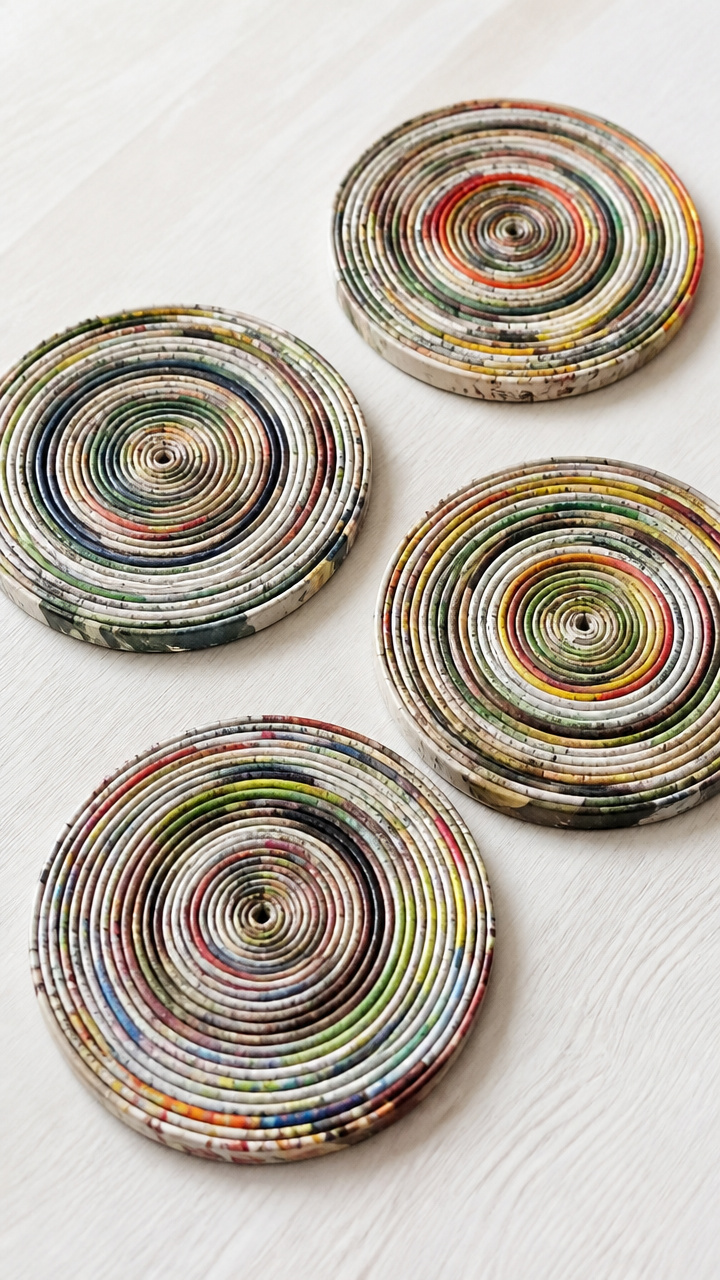
Tightly coiled spirals of colorful paper form durable rings that protect surfaces. Each coaster flashes bold text and images beneath a glossy seal.
Materials Needed
- Old magazines, 3 pages
- Scissors
- Glue stick
- Clear varnish, matte finish, 4 oz
- Paintbrush size 2
- Cardboard circle, 4 inches diameter, 1 per coaster
How to Make It
- Cut magazine pages into 1/2-inch-wide strips, about 10 inches long.
- Start rolling one strip tightly from one end, gluing the tip after one full turn.
- Continue rolling, adding new strips by overlapping and gluing the ends as needed.
- Shape the roll into a spiral and glue the final end down.
- Center the spiral on the cardboard circle and glue in place.
- Apply two coats of varnish with the paintbrush, letting each dry for 30 minutes.
12. Yogurt Cup Luminaries
Easy
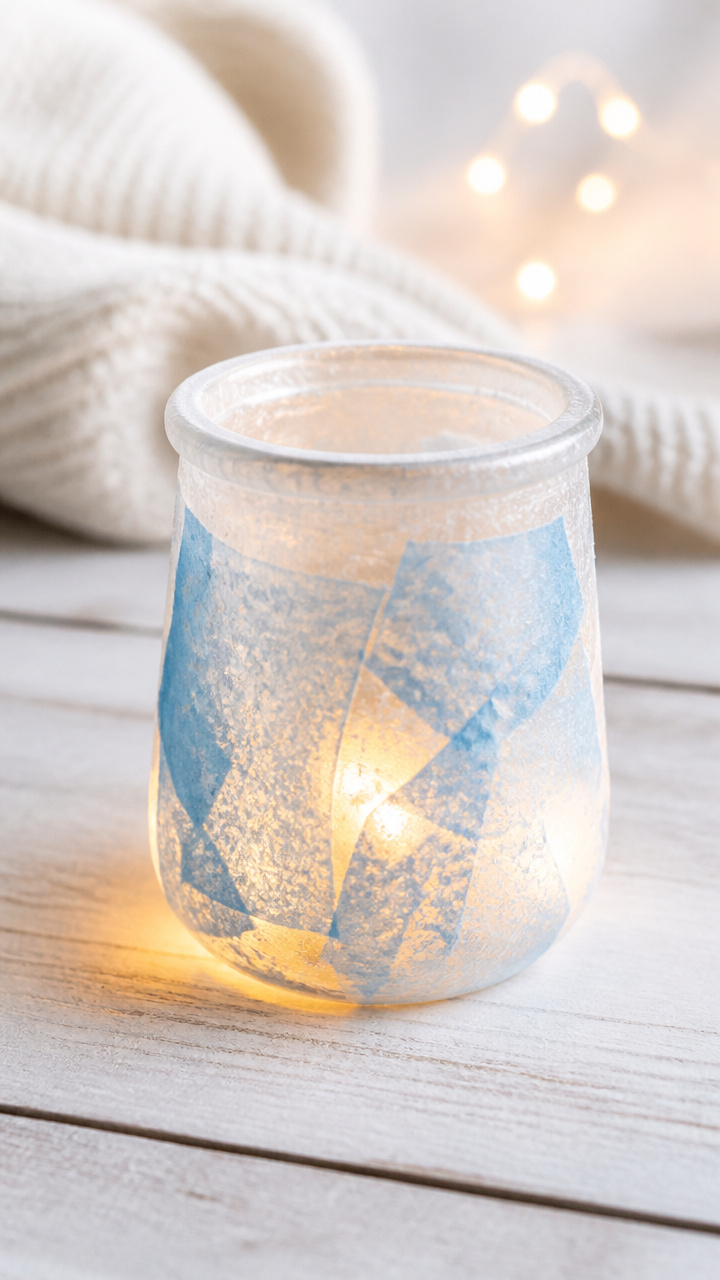
Frosted sides and glowing centers turn plastic cups into peaceful night lights. Group them together for a soft-lit centerpiece.
Materials Needed
- Empty yogurt cup, 6 oz, 3
- White crayon
- Blue tissue paper, 10 x 10 inches
- Mod Podge Matte
- Foam brush, 1 inch
- Battery-powered fairy lights, 20 bulbs
How to Make It
- Wash and dry the yogurt cup, removing any residue.
- Use the white crayon to draw snowflakes or mittens on the outside of the cup.
- Cut blue tissue paper into 1-inch squares.
- Brush Mod Podge over a section of the cup and press tissue paper squares onto it, covering completely.
- Seal with another layer of Mod Podge and let dry for 45 minutes.
- Place the fairy lights inside and turn on in dim light.
13. Cardboard House Ornaments
Easy
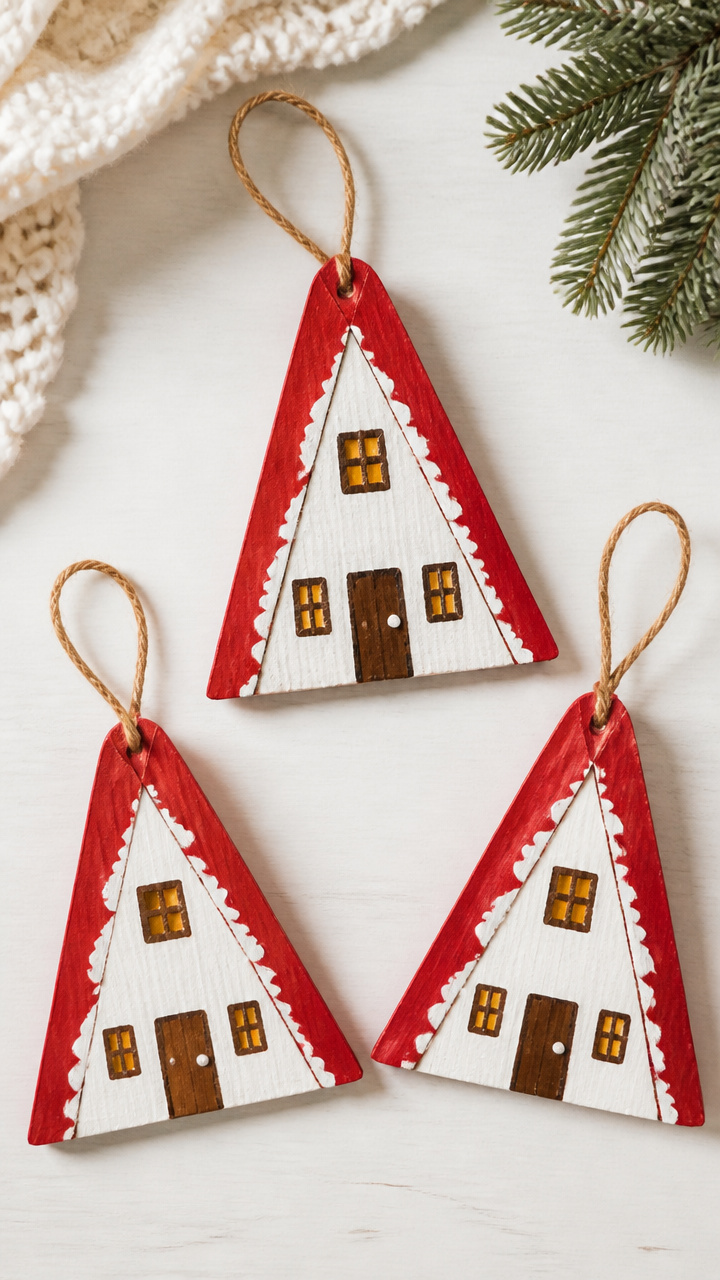
Flat A-frame houses with red roofs dangle from strings, painted like cozy cabins. These make heartfelt gifts when signed on the back.
Materials Needed
- Corrugated cardboard, 6 x 6 inches
- Pencil
- Ruler
- Scissors
- Red acrylic paint
- White acrylic paint
- Paintbrush size 2
- Hole punch
- Red yarn, 6 inches
How to Make It
- Draw an A-frame house outline: 4 inches wide at base, 3 inches tall to peak, with a centered door at bottom.
- Cut out the shape with scissors.
- Paint the roof area red and the walls white, using separate brushes to avoid mixing.
- Let dry for 20 minutes on a flat surface.
- Punch a hole at the top and thread red yarn through for hanging.
14. Cotton Ball Sheep
Easy
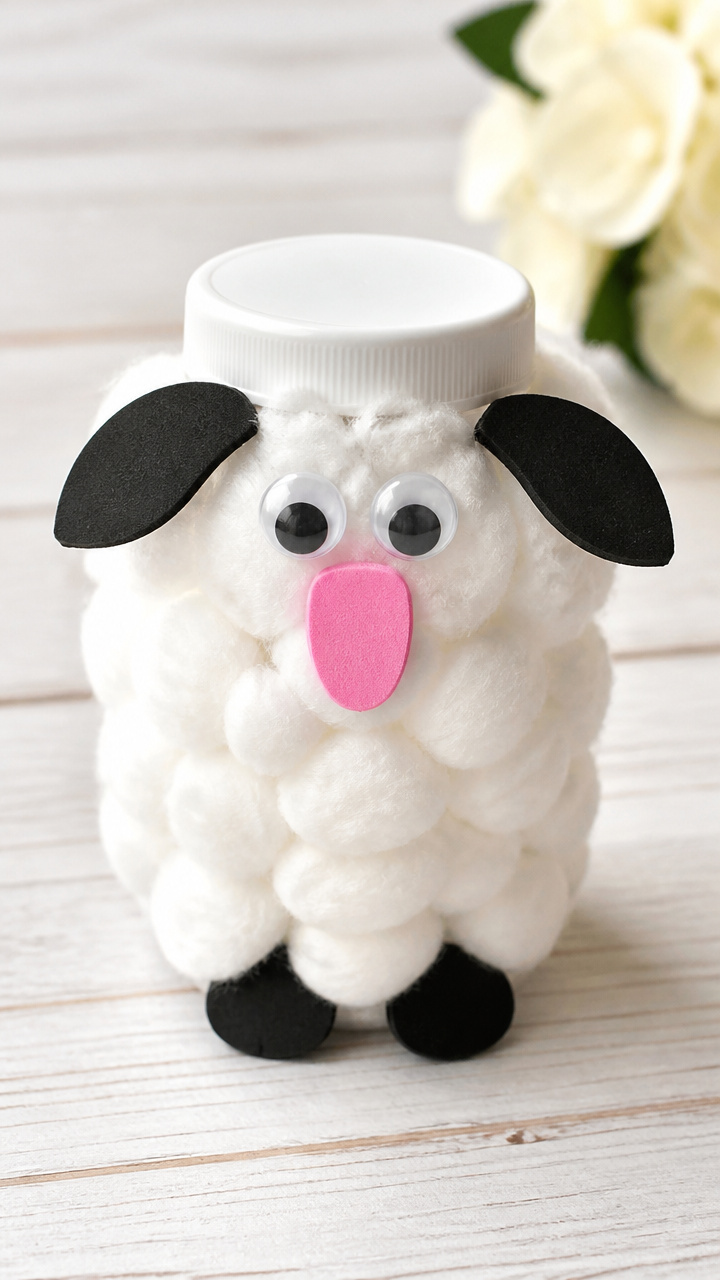
Puffy white bodies and floppy faces make these barnyard animals irresistibly cuddly. They live happily on bookshelves or story corners.
Materials Needed
- Empty prescription bottle, 2 oz, with cap
- White school glue
- Cotton balls, 20 per sheep
- Black craft foam, 6 x 6 inches
- Googly eyes, 8mm, 2
- Pink craft foam, 3 x 3 inches
- Scissors
- Glue stick
How to Make It
- Remove label from the bottle and clean surface.
- Brush a thick layer of white school glue over the entire bottle except the cap.
- Press cotton balls onto the glue, covering completely and layering for fullness.
- Cut two ear shapes from pink foam and glue them to the cap with the glue stick.
- Glue googly eyes just below the cap seam.
- Let dry for 1 hour before handling.
15. CD Snow Angels
Moderate
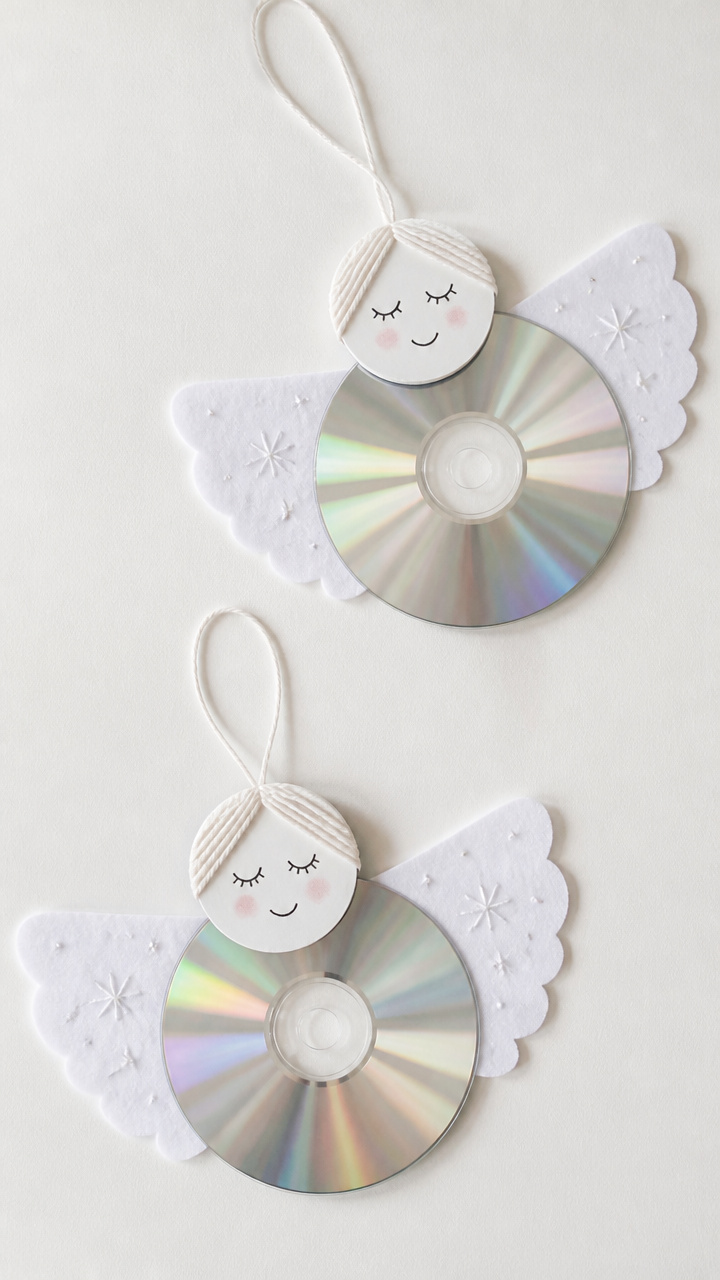
Spinning silver figures flutter when touched, their arms spread mid-flight. The reflective surface adds a magical shimmer to any room.
Materials Needed
- Used CD, 1
- White craft paint
- Paintbrush size 3
- White felt sheet, 6 x 6 inches
- Fabric glue
- Yarn, white, 10 inches
- Hole punch
- Ribbon, 1/4 inch wide, 12 inches
How to Make It
- Paint the non-label side of the CD white and let dry for 30 minutes.
- Cut a small angel face and halo from white felt and glue to the center of the painted side.
- Cut two wing shapes from felt and glue them to the back edges of the CD.
- Punch a hole at the top edge of the CD.
- Thread yarn through the hole and tie to form a hanger.
- Tie ribbon around the yarn for decoration.
16. Jeans Pocket Pouches
Moderate
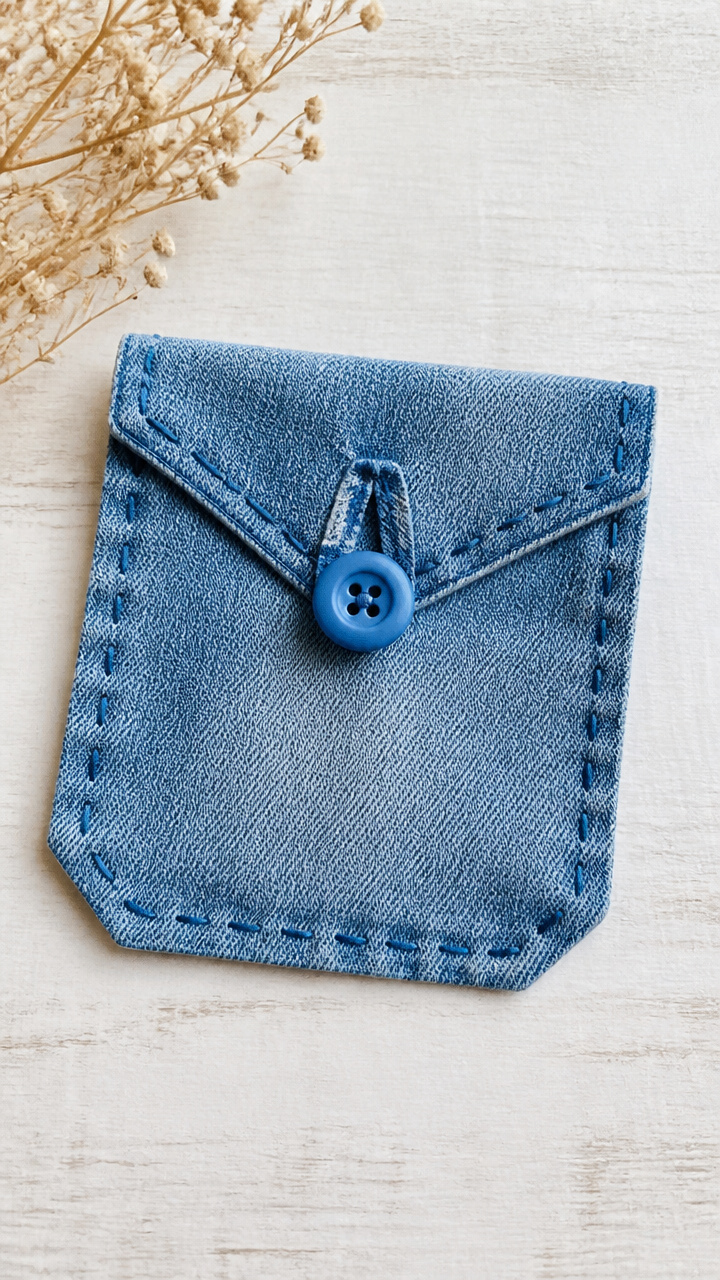
Denim pockets with button closures become tiny storage for treasures. Sewn shut at the sides, they hold marbles or notes.
Materials Needed
- Old pair of jeans, one back pocket with surrounding fabric
- Sewing needle
- Blue thread
- Button, 3/4 inch
- Scissors
- Straight pin
How to Make It
- Cut around the back pocket, leaving a 1-inch fabric border on all sides.
- Thread the needle with blue thread and knot the end.
- Fold the fabric edges toward the inside and pin in place.
- Sew around the three open sides with a running stitch, 1/4 inch from edge.
- Sew the button onto the flap near the top edge.
- Test closure by folding the flap over and pressing the button through the denim loop.
17. Wine Cork Penguins
Easy
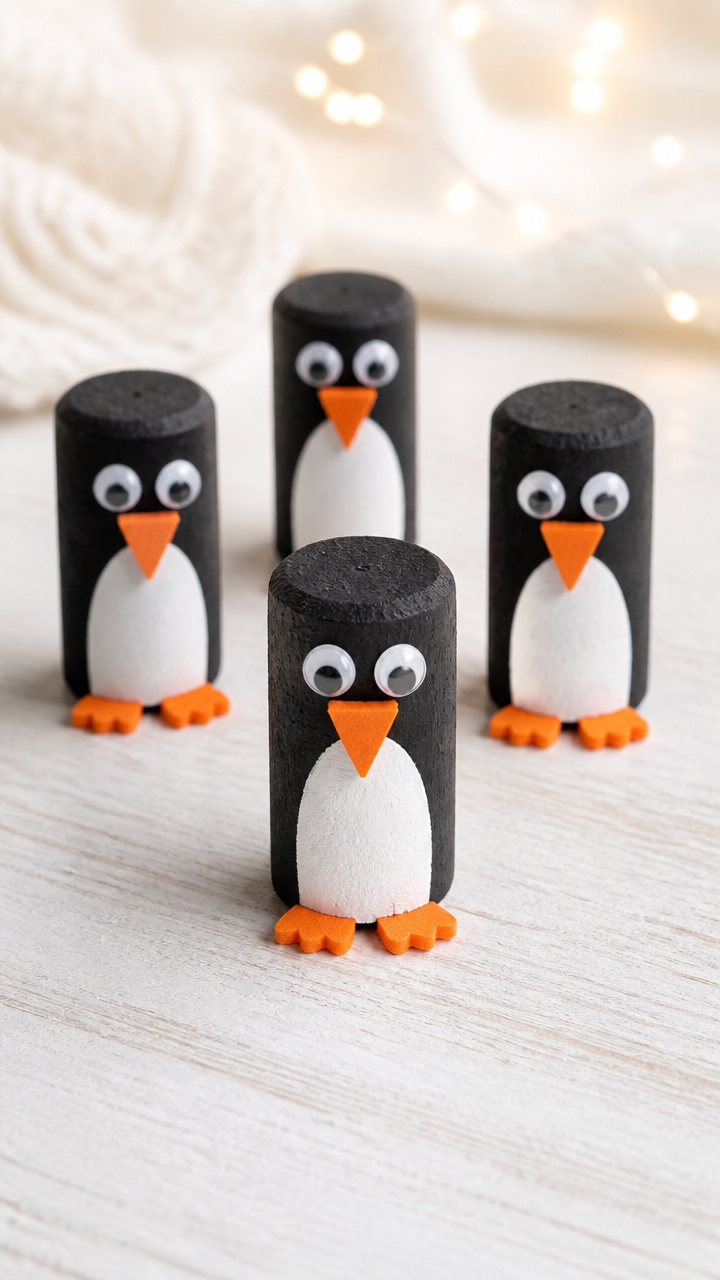
Short black-and-white birds waddle in place, standing on their own. Their smooth bodies fit perfectly in small hands.
Materials Needed
- Natural wine cork, 1
- Black acrylic paint
- White acrylic paint
- Orange craft foam, 3 x 3 inches
- Googly eyes, 6mm, 2
- Paintbrush size 1
- School glue
- Scissors
How to Make It
- Paint the top half of the cork white and the bottom half black, using the small brush.
- Let dry for 15 minutes on a flat surface.
- Cut a small triangle beak from orange foam and glue it between the white and black sections.
- Glue googly eyes above the beak.
18. Greeting Card Coasters
Easy
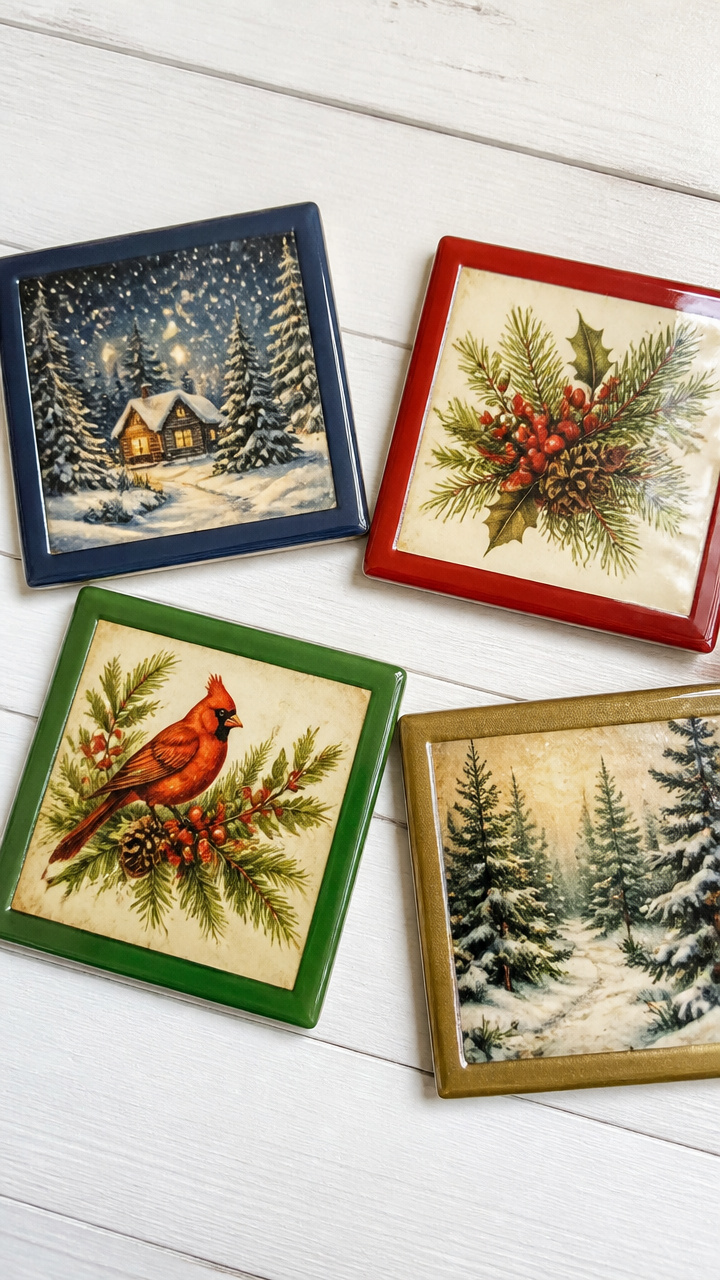
Stiff holiday cards get a second life protecting tables from cold drinks. Trimmed into squares, their festive fronts stay visible.
Materials Needed
- Used greeting cards with solid fronts, 4
- Cardboard from cereal box
- Glue stick
- Clear contact paper, 12 x 12 inches
- Ruler
- Scissors
- Bone folder
How to Make It
- Measure and cut each card into a 4-inch square, keeping the design centered.
- Cut matching squares from cereal box cardboard.
- Glue the card square face-up to the cardboard backing.
- Burnish edges with the bone folder for a crisp finish.
- Cover both sides with contact paper, trimming excess with scissors.
Grab a box, gather the kids, and start turning scraps into warmth. Every creation holds a little more joy than you expect.