22 Winter Animal Crafts for Toddlers

Fuzzy mittens, rosy cheeks, and animals peeking through frosty trees, winter inspires cozy moments and joyful creativity with little hands. Crafting together builds fine motor skills, sparks imagination, and turns quiet afternoons into something special.
Each of these projects uses simple materials you likely have at home or can find easily. They’re designed with toddlers in mind: safe, engaging, and full of sensory fun without overwhelming steps.
1. Pom-Pom Snow Owls
Easy
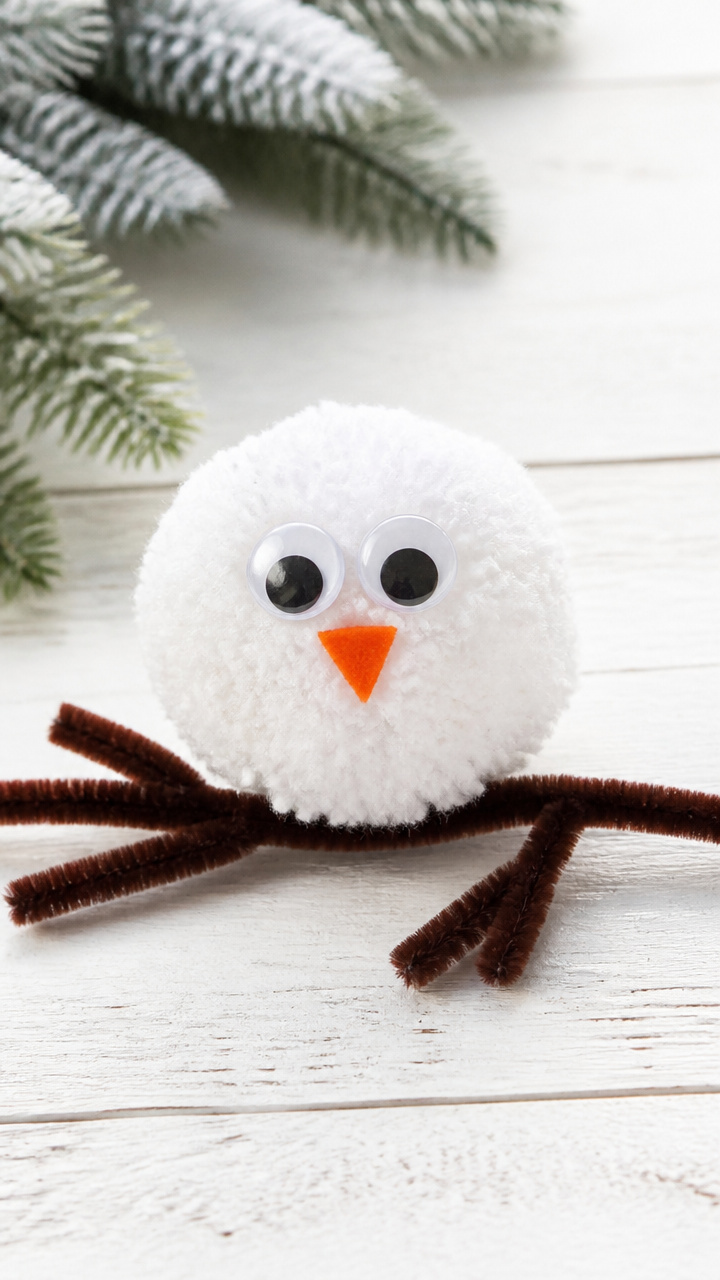
Soft white pom-poms become wide-eyed owls perched on icy branches, perfect for shelf displays or pretend play forests.
Materials Needed
- 3-inch white pom-pom (1)
- Googly eyes (2, 10mm)
- Orange felt sheet (6×6 inches)
- White glue (1 bottle)
- Black marker (1)
- Brown pipe cleaner (1)
- Scissors (1 pair)
How to Make It
- Cut two small triangle shapes from the orange felt for owl feet.
- Glue the googly eyes near the top of the pom-pom and draw tiny pupils with the black marker.
- Fold the pipe cleaner in half and twist the ends to form two clawed feet, then glue the felt triangles over them.
- Attach the feet to the bottom of the pom-pom with strong glue and let dry for 20 minutes.


2. Cotton Ball Sheep
Easy
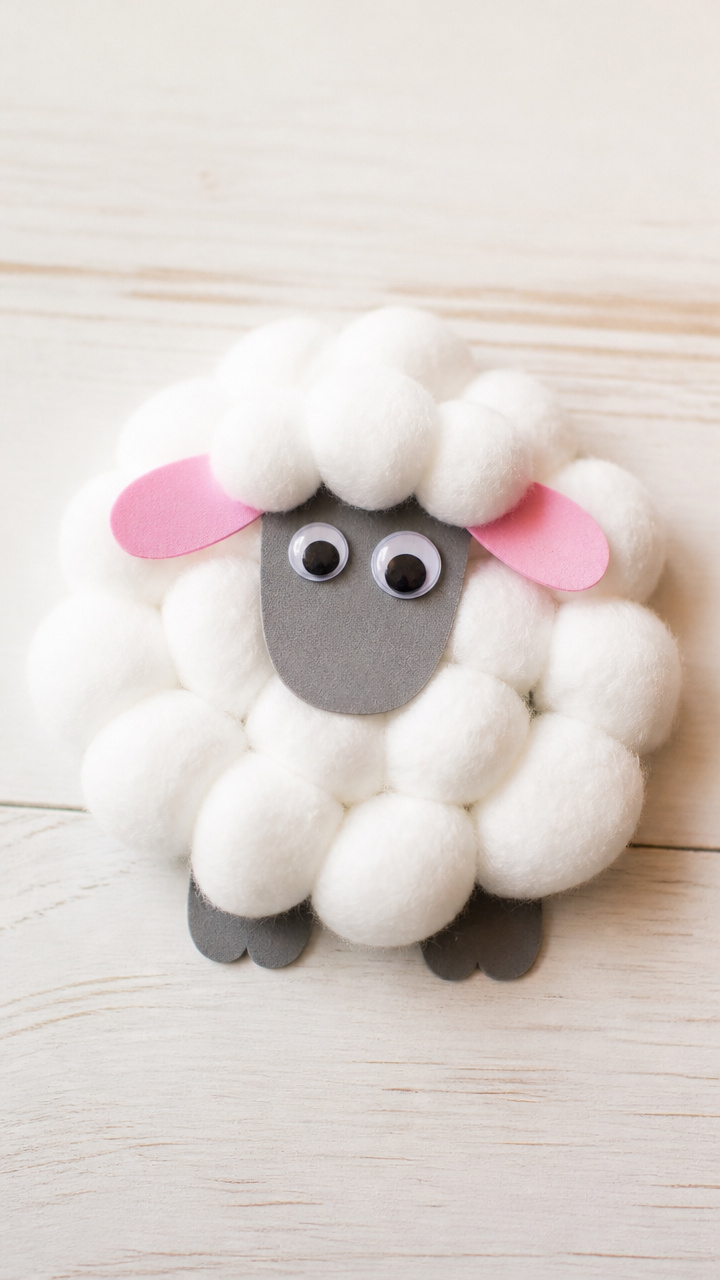
Fluffy cotton balls pile up into a woolly sheep that fits in small palms and looks sweet on a winter windowsill.
Materials Needed
- A4 gray cardstock (1 sheet)
- Cotton balls (15)
- Googly eyes (2, 8mm)
- Pink craft foam (4×4 inches)
- White glue (1 bottle)
- Scissors (1 pair)
- Black marker (1)
How to Make It
- Draw a sheep body outline on the gray cardstock and cut it out with scissors.
- Glue cotton balls all over the sheep’s back and sides, layering slightly for fullness.
- Cut two small ears and a snout from pink craft foam and glue them to the front of the body.
- Add googly eyes and draw a mouth with the black marker.

3. Handprint Reindeer Cards
Easy
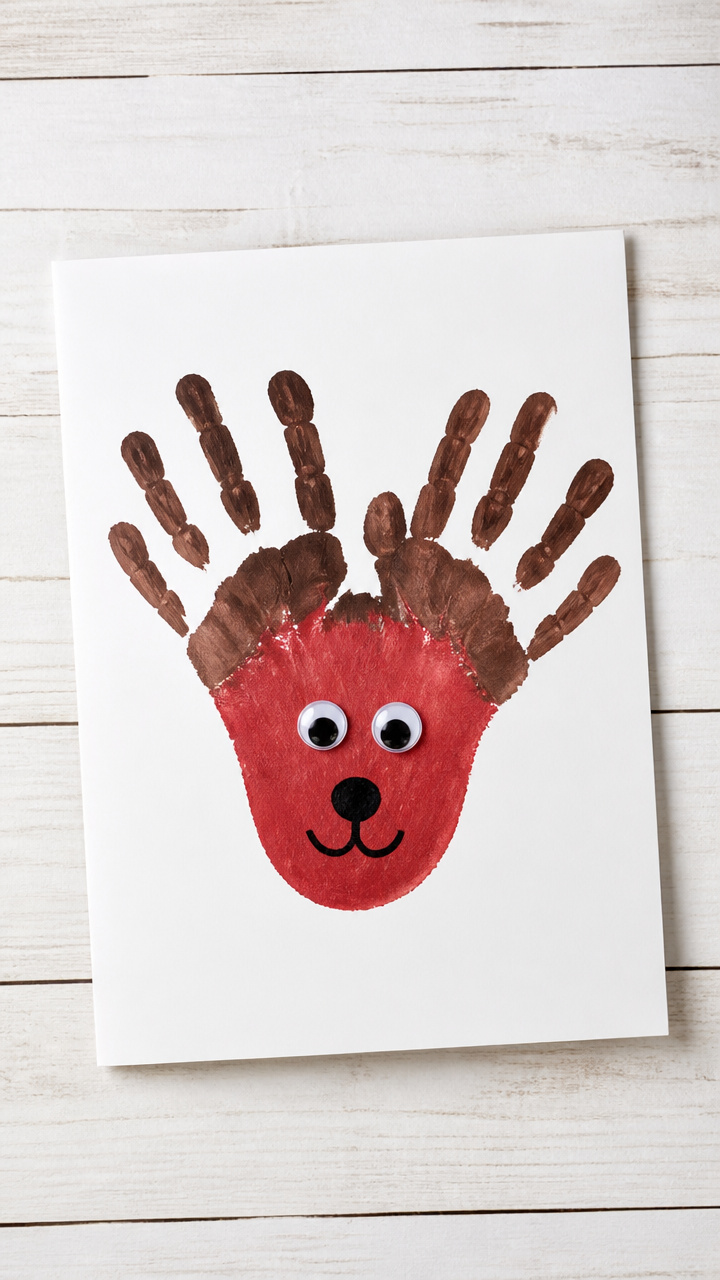
Your toddler’s handprint becomes the reindeer’s antlers, making each card a keepsake as much as a craft.
Materials Needed
- Red washable paint (1 small container)
- Brown washable paint (1 small container)
- White construction paper (5×7 inch, 1 sheet)
- Googly eyes (2, 6mm)
- Black marker (1)
- Glue stick (1)
- Gold glitter glue (1 tube)
How to Make It
- Help your child press their open hand into brown paint and stamp it sideways on the paper to form antlers.
- Dip just the heel of the hand in red paint and stamp below the antlers for the nose.
- Let the paint dry completely for 15 minutes.
- Glue on googly eyes, draw a face with the black marker, and add a gold glitter glue halo around the head.


4. Paper Plate Fox Masks
Moderate
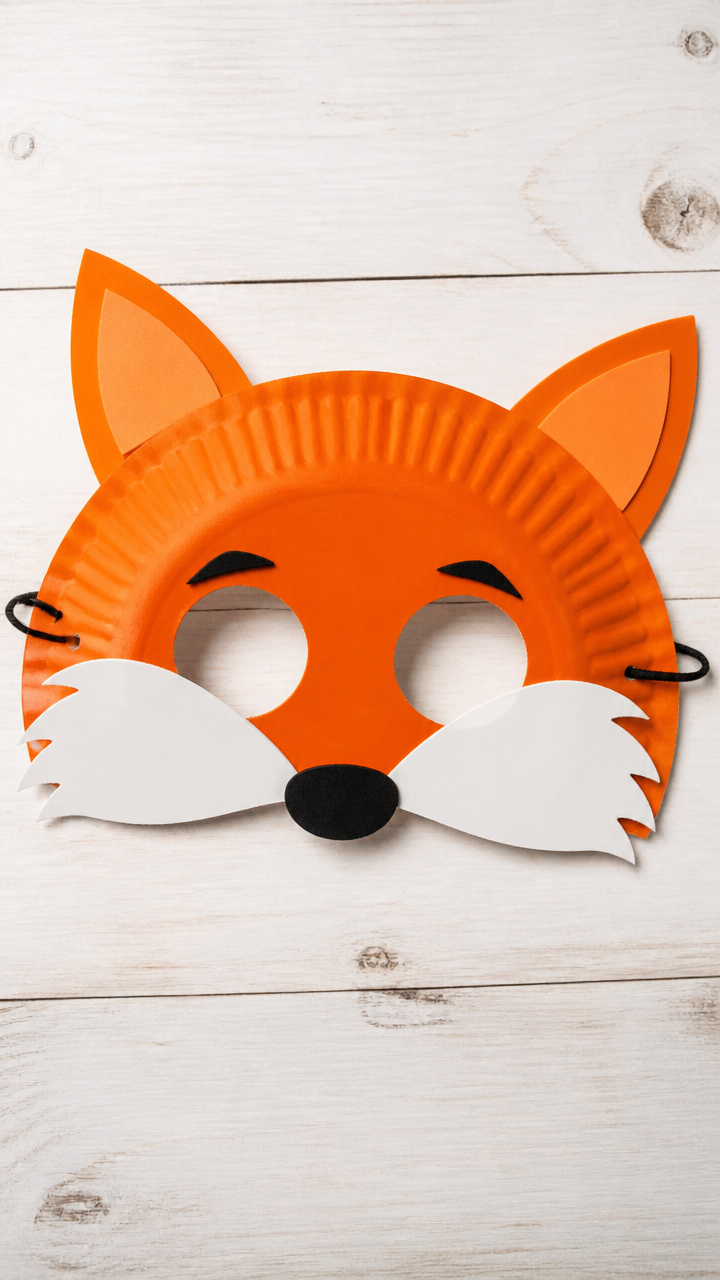
Bright orange paper plates transform into playful fox faces with flicking tails and pointy ears for imaginative adventures.
Materials Needed
- 9-inch orange paper plate (1)
- Orange craft foam (6×6 inches)
- White craft foam (6×6 inches)
- Black craft foam (6×6 inches)
- Hole punch (1)
- Elastic string (18 inches)
- Scissors (1 pair)
- Glue stick (1)
How to Make It
- Cut the center out of the paper plate, leaving a ring for the mask frame.
- Cut two large triangle ears from orange craft foam and line them with white foam inside.
- Glue the ears to the top edge of the plate and let dry for 10 minutes.
- Punch one hole on each side of the plate and thread elastic through, tying knots to secure.


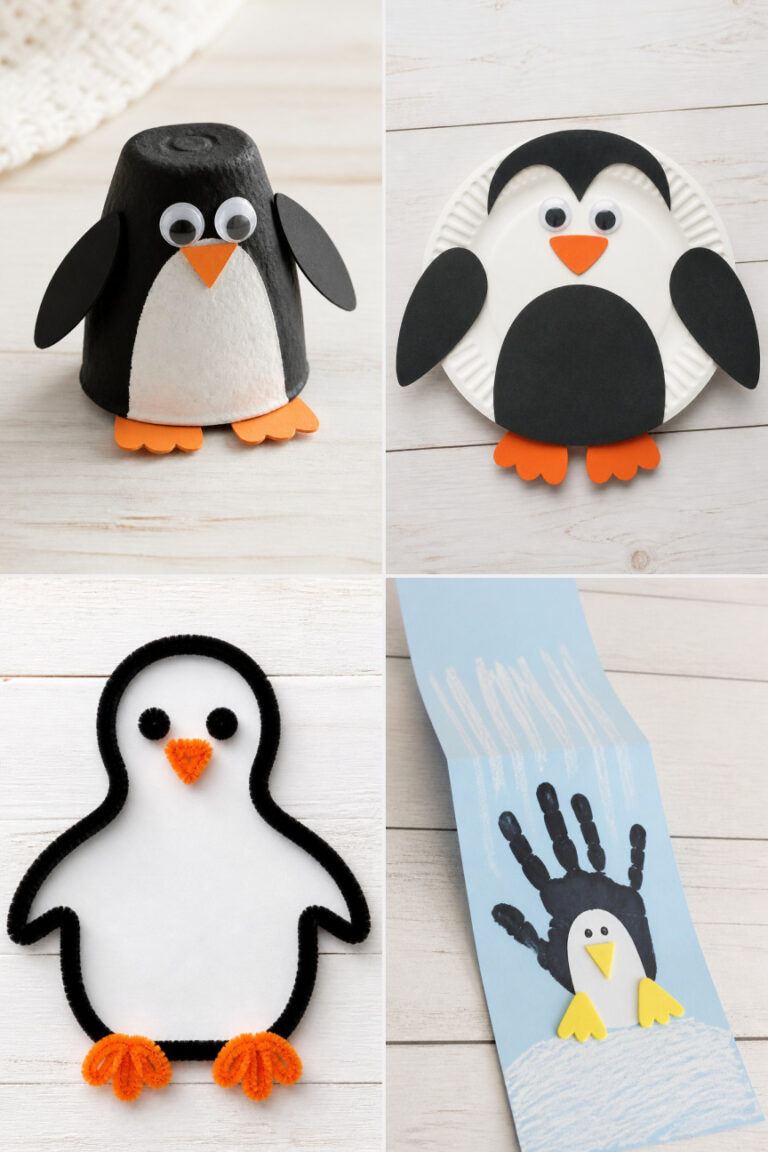
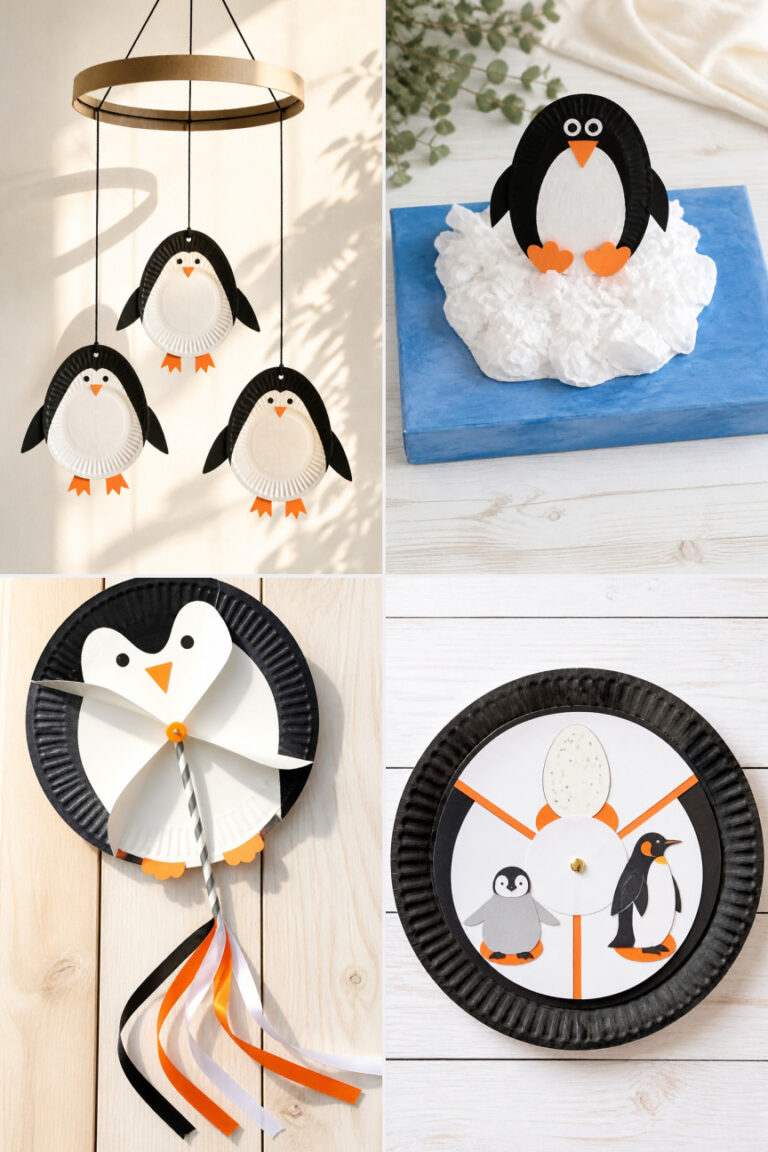
5. Toilet Roll Penguins
Easy
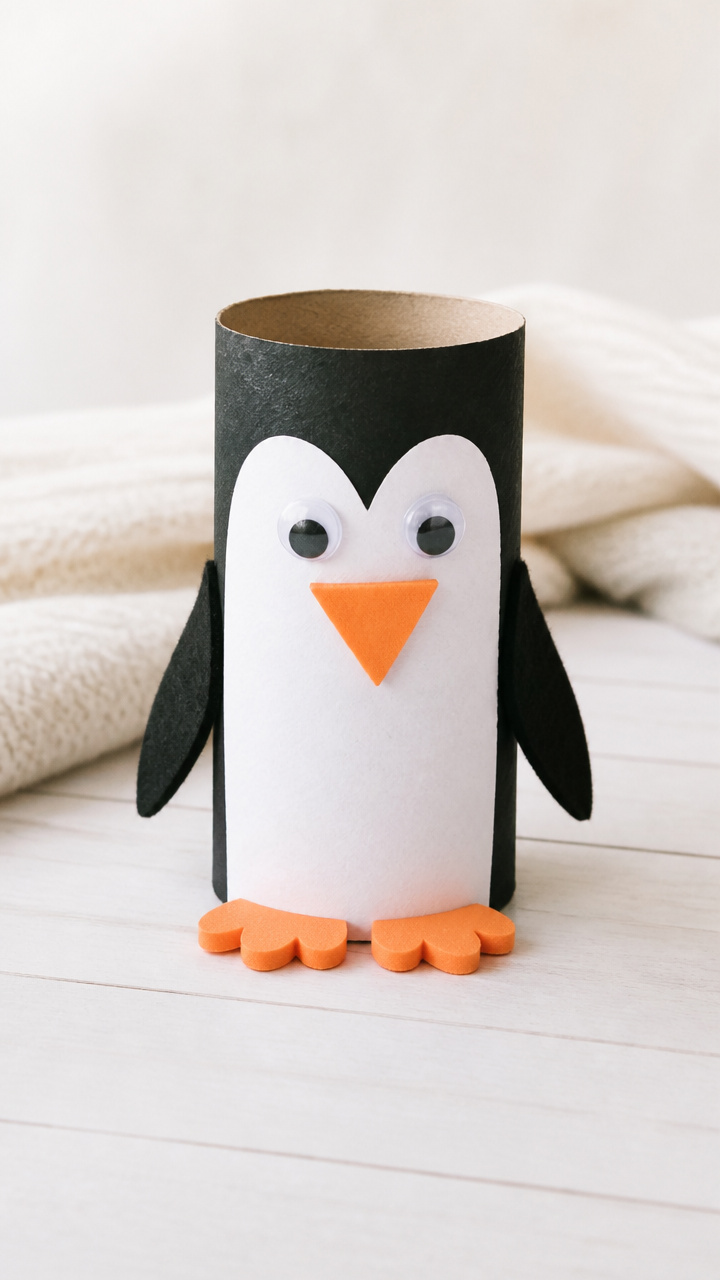
Empty toilet paper rolls gain tuxedo feathers and waddling charm with black and white paint and a pop of orange.
Materials Needed
- Empty toilet paper roll (1)
- Black acrylic paint (1 small container)
- White acrylic paint (1 small container)
- Orange craft foam (3×3 inches)
- Paintbrush (1, size 4)
- Googly eyes (2, 8mm)
- Glue stick (1)
- Scissors (1 pair)
How to Make It
- Paint the top half of the roll black and the bottom half white using the paintbrush.
- Let the paint dry for 20 minutes on a flat surface.
- Cut a small triangle beak and two flippers from orange craft foam.
- Glue the eyes above the black section and attach the beak and flippers to the sides.


6. Q-Tip Porcupine
Moderate
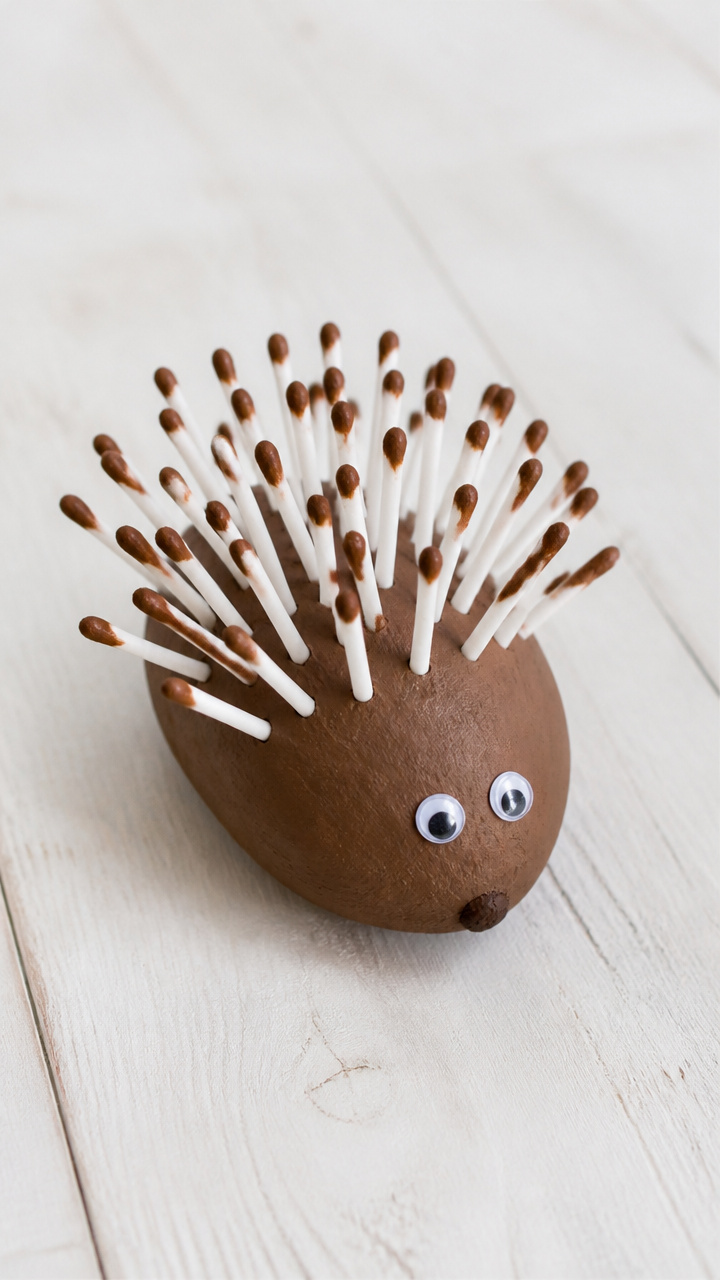
Sturdy Q-tips stand upright in a painted potato base to create a bristly porcupine with a curious face.
Materials Needed
- Small russet potato (1)
- Brown acrylic paint (1 small container)
- White acrylic paint (1 small container)
- Paintbrush (1, size 2)
- Regular-sized Q-tips (12)
- Googly eyes (2, 6mm)
- Black marker (1)
- Glue dot (1)
How to Make It
- Paint the entire potato brown and let dry for 15 minutes.
- Use the white paint to dab two eye spots near the top and let dry for 5 minutes.
- Push 10 Q-tips into the back of the potato, angling them upward.
- Stick googly eyes over the white dots and use the marker for a nose and mouth, securing with a glue dot if needed.


7. Fingerprint Walrus Art
Easy
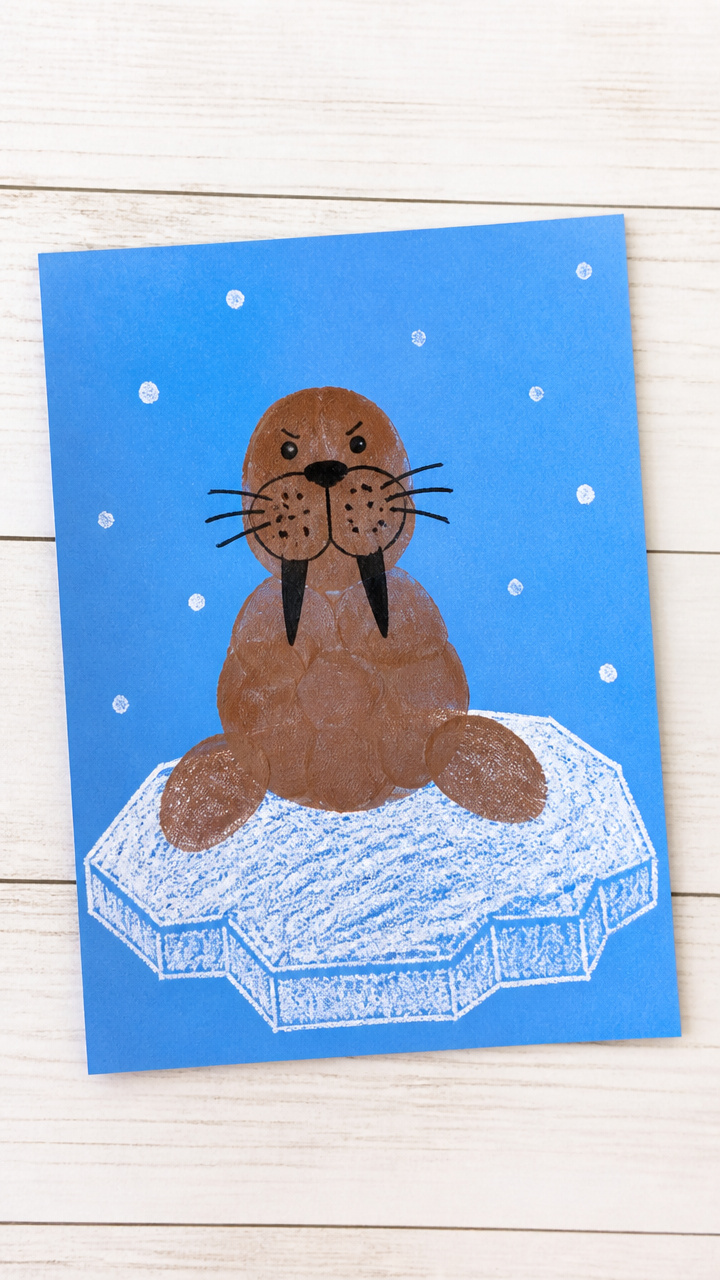
Inky fingerprints grow tusks and whiskers to become a grumpy walrus on a snowy ice floe.
Materials Needed
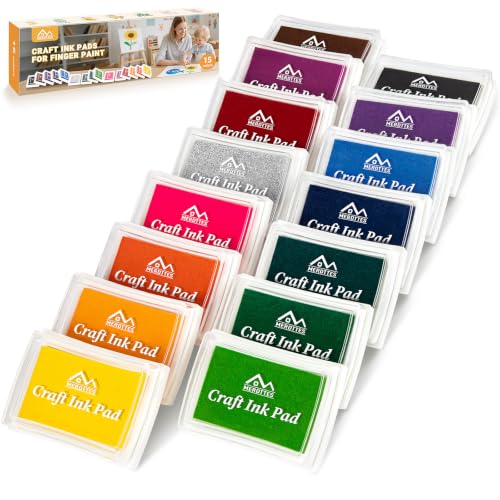
- Brown washable ink pad (1)
- Blue construction paper (8.5×11 inch, 1 sheet)
- White crayon (1)
- Black marker (1)
- White glue (1 bottle)
How to Make It
- Press your child’s fingertip onto the brown ink pad and stamp it near the center of the blue paper.
- Let the ink dry for 2 minutes.
- Draw two long curved lines downward from the print for tusks using the black marker.
- Use the white crayon to scribble short lines around the face for icy breath and whiskers.


8. Yarn-Wrapped Moose
Moderate
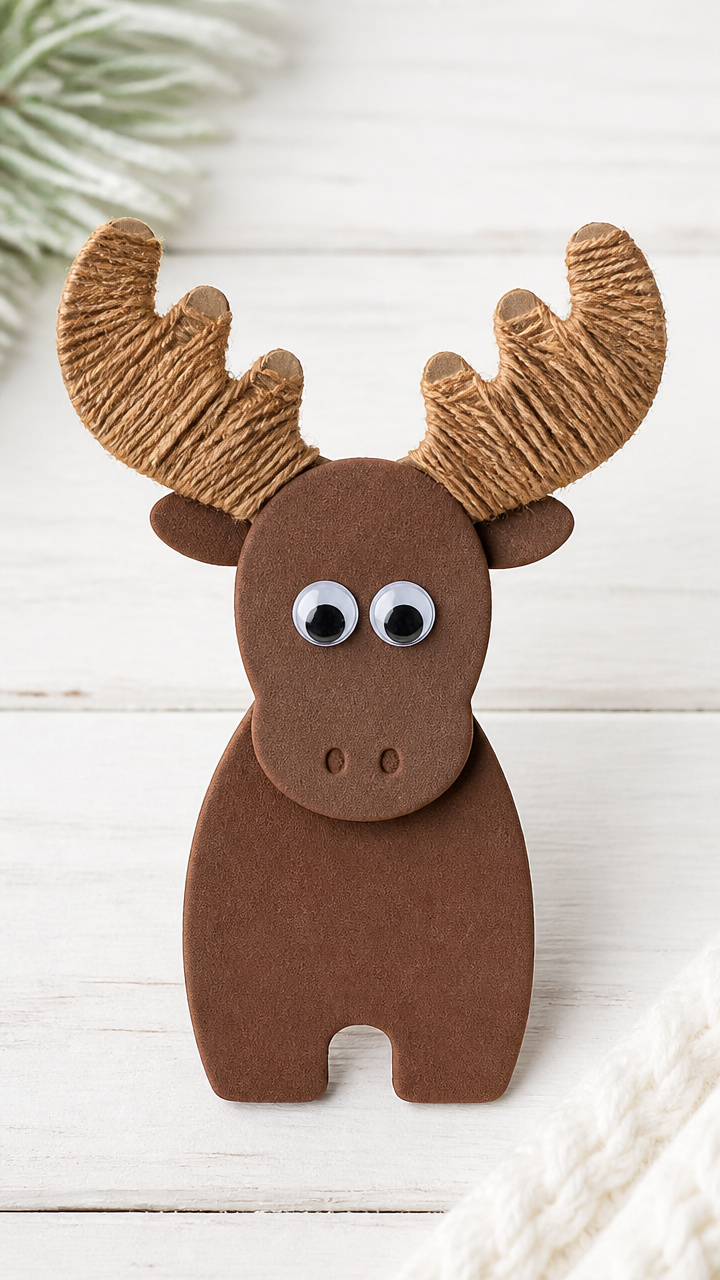
Cardboard antlers wrapped in warm brown yarn give this moose a soft, tactile crown fit for a forest king.
Materials Needed
- Brown yarn (1 skein, 80 yards)
- Cardboard (4×4 inches, 1 piece)
- Scissors (1 pair)
- Hot glue gun (1) and 1 glue stick
- Brown craft foam (6×6 inches)
- Googly eyes (2, 10mm)
- Black marker (1)
How to Make It
- Cut two large branching antler shapes from cardboard and set aside.
- Wrap yarn tightly around one antler, securing the end with a drop of hot glue, and repeat for the second.
- Cut a moose face from brown craft foam and glue the antlers to the top with hot glue.
- Add googly eyes and draw a snout and mouth with the black marker.


9. Popsicle Stick Hedgehog
Easy
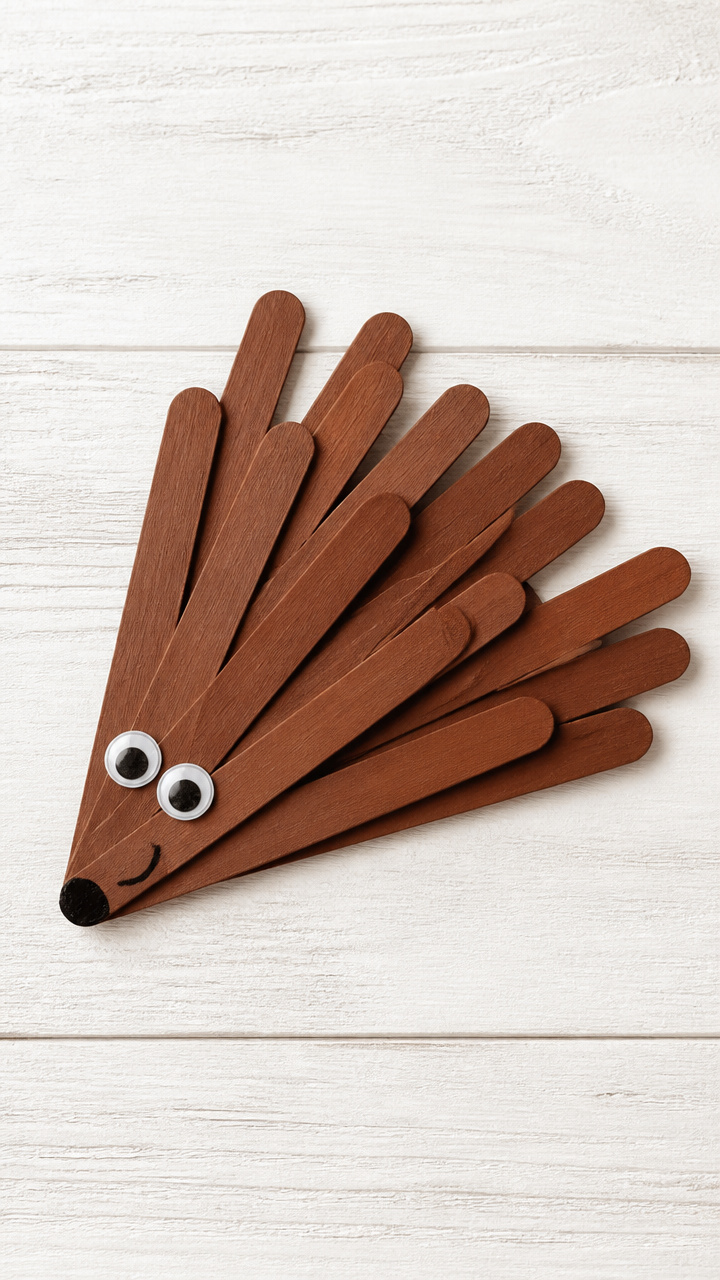
Flat popsicle sticks layered at angles mimic spiky quills, turning wood into a prickly winter creature.
Materials Needed
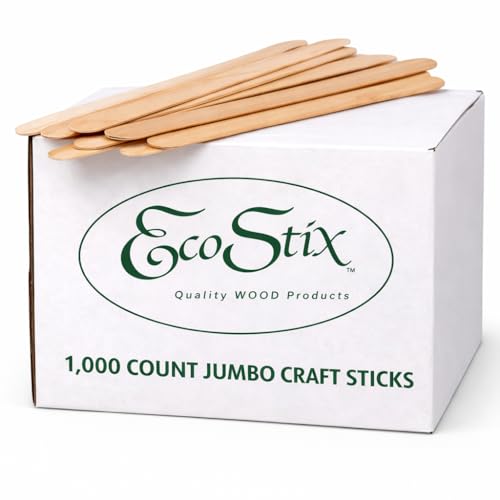
- Jumbo craft sticks (5)
- Brown acrylic paint (1 small container)
- Paintbrush (1, size 3)
- Googly eyes (2, 6mm)
- White glue (1 bottle)
- Black marker (1)
- Scissors (1 pair)
- Tan craft foam (3×3 inches)
How to Make It
- Paint all five craft sticks brown and let dry for 15 minutes.
- Lay one stick flat as the base and glue the other four vertically across it, fanning outward.
- Cut a small oval face from tan foam and glue it to the front stick.
- Add googly eyes and draw a nose and mouth with the black marker.


10. Tissue Paper Fox Lantern
Moderate
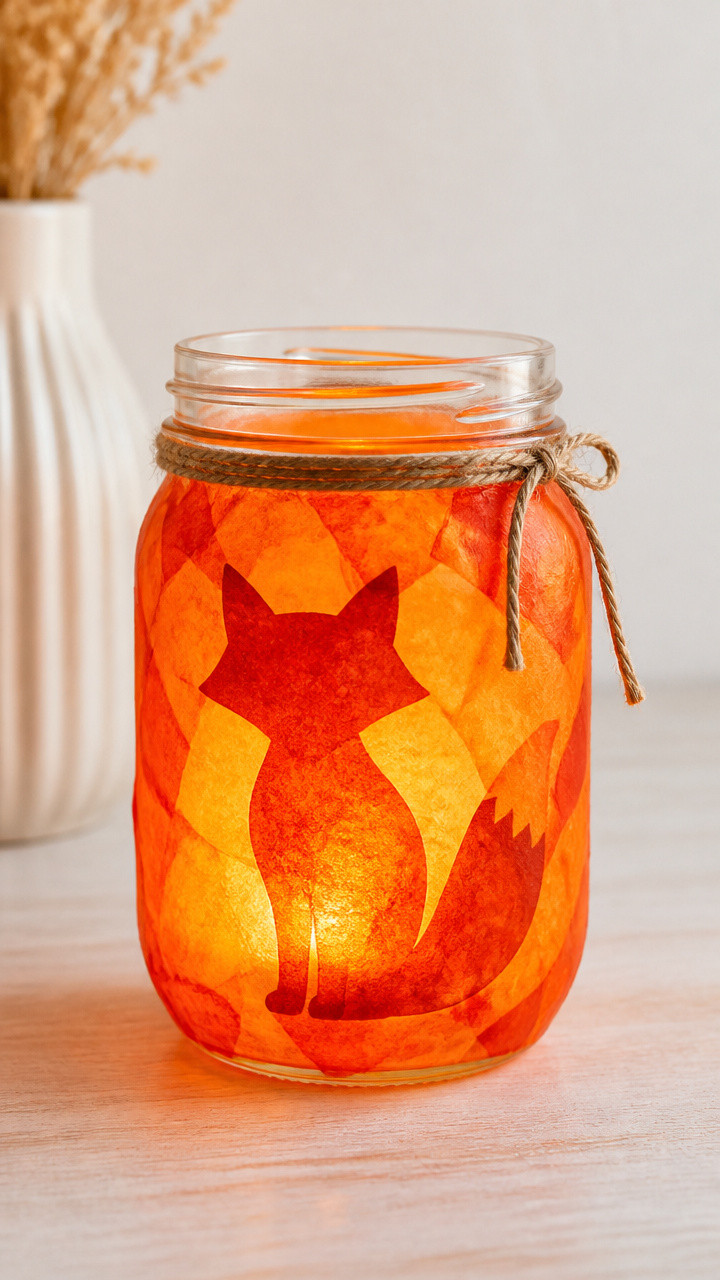
Sheets of bright tissue glow like firelight when taped inside a jar, casting fox-shaped shadows in a dark room.
Materials Needed
- Clear glass mason jar (8 oz, 1)
- Orange tissue paper (6 sheets, 20×20 inch)
- Red tissue paper (2 sheets, 20×20 inch)
- White glue (1 bottle)
- Paintbrush (1, size 6)
- Scissors (1 pair)
- LED tea light (1)
How to Make It
- Cut tissue paper into 2-inch squares and set aside.
- Brush a thin layer of glue on the outside of the jar and press tissue squares onto it, overlapping slightly.
- Use mostly orange with red accents for the tail and ears, covering the entire jar.
- Place the LED tea light inside and turn off the lights to see the glowing fox effect.


11. Button Arctic Fox
Easy
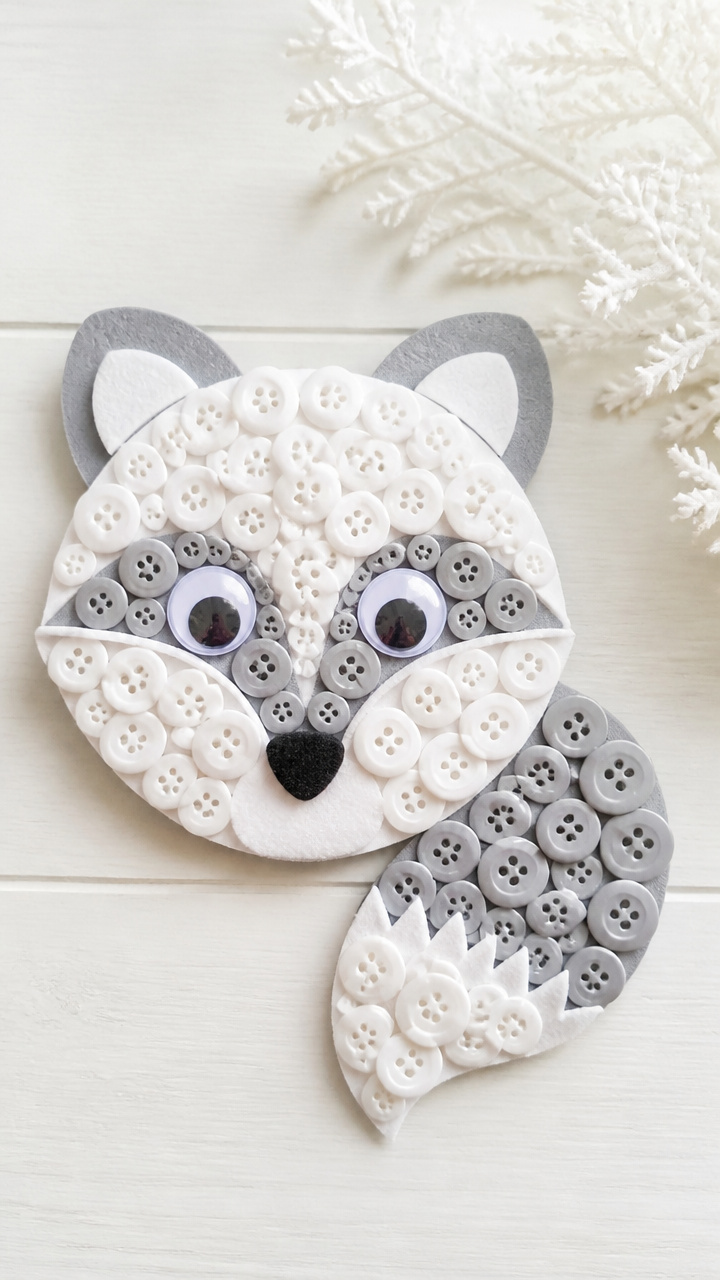
Mismatched white and gray buttons stack into a clever fox face with a fluffy tail and twitching nose.
Materials Needed
- White buttons (3, 1/2 inch)
- Gray buttons (2, 1/2 inch)
- White craft foam (4×4 inches)
- Googly eyes (2, 6mm)
- White glue (1 bottle)
- Scissors (1 pair)
- Black marker (1)
How to Make It
- Cut a fox face shape from white craft foam with pointed ears and a rounded chin.
- Glue one gray button for the nose at the tip and two white buttons above for eyes.
- Place one white and one gray button side by side behind the face for the body.
- Draw whiskers and mouth details with the black marker.


12. Salt Dough Whale Ornaments
Advanced
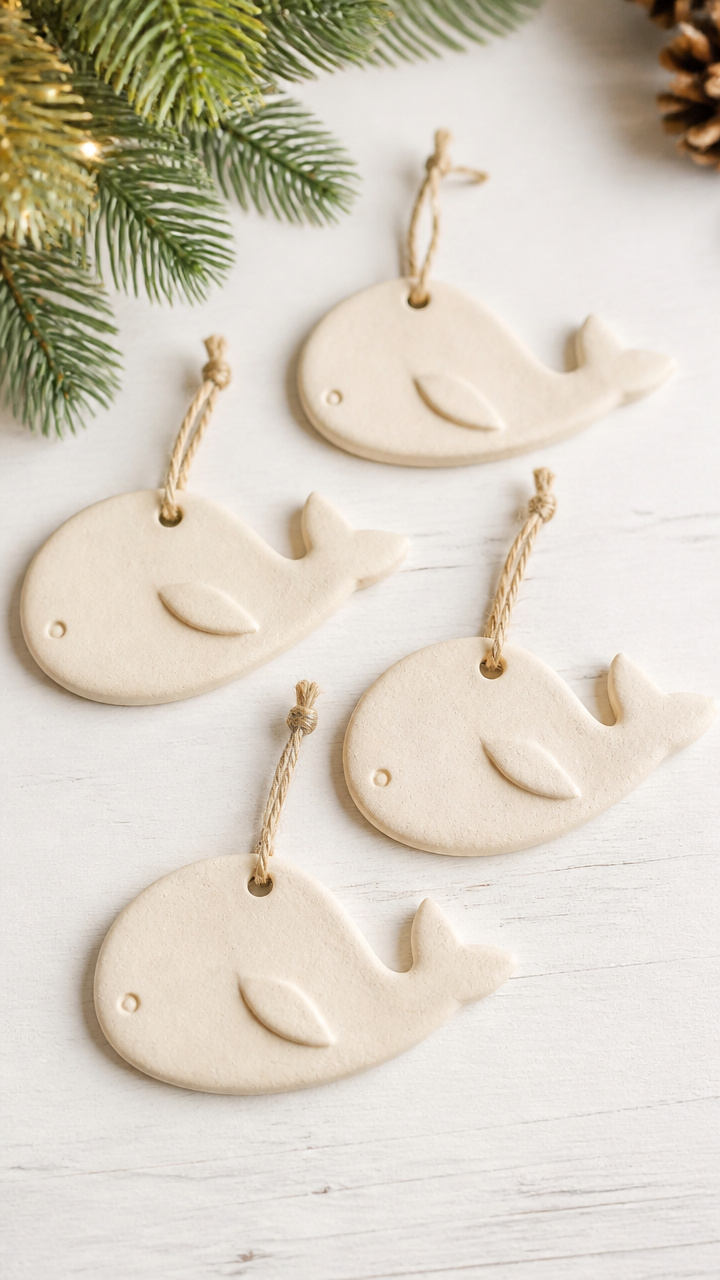
Homemade dough shaped like whales bakes into sturdy ornaments ready for twine and a place on the tree.
Materials Needed
- All-purpose flour (1 cup)
- Table salt (1/2 cup)
- Water (1/2 cup)
- Mixing bowl (1)
- Whisk (1)
- Whale cookie cutter (1)
- Baking sheet (1)
- Parchment paper (1 sheet)
- Oven (1)
- White acrylic paint (1 small container)
- Blue glitter glue (1 tube)
- Twine (12 inches)
How to Make It
- Mix flour, salt, and water in a bowl until a smooth dough forms, kneading for 2 minutes.
- Roll the dough to 1/4 inch thick and cut out whale shapes with the cookie cutter.
- Place shapes on parchment-lined baking sheet and bake at 200°F for 3 hours until hard.
- Paint whales white, add glitter glue waves, and thread twine through a hole before drying.


13. Feathered Snowy Owl
Easy
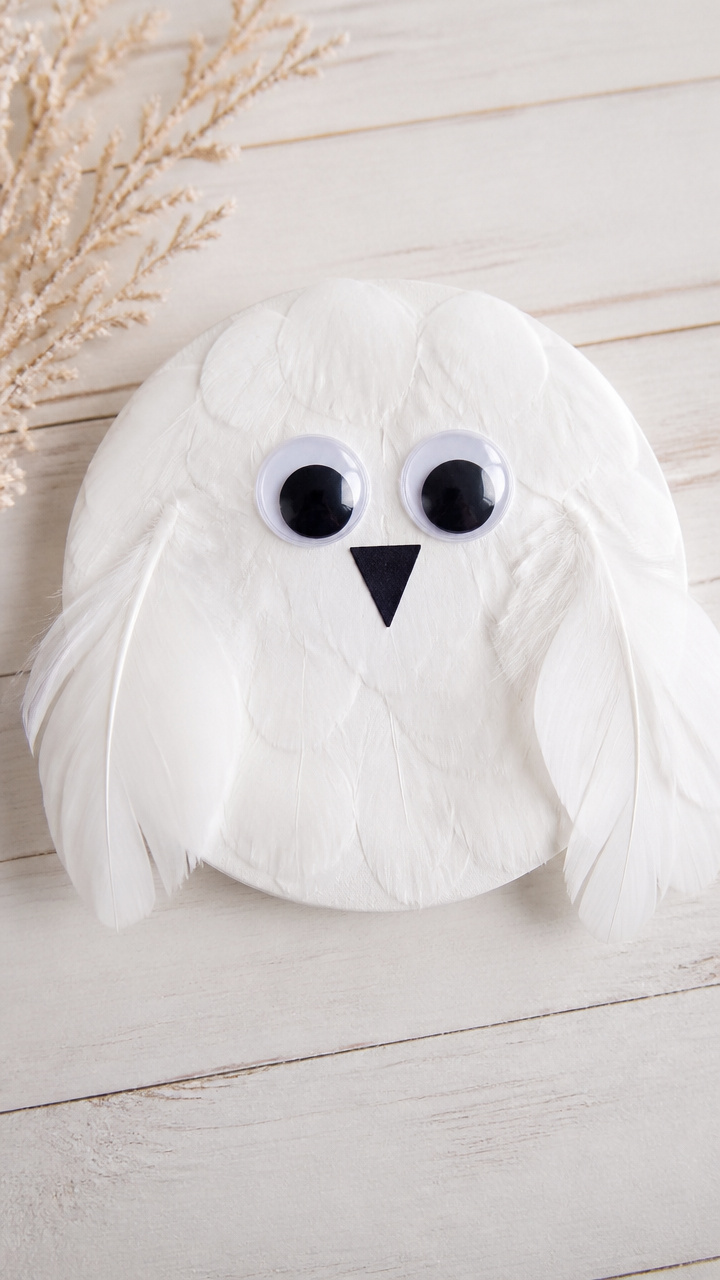
Soft white feathers glued around a paper circle create wings that seem ready to flutter shut.
Materials Needed
- White craft feathers (10, 1 inch long)
- White paper plate (9 inch, 1)
- Googly eyes (2, 12mm)
- White glue (1 bottle)
- Black marker (1)
- Scissors (1 pair)
How to Make It
- Cut the center out of the paper plate, leaving a ring for the owl's body.
- Glue feathers all around the outer edge of the ring, tips pointing outward.
- Let dry for 15 minutes, then glue googly eyes to the front center.
- Draw a small beak between the eyes with the black marker.


14. Crayon Resist Polar Bear
Easy
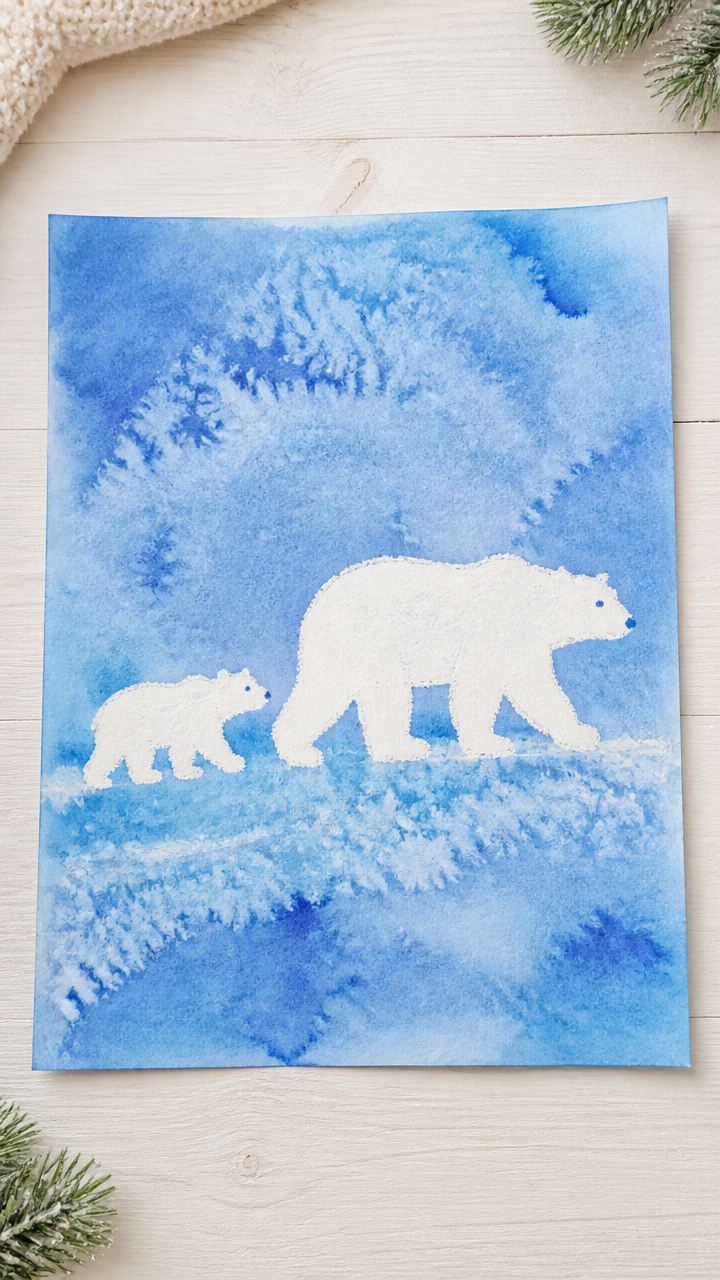
White crayon drawings of bears appear magically when painted over with blue watercolor wash.
Materials Needed
- White crayon (1)
- Watercolor paper (8.5×11 inch, 1 sheet)
- Blue liquid watercolor (1 small bottle)
- Paintbrush (1, size 5)
- Cup of water (1)
- Paper towel (1 sheet)
How to Make It
- Draw a polar bear shape on the paper with the white crayon, pressing firmly.
- Mix a few drops of blue watercolor with water in a cup.
- Paint the entire page with the blue wash using the brush.
- Blot excess water with a paper towel and watch the bear appear as it dries.


15. Pipe Cleaner Bumblebee Hummingbird
Moderate
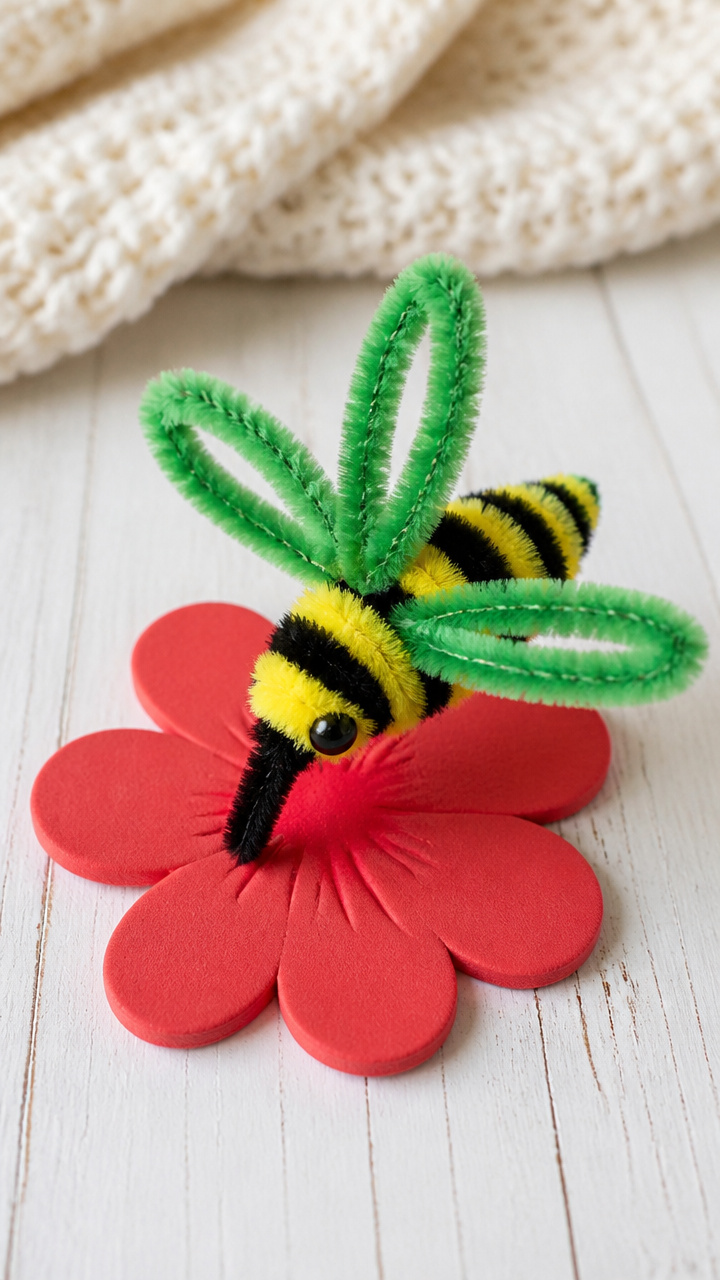
Twisted yellow and black pipe cleaners form a buzzy hummingbird body that hovers above a paper flower.
Materials Needed
- Yellow pipe cleaner (1)
- Black pipe cleaner (1)
- Red craft foam (4×4 inches)
- Green pipe cleaner (1)
- Glue dot (1)
- Scissors (1 pair)
- Craft stick (1)
How to Make It
- Twist the yellow and black pipe cleaners together to form a striped body.
- Cut five petal shapes from red foam and arrange in a circle to make a flower.
- Glue the flower to one end of the craft stick and attach the green pipe cleaner as a stem.
- Stick the hummingbird body into the center with a glue dot so it looks like it's feeding.


16. Shaving Cream Walrus
Easy
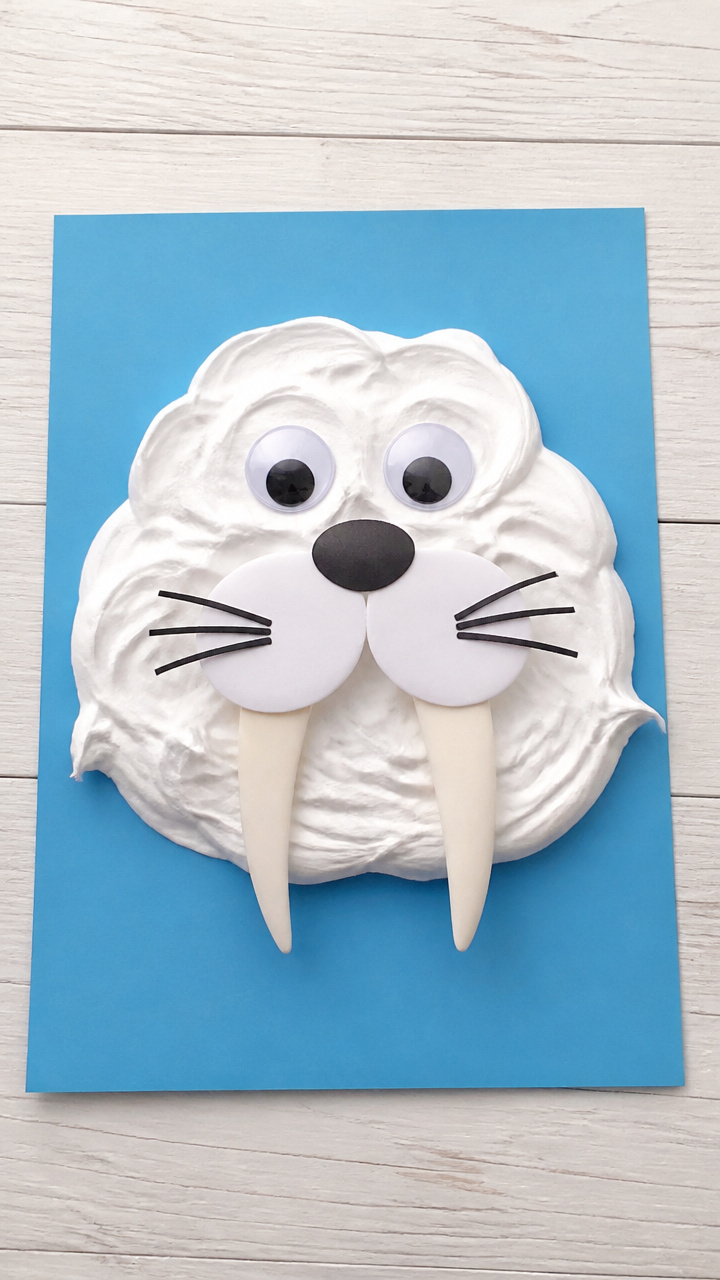
Fluffy shaving cream mixed with glue creates a 3D texture perfect for a blubbery walrus face.
Materials Needed
- White shaving cream (1/2 cup)
- White school glue (1/4 cup)
- Mixing bowl (1)
- Spoon (1)
- Blue construction paper (1 sheet)
- Googly eyes (2, 10mm)
- Black marker (1)
How to Make It
- Mix equal parts shaving cream and glue in a bowl until smooth and fluffy.
- Scoop the mixture onto the blue paper and shape it into a round walrus face.
- Press googly eyes into the top part and let the mixture dry flat for 4 hours.
- Draw long curved tusks and whiskers with the black marker once dry.


17. Clothespin Penguin
Easy
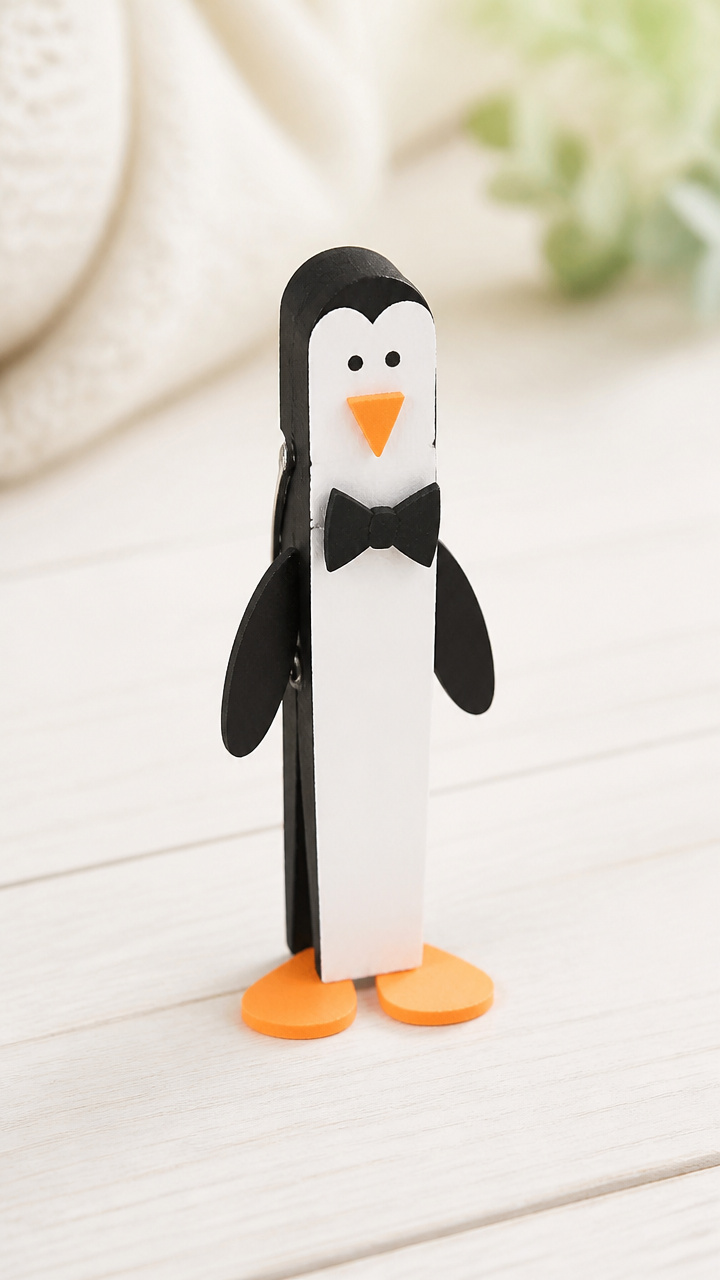
Wooden clothespins wear tiny paper hats and bowties, becoming standing penguins for shelf parades.
Materials Needed
- Wooden clothespin (1)
- Black acrylic paint (1 small container)
- White acrylic paint (1 small container)
- Paintbrush (1, size 2)
- Orange craft foam (3×3 inches)
- Glue stick (1)
- Scissors (1 pair)
How to Make It
- Paint the clothespin clip black and the head white, letting each dry for 10 minutes.
- Cut a small triangle beak and two flippers from orange foam.
- Glue the beak to the front of the head and the flippers to the sides of the body.
- Let dry completely before displaying upright.


18. Felt Fish Under Ice
Moderate
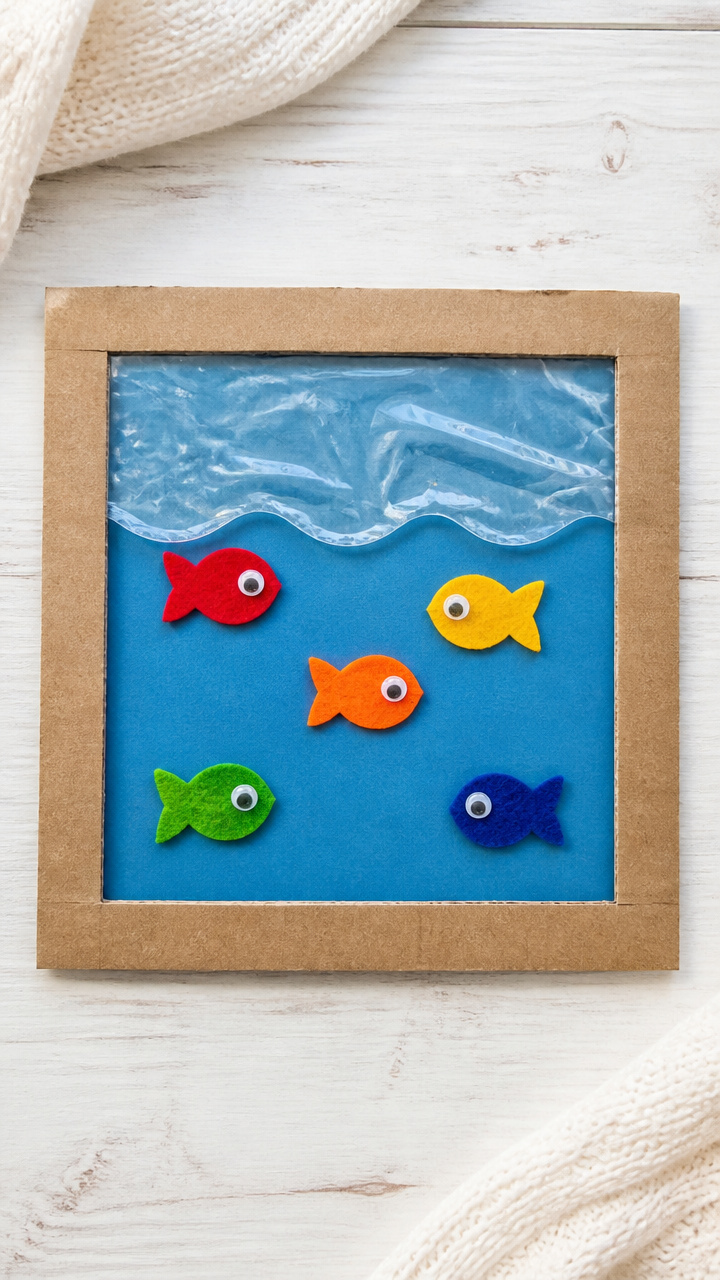
Colorful fish swim beneath a wavy layer of clear contact paper 'ice' in this framed sensory scene.
Materials Needed
- Clear contact paper (12×12 inch, 1 sheet)
- Blue construction paper (8.5×11 inch, 1 sheet)
- Assorted colored felt scraps (5 pieces, 3×3 inch each)
- Scissors (1 pair)
- Roll of tape (1)
- Cardboard frame (8×10 inch, 1)
How to Make It
- Cut fish shapes from colored felt and set aside.
- Cut the contact paper to fit the cardboard frame and peel the backing halfway.
- Place fish on the sticky side, arranging them to look like they're swimming.
- Peel the rest of the backing and smooth the top layer down, sealing the fish inside like ice.


19. Sticker Seal Pups
Easy
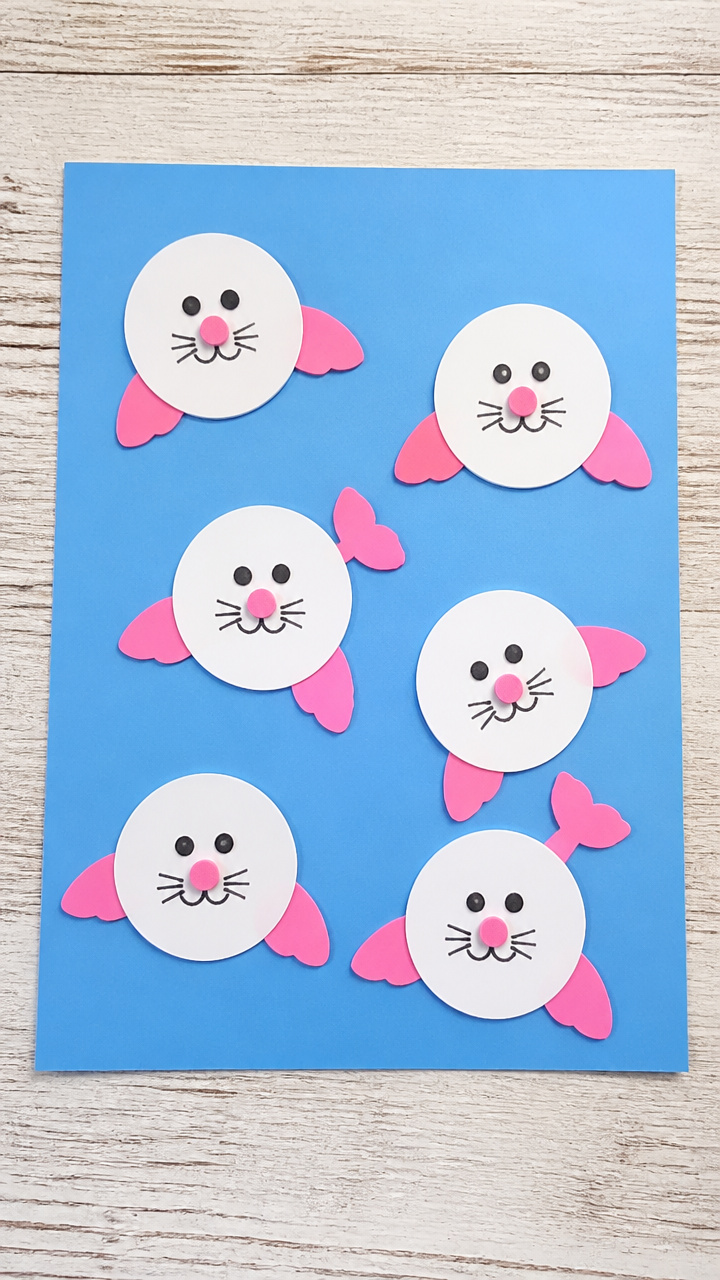
Round stickers become seal bodies, layered with fins and noses to make a whole pod on blue paper.
Materials Needed
- White circle stickers (1 inch diameter, 6)
- Blue construction paper (8.5×11 inch, 1 sheet)
- Pink craft foam (3×3 inches)
- Black marker (1)
- Glue stick (1)
- Scissors (1 pair)
How to Make It
- Peel and stick six white circles onto the blue paper in a group to form seal pups.
- Cut small flippers and nose triangles from pink foam.
- Glue flippers to the sides of each circle and a nose near the top edge.
- Draw eyes and whiskers on each seal with the black marker.


20. Cork Octopus
Easy
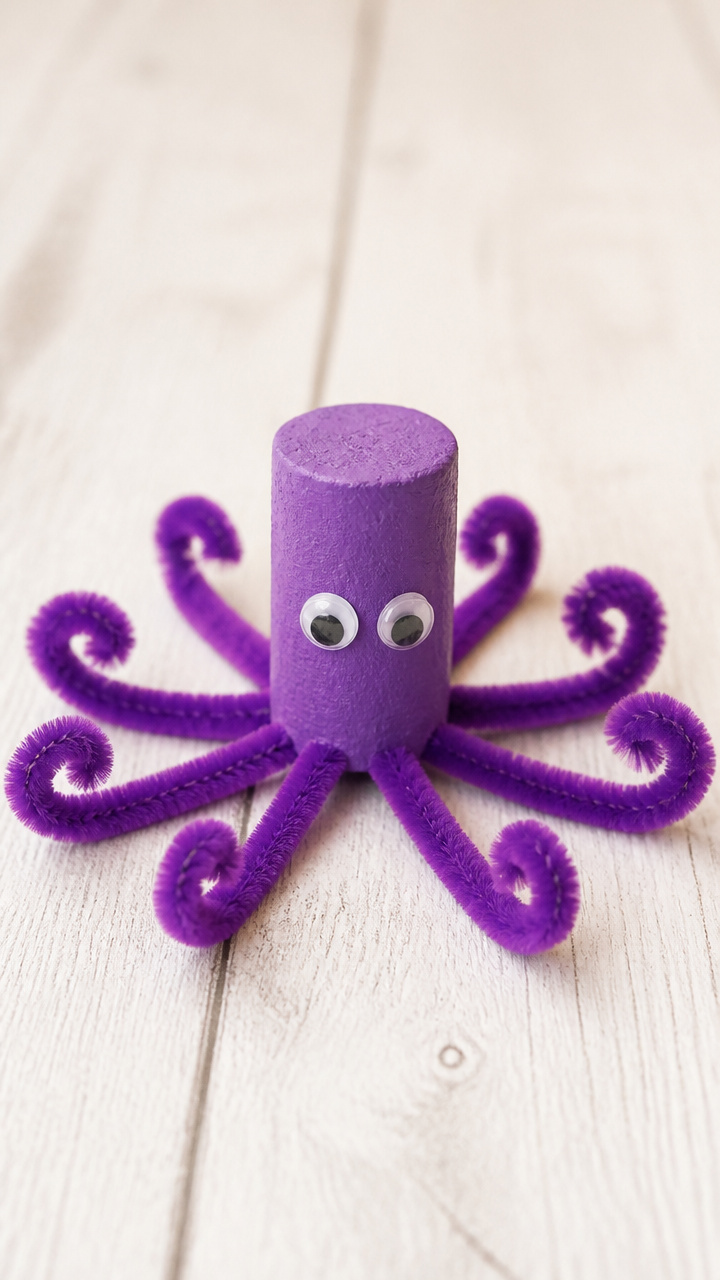
Painted wine corks sprout eight curling legs made from chenille stems for an under-ice explorer.
Materials Needed
- Wine cork (1)
- Purple acrylic paint (1 small container)
- Paintbrush (1, size 3)
- Purple pipe cleaners (8)
- Googly eyes (2, 6mm)
- White glue (1 bottle)
How to Make It
- Paint the cork purple and let dry for 15 minutes.
- Cut each pipe cleaner in half and twist one end around the middle of the cork to form eight legs.
- Press two googly eyes onto the top of the cork with glue.
- Let the glue dry for 10 minutes before playing.


21. Thumbprint Mice Trail
Easy
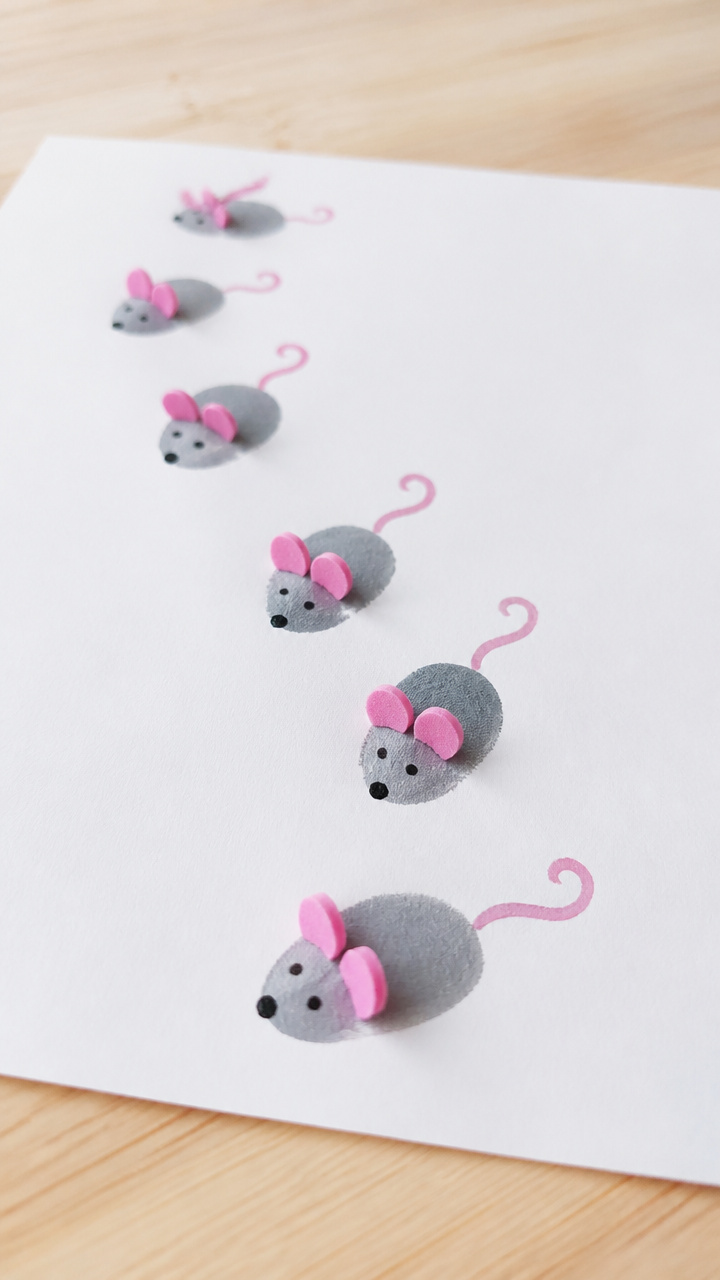
Rows of gray thumbprints scurry across a snowy path, gaining ears and tails with simple cuts and glue.
Materials Needed
- Gray washable ink pad (1)
- White drawing paper (8.5×11 inch, 1 sheet)
- Pink craft foam (3×3 inches)
- Black marker (1)
- Glue stick (1)
- Scissors (1 pair)
How to Make It
- Press your child’s thumb on the ink pad and stamp a trail of prints across the paper.
- Let the ink dry for 3 minutes.
- Cut small circle ears from pink foam and glue them above each print.
- Draw a tail curving from each print and add tiny eyes and noses with the black marker.


22. Pinecone Squirrel Tails
Moderate
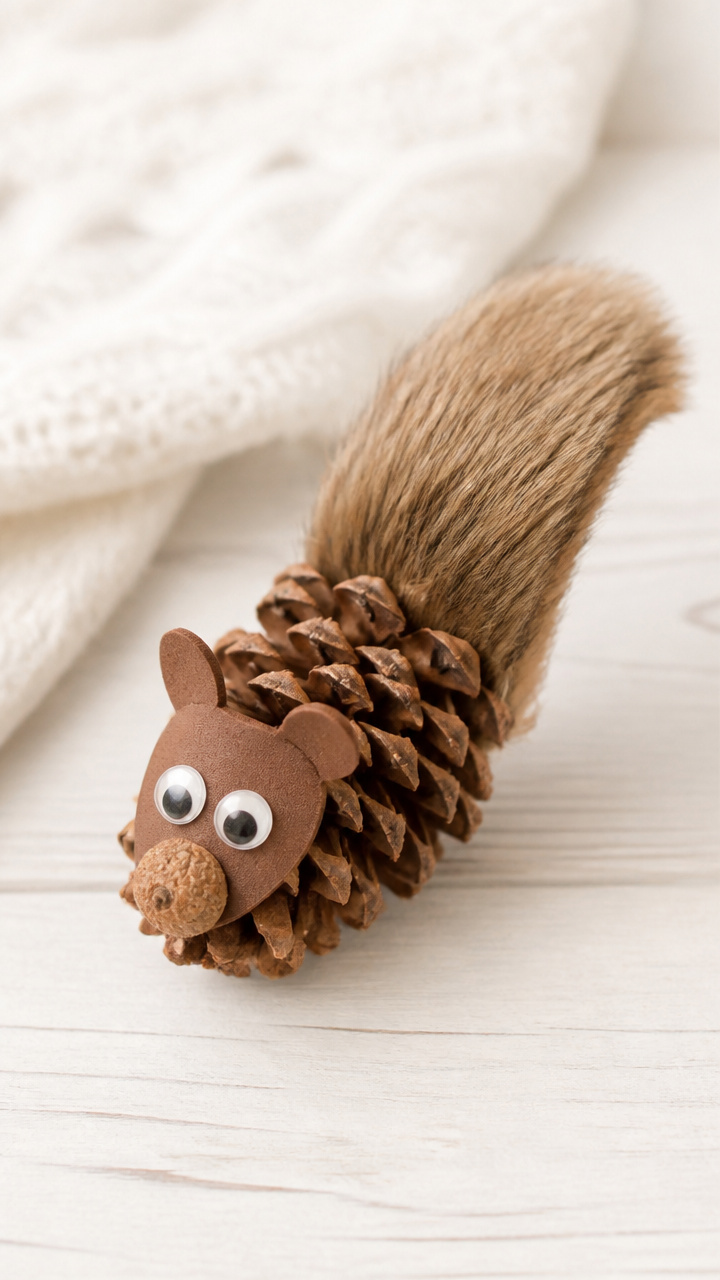
Real pinecones become bushy squirrel tails when paired with a foam face and nut in its paws.
Materials Needed
- Small pinecone (1)
- Brown craft foam (6×6 inches)
- Googly eyes (2, 6mm)
- Acorn cap (1)
- White glue (1 bottle)
- Scissors (1 pair)
- Brown pipe cleaner (1)
How to Make It
- Cut a squirrel face and two paws from brown craft foam.
- Glue the face to the top of the pinecone and the paws near the front.
- Place the acorn cap between the paws and secure with a dot of glue.
- Twist the pipe cleaner into a small coil and glue it behind the face as a front leg.


Grab your glue and paints, invite your little one close, and let the cold season spark warm memories. These animals are waiting to leap from your table into storytime, playtime, or a proud spot on the fridge.