15 Valentine’s Day Wood Crafts for Rustic Home Decor

Rough-hewn pine, soft stains, and the warmth of hand-cut hearts bring a cozy charm to love-themed decor. These wood crafts blend natural texture with heartfelt detail, perfect for mantels, walls, and tabletops.
Each project uses real tools and clear steps so you can create something lasting. No flimsy materials or vague directions—just honest making with beautiful results.
1. Heart-Shaped Barnwood Wall Hanging
Moderate
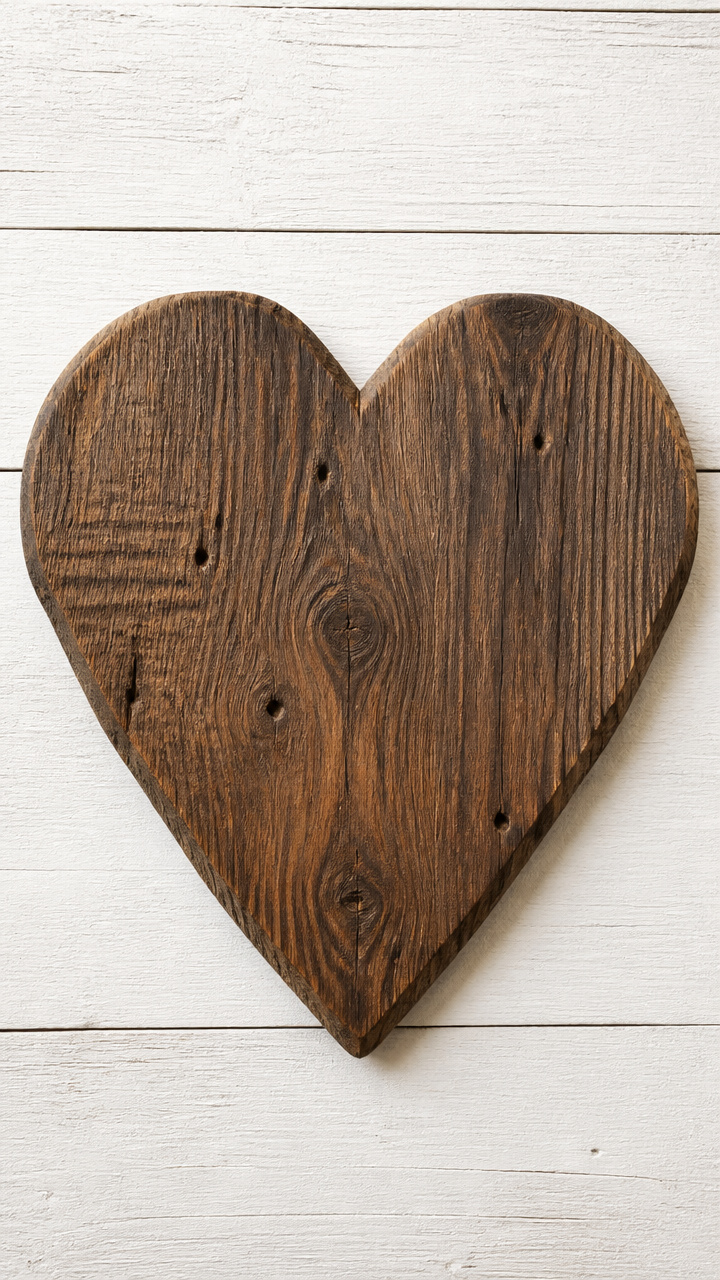
A reclaimed wood heart with chiseled edges hangs proudly on your wall, showing off natural grain and nail holes that tell a story. This piece brings farmhouse warmth to any room without feeling fussy.
Materials Needed
- 12-inch square piece of barnwood (reclaimed pine, approx. 3/4 inch thick)
- Wood rasp
- Jigsaw with fine-tooth blade
- Sandpaper (120 grit, 220 grit)
- Wood stain (dark walnut, 8 oz)
- Clean cotton cloth
- Sawtooth hanger
- Small nails (1/2 inch, 2 pieces)
- Hammer
How to Make It
- Draw a large heart shape centered on the barnwood using a pencil and a dinner plate for the top curves.
- Cut out the heart carefully with the jigsaw, following the line slowly to keep edges smooth.
- Use the wood rasp to refine the outline and create slightly beveled edges.
- Sand the entire surface first with 120 grit, then 220 grit until smooth but not polished.
- Apply dark walnut stain with the cloth, wiping off excess after 5 minutes.
- Let dry for 2 hours, then attach the sawtooth hanger to the back with the hammer and small nails.


2. Two-Tone Love Sign on Pine Board
Moderate
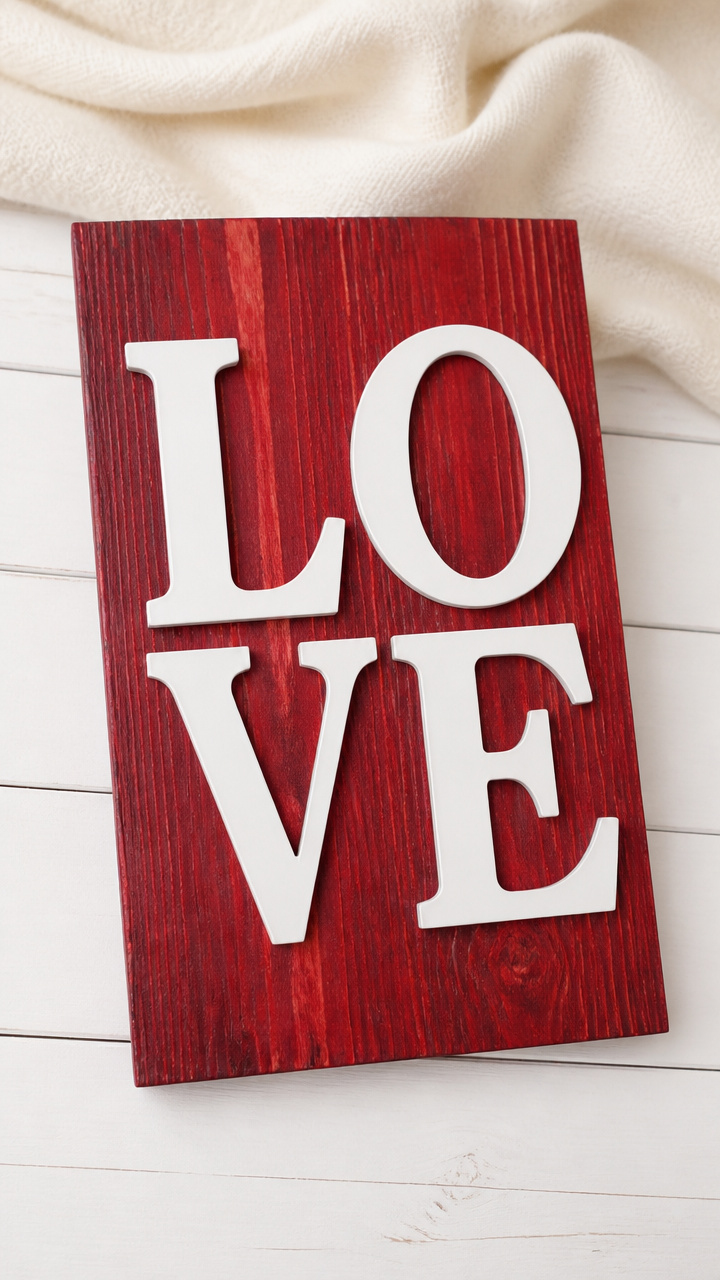
Crisp white letters stand out against a deep red-stained background on a solid pine board, creating a bold focal point for your entryway. The contrast feels modern while the wood keeps it grounded in rustic charm.
Materials Needed
- 8-inch by 12-inch pine board (3/4 inch thick)
- Red wood stain (cherry hue, 6 oz)
- White acrylic paint (gloss finish, 4 oz)
- Stencil for 'LOVE' letters (6-inch height)
- Painter’s tape
- Foam brush (1 inch wide)
- Paint tray liner
- Sandpaper (150 grit)
- Clear matte polyurethane spray (11 oz can)
How to Make It
- Lightly sand the pine board with 150 grit paper to remove rough spots.
- Stain the entire board with cherry red wood stain using the foam brush, let sit 7 minutes, wipe off excess, and dry for 3 hours.
- Tape the stencil firmly over the center of the board, pressing edges down.
- Pour white gloss paint into the tray liner and load the foam brush lightly, dabbing off extra.
- Press the brush straight down through the stencil openings, avoiding side strokes to prevent bleed.
- Peel off the stencil carefully while paint is still wet.
- Let paint dry 1 hour, then apply two light coats of matte polyurethane spray, waiting 20 minutes between coats.

3. Mini Wooden Hearts with Jute Twine
Easy
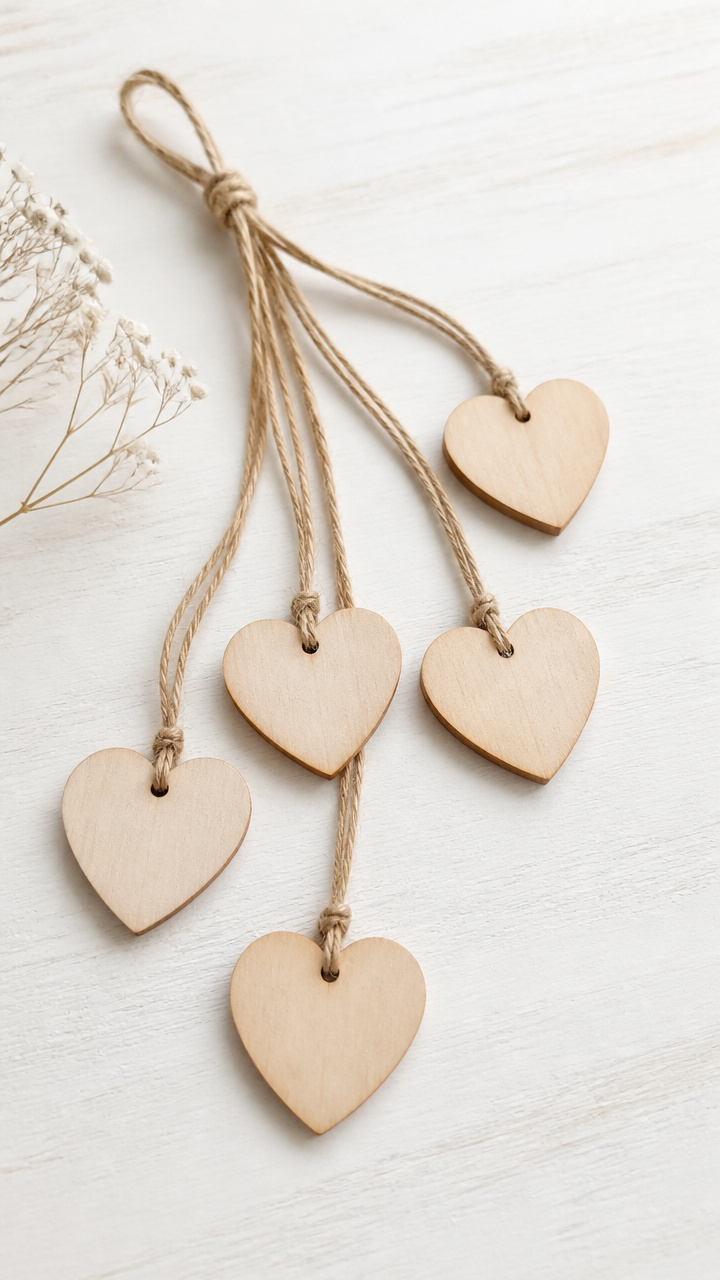
Tiny hearts cut from birch plywood dangle from rough twine along a windowsill or mirror frame, catching light with their smooth sanded edges. These subtle accents add love to corners without overwhelming the space.
Materials Needed
- 4-inch by 6-inch birch plywood sheet (1/8 inch thick)
- Heart-shaped cookie cutter (2 inches wide)
- Pencil
- Scroll saw
- Sandpaper (220 grit)
- Jute twine (3 mm diameter, 10 feet)
- Scissors
- Wood glue (small bottle)
How to Make It
- Trace six heart shapes onto the birch plywood using the cookie cutter and pencil.
- Cut out each heart with the scroll saw, keeping fingers clear of the blade path.
- Sand all edges gently with 220 grit paper until smooth to the touch.
- Cut the jute twine into twelve 10-inch lengths.
- Tie one piece of twine around the top curve of each heart, knotting securely with a double knot.
- Add a tiny drop of wood glue to each knot, let dry 15 minutes.


4. Rustic Wood Slice Centerpiece
Easy
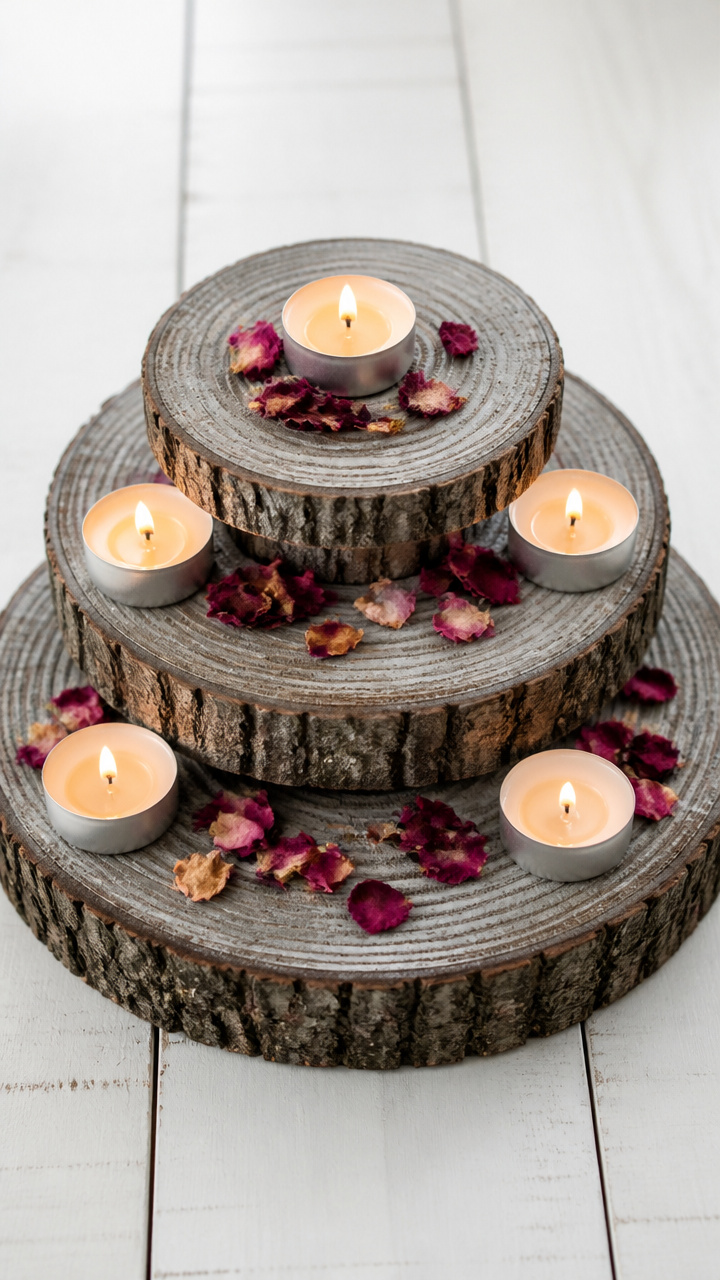
Three round wood slices stacked with gaps in between hold tea lights and rose petals, glowing warmly on a dining table. Each slice shows bark edge and tree rings, grounding the romance in nature.
Materials Needed
- Three wood slices (birch or maple, 4 inches diameter, 3/4 inch thick each)
- Sandpaper (120 grit, 220 grit)
- Tea light candles (3, unscented)
- Dried rose petals (1/4 cup)
- Wood stain (weathered gray, 6 oz)
- Lint-free cloth
How to Make It
- Sand both sides and edges of each wood slice with 120 grit, then 220 grit paper.
- Wipe away dust with a dry cloth.
- Apply weathered gray stain to all surfaces using the lint-free cloth, let sit 4 minutes, wipe off excess.
- Dry for 2 hours on a flat surface.
- Stack the slices like a tiered cake, leaving 1 inch gap between each with tea lights resting on top of lower ones.
- Sprinkle rose petals around the base and between layers.


5. Carved Initial Heart Plaque
Advanced
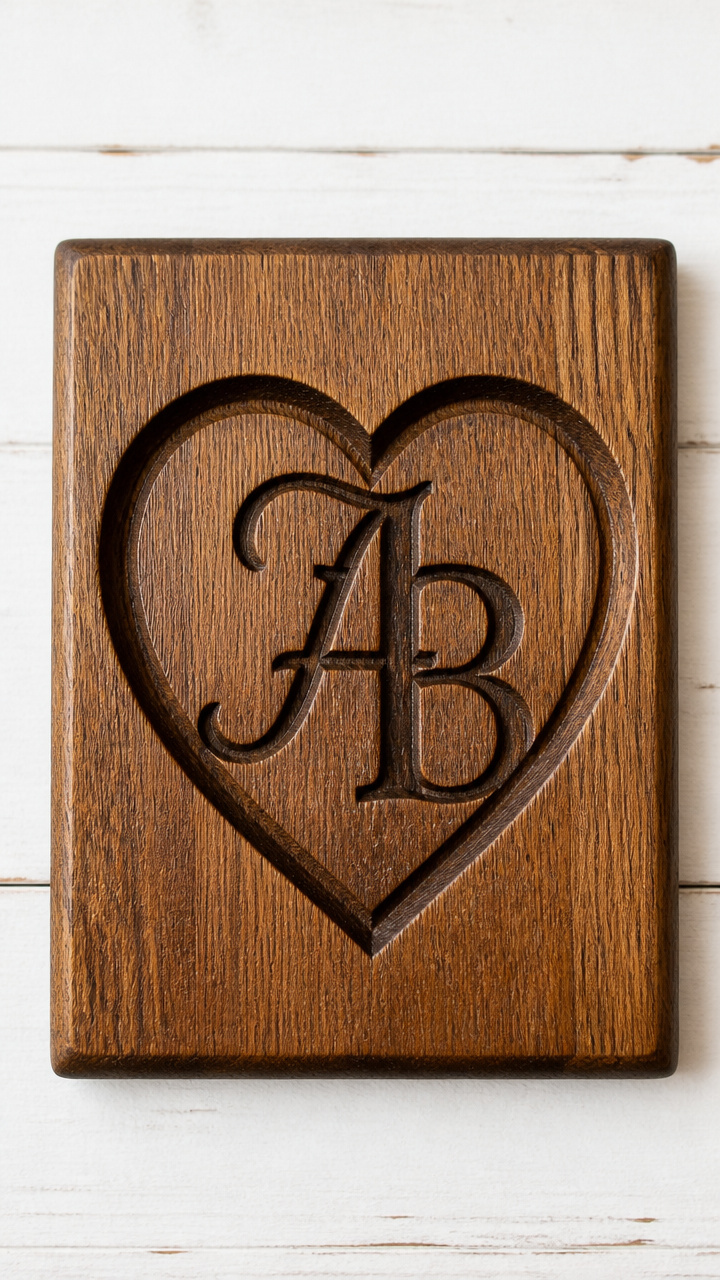
A solid oak plaque holds a deeply carved heart with intertwined initials, stained darker than the rest for contrast. This heirloom-style gift feels personal and timeless.
Materials Needed
- 6-inch by 8-inch oak board (1 inch thick)
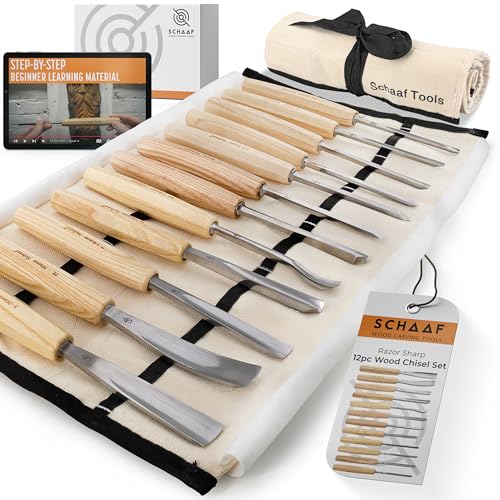
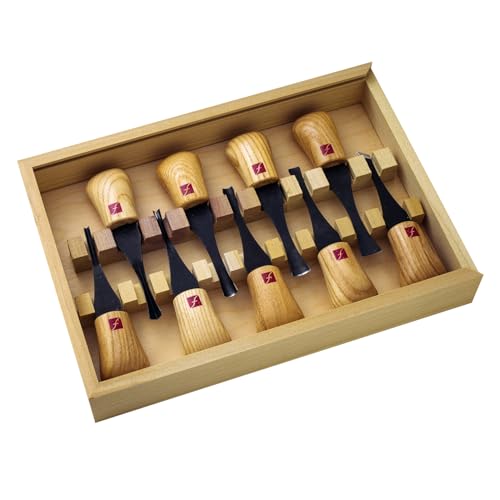
- Carving gouge set (3-piece, curved blades)
- Mallet (wooden handle, rubber head)
- Pencil
- Carbon transfer paper (red)
- Wood burner with fine tip
- Medium brown wood stain (5 oz)
- Soft bristle brush
- Clear beeswax finish (2 oz tin)
How to Make It
- Sketch a heart in the center of the oak board, then draw two interlocking initials inside.
- Place carbon paper under tracing paper with the design and rub onto the wood surface.
- Use the finest gouge and mallet to carve along the heart line, removing wood about 1/8 inch deep.
- Switch to a wider gouge to hollow out the interior of the heart slightly.
- Trace over the initials with the wood burner on low heat to darken them permanently.
- Brush medium brown stain into the carved area only, let sit 6 minutes, wipe clean with cloth.
- Apply beeswax finish over the entire plaque with a soft cloth, buff after 10 minutes.

6. Framed Wood Letter 'XO'
Moderate
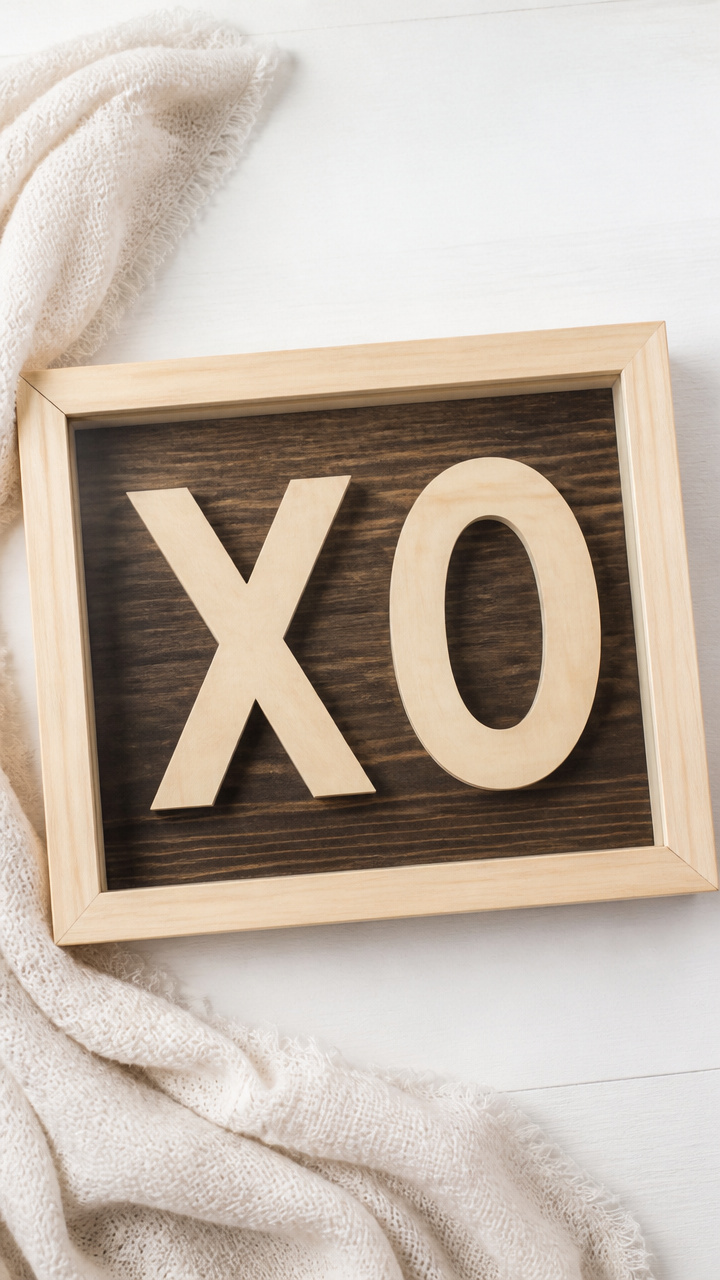
A bare wood frame surrounds two floating letters, 'X' and 'O', mounted slightly apart on a stained backdrop. The negative space makes the gesture feel intentional and quiet.
Materials Needed
- Unfinished pine picture frame (8×10 inch, with glass and backing)
- Basswood sheets (1/8 inch thick, 6×6 inch, 2 pieces)
- Template for 'X' and 'O' letters (printable, 3 inch tall)
- Craft knife with #11 blade
- Cutting mat
- Wood glue (precision tip)
- Mahogany wood stain (6 oz)
- Small foam brush
- Toothpick
How to Make It
- Print and cut out the 'X' and 'O' templates, then trace them onto the basswood sheets.
- Place basswood on cutting mat and cut out letters with the craft knife, using fresh blades as needed.
- Sand edges lightly with fingernail file until smooth.
- Remove glass and backing from the frame.
- Stain the frame with mahogany using the foam brush, wait 5 minutes, wipe off excess, dry 2 hours.
- Place backing inside frame, then arrange 'X' and 'O' letters on it with 1 inch between them.
- Apply a dot of wood glue under each letter corner using the toothpick, press down for 10 seconds.
- Let glue cure 30 minutes, then reassemble frame without glass.


7. Heart-Notched Wooden Spoon
Easy
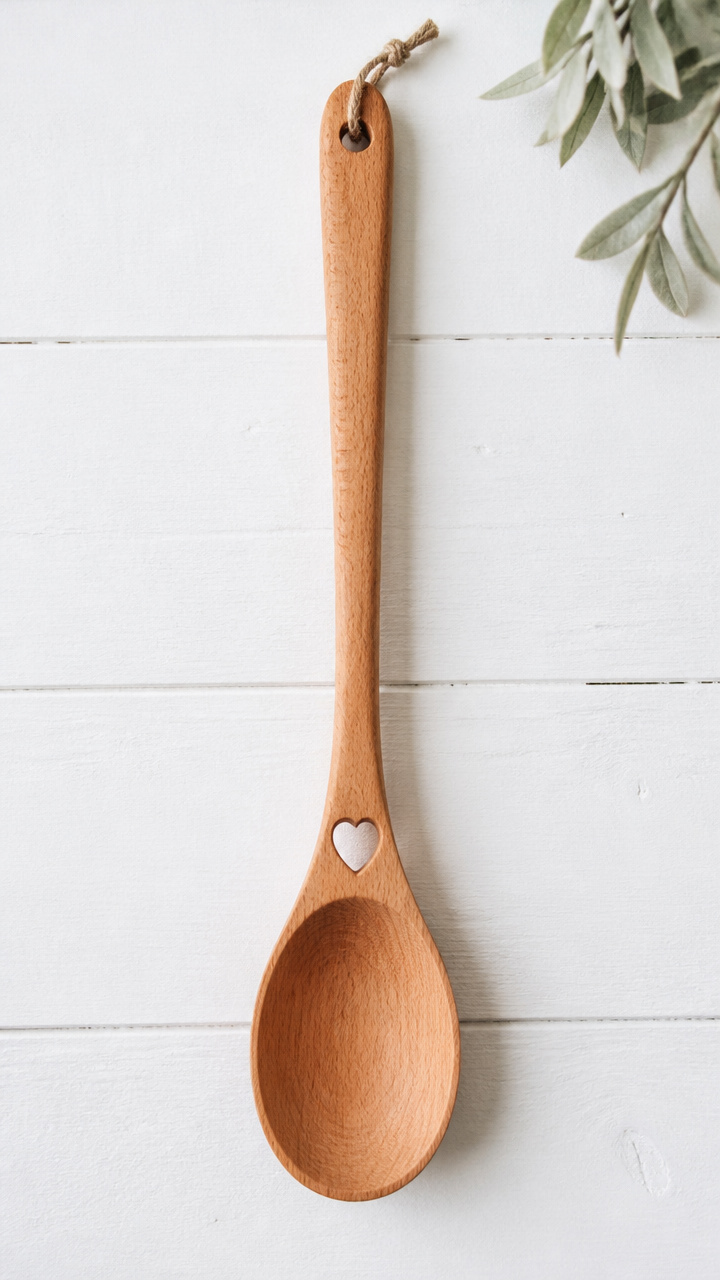
A long-handled spoon carved with a small heart near the bowl becomes a sweet kitchen accent or gift tag alternative. The smooth wood feels good in hand and looks lovely hanging on a hook.
Materials Needed
- Unfinished wooden spoon (beech, 12 inches long)
- Heart-shaped stencil (1 inch tall)
- Pencil
- Whittling knife (fixed blade, 1 inch width)
- Sandpaper (220 grit)
- Almond oil (2 oz bottle)
- Cotton pad
How to Make It
- Position the heart stencil on the handle just above the spoon bowl and trace lightly.
- Hold the spoon firmly on a non-slip surface and use the whittling knife to carve out the heart shape, shaving downward with short strokes.
- Check depth often—it should be about 1/16 inch deep.
- Smooth the carved area with 220 grit sandpaper wrapped around your finger.
- Wipe the entire spoon with a cotton pad soaked in almond oil, let soak 10 minutes, then buff with a dry cloth.


8. Ladder Shelf with Heart Cutouts
Advanced
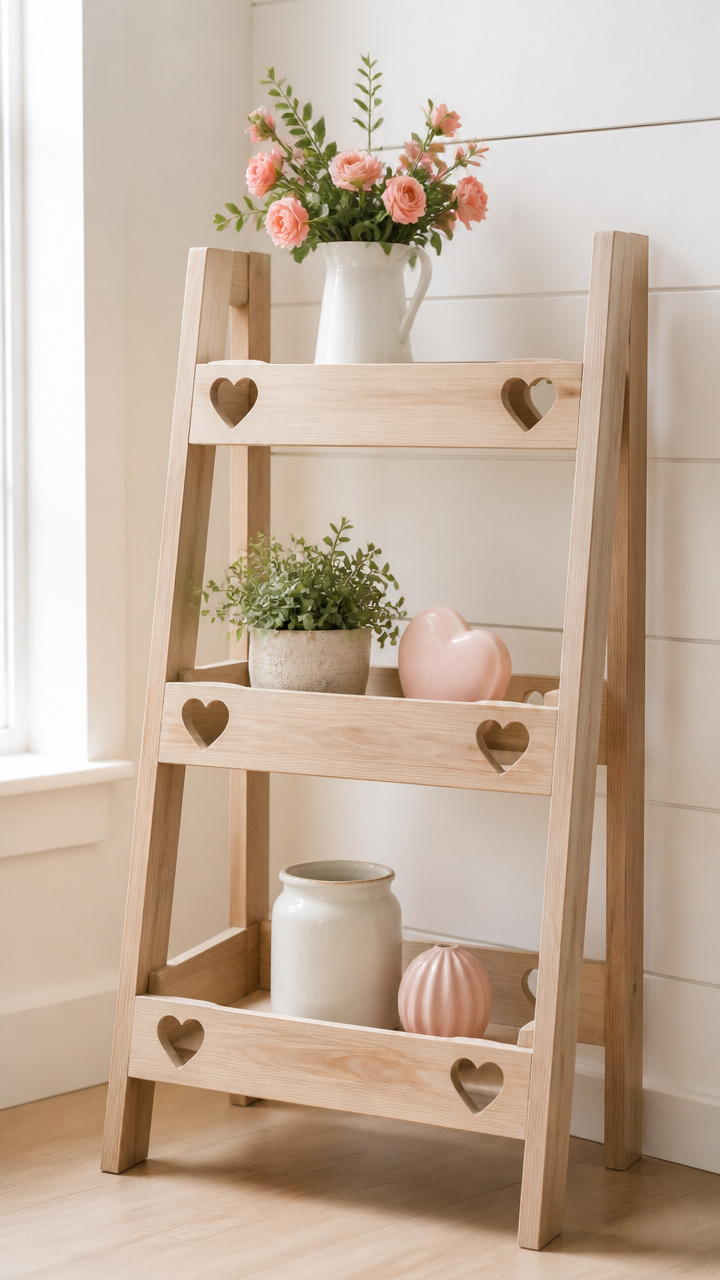
A three-tiered leaning shelf made from poplar boards holds small plants and photos, with delicate hearts cut from each shelf’s side. It stands in a corner, adding height and softness at once.
Materials Needed
- Four poplar boards (1×2 inch, 24 inches long)
- Two poplar boards (1×6 inch, 8 inches long, for shelves)
- Drill with 1/16 inch pilot bit
- Wood screws (1 inch, 8 pieces)
- Countersink bit
- Jigsaw
- Heart template (3 inches tall)
- Pencil
- Wood glue
- Clamps (2)
- Dark oak stain (10 oz)
- Foam applicator
How to Make It
- Mark the heart shape on the top edge of each 1×6 shelf board using the template and pencil.
- Cut out hearts with the jigsaw, starting with a drilled entry hole.
- Lay two 1×2 boards vertically parallel, 8 inches apart, to form the ladder sides.
- Position a shelf board across them at the bottom, drill two pilot holes through shelf into each side, countersink slightly.
- Apply wood glue to the joint, clamp, then drive screws to secure.
- Repeat for middle and top shelves, spacing 6 inches apart.
- Let glue dry 1 hour, then stain entire shelf with dark oak using the foam applicator, wait 7 minutes, wipe off excess, dry 3 hours.


9. Wooden Clothespin Hearts
Easy
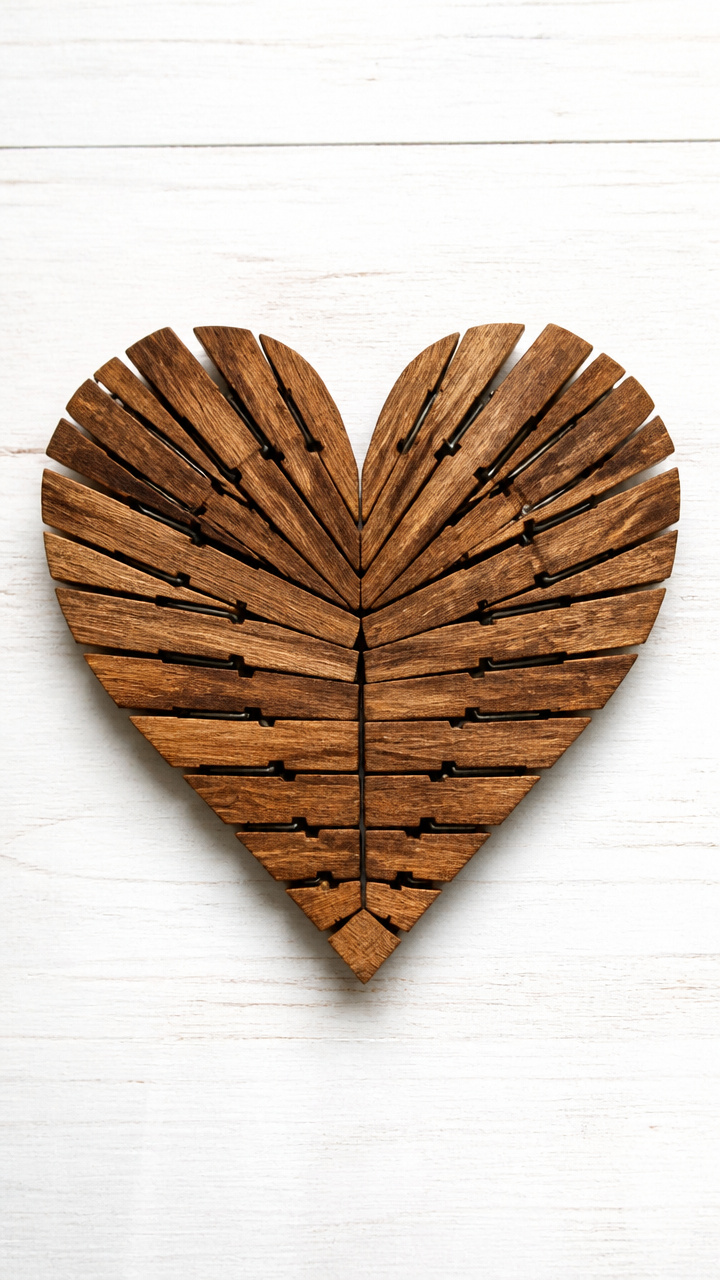
Mini clothespins are glued into heart shapes and stained for tiny clips that hold love notes on a string. Their chunky wood bodies make them sturdier than plastic.
Materials Needed
- 24 unfinished wooden clothespins (1.5 inch size)
- Wood glue (gel formula, 2 oz)
- Hot glue gun with glue sticks (low-temp, 2 sticks)
- Heart template (4 inches tall)
- Cardboard base
- Pencil
- Cherry wood stain (5 oz)
- Small sponge brush
- Twine (4 mm, 5 feet)
How to Make It
- Trace the heart outline onto cardboard and place it on your work surface.
- Glue clothespins tip-to-tip along the line using gel wood glue, holding each for 10 seconds.
- Let the full shape dry 1 hour.
- Touch up weak joints with hot glue from the low-temp gun.
- Stain the entire heart with cherry using the sponge brush, wait 4 minutes, wipe off excess, dry 2 hours.
- Tie twine across the top for hanging, then use the clothespin jaws to clip notes or photos.


10. Cross-Legged Bench with Carved Message
Advanced
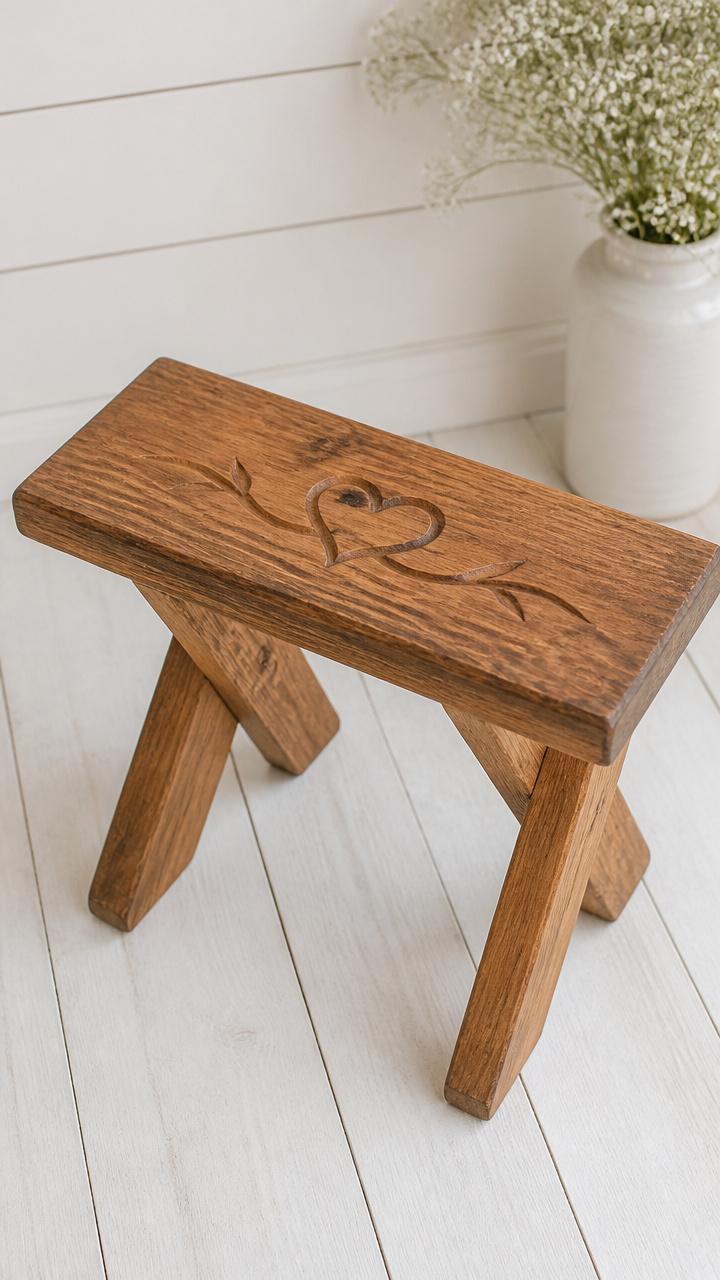
A low bench built from pine beams stands on crossed legs and bears a hand-carved phrase like 'Sit Here With Me'. Its solid weight and personal message invite closeness.
Materials Needed
- Two pine beams (2×4 inch, 18 inches long, for legs)
- One pine board (1×8 inch, 18 inches long, for seat)
- Wood chisel (1/4 inch wide)
- Mallet
- Drill with 3/16 inch bit
- Deck screws (2.5 inch, 4 pieces)
- Wood filler (pine tone, 2 oz)
- Putty knife
- Walnut wood stain (12 oz)
- Lint-free rag
How to Make It
- Lay one leg beam flat, mark its center, then position the second beam across it at a right angle to form an X.
- Drill two pilot holes where beams cross, then secure with deck screws from both sides.
- Center the seat board on top, drill two pilot holes through it into each leg, then screw down.
- Use chisel and mallet to carve 'Sit Here With Me' along the front edge of the seat, tapping gently to control depth.
- Fill any splits or tool marks with pine-tone wood filler using the putty knife, let dry 30 minutes.
- Sand filled areas smooth with 150 grit paper.
- Stain entire bench with walnut using the lint-free rag, wait 8 minutes, wipe off, dry 4 hours.

11. Hanging Branch with Felt Hearts
Easy

A fallen birch branch wired to a leather strap holds small wool hearts dangling at different heights. It sways slightly when touched, turning a corner into a soft memorial of love.
Materials Needed
- Birch branch (24 inches long, 1 inch diameter, with small offshoots)
- Leather strap (1 inch wide, 14 inches long)
- Needle-nose pliers
- Copper wire (18 gauge, 3 feet)
- Wire cutters
- Red wool felt sheet (9×12 inch)
- Heart punch tool (1.5 inch size)
- Embroidery floss (white, 1 yard)
- Tapestry needle
How to Make It
- Wrap copper wire around the top third of the branch twice, twist tightly at the back with pliers, then thread leather strap through the loop and knot ends.
- Cut copper wire into six 6-inch lengths.
- Punch out six hearts from the red wool felt using the heart punch tool.
- Thread embroidery floss through the tapestry needle and sew a running stitch across the top edge of each heart.
- Pull floss tight to gather the top into a small opening.
- Slide a wire length through each gathered top, twist ends together to form a hanger, and attach to branch twigs.


12. Log Slice Coasters with Metal Inlay
Moderate
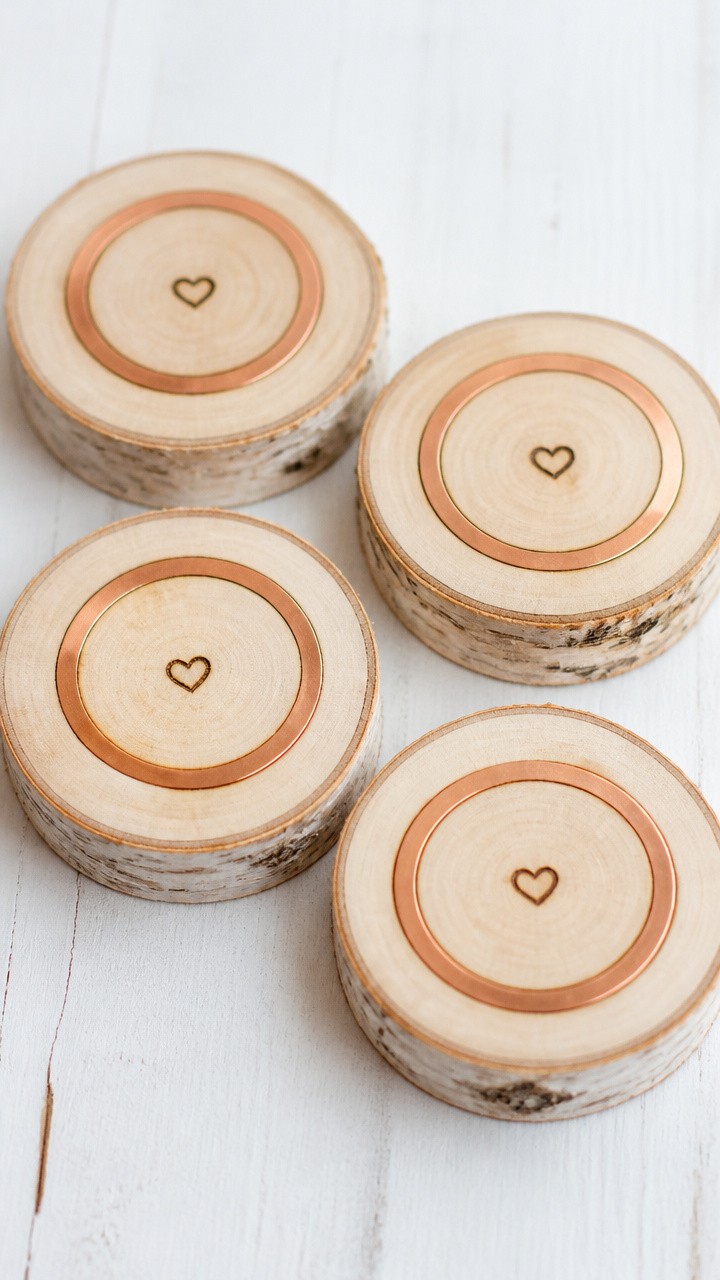
Round birch slices are drilled and fitted with thin copper rings that frame tiny engraved hearts. They protect tables while adding a touch of handmade elegance.
Materials Needed
- Four birch log slices (4 inches diameter, 3/4 inch thick)
- Copper ring inserts (3 inches inner diameter, 1/8 inch thick, 4 pieces)
- Drill with 3/16 inch bit
- Wood glue (waterproof)
- Clamps (4)
- Sandpaper (150 grit, 220 grit)
- Mineral oil (3 oz bottle)
- Cotton cloth
How to Make It
- Sand each log slice on both sides and edges with 150 grit, then 220 grit paper until smooth.
- Center a copper ring on the top face of each slice.
- Drill four small holes through the wood just outside the ring edge to help glue adhere.
- Apply waterproof wood glue under the ring, press down firmly, and clamp with a flat weight on top.
- Let dry 2 hours.
- Rub mineral oil over the entire coaster with a cloth, let absorb 10 minutes, buff with a dry cloth.


13. Tiered Wooden Candle Stand
Moderate
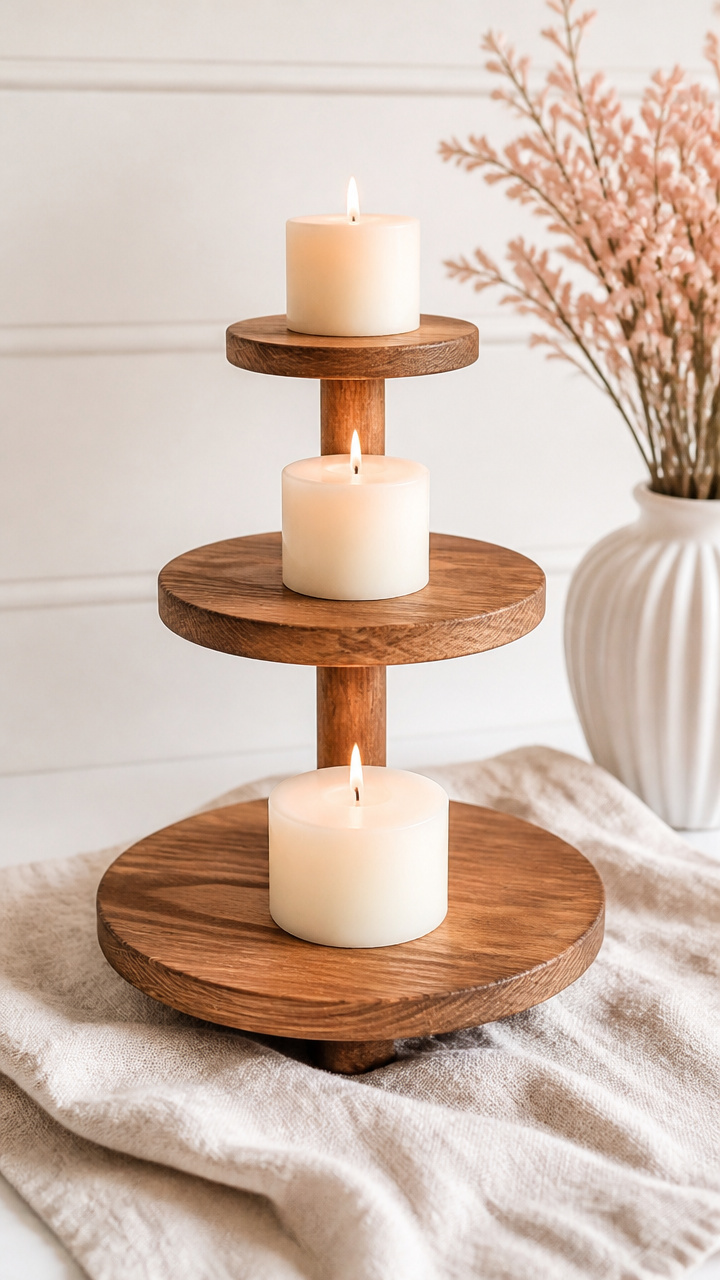
Three staggered wood platforms rise from a central dowel, each holding a pillar candle in graduated sizes. The warm glow climbs upward like a flame ladder.
Materials Needed
- Wood dowel (1 inch diameter, 12 inches long)
- Three pine boards (6×6 inch, 1/2 inch thick)
- Drill with 1 inch spade bit
- Drill with 1/8 inch bit
- Wood glue
- Clamps (3)
- Level
- Mahogany stain (8 oz)
- Foam brush
- 3 pillar candles (2 inch, 2.5 inch, 3 inch diameters)
How to Make It
- Mark the center of each pine board and drill a 1 inch hole through using the spade bit.
- Drill a 1/8 inch pilot hole 1 inch deep into one end of the dowel.
- Apply wood glue inside the hole of the largest board and slide it onto the dowel, letting it rest on the pilot hole end.
- Repeat with medium board 3 inches above, then smallest board 3 inches higher, checking level between each.
- Clamp each joint lightly and let dry 2 hours.
- Stain the entire stand with mahogany using the foam brush, wait 6 minutes, wipe off, dry 3 hours.
- Set candles on each platform, largest on bottom.


14. Wooden Heart String Art
Moderate

A heart outline hammered with nails holds taut white string woven into a dense center, creating shadow and texture on your wall. The mix of sharp pins and soft thread feels balanced and surprising.
Materials Needed
- 6-inch by 6-inch cedar board (3/4 inch thick)
- Small nails (1 inch, 36 pieces)
- Hammer
- Red embroidery floss (2 yards)
- Needle (leather-tipped)
- Pencil
- Heart stencil (5 inches tall)
- Sandpaper (120 grit)
How to Make It
- Sand the cedar board lightly with 120 grit paper to smooth surface.
- Place stencil in center and trace heart shape with pencil.
- Tap nails evenly along the outline, spacing 1/2 inch apart, leaving half their length exposed.
- Tie the floss end tightly around one bottom nail and trim excess.
- Thread the needle and weave the floss in straight lines across the heart, crisscrossing randomly to fill the center.
- Avoid wrapping around nails more than once per pass to keep tension even.
- Knot the final end around a top nail and trim.


15. Floating Shelves with Heart Brackets
Advanced
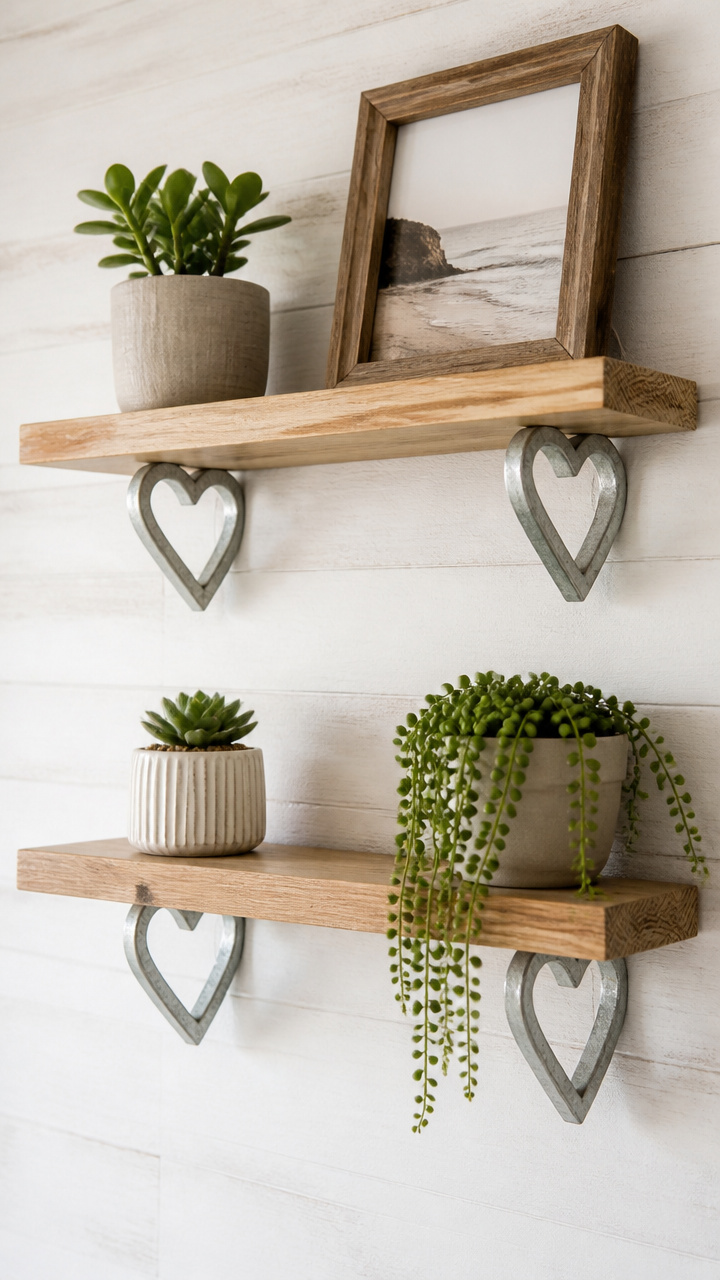
Two narrow pine shelves mount to the wall with hidden brackets shaped like hearts, their curves supporting the weight while staying visible. They display framed photos or small potted succulents with grace.
Materials Needed
- Two pine boards (1×6 inch, 16 inches long)
- Two steel brackets (1/8 inch thick, pre-cut heart shape, 5 inches tall)
- Wall anchors (for drywall, 4 pieces)
- Screws (1 inch, 8 pieces)
- Drill with 1/4 inch bit
- Level
- Pencil
- Wood stain (rustic red, 8 oz)
- Foam applicator
- Stud finder
How to Make It
- Find wall studs with the stud finder and mark two mounting points 12 inches apart.
- Hold the first shelf level at desired height and mark bracket positions on the wall.
- Drill pilot holes at marks, insert wall anchors, then screw brackets to the wall with 1 inch screws.
- Stain both pine boards with rustic red using the foam applicator, wait 5 minutes, wipe off excess, dry 2 hours.
- Align the back edge of each shelf with the top curve of a bracket.
- Drive two screws up through the bracket into the shelf bottom, using the drill on low torque to avoid splitting.


Grab your saw, sandpaper, and stain—you’ve got everything you need to make love part of your home’s texture. These projects wait for no special occasion, just your hands and a little time.