15 Interactive Letter I Crafts for Preschoolers
Little hands love to explore letters through touch, color, and play. Focusing on the letter I gives you a chance to blend early literacy with sensory fun in ways that stick. These crafts invite curiosity while building fine motor skills and letter recognition naturally.
1. Igloo from Cotton Balls
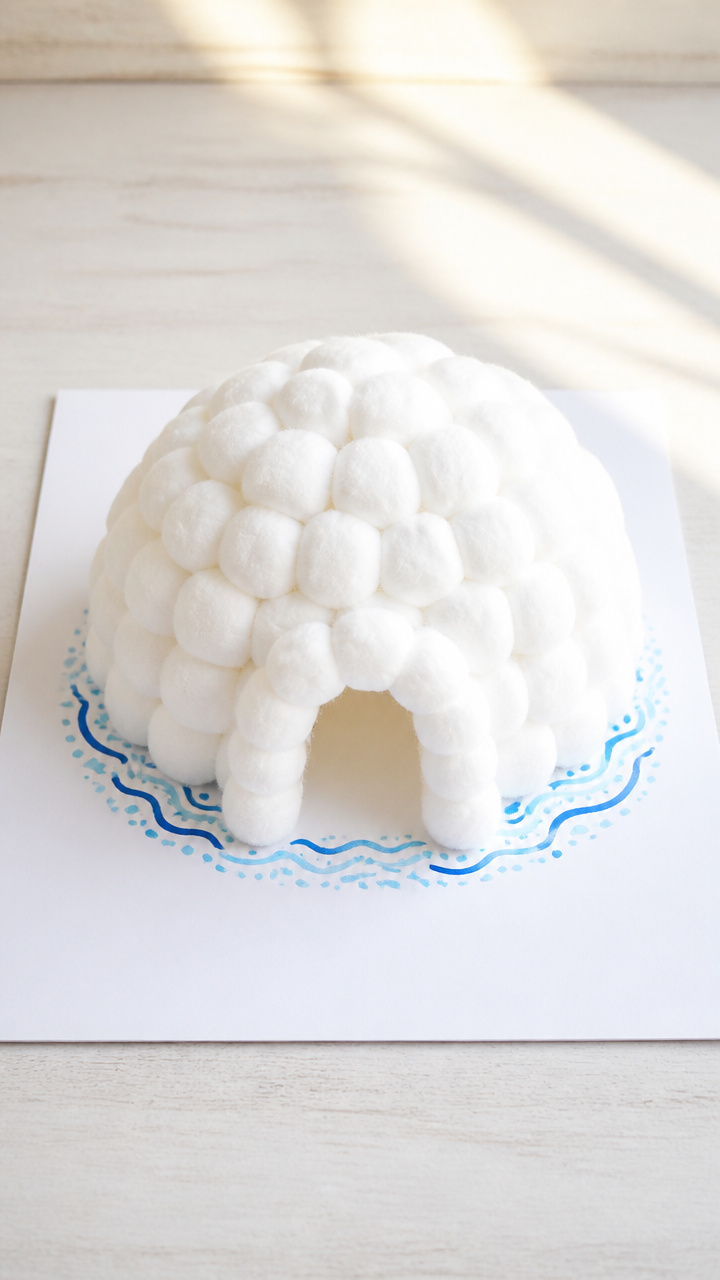
Soft cotton-ball igloos give preschoolers a tactile way to build the letter I while practicing counting and gluing. This snowy scene sticks to paper but lives in their imagination.
Materials Needed
- A4 white cardstock
- White school glue
- Cotton balls, about 50
- Blue acrylic paint
- Paintbrush size 3
- Black marker
How to Make It
- Draw a large block-style capital I in pencil on the cardstock, making it wide enough to fill the page.
- Paint the background blue using the paintbrush and let dry completely, about 20 minutes.
- Dot glue along the outline of the I and press cotton balls side by side to cover the shape completely.
- Use the black marker to draw a small penguin near the igloo after everything is dry.

![McKesson Cotton Balls [2000 Count] Bulk, 100% Pure Cotton Balls for Face, Nail Polish Remover, Makeup, Medium](https://m.media-amazon.com/images/I/312YQNHbahL._SL500_.jpg)
2. Ice Cream Stick Letters
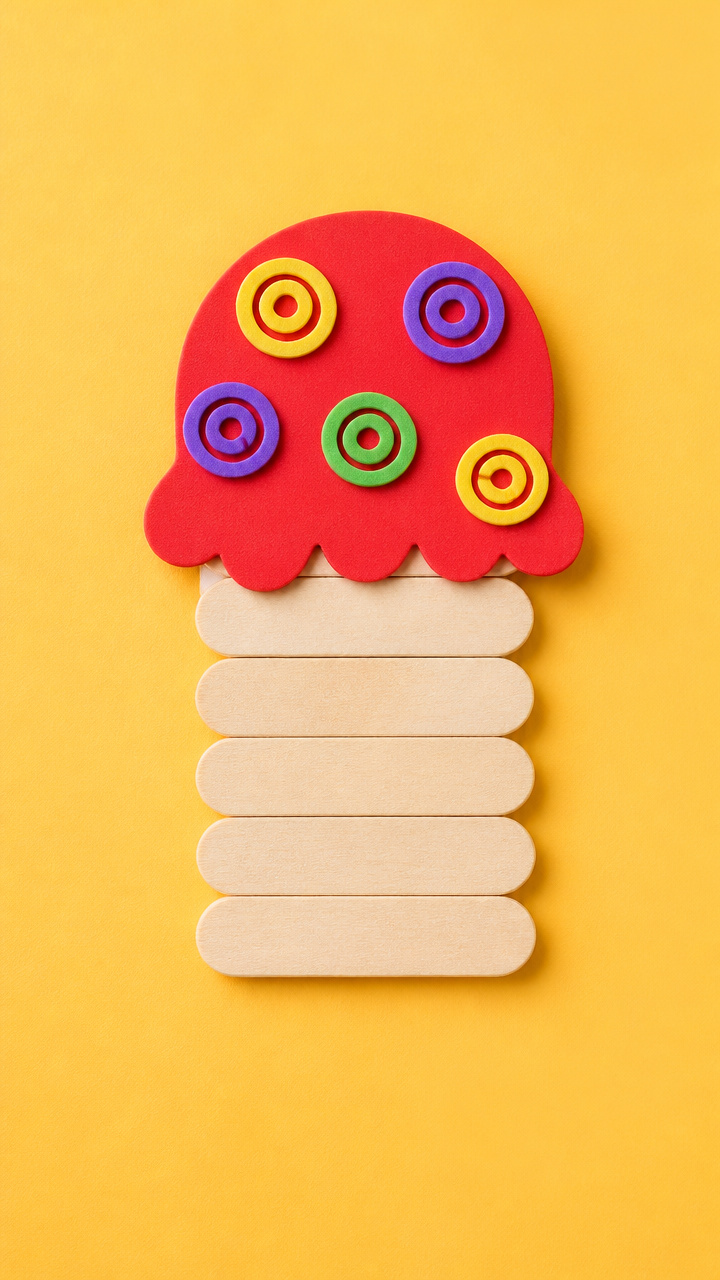
Real popsicle sticks become colorful tools for assembling the letter I in bold, chunky style. Kids practice hand-eye coordination while customizing each stick with patterns.
Materials Needed
- 6 flat wooden popsicle sticks
- Red craft foam sheet 12×18 cm
- Scissors
- Glue stick
- Washable markers: yellow, green, purple
- Liquid school glue
How to Make It
- Let your child color each popsicle stick with markers, filling them with stripes or dots.
- Cut two rectangles from the craft foam, each 4×10 cm, to form vertical columns.
- Glue one foam rectangle straight up on the left side of a blank paper, then another on the right, leaving space between for the crossbar.
- Glue a colored popsicle stick horizontally across the middle to connect both columns, forming a thick I.


3. Inchworm Pom-Pom Sort
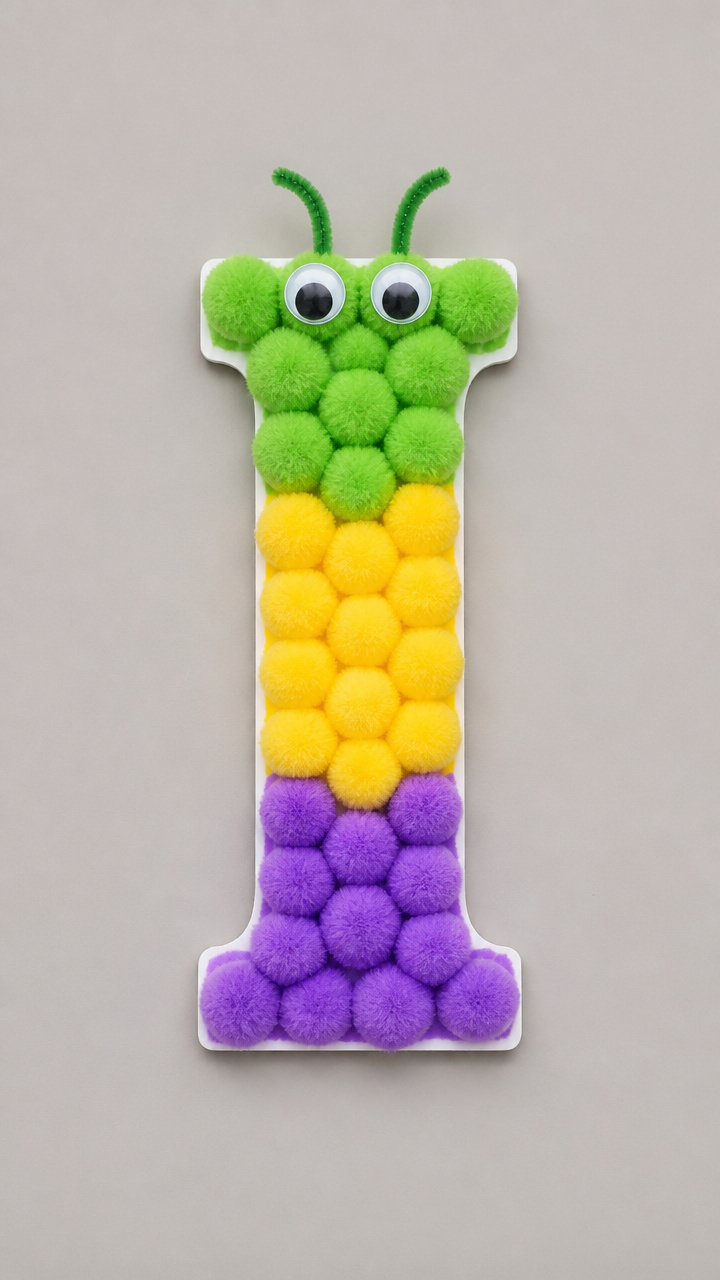
Bright pom-poms turn into inchworm segments as kids sort by color along a printed I path. This craft blends letter shape with early math sorting skills.
Materials Needed
- Letter I template printed on A4 cardstock
- Assorted pom-poms in 3 colors, 30 total
- Tweezers
- Glue
- Laminator or clear contact paper
How to Make It
- Laminate the printed I or cover it with contact paper to make it reusable.
- Place pom-poms in a small bowl and hand your child tweezers and glue.
- Have them pick one pom-pom at a time, squeeze a dot of glue, and place it along the line of the I, grouping same colors together.
- Let dry flat for 30 minutes before touching.


4. Index Card Letter Weaving
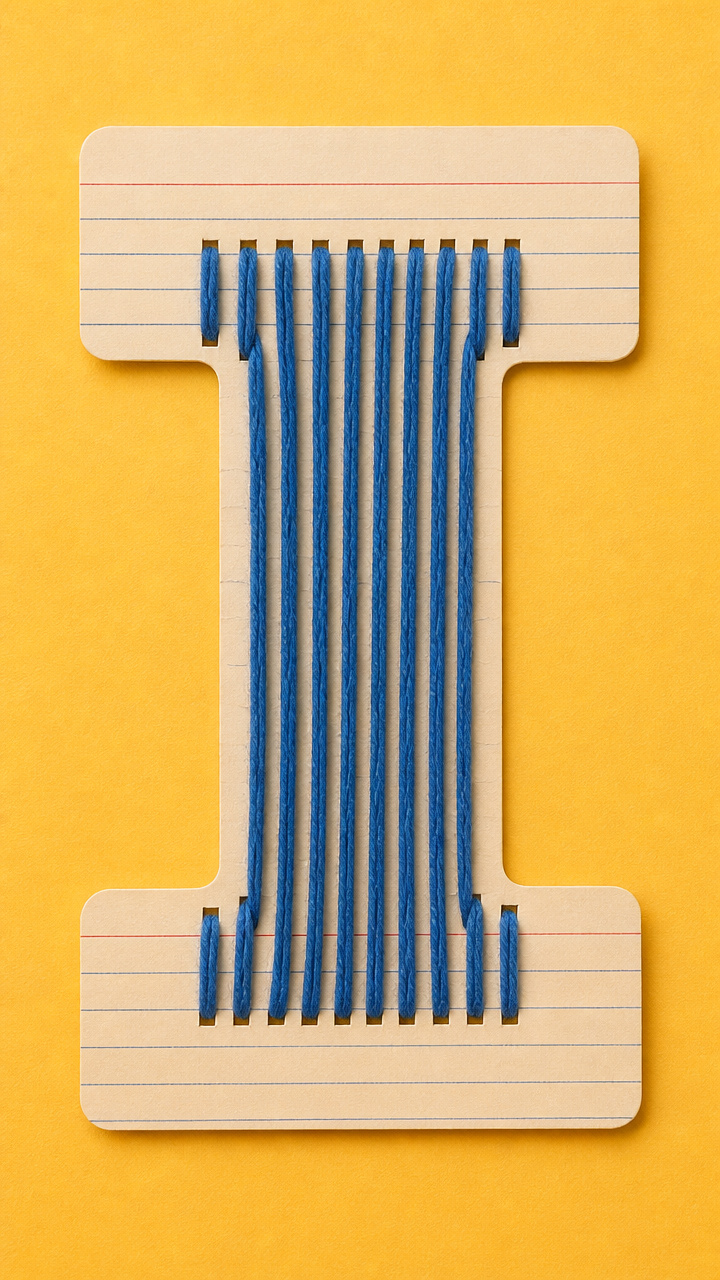
Slits cut into index cards let little fingers weave yarn through to form the letter I. This quiet activity builds focus and finger strength.
Materials Needed
- 2 manila index cards
- Ruler
- Pencil
- Scissors
- Yarn, 1 meter, blue
- White glue
How to Make It
- Lay one index card vertically and use the ruler to mark pencil lines every 1 cm from top to bottom, stopping 2 cm from edges.
- Cut along each line just halfway through the card to create vertical slits.
- Weave the yarn over and under through the slits from left to right to fill the center column, representing the I.
- Tie ends at the back and dab glue on knots to secure.


5. Inch Tall Name Tags
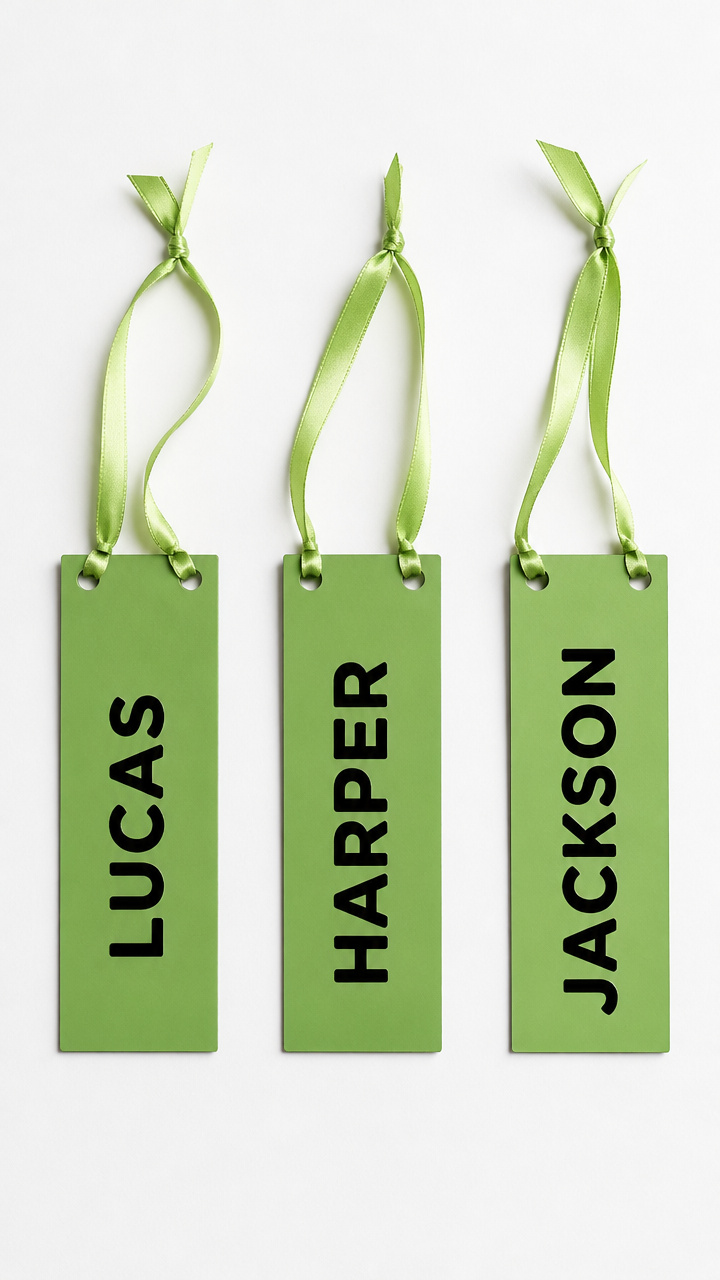
Personalized name tags with an inchworm theme highlight the letter I while teaching basic measurement. Kids wear these proudly after crafting.
Materials Needed
- Green construction paper
- Scissors
- Ruler
- Black marker
- Hole punch
- Ribbon, 30 cm per tag
- Plastic laminating sheets
How to Make It
- Cut the green paper into 5×15 cm strips, one per child.
- Draw a simple inchworm face at one end using the black marker, with curved body segments behind it.
- Write each child's name starting with I or including I clearly on the strip.
- Laminate each tag, punch a hole at one end, and thread ribbon through to wear around the neck.


6. Iron-on Felt Initials
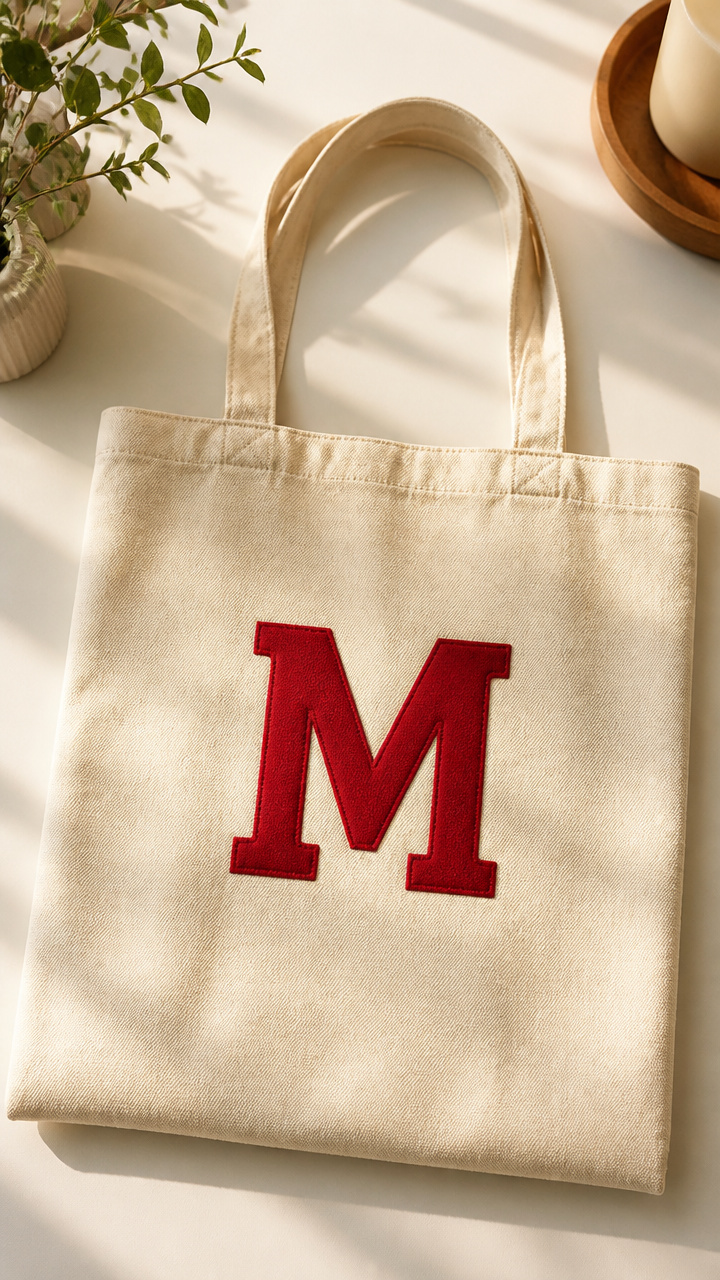
Felt cutouts shaped like the letter I bond to fabric with heat, creating keepsake patches. This craft introduces real-world letter use on clothing.
Materials Needed
- Iron-on adhesive sheet for fabric
- Red felt sheet
- Scissors
- Pencil
- Cloth tote bag
- Hot iron
- Parchment paper
How to Make It
- Draw a large I on the paper side of the iron-on adhesive and cut it out carefully.
- Peel the backing and stick it to the red felt, then cut around the shape to transfer it.
- Place the felt I on the tote bag where desired and cover with parchment paper.
- Press the hot iron firmly over the patch for 30 seconds until bonded, then let cool.

7. Interactive I Sound Board
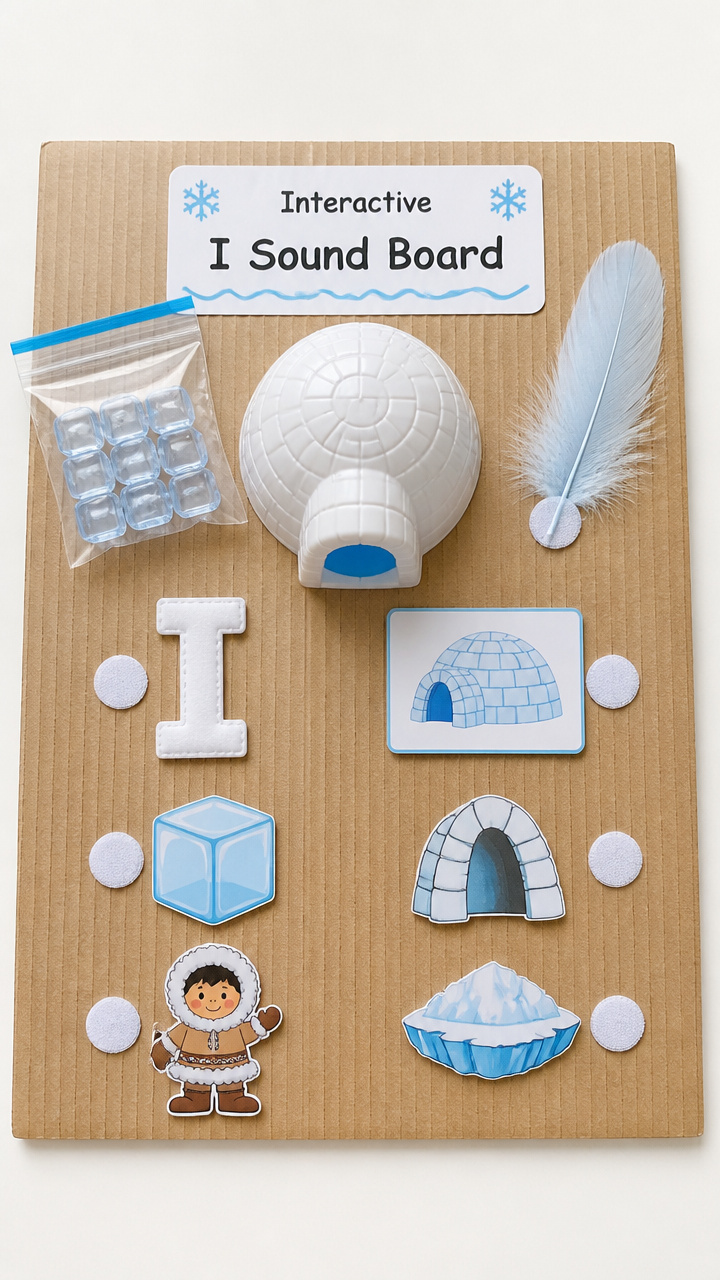
A textured board with items that start with I helps children link sound to symbol. Touching each material reinforces memory through sensation.
Materials Needed
- A4 corrugated cardboard
- Small ziplock bag with ice cubes (frozen beforehand)
- Plastic toy igloo
- Feather
- Glue
- Velcro dots, 4 pairs
How to Make It
- Glue the plastic igloo to the top left of the cardboard and attach a feather with Velcro on the bottom right.
- Seal ice cubes in the ziplock bag and tape it firmly to the upper right corner.
- Stick one Velcro dot to the back of each item and its pair on the board in labeled spots.
- Write 'I says /i/ like igloo, ice, inch, and it!' at the bottom with a thick marker.


8. Iguana with Tissue Paper
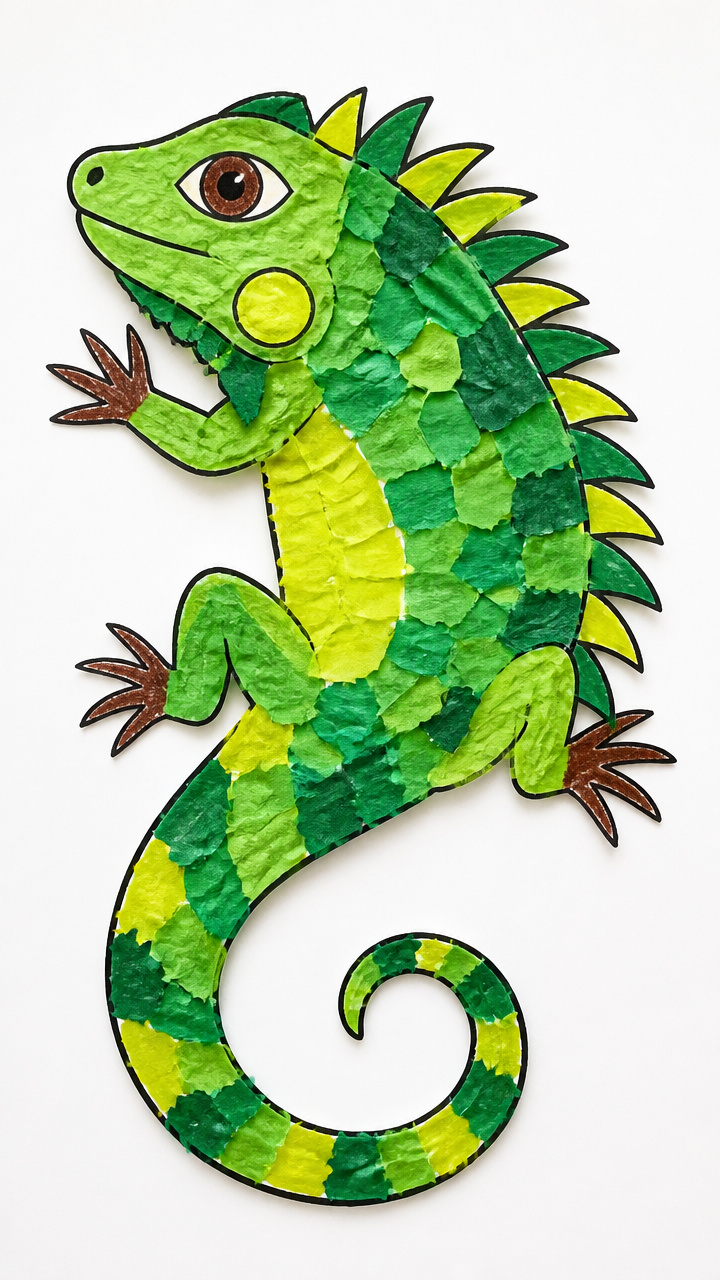
Layered tissue paper scales bring a bright iguana to life while tracing the letter I in the background. This project teaches color blending and gentle handling.
Materials Needed
- Green and yellow tissue paper sheets, 4 each
- White glue diluted with water (1:1 ratio)
- Paintbrush size 4
- Brown crayon
- A4 drawing paper
- Black marker
How to Make It
- Draw a large wavy I on the paper with the brown crayon to represent the iguana's body.
- Brush diluted glue onto a section of the crayon line and lay small pieces of green tissue paper over it, slightly overlapping.
- Add yellow pieces between green ones to create a mottled scale effect.
- Once dry, draw eyes, legs, and spikes with the black marker.


9. Island Collage with Sand
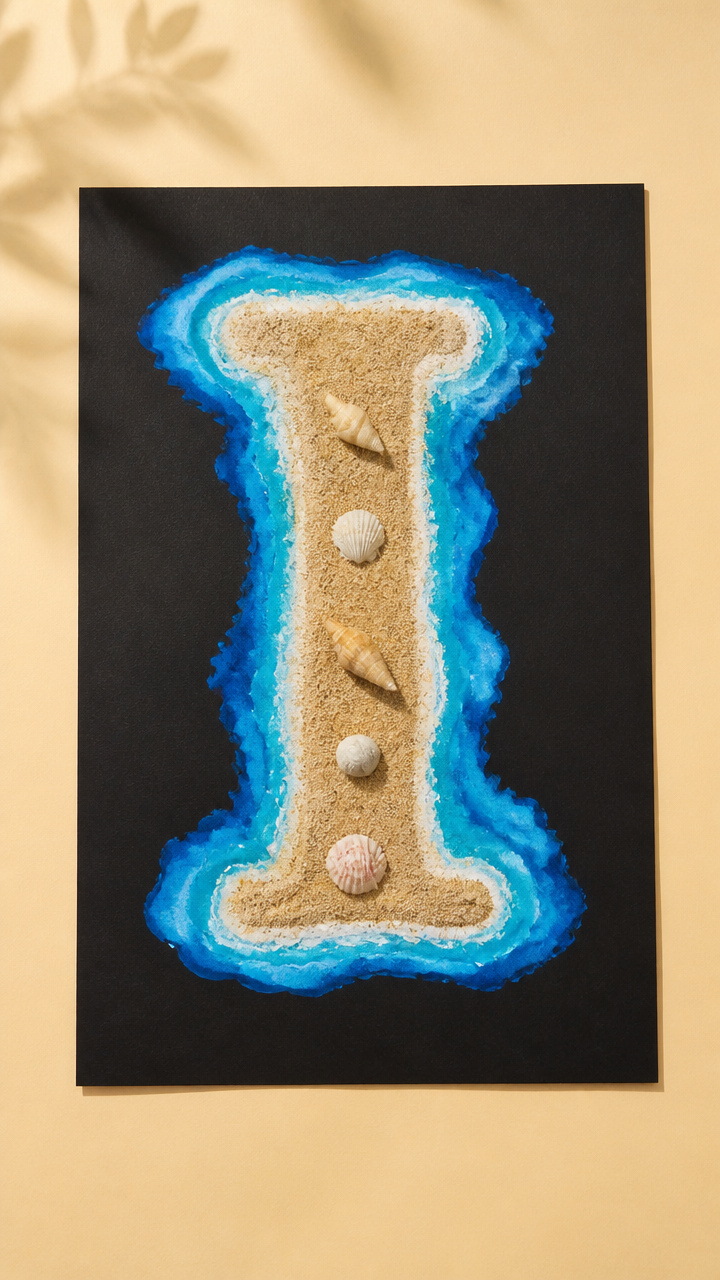
Real sand adds gritty texture to a tropical island shaped like the letter I. This collage brings geography and letter form together through touch.
Materials Needed
- Tan sand, 1/4 cup
- Blue liquid watercolor
- A4 black cardstock
- White school glue
- Paintbrush size 2
- Small seashells, 5
- Green tissue paper
How to Make It
- Draw a tall rectangular island in the shape of an I on the black cardstock using pencil.
- Mix sand with a few drops of blue watercolor and spread it thickly inside the I shape using the brush and fingers.
- Glue seashells along the base of the island.
- Crumple green tissue paper and glue it at the top to look like palm trees.


10. Invisible Ink I Writing
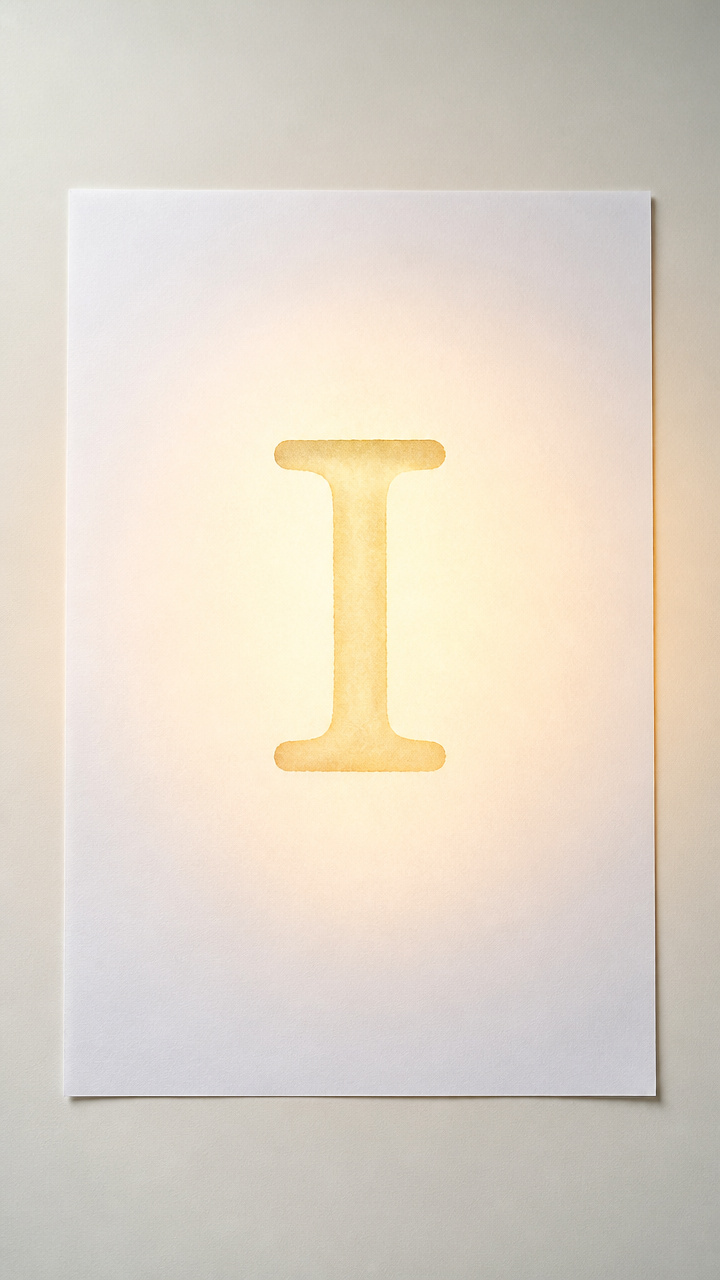
Lemon juice becomes magic ink that reveals hidden Is when heated. This science-infused craft delights kids as they discover secret messages.
Materials Needed
- Lemon, halved
- Cotton swabs, 3
- White A4 paper
- Light bulb desk lamp
- Pencil
How to Make It
- Squeeze lemon halves to get juice into a small dish and dip a cotton swab into it.
- Write a large I on the paper with the juice, pressing lightly to leave a faint trail.
- Let the paper dry completely for 30 minutes, then hold it 10 cm from a lit desk lamp for 2 minutes.
- Watch the I slowly turn brown as the heat reacts with the lemon acid.

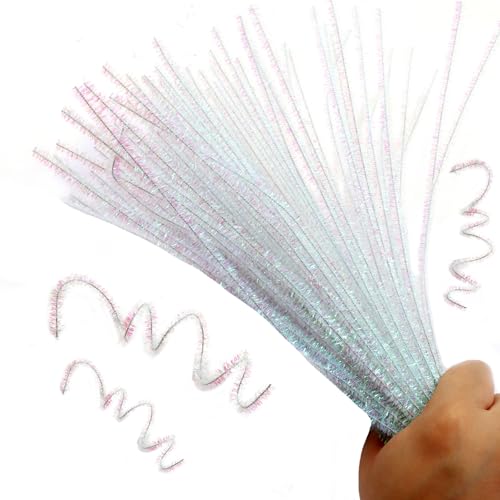
11. Iridescent Pipe Cleaner Frame
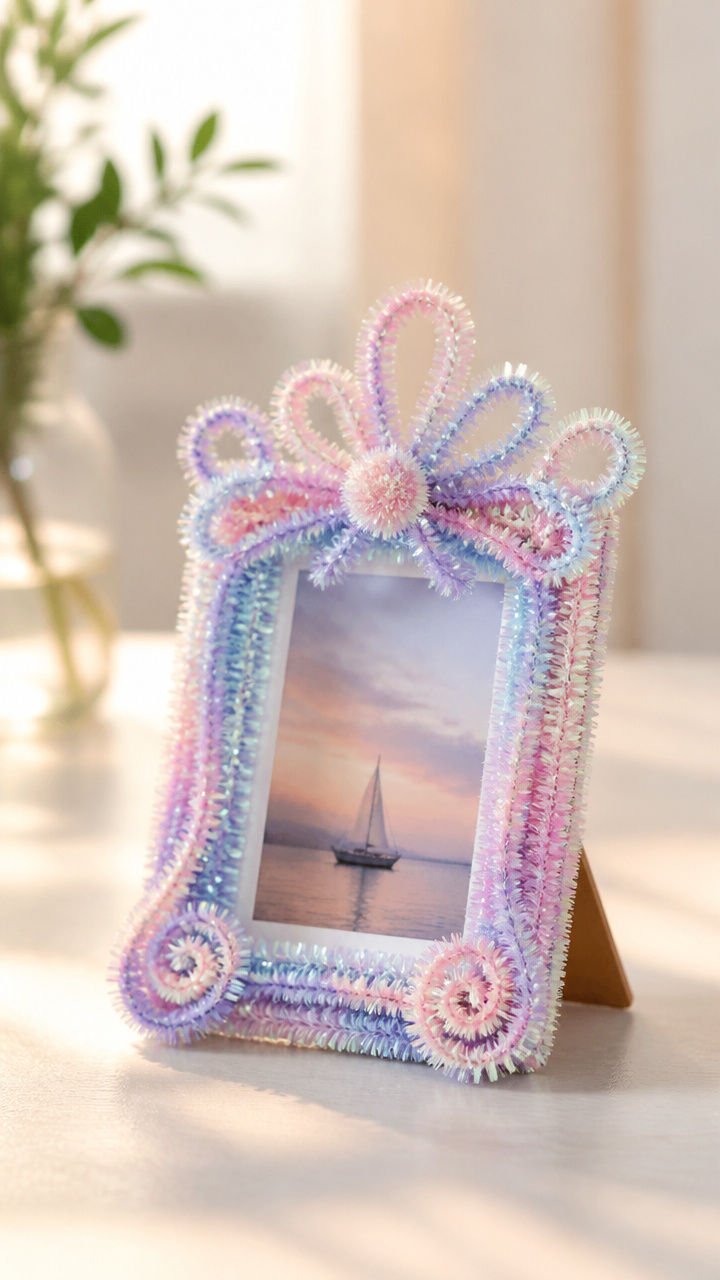
Shiny iridescent pipe cleaners bend easily into the sharp corners of the letter I. This sparkly frame holds a photo and strengthens hand control.
Materials Needed
- 2 iridescent chenille stems (pipe cleaners)
- Child-safe scissors
- Glue dots
- Small photo 5×7 cm
- Cardboard base 10×15 cm
How to Make It
- Lay one pipe cleaner vertically down the left side of the cardboard and press a glue dot at top and bottom to hold it.
- Bend the second pipe cleaner into a straight horizontal bar and glue it across the middle to form the crossbar of the I.
- Trim excess length with scissors so both ends are even.
- Use glue dots to attach the photo just below the letter.


12. Instant Oobleck I Tray
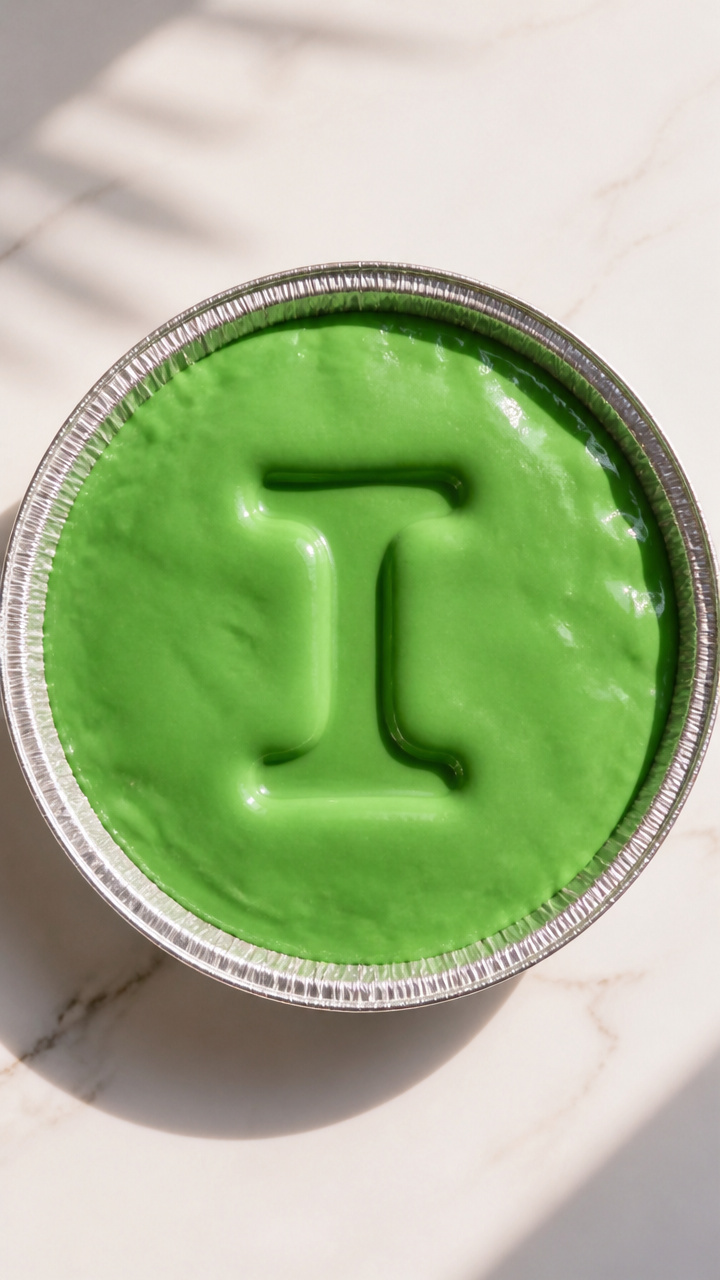
A messy sensory tray filled with oobleck lets kids trace the letter I with their fingers. The goo acts solid under pressure and liquid at rest.
Materials Needed
- 1 cup cornstarch
- 1/2 cup water
- Green food coloring, 5 drops
- Shallow baking tray
- Paper towels
- Aluminum pie pan
How to Make It
- Mix cornstarch and water in the pie pan, adding green food coloring until uniformly tinted.
- Stir slowly with fingers until the mixture resists quick pokes but flows when poured.
- Spread it flat in the baking tray and let your child use one finger to press a deep I into the surface.
- Observe how the shape holds briefly before melting away.


13. Inch-by-Inch Measuring Snake
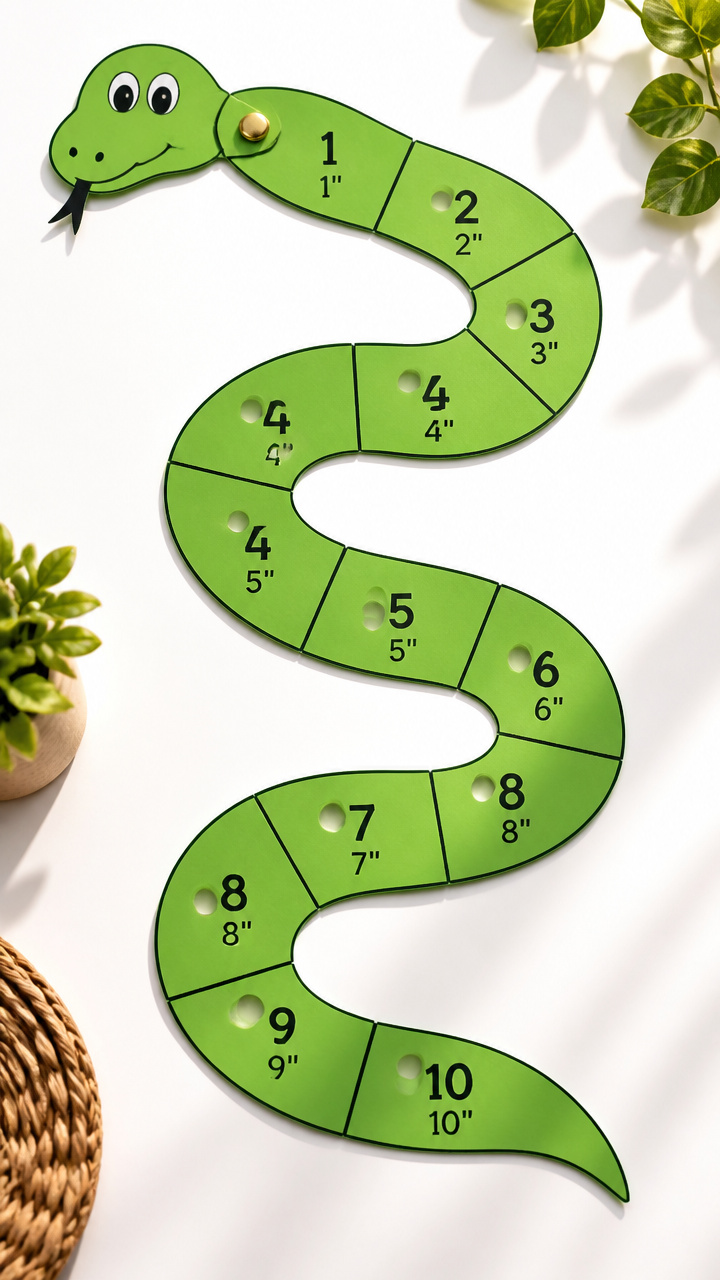
A long paper snake segmented in inches doubles as a ruler and letter I prop. Kids learn measurement while playing with a coiled friend.
Materials Needed
- Green printer paper
- Black marker
- Ruler
- Scissors
- Brads, 2
- Hole punch
How to Make It
- Cut the green paper into 3 cm wide strips and tape them end to end to make a 90 cm long strip.
- Use the ruler and black marker to draw a line every 2.5 cm and label each with numbers 1 to 10 along one edge.
- Draw a snake head at one end and tail at the other.
- Punch holes at both ends and connect them with a brad to form a circle that can stretch into a straight I shape.


14. Ice Cube Painting Prints
Frozen paint-filled ice cubes stamp the letter I when rolled across paper. This chilly method creates soft-edged art with zero brushes.
Materials Needed
- Silicone ice cube tray
- Tempera paint, blue and white
- Water
- Large white paper
- Freezer
- Tray to catch drips
How to Make It
- Mix equal parts blue tempera paint and water and pour into half the ice cube slots, freeze overnight.
- Place the large paper on a tray and arrange the frozen cubes upright in a vertical line to form the sides of a capital I.
- Roll each cube slowly across the paper to leave a painted trail, then add a horizontal roll for the middle bar.
- Let the painting air dry flat for 1 hour.


15. Itsy Bitsy Spider Web
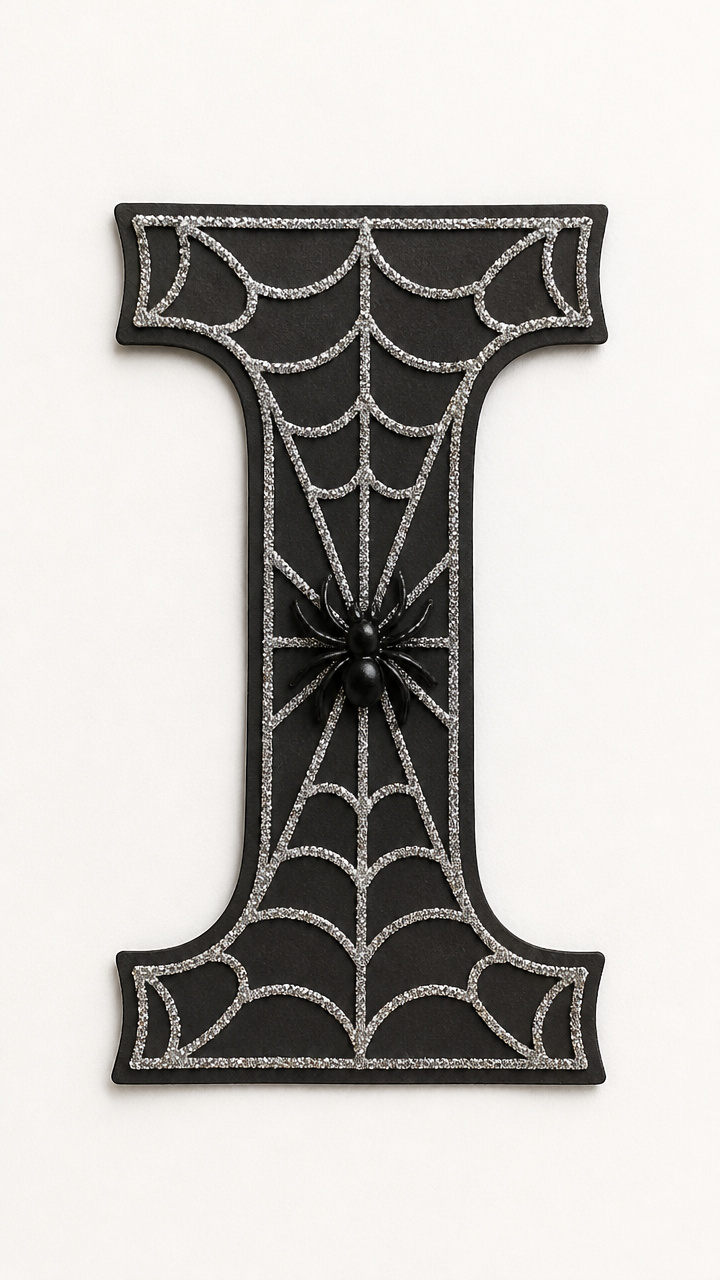
A raised web made with glue and glitter forms the letter I while mimicking the spider’s climb. The bumpy texture invites fingertip exploration.
Materials Needed
- Black construction paper
- White liquid glue
- Fine silver glitter
- Plastic spider charm
- Glue stick
- Cardboard stencil of letter I
How to Make It
- Place the cardboard I stencil on the black paper and trace around it lightly with a pencil.
- Squeeze white glue along the outline to create a thick, continuous line shaped like I.
- Sprinkle silver glitter heavily over the wet glue and shake off excess onto a tray.
- Let dry for 2 hours, then attach the spider charm with a glue stick just above the bottom of the I.


Each of these crafts turns the letter I into something real your child can touch, build, and remember. Grab a few basics like glue, paper, and crayons, and let the learning begin with joy.