25 Harvest Craft Ideas

The air turns crisp, the leaves shift to warm golds and reds, and your home begins to call for cozy touches. These crafts meet that feeling with handmade charm, using simple tools and materials you can gather easily.
Each project brings a piece of the season indoors, from kitchen decor to porch accents. You’ll find ideas that suit quiet afternoons and weekend bursts of creativity alike.
1. Burlap Corn Husk Wreath
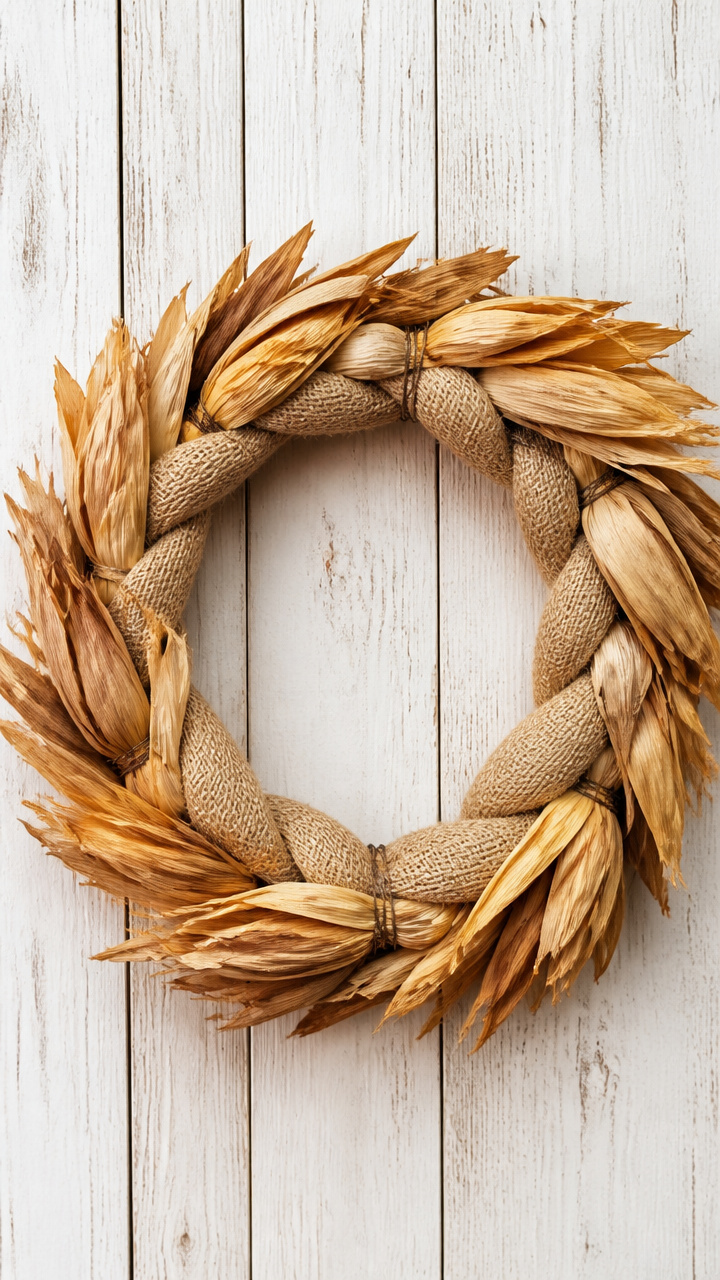
Rustic texture meets autumn color in this lightweight wreath perfect for your front door. The braided burlap base holds dried corn husks for a harvest feel that lasts.
Materials Needed
- 18-inch wire wreath frame
- 2-inch wide natural burlap ribbon, 3 yards
- 10 dried corn husks
- Hot glue gun
- Scissors
- Floral wire, 22 gauge, 12 inches
How to Make It
- Wrap the burlap ribbon tightly around the wire frame, overlapping slightly with each turn. Secure the end with hot glue every few inches to hold it in place.
- Lay each corn husk flat and trim any brittle edges. Cut floral wire into 3-inch pieces and wrap one around the base of each husk.
- Attach the husks to the wreath by twisting the wire ends around the frame. Space them evenly, angling them outward like sunburst rays.


2. Apple Cinnamon Simmer Pot
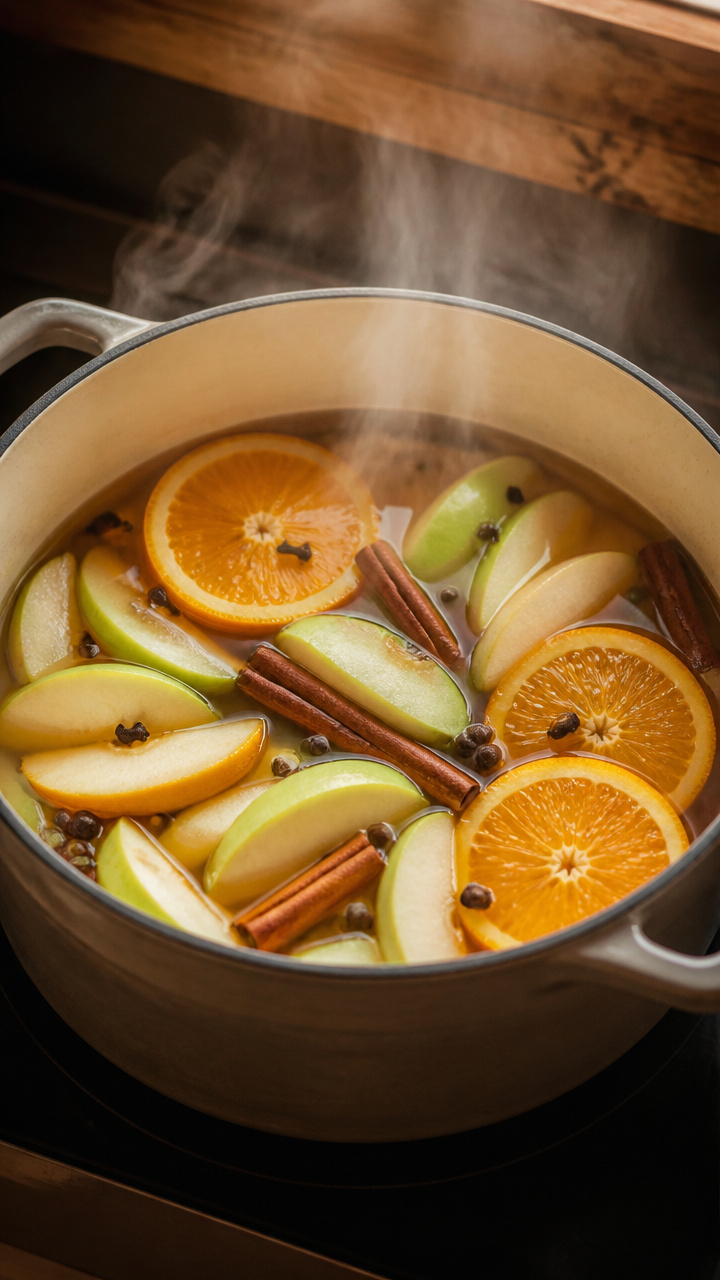
Fragrant slices of apple and spice fill your kitchen with warmth. This stovetop pot simmers safely and doubles as a colorful centerpiece when not in use.
Materials Needed
- 1 medium green apple, sliced thin
- 1 orange, sliced thin
- 3 cinnamon sticks, 3 inches long
- 1 tablespoon whole cloves
- 1 teaspoon whole allspice
- 4 cups water
- Small saucepan, 2-quart
How to Make It
- Place apple and orange slices in the saucepan. Add cinnamon sticks, cloves, and allspice on top.
- Pour in water until the pot is three-quarters full. Bring to a gentle simmer over medium heat.
- Let simmer uncovered for up to 2 hours, adding water if the level drops below half. Turn off when scent fades.


3. Pressed Maple Leaf Art
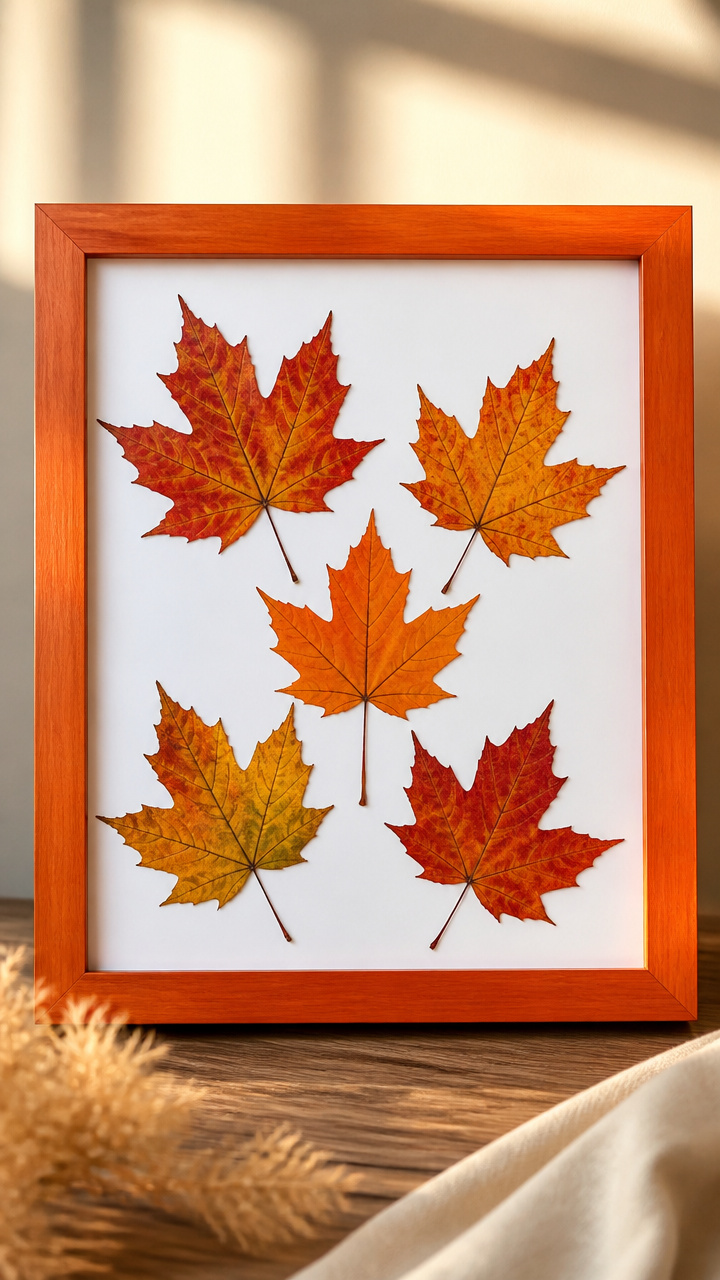
Preserve fall’s fleeting beauty in a framed display of real maple leaves. Pressed between glass, their veins and colors stay vivid for years.
Materials Needed
- 5 fresh maple leaves, different shapes
- Heavy book or flower press
- 8×10-inch picture frame with glass front
- White mat board, cut to fit frame
- Double-sided tape squares, 1/2 inch
- Pencil
How to Make It
- Place each leaf between two sheets of absorbent paper inside the heavy book. Press for 7 days without disturbing.
- Remove leaves carefully. Arrange them on the mat board in a balanced layout, leaving space between each.
- Use double-sided tape to secure each leaf tip and base. Slide the mat board and leaves into the frame behind the glass.


4. Mini Pumpkin Candle Holders
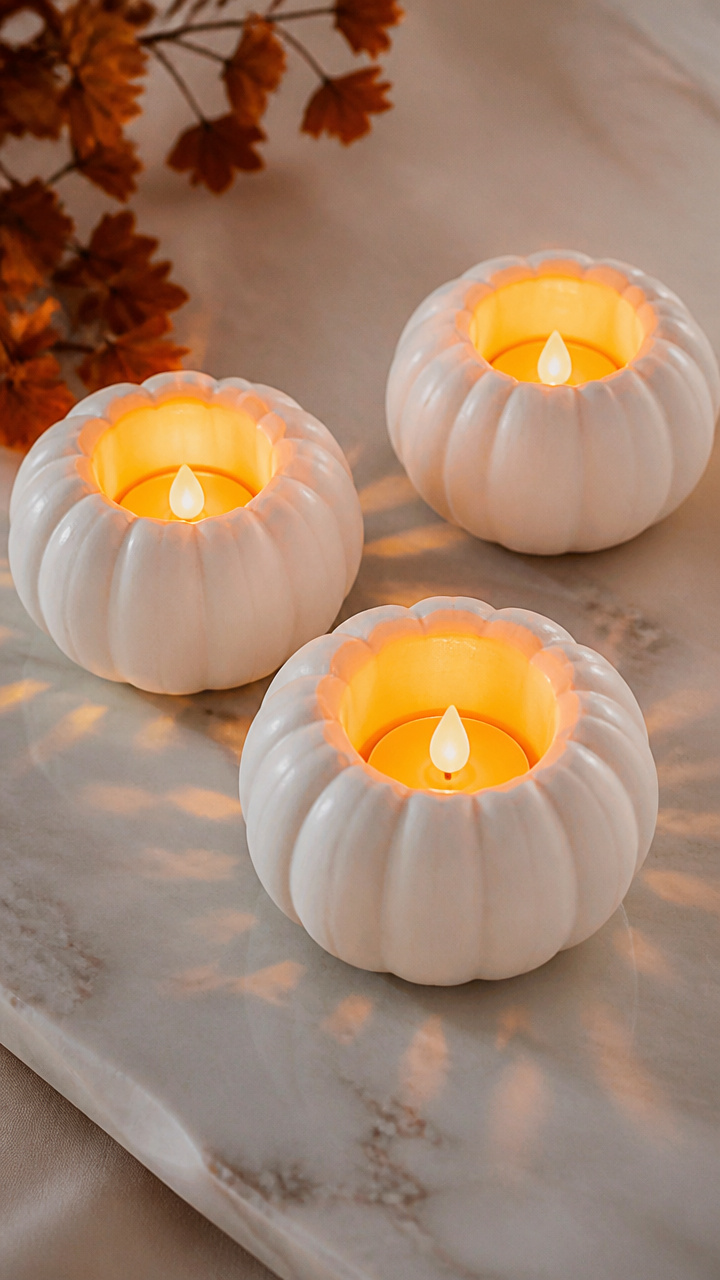
Tiny pumpkins cradle tea lights for a soft glow on tables or steps. Hollowed and cleaned, they cast delicate shadows through their flesh.
Materials Needed
- 6 mini white pumpkins, 3–4 inches tall
- 6 battery-powered tea lights
- Serrated grapefruit spoon
- Kitchen knife
- Paper towels
- Vegetable oil, 1 tablespoon
How to Make It
- Cut a 1-inch circular opening in the top of each pumpkin. Use the grapefruit spoon to scrape out seeds and pulp.
- Smooth the inside walls with the spoon. Wipe each pumpkin dry with paper towels.
- Rub a thin coat of vegetable oil on the inside and cut edge. Place a tea light inside each and turn on at dusk.


5. Woven Wheat Stem Bouquet
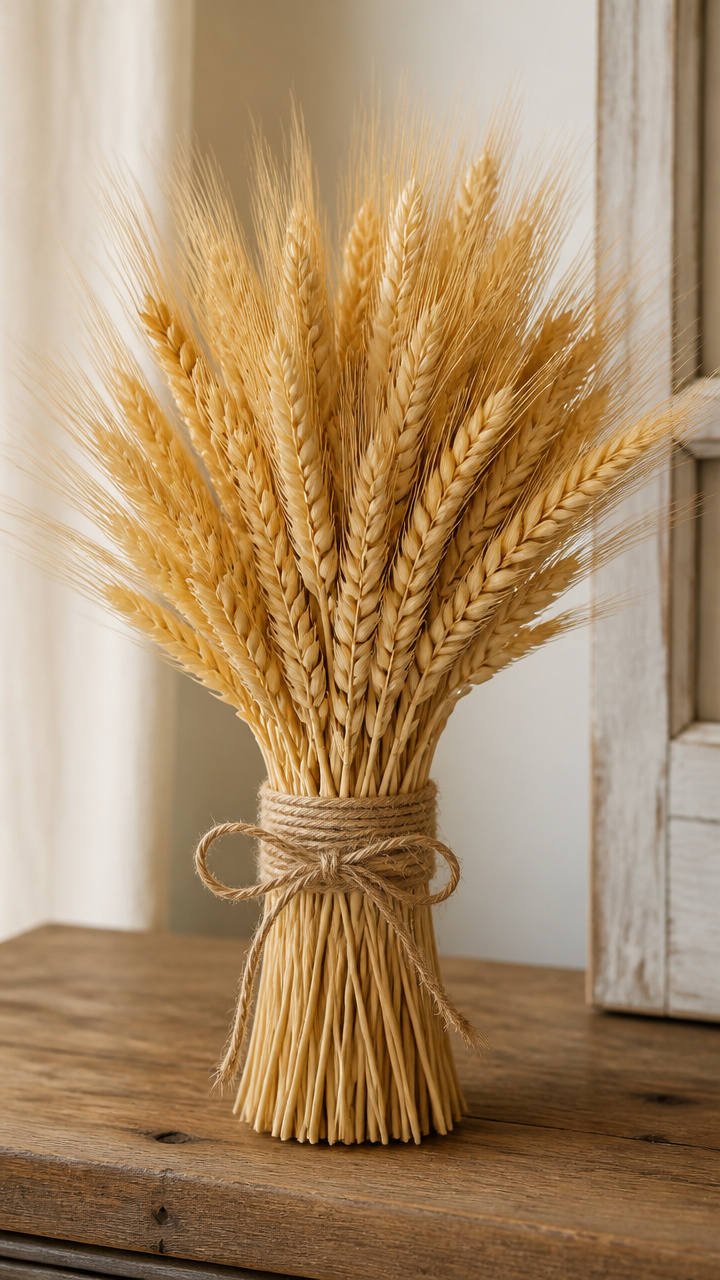
Golden wheat stems bend into a tight bundle tied with twine. This no-fuss bouquet stands tall in a vase or leans in a corner.
Materials Needed
- 15 wheat stalks with seed heads
- Natural jute twine, 18 inches
- Floral shears
- Brown kraft paper sheet, 12×18 inches
How to Make It
- Line up the wheat stems evenly at the base. Trim the ends straight with floral shears.
- Wrap twine around the stems 2 inches from the bottom. Tie a secure square knot.
- Roll the bouquet in kraft paper like a cone and tuck the top edge under. Display upright in a narrow vase.


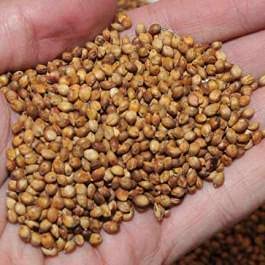
6. Crayon Leaf Rubbings on Canvas
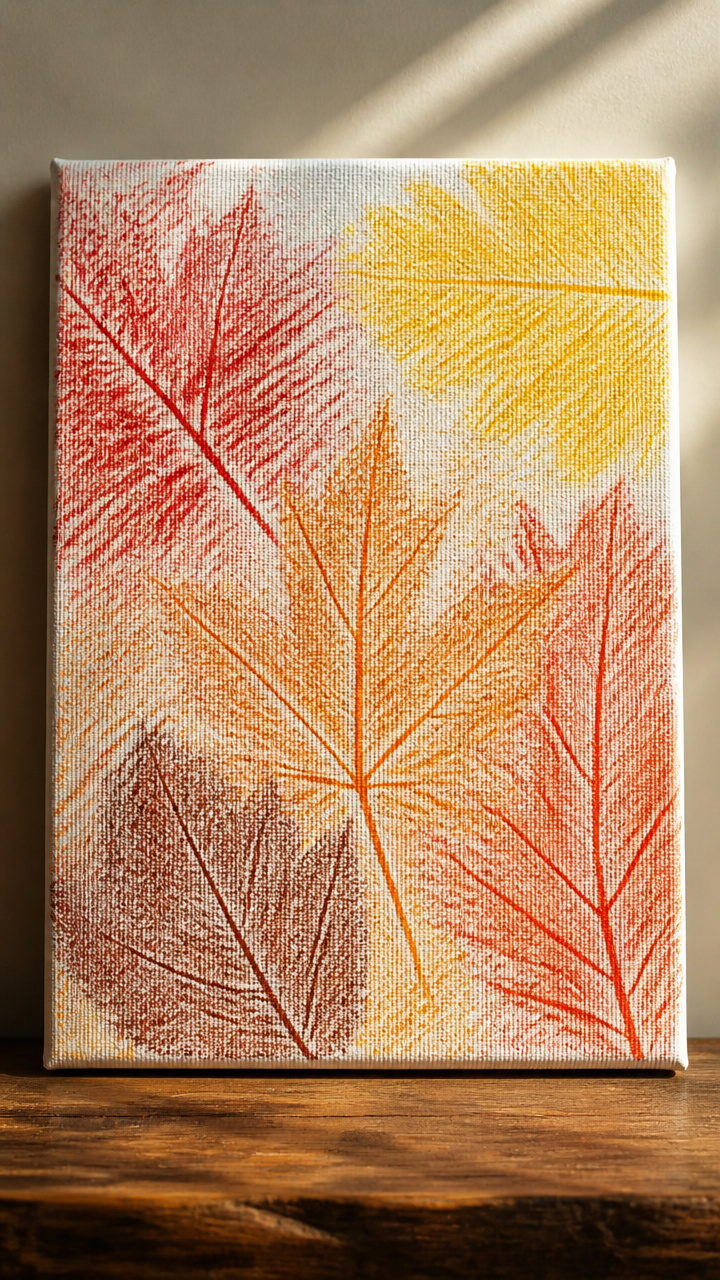
Real leaves imprint their shapes onto fabric using crayons. The canvas holds bold streaks of color that mimic autumn woods.
Materials Needed
- 5 large fallen leaves with clear veins
- Stretched 8×10-inch cotton canvas
- Unwrapped crayons: red, yellow, brown, orange
- Painter’s tape
- Soft cloth
How to Make It
- Place a leaf under the canvas. Tape the canvas corners to a table to keep it still.
- Hold a crayon sideways and rub firmly over the leaf area. Use one color per leaf.
- Lift the canvas to check the print. Wipe excess wax with a soft cloth if needed.
7. Gourd Birdhouse
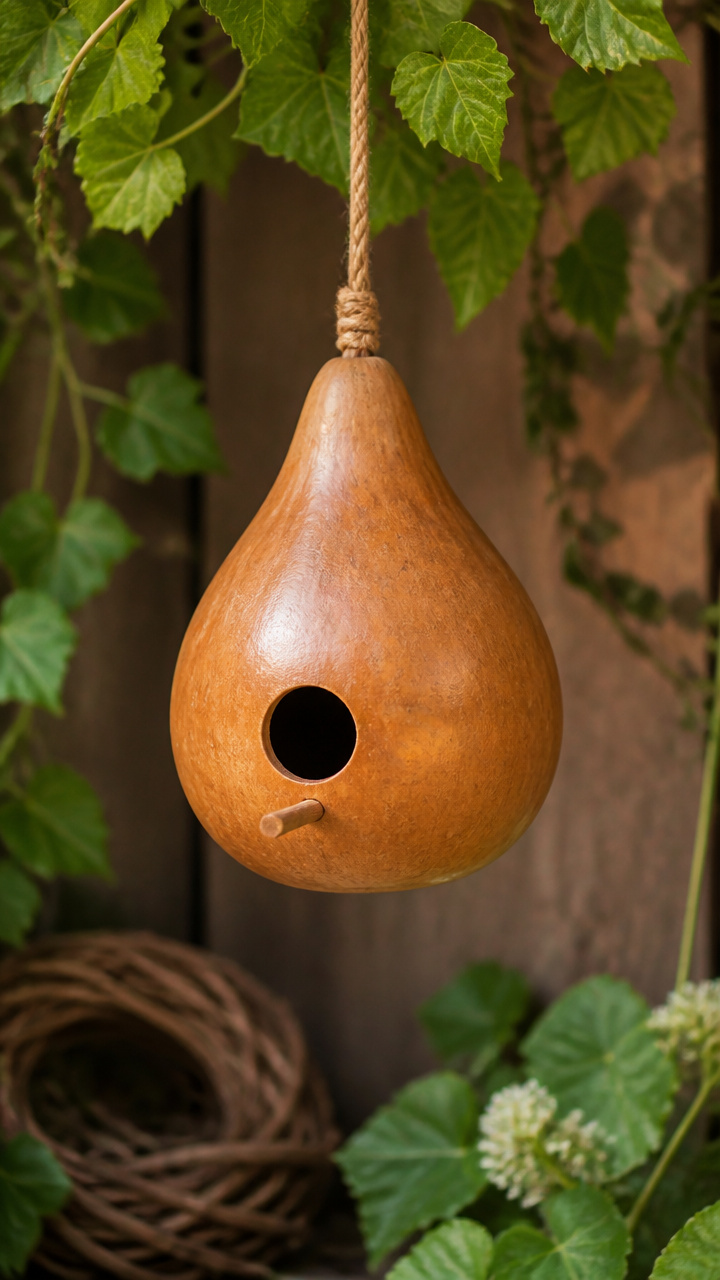
A dried gourd becomes a shelter for small birds with a drilled entry hole. Painted lightly, it blends into garden branches.
Materials Needed
- 1 dried bottle gourd, 6 inches tall
- 1/2-inch spade bit
- Drill
- Sandpaper, 120 grit
- Acrylic sealer spray
- Twine, 24 inches
How to Make It
- Mark a spot 2 inches from the top of the gourd. Drill a 1/2-inch hole using steady pressure.
- Sand the outside surface smooth, especially around the hole. Wipe away dust with a dry cloth.
- Spray with acrylic sealer in a well-ventilated area. Tie twine around the neck and hang from a tree limb.


8. Harvest Mason Jar Lights
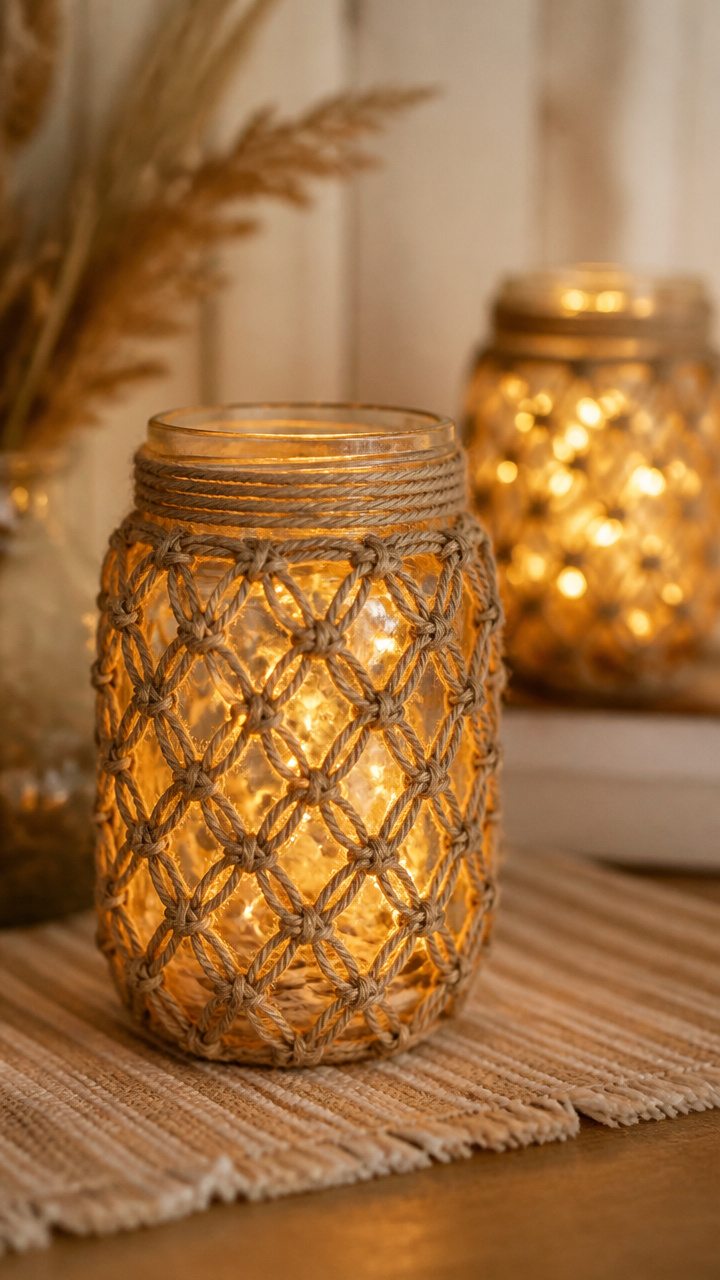
Mason jars wrapped in twine hold fairy lights for porch or table displays. The warm glow peeks through knotted fiber.
Materials Needed
- 4 pint-sized mason jars
- Battery-powered string lights, 20 bulbs
- Jute twine, 1/4 inch thick, 10 feet
- Hot glue gun
- Scissors
How to Make It
- Start gluing twine to the base of the jar. Wrap tightly upward in a spiral, adding glue every inch.
- Overlap each row slightly to cover the glass. Stop wrapping 1 inch below the rim.
- Place 5 bulbs of the string inside each jar. Close the lid loosely to let wires exit the side.
![24 Pack Fairy Lights Battery Operated [3 Modes] 7ft 20 LED Mini Twinkle String Lights Waterproof Silver Wire Firefly Starry Lights for Wedding Party Mason Jars Christmas Decorations, Warm White](https://m.media-amazon.com/images/I/51NBqNkGaHL._SL500_.jpg)


9. Salt Dough Apple Ornaments
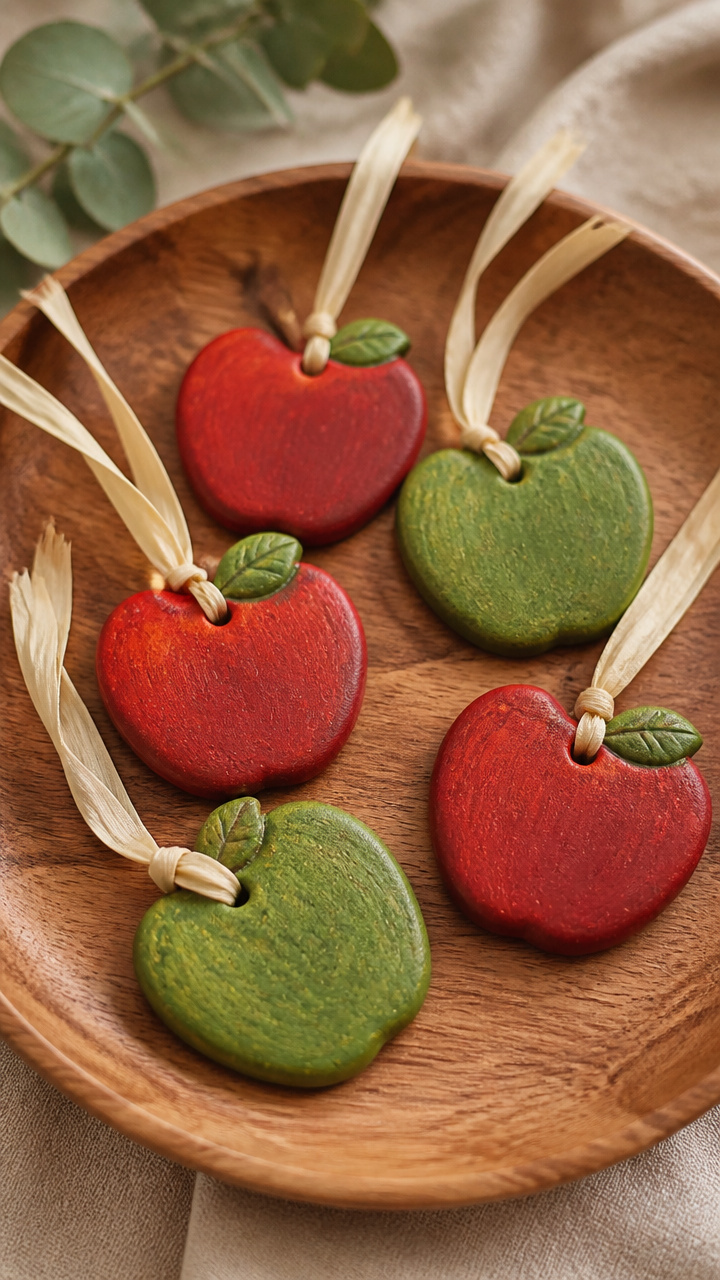
Hand-shaped apples bake into durable keepsakes painted with red and green. Thread with ribbon to hang on a tree or shelf.
Materials Needed
- 2 cups flour
- 1 cup salt
- 3/4 cup water
- Rolling pin
- Apple-shaped cookie cutter, 2 inches
- Straw, 1/8 inch diameter
- Red and green acrylic paint
- Ribbon, 12 inches per ornament
How to Make It
- Mix flour, salt, and water in a bowl until a smooth dough forms. Roll to 1/4-inch thickness on a floured surface.
- Cut shapes with the cookie cutter. Push a straw through the top edge to make a hanging hole.
- Bake at 200°F for 3 hours until hard. Cool completely, then paint and thread with ribbon.


10. Pinecone Owls
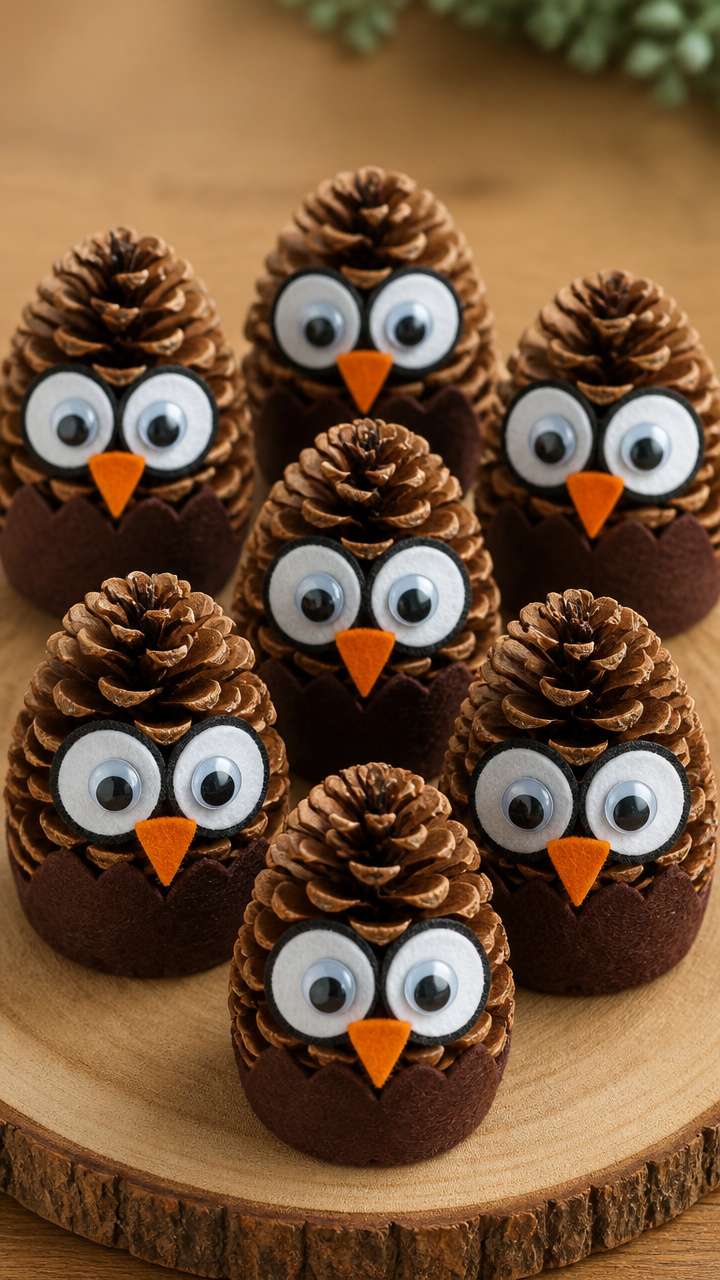
Pinecones sprout felt eyes and beaks to become woodland owls. Glued together, they perch on mantels or bookshelves.
Materials Needed
- 6 large closed pinecones
- Felt sheets: brown, white, orange, 9×12 inches each
- Hot glue gun
- Googly eyes, 1/2 inch, 12 pieces
- Scissors
- Black fine-tip marker
How to Make It
- Cut two white circles and two smaller brown circles for each owl’s eyes. Glue white behind brown.
- Glue eyes near the top of the pinecone. Add googly eyes on top of the felt.
- Cut a small triangle from orange felt for the beak. Glue below the eyes. Draw feather lines with the marker.


11. Caramel Apple Dip Jars
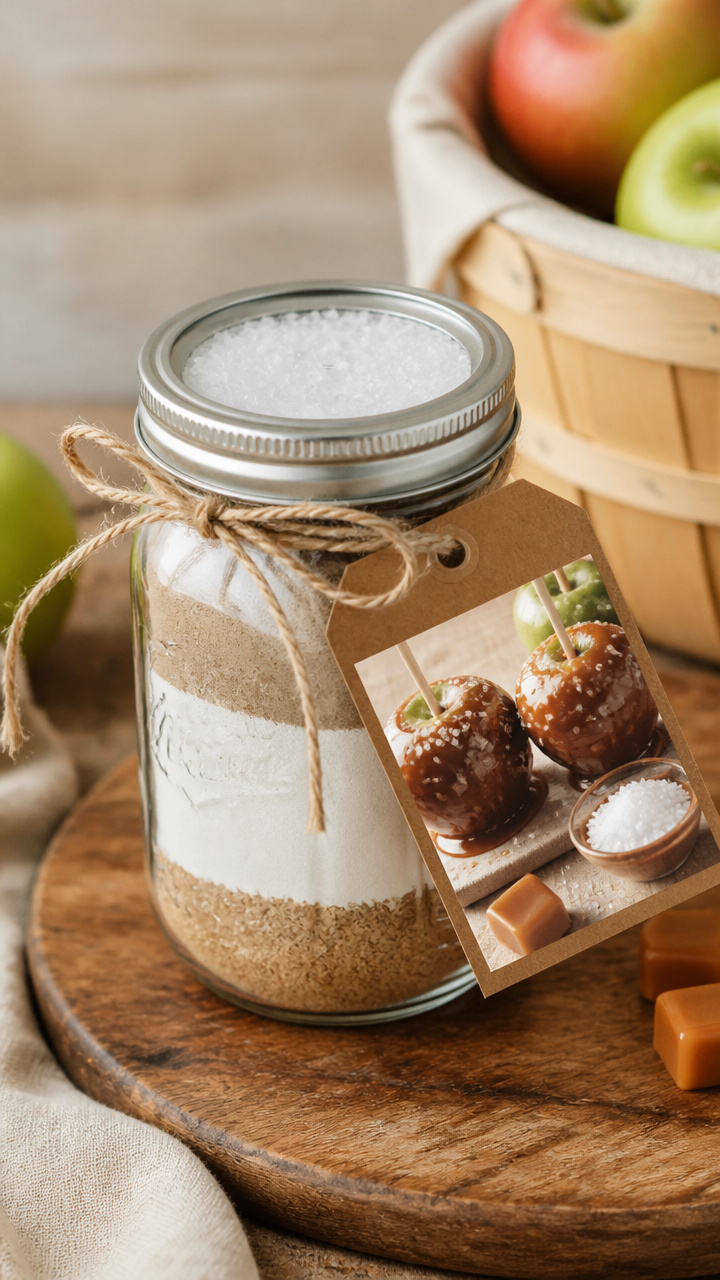
Layered ingredients in a jar make gift-giving easy. Attach a recipe tag and let someone else stir up the sweetness.
Materials Needed
- 1 clean 12-ounce mason jar
- 1 cup packed brown sugar
- 1/2 cup powdered sugar
- 1/3 cup cornstarch
- 1 teaspoon sea salt
- Caramel apple recipe card, 3×5 inches
- Ribbon, 18 inches
How to Make It
- Add brown sugar to the jar first. Tap gently to settle the layer.
- Pour in powdered sugar, then cornstarch, tapping between additions.
- Slide the recipe card into the jar mouth. Seal with the lid and tie ribbon around the neck.


12. Leaf Print Pillow Cover
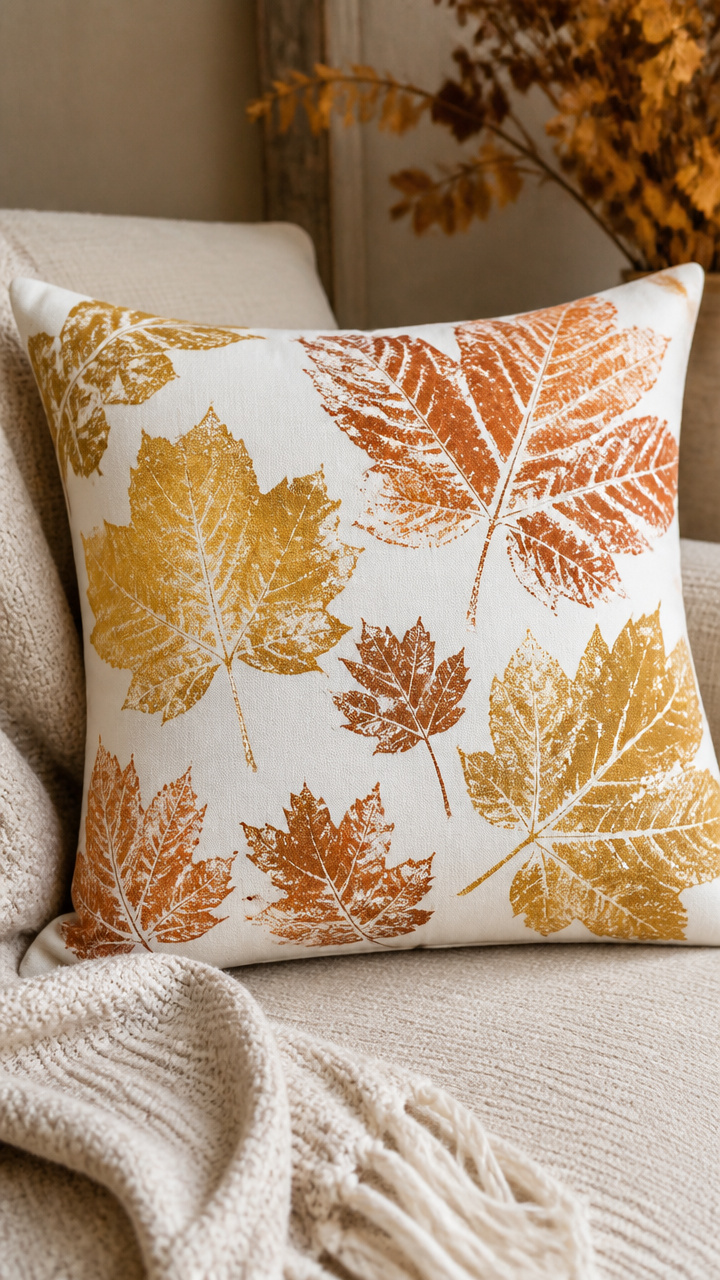
Fresh leaves stamp rich patterns onto linen with fabric paint. Once dry, the cover slips over any 16×16-inch pillow form.
Materials Needed
- 1 white linen pillow cover, 16×16 inches
- Fabric paint: burnt sienna, mustard yellow
- Paintbrush, 1-inch flat
- 5 firm leaves with deep veins
- Plastic wrap, 12×12 inches
- Iron
How to Make It
- Lay the pillow cover on a protected surface. Paint the back of a leaf with one color.
- Press the painted side onto the fabric. Lift straight up to avoid smudging.
- Repeat with other leaves and colors. Cover with plastic wrap and iron on cotton setting for 3 minutes to set.


13. Dried Citrus Garland
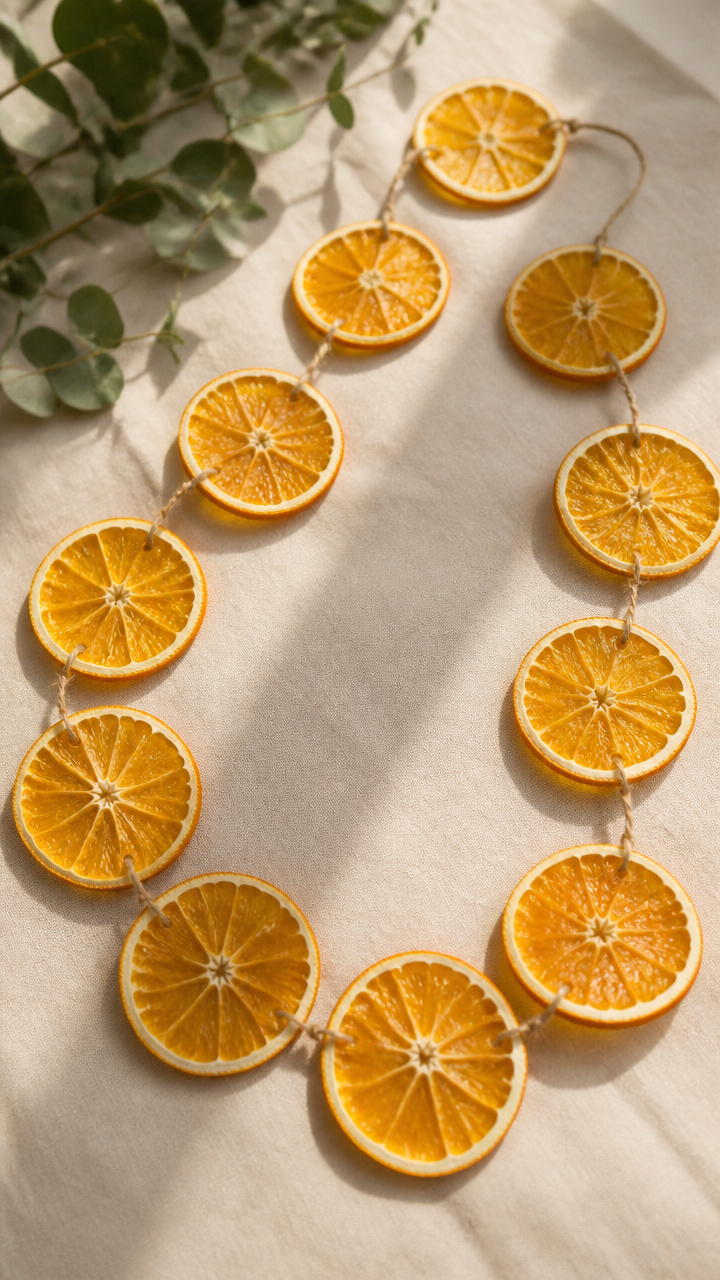
Thin orange and lemon slices dry into sun-colored disks threaded on twine. Hang across a window or beam for a bright strand.
Materials Needed
- 3 oranges, sliced 1/4 inch thick
- 2 lemons, sliced 1/4 inch thick
- Oven
- Parchment paper
- Baking sheet
- Needle, upholstery size
- Natural twine, 6 feet
How to Make It
- Arrange slices on a parchment-lined baking sheet. Bake at 200°F for 3 hours, flipping halfway.
- Cool slices completely. Thread the needle with twine and pierce through the top edge of each slice.
- Knot twine between slices to keep spacing even. Hang in a dry area away from direct sun.


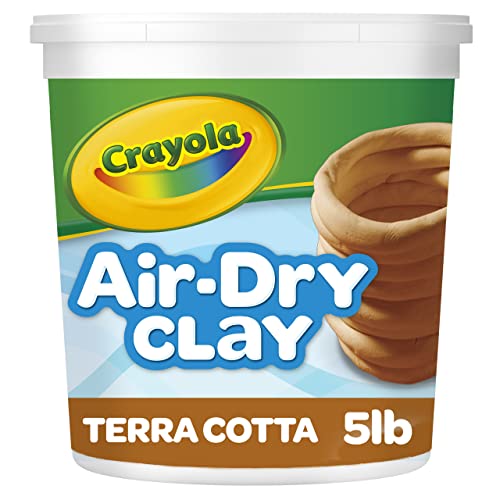
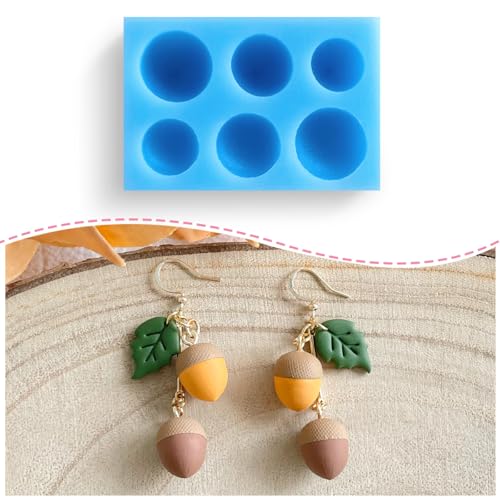
14. Clay Acorn Keychains
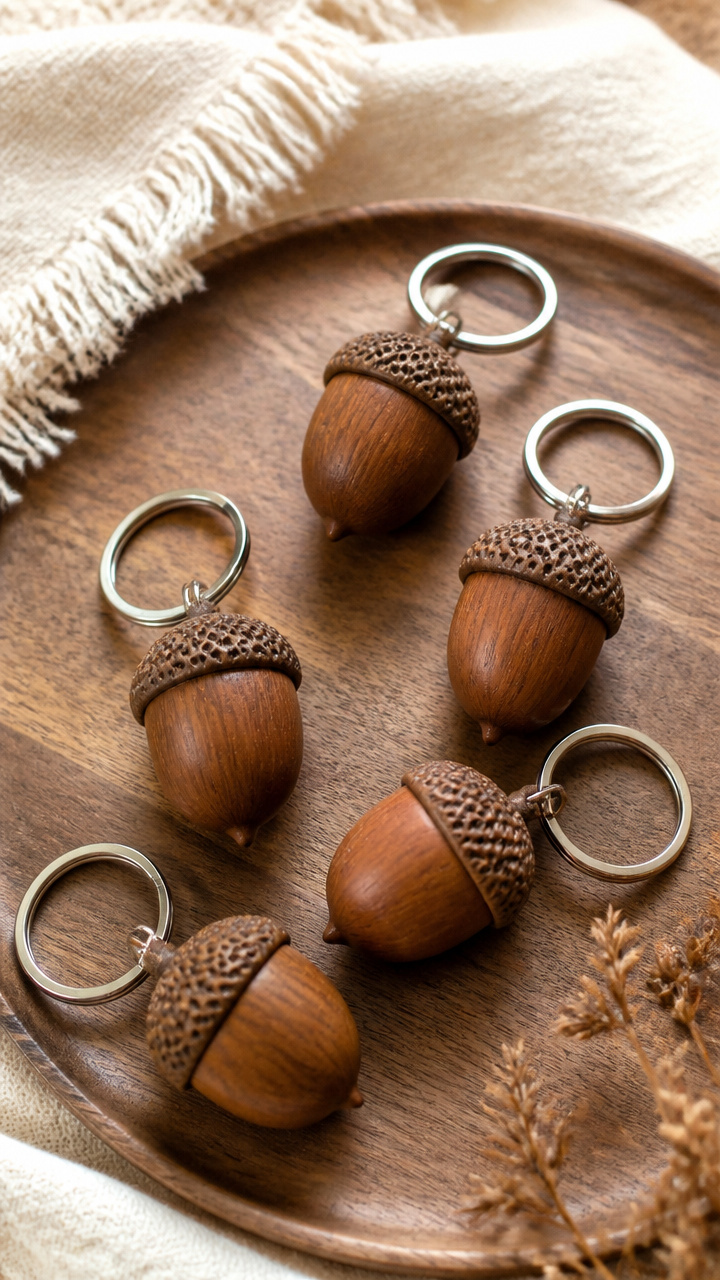
Air-dry clay molds into acorn caps and bodies stained with walnut ink. A split ring turns them into everyday carry charms.
Materials Needed
- Brown air-dry clay, 4 ounces
- Walnut ink stain, 2 oz bottle
- Acorn mold, silicone, 1-cup capacity
- Small paintbrush
- Split key rings, 1 inch, 5 pieces
- Toothpick
How to Make It
- Press clay into the acorn mold, filling both cap and nut sections. Smooth seams with a toothpick.
- Let dry 24 hours. Remove from mold and sand rough spots lightly.
- Brush walnut ink over the surface. Let dry 1 hour. Attach a split ring to the cap's top.

15. Flannel Shirt Pumpkins
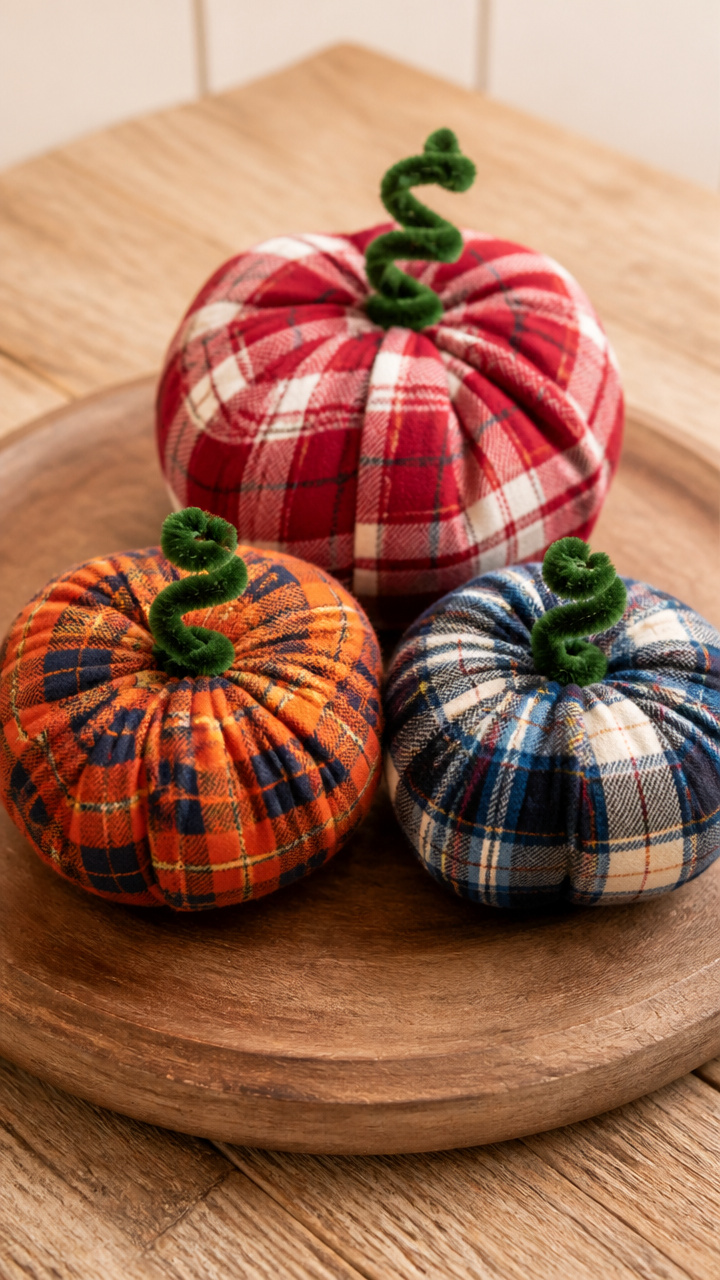
Scraps of flannel roll into plush pumpkins with wired stems. No sewing needed, just twisting and tying.
Materials Needed
- 3 flannel shirt scraps, 12×12 inches each
- Cardboard circle, 4 inches diameter
- Green pipe cleaner, 12 inches
- Scissors
- Ruler
- Hot glue gun
How to Make It
- Cut flannel into 1-inch wide strips. Layer five strips and place the cardboard circle in the center.
- Pull all strip ends upward and tie tightly below the circle with a 6-inch flannel strip.
- Fold the tied section in half to puff the layers. Glue a pipe cleaner stem to the top.


16. Maple Sap Spoon Charms
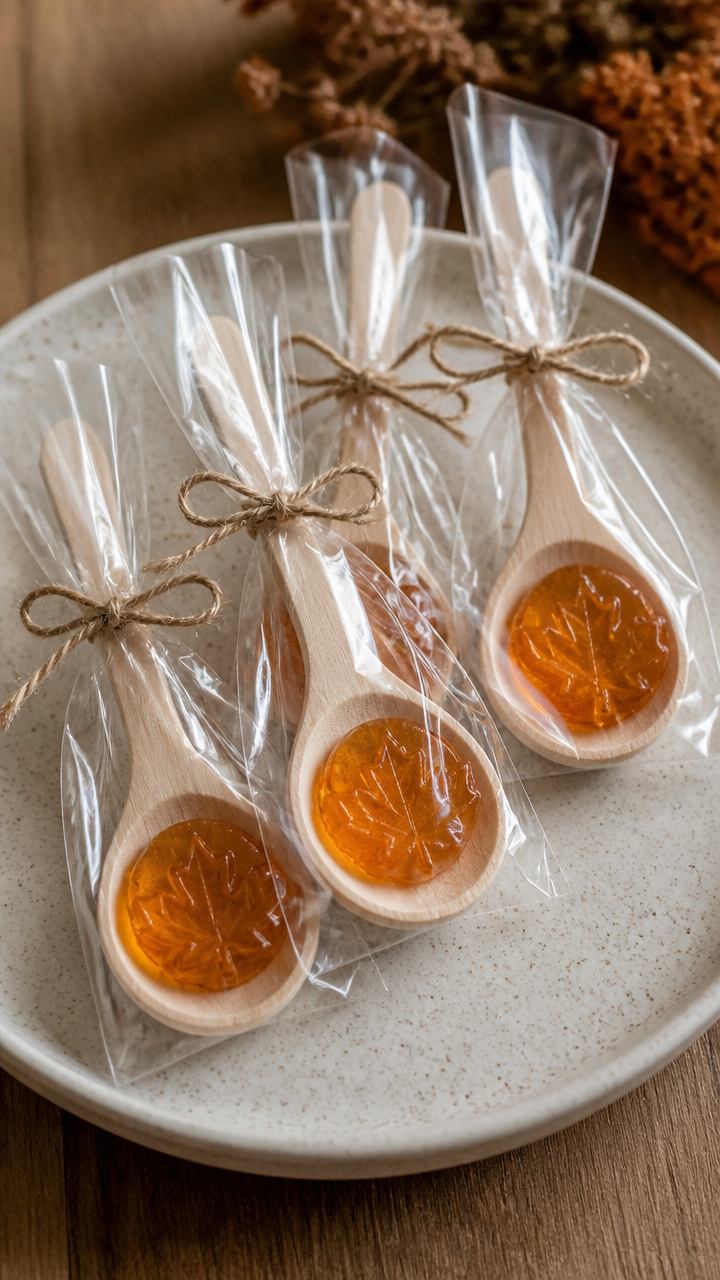
Real maple syrup hardens in spoon bowls to create edible jewelry. Wrap in cellophane for a sweet gift.
Materials Needed
- 5 wooden spoons, 6 inches long
- 1 cup pure maple syrup
- Baking dish, 8×8 inches
- Freezer
- Cellophane bags, 4×6 inches
- Twine, 10 inches per bag
How to Make It
- Pour maple syrup into each spoon bowl. Place spoons in the baking dish to prevent tipping.
- Freeze for 2 hours until solid. Remove and check for cracks.
- Slide each spoon into a cellophane bag. Tie shut with twine.


17. Corn Kernel Mosaic Frame
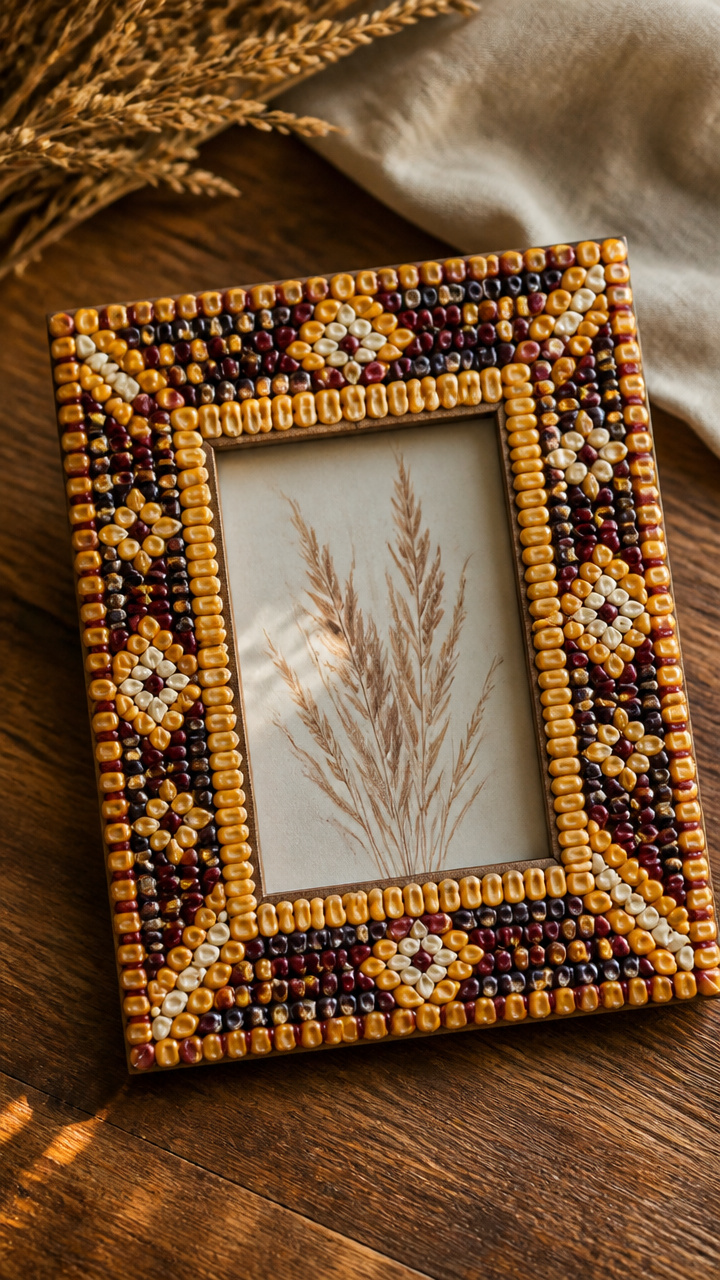
Multi-colored corn kernels glue into geometric rows on a plain wood frame. The result catches light like tiny tiles.
Materials Needed
- 8×10-inch unfinished wood photo frame
- 1/2 cup multicolored corn kernels
- White craft glue
- Toothpicks
- Small bowl
- Clean rag
How to Make It
- Pour glue into the bowl. Use a toothpick to dot the outer 1/2 inch of the frame front.
- Press corn kernels into the glue close together, alternating colors in a zigzag pattern.
- Let dry 6 hours. Wipe excess glue from kernels with a damp rag.


18. Berry Sprig Napkin Rings
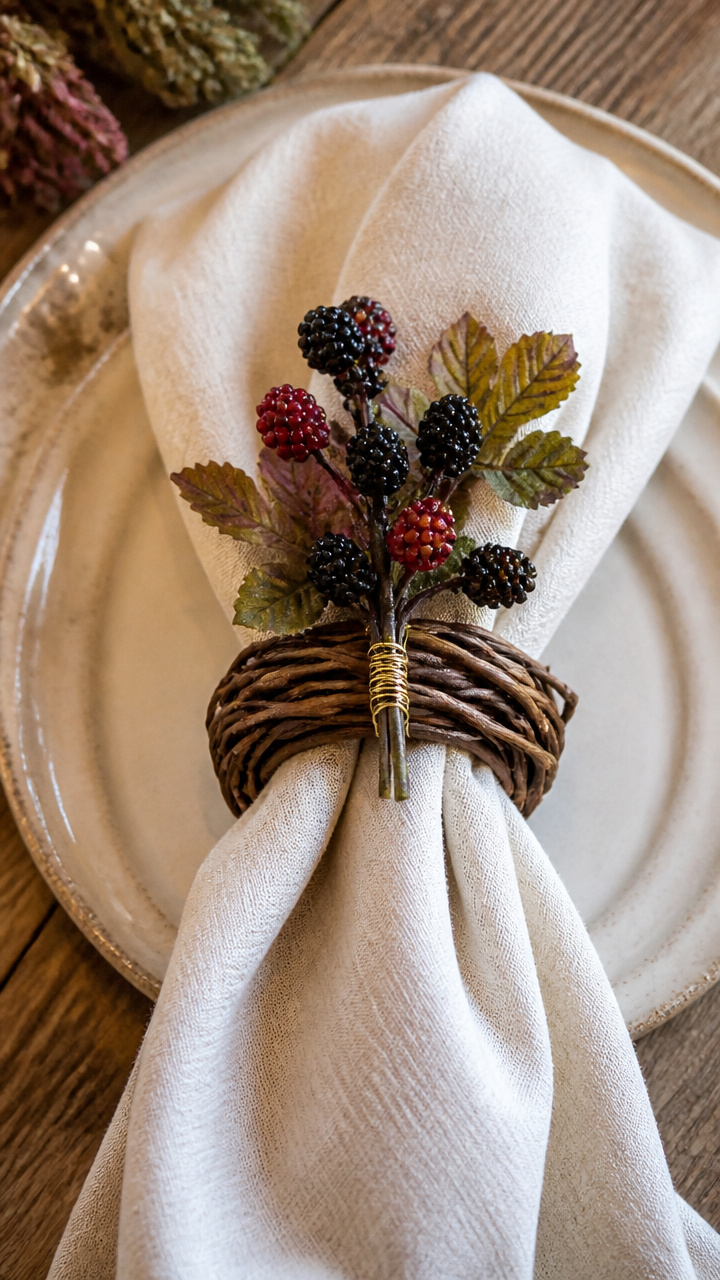
Flexible grapevine wraps around fabric napkins with a faux berry sprig tucked in. Each one adds a touch of wild elegance.
Materials Needed
- Grapevine wreath, 6 inches
- Faux blackberry sprigs, 3 inches, 5 pieces
- Fabric napkins, 18×18 inches, 5
- Wire cutters
- Gold wire, 20 gauge, 12 inches
How to Make It
- Cut the grapevine wreath into 5 equal lengths with wire cutters.
- Wrap one piece around a napkin 2 inches from the top. Overlap the ends.
- Cut a 3-inch piece of gold wire. Twist it around the base of a berry sprig and attach to the vine overlap.


19. Carved Butternut Squash Lanterns
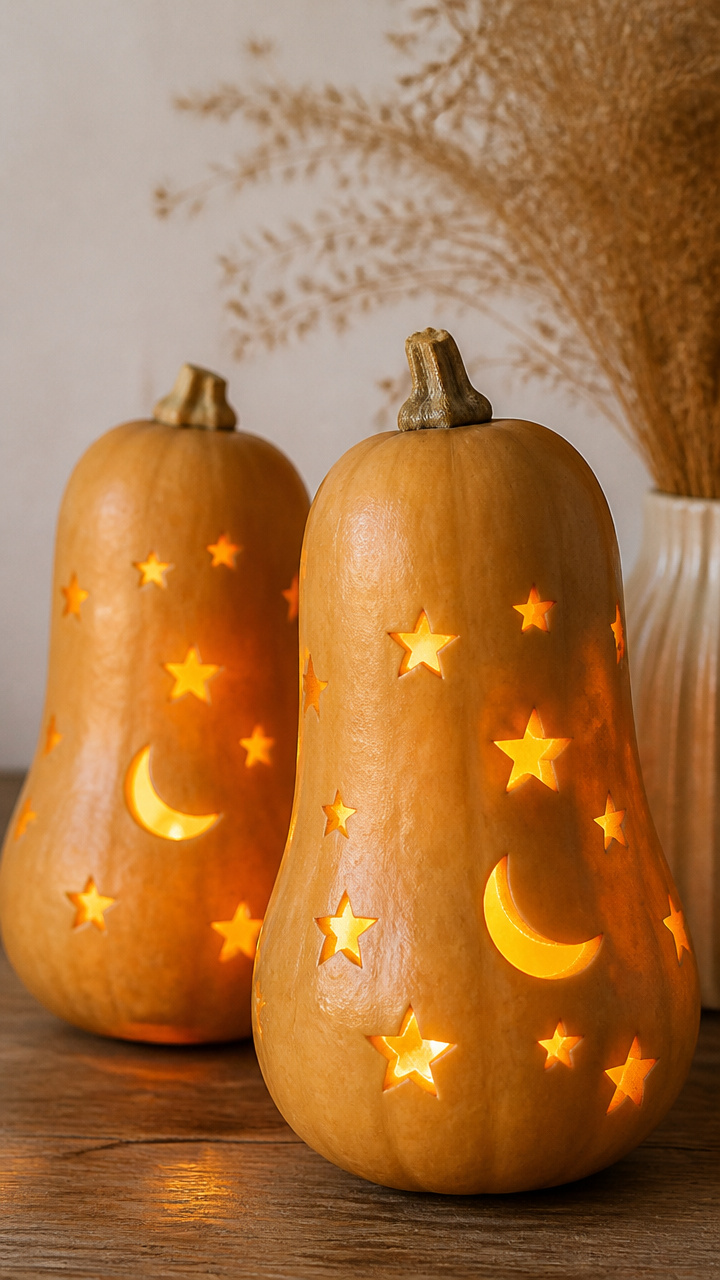
Butternut squash holds candlelight with carved star and moon shapes. Their pale skin glows softly when lit.
Materials Needed
- 3 medium butternut squash
- X-Acto knife
- Spoon
- Pencil
- Battery tea light
- Vegetable oil, 2 tablespoons
How to Make It
- Draw star and moon shapes on the squash sides with pencil. Keep designs under 2 inches tall.
- Cut along lines with the X-Acto knife. Scoop pulp from behind each shape with the spoon.
- Rub oil on the cut areas to preserve. Place a tea light inside and turn on at night.
20. Hay Bale Centerpiece Base
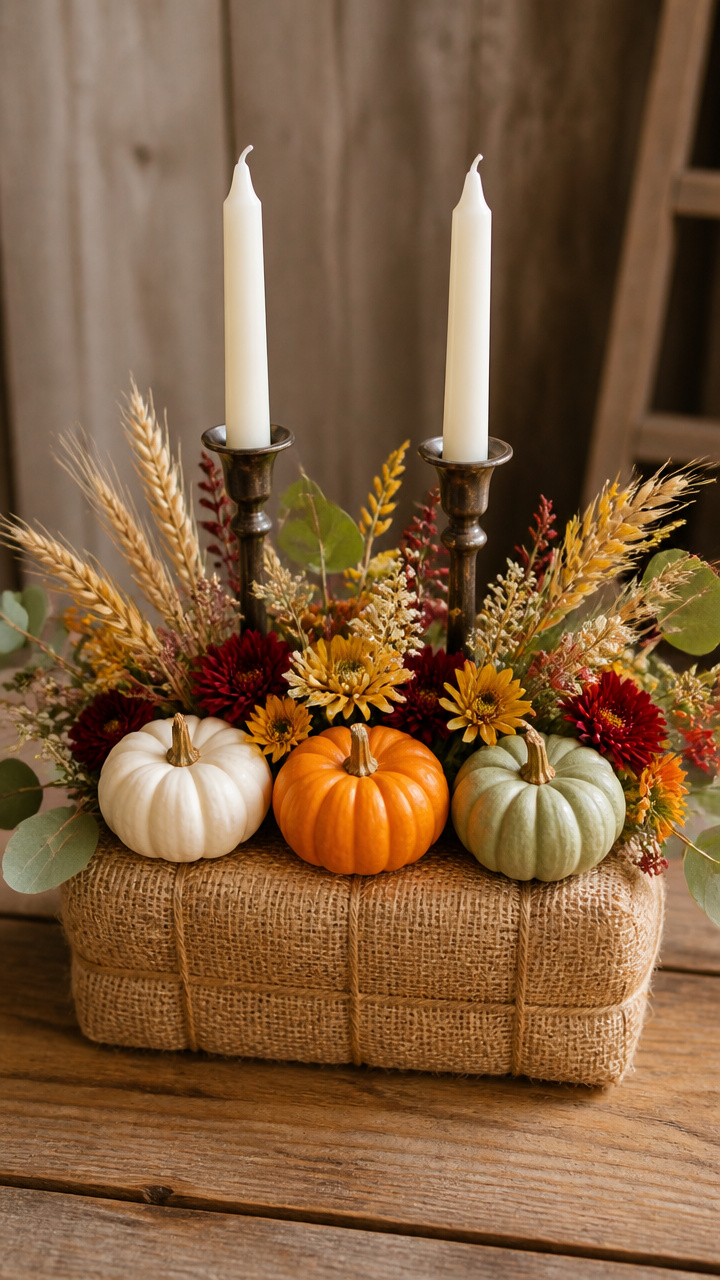
A small hay bale supports pumpkins, candles, and flowers in a rustic arrangement. Wrapped in burlap, it stays neat on tables.
Materials Needed
- 1 mini hay bale, 6x6x4 inches
- 12-inch square burlap fabric
- Jute twine, 24 inches
- 3 mini pumpkins
- 2 taper candles, 6 inches
- Candle holder base, metal
How to Make It
- Center the hay bale on the burlap square. Pull corners up to meet on top.
- Tie twine around the gathered fabric to secure. Tuck loose ends underneath.
- Arrange pumpkins and candle holder on top. Insert candles and light when ready.


21. Feather and Twig Wind Chime
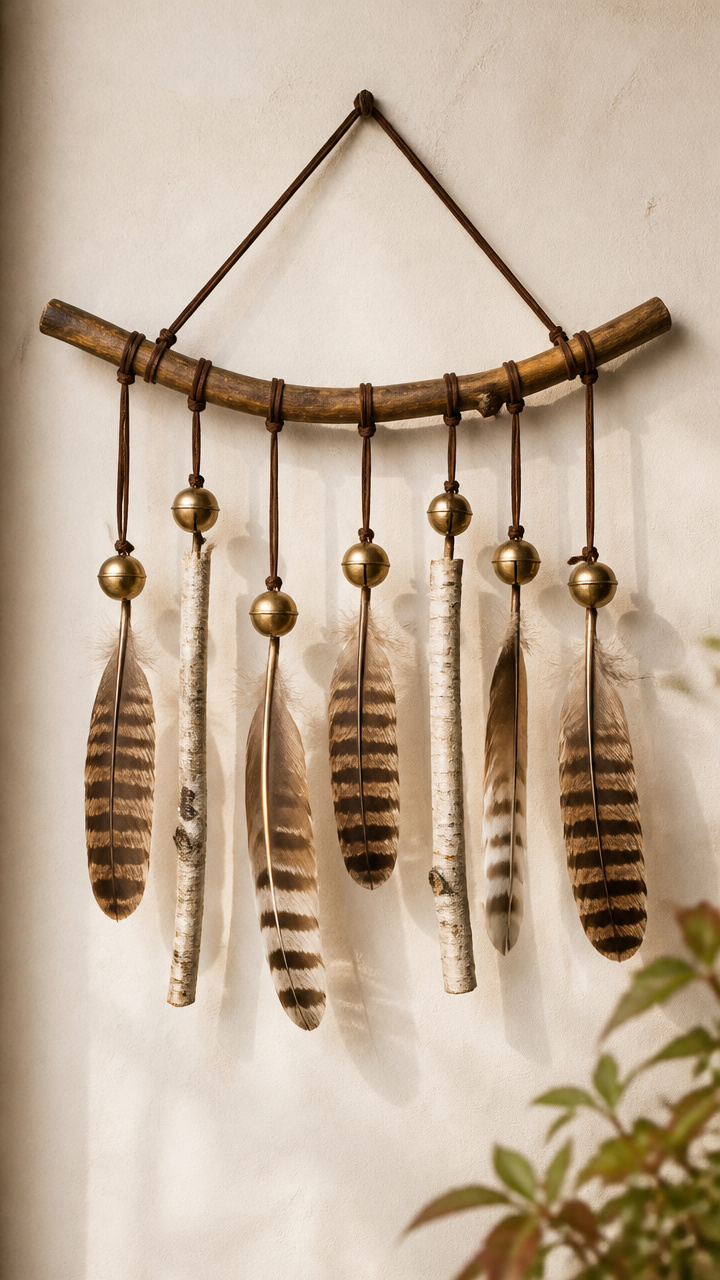
Turkey feathers and short birch twigs hang from a willow branch with jingle bells. Breezes pull soft clinks and rustles.
Materials Needed
- 1 curved willow branch, 12 inches long
- 4 turkey feathers, 6 inches
- 6 birch twigs, 8 inches
- Jingle bells, 1 inch, 6 pieces
- Leather thong, 1/8 inch, 3 feet
- Scissors
How to Make It
- Cut six 6-inch lengths of leather thong. Tie one to the top center of the willow branch for hanging.
- Pair each feather with a birch twig. Wrap thong around the base and secure with a knot.
- Slide a jingle bell onto each hanger before tying to the branch. Space evenly along the curve.


22. Apple Core Seed Pots
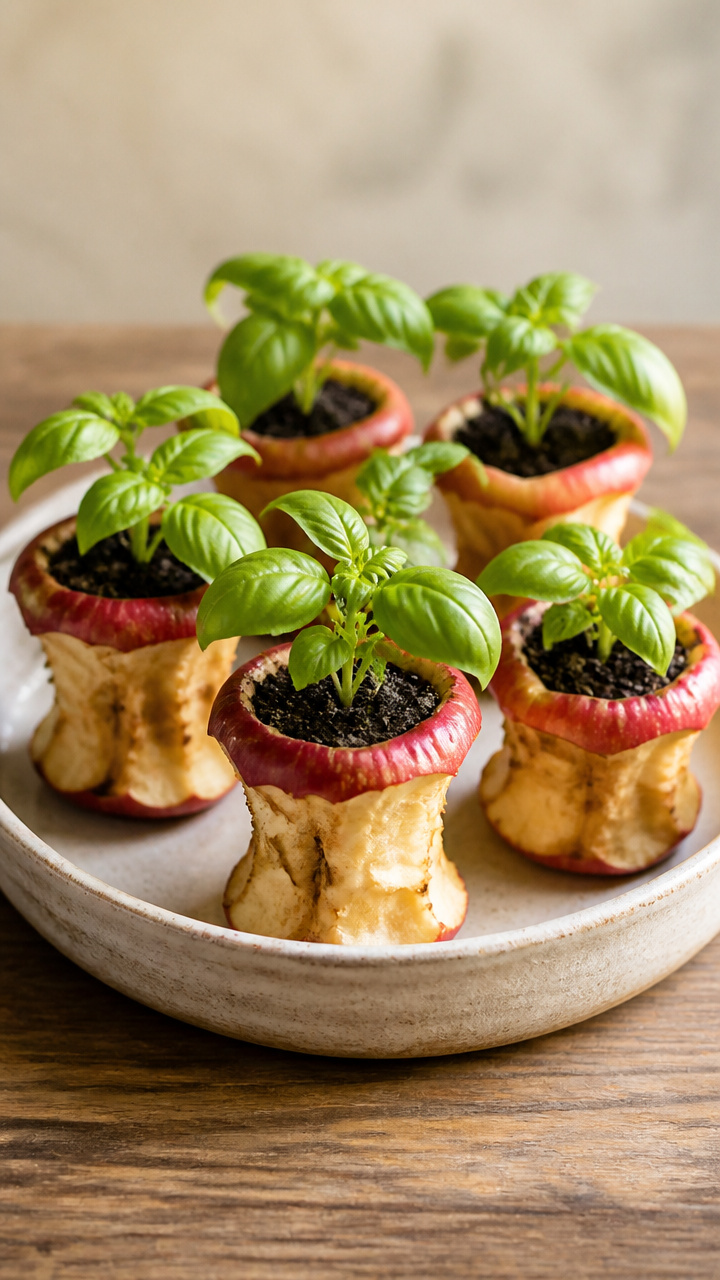
Hollowed apple cores hold soil and basil seeds for indoor growing. As they break down, they feed the young plants.
Materials Needed
- 5 red apples
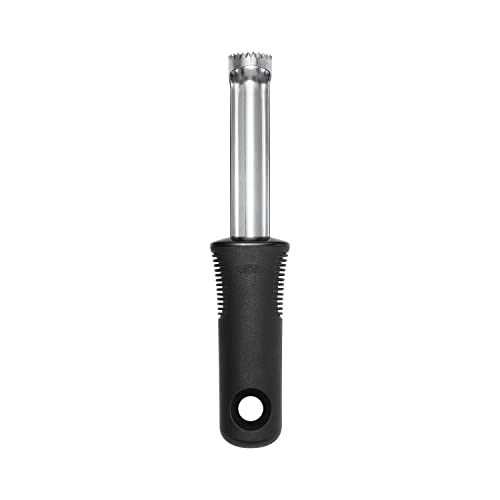
- Corer tool
- Potting soil, 2 cups
- Basil seeds, 1 packet
- Shallow tray
- Spray bottle
How to Make It
- Core each apple from top to bottom, removing all inner flesh. Leave the base intact.
- Fill each core with potting soil to the top. Press gently with your fingertip.
- Sprinkle 3 basil seeds per core. Mist with water and place in the tray. Spray daily until sprouts appear.


23. Quilted Fabric Harvest Banner
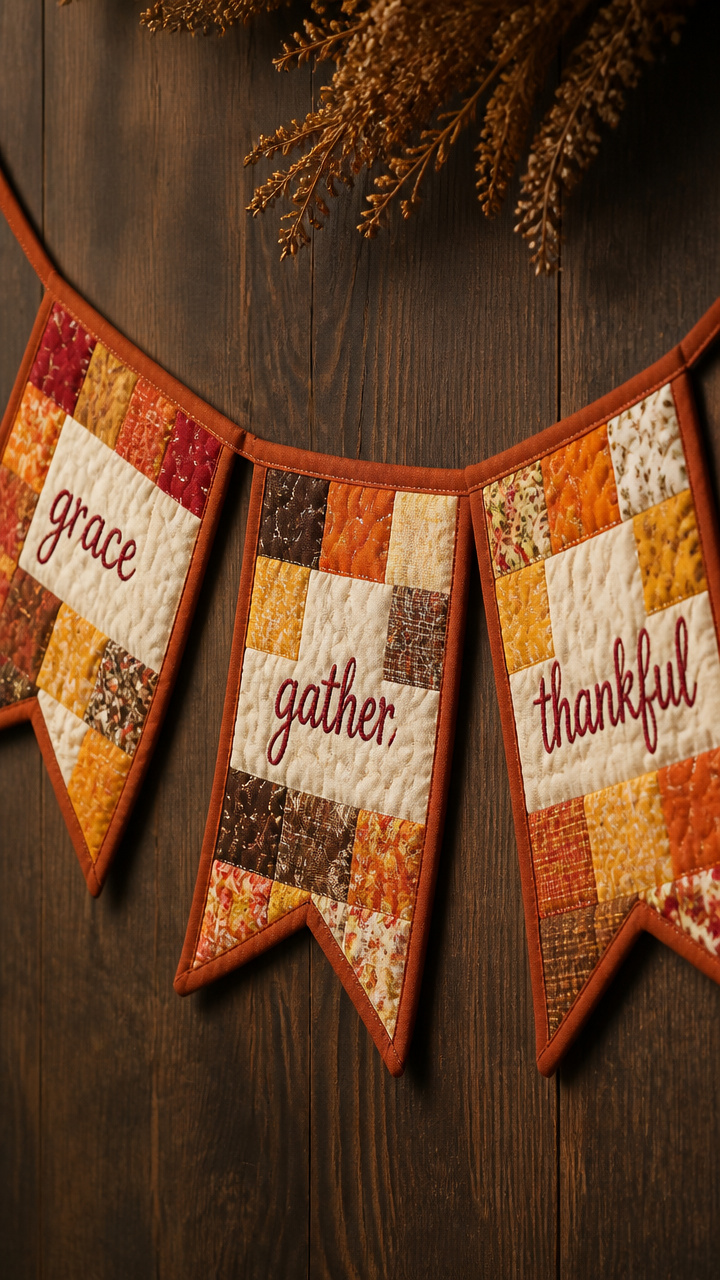
Patchwork squares of cotton stitch into a long banner edged with binding tape. Words like 'grace' or 'gather' appliqué each flag.
Materials Needed
- Cotton fabric scraps: red, orange, brown, yellow, 6×6 inches each, 10 pieces
- Iron-on interfacing, 8.5×11 sheet
- Sewing machine
- Contrasting thread
- Binding tape, double-fold, 1/2 inch, 3 yards
- Polyester stuffing, small pinch per flag
How to Make It
- Cut fabric into 5×5 inch squares. Layer two squares right sides together and stitch 1/4 inch from edge, leaving a 2-inch gap.
- Turn right side out and press. Add a pinch of stuffing. Topstitch 1/8 inch around all edges.
- Arrange flags on binding tape, 4 inches apart. Fold tape over edges and stitch in place along both sides.


24. Beeswax Leaf Coasters
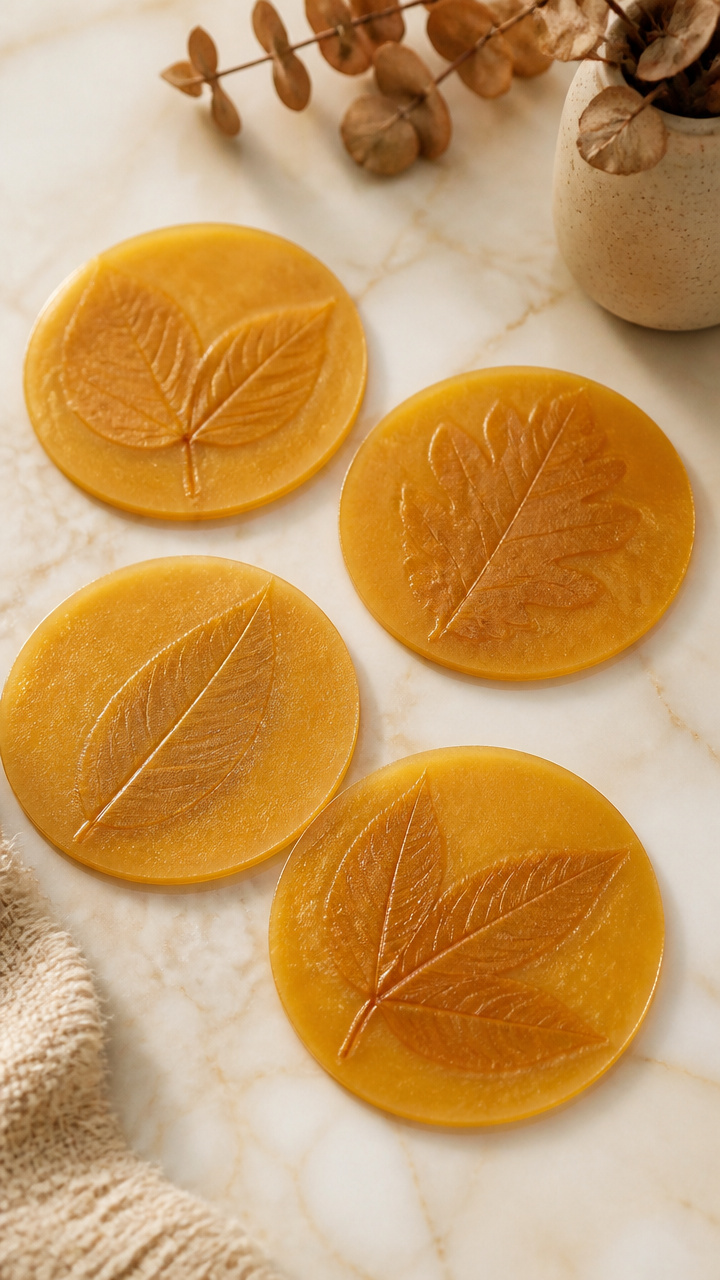
Real leaves press into melted beeswax to form flexible, water-resistant coasters. Their imprints stay sharp and natural.
Materials Needed
- 1 pound beeswax pellets
- Double boiler
- 5 smooth leaves, 4 inches long
- Silicone coaster mold, 4-inch round, 4 cavities
- Tongs
- Parchment paper
How to Make It
- Melt beeswax in the double boiler over medium heat. Stir until fully liquid.
- Place a leaf in each mold cavity. Pour wax to the top using a ladle.
- After 10 minutes, lift leaves gently with tongs. Let coasters cool 1 hour on parchment paper.


25. Cinnamon Stick Bundles
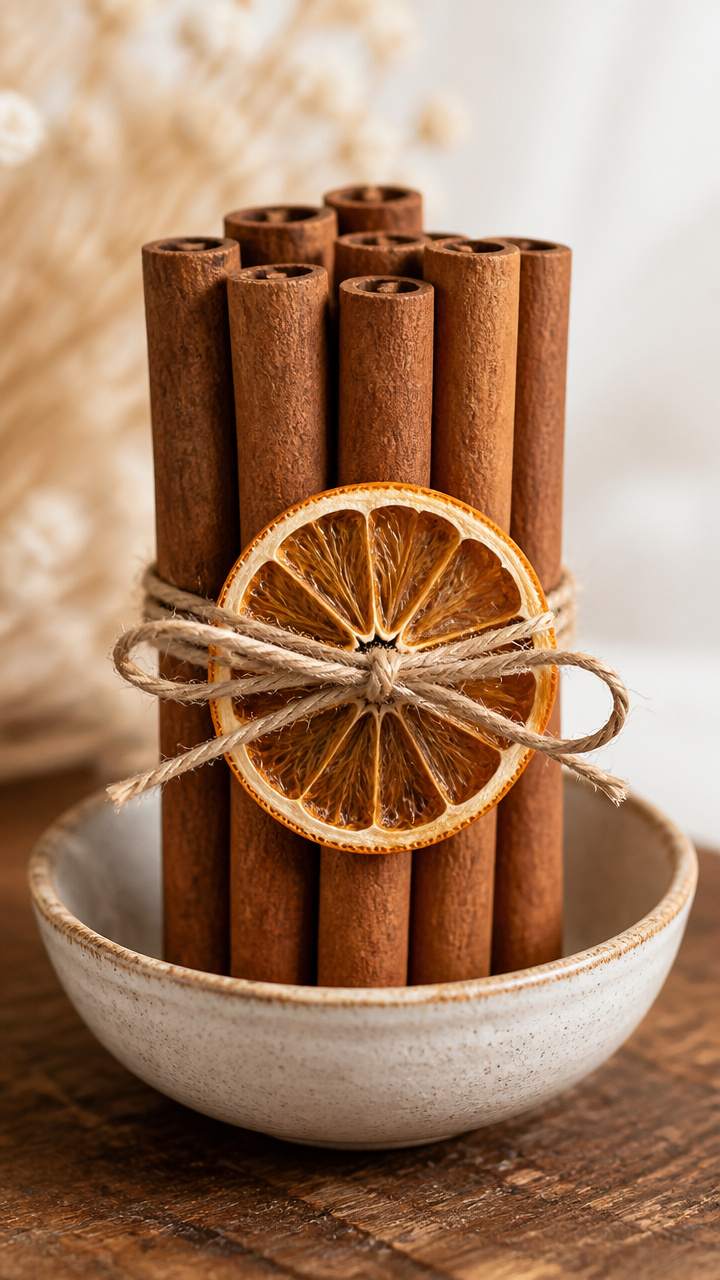
Cinnamon sticks bind with twine and a dried orange slice for fragrant table favors. They stand upright in a bowl or mug.
Materials Needed
- 20 cinnamon sticks, 3 inches
- Dried orange slice, 2 inches
- Natural twine, 10 feet
- Scissors
- Small bowl for display
How to Make It
- Group five cinnamon sticks into a bundle. Wrap twine 1 inch from the top and tie a knot.
- Slide a dried orange slice onto the twine below the knot. Pull tight to hold.
- Trim twine ends at an angle. Place three bundles in a small bowl for serving.


You’ve got everything you need to bring the heart of the season into your hands and home. Pick one craft, gather your supplies, and let the quiet joy of making begin.