20 Cute Scarecrow Craft Ideas

Autumn light turns everything golden, and scarecrows bring a cheerful charm to porches, classrooms, and craft rooms. These handmade figures remind us of harvest days and cozy afternoons spent creating with simple materials.
Each idea here is thoughtfully chosen to spark joy and creativity. You’ll find soft fabric dolls, painted rocks, paper cutouts, and more — all distinct, doable, and full of personality.
1. Burlap Face Scarecrow Plush
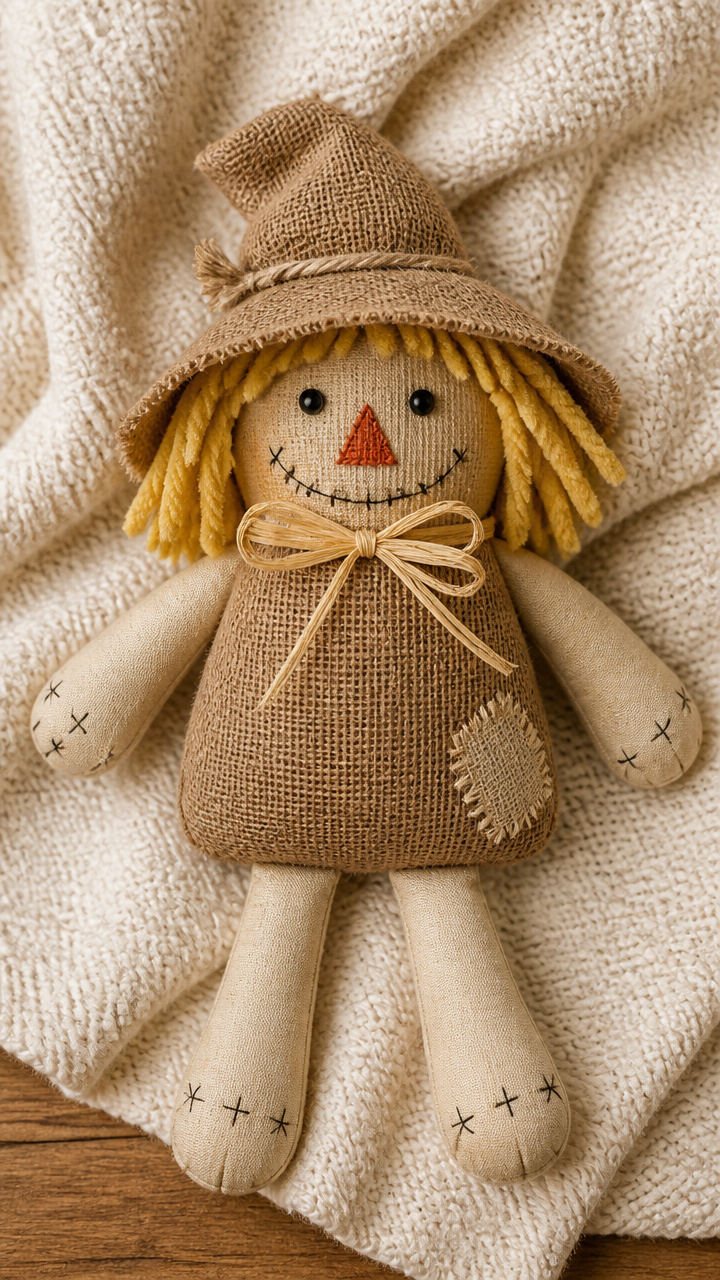
Soft burlap gives this plush doll a rustic texture that feels at home in fall decor. Its stitched face and yarn hair make it sweet without being fussy.
Materials Needed
- 1 yard brown burlap fabric
- ½ yard tan cotton fabric
- Polyester stuffing, 8 ounces
- Black embroidery floss, 2 yards
- Red embroidery floss, 1 yard
- Yellow chenille stems, 2 pieces
- Scissors
- Sewing needle
- Straight pins
- Fabric pencil
How to Make It
- Cut two 6-inch circles from burlap for the head and two 3×5-inch ovals from tan fabric for arms. Pin and sew around edges with a ¼-inch seam, leaving a 1-inch gap.
- Turn both pieces right side out and stuff the head lightly. Do not stuff the arms. Use black floss to stitch triangle eyes and a small nose on the face.
- Embroider a smiling mouth with red floss. Wrap one yellow chenille stem around each arm and pin them to the sides of the head.
- Sew the arms securely to the head using matching thread. Tie off and trim all threads.


2. Mini Mason Jar Scarecrow
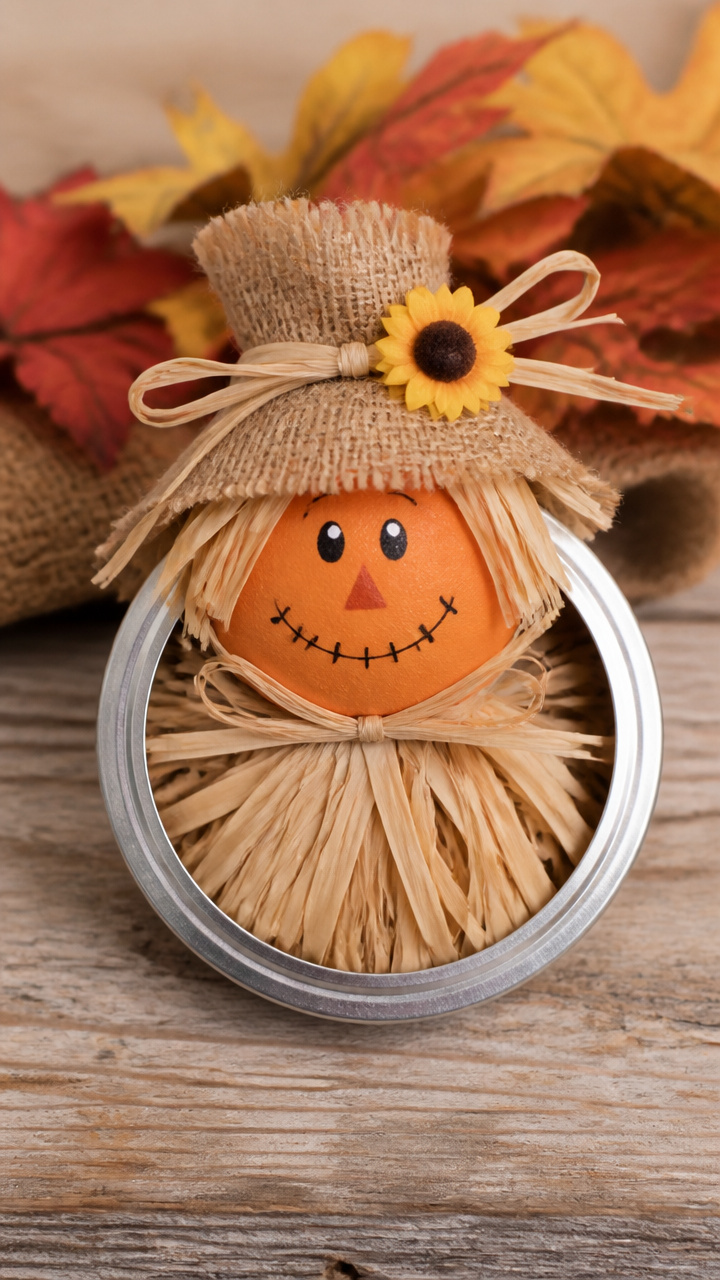
A tiny scarecrow fits perfectly inside a jar lid ring, making it ideal for table accents or shelf displays. The glass adds shine to its humble look.
Materials Needed
- 4-inch mason jar lid ring
- Small bundle of raffia, 3 inches wide
- 1-inch foam ball
- Orange acrylic paint
- Paintbrush
- Glue gun
- Scrap denim fabric, 2×2 inches
- Black permanent marker
How to Make It
- Paint the foam ball orange and let it dry completely, about 20 minutes. Use the marker to draw simple eyes, a nose, and a smile.
- Cut a 2-inch square of denim and fold it in half. Glue it around the top half of the ball so it looks like a shirt collar.
- Place a dab of hot glue on the flat side of the ball and press it into the center of the mason jar ring.
- Fan out the raffia below the head to form hair and secure the base with hot glue around the inside edge of the ring.


3. Paper Plate Hat Scarecrow
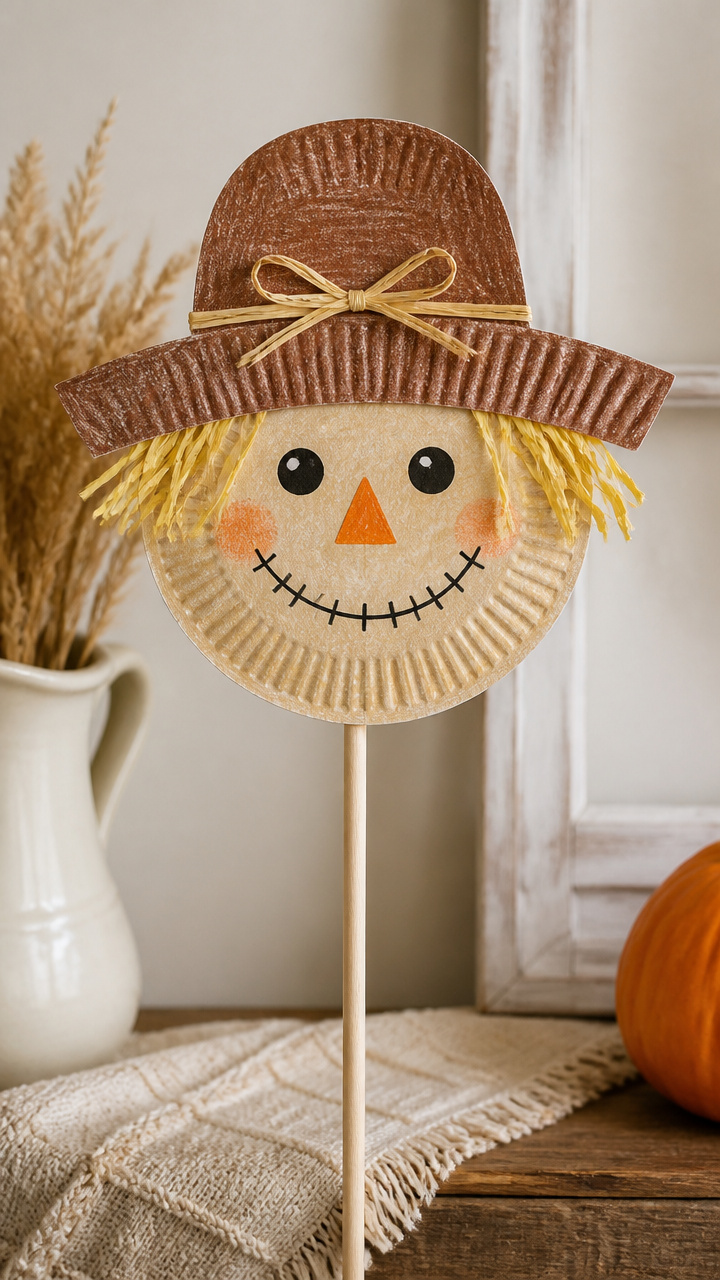
A wide-brimmed hat made from a paper plate becomes the base for a friendly face. This version stands upright on a stick for porch display.
Materials Needed
- 9-inch paper plate
- Brown crayon
- Pencil
- Ruler
- Craft knife
- Dowel rod, 12 inches long
- Glue stick
- Scrap yellow paper
- Scrap red paper
- Straw, 6 pieces
How to Make It
- Color the entire paper plate brown using the crayon. Measure 1 inch from the center and draw a circle. Cut along the line with the craft knife to remove the center.
- Slide the plate onto the dowel rod through the hole. The plate should sit near the top, forming a hat brim.
- Use the glue stick to attach straw pieces side by side across the top of the plate to mimic thatch.
- Cut facial features from yellow and red paper and glue them below the hat on the dowel. Let the glue dry for 5 minutes.
4. Felt Patchwork Scarecrow
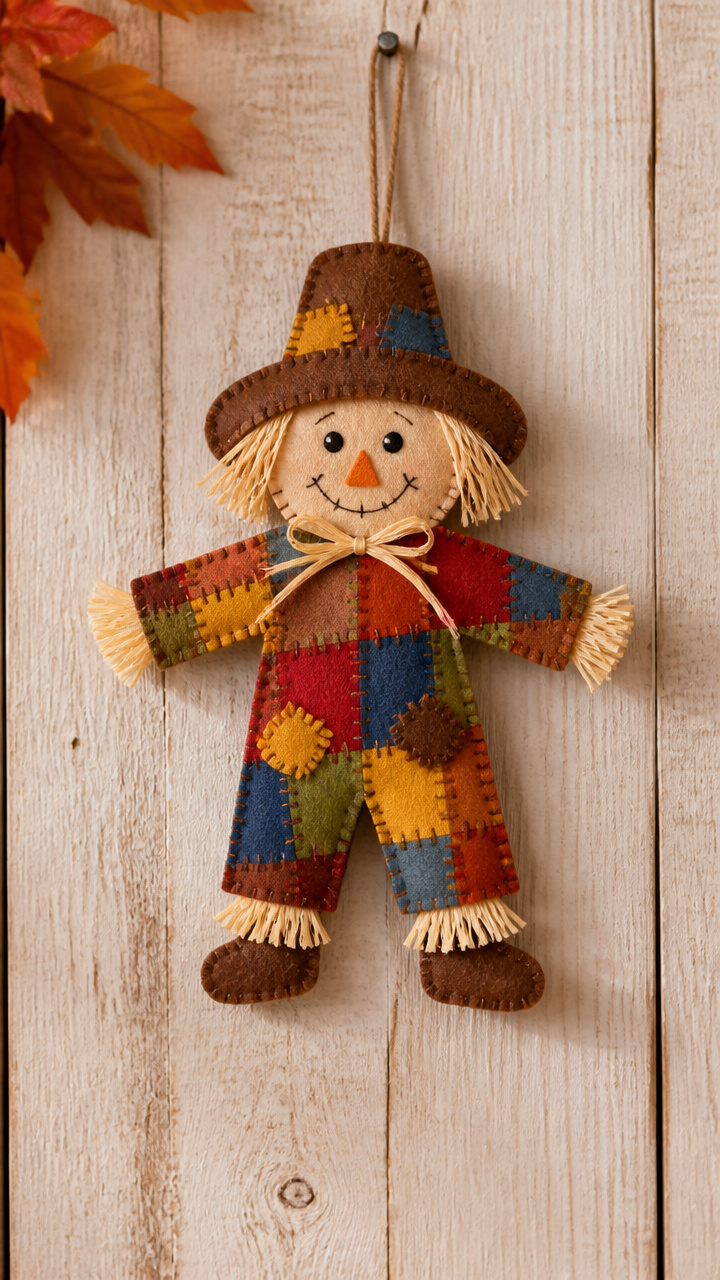
Bright mismatched felt squares give this scarecrow a quilted appearance. It hangs flat like a wall ornament but holds shape with interfacing.
Materials Needed
- Felt sheets: red, yellow, blue, green, brown (one 9×12 inch each)
- Iron-on interfacing, 9×12 inch sheet
- Scissors
- Needle
- White embroidery floss, 2 yards
- Cardboard template (scarecrow shape, 7 inches tall)
- Pencil
How to Make It
- Trace the scarecrow shape onto the dull side of the interfacing and iron it onto the back of a brown felt sheet. Cut out the shape.
- Cut small rectangles from the colored felt sheets, each 1×1 inch. Arrange them in rows on the scarecrow body like patches.
- Use a running stitch with white floss to sew each patch along two opposite edges. Knot securely at each end.
- Thread the needle through the top of the head and tie a loop for hanging.


5. Clothespin Mini Scarecrow
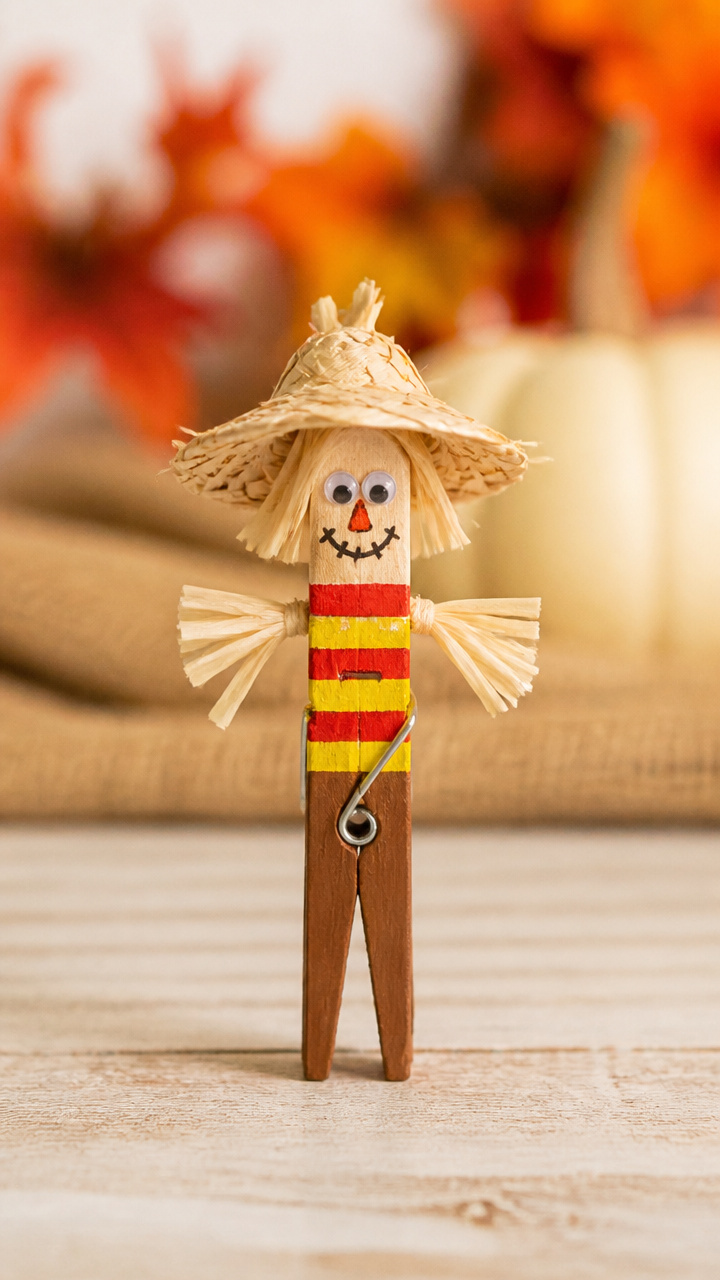
A wooden clothespin becomes a standing figure with just a few additions. Perfect for kids’ crafts or as place card holders.
Materials Needed
- Wooden clothespin, 2.5 inches long
- Acrylic paints: brown, red, yellow
- Paintbrush
- Googly eyes, 6mm, 2 pieces
- Glue dot
- Straw piece, 2 inches
- Scrap fabric, 1×3 inches
- Scissors
How to Make It
- Paint the clothespin body red and the two clamping arms yellow. Let dry for 15 minutes on a scrap paper.
- Glue the googly eyes just above the hinge. Place a dot of glue beneath them and press the straw piece horizontally to form arms.
- Cut the fabric into a 1×1 inch square and fold into a triangle. Glue it around the neck area to make a bandana.
- Let the glue set for 5 minutes before displaying.


6. Toilet Paper Roll Scarecrow
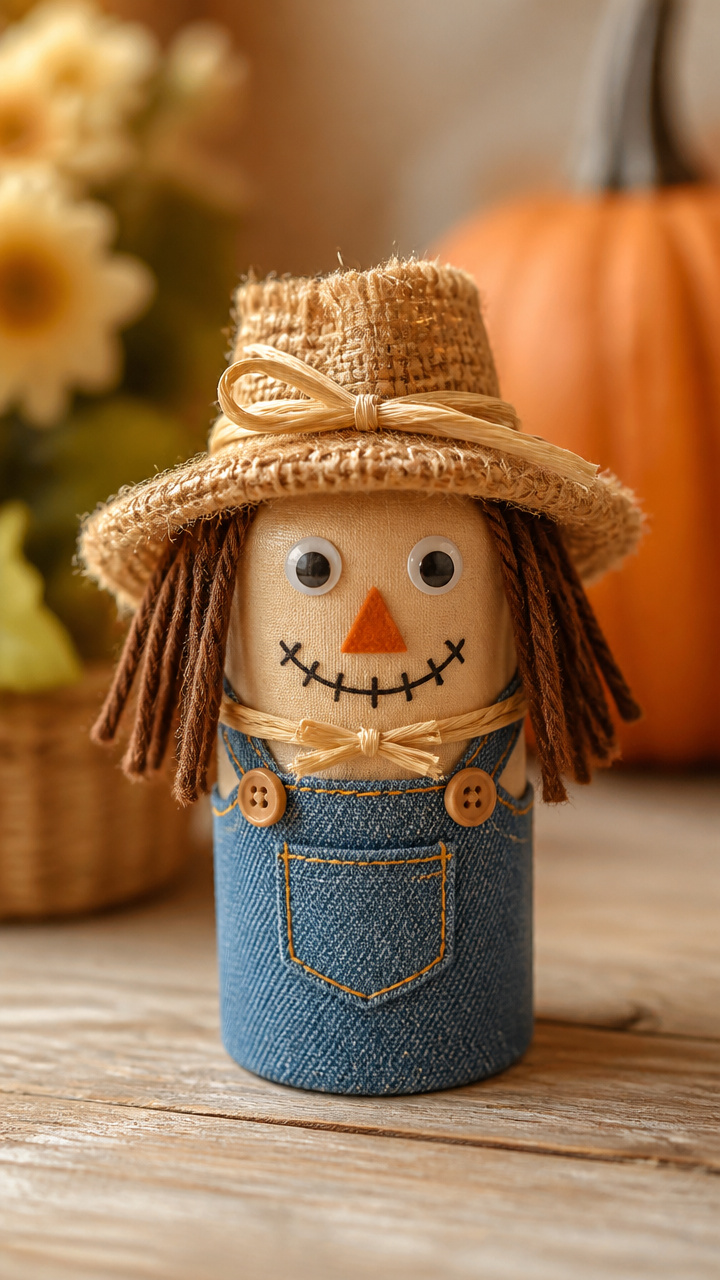
An empty toilet paper roll transforms into a round-bodied scarecrow with fabric scraps and yarn. It stands on its own with rice weight.
Materials Needed
- Empty toilet paper roll
- Rice, ¼ cup
- Glue
- Yarn, brown, 1 yard
- Scrap denim fabric, 3×4 inches
- Wiggle eyes, 8mm, 2 pieces
- Hot glue gun
- Scissors
- Orange construction paper
How to Make It
- Pour rice into the tube and seal one end with glue. Let it dry flat for 20 minutes so the base is flat.
- Wrap the yarn around the upper half of the tube to create hair. Secure ends with dabs of hot glue.
- Cut the denim into a 3-inch strip and wrap it around the middle of the tube to form overalls. Glue in place.
- Glue on the wiggle eyes. Cut a small carrot shape from orange paper and glue it below the eyes for a nose.


7. Popsicle Stick Scarecrow Frame
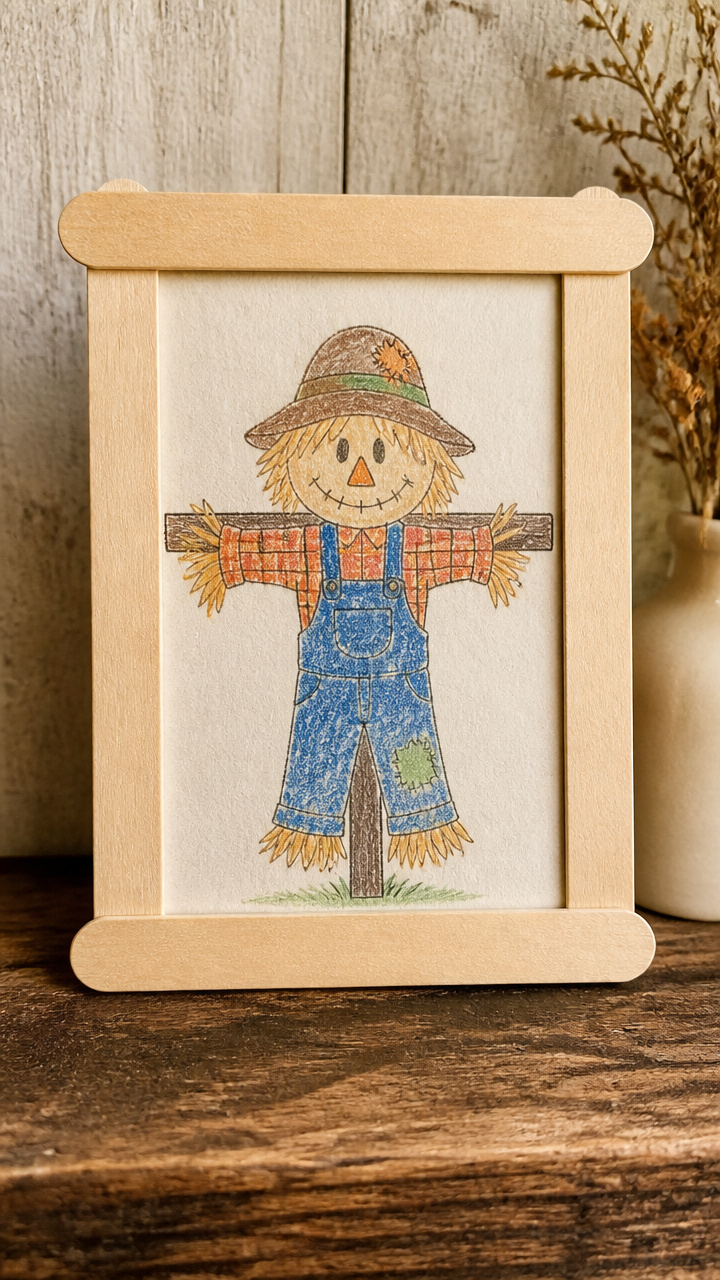
Five popsicle sticks form a tiny frame that holds a miniature scarecrow drawing. It stands upright on a desk or windowsill.
Materials Needed
- 5 unpainted popsicle sticks
- White glue
- Small scarecrow coloring printout, 1.5 inches tall
- Crayons
- Ruler
- Scissors
- Brown marker
How to Make It
- Color the scarecrow printout with crayons. Cut it out carefully along the edges.
- Lay three sticks side by side. Place one stick vertically across the center of the trio, forming a T. Glue all intersections.
- Add the fifth stick diagonally from top left to bottom right across the back to brace the frame. Hold each joint for 10 seconds.
- Slip the colored image behind the front sticks and tilt the frame to stand.
![Popsicle Stick Cottage Model Kit – 350+ Pre-Cut Wooden Pieces – Rustic DIY House Craft for Kids and Adults – Complete Kit [Everything Included] by POPSI KITS](https://m.media-amazon.com/images/I/41ipWx9Y9CL._SL500_.jpg)


8. Scarecrow Rock Painting
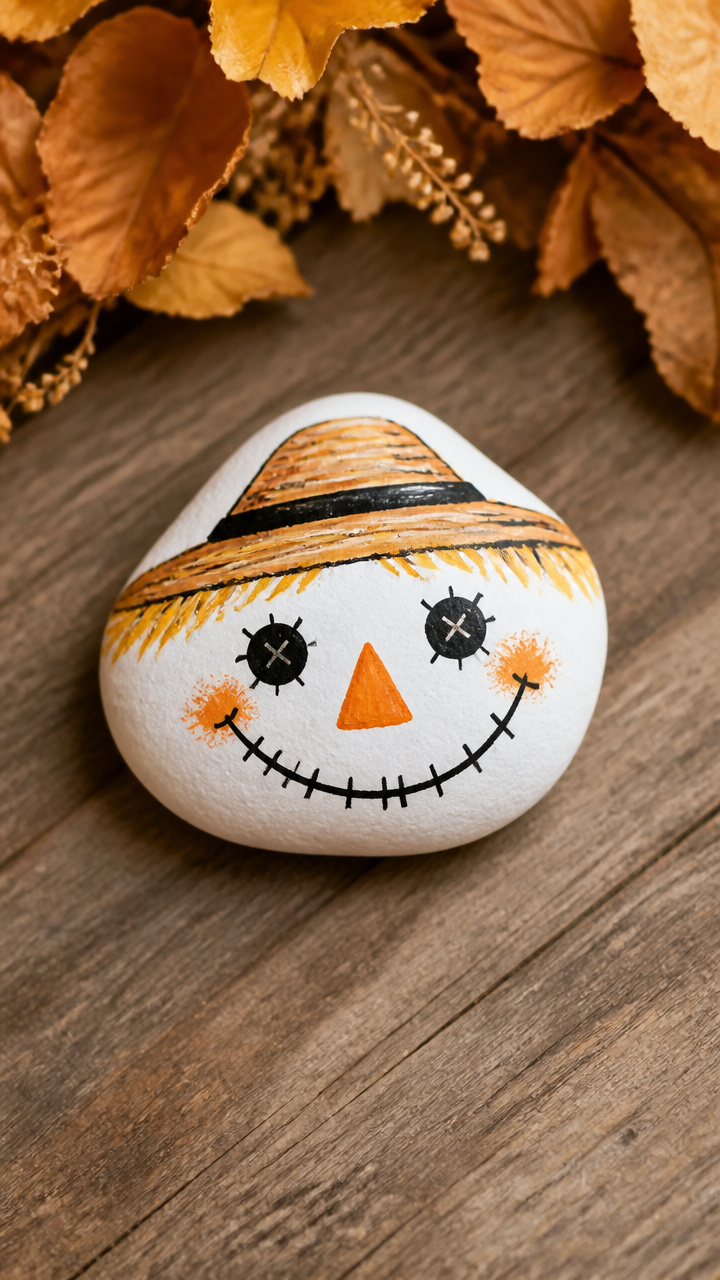
A smooth river rock becomes a durable outdoor decoration with hand-painted details. Rain won’t wash away this cheerful face.
Materials Needed
- Smooth river rock, 3 inches long
- White acrylic paint
- Paintbrush
- Black and orange permanent markers
- Clear spray sealer
- Paper plate
How to Make It
- Paint the top half of the rock white and let it dry for 30 minutes on a paper plate.
- Draw a wide-brimmed hat with the black marker, covering the upper third. Add stitching lines with short dashes.
- Use the orange marker to draw a triangle nose and dots for cheeks. Draw a curved smile beneath the nose.
- Spray the entire rock with clear sealer and let it dry for 1 hour in a well-ventilated area.


9. Scarecrow Button Buddy
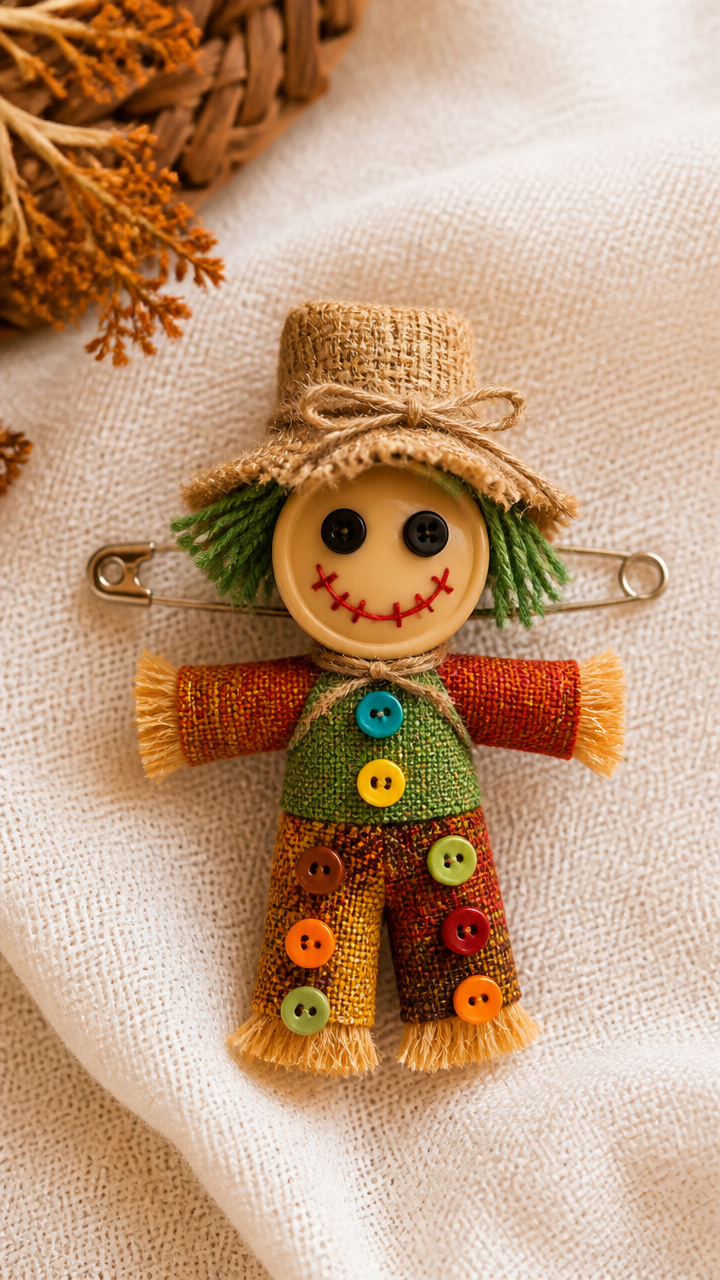
A large button acts as the face base, with smaller buttons for clothing. This buddy clips onto bags or jackets.
Materials Needed
- Large two-hole button, 1.5 inches diameter
- Assorted small buttons, 5 pieces
- Green embroidery floss, 1 yard
- Safety pin backing, 1 piece
- Needle
- Glue gun
How to Make It
- Thread the needle with green floss and sew three small buttons down the front of the large button to look like buttons on a shirt.
- Use hot glue to attach two tiny black buttons near the top for eyes.
- Sew the safety pin backing to the back of the large button using strong stitches through the holes.
- Tie off the floss on the back and trim excess.


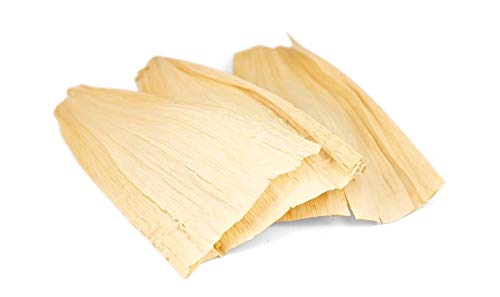
10. Scarecrow Corn Husk Doll
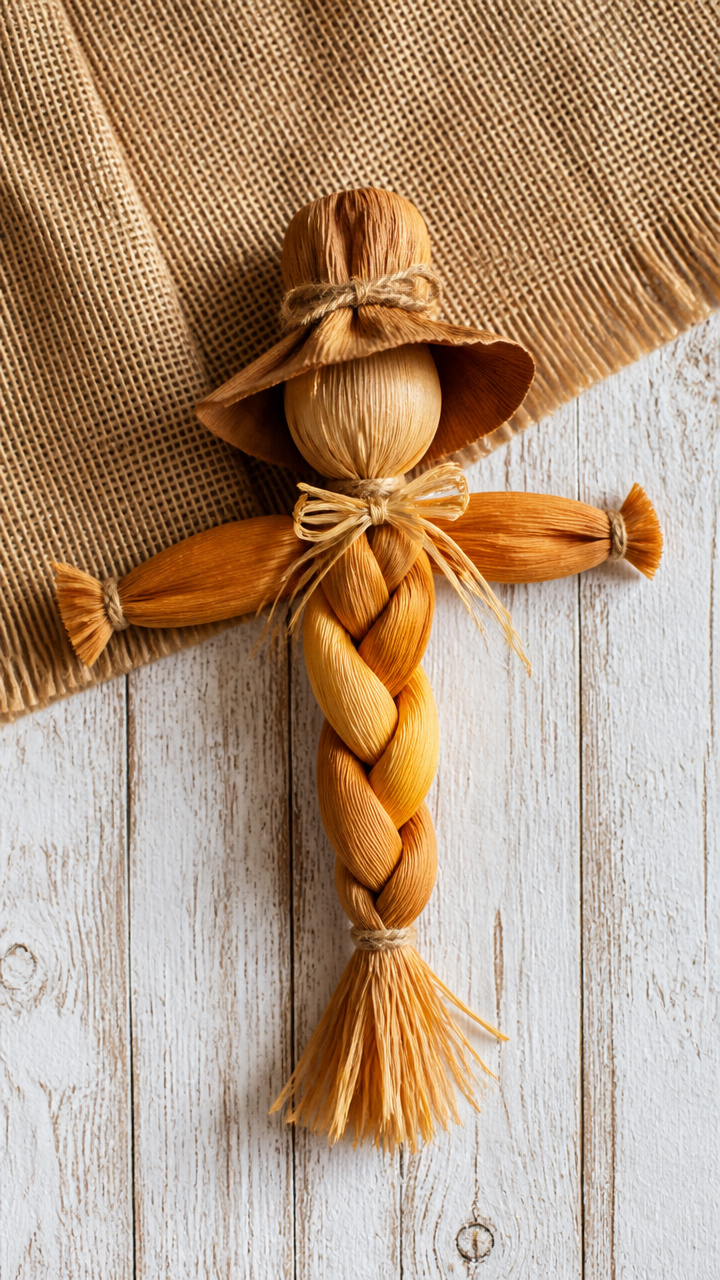
Dried corn husks braid into a traditional-style doll with a floppy hat. Natural tones make it perfect for farmhouse tables.
Materials Needed
- 4 dried corn husks, softened in water for 10 minutes
- Twine, 12 inches
- Raffia, 6 inches
- Scissors
- Bowl of water
How to Make It
- Lay two husks parallel and place the other two perpendicularly across the center to form a cross. Overlap ends slightly.
- Tie twine tightly around the center intersection. Wrap five times and knot securely.
- Fold the vertical husks upward to form arms. Tie raffia around the top to create a bundle like a head.
- Shape the horizontal husks into legs and trim uneven ends. Let dry on a towel for 2 hours.

11. Scarecrow Pinecone Body
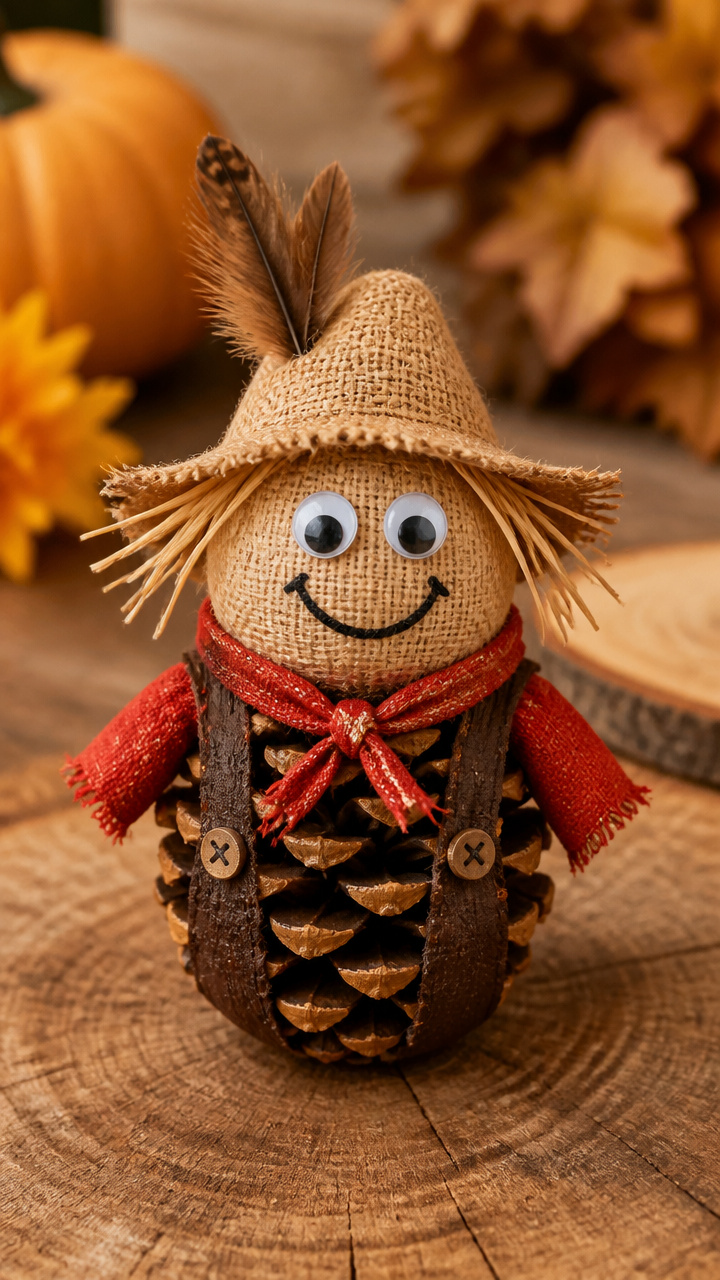
A pinecone’s natural ridges mimic overalls when painted and dressed with a fabric shirt. It wobbles cutely on its base.
Materials Needed
- Medium pinecone
- Red fabric scrap, 2×2 inches
- White glue
- Wiggle eyes, 4mm, 2 pieces
- Brown paint pen
- Feathers, 2 small
- Scissors
How to Make It
- Cut the fabric into a 2-inch square. Fold it diagonally and tuck it under the top scales of the pinecone to form a shirt.
- Glue the fabric in place and add the wiggle eyes just below the fabric edge.
- Use the brown paint pen to draw shoe shapes on the bottom two points of the pinecone.
- Glue one feather on each side of the head area to look like hair.

12. Scarecrow Paper Bag Puppet
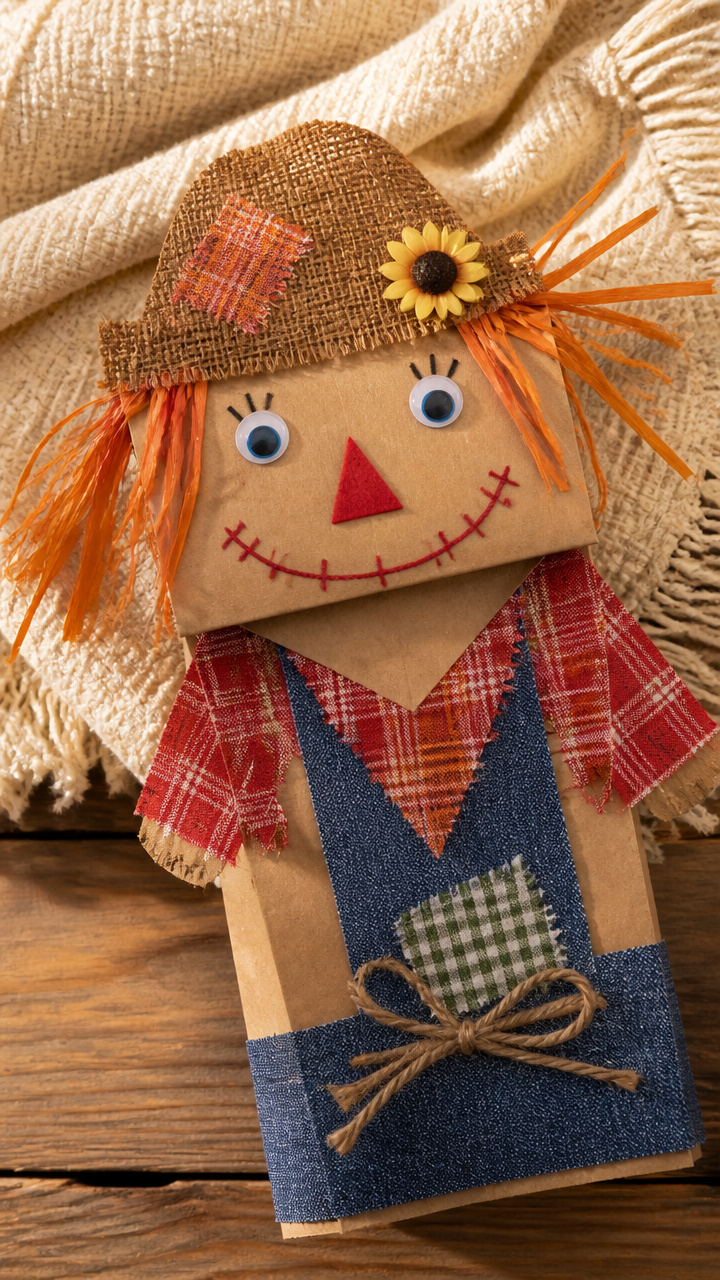
A lunch bag turns into a talking puppet with hand movement and expressive features. Great for storytelling with children.
Materials Needed
- Brown paper lunch bag
- Construction paper: orange, red, blue
- Glue stick
- Scissors
- Black marker
- Raffia, 4 inches
How to Make It
- Cut a carrot shape from orange paper and glue it to the center of the bag flap for a nose. Draw a smile below with the marker.
- Cut two circles from red paper and glue them on the sides of the nose for rosy cheeks.
- Cut a blue overalls shape with straps from blue paper and glue it below the nose, letting it hang over the bag body.
- Glue raffia along the top edge of the flap to form hair. Let hands move the flap to talk.


13. Scarecrow Beaded Ornament
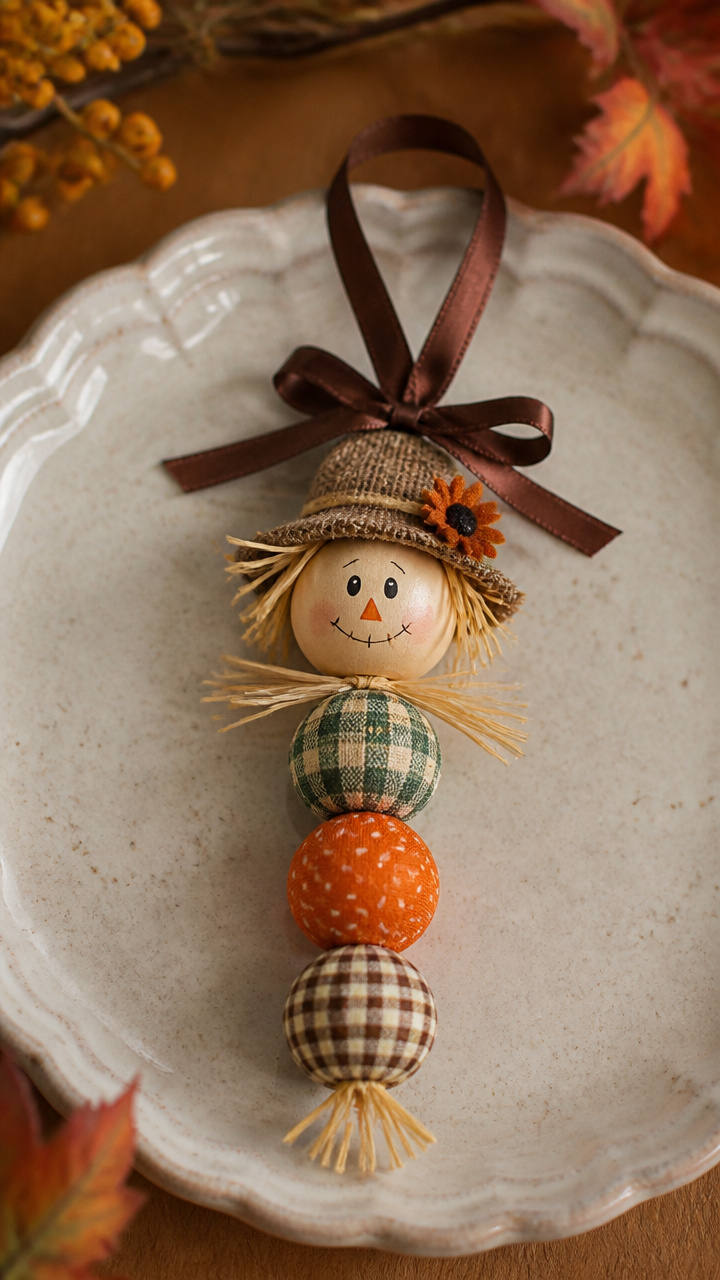
Wood beads stack into a jingle-free holiday-style ornament with fabric scraps for texture. Hangs from a satin ribbon.
Materials Needed
- Wood beads: one 20mm round, two 10mm rounds
- Satin ribbon, ¼ inch wide, 8 inches
- Fabric scrap, 1×2 inches
- Tacky glue
- Beading needle
- Embossing tool or pencil
How to Make It
- Thread the beading needle with the ribbon and pass it through the largest bead first. Tie a knot below it to hold in place.
- Slide the two small beads on top to form a face. Use the embossing tool to press shallow eye and mouth marks into the top bead.
- Cut the fabric into a tiny bandana shape and glue it around the neck between beads.
- Tie the ends of the ribbon together at the top to form a hanger. Let glue dry for 30 minutes.


14. Scarecrow Chalkboard Sign
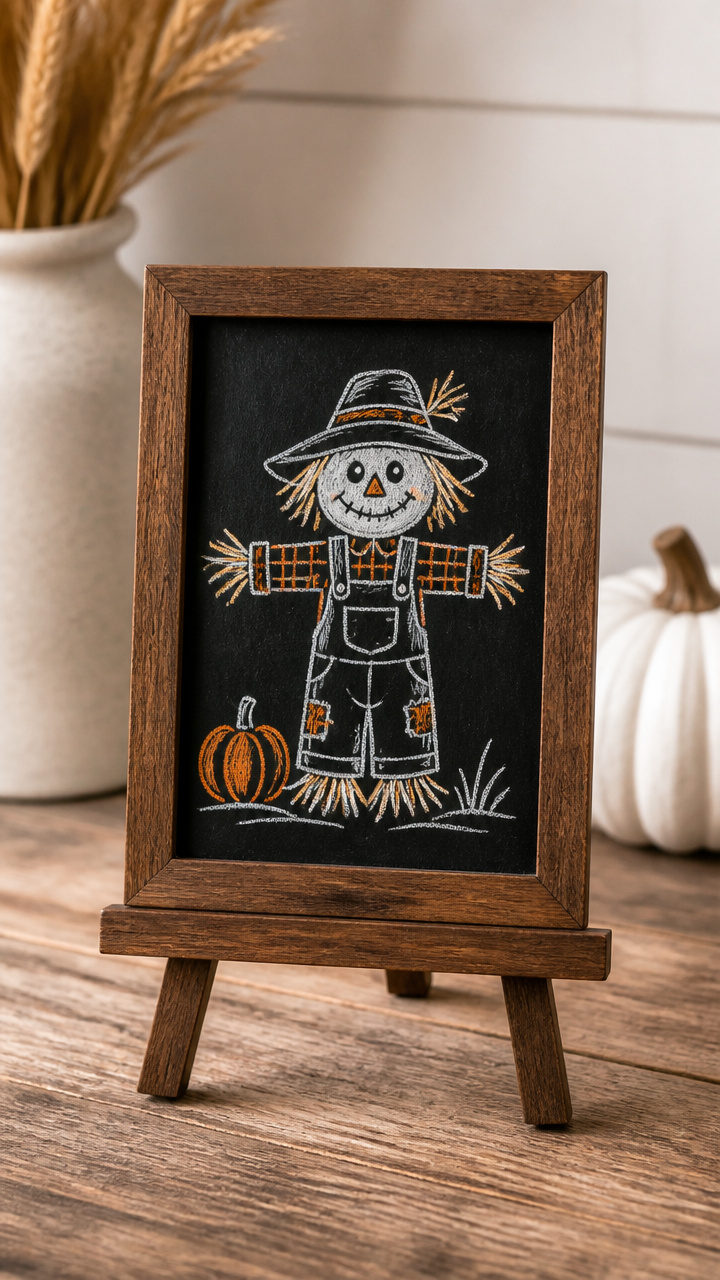
A mini chalkboard displays a drawn scarecrow you can change daily. The wooden frame holds it upright on a shelf.
Materials Needed
- 4×6 inch chalkboard panel
- Chalk: orange, black, white
- Wood picture easel, 5 inches tall
- Glue
- Ruler
- Eraser cloth
How to Make It
- Place the chalkboard on the easel and secure the back with a dab of glue at the bottom corners.
- Use white chalk to draw a wide hat brim across the top third. Shade the underside with light strokes.
- Draw a round face below with black chalk. Add triangle nose, dot eyes, and a curved smile.
- Write “Hello Fall” beneath with orange chalk. Wipe clean with the eraser cloth to reuse.


15. Scarecrow Sock Doll
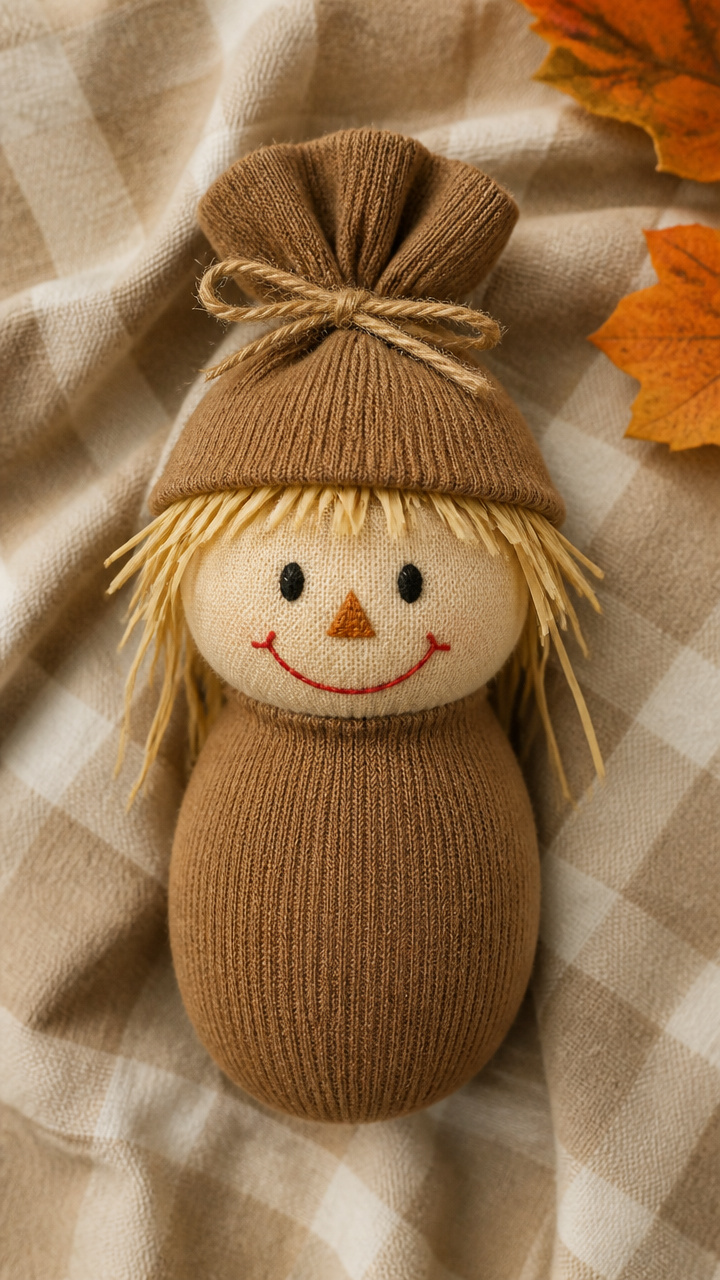
An old crew sock fills with rice and becomes a soft huggable figure. Its face is safe for little ones with embroidered details.
Materials Needed
- Brown crew sock
- Rice, 1 cup
- Funnel
- Needle
- Black embroidery floss, 1 yard
- Red embroidery floss, 6 inches
- Rubber band
- Scissors
How to Make It
- Use the funnel to pour rice into the sock up to the ankle. Tie the open end with a rubber band.
- Sew a triangle nose with black floss on the heel. Stitch two dots for eyes above it.
- Use red floss to backstitch a small smile below the nose. Knot securely on the inside.
- Fold the remaining sock fabric down to form a floppy hat and tuck it gently.


16. Scarecrow Leaf Collage
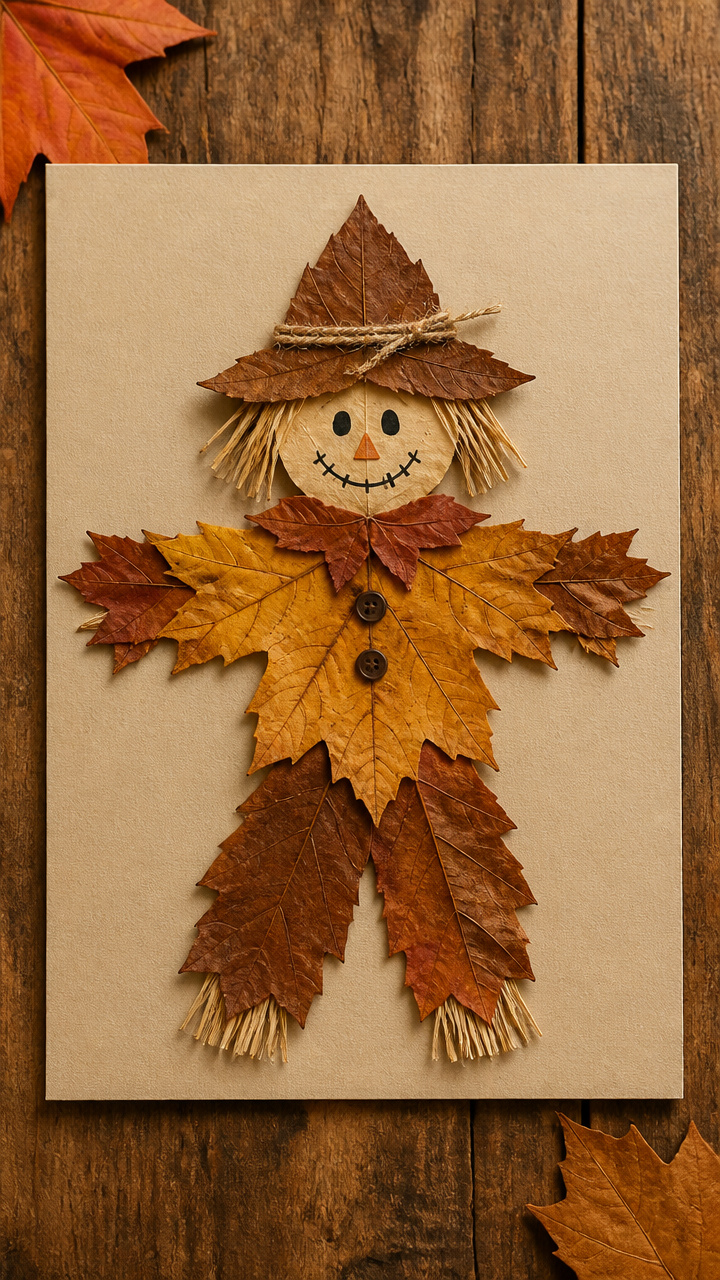
Real pressed leaves form a scarecrow shape on stiff paper. Each one varies slightly, making no two alike.
Materials Needed
- Pressed maple and oak leaves, 8 pieces
- 8×10 inch stiff cardboard
- White glue
- Tweezers
- Spray varnish
How to Make It
- Arrange one large leaf upside down at the top for the head. Use tweezers to place it precisely.
- Set two medium leaves below as arms, angled outward. Layer two narrow leaves vertically for legs.
- Glue each leaf in place and let dry flat for 2 hours. Add a tiny leaf on top as a hat.
- Spray lightly with varnish to preserve and deepen colors. Dry for 1 hour.


17. Scarecrow Salt Dough Figure
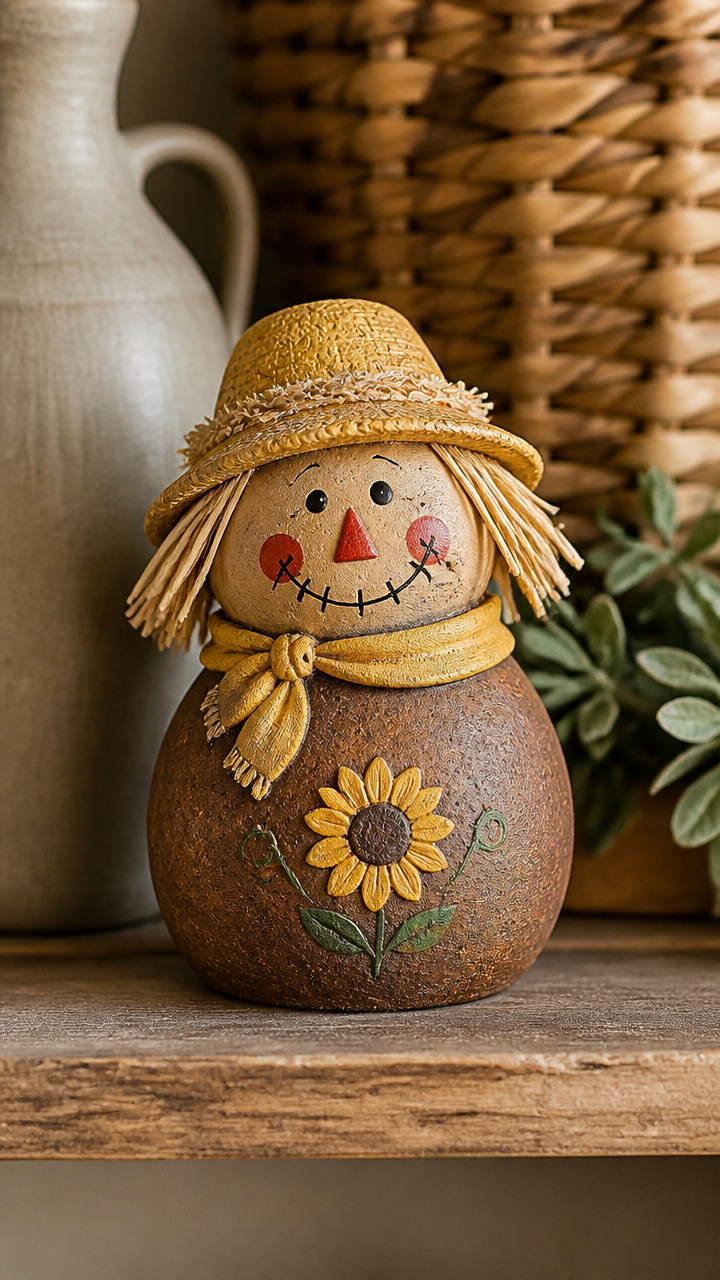
Homemade salt dough bakes into a sturdy sculpture you can paint and seal. It keeps its shape for years on a shelf.
Materials Needed
- Salt dough: 1 cup flour, ½ cup salt, ½ cup water
- Rolling pin
- Butter knife
- Baking sheet
- Parchment paper
- Acrylic paints: brown, red, yellow
- Clear sealant
How to Make It
- Mix ingredients in a bowl until smooth. Roll to ½ inch thickness and cut a scarecrow shape with the knife.
- Place on a parchment-lined baking sheet. Bake at 200°F for 3 hours until hard.
- Let cool completely. Paint a hat, face, and shirt with acrylics. Let dry 30 minutes.
- Apply one coat of sealant and let dry for 2 hours.


18. Scarecrow Tin Can Bank
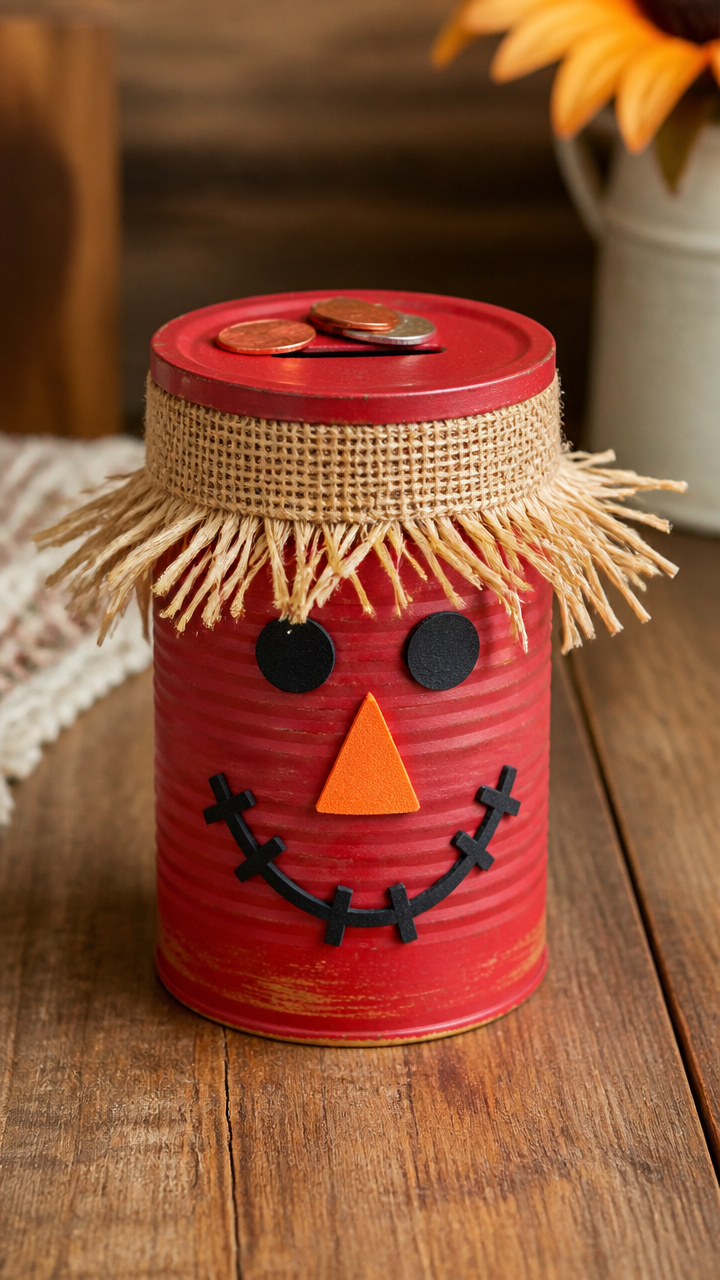
A cleaned tin can gains a scarecrow face and slots for coins. It teaches saving while holding seasonal charm.
Materials Needed
- Empty soup can, label removed
- Red acrylic paint
- Paintbrush
- Craft foam: orange, black
- Scissors
- Glue
- Utility knife
- Sandpaper
How to Make It
- Paint the can red and let dry for 1 hour. Sand any sharp edges on the rim.
- Cut a coin slot 1 inch wide and 2 inches tall near the top using the utility knife. Smooth edges with sandpaper.
- Cut a carrot nose from orange foam and glue it to the center. Add two black foam circles for eyes.
- Let the glue dry for 20 minutes before use.

19. Scarecrow Egg Carton Head
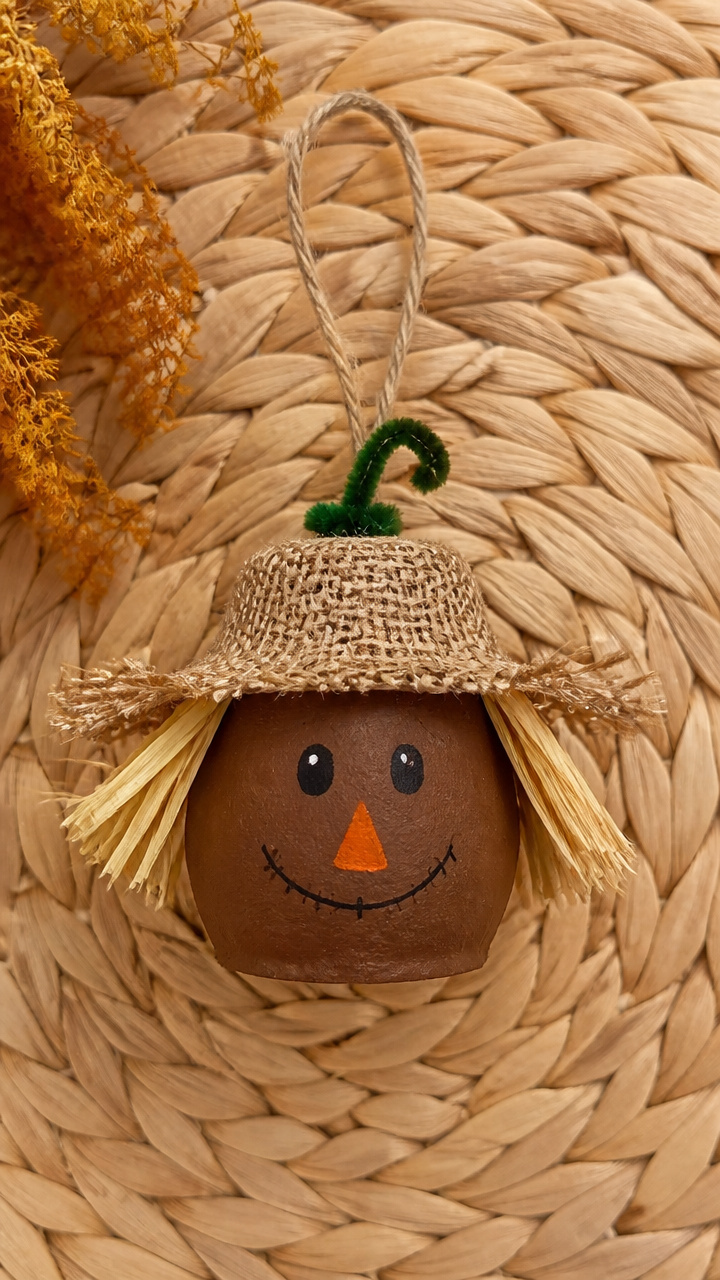
One cup from an egg carton curves into a 3D face with painted details. Lightweight and easy to hang with thread.
Materials Needed
- Cardboard egg carton
- Scissors
- Brown acrylic paint
- Paintbrush
- Green pipe cleaner, 6 inches
- Glue
- Yellow pom-pom, 1 inch
How to Make It
- Cut one cup from the carton with scissors. Trim the rounded edge evenly so it sits flat.
- Paint the entire cup brown and let dry for 30 minutes.
- Glue the yellow pom-pom just above the front for a hat puff. Bend the pipe cleaner into a U and glue it on the sides for arms.
- Use a black marker to draw a face on the front. Poke a small hole at the top and thread string through to hang.


20. Scarecrow Clothesline Display
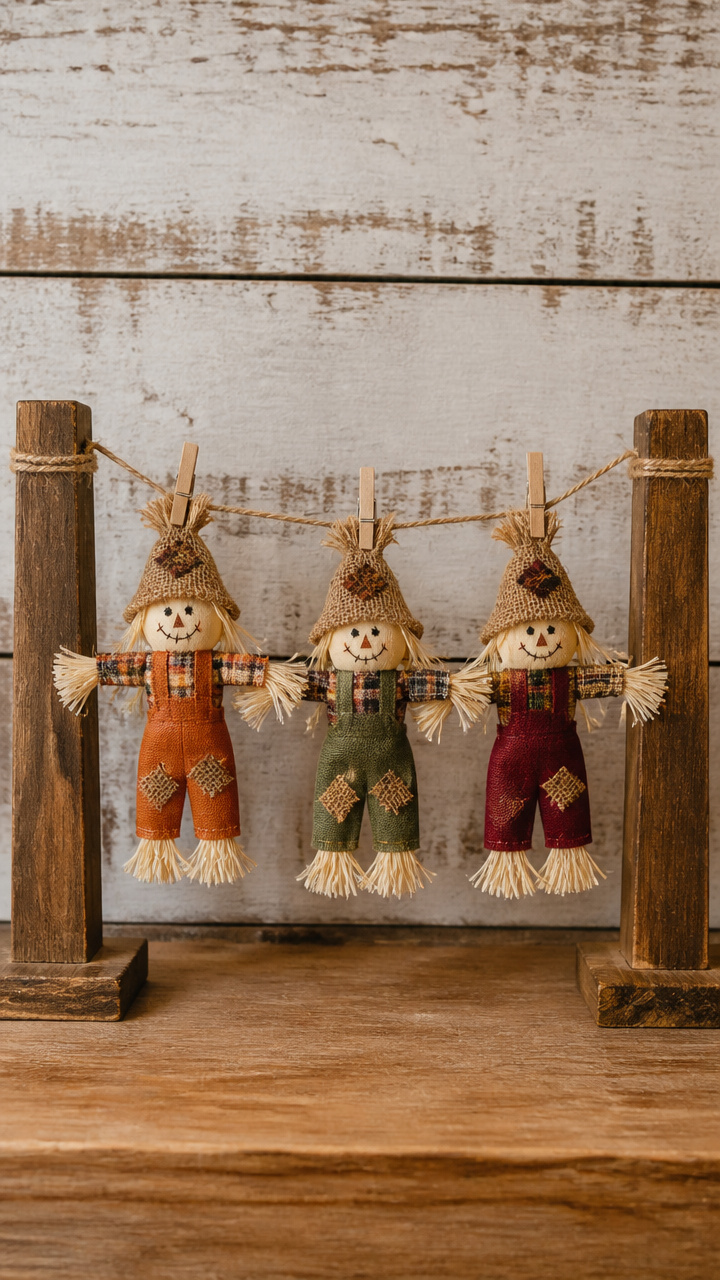
Three mini scarecrows dangle from a real clothesline cord stretched between two blocks. It brings motion and whimsy to a mantle.
Materials Needed
- Clothesline cord, 24 inches
- Wood blocks, 2x2x2 inches, 2 pieces
- Hot glue gun
- 3 mini scarecrow figures (use clothespin or sock versions)
- Nail, 1 inch
- Hammer
How to Make It
- Hammer the nail partway into the top center of each wood block. Wrap the cord end around one nail and tie securely.
- Stretch the cord between blocks and tie the other end to the second nail. Keep it taut.
- Clip each mini scarecrow onto the line with small binder clips or string loops.
- Let the display rest on a flat surface where the cord stays level.


Each of these scarecrows carries a bit of warmth and a smile waiting to happen. Pick one that calls to you and gather what you need, because the best creations start with a single step.