15 Adorable Letter H Crafts for Preschoolers
Little hands love making big discoveries through craft time. Shaping the letter H with playful materials helps preschoolers build recognition and fine motor skills without even realizing they're learning.
Each of these crafts uses simple supplies you likely have at home. They’re designed to be fun, focused, and finished in one sitting.
1. Handprint Hedgehog
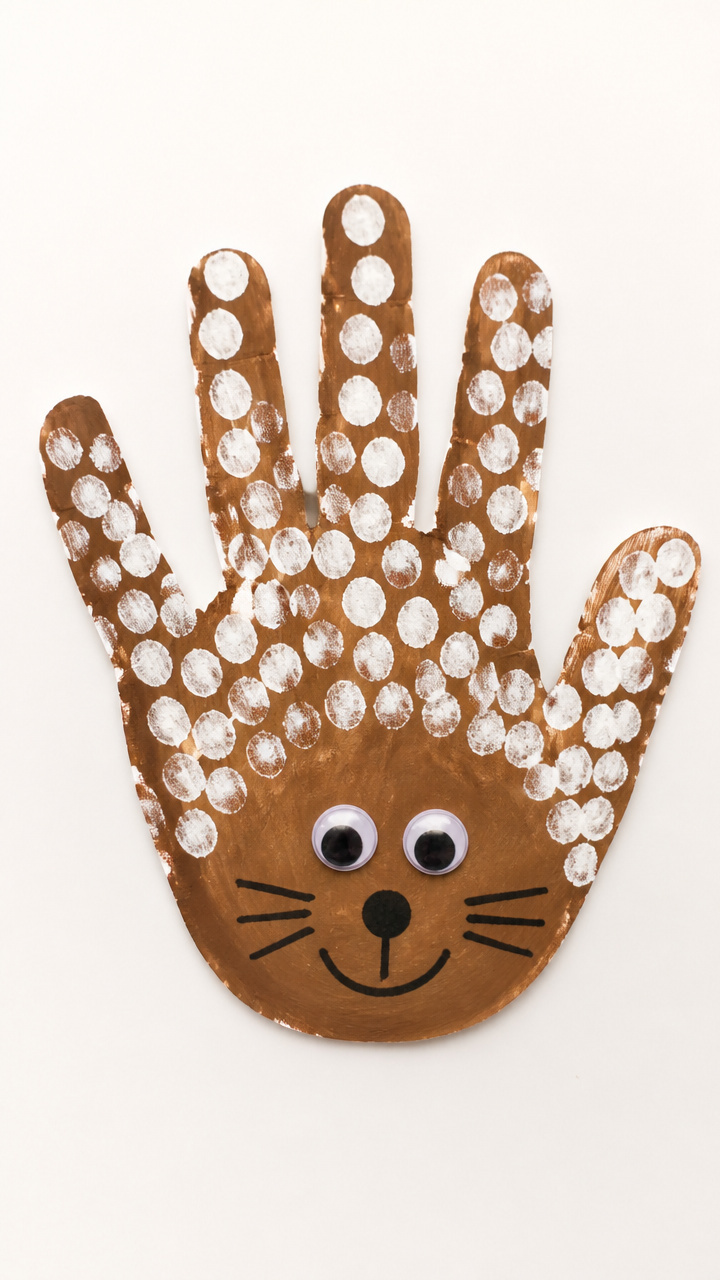
A fuzzy hedgehog with an H-shaped body teaches letter shape through hand painting and texture play. Kids love seeing their hand become part of the art.
Materials Needed
- White finger paint
- Brown acrylic paint
- Black marker
- A4 white cardstock
- Googly eyes (2 per child)
- Glue stick
- Scissors
- Cotton balls (10 per child)
How to Make It
- Press your child’s palm into white finger paint and stamp it sideways on the cardstock to form the round body.
- Use brown acrylic paint to dab short vertical lines above the handprint for spiky hair, shaping them into an H outline.
- Glue two googly eyes near the thumb edge and draw a small nose and mouth with the black marker.
- Stick cotton balls below the handprint to create fluffy belly fur.


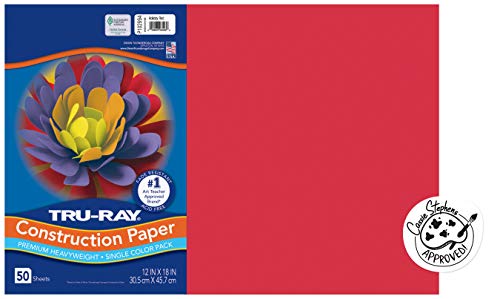
2. H is for Heart Wreath
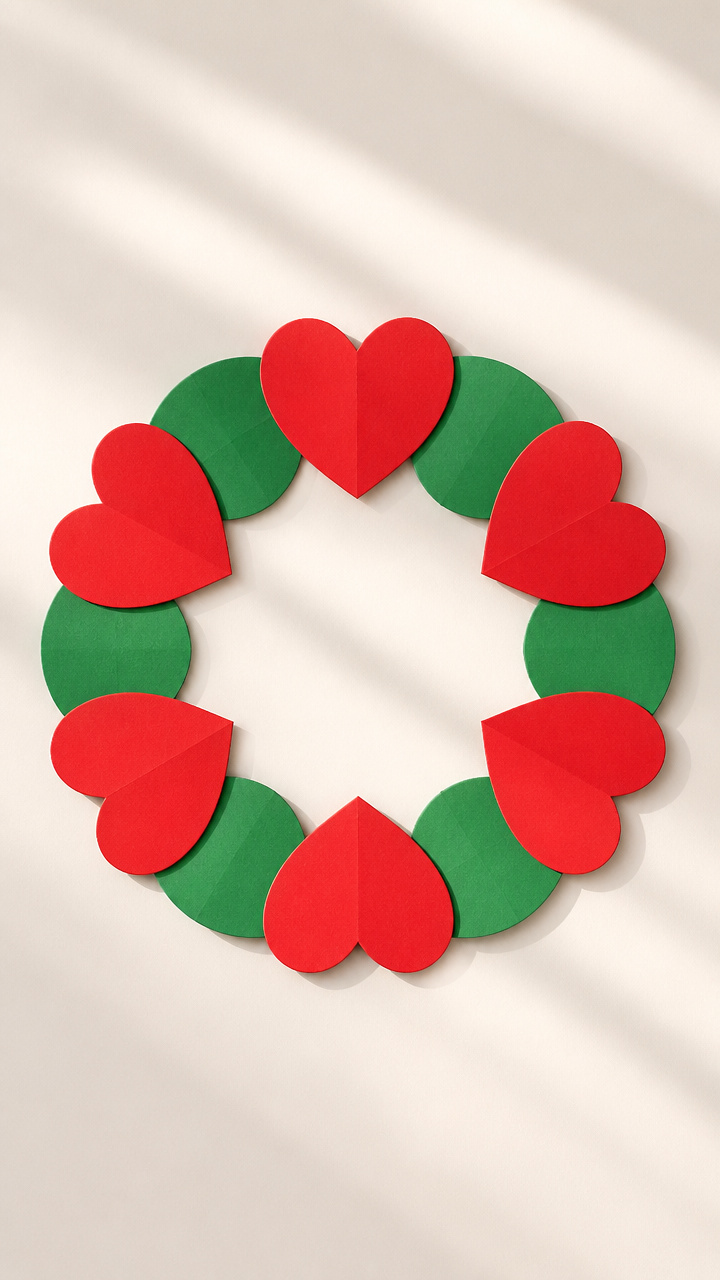
Tiny red hearts arranged in a ring form a soft H-shaped center, blending letter learning with holiday charm. It’s perfect for Valentine’s Day or kindness themes.
Materials Needed
- Red construction paper (one sheet per child)
- Green construction paper (one quarter sheet per child)
- Circle punch (1.5 inch diameter)
- Glue stick
- Scissors
- Pencil
- Yarn (12 inches per child)
How to Make It
- Cut the red paper into 12 heart shapes using the circle punch and folding technique: fold paper, draw half-heart, cut, unfold.
- Draw a large lowercase h lightly in pencil on the green paper.
- Glue six hearts along each vertical line of the h, slightly overlapping them.
- Punch a hole at the top and thread yarn through for hanging.


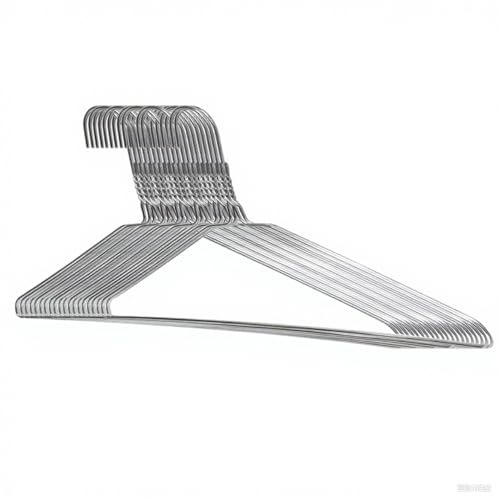
3. Hanger H Sculpture
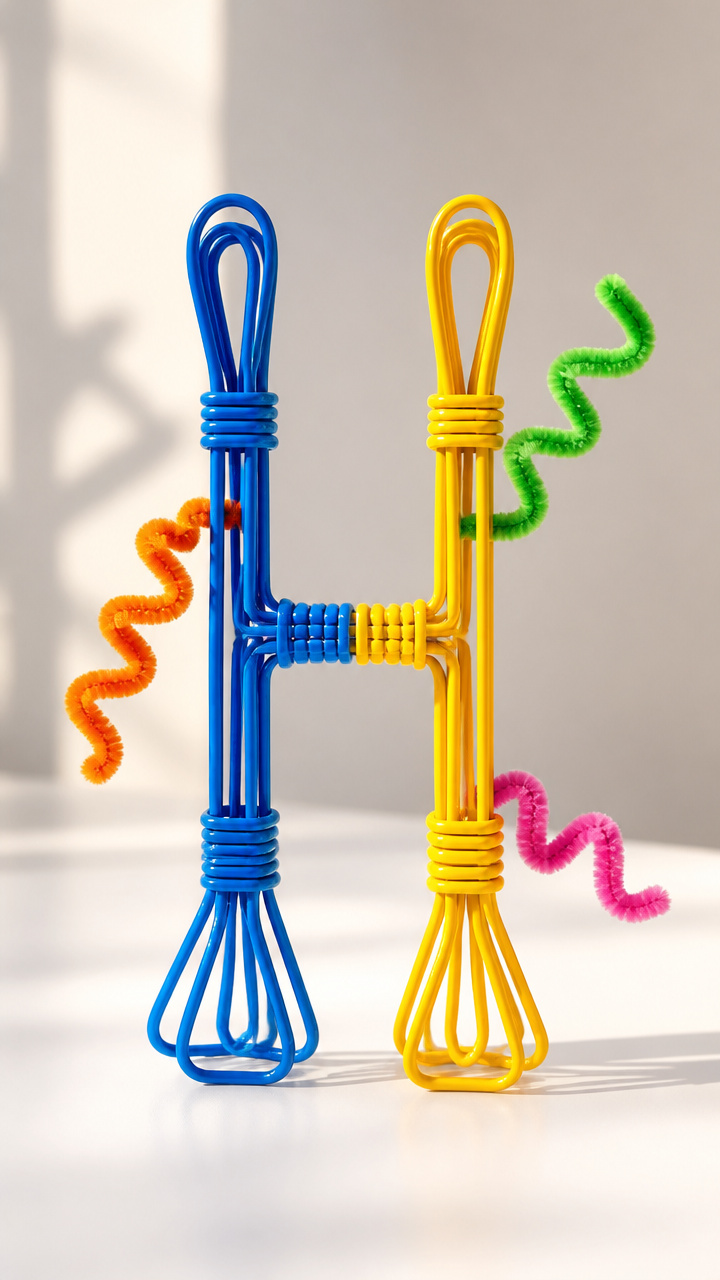
A bent wire coat hanger becomes a 3D letter H kids can paint and decorate. The sturdy base invites sensory exploration and display pride.
Materials Needed
- Wire coat hangers (one per child)
- Masking tape
- Acrylic paint (two colors per child)
- Paintbrushes (size 6)
- Pipe cleaners (3 per child)
- Plastic tray
How to Make It
- Wrap masking tape around the curved top of the hanger to make it safe and give paint something to grip.
- Set the hanger on a plastic tray and let your child paint the uprights and crossbar with two different colors.
- Once dry, twist one pipe cleaner horizontally between the uprights to reinforce the H shape.
- Attach two more pipe cleaners at the top as antennae or decorations.


4. Hammered H Nail Board
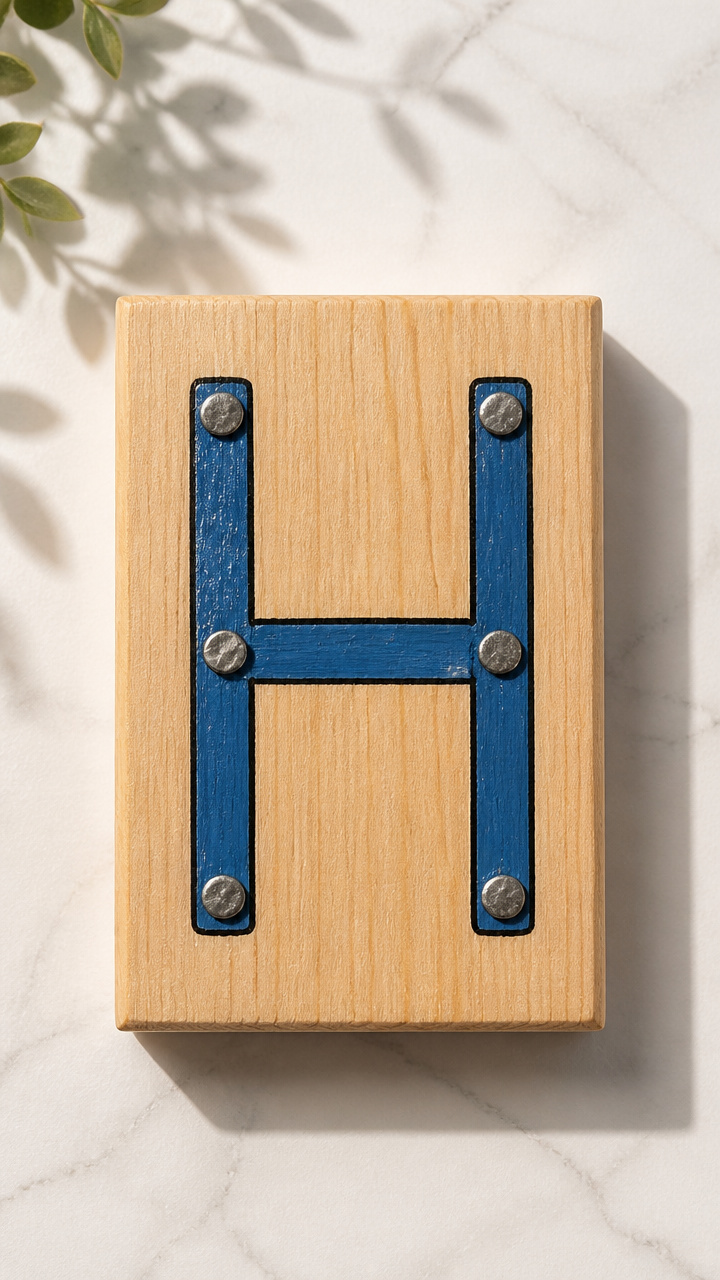
A wooden board with pre-marked H nails lets kids tap gently with a real hammer. This tactile project builds coordination and confidence.
Materials Needed
- Softwood block (6x4x1 inches per child)
- 6 finishing nails (1 inch long per child)
- Hammer (child-sized)
- Permanent black marker
- Sandpaper (medium grit)
- Blue acrylic paint
- Paintbrush
How to Make It
- Sand the wood block smooth and wipe clean. Draw a large capital H with the marker.
- Place one nail at the top and bottom of each upright bar and one at each end of the crossbar.
- Let your child tap each nail into place with the hammer, guiding hand-over-hand if needed.
- Paint the background blue with the brush and let dry completely.


5. Haystack Playdough Mat
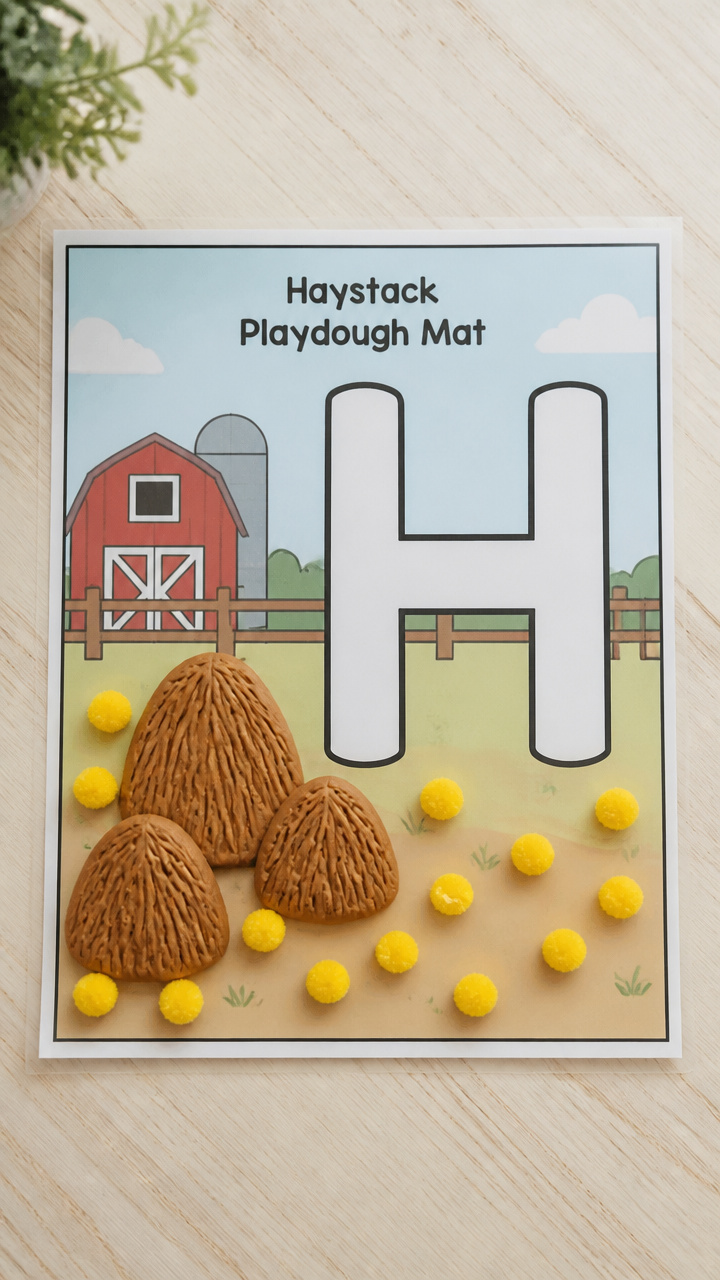
Rolled playdough snakes coil into an H on a farm-themed mat. This open-ended craft encourages storytelling alongside letter practice.
Materials Needed
- Brown playdough (one golf ball size per child)
- Laminated activity mat (8.5×11 inches, printed with barn, fence, and H outline)
- Plastic knife
- Yellow pom poms (15 per child)
- Glue stick
How to Make It
- Roll the playdough into two long, straight snakes and lay them vertically on the mat where the H uprights go.
- Use the plastic knife to cut a shorter snake and press it across the middle to complete the H.
- Glue yellow pom poms around the base of the H to look like scattered hay.
- Store the mat and dough separately for reuse.


6. Helicopter Paper Cup Craft
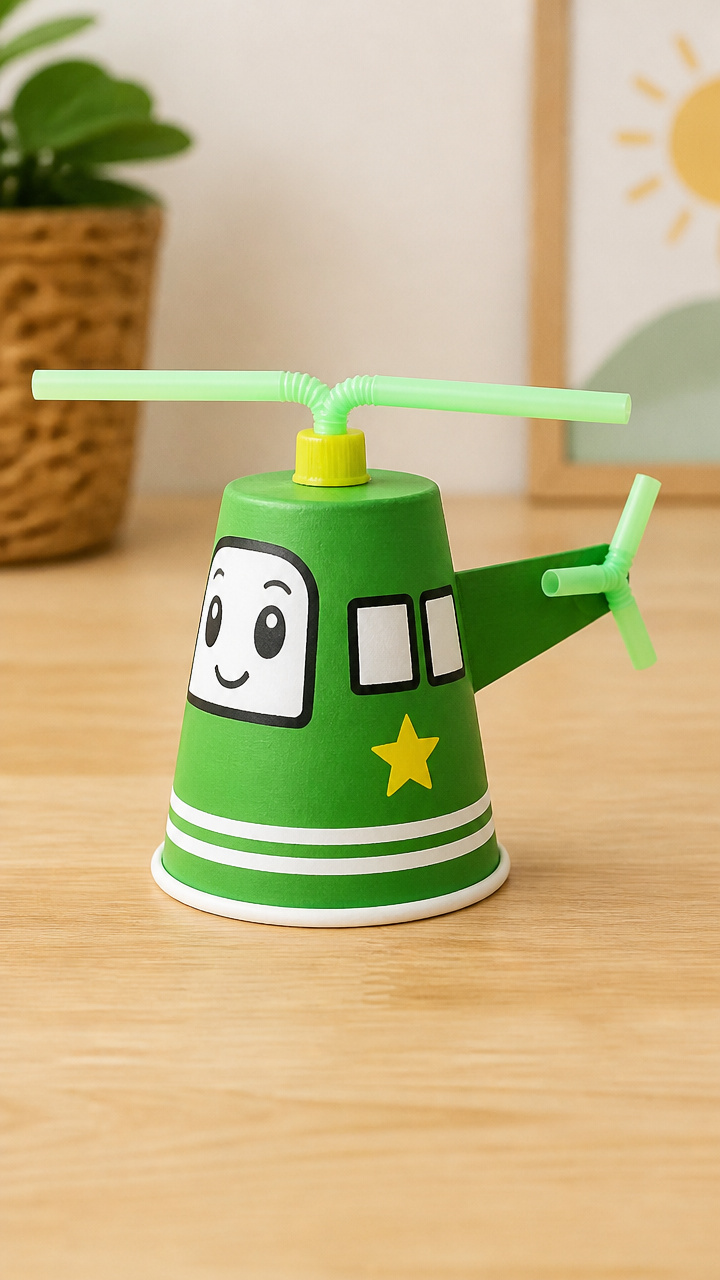
A spinning cup helicopter flies when you pull a string. The H is painted boldly on the cup, turning motion into letter reinforcement.
Materials Needed
- White paper cup (9 oz per child)
- Green acrylic paint
- Paintbrush
- Pencil
- Ruler
- Straw (flexible type, one per child)
- String (24 inches per child)
- Tape
How to Make It
- Paint a large green H on the side of the cup and let it dry flat for 20 minutes.
- Use the pencil and ruler to poke two small holes opposite each other just below the rim.
- Thread the string through both holes and tie the ends together securely.
- Slide the straw onto the string and tape the ends of the string to the table. Pull the cup down and release to spin.

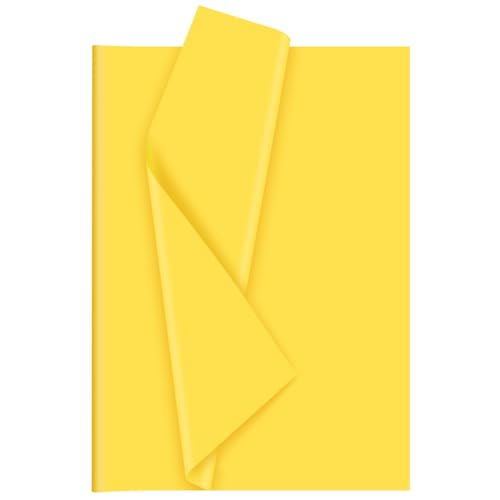
7. Honeycomb Tissue Ball Art
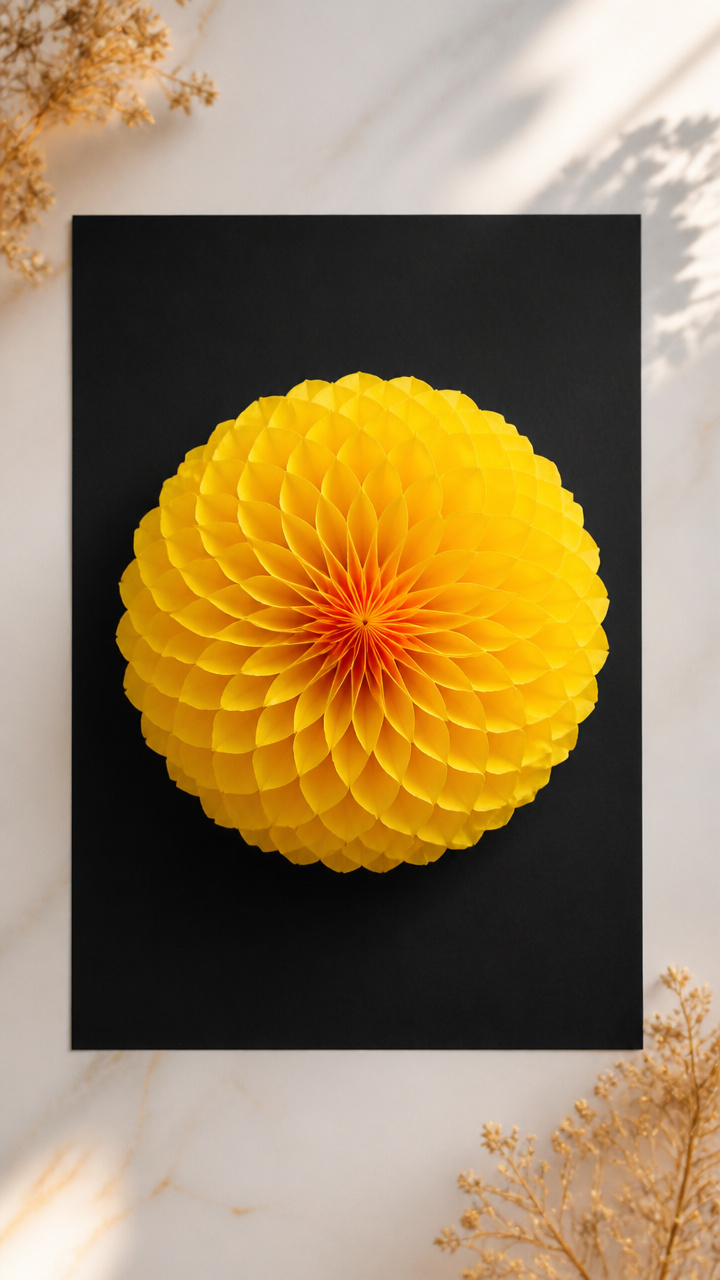
Layered tissue paper balls mimic a bee’s honeycomb while forming a textured H. The crinkle and color mixing delight little artists.
Materials Needed
- Yellow tissue paper (one full sheet per child)
- Orange tissue paper (half sheet per child)
- Glue stick
- Scissors
- A4 black cardstock
- Pencil
How to Make It
- Draw a thick capital H on the black cardstock with pencil, about 6 inches tall.
- Cut both tissue sheets into 2-inch squares. Mix yellow and orange pieces in a pile.
- Crumple ten squares at a time into tight balls and glue them side by side to fill the H shape.
- Leave small gaps between balls to show the black background, like real honeycomb.


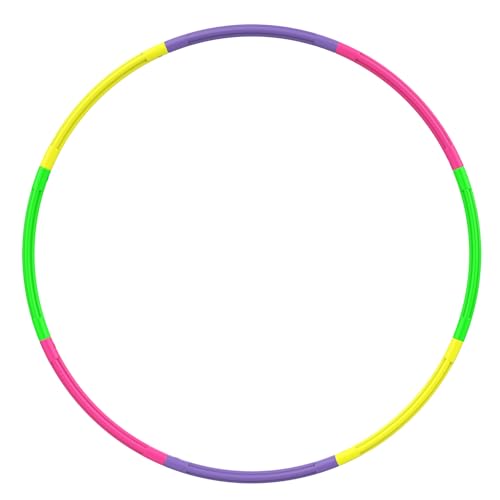
8. Hula Hoop Tracing Frame
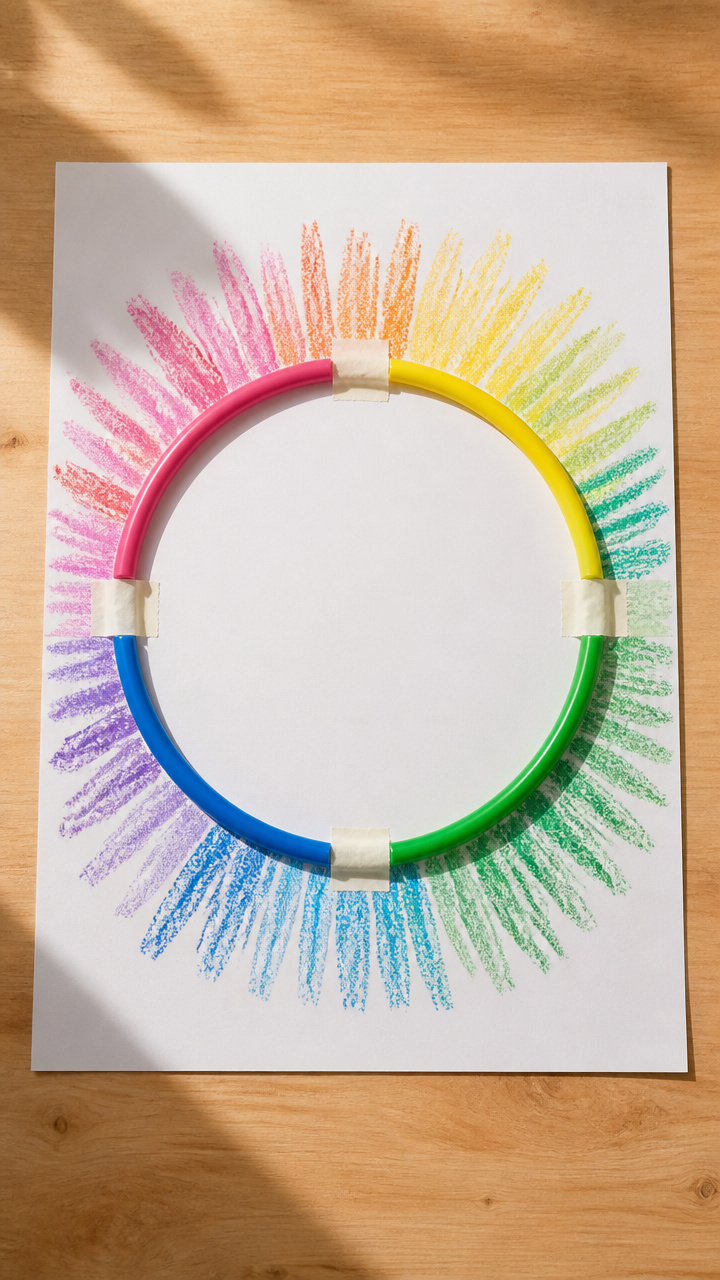
A section of hula hoop taped to paper creates a curved guide for drawing H paths. This gross motor craft blends movement and mark-making.
Materials Needed
- Child-sized hula hoop (cut into four arcs)
- Masking tape
- Crayons (thick, unwrapped)
- A4 white paper
- Marker
How to Make It
- Lay the hula hoop arc on the paper and tape it firmly at both ends.
- Use the marker to draw one straight line up from each end of the arc, forming two sides of an H.
- Let your child trace inside the arc and lines repeatedly with bright crayons, pressing hard.
- Remove the hoop piece and add 'H is for Hop!' at the bottom with marker.


9. Hatching Chick Egg
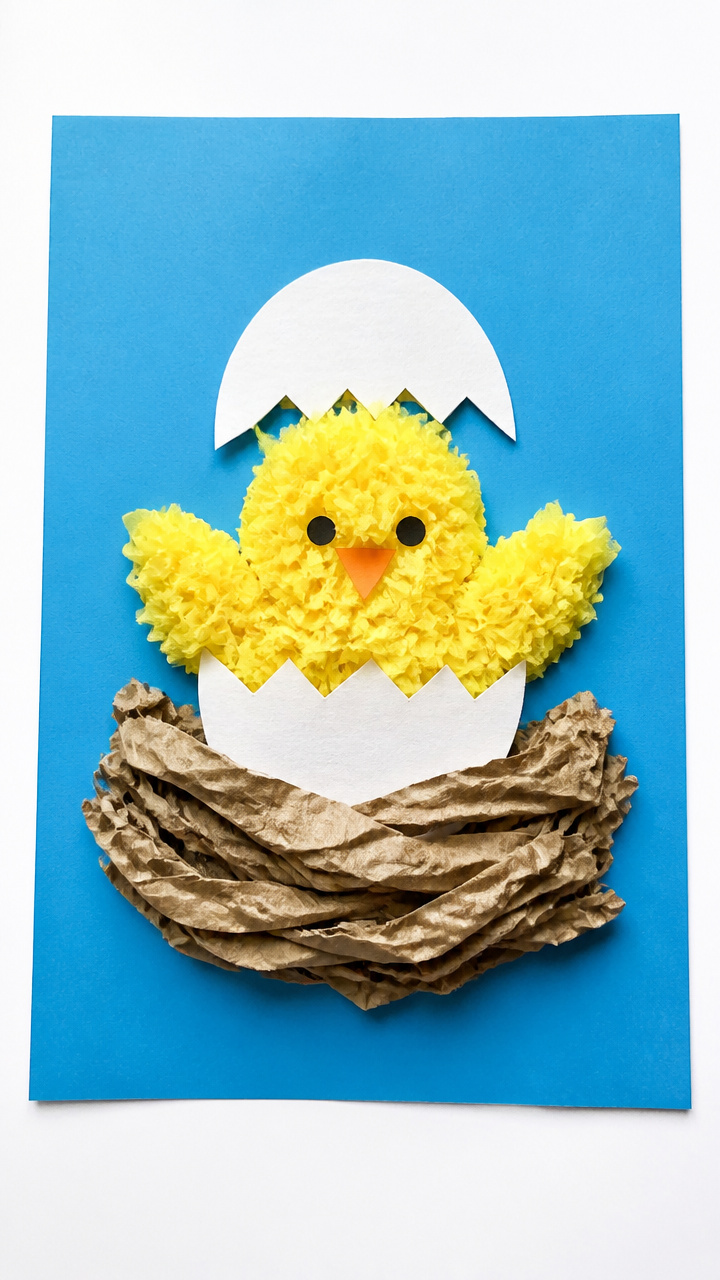
A torn paper nest holds a cracked egg with a fuzzy chick peeking out. The letter H is hidden under the shell for surprise discovery.
Materials Needed
- Blue construction paper (one sheet per child)
- Yellow tissue paper (one quarter sheet per child)
- Brown paper bag (for nest material)
- Glue stick
- Scissors
- Pencil
- Googly eye (1 per child)
How to Make It
- Draw a large oval on the blue paper and write a small H inside it with pencil.
- Tear the brown bag into small strips and glue them in a circle around the oval to make a nest.
- Crumple yellow tissue paper into a chick shape and glue it so it peeks out from the top of the oval.
- Add one googly eye to the chick and leave the H visible beneath the opening.
10. Hexagon Habitat Mosaic
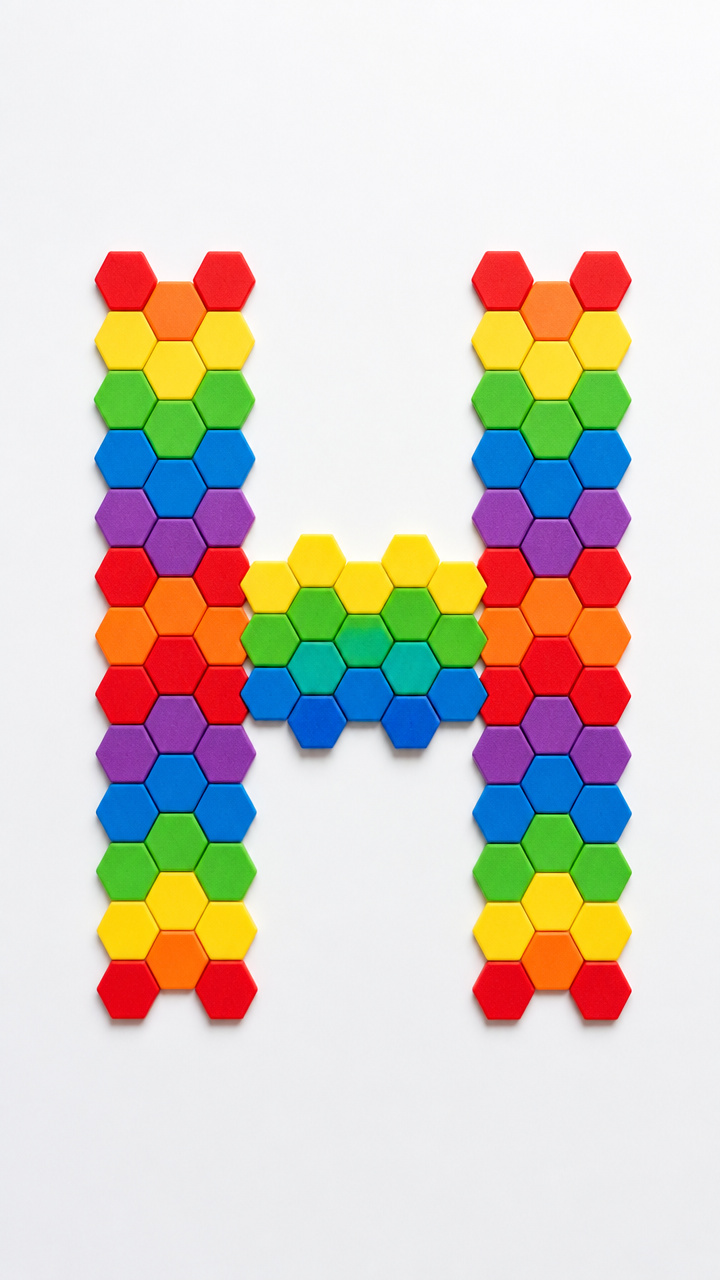
Colorful hexagons snap together into a bee’s eye view of a hive. Each shape carries part of an H, building the letter through pattern.
Materials Needed
- Pre-cut foam hexagons (1 inch, 6 per child in assorted colors)
- Magnetic board (8×10 inches per child)
- Black marker
- Glue dots (6 per child)
How to Make It
- Draw half of a capital H on three hexagons and the other half on the remaining three, so they connect when aligned.
- Let your child arrange the hexagons on the magnetic board to complete the H.
- Press one glue dot under each hexagon to secure it to the board.
- Use the marker to outline the completed H in bold black.


11. Household H Collage
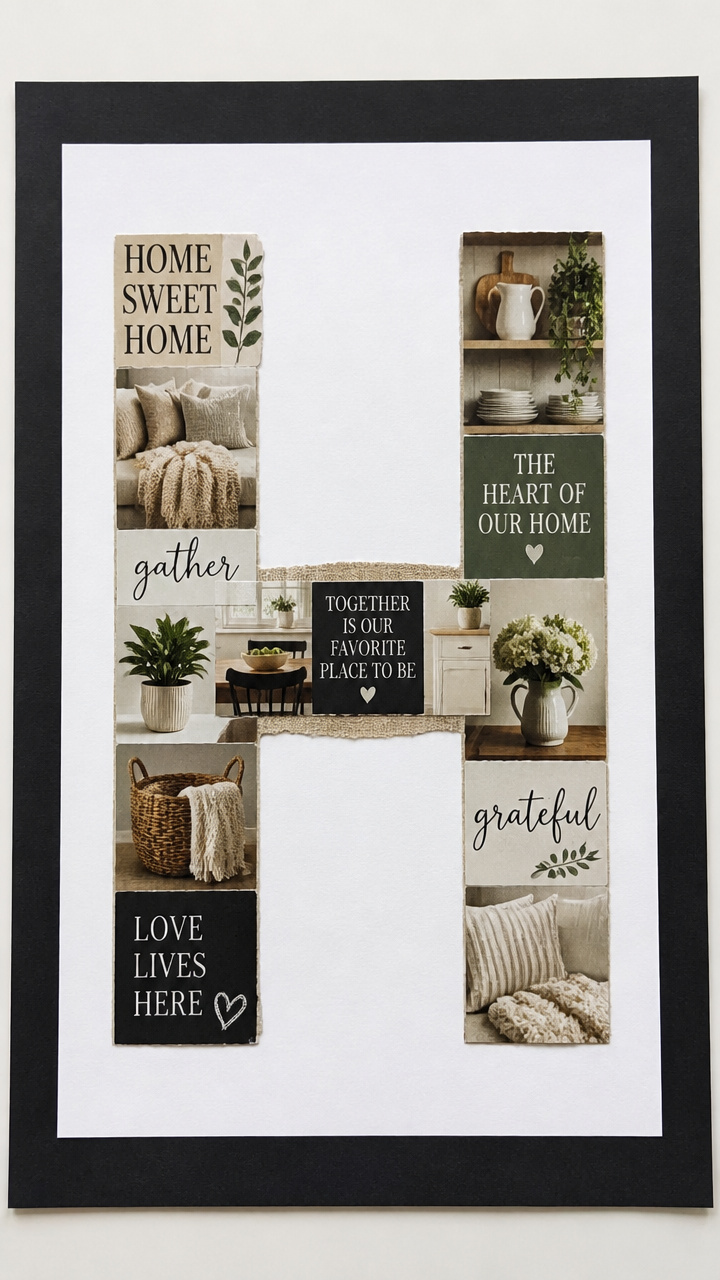
Magazine cutouts of homes, hammers, hats, and horses form a themed collage around a bold letter H. Real-world connections deepen recognition.
Materials Needed
- Old magazines
- Scissors (blunt tip)
- Glue stick
- A4 white paper
- Black construction paper (one quarter sheet per child)
- Pencil
How to Make It
- Cut the black paper into a large H shape, about 5 inches tall.
- Flip through magazines and cut out pictures of houses, hats, hammocks, hens, and horses.
- Arrange the pictures around the H on the white paper, leaving space between them.
- Glue the H in the center and then paste each picture in place.


12. Hammock Stick Figure
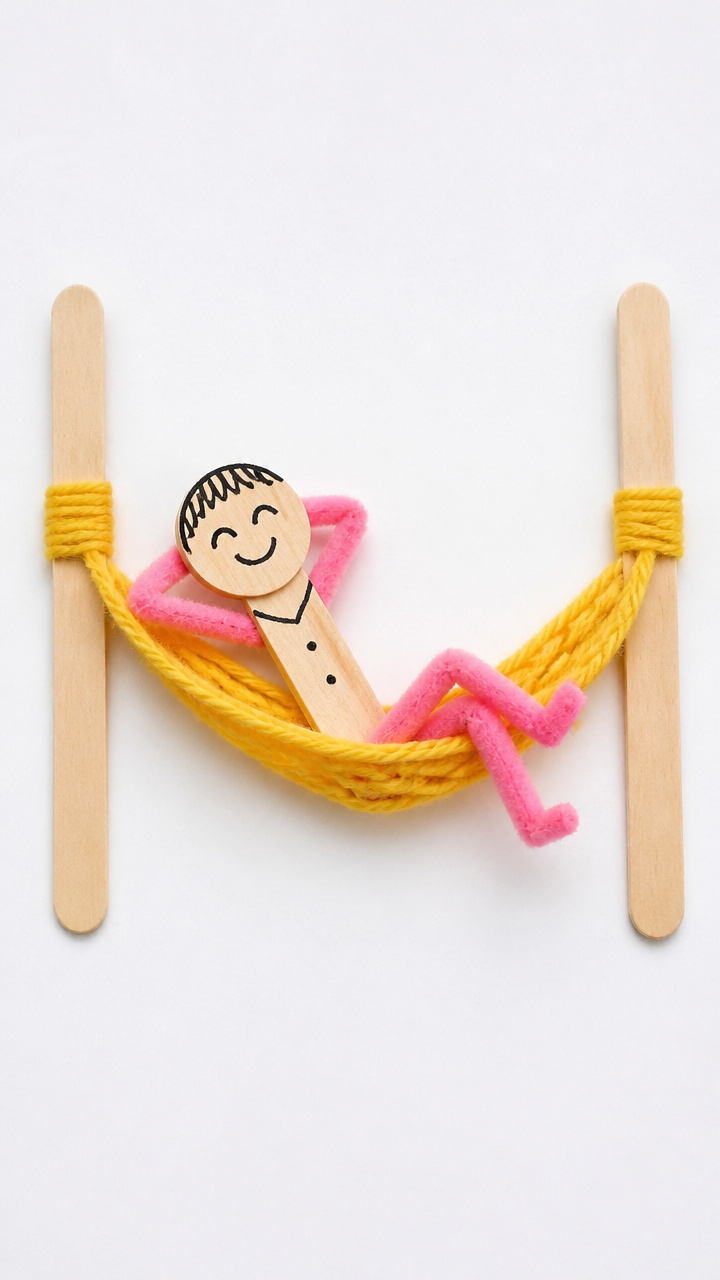
Two craft sticks support a yarn hammock strung with a smiling felt face. The horizontal yarn line emphasizes the H crossbar.
Materials Needed
- Two popsicle sticks (per child)
- Pink felt sheet
- Black marker
- Scissors
- Yellow yarn (18 inches per child)
- Glue dot
- Wiggle eyes (2 per child)
How to Make It
- Cut a small oval face from pink felt and draw cheeks and a smile with the marker.
- Glue wiggle eyes above the smile and attach a glue dot to the back.
- Lay the popsicle sticks parallel on the table, 3 inches apart.
- Wrap the yarn around each stick several times to form a sagging hammock, then press the face onto the yarn.


13. Hot Air Balloon Mobile
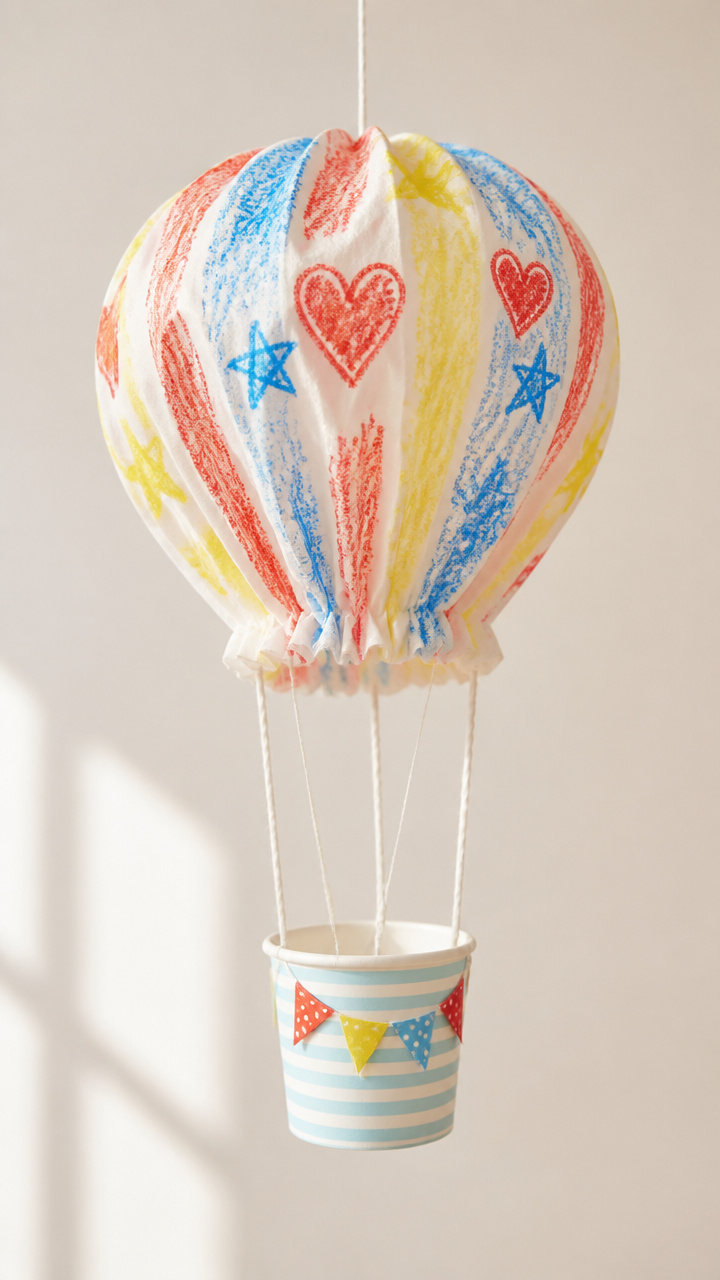
A dangling balloon made from a coffee filter floats above a basket labeled H. The mobile spins gently, keeping the letter in sight.
Materials Needed
- Round coffee filter (one per child)
- Crayons (red, blue, yellow)
- String (three 10-inch pieces per child)
- Small paper cup (3 oz)
- Glue stick
- Straw (6 inch piece)
- Tape
How to Make It
- Color the coffee filter with bright crayon patterns and mist lightly with water to blend.
- Let it dry flat for 30 minutes, then gather the top and tie with one string to form a balloon.
- Punch three holes around the rim of the cup and thread one string through each to hang it below the balloon.
- Write H for Hot Air Balloon on the cup and tape the straw across the top to hang the mobile.


![RACETOP [100 Pack] 3 oz Bathroom Paper Cups, Disposable Paper Cups, Mouthwash Cups, Paper Coffee Cups, Ideal for Bathroom](https://m.media-amazon.com/images/I/21csAp-1QwL._SL500_.jpg)
14. Hiking Boot Print Path
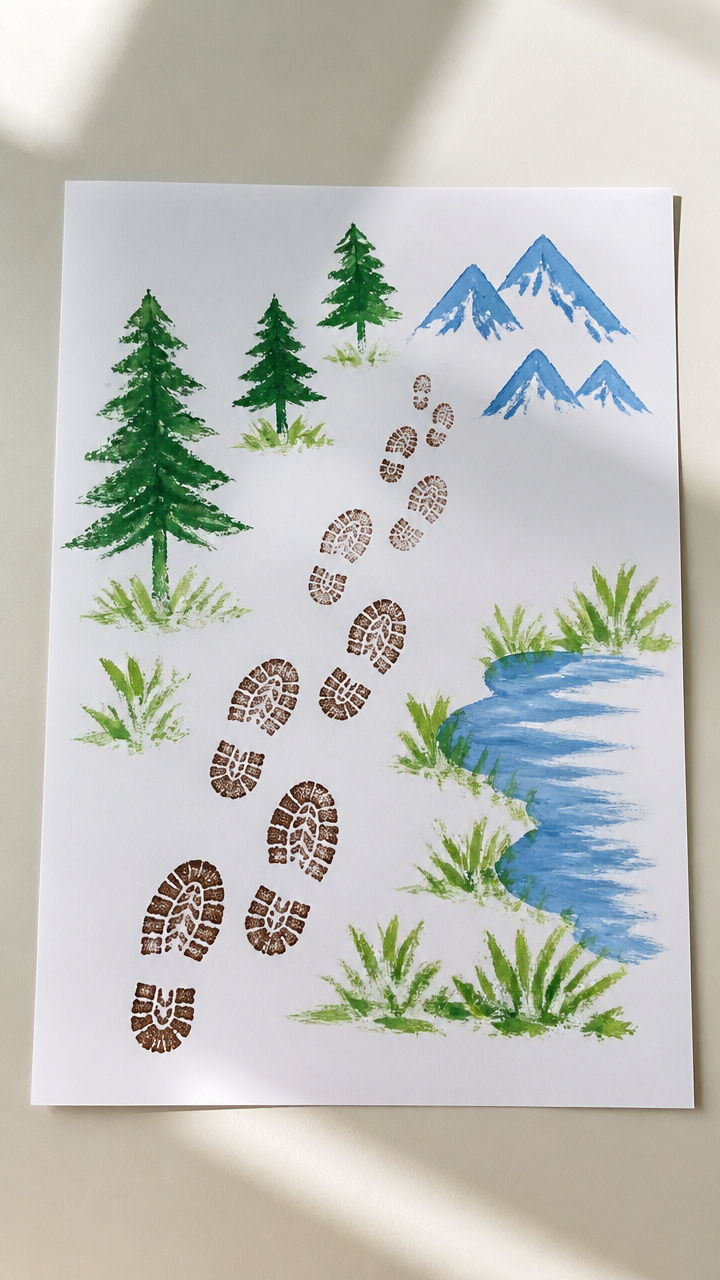
Sponge-painted boot prints march in an H formation across a trail scene. This active craft celebrates outdoor adventure and letter shape.
Materials Needed
- Brown sponge (kitchen type, one per child)
- Green acrylic paint
- Blue acrylic paint
- A4 white paper
- Scissors
- Pencil
- Glue stick
How to Make It
- Fold the paper in half vertically and draw half an H on the crease with pencil.
- Cut out the H to make a stencil with connecting trails.
- Dip the sponge in brown paint and stamp boot prints along both upright and cross trails.
- Paint a green ground below and blue sky above, then remove the stencil.


15. Horned Hat Headband
A wearable headband with curly paper horns spells H with its shape when viewed from the front. Dress-up fun doubles as letter reinforcement.
Materials Needed
- Cardstock strip (18×2 inches, color of choice per child)
- Red construction paper
- Glue stick
- Scissors
- Brad fastener (one per child)
- Pencil
- Crayon
How to Make It
- Draw two small spirals on the red paper and cut them out carefully.
- Glue one spiral to each end of the cardstock strip so they curl outward like ram horns.
- Write a large H in crayon in the center of the strip between the horns.
- Punch holes at both ends and fasten with a brad to fit around the child’s head.


You’ve got everything you need to turn a simple letter into joyful moments. Grab those crayons, scissors, and smiles — your preschooler is ready to create.