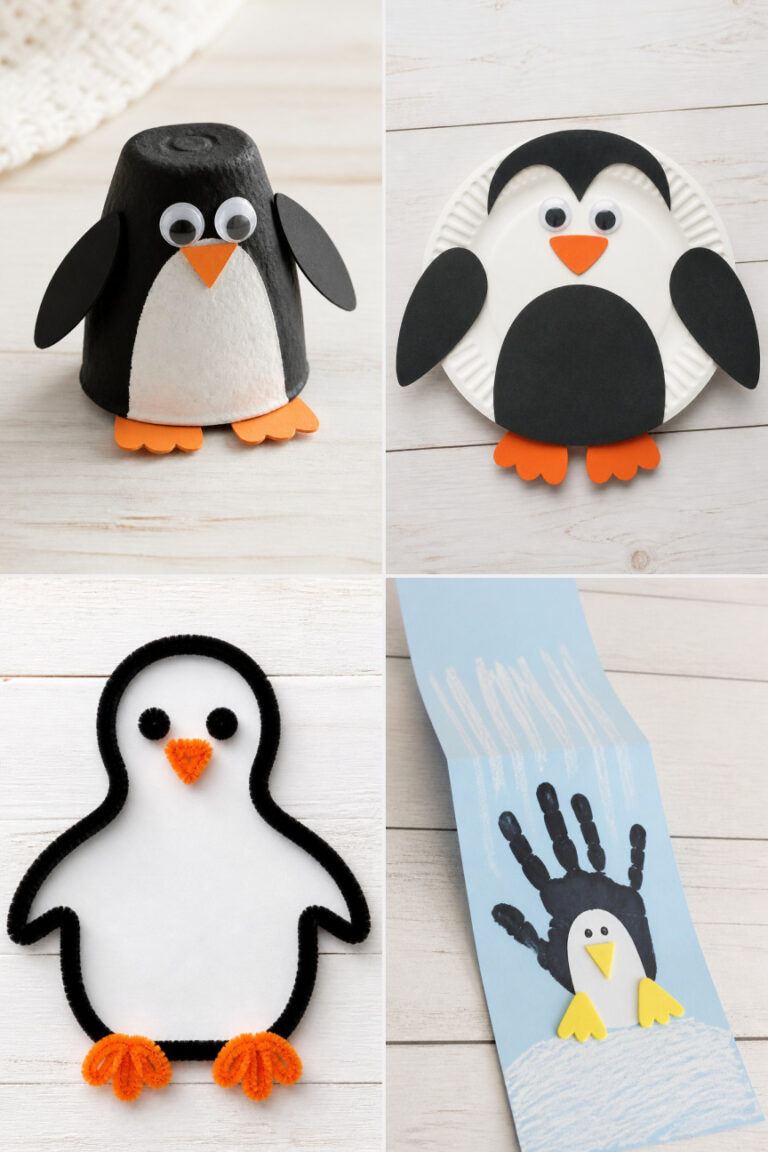
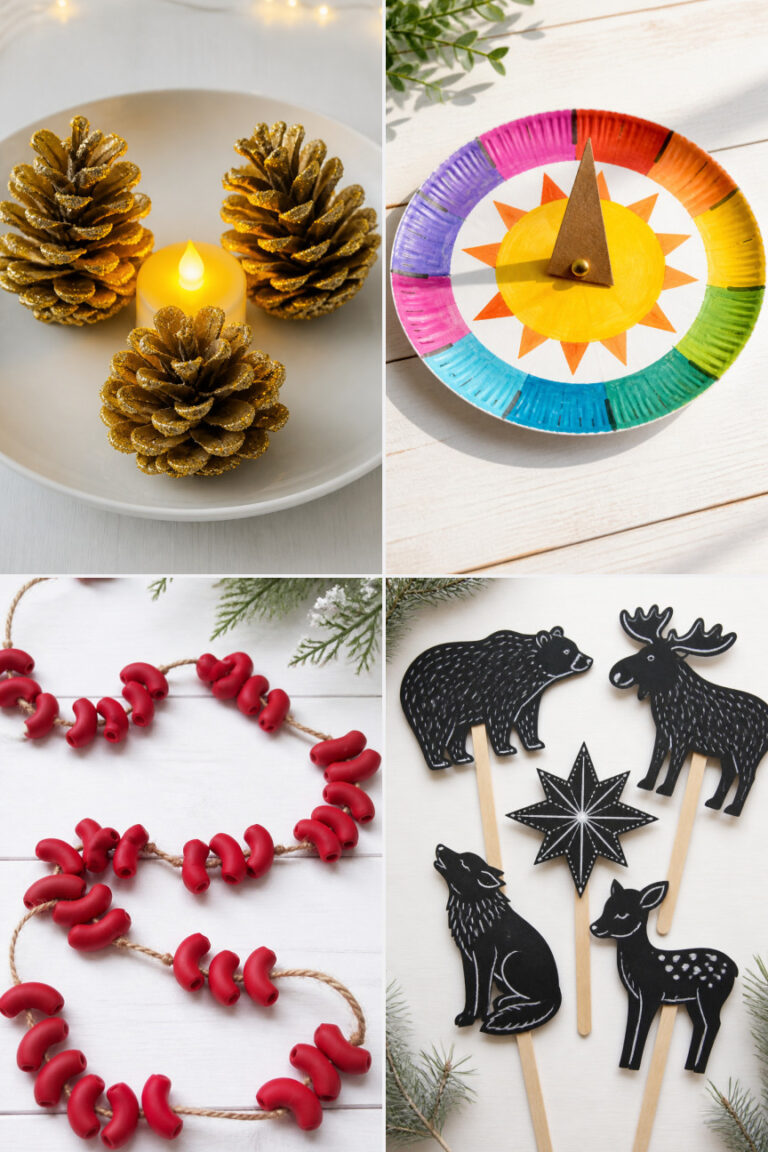
21 Winter Crafts for 3 Year Olds to Do at Home

Fingerprints smudged with glitter, tiny hands pressing paint-soaked sponges onto paper, the quiet focus of a child threading a big wooden bead, these are the moments winter days are made for.
When the air turns crisp and playtime moves indoors, simple crafts become cozy rituals. With just a few supplies and space at the table, you can create joyful activities that build fine motor skills and spark imagination without needing a mess-free promise or perfection.
Each craft here uses real materials in honest amounts, follows clear steps, and respects how three-year-olds really work: with curiosity, short attention spans, and delight in process over product.
1. Cotton Ball Snowmen Cards
Easy
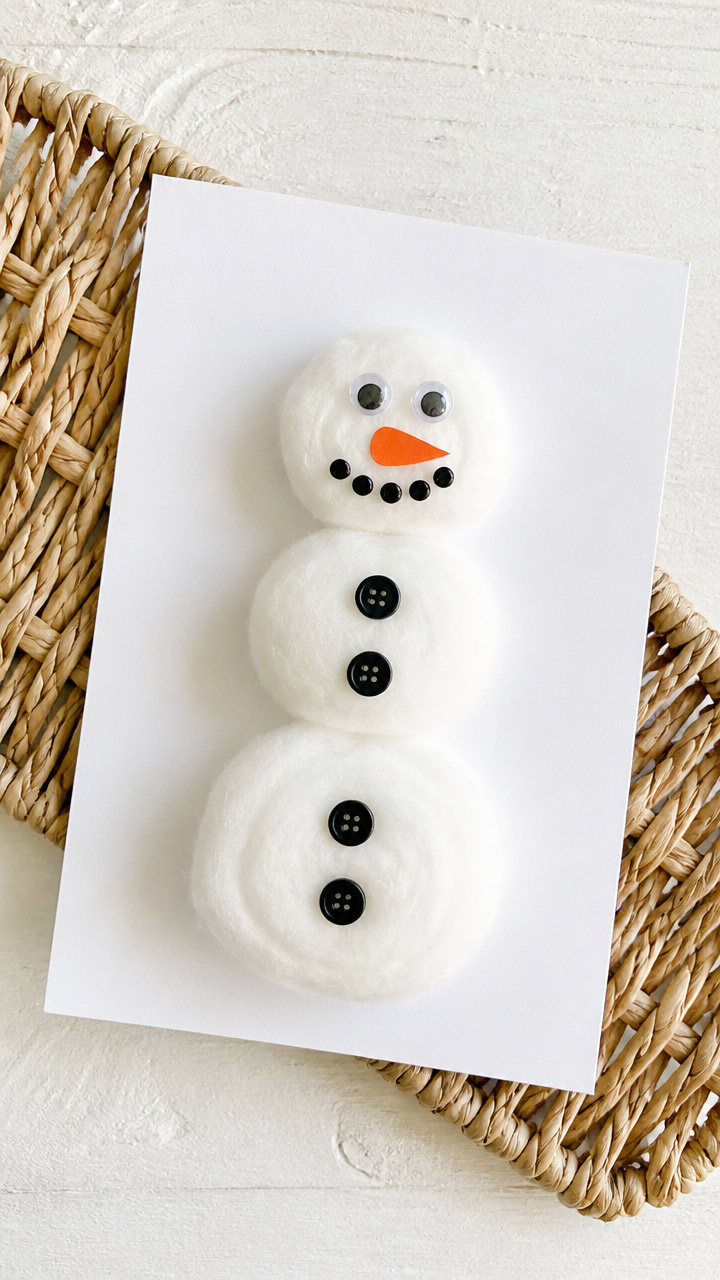
Fluffy white snowmen with carrot noses and button smiles stand proudly on handmade greeting cards perfect for gifting to grandparents.
Materials Needed
- A4 white cardstock, 1 sheet
- Glue stick
- Small cotton balls, 15
- Orange construction paper, 1 sheet
- Black buttons, 6 mm, 6
- Googly eyes, 10 mm, 2
- Scissors
How to Make It
- Fold the A4 white cardstock in half horizontally to make a card.
- Glue three cotton balls vertically down the center of the front to form the snowman's body.
- Cut a small triangle from the orange construction paper and glue it as the nose.
- Glue two black buttons above the nose for eyes and two more near the bottom for buttons.
- Stick the googly eyes just above the orange nose.

2. Pinecone Bird Feeders
Easy
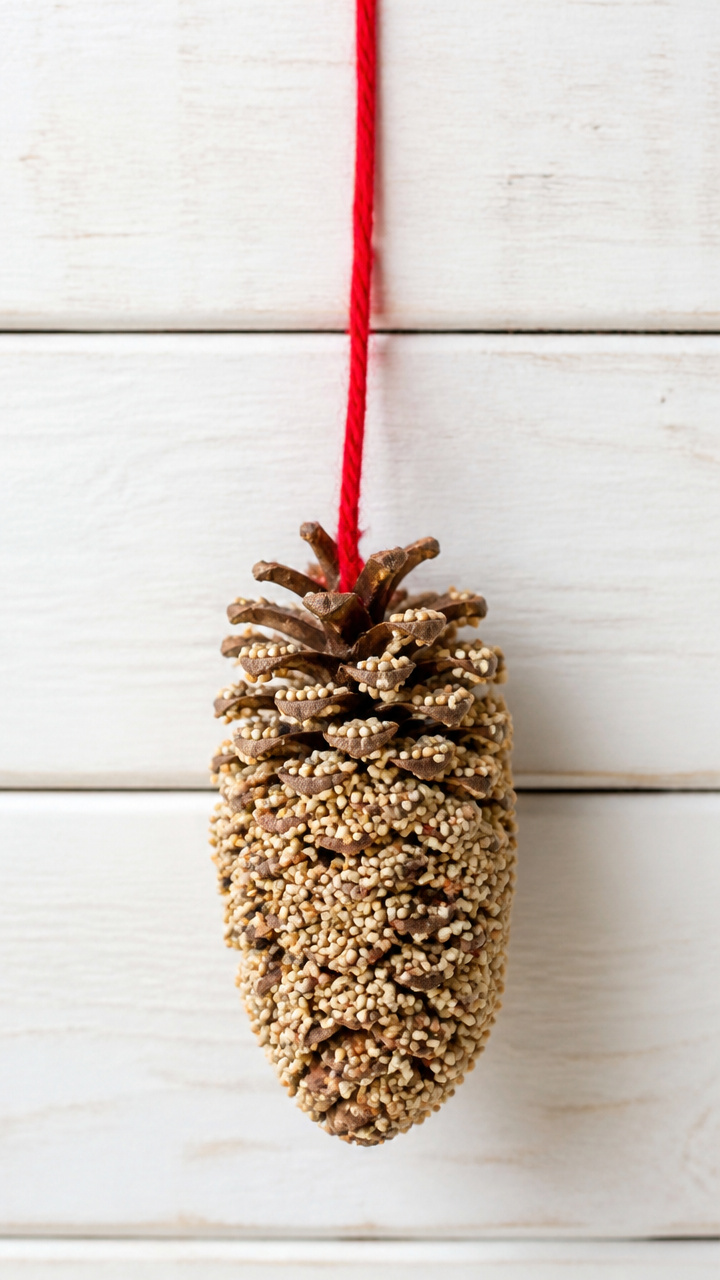
Rough-textured pinecones coated in peanut butter and birdseed dangle from red yarn, bringing wild birds close to your window.
Materials Needed
- Pinecone, 1, about 4 inches long
- Smooth peanut butter, 3 tablespoons
- Birdseed, 1 cup
- Butter knife
- String, 18 inches, red
- Bowl
How to Make It
- Tie the string around the top of the pinecone and knot it securely.
- Use the butter knife to spread peanut butter all over the pinecone, pushing it into the crevices.
- Pour birdseed into the bowl and roll the peanut butter-covered pinecone in it until fully coated.
- Place the feeder on wax paper and let it dry for 1 hour before hanging outside.


3. Handprint Reindeer Art
Easy
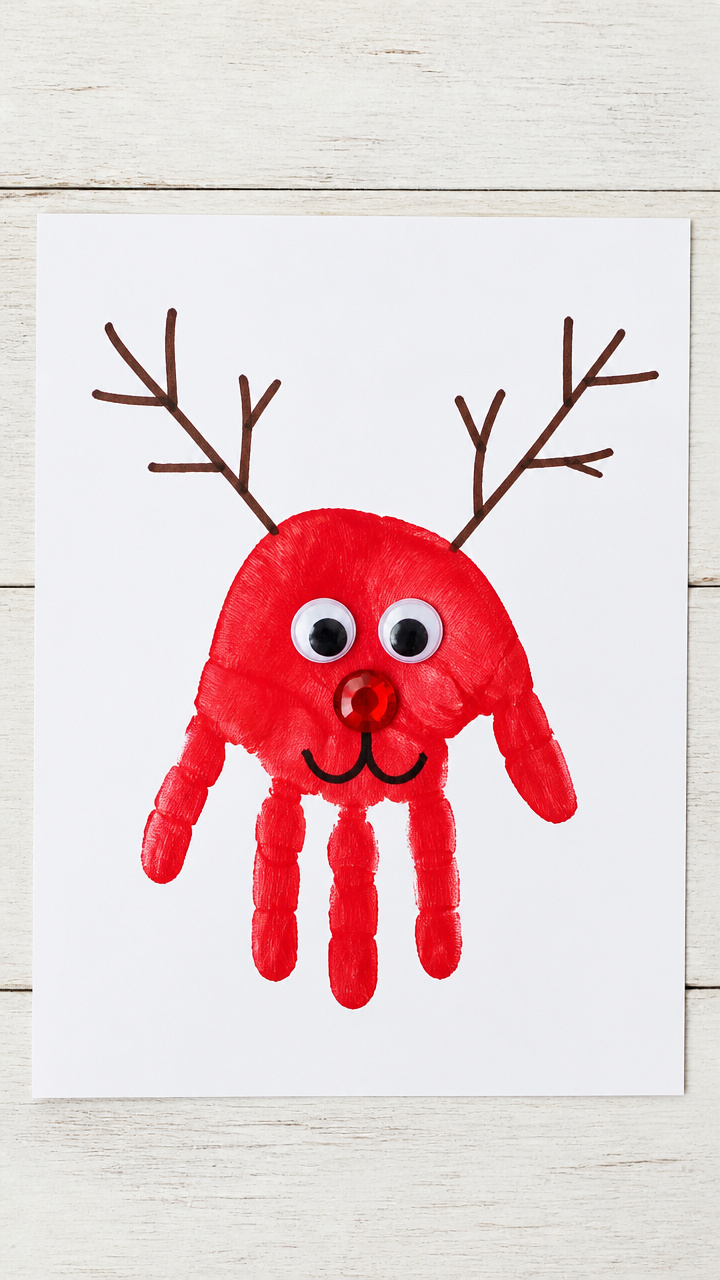
A bold red handprint becomes the face of a reindeer with antlers made from painted twigs and a shiny red nose.
Materials Needed
- Red washable paint, 2 tablespoons
- White drawing paper, 9×12 inches, 1 sheet
- Brown acrylic paint, 1 tablespoon
- Paintbrush, size 4 round
- Black marker, fine tip
- Googly eyes, 15 mm, 2
- Glue
- Twigs, 2, each 3 inches long
How to Make It
- Help your child press their open hand into the red paint and then firmly onto the paper to make a handprint facing upward.
- Let the paint dry completely, about 15 minutes.
- Paint both twigs brown using the paintbrush and let them dry for 10 minutes.
- Glue the twigs above the handprint as antlers.
- Draw a mouth below the thumb with the black marker, add eyes with the googly eyes, and draw a red nose with the marker.


4. Salt Dough Ornaments
Moderate
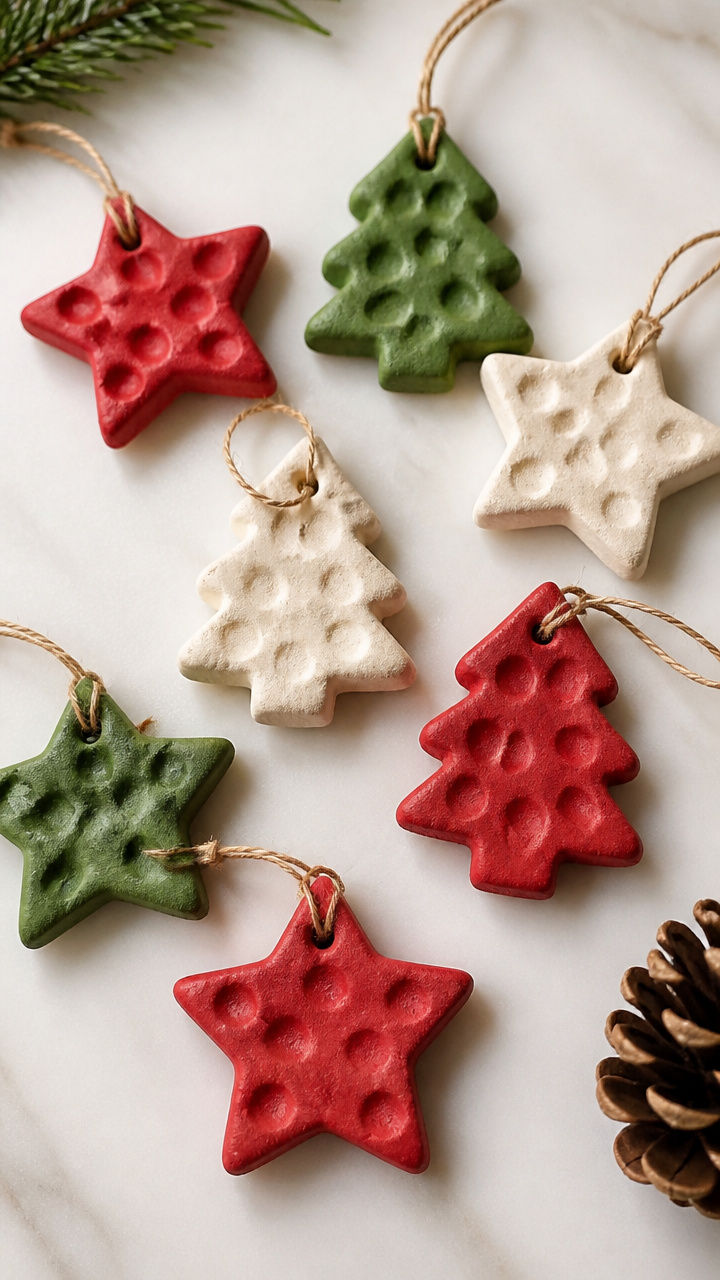
Simple dough shaped into stars and trees bakes into keepsake ornaments stamped with tiny fingerprints and painted in holiday colors.
Materials Needed
- All-purpose flour, 1 cup
- Table salt, 1/2 cup
- Water, 1/2 cup
- Mixing bowl
- Rolling pin
- Star-shaped cookie cutter, 2 inches
- Straw, 1
- Baking sheet
- Parchment paper
- Acrylic paint, red, green, gold
- Paintbrush, size 2
- Ribbon, 1/8 inch wide, red, 12 inches
How to Make It
- Mix flour, salt, and water in the bowl until a smooth dough forms, about 2 minutes.
- Roll the dough to 1/4 inch thickness on a floured surface.
- Cut out two star shapes using the cookie cutter.
- Push the straw through the top edge of each ornament to make a hole for hanging.
- Place ornaments on the baking sheet lined with parchment paper.
- Bake at 200°F for 3 hours until hard.
- Paint each ornament with acrylics and let dry 30 minutes.
- Thread ribbon through the hole and tie a loop.


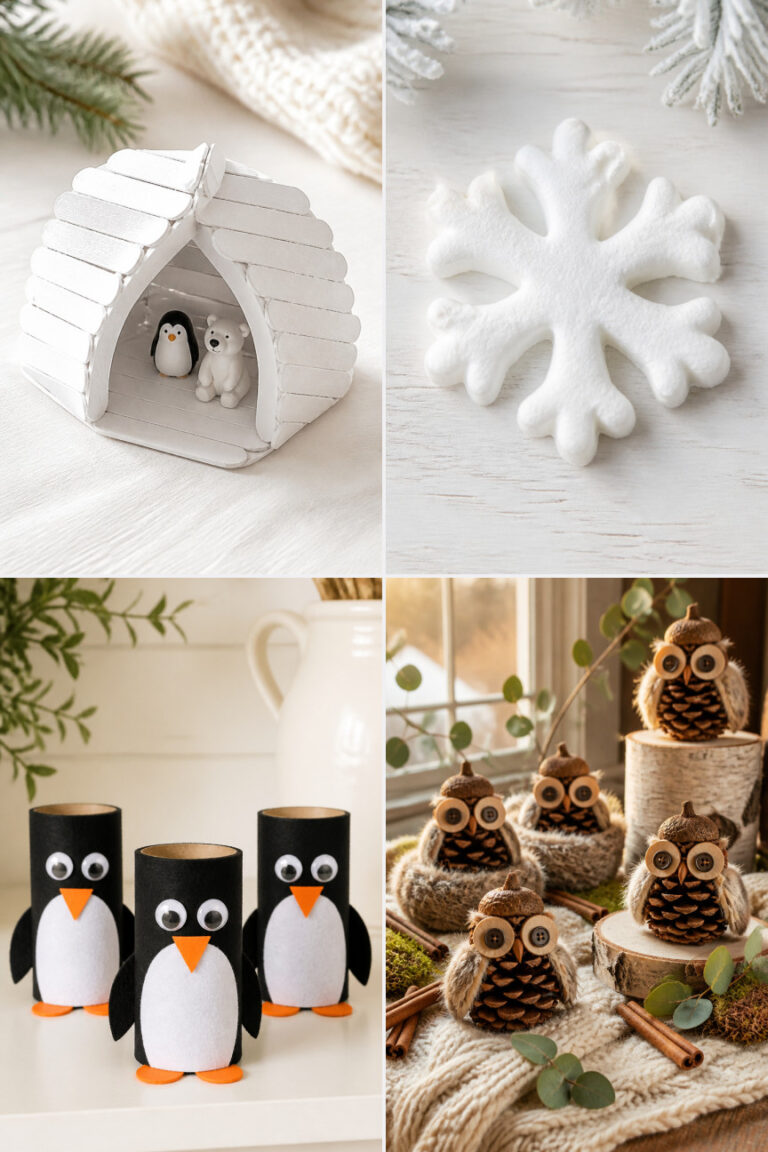
5. Toilet Paper Roll Penguins
Easy
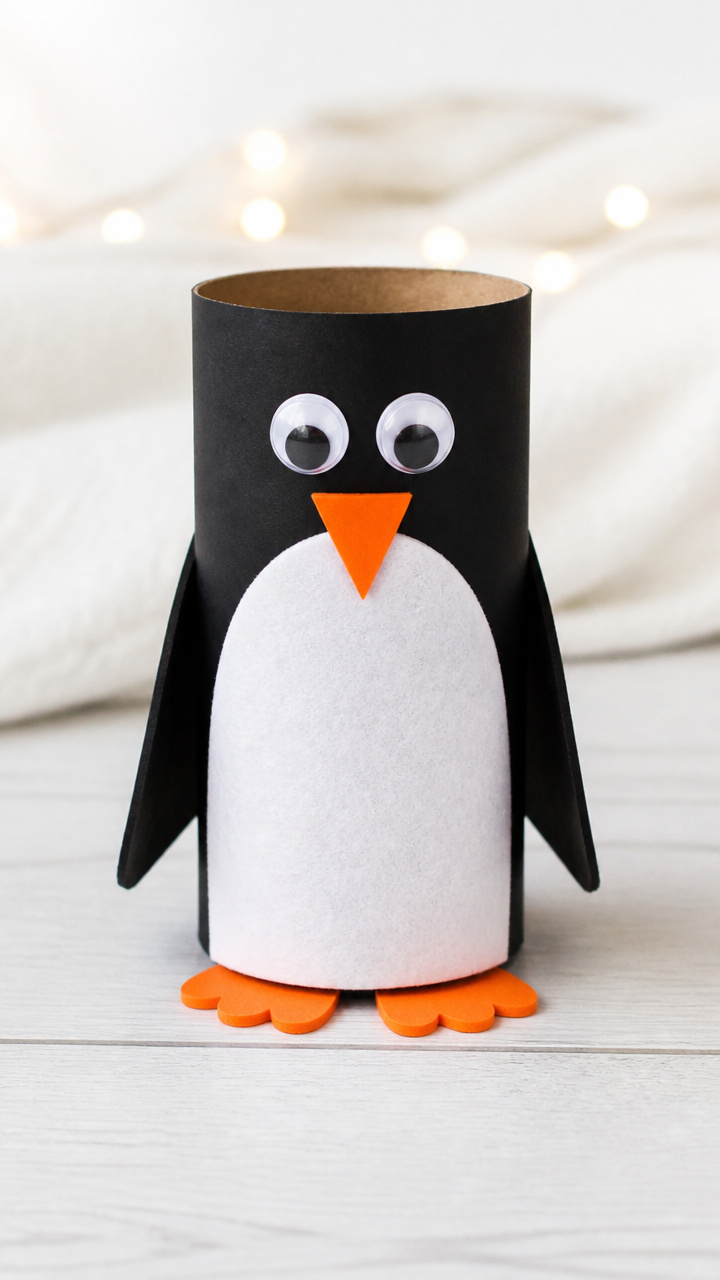
Empty toilet paper rolls wear black and white feathers with waddling feet and bright orange beaks.
Materials Needed
- Empty toilet paper roll, 1
- Black construction paper, 1 sheet
- White craft foam sheet, 1 sheet
- Orange craft foam sheet, 1 sheet
- Googly eyes, 10 mm, 2
- Scissors
- Glue
- Black marker
How to Make It
- Cut the black construction paper to wrap around the toilet paper roll and glue it in place.
- Cut a white oval from the white craft foam and glue it to the front of the roll as the belly.
- Cut two small orange triangles from the orange craft foam for feet and one larger triangle for the beak.
- Glue the feet to the bottom edge of the roll so they peek out.
- Glue the beak just below the googly eyes.
- Draw wing lines on each side with the black marker.


6. Glitter Jar Snow Globes
Moderate
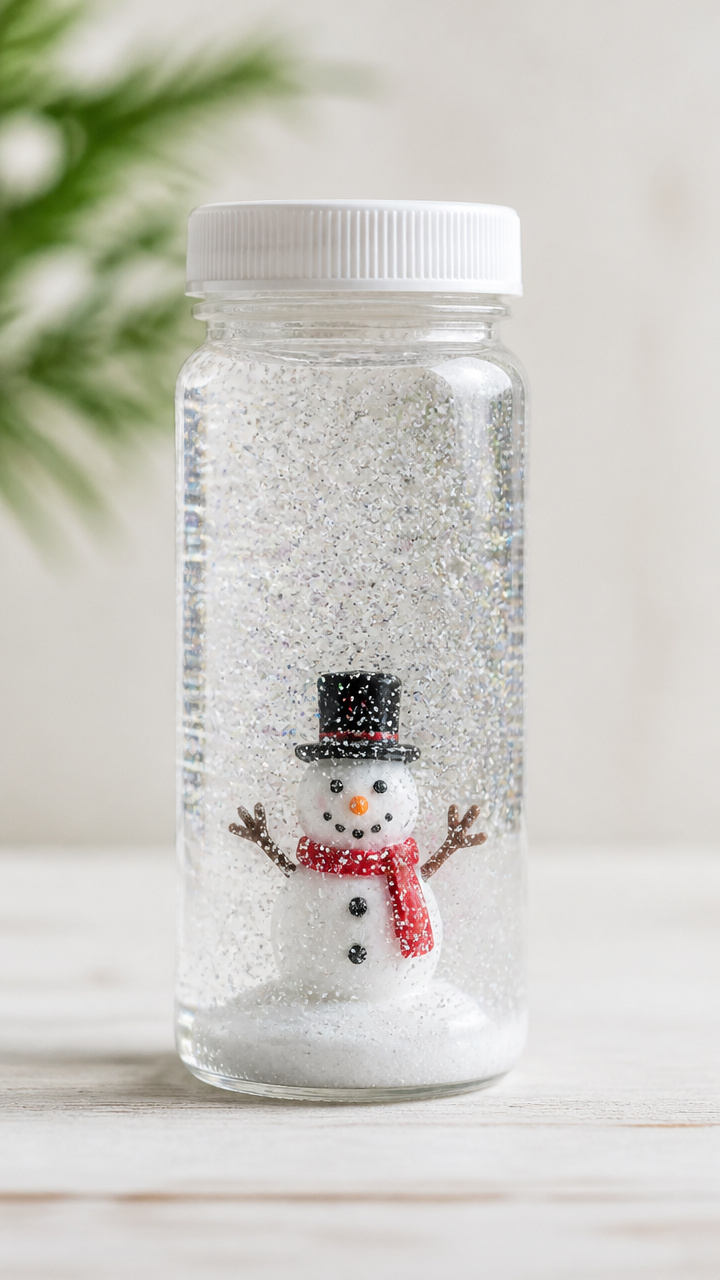
Clear plastic bottles swirl with glitter and slow-moving glycerin when shaken, mimicking a blizzard in a jar.
Materials Needed
- Clear plastic bottle with screw lid, 8 oz, 1
- Distilled water, 6 oz
- Clear school glue, 2 tablespoons
- Fine white glitter, 1 teaspoon
- Glycerin, 1/2 teaspoon
- Mini plastic snowman figurine, 1
- Hot glue gun
- Glue sticks, 2
How to Make It
- Fill the bottle with distilled water, leaving 1 inch of space at the top.
- Add the school glue, glitter, and glycerin to the bottle.
- Screw the lid on tightly.
- Use the hot glue gun to secure the snowman figurine to the inside of the lid.
- Let the glue cool for 5 minutes, then screw the lid back on and turn the bottle upside down.


7. Paper Plate Snowflakes
Easy
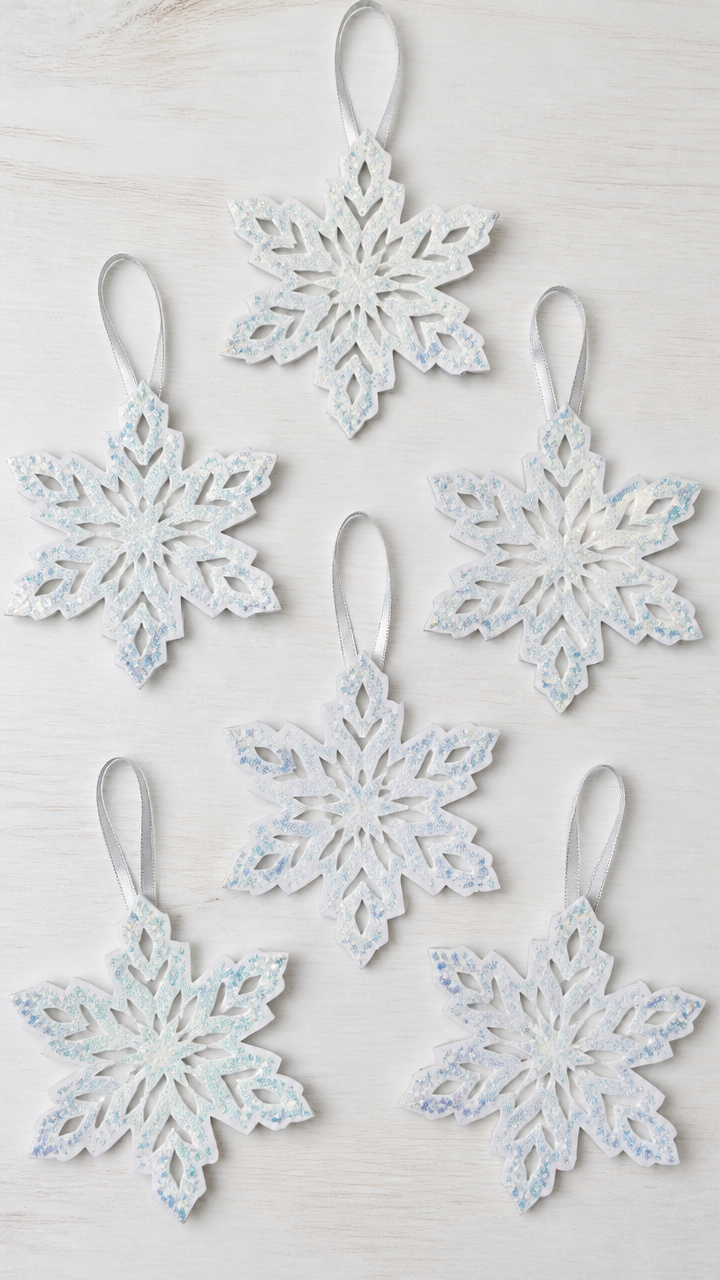
Six-pointed snowflakes with cut-out patterns hang from windows catching light like icy crystals.
Materials Needed
- White paper plate, 1
- Scissors
- White crayon
- Glitter, blue iridescent, 2 teaspoons
- Glue
- Ribbon, 6 inches, silver
How to Make It
- Cut out the center of the paper plate to leave only the rim.
- Fold the rim into six equal sections by bringing edges together.
- Cut small shapes like triangles and half-circles along the folded edges.
- Unfold to reveal the snowflake pattern.
- Color parts of the snowflake lightly with the white crayon to create texture.
- Brush glue over some areas and sprinkle blue glitter on top.
- Tie ribbon to one point for hanging.


8. Yarn-Wrapped Snowmen
Moderate
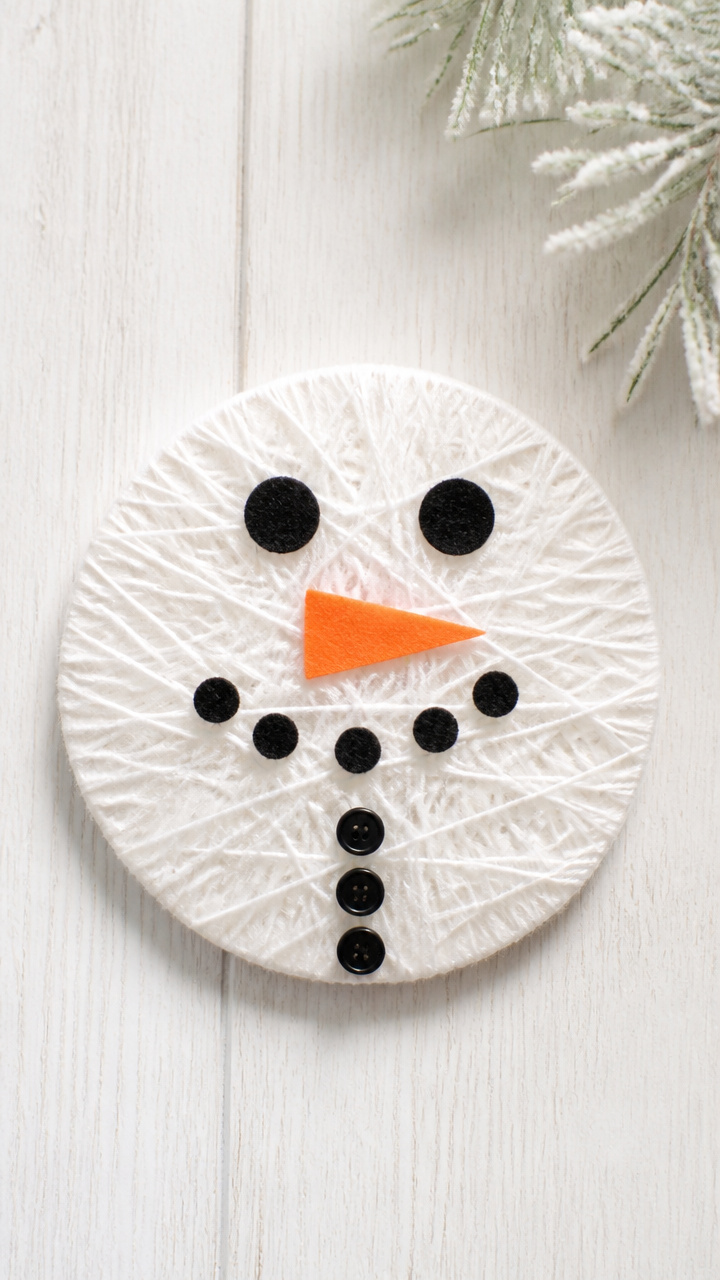
Cardboard circles wrapped tightly in white yarn grow arms and faces with felt scraps and buttons.
Materials Needed
- Cardboard circle, 3 inches diameter, 1
- White yarn, 10 yards
- Glue
- Black felt sheet, 1 piece
- Orange felt sheet, 1 small piece
- Buttons, 8 mm, 3
- Craft stick, 1
- Scissors
How to Make It
- Apply a dot of glue to the edge of the cardboard circle.
- Press the end of the yarn onto the glue and begin wrapping it tightly around the circle.
- Continue wrapping until the entire surface is covered, then glue the end down.
- Cut two small rectangles from the black felt and glue them as arms on opposite sides.
- Glue three buttons vertically on the front for the belly.
- Cut a small triangle from the orange felt and glue it as the nose.
- Attach the craft stick behind the head with glue to use as a handle.


9. Mitten Stamped Trees
Easy
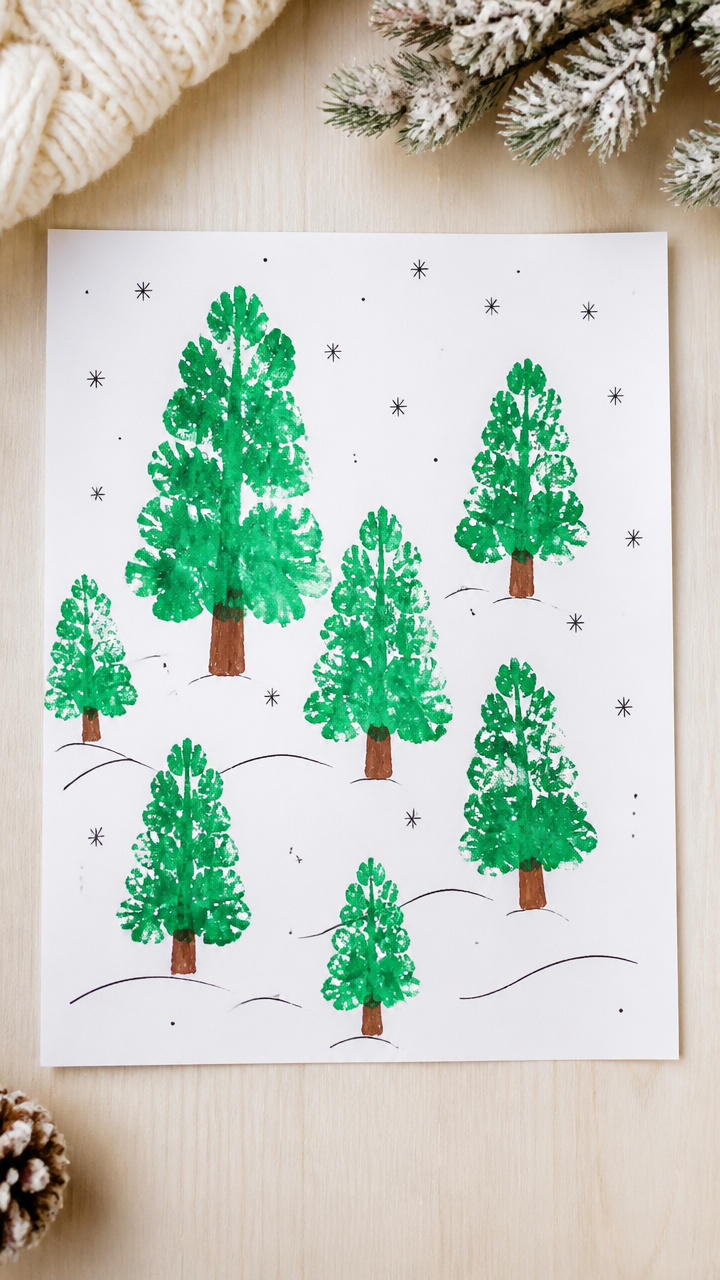
A child's mitten dipped in green paint stamps a forest of lopsided evergreens across a wintry scene.
Materials Needed
- Green tempera paint, 3 tablespoons
- White drawing paper, 9×12 inches, 1 sheet
- Brown washable paint, 1 tablespoon
- Paint tray
- Child-sized cotton mitten, 1
- Black marker
How to Make It
- Pour green paint into the paint tray.
- Dip the palm side of the mitten into the paint, making sure the fabric is evenly coated.
- Press the mitten firmly onto the lower half of the paper to make a tree shape.
- Repeat to make four more trees, letting each dry 10 minutes between prints.
- Use the brown paint to stamp a short trunk under each tree.
- Once dry, draw snowdrifts at the base with the black marker.


10. Shaving Cream Snow Paint
Easy
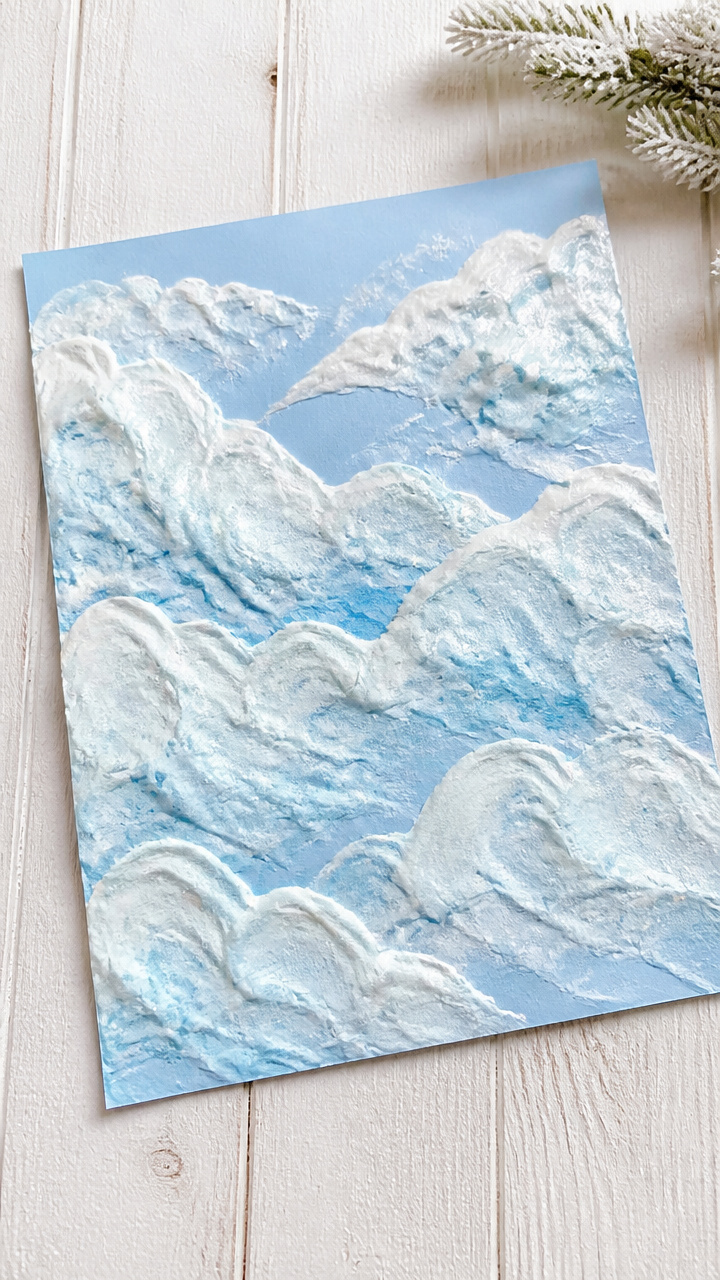
Puffy clouds of shaving cream mixed with glue and food coloring spread like frosting onto cards for snowy scenes.
Materials Needed
- White shaving cream, 1 cup
- White school glue, 1/2 cup
- Blue food coloring, 3 drops
- Mixing bowl
- Spoon
- Cardstock, A4, 1 sheet
- Paintbrush, size 6
How to Make It
- Mix shaving cream and school glue in the bowl until smooth, about 1 minute.
- Add blue food coloring and stir gently to create a marbled effect.
- Use the paintbrush to spread the mixture onto the cardstock in thick patches.
- Let the paint dry flat for 4 hours until puffy and firm.
11. Popsicle Stick Igloos
Moderate
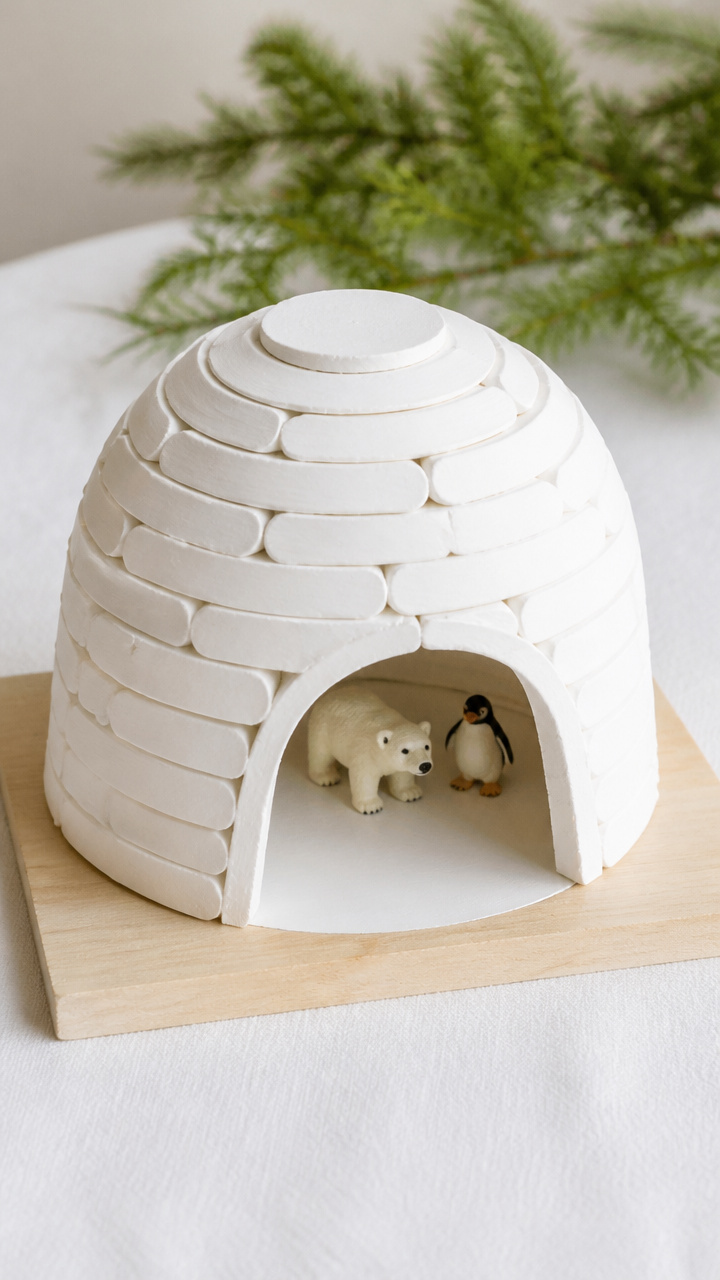
Flat wooden sticks layered in a circular dome shape stand strong with glue and hold tiny toy animals inside.
Materials Needed
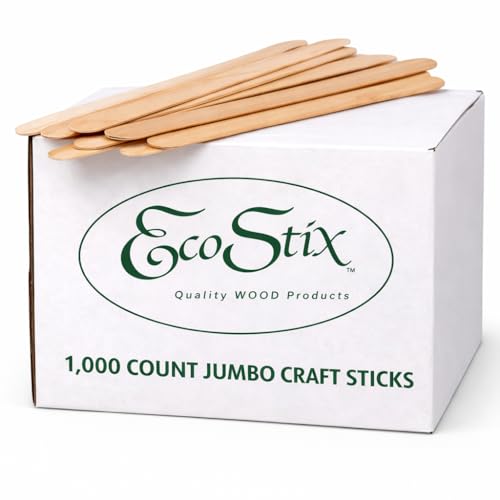
- Jumbo popsicle sticks, 20
- White school glue
- Circular stencil, 4 inches diameter
- Pencil
- Craft knife
- Baseboard, 6×6 inch wood square, 1
How to Make It
- Trace the stencil onto the baseboard with the pencil and set aside.
- Lay eight popsicle sticks around the circle edge, standing upright, and glue them to the base.
- Glue a second layer of sticks across the gaps of the first, forming a staggered wall.
- Continue layering sticks, reducing the circle size slightly each time, until five layers are complete.
- Let the igloo dry for 2 hours before placing small toys inside.


12. Button Mitten Magnets
Easy
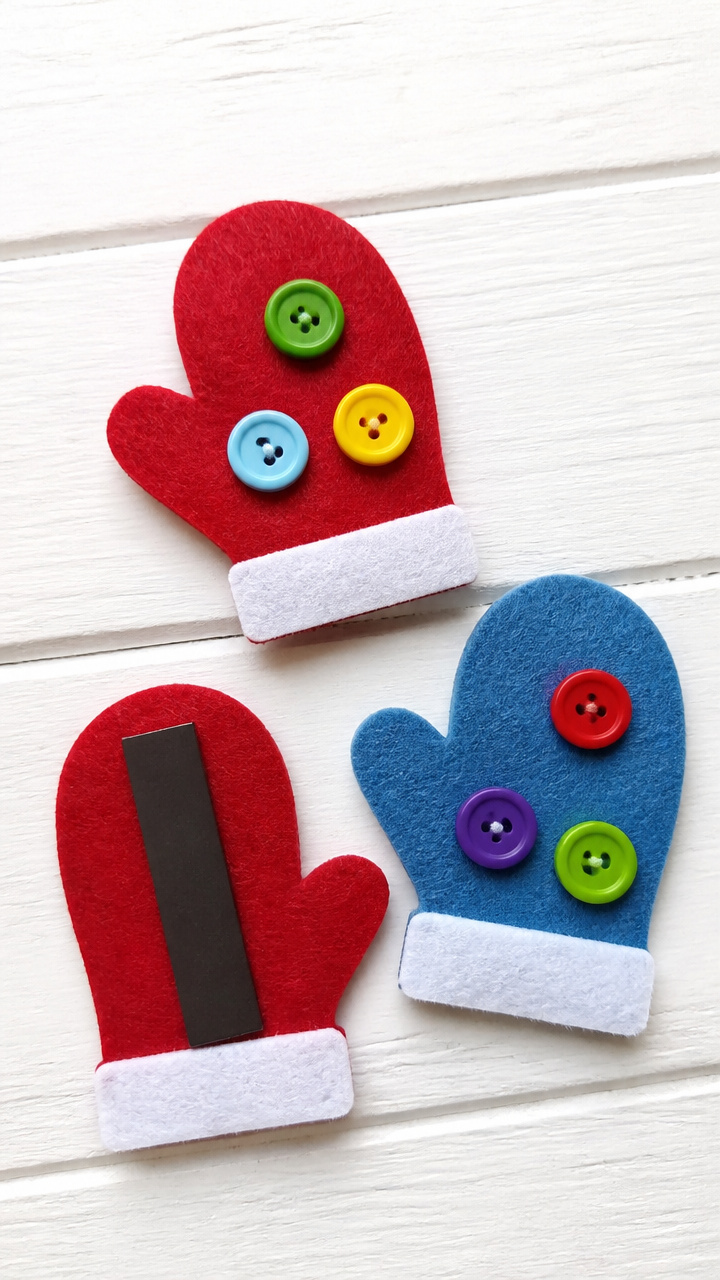
Two colorful mittens made from felt brim with mismatched buttons and stick to the fridge with magnetic tape.
Materials Needed
- Red felt sheet, 1 piece
- Blue felt sheet, 1 piece
- Assorted buttons, 12 mm, 8
- Scissors
- Glue
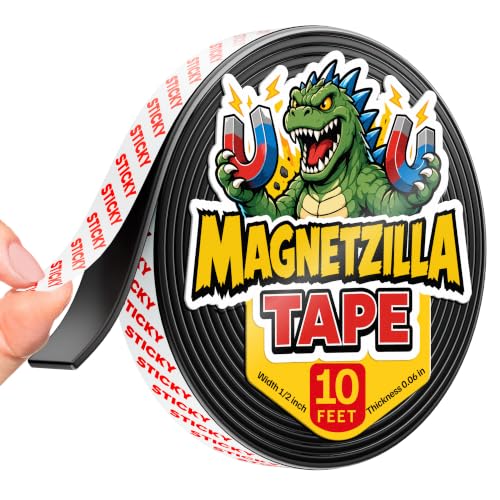
- Magnetic tape, adhesive-backed, 2 inches
- Pencil
How to Make It
- Draw a mitten shape on the red felt and cut it out.
- Draw a smaller mitten on the blue felt and cut it out to use as a cuff.
- Glue the blue cuff to the bottom edge of the red mitten.
- Glue four buttons down the front of each mitten.
- Cut a 1-inch piece of magnetic tape and stick it to the back of each mitten.


13. Q-Tip Snowflake Painting
Easy
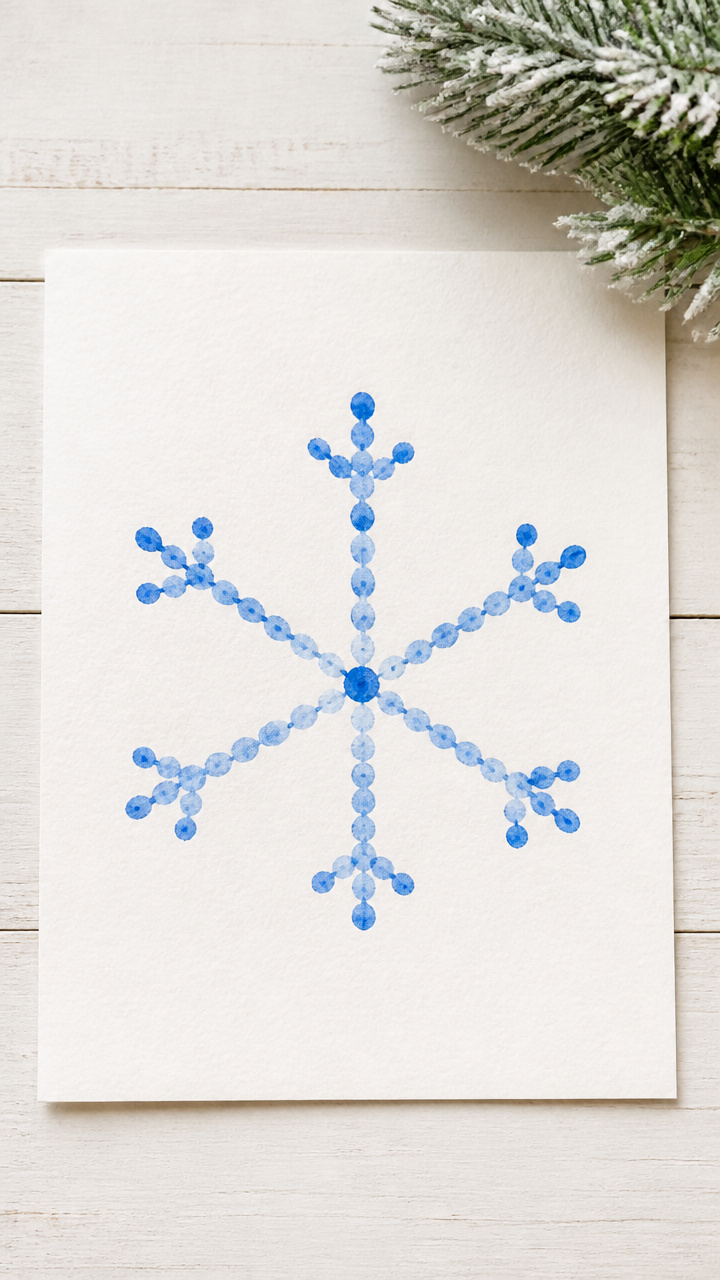
Six arms of a snowflake emerge from a center dot as cotton swabs dab paint in symmetrical bursts.
Materials Needed
- White drawing paper, 9×12 inches, 1 sheet
- Blue tempera paint, 2 tablespoons
- Q-Tips, 7
- Black marker
- Ruler
How to Make It
- Use the ruler and black marker to draw a small dot in the center of the paper.
- Draw six faint lines outward from the dot at even angles like a clock.
- Dip one end of a Q-Tip into the blue paint.
- Dab paint along one line starting from the center outward.
- Repeat with clean Q-Tips for each arm until all six are filled.
- Let the paint dry for 20 minutes.


14. Crayon Resist Snow Scenes
Easy
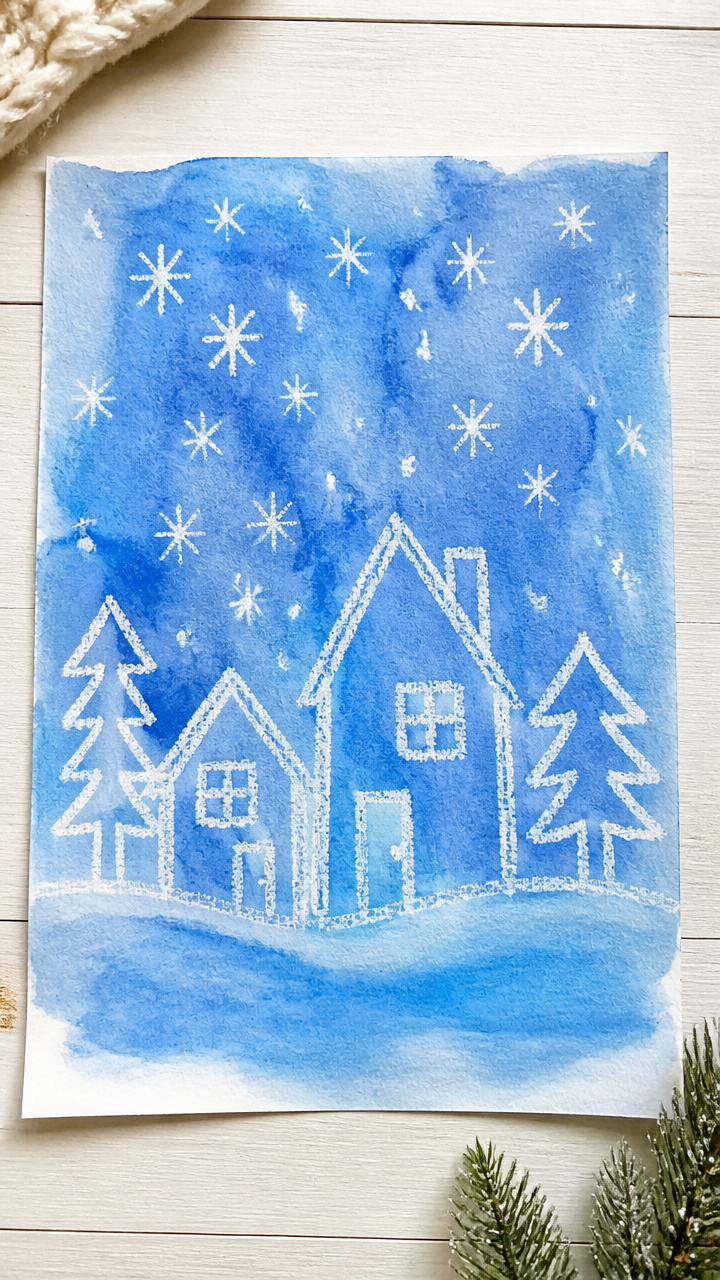
Invisible drawings made with white crayon appear when brushed over with blue paint, revealing hidden houses and trees.
Materials Needed
- White drawing paper, 9×12 inches, 1 sheet
- White crayon
- Blue liquid watercolor, 2 tablespoons
- Paintbrush, size 5
- Cup of water
How to Make It
- Use the white crayon to draw a house, tree, or snowman on the paper, pressing firmly.
- Dip the paintbrush in the blue watercolor.
- Brush the paint over the entire page, covering the crayon drawing.
- Watch the image appear as the paint resists the wax.


15. Fingerprint Snow Angels
Easy
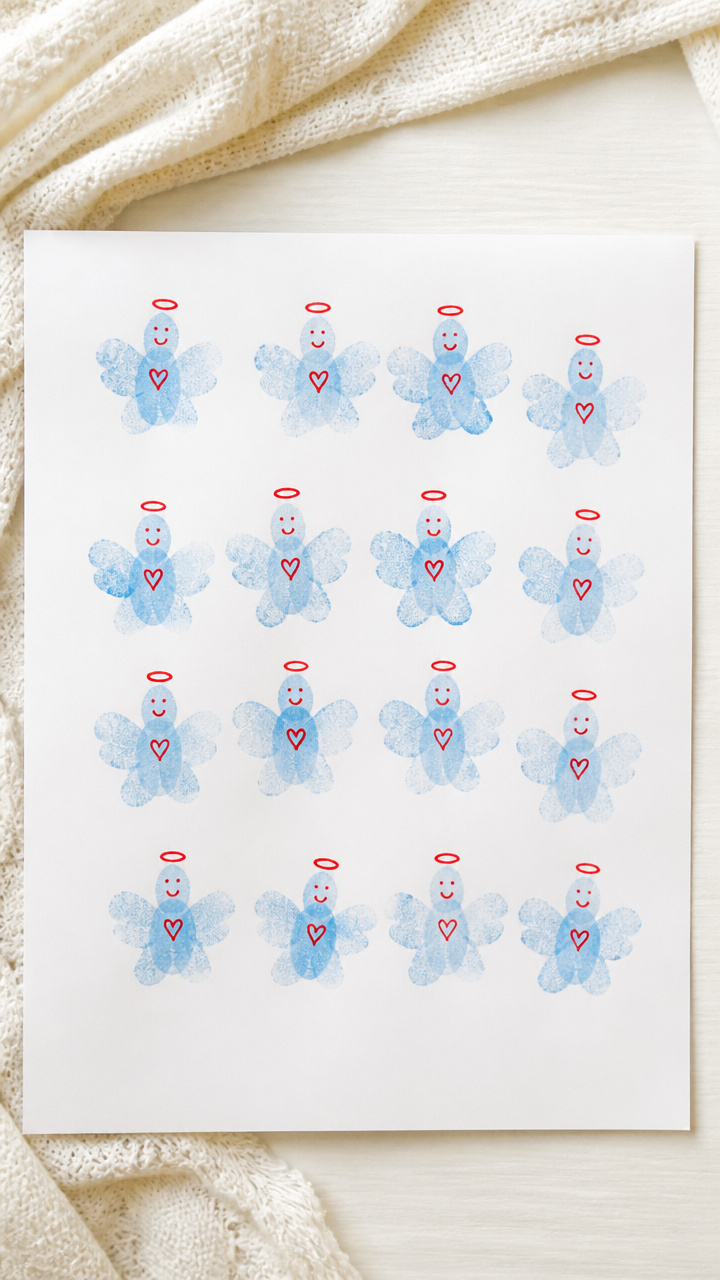
Rows of overlapping fingerprints stretch arms and legs to form a sky full of tiny snow angels.
Materials Needed
- White drawing paper, 9×12 inches, 1 sheet
- Blue washable paint, 2 tablespoons
- Paint tray
- Cotton swab
- Red marker
How to Make It
- Pour blue paint into the paint tray.
- Press your child's fingertip into the paint and then onto the paper to make a dot.
- Make five more fingerprints in a line to form the angel's body and wings.
- Use the cotton swab dipped in blue paint to draw connecting lines for arms and legs.
- Add a red scarf detail with the marker.


16. Plastic Lid Snowmen
Easy
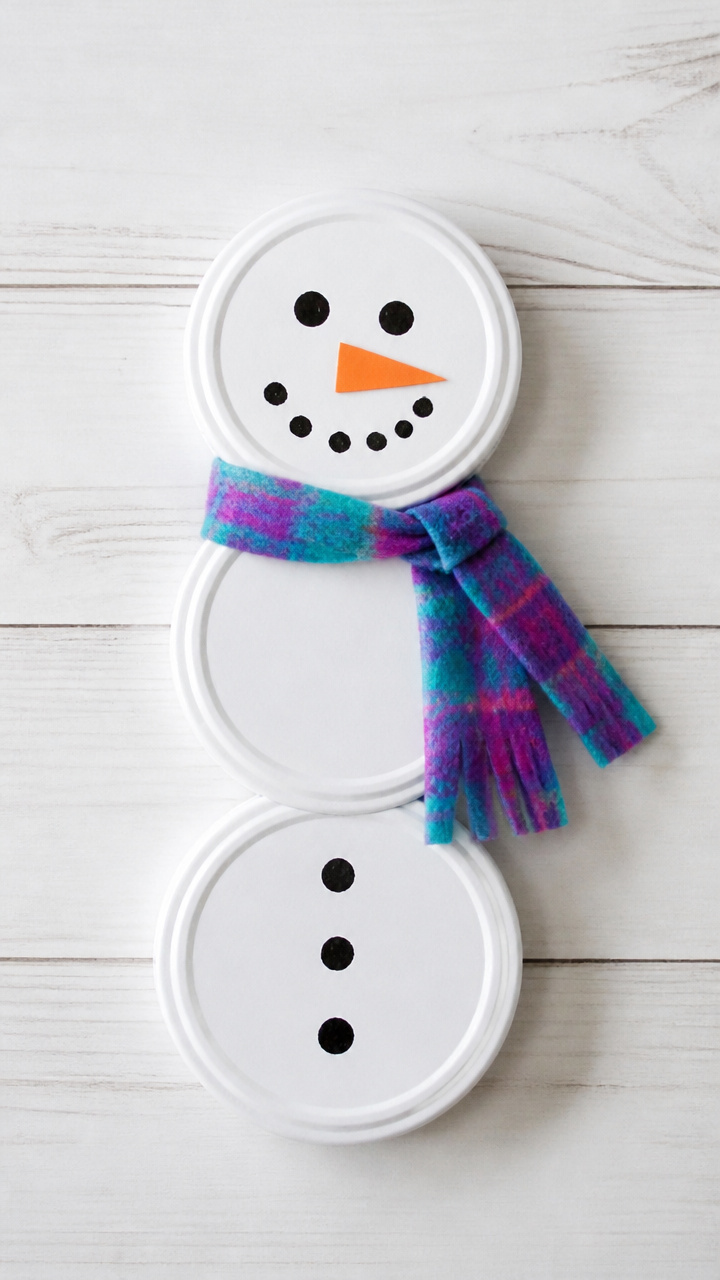
Recycled yogurt lids stack into smiling snowmen with painted faces and scarf collars.
Materials Needed
- Three plastic lids, 3 inch diameter, clean and dry
- White acrylic paint, 3 tablespoons
- Paintbrush, size 3
- Black marker
- Orange construction paper
- Scissors
- Glue
- Yarn, 6 inches, red
How to Make It
- Paint all three lids white and let them dry for 20 minutes.
- Stack the lids largest to smallest to form a snowman body.
- Glue the lids together and let dry for 30 minutes.
- Draw eyes and a mouth on the top lid with the black marker.
- Cut a small triangle from the orange paper and glue it as the nose.
- Wrap the red yarn around the middle lid as a scarf and glue the ends.


17. Sticker Window Frosting
Easy
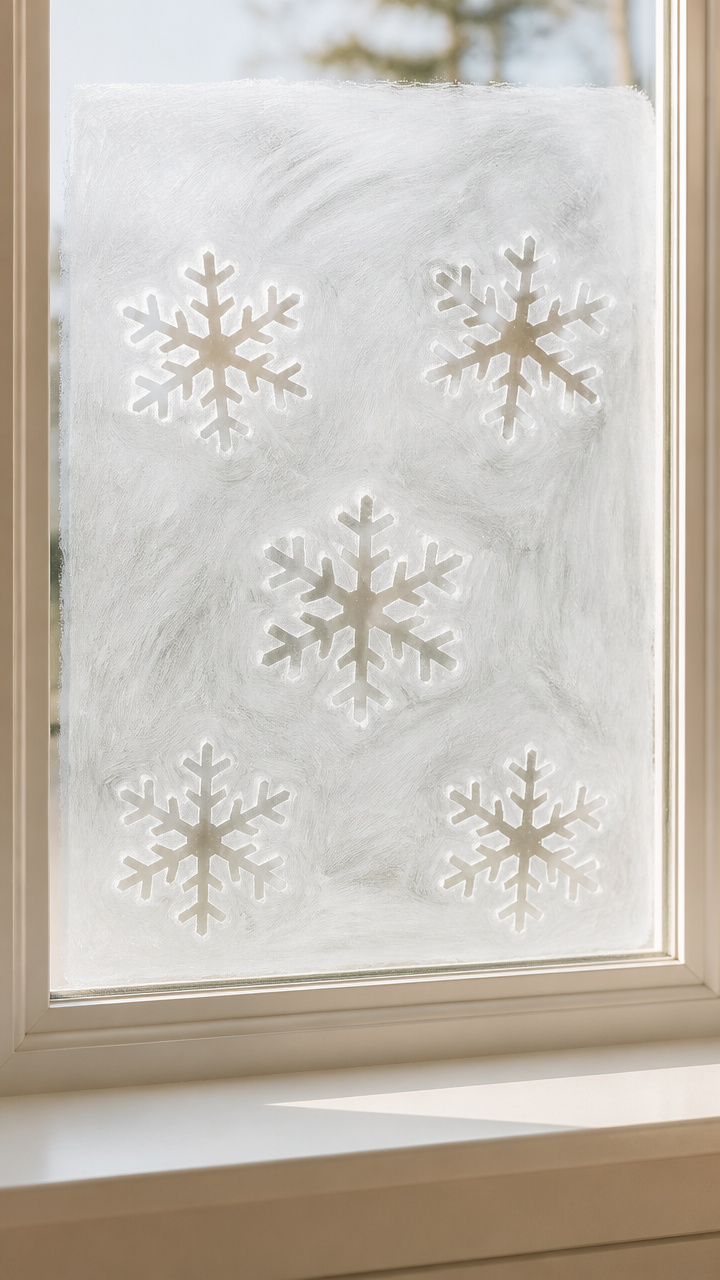
Die-cut stickers block paint while the rest of the glass gets coated, leaving frosty silhouettes when peeled away.
Materials Needed
- White tempera paint, 1/4 cup
- Paintbrush, 1 inch flat
- Snowflake stickers, 3 inch, 5
- Large window or glass surface
- Sponge
How to Make It
- Wash the window with the sponge and let it dry completely.
- Place five snowflake stickers randomly on the glass.
- Use the flat brush to paint a thin layer of white tempera over the entire window including the stickers.
- Wait 10 minutes for the paint to dry, then peel off the stickers to reveal clear snowflakes.


18. Pipe Cleaner Reindeer
Moderate
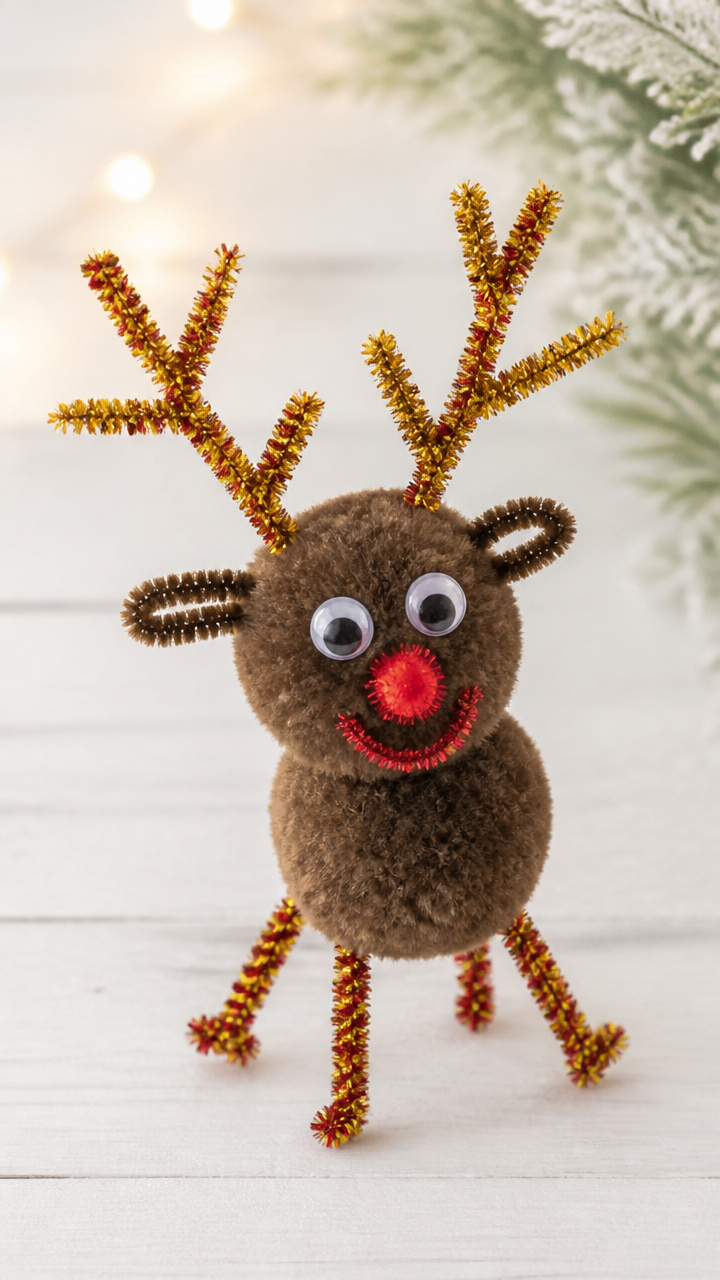
Twisted gold and red pipe cleaners form antlers, legs, and a face on a pom-pom body with googly eyes.
Materials Needed
- Brown pom-pom, 1 inch, 1
- Brown pipe cleaner, 12 inch, 1
- Red pipe cleaner, 6 inch, 1
- Gold pipe cleaner, 12 inch, 1
- Googly eyes, 6 mm, 2
- Glue
- Scissors
How to Make It
- Bend the brown pipe cleaner in half and twist the top 2 inches to make antlers.
- Slide the antlers through the top of the pom-pom and twist the ends inside to secure.
- Cut the red pipe cleaner in half and bend each piece into a U-shape for legs.
- Push two leg pieces into the bottom of the pom-pom on each side.
- Wrap the gold pipe cleaner around the front to make a face outline and twist the ends behind.
- Glue googly eyes to the front of the pom-pom.


19. Tissue Paper Windows
Easy
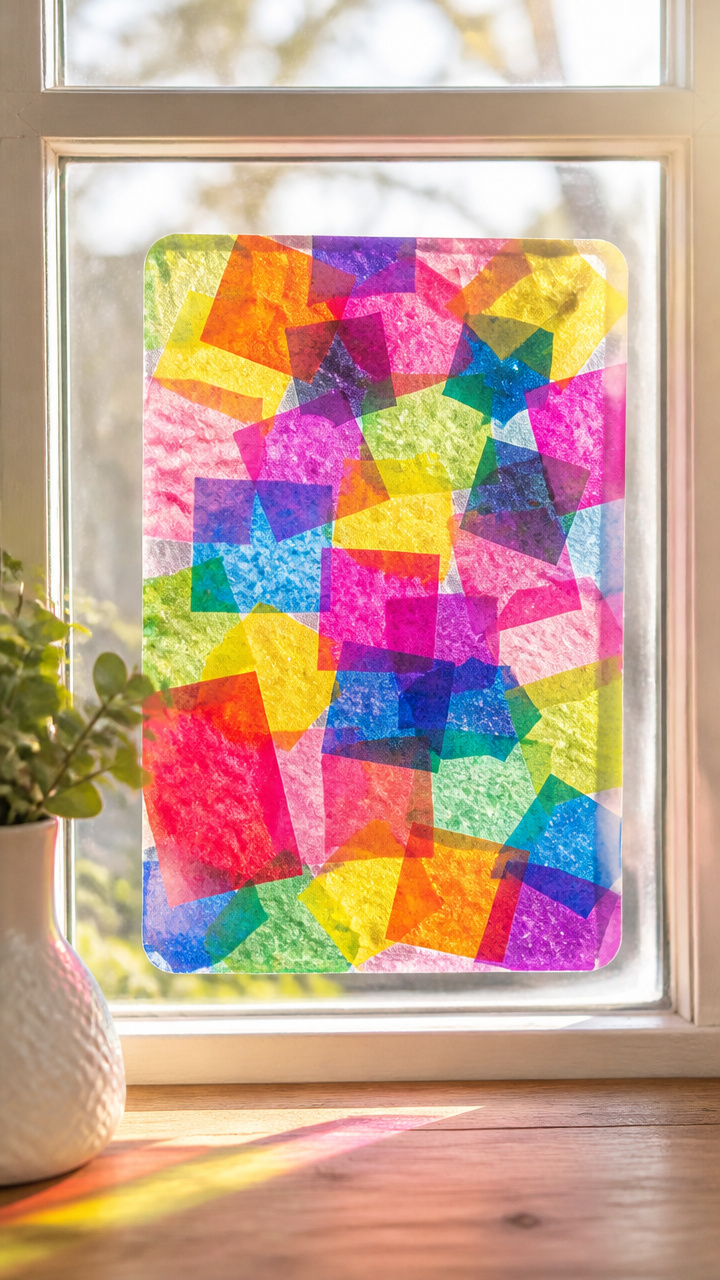
Bright squares of tissue paper overlap on contact paper to make a stained-glass effect glowing in sunlight.
Materials Needed
- Clear contact paper, 9×12 inches, 1 sheet
- Blue tissue paper, 4 sheets
- Scissors
- Roll of tape
How to Make It
- Peel the backing off the contact paper and lay it sticky-side up on the table.
- Cut the tissue paper into 2-inch squares.
- Place the squares on the sticky surface, overlapping slightly to fill the sheet.
- Cover with another 9×12 inch sheet of contact paper, sticky sides together, to seal.
- Trim edges and tape the window to a sunny pane.


20. Puffy Paint Stockings
Easy
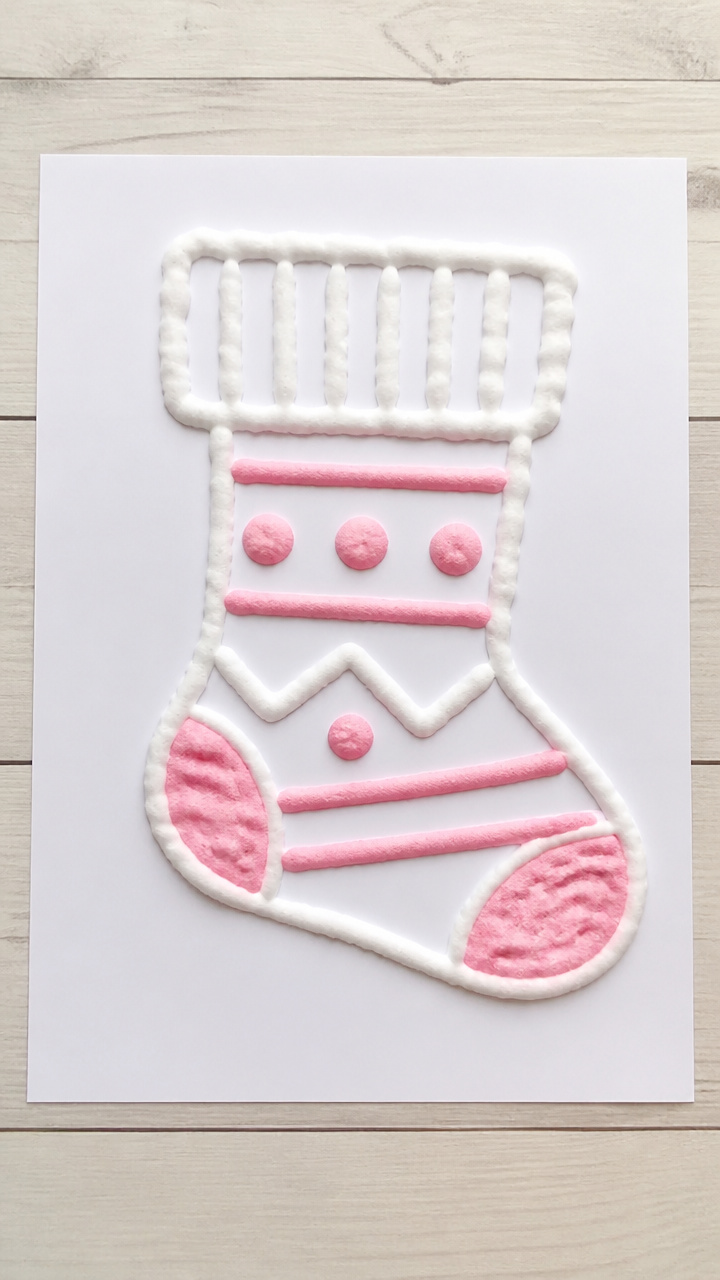
A mix of glue, shaving cream, and food coloring pipes onto paper in thick lines that dry raised and soft.
Materials Needed
- White school glue, 1/2 cup
- Shaving cream, 1/2 cup
- Red food coloring, 4 drops
- Plastic sandwich bag
- Scissors
- White drawing paper, 9×12 inches, 1 sheet
How to Make It
- Mix glue and shaving cream in a bowl until fluffy, about 1 minute.
- Add red food coloring and stir to combine.
- Snip a small corner off the plastic bag and fill it with the mixture.
- Squeeze the bag to pipe a stocking shape onto the paper.
- Let the paint dry flat for 6 hours until puffy and solid.


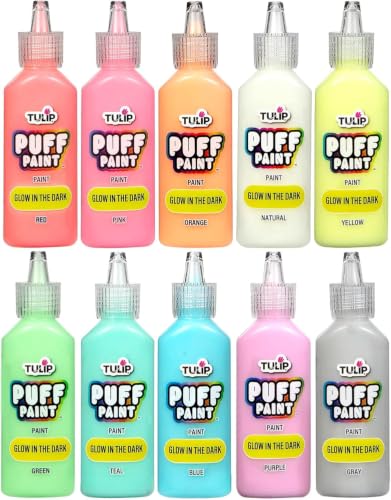
21. Cereal Loop Chains
Easy
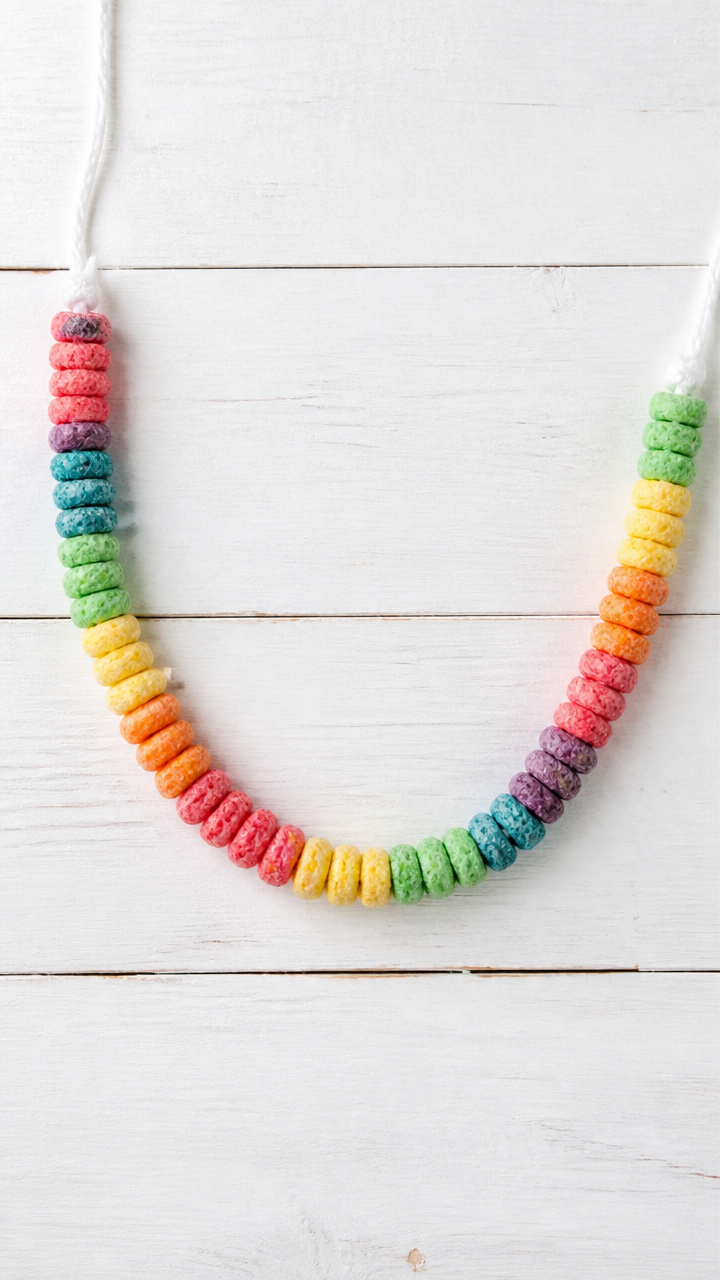
Rainbow-colored oat rings strung on yarn make cheerful garlands that drape over mantels or doorframes.
Materials Needed
- Rainbow-colored cereal loops, 1 cup
- Yarn, 3 feet, white
- Tape
- Needle, large-eye
How to Make It
- Thread the yarn through the needle and tape the end of the yarn to the table.
- Slide one cereal loop onto the yarn through the center.
- Continue threading loops until the yarn is full, leaving 6 inches free at the end.
- Tie the ends together to form a looped garland.


Grab a few sheets of paper, dig out that old box of buttons, and invite your child to sit beside you. These crafts are meant to be simple, joyful, and full of shared focus.