25 Winter Nature Crafts to Make After a Walk in the Snow

Frost-kissed pine needles cling to your coat, and your pockets are full of twigs, stones, and lacy dried seed pods gathered from a quiet forest path. The cold air has sharpened your senses, and now you're ready to bring a piece of that stillness indoors.
These crafts honor what you've collected — simple, grounded, and full of winter’s quiet beauty. Each one turns your snowy walk into something tangible, something warm to hold by the firelight.
1. Pinecone Bird Feeder Ornaments
Easy
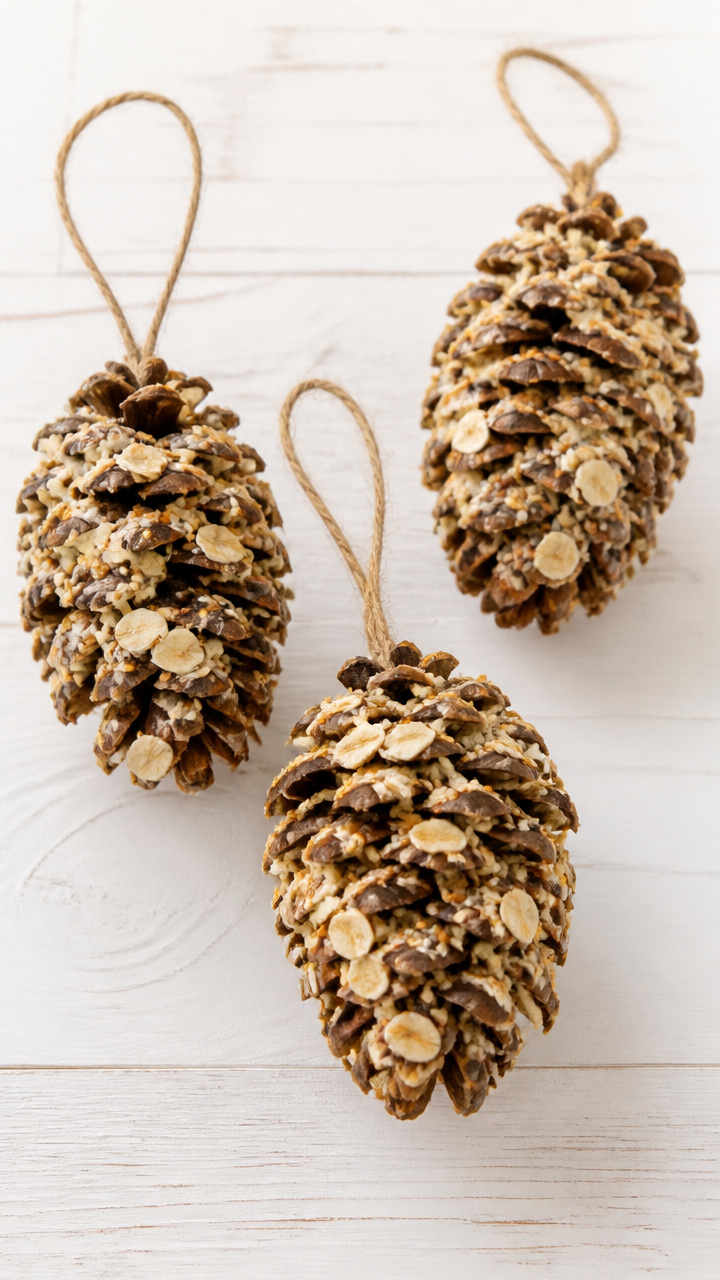
Rich copper pinecones become feathery dining spots for chickadees and nuthatches. String them up and watch birds flutter close to your window.
Materials Needed
- 3 medium pinecones, dry and open
- 12 inches of 1/8-inch jute twine
- 1/4 cup natural peanut butter (no sugar added)
- 1/2 cup rolled oats
- 1/4 cup sunflower seeds
How to Make It
- Cut the jute twine into three 4-inch pieces. Tie one piece around the top of each pinecone, looping it through the base of the top scales to form a hanging loop.
- Spread peanut butter all over the surface of each pinecone using a butter knife, pressing it into the crevices.
- Roll each coated pinecone in a mix of rolled oats and sunflower seeds until fully covered.
- Hang them from tree branches outside within 2 hours of making to prevent spoilage.
2. Snowprint Clay Tiles
Moderate
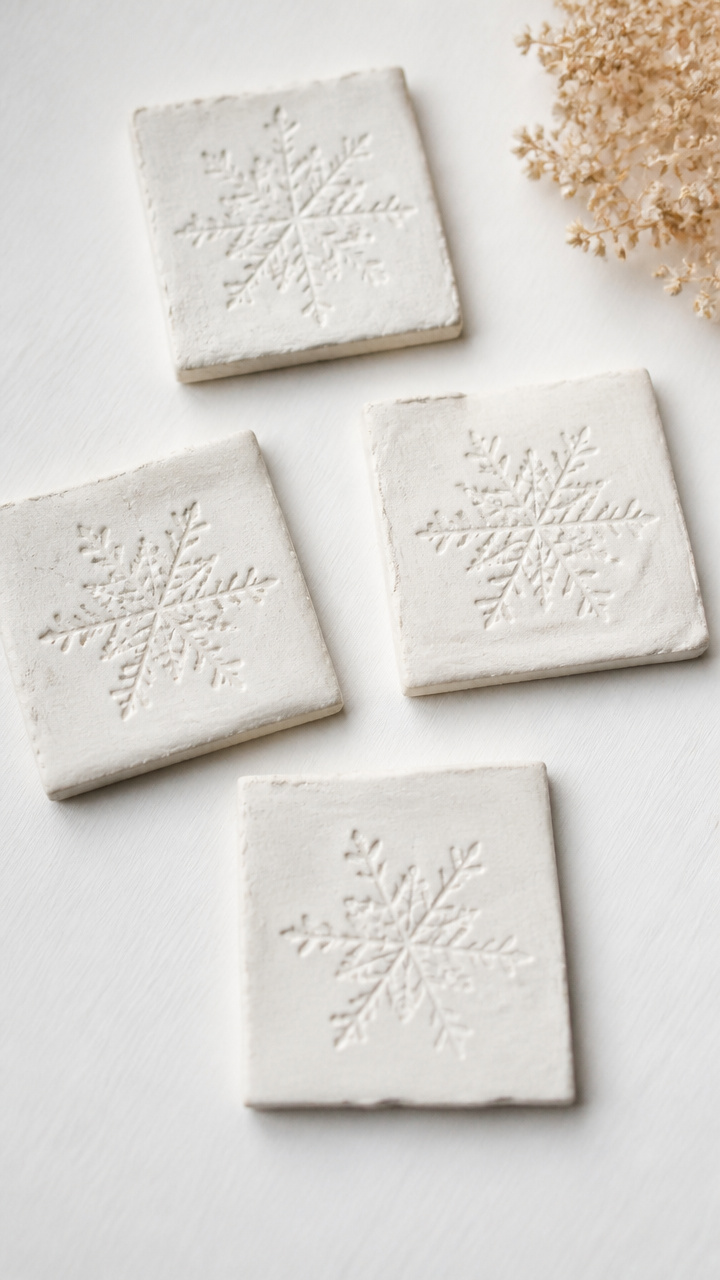
Delicate snowflake patterns pressed into soft clay become permanent impressions of a single winter morning. These tiles hold the ghost of falling snow.
Materials Needed
- 4 ounces air-dry white polymer clay
- 1/2-inch thick wooden rolling pin
- 2 tablespoons cornstarch
- Small flat tray or baking sheet
- Toothpick
How to Make It
- Sprinkle cornstarch on your work surface and roll the clay to 1/4-inch thickness using the rolling pin.
- Carry the clay outside on the tray while snow is still falling. Press the flat side gently into fresh snow to capture snowflake imprints.
- Lift carefully and use a toothpick to write the date or location in one corner.
- Let the tile dry undisturbed on the tray for 48 hours until fully hardened.
3. Fir Twig Candle Rings
Moderate
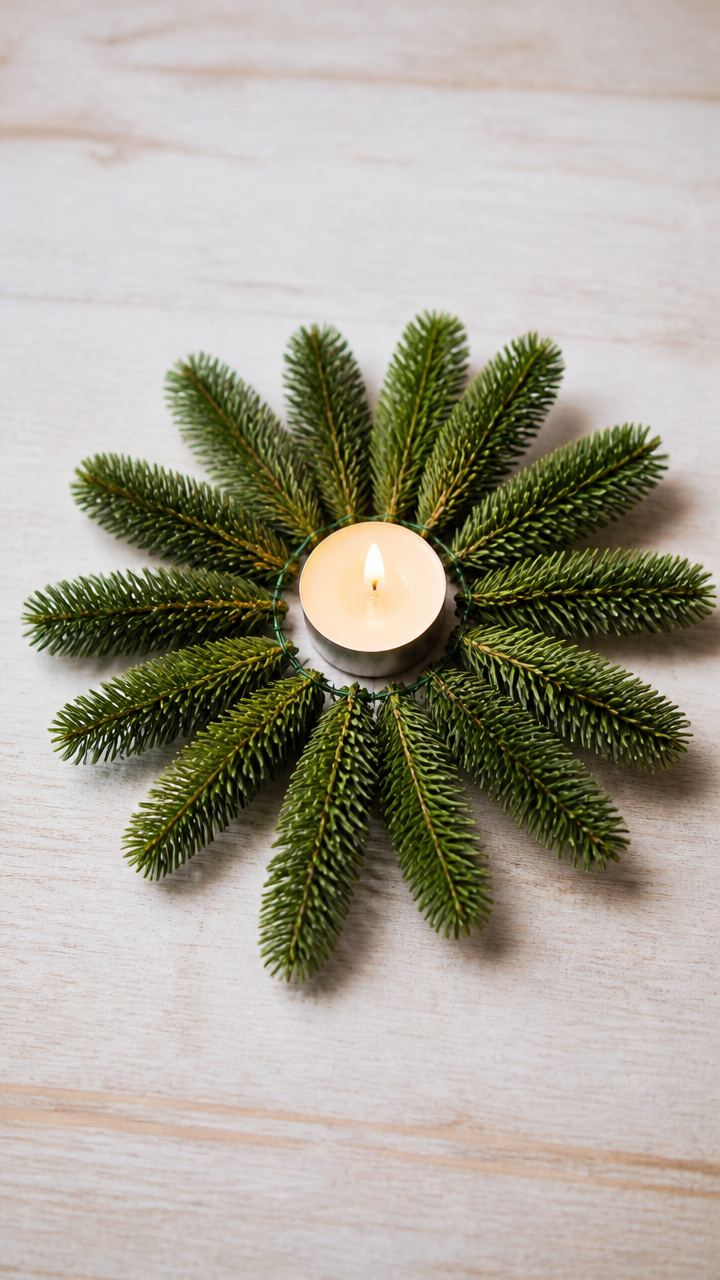
Short bundles of fir twigs circle a tea light, releasing a woodsy scent when warmed. This centerpiece brings the forest floor to your dining table.
Materials Needed
- 12 fresh fir twigs, each 6 inches long and pencil-thick
- 6 inches of 20-gauge green floral wire
- Scissors
- 1 tea light candle
How to Make It
- Lay six twigs side by side and wrap floral wire tightly around the center to bind them.
- Attach the second bundle perpendicular to the first, forming a cross, and wrap the wire around all four arms to secure.
- Bend each twig end outward gently to form a starburst ring, ensuring the tea light fits in the center.
- Place the tea light in the middle, resting on a heat-safe dish.
4. Frozen Leaf Ice Coasters
Easy

Maple leaves flash-frozen in clear ice become shimmering drink holders for winter gatherings. They catch the light like stained glass.
Materials Needed
- 4 small maple leaves, dry and intact
- 4 silicone ice cube trays (3-inch diameter)
- Filtered water
- Small funnel
How to Make It
- Place one leaf in the bottom of each silicone tray, smoothing it flat against the base.
- Use the funnel to pour filtered water into each tray, covering the leaf completely.
- Freeze trays for 6 hours or until solid.
- Pop the ice coasters out and place under drink glasses for a temporary, frosty base.
5. Birch Bark Button Pins
Advanced
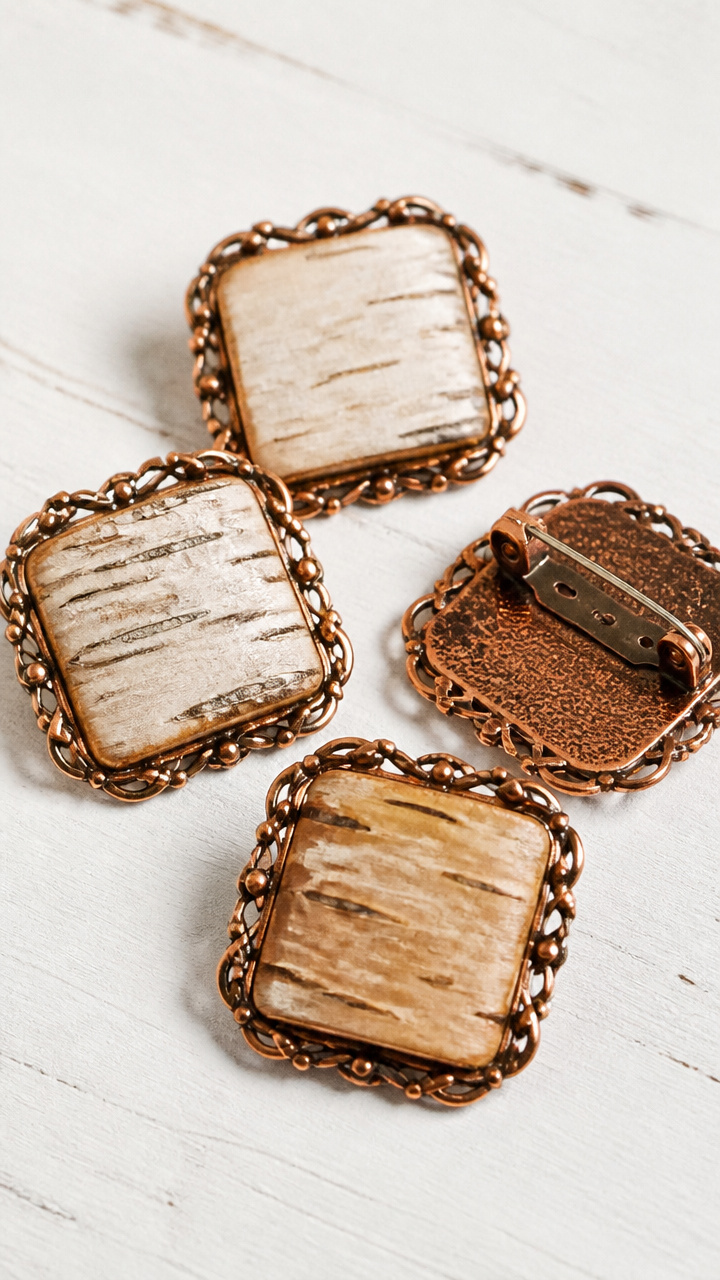
Slivers of peeling birch bark become tiny wearable landscapes, edged in copper. These pins are quiet tributes to winter trees.
Materials Needed
- 4 pieces birch bark, 1.5 x 1.5 inches, outer layer intact
- 4 metal pin backs with adhesive
- 4 12mm copper filigree button blanks
- E6000 craft glue
- Small paintbrush
- Fine-grit sandpaper
How to Make It
- Lightly sand the back of each birch bark piece to remove loose fibers.
- Brush a thin layer of E6000 glue onto the back of a copper filigree blank.
- Press the birch bark firmly into the glue, aligning edges, and let dry for 2 hours.
- Glue the pin back to the metal underside and cure overnight before wearing.
6. Snowy Branch Wall Hanger
Easy
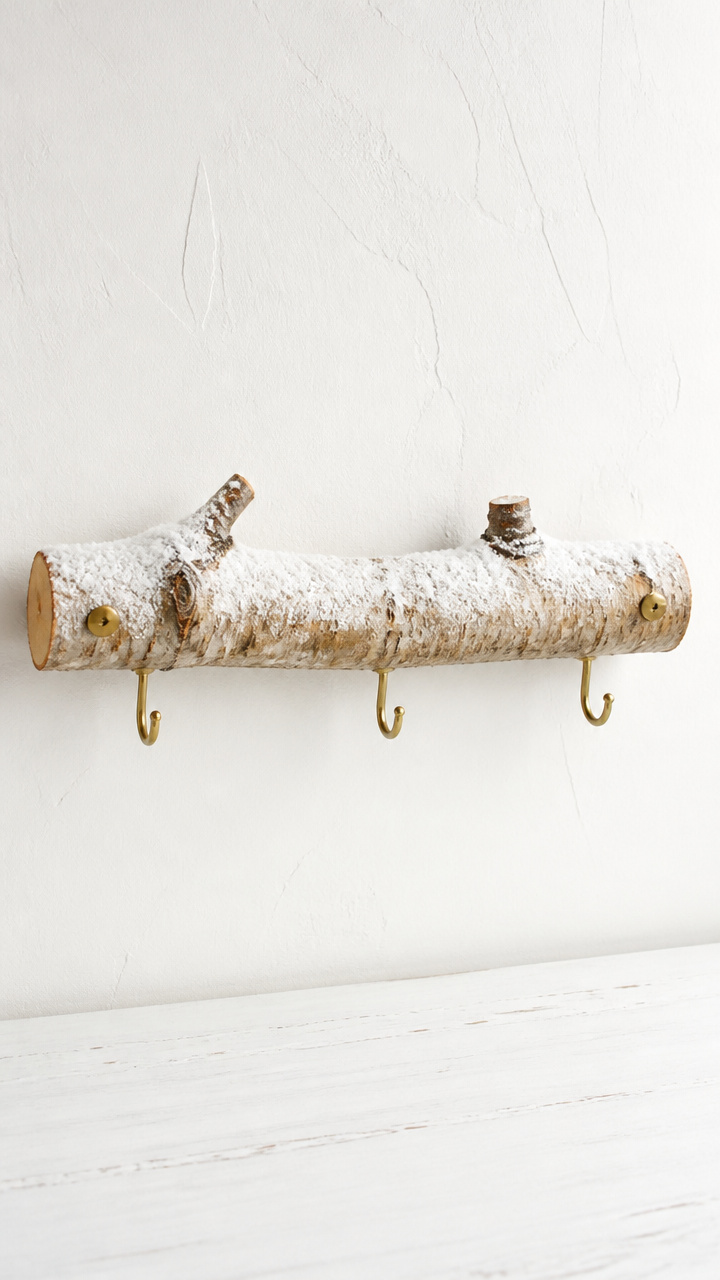
A single foraged branch becomes a rustic hook for scarves and mittens. Dust it with cornstarch to mimic fresh snowfall.
Materials Needed
- 1 straight birch branch, 18 inches long and 1 inch thick
- 3 small cup hooks, 3/4-inch screw base
- Drill with 1/8-inch bit
- 1 tablespoon cornstarch
- 1/2-inch wide paintbrush
How to Make It
- Drill three evenly spaced holes along the underside of the branch, 1 inch apart, using the 1/8-inch bit.
- Screw a cup hook into each hole by hand, turning until snug.
- Dip the paintbrush in cornstarch and lightly dust the top surface of the branch to simulate snow.
- Mount the branch horizontally on the wall using two picture hooks under each end.
7. Pine Needle Wreath Base
Moderate
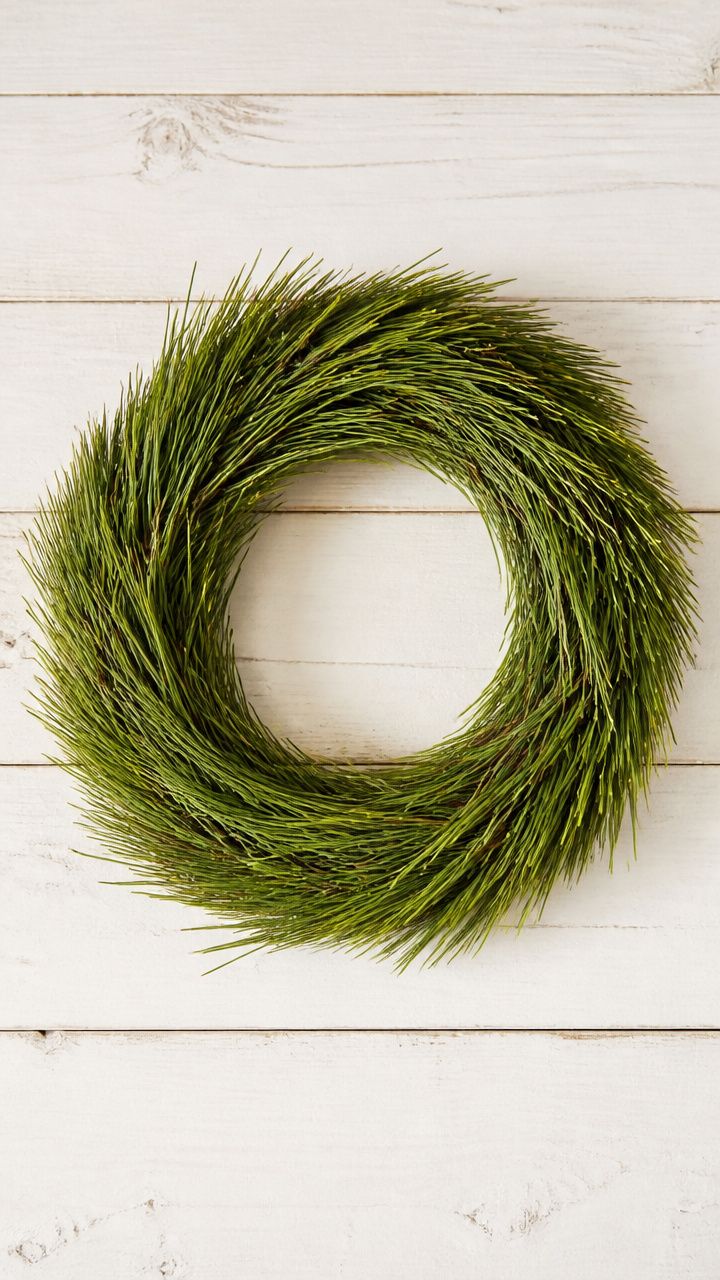
Tightly coiled pine needles form a soft, fragrant ring that lasts for years. Wrap it in ribbon or leave it bare for a woodsy look.
Materials Needed
- 2 cups long pine needles (from white pine)
- 12-inch wire wreath frame with mesh
- Needle-nose pliers
- Green 24-gauge floral wire
How to Make It
- Gather pine needles into 2-inch bundles and insert the base of each bundle into the mesh of the wreath frame.
- Wrap floral wire around the base of the bundle and the frame to secure, using pliers to tighten.
- Continue adding bundles, overlapping each by half, until the entire ring is covered.
- Trim any stray needles with scissors and shape the wreath by hand.
8. Ice Lantern with Berries
Easy
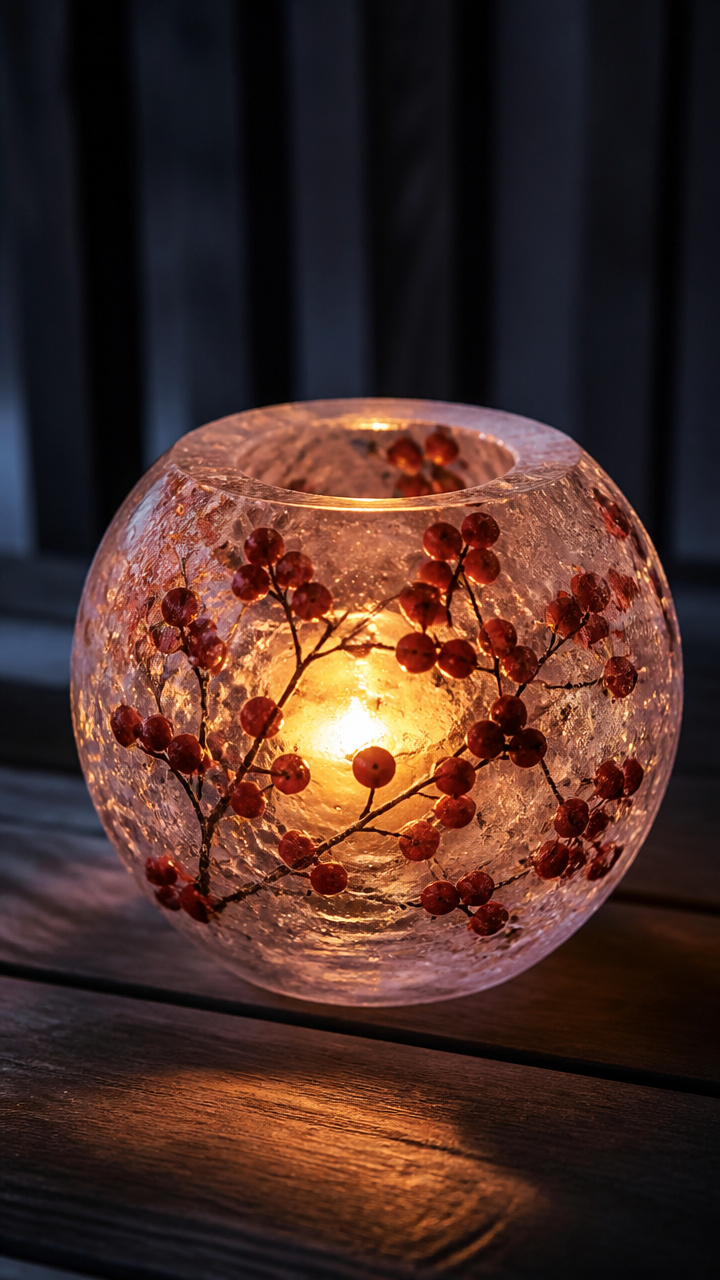
Red winter berries glow inside a hollow ice sphere when lit from within. Set it on your porch with a votive candle.
Materials Needed
- 1 clean 1-quart plastic bowl
- 1 clean 1-pint plastic bowl
- Filtered water
- 10 frozen winter berries (e.g., bittersweet or rose hips)
- 1 tea light candle
How to Make It
- Fill the quart bowl with 2 cups of filtered water and place the pint bowl inside, pressing down slightly to center it.
- Sprinkle berries into the water around the smaller bowl.
- Freeze for 12 hours or until solid.
- Run warm water over the outside of the quart bowl, then invert and lift to release the ice lantern. Place a tea light inside the hollow center.
9. Frosted Twig Picture Frame
Moderate
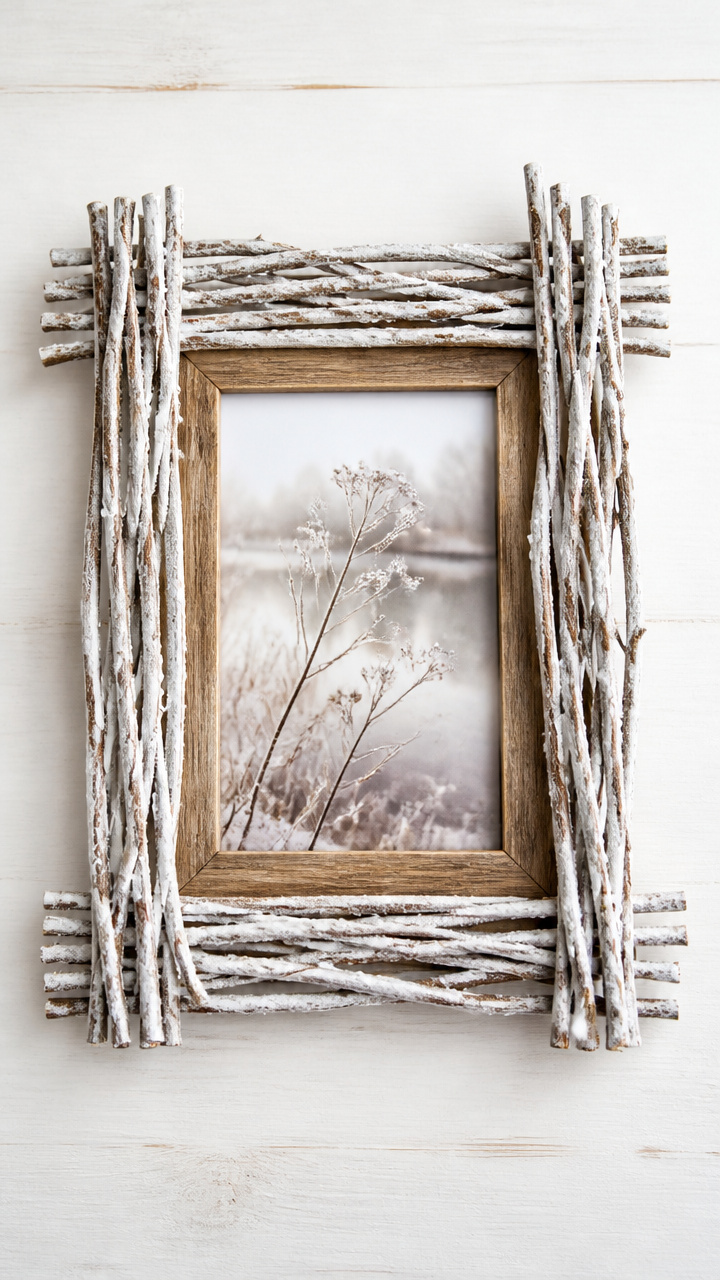
A plain wooden frame gets a frost-kissed upgrade with glued twigs and a dusting of white paint. It holds a photo from your snowy walk.
Materials Needed
- 1 unfinished wooden photo frame, 5×7 inches
- 8 straight twigs, each 5 inches long
- Hot glue gun and 1 glue stick
- White acrylic paint
- 1/2-inch foam brush
- Craft knife
How to Make It
- Arrange twigs around the outer edge of the frame, trimming any that extend past the border using the craft knife.
- Glue each twig in place with the hot glue gun, applying glue at both ends and the center.
- Dip the foam brush in white acrylic paint and lightly dab it over the twigs to mimic frost.
- Let dry for 1 hour before inserting a 5×7 photograph.
10. Moss and Stone Succulent Planter
Advanced
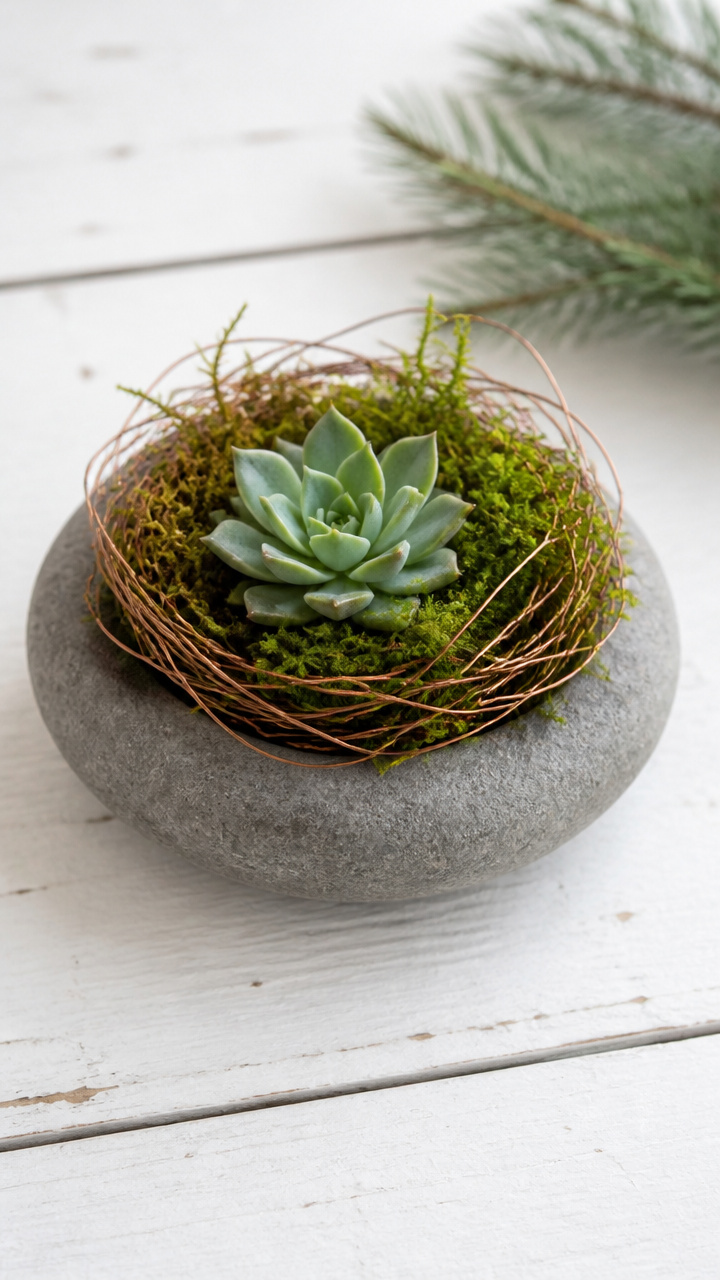
A flat river stone cradles a tuft of moss and a tiny succulent, held in a wire nest. It feels like a miniature winter garden.
Materials Needed
- 1 flat river stone, 4 inches wide
- 1 small clump of sheet moss
- 1 miniature succulent cutting (e.g., Sedum)
- 12 inches of 22-gauge copper wire
- Pliers
- Spray bottle with water
How to Make It
- Wrap the copper wire around the succulent's base and moss to form a loose cage, twisting the ends underneath.
- Shape the wire to conform to the curve of the stone, securing the plant in a central dip.
- Use pliers to tuck wire ends flat against the stone's underside.
- Mist the moss and succulent lightly every other day with the spray bottle.
11. Bark Bark Name Tags
Easy
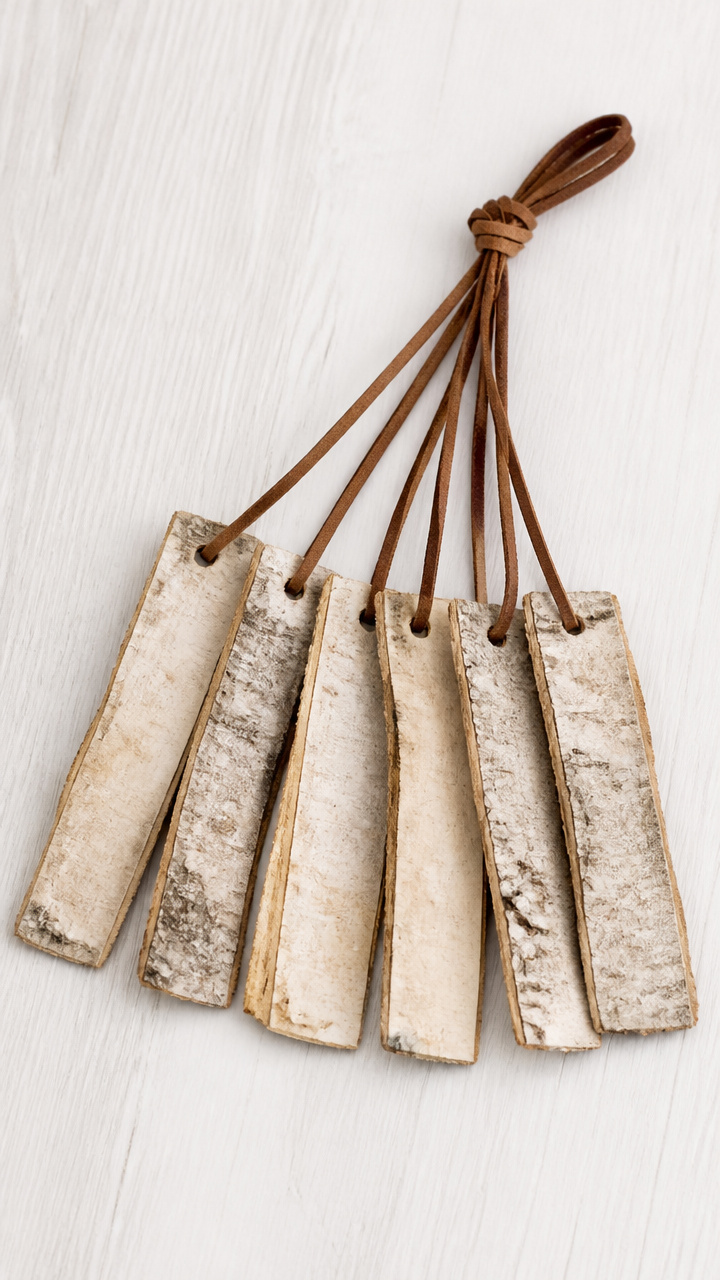
Rectangles of sturdy bark become garden-style labels with names written in charcoal. Use them for mugs, gifts, or plant pots.
Materials Needed
- 6 pieces of birch bark, 2 x 1 inches
- 1 charcoal pencil
- Hole punch (1/8-inch)
- 6 inches of thin leather cord
How to Make It
- Write a name or word on each bark piece using the charcoal pencil, pressing lightly for a soft gray line.
- Punch a hole in the top center of each tag.
- Cut the leather cord into six 1-inch pieces and thread one through each hole to hang.
12. Snow Crystal Window Clings
Moderate
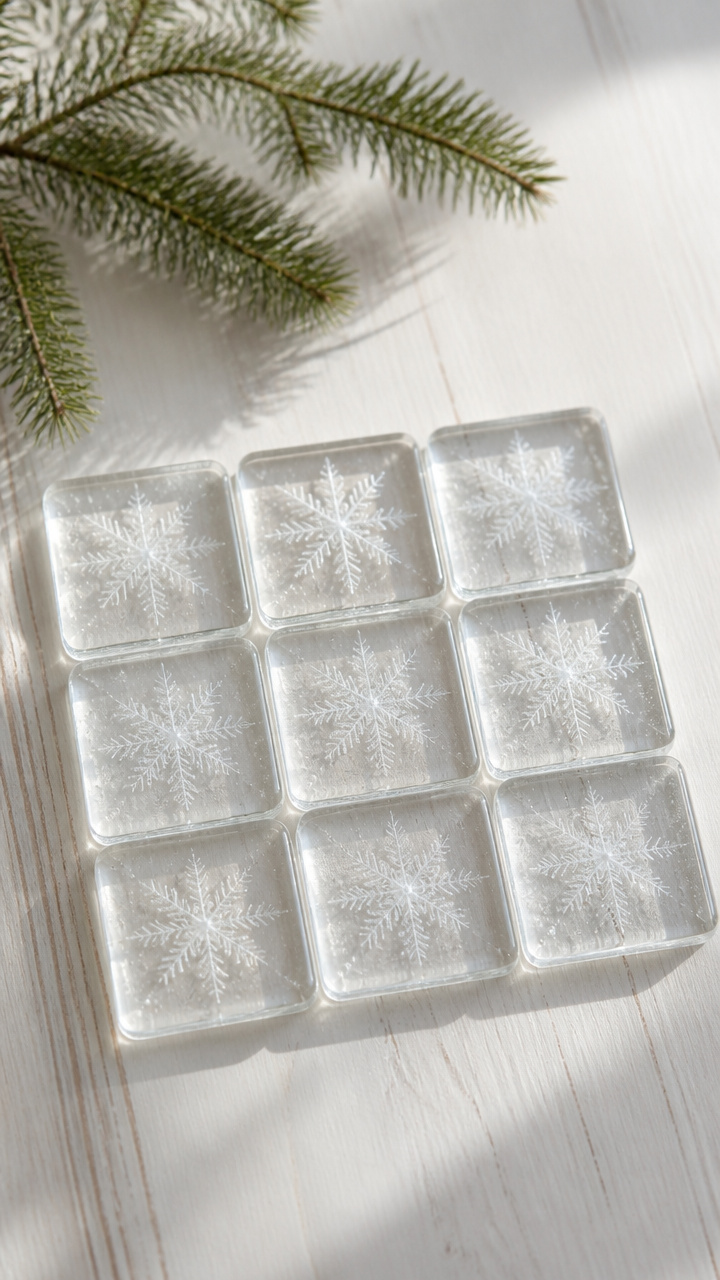
Clear glue holds tiny ice crystals from snowflakes, preserved on glass. They sparkle like real frost when backlit.
Materials Needed
- 4 3×3-inch clear glass tiles
- White school glue
- Small paintbrush
- Fresh snowflakes (collected immediately after falling)
- Tweezers
How to Make It
- Paint a thin, even layer of white school glue on one glass tile using the paintbrush.
- Use tweezers to gently place intact snowflakes onto the glue before they melt.
- Let the tile sit undisturbed in a cold room for 3 hours until the glue hardens and captures the shapes.
- Repeat for remaining tiles and press gently against windows to cling.
13. Cedar Slice Coasters
Moderate
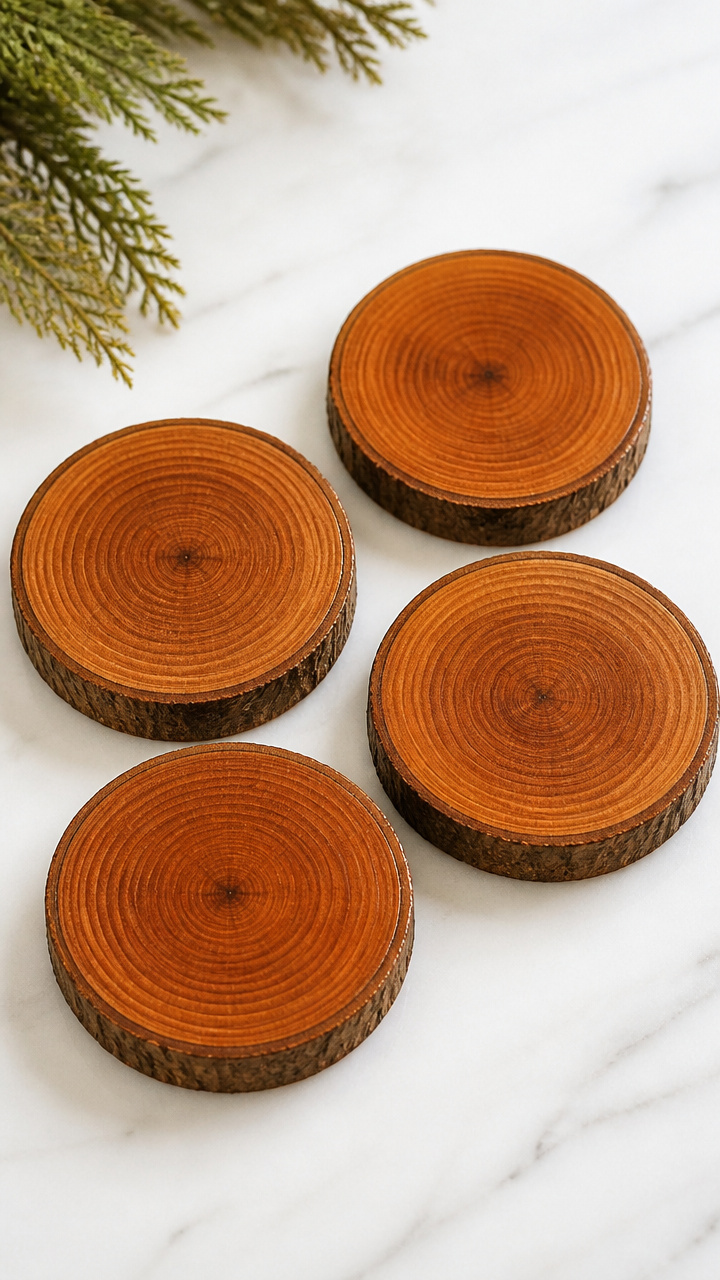
Thin crosscuts of cedar log become warm, aromatic coasters. Sand them smooth and seal with natural oil.
Materials Needed
- 4 cedar log slices, 4 inches diameter and 1/2 inch thick
- Medium and fine-grit sandpaper
- 1/4 cup food-safe mineral oil
- Lint-free cloth
How to Make It
- Sand each slice with medium-grit paper until smooth, then finish with fine-grit for a polished surface.
- Wipe away dust with a dry cloth.
- Soak a lint-free cloth in mineral oil and rub it into each coaster in circular motions.
- Let sit for 2 hours, then buff with a clean cloth.
14. Frosty Pine Twig Mirror
Moderate
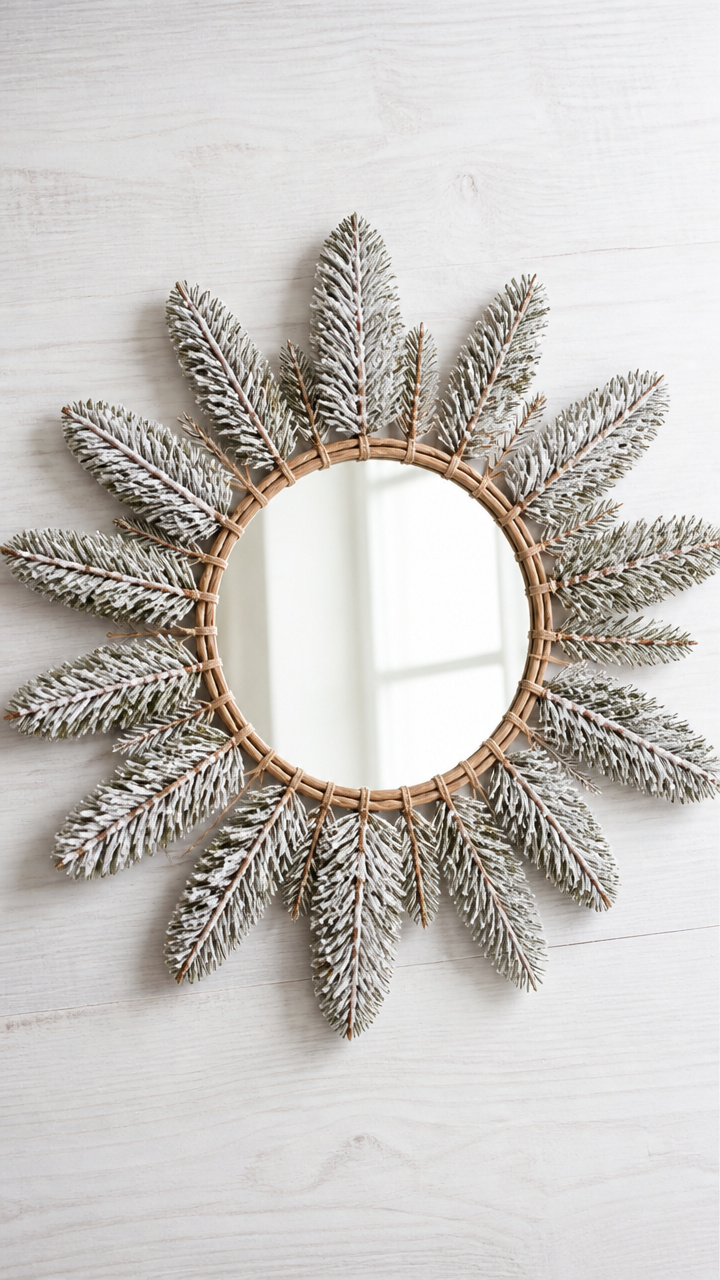
Short pine twigs radiate from a round mirror like a sunburst, dusted with white paint for a wintry glow.
Materials Needed
- 1 round mirror, 8 inches in diameter with flat back
- 16 pine twigs, each 6 inches long
- Hot glue gun and 1 glue stick
- White acrylic paint
- Toothbrush
How to Make It
- Arrange twigs around the mirror’s edge, pointing outward like rays.
- Glue each twig at the center and both ends using the hot glue gun.
- Flick white paint onto the twigs using a toothbrush for a speckled frost effect.
- Let dry for 1 hour before hanging.
15. Acorn Cap Fairy Lanterns
Easy
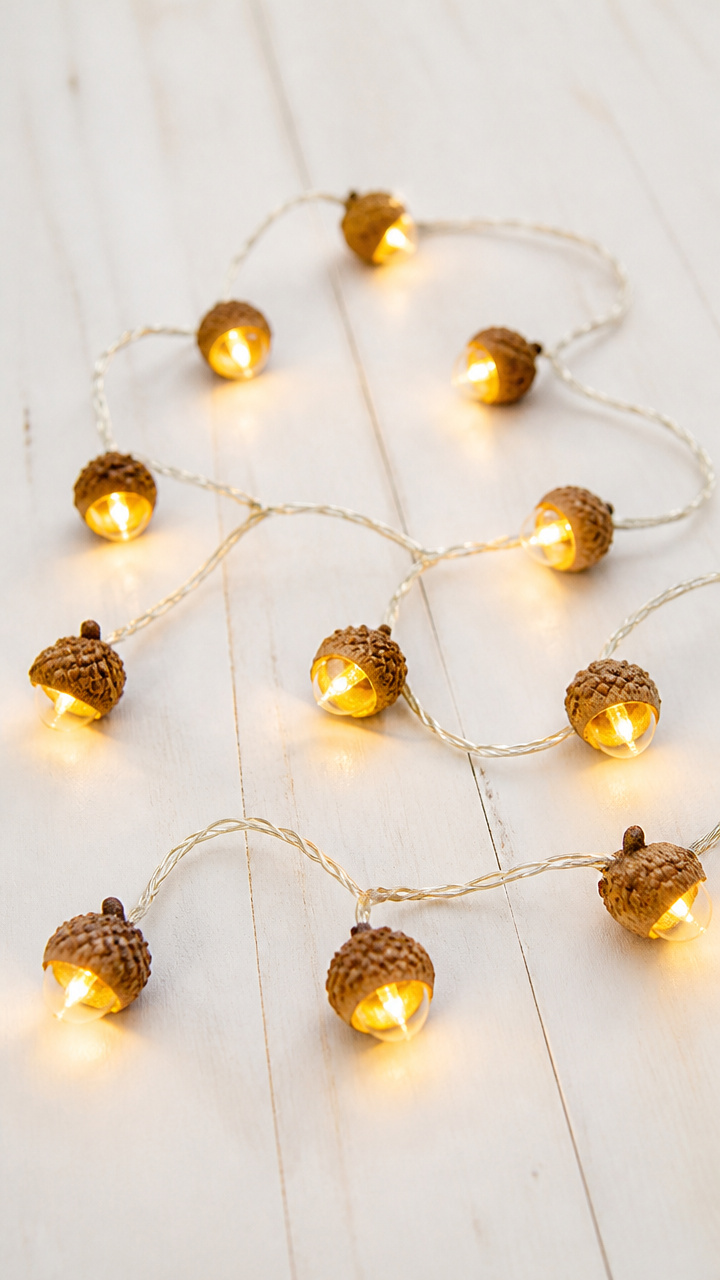
Tiny acorn caps cradle LED micro lights, strung into a delicate garland. They flicker like woodland fireflies.
Materials Needed
- 12 acorn caps with intact rims
- 1 string of 12 LED micro lights (battery-powered)
- Tweezers
- Hot glue gun
How to Make It
- Use tweezers to gently place the bulb of one LED light into each acorn cap, ensuring the wire exits the bottom.
- Add a tiny dot of hot glue under each bulb to secure it inside the cap.
- Drape the garland on a mantel or around a window frame.
- Turn on the lights at dusk.
16. Icicle Paperweights
Advanced
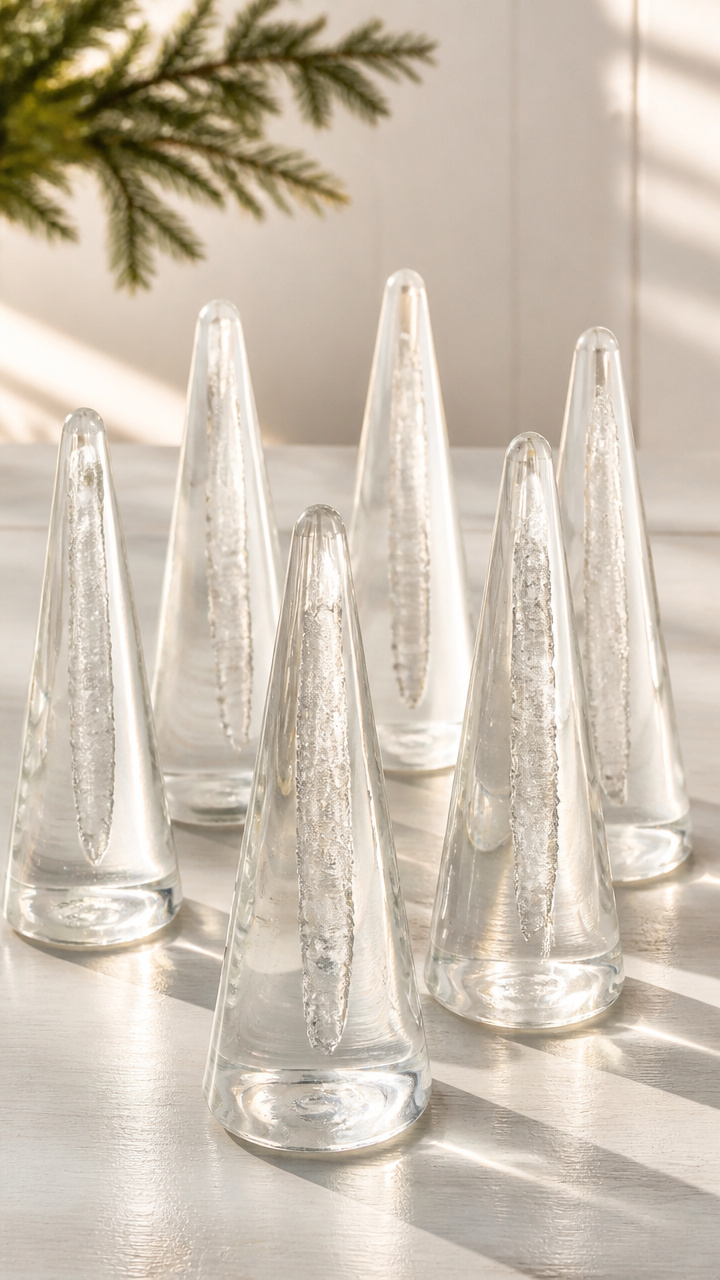
Clear resin poured into cone molds captures real icicles in glossy form. These stay cold to the touch indoors.
Materials Needed
- 6 real icicles, 4 inches long
- Silicone cone molds (6 cavities)
- Clear two-part epoxy resin (1 cup total)
- Stir sticks
- Disposable gloves
How to Make It
- Collect icicles and place one upright in each cone mold cavity.
- Mix the epoxy resin according to package instructions, stirring slowly to avoid bubbles.
- Pour the resin carefully into each mold, covering the icicle completely.
- Let cure for 24 hours before unmolding.
17. Birch Bark Bookmarks
Easy
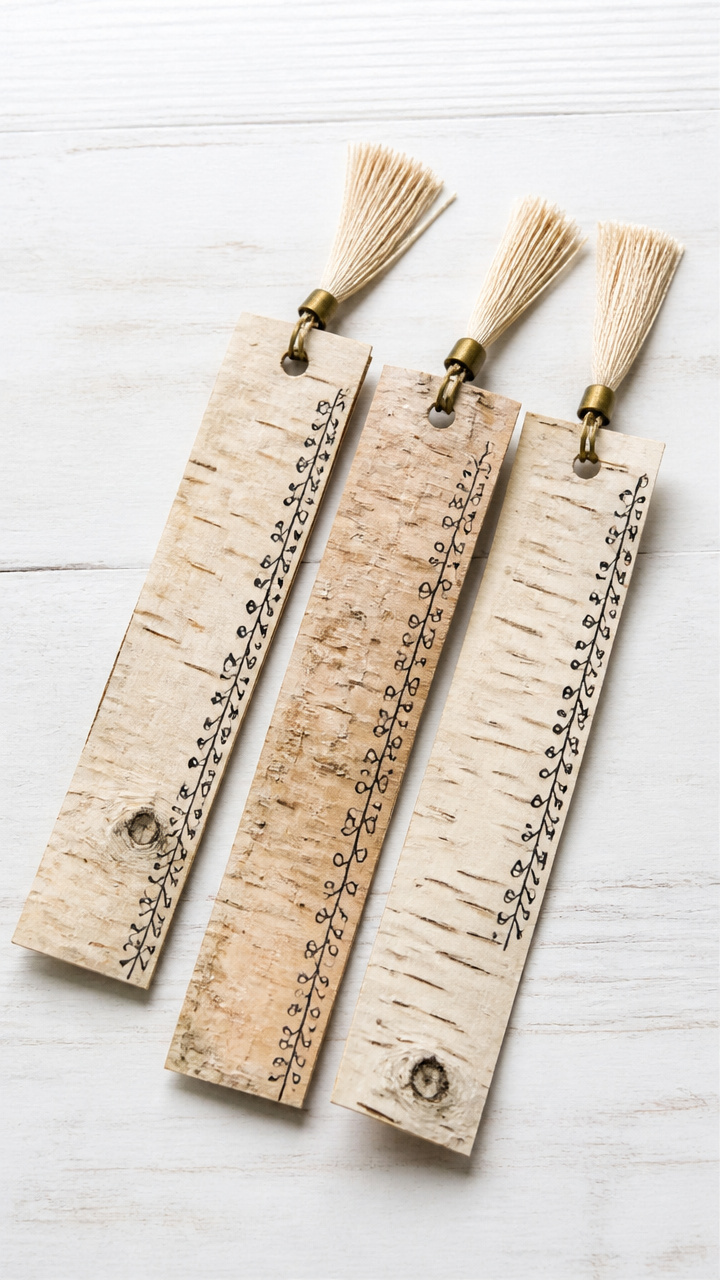
Long, narrow strips of birch bark become flexible bookmarks with a natural grain. Write a word along the edge with ink.
Materials Needed
- 4 birch bark strips, 6 x 1 inches
- Black waterproof ink pen
- Hole punch
- 4 tassels with metal caps
How to Make It
- Write a word like 'winter' or 'still' along the long edge of each bark strip using the ink pen.
- Punch a hole at the top center of each strip.
- Thread the string from a tassel through the hole and knot securely.
18. Frozen Flower Lanterns
Easy
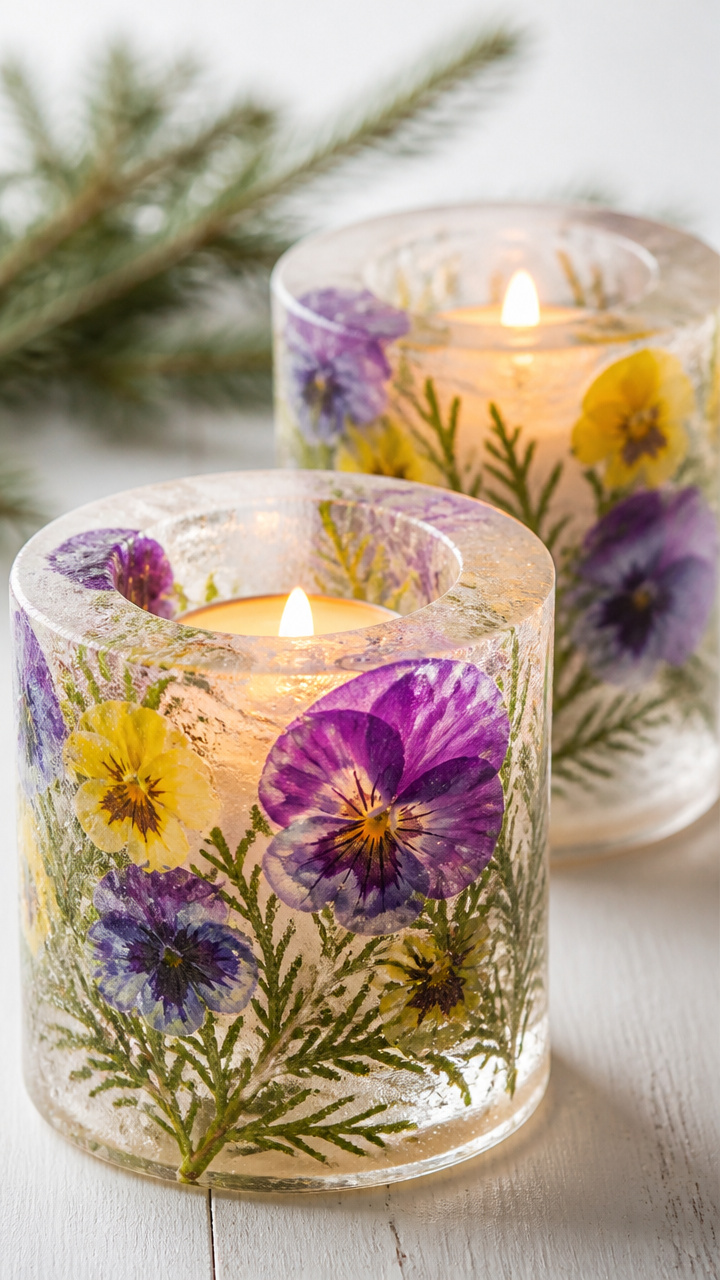
Petals and stems suspended in ice create glowing centerpieces. Use frozen pansies or evergreen sprigs.
Materials Needed
- 2 clean 1-liter plastic bottles
- Filtered water
- 8 small evergreen sprigs
- 4 frozen pansy flowers
- 1 tea light candle
How to Make It
- Cut the bottom 4 inches off each bottle to make a mold.
- Fill each mold halfway with filtered water and freeze for 3 hours.
- Place flowers and sprigs on the icy surface, then add more water to fill and refreeze for 6 hours.
- Remove from molds and place a tea light inside each lantern.
19. Pine Twig Napkin Rings
Easy
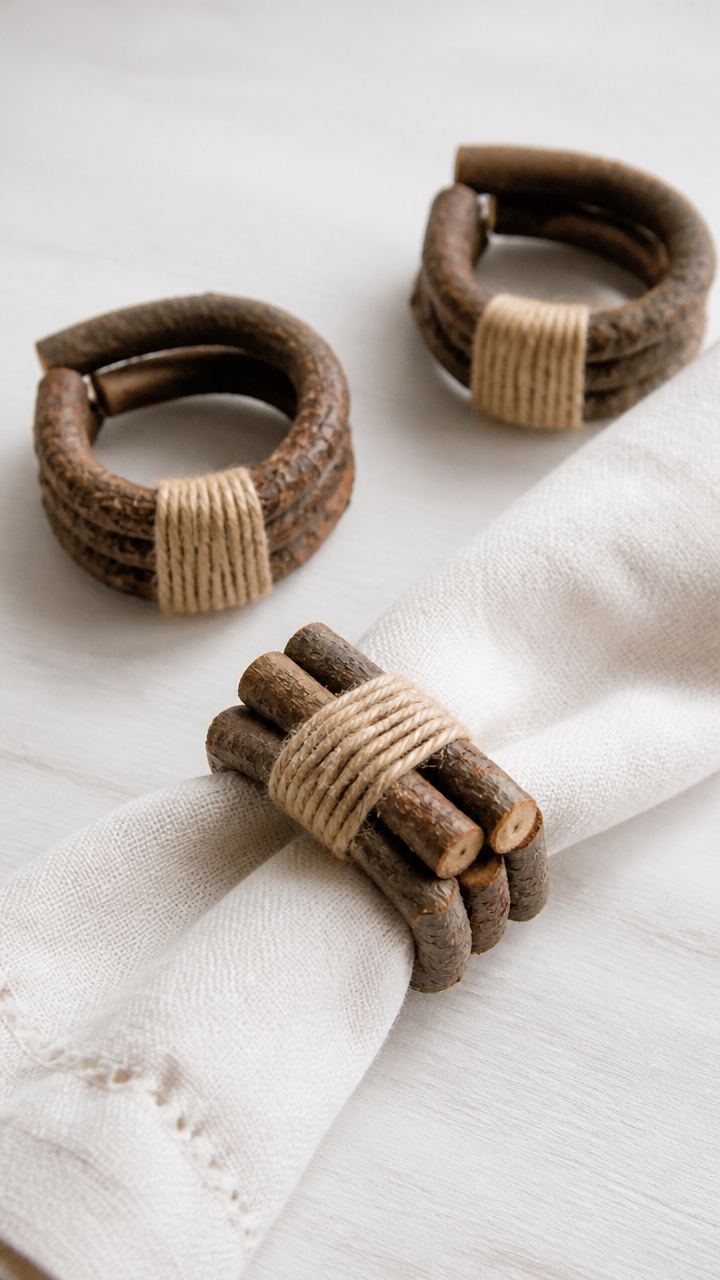
Three twigs bound with twine make rustic napkin holders for winter meals. They’re simple but full of forest texture.
Materials Needed
- 8 sets of 3 pine twigs, each 7 inches long
- 12 yards of natural hemp twine
- Scissors
How to Make It
- Lay three twigs side by side and tie hemp twine tightly around the center.
- Wrap the twine around each side twice and knot securely at the back.
- Trim the ends of the twine at an angle with scissors.
20. Snow Mold Salt Dough Ornaments
Moderate
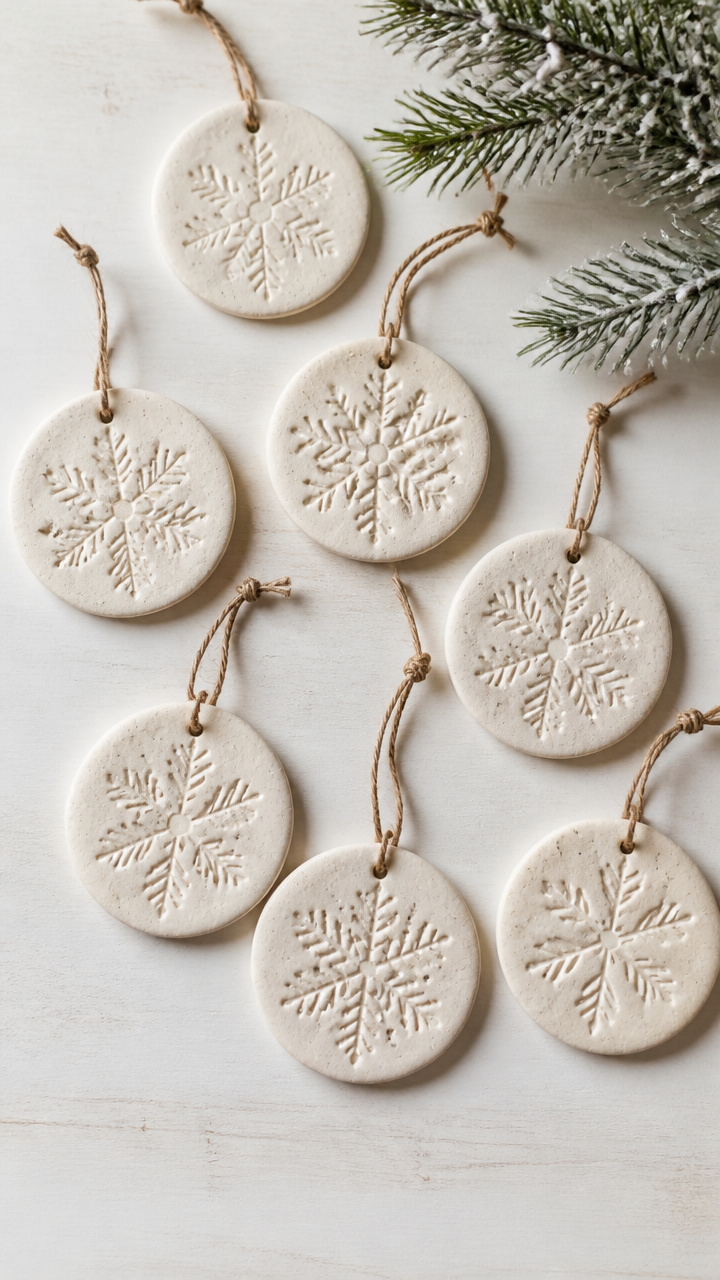
Fresh snow impressions pressed into salt dough become keepsake ornaments. Bake them to preserve the moment.
Materials Needed
- 1 cup all-purpose flour
- 1/2 cup table salt
- 1/2 cup water
- Rolling pin
- Straw
- Baking sheet
- Parchment paper
How to Make It
- Mix flour, salt, and water in a bowl until a smooth dough forms.
- Roll dough to 1/4-inch thickness on a floured surface.
- Press the flat side of a snow-covered object (like a pinecone) into the dough to leave a print.
- Use a straw to poke a hole near the top, then bake on parchment at 200°F for 3 hours until hard.
21. Bark and Moss Journal Cover
Advanced
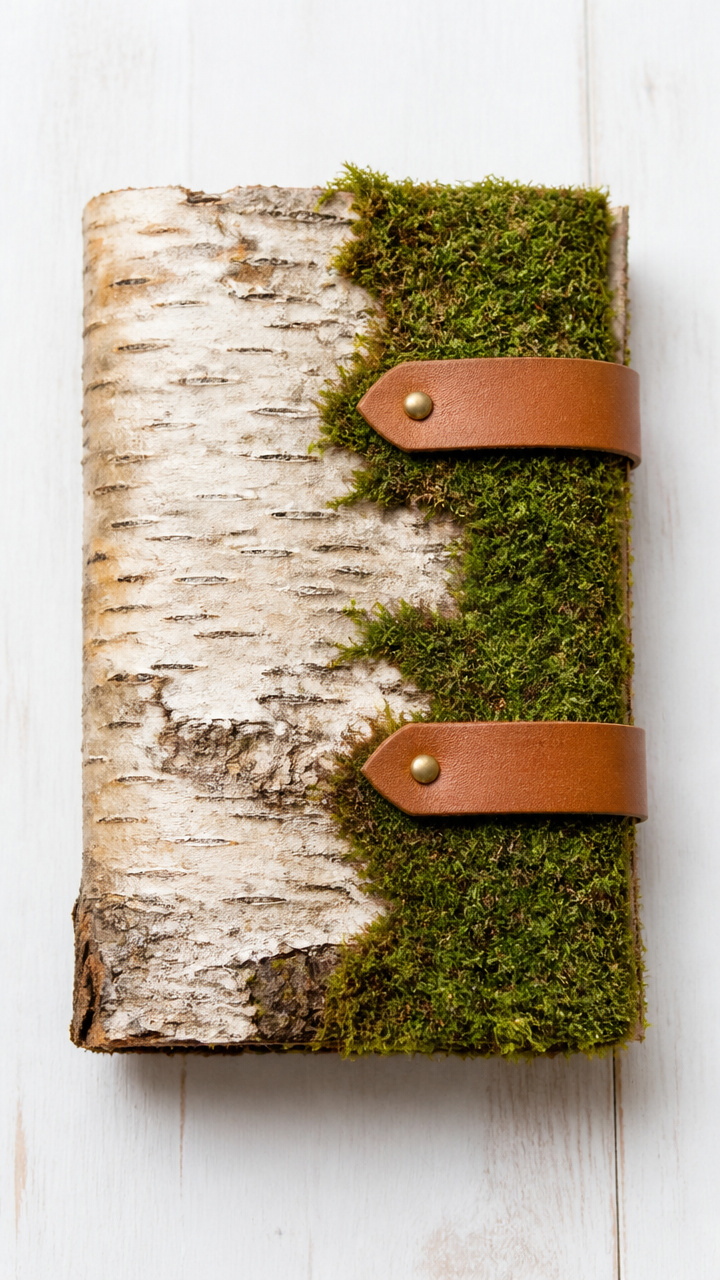
A handmade journal gets a wild cover of bark and soft moss, held with leather strips. It’s perfect for winter notes.
Materials Needed
- 1 blank notebook, 5×7 inches
- 1 piece birch bark, 6×8 inches
- 1/4 cup sheet moss
- 2 8-inch leather strips
- E6000 glue
- Clamps
How to Make It
- Glue the birch bark to the front of the notebook using E6000, wrapping it slightly over the edges.
- Apply glue to the bark surface and press moss into place, covering half the cover.
- Glue one leather strip to the top and one to the bottom of the notebook, crossing over the moss to act as a closure.
- Use clamps to hold everything in place for 4 hours while drying.
22. Fir Cone Fire Starters
Easy
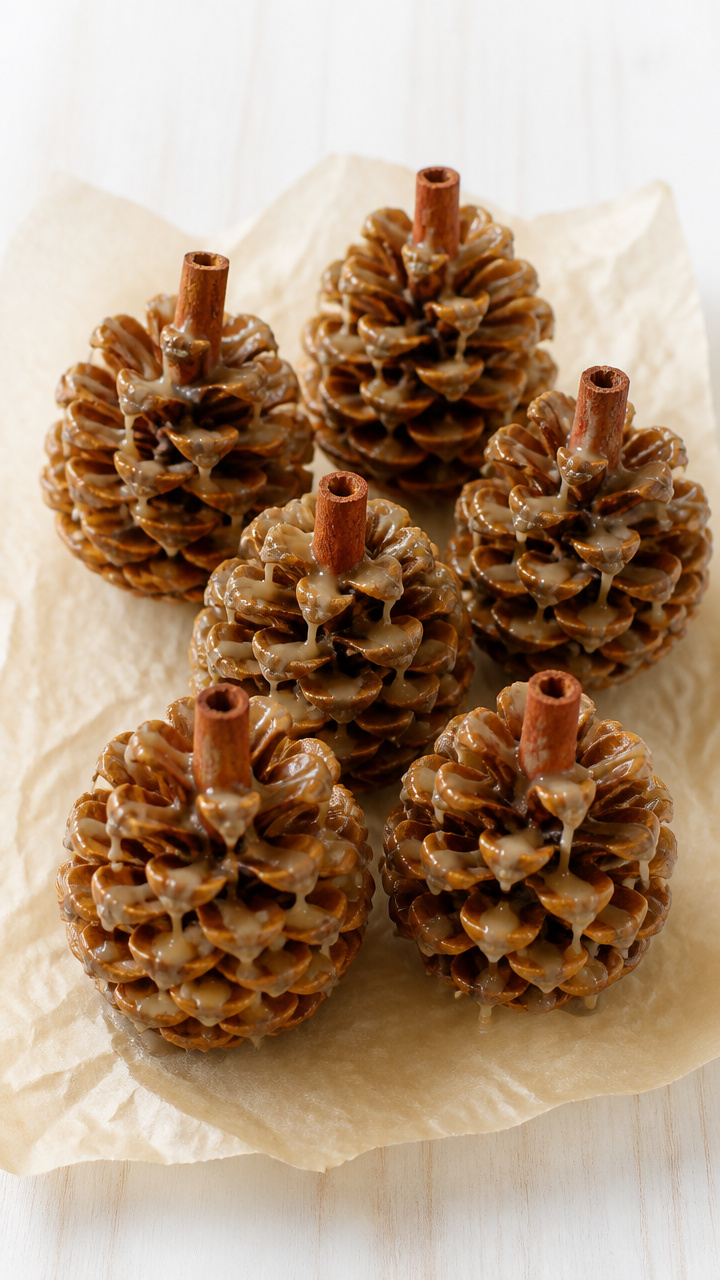
Pinecones soaked in wax become reliable fire starters for wood stoves. Add a cinnamon stick for scent.
Materials Needed
- 6 dry pinecones
- 1 cup old candle wax or paraffin
- Double boiler
- 2 cinnamon sticks, broken into 3 pieces
- Baking sheet
- Parchment paper
How to Make It
- Line a baking sheet with parchment paper.
- Melt wax in a double boiler over low heat.
- Dip each pinecone into the wax, letting excess drip off, and place on the baking sheet.
- Push a piece of cinnamon stick into the top of each while wax is still soft. Let cool for 1 hour.
23. Twig and Yarn Wall Art
Moderate
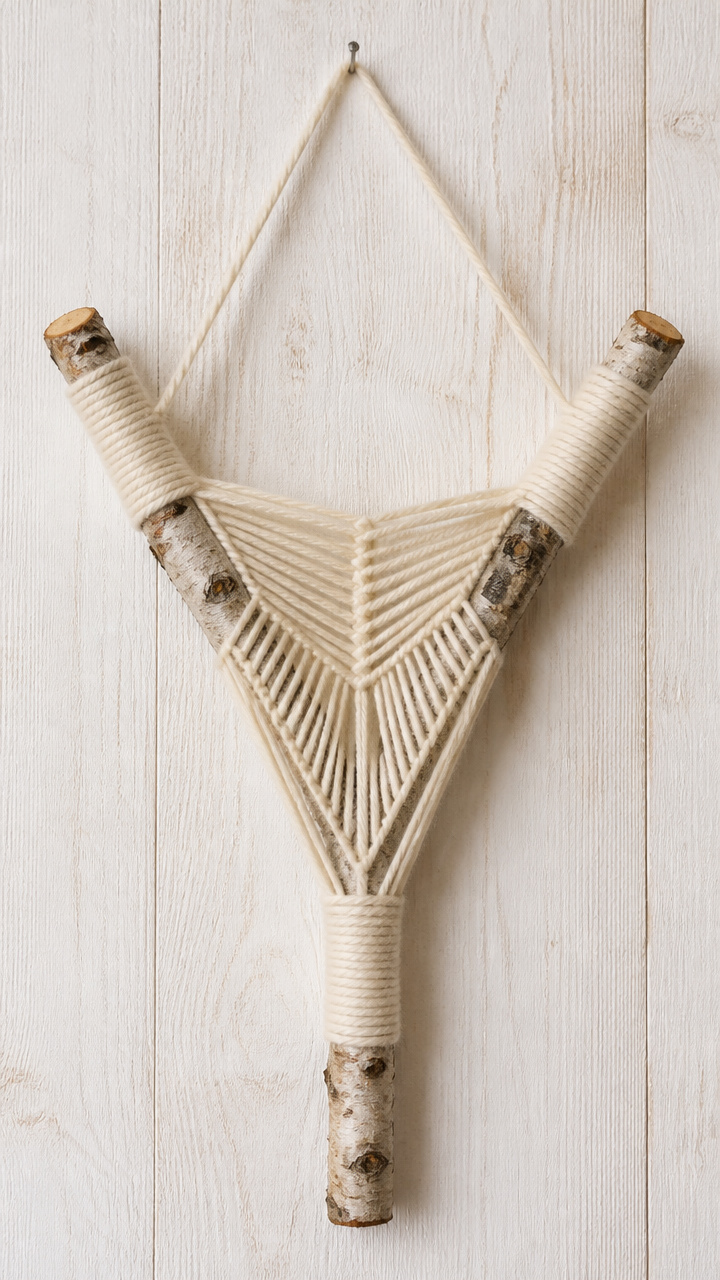
A Y-shaped twig becomes a loom for geometric yarn patterns. Hang it as a quiet statement piece.
Materials Needed
- 1 Y-shaped birch twig, 8 inches wide
- 10 yards of cream wool yarn
- Scissors
- Tapestry needle
How to Make It
- Tie one end of the yarn to the bottom stem of the Y and pull taut up to the left fork.
- Loop the yarn around the fork and bring it down diagonally to the right fork, repeating to form a zigzag web.
- Use the tapestry needle to weave in loose ends on the back.
- Hang from a single nail using a loop of yarn tied to the top.
24. Frozen Berry Magnets
Advanced
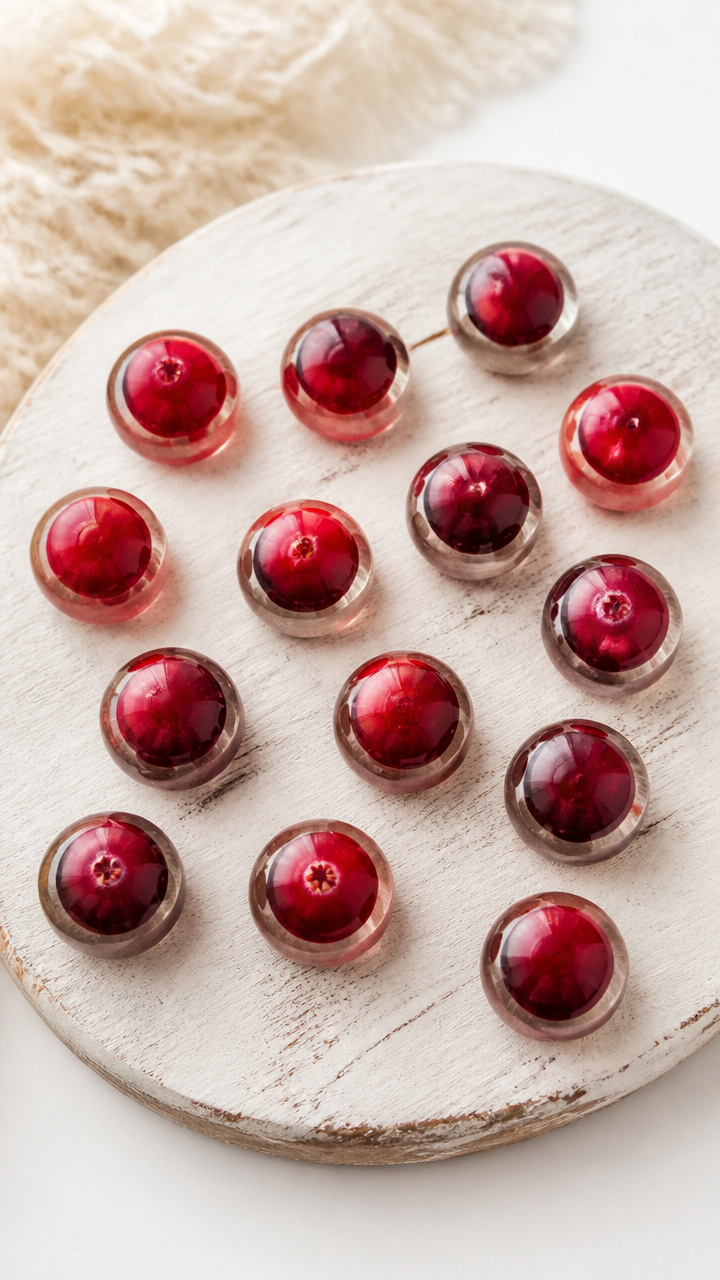
Whole cranberries sealed in resin domes become bright red fridge magnets. They stay glossy and bold all season.
Materials Needed
- 12 fresh cranberries
- 12 1-inch resin dome molds
- Clear two-part epoxy resin (1/2 cup)
- Stir sticks
- 12 small magnet discs
- E6000 glue
How to Make It
- Place one cranberry in each resin mold, centering it.
- Mix the epoxy resin and pour slowly over each berry, filling the dome.
- Let cure for 24 hours.
- Glue a magnet disc to the flat back of each dome with E6000 and cure for 6 hours.
25. Snowy Spruce Topiary
Easy
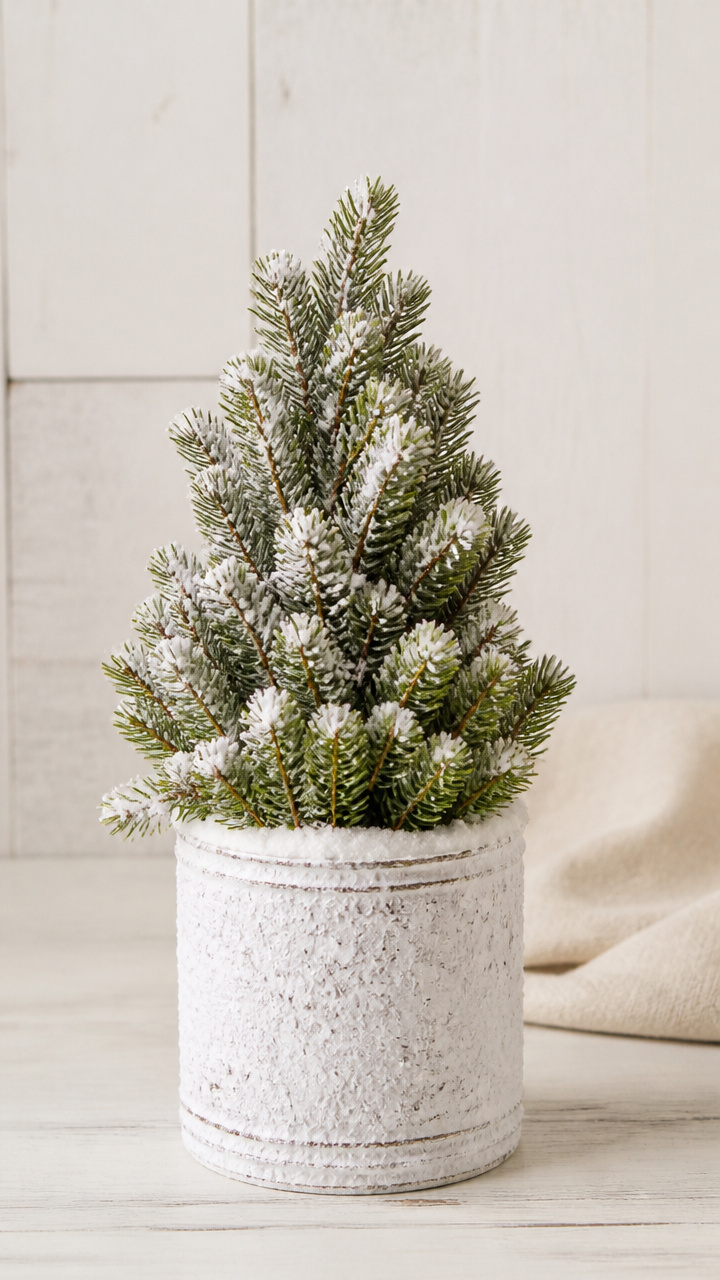
A small spruce branch stands in a tin can coated with glue and baking soda, mimicking a snow-dusted tree.
Materials Needed
- 1 small spruce branch, 10 inches tall
- 1 clean 8-ounce tin can
- White craft glue
- 1/2 cup baking soda
- Paintbrush
How to Make It
- Paint the outside of the tin can with white craft glue using the paintbrush.
- Sprinkle baking soda all over the glued surface and let dry for 30 minutes.
- Insert the spruce branch stem into the can, packing moss or stones around the base to hold it upright.
- Display on a shelf where it catches natural light.
Your pockets are empty now, but your hands are full of what matters. Pick one of these ideas and let the quiet magic of winter find its way into your home.