25 Winter Crafts You Can Make with Items from Home

Soft light glows through frosted windows, and the quiet hum of winter fills the air. It's the perfect time to gather simple things from around your home and turn them into something warm, personal, and handmade.
No need for special trips to the store or complicated supplies. These crafts use what you already have — paper, jars, fabric scraps, pinecones, even old sweaters — and guide you step by step to create cozy decorations, thoughtful gifts, and cheerful touches that make the season feel like yours.
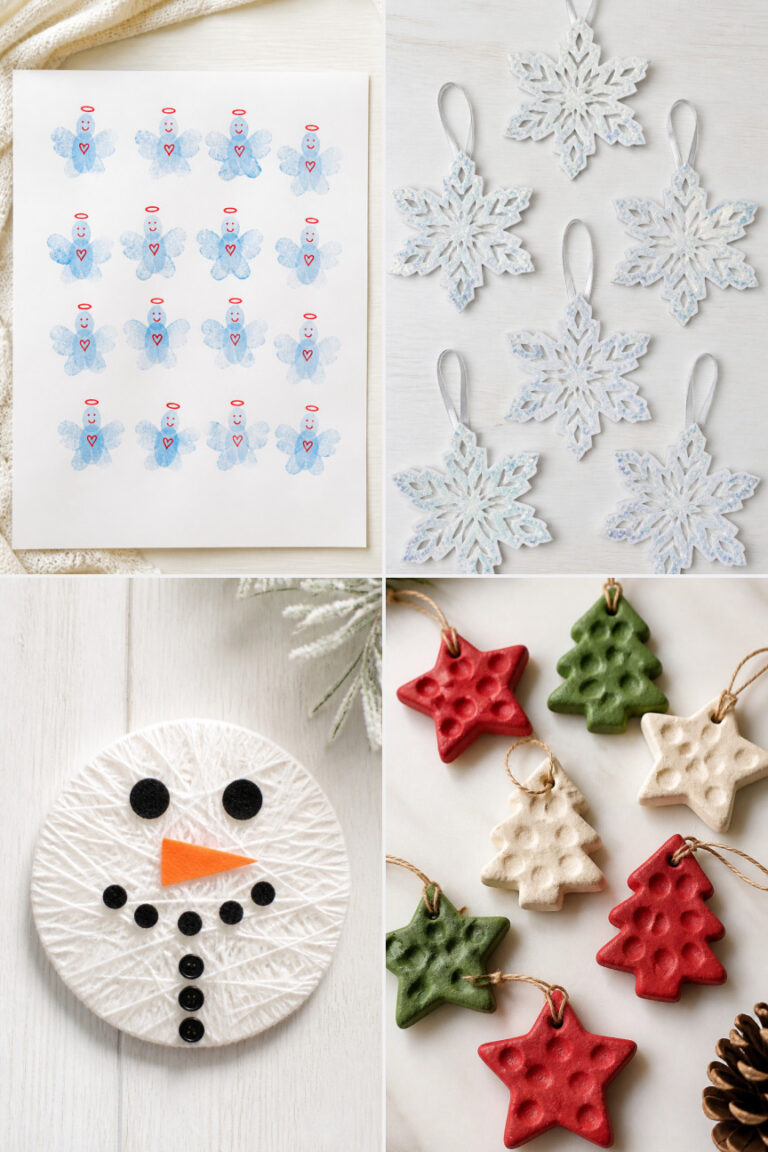
1. Salt Dough Ornaments
Easy

Hand-shaped ornaments hold the charm of childhood winters and make lasting keepsakes for the tree. Each one carries fingerprints and memories.
Materials Needed
- 2 cups all-purpose flour
- 1 cup table salt
- 1 cup warm water
- Pencil
- Straw
- Baking sheet
- Red acrylic paint
- Ribbon (red, 1/8 inch wide, 6 inches per ornament)
How to Make It
- Mix flour, salt, and warm water in a bowl until a smooth dough forms, adding a teaspoon more water if too dry.
- Roll dough to 1/4 inch thickness on a floured surface and cut into circles using a drinking glass.
- Use a pencil to draw simple snowflake or star designs on each piece, then press a straw just above the top edge to make a hanging hole.
- Place ornaments on a baking sheet and bake at 200°F for 3 hours until hard and dry.
- Paint the front of each ornament with red acrylic paint and let dry completely.
- Thread a 6-inch piece of red ribbon through the hole and tie into a loop for hanging.


2. Mason Jar Snow Globes
Moderate
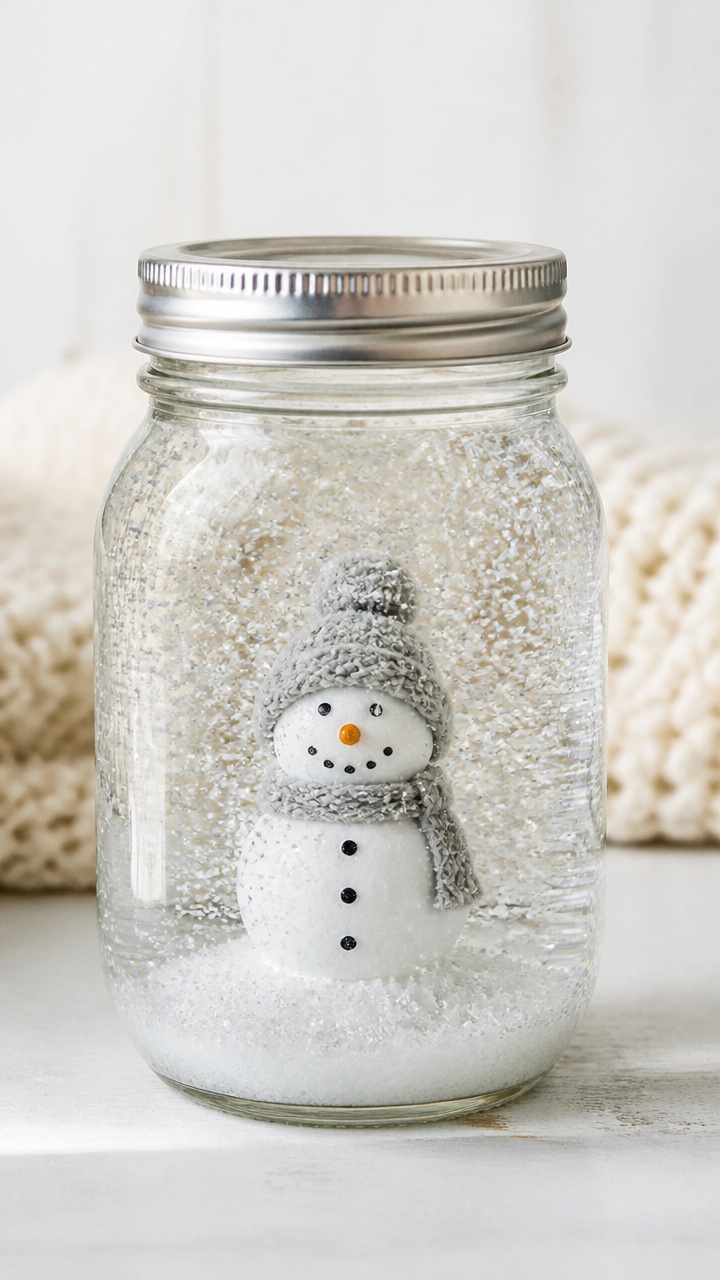
A swirling winter scene inside a jar brings magic to any shelf. This version uses baby oil for slow, dreamy snowfall.
Materials Needed
- 1 clean 16 oz mason jar with lid
- Small plastic snowman figure (1 inch tall)
- Glitter (white, 1 teaspoon)
- Baby oil (1/2 cup)
- Distilled water (1/2 cup)
- Hot glue gun
- Craft knife
How to Make It
- Use hot glue to attach the snowman figure to the inside center of the mason jar lid, holding it in place for 30 seconds.
- Let the glue cool completely, then carefully fill the jar with 1/2 cup distilled water and 1/2 cup baby oil.
- Add 1 teaspoon of white glitter to the jar and screw the lid on tightly.
- Turn the jar upside down to test the swirl and check for leaks. If leaking, unscrew, dry the rim, reapply hot glue to the lid threads, and retighten.


3. Felt Pinecone Wreath
Moderate
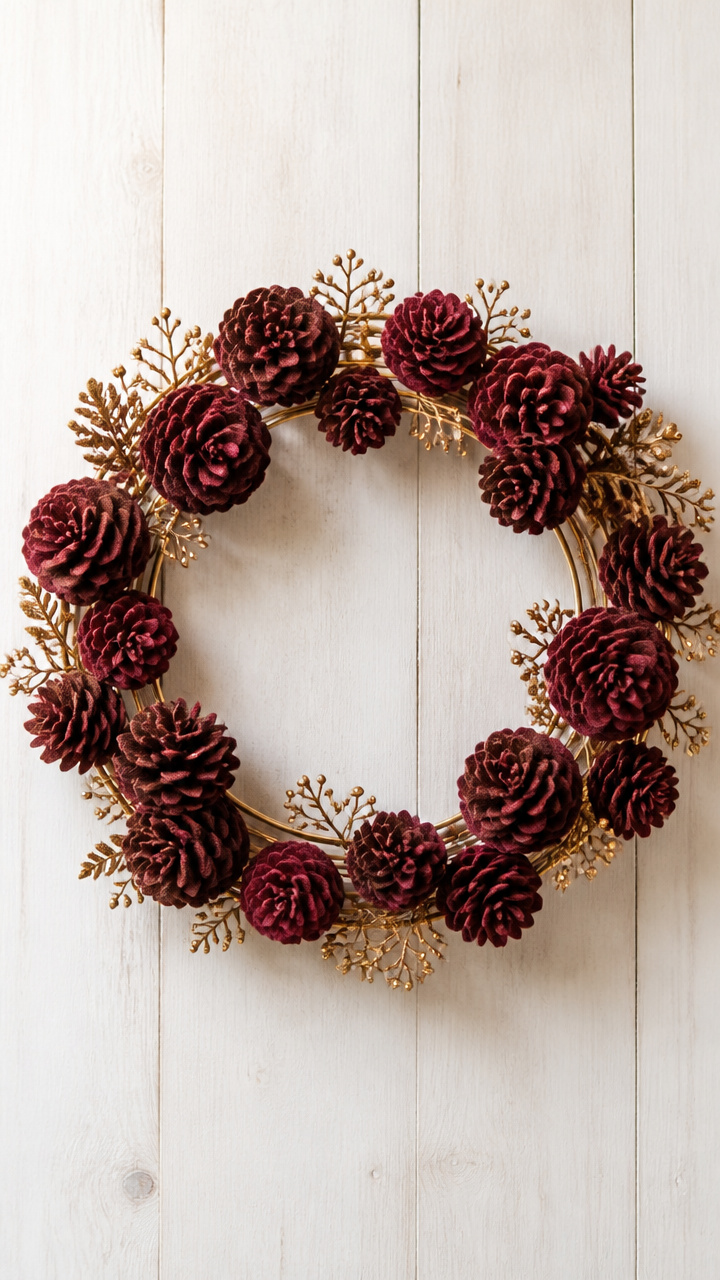
Rich burgundy felt cones cluster into a lush wreath that lasts longer than real evergreens. Hang it on a door or wall for instant warmth.
Materials Needed
- Burgundy felt sheet (9 x 12 inches)
- Cardboard toilet paper roll
- Scissors
- Hot glue gun
- Gold spray paint
- 12-inch wire wreath frame
How to Make It
- Cut the toilet paper roll into 1/2 inch rings and flatten each into small ovals.
- Spray-paint the ovals with gold spray paint and let dry for 20 minutes on a protected surface.
- Cut the felt into 24 teardrop shapes, each 2 inches long, using scissors.
- Layer three teardrops around one gold oval, gluing the base of each piece to the oval with hot glue, overlapping slightly.
- Continue making pinecones until you have 12, then glue them evenly around the wire wreath frame, clustering some closer for fullness.


4. Knit Sweater Coasters
Easy
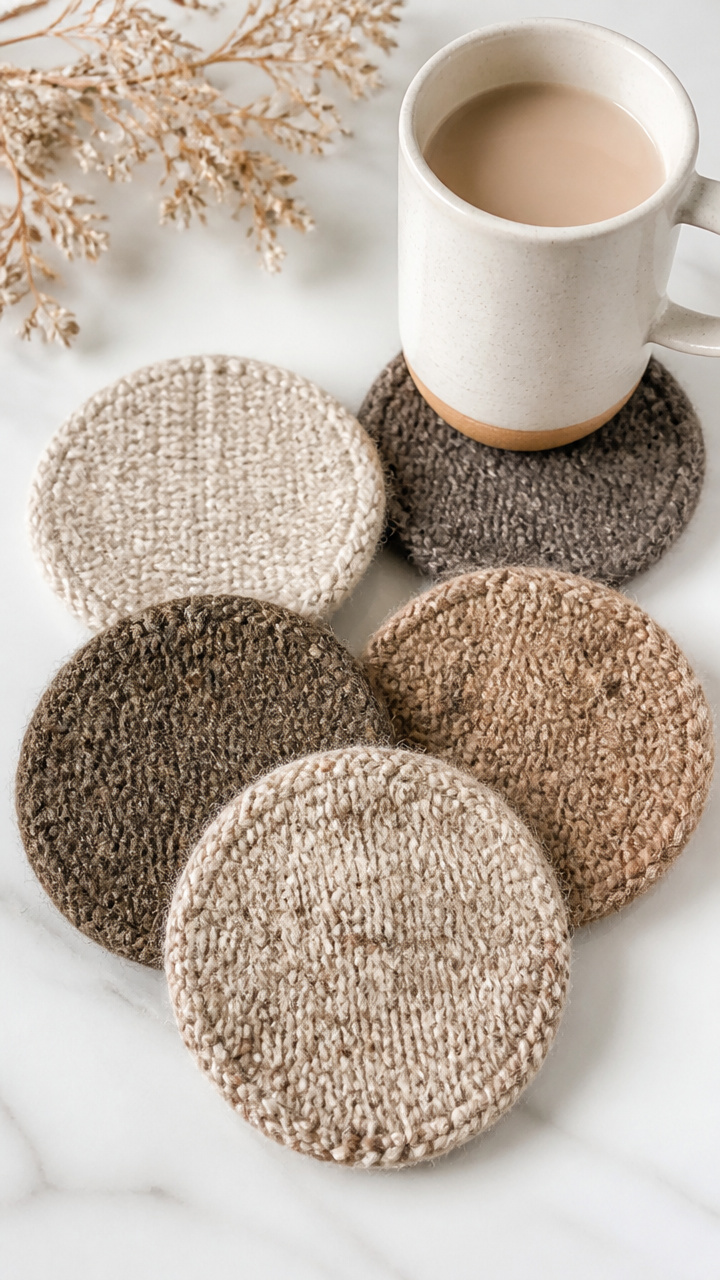
Scraps of wool sweater become thick, absorbent coasters that protect tables and add rustic texture. Ideal for gifting with a mug set.
Materials Needed
- Wool blend sweater (clean, pre-washed)
- Scissors
- Circle template (3.5 inches diameter)
- Fabric chalk
- Pins
How to Make It
- Lay the sweater flat and pin the circle template onto the fabric panel.
- Trace around the template with fabric chalk, then cut out four identical circles with scissors.
- Use the same template to trace and cut four more circles from a different part of the sweater for contrast.
- Stack one solid and one patterned circle together and hand-stitch around the edge with a whipstitch using matching thread.
5. Cinnamon Stick Candles
Easy
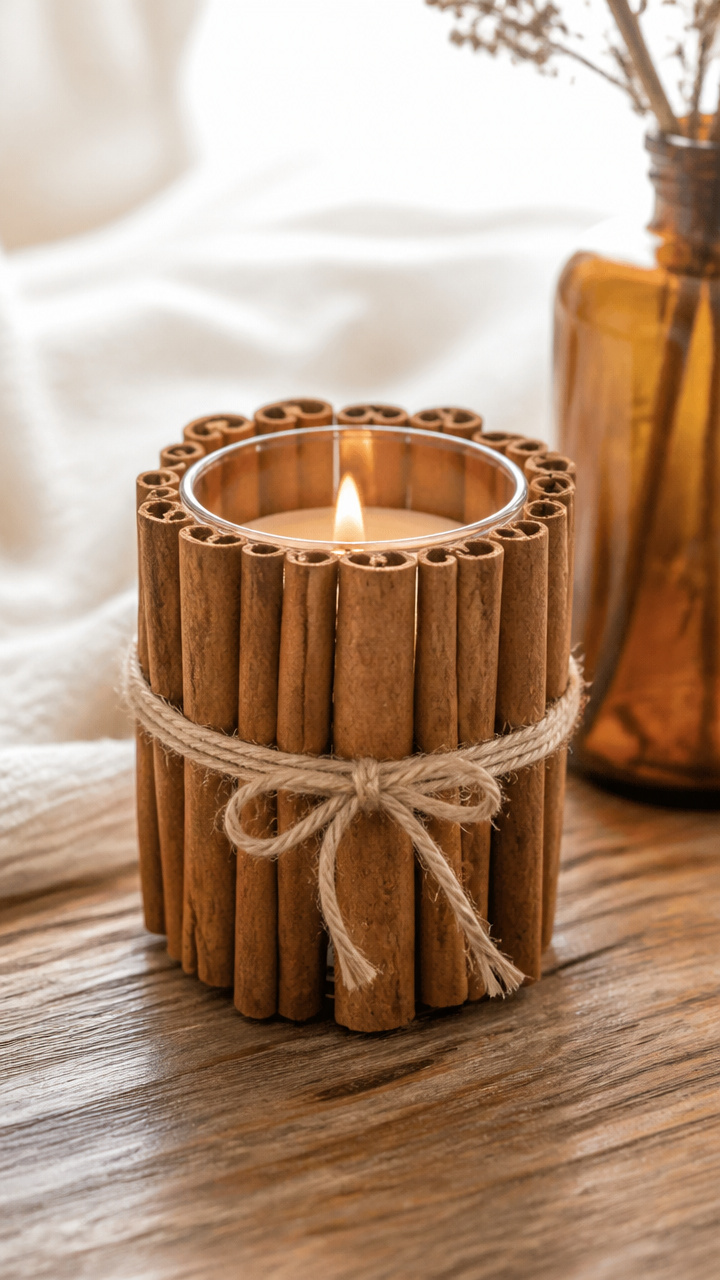
Three cinnamon sticks wrap around a tea light holder, releasing a spicy scent when warmed. The look is rustic and inviting.
Materials Needed
- 3 whole cinnamon sticks (6 inches long)
- Glass tea light holder (3 inches tall)
- Hot glue gun
- Jute twine (12 inches)
How to Make It
- Stand one cinnamon stick against the outside of the glass holder and apply a 1/2 inch line of hot glue near the bottom to secure it.
- Repeat with the second stick, placing it 120 degrees around the glass from the first.
- Apply glue and attach the third stick to complete the triangle shape around the holder.
- Wrap jute twine once around the middle of the bundle and tie a simple knot to finish.


6. Paper Snowflakes Garland
Easy
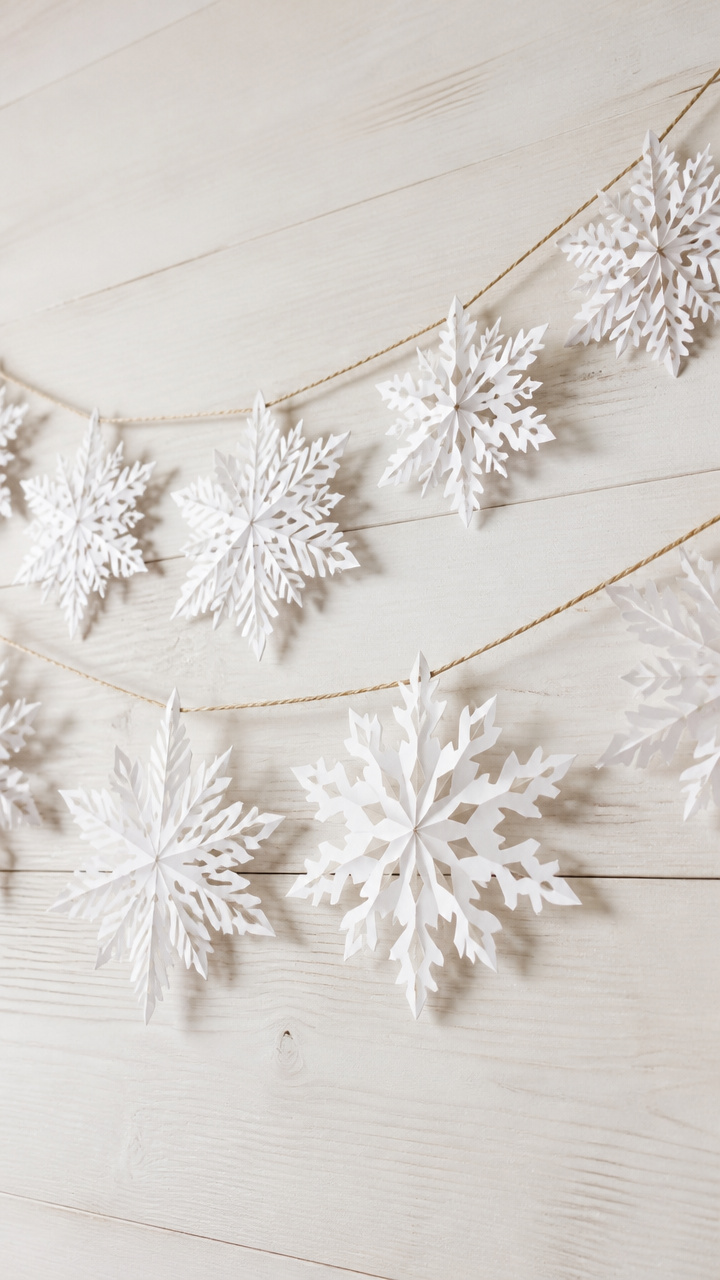
Delicate paper snowflakes dangle from twine in a frosty cascade. Hang it across a mantel or window for instant winter charm.
Materials Needed
- White printer paper (8.5 x 11 inches, 10 sheets)
- Scissors
- Pencil
- Ruler
- Twine (3 yards)
- Tape
How to Make It
- Fold one sheet of paper diagonally into a triangle, then fold it twice more into smaller triangles to create a wedge.
- Use scissors to cut small shapes along the edges, avoiding cutting all the way across any fold.
- Unfold the paper to reveal a snowflake and repeat with nine more sheets.
- Measure and mark 6 inch intervals along the twine, then tape one snowflake to each mark, spacing them evenly.
- Hang the garland by tying the ends of the twine to two nails or hooks.


7. Fabric Scrap Wreath
Moderate
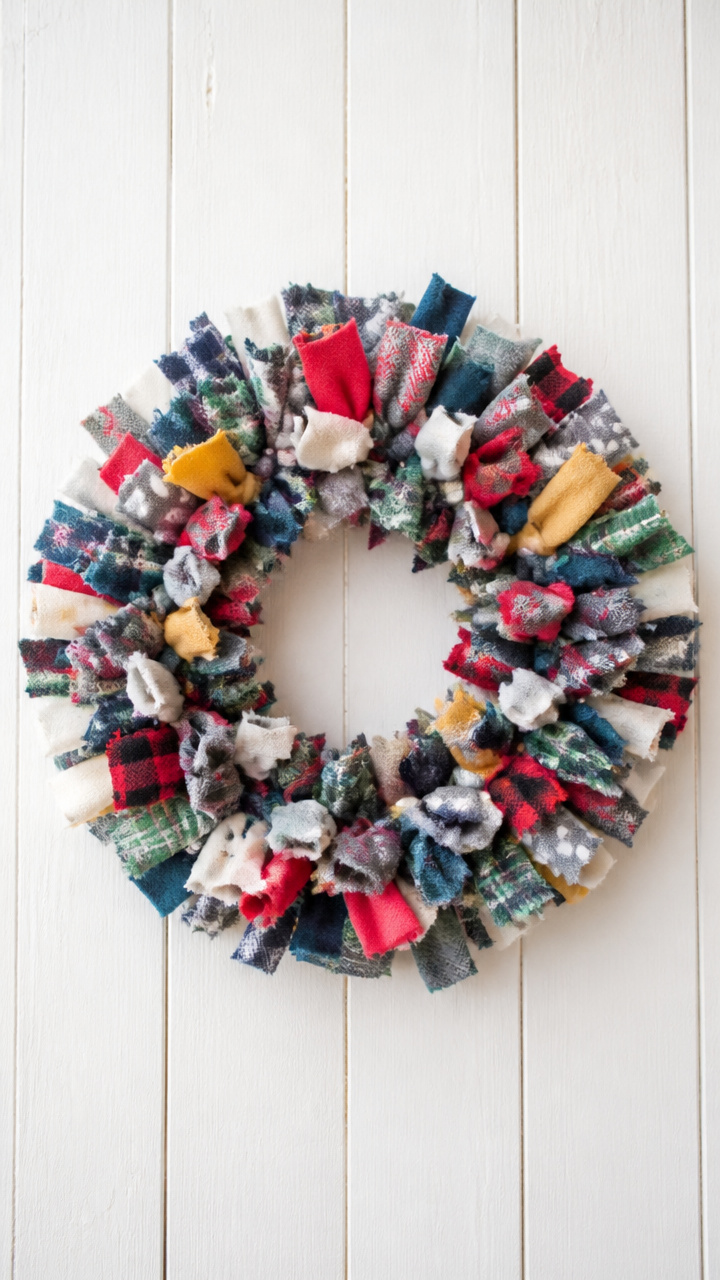
Colorful strips of old clothes twist into a full, fluffy wreath that celebrates texture and reuse. No two will ever look alike.
Materials Needed
- Assorted fabric scraps (cotton, flannel, fleece, total 2 yards)
- Scissors
- Cardboard ring (8 inch outer diameter, 4 inch inner)
- Hot glue gun
How to Make It
- Cut fabric into 1 inch wide strips, each 18 inches long, totaling 72 strips.
- Take one strip, fold it in half, and loop it through the cardboard ring from back to front.
- Pull the loose ends through the folded loop and tighten to create a knot on the front side.
- Continue knotting strips around the entire ring until fully covered and dense, varying colors as you go.
- Trim any uneven ends with scissors for a neat finish.
8. Pinecone Fire Starters
Moderate
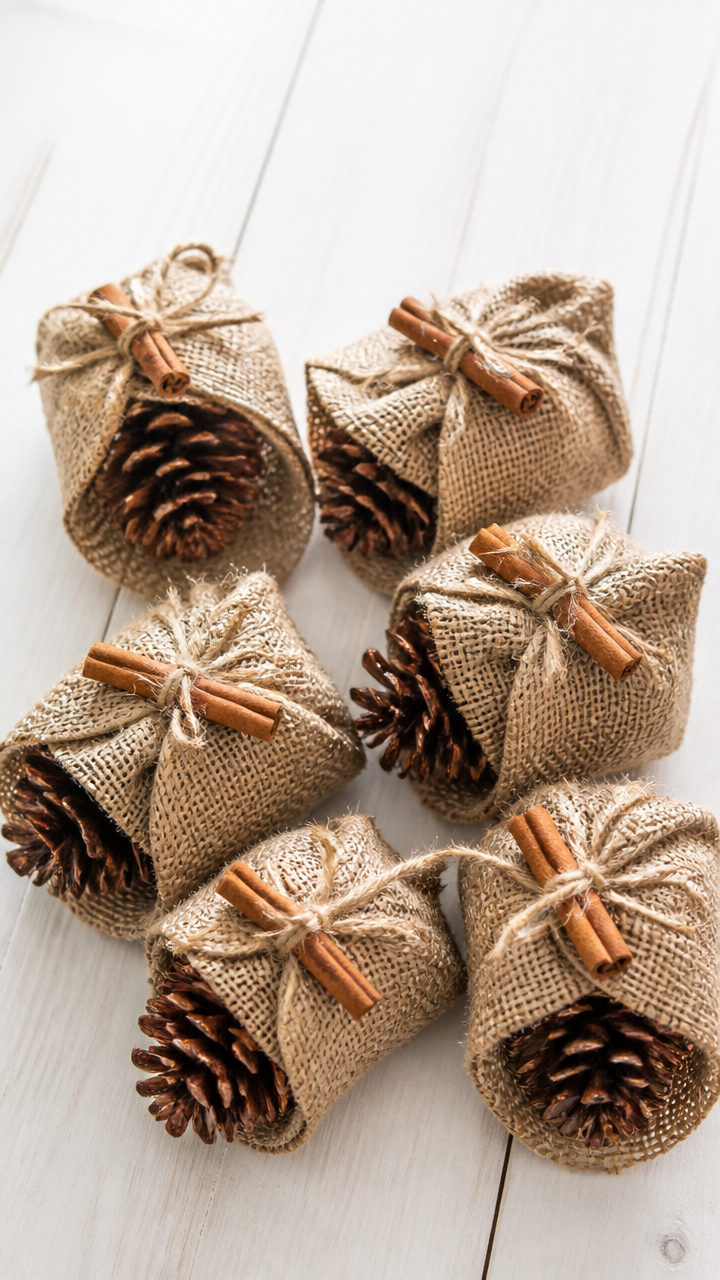
Pinecones dipped in wax catch flame easily and burn long. Wrap them in burlap for a rustic gift that warms hands and hearths.
Materials Needed
- 6 dry pinecones
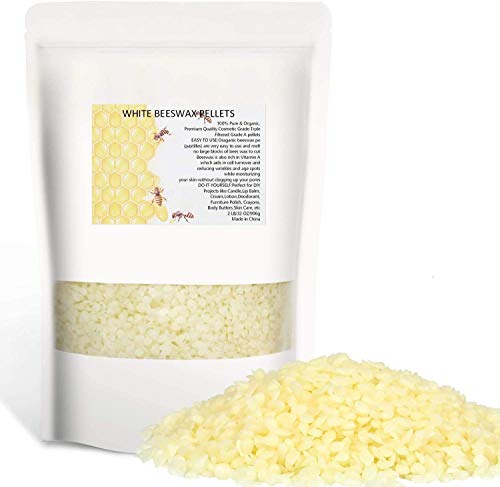
- Beeswax pellets (1 cup)
- Double boiler
- Burlap squares (5 x 5 inches, 6 pieces)
- Jute twine (6 pieces, 8 inches each)
- Cinnamon stick (optional, 6 pieces, 2 inches)
How to Make It
- Place beeswax pellets in the top of a double boiler and heat over medium until fully melted, stirring occasionally.
- Hold a pinecone by the base and dip it into the melted wax, letting excess drip off for 10 seconds.
- Set the waxed pinecone on parchment paper to cool for 5 minutes.
- Lay a burlap square flat, place a cooled pinecone in the center, and tie with jute twine in a crisscross pattern.
- Tuck a small cinnamon stick under the twine if desired for added scent.


9. Cardstock Gift Tags
Easy
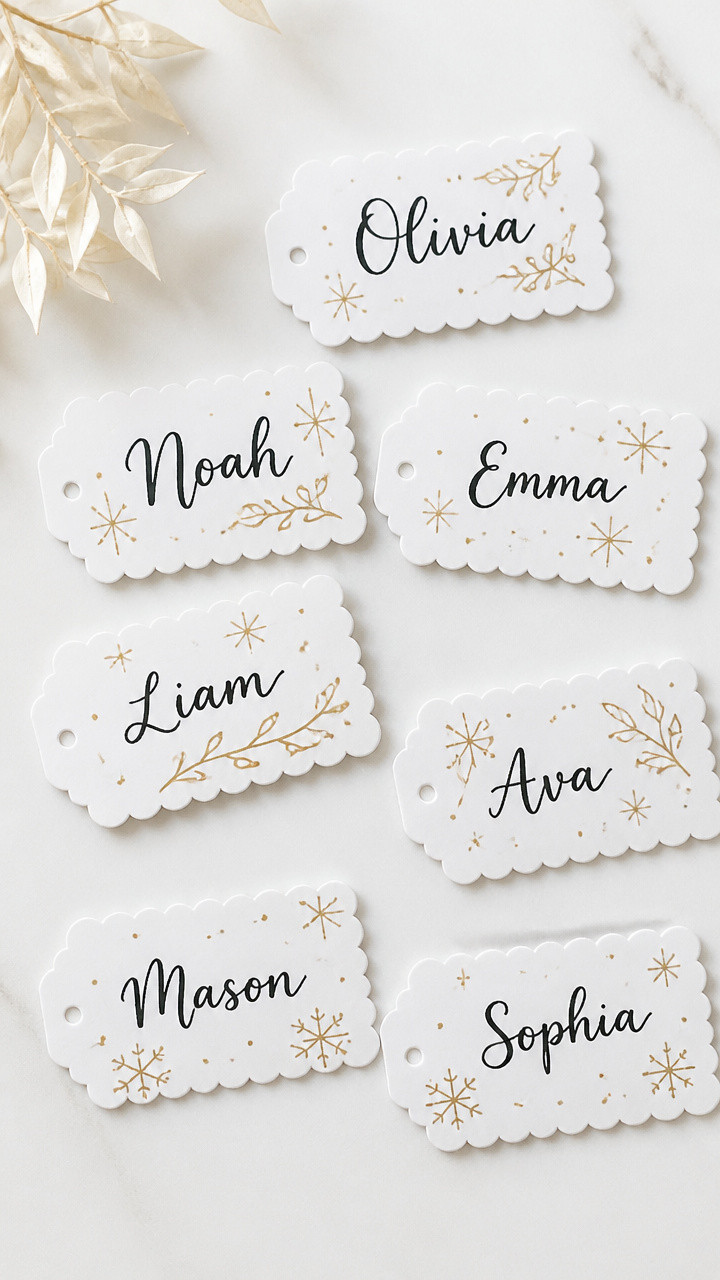
Sturdy tags with scalloped edges and hand-lettered names elevate any present. Make a batch in minutes with basic supplies.
Materials Needed
- A4 white cardstock
- Scissors
- Hole punch
- Black fine-tip marker
- Ruler
- Gold gel pen
- Twine (black, 6 inches per tag)
How to Make It
- Cut the cardstock into 2 x 3 inch rectangles using scissors and ruler for straight edges.
- Round each corner with scissors or use a corner punch if available.
- Use the black marker to write a name or message on the front of each tag.
- Draw a scalloped border around the edge with the gold gel pen and let dry for 2 minutes.
- Punch a hole in the top left corner and thread a 6-inch piece of black twine through for tying.
10. Yarn-Wrapped Votive Holders
Easy
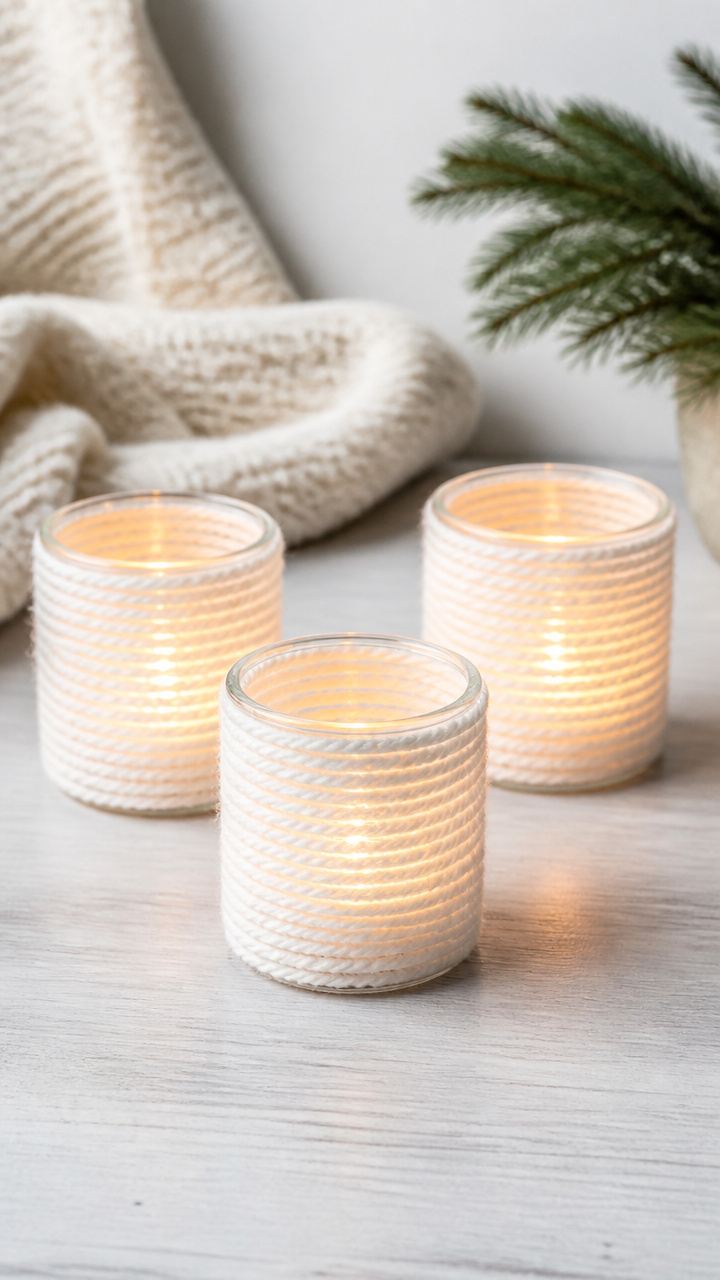
Clear glass holders glow warmer when wrapped in snowy white yarn. The soft texture diffuses candlelight beautifully.
Materials Needed
- 3 clear glass votive holders (3 inches tall)
- White yarn (size 4, 20 yards total)
- Craft glue
- Paintbrush (small)
How to Make It
- Apply a small dot of craft glue to the bottom edge of a glass holder using the paintbrush.
- Press the end of the yarn into the glue and wait 30 seconds for it to adhere.
- Wrap the yarn tightly around the glass, overlapping slightly, adding a dab of glue every inch to secure.
- When reaching the top, cut the yarn, glue the end down, and let dry for 10 minutes.
- Repeat for the remaining two holders.
11. Maple Seed Angel Ornaments
Advanced
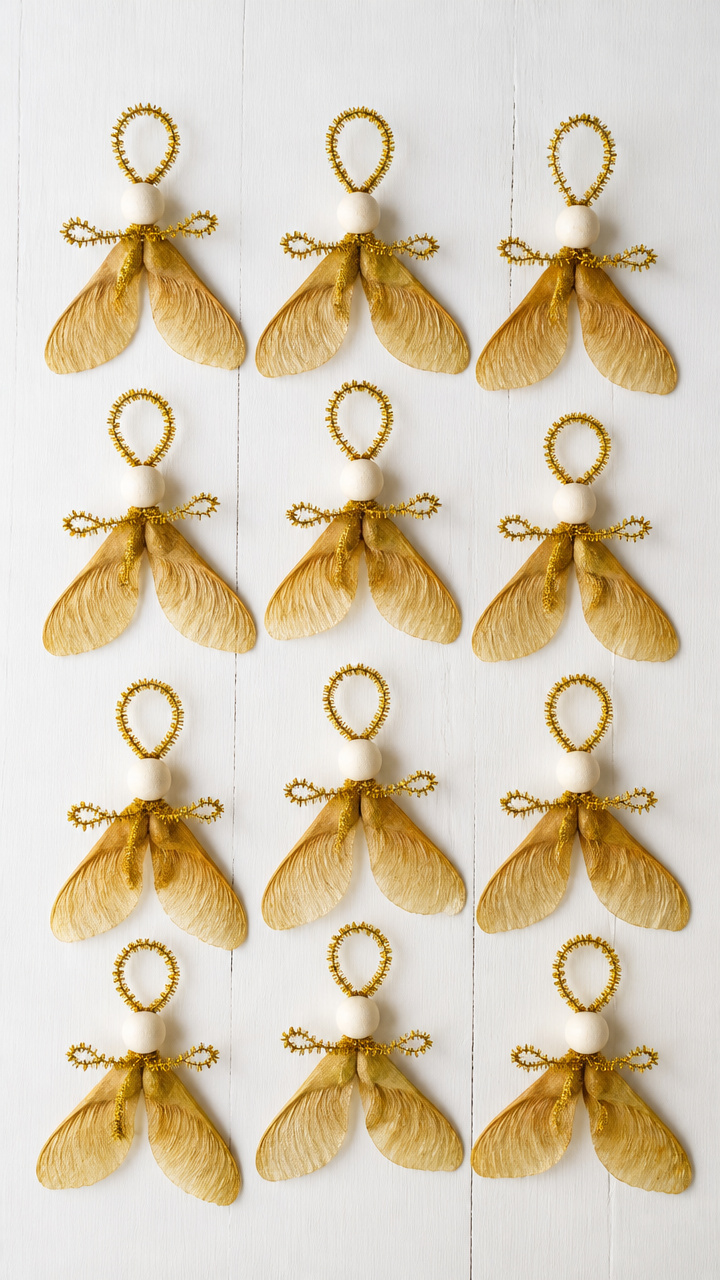
Delicate maple seeds form tiny angel wings when paired with beads and wire. These fragile ornaments shimmer on the tree.
Materials Needed
- 12 dried maple seed pods (winged, about 1.5 inches long)
- Gold chenille stems (6 inches, 12 gauge, 2 per angel)
- Small white bead (6 mm, 1 per angel)
- Wire cutters
- Round-nose pliers
- Gold spray paint
How to Make It
- Lay six maple seeds in a fan shape and mist lightly with gold spray paint, letting them dry on wax paper for 15 minutes.
- Cut one chenille stem in half and bend one piece into a small halo using round-nose pliers.
- Twist the other half around a white bead to form arms, leaving a tail to attach to the body.
- Arrange the painted seeds into wings and use the second chenille stem piece to bind them at the base.
- Attach the body and halo assembly to the wing base by twisting the wire ends together securely.
12. Crayon Melting Art
Moderate
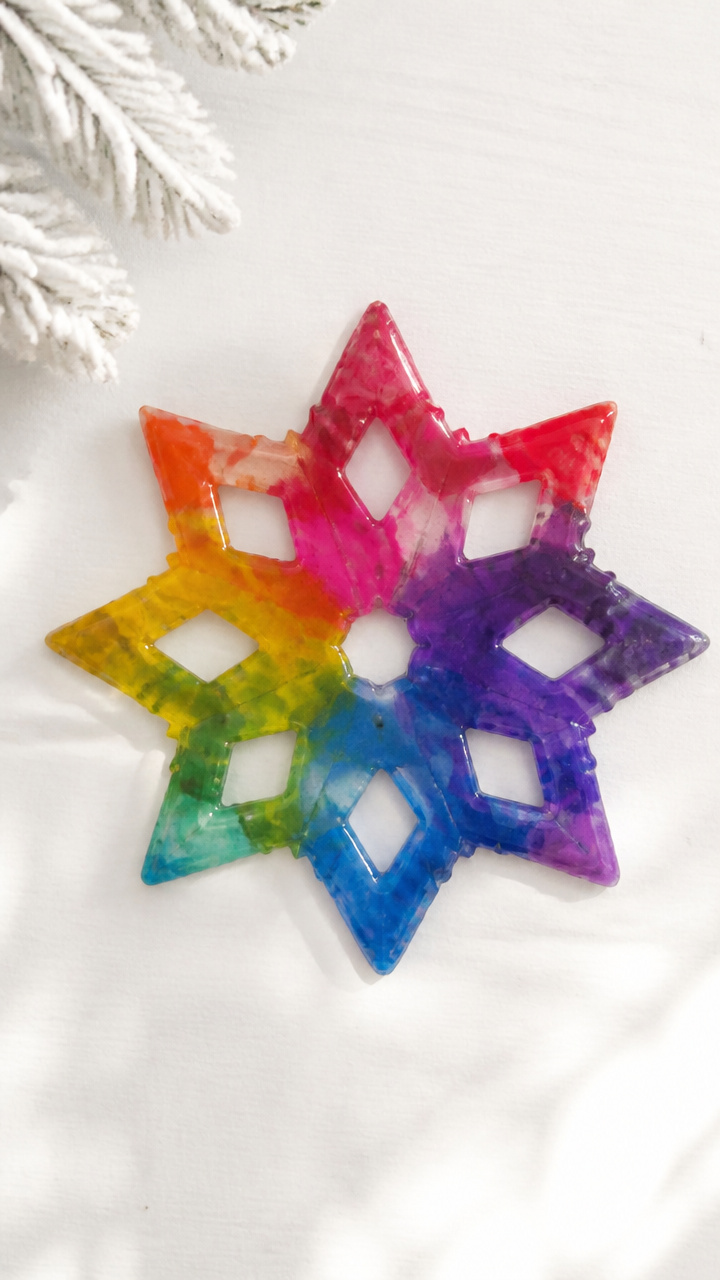
Leftover crayon stubs melt into vibrant suncatchers that cast colored light on winter walls. Heat guns make the process safe and controlled.
Materials Needed
- Assorted crayons (peel paper off, 12 stubs)
- Silicone mold (star, snowflake, or circle, 4 inch)
- Heat gun
- Aluminum foil
- Popsicle stick
How to Make It
- Break crayon stubs into small pieces and sort by color.
- Fill the silicone mold cavity with layers of different colored pieces, packing them tightly.
- Place the mold on a foil-lined tray and heat from above with a heat gun on low, moving constantly.
- Watch as the crayons melt and settle, using a popsicle stick to stir gently if needed.
- Let cool completely for 1 hour before flexing the mold to release the finished piece.
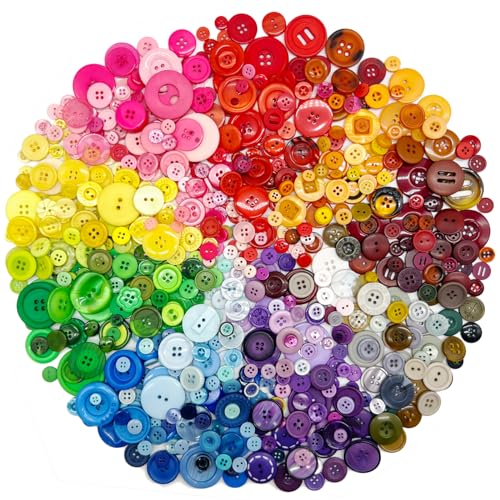
13. Button Snowmen
Easy
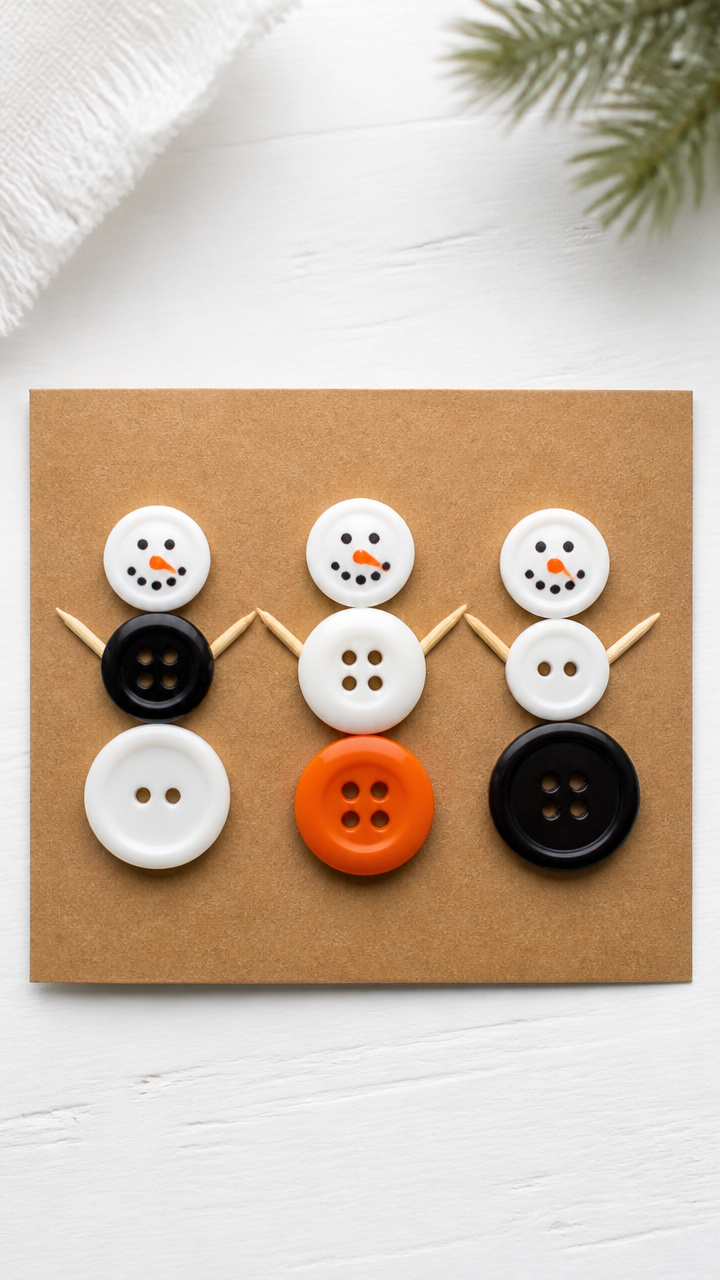
Mismatched buttons stack into smiling snowmen with toothpick arms and marker faces. Glue them to cards or hang as mini decor.
Materials Needed
- Black, white, and orange buttons (various sizes, 15 total)
- Toothpicks (3 inches, 10 pieces)
- Craft glue
- Fine-tip black marker
- Cardboard scraps (2 x 2 inches, 5 pieces)
How to Make It
- Glue three buttons in a vertical stack on a cardboard scrap: large black on bottom, medium white in middle, small white on top.
- Snip one toothpick in half and glue one piece horizontally into the middle button for arms.
- Use the black marker to draw two eyes and a curved smile on the top button.
- Add a tiny orange button below the eyes for a carrot nose, gluing it in place.
- Let dry for 20 minutes before displaying or mailing as a note card.


14. Newspaper Basket Weave
Advanced
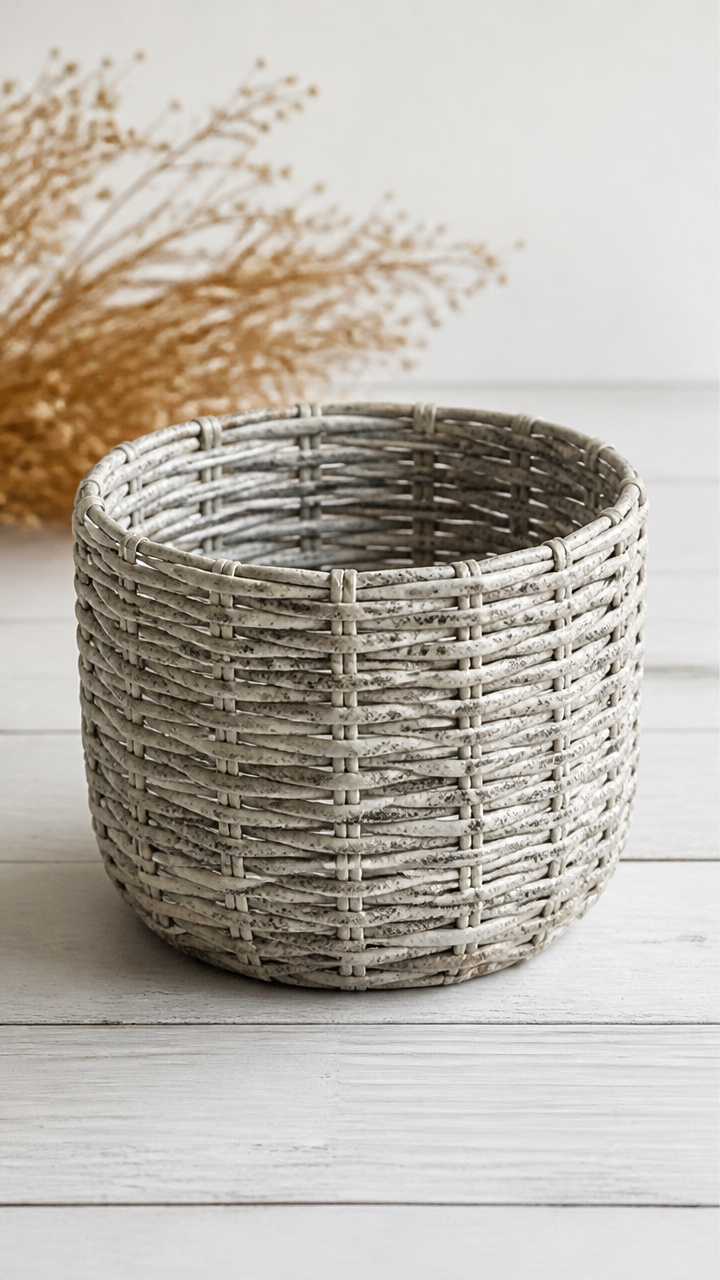
Rolled newspaper strips braid into a sturdy basket perfect for holding mittens or mail. Waterproof with a sealant coat.
Materials Needed
- Old newspaper (8 pages, black text only)
- Mod Podge Matte
- Paintbrush (1 inch wide)
- Scissors
- Clothespins
- Plastic bowl (6 inch diameter)
- Clear acrylic sealer spray
How to Make It
- Cut newspaper into 1 inch wide strips, each 18 inches long, totaling 60 strips.
- Roll each strip tightly around a skewer or pencil, securing the end with a dab of Mod Podge.
- Coat the plastic bowl with Mod Podge and spiral seven rolls around the base, gluing each end down.
- Weave additional rolls over and under the upright spokes, adding glue to each intersection and using clothespins to hold in place.
- Let dry 4 hours, remove from bowl, then spray entire basket with two coats of acrylic sealer, drying 30 minutes between coats.

15. Flour Sack Linen Napkins
Moderate
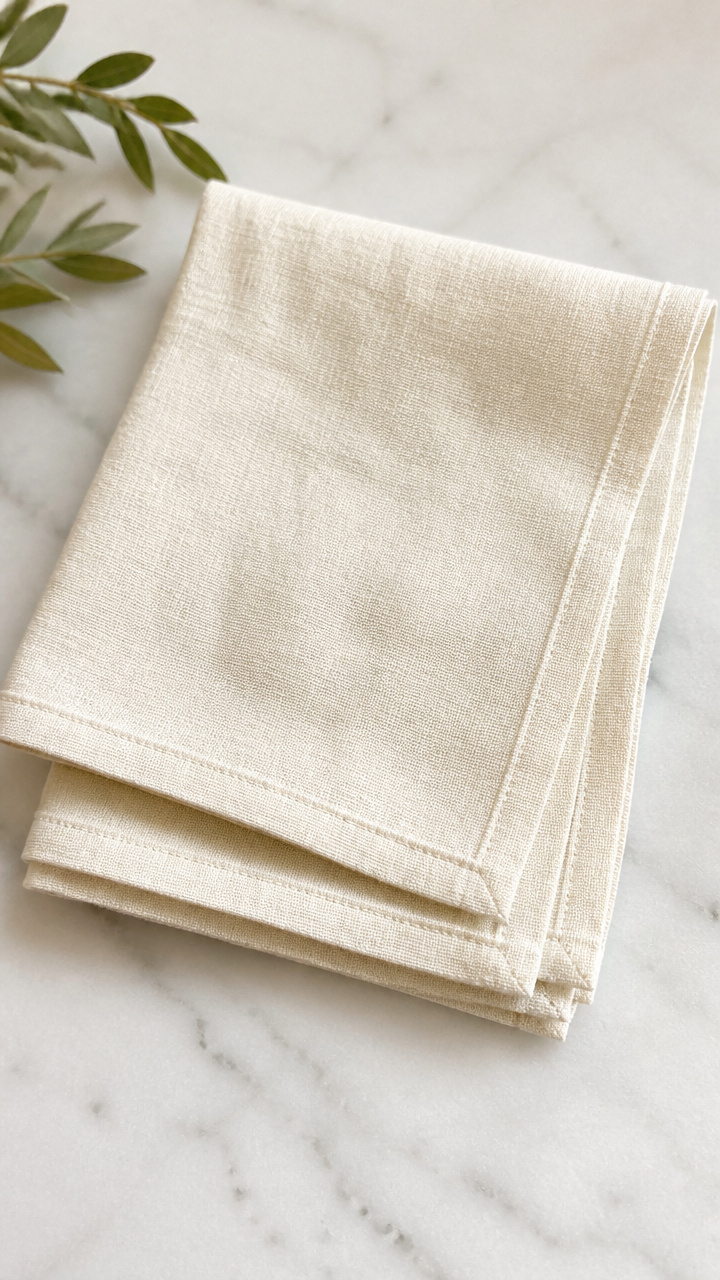
Repurposed flour sacks become soft, absorbent napkins with a vintage hem. They launder well and grow softer over time.
Materials Needed
- Unbleached cotton flour sack (1 piece, 18 x 18 inches)
- Scissors
- Sewing machine
- White thread
- Iron
How to Make It
- Wash and dry the flour sack to pre-shrink it, then iron it flat.
- Cut the fabric into four 9 x 9 inch squares using scissors and a ruler for accuracy.
- Fold one edge of a square 1/4 inch toward the wrong side and press with the iron, then fold again 1/4 inch and press.
- Stitch along the inner folded edge using a straight stitch on the sewing machine.
- Repeat hemming and stitching for all four sides of each napkin.
16. Clothespin Reindeer
Easy
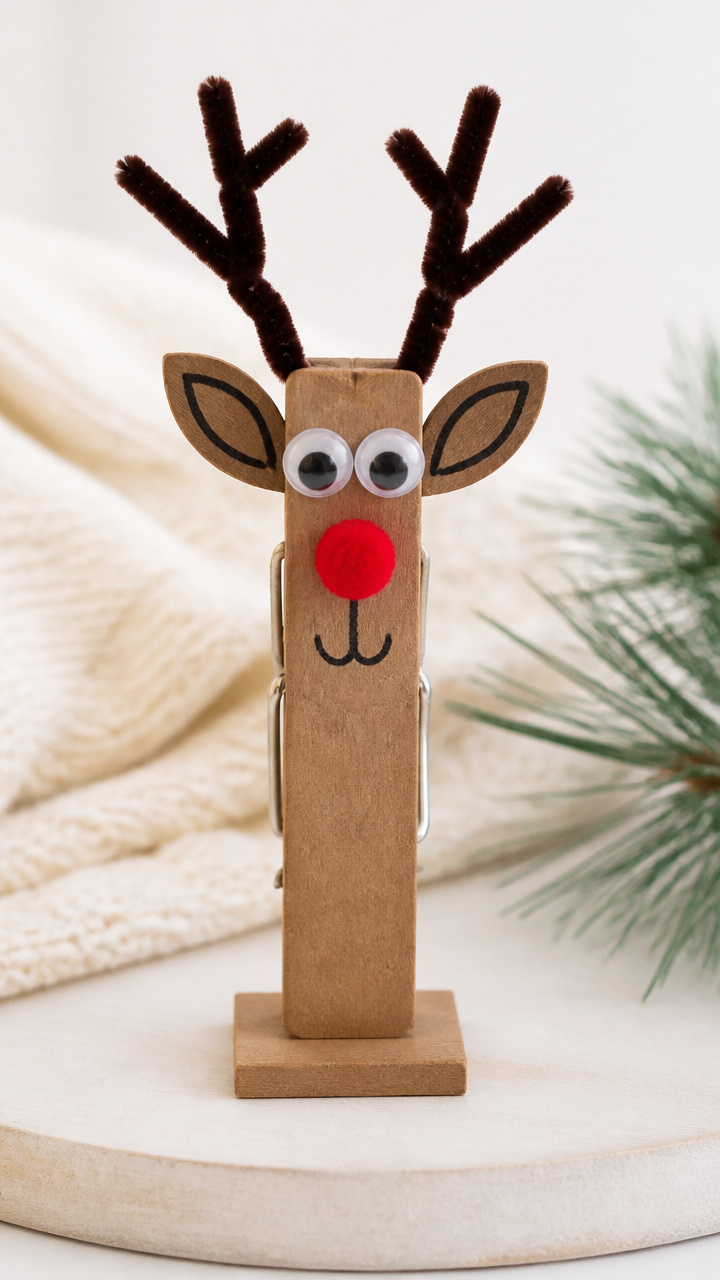
Wooden clothespins sprout pipe cleaner antlers and googly eyes to become playful desk companions. Kids love assembling these.
Materials Needed
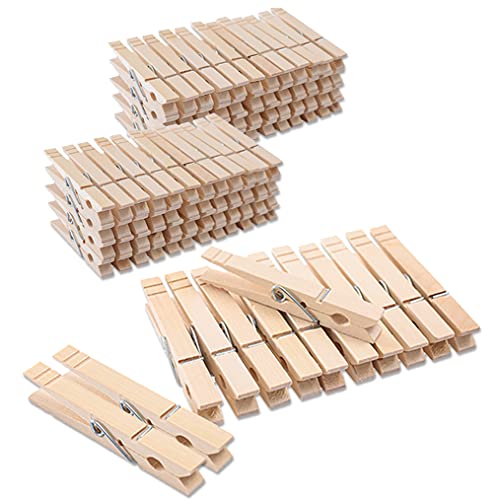
- Wooden clothespins (6 pieces)
- Brown pipe cleaners (12 inches, 12 pieces)
- Googly eyes (8 mm, 12 per reindeer)
- Red pom-pom (6 mm, 6 pieces)
- Craft glue
- Black fine-tip marker
How to Make It
- Bend one pipe cleaner in half and twist the ends around the top of a clothespin to form antlers.
- Glue two googly eyes just below the antler base on the clothespin head.
- Dot a small black pupil on each eye with the marker for detail.
- Glue a red pom-pom to the tip of the clothespin for the nose.
- Let dry for 15 minutes before placing on a mantle or tree branch.


17. Ice Lantern with Berries
Moderate
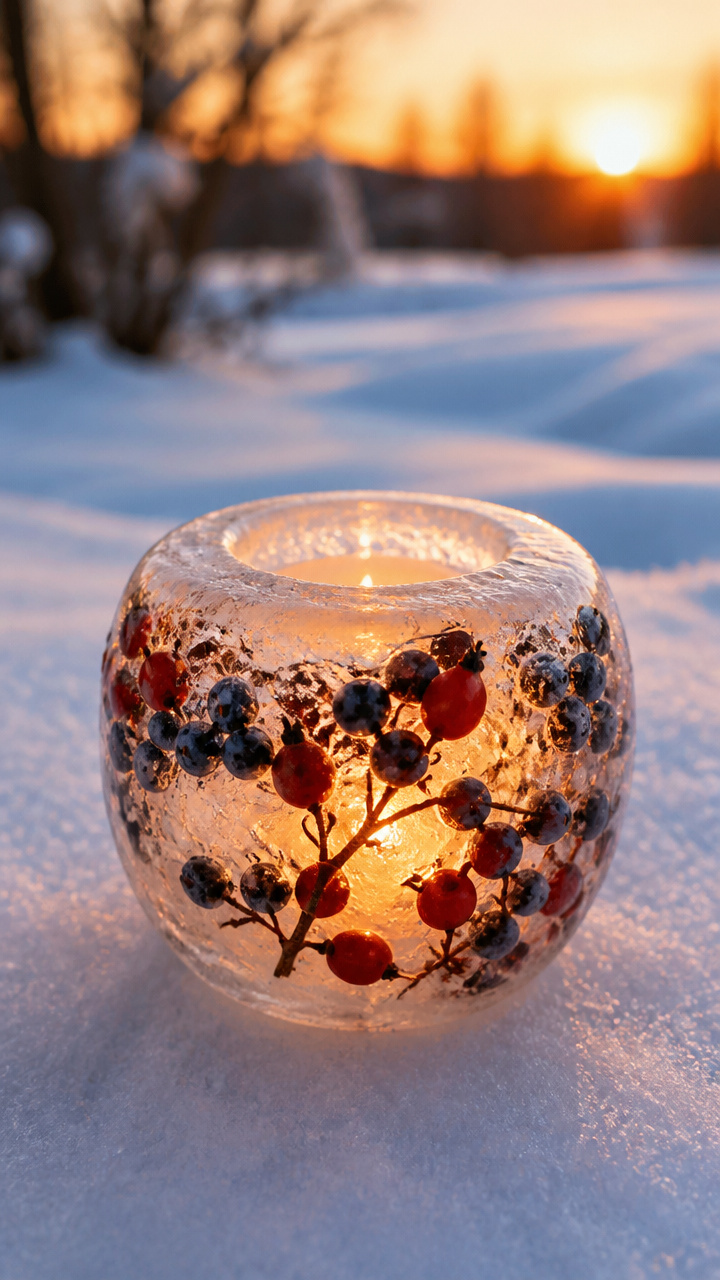
Frozen water balloons encase rose hips and juniper for a glowing outdoor lantern. Place a candle inside at dusk.
Materials Needed
- Large balloon (12 inch inflated size)
- Water (4 cups)
- Rose hips (10 pieces)
- Juniper berries (10 pieces)
- Freezer-safe bowl
- Tealight candle
How to Make It
- Inflate the balloon to 12 inches and tie it off, then place it in a bowl to stabilize.
- Pour water slowly into the balloon until it feels firm but not overstretched.
- Drop rose hips and juniper berries into the neck before tying the balloon closed.
- Place the balloon in the freezer overnight, laying it flat so berries sink evenly.
- Peel off the balloon the next day and set a tealight inside the ice lantern.
18. Cookie Cutter Wind Chime
Easy
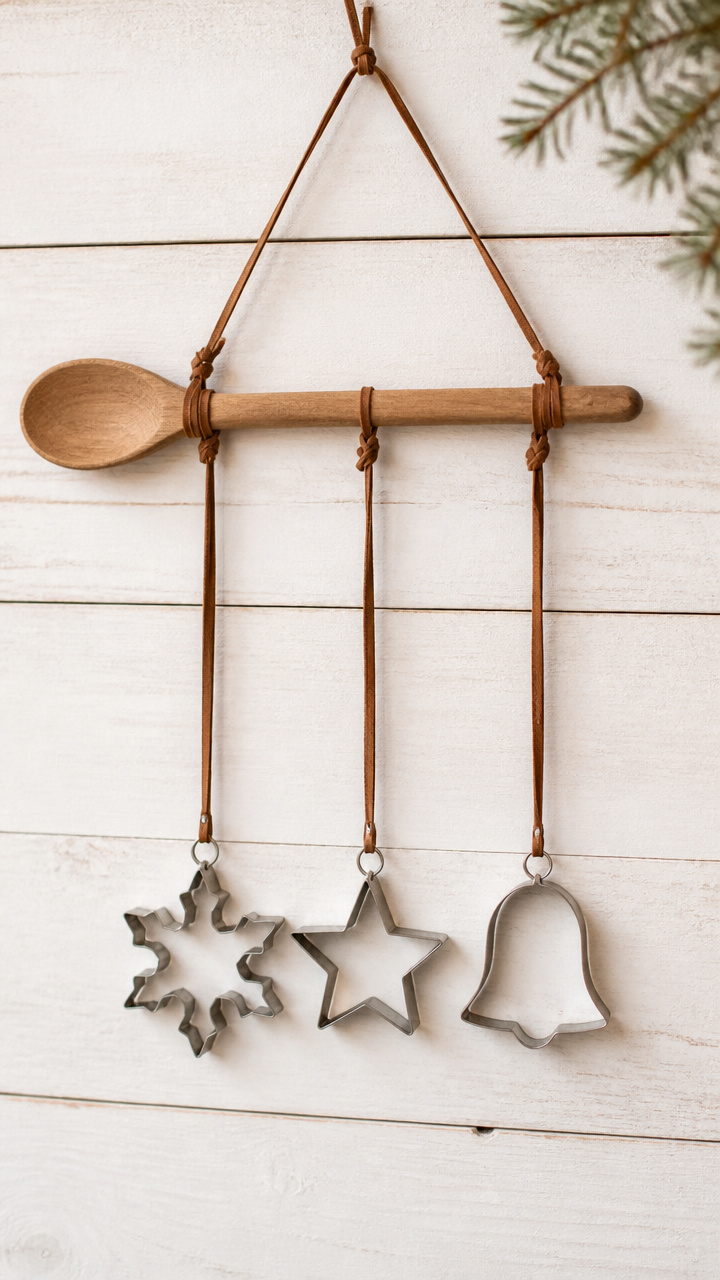
Vintage cookie cutters dangle from a wooden spoon, ringing softly in winter drafts. A sweet sound for a kitchen window.
Materials Needed
- Wooden spoon (10 inches long)
- Metal cookie cutters (snowflake, star, bell, 3 total)
- Leather cord (1/8 inch, 3 feet)
- Jump rings (15 mm, 3 pieces)
- Pliers
How to Make It
- Open each jump ring with pliers and hook one through the handle hole of a cookie cutter, then close the ring.
- Cut the leather cord into three 12 inch lengths.
- Tie one end of each cord to a jump ring using a double knot.
- Gather the three loose ends and tie them securely to the handle end of the wooden spoon.
- Hang the chime from a hook and enjoy the gentle tinkle in the breeze.
19. Dried Orange Garland
Easy
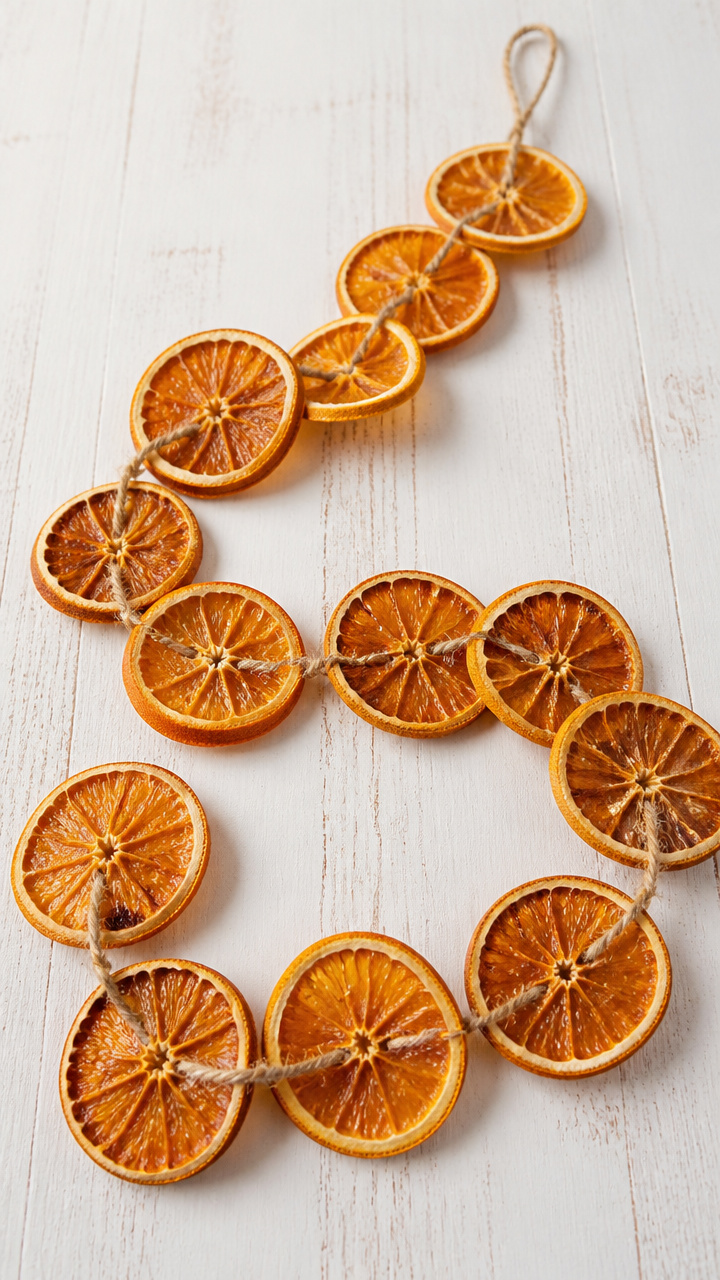
Thin orange slices bake into fragrant, leathery discs that string into a sun-colored garland. It smells like holiday warmth.
Materials Needed
- 3 oranges
- Knife
- Baking sheet
- Parchment paper
- Olive oil (1 tablespoon)
- Twine (2 yards)
- Needle (tapestry)
How to Make It
- Slice oranges into 1/4 inch rounds using a sharp knife, removing any seeds.
- Line a baking sheet with parchment paper and arrange slices in a single layer.
- Brush both sides lightly with olive oil and bake at 200°F for 3 hours, flipping halfway.
- Let cool completely, then thread a tapestry needle with twine and pierce through the top edge of each slice.
- String 15 slices onto the twine, spacing them 2 inches apart, and tie ends for hanging.


20. Quilted Fabric Tree Skirt
Advanced
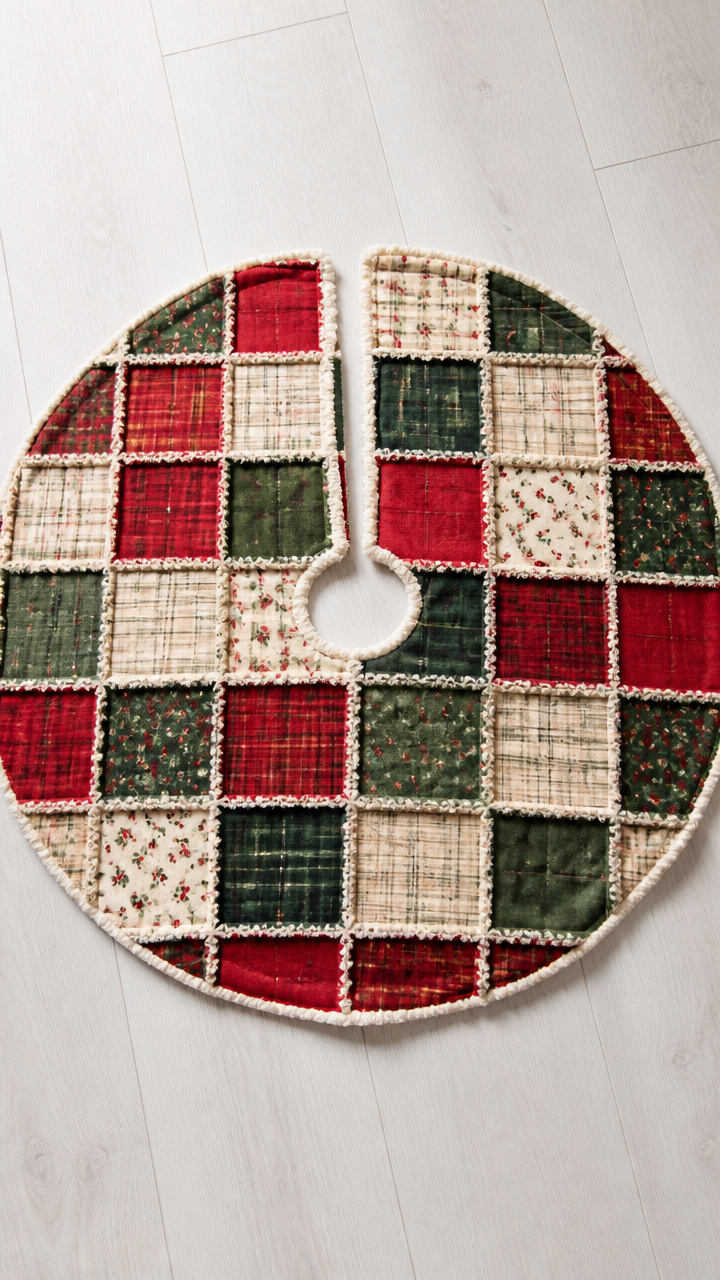
Scraps of flannel and cotton patch together into a cozy tree skirt with a simple running stitch. It hides presents in style.
Materials Needed
- Flannel scraps (red, green, cream, total 1/2 yard)
- Cardboard circle template (18 inch diameter)
- Scissors
- Sewing machine
- Thread (matching colors)
- Safety pin
- Velcro strip (1 inch x 6 inches)
How to Make It
- Cut the cardboard into a donut shape: 18 inch outer circle with a 6 inch center hole.
- Use the template to trace and cut two identical fabric circles from layered scraps sewn together.
- Place the circles right sides together and sew around the outer edge with a 1/2 inch seam, leaving a 4 inch gap.
- Turn the skirt right side out through the gap and press the edges flat with an iron.
- Topstitch around the entire outer and inner edges with a running stitch, inserting a Velcro tab at the opening for closure.
21. Toilet Paper Roll Trees
Easy
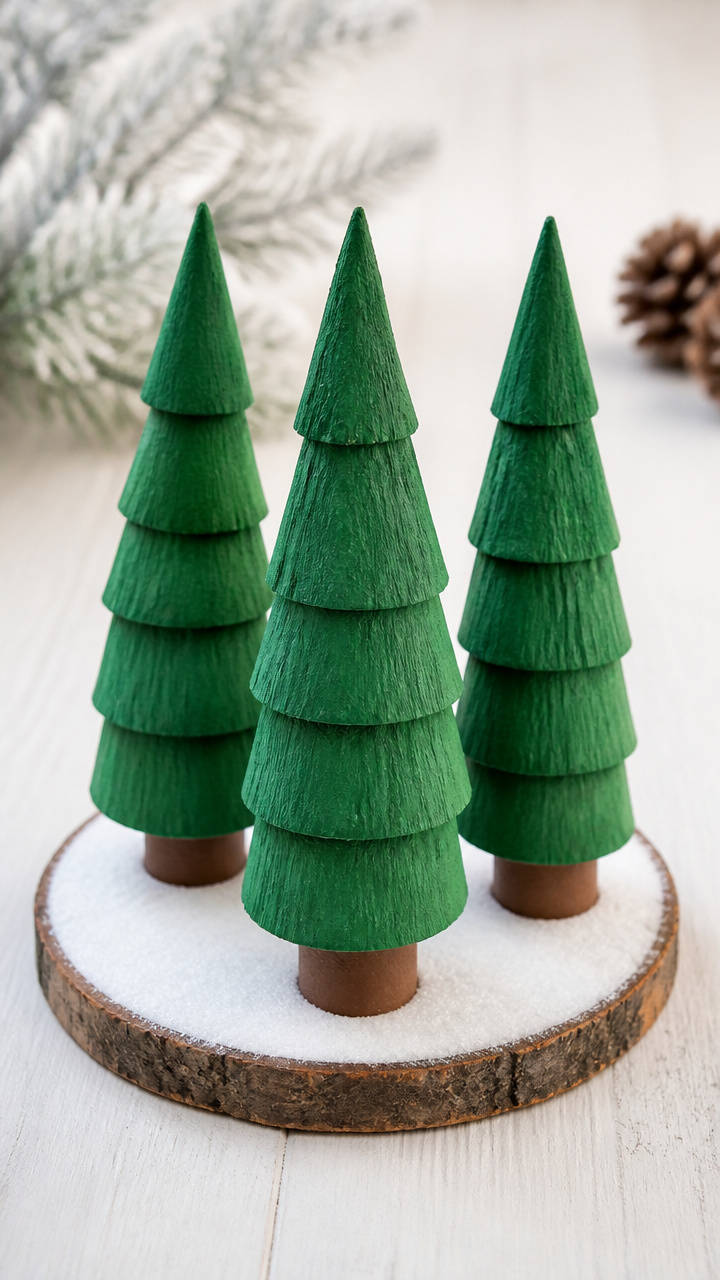
Cardboard tubes rise into miniature evergreens when painted and layered with texture. Group them into a wintry forest scene.
Materials Needed
- 3 toilet paper rolls
- Green acrylic paint
- Paintbrush (medium)
- Scissors
- Brown construction paper
- Craft glue
- Pom-poms (green, assorted sizes, 15 total)
How to Make It
- Cut each toilet paper roll vertically and reshape into cones, overlapping the edges and gluing to hold.
- Paint each cone with green acrylic paint, covering all sides, and let dry for 20 minutes.
- Cut small circles from brown construction paper and glue one to the base of each cone for a trunk.
- Glue pom-poms in staggered rows from the base upward, starting with largest at bottom, to mimic tree texture.
- Let dry completely before arranging on a tray or shelf.


22. Linen Sachets with Lavender
Easy
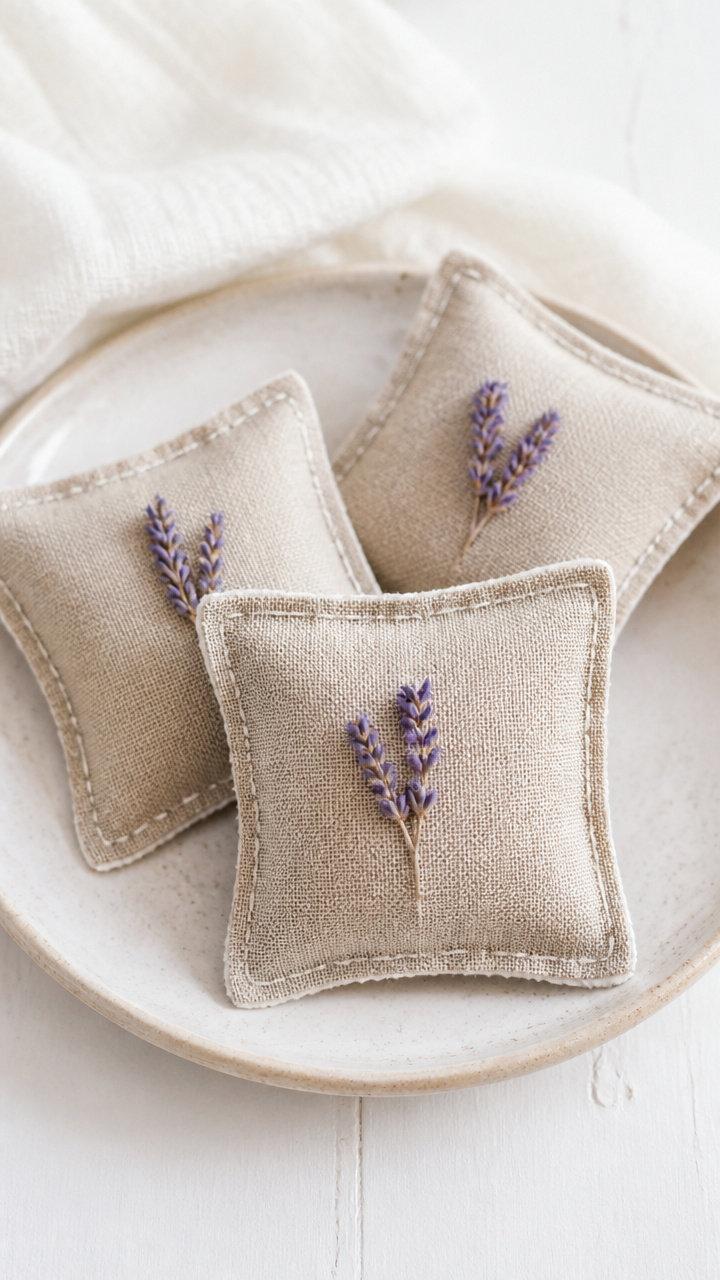
Tiny linen pouches filled with dried lavender keep drawers smelling fresh. Stitch them shut with a simple running stitch.
Materials Needed
- Linen fabric scrap (6 x 6 inches)
- Scissors
- Dried lavender buds (1/4 cup)
- Needle
- White thread
- Ruler
How to Make It
- Cut the linen into two 3 x 3 inch squares using scissors and ruler.
- Place squares right sides together and sew around three edges with a 1/4 inch seam using needle and thread.
- Turn the pouch right side out and fill with 2 tablespoons of dried lavender buds.
- Fold the open edge inward 1/4 inch and sew shut with a running stitch across the top.
23. Wine Cork Name Tags
Easy
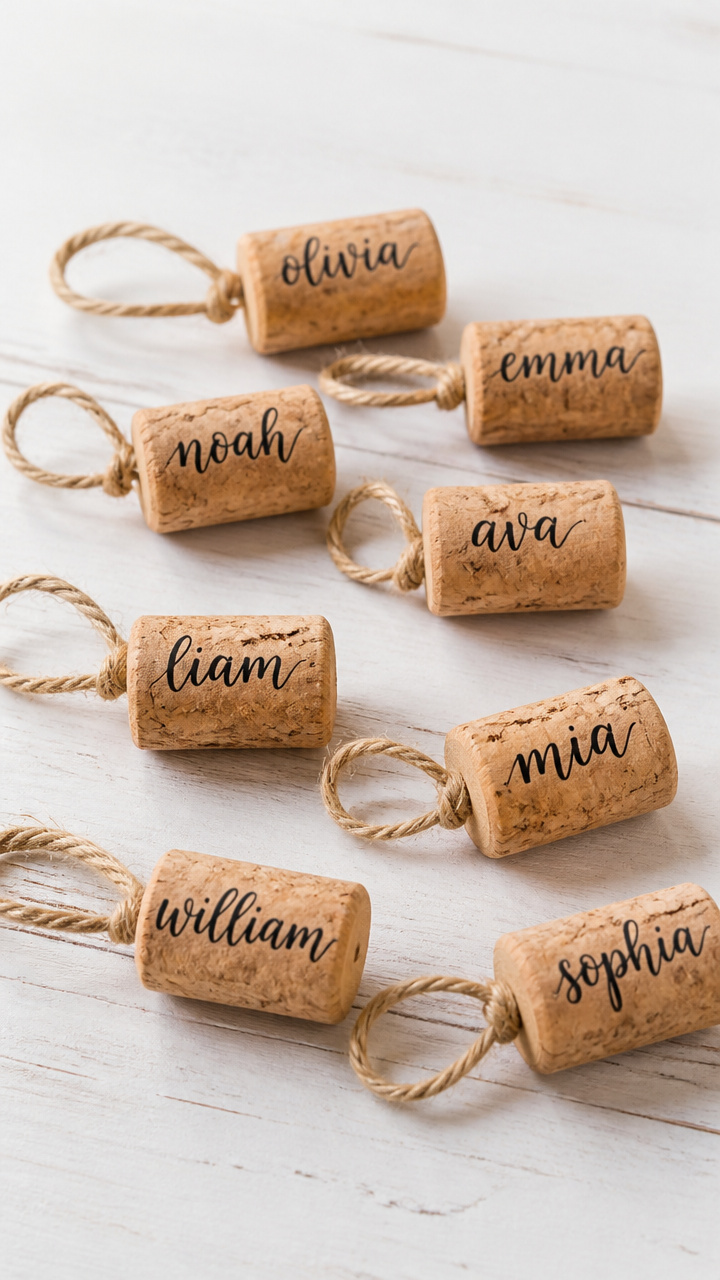
Cork slices become charming place markers when stamped with names. Use calligraphy ink for an elegant touch.
Materials Needed
- 6 wine corks
- Knife
- Sandpaper (120 grit)
- Black calligraphy pen
- Twine (6 pieces, 6 inches)
- Hole punch (1/16 inch)
How to Make It
- Cut each cork horizontally into two 1/2 inch slices using a sharp knife.
- Smooth the top surface of each slice with sandpaper in circular motions for 10 seconds.
- Write a guest's name on the flat side using the calligraphy pen and let dry for 3 minutes.
- Punch a small hole near the top edge and thread a 6 inch piece of twine through for hanging.
- Rest each tag on a dinner plate or tie to a glass.


24. Frosted Branch Centerpiece
Moderate
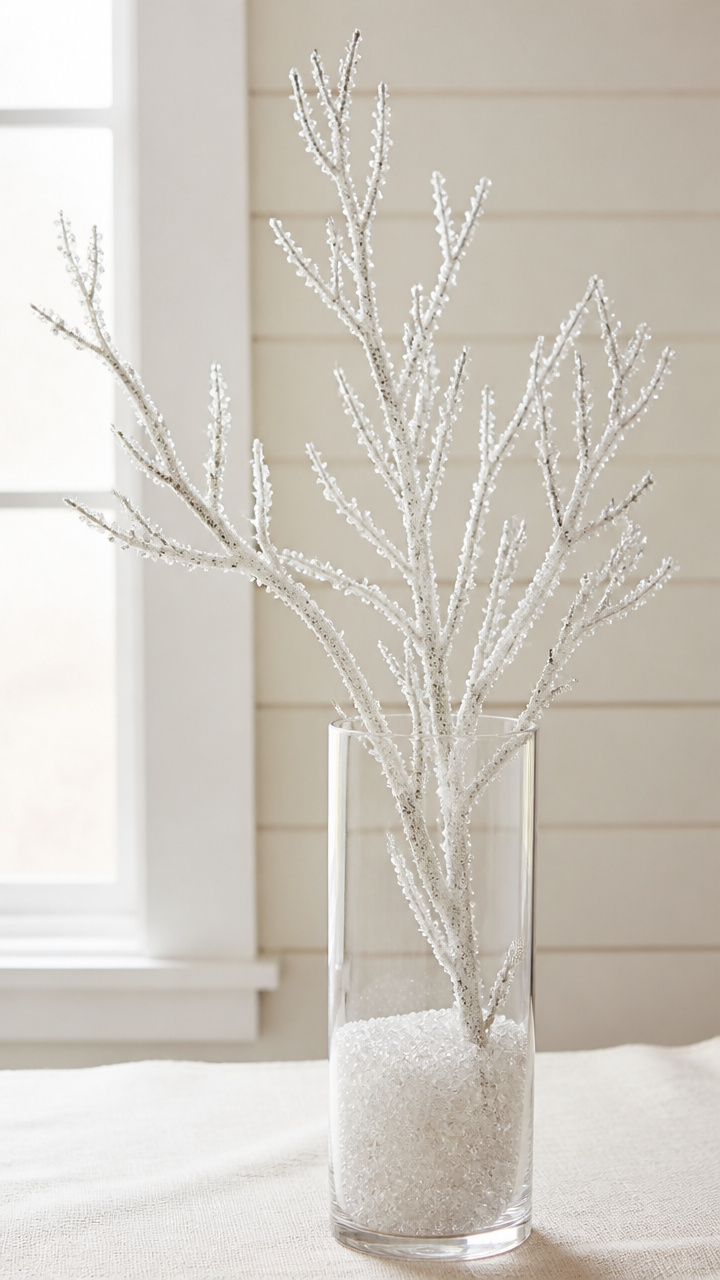
A simple branch becomes a frost-kissed sculpture when dipped in glue and glitter. Display it in a tall vase for drama.
Materials Needed
- One bare tree branch (18 inches long)
- White craft glue
- Paintbrush (wide)
- Fine white glitter (1/2 cup)
- Tall glass vase (8 inches)
- Paper bag
How to Make It
- Place the paper bag on your work surface and lay the branch inside.
- Brush white craft glue evenly over the lower 12 inches of the branch, working from base to tip.
- Sprinkle fine white glitter generously over the glued section, rotating the branch to coat all sides.
- Let dry for 45 minutes, then tap off excess glitter into the bag.
- Place the branch in the vase and display on a dining table or entryway console.


25. Embroidered Towel Edges
Moderate
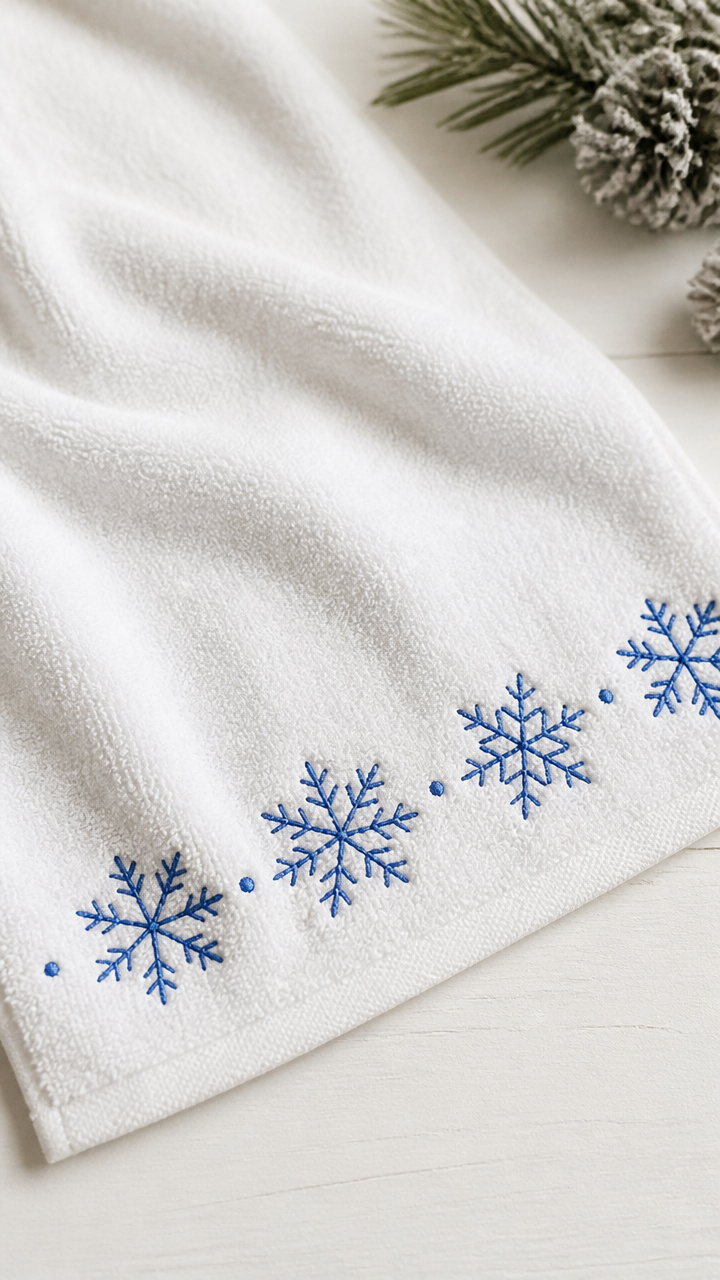
Plain dish towels gain personality with a row of snowflake stitches along the hem. Simple backstitch makes it beginner-friendly.
Materials Needed
- White cotton dish towel (1 piece)
- Blue embroidery floss (6 strands, 18 inches)
- Embroidery needle
- Scissors
- Water-soluble fabric marker
How to Make It
- Fold the towel’s edge to find the center and mark a spot 2 inches from the side with the fabric marker.
- Thread the needle with blue floss and knot the end.
- Bring the needle up from the back at the starting mark and make a small backstitch forward, then another backward over it.
- Continue stitching snowflakes 1 inch apart along the hem, using five short lines per flake.
- Knot the thread on the back when finished and trim excess with scissors.
Grab a pair of scissors, dig into that drawer of forgotten bits, and start creating. Each of these crafts turns ordinary moments into something meaningful.