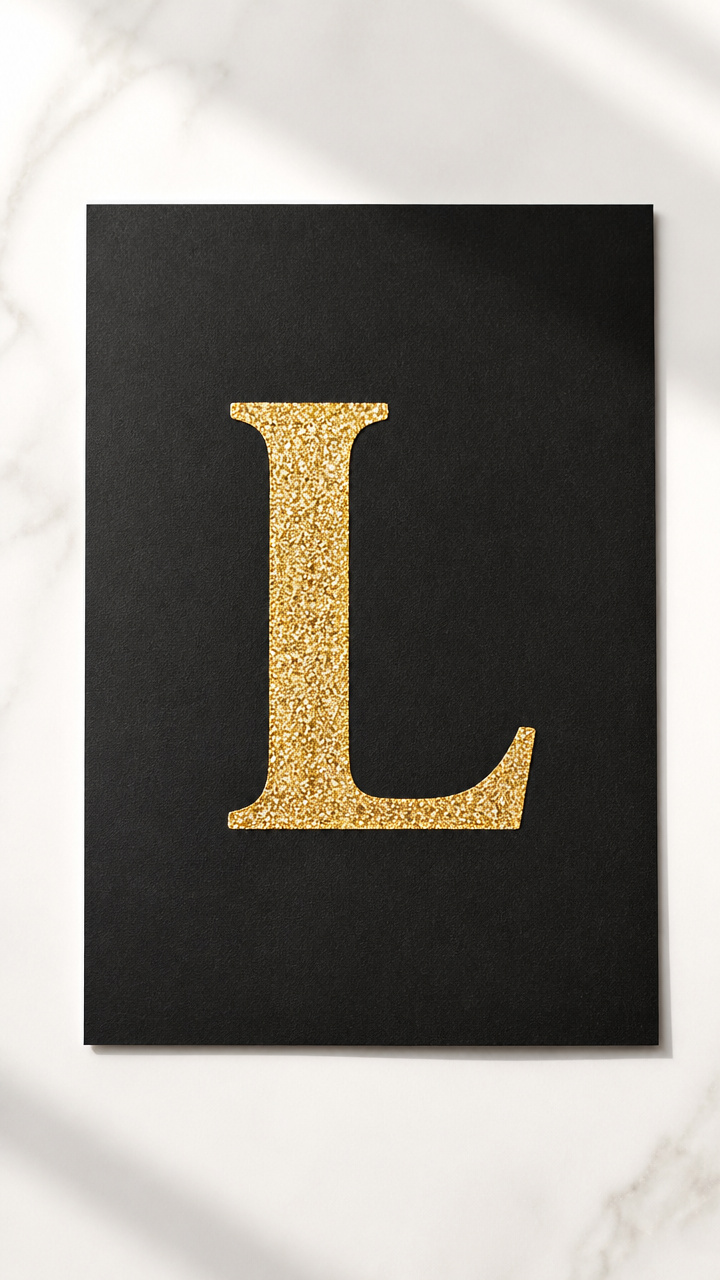
15 Fun Letter L Crafts for Preschoolers
Little hands love to explore letters through play and creativity. Focusing on the letter L gives you a chance to blend literacy with sensory fun using simple supplies you likely have at home.
Each of these crafts invites preschoolers to touch, glue, paint, and build while reinforcing letter shape and sound. These are not just cute projects, they’re purposeful activities that support early learning in a joyful way.
1. L is for Leaf Rubbing
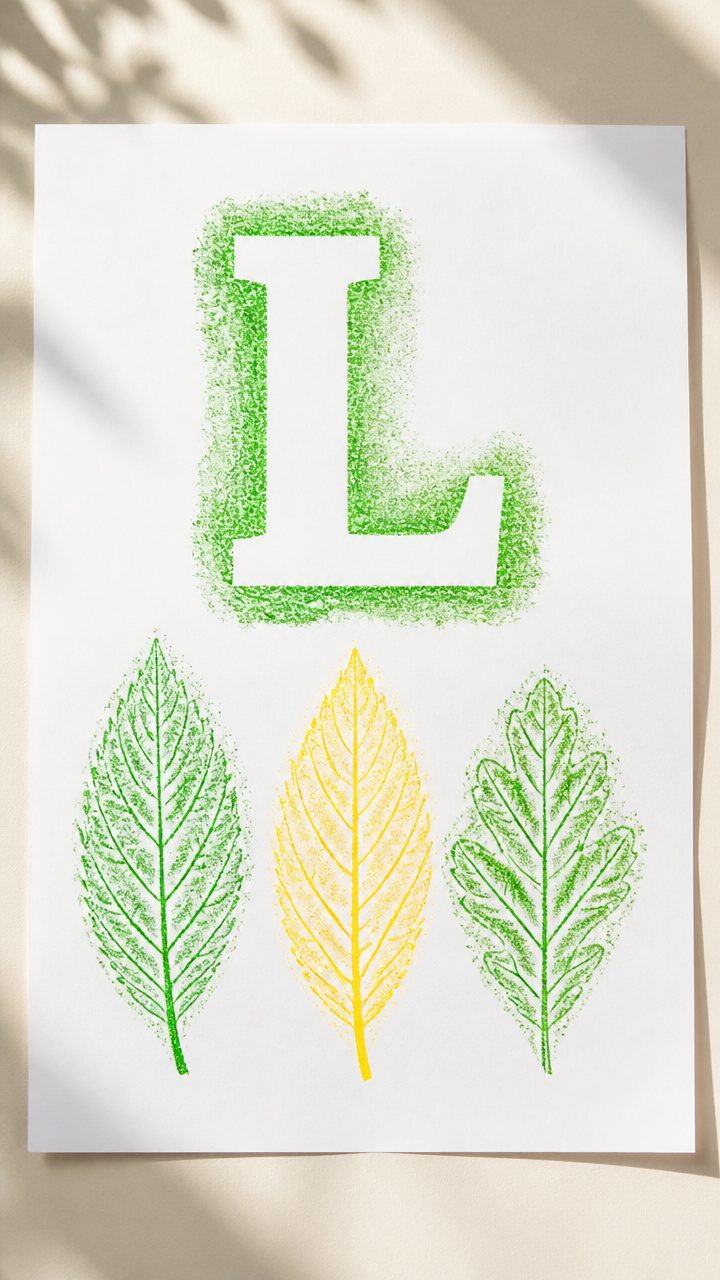
Crisp leaf textures reveal the shape of L when rubbed with crayons on paper. This outdoor-inspired craft connects nature and literacy.
Materials Needed
- 3 large fallen leaves with clear veins
- White A4 drawing paper
- Green and yellow unwrapped crayons
- Alphabet stencil with uppercase L
- Scissors
How to Make It
- Place a leaf under the white paper and position the paper on a flat surface like a sidewalk or table.
- Hold the crayon sideways and rub gently over the leaf until the texture shows clearly.
- Use the alphabet stencil to trace a large uppercase L directly onto the paper beside the rubbing.
- Cut out the leaf rubbing and glue it inside the curve of the traced L.


2. Lacing Letters with Yarn

Sturdy cardboard L shapes become lacing cards that build fine motor skills. Threading yarn through holes teaches hand-eye coordination.
Materials Needed
- Cardboard cut into 15cm tall uppercase L shapes (2 per child)
- Hole punch
- 50cm length of yellow yarn per L
- Tape to secure yarn end
- Scissors
How to Make It
- Punch holes every 2cm along the outer edge of the cardboard L.
- Tape one end of the yarn to make a firm needle-like tip.
- Thread the yarn in and out of the holes, starting from the bottom left corner.
- Continue until the entire outline is laced, then tie a knot at the top.


3. Lego Letter L Build
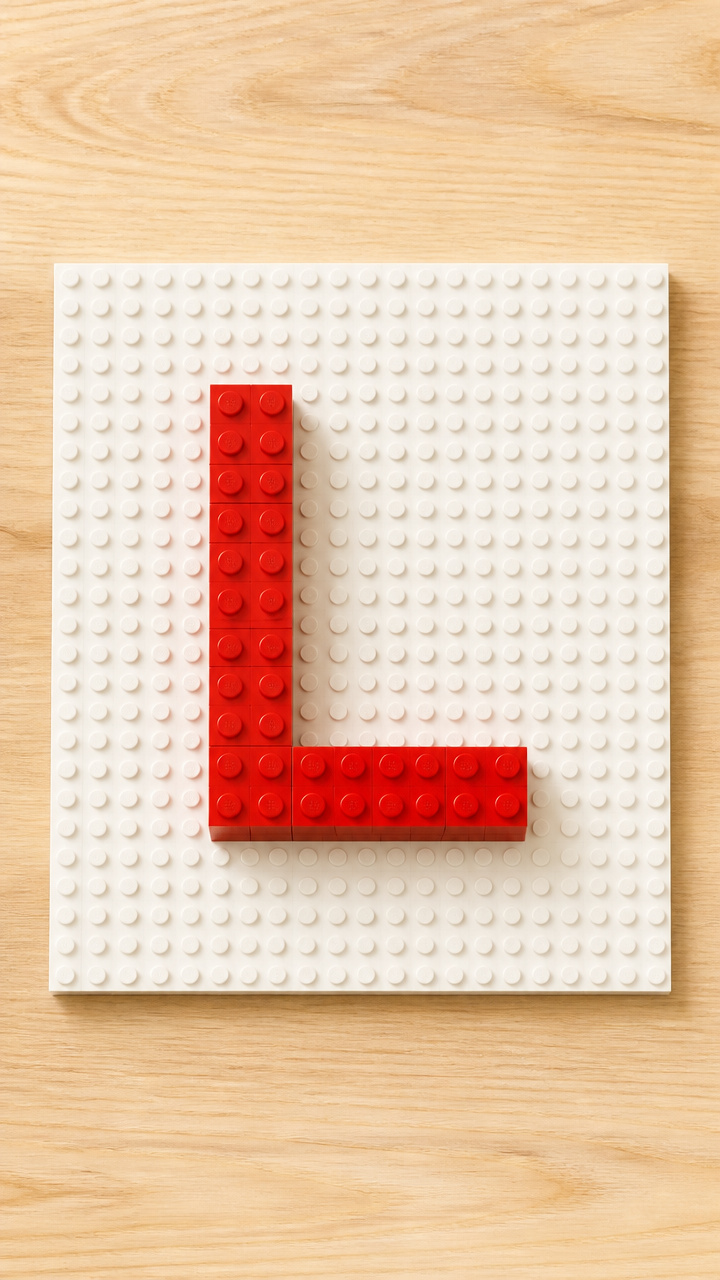
Bright plastic bricks snap together to form a bold 3D letter L. Building with Legos strengthens problem-solving and spatial awareness.
Materials Needed
- 10 red 2×2 Lego bricks
- 5 red 2×4 Lego bricks
- Baseplate (20×20 studs)
- Wet-erase marker
How to Make It
- Use the wet-erase marker to draw a large uppercase L on the baseplate as a guide.
- Snap the 2×4 bricks vertically to form the long side of the L, stacking four high.
- Attach the 2×2 bricks horizontally at the bottom to form the shorter arm of the L.
- Count each brick aloud as you place it to reinforce number recognition.


4. Puffy Paint L Art
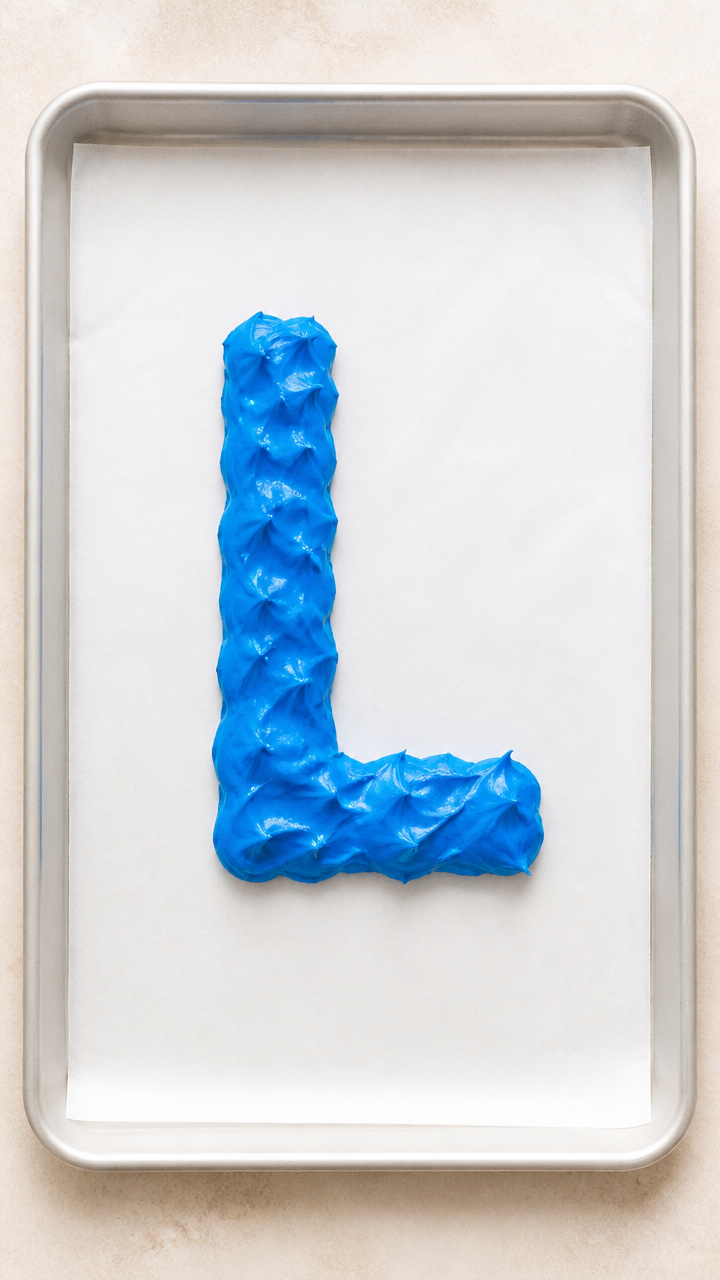
A flour-based puffy paint mixture rises when baked, creating a tactile letter L. Kids love watching their art puff up in the oven.
Materials Needed
- 1/4 cup all-purpose flour
- 1/8 cup salt
- 1/4 cup water
- Blue food coloring (6 drops)
- Squeeze bottle
- Parchment-lined baking sheet
- Oven set to 175°F
How to Make It
- Mix flour, salt, and water in a bowl until smooth, then add blue food coloring and stir well.
- Pour mixture into a squeeze bottle for easy control.
- Squeeze the bottle to draw a large uppercase L on the parchment paper.
- Bake for 45 minutes until puffed and firm, then cool completely before handling.


5. Lollipop Letter L Decor
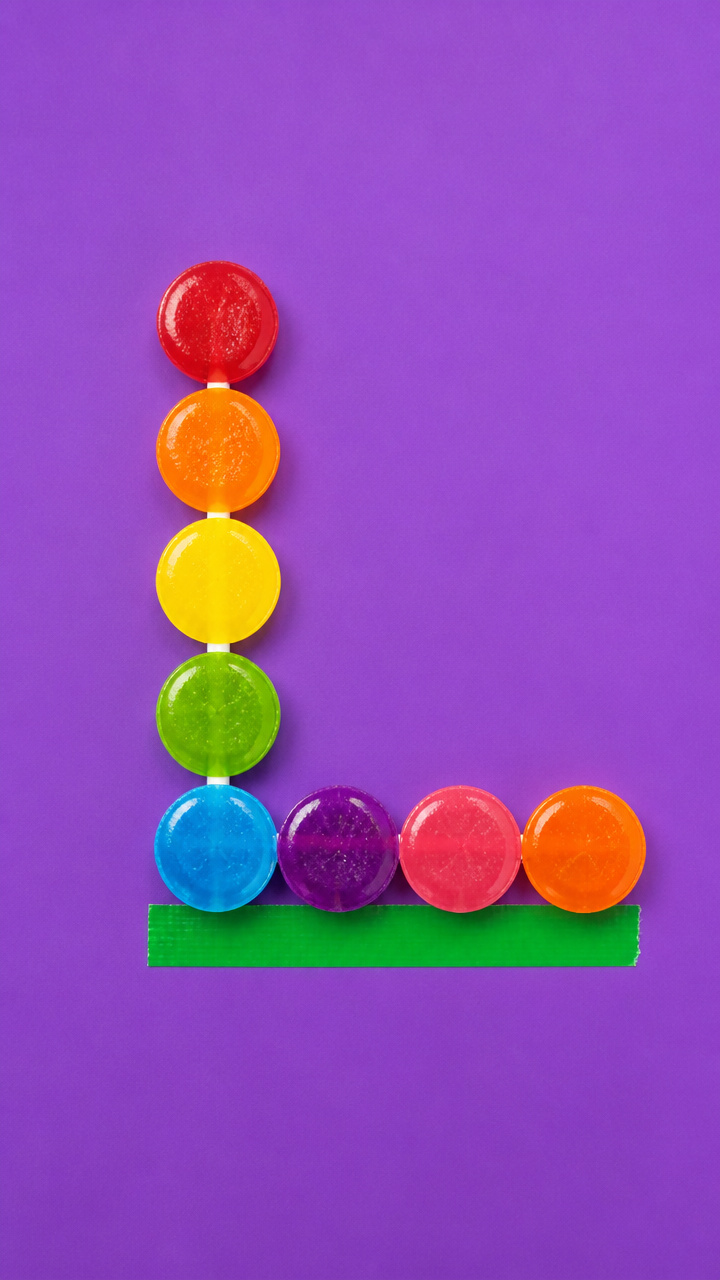
Colorful lollipops form the shape of an L on construction paper. This sweet-themed craft doubles as classroom decoration.
Materials Needed
- 9 fruit-flavored lollipops with round heads
- 9-inch strip of green duct tape
- 12×18 inch purple construction paper
- Glue stick
How to Make It
- Lay the lollipops flat and use the duct tape strip to bind their sticks together in an L formation.
- Glue the taped stick side down onto the purple paper, aligning the curve of the L shape.
- Let the glue dry for 5 minutes before displaying on a wall or shelf.
- Keep away from direct sunlight to prevent melting.


6. Lizard Handprint Craft
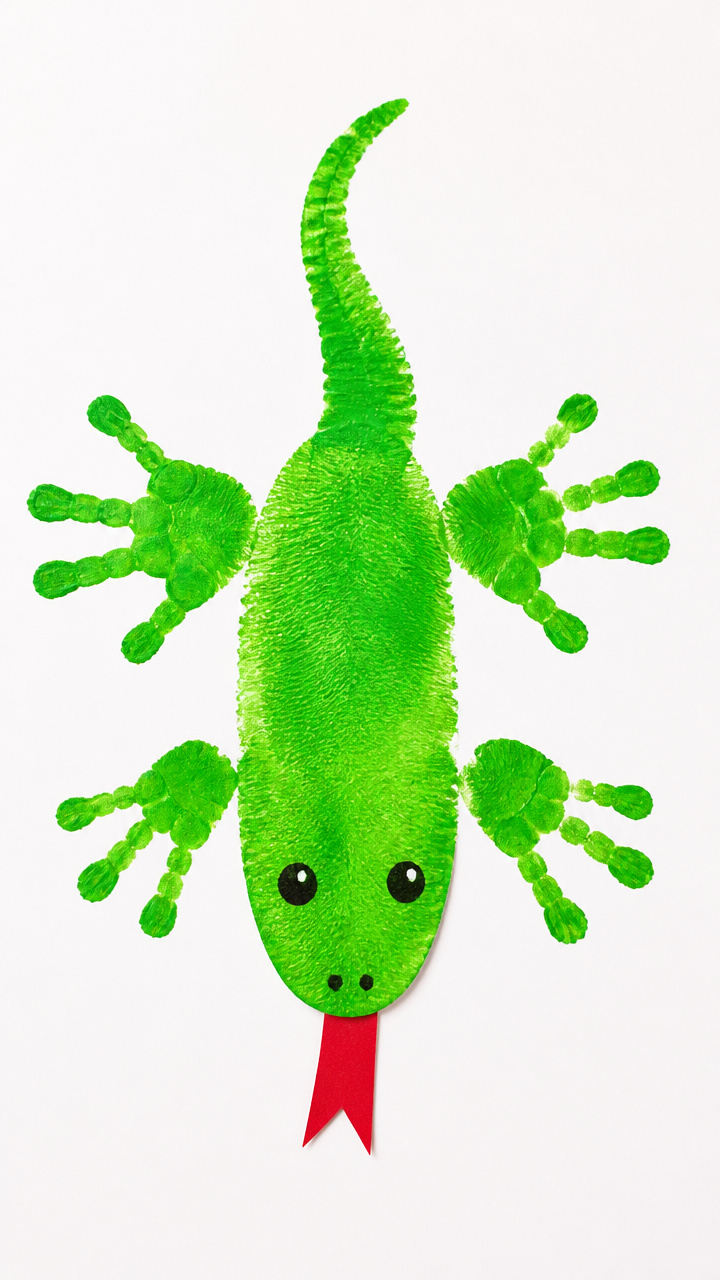
A green handprint becomes the body of a playful lizard shaped like an L. Adding legs and tail brings the letter to life.
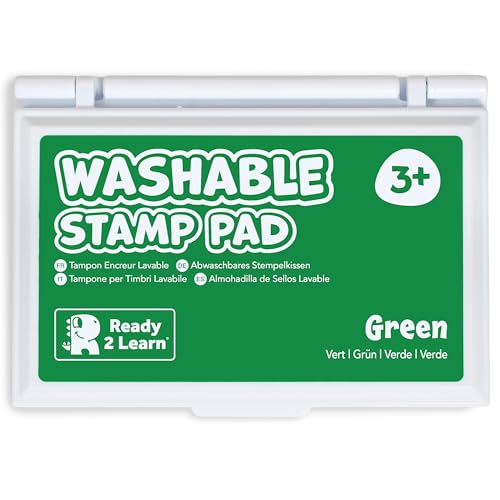
Materials Needed
- Green washable stamp pad
- White cardstock (8.5×11 inch)
- Black fine-tip marker
- Red construction paper
- Glue stick
- Scissors
How to Make It
- Press your child’s right hand firmly on the stamp pad, then stamp it diagonally upward on the cardstock to form the long part of the L.
- Use the black marker to draw a face, eye, and mouth on the thumb area.
- Cut two small feet from red paper and glue one near the bottom of each finger.
- Draw a curved tail extending from the wrist area to complete the lizard shape.


7. Link-Chain Letter Loop
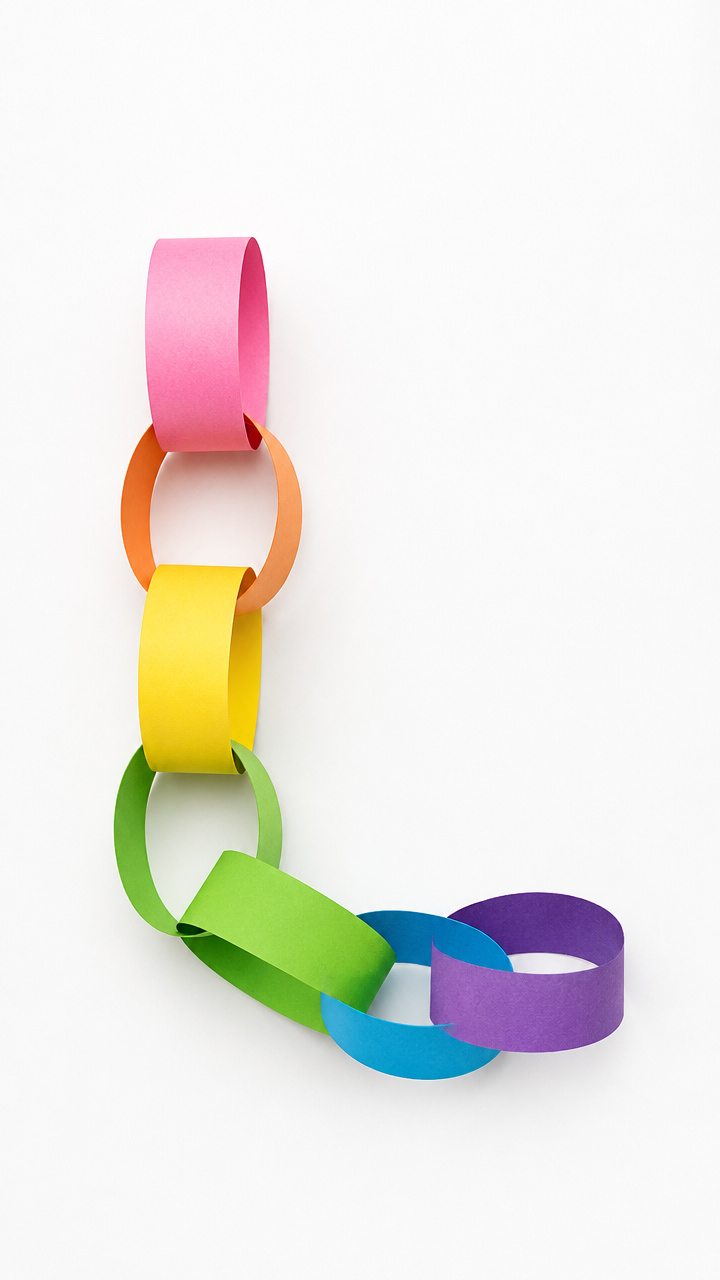
Paper strips interlock to form a chain bent into an uppercase L. Cutting and linking builds sequencing and scissor skills.
Materials Needed
- 6 strips of 1-inch wide colored construction paper (8 inches long each)
- Glue stick
- Ruler
- Scissors
How to Make It
- Cut six strips of paper using the ruler to ensure even width.
- Form the first strip into a loop and glue the ends together.
- Thread the second strip through the first before gluing its ends to make a chain.
- Repeat until all six strips are linked, then bend the chain into an uppercase L shape and glue the final connection.


8. Lighthouse Painting with Sponges
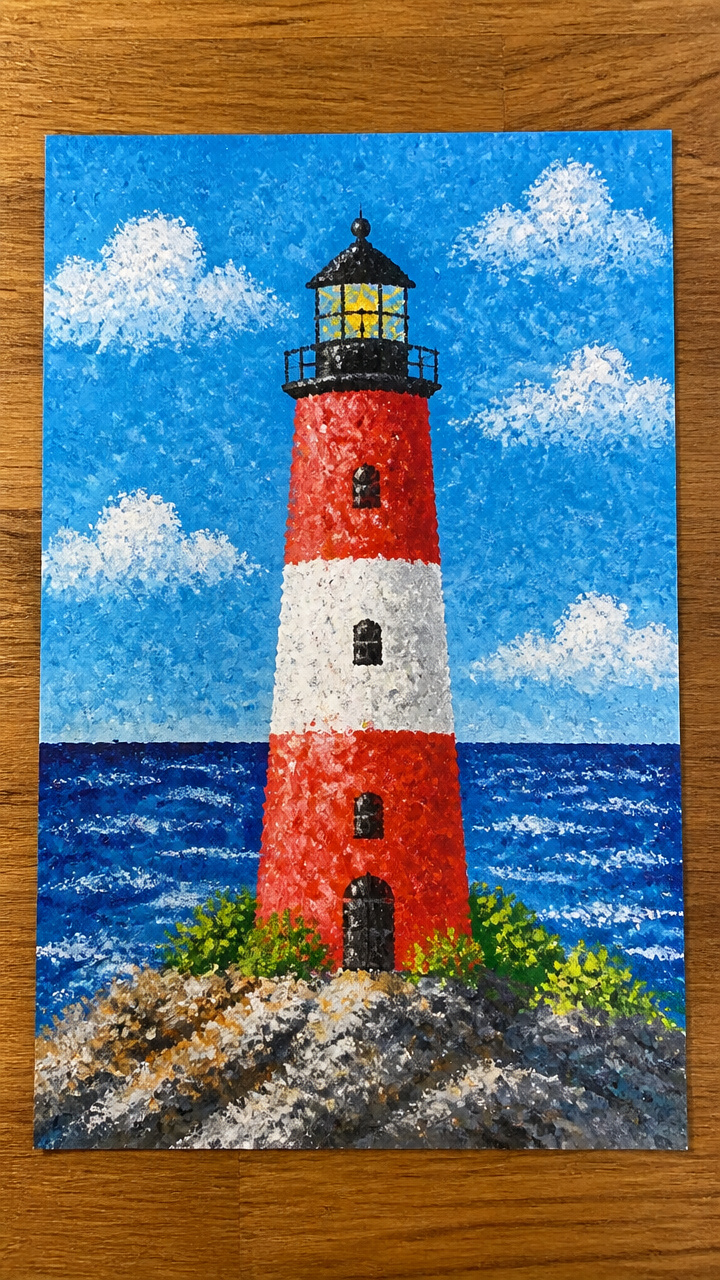
Sponge dabbing creates a textured red-and-white striped lighthouse in the shape of an L. This method controls paint neatly.
Materials Needed
- White A4 tempera paint
- Red acrylic paint
- Natural sea sponges (2 per child)
- Paint trays
- Blue construction paper (9×12 inch)
- Black marker
How to Make It
- Cut one sponge into a 1-inch wide strip for stripes, leave the other whole for base.
- Dip the whole sponge in red paint and dab a tall rectangle at the bottom right of the blue paper.
- Dip the strip sponge in white paint and dab horizontal lines across the red to make stripes.
- Use the black marker to draw a door, window, and beam line shooting from the top.


9. Lunchbox Collage Letters
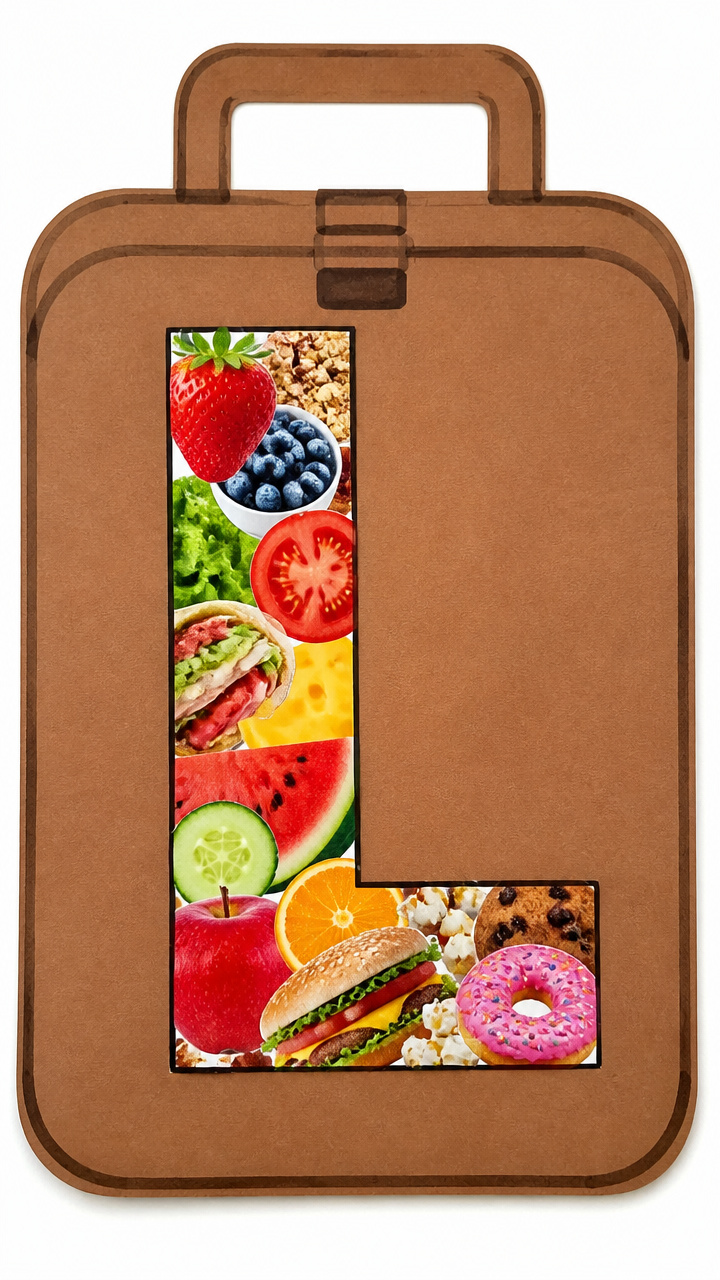
Tiny images of lunch foods glue onto a giant L to build vocabulary. Sorting pictures sharpens visual discrimination.
Materials Needed
- Magazine pages with food photos
- Scissors
- Large uppercase L template (10 inches tall)
- Glue stick
- Brown construction paper (12×18 inch)
How to Make It
- Trace the L template onto the brown paper and cut it out.
- Flip through magazines and cut out pictures of apples, sandwiches, milk, bananas, and juice boxes.
- Arrange the food pictures inside the L shape, leaving small gaps between them.
- Glue each picture down with the glue stick, pressing flat for 5 seconds each.


10. Pipe Cleaner Letter Bend
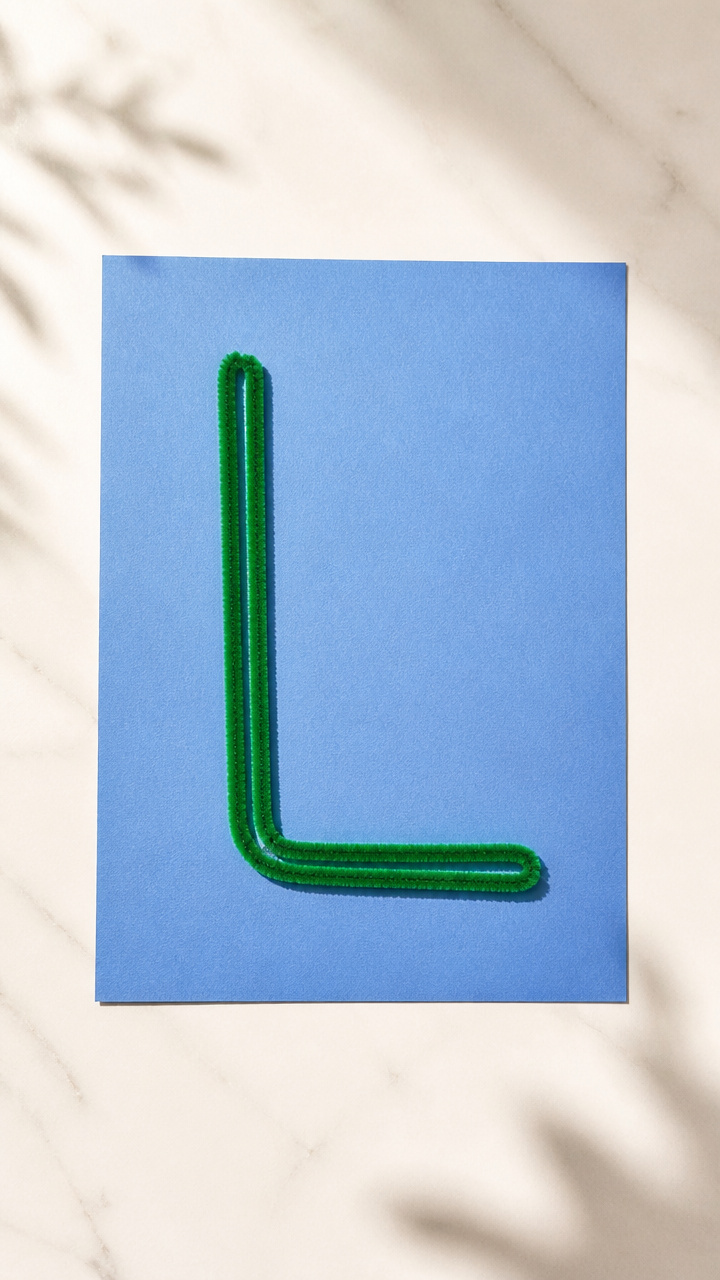
Flexible green pipe cleaners twist into a bold uppercase L. Bending wire helps children memorize the letter’s form.
Materials Needed
- 2 green pipe cleaners (12 inches each)
- Construction paper (blue, 9×12 inch)
- Glue dot
How to Make It
- Lay one pipe cleaner straight to form the long vertical line of the L.
- Bend the second pipe cleaner at a right angle 3 inches from one end to form the base.
- Twist the short end of the bent pipe cleaner around the bottom of the straight one to join them.
- Press a glue dot on the back and stick it to the blue paper to display.


11. Ladybug Letter Stamp
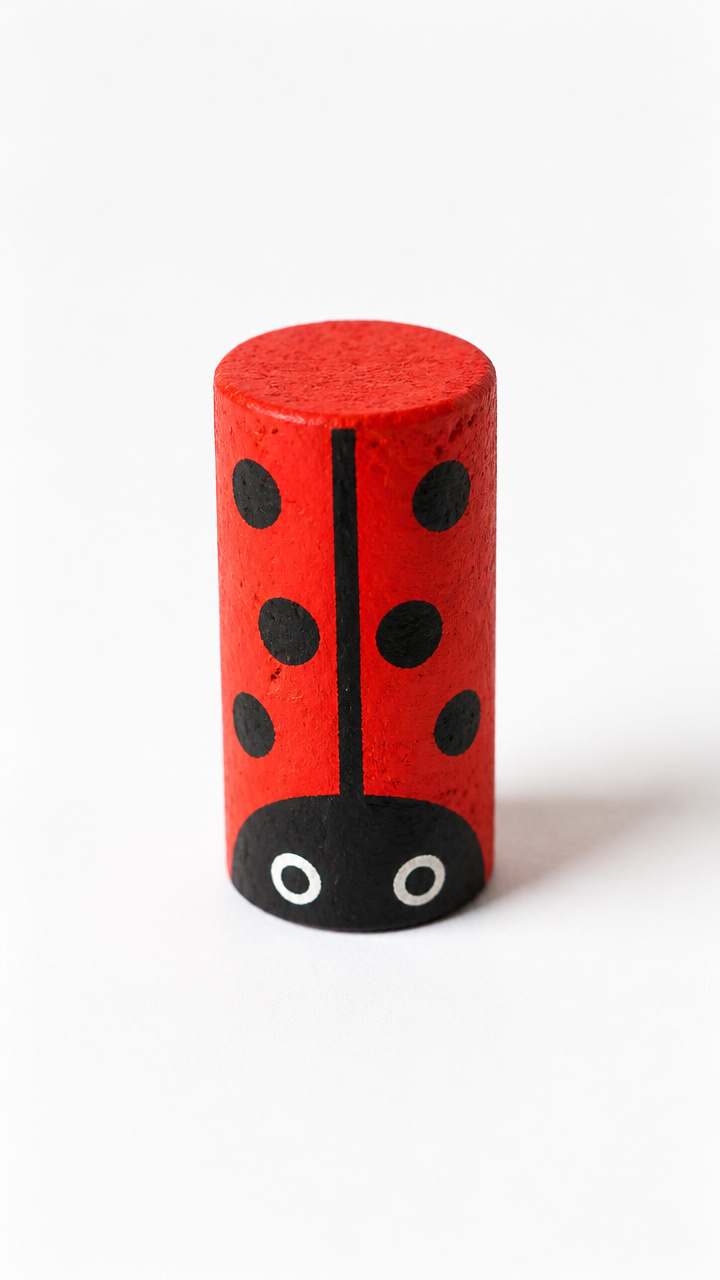
A cork-bottomed bottle stamps polka-dot ladybugs along the arms of an L. Stamping builds rhythm and pattern sense.
Materials Needed
- Empty wine cork
- Red acrylic paint
- Black paint pen
- Round plastic lid (2 inch diameter)
- Paint tray
- White drawing paper
How to Make It
- Dip the plastic lid into red paint and stamp two connected circles near the bottom left of the paper to start the L.
- Repeat stamping upward in a straight line for 5 more ladybugs.
- Dip the cork into red paint and stamp a horizontal line of 3 ladybugs forming the base.
- Use the black paint pen to add eyes, spots, and legs to each ladybug.


12. Lincoln Log Letter Frame
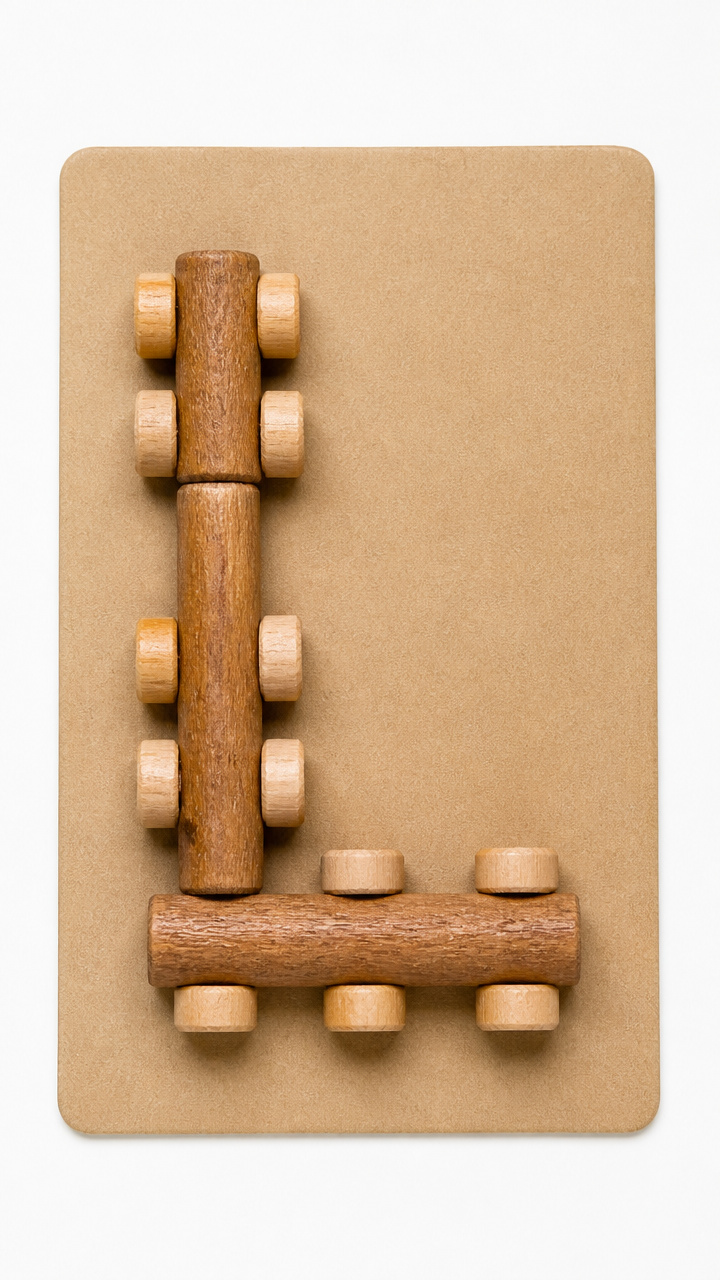
Mini wooden logs stack and glue into a freestanding letter L. This craft combines building and letter recognition.
Materials Needed
- 10 unpainted Lincoln Logs (6 medium, 4 short)
- White school glue
- Flat cardboard base (4×6 inch)
- Brown paintbrush
How to Make It
- Lay the cardboard base flat and apply a line of glue along the left edge.
- Stand the 6 medium logs upright in the glue to form the tall side of the L.
- Glue the 4 short logs horizontally across the bottom logs to create the base arm.
- Let dry for 20 minutes until stable enough to stand alone.


13. Glue and Glitter L Outline
Liquid glue traces a shimmering L covered in gold glitter. The slow drying time encourages patience and focus.
Materials Needed
- Gold glitter (1/4 cup)
- White liquid school glue
- Black construction paper (9×12 inch)
- Plastic spoon
- Ziplock bag with corner snipped
How to Make It
- Pour glue into the Ziplock bag, seal it, and snip a tiny hole in one corner.
- Squeeze the glue to draw a large uppercase L on the black paper.
- Immediately sprinkle gold glitter over the wet glue line, covering it completely.
- Wait 10 minutes for glue to dry, then gently shake off excess glitter into the spoon.


14. Yarn-Wrapped L on Canvas
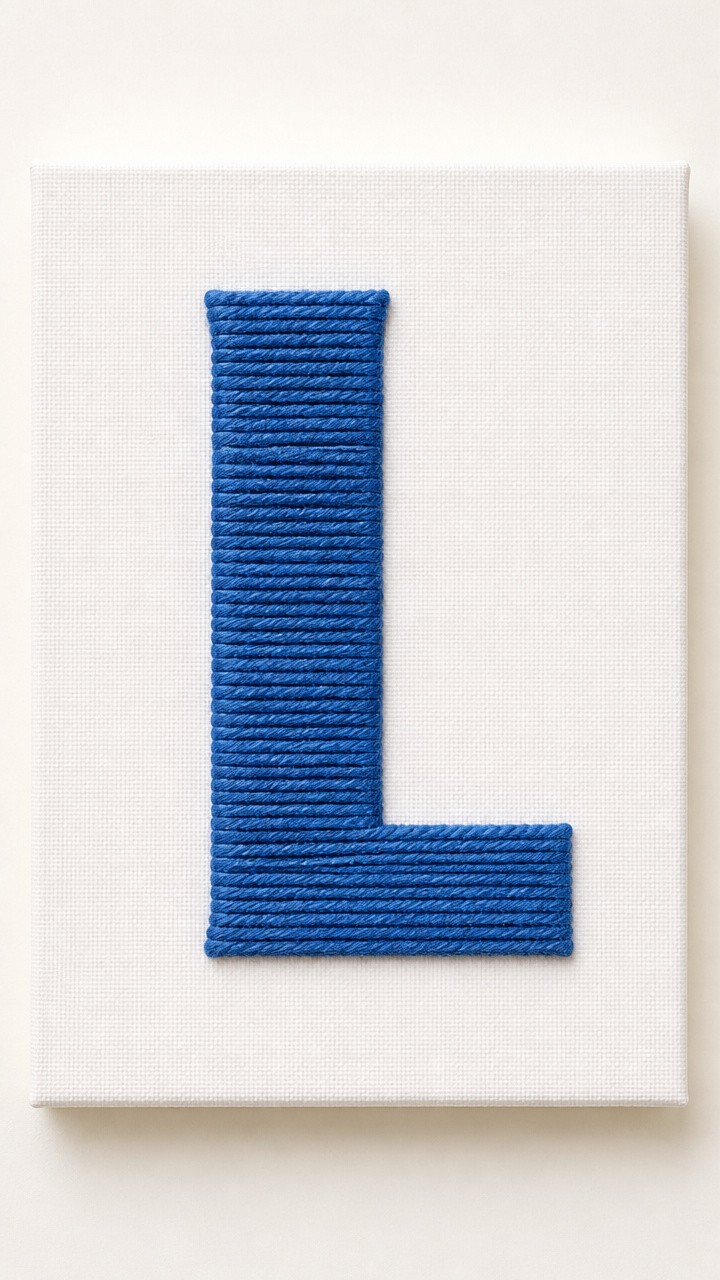
Stiff canvas board becomes a colorful wrapped letter L using blue yarn. Wrapping teaches direction and tension.
Materials Needed
- Canvas board (6×8 inch)
- Uppercase L stencil (5 inch tall)
- Blue yarn (1 meter)
- White school glue
- Paintbrush
How to Make It
- Place the stencil on the canvas and trace around it with pencil.
- Brush a thin layer of glue along the left and bottom edges of the penciled L.
- Start at the bottom left and press the yarn into the glue, following the outline tightly.
- Wrap continuously until the entire L is covered, then dab glue over the end to secure.


15. Lily Pad Paper Plate
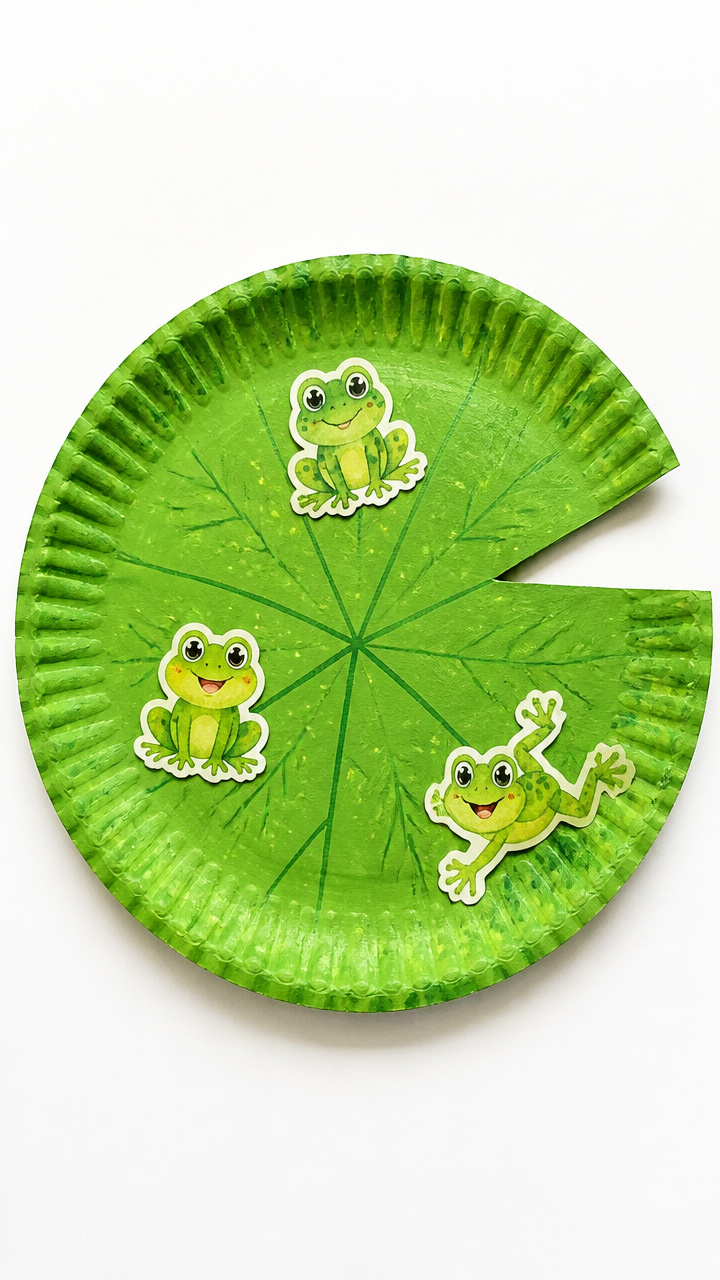
A green paper plate transforms into an L-shaped lily pad with frog cutouts. Cutting and arranging supports storytelling.
Materials Needed
- One green paper plate per child
- Scissors
- Black marker
- Small frog stickers (3 per plate)
- Glue stick
How to Make It
- Cut the paper plate straight across one side to form the long stem of the L.
- Cut a second straight line from the edge to the center to create the base arm.
- Draw wavy lines around the rim with the black marker to mimic lily pad edges.
- Stick three frog stickers along the L shape and press lightly to adhere.

You’ve got everything you need to turn the letter L into a week of joyful learning. Grab your supplies and let your child’s hands do the exploring.