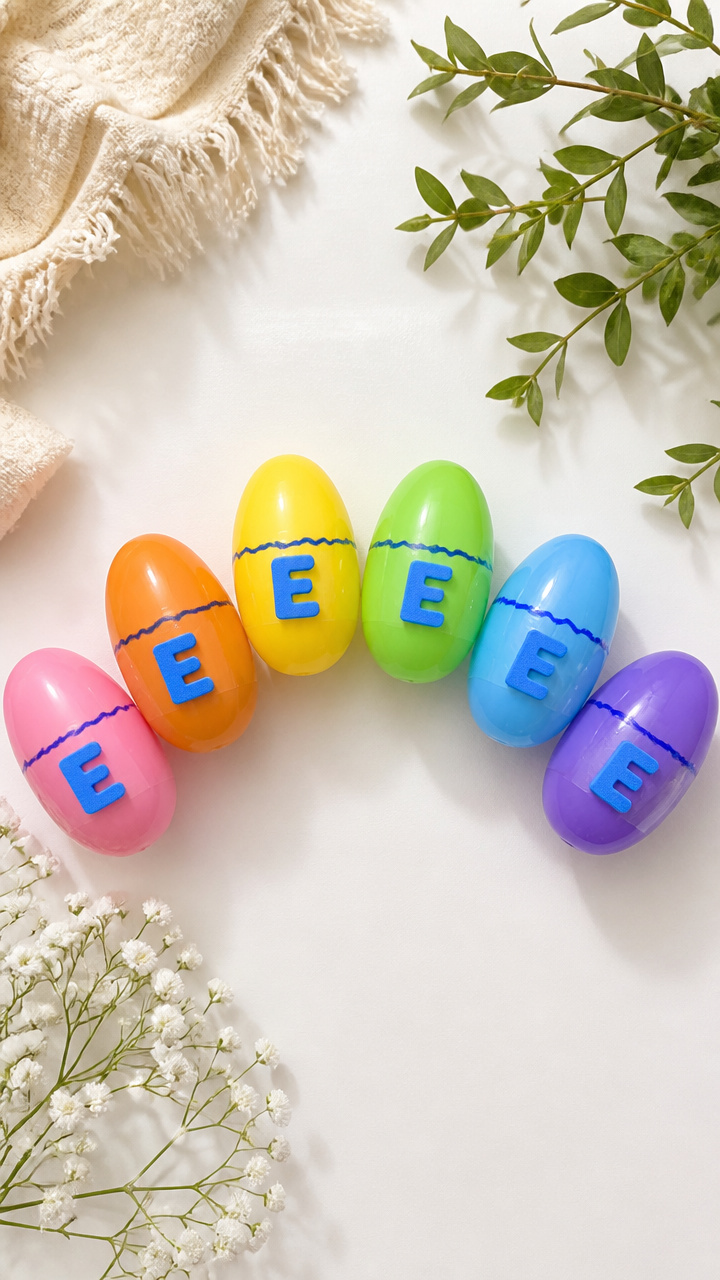
15 Easy Letter E Crafts for Preschoolers
Little hands love to explore letters through touch, color, and creativity. These playful crafts focus on the letter E while building fine motor skills and early literacy in ways that feel like pure fun.
Each idea uses simple materials you likely have at home and offers a fresh way for your child to see, shape, and celebrate the letter E.
1. Egg Carton Es
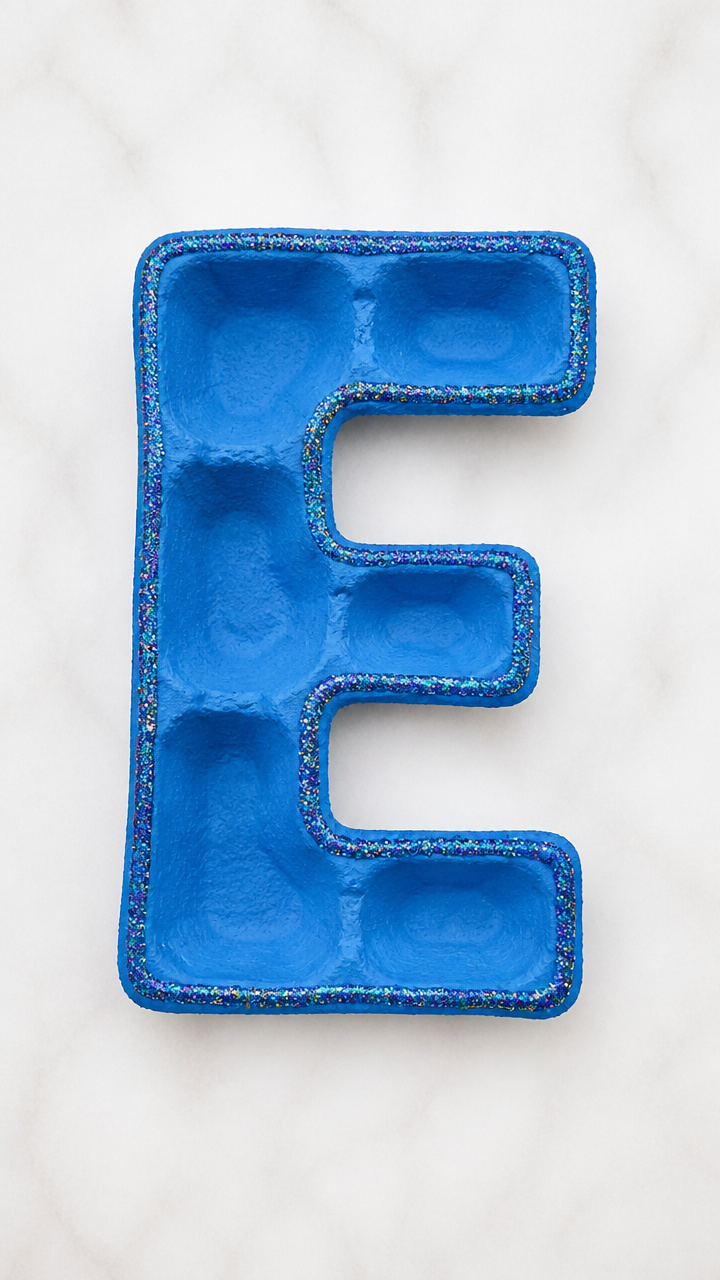
Three-dimensional letter Es made from recycled egg cartons give kids a tactile way to trace and decorate the letter shape.
Materials Needed
- One cardboard egg carton
- Scissors
- White glue
- Paintbrush
- Blue acrylic paint
- Glitter glue
- Popsicle stick
How to Make It
- Cut two connected cups from the egg carton using scissors, then trim the edges so the base forms a sideways E shape.
- Paint the entire surface blue with a paintbrush and let it dry flat for 20 minutes.
- Outline each section of the E with glitter glue and rest the craft upright to dry for another 30 minutes.
- Use a popsicle stick to gently press down any loose edges before drying completely.


2. Elmer the Elephant
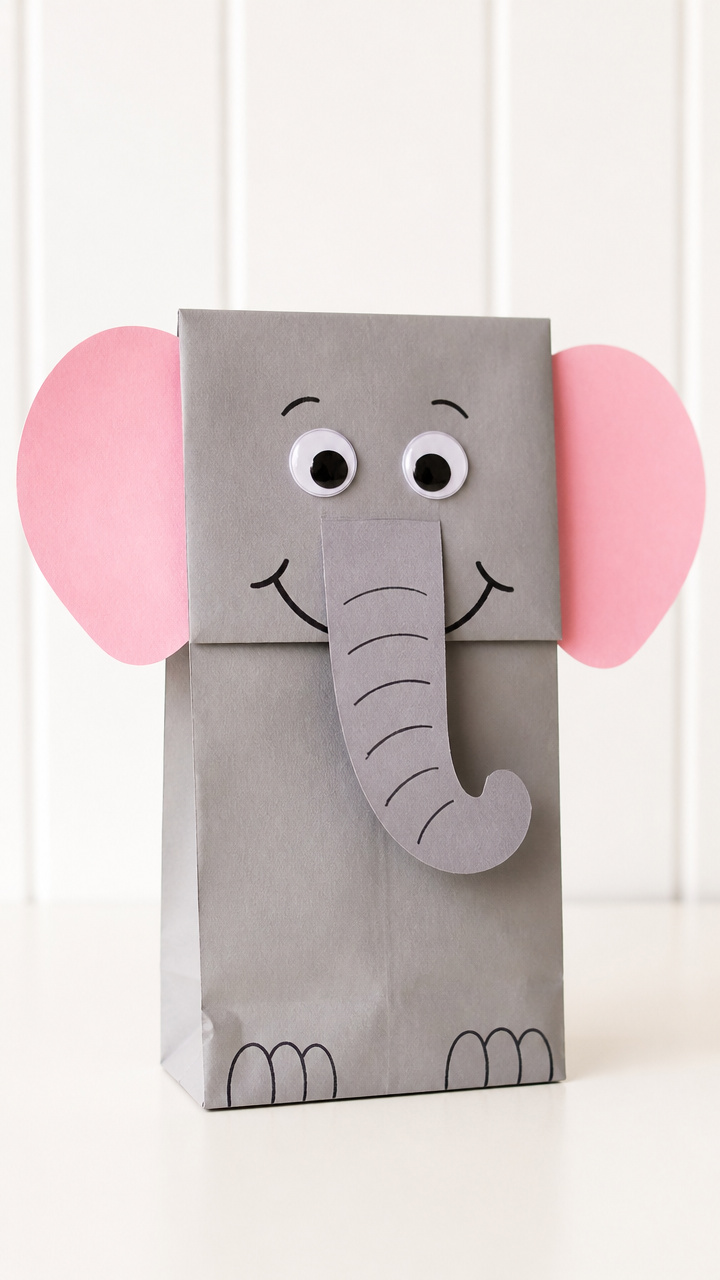
A friendly elephant puppet with floppy ears helps children remember the starting sound of the letter E.
Materials Needed
- Gray paper lunch bag
- Two googly eyes, 1 inch
- Pink construction paper, 6×6 inches
- Black marker
- Glue stick
- Scissors
- Cotton ball
How to Make It
- Cut two large ear shapes from the pink construction paper and one small trunk curve from the gray bag's flap.
- Glue the ears to the sides of the bag’s bottom fold and attach the googly eyes above them.
- Draw an eye outline and mouth with the black marker, then glue a cotton ball to the tip of the trunk.
- Slide your hand into the bag so fingers point upward, letting the elephant ‘wave’ as you talk.


3. Edible Rainbow Cereal Es
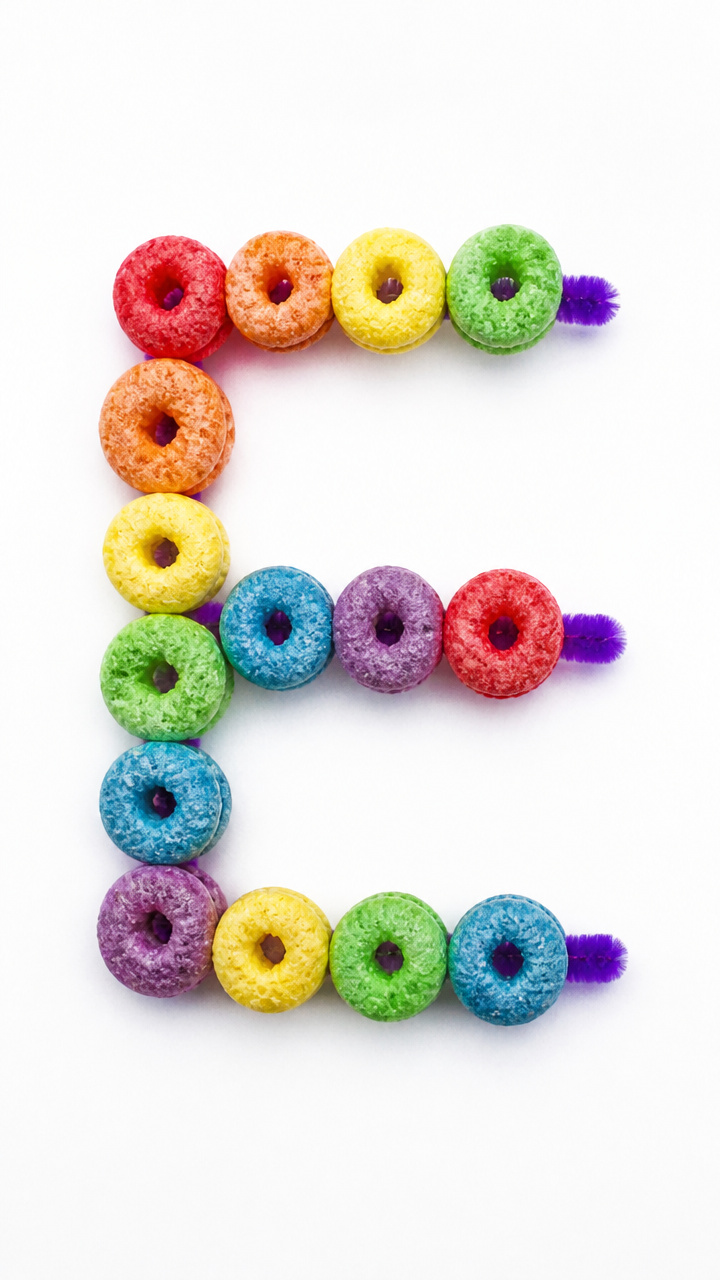
Colorful cereal threaded onto pipe cleaners makes a safe, tasty alphabet snack that doubles as a fine motor workout.
Materials Needed
- 12 multicolored fruit-flavored cereal rings
- Two 12-inch chenille stems (pipe cleaners)
- Small bowl
How to Make It
- Lay out 6 cereal rings of different colors in a line on the table.
- Thread each ring onto one pipe cleaner, leaving 1 inch free at the end.
- Bend the pipe cleaner into the shape of a block letter E by folding three right angles: one at the top, middle, and bottom.
- Twist the end of the wire to secure the last ring and offer the second E for making a pair.

4. Exploding Cotton Ball Volcano
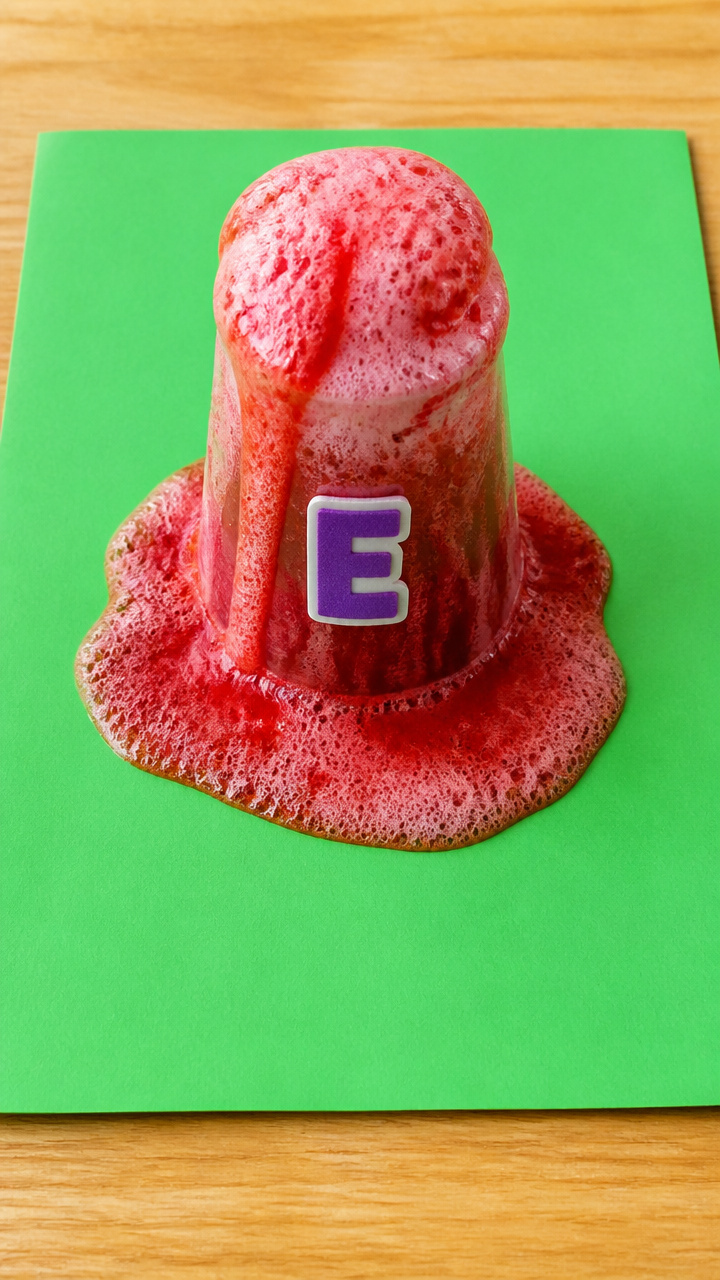
A fizzy science-infused craft lets kids spell E with eruptions of color and foam.
Materials Needed
- Small plastic cup
- Baking soda, 2 tablespoons
- White vinegar, 1/4 cup
- Red food coloring, 5 drops
- Alphabet sticker sheet with letter E
- Construction paper, green 9×12 inch
- Glue stick
How to Make It
- Place the baking soda in the cup and add red food coloring, mixing gently with a spoon.
- Glue the cup in the center of the green paper and stick the letter E near the base.
- Pour vinegar into the cup quickly and watch the red foam rise and spill over like lava.
- Let the foam settle before moving the craft, then display it with the label 'E is for Explosion'.


5. Envelope Word Pals

Handmade envelopes hold tiny notes starting with E, turning writing practice into a surprise game.
Materials Needed
- Brown A4 paper, 8.5×11 inch
- Ruler
- Pencil
- Scissors
- Glue stick
- Crayons
- Small white paper, 3×3 inch, 5 sheets
How to Make It
- Fold the brown paper diagonally to form a triangle, then cut off the excess rectangle at the bottom.
- Open the triangle and fold all three corners toward the center to form an envelope shape.
- Glue the side flaps closed and leave the top open, pressing firmly along the edges.
- On each small paper, draw or write a word starting with E like egg, elbow, or eagle, then tuck them inside for daily surprises.


6. Eyeball Dip Paintings
Googly eyes dipped in paint create silly faces that teach symmetry and the letter E through reflection.
Materials Needed
- Four 1-inch googly eyes
- Washable yellow paint
- Paint tray
- Blank index card
- Black fine-tip marker
- Glue dot
How to Make It
- Pour yellow paint into the tray and roll one googly eye in it until fully coated.
- Press the painted eye twice on opposite sides of the index card to make symmetrical circles.
- Repeat with a second eye on each side slightly lower to form four eyes total.
- Once dry, use the marker to draw lashes and eyebrows, then add a tiny E with a glue dot below the faces.
7. Easel Chalkboard Letters
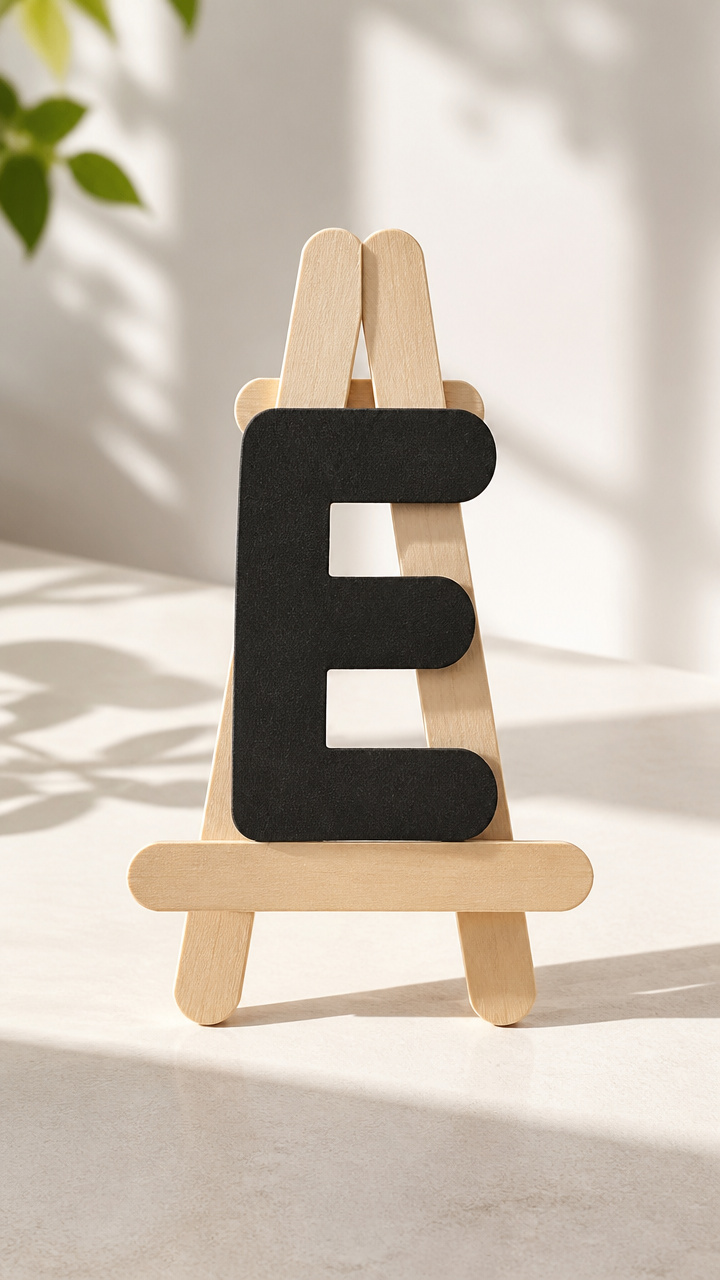
Mini chalkboards mounted on craft sticks let kids rewrite the letter E again and again.
Materials Needed
- Small wooden paddle pop sticks, 3 inches, 5 pieces
- Black foam sheet, 6×9 inch
- White chalk
- Hot glue gun
- Ruler
- Scissors
How to Make It
- Cut the black foam into five rectangles, each 2.5 x 3 inches, using scissors and ruler.
- Apply hot glue along the top edge of one pop stick and press it centered on the back of a foam rectangle.
- Hold for 10 seconds until set, then repeat for all five boards.
- Use white chalk to write a capital E on each board and wipe clean later with a dry cloth.


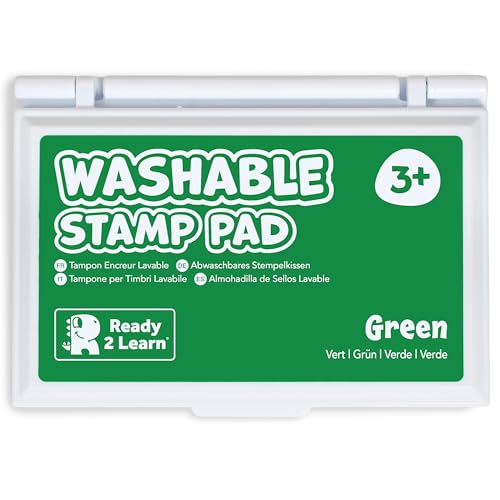
8. Evergreen Tree Fingerprint Art
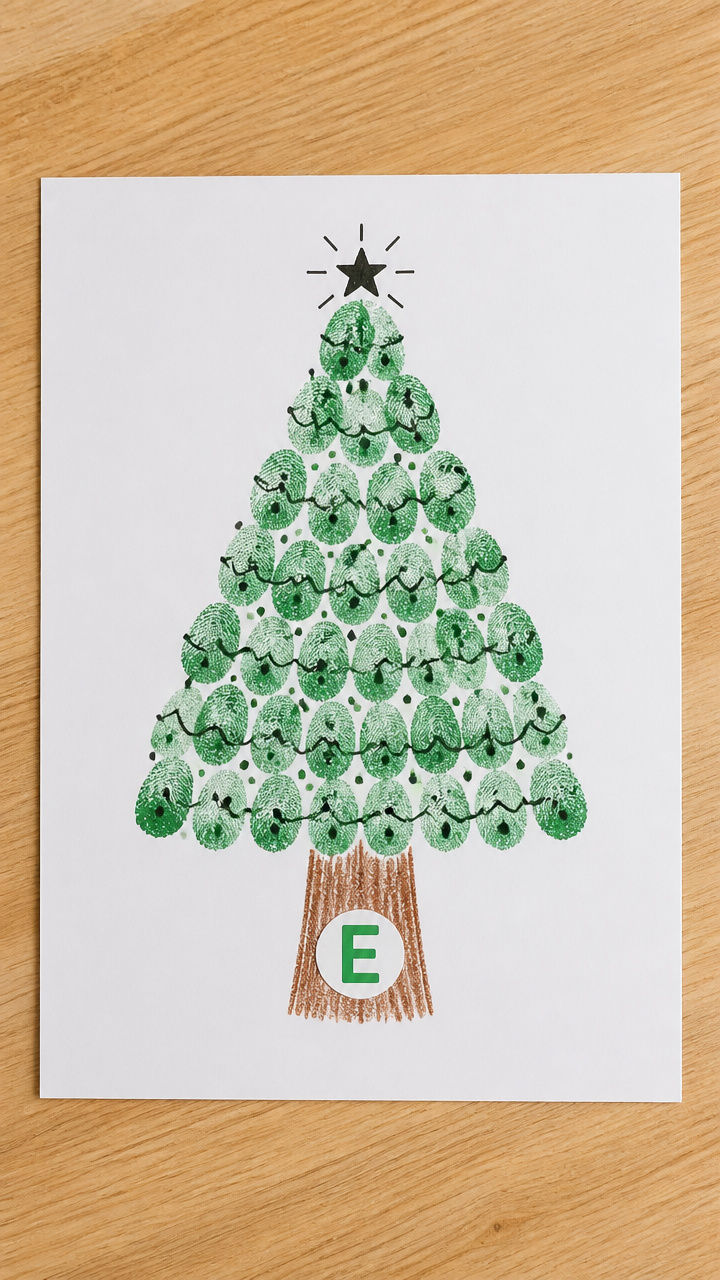
Fingerprints stacked in a triangle become a forest of evergreen trees labeled with textured letter Es.
Materials Needed
- Green washable ink pad
- White drawing paper, 8.5×11 inch
- Brown crayon
- Black marker
- Sticker letters E, 1 inch
How to Make It
- Press your child’s fingertip into the green ink pad and stamp three fingerprints in a triangle shape on the paper.
- Add a fourth fingerprint beneath as the tree trunk base, then let the ink dry for 5 minutes.
- Color a thin trunk under each tree with the brown crayon, connecting to the bottom print.
- Place a sticker letter E beside each tree and use the marker to draw a star at the top.


9. Engineer Name Badge
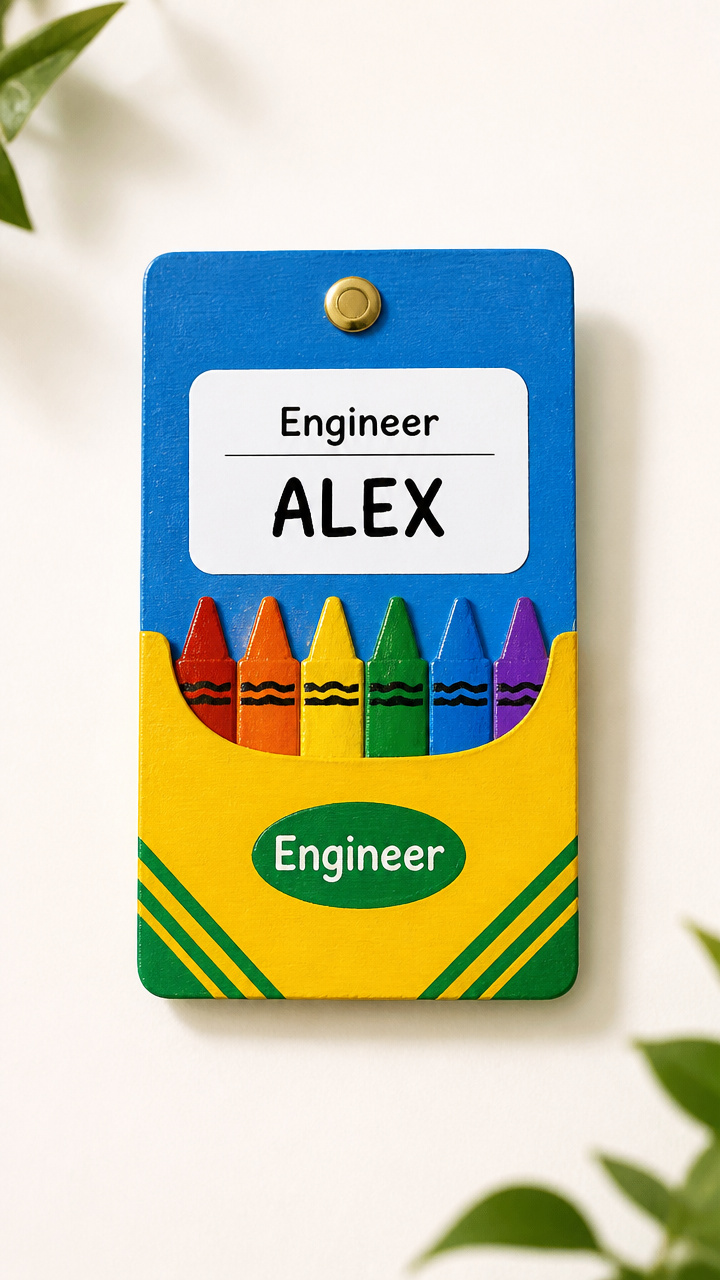
A wearable badge with gears and bolts celebrates the letter E while sparking imaginative play.
Materials Needed
- Cardboard rectangle, 3×4 inch
- Brass fastener, 1 inch
- Silver paint pen
- Hole punch
- Crayon box
- Name sticker
How to Make It
- Use the hole punch to make two holes at the top corners of the cardboard badge.
- Draw three interlocking gears around the edges with the silver paint pen and let dry 15 minutes.
- Write 'Engineer' across the top with the same pen and place the child’s name sticker in the center.
- Thread the brass fastener through both holes and bend the ends on the back to secure.


10. Earmuff Craft Frame
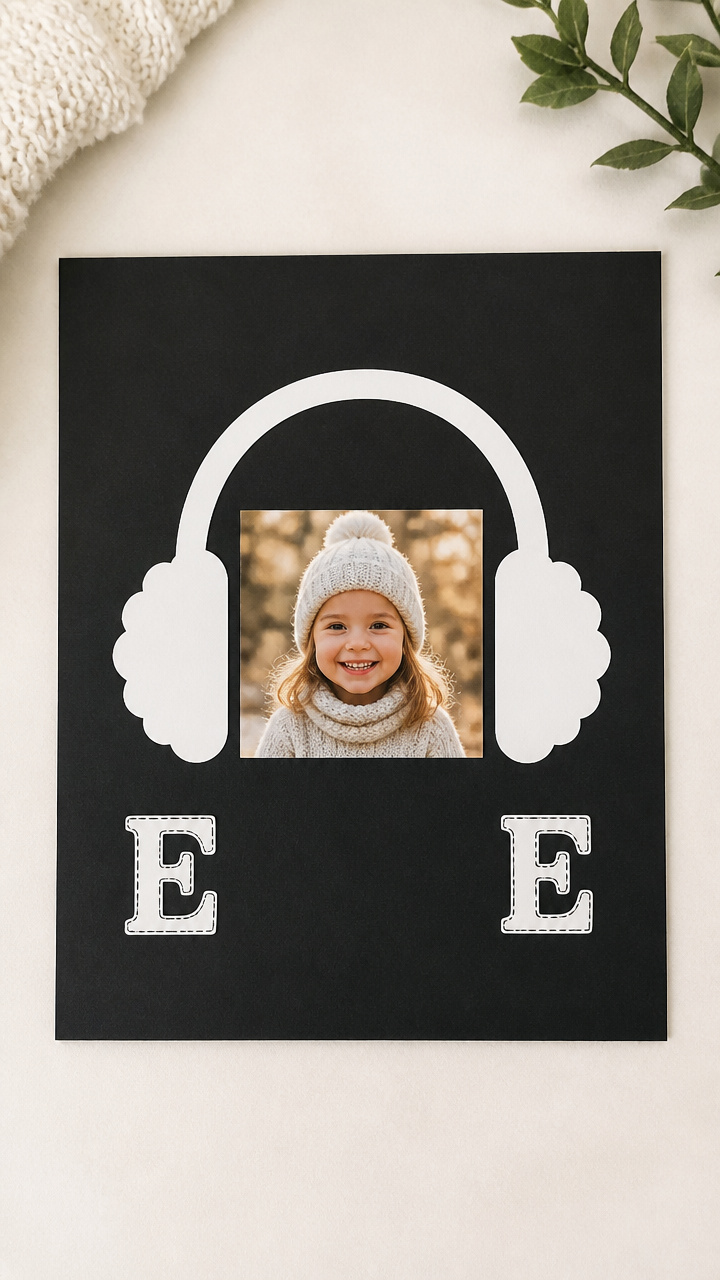
Cotton-lined paper earmuffs double as a frame for a photo with giant letter E decorations.
Materials Needed
- Black construction paper, 9×12 inch
- White craft foam, 6×6 inch
- Glue stick
- Child’s photo, 2×2 inch
- Scissors
- Letter E stickers, 2 inch
How to Make It
- Cut the black paper in half horizontally, then bend it into a U-shape to fit behind the ears.
- Cut two circles from the white foam and glue them to the inside edges where ears would touch.
- Center the photo in the middle of the band and glue it down firmly.
- Stick a large E on each outer side of the band and let your child wear it like real earmuffs.


11. Egg Shaker Instruments
Empty plastic eggs filled with rice become musical shakers stamped with bold letter Es.
Materials Needed
- Six plastic Easter eggs
- Uncooked rice, 1/3 cup
- Funnel
- Tape, clear 1/2 inch
- Blue marker
- Craft foam letter E, 1.5 inch
How to Make It
- Use the funnel to pour 1 tablespoon of rice into each egg half.
- Snap the halves together and wrap a piece of tape around the seam to seal it shut.
- Trace the foam E onto the egg with the blue marker, then press the foam cutout on top with glue.
- Shake gently to hear the sound and group three eggs together as a rhythm set.


12. Eel Paper Chain
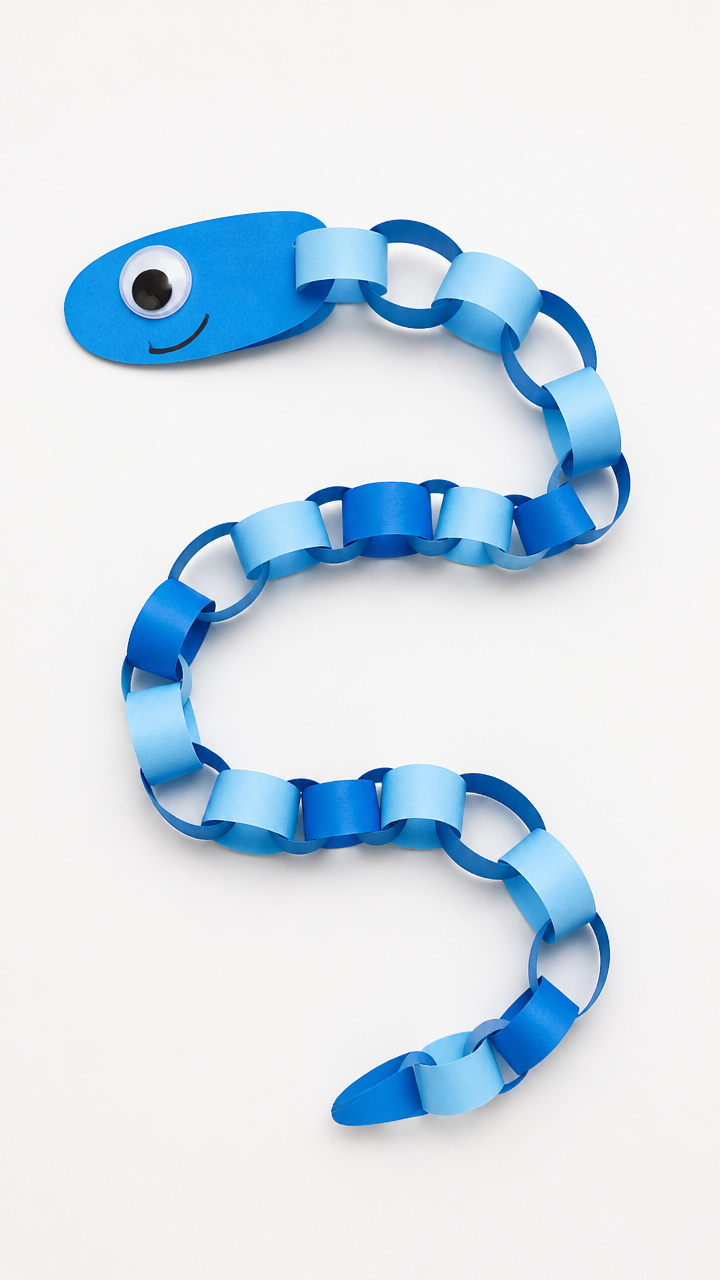
Linked strips of blue paper twist into a wavy eel that spells out the letter E in motion.
Materials Needed
- Blue construction paper, 8.5×11 inch, 2 sheets
- Scissors
- Glue stick
- Googly eye, 0.5 inch
- Black marker
How to Make It
- Cut the paper into 1 inch wide strips, each 8.5 inches long, making 16 total.
- Form a circle with the first strip and glue the ends together, pressing flat for 10 seconds.
- Link the next strip through the first before gluing, continuing until all are connected in a chain.
- Arrange the chain into a squiggly eel shape on a table, glue on the eye, and draw a mouth with the marker.


13. Edison Lightbulb Drawing
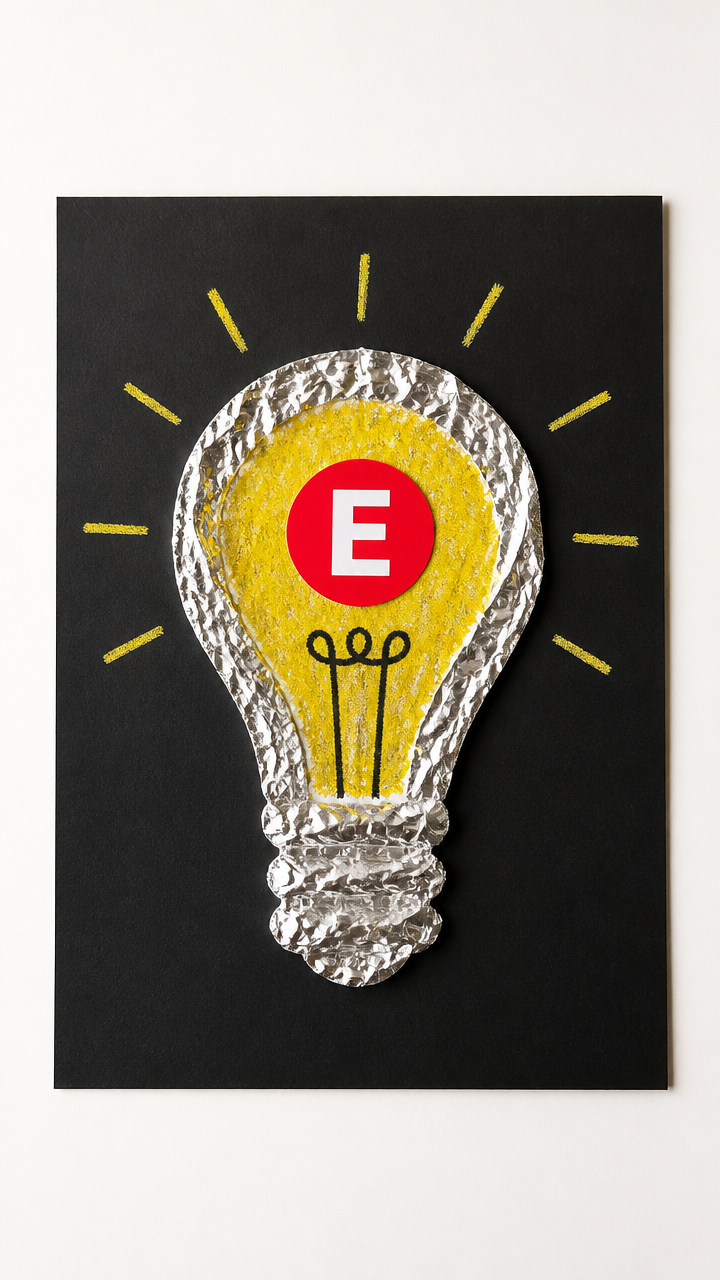
A foil-wrapped bulb lights up a page with glowing crayon lines and a bold letter E switch.
Materials Needed
- Aluminum foil, 6×6 inch
- Yellow crayon
- Glue stick
- Black drawing paper
- Circle stencil, 3 inch
- Red sticker E
How to Make It
- Trace the stencil on the black paper and glue the foil inside the circle, smoothing out wrinkles.
- Use the yellow crayon to draw zigzag rays outward from the bulb across the page.
- Press hard to make bright lines, covering at least half the paper with light beams.
- Place the red sticker E near the bottom corner and say 'Flip the E switch!' when showing the art.


14. Earth Mosaic Tiles
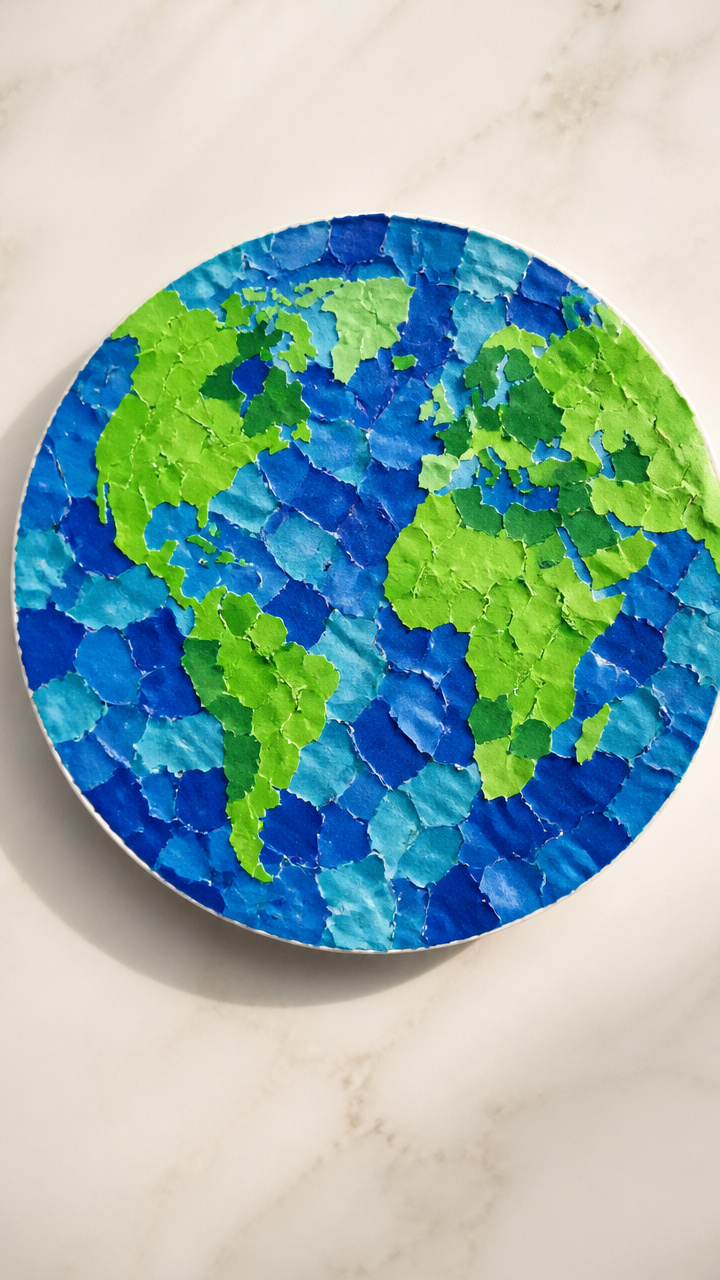
Torn paper pieces in blue and green form a globe design centered on a lowercase e.
Materials Needed
- Blue tissue paper, 8×8 inch
- Green tissue paper, 8×8 inch
- Round paper plate
- Glue bottle with tip
- Scissors
- Pencil
How to Make It
- Draw a lowercase e in the center of the plate with a pencil, about 2 inches tall.
- Tear both tissue papers into 1 inch squares and sort into two piles.
- Squeeze a thin line of glue inside the e shape and press green pieces into it, then fill around with blue.
- Overlap the pieces slightly like tiles and let dry face-up for 40 minutes before display.


15. Elevator Button Panel
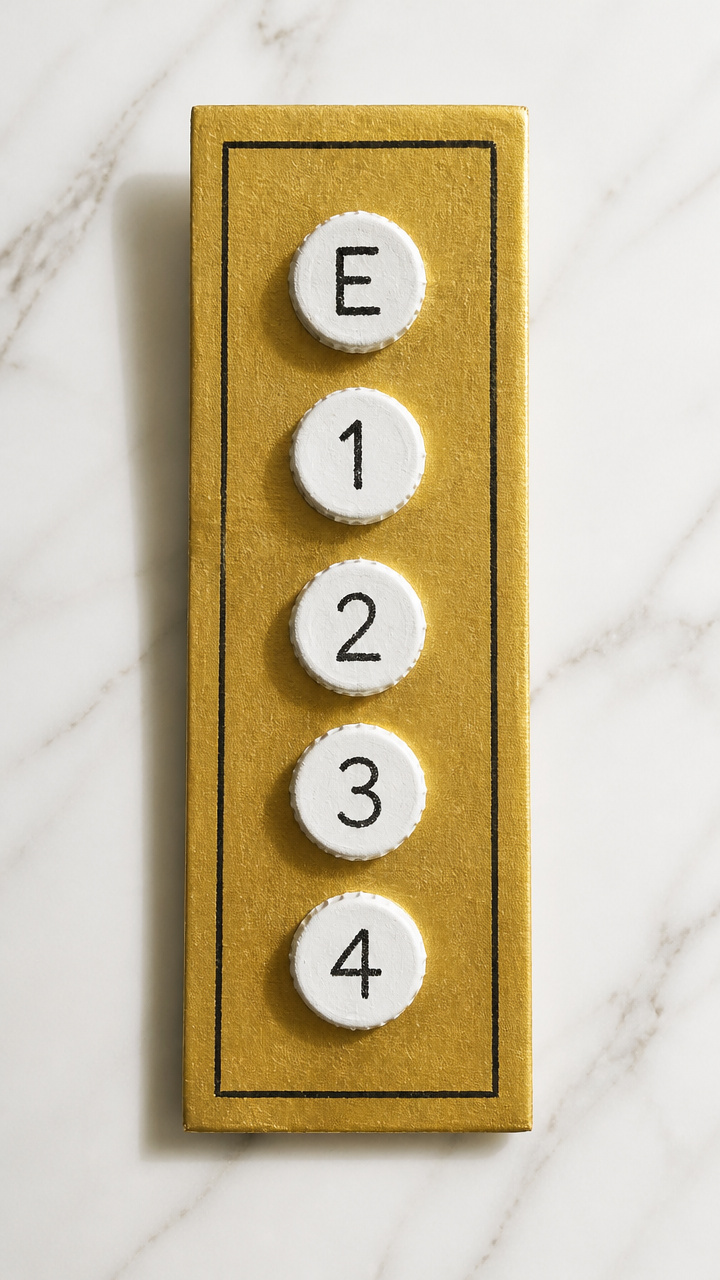
A cardboard control panel with raised buttons invites kids to press and name words that start with E.
Materials Needed
- Cereal box, flattened
- Black crayon
- Five bottle caps, 1 inch
- Hot glue gun
- White paint
- Paintbrush
- Marker
How to Make It
- Cut the cereal box into a 6×8 inch rectangle and paint it white, letting it dry for 30 minutes.
- Write numbers 1 to 5 on the caps with the marker and let dry 10 minutes.
- Glue each cap to the board in a column, spacing them 1 inch apart, holding each for 15 seconds.
- Write an E-word beside each button like Elevator, Exit, Enter, Explore, Enjoy, and press each as you read.


These little letter E projects are more than just fun, they’re quiet moments of learning wrapped in color, texture, and pride. Grab what you have and let your child’s hands do the talking.