21 Winter Wreath and Door Decor Crafts for a Cozy Entrance

The soft glow of pine and the quiet crunch of snow underfoot set the mood for a season of warmth and welcome. Your front door can reflect that same comfort with handmade touches that invite people in.
These crafts use real textures, natural materials, and thoughtful details to turn your entry into a personal winter retreat. Each one is designed to be doable, beautiful, and full of charm.
1. Pinecone and Cinnamon Wreath
Easy
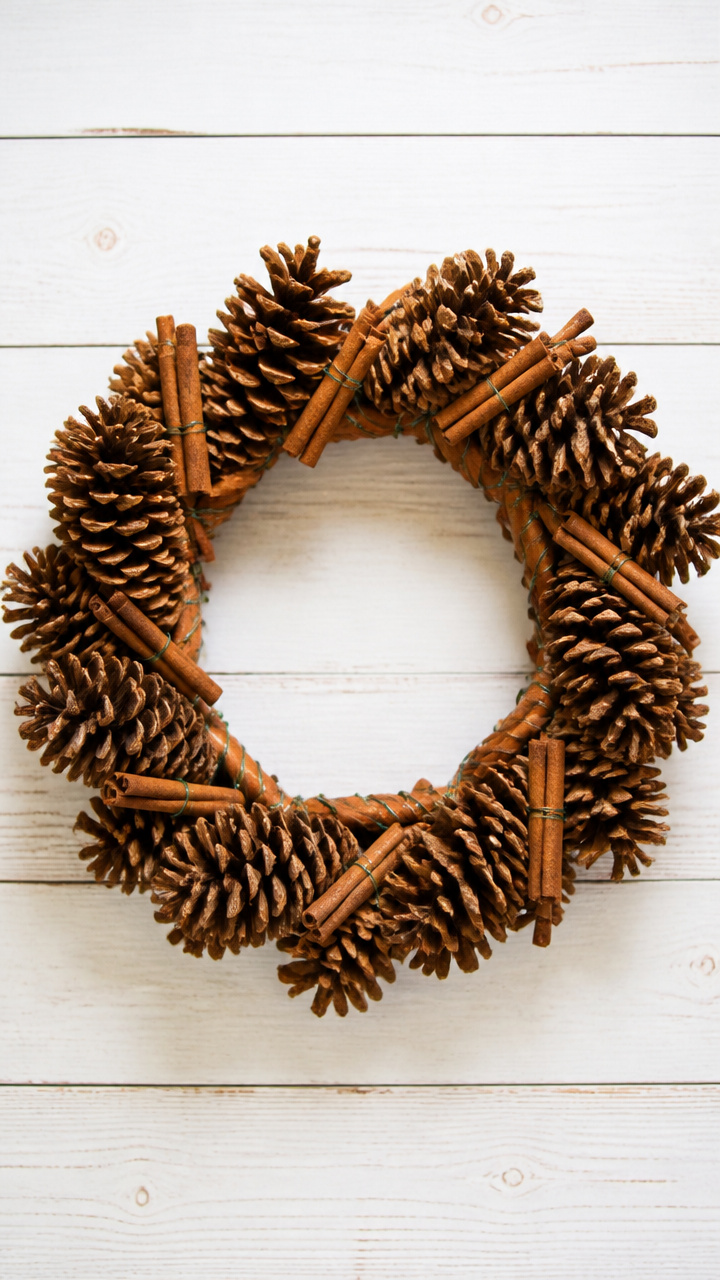
A fragrant, rustic circle of gathered pinecones and cinnamon sticks that greets guests with the scent of winter baking. This wreath stays fresh and inviting for weeks.
Materials Needed
- 12 large pinecones
- 6 whole cinnamon sticks, 4 inches long
- 12-inch wire wreath frame
- Hot glue gun
- Hot glue sticks
- 24-gauge floral wire
- Scissors
How to Make It
- Arrange pinecones around the wire frame, pointing tips outward, to cover the entire circle.
- Glue each pinecone in place with hot glue, holding for 10 seconds until secure.
- Tuck cinnamon sticks between pinecones every few inches, gluing each at the base.
- Wrap floral wire around the frame at two points to reinforce the shape and hang the wreath.


2. Felted Wool Snowflake Wreath
Moderate
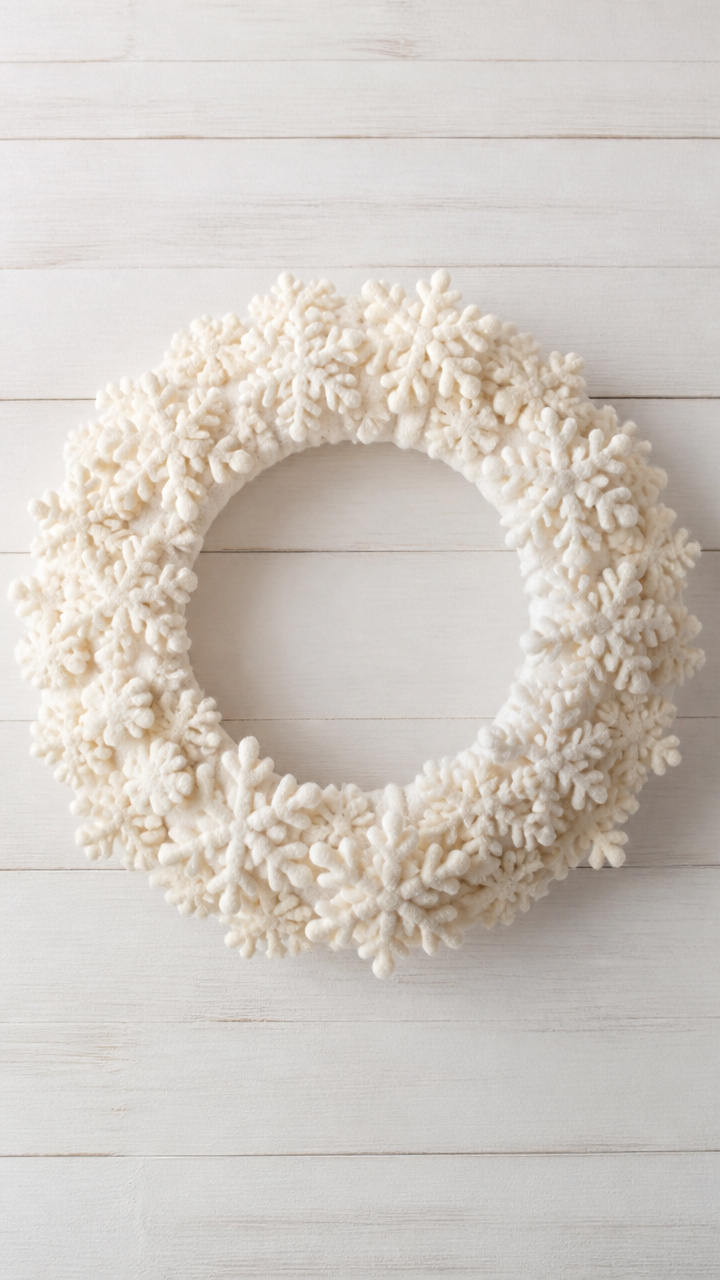
Delicate snowflakes made from wool roving, felted by hand into soft, three-dimensional shapes. This wreath adds subtle winter magic without bulk.
Materials Needed
- White wool roving, 4 ounces
- Needle felting kit with felting needle and foam pad
- 10-inch foam wreath base
- White craft glue
- Tapered wooden dowel, 6 inches
- Scissors
How to Make It
- Pull off small pieces of wool roving and shape into six-pointed snowflakes on the foam pad.
- Use the felting needle to repeatedly poke each snowflake, compacting fibers until firm.
- Create 15 snowflakes, varying sizes from 1.5 to 3 inches in diameter.
- Glue each snowflake to the foam wreath base, clustering some and spacing others.
- Insert the wooden dowel into the back center of the wreath to hang it from a hook.


3. Mini Sweater Door Hanger
Moderate
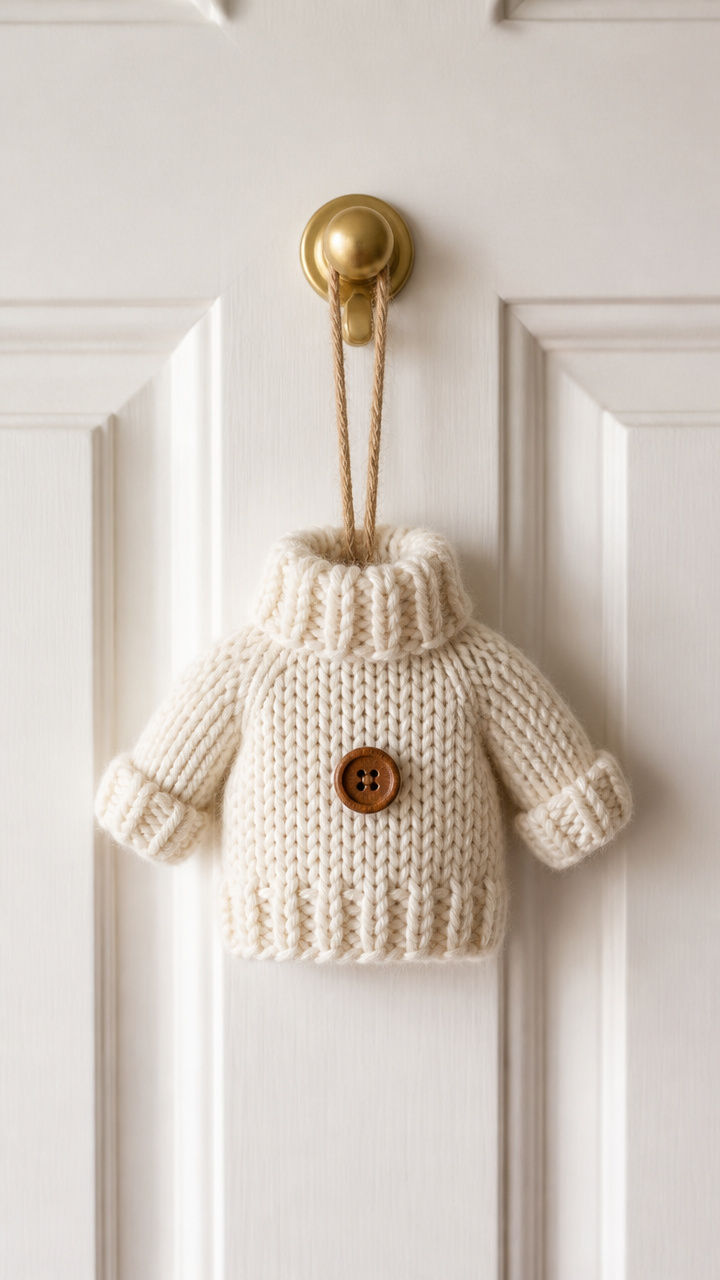
A tiny vintage-style sweater stitched into a door ornament, complete with a knit texture and a wooden button. It’s cozy charm in a small package.
Materials Needed
- Small piece of cream-colored knit sweater fabric, 6×8 inches
- Brown 1/2-inch wooden button
- Sewing needle
- White polyester thread
- Scissors
- Cardboard template (cut to 5-inch sweater shape)
- Hot glue gun
How to Make It
- Trace the sweater shape onto the knit fabric and cut two identical pieces.
- Place pieces together, right sides facing, and hand-stitch around the edges with a backstitch.
- Turn the piece right side out and press gently with fingers to shape.
- Sew the wooden button centered on the front of the sweater.
- Fold a loop of thread and glue it to the back top edge for hanging.


4. Dried Orange Slice Garland
Easy
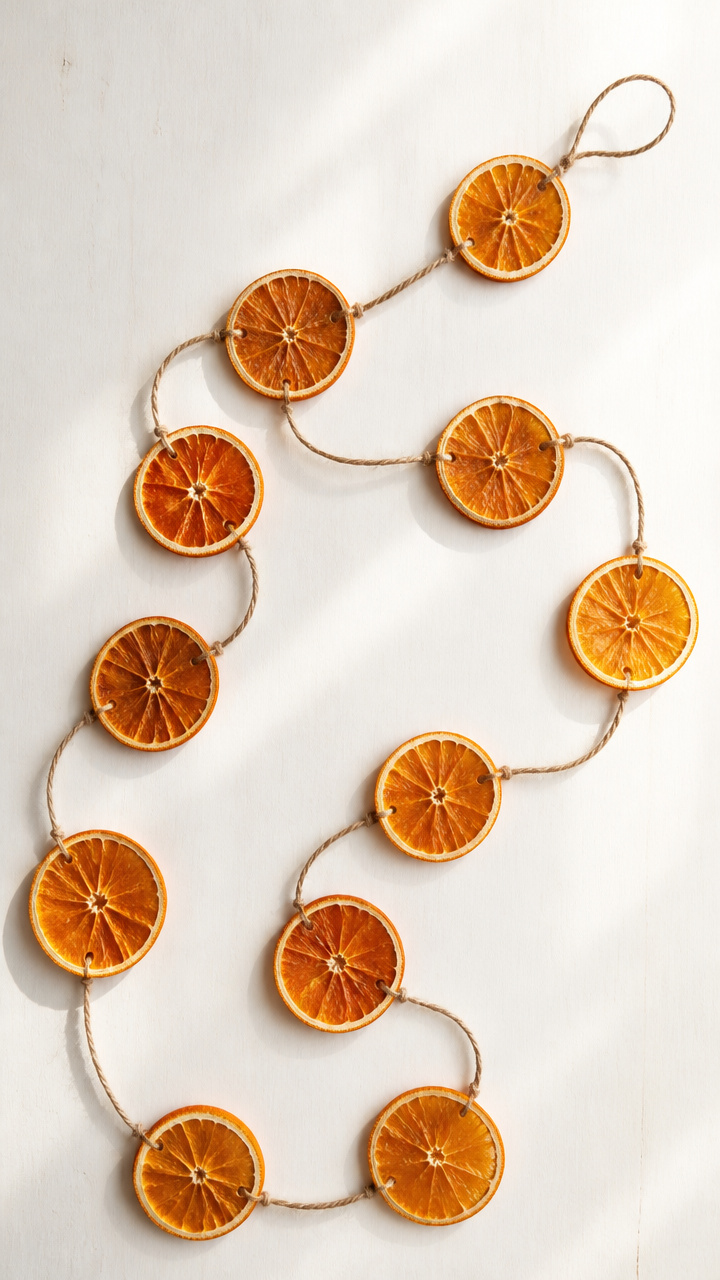
Thin slices of orange dried until crisp, strung into a bright, citrus-scented garland. Hang it around your wreath or on its own for a pop of color.
Materials Needed
- 6 oranges
- Sharp knife
- Baking sheet
- Parchment paper
- Oven
- 2 yards jute twine
- Needle with large eye
How to Make It
- Slice each orange into 1/4-inch thick rounds using the sharp knife.
- Line a baking sheet with parchment paper and arrange slices in a single layer.
- Bake at 200°F for 3 to 4 hours, flipping halfway, until dry and leathery.
- Thread the jute twine through each slice using the needle, spacing them 2 inches apart.
- Hang the garland on a wreath or directly on the door.


5. Birch Log Slice Wreath
Moderate
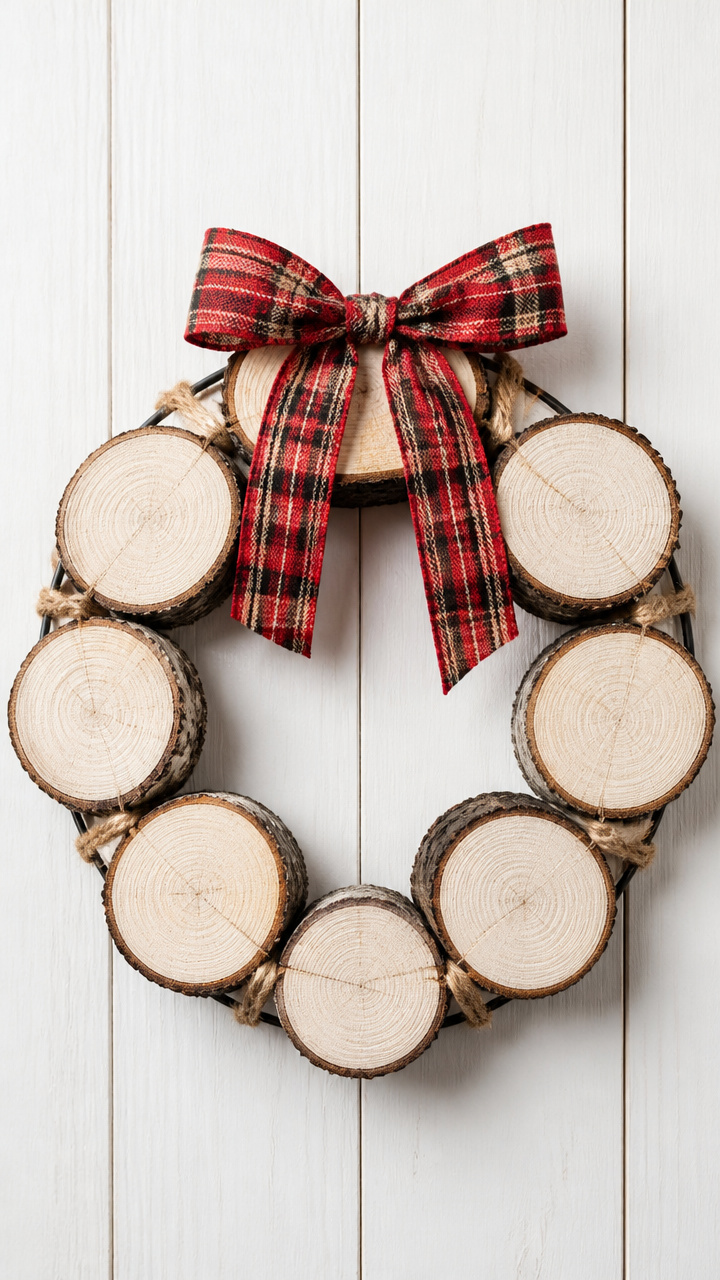
Real birch log rounds arranged in a circle, bound with twine and accented with a red plaid ribbon. This wreath brings the forest feel to your porch.
Materials Needed
- 8 birch log slices, 2 inches thick and 3 inches in diameter
- 12-inch metal wreath frame
- Heavy-duty wood glue
- 1 yard red plaid cotton ribbon, 1.5 inches wide
- Scissors
- Gloves
- Paintbrush
How to Make It
- Arrange the birch slices around the metal frame, alternating grain direction for visual interest.
- Apply wood glue to the back of each slice and press firmly onto the frame.
- Let dry for 4 hours in a warm room.
- Tie the plaid ribbon into a full bow and attach it to the bottom of the wreath with glue.
- Wear gloves when handling to avoid sap residue.


6. Knit Hat Mug Wreath
Easy

A bright knit hat perched over a ceramic mug, turned into a whimsical door decoration. It’s playful and perfect for homes with a sense of humor.
Materials Needed
- One red acrylic knit beanie, small size
- One 12-ounce white ceramic mug
- Hot glue gun
- Hot glue sticks
- 18-inch length of black pipe cleaner
- Scissors
How to Make It
- Turn the mug upside down and center the knit hat over the base.
- Glue the inside edge of the hat to the mug’s rim with hot glue.
- Bend the pipe cleaner into a curl and glue one end inside the hat’s cuff.
- Let dry for 10 minutes before hanging with a wreath hanger.


7. Illuminated Berry Wreath
Moderate

Clusters of faux red berries wrapped around a lighted wreath form, glowing softly at dusk. This piece adds warmth when days are shortest.
Materials Needed
- 12-inch wreath-shaped LED string lights (warm white)
- 30 red faux berry sprigs, 4 inches long
- Floral wire, 22-gauge
- Wire cutters
- Green pipe cleaners, 6 count
How to Make It
- Wrap each berry sprig with a 3-inch piece of floral wire, leaving a tail.
- Twist the wire tail around the LED wreath frame, spacing sprigs evenly.
- Use pipe cleaners to secure any loose light wires to the frame.
- Test the lights and hang the wreath using the built-in loop.


8. Quilted Fabric Star
Moderate

A five-pointed star stitched from scrap flannel and cotton, echoing traditional quilting patterns. It’s a nod to heritage warmth on your door.
Materials Needed
- Red cotton fabric, 6×6 inches
- Plaid flannel fabric, 6×6 inches
- Cardboard star template, 8 inches wide
- Scissors
- Sewing needle
- Black thread
- Polyester stuffing, 1/4 cup
How to Make It
- Trace the star template onto both fabrics and cut two stars from each.
- Place one cotton and one flannel star together, right sides facing, and stitch around the edge with a 1/4-inch seam.
- Clip corners and turn right side out.
- Repeat for the second pair and place both pieces together.
- Whip stitch the two stars together, stuffing lightly before closing the last inch.


9. Pine Twig Circle
Easy
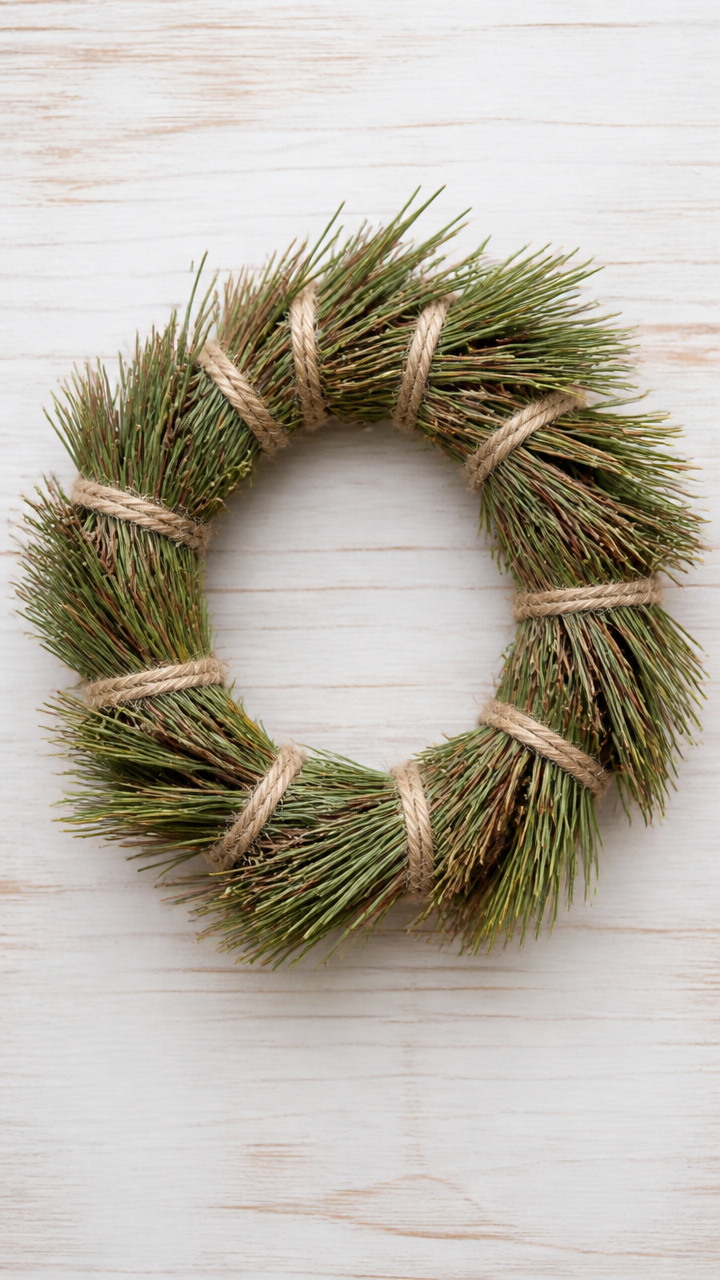
Fresh pine twigs bundled and tied into a tight ring, releasing a crisp forest scent. This natural piece changes subtly as it dries.
Materials Needed
- 20 fresh pine twigs, 8 inches long
- Jute twine
- Scissors
- Floral wire, 20-gauge
- Wire cutters
How to Make It
- Bundle 10 twigs together and tie tightly at one end with jute twine.
- Form into a half-circle and secure the open ends with floral wire.
- Repeat with the second bundle and attach to the first to form a full circle.
- Wrap jute twine around the entire ring for a finished look and tie a hanging loop.


10. Candle Ring with Moss
Easy
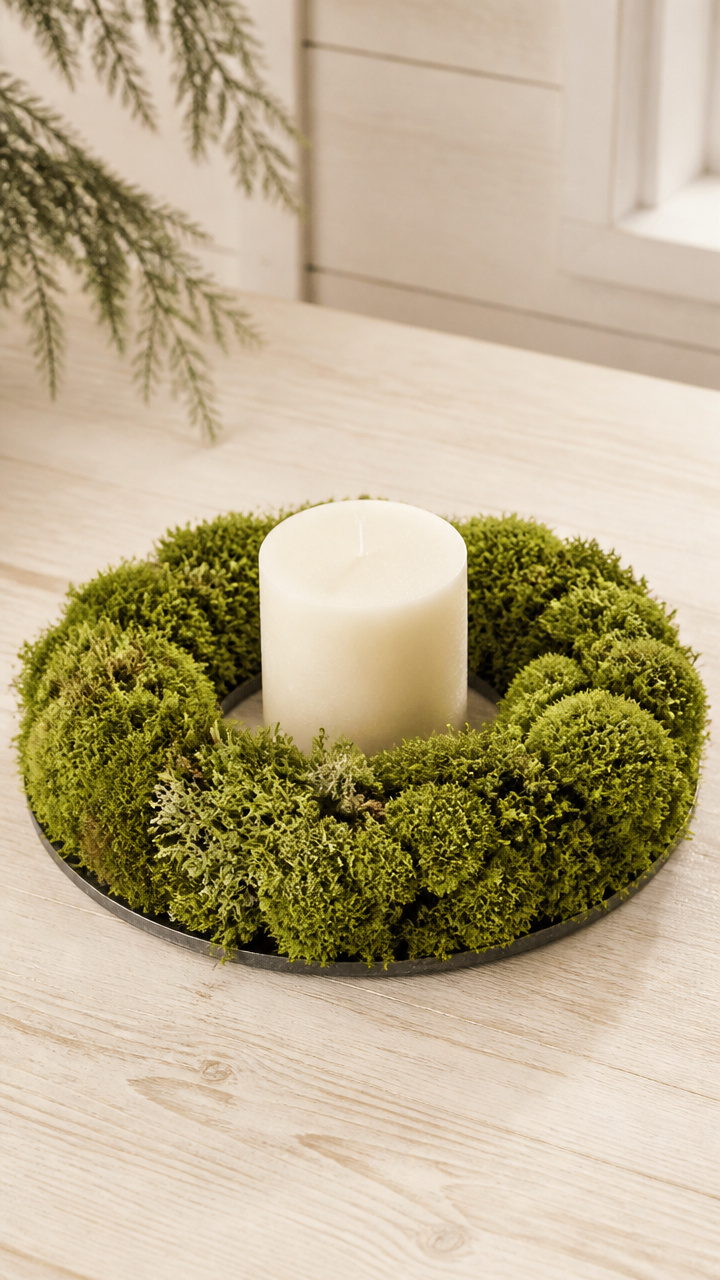
A cushion of preserved sheet moss wrapped around a candle-safe ring, holding a pillar candle. It brings soft light and earthy texture to your entry.
Materials Needed
- Preserved sheet moss, 6×6 inches
- 4-inch metal candle ring
- Hot glue gun
- Hot glue sticks
- 3-inch white pillar candle
- Scissors
How to Make It
- Cut the moss into 1-inch strips using scissors.
- Glue each strip around the metal ring, overlapping slightly until fully covered.
- Let dry for 15 minutes.
- Place the pillar candle in the center when ready to display.


11. Vintage Skating Ornament
Advanced
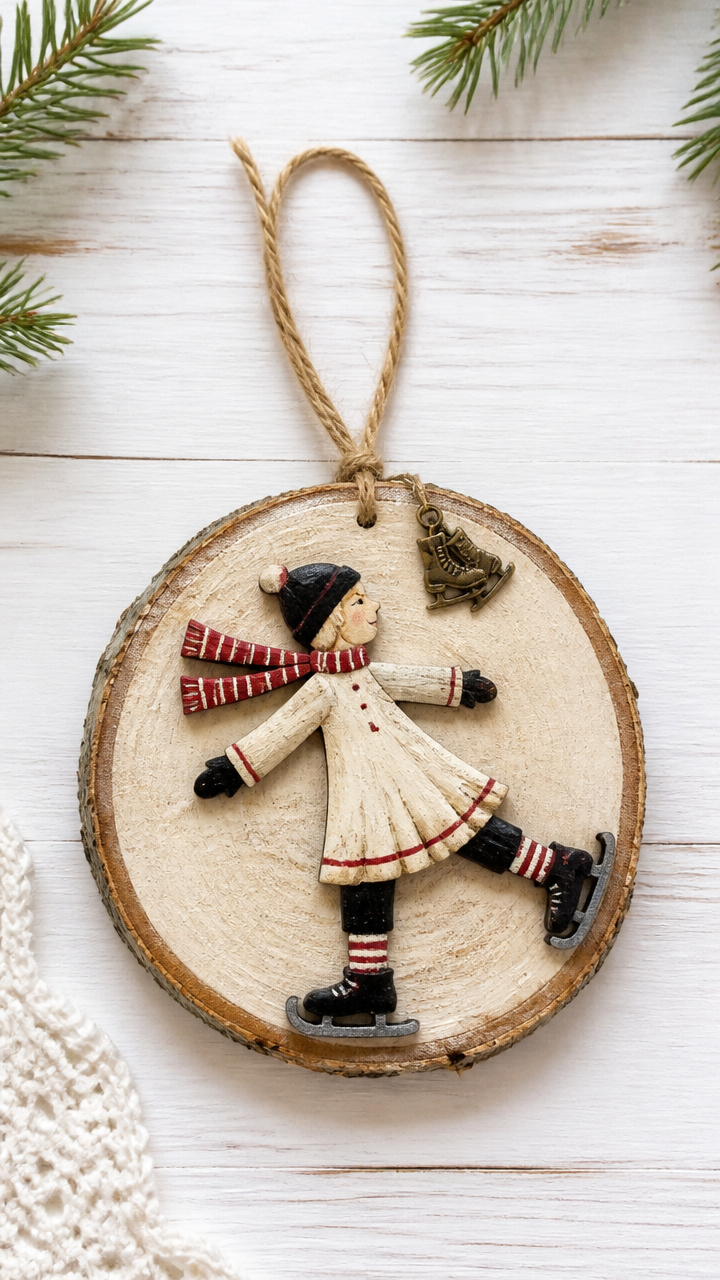
A miniature wooden ice skater glued to a birch slice, dressed in hand-painted details. This tiny scene adds nostalgic charm.
Materials Needed
- 1-inch wooden ice skater figure
- 3-inch birch log slice
- Acrylic paint: black, red, white
- Paintbrush size 1
- Wood glue
- Toothpick
- Clear sealant spray
How to Make It
- Paint the skater’s coat red, boots black, and face white using the paintbrush and toothpick for fine lines.
- Let paint dry for 30 minutes.
- Apply wood glue to the bottom of the skater and press onto the center of the birch slice.
- Let dry for 2 hours.
- Spray lightly with sealant in a well-ventilated area.


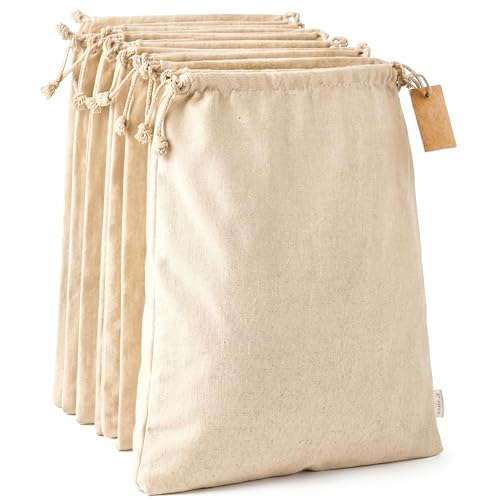
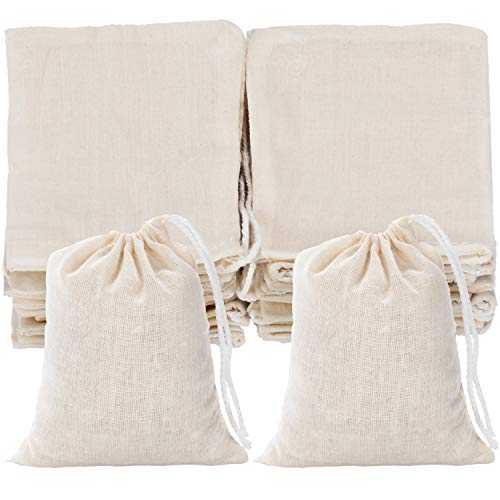
12. Linen Snowman Bag
Moderate
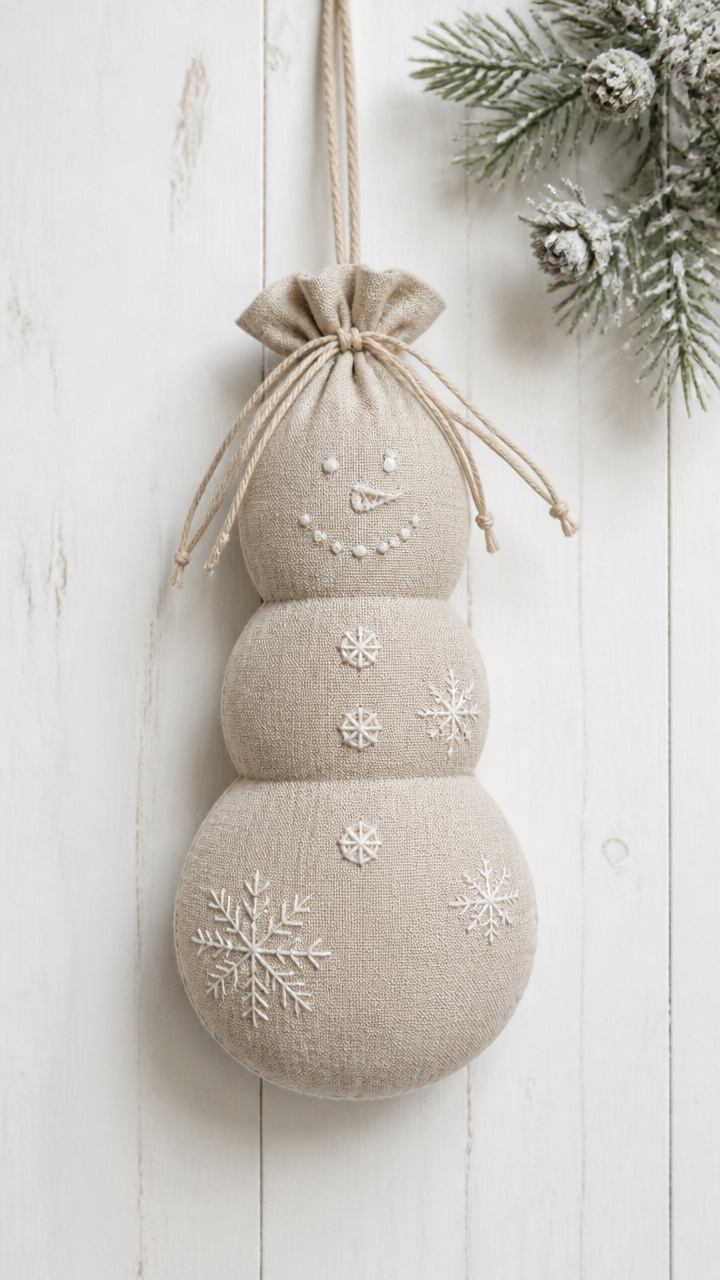
A drawstring bag made from natural linen, shaped like a snowman and stuffed with lavender. It hangs like a sachet but looks like a decoration.
Materials Needed
- Natural linen fabric, 9×12 inches
- Cardboard snowman template (3 tiers)
- Scissors
- Sewing needle
- White cotton thread
- Dried lavender buds, 1/2 cup
- 18-inch cotton cord
How to Make It
- Trace the snowman shape onto the linen and cut two pieces.
- Place pieces together, right sides facing, and backstitch around the edge, leaving the top open.
- Turn right side out and fill with lavender buds.
- Gather the top edge with the cotton cord to close and hang.

13. Frosted Pine Sprig
Easy
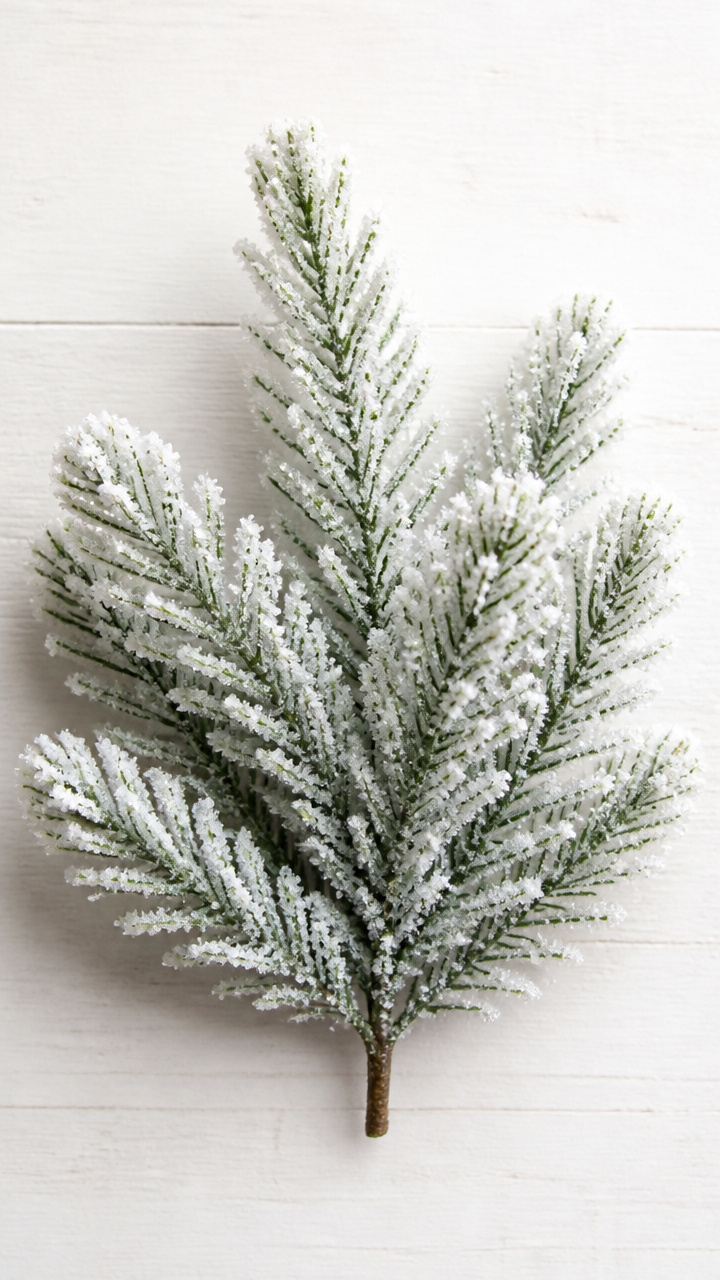
Real pine sprigs dipped in Epsom salt solution to look like they’re dusted with snow. They keep their shape and sparkle for weeks.
Materials Needed
- 10 fresh pine sprigs, 5 inches long
- 1 cup Epsom salt
- 1 cup boiling water
- Glass jar
- Tongs
- Paper plate
- Twine
How to Make It
- Dissolve Epsom salt in boiling water inside the glass jar.
- Dip each pine sprig into the solution for 10 seconds using tongs.
- Lay sprigs flat on a paper plate to dry for 4 hours.
- Tie with twine and hang individually or bundle into a small wreath.


14. Copper Wire Evergreen
Advanced
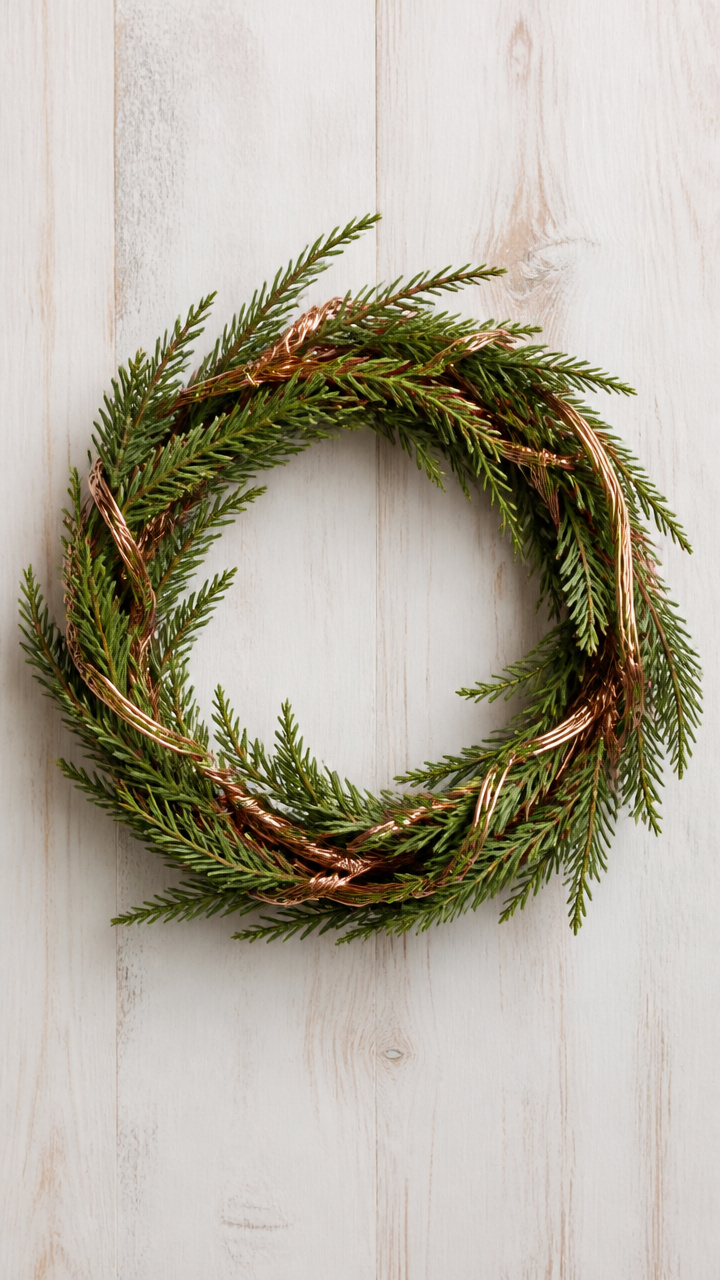
Thin copper wire hand-coiled around small evergreen cuttings to form a shimmering wreath. The metal catches light and highlights the greenery.
Materials Needed
- 24-gauge copper wire, 10 feet
- 12 small evergreen cuttings, 3 inches long
- 8-inch metal wreath frame
- Wire cutters
- Needle-nose pliers
How to Make It
- Cut copper wire into 8-inch lengths using wire cutters.
- Wrap one wire around the base of an evergreen cutting and twist tightly.
- Attach the cutting to the wreath frame by twisting the wire ends around the metal.
- Repeat, overlapping slightly, until the frame is fully covered.
- Use pliers to tuck in any sharp wire ends.


15. Plaid Ribbon Bow
Easy

A giant bow made from wired plaid ribbon, structured to hold its shape and mounted on a wooden disc. It’s classic holiday style with no fraying.
Materials Needed
- 2.5-inch red and black plaid wired ribbon, 2 yards
- 6-inch wooden disc
- Hot glue gun
- Hot glue sticks
- Scissors
How to Make It
- Form a loop with 12 inches of ribbon and pinch the center.
- Repeat to make five loops, then bind the center with wire from the ribbon edge.
- Fluff each loop evenly to form a full bow.
- Glue the bow’s center to the wooden disc and let dry for 10 minutes.
- Hang using a nail or adhesive hook.


16. Mini Mason Jar Lantern
Easy
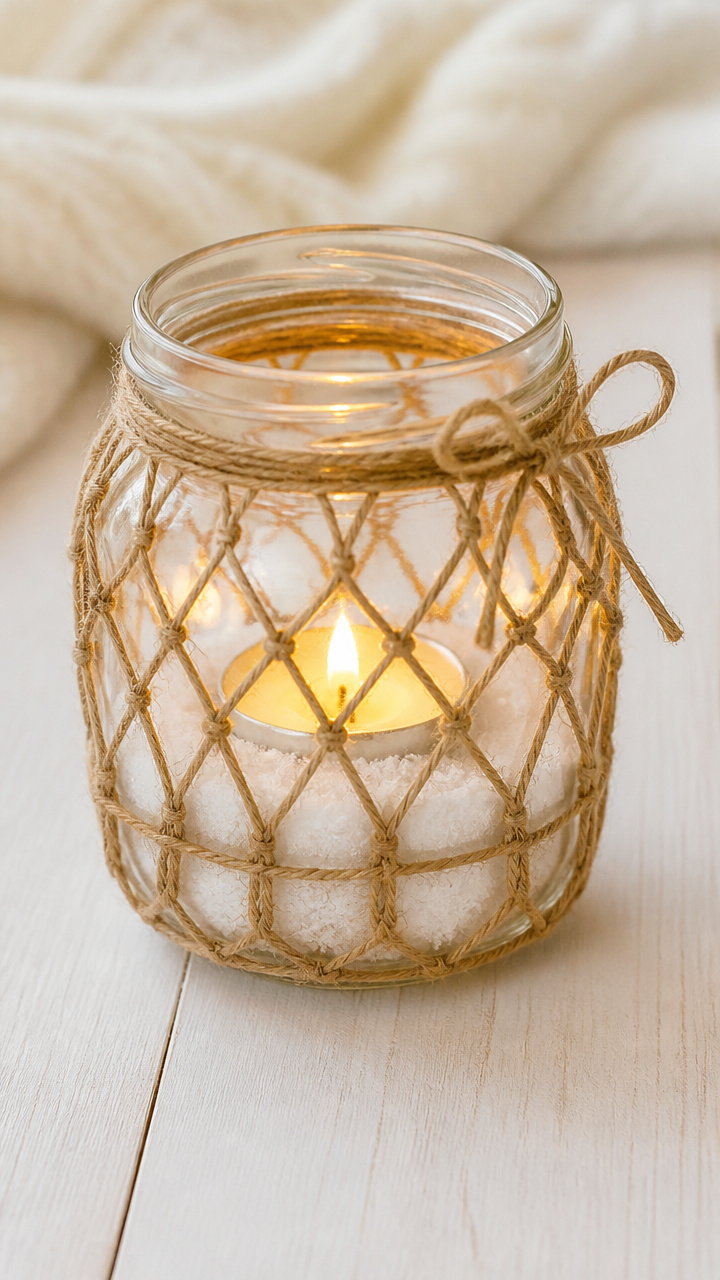
A tiny mason jar filled with faux snow and a tea light, wrapped in twine and hung like an ornament. It glows like a winter cottage light.
Materials Needed
- 4-ounce mason jar with lid
- Artificial snow, 1/4 cup
- Battery-operated tea light
- Jute twine, 12 inches
- Hot glue gun
- Hot glue sticks
How to Make It
- Fill the jar halfway with artificial snow.
- Place the tea light on top of the snow and turn it on.
- Screw the lid on tightly.
- Glue the twine around the neck of the jar and tie a loop for hanging.
17. Crocheted Snowflake Plaque
Advanced
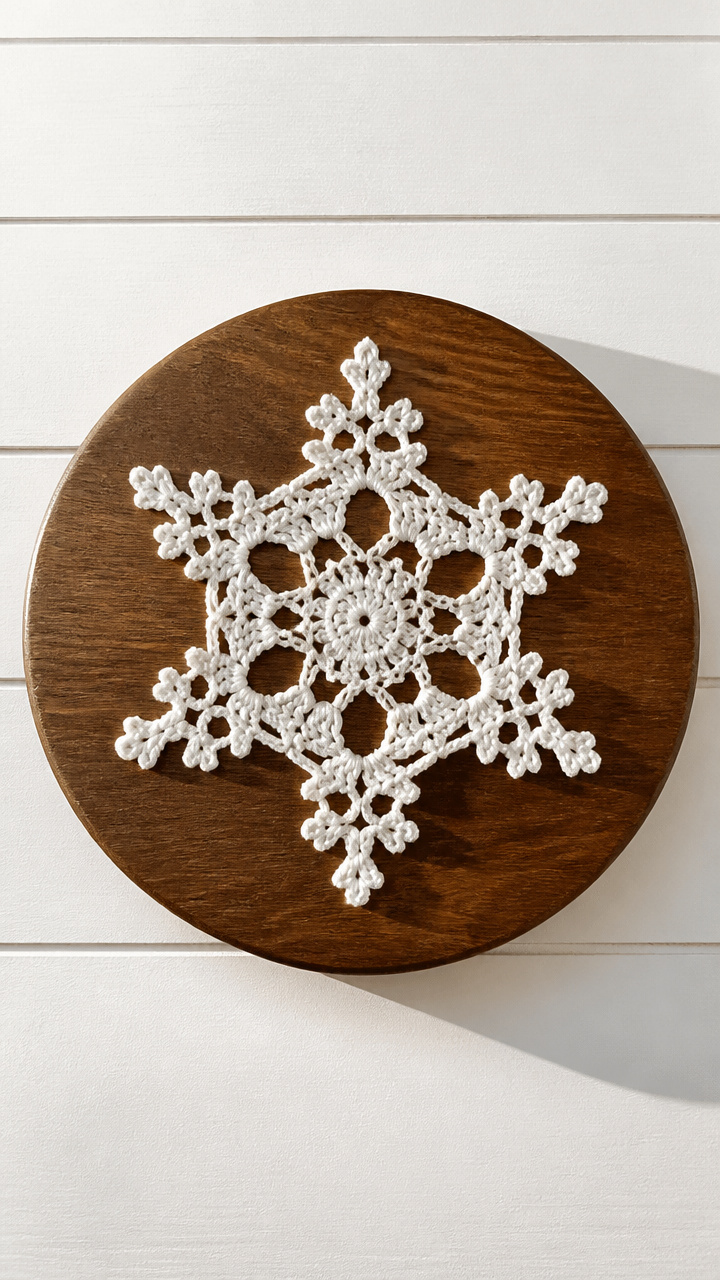
A lacy white snowflake crocheted in cotton thread and mounted on a stained wood plaque. The openwork pattern casts delicate shadows.
Materials Needed
- White size 10 crochet thread
- Steel crochet hook size 7
- 6-inch pine plaque
- Wood stain (walnut)
- Foam brush
- Craft glue
- Scissors
How to Make It
- Crochet a snowflake using a six-point star pattern with double crochet and chain spaces.
- Complete 12 rounds until the snowflake is 5 inches wide.
- Stain the pine plaque with the foam brush and let dry for 2 hours.
- Glue the snowflake centered on the plaque and let dry for 1 hour.



18. Cardamom Pod Wreath
Moderate
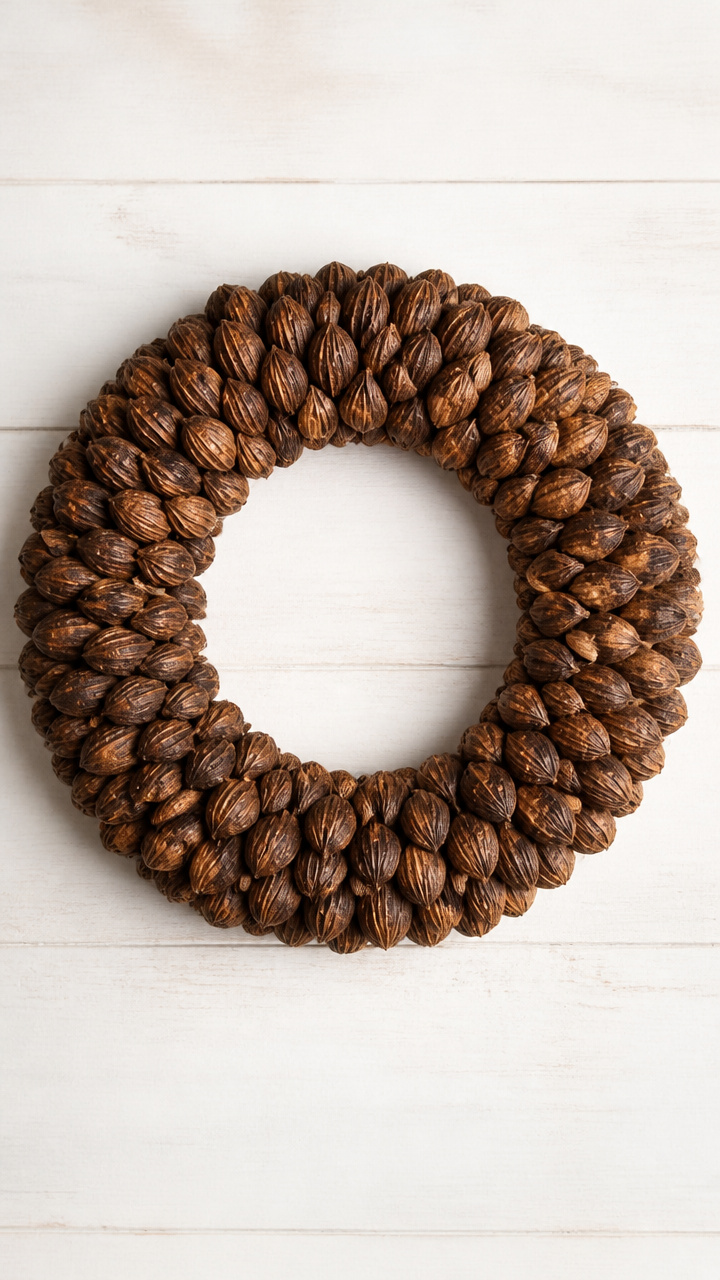
Dozens of whole cardamom pods glued in concentric circles on a straw base. This wreath smells like spiced cider and looks like a natural mosaic.
Materials Needed
- 80 whole cardamom pods
- 10-inch straw wreath base
- Hot glue gun
- Hot glue sticks
- Tweezers
How to Make It
- Arrange cardamom pods in a circle around the outer edge of the base, points facing out.
- Glue each pod in place with a dab of hot glue, using tweezers for precision.
- Work inward in concentric rings, overlapping slightly until the base is covered.
- Let dry for 20 minutes before hanging.


19. Faux Fur Snow Tuft
Easy
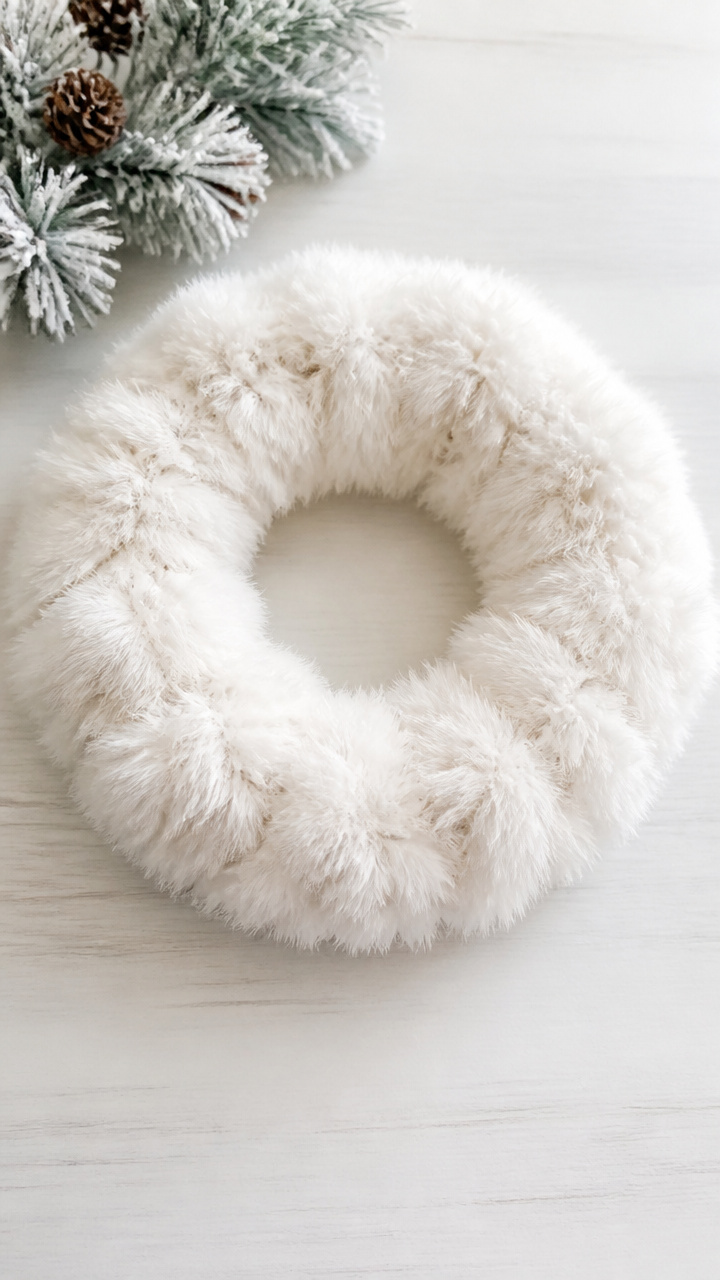
Small puffs of white faux fur glued to a wreath base to mimic snowdrifts. It’s soft to the eye and adds instant winter stillness.
Materials Needed
- White faux fur fabric, 6×6 inches
- 10-inch foam wreath base
- Scissors
- Hot glue gun
- Hot glue sticks
How to Make It
- Cut the faux fur into 1-inch squares, pulling fibers apart to create fluffy puffs.
- Apply a dot of hot glue to the back of each puff.
- Press puffs onto the top half of the foam base, clustering some and spacing others.
- Let dry for 15 minutes before hanging.


20. Hand-Stamped Doormat
Moderate
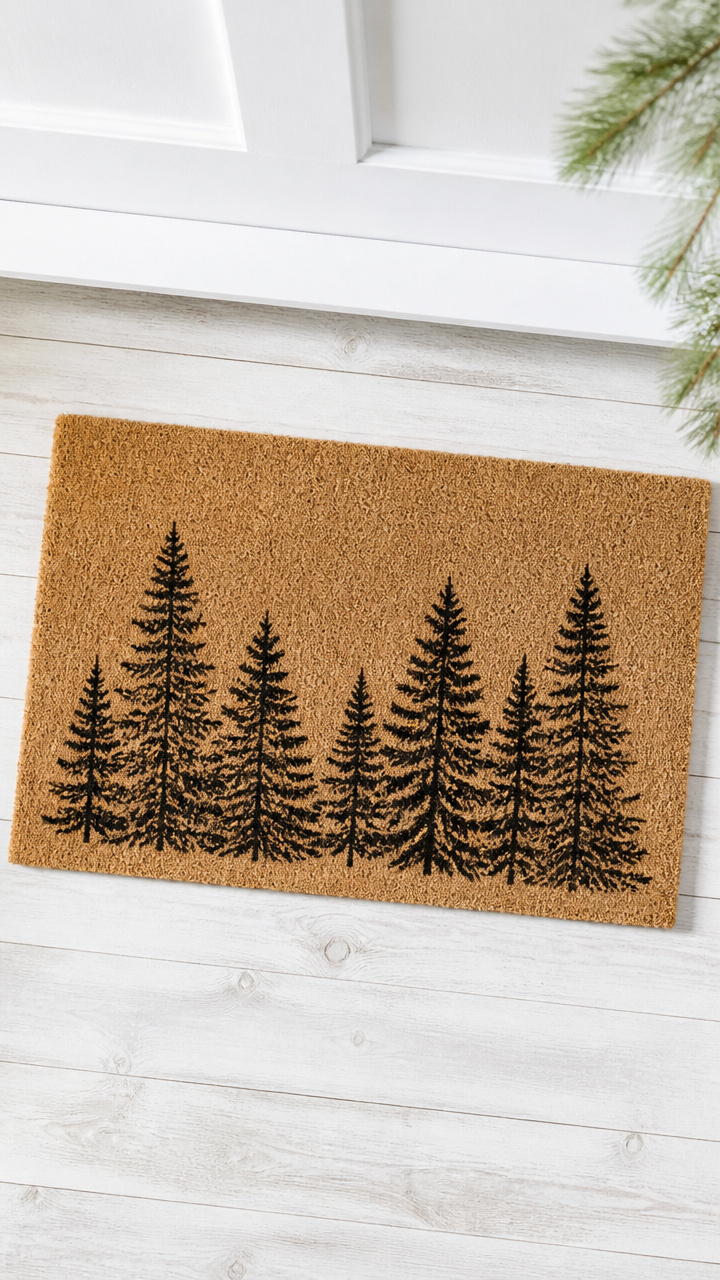
A plain coir mat stamped with a winter tree design using fabric paint. This custom mat sets the tone before guests even reach the door.
Materials Needed
- Natural coir doormat, 18×30 inches
- Black fabric paint
- Foam stencil brush
- Cardboard tree stencil
- Painter’s tape
- Paper plate
How to Make It
- Secure the stencil to the mat with painter’s tape.
- Pour a small amount of fabric paint onto the paper plate.
- Dab the brush into the paint and stipple it over the stencil openings.
- Carefully lift the stencil and let dry for 4 hours before removing tape.


21. Glittered Pine Needle Swag
Easy
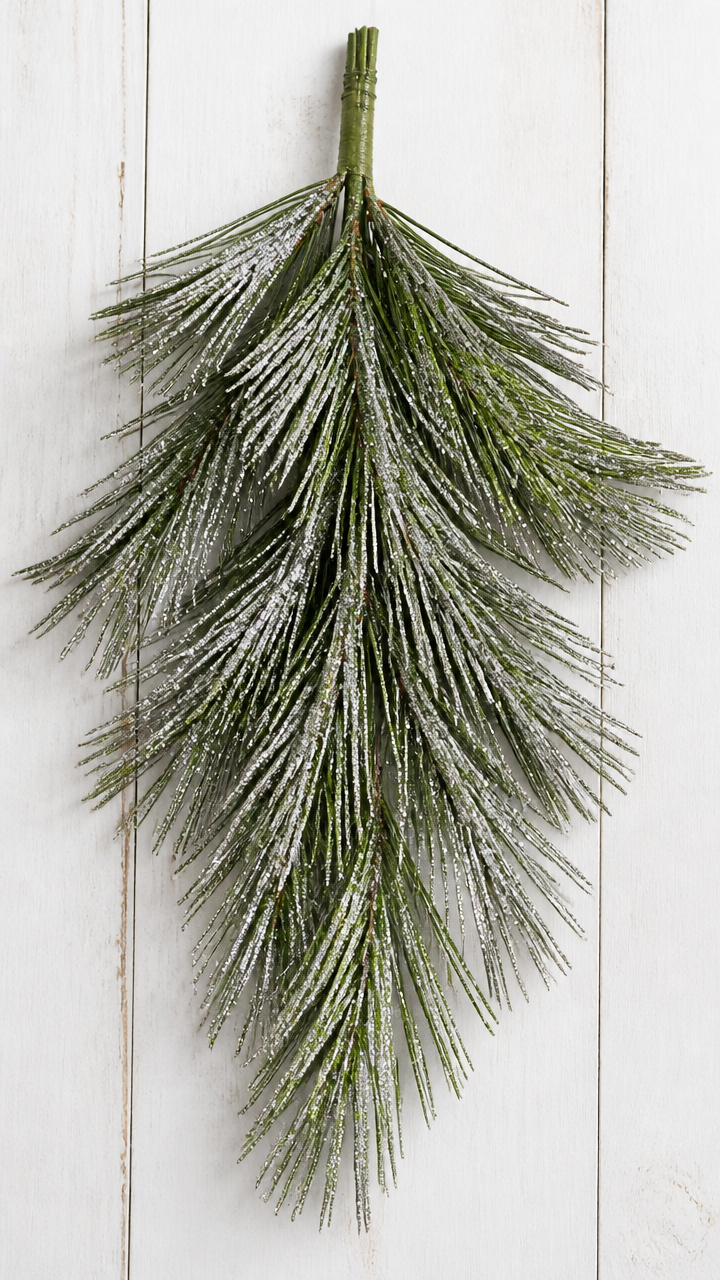
Fresh pine needles brushed with fine silver glitter and arranged in a cascading swag. It sparkles like frost under porch light.
Materials Needed
- 30 fresh pine needles
- Silver fine glitter
- Clear craft glue
- Small paintbrush
- Floral wire, 6 inches
- Scissors
How to Make It
- Mix glitter and glue on a paper plate to form a thick paste.
- Use the paintbrush to coat the tip of each pine needle with the mixture.
- Lay needles on wax paper to dry for 1 hour.
- Bundle 10 needles together and twist floral wire around the base.
- Create three bundles and wire them together at the base to form a swag.


Your front door deserves to feel like a warm hello. Pick one of these ideas and let your hands create the welcome you’ve been imagining.