16 Snowman Paper Crafts for Kids

Soft paper snowmen dangle from windows, stand on shelves, and brighten up winter walls in homes where creativity sparkles like frost on glass. These handmade figures bring cozy joy to cold days and turn simple supplies into cheerful keepsakes.
Each craft here uses paper as the star, paired with everyday or easy-to-find materials. You'll find garlands, pop-ups, lanterns, and more—projects that let kids shape snowy magic with their own hands.
1. Tissue Paper Snowman Lantern
Easy

Glowing layers of soft blue and white tissue create a frosty lantern that casts gentle shadows on winter nights. This light-catching piece works beautifully on a shelf or as a centerpiece.
Materials Needed
- One clean pint-sized glass jar with lid
- White tissue paper (one full sheet)
- Pale blue tissue paper (half sheet)
- Glue stick
- Scissors
- Battery-operated tea light
How to Make It
- Cut the white tissue paper into 1-inch wide strips about 6 inches long. Tear the pale blue tissue into similar sized pieces.
- Apply glue to the outside of the jar in patches and press the white and blue tissue strips onto it, overlapping them to create a cloudy, frosted look.
- Cover the entire jar except the base, letting some blue peek through for sky-like depth. Let dry completely.
- Place the battery tea light inside the jar and close the lid. Turn it on at dusk to see your snowman scene glow.


2. Paper Plate Snowman Mask
Easy
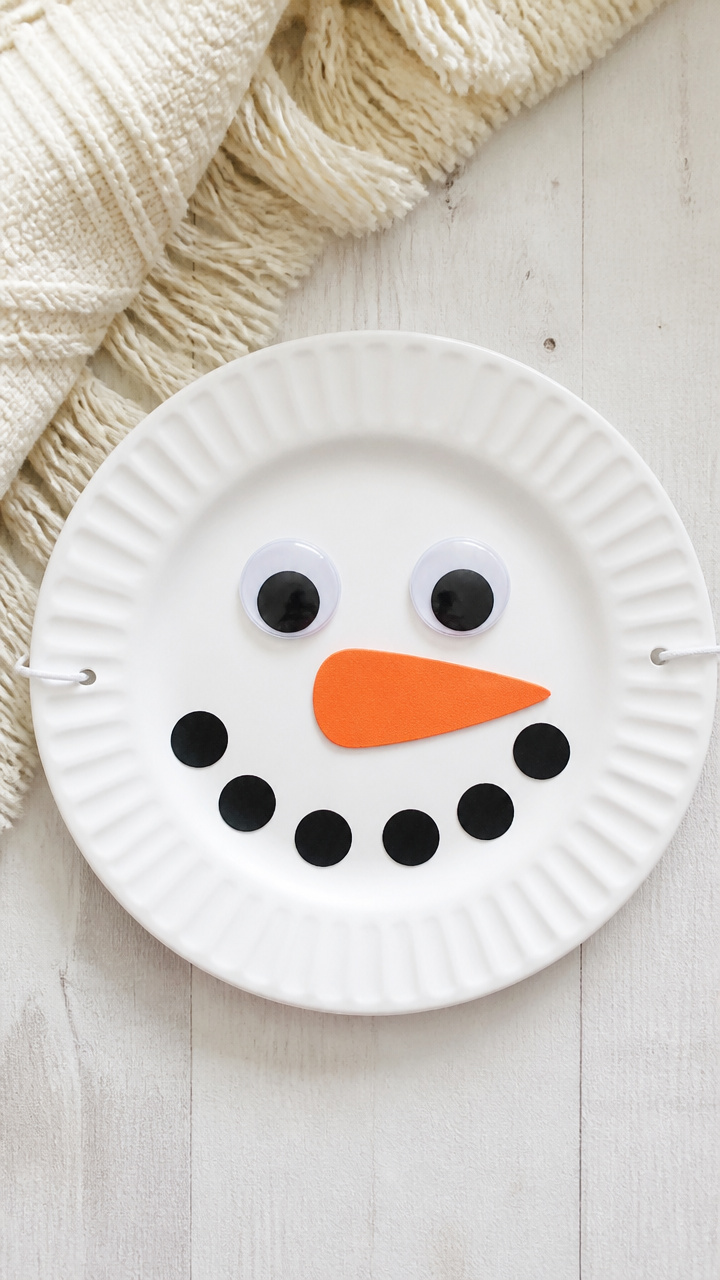
Big eyes, a carrot nose, and a coal-button smile make this wearable mask perfect for winter playtime or classroom performances. Kids love pretending to be jolly snowfolk with their faces behind this friendly design.
Materials Needed
- One white paper plate
- Black construction paper (4×4 inch square)
- Orange craft foam (2×2 inch square)
- Googly eyes (2, 1 inch diameter)
- Glue stick
- Scissors
- Elastic string (18 inches)
How to Make It
- Cut out eye holes on either side of the center of the plate, just big enough to see through. Cut a small triangle from orange foam for the nose.
- Glue the googly eyes above the eye holes and the orange nose slightly below them. Cut three small circles from black paper for mouth buttons and glue them in a curved line.
- Punch one hole on each side of the plate near the edge. Thread the elastic through both holes and tie knots to secure.
- Let the glue dry, then wear the mask and waddle around like a real snowman.


3. Roll-and-Stack Toilet Paper Snowmen
Easy

Three snug rolls layered like snowballs form a standing snowman with room for hats, scarves, and silly faces. These take minutes to build and become instant decorations for desks or mantels.
Materials Needed
- Three toilet paper tubes (all same size)
- White acrylic paint
- Paintbrush (1/2 inch flat)
- Glue gun with glue sticks
- Black marker
- Orange construction paper
- Mini pom-pom (red or pink, 1/2 inch)
How to Make It
- Paint all three tubes white and let them dry flat for 15 minutes. Set the smallest tube aside for the head.
- Stack the two larger tubes vertically on a table. Use hot glue to attach the bottom of the middle tube to the top of the base tube.
- Glue the smallest tube on top to form the head. Let the glue set for 2 minutes before decorating.
- Draw two eyes and a mouth with the black marker. Cut a tiny carrot shape from orange paper and glue it between the eyes. Glue the pom-pom below for a nose.


4. Folded Snowman Pop-Up Card
Moderate
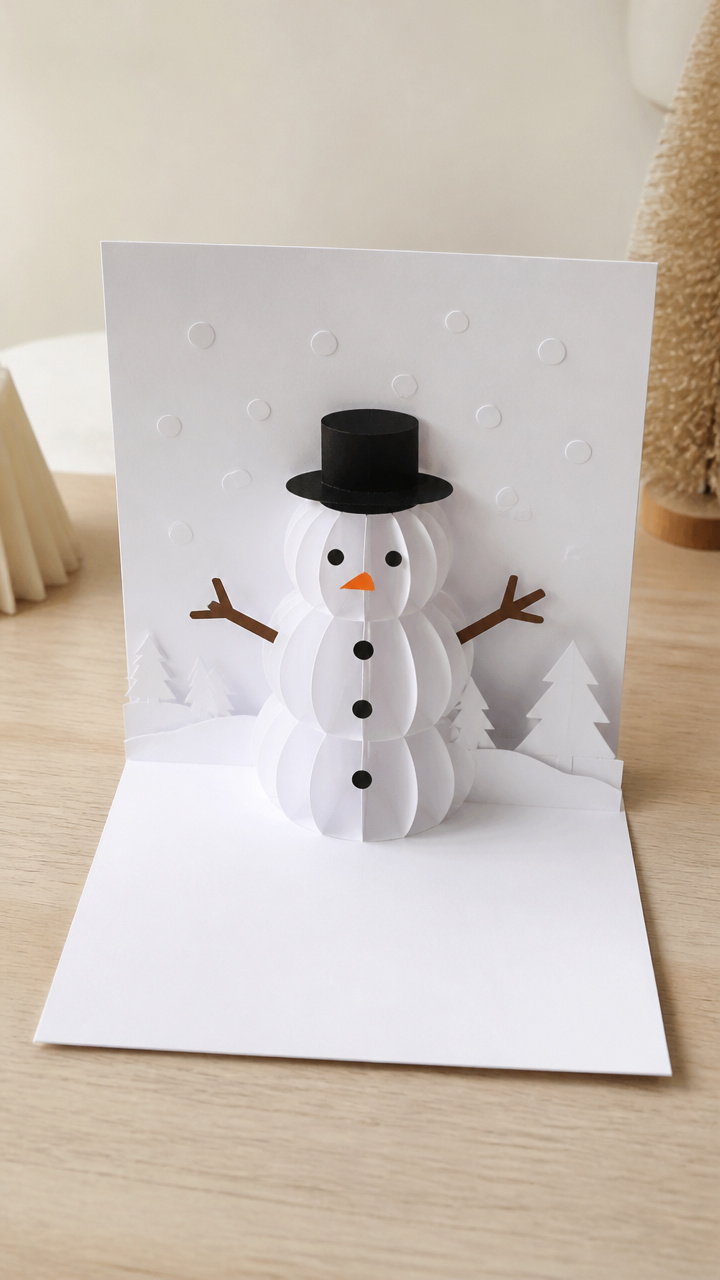
A surprise snowman jumps into view when the card opens, complete with arms and a top hat. This clever paper trick delights little hands and makes a heartfelt handmade gift.
Materials Needed
- A5 folded white cardstock (5.5 x 8.5 inches)
- Black construction paper (3×3 inch square)
- Orange scrap paper
- Glue stick
- Scissors
- Ruler
- Pencil
How to Make It
- Measure and mark a 1.5-inch vertical line centered on the inside fold of the card. Cut up halfway, then fold the flap forward to form the pop-up base.
- Cut a small snowman body from white paper: three stacked ovals, 2 inches tall total. Glue it to the pop-up tab so it stands when opened.
- Cut two thin black arms from construction paper and glue them to the sides of the middle oval. Add two small coal buttons with black paper dots.
- Cut a tiny top hat from black paper and a carrot nose from orange. Glue them in place. Close the card gently to test the pop.


5. Snowman String Art with Cardboard
Advanced
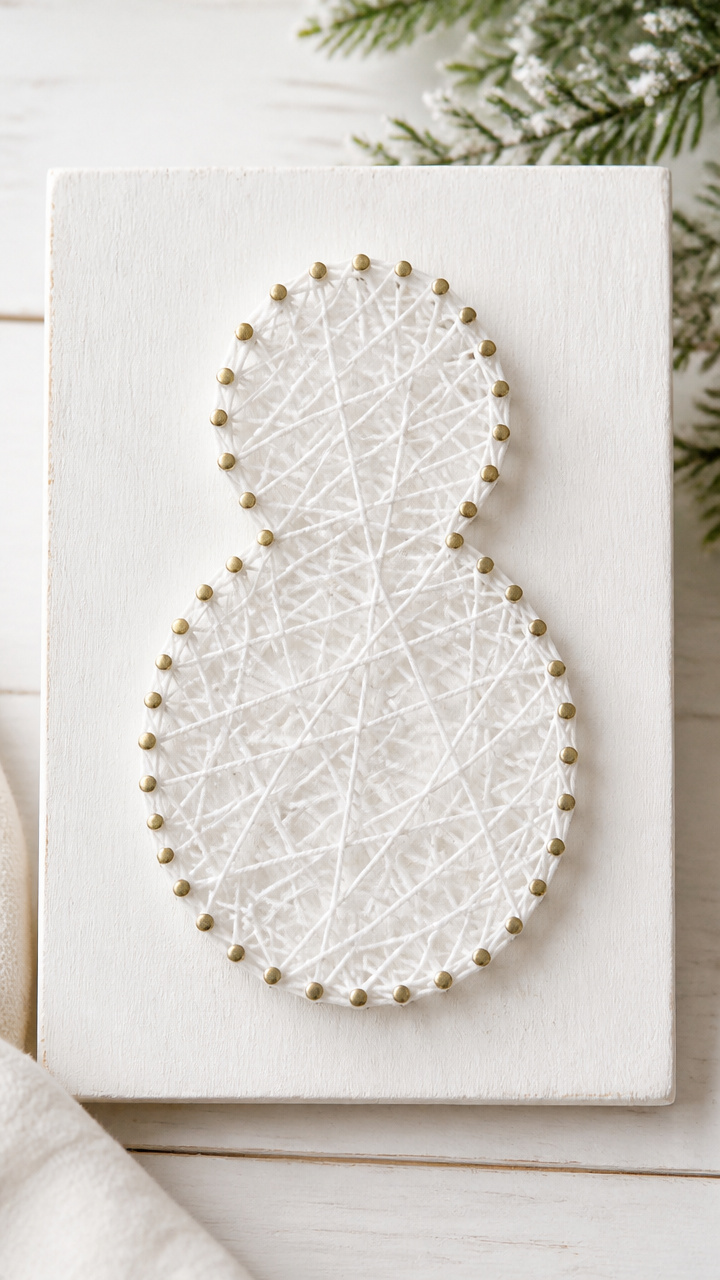
Tiny nails and white thread form a frosty snowman silhouette on a painted board. This tactile project blends drawing, hammering, and wrapping into one satisfying creation.
Materials Needed
- 8×10 inch pine wood board
- White acrylic paint
- Paintbrush
- Printed snowman stencil (3 inches tall)
- Small hammer
- 64 brass brad nails (1/2 inch)
- White embroidery floss (2 yards)
- Clothespin
How to Make It
- Paint the board white and let it dry for 30 minutes. Tape the stencil in the center and trace the outline with pencil.
- Place a brad nail at each curve and corner of the snowman shape, spacing them about 1/2 inch apart. Tap each gently with the hammer until secure.
- Tie one end of the floss to a bottom nail. Wrap the thread over and under nails to fill the shape, creating a dense web of white lines.
- When filled, tie off the end on a back nail. Clip excess. Clip the clothespin to the top edge so it can hang.


6. Cotton Ball Snowman Garland
Easy

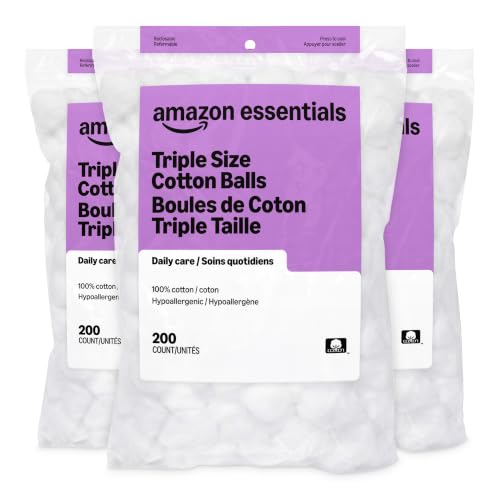
Fluffy cotton balls become snowman heads strung across a twine line, bobbing cheerfully above a window or bed. This soft garland adds whimsy with zero mess.
Materials Needed
- White cotton balls (12 large)
- Black felt scraps
- Orange craft foam
- Twine (3 feet)
- Glue gun
- Needle
- Scissors
How to Make It
- Cut tiny eyes, mouths, and top hats from black felt. Cut 12 mini carrots from orange foam.
- Glue one orange triangle and two black shapes onto each cotton ball to make a face. Let dry 10 minutes.
- Thread the needle with twine and poke through the top of each cotton ball, spacing them 3 inches apart.
- Knot the ends of the twine and hang the garland where it catches light.


7. Paper Cup Snowman Family
Moderate
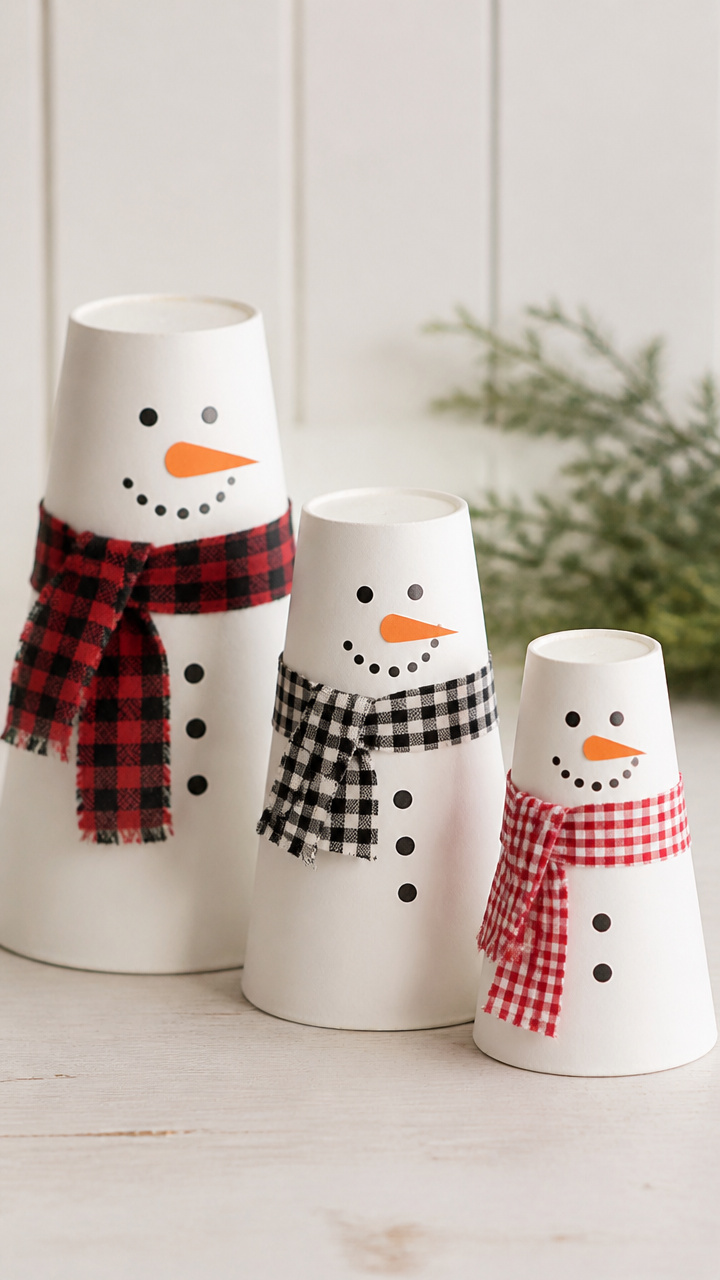
Three different sized paper cups become a tiered snowman family with painted details and fabric scraps for scarves. These stand-alone figures are great for storytelling or shelf displays.
Materials Needed
- Three paper cups (small, medium, large, all white)
- White acrylic paint
- Paintbrush
- Black permanent marker
- Orange construction paper
- Fabric scraps (3 pieces, 2×6 inches)
- Glue gun
- Sand (1/4 cup)
How to Make It
- Paint the outside of all cups white and let dry for 20 minutes. Flip them upside down so the open end becomes the base.
- Fill each cup halfway with sand to weigh it down. Wipe any spills.
- Draw two eyes and a smiling mouth on each cup with the marker. Cut a carrot nose from orange paper and glue it on.
- Wrap a fabric strip around the neck area of each snowman and secure with hot glue at the back.


8. Origami Snowman Bookmarks
Moderate
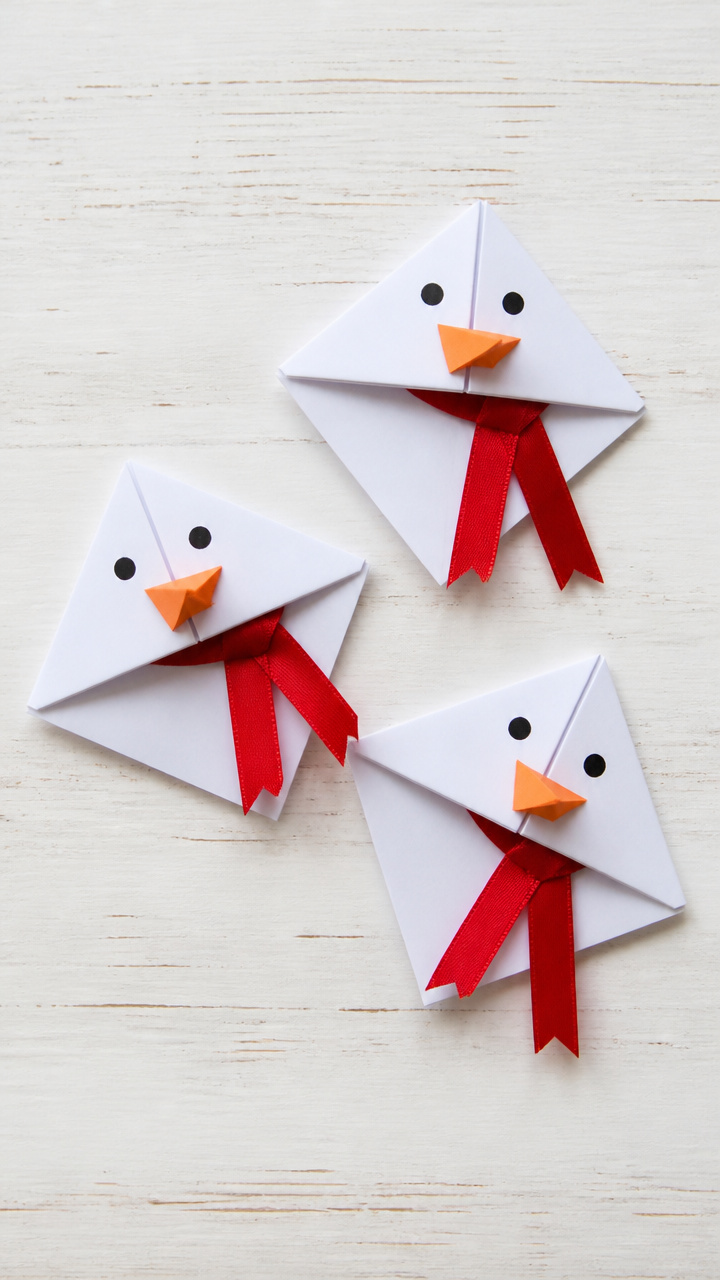
Neat folds of glossy paper form tiny snowmen with scarves that dangle off the page edge. These functional bookmarks double as gifts tucked inside winter stories.
Materials Needed
- 6×6 inch square origami paper (white, 3 sheets)
- Black fine-tip marker
- Orange gel pen
- Red ribbon (6 inches per bookmark)
- Craft glue
How to Make It
- Fold one paper square into a triangle by bringing bottom right to top point. Crease sharply and unfold.
- Repeat with bottom left to top point, forming an X crease. Push sides in to collapse into a smaller triangle (a waterbomb base).
- Fold bottom corners up to meet the top to form a diamond. Flip and repeat to create a smaller diamond.
- Draw eyes, mouth, and buttons with black marker. Add a tiny orange carrot nose with the gel pen. Glue red ribbon to the bottom tip to act as a tassel scarf.


9. Shaving Cream Snowman Painting
Easy
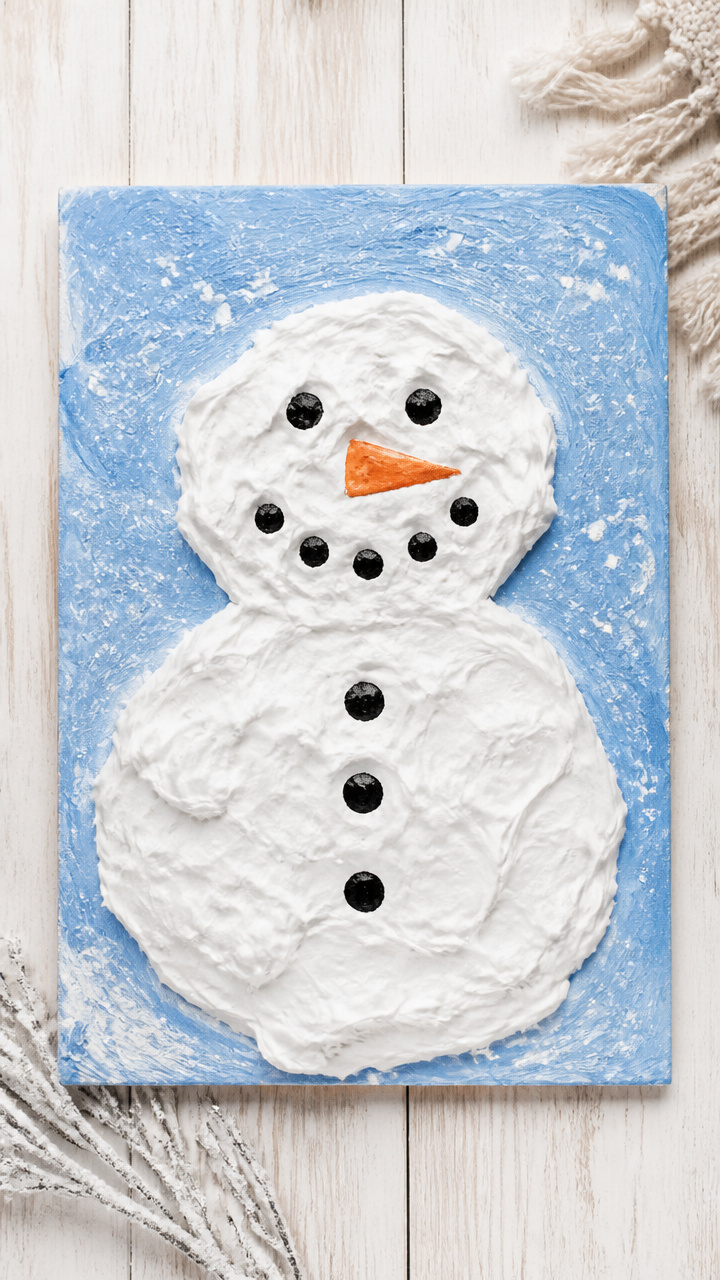
A swirl of shaving cream and glue creates a puffy, textured painting that feels like real snow. Kids spread the mixture and draw a snowman into the drying surface.
Materials Needed
- White school glue (4 oz)
- Foam shaving cream (8 oz)
- Mixing bowl
- Spoon
- Cardboard sheet (6×8 inch)
- Black and orange markers
- Plastic table cover
How to Make It
- Lay the table cover down and mix equal parts glue and shaving cream in the bowl until smooth and fluffy.
- Spread a thick layer of the mixture onto the cardboard with the spoon, covering the whole surface. Let dry flat overnight.
- Once dry, use black and orange markers to draw a snowman face, buttons, and arms on the bumpy surface.
- Set it on a bookshelf where fingers can brush over the snowy texture.


10. Paper Towel Roll Winter Scene
Moderate
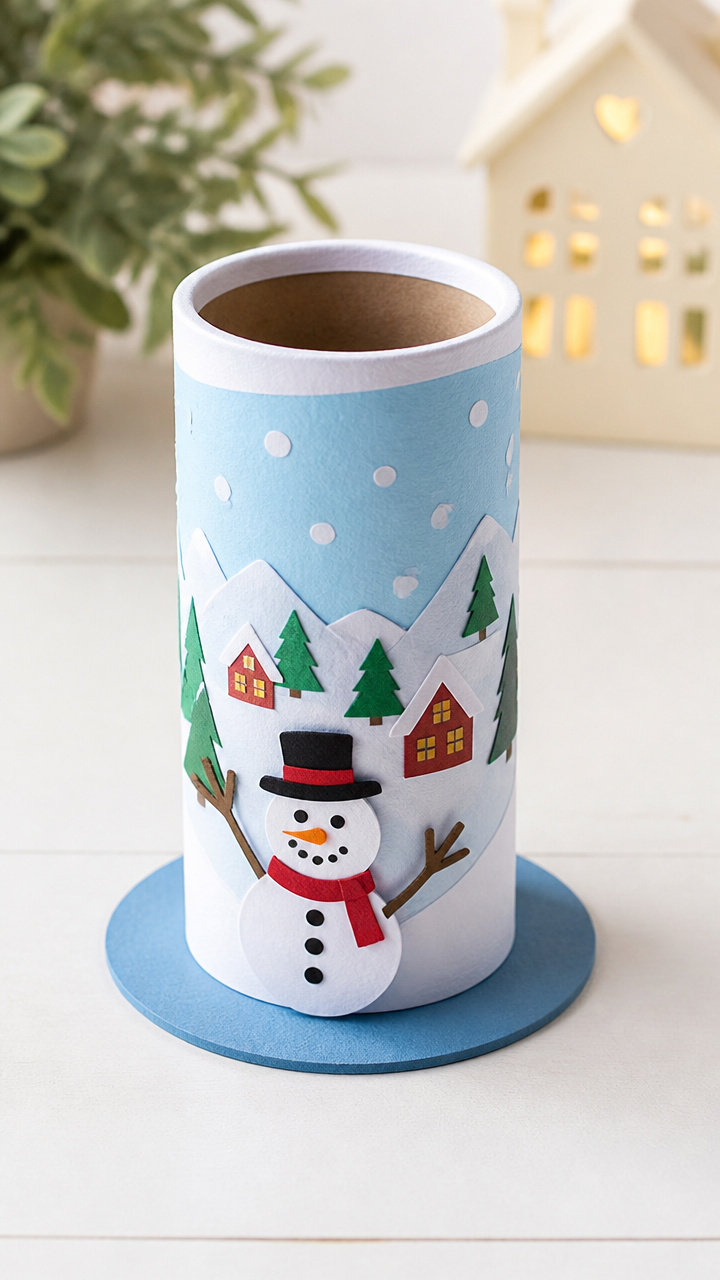
A wrapped cardboard tube becomes a snowy village backdrop with a snowman waving from the front. This cylindrical canvas offers a 360-degree story to walk around.
Materials Needed
- One empty paper towel roll
- White acrylic paint
- Paintbrush
- Blue construction paper (5×7 inch)
- Glue stick
- Scissors
- Black and orange markers
How to Make It
- Paint the entire roll white and let dry for 20 minutes. Cut the blue paper into a rectangle that wraps around the roll once.
- Glue the paper to the inside back half of the roll to form a sky backdrop. Let dry 5 minutes.
- Draw a snowman on the front of the roll with the markers: three white circles, black eyes, orange nose, and stick arms.
- Add snowflakes and ground drifts with short white paint strokes using the edge of the brush.


11. Snow Globe Cut-Out Window Display
Easy
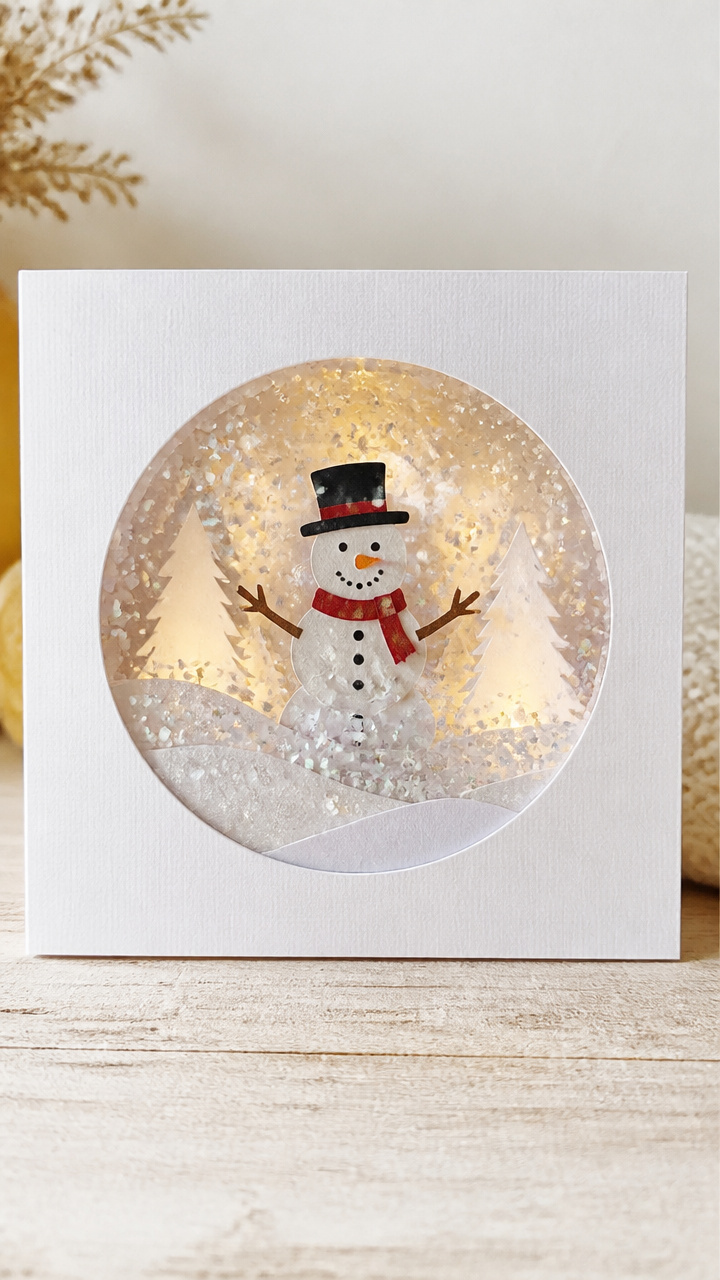
A circular frame cut from cardstock holds a shimmering snowman scene you can hang on glass. Light shines through the fake snow and glitter, making it twinkle like real weather.
Materials Needed
- A4 white cardstock
- Round cookie cutter (3 inches)
- Pencil
- Scissors
- Glue stick
- Clear contact paper (6×8 inch sheet)
- White glitter
- Mini fake snow (1 tablespoon)
How to Make It
- Trace the cookie cutter twice on the cardstock and cut out both circles. Draw a small snowman on one circle with pencil.
- Glue the glitter and fake snow inside the drawn snowman area. Press gently to stick.
- Place the clear contact paper over the decorated side, sticky side down, and smooth out bubbles. Trim excess.
- Glue the second circle on the back to seal the edges. Hang on a sunny window with tape.


12. Layered Snowman Silhouette Frame
Moderate
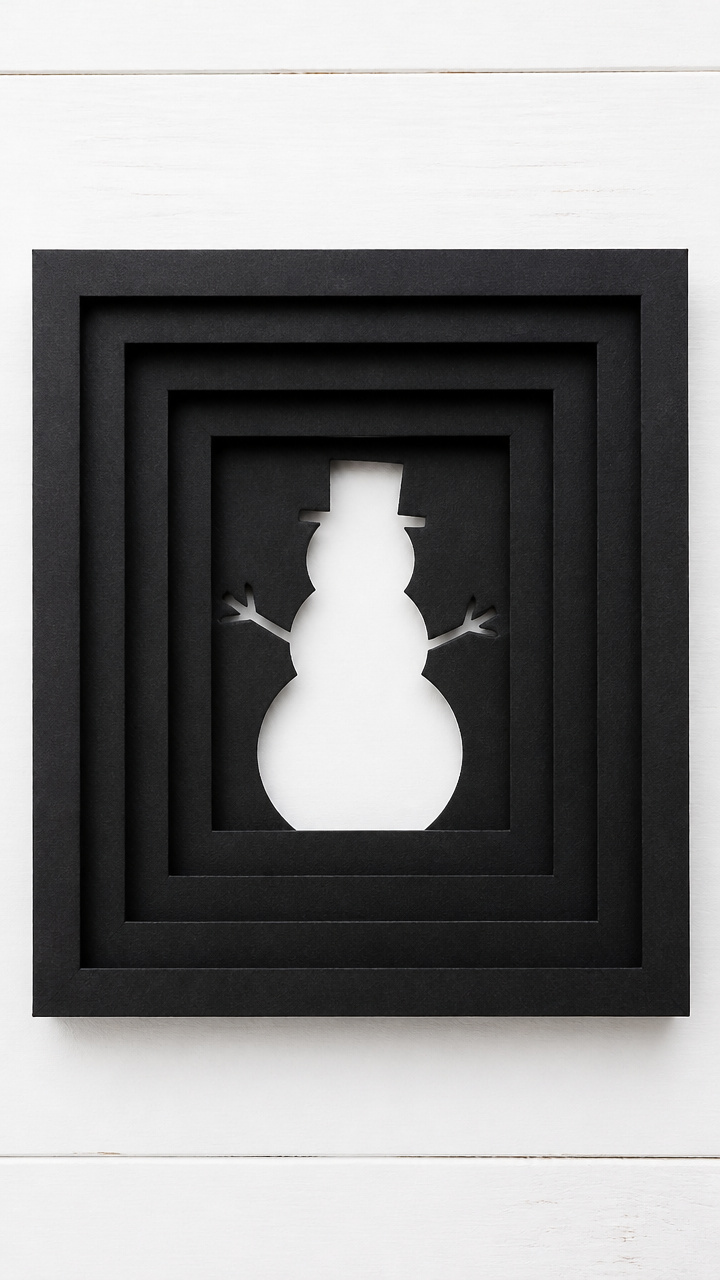
Five sheets of black paper stacked in descending sizes form a bold 3D shadow art piece. The deep layers give depth to a simple snowman cut-out.
Materials Needed
- Black cardstock (5 sheets, 6×6 inch)
- White glue
- Craft knife
- Cutting mat
- Ruler
- Pencil
- Frame (7×7 inch)
How to Make It
- On the first sheet, draw a snowman using three stacked circles (2, 1.5, 1 inch). Use the craft knife on the cutting mat to cut it out carefully.
- Repeat with each sheet, reducing each circle size by 1/8 inch so layers nest tightly. Align and glue one on top of the other with white glue.
- Let the stack dry under a light book for 15 minutes. Insert into the frame with the cut side facing forward.
- Hang where overhead light highlights the layered edges.


13. Paper Chain Snowman Wreath
Easy

Interlocking loops of white paper form a ring dressed with a scarf and hat. This looping craft teaches sequencing while building a festive door decoration.
Materials Needed
- White construction paper (8.5×11 inch, 4 sheets)
- Scissors
- Glue stick
- Red construction paper (1 sheet)
- Black marker
- Hole punch
How to Make It
- Cut each white sheet into ten 1-inch wide strips, 11 inches long. Cut one red strip 1 inch by 11 inches for the scarf tail.
- Form a loop with one white strip and glue the ends together. Link the next strip through the first and glue shut. Repeat until you have 40 connected loops.
- Shape the chain into a circle and glue the last loop to the first. Let dry 5 minutes.
- Glue the red strip at the bottom as a scarf. Use the marker to draw a face and buttons on the top third of the wreath.


14. Snowman Puppet with Moving Arms
Advanced
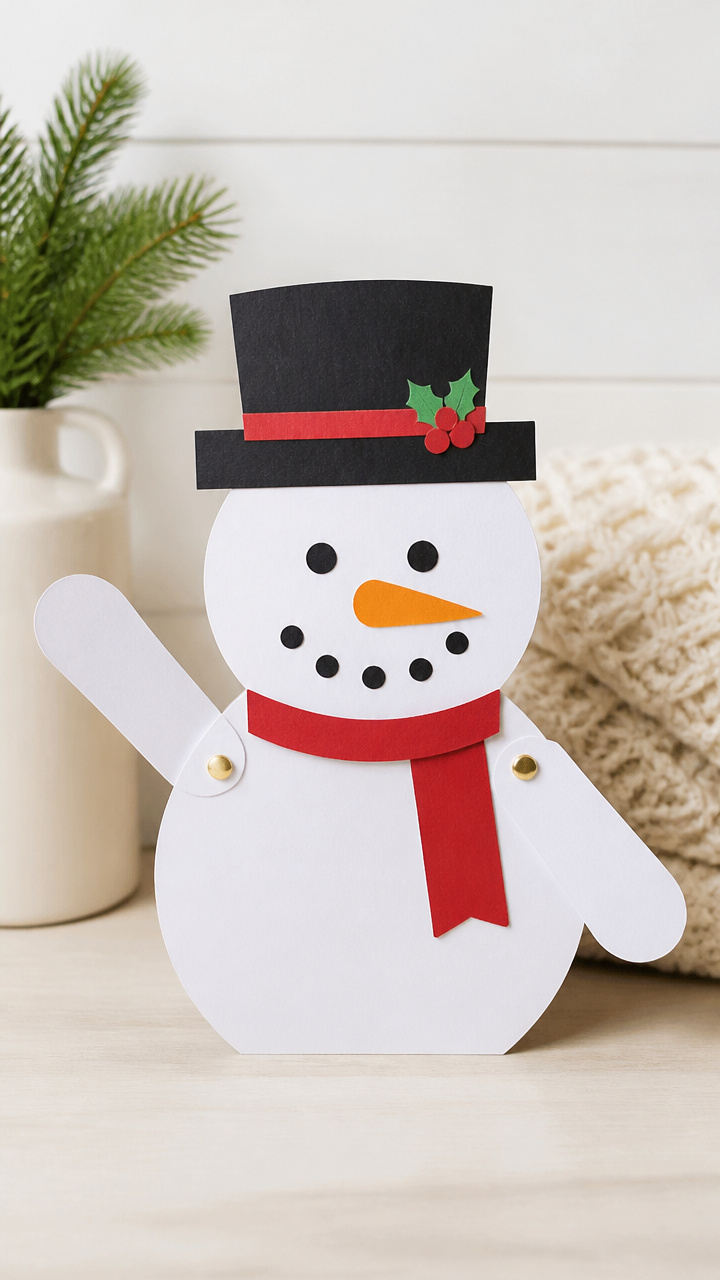
Stiff paper arms flap when strings are pulled, making this snowman wave hello from behind a chair or table. A fun twist on classic hand puppets.
Materials Needed
- Thick white cardstock (8.5×11 inch)
- Brass fasteners (2, 1/2 inch)
- Black construction paper
- Orange craft foam
- Hole punch
- Scissors
- Glue stick
- Wooden dowel (6 inches, 1/4 inch diameter)
How to Make It
- Draw a snowman on the cardstock: three large circles stacked, with two long arm shapes extending sideways. Cut it out.
- Cut small circles from black paper for eyes and buttons. Cut a triangle from orange foam for the nose. Glue them in place.
- Punch a hole at the end of each arm and one on each side of the body. Attach arms with brass fasteners so they swing freely.
- Glue the dowel vertically to the back center of the body. Hold it behind a surface and pull the arms to make them wave.


15. Salt Dough Snowman Ornaments
Moderate
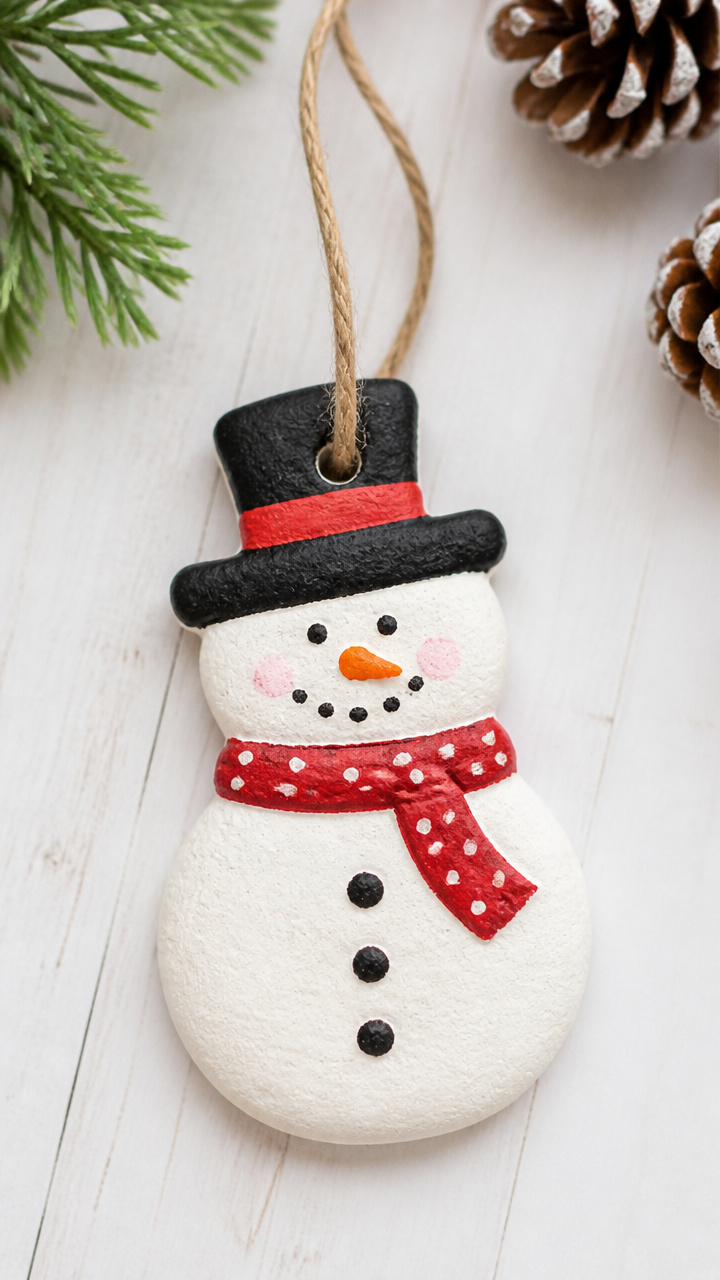
Homemade dough shaped by little fingers bakes into sturdy ornaments that last for years. These rustic keepsakes smell like the kitchen and feel like tradition.
Materials Needed
- 2 cups all-purpose flour
- 1 cup table salt
- 3/4 cup warm water
- Mixing bowl
- Spoon
- Baking sheet
- Parchment paper
- Straw (for hanging hole)
- Acrylic paint (black, orange, red)
- Paintbrush
- Ribbon (6 inches per ornament)
How to Make It
- Mix flour, salt, and warm water in the bowl until a firm dough forms. Knead for 2 minutes until smooth.
- Roll small, medium, and large balls. Stack them on a parchment-lined baking sheet to form a snowman. Use a straw to poke a hole at the top.
- Bake at 250°F for 2 hours, then let cool completely. Paint on a face, buttons, and a scarf.
- Thread ribbon through the hole and tie a knot for hanging.


16. Snowman Stained Glass Window Art
Easy
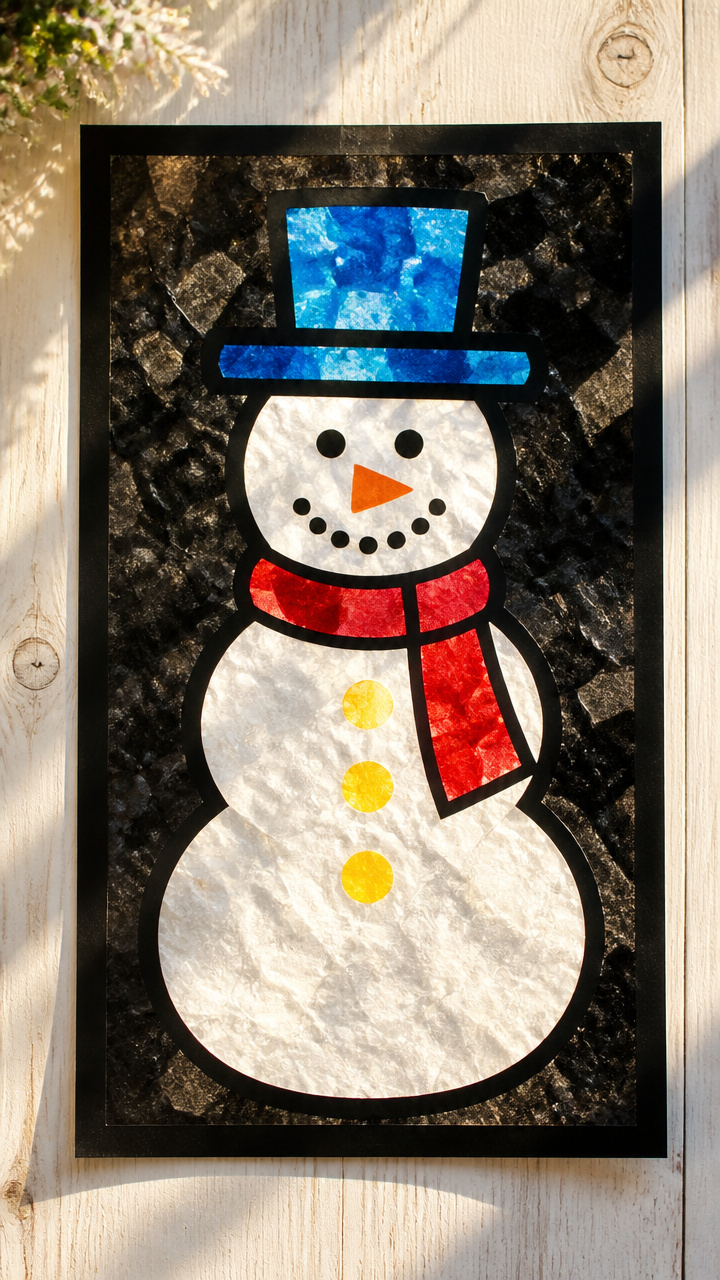
Colorful tissue paper stuck to contact paper shines like sunlight through a cathedral window. This radiant craft turns any pane into a winter wonderland.
Materials Needed
- Clear contact paper (12×18 inch sheet)
- Black construction paper (12×18 inch)
- Scissors
- Red, blue, yellow, and white tissue paper (each 6×6 inch)
- Ruler
- Pencil
How to Make It
- Cut the contact paper into a 10-inch circle. Peel the backing halfway and lay it sticky-side up.
- Cut small squares of colored tissue paper. Cover the exposed sticky area with pieces, leaving no gaps.
- Peel the rest of the backing and press the black paper circle on top to seal. Trim edges evenly.
- Draw a snowman face and buttons with pencil on the black border. Hang on a sunny window.


Grab your scissors, gather the kids, and let the paper pile grow with giggles and glitter. Each snowman you make carries a little warmth all its own.