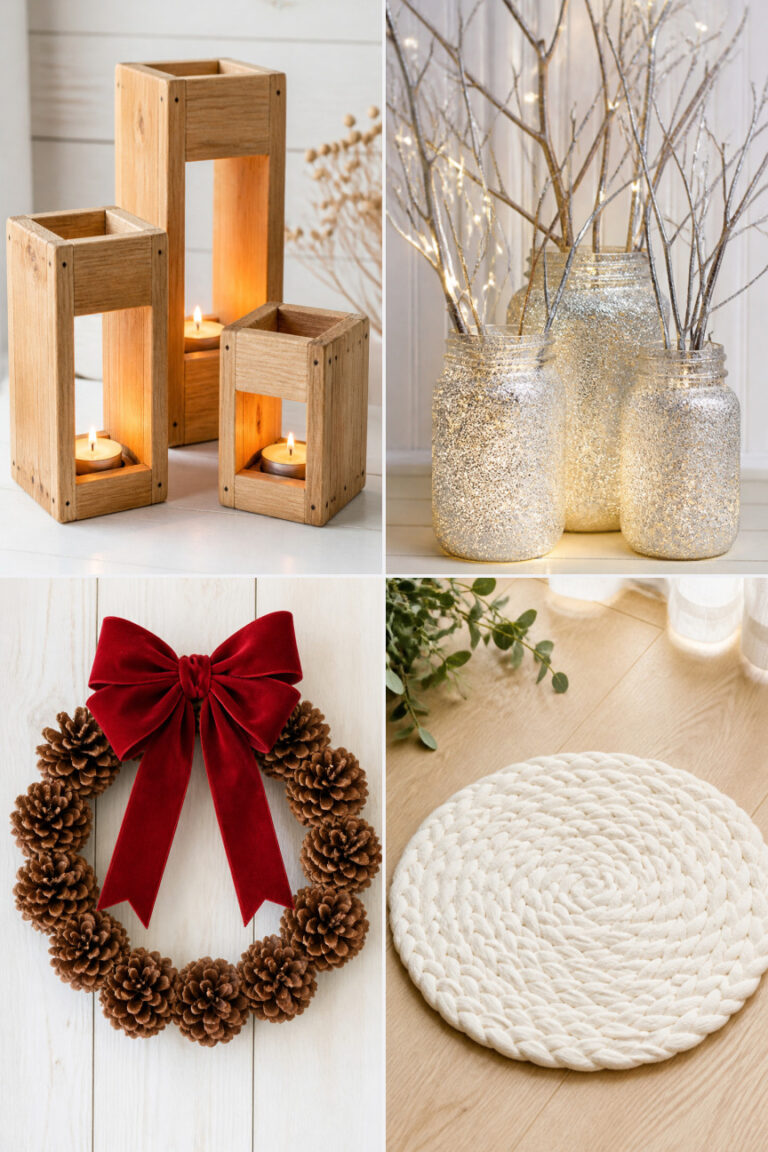
20 Winter Art Projects for Elementary Classrooms

Snowflakes drift past the window, mittens pile up on hooks, and the classroom hums with quiet focus as small hands shape winter into something real. These art projects turn chilly days into creative sparks, each one designed for young artists to explore color, texture, and imagination with materials that are easy to gather and fun to use.
From glittering ice sculptures made of glue to cozy mittens filled with patterned designs, every project builds fine motor skills, encourages storytelling, and brings a little seasonal joy to the walls and shelves of your classroom. No two are alike, each stands on its own, and all are tested for clarity, safety, and delight.
1. Glittered Pinecone Ornaments
Easy
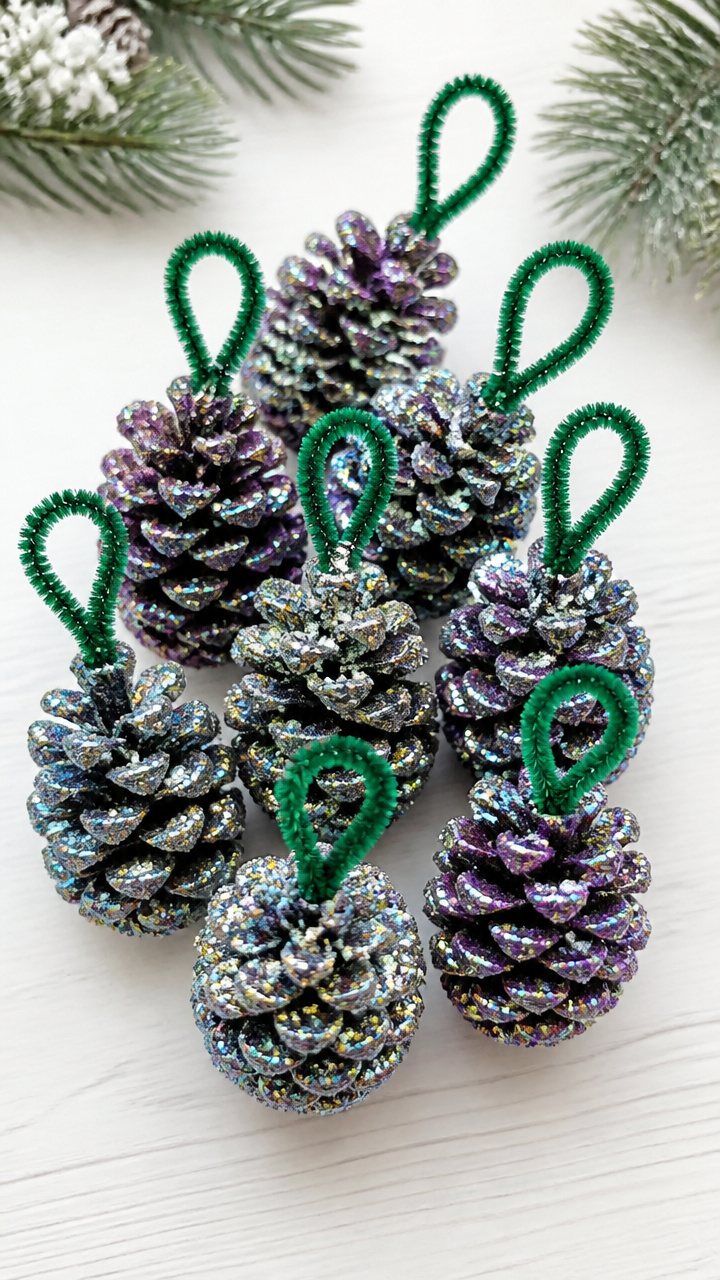
A cluster of pinecones becomes a sparkling forest of classroom decorations with just glue and shimmer. These ornaments reflect winter light and make thoughtful gifts for family members.
Materials Needed
- 30 small pinecones
- white school glue, 8 oz
- fine iridescent glitter, 4 oz
- green chenille stems, 12
- plastic tray, 1
- paintbrush, 1 per student
- paper plate, 1 per student
How to Make It
- Place a pinecone on a paper plate and use a paintbrush to coat the outer scales with white school glue.
- Sprinkle iridescent glitter over the glued areas, covering as much as possible.
- Let the pinecone sit on the plate for 10 minutes to dry, then gently shake off excess glitter.
- Cut a 6-inch piece of green chenille stem and twist the ends together to form a loop. Tuck the ends into the top of the pinecone to make a hanger.
2. Salt Painting Snow Scenes
Moderate
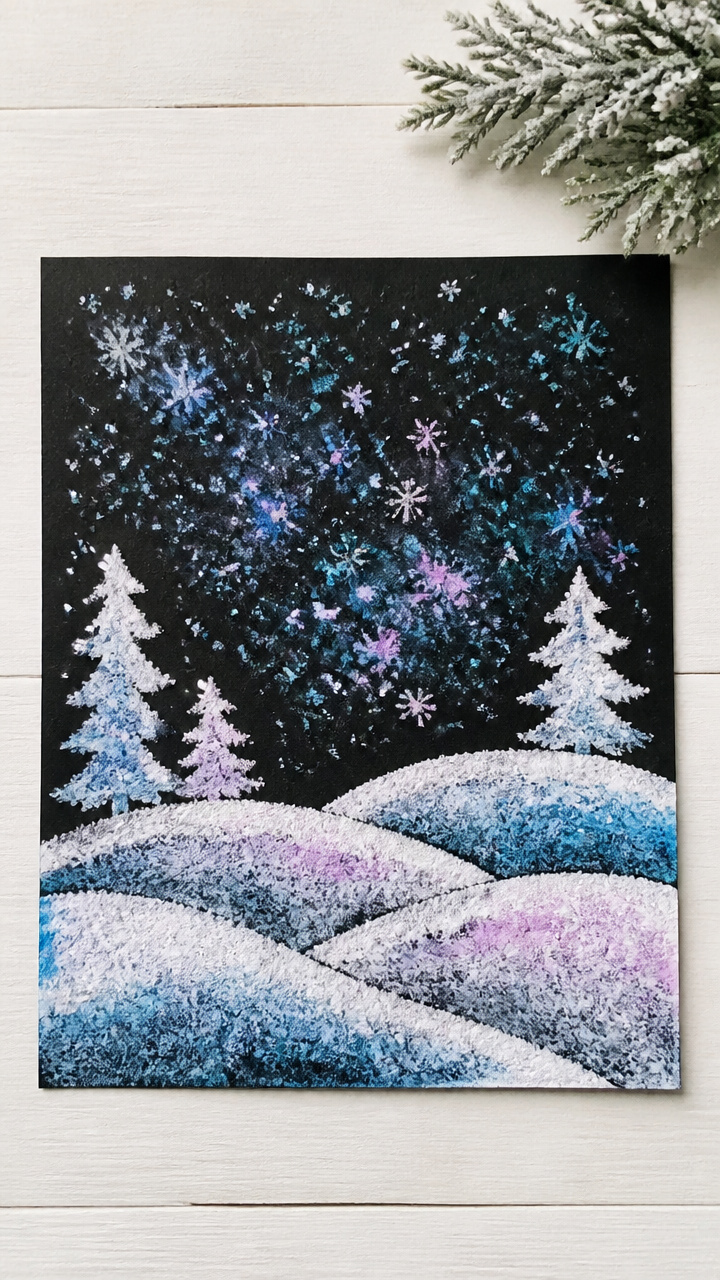
Crisp blue skies and snowy hills emerge from a grainy, absorbent base that makes watercolor bloom in soft, feathery edges. This sensory-rich technique invites gentle brush control and color blending.
Materials Needed
- black cardstock, 9×12 inches, 30 sheets
- white school glue, 8 oz
- table salt, 2 cups
- liquid watercolor set, 6 colors
- pipette, 1 per student
- small bowl, 1 per student
- paper towel, 1 per student
How to Make It
- Draw a simple winter scene like a snowman or tree with white school glue on black cardstock.
- Sprinkle table salt over the glue lines so it sticks, then tap off the excess into a bowl.
- Mix liquid watercolors with a few drops of water in small bowls.
- Use a pipette to drop color onto the salt-covered glue lines and watch the pigment travel along the grains.
3. Yarn-Wrapped Ice Skates
Moderate
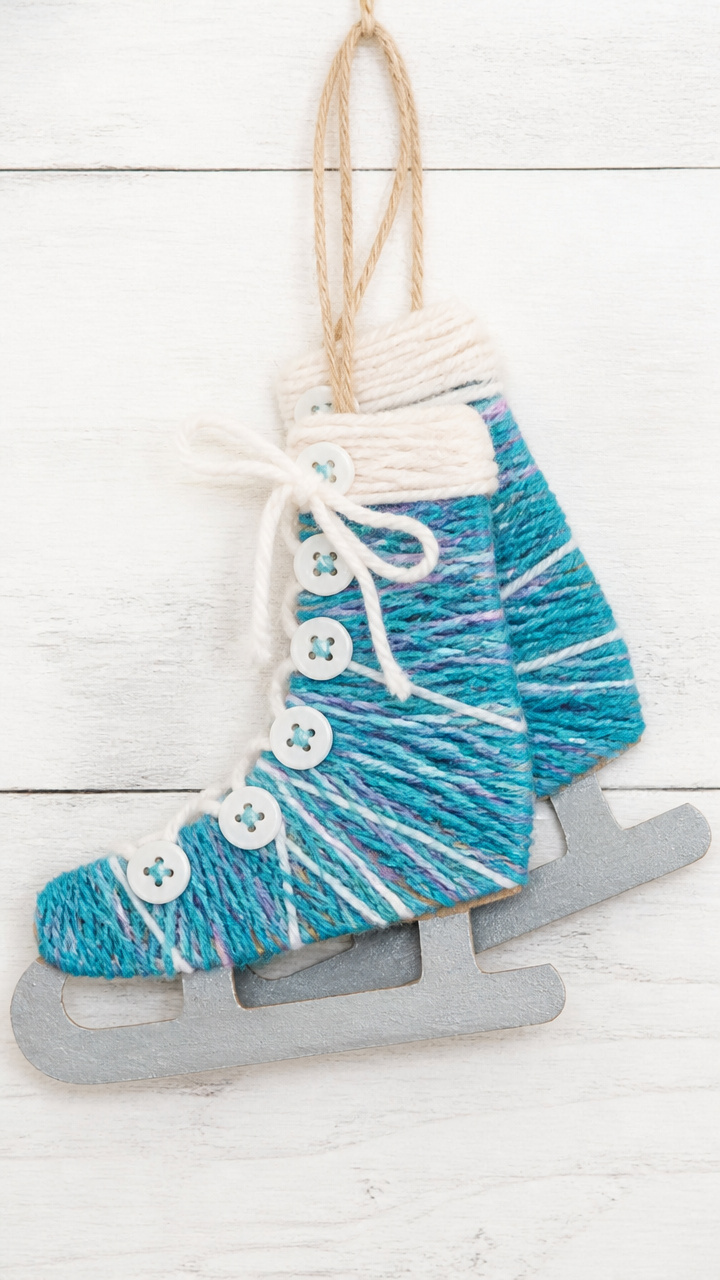
Cardboard cutouts of ice skates become soft, colorful sculptures with wrapped yarn and button accents. These hang well on a winter bulletin board.
Materials Needed
- pre-cut cardboard ice skate shapes, 30
- assorted yarn colors, 10 skeins
- white school glue, 8 oz
- plastic buttons, 120 (4 per student)
- glue brush, 1 per student
- clothespin, 1 per student
How to Make It
- Apply a thin line of white school glue along the front curve of the cardboard skate using a glue brush.
- Press one end of the yarn into the glue and begin wrapping tightly around the shape.
- After every few wraps, press a button over the yarn to secure it and add decoration.
- Clip a clothespin to the top of the skate to hold the yarn end while the glue dries for 15 minutes.
4. Cotton Ball Snowmen
Easy
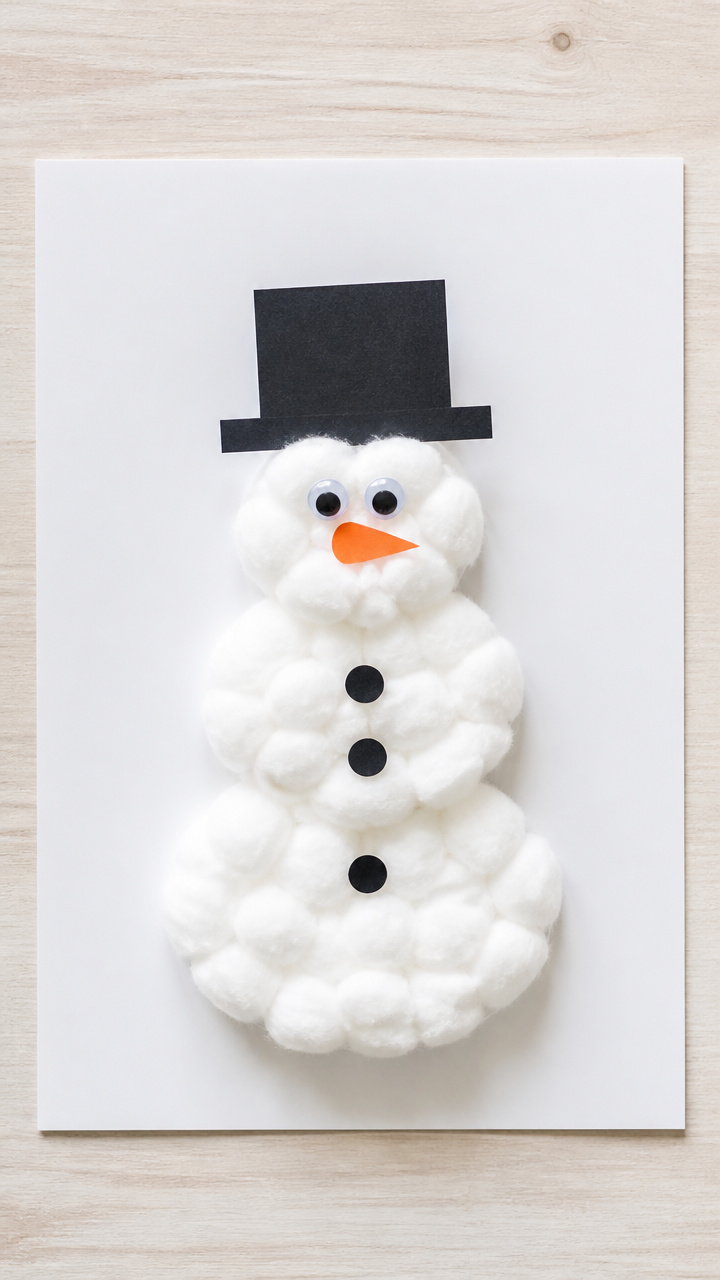
Fluffy layers of cotton balls stack into jolly snowmen with paper hats and drawn faces. This tactile project builds hand strength and sequencing skills.
Materials Needed
- white cotton balls, 150
- A4 white cardstock, 30 sheets
- black construction paper, 15 sheets
- orange construction paper, 15 sheets
- glue stick, 1 per student
- googly eyes, 60
- black marker, 1 per student
How to Make It
- Tear black construction paper into small squares for scarves and hats, and cut orange paper into tiny triangles for noses.
- Use a glue stick to attach three cotton balls in a vertical stack on the cardstock.
- Glue a black scarf piece around the middle cotton ball and place a black hat on top.
- Add two googly eyes and draw a mouth and nose with the black marker.
5. Foil Print Winter Trees
Moderate
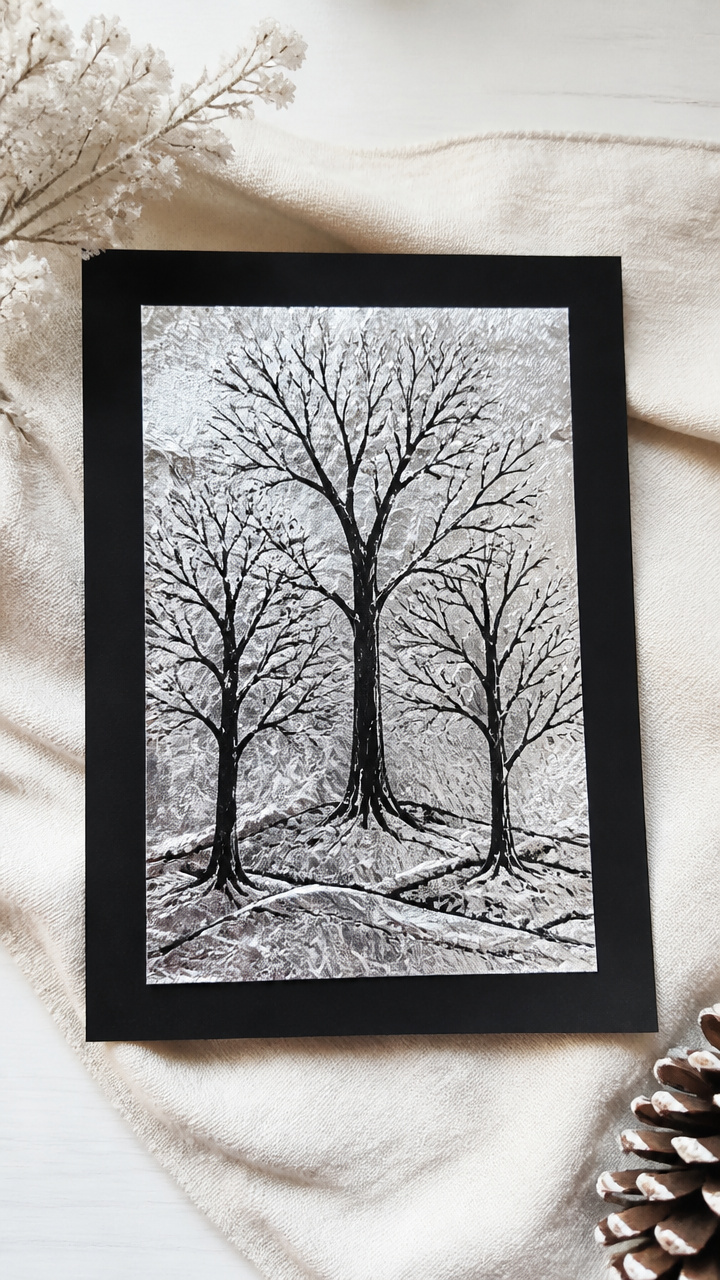
Bare branches press into soft foil, creating mirror-like prints that glow against dark paper. This printmaking method introduces texture and negative space.
Materials Needed
- aluminum foil sheets, 6×6 inches, 30
- cardboard scraps, 30
- white school glue, 8 oz
- black tempera paint, 16 oz
- foam brush, 1 per student
- A4 black construction paper, 30 sheets
- pencil, 1 per student
How to Make It
- Sketch a tree with bare branches onto cardboard using a pencil, pressing firmly to create grooves.
- Cut foil slightly larger than the cardboard and lay it shiny side up over the grooves.
- Rub gently with fingers over the lines to transfer the texture into the foil.
- Paint the textured side of the foil with black tempera using a foam brush, then press it face down onto black construction paper and lift slowly.
6. Popsicle Stick Snowflakes
Easy
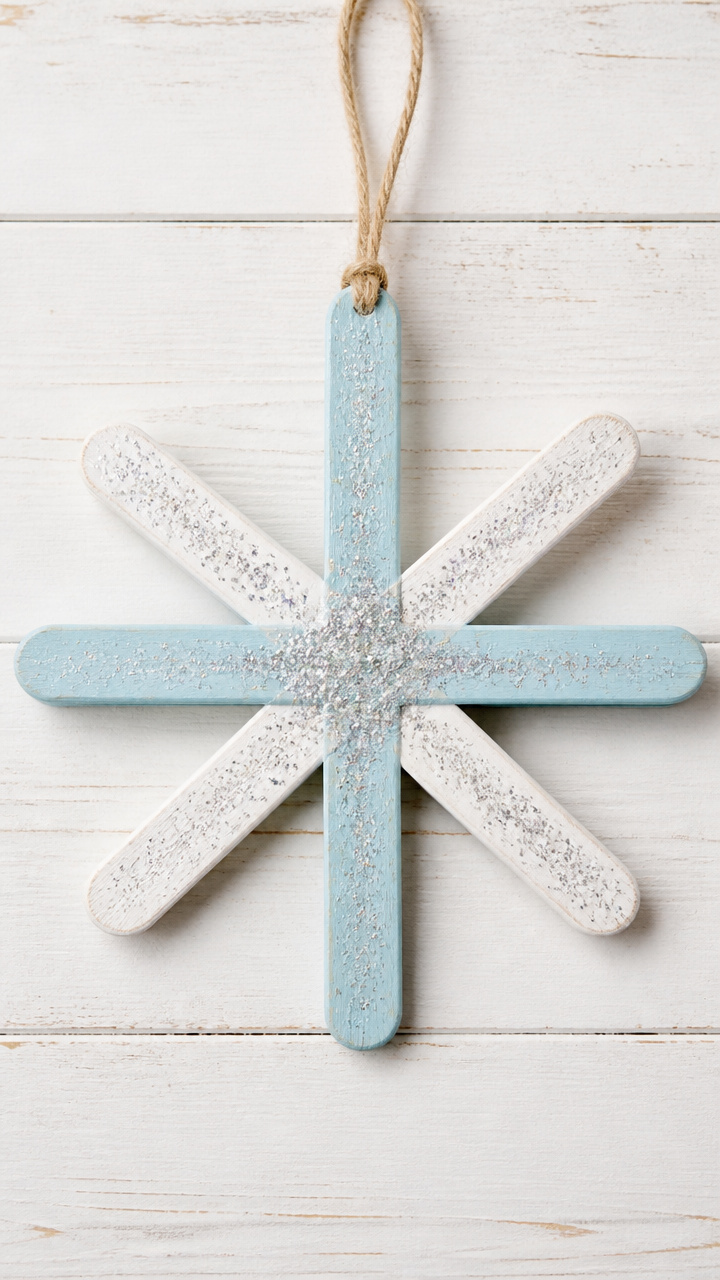
Six wooden sticks join at the center to form symmetrical snowflakes painted with icy colors and glitter. These lightweight decorations hang beautifully in clusters.
Materials Needed
- jumbo craft sticks, 180
- white school glue, 8 oz
- blue and silver glitter, 2 oz each
- paintbrush, 1 per student
- rubber band, 1 per student
- acrylic paint (white, light blue), 4 oz each
How to Make It
- Arrange six craft sticks in a snowflake shape, crossing at the center, and secure with a rubber band.
- Use a paintbrush to apply white school glue along each stick and immediately sprinkle blue or silver glitter over it.
- Let dry for 12 minutes, then slide off the rubber band.
- Paint any bare spots with white or light blue acrylic paint and let dry completely.
7. Shaving Cream Marble Paper
Moderate
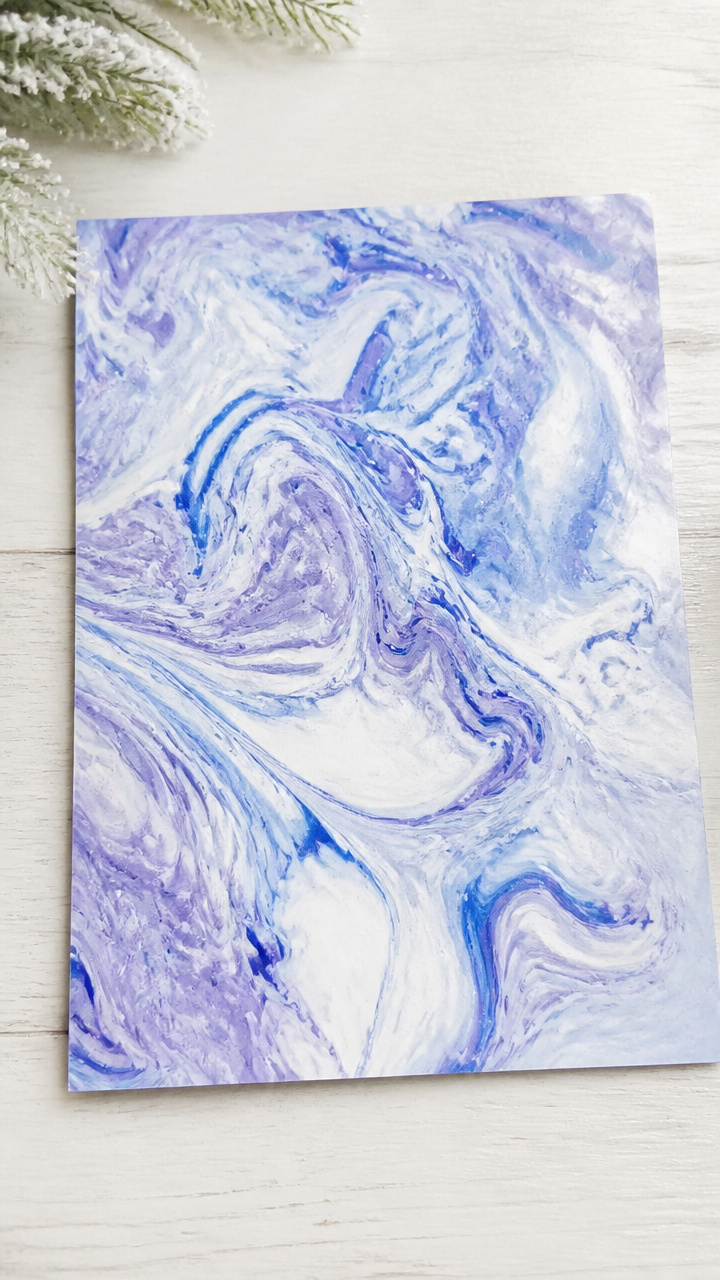
Swirls of colored shaving cream create dreamy, marbled patterns on paper that mimic winter fog and drifting snow. This sensory project is messy but unforgettable.
Materials Needed
- canned shaving cream, 1 can
- A4 white cardstock, 30 sheets
- liquid food coloring (blue, purple, white), 3 bottles
- spoon, 1 per student
- tongue depressor, 1 per student
- tray, 1 per table
- scrap cardboard, 30 pieces
How to Make It
- Squirt shaving cream onto a tray to cover the bottom in a 1/2-inch layer.
- Add drops of blue, purple, and white food coloring onto the cream.
- Use a tongue depressor to swirl the colors into marble patterns.
- Lay a sheet of cardstock face down on the shaving cream, press gently, then lift and place on scrap cardboard to dry for 20 minutes.
8. Button Mitten Collages
Easy
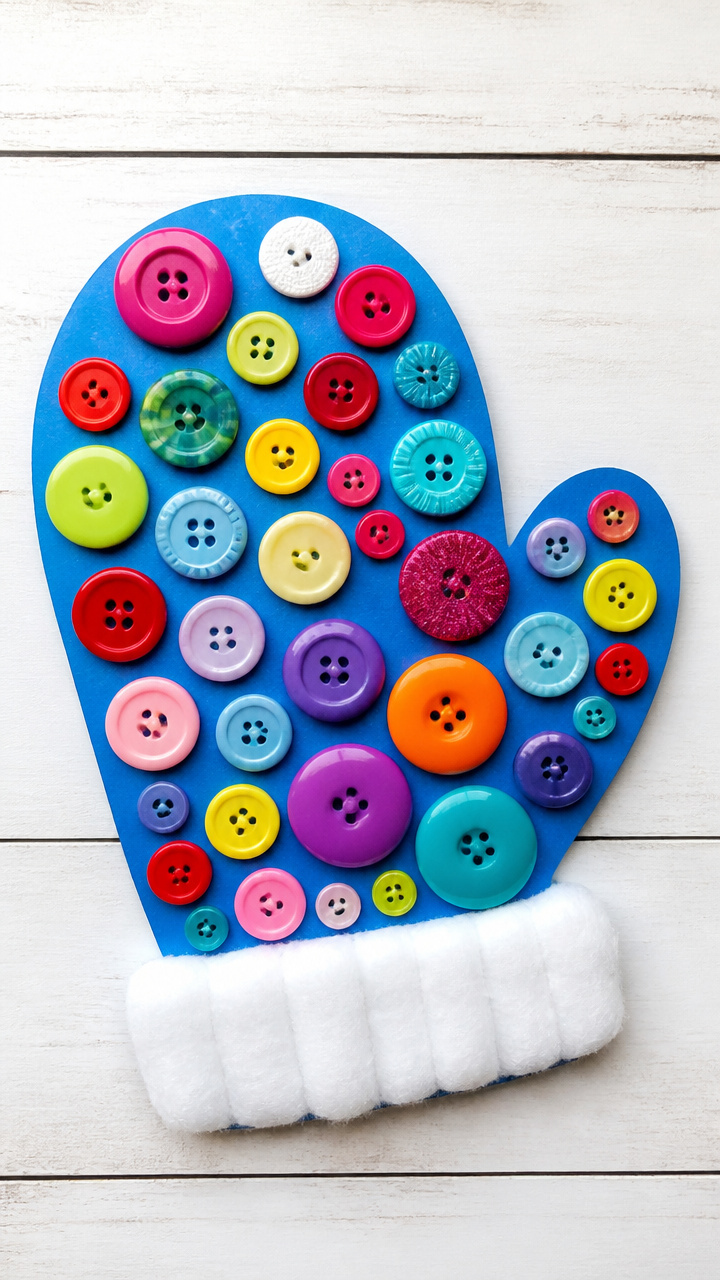
Construction paper mittens fill with real buttons in different sizes and colors to create playful, textured designs. This project doubles as a fine motor workout.
Materials Needed
- blue construction paper, 30 sheets
- assorted buttons, 300
- white school glue, 8 oz
- glue brush, 1 per student
- scissors, 1 per student
- pencil, 1 per student
How to Make It
- Draw a mitten shape on blue construction paper with a pencil and cut it out.
- Use a glue brush to spread a thin layer of white school glue on the mitten surface.
- Press buttons into the glue to fill the shape, mixing sizes and colors.
- Let the collage dry flat for 15 minutes before displaying.
9. Tissue Paper Frost Windows
Easy
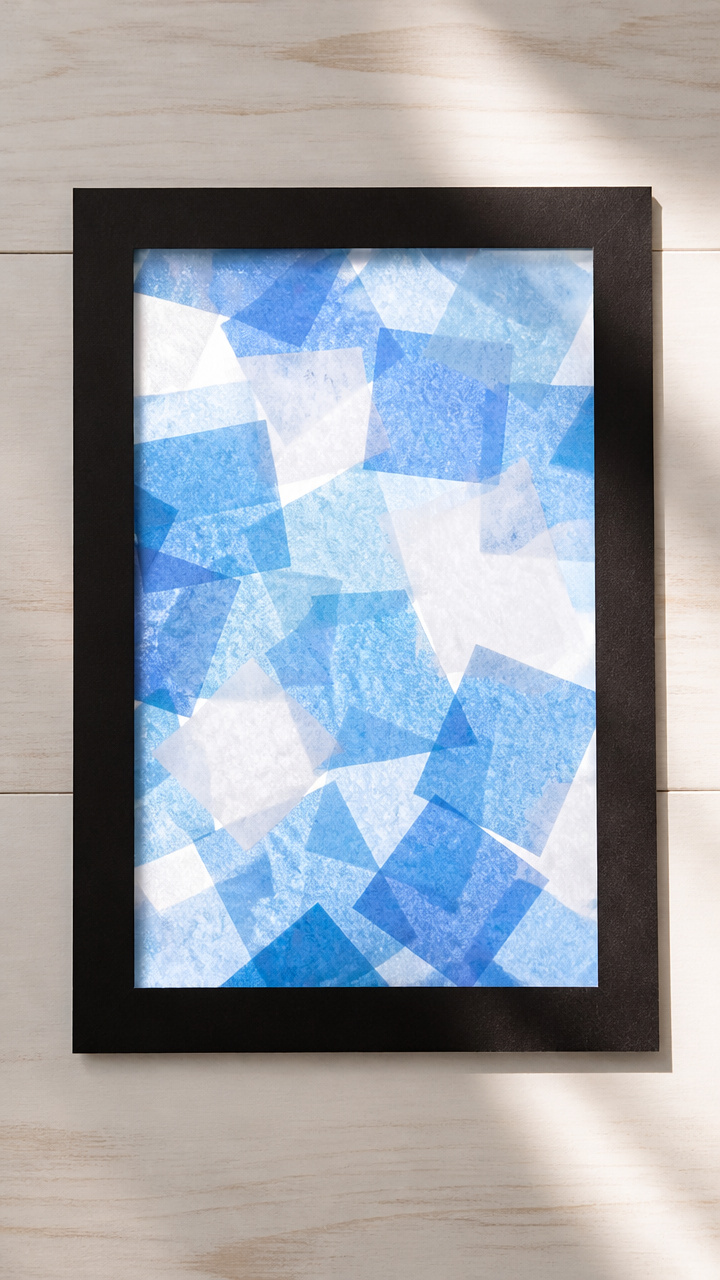
Overlapping squares of blue and white tissue paper form frosted window panes that glow when hung near light. This translucent art teaches color layering.
Materials Needed
- clear contact paper, 18×24 inches, 1 roll
- blue and white tissue paper, 10 sheets each
- scissors, 1 per student
- construction paper frame (black), 30
- plastic ruler, 1 per student
How to Make It
- Cut contact paper into 8×10 inch rectangles and peel off the backing.
- Tear tissue paper into 1-inch squares and layer them on the sticky side of the contact paper.
- Press gently with a ruler to smooth and seal the pieces.
- Trim edges and mount the panel onto a black construction paper frame.
10. Puffy Paint Snow Globes
Moderate
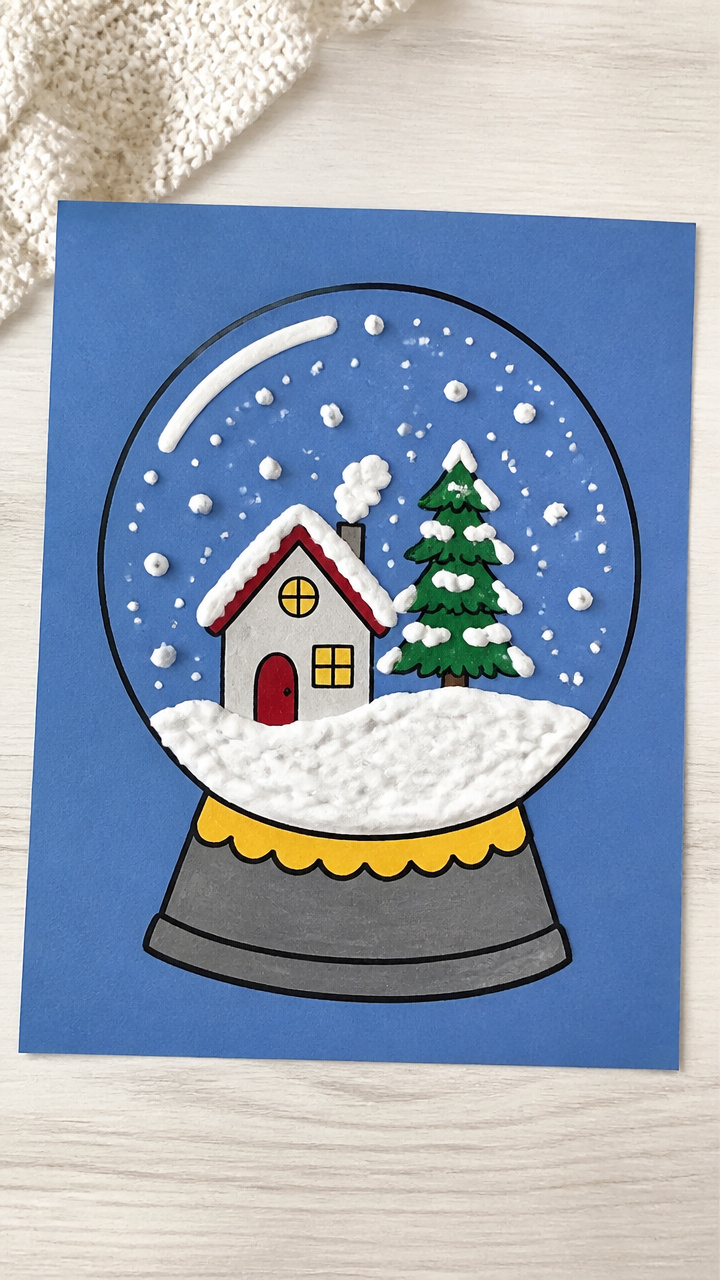
A mixture of glue and shaving cream puffs up into soft, 3D snow inside drawn globes. The result feels like real snow and dries with a light, spongy texture.
Materials Needed
- white school glue, 16 oz
- canned shaving cream, 1 can
- A4 white cardstock, 30 sheets
- paintbrush, 1 per student
- black marker, 1 per student
- mixing bowl, 1 per table
- spoon, 1 per table
How to Make It
- Mix equal parts white school glue and shaving cream in a bowl until smooth and fluffy.
- Draw a snow globe shape with a black marker on cardstock, leaving the dome empty.
- Use a paintbrush to fill the dome with the puffy mixture, building it up slightly in the center.
- Let dry flat for 4 hours or overnight until fully puffed and firm.
11. Q-Tip Snowflake Prints
Easy
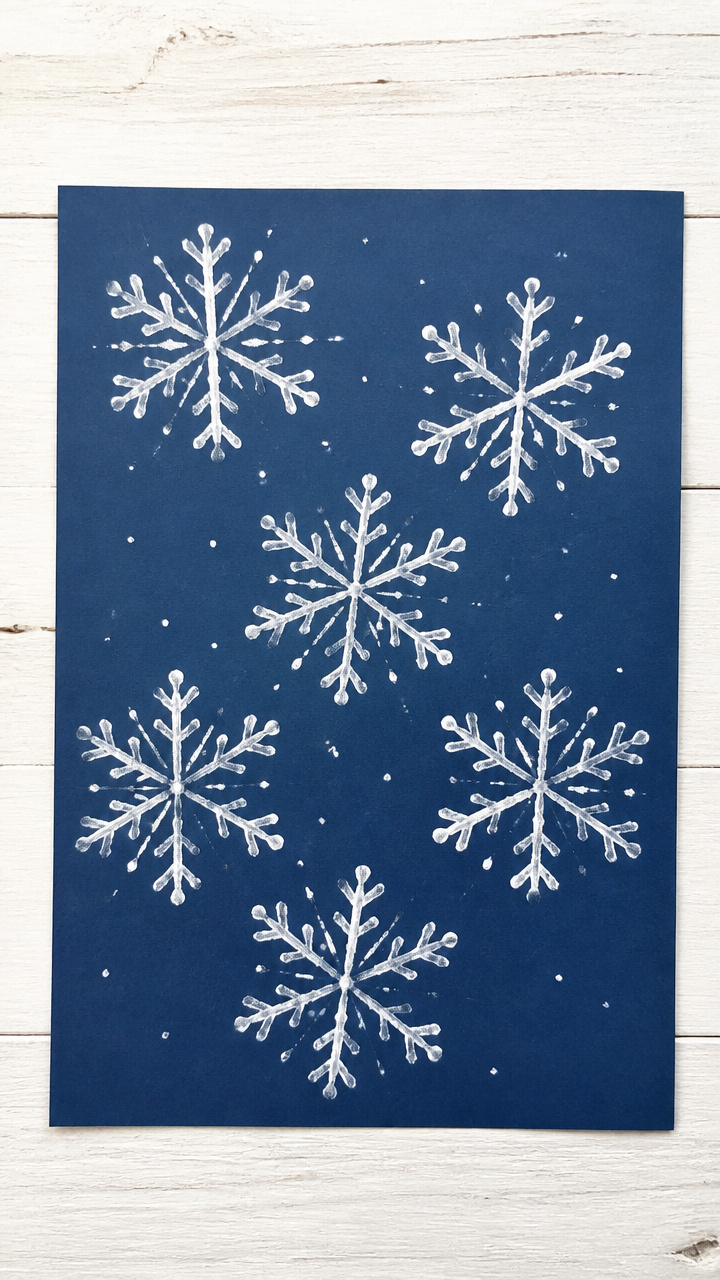
Six Q-Tips dipped in paint form instant snowflakes with crisp, radial symmetry. This quick print method builds pattern awareness and hand-eye coordination.
Materials Needed
- cotton swabs (Q-Tips), 180
- white tempera paint, 8 oz
- A4 dark blue construction paper, 30 sheets
- plastic plate, 1 per student
- paint tray, 1 per table
How to Make It
- Pour white tempera paint onto a plastic plate for dipping.
- Dip one end of six cotton swabs into the paint.
- Arrange the swabs in a star shape on dark blue paper, pressing the painted ends into the center to form a snowflake.
- Let dry for 10 minutes before adding a second layer if desired.
12. Pipe Cleaner Northern Lights
Moderate
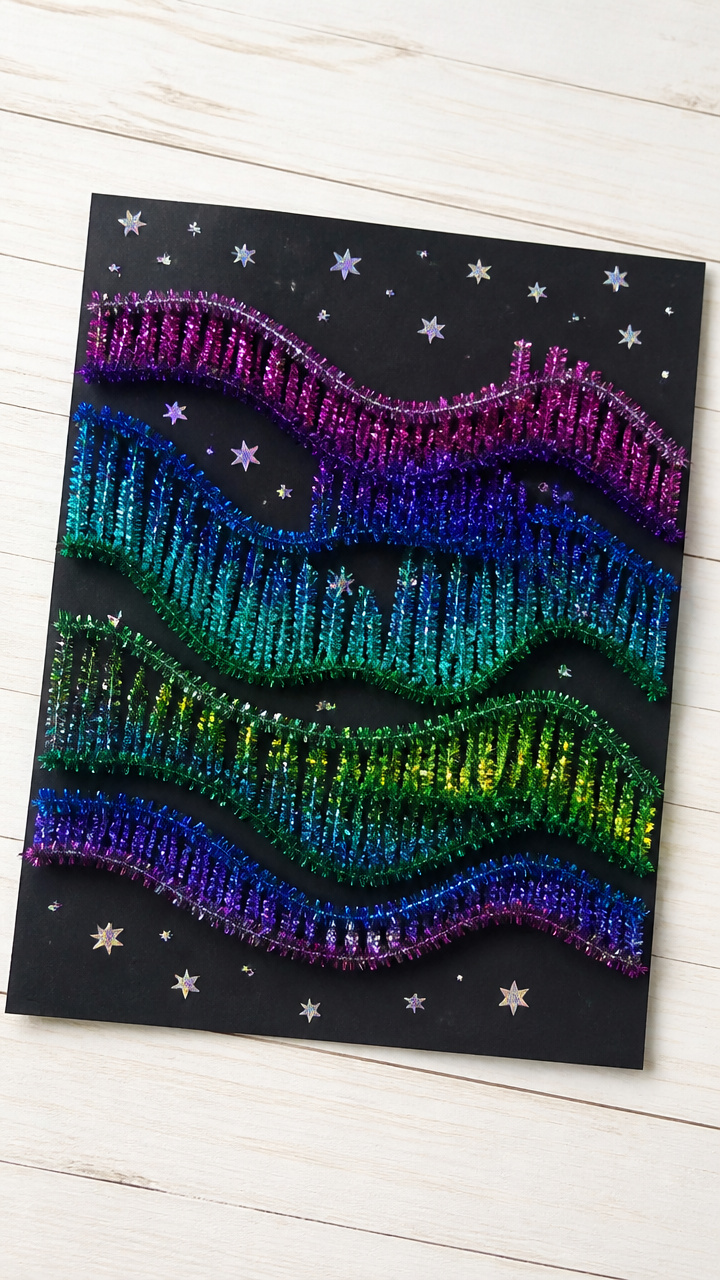
Twisted bands of colored pipe cleaners glow like auroras when layered over black paper with star stickers. This project introduces color gradients and light effects.
Materials Needed
- black cardstock, 9×12 inches, 30 sheets
- assorted colored pipe cleaners, 60 (2 per student)
- star stickers, 30 sheets
- scissors, 1 per student
- glue stick, 1 per student
How to Make It
- Cut each pipe cleaner in half and bend the pieces into wavy horizontal lines.
- Arrange 3–4 colored wavy pieces on black cardstock to overlap like aurora bands.
- Use a glue stick to secure the center of each piece only, leaving the ends raised.
- Add star stickers around and beneath the lights for a night sky effect.
13. Crayon Resist Snowy Owls
Moderate
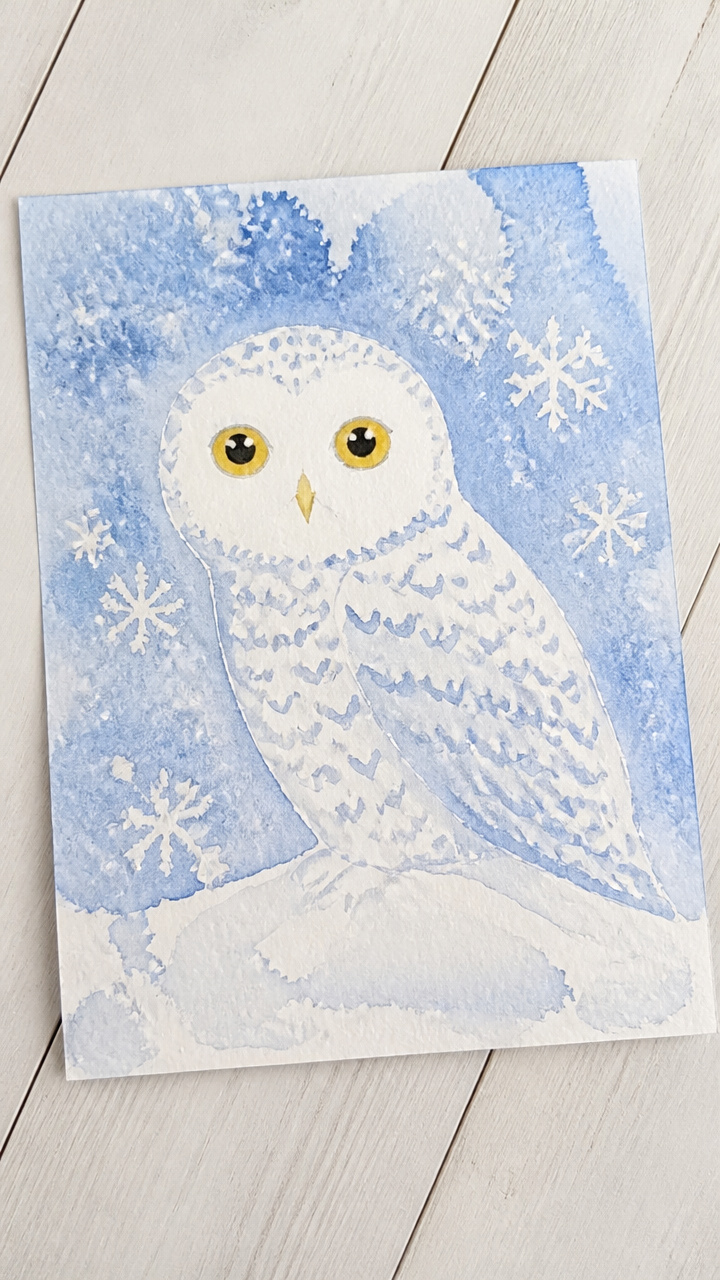
Waxy yellow eyes and beaks stay bright while blue paint washes over them, revealing owls hidden in the snow. This project teaches resist techniques with vivid results.
Materials Needed
- A4 white drawing paper, 30 sheets
- white crayon, 1 per student
- blue liquid watercolor, 16 oz
- pipette, 1 per student
- small bowl, 1 per student
- paper towel, 1 per student
How to Make It
- Use a white crayon to draw a large owl face with wide eyes and a small beak on white paper.
- Mix blue watercolor with a few drops of water in a bowl.
- Use a pipette to drop color over the entire page, watching the waxed areas resist the paint.
- Blot excess with a paper towel and let dry flat for 15 minutes.
14. Pine Branch Stamped Trees
Easy
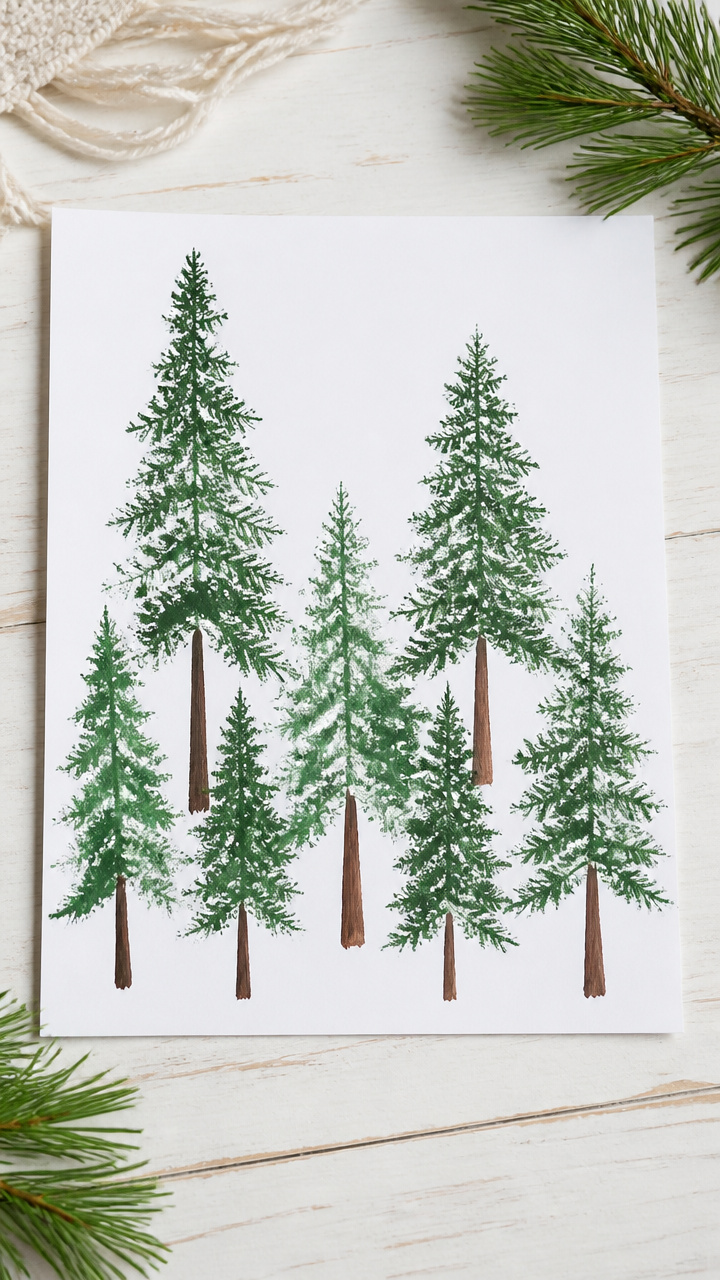
Fresh pine sprigs dipped in paint make realistic evergreen shapes with natural texture. This nature-based stamping creates forest scenes in minutes.
Materials Needed
- fresh pine sprigs, 30
- green tempera paint, 16 oz
- A4 white paper, 30 sheets
- paint tray, 1 per table
- paper plate, 1 per student
- brown marker, 1 per student
How to Make It
- Pour green tempera paint into a paint tray.
- Dip the bottom end of a pine sprig into the paint and press it onto white paper to form a tree shape.
- Use a brown marker to draw a trunk beneath each stamped tree.
- Let dry for 10 minutes before adding snow with a white crayon.
15. Wool Ball Snow Animals
Moderate
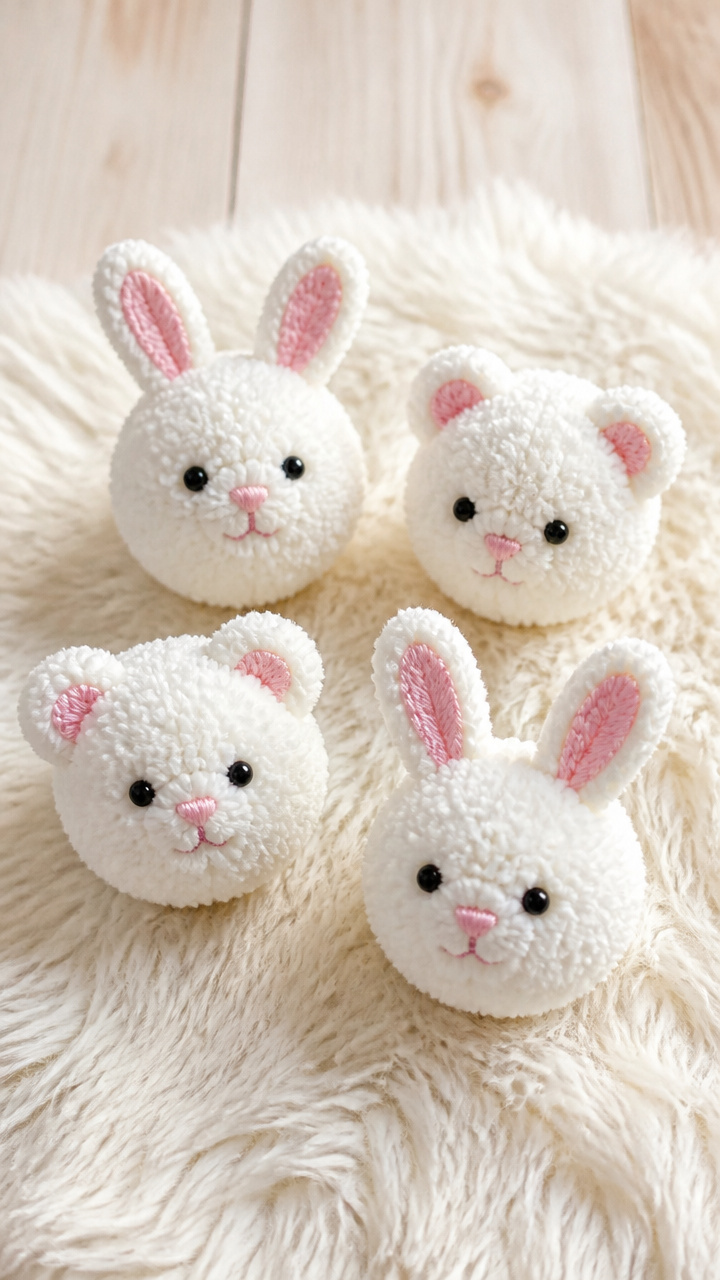
Tiny balls of wool felt roll into snowy rabbits and bears with simple facial features. These soft sculptures fit in small hands and inspire imaginative play.
Materials Needed
- white wool roving, 4 oz
- felting needle, 1 per student
- foam pad, 1 per student
- small black beads, 60
- pink embroidery floss, 1 spool
- tweezers, 1 per student
How to Make It
- Pull a small piece of wool roving and roll it into a loose ball.
- Place the ball on a foam pad and repeatedly poke it with a felting needle until firm and round.
- Use tweezers to thread a black bead onto a short length of floss for eyes and nose.
- Poke the floss ends into the wool ball to attach the features.
16. Melted Crayon Winter Hills
Advanced
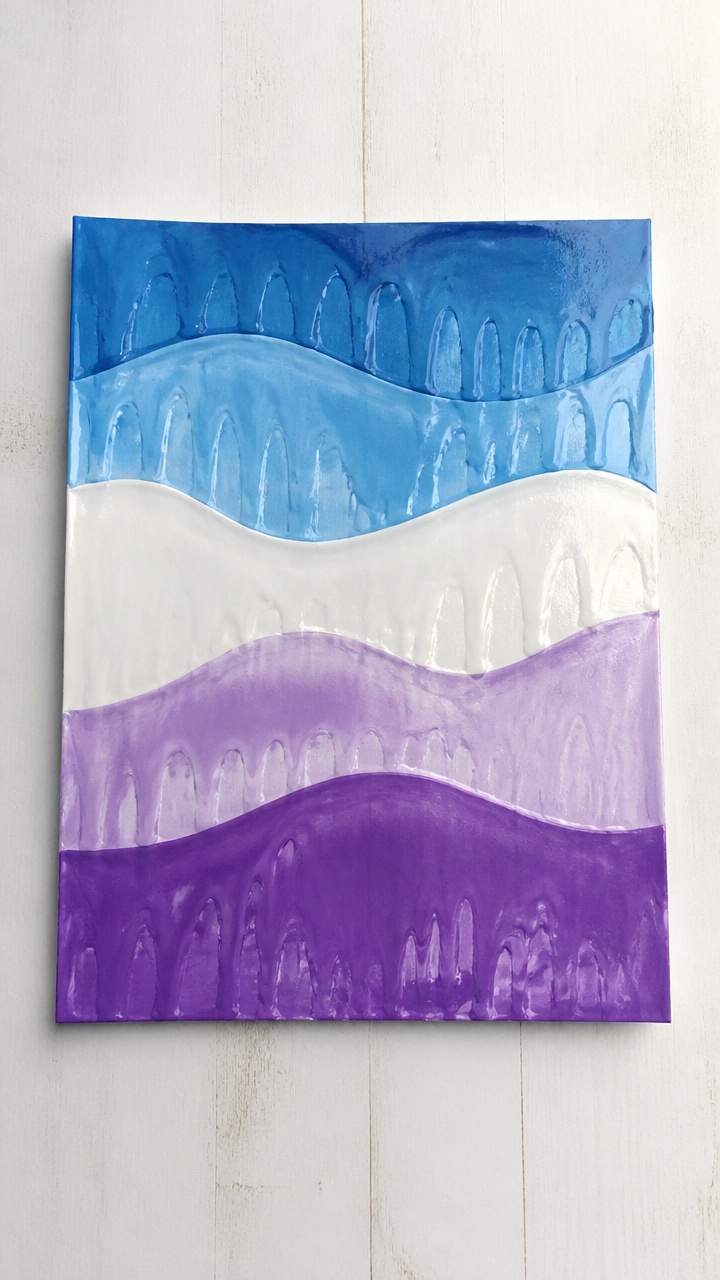
Shaved crayon bits melt into flowing color bands that mimic snowy slopes under a warm iron. This heat-based technique creates bold, waxy landscapes.
Materials Needed
- white paper, 9×12 inches, 30 sheets
- blue, white, and purple crayons, 30 each
- crayon sharpener, 1 per table
- iron, 1 per table
- parchment paper, 30 sheets
- clothespin, 1 per student
How to Make It
- Use a crayon sharpener to collect shavings of blue, white, and purple onto a paper.
- Sprinkle the shavings across the bottom third of white paper to form hill shapes.
- Cover the paper with a sheet of parchment paper.
- Ask an adult to use a warm iron over the parchment for 20 seconds until the wax melts and spreads.
17. Sticker Resist Ice Patterns
Easy
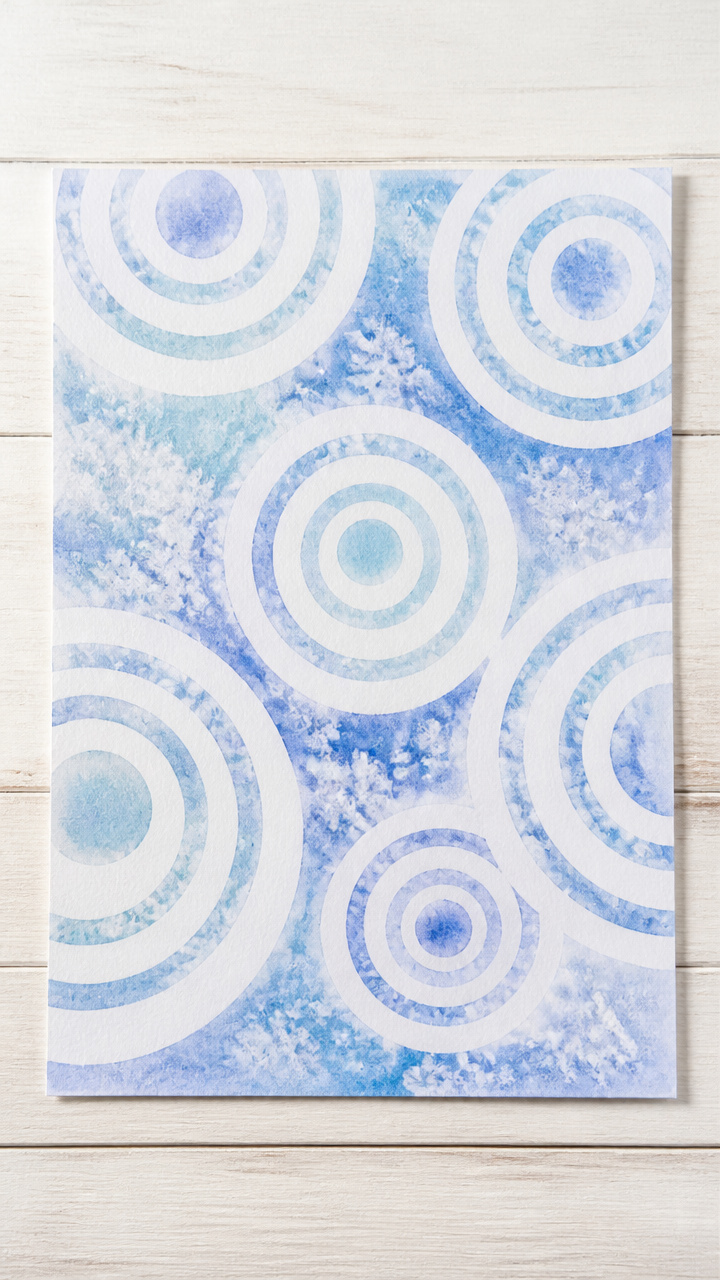
Circle stickers pull away to reveal perfect frost rings on painted backgrounds. This simple resist method creates crisp, repeating designs with surprise results.
Materials Needed
- A4 white drawing paper, 30 sheets
- round stickers (various sizes), 120
- blue liquid watercolor, 16 oz
- pipette, 1 per student
- bowl, 1 per student
- plastic card, 1 per student
How to Make It
- Place 5–8 round stickers on white paper in a scattered pattern.
- Mix blue watercolor with water in a bowl and use a pipette to cover the paper.
- Drag a plastic card across the surface to spread the paint evenly.
- Peel off the stickers after 2 minutes to reveal white frost rings.
18. Feather-Dipped Snow Geese
Easy
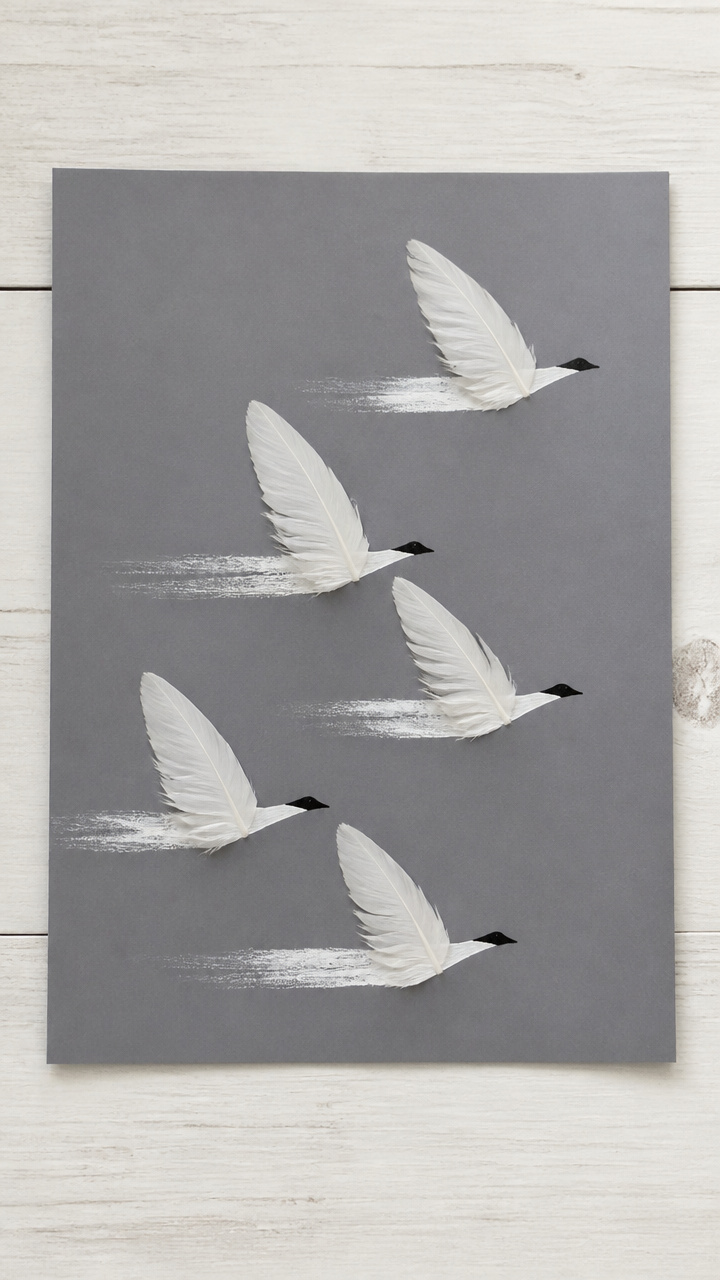
Turkey feathers dipped in white paint glide across paper to form flying geese in V formation. The natural quill shape makes elegant wing strokes.
Materials Needed
- natural turkey feathers, 30
- white tempera paint, 8 oz
- A4 gray construction paper, 30 sheets
- paint tray, 1 per table
- paper plate, 1 per student
How to Make It
- Pour white tempera paint onto a paper plate.
- Dip the tip of a feather into the paint and place it on gray paper at an angle.
- Drag the feather smoothly across the paper to form a long, tapered wing shape.
- Repeat to make a flock in V formation, letting dry for 10 minutes.
19. Clay Ice Lanterns
Advanced
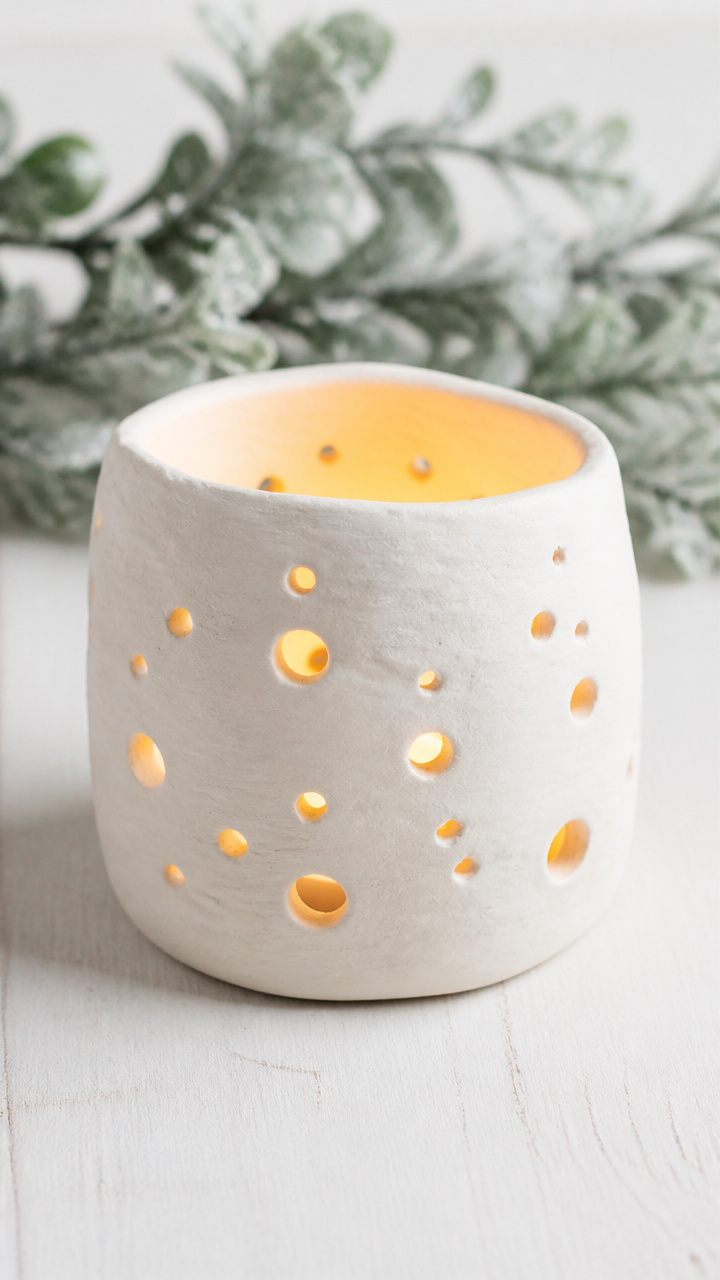
Pinched air-dry clay forms icy lanterns with holes for battery tea lights. These sculptural pieces glow warmly when lit from within.
Materials Needed
- white air-dry clay, 5 lbs
- plastic knife, 1 per student
- toothpick, 1 per student
- rolling pin, 1 per table
- battery-operated tea light, 30
- wax paper, 30 sheets
How to Make It
- Roll a clay ball and flatten it into a 1/4-inch thick circle on wax paper.
- Use fingers to pinch up the edges into a bowl shape.
- Press a toothpick through the sides in a pattern to make 'ice holes'.
- Let dry for 24 hours, then place a tea light inside.
20. Glue-Resist Icicles
Moderate
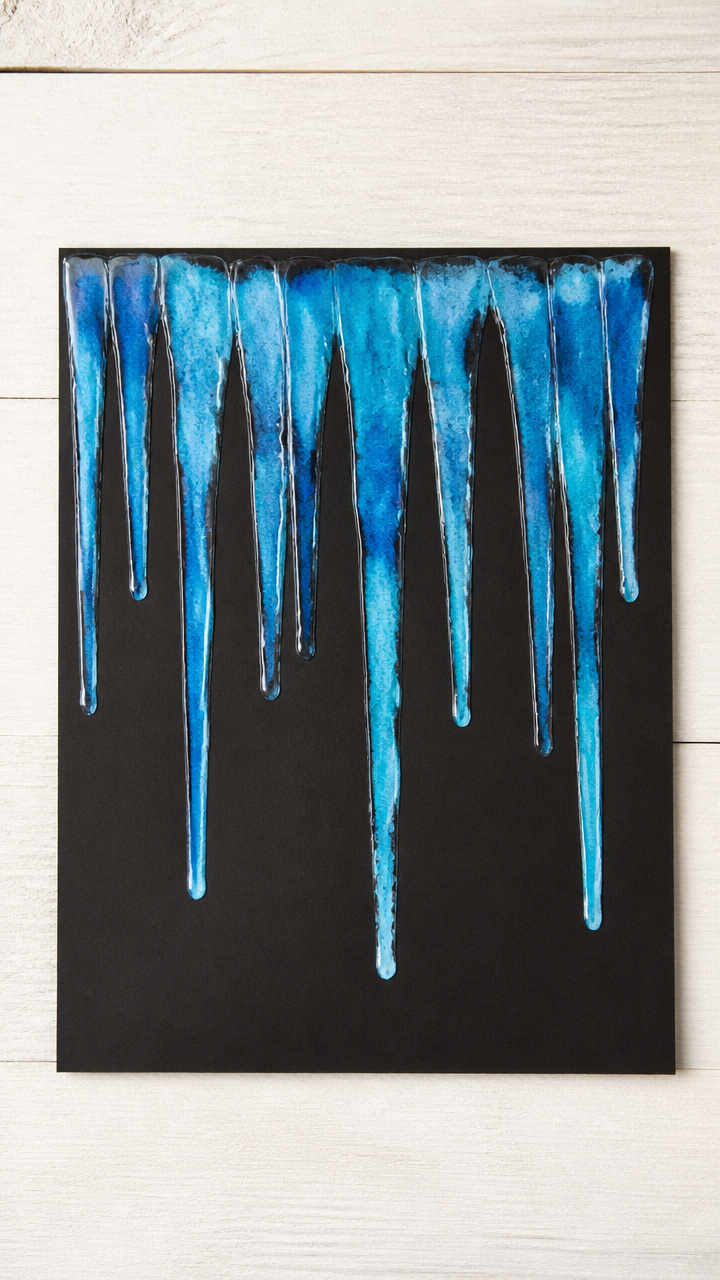
Lines of glue dry clear and resist blue paint, forming shiny, dripping icicles on dark paper. This method teaches planning and delayed results.
Materials Needed
- A4 black cardstock, 30 sheets
- white school glue, 8 oz
- paintbrush, 1 per student
- blue liquid watercolor, 16 oz
- pipette, 1 per student
- paper plate, 1 per student
How to Make It
- Use a paintbrush to draw long, wavy vertical lines with white school glue on black cardstock.
- Let the glue dry completely for 30 minutes until clear and slightly raised.
- Mix blue watercolor with a few drops of water on a paper plate.
- Use a pipette to drip color over the page, watching it bead up and flow around the glue lines.
Each of these projects brings a little winter magic into your classroom with materials you can gather and steps every child can follow. Pick one that fits your day and watch creativity take shape.