16 Salt Dough Winter Crafts You Can Bake and Paint

The smell of warm salt dough baking in the oven carries the quiet magic of winter afternoons. Shapes take form under small hands, then glow with paint and care, turning into keepsakes that last for years.
These handmade ornaments, figures, and decorations bring a soft handmade charm to mantels, trees, and gift exchanges. Each one holds the imprint of time spent creating, and the joy of something made from scratch.
1. Mini Pinecone Ornaments
Easy
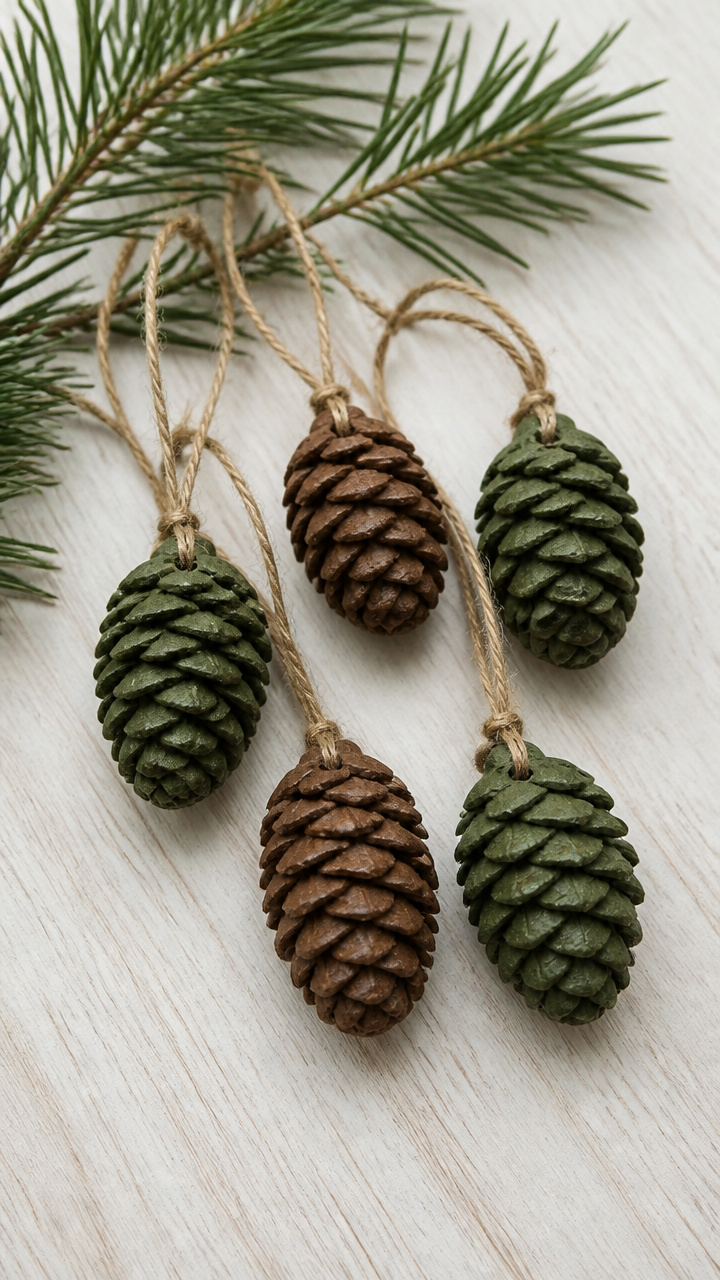
Tiny, textured pinecones you can hang on tree branches or garlands, each with realistic ridges and a rustic painted finish.
Materials Needed
- 1 cup all-purpose flour
- 1/2 cup table salt
- 1/2 cup warm water
- Green acrylic paint
- Brown acrylic paint
- Clear matte sealer spray
- Baking sheet
- Parchment paper
- Pencil
- Twine, 12 inches
How to Make It
- Mix flour, salt, and warm water in a bowl until a smooth dough forms, kneading briefly on a floured surface.
- Roll small pieces of dough into tapered cones, then use the pencil tip to press spiral lines from base to tip to mimic scales.
- Press a toothpick into the top back of each cone to make a hanging hole, then place on a parchment-lined baking sheet.
- Bake at 200°F for 3 hours, turning once halfway through, until fully hardened and dry.
- Paint each pinecone with brown base coat, then dry brush green over raised ridges for a frosted look.
- Spray lightly with matte sealer and thread twine through the hole to hang.
2. Snowflake Press Cookies
Easy
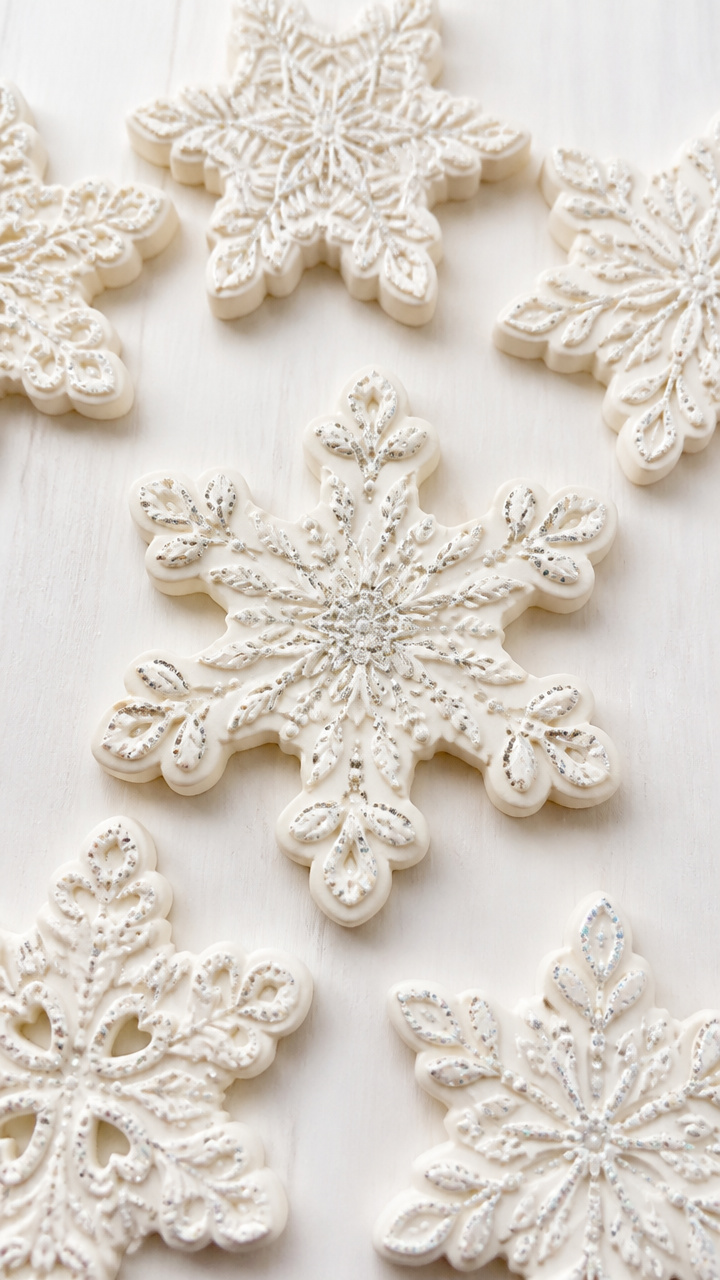
Delicate snowflakes made using real snowflake-shaped cookie cutters, capturing intricate lace-like patterns in baked dough.
Materials Needed
- 1 cup all-purpose flour
- 1/2 cup table salt
- 1/2 cup warm water
- White acrylic paint
- Glitter glue, iridescent
- Fine silver glitter
- Baking sheet
- Parchment paper
- Snowflake cookie cutters, 3 different sizes
- Straw
- Ribbon, 10 inches per ornament
How to Make It
- Combine flour, salt, and warm water in a bowl, mixing until a pliable dough forms.
- Roll dough to 1/4-inch thickness on a floured surface, then press in snowflake cutters to cut shapes.
- Use a straw to poke a hole near the top edge of each snowflake for hanging.
- Place on a parchment-lined baking sheet and bake at 200°F for 2.5 hours, flipping once, until hard and dry.
- Paint each snowflake with white acrylic paint and let dry completely.
- Apply glitter glue along the edges and sprinkle silver glitter before it dries, then thread ribbon through the hole.
3. Mitten Handprint Keepsakes
Easy
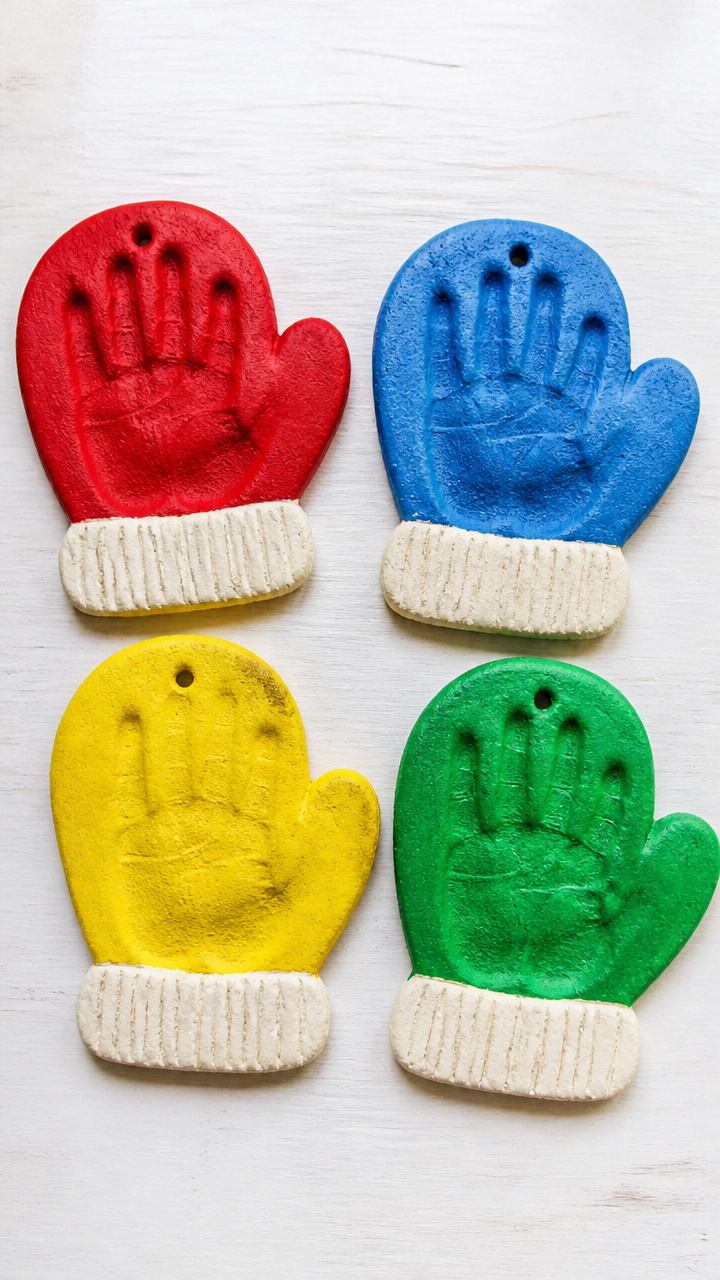
Charming mitten shapes stamped with a child’s actual handprint, turned into colorful painted keepsakes for grandparents.
Materials Needed
- 1 cup all-purpose flour
- 1/2 cup table salt
- 1/2 cup warm water
- Acrylic paint in assorted colors (red, blue, yellow, green)
- Paintbrush set, small
- Baking sheet
- Parchment paper
- Pencil
- Ribbon, 8 inches per mitten
How to Make It
- Mix flour, salt, and warm water until a smooth dough forms, then roll to 1/3-inch thickness.
- Draw a mitten shape on the dough using a pencil and cut it out with a knife.
- Press a child’s hand gently into the center of each mitten to leave a print, then use a straw to poke a hole at the top.
- Place on a parchment-lined baking sheet and bake at 200°F for 3 hours, turning once, until hard.
- Paint the mitten body in bright colors and add contrasting cuffs or polka dots with small brushes.
- Thread ribbon through the hole after paint dries completely.
4. Frosted Evergreen Trees
Moderate
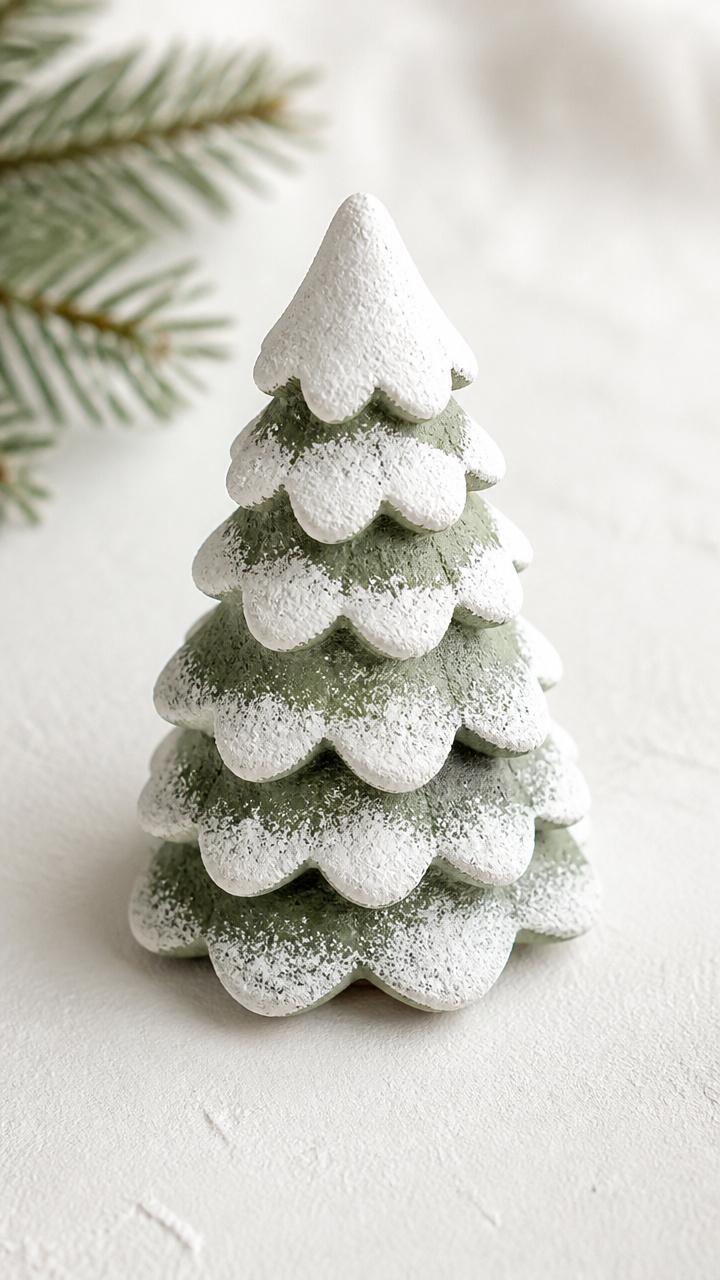
Layered salt dough trees with scalloped edges that mimic snow-laden branches, painted in soft white and sage green.
Materials Needed
- 1.5 cups all-purpose flour
- 3/4 cup table salt
- 3/4 cup warm water
- Sage green acrylic paint
- White acrylic paint
- Fine paintbrush
- Baking sheet
- Parchment paper
- Circle cookie cutters, 2-inch, 1.5-inch, 1-inch
- Doweling rod, 1/4 inch diameter
- Glue gun
- Twine, 6 inches
How to Make It
- Mix flour, salt, and warm water into a firm dough, then divide into three portions for rolling at different thicknesses.
- Roll one portion to 1/8 inch and cut one 2-inch circle, another to 1/8 inch for a 1.5-inch circle, and the third for a 1-inch circle.
- Use the edge of a fork to press scalloped lines around each circle to resemble tree layers, then poke a hole in the center of each with the dowel.
- Line up centers on the dowel and gently press together, then remove dowel and place on parchment-lined baking sheet.
- Bake at 200°F for 3.5 hours, flipping once, until completely dry and hardened.
- Paint bottom layer sage green, middle layer lighter green, top layer white, and dry brush white on lower edges for frost.
- Glue twine loop to the back top with hot glue after paint dries.
5. Reindeer Face Ornaments
Moderate
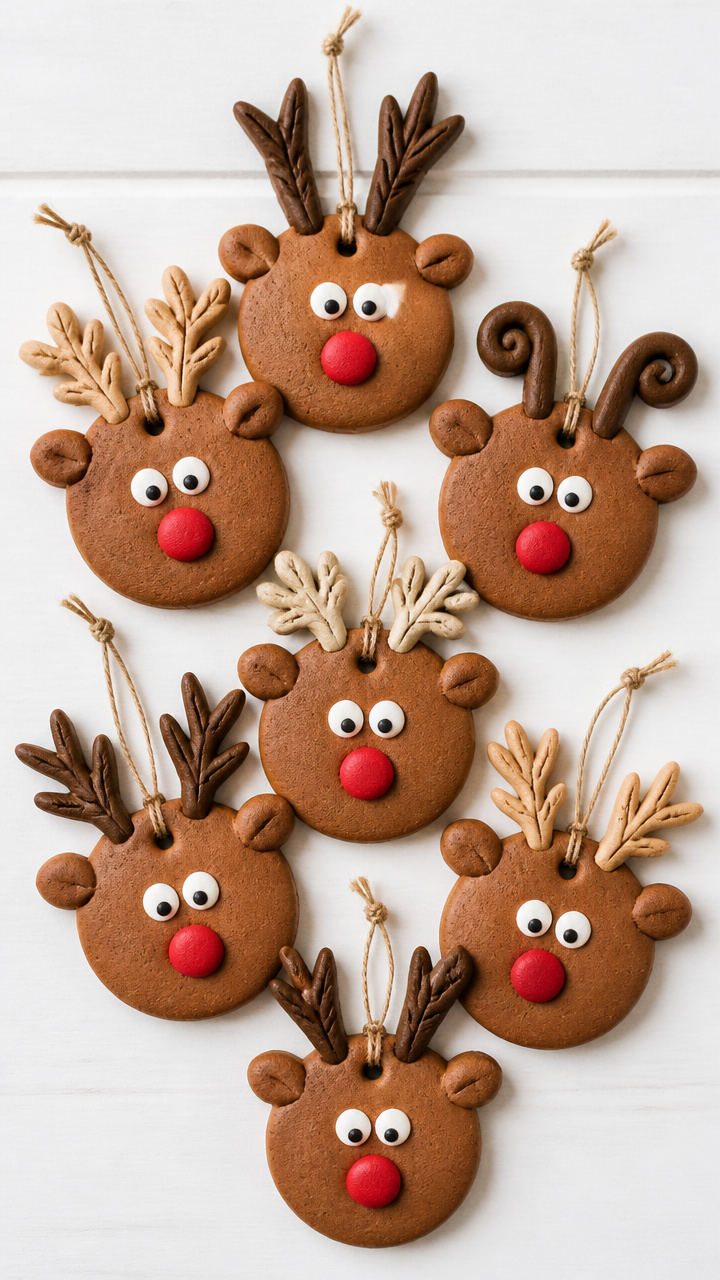
Round ornaments shaped like reindeer faces, with hand-modeled antlers and painted details that bring each one to life.
Materials Needed
- 1 cup all-purpose flour
- 1/2 cup table salt
- 1/2 cup warm water
- Brown acrylic paint
- Red acrylic paint
- White acrylic paint
- Black acrylic paint
- Small paintbrush
- Baking sheet
- Parchment paper
- Circle cutter, 3-inch
- Toothpicks
- Googly eyes, 6mm, 2 per ornament
- Glue gun
- Ribbon, 7 inches
How to Make It
- Mix flour, salt, and warm water into a smooth dough, then roll to 1/4 inch thick and cut 3-inch circles.
- Shape two small sausage rolls for antlers and attach to the top back of each circle using a dab of water as glue.
- Press a toothpick into each side near the top for hanging holes, then place on a parchment-lined baking sheet.
- Bake at 200°F for 3 hours, flipping once, until hard and dry.
- Paint faces brown, add red nose with red paint, white eye rings, and black pupils with fine brush.
- Glue on googly eyes and attach ribbon through holes with hot glue after paint dries.
6. Snowman Stack Ornaments
Moderate

Three-part snowmen built from stacked salt dough balls, painted with carrot noses and scarf details for a cheerful look.
Materials Needed
- 1.5 cups all-purpose flour
- 3/4 cup table salt
- 3/4 cup warm water
- White acrylic paint
- Orange acrylic paint
- Black acrylic paint
- Red acrylic paint
- Paintbrush set
- Baking sheet
- Parchment paper
- Doweling rod, 1/8 inch
- Glue gun
- Twine, 8 inches
- Small black buttons, 3 per snowman
How to Make It
- Mix flour, salt, and warm water into a firm dough, then roll into three balls per snowman: large, medium, small.
- Stack balls on a parchment-lined baking sheet, pressing gently to adhere, and smooth seams with damp finger.
- Use a toothpick to mark eyes and mouth, and the dowel to make a hole through the top ball for hanging.
- Bake at 200°F for 4 hours, turning once, until completely dry and hardened.
- Paint entire snowman white, then add orange carrot nose, black eyes and mouth, and red scarf with paint.
- Glue on buttons and attach twine loop with hot glue after paint dries.
7. Icicle Pendants
Easy
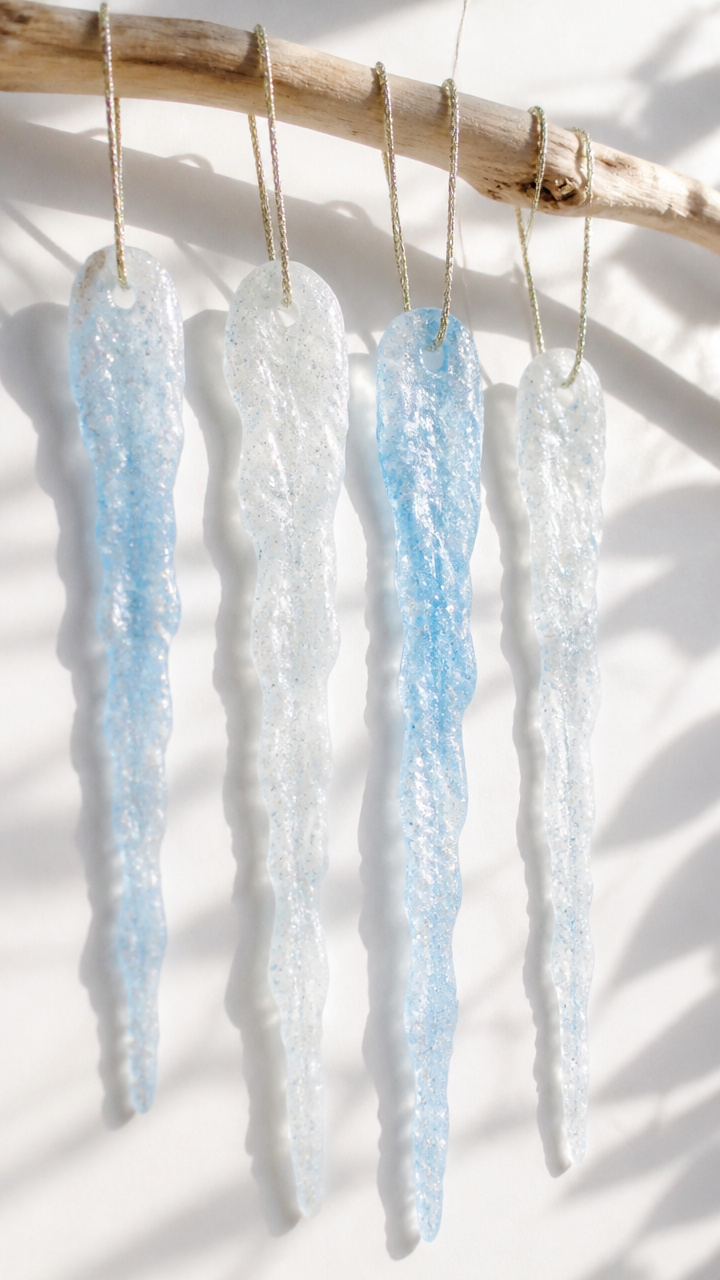
Long, slender salt dough icicles with dripped paint effects and shimmer, designed to hang in windows or on trees.
Materials Needed
- 1 cup all-purpose flour
- 1/2 cup table salt
- 1/2 cup warm water
- White acrylic paint
- Light blue acrylic paint
- Glitter glue, clear
- Fine silver glitter
- Baking sheet
- Parchment paper
- Knife
- Twine, 5 inches per icicle
How to Make It
- Mix flour, salt, and warm water into a smooth dough, then roll into long, thin cones about 6 inches long and pointed at one end.
- Use a knife to add light texture lines along the length to mimic ice ridges, then poke a hole near the top end.
- Place on a parchment-lined baking sheet and bake at 200°F for 2.5 hours, flipping once, until dry and hard.
- Paint with white base, then drip light blue paint down the sides with a brush for a melting effect.
- While paint is wet, apply glitter glue and sprinkle silver glitter before it dries.
- Thread twine through the hole after drying completely.
8. Winter Bird Feeder Tags
Moderate
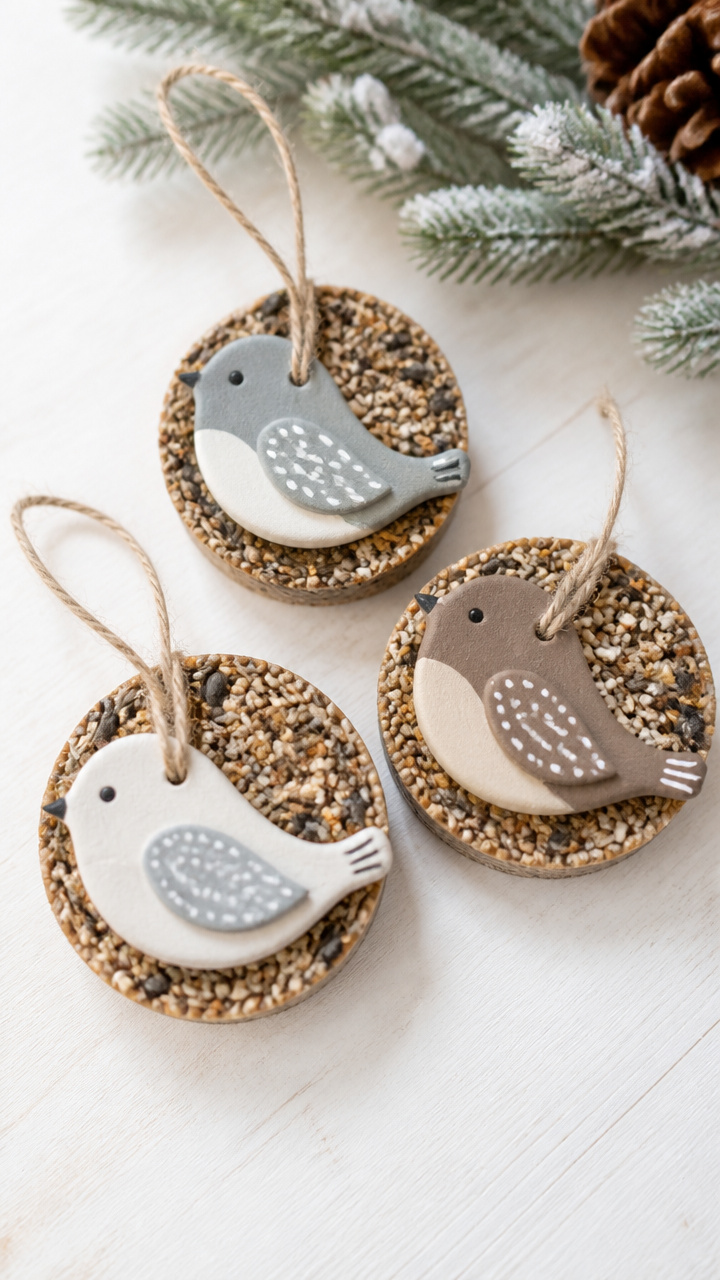
Flat salt dough tags shaped like birds, painted with natural tones and tied to homemade seed cakes for outdoor gifts.
Materials Needed
- 1 cup all-purpose flour
- 1/2 cup table salt
- 1/2 cup warm water
- Brown acrylic paint
- Gray acrylic paint
- White acrylic paint
- Black acrylic paint
- Bird-shaped cookie cutter
- Baking sheet
- Parchment paper
- Straw
- Twine, 9 inches
- Paintbrush set
How to Make It
- Mix flour, salt, and warm water into a pliable dough, then roll to 1/4 inch thick and cut out bird shapes.
- Use a straw to poke a hole near the top of each bird for hanging, then place on a parchment-lined baking sheet.
- Bake at 200°F for 3 hours, flipping once, until hard and dry.
- Paint bodies brown or gray, add white bellies, black wings, and fine facial details with small brushes.
- Let paint dry completely, then thread twine through the hole to attach to seed cakes.
9. Star of Bethlehem Ornaments
Easy
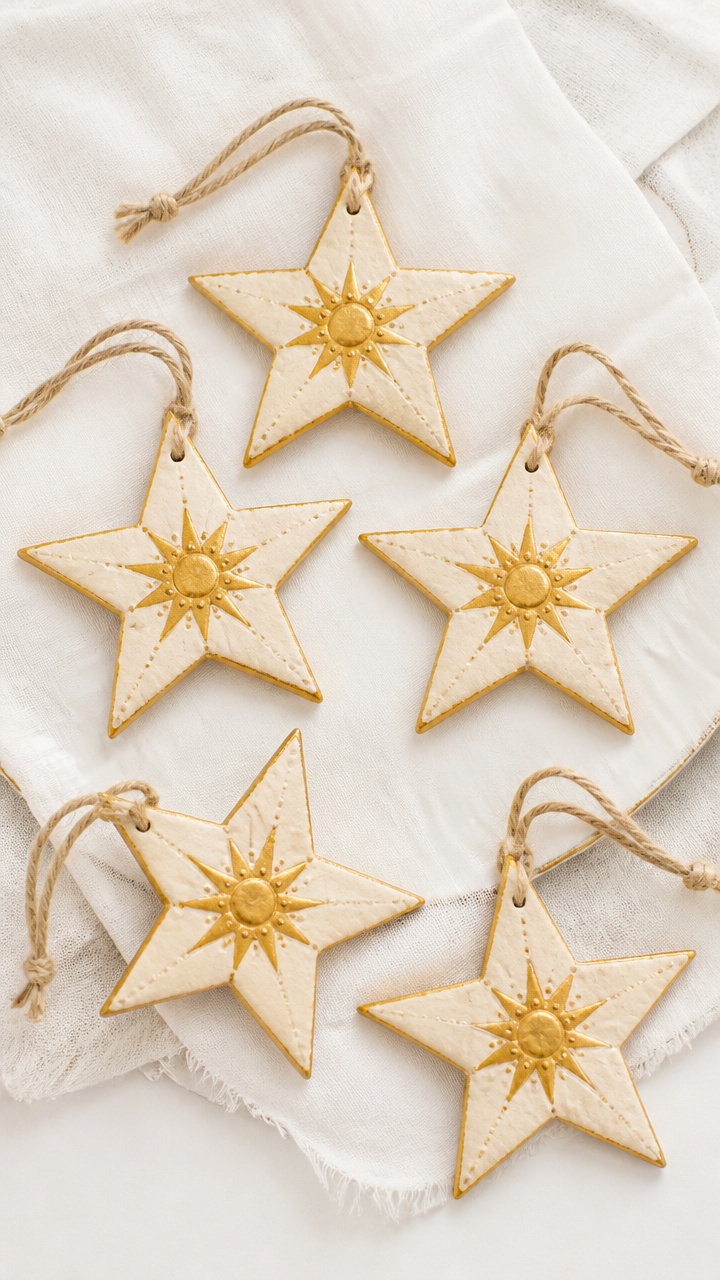
Five-pointed stars with a small circle in the center, symbolizing the Christmas star, painted in gold and cream.
Materials Needed
- 1 cup all-purpose flour
- 1/2 cup table salt
- 1/2 cup warm water
- Gold acrylic paint
- Cream acrylic paint
- Fine paintbrush
- Star cookie cutter, 3-inch
- Baking sheet
- Parchment paper
- Straw
- Ribbon, 7 inches
How to Make It
- Mix flour, salt, and warm water into a smooth dough, then roll to 1/4 inch thick and cut out stars.
- Use a straw to poke a hole near one tip for hanging, then place on a parchment-lined baking sheet.
- Bake at 200°F for 3 hours, flipping once, until fully hardened.
- Paint stars gold, then dry brush cream paint lightly over edges for an aged glow.
- Thread ribbon through the hole after paint dries completely.
10. Snowy Cabin Scenes
Advanced
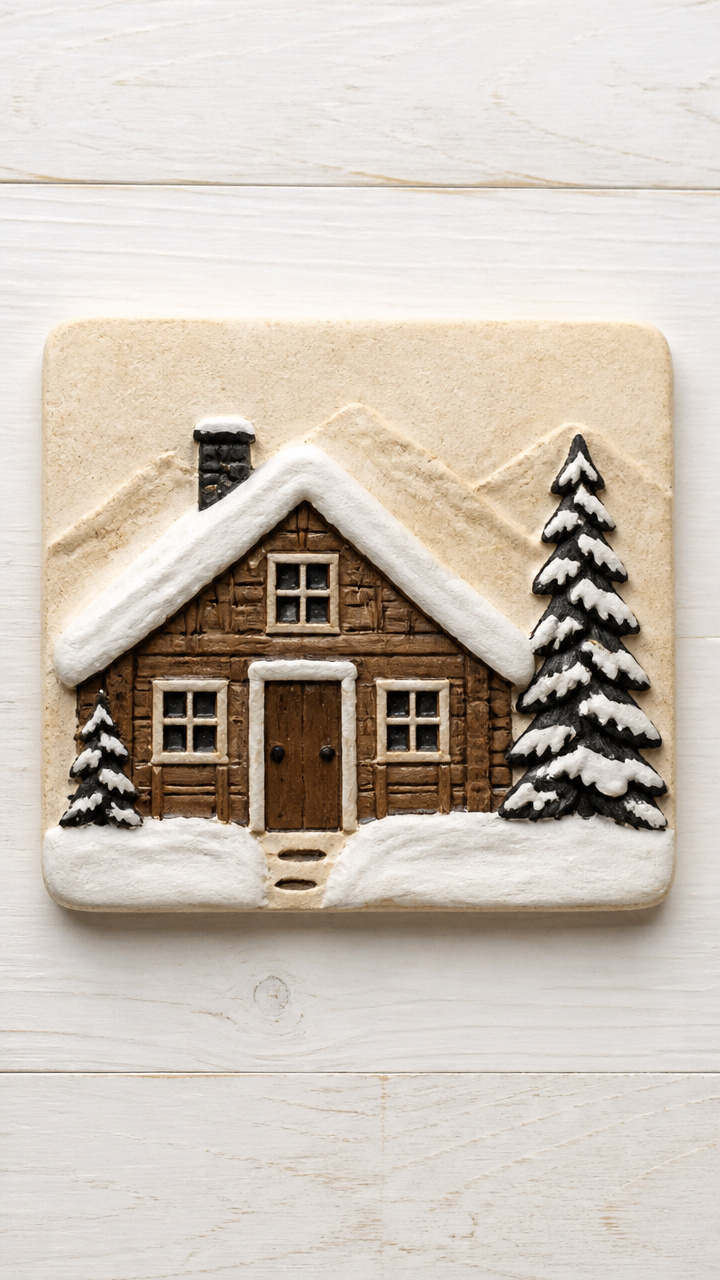
Rectangular salt dough plaques with carved window and door details, painted like cozy winter cabins with snow-covered roofs.
Materials Needed
- 1.5 cups all-purpose flour
- 3/4 cup table salt
- 3/4 cup warm water
- Brown acrylic paint
- White acrylic paint
- Black acrylic paint
- Paintbrush set
- Baking sheet
- Parchment paper
- Popsicle stick
- Craft knife
- Ruler
- Pencil
- Clear gloss sealer
How to Make It
- Mix flour, salt, and warm water into a firm dough, then roll into a 4×3 inch rectangle about 1/3 inch thick.
- Use a pencil and ruler to sketch a cabin shape with peaked roof, door, and two windows, then carve outlines with a craft knife.
- Press popsicle stick into the top back edge to make a hanging loop, then place on a parchment-lined baking sheet.
- Bake at 200°F for 4 hours, turning once, until completely dry and hard.
- Paint walls brown, roof white, windows with black panes, and add snow drifts with white paint.
- Apply gloss sealer to roof and windows to mimic ice after paint dries.
11. Polar Bear Silhouettes
Moderate
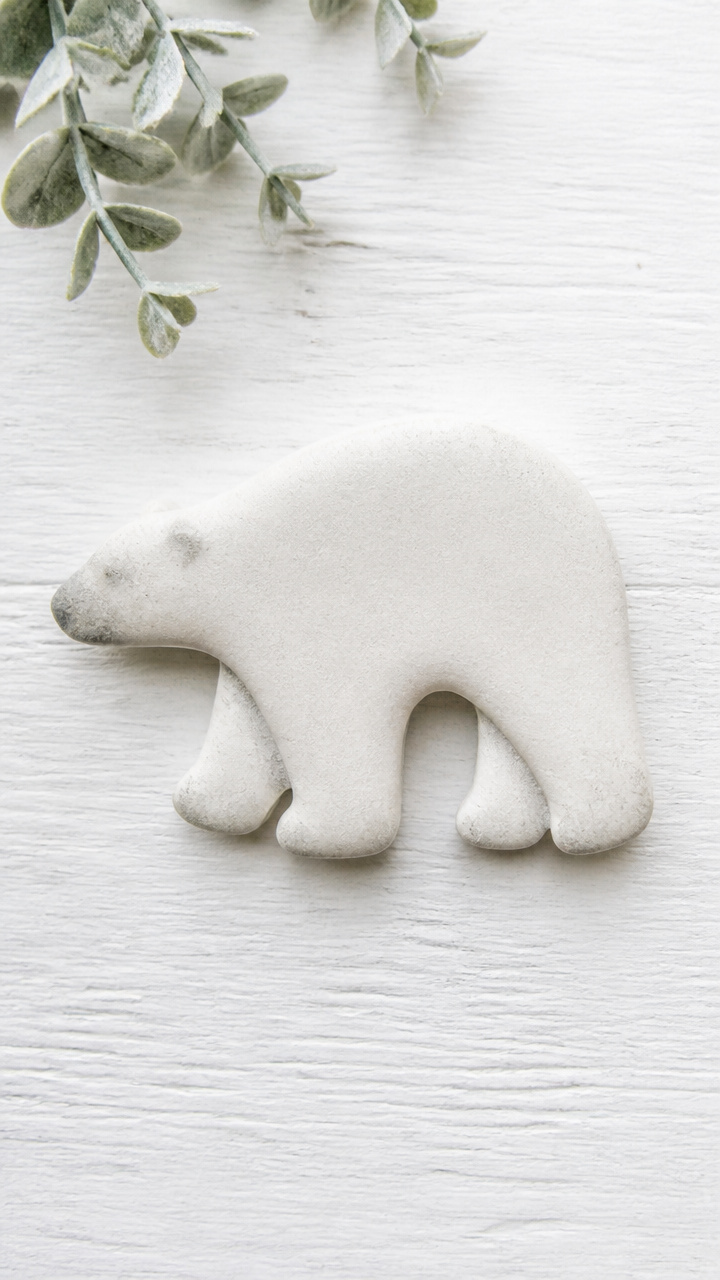
Simple bear outlines with smooth curves, painted white with subtle gray shading to mimic fur under winter light.
Materials Needed
- 1 cup all-purpose flour
- 1/2 cup table salt
- 1/2 cup warm water
- White acrylic paint
- Light gray acrylic paint
- Small paintbrush
- Bear silhouette stencil
- Baking sheet
- Parchment paper
- Pencil
- Straw
- Twine, 6 inches
How to Make It
- Mix flour, salt, and warm water into a smooth dough, then roll to 1/4 inch thick.
- Trace bear silhouette onto dough with pencil and cut out with a knife, then poke a hole near the top with a straw.
- Place on a parchment-lined baking sheet and bake at 200°F for 3 hours, flipping once, until hard.
- Paint entire bear white, then dry brush light gray along one side for shadow and depth.
- Let dry completely, then thread twine through the hole for hanging.
12. Candy Cane Swirls
Moderate

Twisted salt dough pieces shaped like candy canes, with red and white paint swirls that mimic real peppermints.
Materials Needed
- 1 cup all-purpose flour
- 1/2 cup table salt
- 1/2 cup warm water
- White acrylic paint
- Red acrylic paint
- Paintbrush
- Baking sheet
- Parchment paper
- Pencil
- Ribbon, 6 inches
How to Make It
- Mix flour, salt, and warm water into a smooth dough, then divide into two equal parts.
- Roll one part into a white rope about 8 inches long, then roll the other into a red rope of the same length.
- Twist the two ropes together tightly, then bend into a cane shape and pinch ends to secure.
- Place on a parchment-lined baking sheet and bake at 200°F for 3 hours, flipping once, until dry and hard.
- Paint lightly to enhance red and white contrast, then let dry completely.
- Tie ribbon around the top curve for hanging.
13. Frozen Berry Clusters
Easy
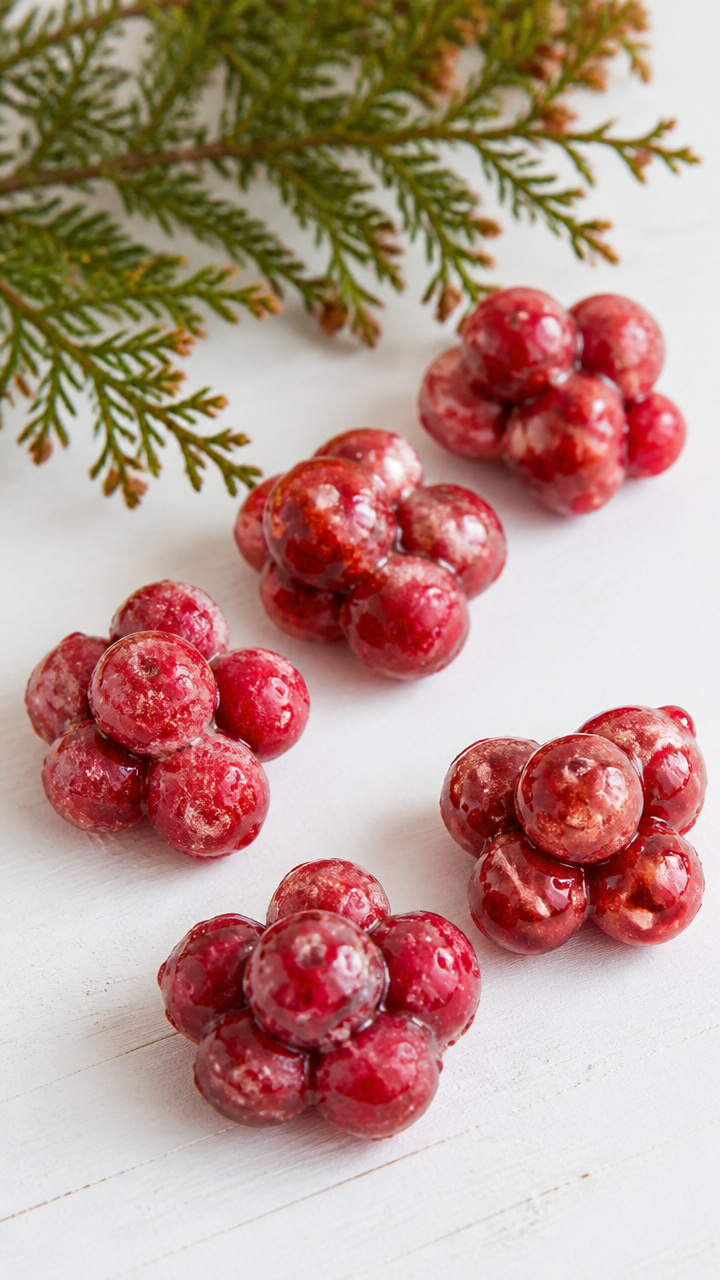
Small clusters of salt dough berries with a frosted glaze, mimicking winter vines heavy with icy fruit.
Materials Needed
- 1 cup all-purpose flour
- 1/2 cup table salt
- 1/2 cup warm water
- Red acrylic paint
- Clear gloss varnish
- Fine paintbrush
- Baking sheet
- Parchment paper
- Toothpicks
- Green acrylic paint
- Twine, 5 inches
How to Make It
- Mix flour, salt, and warm water into a smooth dough, then roll into 10 small 1/2-inch balls per cluster.
- Press toothpicks into several balls and group them into clusters of 4–5, attaching with a dab of water.
- Place on a parchment-lined baking sheet and bake at 200°F for 2.5 hours, flipping once, until hard.
- Paint berries red and add tiny green stems with green paint, then let dry completely.
- Brush with clear gloss varnish for a frozen sheen and tie twine around the base for hanging.
14. North Star Compass
Advanced

An eight-pointed star with directional markings, painted in navy and gold to resemble an old explorer’s guide.
Materials Needed
- 1 cup all-purpose flour
- 1/2 cup table salt
- 1/2 cup warm water
- Navy blue acrylic paint
- Gold acrylic paint
- Fine paintbrush
- Compass stencil
- Baking sheet
- Parchment paper
- Pencil
- Straw
- Ribbon, 8 inches
How to Make It
- Mix flour, salt, and warm water into a firm dough, then roll to 1/4 inch thick.
- Trace an eight-pointed star with compass points labeled N, S, E, W using a stencil and pencil, then cut out carefully with a knife.
- Poke a hole near the top point with a straw, then place on a parchment-lined baking sheet.
- Bake at 200°F for 3.5 hours, flipping once, until fully hardened.
- Paint background navy, then paint star arms and lettering in gold with a fine brush.
- Let dry completely, then thread ribbon through the hole for hanging.
15. Wintertime Boot Prints
Moderate

Mini salt dough boots with laced details, painted in classic red or green and hung as playful tree decorations.
Materials Needed
- 1 cup all-purpose flour
- 1/2 cup table salt
- 1/2 cup warm water
- Red acrylic paint
- Green acrylic paint
- White acrylic paint
- Paintbrush set
- Baking sheet
- Parchment paper
- Pencil
- Toothpick
- Ribbon, 7 inches
How to Make It
- Mix flour, salt, and warm water into a smooth dough, then roll to 1/4 inch thick.
- Draw a small boot shape with pencil and cut out with a knife, then use a toothpick to etch laces and tread lines.
- Poke a hole near the top cuff with a straw, then place on a parchment-lined baking sheet.
- Bake at 200°F for 3 hours, flipping once, until hard and dry.
- Paint boots red or green, add white trim at the top, and highlight laces with white paint.
- Let dry completely, then thread ribbon through the hole for hanging.
16. Frozen Feather Ornaments
Easy
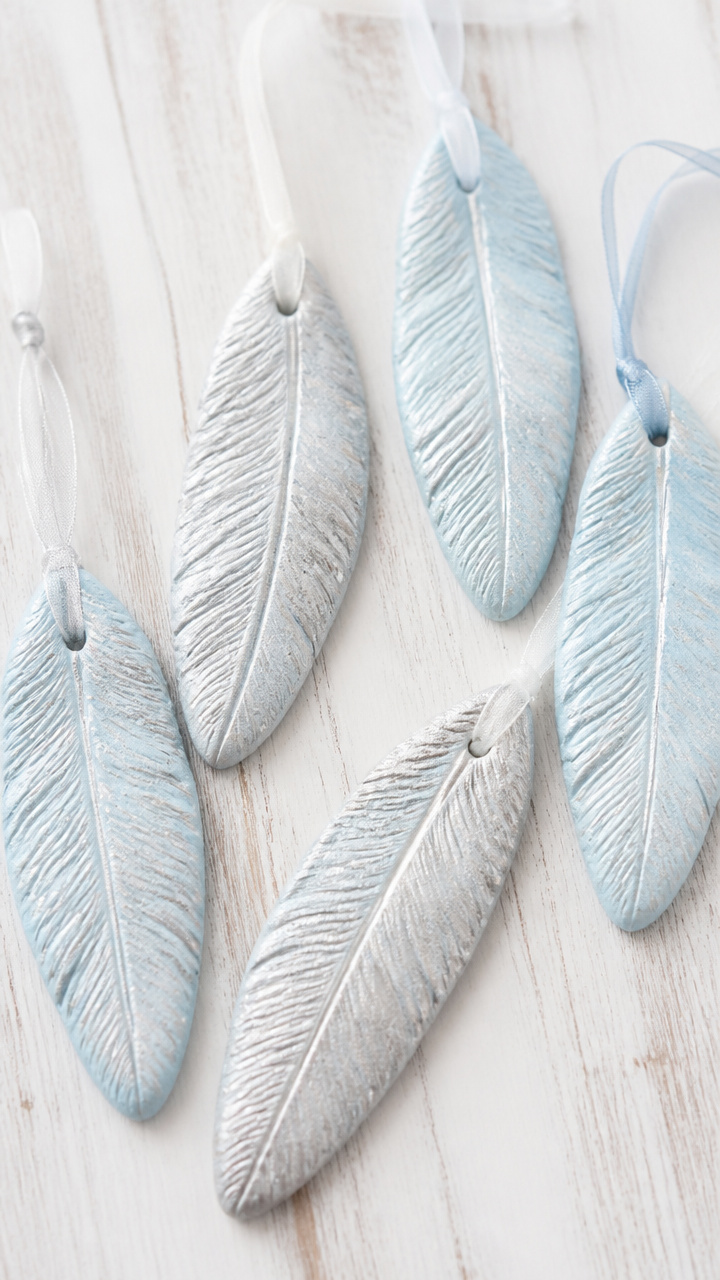
Feather-shaped salt dough pieces with delicate vein lines, painted in icy blue and silver to mimic frost-covered plumes.
Materials Needed
- 1 cup all-purpose flour
- 1/2 cup table salt
- 1/2 cup warm water
- Light blue acrylic paint
- Silver acrylic paint
- Fine paintbrush
- Feather stencil
- Baking sheet
- Parchment paper
- Pencil
- Straw
- Twine, 6 inches
How to Make It
- Mix flour, salt, and warm water into a pliable dough, then roll to 1/4 inch thick.
- Trace feather shapes with pencil using a stencil and cut out with a knife, then poke a hole near the base with a straw.
- Use a toothpick to draw fine lines along the center and sides to mimic feather veins.
- Place on a parchment-lined baking sheet and bake at 200°F for 2.5 hours, flipping once, until hard.
- Paint feathers light blue, then dry brush silver along edges and veins for icy shimmer.
- Let dry completely, then thread twine through the hole for hanging.
Each of these salt dough creations carries the warmth of your hands and the sparkle of the season. Pick your favorite, gather your supplies, and let the quiet joy of crafting fill your home.