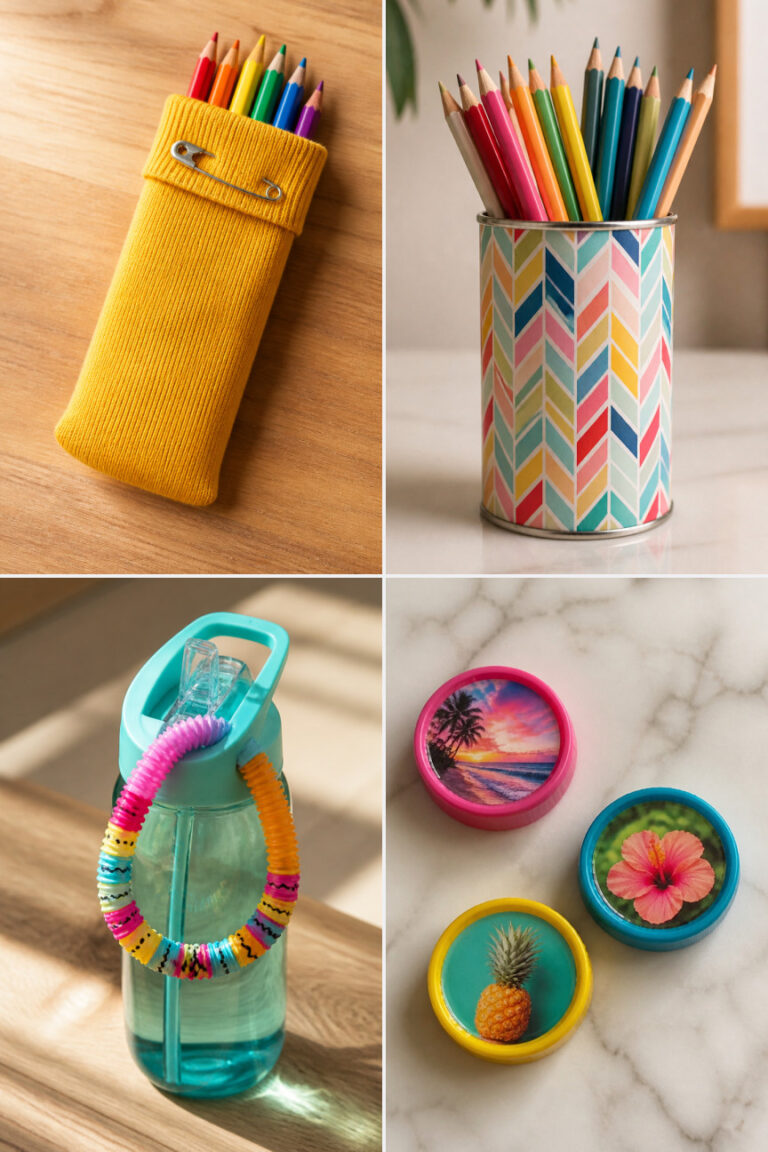
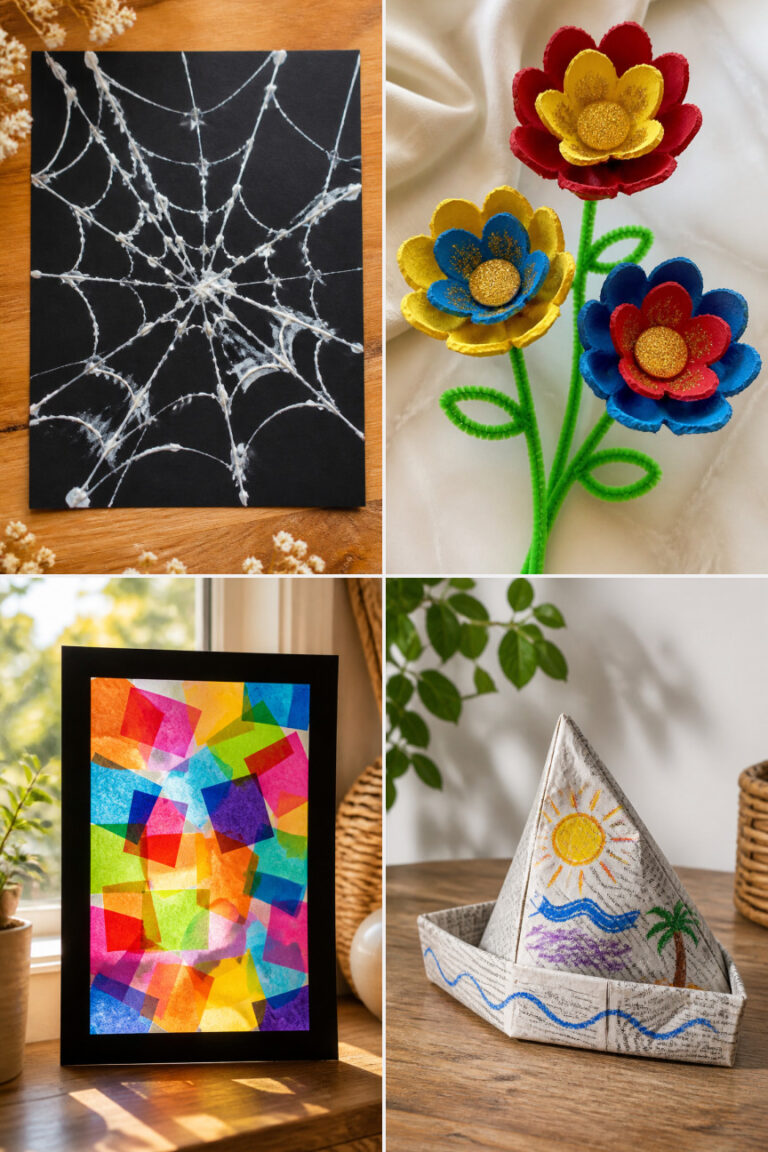
15 Easy Back to School Crafts for Kids
Getting ready for school is more fun when you make it together. These simple crafts help children express their personalities while creating useful items they can use every day.
Each project uses common supplies and clear steps so you can jump right in. From pencil holders to book covers, everything here adds a personal touch to the new school year.
1. Popsicle Stick Name Tags
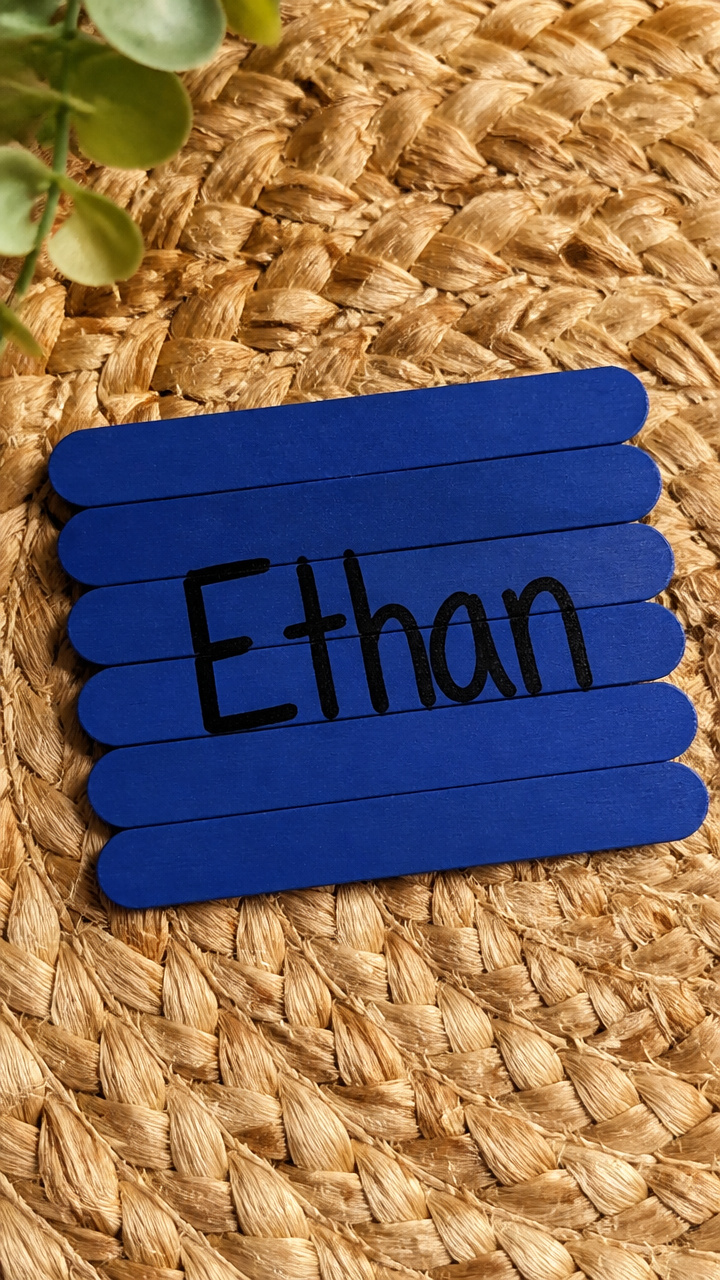
Bright wooden tags with your child’s name stand out on backpacks or desks. Sandpaper edges ensure smooth handling for little hands.
Materials Needed
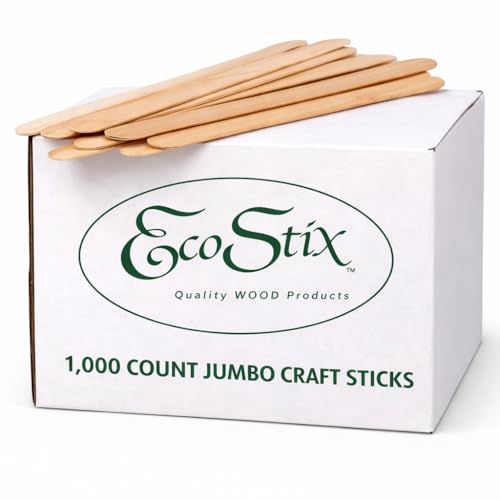
- 6 jumbo popsicle sticks
- Sandpaper sheet (9×12 inches)
- White school glue
- Acrylic paint: navy blue
- Paintbrush size 4
- Permanent black marker
How to Make It
- Lay 3 popsicle sticks side by side horizontally and glue one across the top and another across the bottom to form a rectangle frame.
- Let dry completely for 30 minutes then lightly sand all outer edges using the sandpaper sheet until smooth.
- Paint the entire frame with navy blue acrylic paint and let dry for 1 hour.
- Write your child’s first name in block letters using the permanent black marker.


2. Crayon Melt Silhouette Art
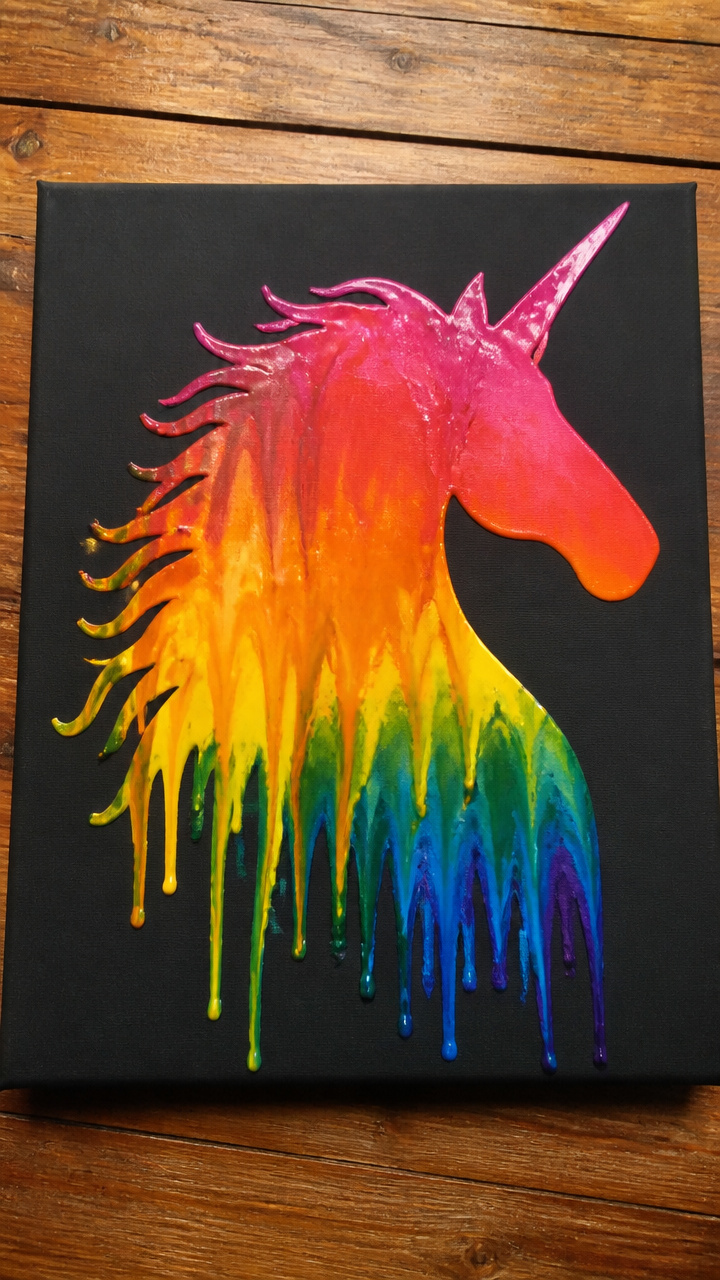
Bold silhouettes made from melted crayons turn into classroom decorations. Each piece captures a child’s favorite animal or hobby.
Materials Needed
- 8 used crayons of the same color
- Aluminum foil sheet (8×8 inches)
- Scissors
- Black construction paper (9×12 inches)
- Oven-safe ceramic dish
- Parchment paper
How to Make It
- Peel paper off crayons and chop into small pieces using scissors.
- Line the dish with parchment paper and spread crayon pieces evenly inside.
- Place dish in oven at 275°F for 7 minutes or until fully melted.
- Carefully pour melted wax over the silhouette shape cut from black paper placed on foil, then cool for 20 minutes.
![Crayola Inspiration Art Case Coloring Set - Tie-Dye (140ct), Art Supplies Set For Kids, Travel Drawing Kit, Gift for Girls & Boys, Ages 5+ [Amazon Exclusive]](https://m.media-amazon.com/images/I/51wKWtC3NLL._SL500_.jpg)

![Crayola Inspiration Art Case Coloring Set, 140pc Space Theme – Art Kit for Kids, Crayons, Markers, Pencils, Gift for Boys & Girls, Ages 5, 6, 7, 8 [Amazon Exclusive]](https://m.media-amazon.com/images/I/512fTojPeRL._SL500_.jpg)
3. Glue Bottle Pencil Holders
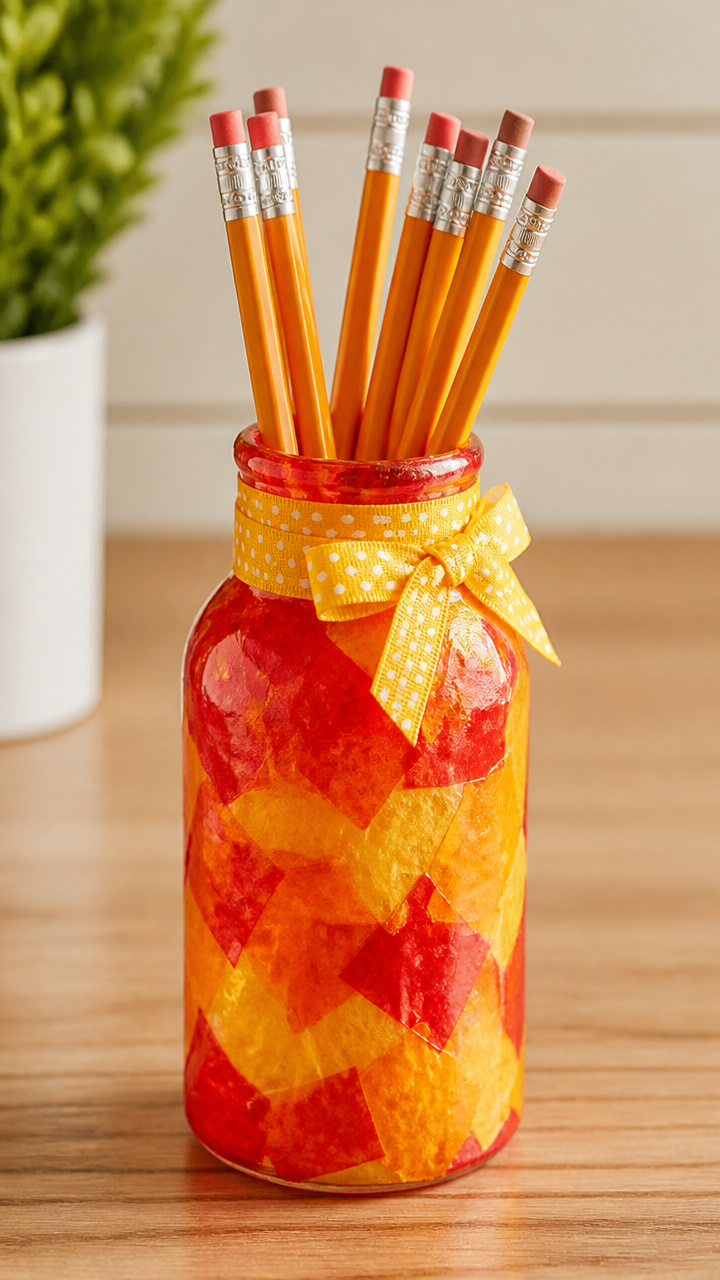
Empty glue bottles become sturdy holders with colorful tissue paper layers. The glossy finish resists daily wear.
Materials Needed
- 1 empty Elmer’s glue bottle
- Scissors
- Mod Podge glue
- Tissue paper squares (6×6 inches), red and yellow
- Foam brush
- Ribbon (1/4 inch wide, 18 inches long)
How to Make It
- Wash and dry the glue bottle thoroughly to remove residue.
- Cut tissue paper into 1-inch squares and apply Mod Podge to one section of the bottle at a time.
- Press squares onto the bottle using the foam brush to smooth bubbles, covering completely.
- Let dry for 2 hours then seal with a final coat of Mod Podge and tie ribbon around the neck.


4. Paper Plate Clock Practice
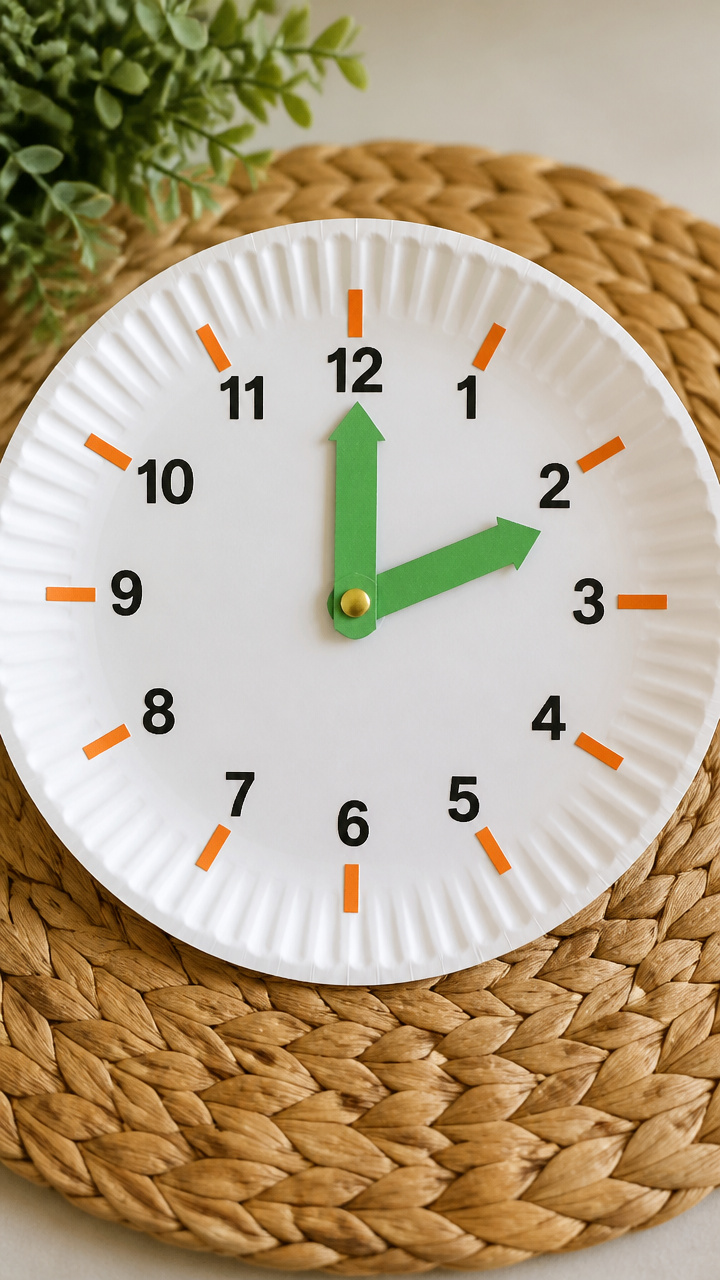
A working cardboard clock teaches time with movable hands. Bright numerals help early learners read the hour fast.
Materials Needed
- 1 white paper plate
- Cardboard from a shipping box
- Brass fastener (1 inch)
- Black marker
- Scissors
- Colored pencils: orange and green
How to Make It
- Draw a circle in the center of the plate and write numbers 1 through 12 evenly spaced around the edge.
- Cut two clock hands from the cardboard: one short for hours, one long for minutes.
- Color the hour hand orange and the minute hand green with colored pencils.
- Poke a hole through the center of the plate and both hands, then secure with the brass fastener.


5. Yarn-Wrapped Notebook Covers
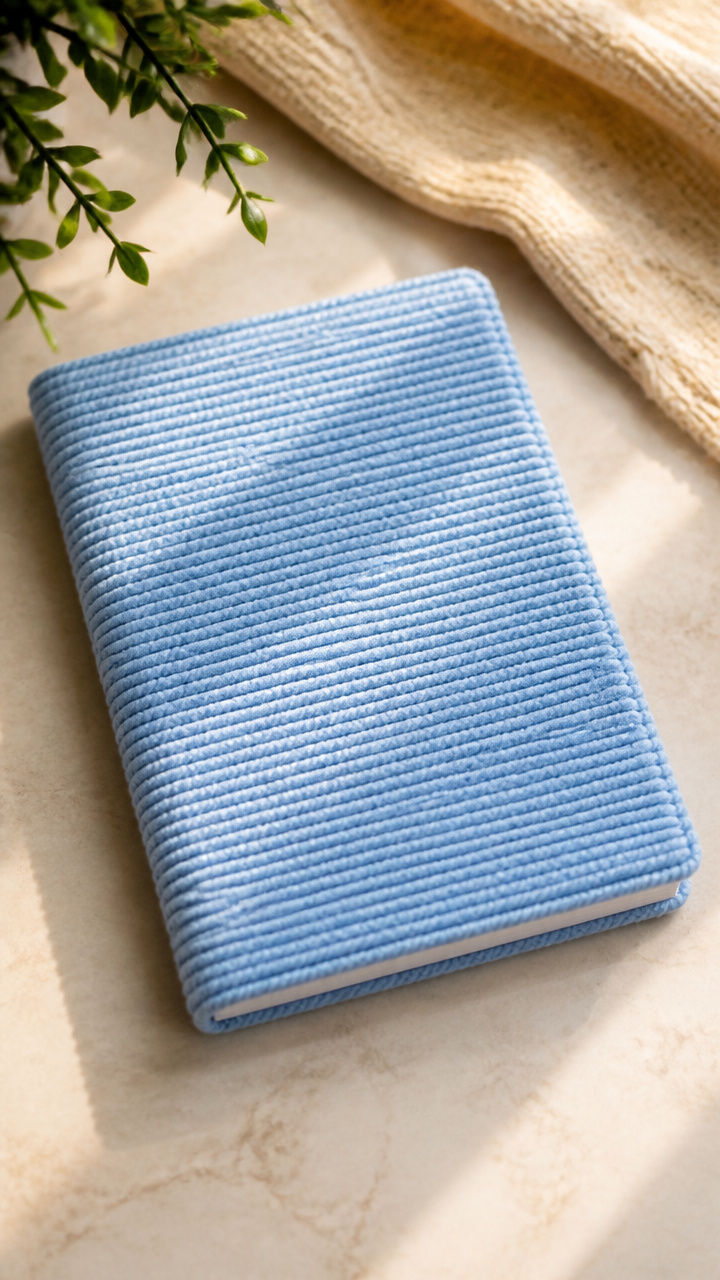
Plain notebooks get cozy wraps with soft cotton yarn. The texture stays grippy even in small hands.
Materials Needed
- 1 composition notebook
- Cotton yarn (worsted weight, sky blue, 50 yards)
- Glue stick
- Craft knife
- Ruler
How to Make It
- Measure the notebook height and cut two 1-inch strips of yarn lengthwise.
- Apply glue along the spine edge of the front cover and press one strip vertically down the center.
- Wrap yarn tightly around the front cover from left to right, pressing each loop close together.
- Glue the end in place and trim excess with the craft knife.


6. Button Alphabet Magnets

Colorful buttons spell names on magnetic sheets. They stick securely to metal lockers or fridges.
Materials Needed
- Assorted plastic buttons (20 count, various sizes)
- Magnetic tape sheet (8×10 inches)
- White school glue
- Blunt-tipped tweezers
- Letter stencil set
How to Make It
- Trace each letter of your child’s first name onto the magnetic sheet using the stencil.
- Cut out each letter carefully with scissors.
- Arrange buttons to fill each letter shape and glue them in place using the tweezers for positioning.
- Let dry flat for 2 hours before peeling off the backing and sticking to metal surfaces.


7. Foil-Stamped Bookmarks
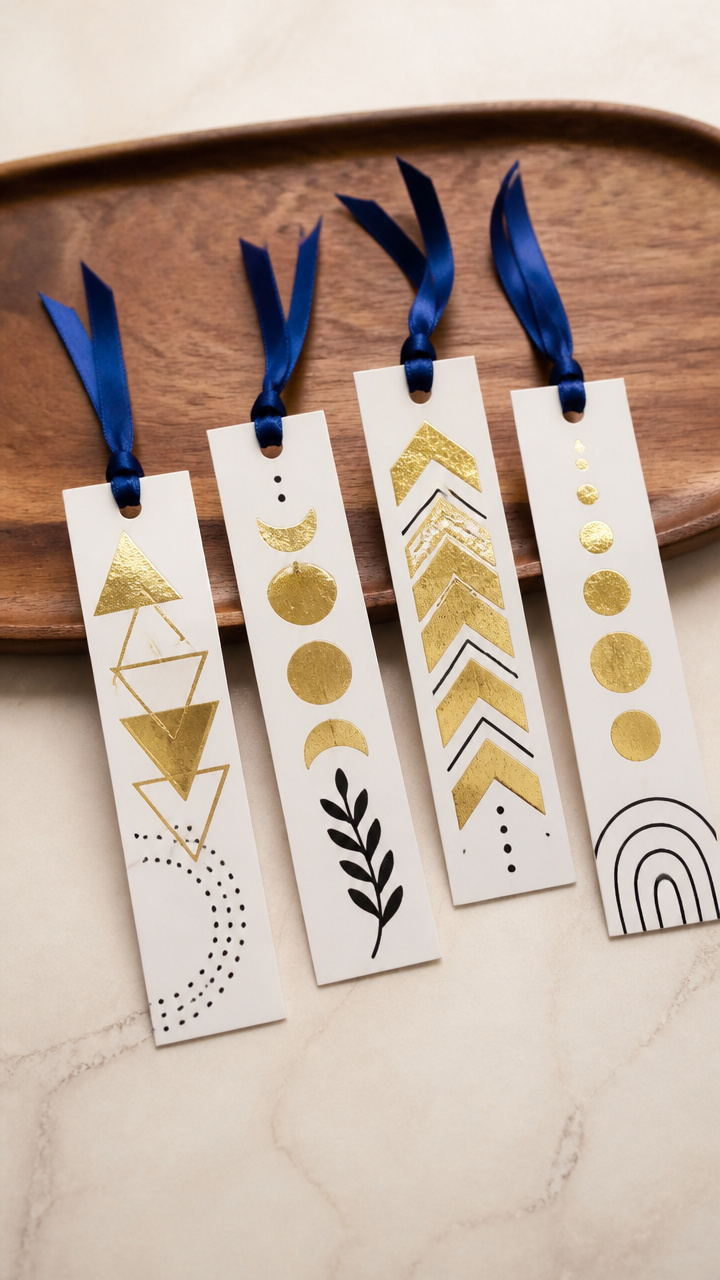
Shiny gold patterns stamped on cardstock make bookmarks that slide easily between pages. Durable for daily use.
Materials Needed
- A4 white cardstock
- Golden silver foil sheets (6×9 inches)
- Rubber stamps with geometric shapes
- Ink pad: black pigment
- Hole punch
- Satin cord (6 inches, royal blue)
How to Make It
- Cut the cardstock to 2×6 inches using scissors and ruler.
- Press the rubber stamp into the ink pad and stamp a pattern near the top of the bookmark.
- Lay foil sheet over the inked area and rub firmly with your fingertip for 10 seconds.
- Remove foil and punch a hole at the top, then thread satin cord through.


8. Pipe Cleaner Bookmarks

Bendable wire bookmarks hold their shape without slipping. A spiral tail curls around any page gently.
Materials Needed
- 2 chenille stems (green and yellow)
- Round-nose pliers
- Wire cutter
- Bead with 4mm hole (red glass)
How to Make It
- Twist the green and yellow pipe cleaners together at one end for 1 inch.
- Use the round-nose pliers to curl the top into a small loop.
- Slide the red bead onto the twisted stem below the loop.
- Shape the bottom 2 inches into a spiral using your fingers and pliers.


9. Pom-Pom Backpack Tags
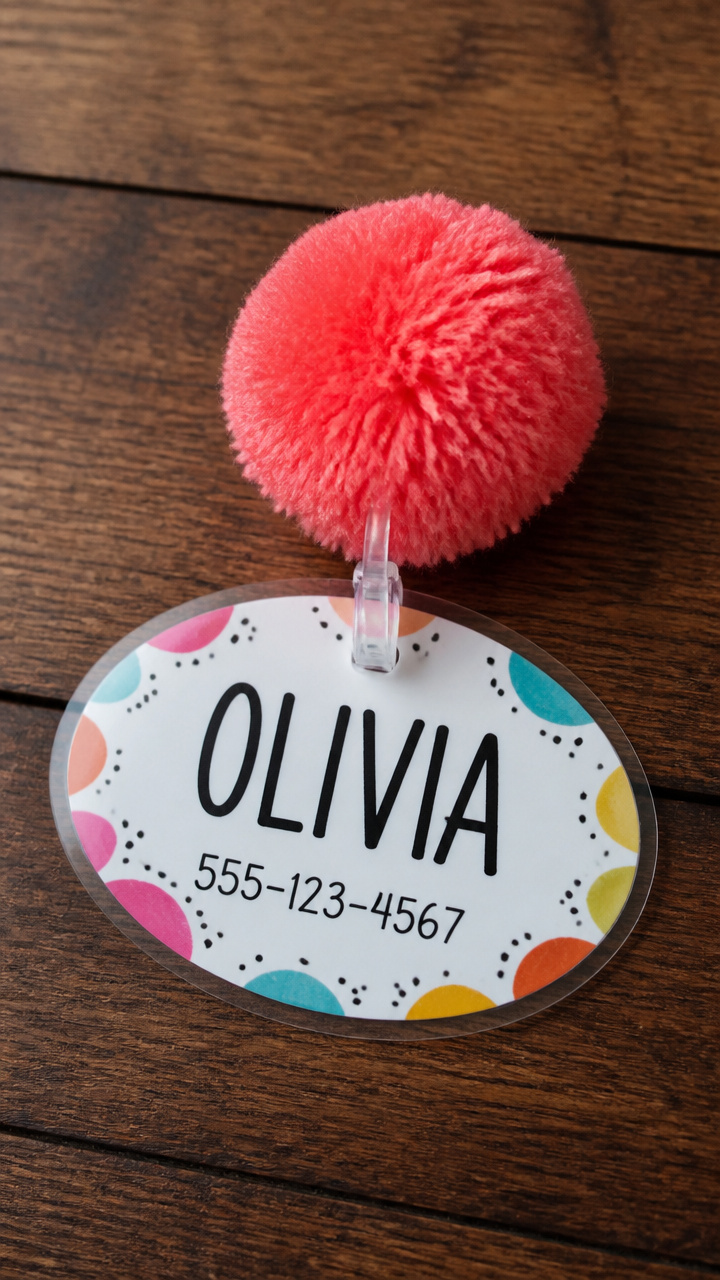
Fluffy pom-poms dangle from laminated tags with names and contact info. They’re easy to spot in busy hallways.
Materials Needed
- Oval luggage tag (plastic, 2×3 inches)
- Laminator and laminating pouch
- Large pom-pom (2 inch diameter, coral)
- Strong double-sided tape
- Fine-tip marker
How to Make It
- Write your child’s full name and phone number on the tag with the fine-tip marker.
- Insert the tag into the laminating pouch and run through the laminator.
- Cut a small piece of double-sided tape and attach to the top back of the tag.
- Press the pom-pom firmly onto the tape so it hangs freely.


10. Cereal Box Folder Labels
Stiff labels cut from cereal boxes slide into binders. Waterproof coating keeps names legible all year.
Materials Needed
- Empty cardboard cereal box
- Clear packing tape roll
- Scissors
- Black Sharpie
- Ruler
How to Make It
- Cut a 3×1 inch rectangle from the flat side of the cereal box.
- Write subject name like ‘Math’ or ‘Science’ with the Sharpie.
- Cover front and back completely with clear packing tape, wrapping edges to seal.
- Slide into the folder’s label window or tape inside the cover corner.


11. Clay Number Stamp Blocks
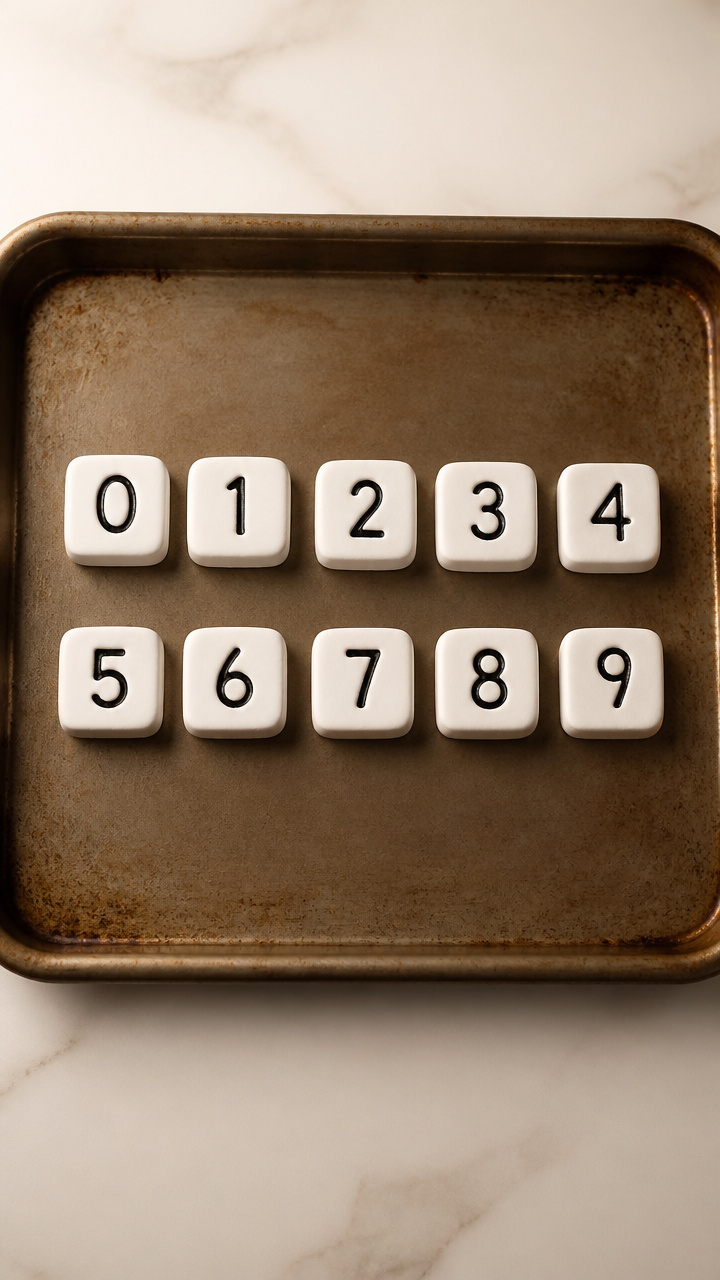
Homemade clay blocks stamped with numerals help practice math skills. Air-dry strength lasts through many lessons.
Materials Needed
- Air-dry modeling clay (white, 4 oz)
- Number stamps (0–9, wooden handles)
- Rolling pin
- Plastic knife
- Baking sheet
How to Make It
- Roll the clay to 1/2 inch thickness using the rolling pin on a clean surface.
- Press each number stamp firmly into separate clay sections.
- Cut around each numeral with the plastic knife to form individual blocks.
- Place on baking sheet and let harden overnight in a dry place.


12. Tissue Paper Lunch Bags
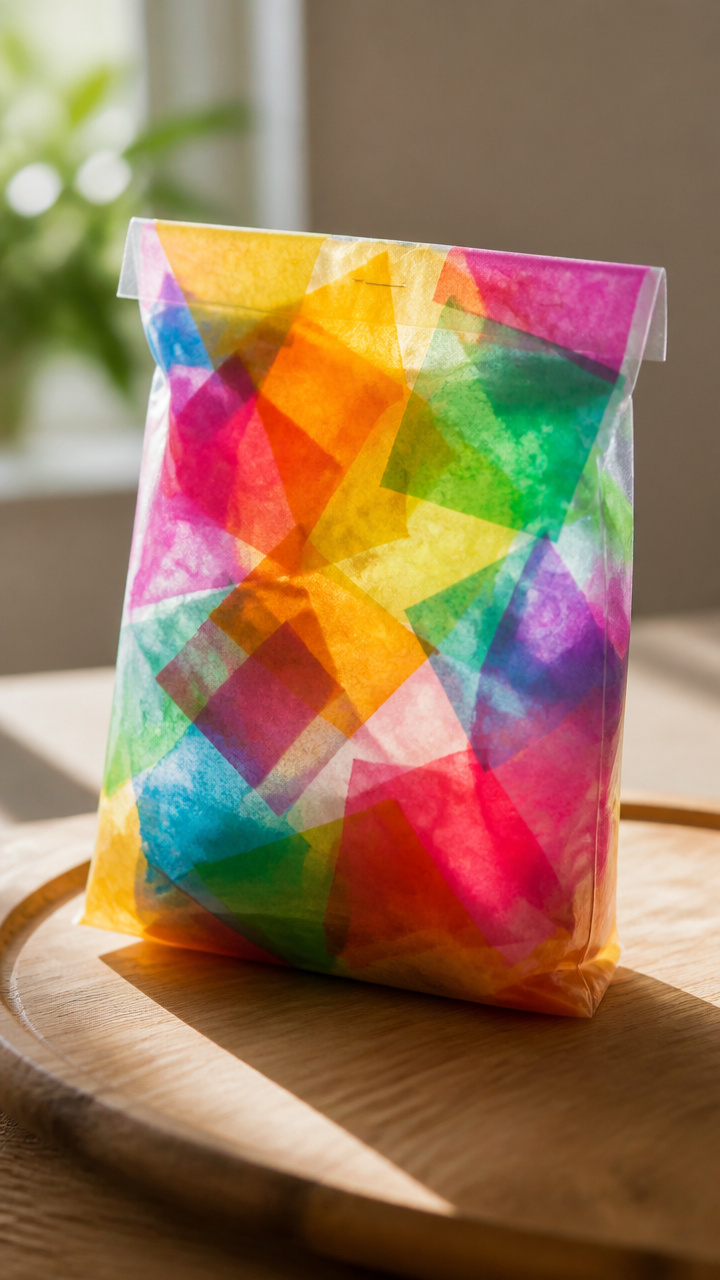
Clear cellophane bags glow with layered tissue paper. Perfect for carrying snacks with style.
Materials Needed
- Clear cellophane bag (quart size)
- Tissue paper (assorted colors, 8 sheets)
- Water-based glue in a spray bottle
- Cookie sheet
- Hairdryer
How to Make It
- Lay the cellophane bag flat on the cookie sheet.
- Spray a light mist of glue over the surface.
- Layer tissue paper pieces across the bag, overlapping slightly.
- Dry with the hairdryer on low for 3 minutes until smooth and sealed.


13. Straw Bracelet Name Bands
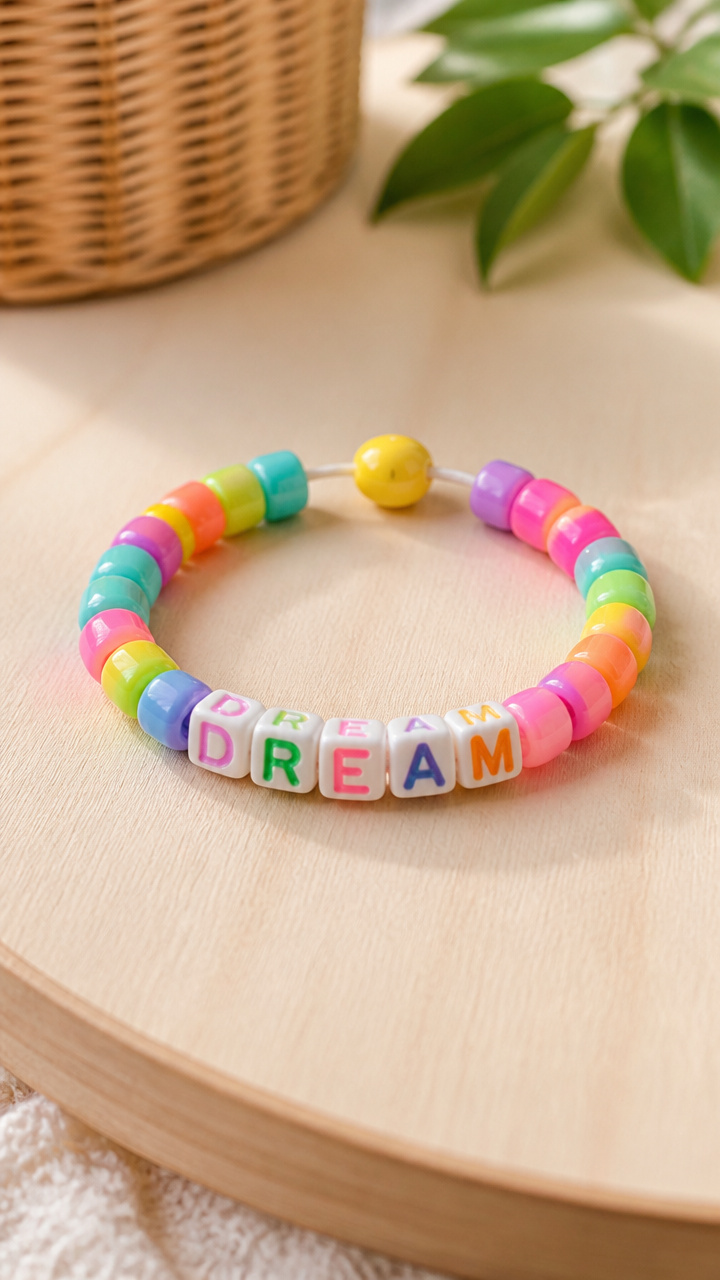
Drinking straws sliced into beads form stretchy name bracelets. Lightweight and safe for school wear.
Materials Needed
- 5 plastic drinking straws (different colors)
- Scissors
- Elastic string (1 mm thick, 12 inches)
- Bead stopper tool
How to Make It
- Cut each straw into 1/2 inch rings using scissors.
- Sort rings to spell your child’s first name using one ring per letter.
- Thread elastic string through the rings in order, leaving 2 inches at each end.
- Tie ends together tightly and trim excess, using the bead stopper to hold during tying.


14. Foam Sticker Reward Chart
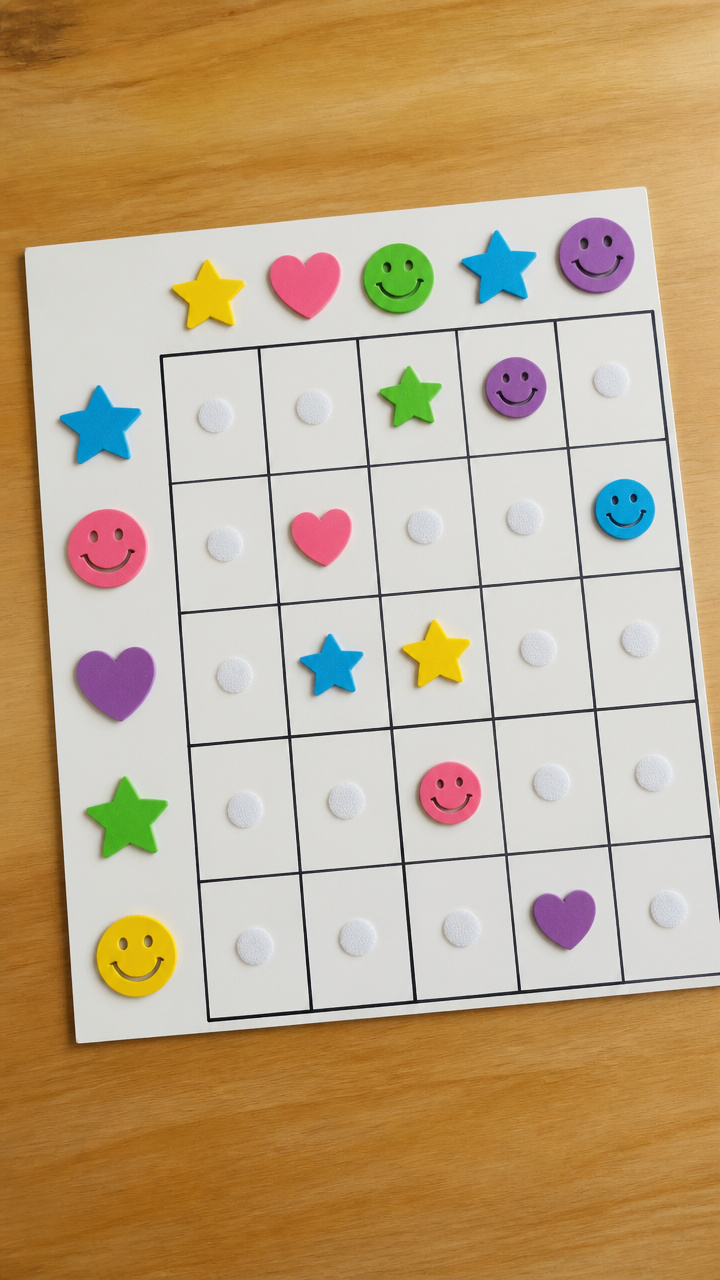
Reusable sticker charts track homework with bright foam shapes. Velcro dots keep stickers in place.
Materials Needed
- Poster board (11×14 inches)
- Self-adhesive Velcro dots (10 pairs)
- Foam sticker sheets (stars, hearts, smiley faces)
- Black marker
- Ruler
How to Make It
- Draw seven rows and five columns on the poster board with the marker and ruler.
- Label each row with a day of the week starting with Monday.
- Stick one Velcro dot in each square of the grid.
- Cut foam stickers to fit each dot and hand them out as rewards.


15. Salt Dough Ornament Name Signs
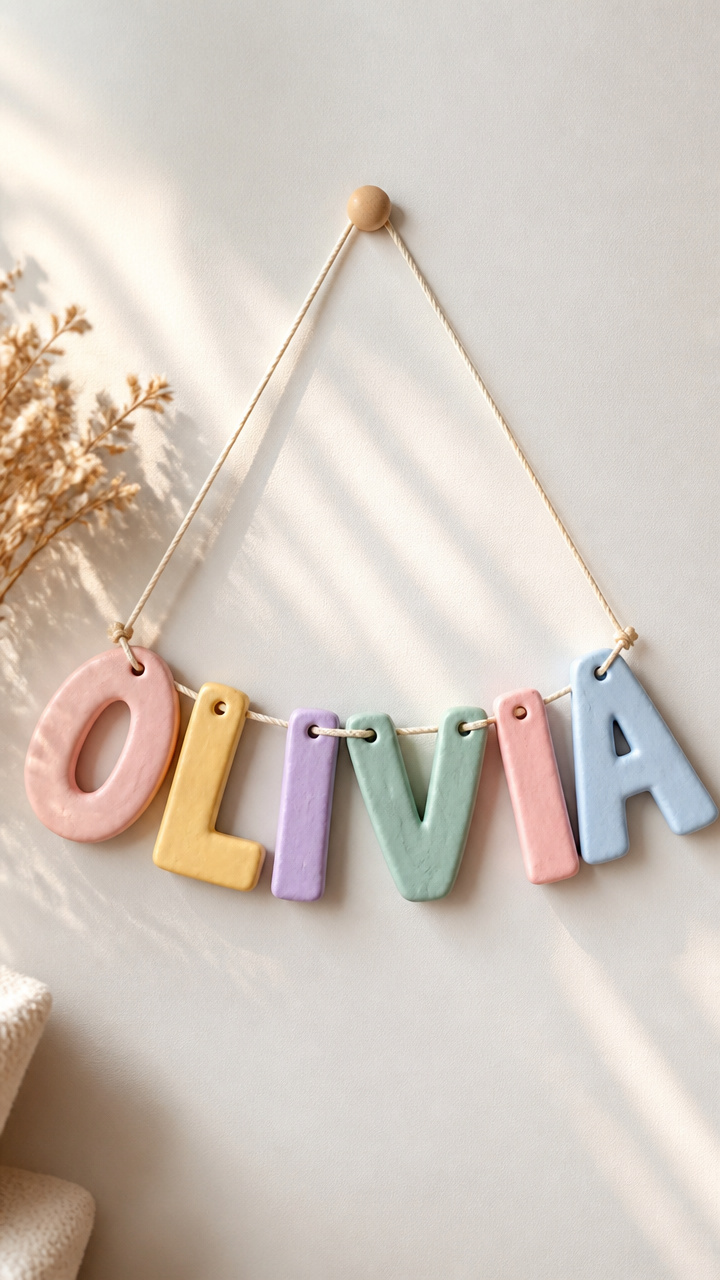
Baked salt dough letters hang on doors or cubbies. Natural texture holds paint well and lasts years.
Materials Needed
- 2 cups all-purpose flour
- 1 cup table salt
- 1 cup warm water
- Rolling pin
- Alphabet cookie cutters
- Baking tray lined with parchment
How to Make It
- Mix flour, salt, and warm water in a bowl until a smooth dough forms.
- Roll dough to 1/4 inch thickness on a floured surface.
- Press alphabet cutters into the dough to create each letter of your child’s first name.
- Place letters on the tray and bake at 200°F for 3 hours until hard.


These crafts bring joy to the everyday routines of school life. With just a few supplies and a little time, you create something meaningful together. Pick one that sparks excitement and start making memories today.