23 Winter Crafts to Make and Sell on Etsy

Soft wool mittens stacked in a basket, pine-scented candles glowing on a windowsill, tiny snow globes catching the morning light—winter brings a quiet magic that people love to bring into their homes.
You can capture that feeling with handmade crafts that sell fast during the colder months. These 23 projects use accessible materials and proven techniques to create pieces people are eager to buy.
1. Mini Knit Snowman Ornaments
Easy
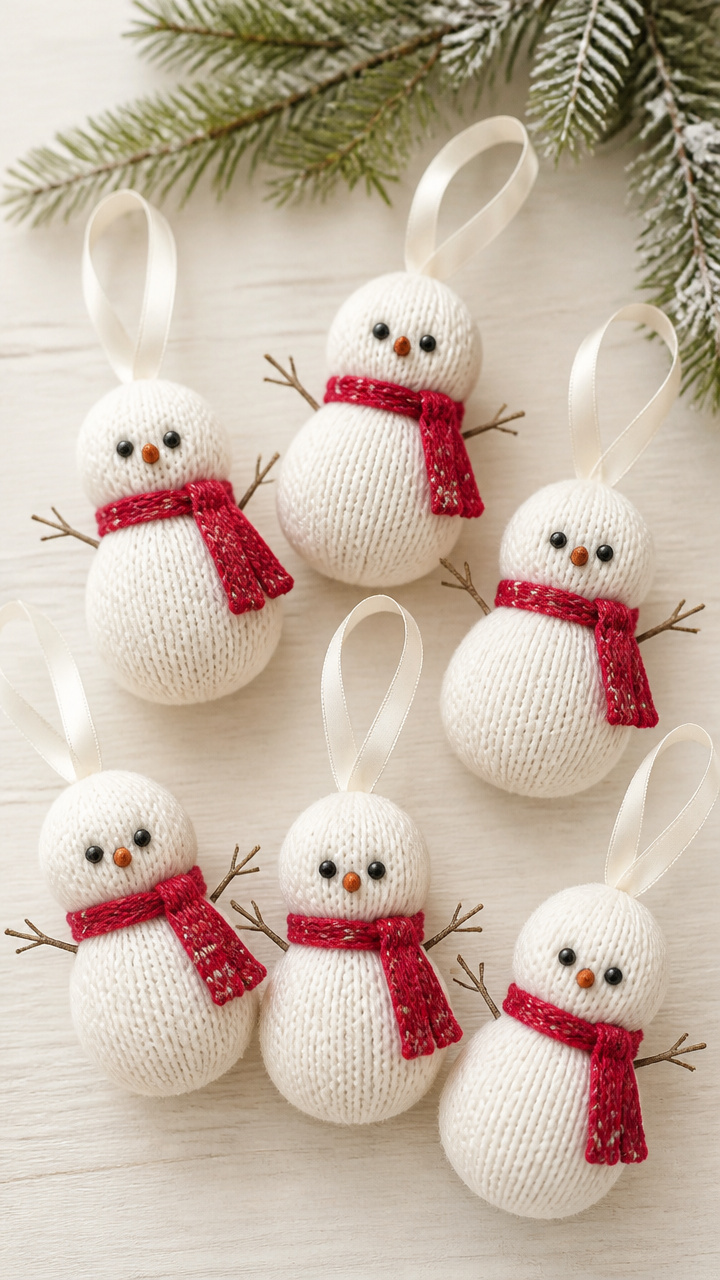
Tiny snowmen with knit scarves and twig arms hang from ribbons and bring whimsy to any tree. These are quick to make and popular with buyers who love handmade holiday decor.
Materials Needed
- White acrylic yarn
- Black and orange embroidery floss
- 6mm black craft beads (2 per ornament)
- Small brown pipe cleaners (1 per ornament)
- Red satin ribbon (12 inches per ornament)
- Polyester stuffing
- Size 6 knitting needles
- Yarn needle
How to Make It
- Knit a 2-inch tube using white yarn and size 6 needles, then bind off and sew one end closed.
- Turn the tube inside out, stuff it lightly with polyester stuffing, then sew the open end closed.
- Use black embroidery floss to stitch two eyes and a mouth on the top third of the ornament.
- Glue two 6mm black beads over the stitched eyes for shine.
- Cut a 1-inch piece of brown pipe cleaner and twist it into arms, then glue them to the sides.
- Use orange embroidery floss to form a small carrot nose and secure it with glue.
- Tie a 12-inch piece of red satin ribbon into a loop and attach it to the top for hanging.
2. Frosted Pinecone Wreaths
Easy
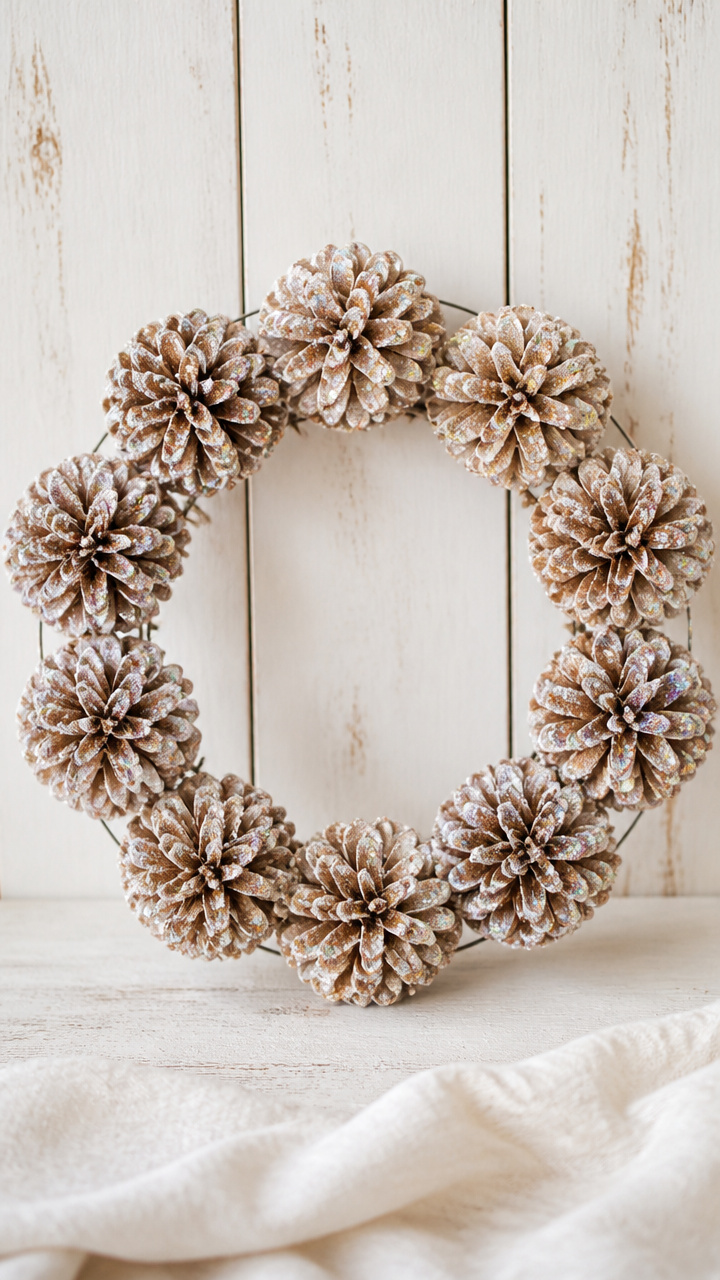
Pinecones dipped in glitter and arranged in a ring create a rustic winter centerpiece. These sell well as farmhouse-style decor and require no sewing or power tools.
Materials Needed
- 12 medium pinecones
- 12-inch wire wreath frame
- White craft glue
- Fine iridescent glitter
- Floral wire (24 gauge)
- Hot glue gun
- Small paintbrush
How to Make It
- Brush white craft glue onto the tips of each pinecone using the paintbrush.
- Roll the glued tips in fine iridescent glitter and set aside to dry for 20 minutes.
- Once dry, use the hot glue gun to attach each pinecone to the wire wreath frame, placing them tip-facing outward.
- Wrap floral wire around the base of each pinecone and twist at the back of the frame for extra hold.
3. Hand-Painted Mugs with Snowy Trees
Moderate
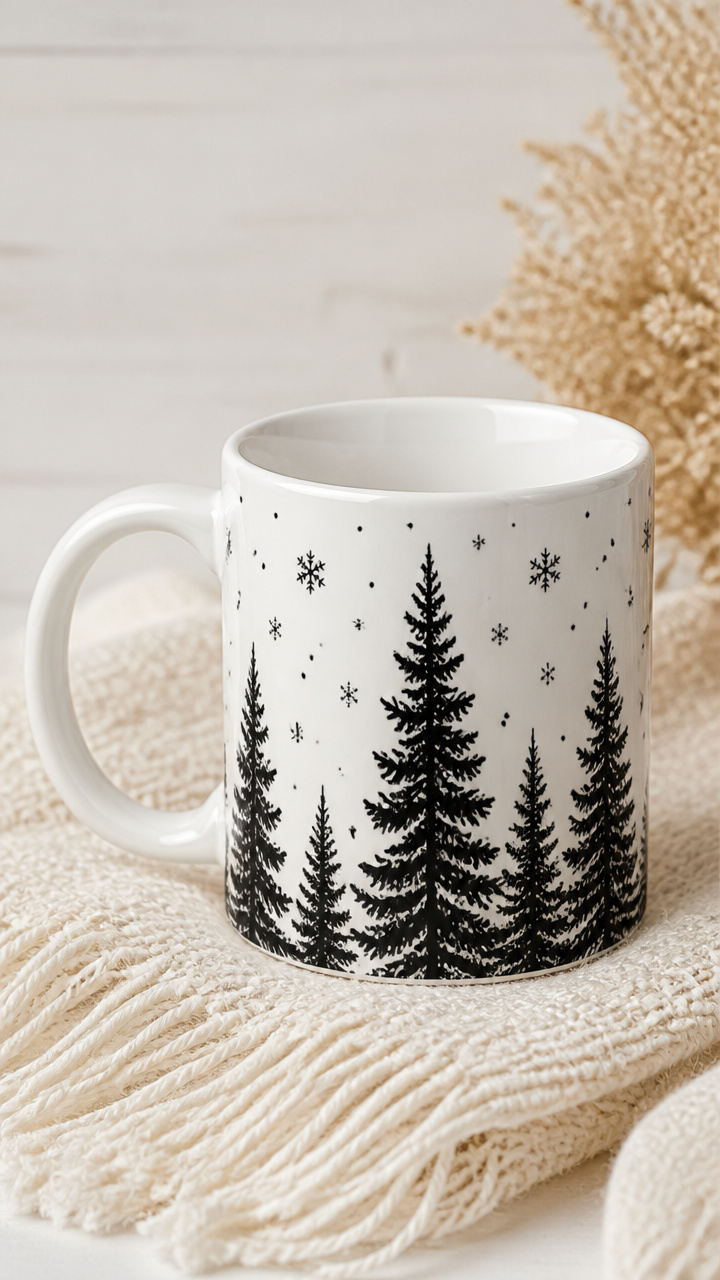
Ceramic mugs with delicate black silhouette trees and snowflakes appeal to coffee lovers. These are oven-cured so they’re dishwasher safe and last for years.
Materials Needed
- White ceramic mugs (1 per craft)
- Oil-based paint markers (black)
- Rubbing alcohol
- Cotton pads
- Oven
- Paper towels
How to Make It
- Wipe the mug surface with a cotton pad dampened with rubbing alcohol and let dry completely.
- Draw a simple pine tree silhouette near the handle using the black oil-based paint marker.
- Add small dots or swirls around the tree to represent falling snowflakes.
- Let the paint dry for 24 hours, then place the mug in a cold oven.
- Set the oven to 350°F and bake for 30 minutes, then turn off and let cool inside.
4. Wool Felt Hot Cocoa Coasters
Easy
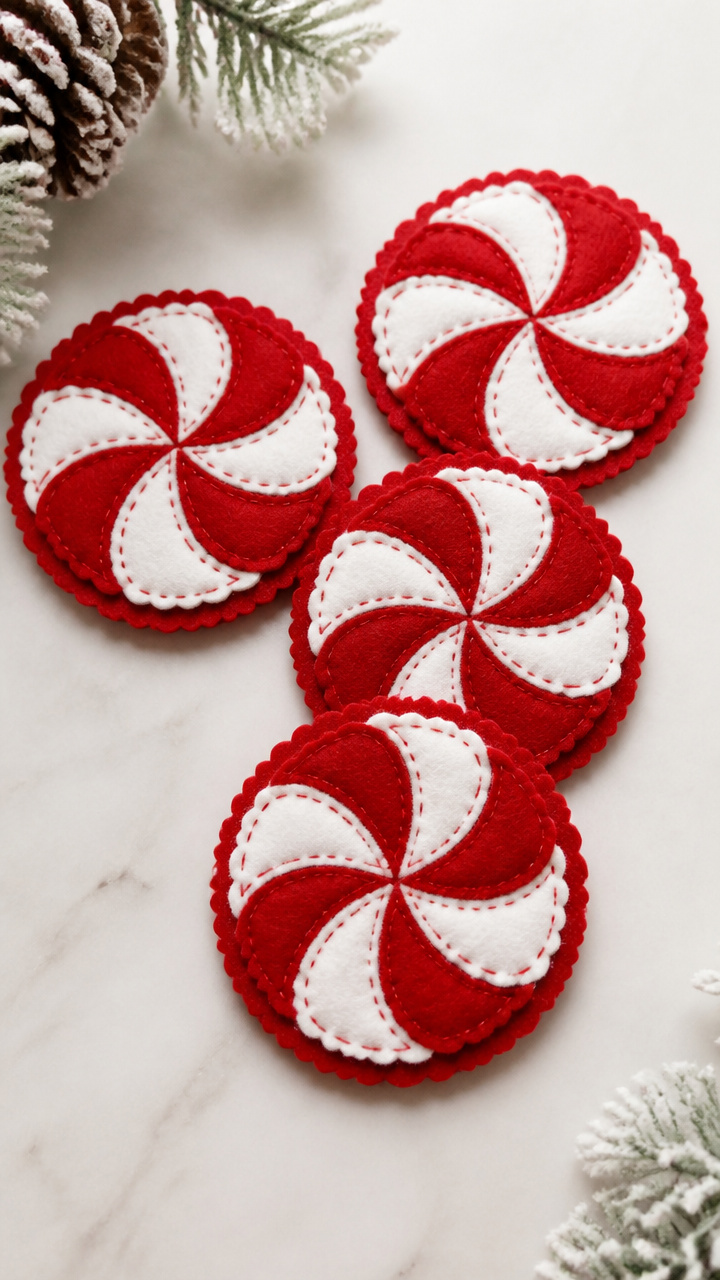
Thick red and white felt circles mimic candy canes and protect tables from hot mugs. These are simple to cut and assemble, and buyers love seasonal utility.
Materials Needed
- Red wool felt sheet
- White wool felt sheet
- 1.5-inch circle punch
- Fabric glue
- Pinking shears
How to Make It
- Use the circle punch to cut six red and six white felt circles from their respective sheets.
- Glue three red and three white circles together in alternating layers, letting each dry before adding the next.
- Trim the edges with pinking shears to prevent fraying and give a decorative edge.
5. Miniature Wooden Sled Decor
Moderate
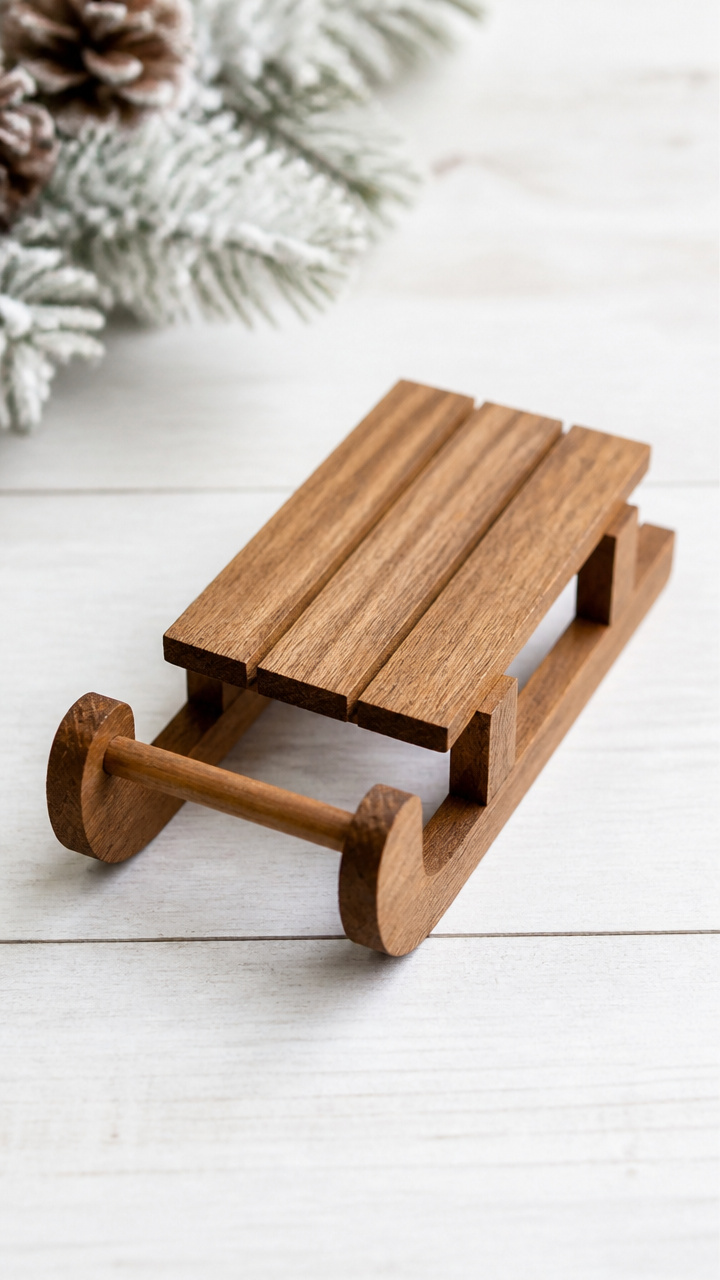
Tiny sleds made from balsa wood and twine make charming shelf decor or gift toppers. They’re lightweight, inexpensive to make, and evoke nostalgic winter scenes.
Materials Needed
- Balsa wood sheet (6×12 inches)
- Wood glue
- Craft knife
- Ruler
- Sandpaper (220 grit)
- Natural jute twine (10 feet)
- Small paintbrush
How to Make It
- Cut two 4-inch curved runners from the balsa wood using the craft knife and ruler.
- Cut two 3-inch straight pieces for the crossbars and sand all edges smooth.
- Glue the crossbars between the runners to form a sled shape and let dry for 30 minutes.
- Brush a thin coat of wood glue along the top of the crossbars and wrap jute twine tightly around them, securing the ends with glue.
6. Scented Beeswax Candle Logs
Moderate
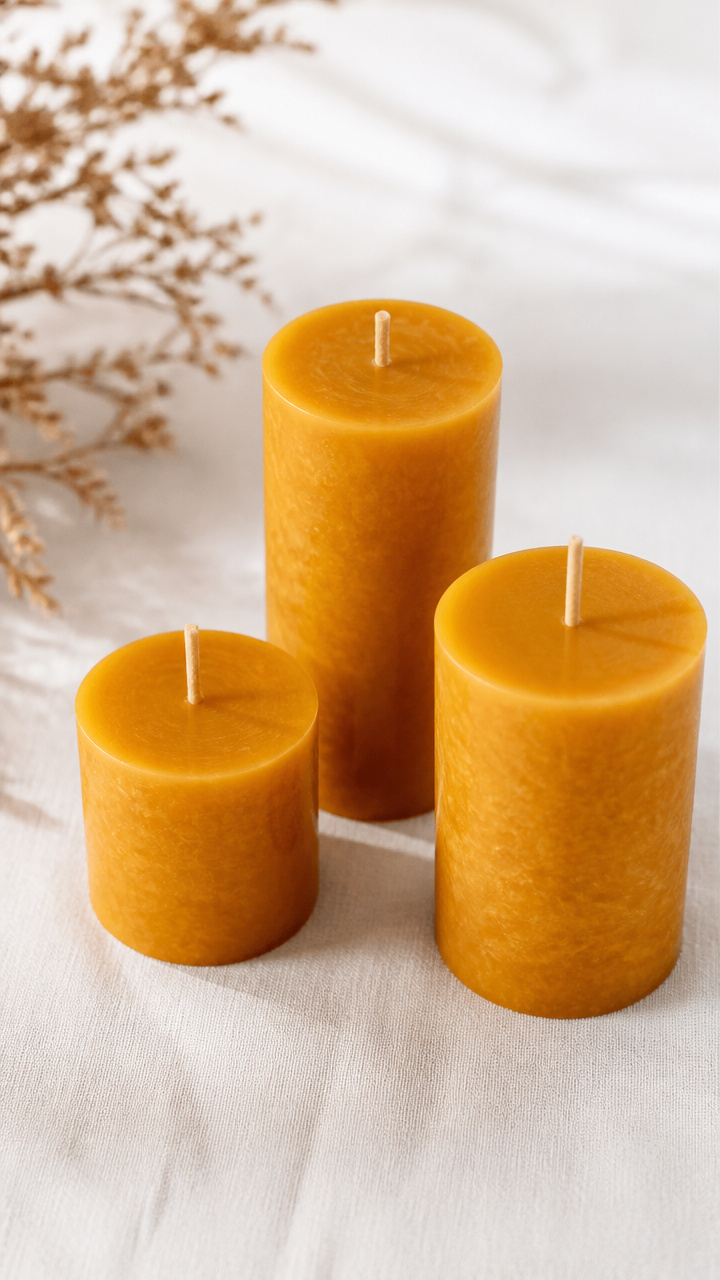
Small log-shaped candles made with beeswax and cedar essential oil burn cleanly and smell like a winter forest. These are poured in silicone molds and sell at a premium.
Materials Needed
- Beeswax pellets (8 oz)
- Cedarwood essential oil (10 drops)
- Silicone log molds (3 cavities)
- Cotton wicks (3, 3 inches long)
- Double boiler
- Wick stickers (3)
How to Make It
- Melt beeswax pellets in a double boiler over medium heat, stirring occasionally.
- Once fully melted, remove from heat and stir in 10 drops of cedarwood essential oil.
- Place a wick sticker on the bottom of each wick and stick it to the base of a mold cavity.
- Slowly pour the scented beeswax into each mold, filling to the top, and let cool for 2 hours.
7. Embroidered Flannel Hand Warmers
Moderate
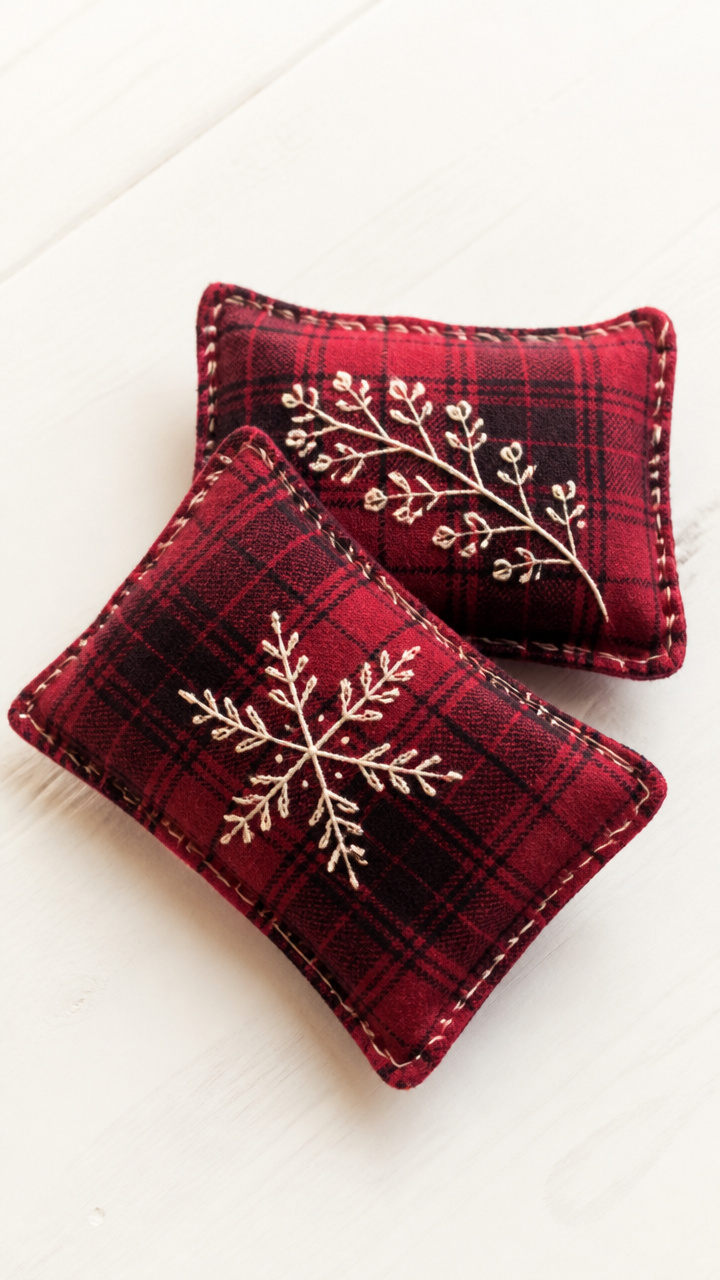
Flannel pouches filled with rice and lavender scent provide cozy heat when microwaved. These are practical gifts and popular in holiday bundles.
Materials Needed
- Red flannel fabric (1/4 yard)
- Lavender-scented rice (1 cup)
- Embroidery floss (white)
- Embroidery needle
- Scissors
- Sewing machine
- Straight pins
How to Make It
- Cut two 4×6 inch rectangles from the flannel fabric and pin them right sides together.
- Sew around three sides with a 1/4 inch seam, leaving one short side open.
- Turn the pouch right side out and fill with 1 cup of lavender-scented rice.
- Use the embroidery needle and white floss to stitch a snowflake design on the front panel.
- Hand-sew the open edge closed with a whipstitch.
8. Glitter-Dipped Birch Branches
Easy
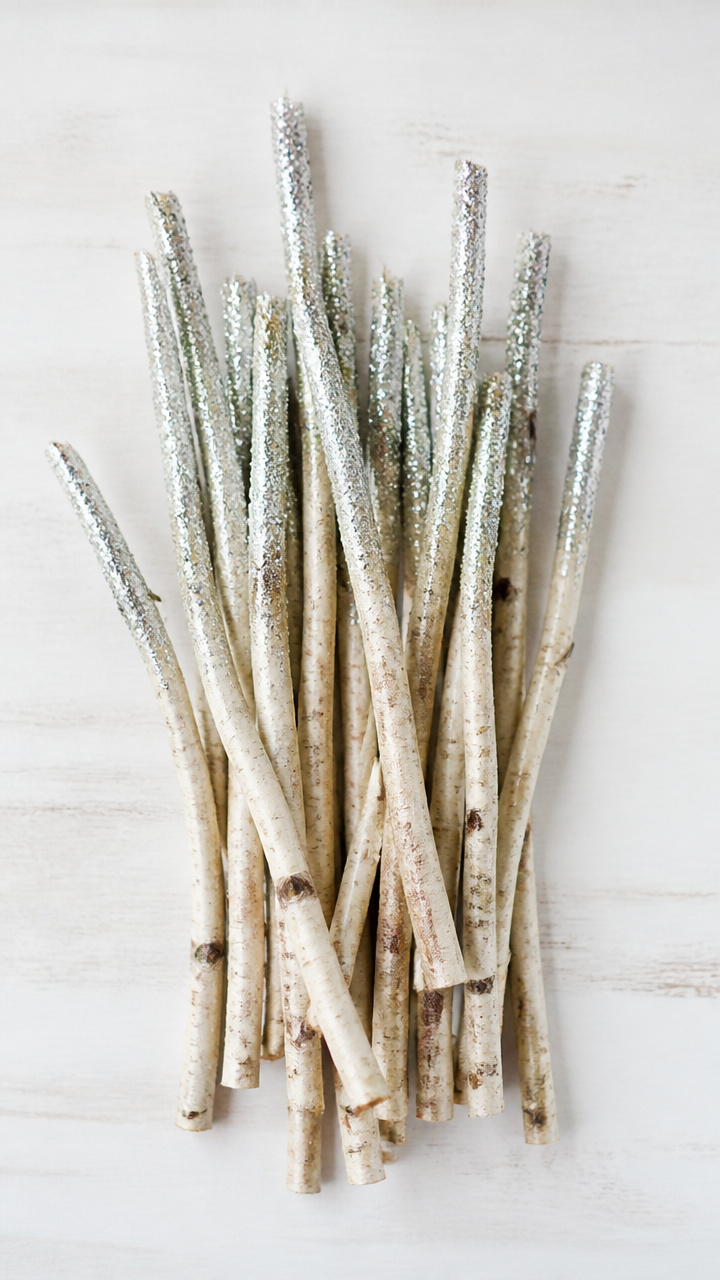
Natural birch twigs with frosted tips add elegance to vases and centerpieces. These take minutes to make and sell as wedding or holiday decor.
Materials Needed
- Birch twigs (6 inches long, 3 per set)
- White craft glue
- Fine silver glitter
- Paper plate
- Small paintbrush
How to Make It
- Lay the birch twigs on a paper plate and use the paintbrush to coat the top inch with white craft glue.
- Sprinkle fine silver glitter over the glued tips and shake off excess.
- Let dry for 15 minutes before packaging in sets of three.
9. Knit Cable Stitch Ear Warmers
Advanced
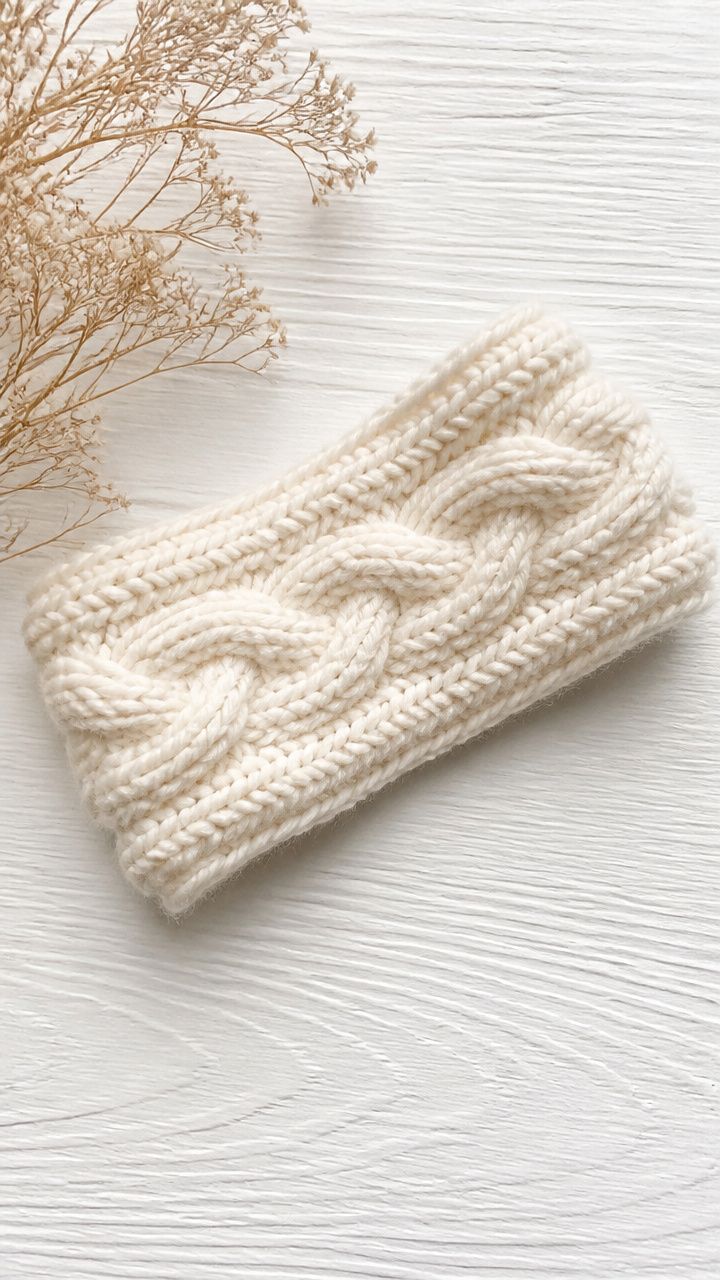
Stretchy headbands with classic cable patterns keep ears warm and look stylish. These use bulky yarn and sell well to outdoor enthusiasts.
Materials Needed
- Bulky cream-colored yarn (100 yards)
- Size 10 knitting needles
- Cable needle
- Yarn needle
How to Make It
- Cast on 20 stitches using the long-tail method and knit 2 inches in rib stitch.
- Begin the cable pattern by slipping 3 stitches to the cable needle and holding it in front, then knitting 3, then knitting 3 from the cable needle.
- Repeat the cable every 6 rows across the center 12 stitches while maintaining rib on the edges.
- Knit 2 inches more in rib stitch, then bind off and weave in ends with the yarn needle.
10. Pressed Flower Snow Globe Jars
Moderate
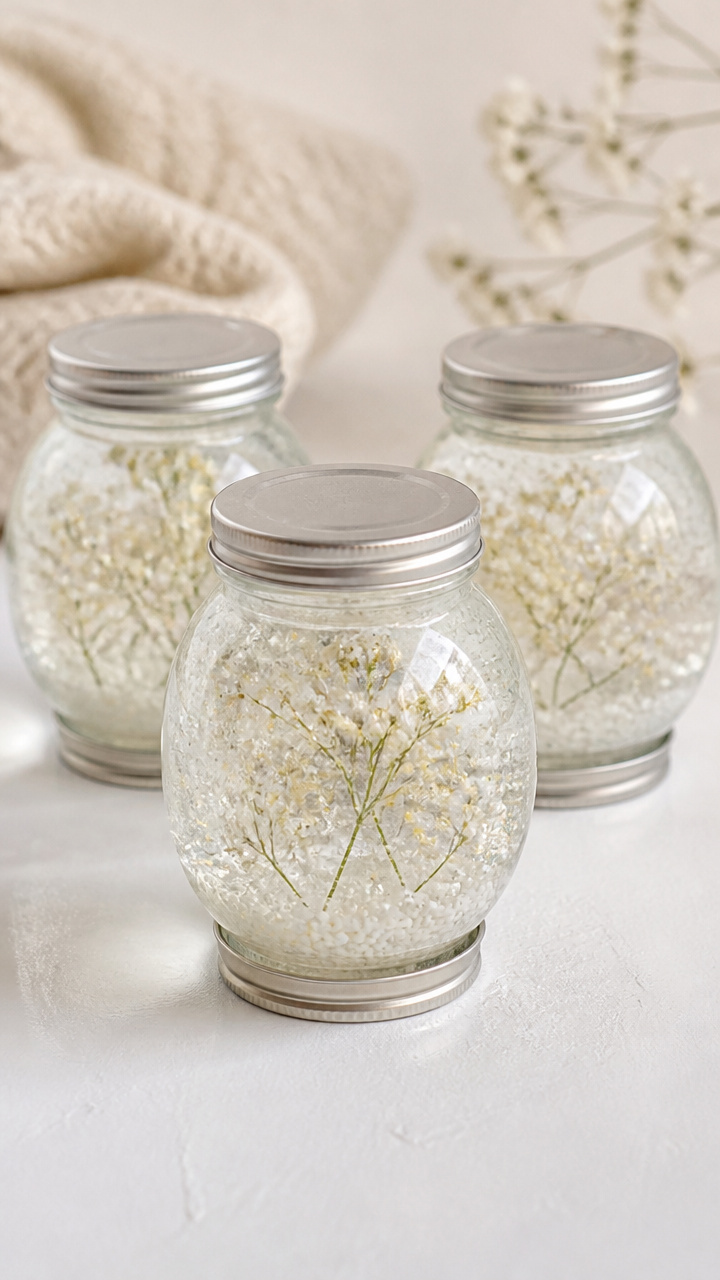
Tiny glass jars with dried flowers and faux snow create enchanting mini globes. These are sealed and require no water, making them safe and easy to ship.
Materials Needed
- Small glass jars with lids (2 oz, 3 per set)
- Dried white baby's breath (1 sprig per jar)
- Artificial snow (1 tsp per jar)
- Clear craft glue
- Tweezers
- Small funnel
How to Make It
- Use tweezers to place one sprig of dried baby's breath upright in the jar.
- Use the funnel to add 1 teaspoon of artificial snow around the base of the flower.
- Apply a thin ring of clear craft glue to the inside of the lid.
- Screw the lid on tightly and let the glue cure for 1 hour to seal.
11. Hand-Stamped Gift Tags on Wood
Easy
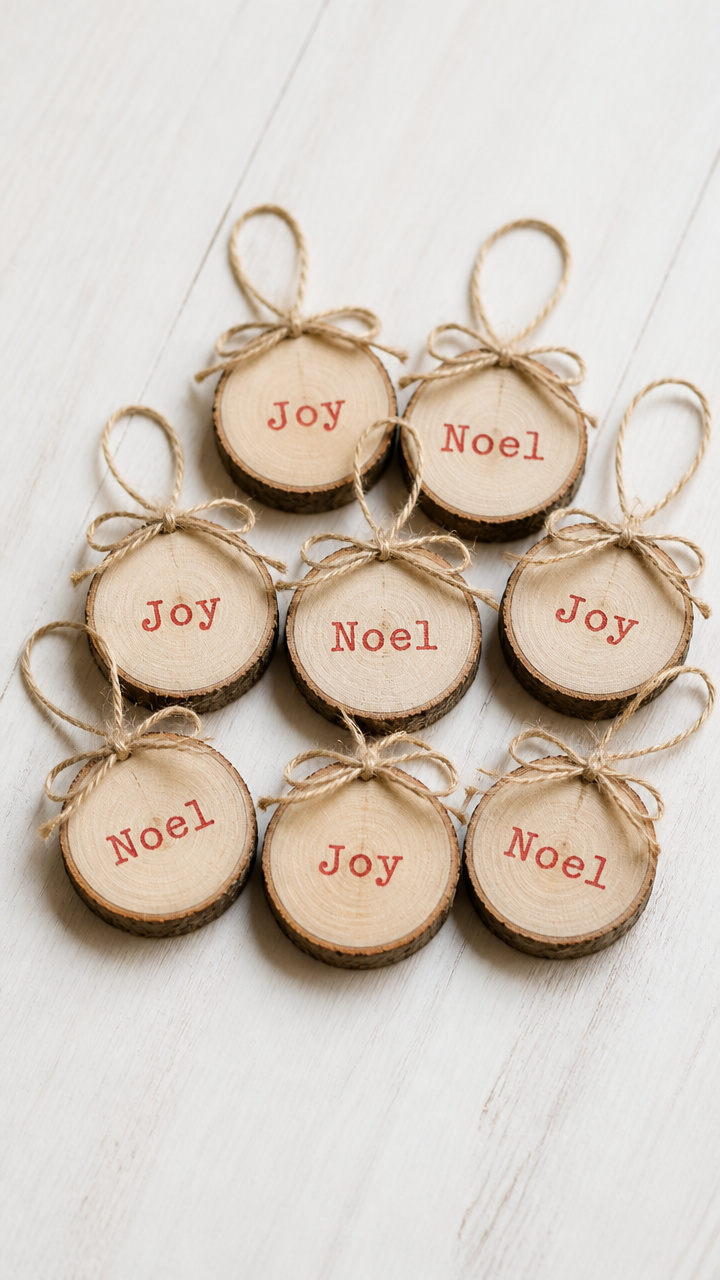
Thin wood slices with inked holiday phrases make rustic tags that buyers attach to presents. These are fast to stamp and sell in sets of ten.
Materials Needed
- Round wood slices (1.5 inch diameter, 10 per set)
- Red ink pad
- Rubber stamp with 'Joy' or 'Noel'
- Fine twine (1 yard)
- Hole punch (1/8 inch)
How to Make It
- Press the rubber stamp firmly onto the red ink pad.
- Stamp the word 'Joy' or 'Noel' onto the center of each wood slice.
- Let the ink dry for 10 minutes, then use the hole punch to make a top hole.
- Cut ten 4-inch pieces of twine and thread one through each hole.
12. Quilted Flannel Stocking Ornaments
Moderate
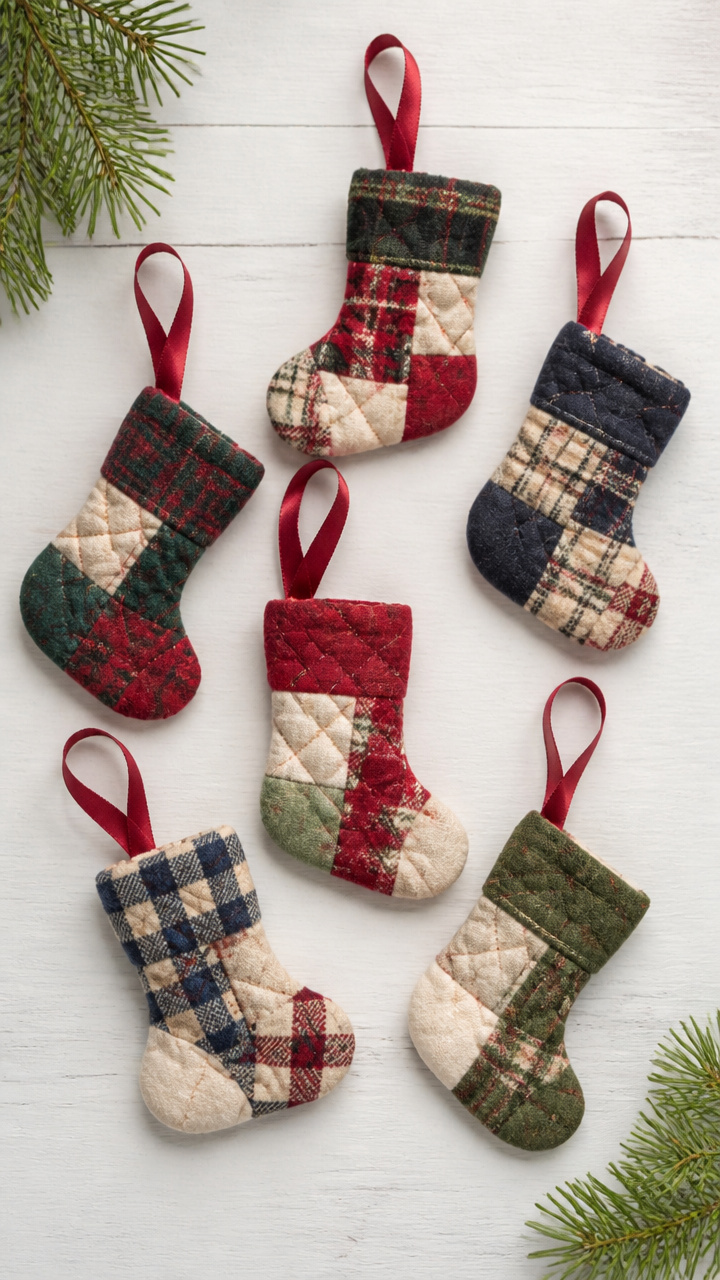
Mini stockings made from patchwork flannel squares dangle from tree branches with charm. These are sewn flat and framed with ribbon hangers.
Materials Needed
- Assorted flannel fabric scraps
- Sewing machine
- Scissors
- Iron
- Red satin ribbon (6 inches)
- Fusible interfacing (4×6 inch sheet)
How to Make It
- Cut two 3×4 inch stocking shapes from different flannel scraps and one from fusible interfacing.
- Iron the interfacing to the back of one flannel piece for stiffness.
- Place the two flannel pieces right sides together and sew around the edge with a 1/4 inch seam, leaving the top open.
- Turn right side out and press flat with the iron.
- Glue a 6-inch red satin ribbon to the back for hanging.
13. Ceramic Snowman Garden Markers
Advanced
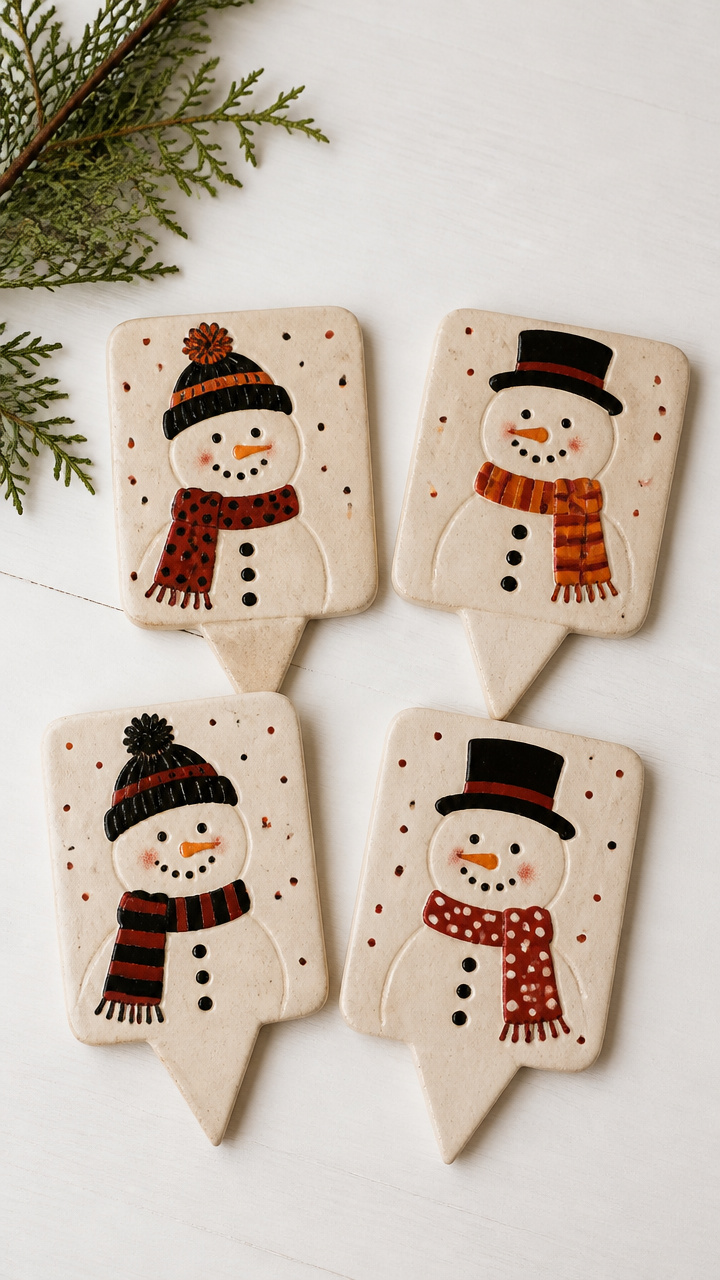
Hand-painted snowmen on ceramic tiles label herb pots with winter cheer. These are fired in a kiln and sold as kitchen garden sets.
Materials Needed
- Unglazed ceramic tiles (3×3 inches, 4 per set)
- Underglaze paints (black, orange, red)
- Paintbrush set
- Kiln
- Pencil
How to Make It
- Sketch a simple snowman with three circles on each tile using a pencil.
- Paint the hat, eyes, and buttons with black underglaze, the nose with orange, and the scarf with red.
- Let the paint dry for 1 hour, then fire the tiles in a kiln at 1828°F for 8 hours.
- Cool completely before packaging in sets of four.
14. Wool Needle Felting Ornaments
Advanced
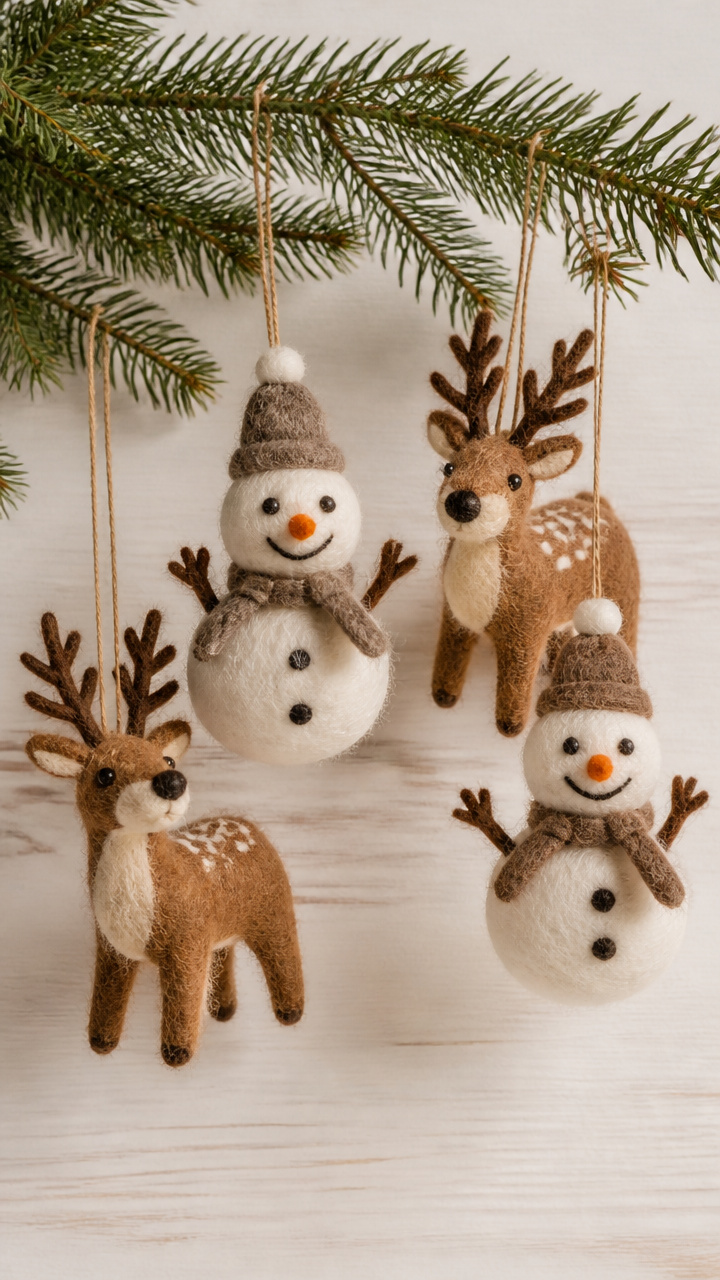
Fuzzy snowmen and reindeer shaped with a felting needle sell as unique tree decorations. These require a foam pad and wool roving but make high-margin items.
Materials Needed
- White wool roving (1 oz)
- Brown wool roving (0.25 oz)
- Felting needle
- Foam working pad
- Ornament hook (plastic, 3 per set)
How to Make It
- Pull a small amount of white wool roving and roll it into a loose ball.
- Place the ball on the foam pad and repeatedly stab it with the felting needle until it forms a firm 1-inch sphere.
- Repeat to make two smaller spheres for the head and body.
- Attach the head to the body by felting the contact area with the needle.
- Use brown roving to form tiny antlers or arms and felt them into place.
- Insert a plastic ornament hook into the top.
15. Cinnamon Stick Bundles with Ribbon
Easy
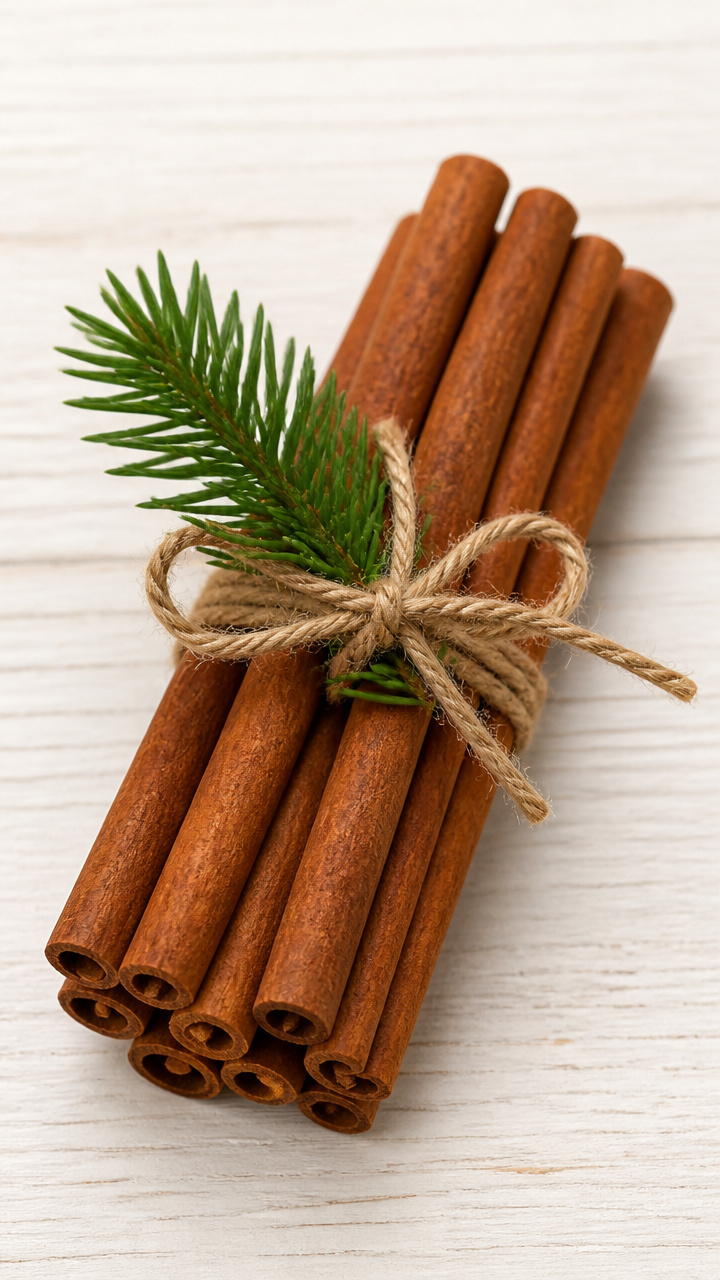
Tied bundles of cinnamon sticks release a warm spice scent and double as decor. These take five minutes to assemble and cost almost nothing to make.
Materials Needed
- Cinnamon sticks (5 per bundle)
- Baker's twine (12 inches)
- Mini pine sprig (1 per bundle)
- Glue dot
How to Make It
- Lay five cinnamon sticks side by side and wrap baker's twine around one end twice.
- Tie a secure knot and form a small loop for hanging.
- Attach a mini pine sprig to the knot using a glue dot.
16. Hand-Cut Paper Snowflakes in Frames
Moderate
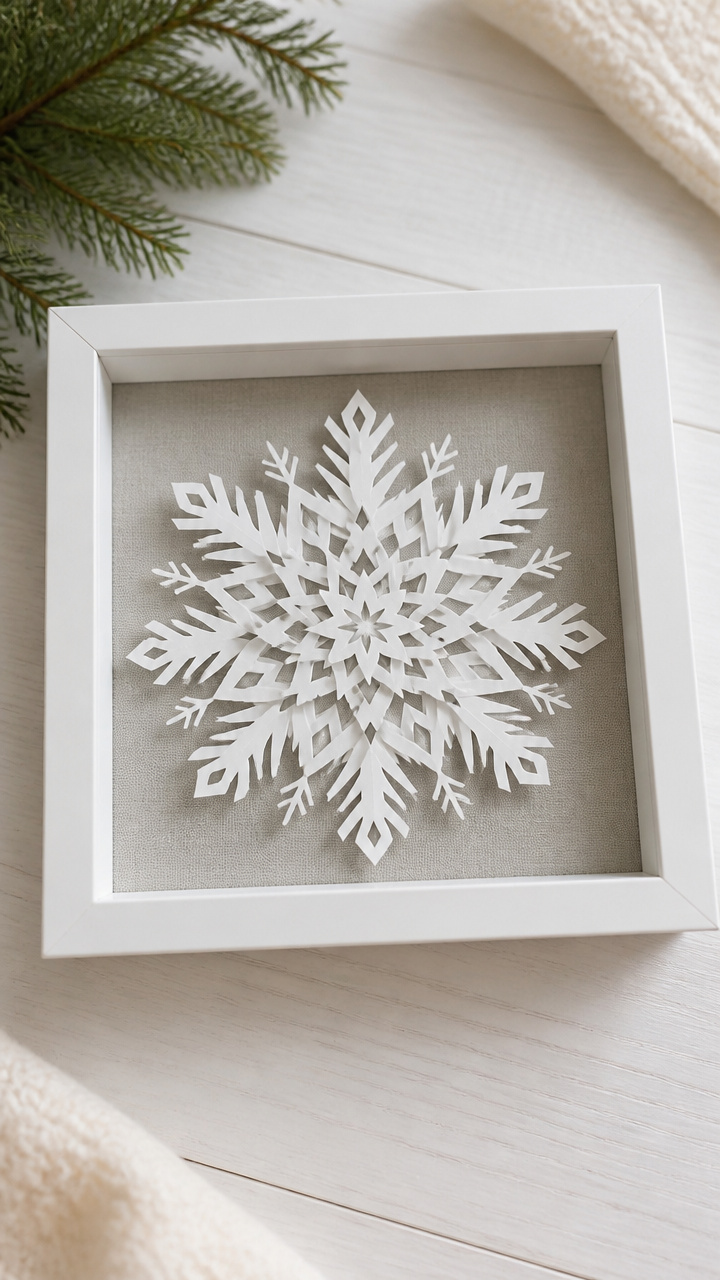
Delicate paper snowflakes mounted in shadow boxes sell as nursery or classroom decor. Each is unique due to the folding and cutting process.
Materials Needed
- White A4 cardstock
- Craft scissors
- 6×6 inch shadow box frames (3 per set)
- Double-sided tape
- Pencil
How to Make It
- Fold one sheet of cardstock into a triangle, then fold into thirds twice to create a narrow wedge.
- Use scissors to cut small shapes along the edges, avoiding cutting the folded spine.
- Unfold carefully to reveal the snowflake.
- Place a small piece of double-sided tape on the back center of the snowflake and mount it inside the shadow box.
- Close and seal the frame.
17. Knit Hat Miniature Doll Sweaters
Advanced
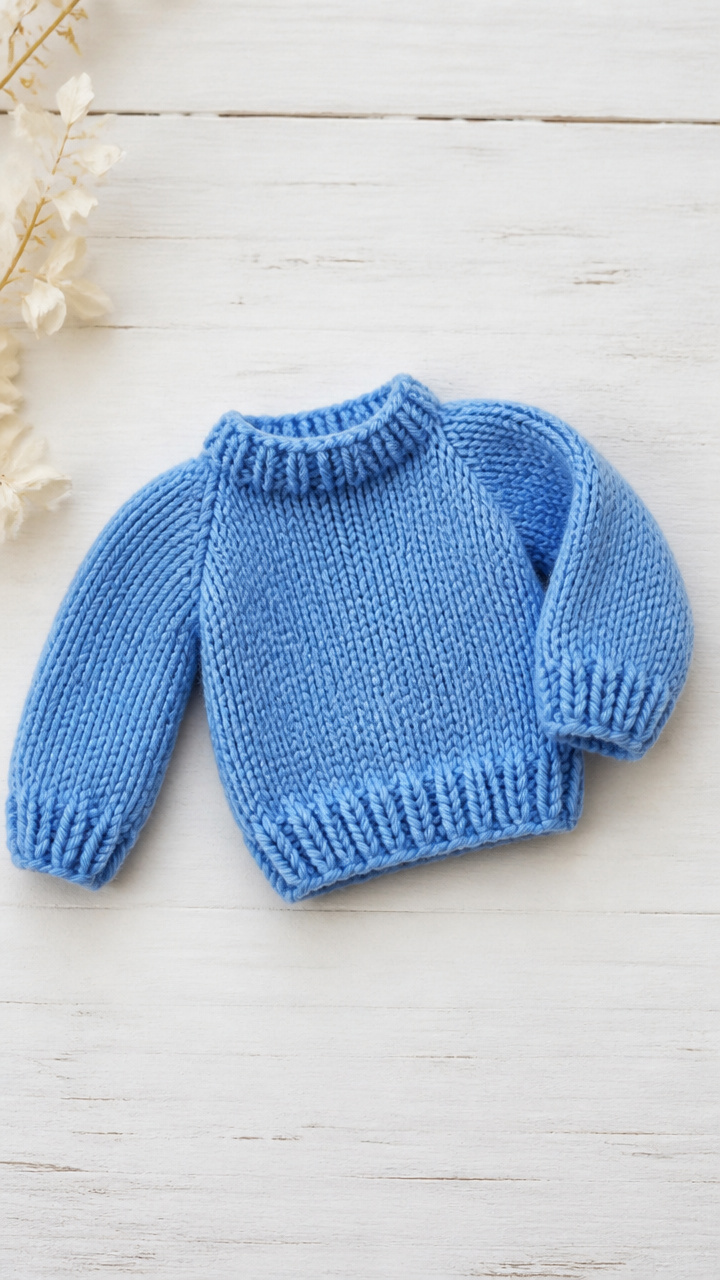
Tiny sweaters sized for 18-inch dolls make adorable holiday photo props. These use fine yarn and sell to doll collectors and gift shoppers.
Materials Needed
- Lightweight blue yarn (50 yards)
- Size 6 double-pointed needles
- Stitch markers (2)
- Yarn needle
How to Make It
- Cast on 40 stitches and distribute evenly across three double-pointed needles.
- Join in the round and place a marker, then knit 1 inch in stockinette stitch.
- Increase 8 stitches evenly around, then knit 2 inches more.
- Bind off and weave in ends with the yarn needle.
18. Felted Wool Dryer Ball Sets
Moderate
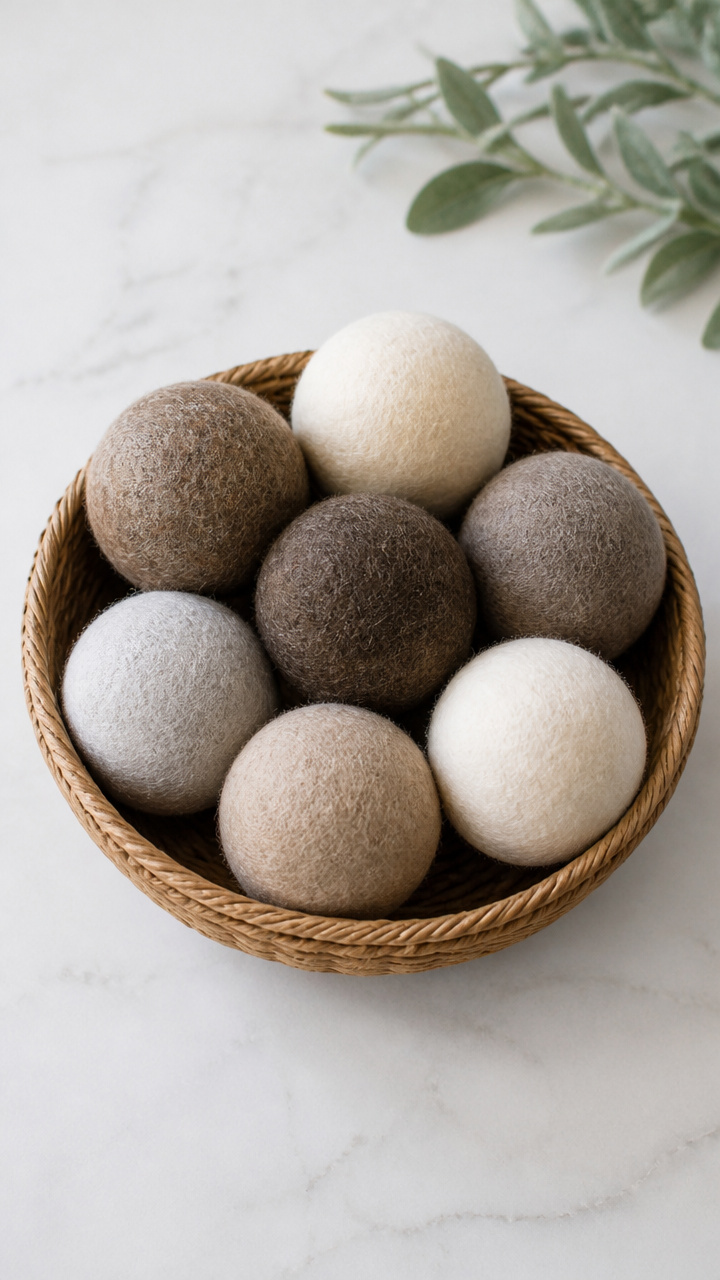
Wool balls that reduce drying time and static cling are eco-friendly and in constant demand. These are made by wet-felting raw wool and air-dry in hours.
Materials Needed
- Raw wool roving (100 grams)
- Liquid soap
- Hot water
- Plastic mesh bag
- Rubber gloves
How to Make It
- Pull 20 grams of wool roving and form a loose ball.
- Repeat to make four more balls.
- Place all five in a plastic mesh bag and secure the top.
- Fill a bowl with hot water and add 1 tablespoon of liquid soap.
- Agitate the bag in the soapy water for 10 minutes, squeezing and rolling it with gloved hands.
- Rinse in cold water and let air dry for 6 hours.
19. Resin Snowflake Coasters
Advanced
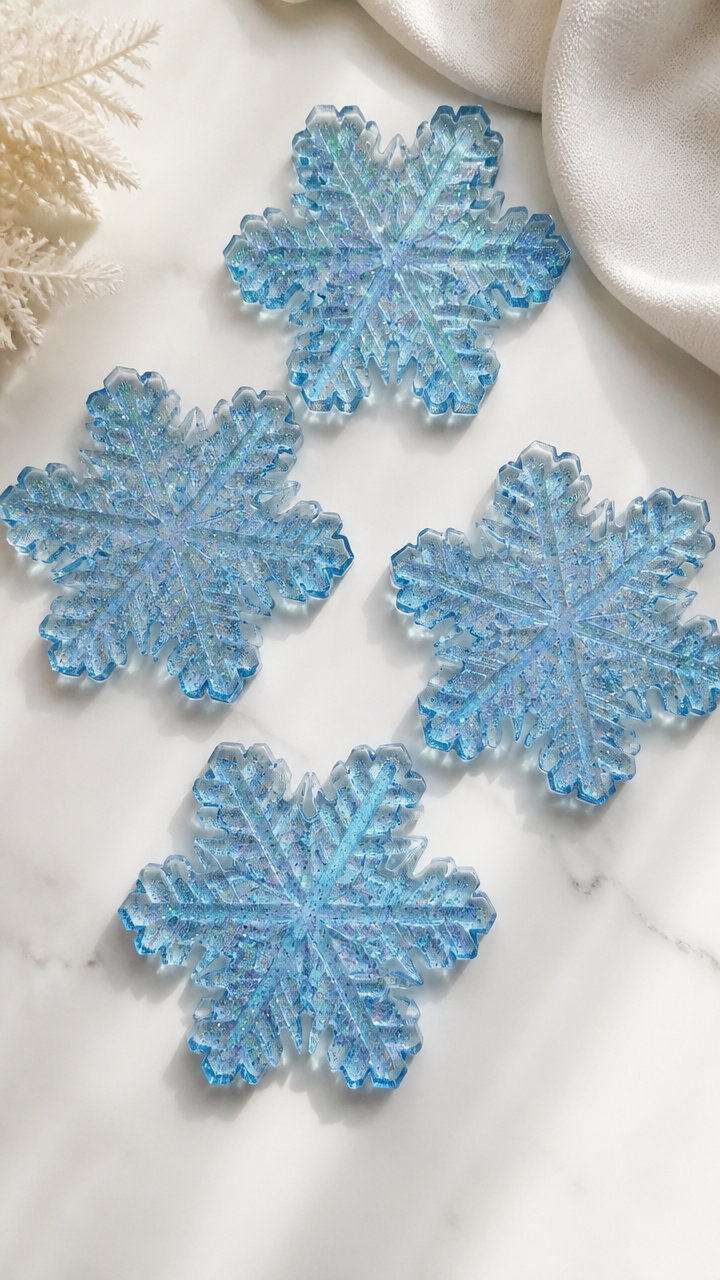
Clear resin poured into snowflake molds creates glossy, durable coasters. These can include glitter or embedded mica for shimmer.
Materials Needed
- Epoxy resin kit (8 oz)
- Snowflake silicone mold (4 cavities)
- Fine blue glitter
- Mixing cups (2)
- Stir sticks (2)
- Heat gun
How to Make It
- Mix 4 oz of resin and hardener in a cup according to package instructions.
- Sprinkle a pinch of blue glitter into each mold cavity.
- Pour the mixed resin into each cavity, filling to the top.
- Pass a heat gun slowly over the surface to remove bubbles.
- Let cure for 24 hours before unmolding.
20. Hand-Stamped Tea Towels
Moderate
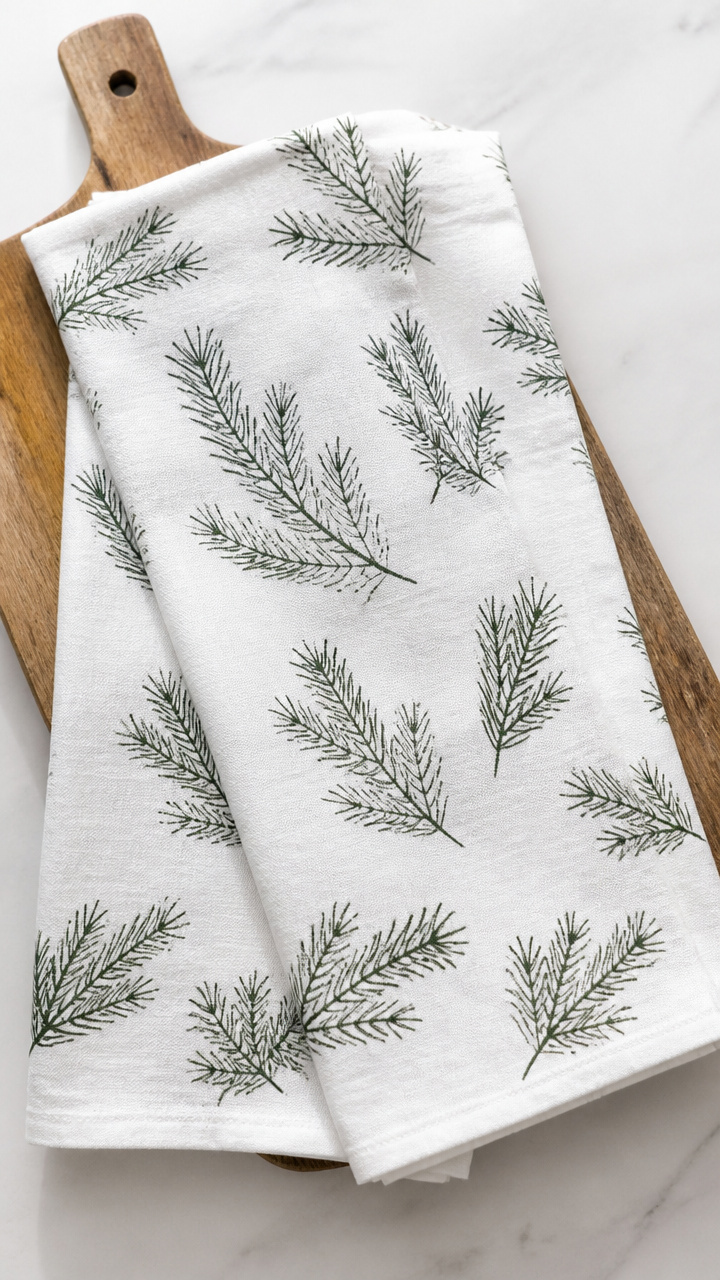
Linen towels with stamped evergreen sprigs add charm to kitchens. These use fabric ink and are washable for everyday use.
Materials Needed
- White linen tea towel (1 per craft)
- Fabric ink pad (forest green)
- Rubber stamp with pine branch design
- Parchment paper
- Iron
How to Make It
- Place the tea towel on a flat surface and position the stamp near one corner.
- Press the stamp firmly onto the ink pad, then onto the towel.
- Let dry for 30 minutes, then place parchment paper over the design.
- Iron on high heat for 3 minutes to set the ink.
21. Mini Mason Jar Snow Scenes
Easy
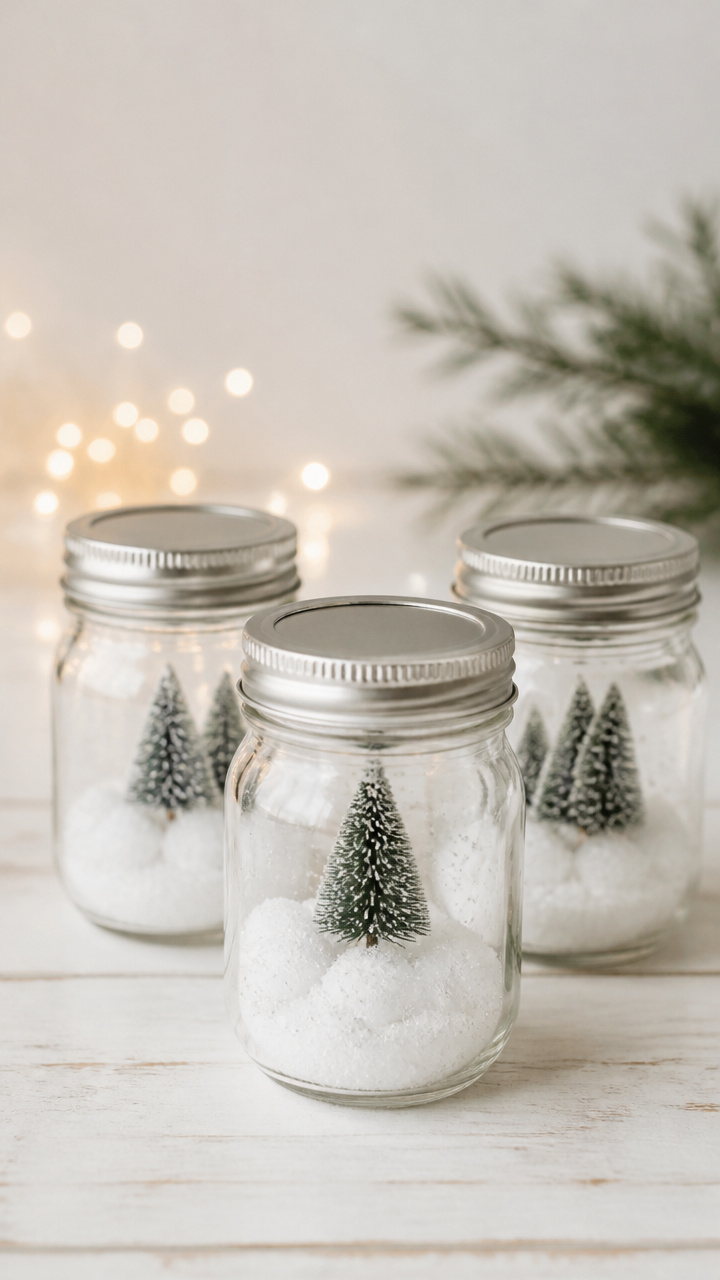
Tiny jars filled with cotton, mini trees, and glitter mimic snowy landscapes. These are sealed and sold as desktop decor or teacher gifts.
Materials Needed
- Mini mason jars with lids (2 oz, 3 per set)
- Artificial snow (2 tbsp per jar)
- Mini evergreen trees (3 per jar)
- Cotton balls (2 per jar)
- Glitter (1/2 tsp per jar)
- Hot glue gun
How to Make It
- Place three mini evergreen trees in the jar and surround them with cotton balls to form snow drifts.
- Sprinkle 2 tablespoons of artificial snow and 1/2 teaspoon of glitter over the cotton.
- Apply hot glue to the inside of the lid and screw it on tightly to seal.
22. Crocheted Cable Stitch Scrubbies
Moderate
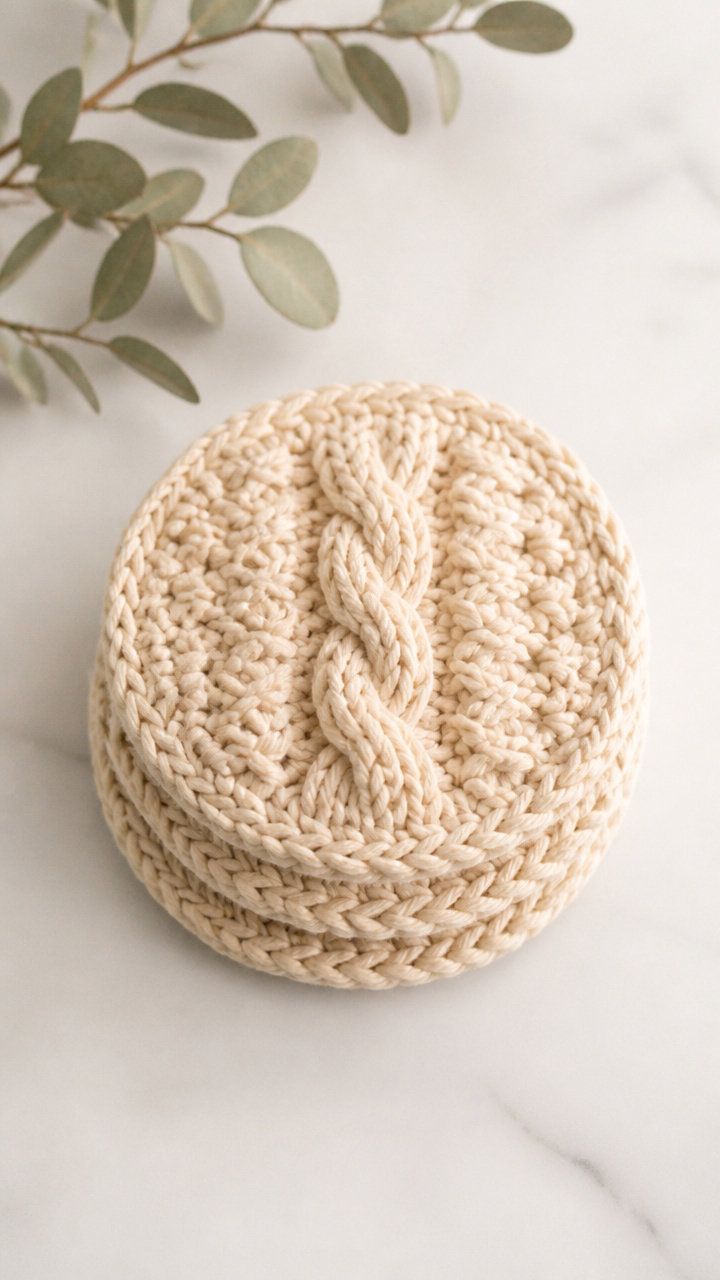
Textured dish scrubbies made with cotton yarn clean gently and last for months. These are quick to crochet and appeal to eco-conscious buyers.
Materials Needed
- 100% cotton yarn (scrub color)
- Size H crochet hook
- Scissors
How to Make It
- Chain 20 stitches and single crochet in the second chain from the hook and each chain across.
- Chain 1, turn, and single crochet in each stitch across.
- Repeat the previous row until the piece measures 3 inches long.
- Cut the yarn, pull through the last loop, and weave in the end.
23. Maple Wood Spoon Charms
Advanced
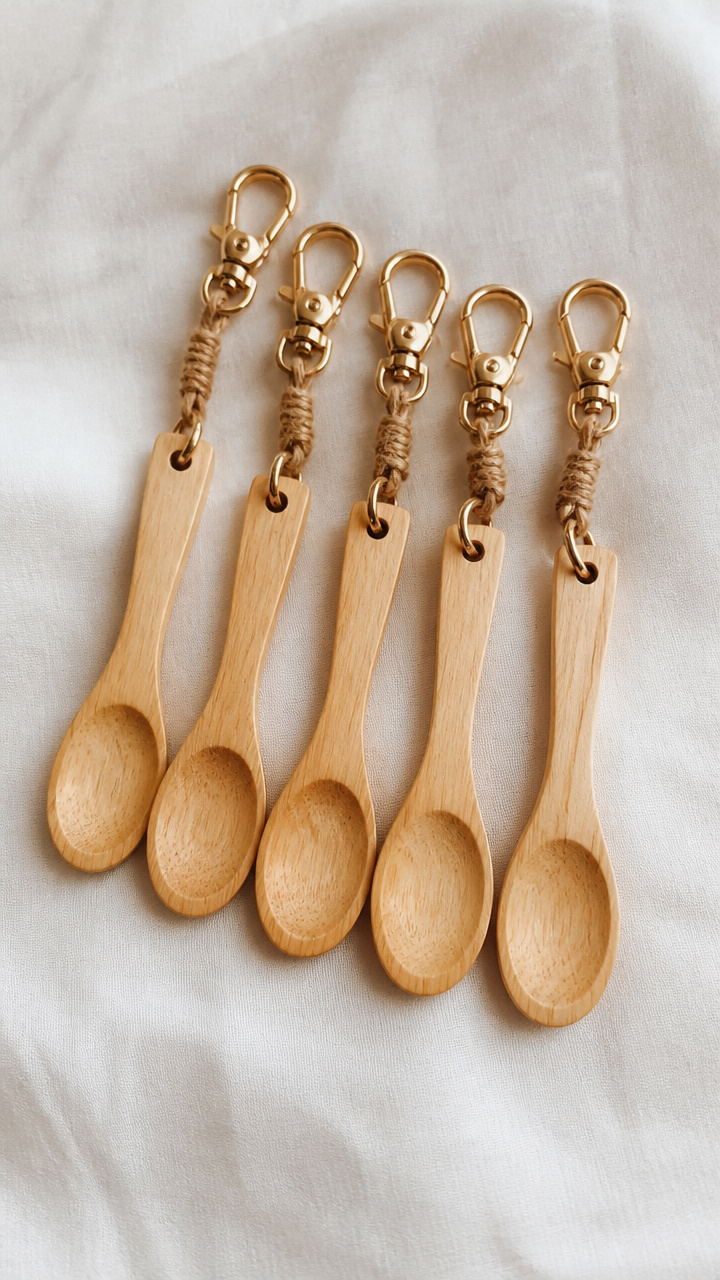
Small spoons laser-cut from maple wood dangle from keychains or gift tags. These are lightweight and sell as kitchen-themed gifts.
Materials Needed
- Laser-cut maple wood spoon blanks (1.5 inches long, 5 per set)
- Jute cord (6 inches)
- Jump rings (5, 8mm)
- Pliers
- Keychain clasp (5)
How to Make It
- Open a jump ring with pliers and slide it through the hole in the spoon handle.
- Attach a 6-inch jute cord and a keychain clasp to the jump ring.
- Close the jump ring securely with pliers.
- Repeat for all five spoons.
You’ve got everything you need to start creating beautiful winter pieces today. Pick one that speaks to you and let your hands bring it to life.