15 Kid-Friendly Garden Craft Projects to Do This Summer

Long sunny afternoons offer the perfect opportunity to bring your kids outside and make something creative with their hands. Garden crafts teach children how plants grow, welcome beneficial pollinators, and add bright pops of color to your flowerbeds.
You do not need complicated equipment or expensive art supplies to get started. Basic household staples, natural materials collected from your yard, and a few containers of outdoor-safe paint provide everything needed for hours of joyful making.


1. Painted River Stone Plant Markers
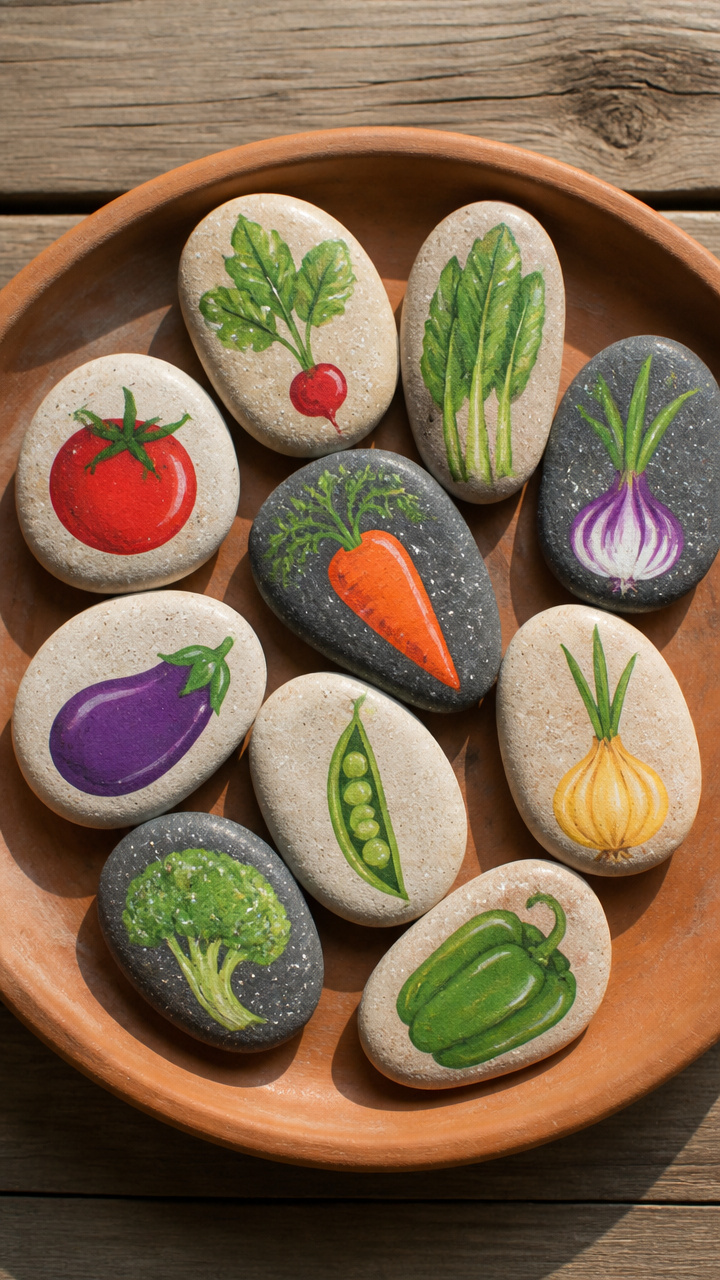
Smooth river stones become durable, weatherproof identifiers for your vegetable beds and herb pots. Kids love searching the yard for flat rocks and decorating them with bright produce illustrations.
Materials Needed
- 6 smooth flat river stones (3 to 4 inches wide)
- 1 set of multi-surface POSCA acrylic paint pens
- 1 can of clear outdoor spray sealant
How to Make It
- Wash each stone with warm soapy water using a stiff scrub brush, then let them dry completely in the sun for 30 minutes.
- Sketch your vegetable or herb name onto the center of each rock using a light pencil outline.
- Fill in your letters and draw simple matching illustrations using the acrylic paint pens, applying a second coat after 10 minutes if the colors look faint.
- Spray the rocks with a thin, even coat of clear outdoor sealant in a well-ventilated space and allow them to cure for two hours before placing them in your garden beds.
2. Glass Marble Bee Waterer
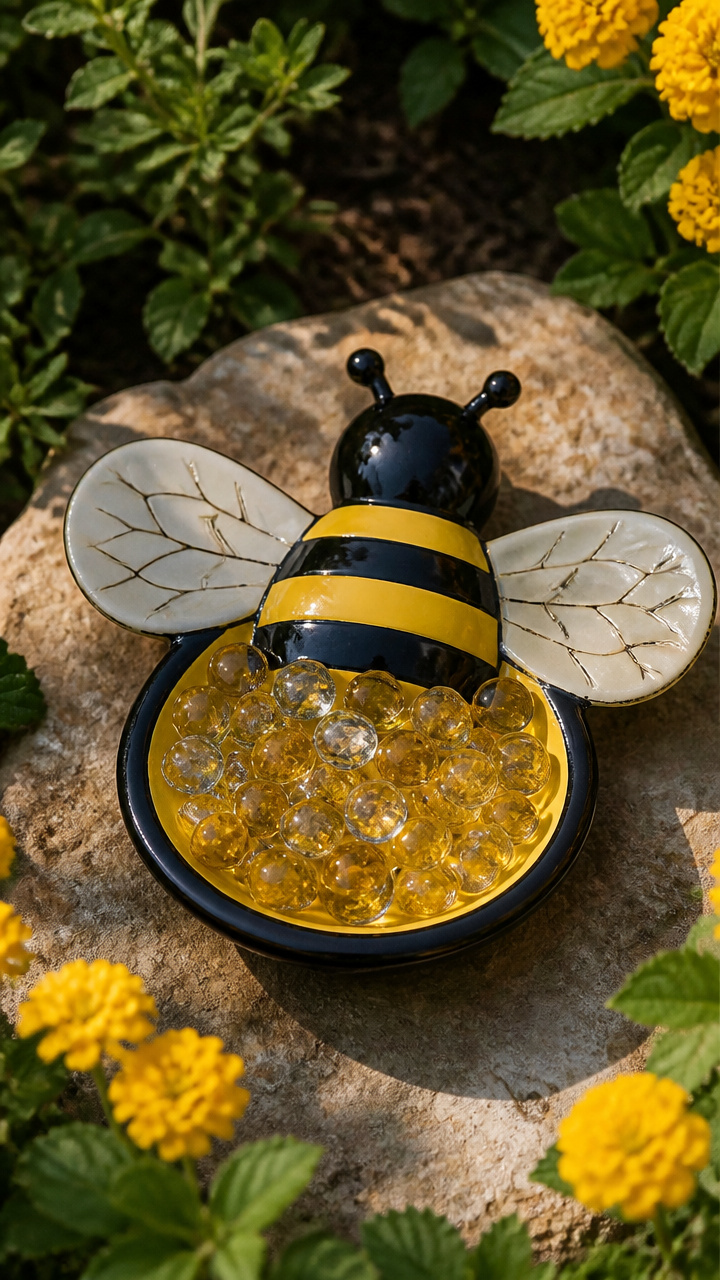
Shimmering glass gems resting in a shallow basin create a safe hydration station where bees can drink without drowning. Little hands can arrange colorful patterns that catch the morning sunlight and attract helpful garden pollinators.
Materials Needed
- 1 shallow 8-inch glazed ceramic plant saucer
- 2 bags of smooth glass craft marbles (approx. 50 marbles total)
- 2 cups of fresh dechlorinated water
How to Make It
- Rinse the ceramic saucer and glass marbles with warm water to remove any factory dust.
- Pour the glass marbles into the saucer, spreading them across the base in a single, level layer so they touch edge to edge.
- Pour fresh water slowly into the saucer until the water level reaches halfway up the height of the marbles, leaving the tops exposed as dry landing pads for insects.
- Set the completed waterer in a shady spot near your blooming flowers, refreshing the water every two days to keep it clean.
3. Mini Terracotta Pot Wind Chime
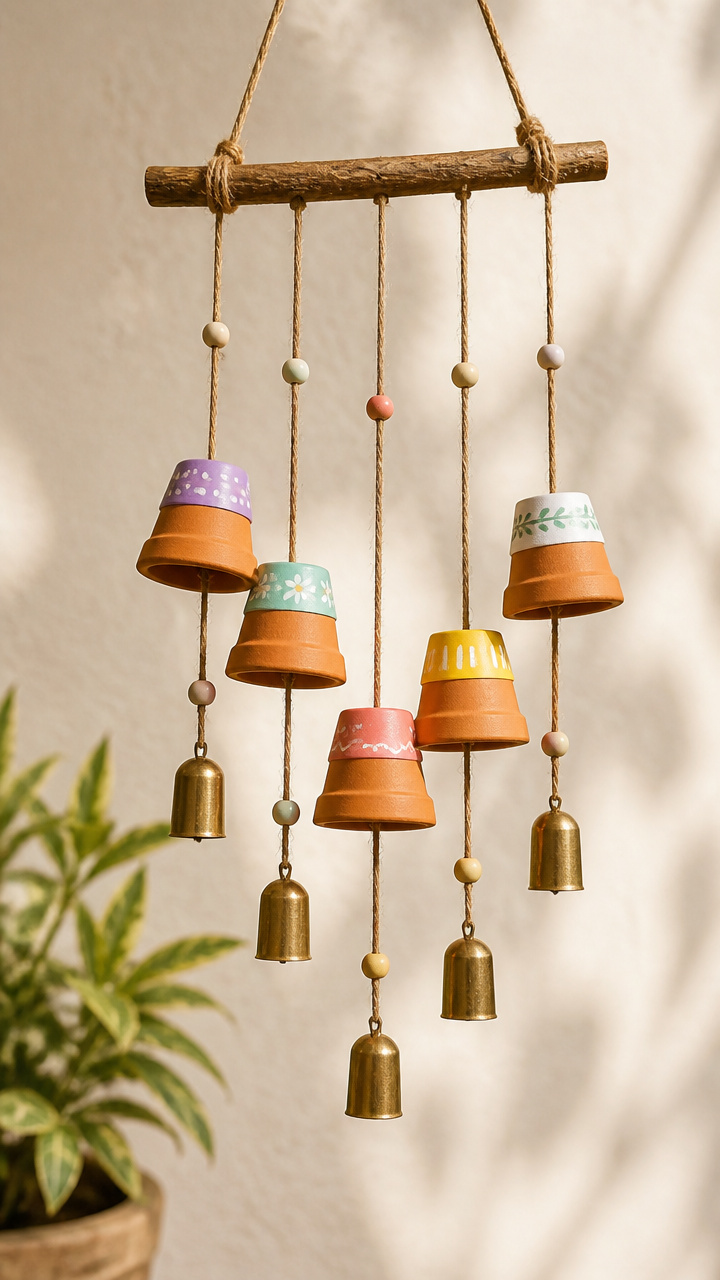
Clay pots stacked along sturdy cord produce a soft, earthy ring whenever a summer breeze blows through your patio. Children practice knot tying and pattern design while creating a musical garden accent.
Materials Needed
- 3 mini terracotta pots (2-inch diameter)
- 6 feet of 3-ply jute twine
- 4 round wooden craft beads (1-inch diameter)
- 1 set of outdoor acrylic craft paints
- 1 flat synthetic paintbrush
How to Make It
- Paint colorful geometric patterns or dots across the outside walls of each terracotta pot using outdoor acrylic paint and let dry for 45 minutes.
- Tie a double knot at the bottom of the jute twine, thread on one wooden bead, and slide the twine through the drainage hole of the first pot from the inside out.
- Measure four inches up the twine, tie another knot, thread on the second bead, and add the second pot so it rests securely over the bead without touching the lower pot.
- Repeat the knotting and bead process for the third pot, then knot the top of the twine into a three-inch hanging loop to suspend the chime from a tree branch.
4. Pressed Flower Sun Catcher Frame
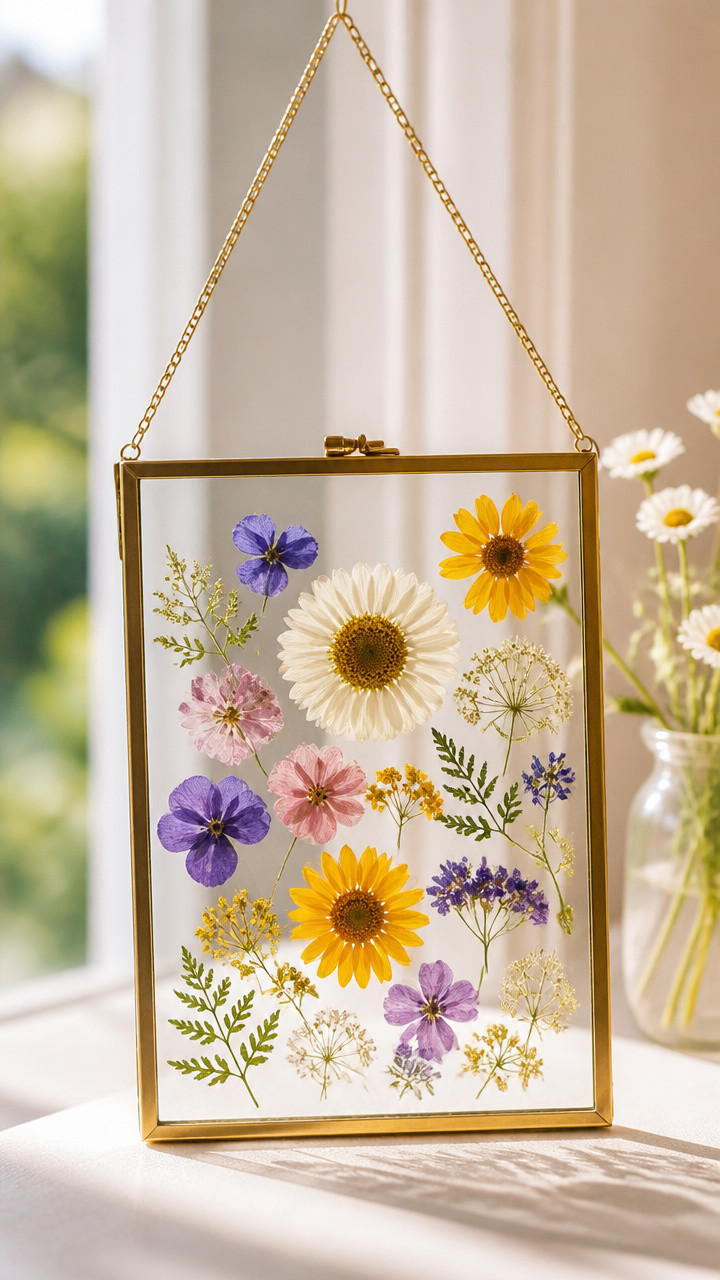
Dried botanical petals trapped between clear sheets glow like stained glass when hung against a sunny garden fence. Collecting blossoms on a morning garden walk encourages kids to observe tiny petal shapes and leaf textures.
Materials Needed
- 1 six-inch wooden embroidery hoop
- 1 roll of clear self-adhesive contact paper
- 1 pair of craft scissors
- 1 collection of flat pressed petals and small leaves
- 1 foot of satin ribbon
How to Make It
- Separate the two rings of the wooden embroidery hoop and trace the outer edge of the inner ring onto the backing of the contact paper twice.
- Cut out both contact paper circles with scissors, then peel the backing off one circle and press it firmly across the inner wooden hoop sticky side up.
- Arrange your pressed petals and green leaves carefully across the sticky surface, leaving a half-inch border along the wooden rim.
- Peel the second contact paper circle and press it sticky side down over your flowers to seal them, tighten the outer wooden hoop around the sandwich, and tie a ribbon to the top screw for hanging.
5. Upcycled Tin Can Bird Feeder
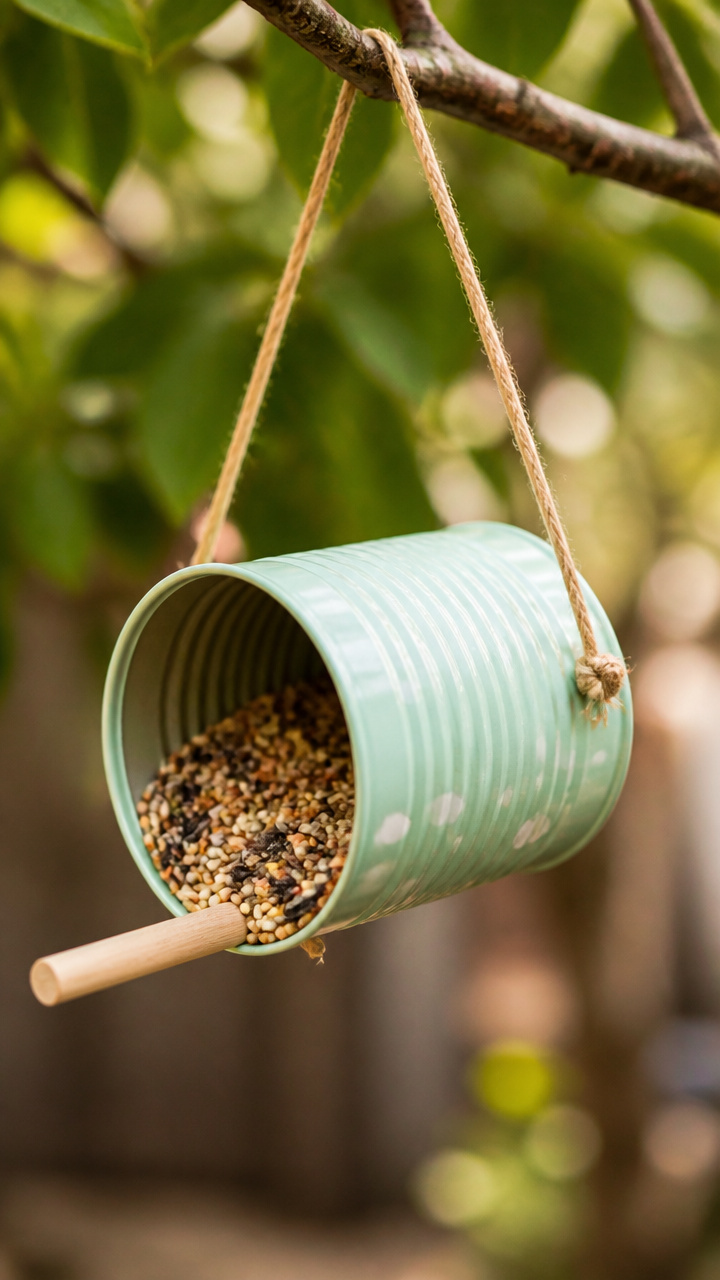
Recycled soup cans turn into hanging seed perches that bring lively songbirds right to your backyard window. Kids build assembly skills by securing a wooden perch and painting colorful stripes across the metal body.
Materials Needed
- 1 clean 14-ounce metal soup can with edges smoothed
- 1 wooden craft dowel (6 inches long, 1/4-inch diameter)
- 1 tube of outdoor silicone adhesive
- 1 bottle of non-toxic yellow acrylic paint
- 2 feet of braided nylon cord
- 1 cup of black oil sunflower seeds
How to Make It
- Paint the clean exterior of the soup can with yellow outdoor acrylic paint, applying two smooth coats with 20 minutes of drying time between layers.
- Apply a dime-sized bead of outdoor silicone adhesive along the inside bottom rim of the can and press the wooden dowel firmly into place so four inches extend outward as a perch.
- Wrap the nylon cord tightly around the center of the can body, knotting it underneath and tying the ends together at the top to create an 8-inch hanging loop.
- Hang the feeder horizontally from a low tree limb and fill the bottom interior cavity with sunflower seeds up to the level of the dowel perch.
6. Wildflower Seed Clay Bombs

Earthy clay balls packed with soil and hardy seeds allow children to launch future flowers into neglected garden patches. Rolling the mixture develops sensory coordination while preparing a season-long buffet for butterflies.
Materials Needed
- 1 cup of dry red pottery clay powder
- 1 cup of organic potting soil
- 2 tablespoons of mixed native wildflower seeds
- 1/2 cup of tap water
- 1 mixing bowl
How to Make It
- Combine the dry clay powder, potting soil, and wildflower seeds inside your mixing bowl, stirring with your hands to distribute the seeds evenly.
- Add water one tablespoon at a time, kneading the mixture until it reaches the consistency of firm cookie dough.
- Pinch off walnut-sized portions of the mixture and roll them between your palms into smooth, compact round balls.
- Lay the finished seed bombs on a baking tray to dry in a sunny, warm room for 48 hours before tossing them into garden beds right before a summer rain.
7. Pinecone Weather Station Hygrometer
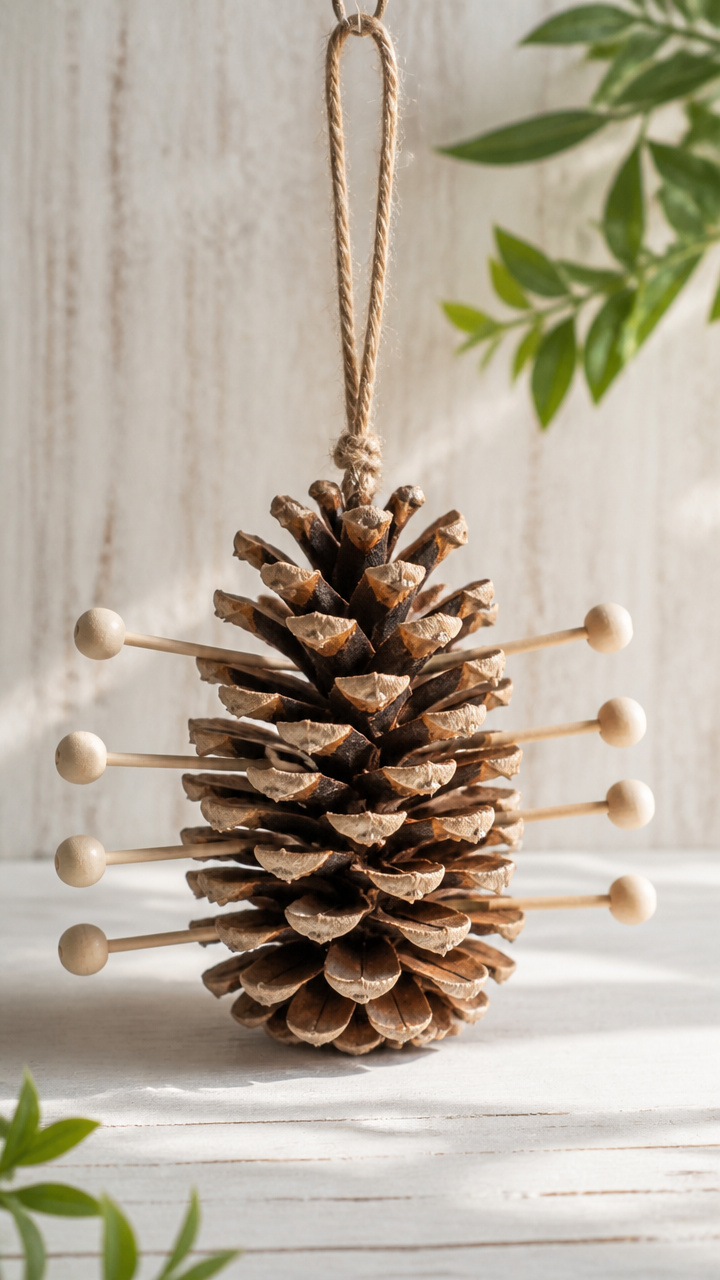
Natural pinecones react to changes in air moisture by opening when the air is dry and closing tight before rain storms. Young scientists can track daily weather patterns by building this simple outdoor observation board.
Materials Needed
- 2 large open pinecones
- 1 unfinished wood craft plaque (6×8 inches)
- 1 tube of waterproof wood glue
- 1 fine-point black permanent marker
- 1 brass screw eye hook
How to Make It
- Write Sunny & Dry at the top right of the wooden plaque and Rainy & Humid at the bottom right using your permanent marker.
- Glue the base of each pinecone firmly to the left side of the wooden plaque using waterproof wood glue, pressing down for two minutes.
- Screw the brass eye hook into the center of the top edge of the wooden plaque by hand until it sits flush against the wood.
- Allow the glue to dry for 24 hours, then mount the board on a sheltered outdoor post where your kids can check the pinecone scales every morning.
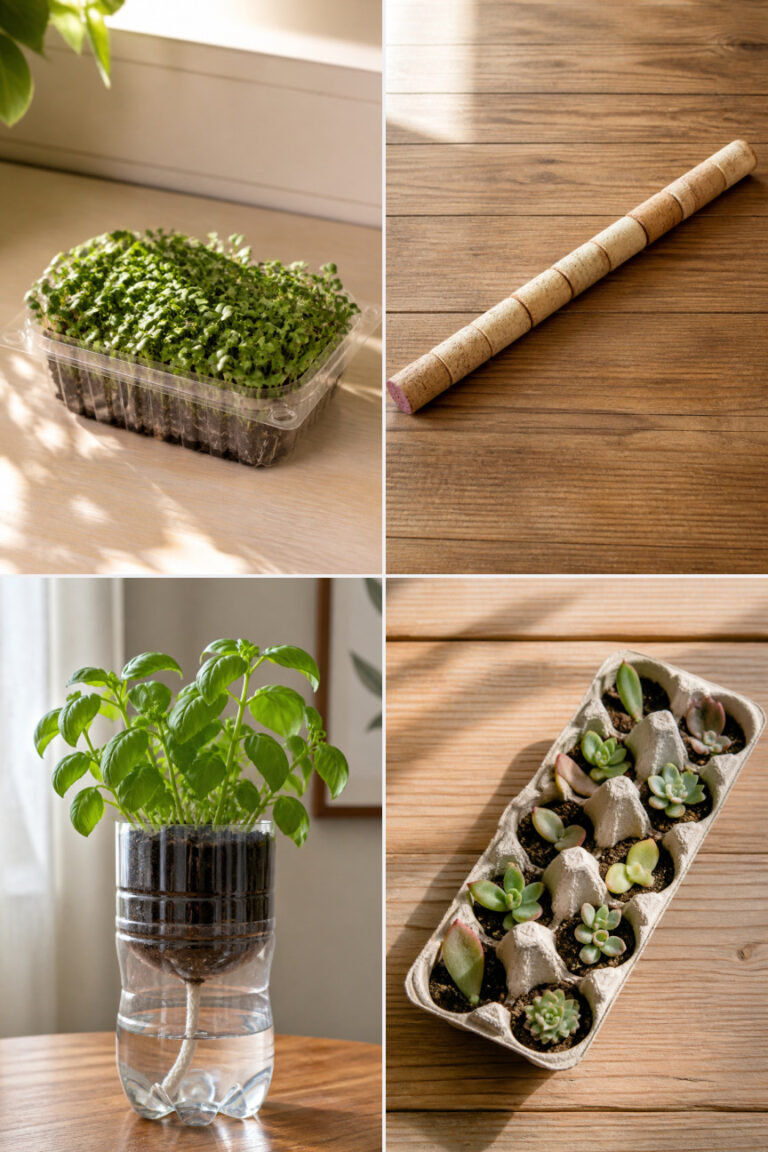
8. Egg Carton Mini Greenhouse
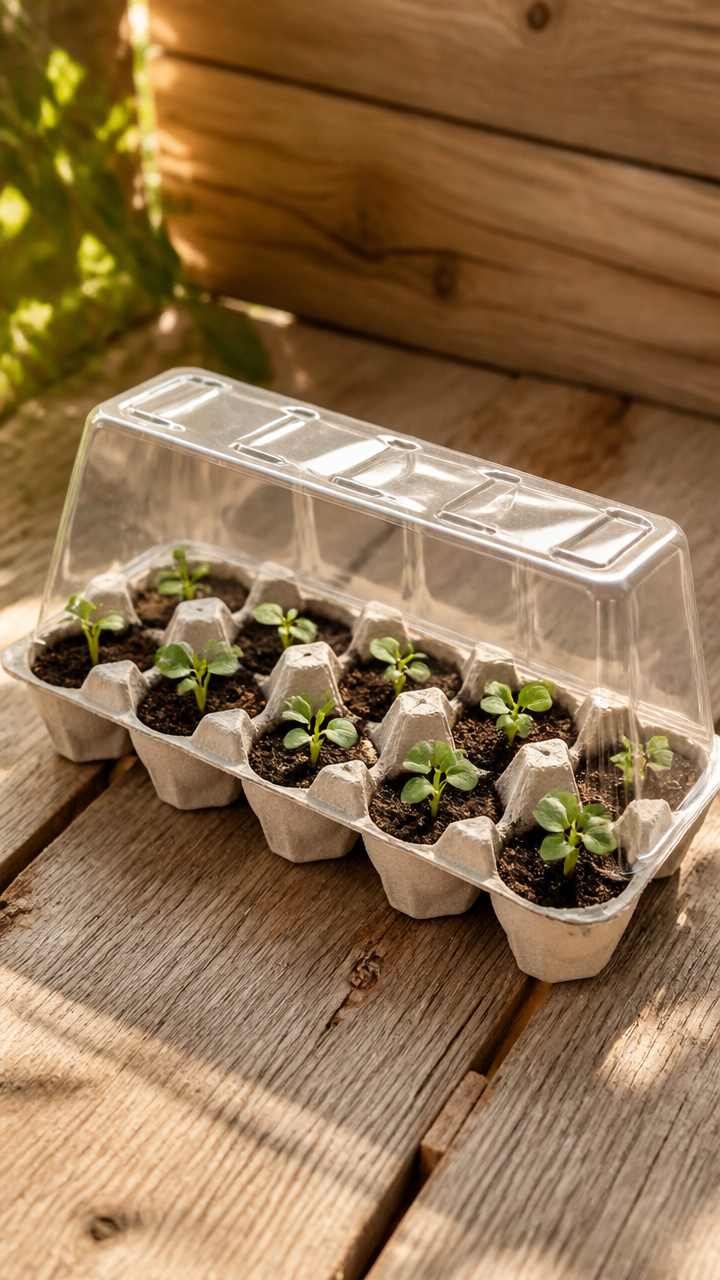
Cardboard egg cartons paired with clear plastic produce lids create self-contained germination chambers for eager young gardeners. Watching tiny radish seeds sprout in under a week delivers fast, rewarding results for little growers.
Materials Needed
- 1 cardboard 12-cup egg carton
- 1 clear plastic salad container lid (large enough to cover the carton)
- 2 cups of seed-starting soil mix
- 24 quick-sprouting radish seeds
- 1 misting spray bottle filled with water
How to Make It
- Cut the lid off the cardboard egg carton, keeping only the bottom twelve-cup portion.
- Fill each individual egg cup to the rim with loose seed-starting soil mix, tapping the bottom of the carton against your table to settle the dirt.
- Poke two shallow quarter-inch holes into each soil cup with a pencil tip, drop one radish seed into each hole, and gently cover them with soil.
- Mist the soil thoroughly with the spray bottle, invert the clear plastic lid over the carton to lock in humidity, and place the setup on a warm windowsill until green shoots appear.
9. Twig and Yarn Garden Talisman
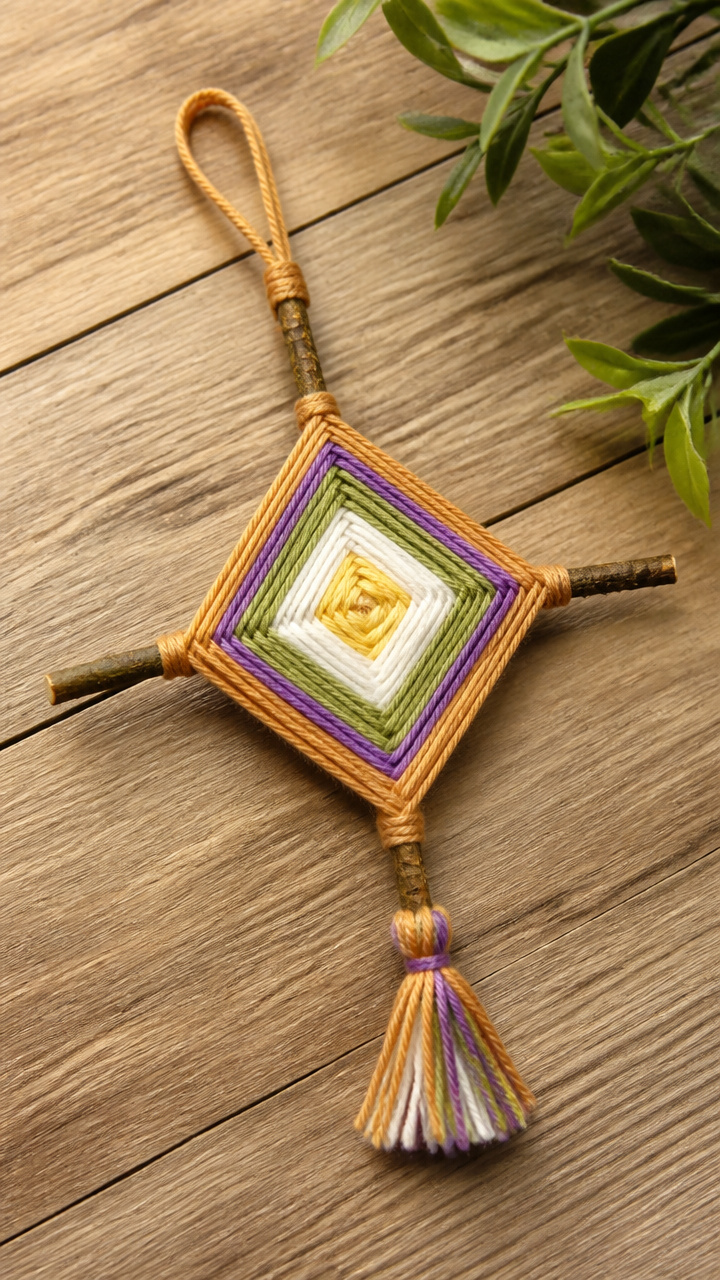
Fallen branches woven with vibrant yarn produce rustic ornaments that sway gently among tall garden grasses. Kids practice tactile weaving patterns that strengthen fine motor control while making bold outdoor art.
Materials Needed
- 2 straight fallen twigs (8 inches long, 1/2-inch thick)
- 3 skeins of worsted acrylic yarn in contrasting bright colors
- 1 pair of child-safe scissors
How to Make It
- Cross the two twigs at their midpoints to form an even plus-sign shape, wrapping the tail of your first yarn color diagonally across the center four times in each direction to lock them together.
- Wind the working yarn over one twig arm, wrap it around the back of that arm once, and carry it across to the next twig arm in a clockwise direction.
- Continue the wrap-and-turn pattern around all four arms, tying on a new yarn color whenever you want to switch shades and trimming excess tails with scissors.
- Stop weaving two inches before reaching the twig tips, tie off the working yarn in a double knot around one branch, and knot an extra 6-inch yarn loop at the top to hang it in your garden.
10. Beaded Copper Wire Plant Stakes
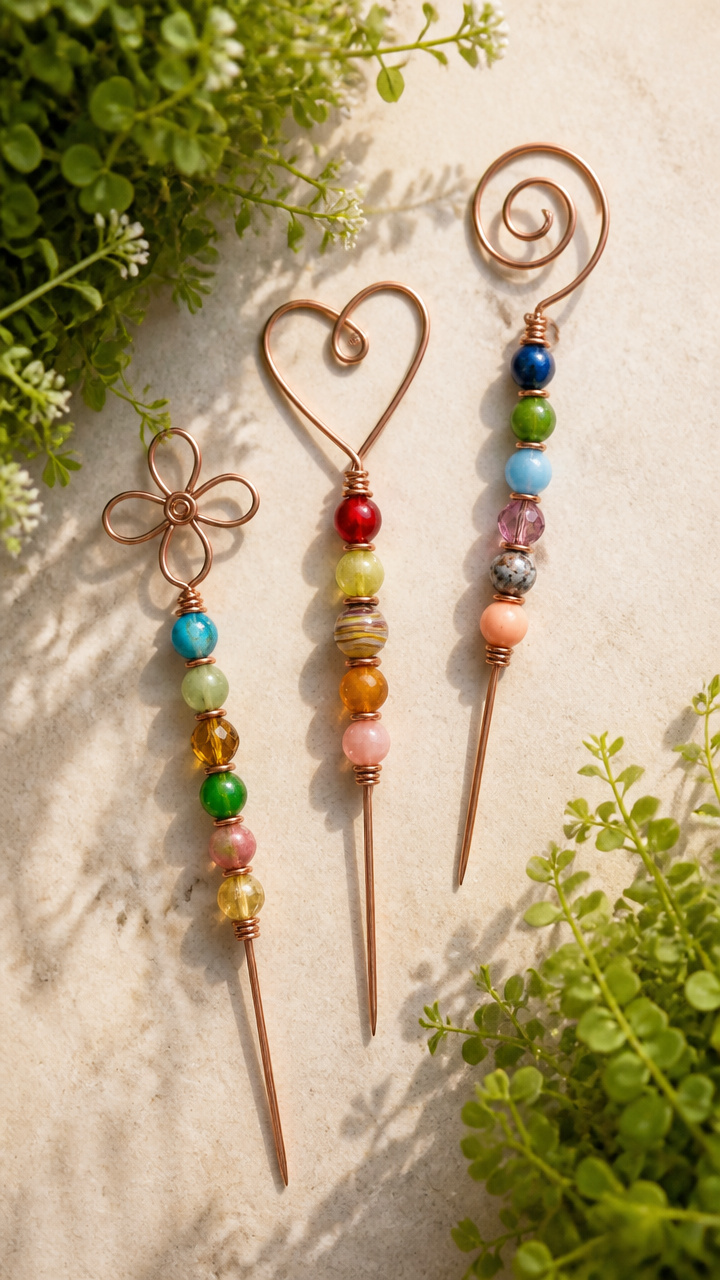
Malleable copper wire strung with colorful beads adds sparkling support for heavy tomato branches and indoor houseplants. Bending and threading the wire lets children explore wire sculpture while making practical garden hardware.
Materials Needed
- 3 feet of 16-gauge solid copper craft wire
- 30 assorted plastic pony beads and glass faceted beads
- 1 pair of needle-nose craft pliers
- 1 pair of wire cutters
How to Make It
- Cut an 18-inch length of copper wire using wire cutters, then use needle-nose pliers to bend one end into a small decorative spiral to act as a bead stopper.
- Slide your assorted beads onto the wire from the straight end, pushing them up toward the top spiral in any color pattern you prefer until 6 inches are covered.
- Bend the wire immediately below the last bead at a sharp 90-degree angle with pliers to lock all the beads firmly in place.
- Push the remaining 10 inches of bare copper wire straight into the soil beside a growing plant stem to hold it upright.
11. Concrete Leaf Cast Stepping Stone
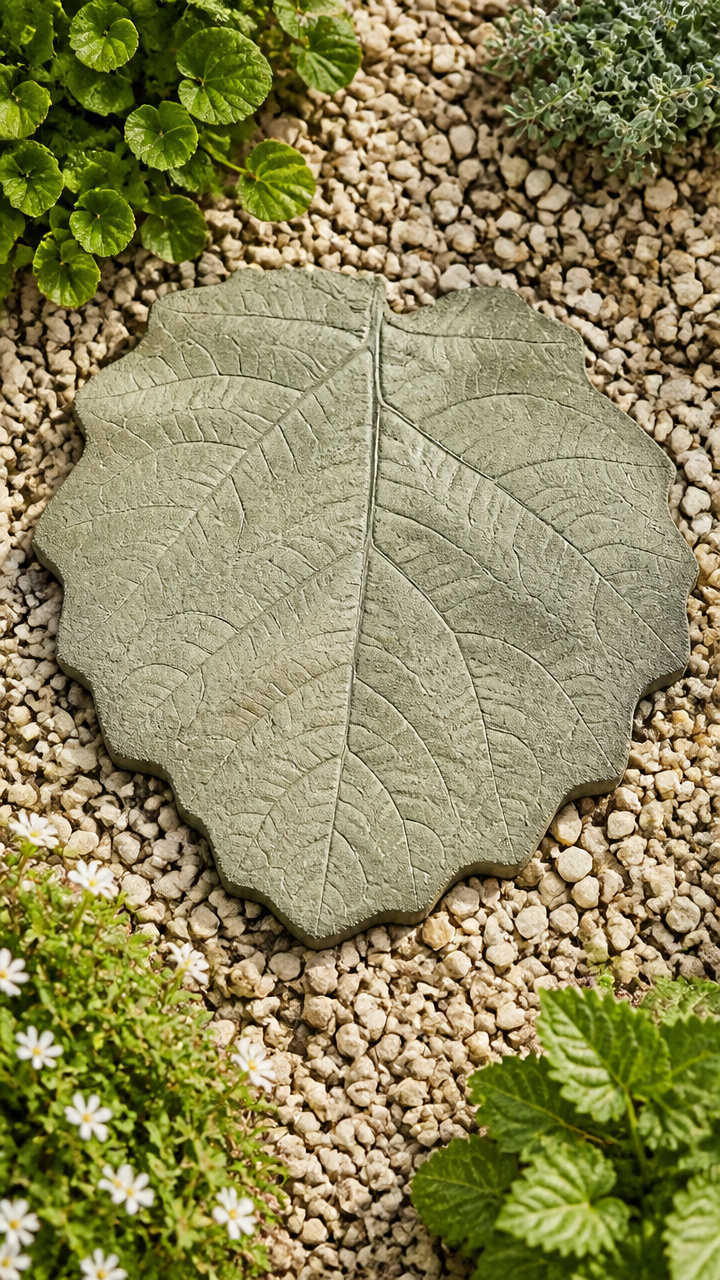
Massive garden leaves pressed into wet concrete create detailed, fossil-like pavers displaying every vein and contour. This hands-on masonry project introduces kids to mold-making and leaves behind a permanent garden path keepsake.
Materials Needed
- 1 large fresh hosta or rhubarb leaf
- 5 pounds of quick-setting stepping stone concrete mix
- 1 plastic bucket
- 1 small garden trowel
- 1 cup of tap water
- 1 sheet of heavy-duty plastic wrap
- 1 bottle of non-stick cooking spray
How to Make It
- Build a four-inch high mound of damp sand or soil on the ground, cover it with plastic wrap, and lay your leaf vein-side up across the mound to create a gentle curve.
- Coat the exposed veins and surface of the leaf lightly with non-stick cooking spray to keep the concrete from sticking later.
- Mix five pounds of concrete with water in your bucket using the trowel until it reaches the thickness of chunky peanut butter.
- Spoon the wet concrete onto the leaf, building a smooth one-inch thick layer outward from the center, and let it cure undisturbed for 48 hours before peeling away the green leaf.
12. Bamboo Cane Solitary Bee Hotel
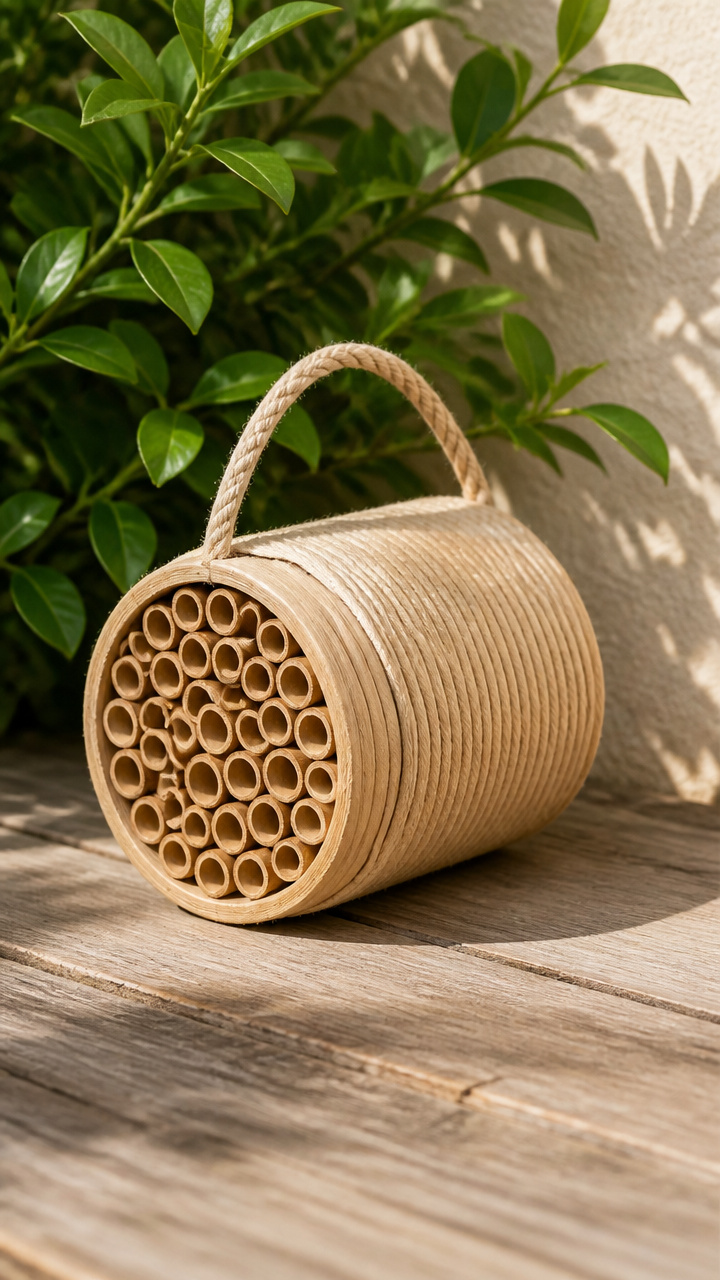
Bundled hollow bamboo tubes provide nesting cavities for non-stinging solitary bees that pollinate summer vegetables. Kids learn about native pollinator habitats while measuring and assembling natural building materials.
Materials Needed
- 1 small unfinished wooden box (6x6x4 inches)
- 20 hollow bamboo garden stakes (approx. 1/2-inch diameter)
- 1 pair of sturdy pruning shears
- 1 bottle of waterproof wood glue
- 1 sheet of medium-grit sandpaper
How to Make It
- Cut the hollow bamboo canes with pruning shears into uniform 4-inch lengths, ensuring each tube is open on at least one end.
- Rub both ends of each cut bamboo piece against medium-grit sandpaper to remove rough splinters that could harm insect wings.
- Apply a generous layer of waterproof wood glue across the bottom and sides of the inside of your wooden box.
- Stack the sanded bamboo tubes tightly inside the box with the open ends facing forward, pressing them together until the entire frame is packed firmly and cannot shift.
13. Cyanotype Sun-Print Botanical Flags
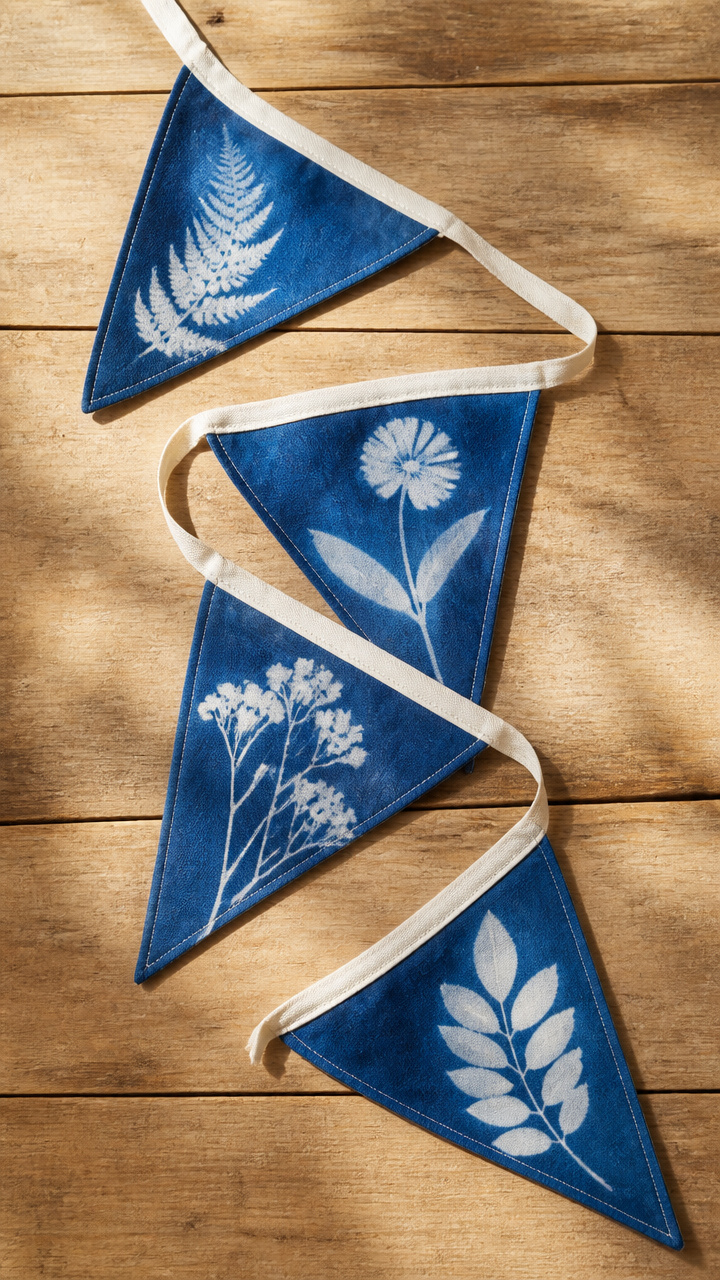
Sunlight-activated paper records white photographic silhouettes of backyard leaves against deep Prussian blue backgrounds. Children combine botany with early photographic science using nothing more than fresh plant cuttings and natural sunlight.
Materials Needed
- 4 sheets of 5×7-inch cyanotype sun-print paper
- 4 fresh flat plant clippings (such as fern fronds or clover leaves)
- 1 sheet of clear acrylic from an old picture frame
- 1 shallow tray of cold tap water
- 4 wooden spring clothespins
- 4 feet of natural jute cord
How to Make It
- Take your sun-print paper out of its light-blocking bag indoors, place it blue-side up on a flat piece of cardboard, and arrange your fresh fern fronds across the surface.
- Place the clear acrylic sheet over the botanical specimens to press them completely flat against the paper so crisp shadows form.
- Carry the setup outdoors into direct midday sunlight for three minutes until the exposed paper changes from bright blue to pale bronze.
- Remove the plants and submerge the paper in your water tray for two minutes to stop the chemical reaction, let it dry flat on a paper towel, and clip it to your jute cord to hang as garden bunting.
14. Dried Bottle Gourd Birdhouse
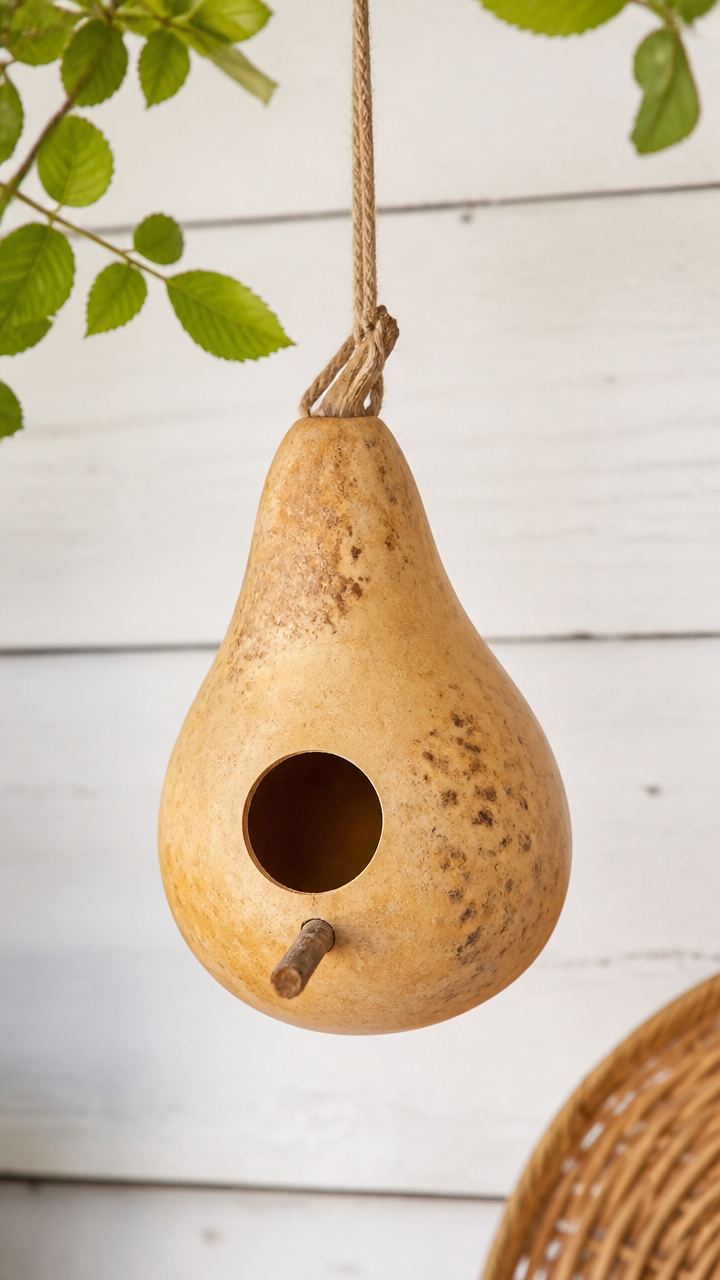
Hollow dried gourds offer sturdy, weather-resistant nesting quarters for chickadees and wrens looking for summer shelter. Kids love sanding the organic curves of the gourd shell and painting rustic patterns around the entryway.
Materials Needed
- 1 dried hard-shell bottle gourd (8 to 10 inches tall)
- 1 hand drill fitted with a 1.25-inch spade bit
- 1 sheet of 120-grit sandpaper
- 1 set of exterior acrylic paints
- 1 eighteen-inch leather hanging lace
- 1 small artist paintbrush
How to Make It
- Sand the entire outer surface of the dried gourd using 120-grit sandpaper to buff away any loose dried skin and smooth rough spots.
- Have an adult drill a 1.25-inch round entrance hole three inches up from the widest part of the gourd belly, along with two small 1/8-inch drainage holes through the bottom base.
- Paint colorful rings or floral designs around the entrance hole using exterior acrylic paints, then let the paint dry for one hour.
- Drill two tiny holes straight through the top stem neck, thread your leather lace through the opening, and tie the ends into a secure knot to hang the birdhouse from a sturdy tree branch.
15. Wooden Clothespin Butterfly Plant Clips
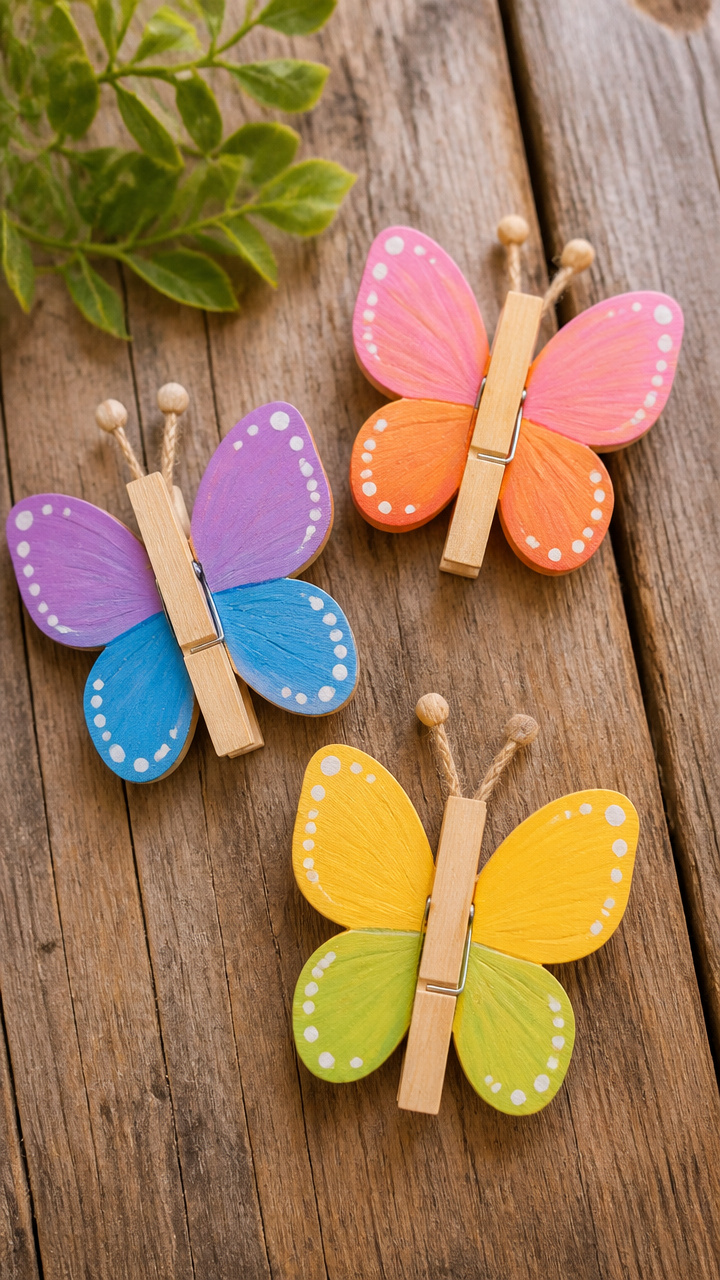
Decorated wooden clothespins provide gentle support for trailing sweet pea vines and tall flower stems along garden trellises. Assembling delicate pipe cleaner antennae and painting wooden wings gives children a fun way to help tend the vegetable garden.
Materials Needed
- 6 wooden spring clothespins
- 1 set of watercolor cakes with brush
- 3 black chenille pipe cleaners
- 1 tube of quick-dry craft glue
- 1 pair of scissors
How to Make It
- Paint both wooden sides of each clothespin with bright watercolor washes, blending two or three colors together, and let them dry for 15 minutes.
- Cut each chenille pipe cleaner in half with scissors, fold each piece into a sharp V-shape, and curl the two top tips with your fingertips to create curved antennae.
- Dab a drop of quick-dry craft glue onto the metal spring hinge of the clothespin and press the base of the pipe cleaner antennae firmly into the glue.
- Allow the glue to set for ten minutes, then pinch the clothespins open to gently clip growing tomato and bean stems onto your garden stakes without pinching the vines.
Gather your budding artists and head outside to try one of these sunny backyard projects. With just a few simple tools and some fresh air, you will build wonderful memories together that last long after harvest season ends.