24 Sensory Winter Crafts for Toddlers and Little Hands

Snowflakes stick to mittens, cheeks glow pink from the cold, and little fingers wiggle with the need to create. These moments call for crafts that match the season’s magic and a toddler’s curiosity.
Each project here invites touch, motion, and discovery. Made for small hands and big imaginations, they use simple materials to spark joy, focus, and cozy connection.
1. Glitter Snow Globe Jars
Easy
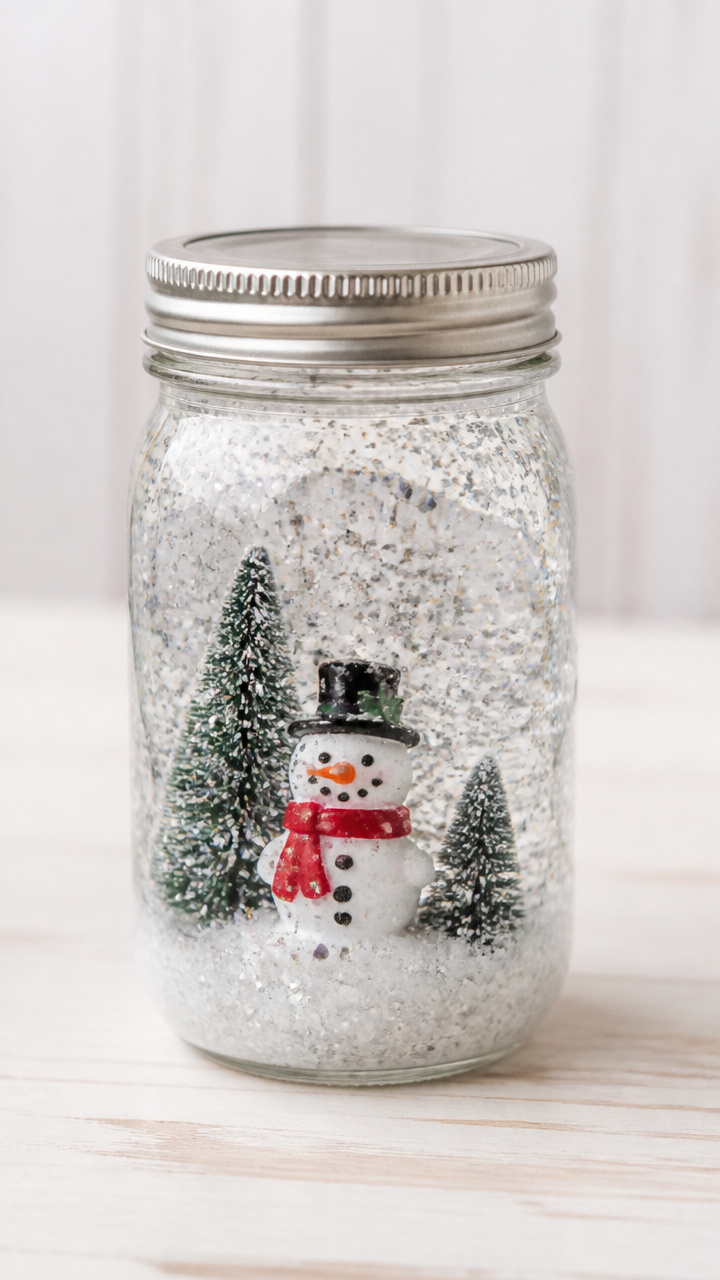
A swirling winter storm inside a jar gives toddlers a calming sensory tool they can shake and watch again and again.
Materials Needed
- 4-ounce clear glass mason jars with lids
- distilled water
- clear school glue
- liquid glycerin
- fine white glitter
- miniature plastic snowman figurine
How to Make It
- Place one snowman figurine into each jar, pressing it against the inside of the lid.
- Glue the figurine to the lid using one teaspoon of clear school glue, then let dry for 20 minutes.
- Fill the jar to the top with distilled water, leaving no air gap.
- Add 1/2 teaspoon of glycerin and 1 teaspoon of white glitter to the water.
- Screw the lid tightly onto the jar, sealing it. Wipe the outside clean and shake gently to swirl the glitter.
2. Pom-Pom Icicle Trees
Easy
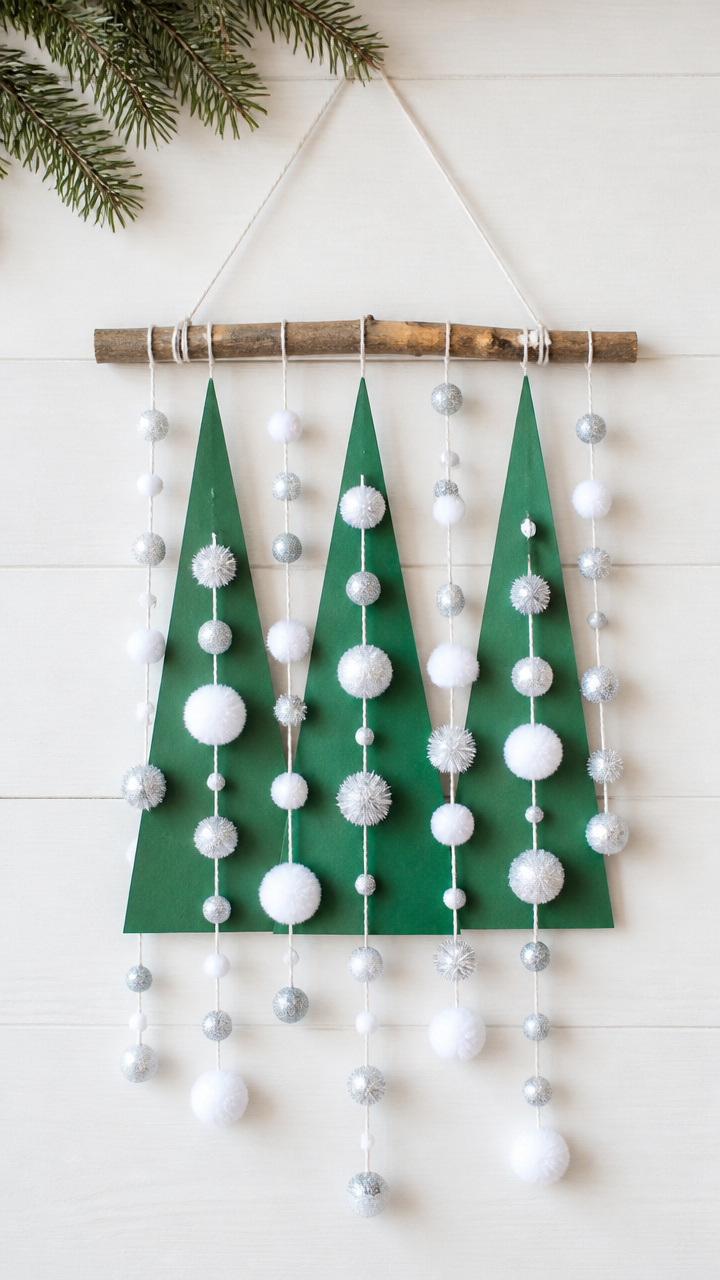
Soft, colorful pom-poms dangle from paper trees, offering visual delight and tactile play for little fingers.
Materials Needed
- green construction paper
- 12-inch wooden craft sticks
- assorted small pom-poms in white and silver
- craft glue
- hole punch
- white yarn, 12 inches per tree
How to Make It
- Cut the construction paper into triangle tree shapes, 6 inches tall.
- Glue one craft stick vertically to the back of each triangle as a trunk.
- Punch three holes along the bottom edge of each triangle.
- Cut 12-inch lengths of white yarn and tie one end through each hole.
- Glue a pom-pom to the free end of each yarn strand, then let dry completely.
3. Shaving Cream Snow Paint
Easy
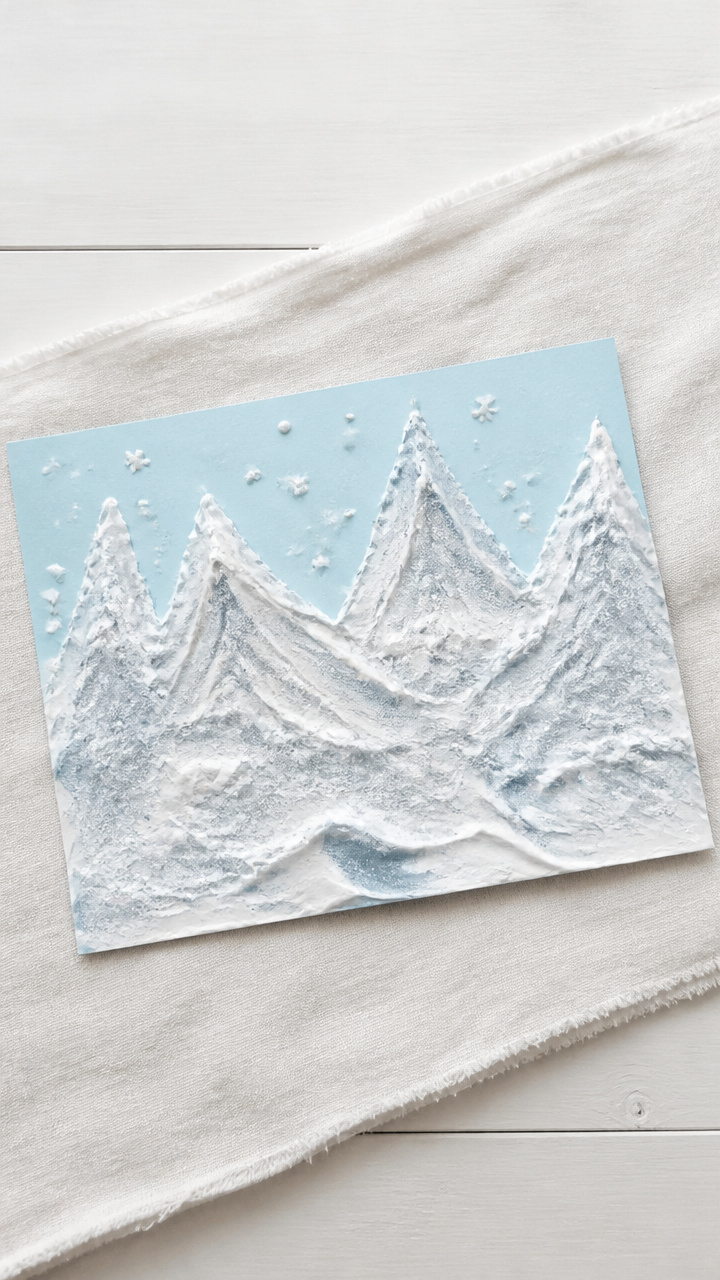
Cool, foamy paint spreads easily on paper, letting toddlers explore texture while creating frosty winter scenes.
Materials Needed
- unscented shaving cream
- white school glue
- plastic mixing bowls
- paintbrushes
- A4 white cardstock
- blue and silver liquid food coloring
How to Make It
- Mix equal parts shaving cream and white school glue in a bowl until smooth.
- Divide the mixture into two bowls and stir 3 drops of blue food coloring into one, 3 drops of silver into the other.
- Spread the colored foam onto cardstock using paintbrushes or fingers.
- Let the paintings dry flat overnight until the foam flattens and firms.
4. Cotton Ball Snowmen
Easy
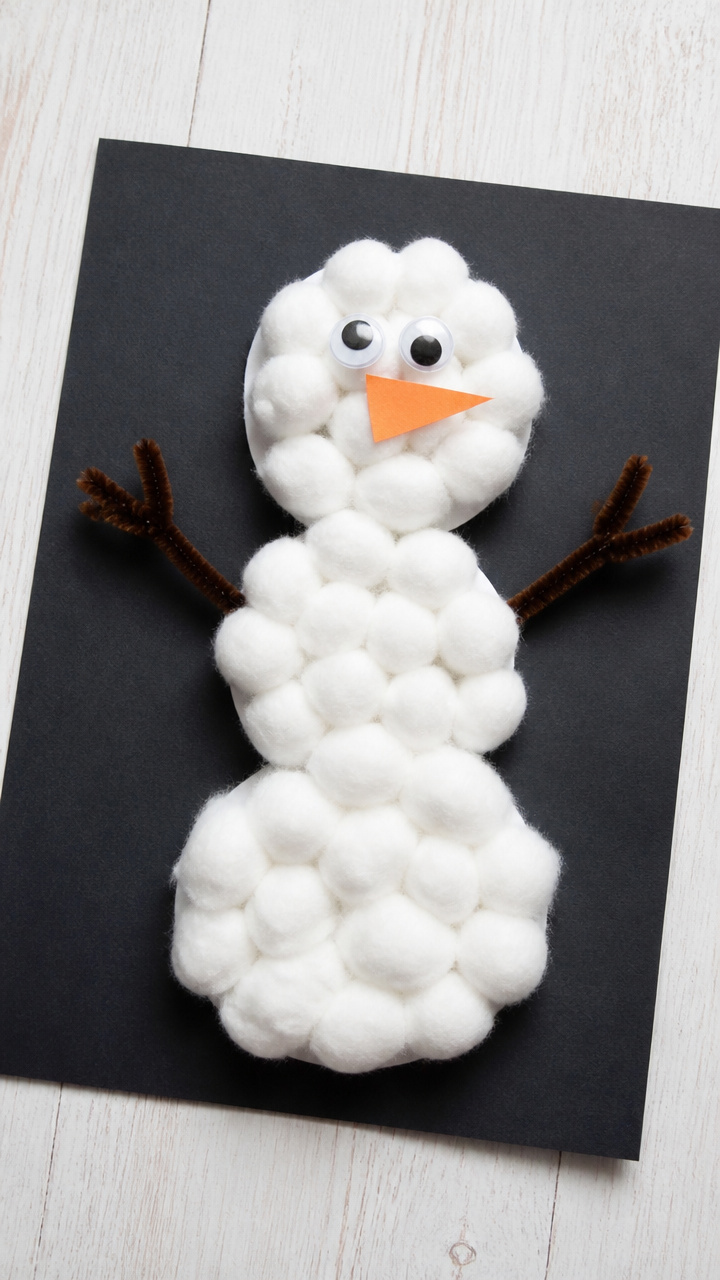
Fluffy cotton balls stack into jolly snowmen on paper, giving toddlers a soft, no-mess way to build winter friends.
Materials Needed
- black construction paper
- large white cotton balls
- orange craft foam
- black googly eyes
- craft glue
- brown pipe cleaners
How to Make It
- Glue three cotton balls vertically on black paper to form a snowman body.
- Cut tiny triangles from orange craft foam and glue one between the top two cotton balls for a nose.
- Glue two googly eyes above the nose.
- Cut brown pipe cleaners into 1-inch pieces and glue two as arms extending from the middle cotton ball.
5. Felt Snowflake Rubbings
Easy
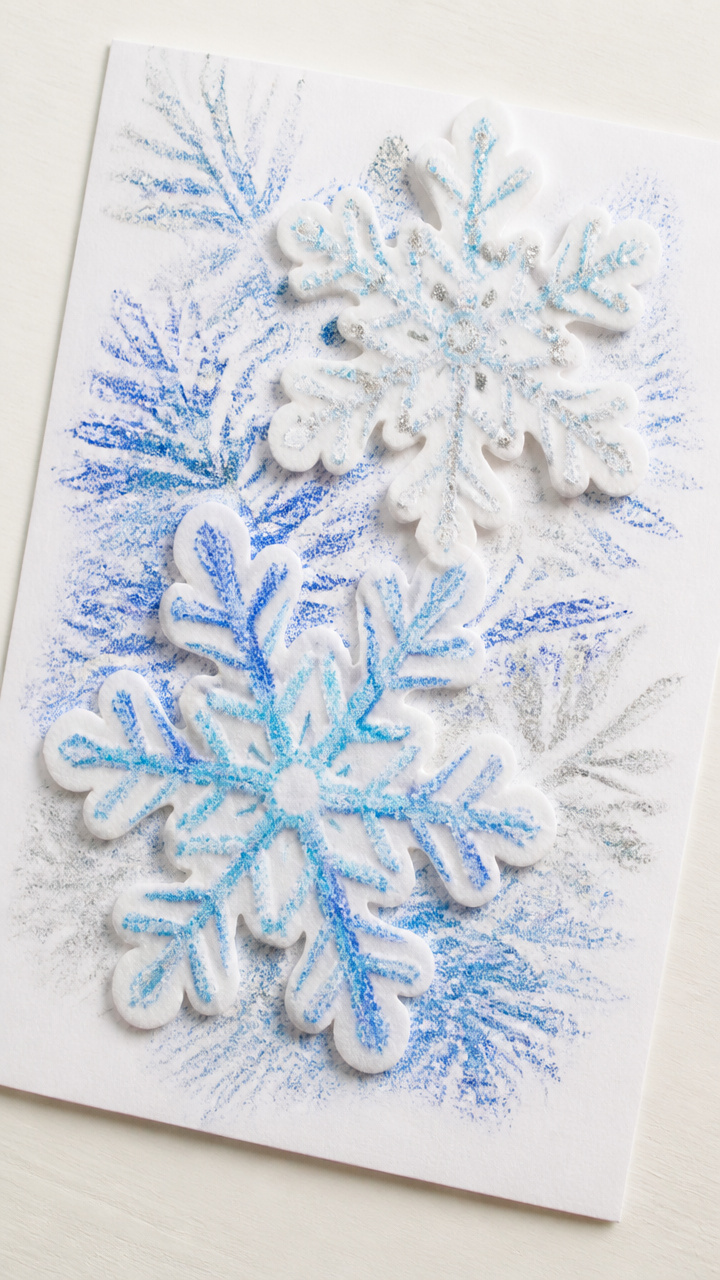
Layered felt snowflakes reveal their shapes under crayon rubbings, blending tactile play with art.
Materials Needed
- white felt sheets
- snowflake-shaped craft punches
- white drawing paper
- peelable crayons in blue and silver
- double-sided tape
How to Make It
- Use snowflake punches to cut five snowflakes from white felt.
- Tape one snowflake under a sheet of drawing paper using small pieces of double-sided tape.
- Color over the paper with a blue crayon, pressing firmly to reveal the snowflake texture.
- Repeat with different snowflakes and silver crayons on new sheets.
6. Ice Tray Sensory Beads
Easy
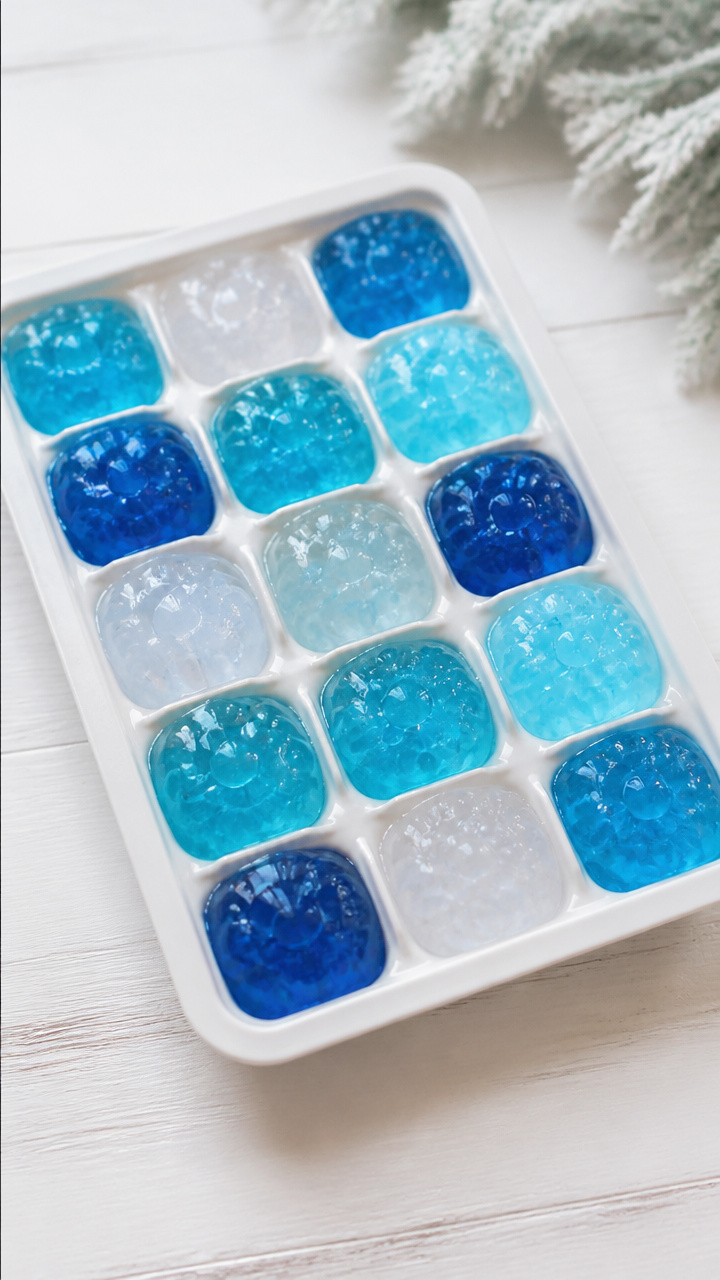
Colorful gel beads expand in water and fit perfectly into ice cube trays, offering scooping and sorting fun.
Materials Needed
- dried water gel beads (clear or winter colors)
- warm water
- silicone ice cube tray
- small plastic scoop
- clear plastic storage container
How to Make It
- Soak one teaspoon of dried gel beads in 2 cups of warm water for 3 hours until fully expanded.
- Drain excess water and place beads into the compartments of a silicone ice cube tray.
- Give toddlers a scoop to transfer beads from tray to container and back.
- Store beads in a sealed container with a splash of water to keep them plump.
7. Salt Dough Ornaments
Moderate
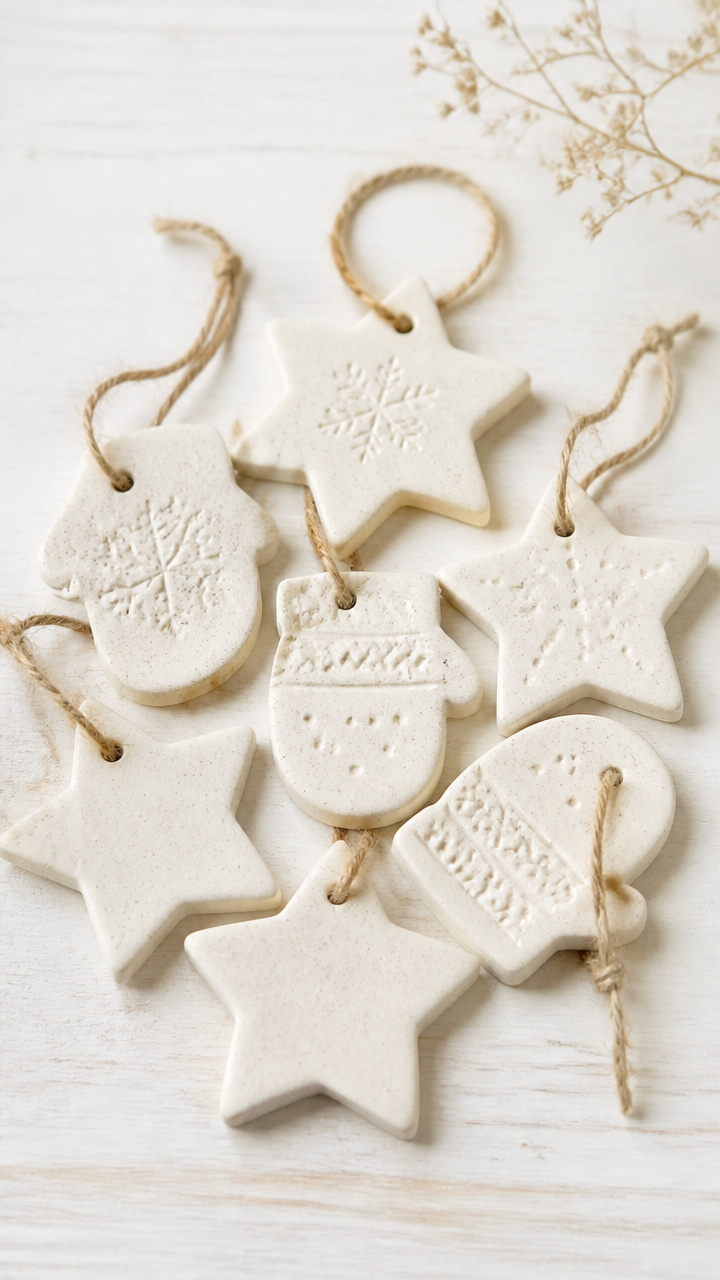
Homemade dough shaped into stars and mittens bakes hard, becoming keepsakes that toddlers help make and hang.
Materials Needed
- 2 cups all-purpose flour
- 1/2 cup table salt
- 3/4 cup warm water
- cookie cutters (snowflake, mitten, star)
- baking sheet
- parchment paper
- acrylic paint in red, green, gold
- fine ribbon, 6 inches per ornament
How to Make It
- Mix flour, salt, and warm water in a bowl until a smooth dough forms, kneading by hand for 3 minutes.
- Roll dough to 1/4 inch thick and cut shapes with cookie cutters.
- Place shapes on a parchment-lined baking sheet and bake at 200°F for 3 hours until dry and hard.
- Let cool, then paint with acrylics and let dry for 1 hour.
- Punch a small hole near the top of each ornament and thread with ribbon.
8. Feathered Snow Owls
Easy
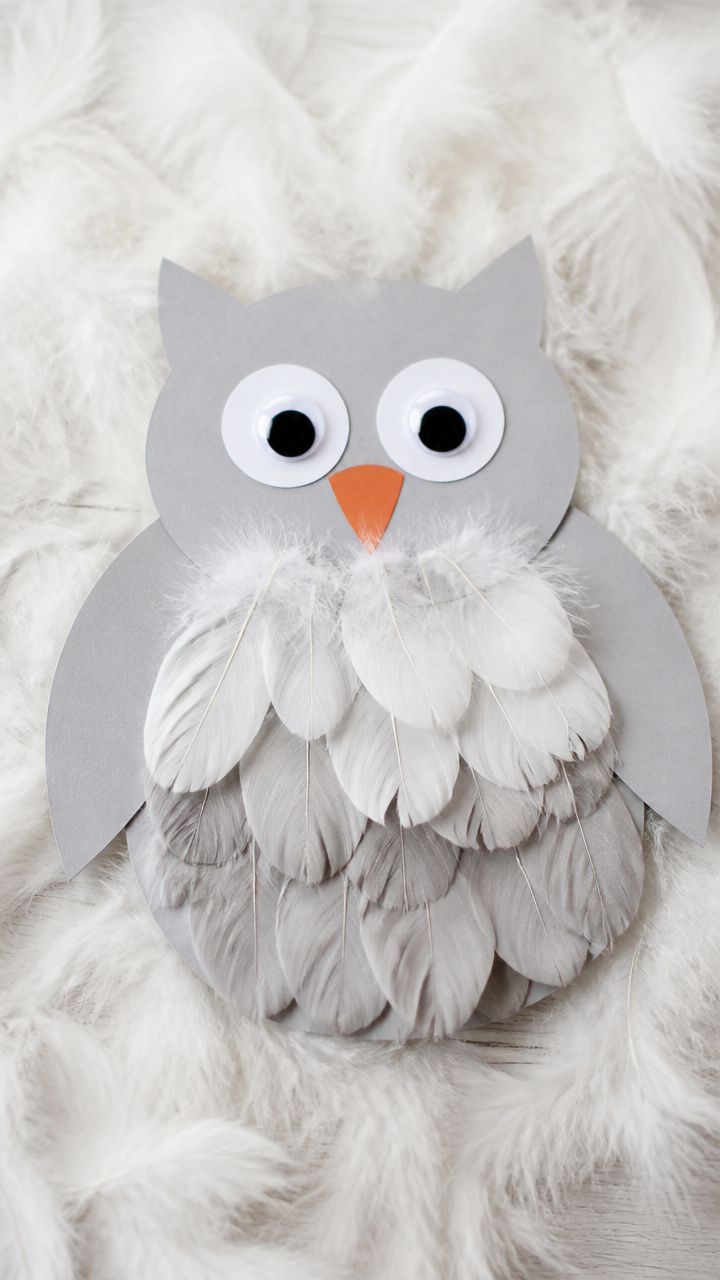
Downy feathers stick to paper owls, creating soft, feathery faces that invite gentle touch and quiet focus.
Materials Needed
- gray construction paper
- craft glue
- white and gray craft feathers
- black wiggle eyes
- orange craft foam
How to Make It
- Cut an owl shape from gray paper, about 5 inches tall with rounded ears.
- Glue feathers in overlapping rows from the bottom up to cover the body.
- Glue two wiggle eyes near the top.
- Cut a small triangle from orange foam and glue it below the eyes for a beak.
9. Glitter Pipe Cleaner Snowflakes
Easy
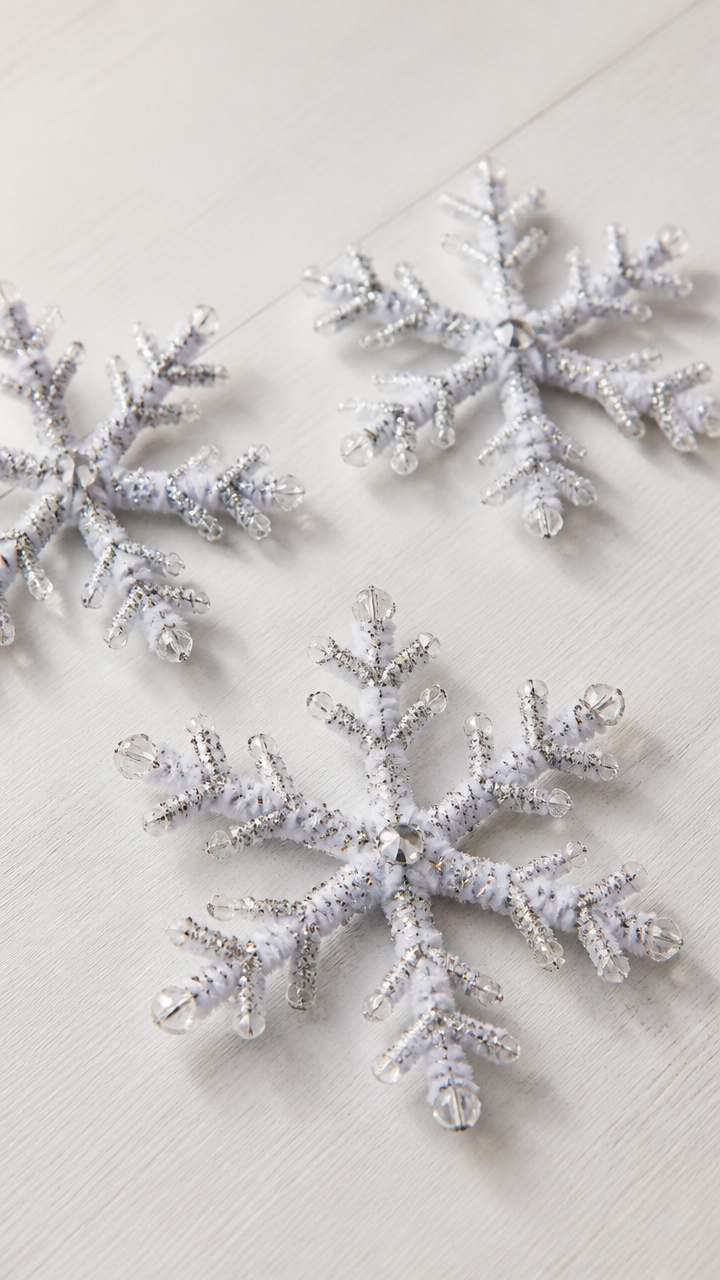
Bendable pipe cleaners threaded with glitter beads form shimmering snowflakes that catch the light and hold little hands.
Materials Needed
- white pipe cleaners
- silver and clear glitter beads with 4mm holes
- scissors
How to Make It
- Cut one pipe cleaner into three equal lengths.
- Twist the three pieces together at the center to form a six-pointed star.
- Thread glitter beads onto each arm, pushing them close to the center.
- Bend the ends of each arm into small hooks to keep beads from sliding off.
10. Sensory Bag of Falling Snow
Easy
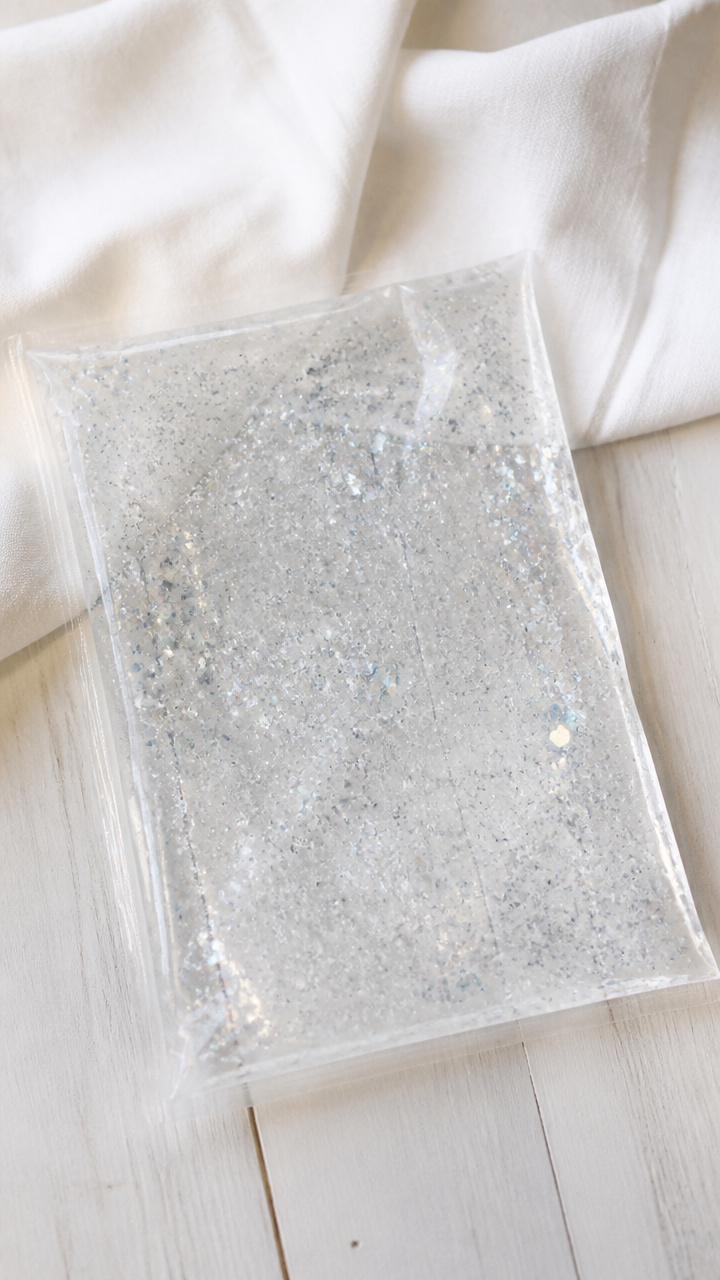
A sealed bag of hair gel and glitter becomes a mesmerizing shake-and-watch toy that stays clean and contained.
Materials Needed
- 1-gallon zip-top plastic bag
- clear hair gel
- fine iridescent glitter
- duct tape
How to Make It
- Fill the bag halfway with clear hair gel.
- Sprinkle in 2 tablespoons of iridescent glitter.
- Seal the bag tightly, pressing out extra air.
- Tape the zipper seam shut with duct tape on three sides for safety.
11. Puffy Paint Snow Scenes
Easy
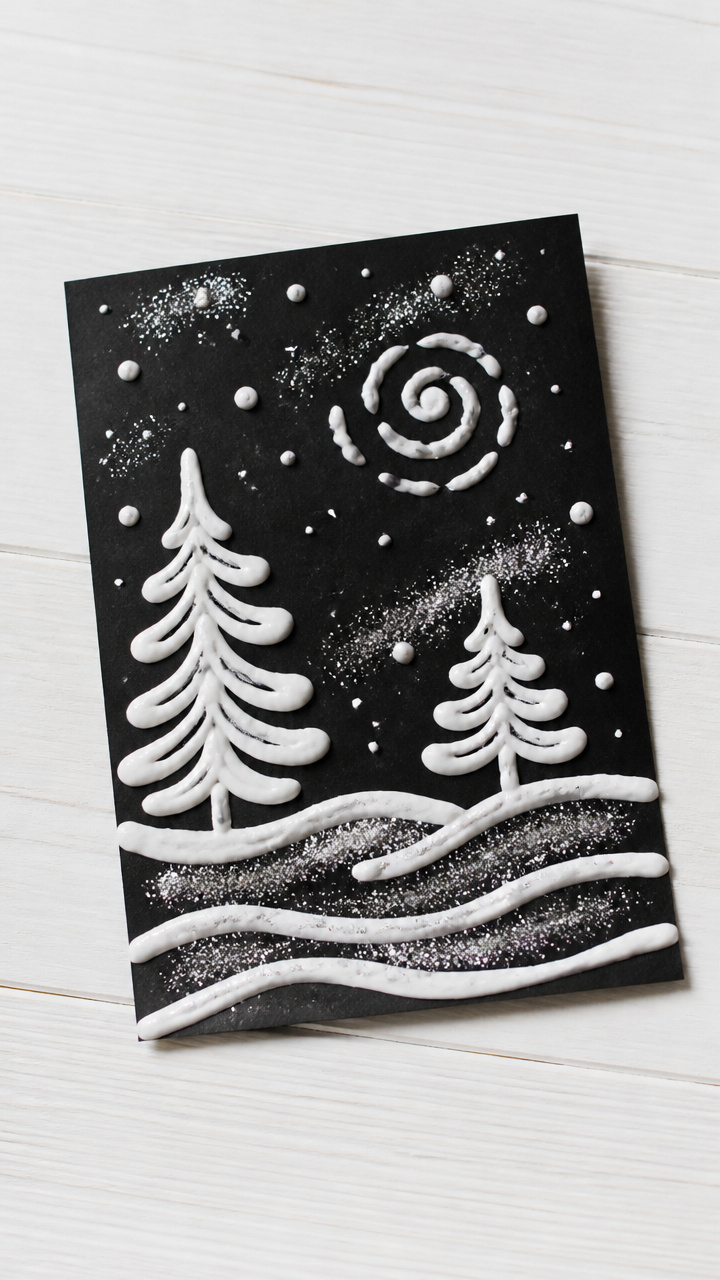
A thick, puffy paint made from soap and glue rises slightly when dried, giving dimension to snowy drawings.
Materials Needed
- white school glue
- liquid dish soap
- plastic mixing bowls
- paintbrushes
- black cardstock
- silver glitter
How to Make It
- Mix equal parts white school glue and dish soap in a bowl until smooth.
- Paint snow-covered trees, hills, or clouds on black cardstock using a brush.
- Sprinkle silver glitter lightly over wet paint.
- Let dry flat for 4 hours until puffy and firm.
12. Mitten Hand Tracing Art
Easy
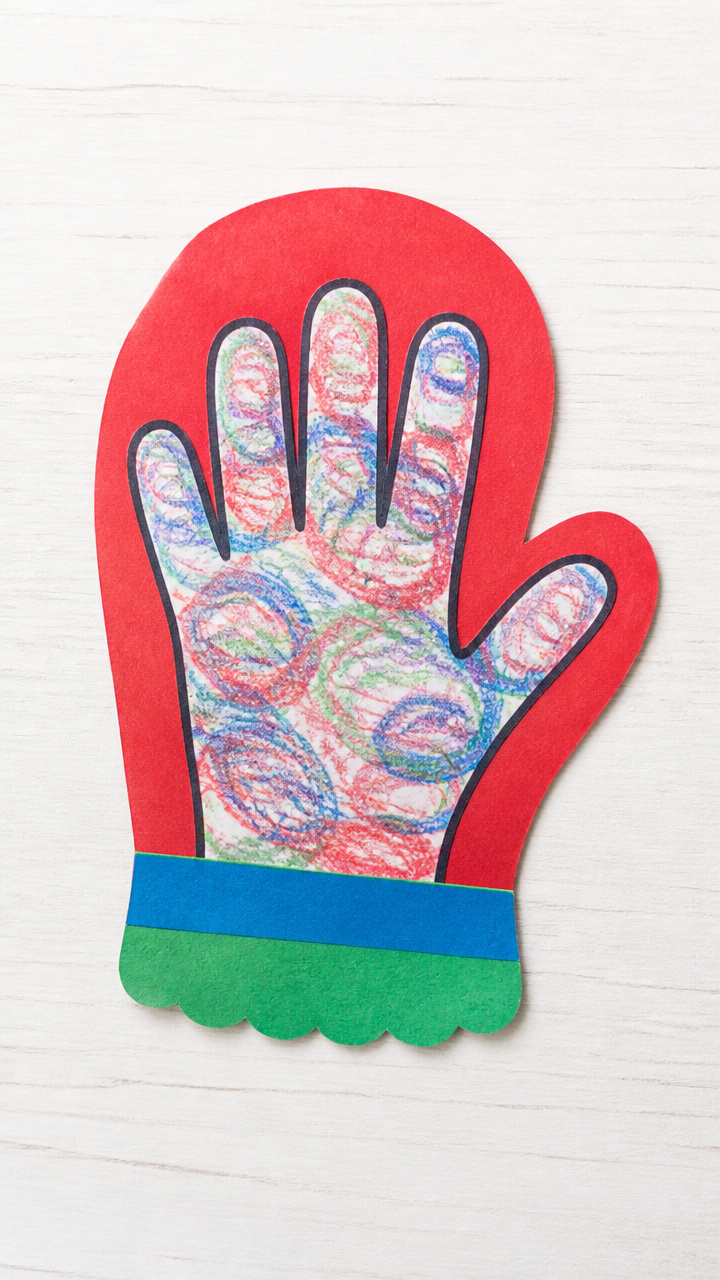
A traced hand becomes a mitten filled with crayon swirls, making a personal winter keepsake from their own little hand.
Materials Needed
- construction paper in red, blue, and green
- black crayon
- multicolored crayons
- scissors
How to Make It
- Help the child place their hand on colored paper with fingers together and trace around it with a black crayon.
- Cut out the hand shape.
- Flip the hand over and draw a mitten shape extending from the wrist.
- Fill the mitten with swirls and lines using colored crayons.
13. Crumpled Paper Snow Mountains
Easy
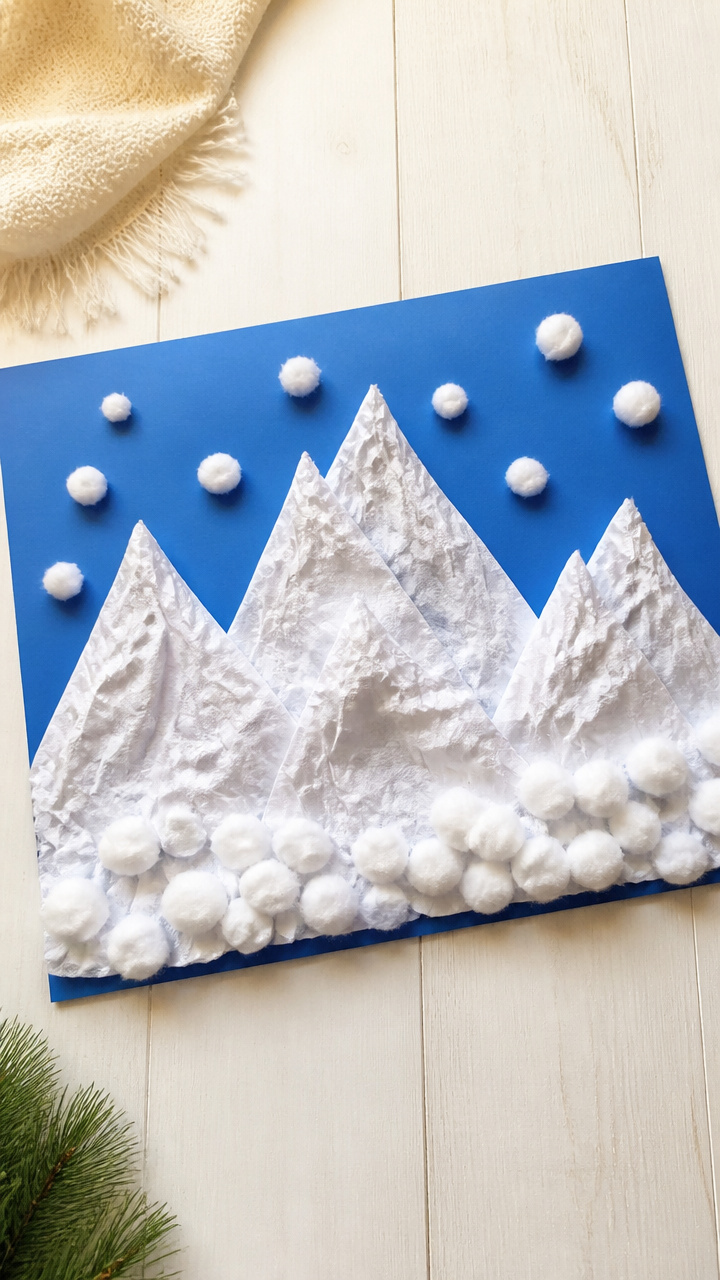
White tissue paper balls glued into a range of snowy peaks create a textured landscape for imaginative play.
Materials Needed
- white tissue paper sheets
- large blue construction paper
- craft glue
- cotton swabs
How to Make It
- Crumple tissue paper into small balls, about 1 inch wide.
- Spread craft glue on the bottom third of blue paper using a cotton swab.
- Press tissue balls into the glue to form a bumpy mountain range.
- Let dry completely before adding toy animals or cars.
14. Yarn-Wrapped Cardboard Trees
Moderate
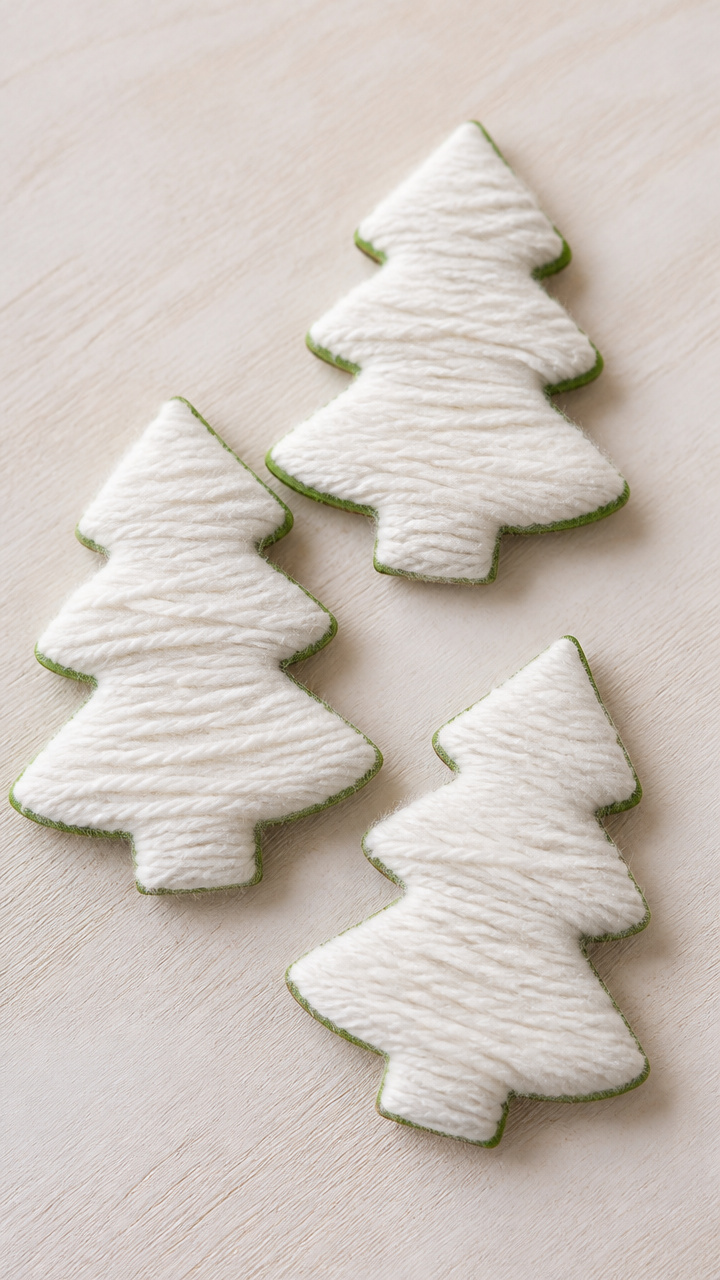
Sturdy cardboard trees become soft and fuzzy as toddlers wrap them with white yarn, building fine motor skills.
Materials Needed
- green cardboard from cereal boxes
- scissors
- pencil
- white yarn
- craft glue
- paintbrush
How to Make It
- Draw a 6-inch tree shape on green cardboard and cut it out.
- Paint a thin layer of craft glue along one edge of the tree.
- Start wrapping white yarn around the glued edge, covering the glue as you go.
- Continue wrapping tightly until the entire tree is covered, pressing the end into glue to secure. Let dry 1 hour.
15. Button Snowman Faces
Easy
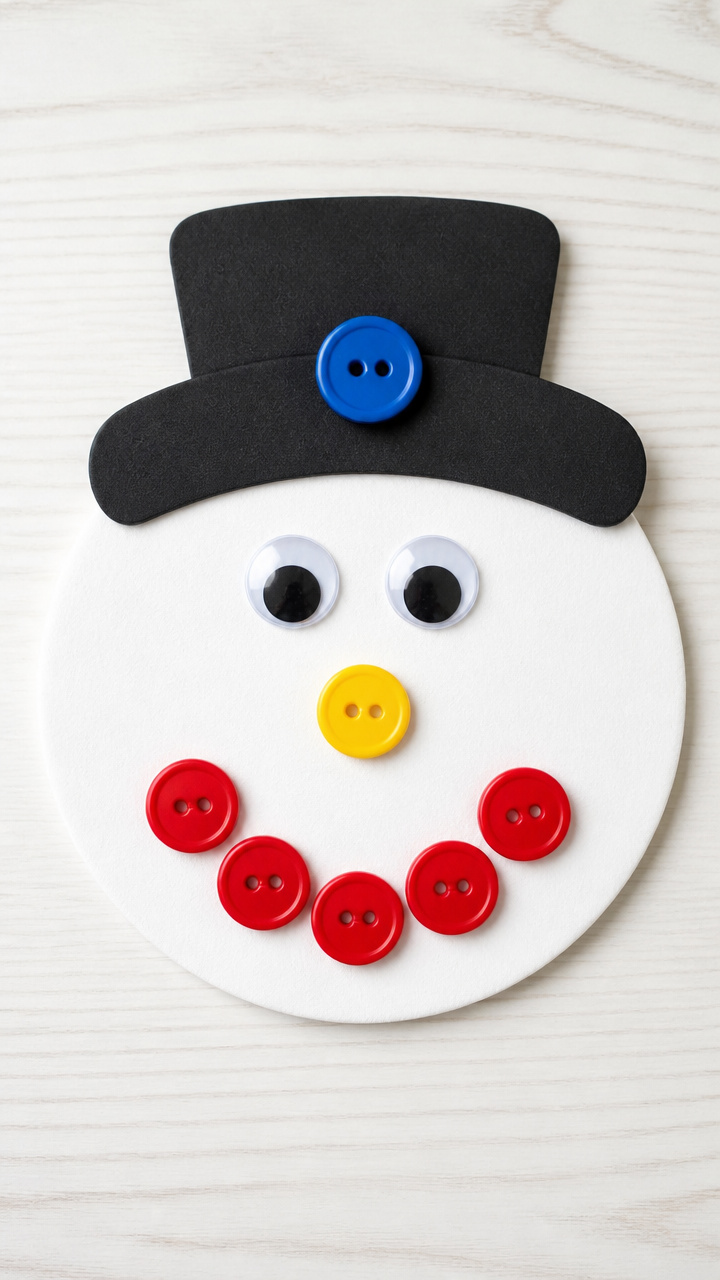
Colorful buttons with two or four holes become silly snowman features, sorted and glued for facial fun.
Materials Needed
- black cardstock
- assorted winter-colored buttons (red, blue, yellow)
- white craft foam
- craft glue
- googly eyes
How to Make It
- Cut small circles from white craft foam for snowman heads.
- Glue one googly eye to the center of each foam circle.
- Glue three buttons below the eye for a mouth.
- Use a single red button above the eye for a hat or nose.
16. Frosted Pinecone Decor
Easy
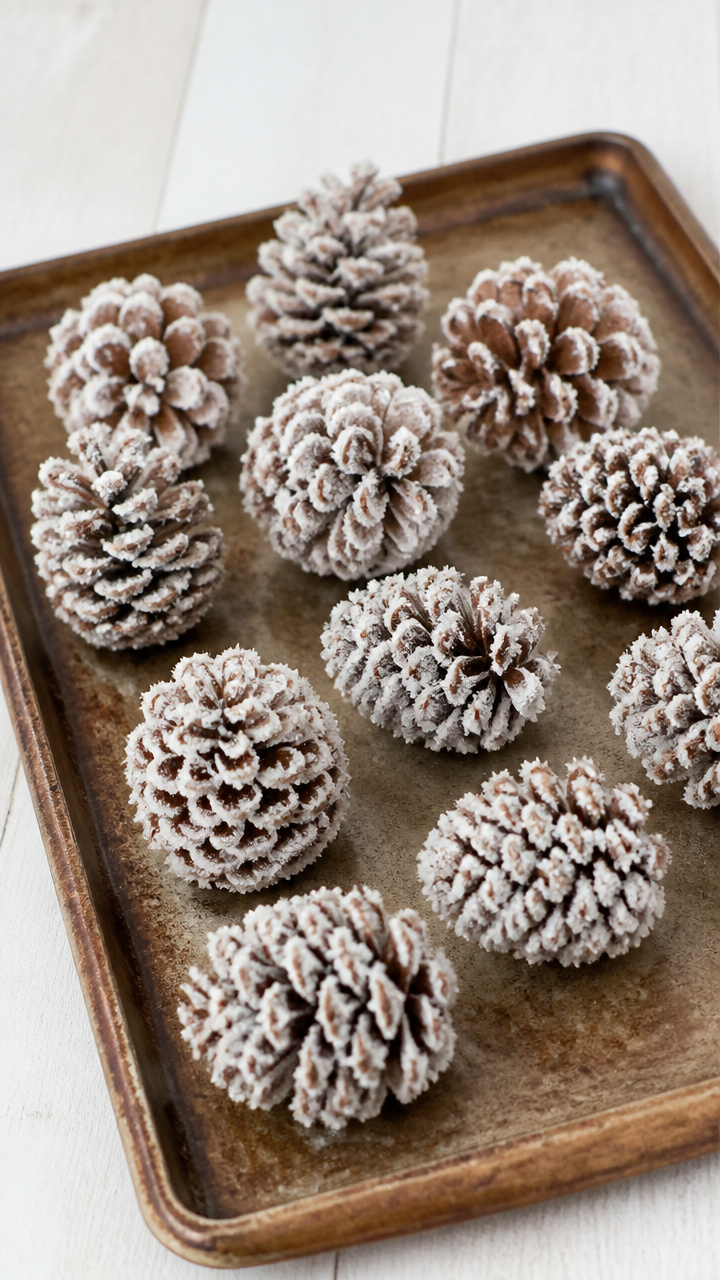
Real pinecones coated in glue and salt sparkle like they’ve been dusted by a winter storm.
Materials Needed
- small pinecones
- white school glue
- table salt
- paintbrush
- baking sheet
- parchment paper
How to Make It
- Place pinecones on a parchment-lined baking sheet.
- Brush white school glue all over each pinecone, coating between the scales.
- Sprinkle table salt generously over the glued pinecone until fully coated.
- Let dry for 6 hours, then gently shake off excess salt.
17. Sensory Rice Snow
Easy
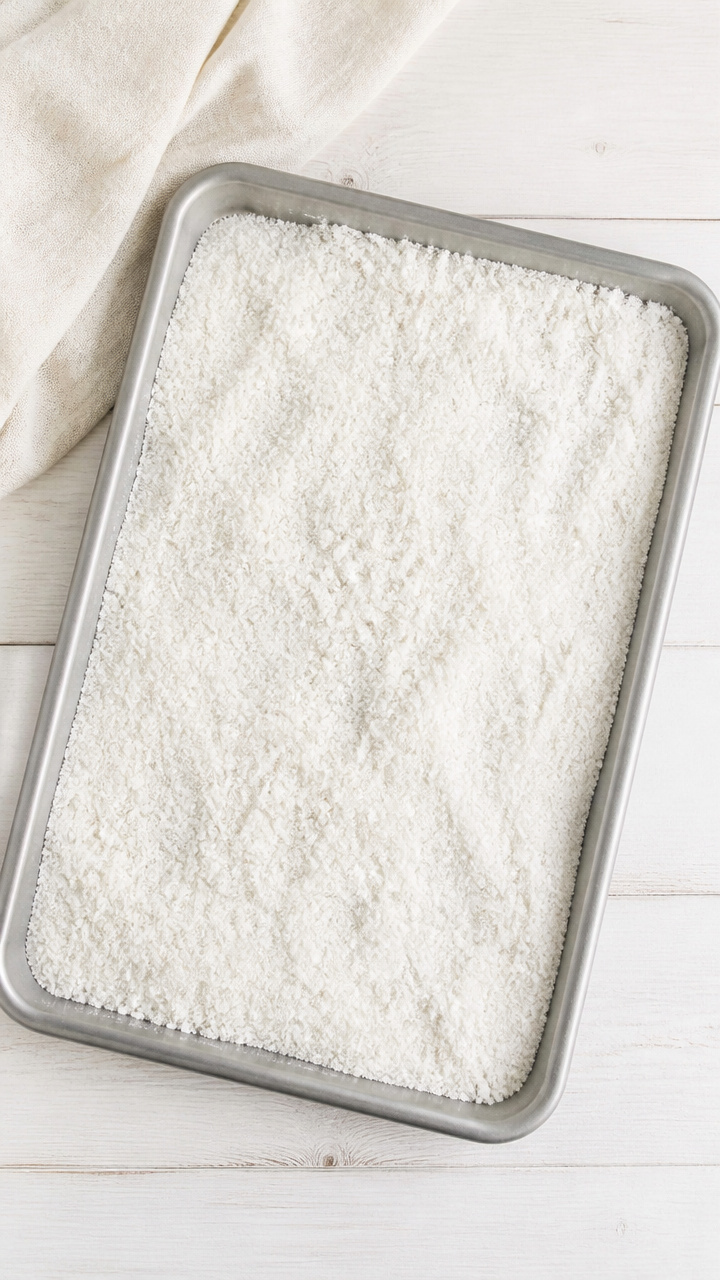
White rice dyed with cornstarch becomes a soft, pourable snow substitute perfect for trays and bins.
Materials Needed
- 2 cups white rice
- 1 tablespoon cornstarch
- 1 tablespoon white vinegar
- resealable plastic bag
- baking sheet
- parchment paper
How to Make It
- Mix rice, cornstarch, and vinegar in a resealable bag and shake until evenly coated.
- Spread rice on a parchment-lined baking sheet.
- Let dry overnight, stirring once after 4 hours.
18. Tissue Paper Windows
Easy
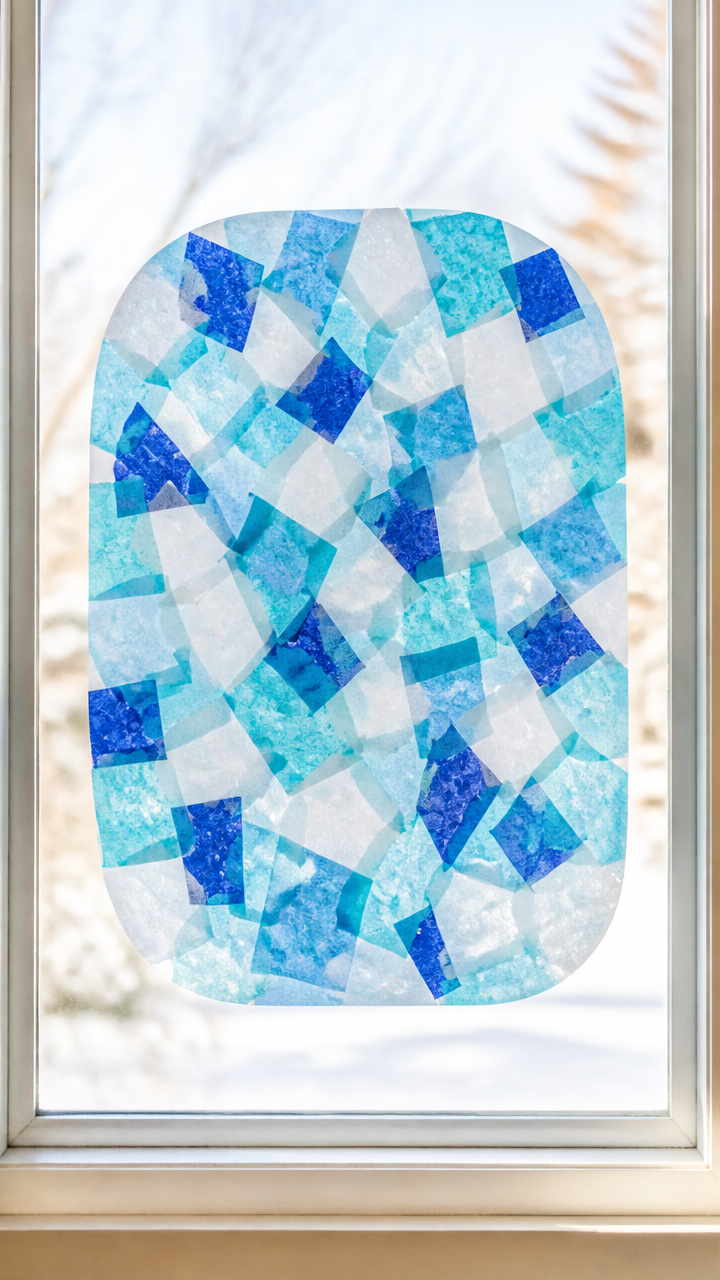
Colorful tissue squares stick to contact paper to form a frosty stained-glass window display.
Materials Needed
- clear contact paper roll
- scissors
- blue and white tissue paper
- frameless window
How to Make It
- Cut a piece of contact paper slightly larger than a window pane, sticky side up.
- Tear tissue paper into 1-inch squares and let toddlers place them on the sticky surface.
- Once covered, carefully press a second layer of contact paper on top, sticky sides together.
- Trim edges and stick the sheet directly to a window.
19. Popsicle Stick Snowflakes
Moderate
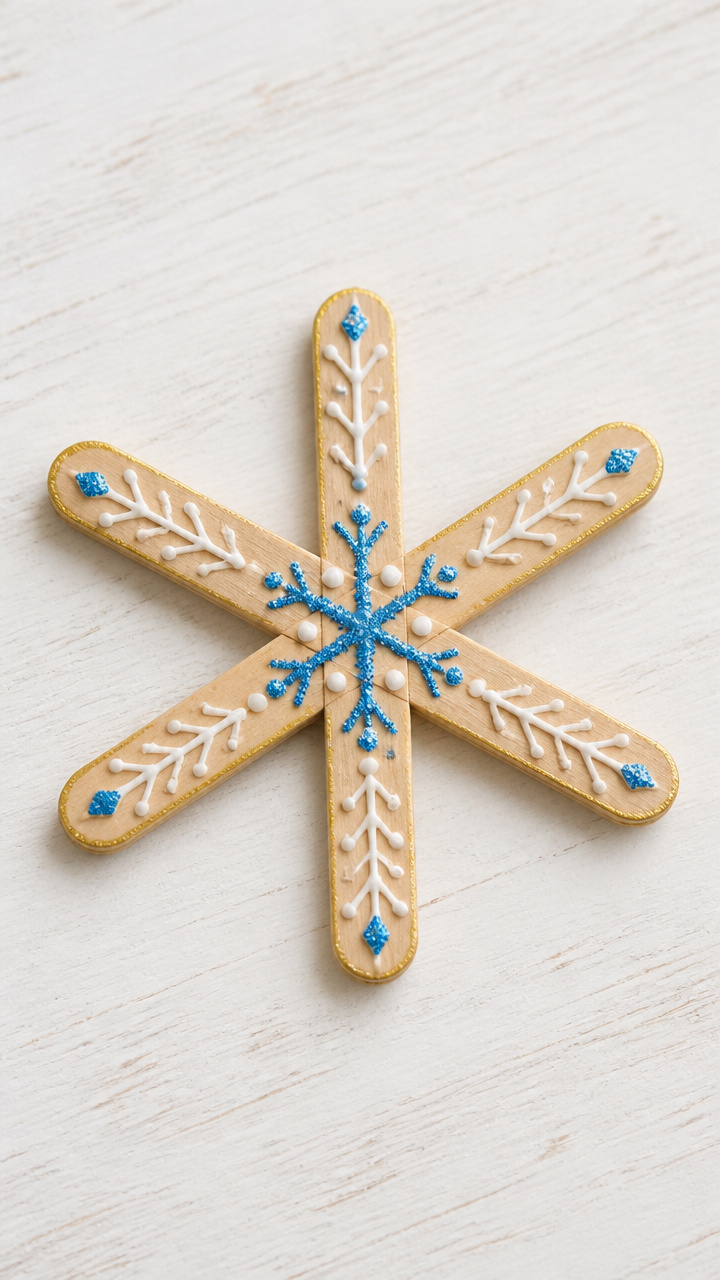
Six popsicle sticks radiate from a center hub, decorated with glue and glitter to mimic real snow crystals.
Materials Needed
- 6 flat wooden popsicle sticks
- white craft glue
- fine blue glitter
- clothespin
- gold acrylic paint
- paintbrush
How to Make It
- Arrange six popsicle sticks in a star pattern, overlapping slightly at the center.
- Use a clothespin to hold them together while gluing.
- Paint the center joint with white glue and sprinkle with blue glitter.
- Paint the tips with gold acrylic paint and let dry for 2 hours.
20. Scented Cinnamon Ornaments
Moderate
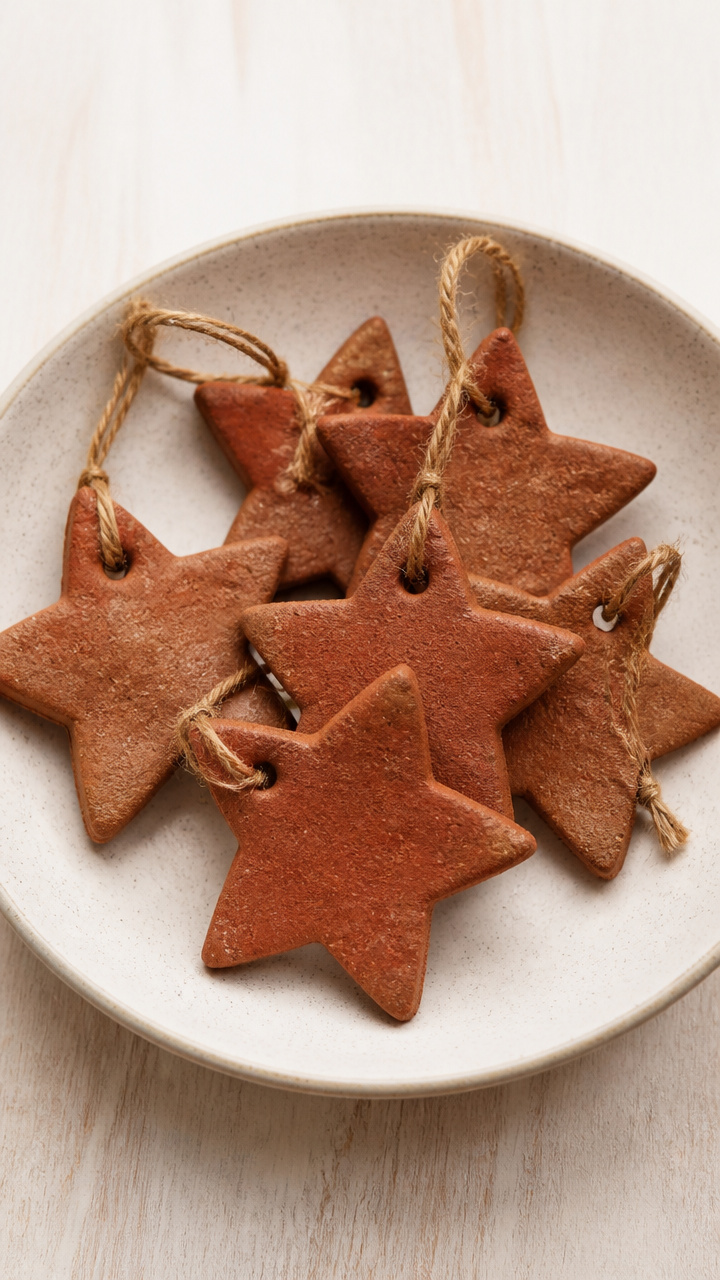
Spiced dough shaped into stars smells like winter and dries into rustic decorations for low shelves.
Materials Needed
- 1 cup ground cinnamon
- 1/2 cup applesauce
- mixing bowl
- rolling pin
- star-shaped cookie cutter
- baking sheet
- parchment paper
- red yarn, 6 inches
How to Make It
- Mix cinnamon and applesauce in a bowl until a stiff dough forms.
- Roll dough to 1/4 inch thick and cut into stars.
- Place on a parchment-lined baking sheet and dry at 175°F for 4 hours.
- Let cool, then tie red yarn through a small hole for hanging.
21. Cotton Reel Snowmen
Moderate
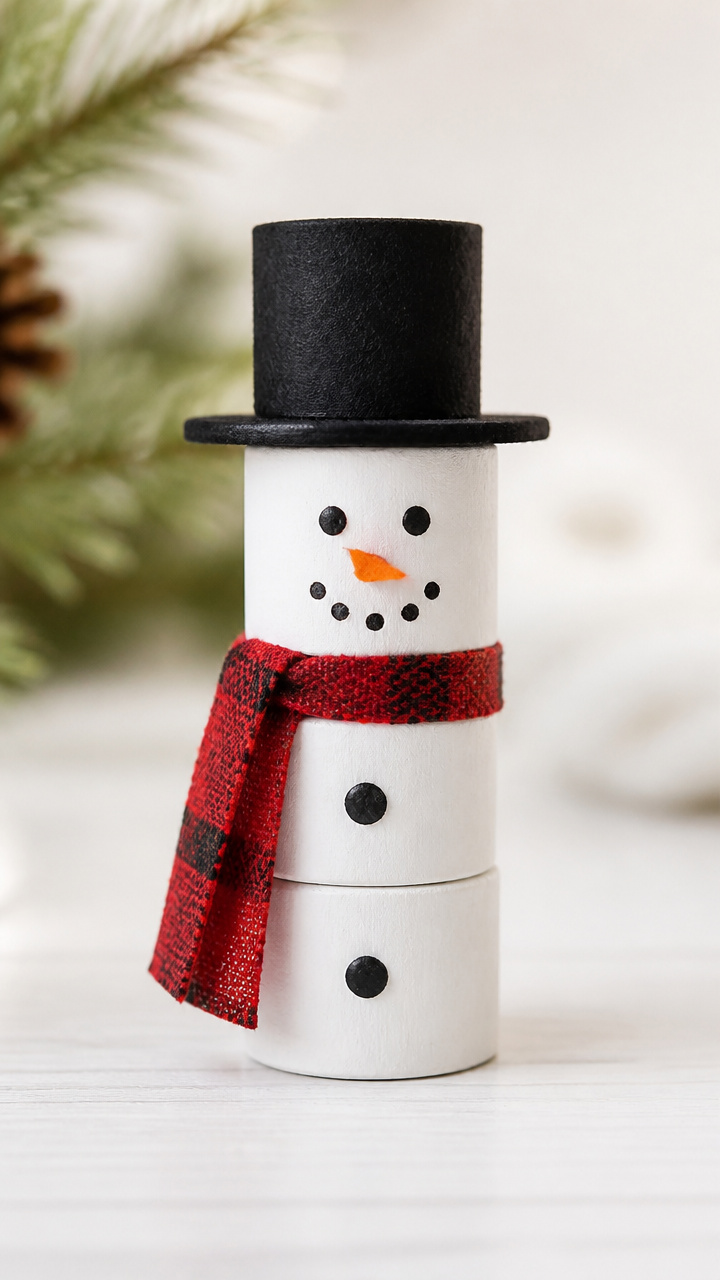
Wooden cotton reels stack into tiny snowmen, painted and accessorized with mini scarves and hats.
Materials Needed
- wooden cotton reels (3 per snowman)
- white acrylic paint
- paintbrush
- black craft foam
- orange craft foam
- glue
- tiny red pom-pom
How to Make It
- Paint each cotton reel white and let dry for 1 hour.
- Stack three reels vertically and glue together.
- Cut a scarf shape from black foam and wrap it around the middle reel.
- Glue an orange triangle nose and a red pom-pom under the top reel.
22. Glitter Jar Calm-Down Bottles
Easy
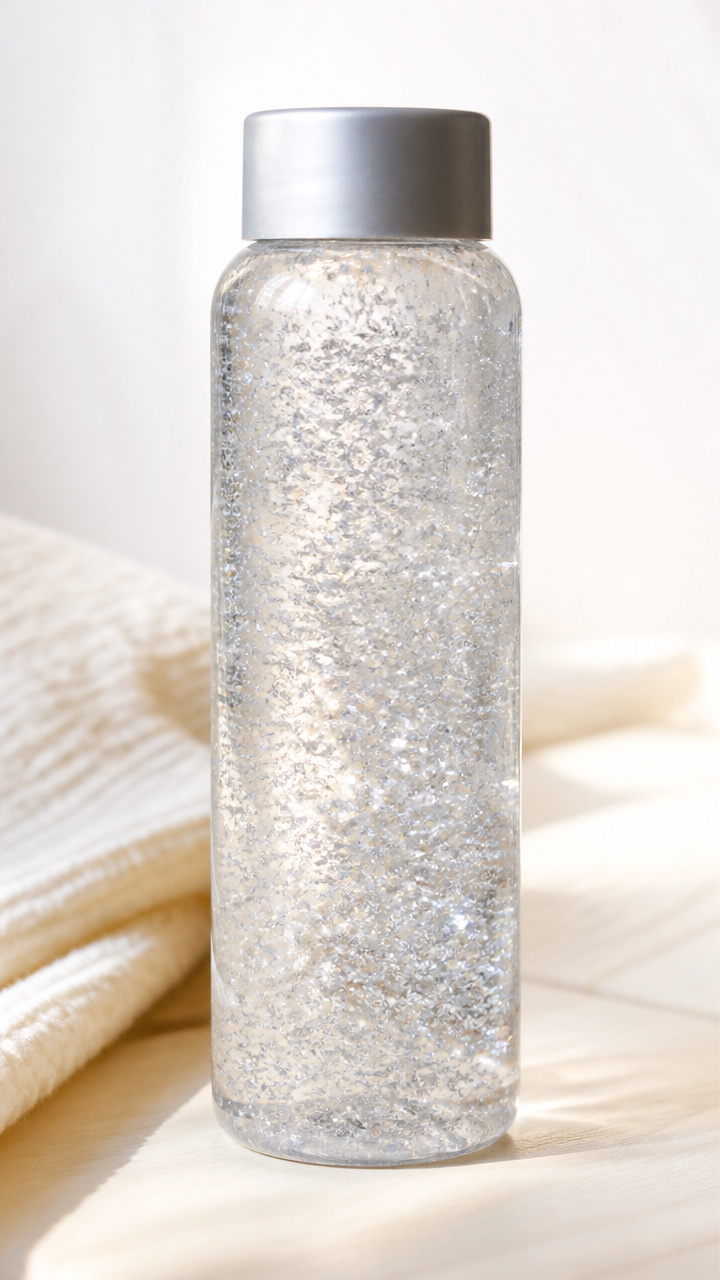
A swirling mix of glue, water, and glitter slows as it settles, helping toddlers focus and breathe.
Materials Needed
- 8-ounce clear plastic bottle with screw top
- warm water
- clear school glue
- fine silver glitter
- duct tape
How to Make It
- Fill the bottle 3/4 full with warm water.
- Add 2 tablespoons of clear school glue and 1 tablespoon of silver glitter.
- Screw the cap on tightly and shake to mix.
- Tape the cap shut with duct tape for safety.
23. Snowy Nature Collage
Easy
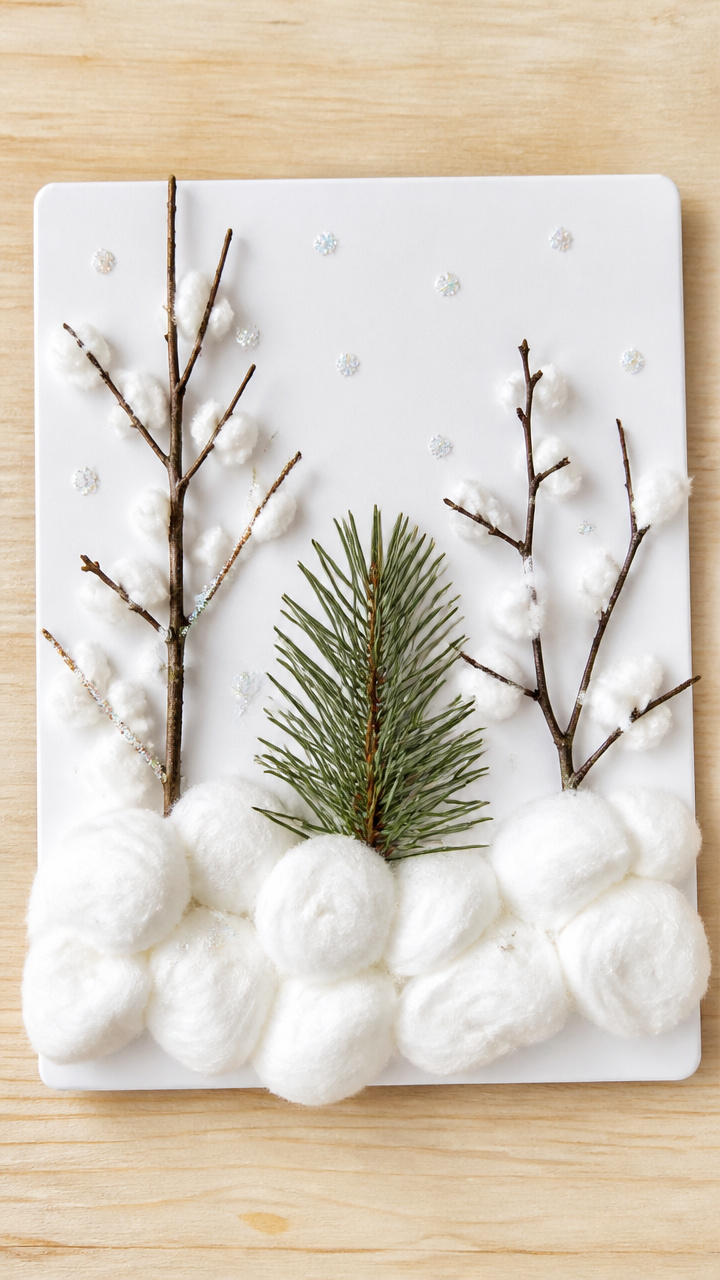
Real twigs, pine needles, and cotton form a nature-inspired winter scene on sturdy cardboard.
Materials Needed
- white cardboard
- craft glue
- cotton balls
- small twigs
- pine needles
- glitter glue
How to Make It
- Spread craft glue on the lower half of the cardboard.
- Press cotton balls into the glue to form snowbanks.
- Glue twigs vertically for trees and add pine needles as branches.
- Outline the scene with glitter glue and let dry overnight.
24. Felt Mitten Matching Game
Easy
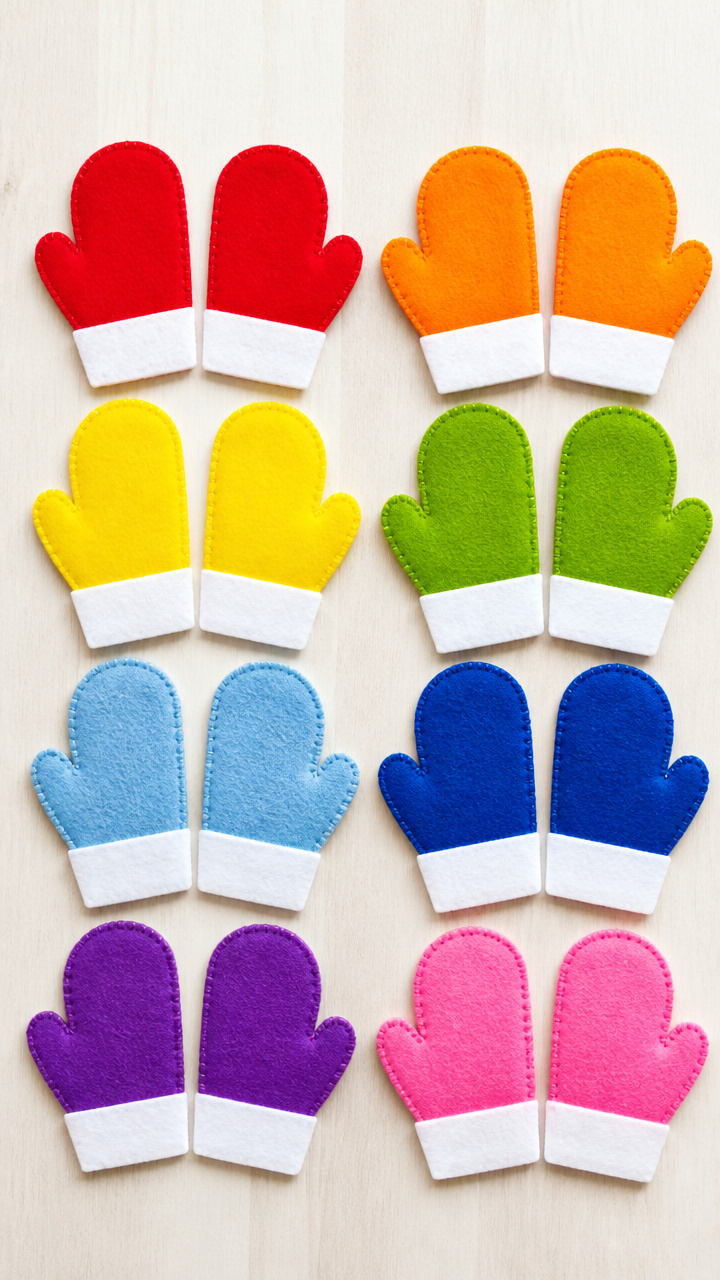
Soft felt mittens in pairs invite sorting and matching, building memory and motor skills with cozy winter charm.
Materials Needed
- assorted colored felt sheets
- mitten-shaped template
- scissors
- fabric glue
How to Make It
- Cut 10 mitten pairs (20 total) from colored felt using the template.
- Ensure each pair matches in color and pattern.
- Let toddlers mix and match the mittens on a table or floor.
- Store in a fabric bag when not in use.
Each of these crafts meets little hands where they are, with textures, colors, and actions that invite wonder. Pick one, gather what you have, and let the quiet magic of making begin.