24 Winter Farmhouse Crafts with Wood Slices and Burlap

The soft grain of wood slices and the rough weave of burlap bring quiet charm to winter decor. Together, they form the heart of cozy, handmade moments that feel both rustic and personal.
You don’t need a workshop or years of crafting to bring these ideas to life. With just a few tools and a little time, you can create pieces that warm up any space and carry the spirit of the season.
1. Burlap-Wrapped Wood Slice Ornaments
Easy
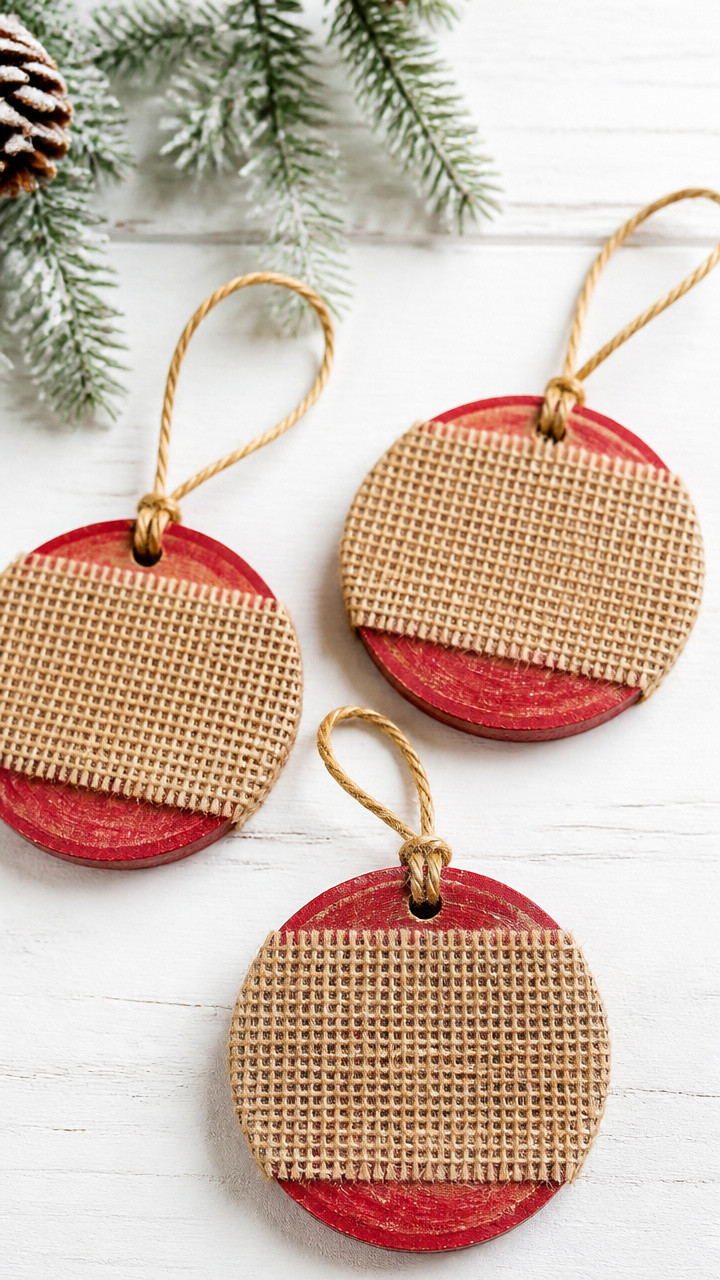
Rough-textured burlap bands wrap snugly around smooth wood slices, creating rustic holiday ornaments perfect for gifting or tree trimming.
Materials Needed
- 6 wood slices, 2.5 inches in diameter
- 1 yard natural burlap ribbon, 1.5 inches wide
- Red acrylic paint
- Small paintbrush
- Hot glue gun and glue sticks
- Gold jute cord, 10 feet
How to Make It
- Paint a thin red stripe across the center of each wood slice using the paintbrush. Let dry for 15 minutes.
- Cut the burlap ribbon into six 6-inch strips. Wrap one strip around the center of each painted wood slice, covering the red stripe.
- Secure each burlap strip with a dab of hot glue on the back. Tie a loop of gold jute cord to the top edge for hanging.
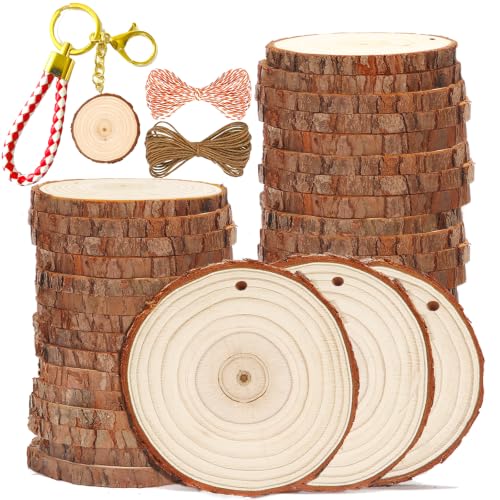


2. Wood Slice Tiered Tray Base
Moderate
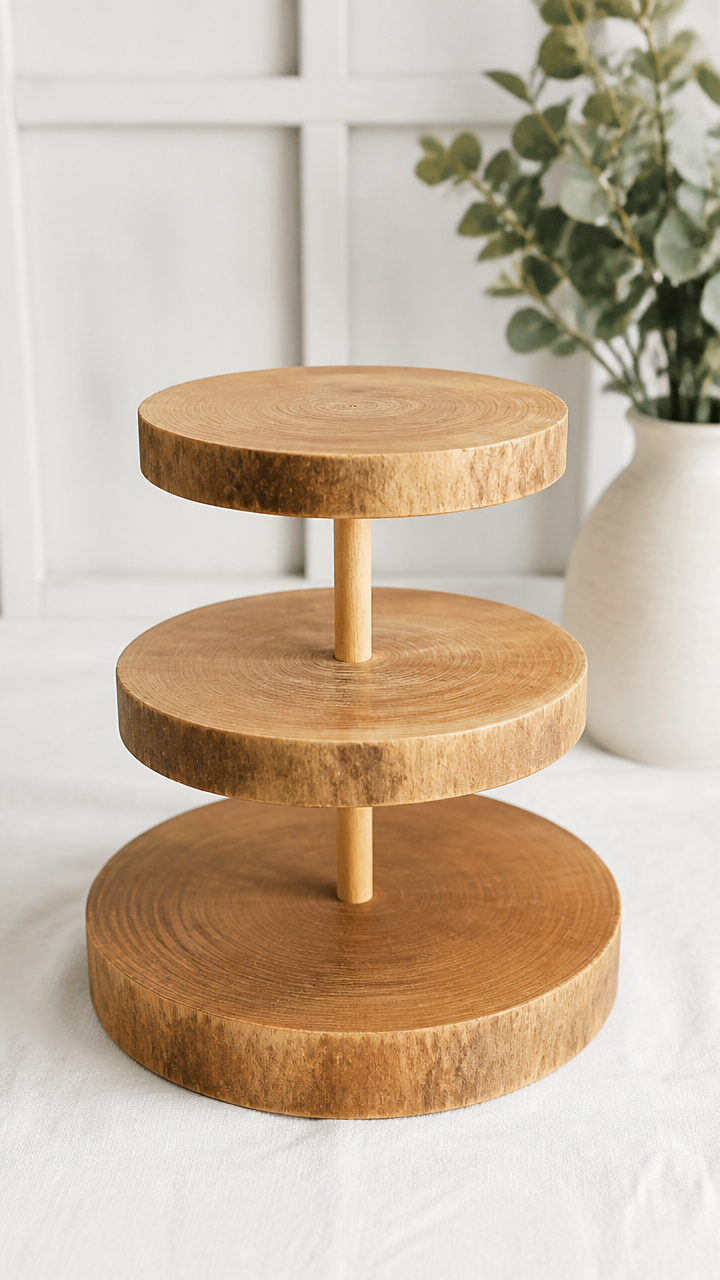
Stacked wood slices form a sturdy, natural base for a three-tiered tray that holds winter candles, pinecones, or small gifts.
Materials Needed
- 3 wood slices, 6 inches in diameter, 0.75 inches thick
- 2 wooden dowels, 0.25 inches in diameter, 4 inches long
- Wood glue
- Drill with 0.25-inch bit
- Sandpaper (120 grit)
- Clear matte wood sealant, 4 oz
How to Make It
- Sand the edges and faces of all three wood slices until smooth. Wipe away dust with a dry cloth.
- Drill a centered hole through the middle of each slice using the 0.25-inch drill bit.
- Apply wood glue to one end of a dowel and insert it into the hole of the bottom slice. Stack the second slice, then add the second dowel and top slice.
- Let the glue dry for 2 hours. Brush on one coat of clear matte wood sealant and let dry for 4 hours.

3. Burlap and Wood Snowflake
Moderate
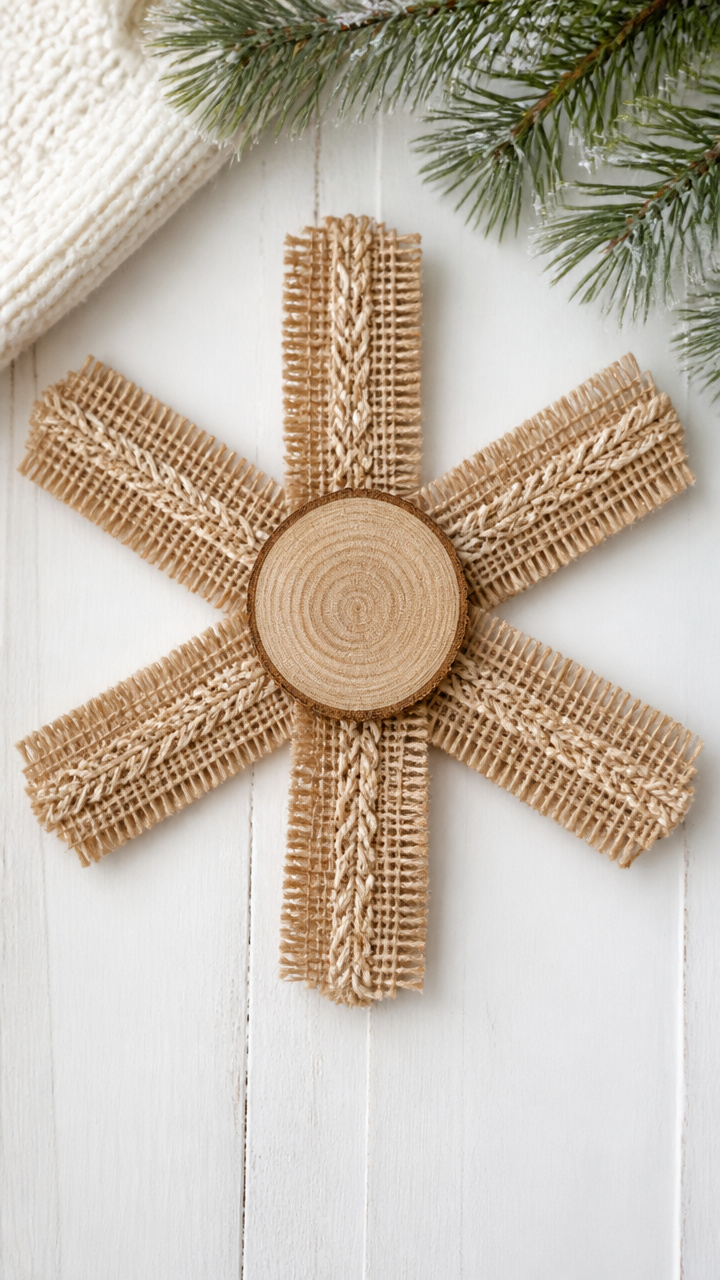
Six burlap strips radiate from a central wood slice, shaped into a dimensional snowflake for mantel or wall decor.
Materials Needed
- 1 wood slice, 3 inches in diameter
- 6 burlap strips, 1 inch wide by 8 inches long
- White craft glue
- Clothespin
- Pencil
- Scissors
How to Make It
- Lay the wood slice flat. Use the pencil to mark six evenly spaced points around the edge.
- Apply a dab of white craft glue to one end of each burlap strip and attach them to the marked points, fanning outward.
- Bend each strip into a gentle curve and glue the outer tip down to form a snowflake arm. Use a clothespin to hold each tip in place.
- Let dry for 3 hours. Flip and repeat the curve on the back side for full dimension.


4. Wood Slice Coasters with Burlap Edges
Easy
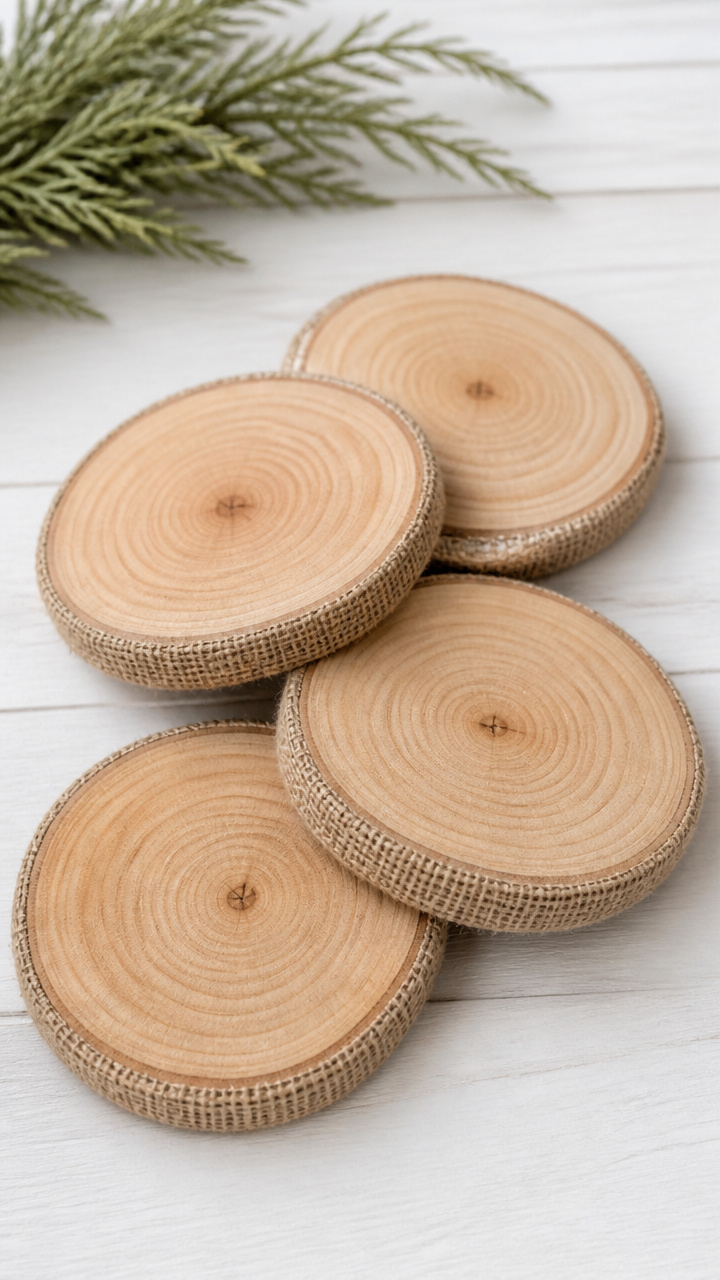
Smooth sanded wood slices gain grip and texture with glued burlap strips wrapped tightly around their rims.
Materials Needed
- 4 wood slices, 3.5 inches in diameter, 0.5 inches thick
- Burlap fabric, 6 inches by 12 inches
- PVA glue
- Foam brush
- Scissors
- Clear waterproof sealant spray, 6 oz
How to Make It
- Cut the burlap into four 1-inch wide strips, each long enough to wrap around one wood slice.
- Brush PVA glue around the edge of a wood slice. Wrap a burlap strip snugly around it, pressing to adhere.
- Repeat for all slices. Let dry for 1 hour. Spray both sides with clear waterproof sealant and let dry for 2 hours.


5. Burlap Bow Wood Slice Wreath
Moderate
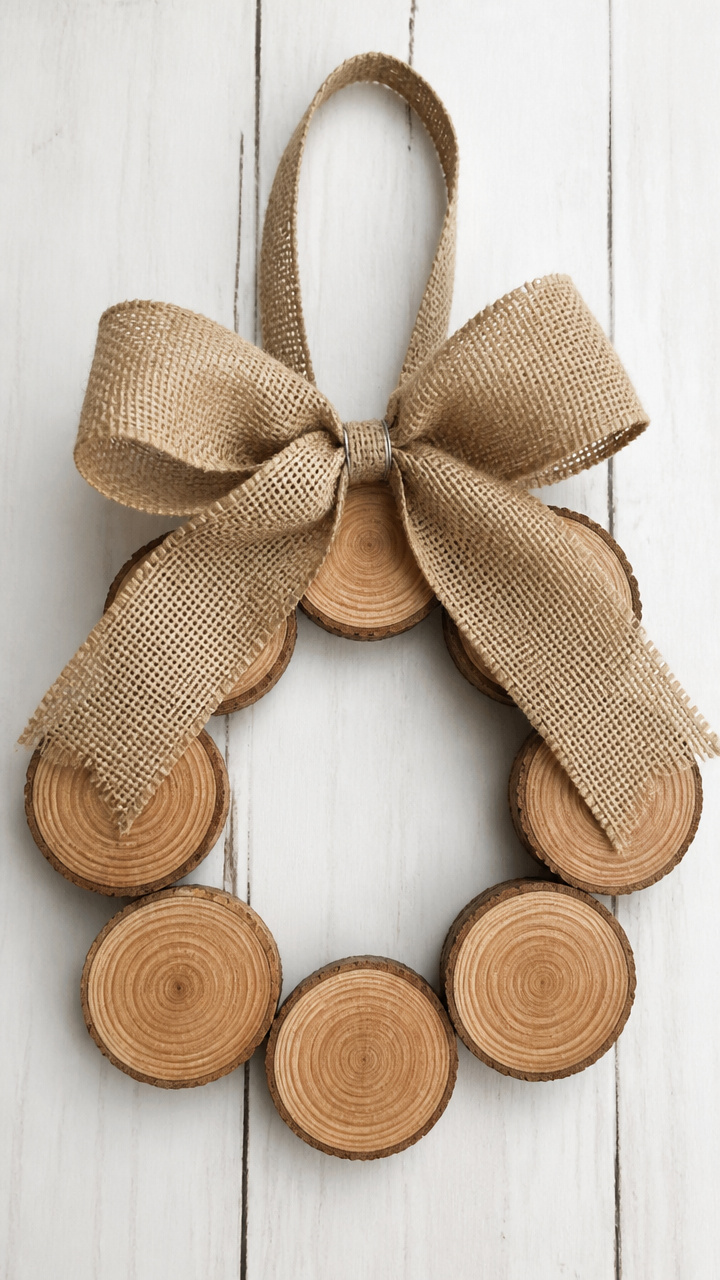
A ring of glued wood slices forms a base for a large burlap bow, creating a farmhouse-style wreath for your front door.
Materials Needed
- 8 wood slices, 3 inches in diameter
- Burlap roll, 9 inches wide, 1 yard
- Hot glue gun and glue sticks
- Wire wreath frame, 10 inches
- Floral wire, 18 gauge, 12 inches
- Scissors
How to Make It
- Arrange the wood slices in a circle on the wire wreath frame, overlapping slightly. Attach each with hot glue.
- Cut a 24-inch length of burlap. Fold it in half lengthwise and tie the center with floral wire.
- Fan out the loops to form a bow and glue it to the bottom of the wreath. Let dry for 30 minutes.
6. Wood Slice Name Tags
Easy
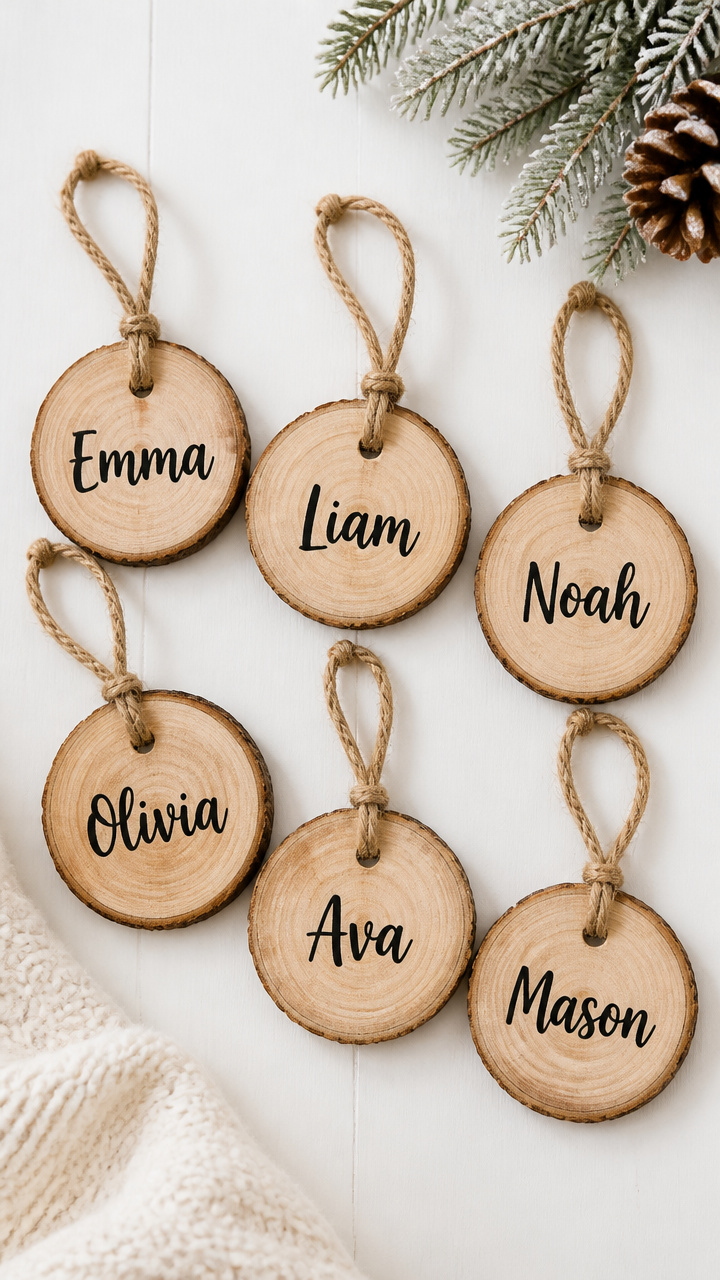
Personalized with painted names, these burlap-tied wood slices make charming place cards for a winter dinner table.
Materials Needed
- 6 wood slices, 2 inches in diameter
- Black acrylic paint pen
- Burlap string, 1/8 inch thick, 6 feet
- Small hole punch tool
- Sandpaper (220 grit)
How to Make It
- Lightly sand the face of each wood slice. Wipe clean with a dry cloth.
- Use the black acrylic paint pen to write one name on each slice. Let dry for 10 minutes.
- Punch a small hole near the top edge of each slice. Thread a 10-inch piece of burlap string through and tie a knot.


7. Burlap-Lined Wood Slice Trinket Dish
Moderate
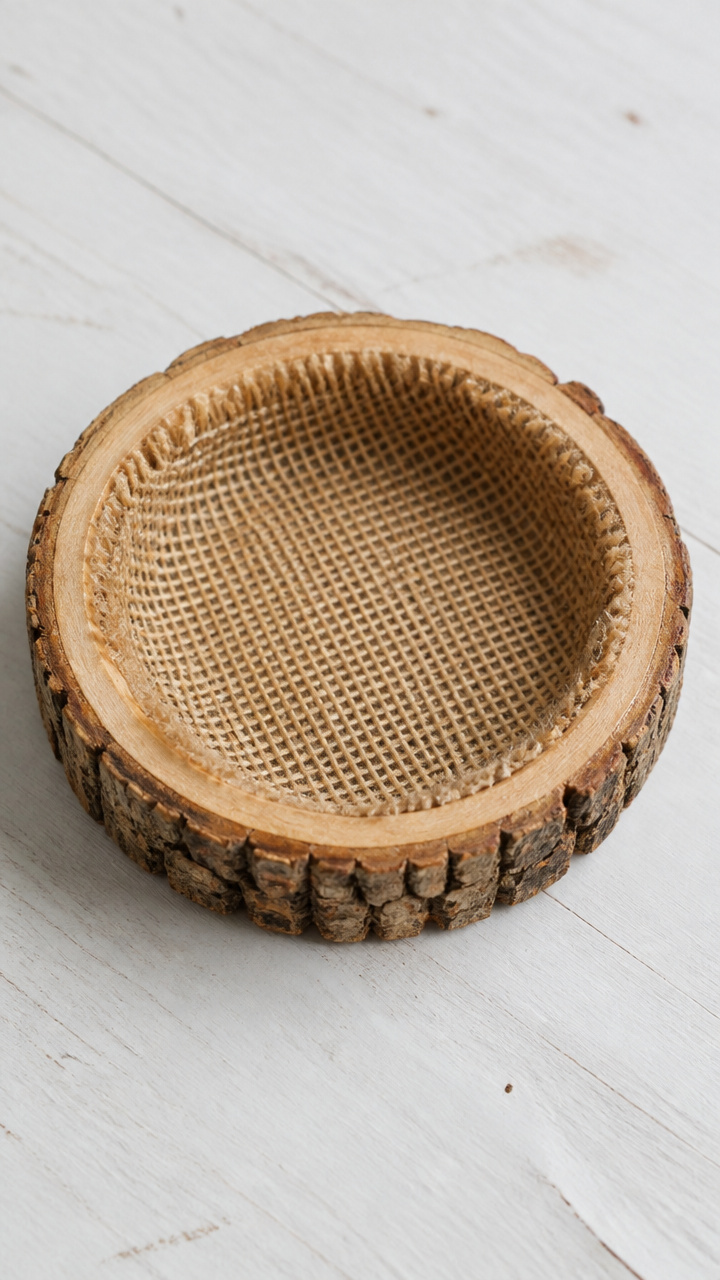
A shallow wood slice bowl gets a soft interior lining of burlap, perfect for holding keys or holiday trinkets.
Materials Needed
- 1 deep wood slice, 4 inches in diameter, 1 inch thick with natural hollow
- Burlap fabric, 5 inches square
- Fabric glue
- Scissors
- Foam brush
How to Make It
- Cut the burlap to fit the inside hollow of the wood slice, adding 0.5 inches to each side for overlap.
- Brush fabric glue along the inner walls of the hollow. Press the burlap into place, smoothing out wrinkles.
- Fold the excess burlap over the rim and glue it to the top surface. Let dry for 3 hours.


8. Wood Slice Advent Calendar
Advanced
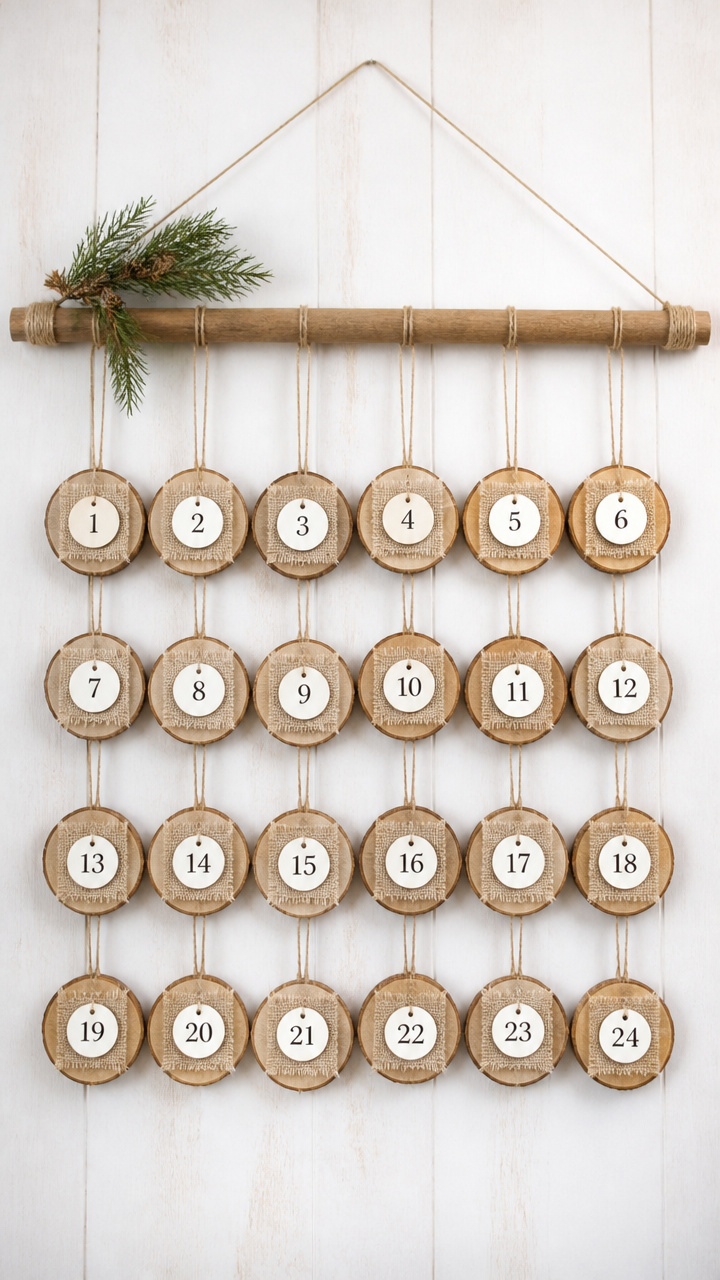
Twenty-four small wood slices hang with burlap string, each marked with a number for a handmade holiday countdown.
Materials Needed
- 24 wood slices, 1.5 inches in diameter
- Burlap string, 1/8 inch thick, 12 feet
- Numbers 1–24 printed on 0.75-inch white circle labels
- Small hole punch tool
- Hot glue gun and glue sticks
- Wooden dowel, 12 inches long, 0.5 inches in diameter
- Twine, 24 inches
How to Make It
- Punch a hole near the top edge of each wood slice. Attach a 6-inch burlap string to each with a knot.
- Glue one number label to the face of each slice. Let dry for 20 minutes.
- Tie the ends of the burlap strings to the wooden dowel, spacing them evenly. Tie twine to both ends of the dow for hanging.


9. Burlap and Wood Candle Holders
Moderate
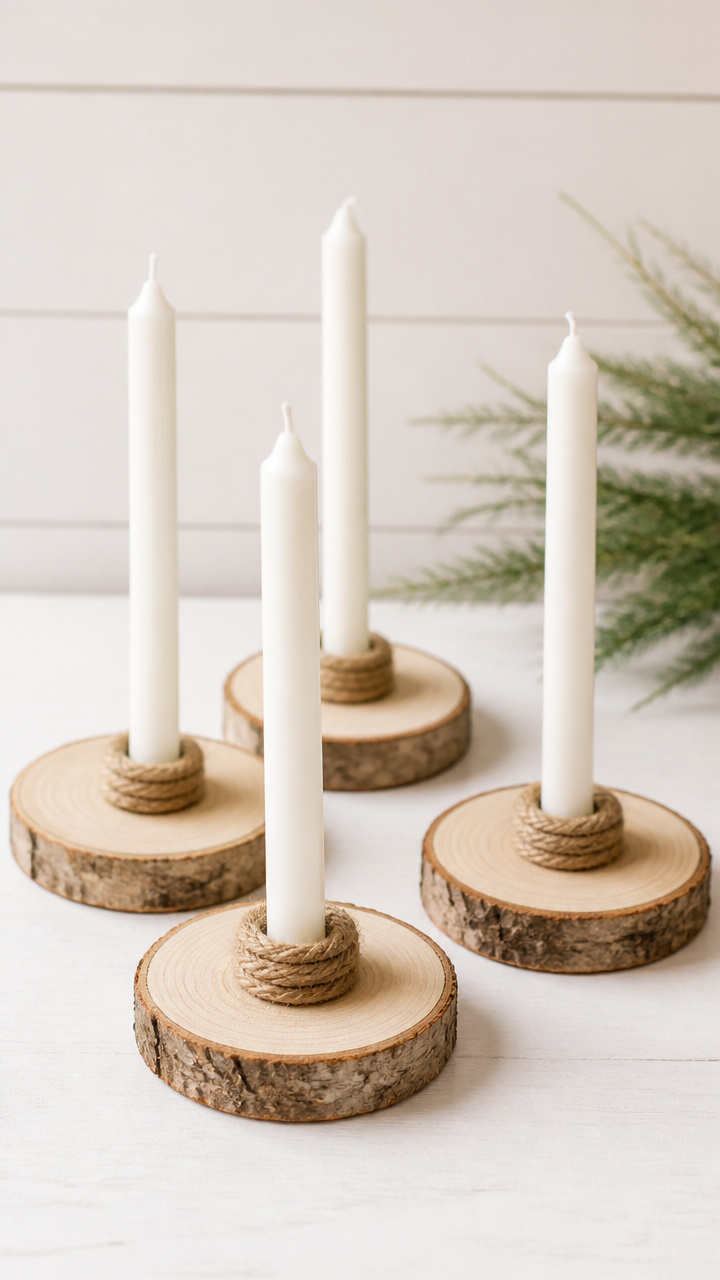
Tall wood slices with drilled centers hold taper candles, wrapped at the base with twisted burlap cord.
Materials Needed
- 4 wood slices, 3 inches in diameter, 1.5 inches thick
- Drill with 0.5-inch bit
- Burlap string, 1/4 inch thick, 4 feet
- Hot glue gun and glue sticks
- White taper candles, 10 inches, 4
How to Make It
- Drill a 0.5-inch hole in the center of each wood slice, 1 inch deep.
- Cut the burlap string into four 12-inch lengths. Twist each piece tightly.
- Wrap one twisted burlap string around the base of each wood slice and secure with hot glue.
- Insert a taper candle into each holder. Use on a fire-safe surface.


10. Wood Slice Tree Topper
Easy

A star-shaped wood slice, wrapped in burlap and crowned with a jute knot, becomes a simple tree topper.
Materials Needed
- 1 star-shaped wood slice, 4 inches across
- Burlap ribbon, 1 inch wide, 18 inches
- Hot glue gun and glue sticks
- Gold jute cord, 12 inches
How to Make It
- Wrap the burlap ribbon around the center of the star, crossing at the back. Secure with hot glue.
- Tie the gold jute cord into a knot and glue it to the center front of the star.
- Attach a loop of jute to the back for hanging on the tree.
11. Burlap-Edged Wood Slice Mirror
Advanced
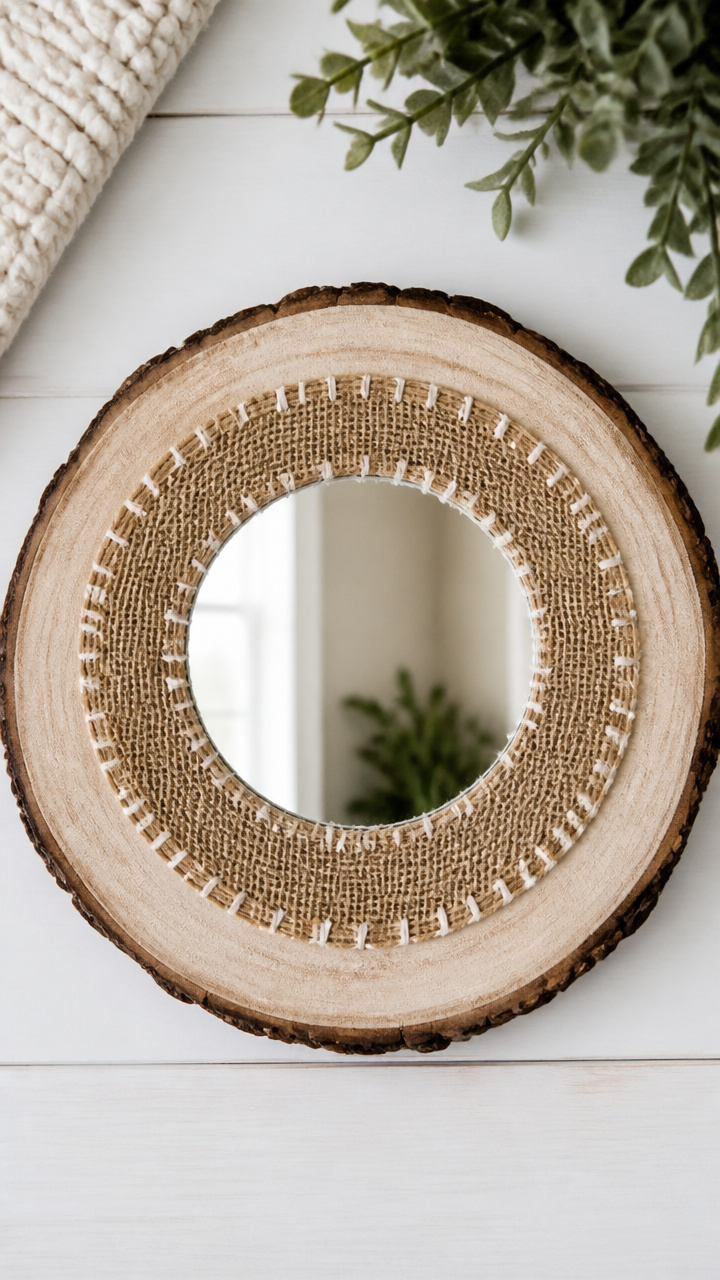
A round mirror glued to a large wood slice gains warmth with a burlap border stitched in place.
Materials Needed
- 1 wood slice, 6 inches in diameter, 1 inch thick
- Round mirror, 4 inches in diameter with flat back
- E6000 glue
- Burlap fabric, 8 inches by 8 inches
- Craft needle and white thread
- Scissors
- Ruler
How to Make It
- Cut a burlap square 2 inches larger than the wood slice on all sides. Center it under the slice.
- Apply E6000 glue to the back of the mirror and press it centered on the wood slice. Let dry for 4 hours.
- Fold the burlap edges up over the back of the wood slice. Stitch them down with small whipstitches every inch.
- Trim excess burlap. Let glue cure fully for 24 hours before hanging.


12. Wood Slice Garland with Burlap Tags
Easy
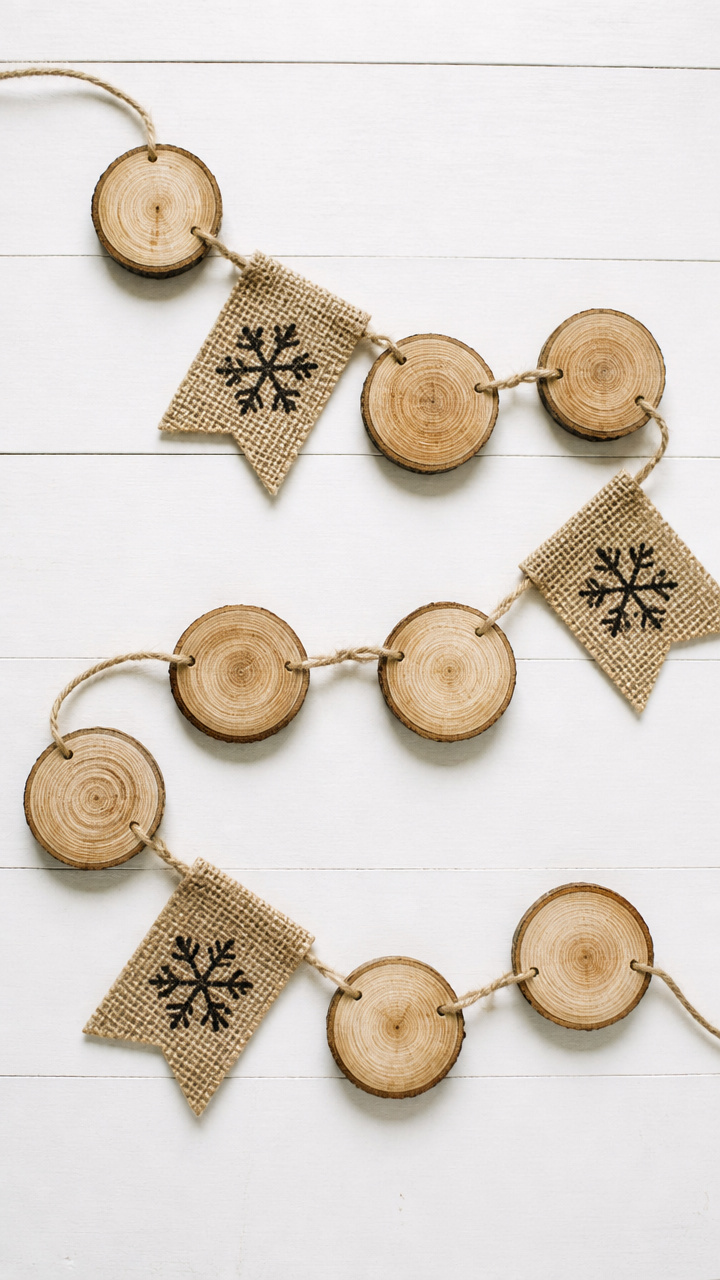
A string of wood slices alternates with burlap tags stamped with winter words like 'Joy' or 'Peace'.
Materials Needed
- 10 wood slices, 2 inches in diameter
- Burlap fabric, 6 inches by 10 inches
- Alphabet stamp set and black ink pad
- Twine, 5 feet
- Hole punch tool
- Scissors
How to Make It
- Cut the burlap into 10 rectangles, 1.5 inches by 2 inches. Stamp one winter word on each.
- Punch a hole in the top of each wood slice and burlap tag.
- Thread the twine through alternating wood slices and burlap tags, knotting between each to secure.
13. Burlap-Wrapped Wood Slice Vase Base
Moderate
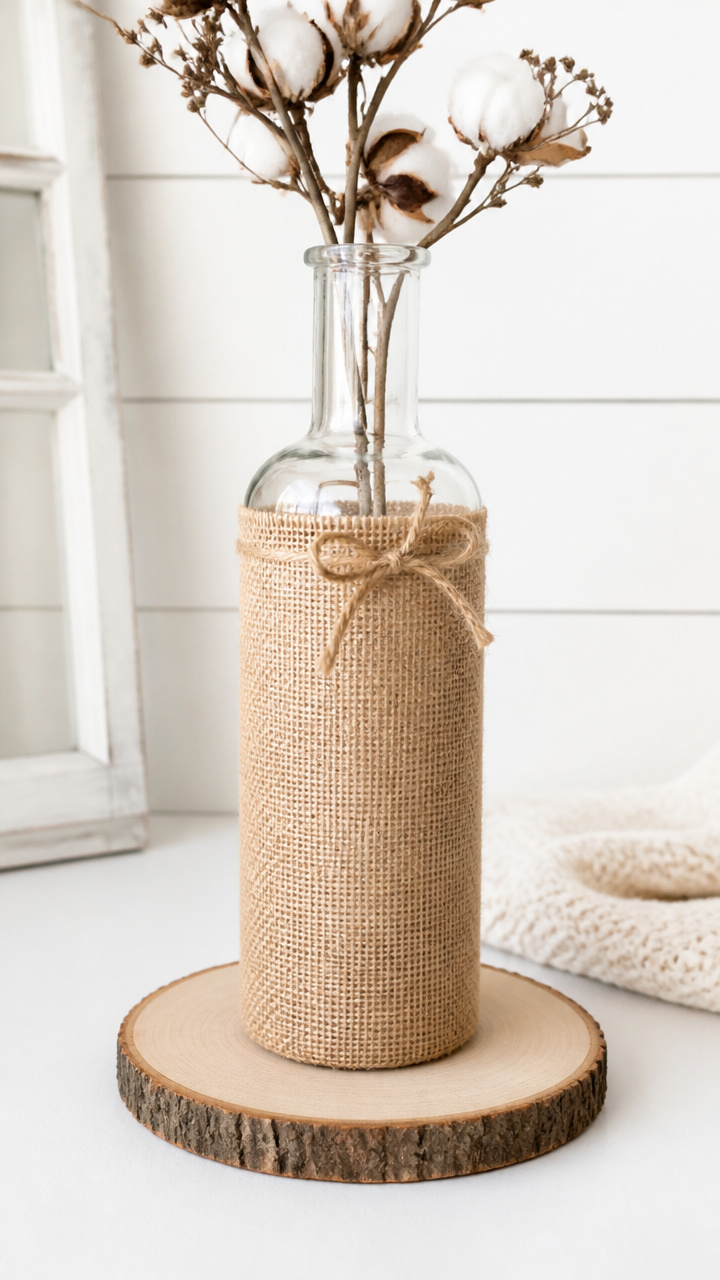
A wide wood slice supports a glass bottle wrapped in burlap, creating a farmhouse-style vase for winter greens.
Materials Needed
- 1 wood slice, 5 inches in diameter
- Glass bottle, 6 inches tall, 2 inches wide
- Burlap fabric, 8 inches by 4 inches
- PVA glue
- Foam brush
- Scissors
- Hot glue gun
How to Make It
- Brush PVA glue on the burlap piece. Wrap it smoothly around the glass bottle, covering the lower half.
- Let dry for 1 hour. Apply a thin line of hot glue to the center of the wood slice.
- Press the bottom of the bottle into the glue. Hold for 30 seconds. Let set for 2 hours.

14. Wood Slice and Burlap Wall Art
Moderate
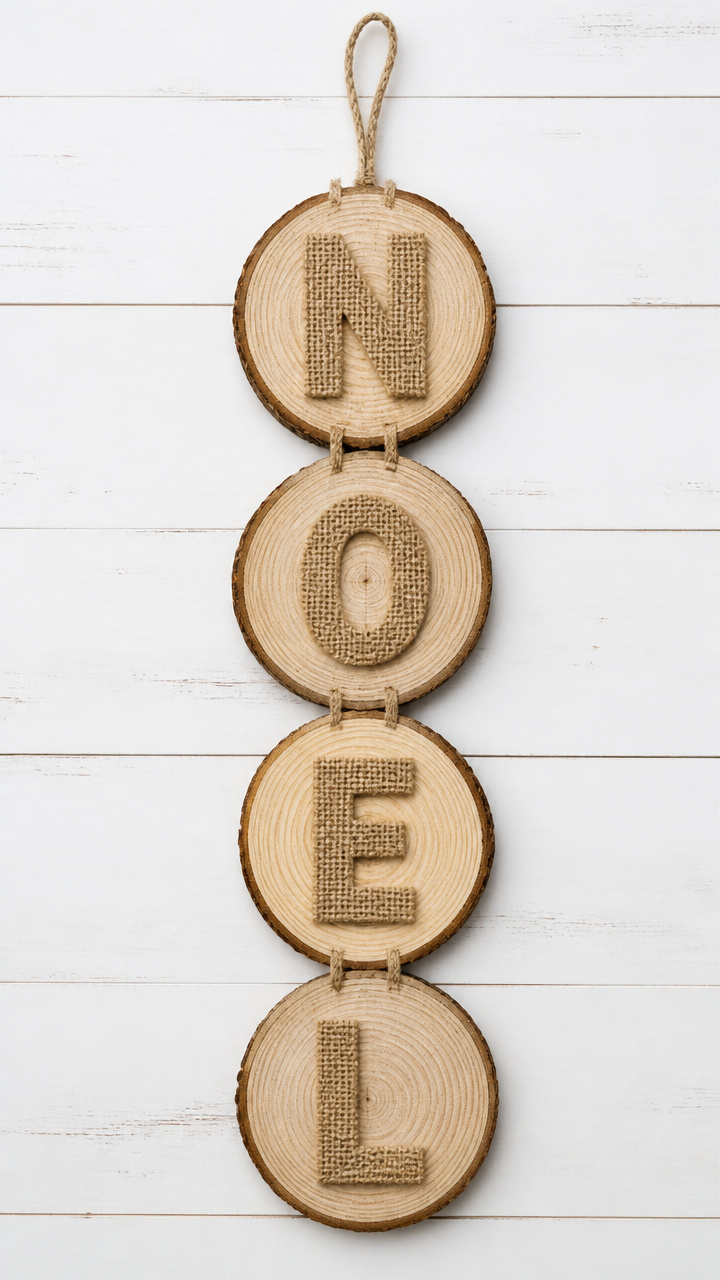
Three stacked wood slices spell 'NOEL' in bold burlap letters glued to their faces.
Materials Needed
- 3 wood slices, 4 inches in diameter
- Burlap fabric, 6 inches by 6 inches
- Craft knife
- PVA glue
- Foam brush
- Letter stencil set: N, O, E, L
- Ruler
- Sandpaper (120 grit)
How to Make It
- Sand the face of each wood slice. Wipe clean.
- Use the stencil to trace one letter onto the burlap. Cut out with the craft knife.
- Brush PVA glue on the back of each letter. Center and press onto a wood slice.
- Let dry for 2 hours. Arrange and hang vertically with picture hooks.
15. Burlap-Tied Wood Slice Tree
Advanced
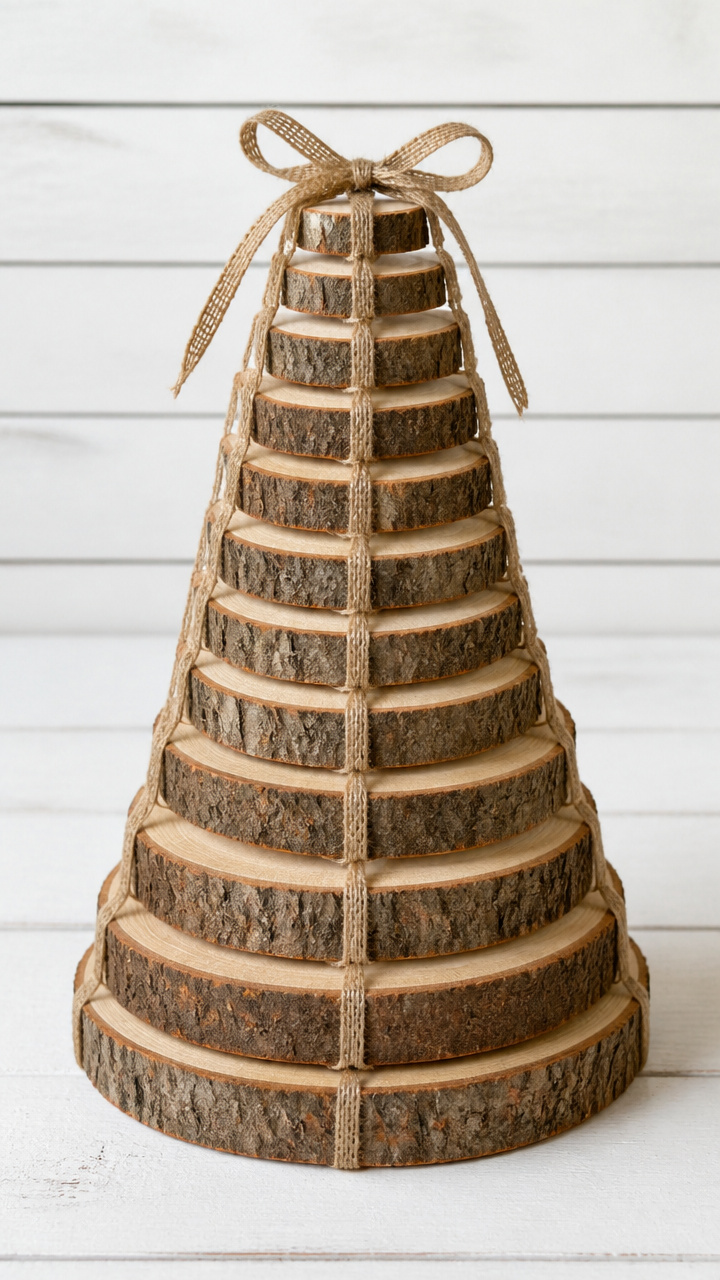
Mini wood slices stacked and burlap-tied form a tabletop Christmas tree silhouette.
Materials Needed
- 7 wood slices, varying from 1.5 to 3.5 inches in diameter
- Burlap string, 1/8 inch thick, 3 feet
- Wood glue
- Drill with 1/16-inch bit
- 1 wooden skewer, 6 inches
How to Make It
- Drill a small hole in the center of each wood slice. Sand edges lightly.
- Apply wood glue to one end of the skewer. Insert through the largest slice, then stack remaining slices by size.
- Tie burlap string around each slice where it meets the skewer, securing with a knot. Let dry for 4 hours.
16. Wood Slice Photo Frame
Moderate
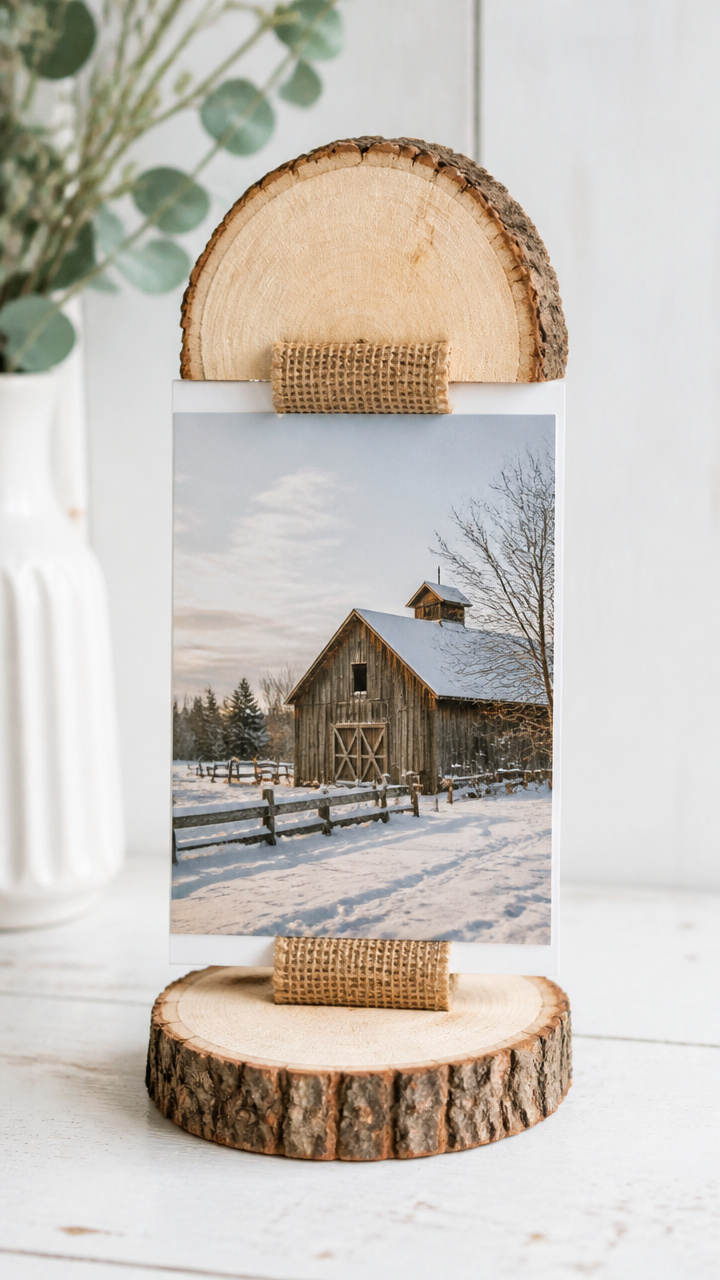
Two wood slices clamp a photo with a burlap hinge, creating a stand-up memory display.
Materials Needed
- 2 wood slices, 3 inches in diameter
- Burlap strip, 1 inch wide by 4 inches long
- PVA glue
- Foam brush
- 4-inch by 6-inch photo
- Clothespin
How to Make It
- Place the burlap strip vertically across the back edges of both wood slices, overlapping each by 0.5 inches.
- Brush PVA glue on the burlap and press it to both slices. Clip a clothespin over the joint and let dry for 2 hours.
- Slide the photo between the front faces. The burlap acts as a hinge to stand it up.


17. Burlap Poinsettia on Wood Slice
Moderate
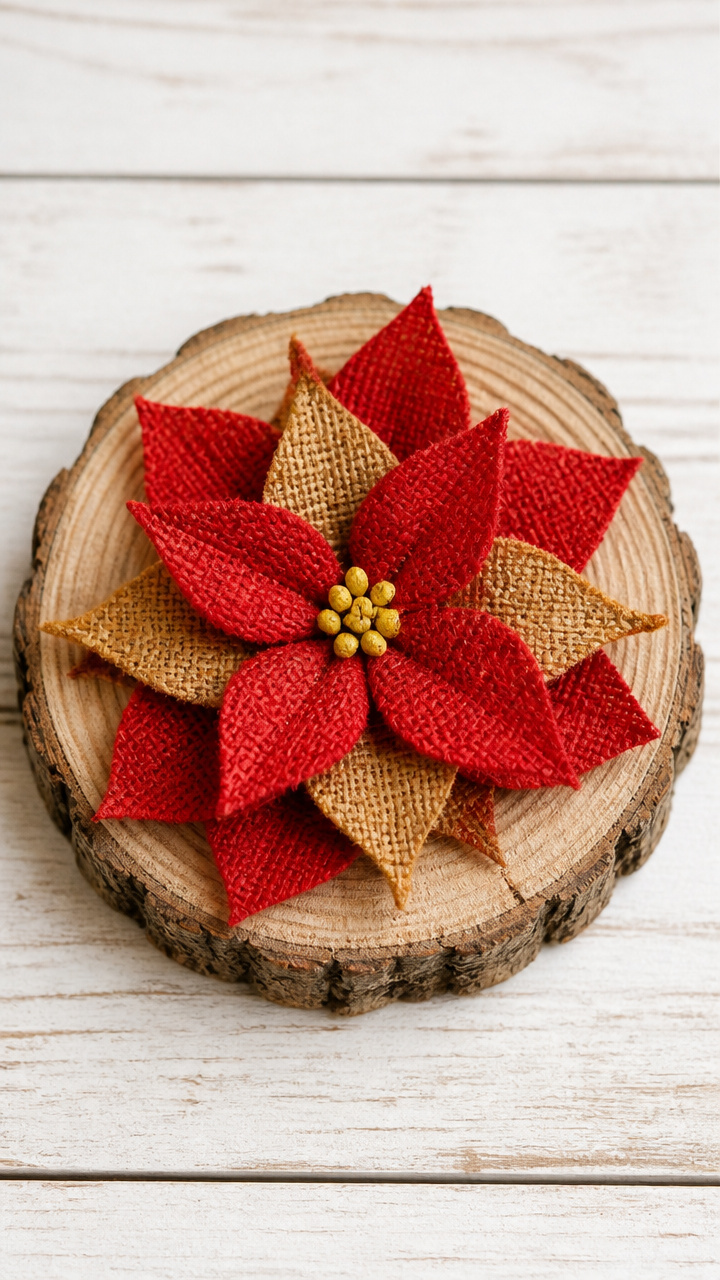
Layered burlap petals form a rustic poinsettia, glued to a wood slice for a seasonal centerpiece.
Materials Needed
- 1 wood slice, 3 inches in diameter
- Red burlap fabric, 6 inches square
- Yellow burlap fabric, 2 inches square
- Scissors
- Hot glue gun
- Pencil
How to Make It
- Cut 8 red burlap petals, each 1.5 inches long, teardrop shaped. Cut 5 small yellow circles for the center.
- Layer the red petals in a circle on the wood slice, gluing each at the base with slight overlap.
- Glue the yellow circles in a tight cluster in the center. Let dry for 30 minutes.
18. Wood Slice and Burlap Bookmarks
Easy
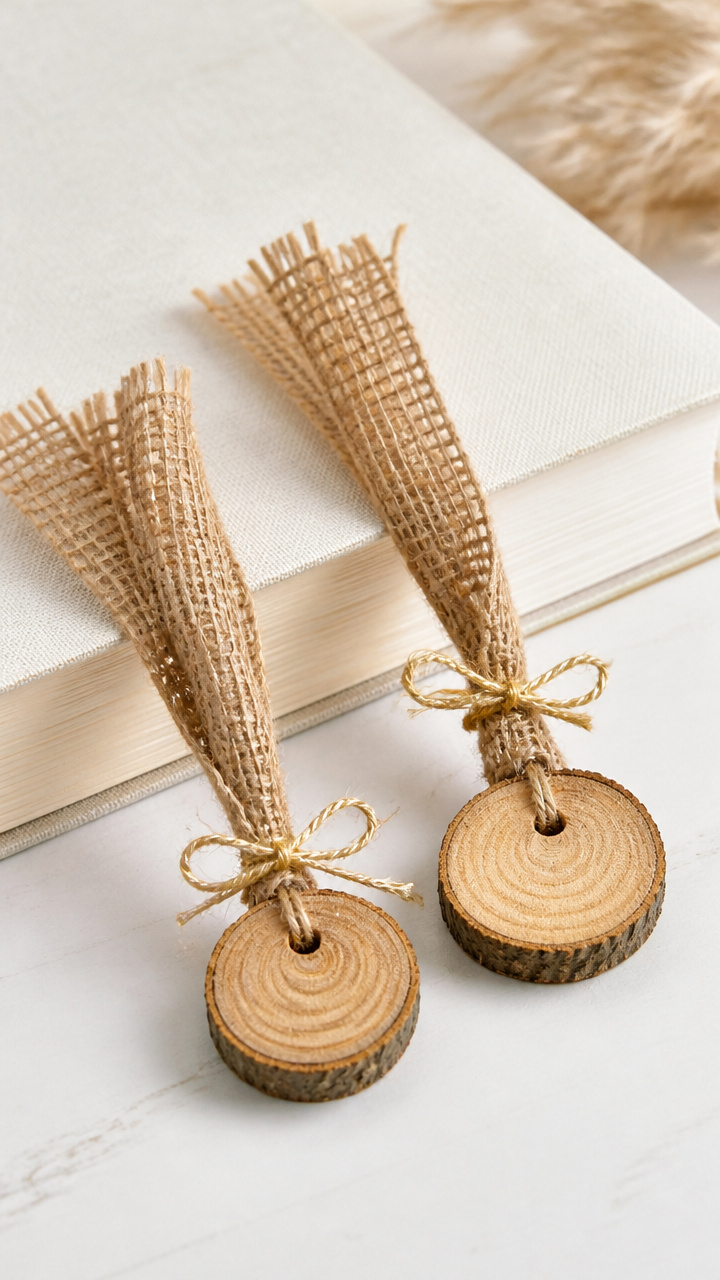
Tiny wood slices with burlap tassels dangle from the corner of pages, marking your place with rustic charm.
Materials Needed
- 4 wood slices, 1 inch in diameter
- Burlap string, 1/8 inch thick, 2 feet
- Small hole punch tool
- Gold jute cord, 8 inches
How to Make It
- Punch a hole in the top edge of each wood slice.
- Cut four 6-inch lengths of burlap string. Tie them together at one end to form a tassel.
- Thread the tied end through the hole and secure with a knot. Attach a 2-inch piece of gold jute to the knot.


19. Burlap-Wrapped Wood Slice Clock
Advanced
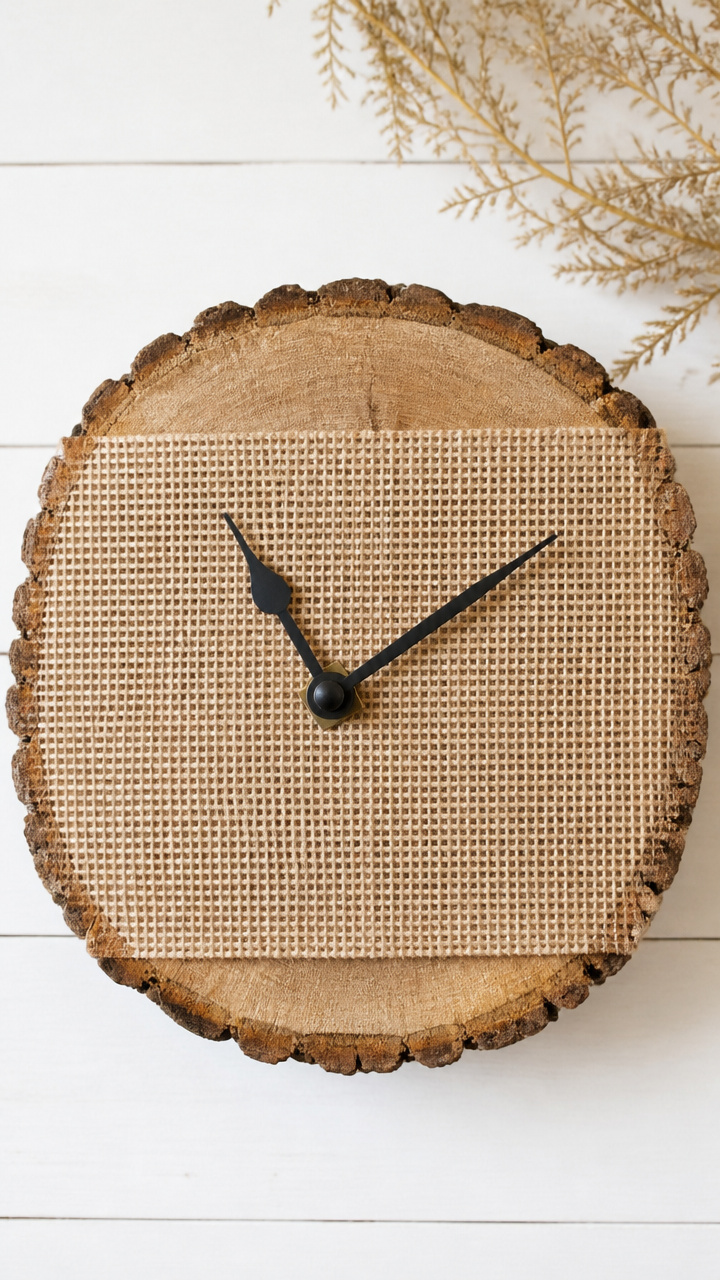
A large wood slice holds a clock mechanism, its rim wrapped in burlap for soft contrast.
Materials Needed
- 1 wood slice, 8 inches in diameter
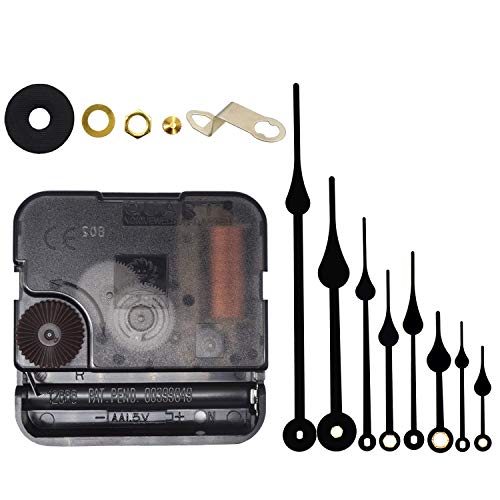
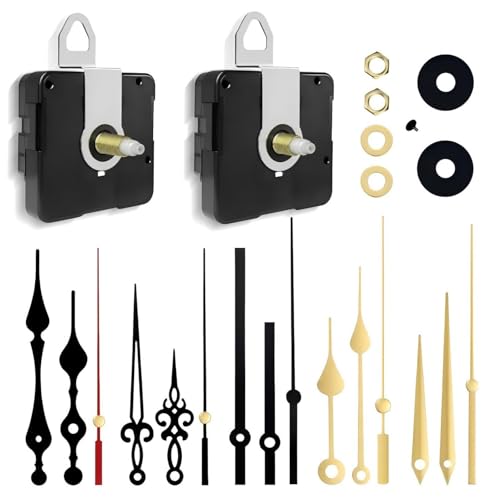
- Clock kit with hands and mechanism
- Drill with 3/8-inch bit
- Burlap ribbon, 2 inches wide, 1 yard
- Hot glue gun
- Scissors
How to Make It
- Drill a 3/8-inch hole in the center of the wood slice. Insert the clock mechanism from the back.
- Wrap the burlap ribbon around the outer edge, covering the rim. Secure with hot glue every inch.
- Attach clock hands according to kit instructions. Hang with a sawtooth hanger.

20. Wood Slice and Burlap Napkin Rings
Easy
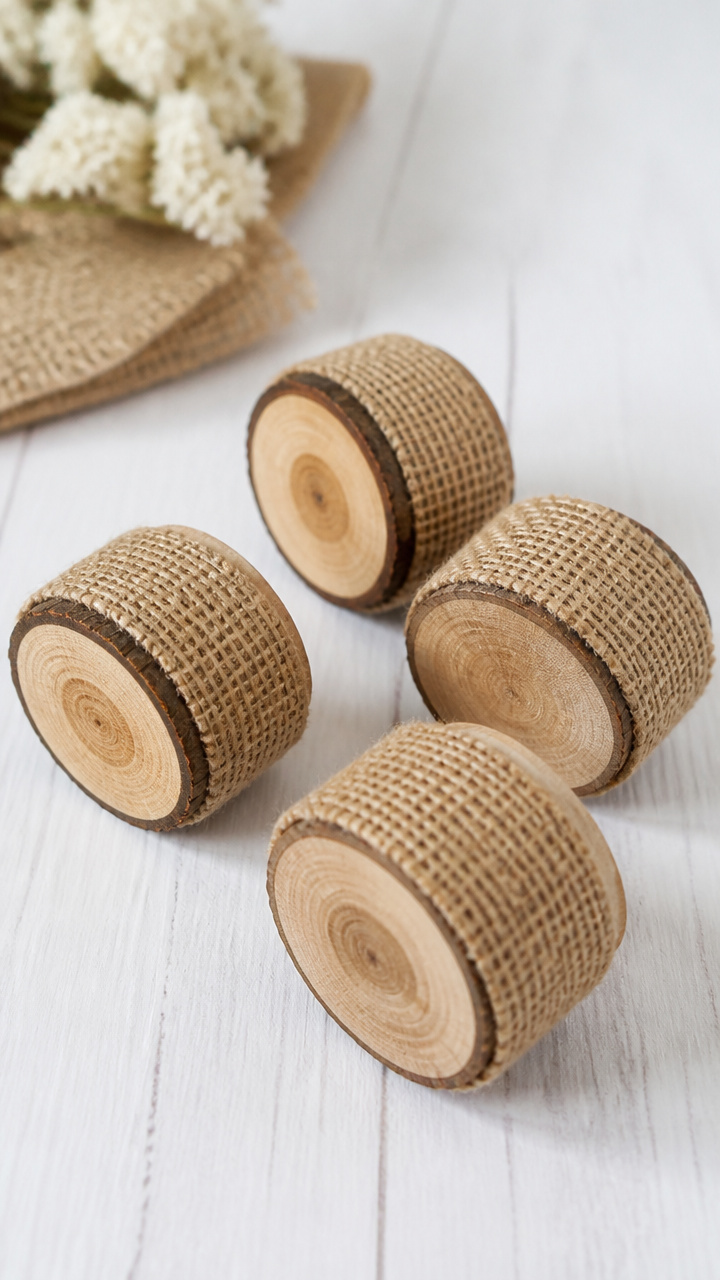
Small wood slices with burlap bands make reusable napkin rings for winter holiday meals.
Materials Needed
- 4 wood slices, 2 inches in diameter, 0.5 inches thick
- Burlap ribbon, 1 inch wide, 1 yard
- Scissors
- Hot glue gun
How to Make It
- Cut the burlap ribbon into four 5-inch lengths.
- Wrap one piece around the center of each wood slice. Overlap the ends and glue them together on the back.
- Slide a cloth napkin through the ring. Use immediately.
21. Burlap-Backed Wood Slice Plaque
Easy
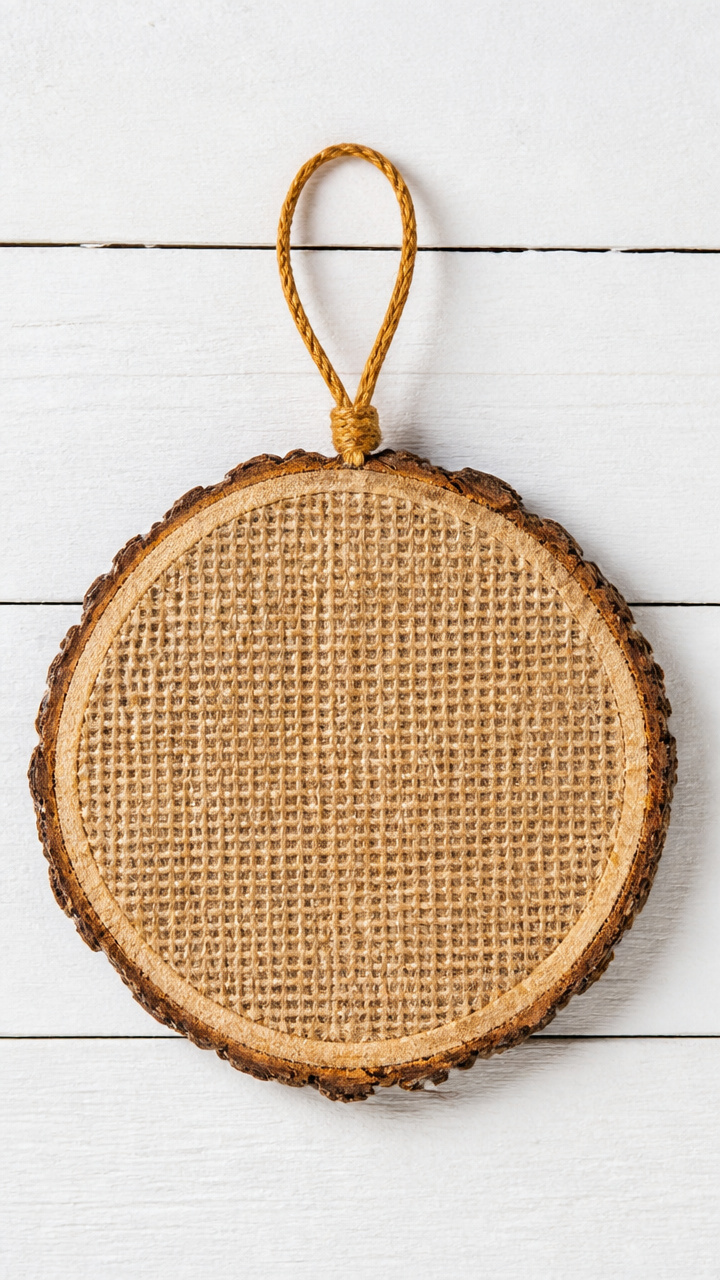
A large wood slice gains a soft backing of burlap, ready to hang with a hidden jute loop.
Materials Needed
- 1 wood slice, 5 inches in diameter
- Burlap fabric, 7 inches square
- PVA glue
- Foam brush
- Scissors
- Gold jute cord, 6 inches
How to Make It
- Cut the burlap 1 inch larger than the wood slice on all sides. Brush PVA glue on the back of the slice.
- Press the burlap onto the back, smoothing from center outward. Fold edges over and glue down.
- Glue a loop of jute cord to the top edge on the back. Let dry for 2 hours.


22. Wood Slice and Burlap Ornament Stand
Moderate
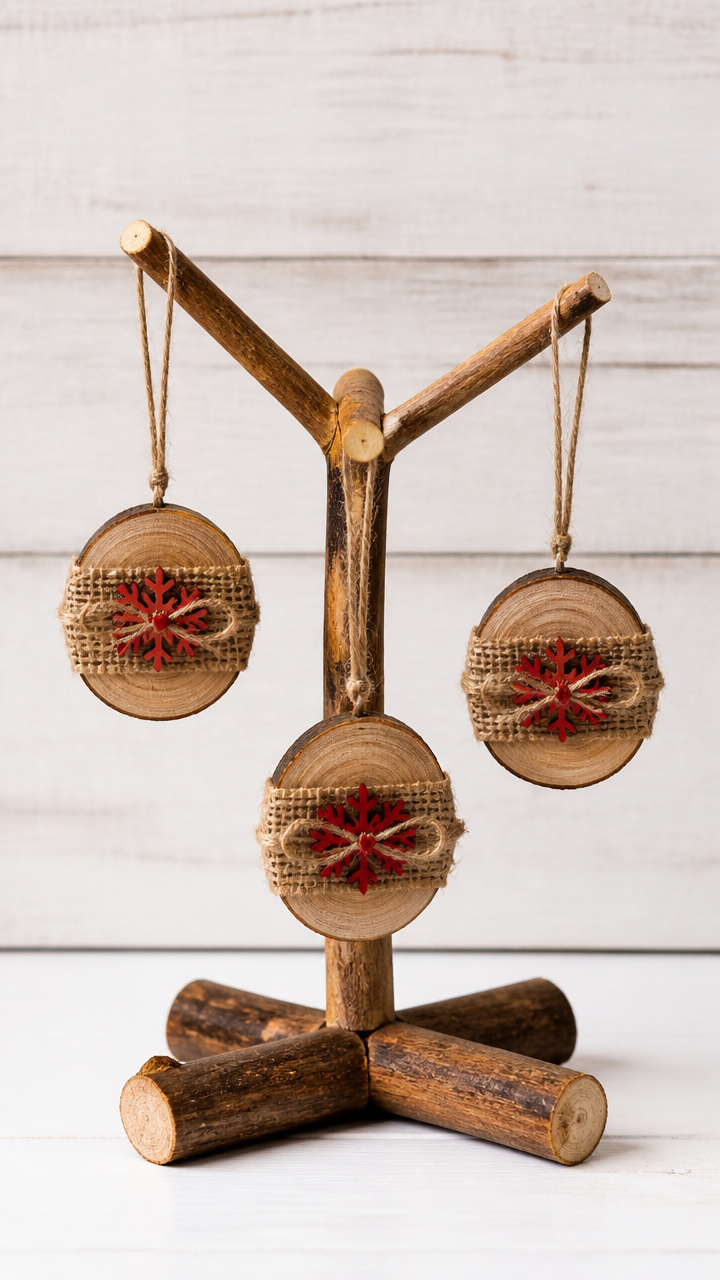
A Y-shaped branch base holds upright wood slice ornaments wrapped in burlap bands.
Materials Needed
- 1 Y-shaped wooden branch, 6 inches tall
- 3 wood slices, 2 inches in diameter
- Burlap string, 1/8 inch thick, 1 foot
- Hot glue gun
- Red acrylic paint
- Small paintbrush
How to Make It
- Paint a red stripe across the center of each wood slice. Let dry for 15 minutes.
- Wrap a 4-inch burlap string around the center of each slice and tie. Trim ends.
- Apply hot glue to the flat bottom of each slice. Press onto a branch arm. Hold 20 seconds. Let dry.


23. Burlap-Wrapped Wood Slice Tray Handle
Moderate
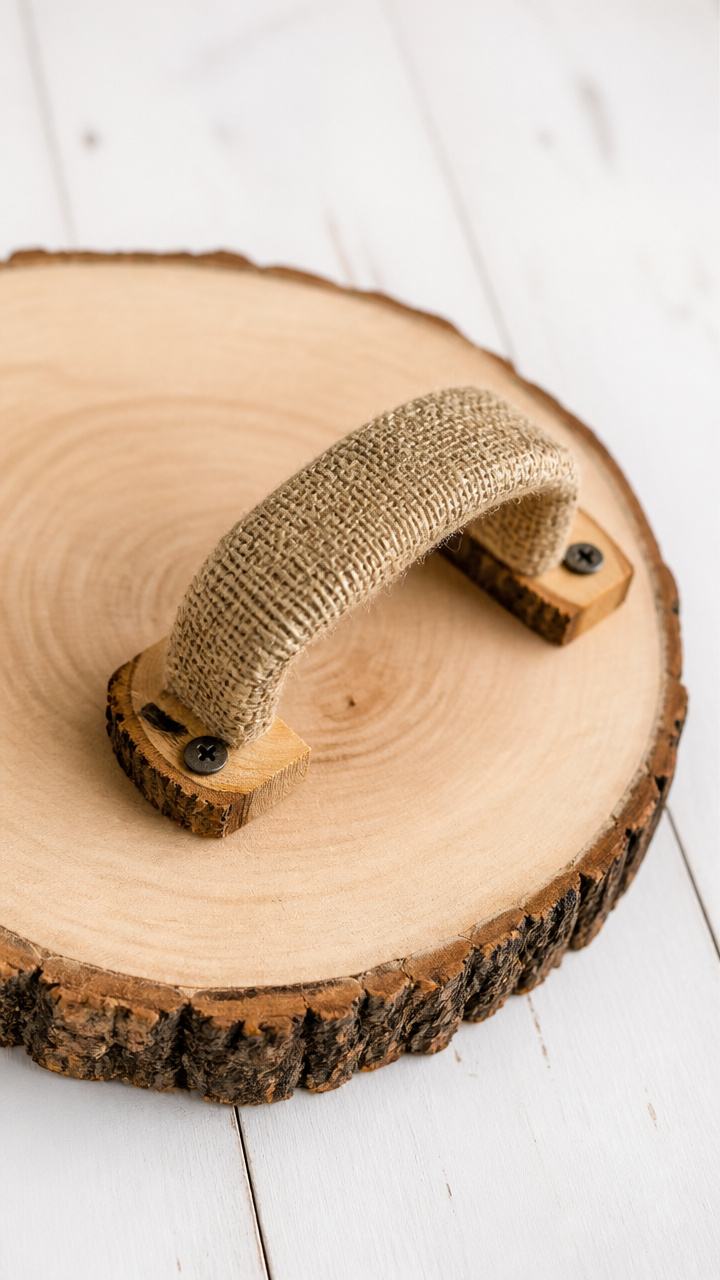
A long wood slice becomes a handle for a tray, wrapped in burlap for comfort and grip.
Materials Needed
- 1 wood slice, 6 inches long, 1.5 inches wide
- Burlap fabric, 8 inches by 2 inches
- PVA glue
- Foam brush
- Drill with 1/8-inch bit
- 2 small screws, 1/2 inch
How to Make It
- Drill a 1/8-inch hole 0.5 inches from each end of the wood slice.
- Cut the burlap to size. Brush PVA glue on the wood and wrap the burlap smoothly around it.
- Let dry for 1 hour. Screw the handle to the sides of a small tray using the pre-drilled holes.


24. Wood Slice and Burlap Candle Ring
Moderate
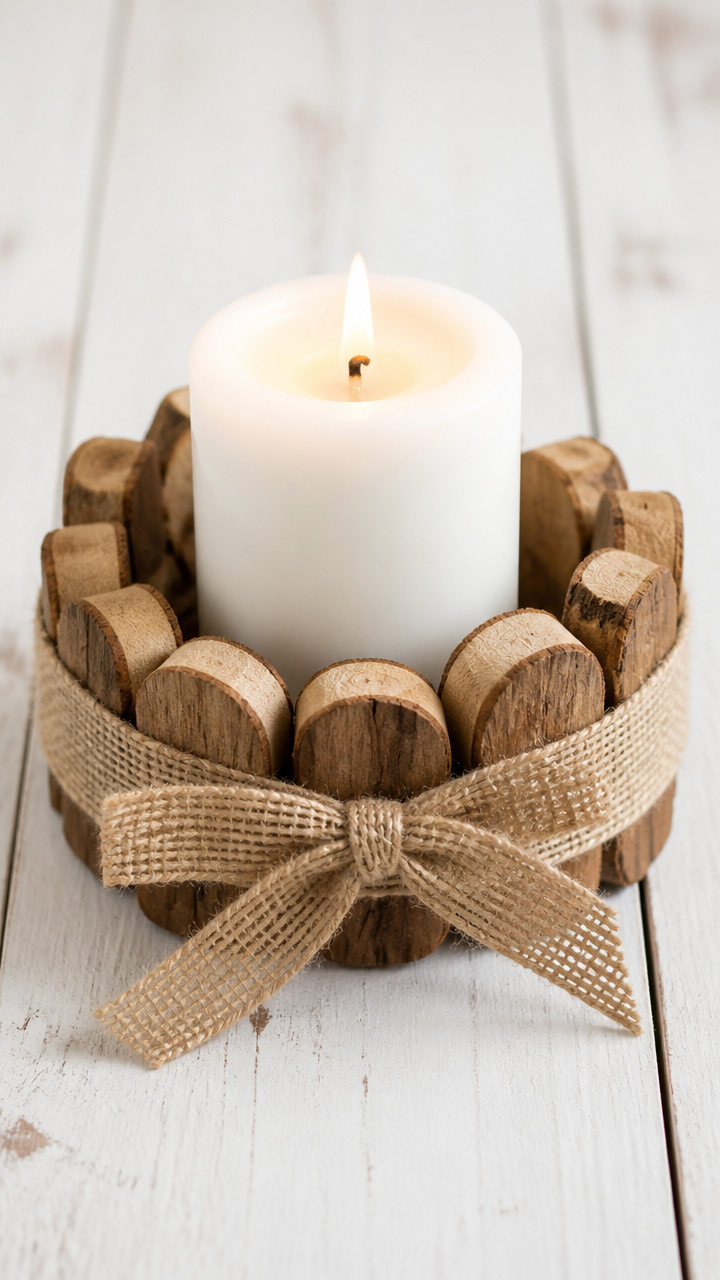
A circle of burlap-wrapped wood slices holds a pillar candle in the center, ideal for a dining centerpiece.
Materials Needed
- 6 wood slices, 2.5 inches in diameter
- Burlap ribbon, 1.5 inches wide, 1 yard
- Hot glue gun
- Scissors
- White pillar candle, 3 inches diameter
How to Make It
- Wrap each wood slice with a burlap ribbon strip, covering the center. Glue the ends on the back.
- Arrange the slices in a circle on a heat-safe surface, touching edge to edge.
- Glue each slice to its neighbor at the sides. Place the candle in the center once dry.

You’ve got everything you need to start crafting with warmth and intention. Grab your wood slices and burlap, and let your hands create something beautiful.