25 Pine Cone Craft Ideas for Fall

The crisp air carries the scent of fallen leaves and woodsmoke, and pine cones gather along your path like nature’s gifts. Gather them up and turn what you find into handmade treasures that bring warmth to your home and joy to your hands. Each craft here uses simple tools and clear steps so you can create with confidence.
1. Pine Cone Bird Feeder Ornaments
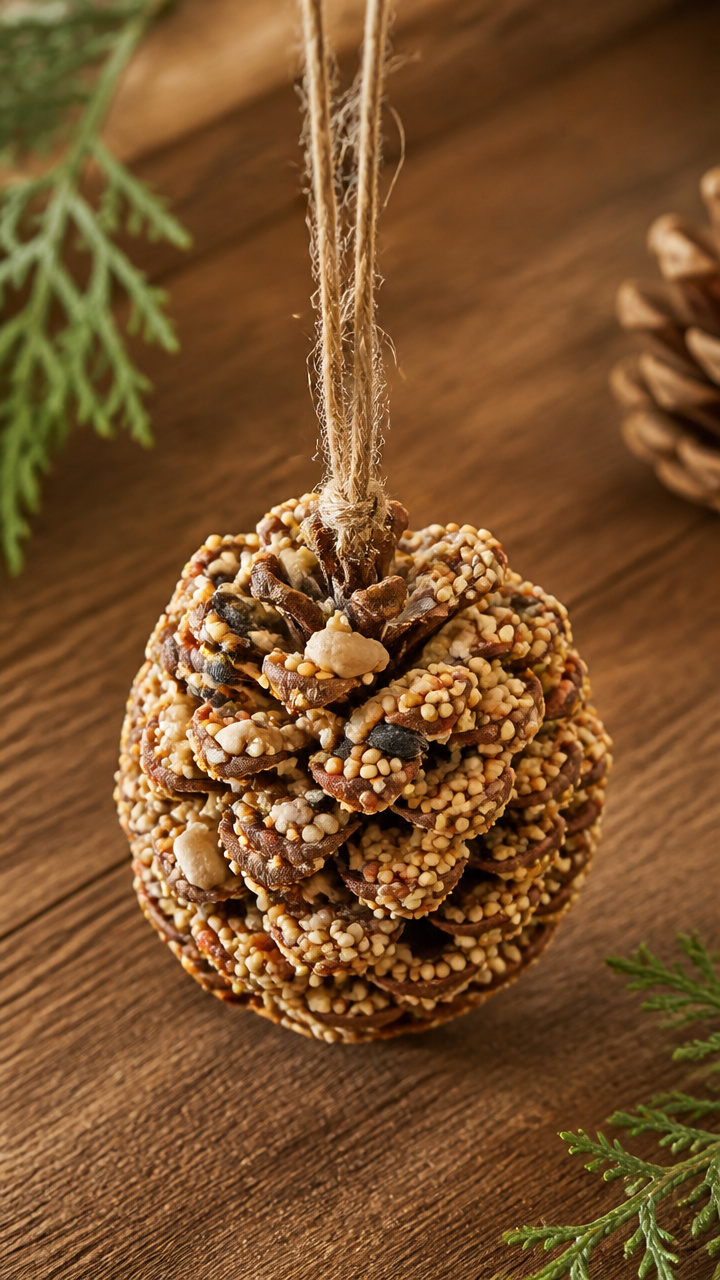
Golden peanut butter coats each scale and holds seeds that birds love. These double as rustic window decorations before they feed your backyard visitors.
Materials Needed
- Large dry pine cones, 3
- Creamy peanut butter, 1 cup
- Mixed birdseed, 2 cups
- Jute twine, 12 inches
- Butter knife
- Baking sheet
- Parchment paper
How to Make It
- Lay parchment paper on a baking sheet and set the pine cones aside.
- Use the butter knife to spread peanut butter between every scale of each pine cone.
- Roll each coated pine cone in birdseed until fully covered, then place on the baking sheet.
- Tie jute twine around the top of each cone for hanging, let dry overnight indoors.


2. Mini Pine Cone Wreath Base
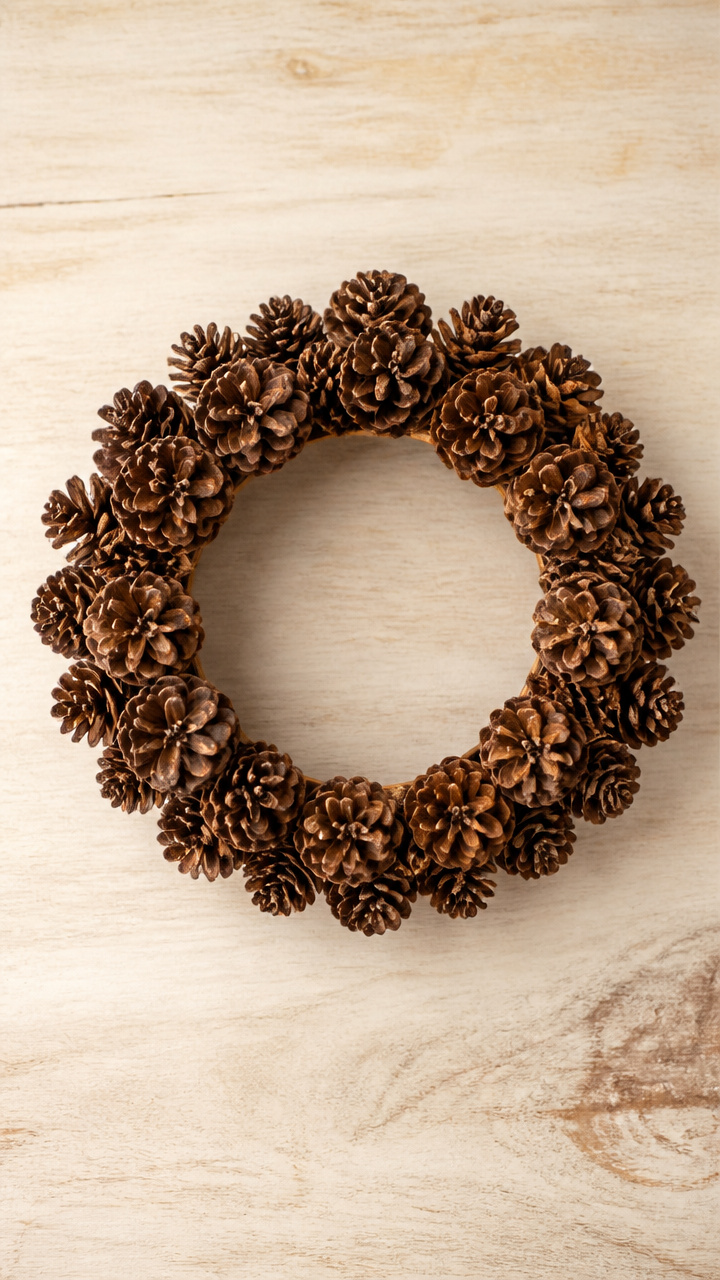
Tiny pine cones glue tightly side by side to form a full ring perfect for table centerpieces or door accents.
Materials Needed
- Small pine cones, 40
- Hot glue gun
- Glue sticks, 1
- Wire wreath frame, 6 inch diameter
- Floral wire, 8 inches
How to Make It
- Slide the wire frame onto a stable surface and begin placing pine cones around the outer edge.
- Apply hot glue to the base of each cone and press it firmly against the frame, overlapping slightly.
- Continue gluing cones all the way around both the front and back edges until the frame is fully covered.
- Twist floral wire around the top for hanging and trim excess.


3. Pine Cone Salt Dough Ornaments
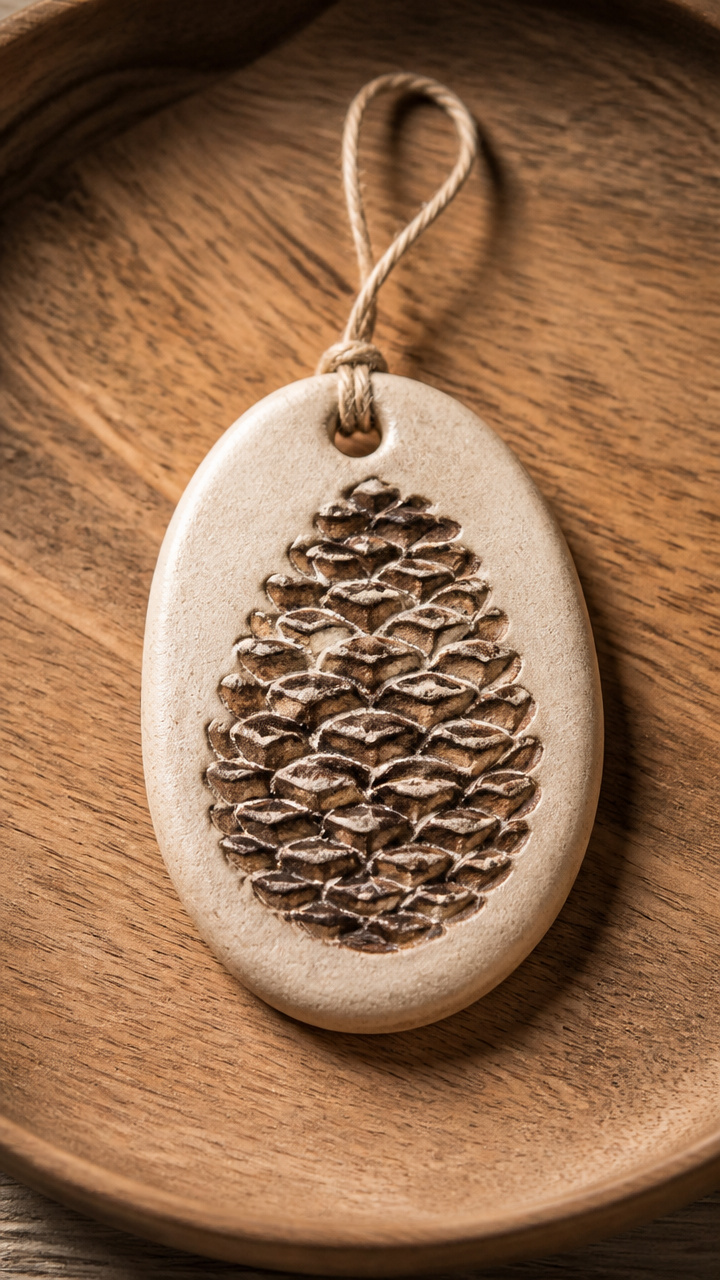
Soft salt dough molds around real pine cones for keepsakes that hold their shape year after year.
Materials Needed
- All-purpose flour, 2 cups
- Table salt, 1 cup
- Water, 1 cup
- Fresh pine cones, 5
- Rolling pin
- Cookie cutters, leaf-shaped, 2
- Baking sheet
- Parchment paper
- Acrylic paint, brown and gold, small bottles
- Ribbon, 12 inches per ornament
How to Make It
- Mix flour, salt, and water in a bowl until a smooth dough forms, knead for 3 minutes.
- Roll dough to 1/4 inch thickness and press cookie cutters into it to make leaf shapes.
- Press one pine cone gently into the center of each leaf, wrap dough slightly up its sides.
- Place on parchment-lined baking sheet and bake at 200°F for 3 hours until hard.
- Paint details with brown and gold, thread ribbon through a hole poked before baking.


4. Pine Cone Cinnamon Applesauce Simmer Pot
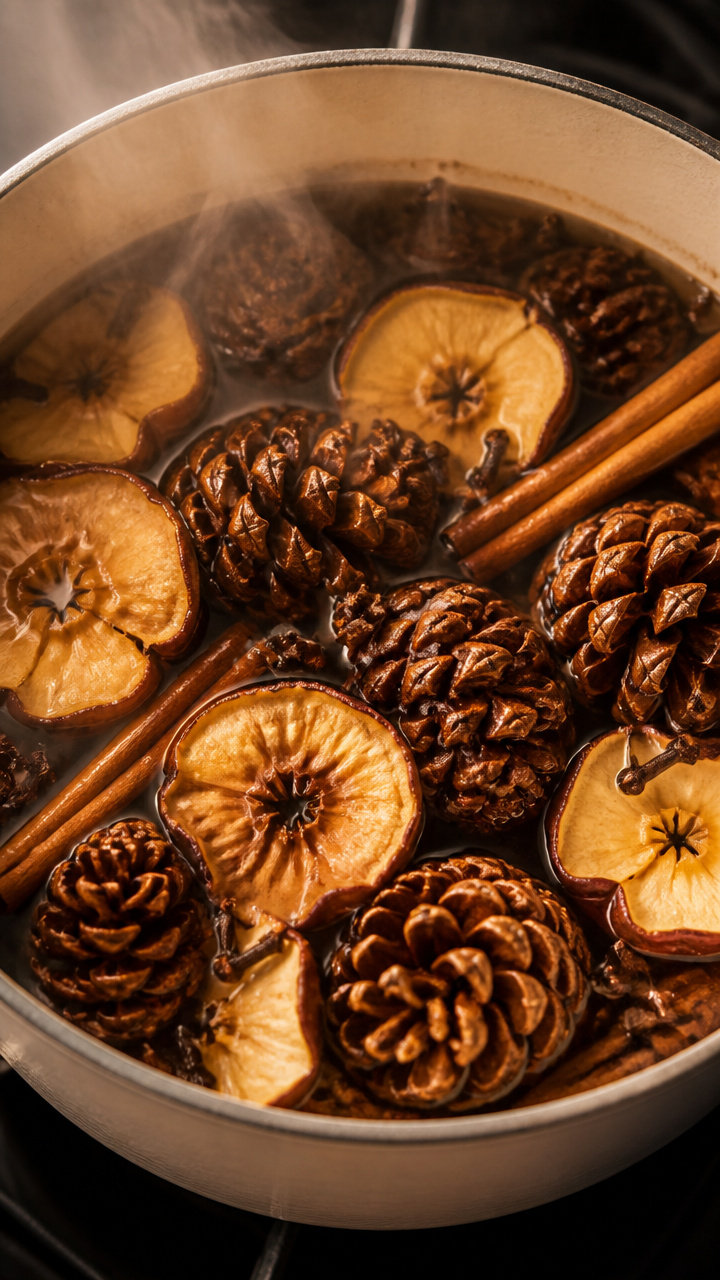
Simmered pine cones release resinous warmth while cinnamon and apples fill your kitchen with cozy spice.
Materials Needed
- Medium pine cones, 4
- Apple slices, dried, 1 cup
- Cinnamon sticks, 3
- Whole cloves, 10
- Large pot
- Water, 6 cups
How to Make It
- Place pine cones, apple slices, cinnamon sticks, and cloves into the pot.
- Add water and bring to a gentle boil over medium heat.
- Reduce heat and simmer uncovered for 2 hours, adding water if level drops below half.
- Enjoy the scent throughout your home and discard contents when done.

5. Pine Cone Fire Starters
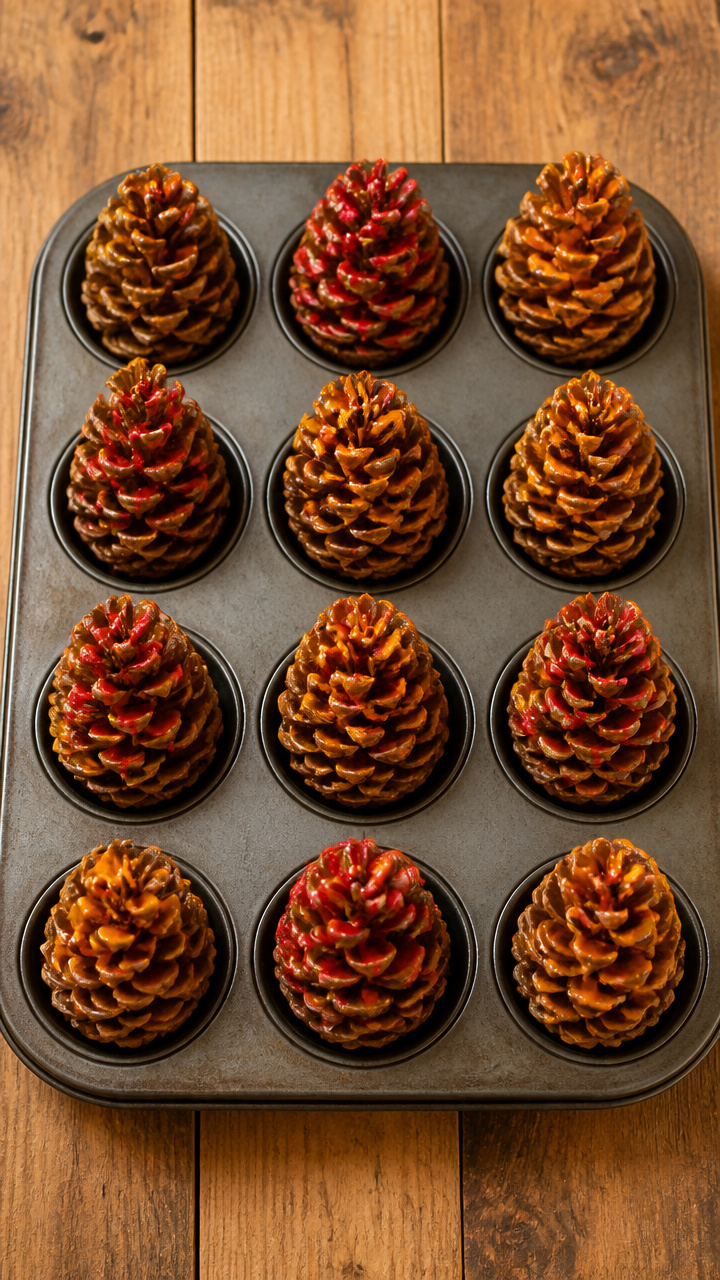
Beeswax-soaked pine cones catch flame easily and burn long enough to light logs in fireplaces or campfires.
Materials Needed
- Dry pine cones, 12
- Beeswax pellets, 1 cup
- Double boiler
- Silicone muffin tray
- Crayon stubs, red or orange, 3
- Matches
How to Make It
- Fill the top of the double boiler with beeswax pellets and melt over simmering water.
- Stir in crayon stubs to add color and help identify starters.
- Hold each pine cone by the base and dip into melted wax for 5 seconds.
- Place upright in the muffin tray to cool for 20 minutes before storing in a dry box.
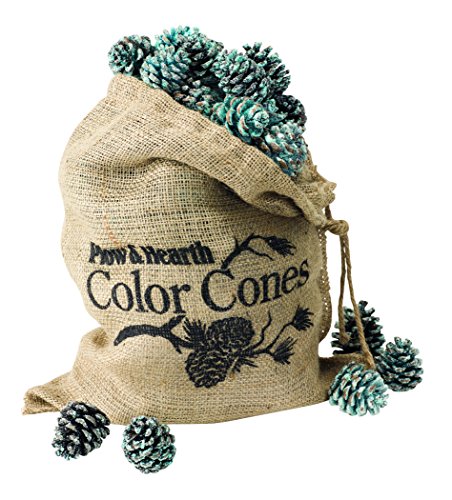


6. Pine Cone Garden Markers
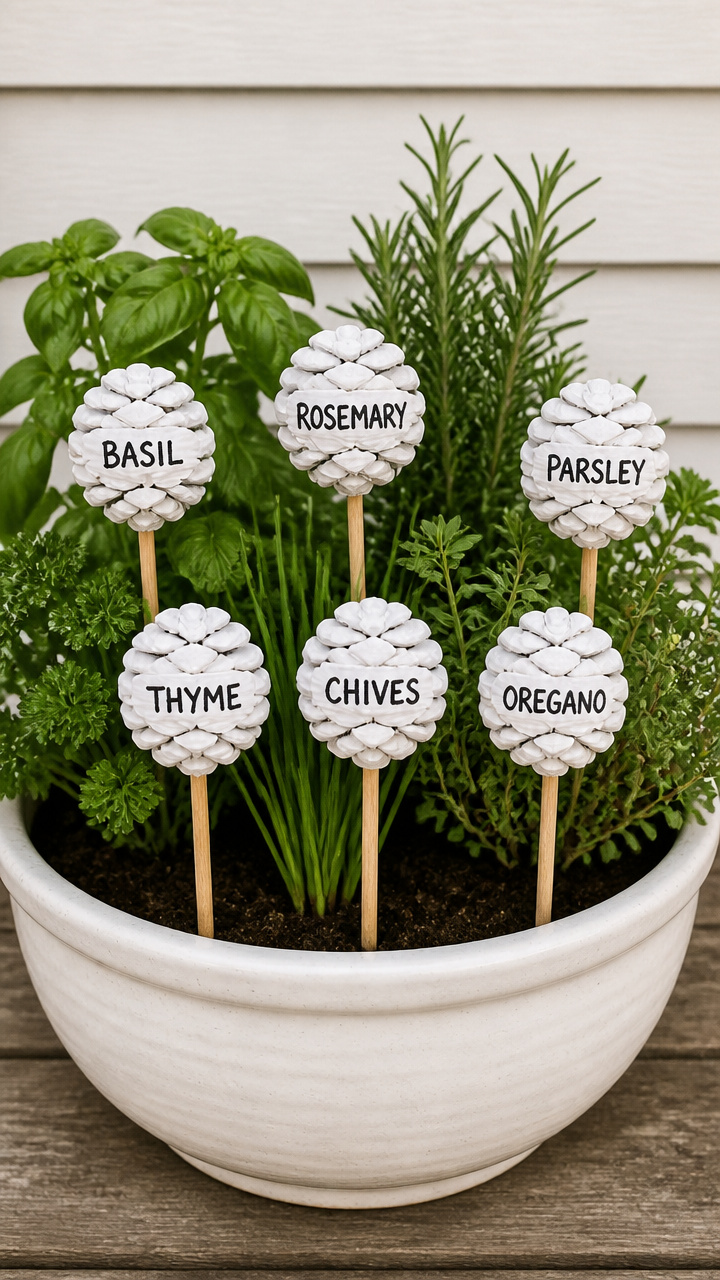
Painted pine cones label herbs and vegetables with charm and durability through the season.
Materials Needed
- Medium pine cones, 6
- White acrylic paint
- Paintbrush, fine tip
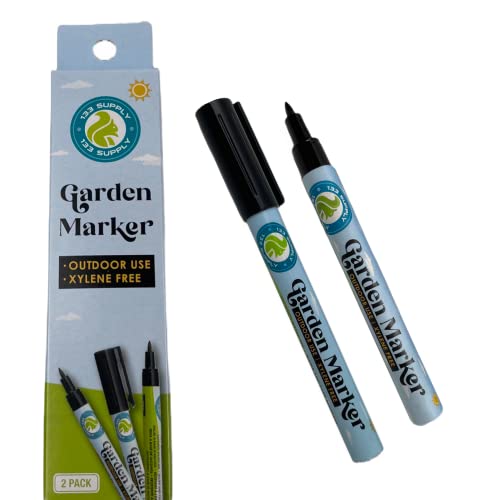
- Black permanent marker
- Wooden skewers, 6
- Craft glue
- Clear outdoor sealant spray
How to Make It
- Paint the top third of each pine cone white and let dry for 30 minutes.
- Use the marker to write herb names like 'Basil' or 'Thyme' on the painted area.
- Glue the pointed end of each skewer to the bottom of a pine cone.
- Spray lightly with sealant and let cure for 2 hours before placing in garden soil.


7. Pine Cone Wind Chime
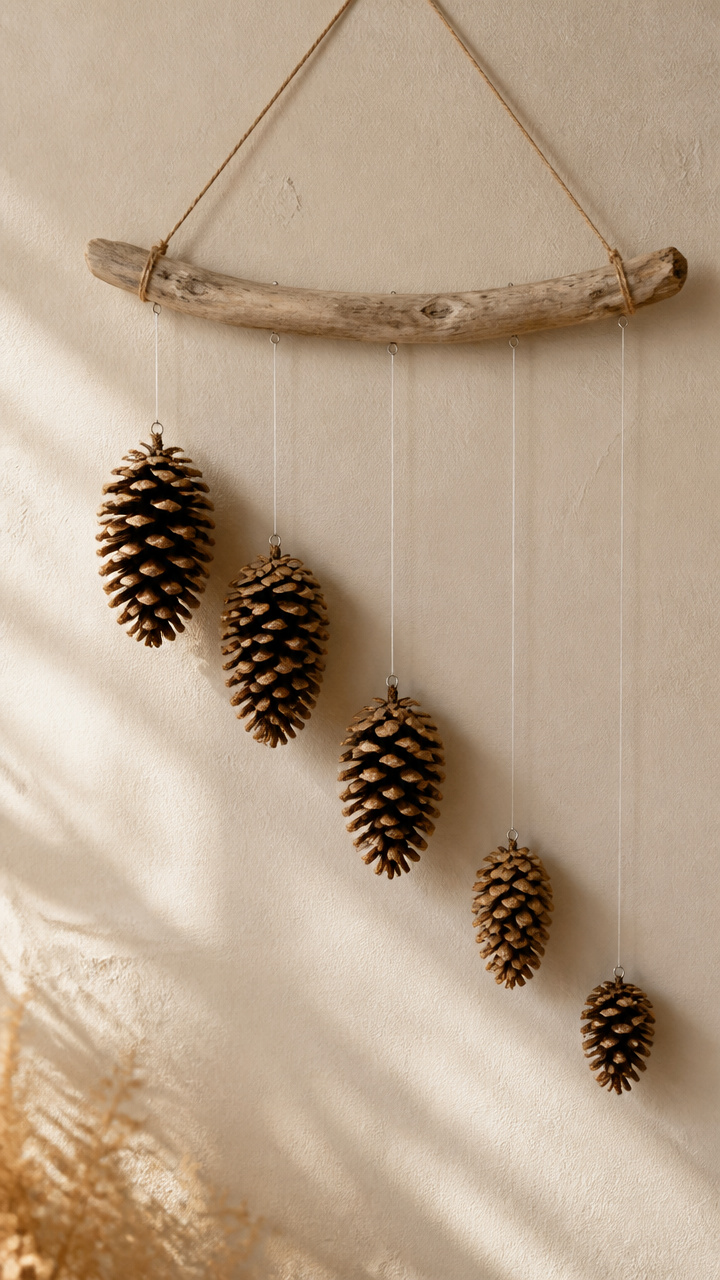
Five pine cones hang at different lengths and click softly in the breeze from a driftwood crossbar.
Materials Needed
- Driftwood branch, 12 inches long
- Pine cones, 5 (graduated sizes)
- Nylon fishing line, 5 feet
- Scissors
- Drill with 1/8 inch bit
- Small washer
- Metal ring, 1 inch diameter
How to Make It
- Drill a small hole through the top of each pine cone.
- Cut five pieces of fishing line: 8, 10, 12, 14, and 16 inches long.
- Thread each line through a pine cone and tie a knot beneath to secure.
- Tie the top of each line to the driftwood at staggered points.
- Drill two holes at the ends of the driftwood, run line through to attach the metal ring, add washer to base for weight.


8. Pine Cone Painted Mushroom Decor
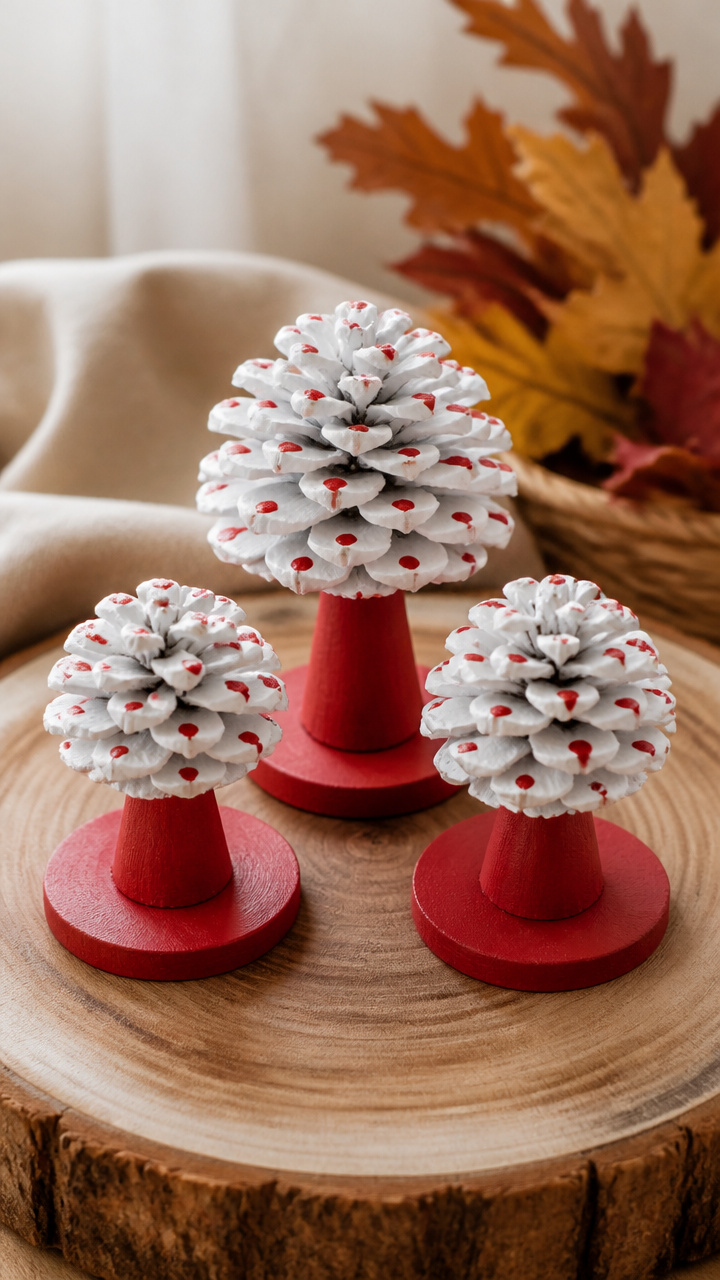
White-painted caps become whimsical mushrooms when paired with red wooden bases and dotted tops.
Materials Needed
- Large pine cones, 4
- Red acrylic paint
- White acrylic paint
- Paintbrush, small flat
- Round wooden bases, 2 inch diameter, 4
- Hot glue gun
- Black paint pen
How to Make It
- Paint the entire pine cone cap white and let dry on a flat surface for 1 hour.
- Paint the wooden base red and let dry completely.
- Use the black paint pen to add white-centered dots across the pine cone cap.
- Glue the base of the pine cone to the center of the red wooden base and hold for 30 seconds.


9. Pine Cone Garland with Yarn
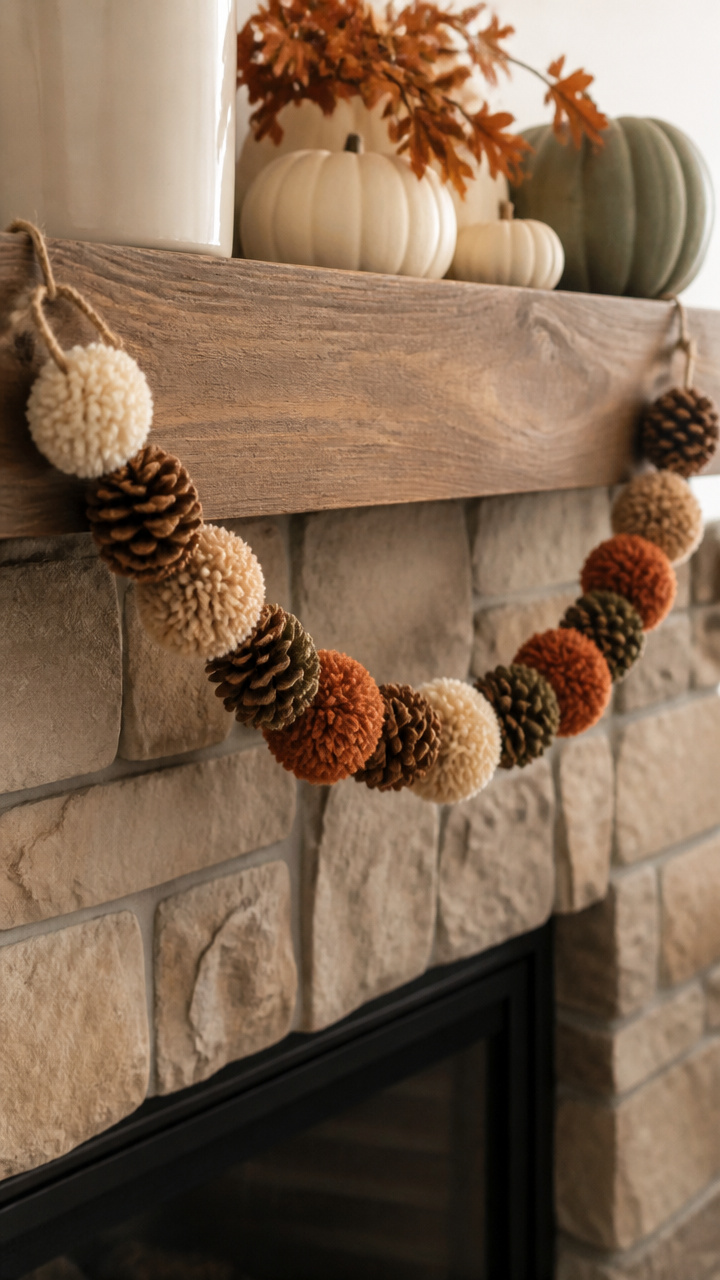
Natural pine cones alternate with chunky yarn puffs on thick twine for a textured mantle display.
Materials Needed
- Small pine cones, 10
- Unspun wool yarn, 3 colors, 1 skein each
- Twine, 5 feet
- Needle with large eye
- Scissors
How to Make It
- Cut 20 pieces of yarn, each 6 inches long, in assorted colors.
- Fold each piece in half and use the needle to pull loops through the base of a pine cone, creating a fringe.
- Tie a knot after pulling the ends through to secure each yarn puff.
- Thread twine through the top of each pine cone and space evenly along the length.


10. Pine Cone Suncatchers with Resin
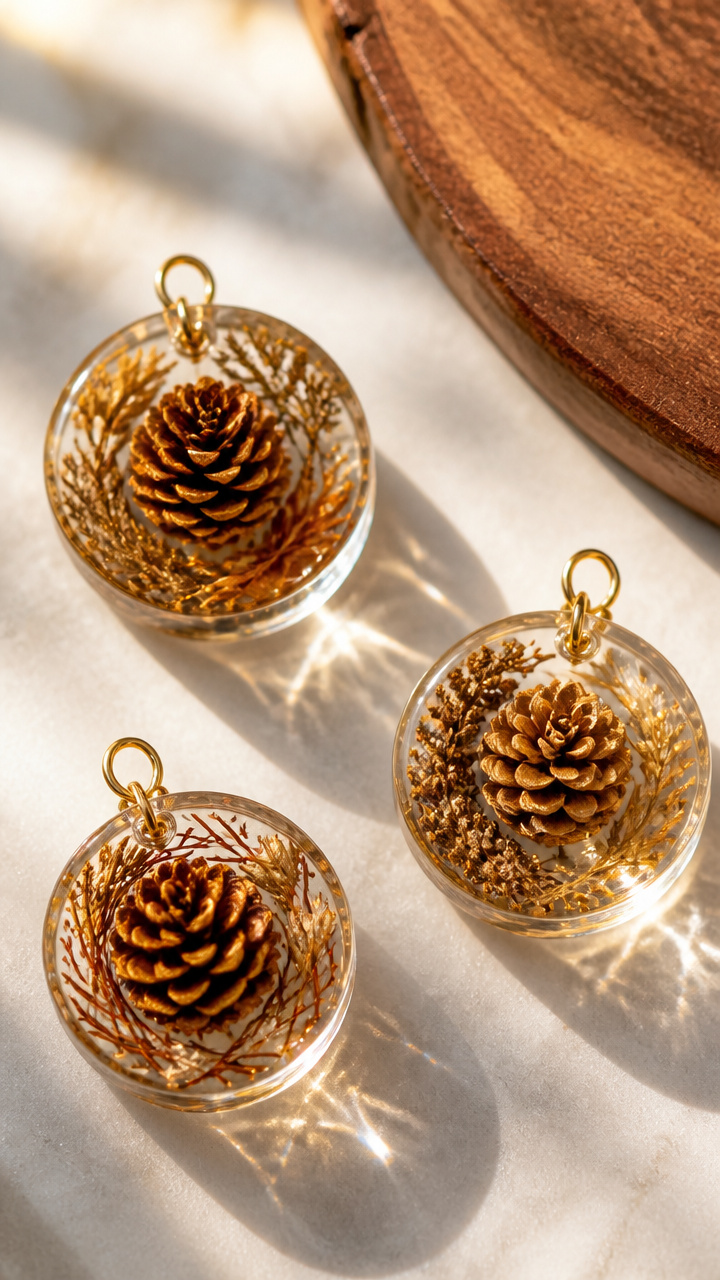
Clear epoxy resin seals tiny pine cones under glass-like domes that sparkle in sunlight.
Materials Needed
- Tiny pine cones, 8
- Epoxy resin kit, 2 oz
- Silicone mold, circle, 1.5 inch
- Toothpicks
- Jewelry pliers
- Jump rings, 8
- Chain, 12 inches
How to Make It
- Mix resin according to package directions and pour a thin layer into each mold cavity.
- Place one pine cone in each mold and push gently with a toothpick to submerge halfway.
- Let cure for 24 hours undisturbed, then pop out of molds.
- Attach jump rings to any natural loop, then link to chain for hanging.


11. Pine Cone Seed Starter Pots
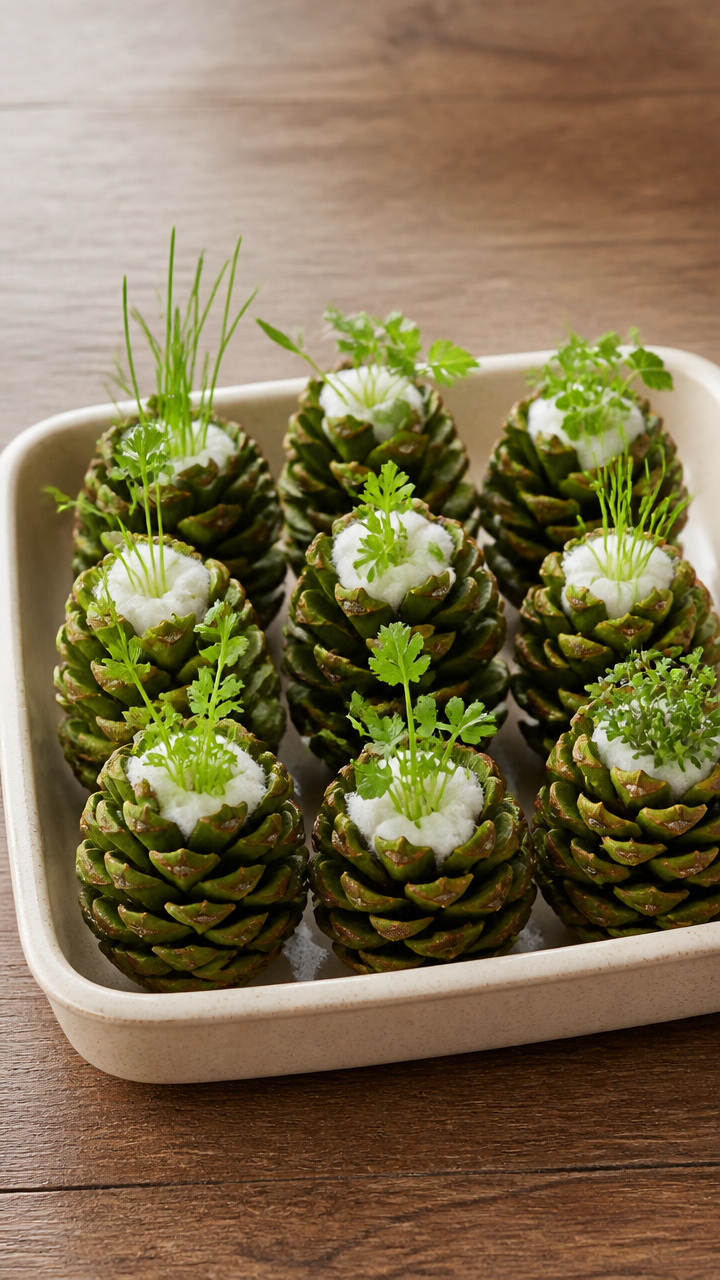
Each closed pine cone holds damp cotton and a single seed, opening naturally as it sprouts.
Materials Needed
- Closed green pine cones, 6
- Organic cotton balls
- Water
- Herb seeds, 6 types
- Shallow tray
- Spray bottle
How to Make It
- Pull apart the top layers of each pine cone to create a small pocket.
- Place a cotton ball inside each pocket and mist with water until damp.
- Drop one seed type into each cone, such as basil or cilantro.
- Set in tray and mist daily, watching the cone open as the seed germinates.


12. Pine Cone Felt Animals
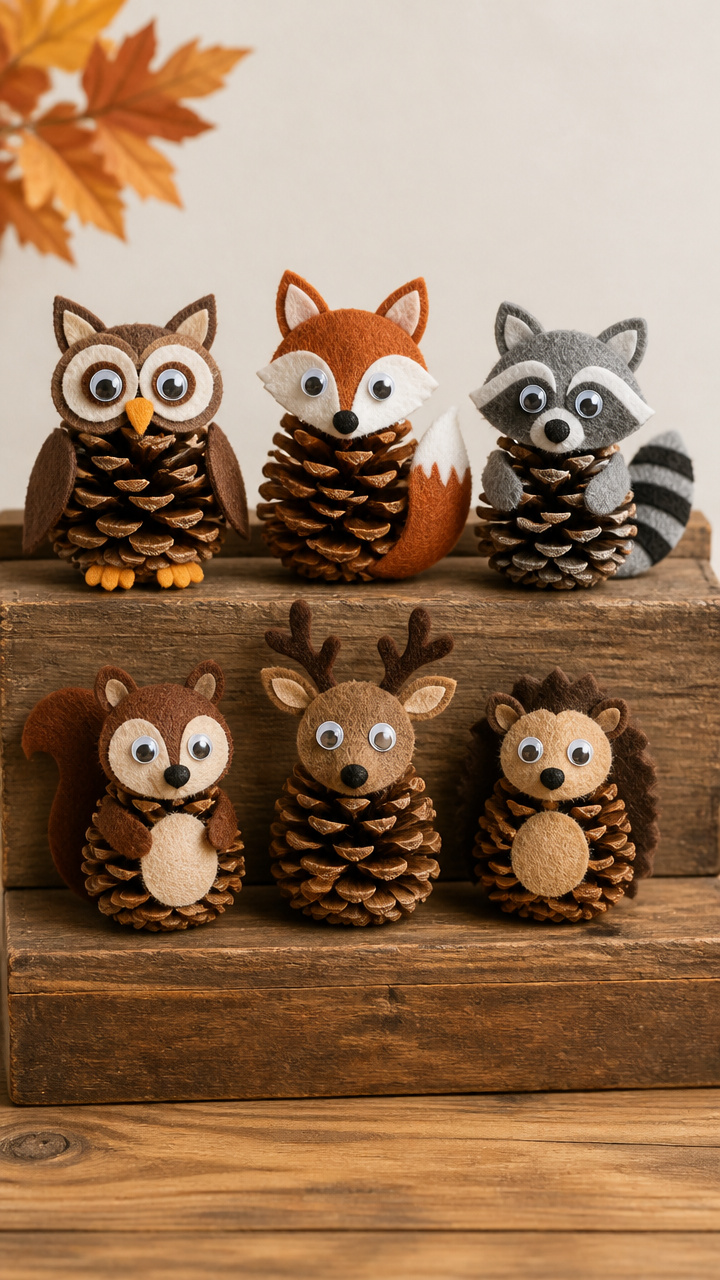
Fuzzy felt tails and ears turn pine cones into forest creatures that sit steadily on shelves.
Materials Needed
- Medium pine cones, 5
- Brown craft felt, 1 sheet
- Black craft felt, 1 sheet
- Fabric scissors
- Fabric glue
- Googly eyes, 10 mm, 5 pairs
- Pencil
How to Make It
- Draw fox ears and tails on brown felt, and small nose triangles on black felt.
- Cut out shapes with scissors, making 1 tail and 2 ears per animal.
- Glue ears to the top sides of each pine cone and tail to the back base.
- Add googly eyes and a black nose triangle to complete each face.


13. Pine Cone Table Numbers
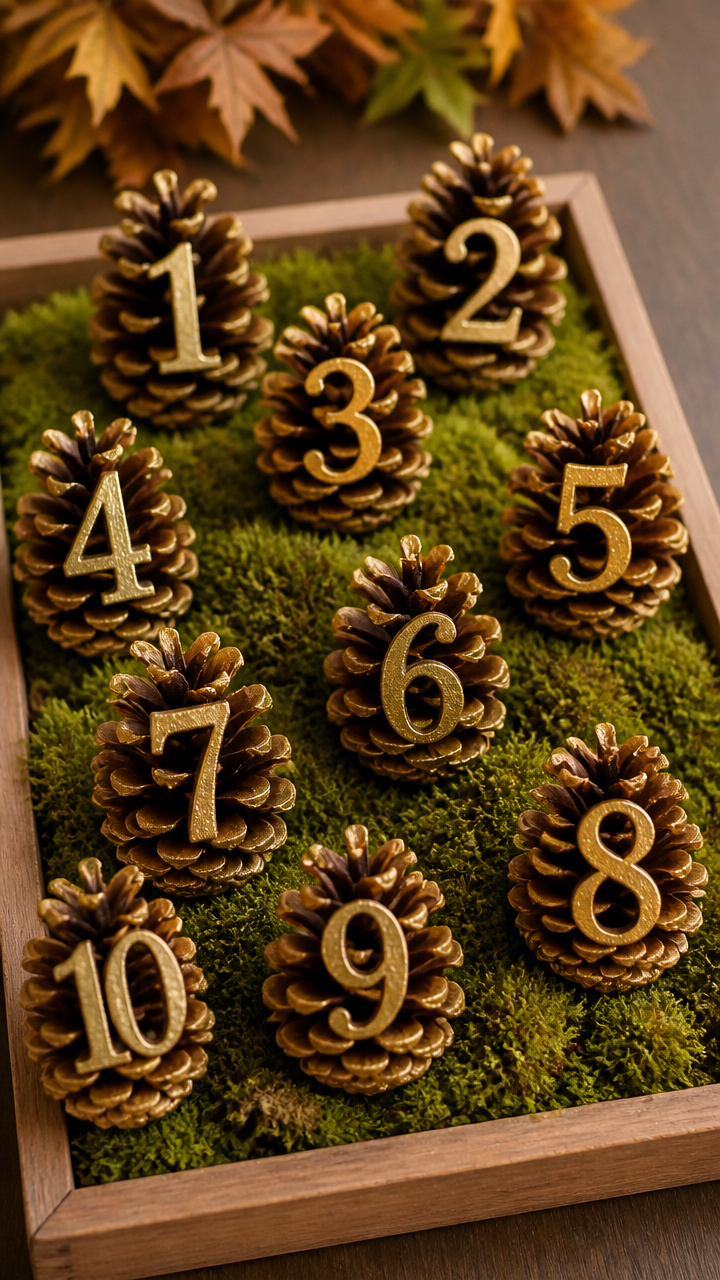
Numbered pine cones stand in moss-filled trays to mark seats at autumn gatherings.
Materials Needed
- Large pine cones, 8
- Gold metallic paint pen
- Artificial moss, 1 bag
- Shallow wooden tray, 10 x 6 inch
- Hot glue gun
How to Make It
- Write numbers 1 to 8 on the top scales of each pine cone using the paint pen.
- Let dry for 20 minutes on a flat surface.
- Spread moss evenly in the tray and arrange pine cones upright.
- Secure each cone base with a dab of hot glue underneath if needed.


14. Pine Cone Photo Display Clips
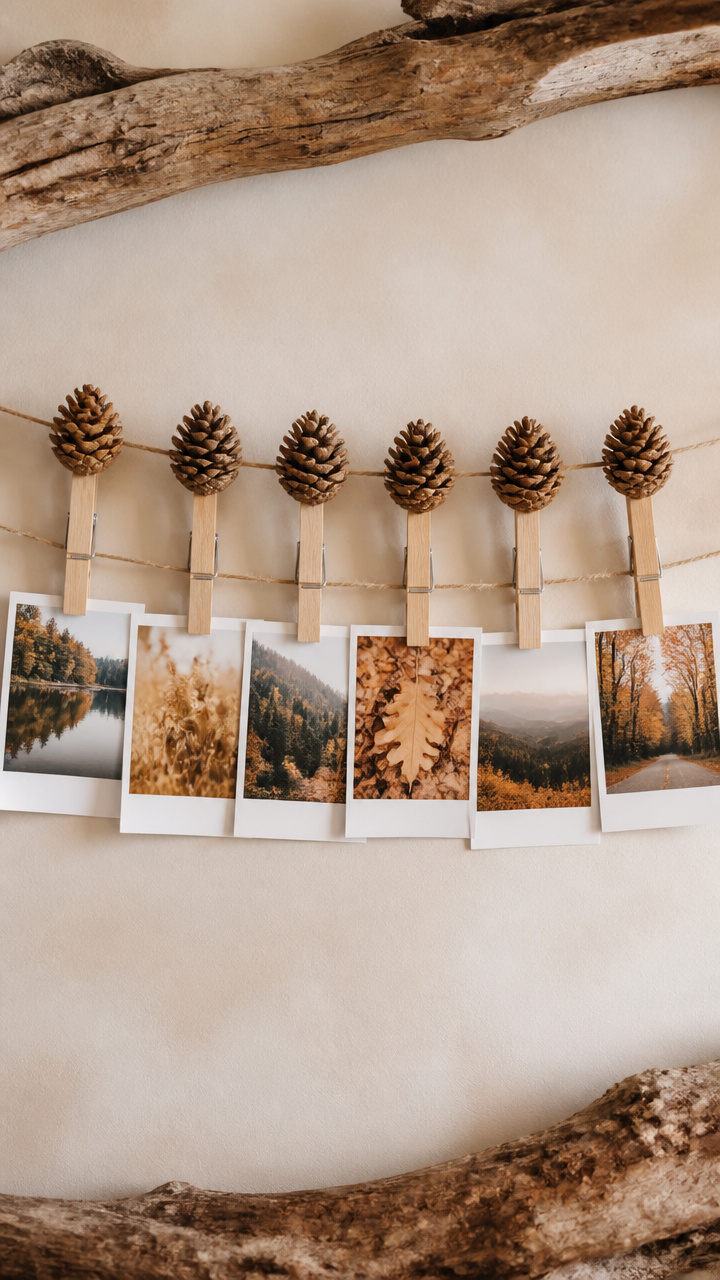
Clothespins get pine cone heads and dangle snapshots from string with a rustic touch.
Materials Needed
- Wooden clothespins, 6
- Small pine cones, 6
- Brown acrylic paint
- Paintbrush
- Strong craft glue
- Twine, 3 feet
- Mini clothespin refills, 6
How to Make It
- Paint each pine cone brown and let dry for 30 minutes.
- Glue the base of each pine cone to the flat end of a clothespin, hold 30 seconds.
- Tie twine between two hooks and clip photos using the original pin, refill added.
- Hang decorated pins from the string by the top of the clothespin body.


15. Pine Cone Luminaries with LED Lights
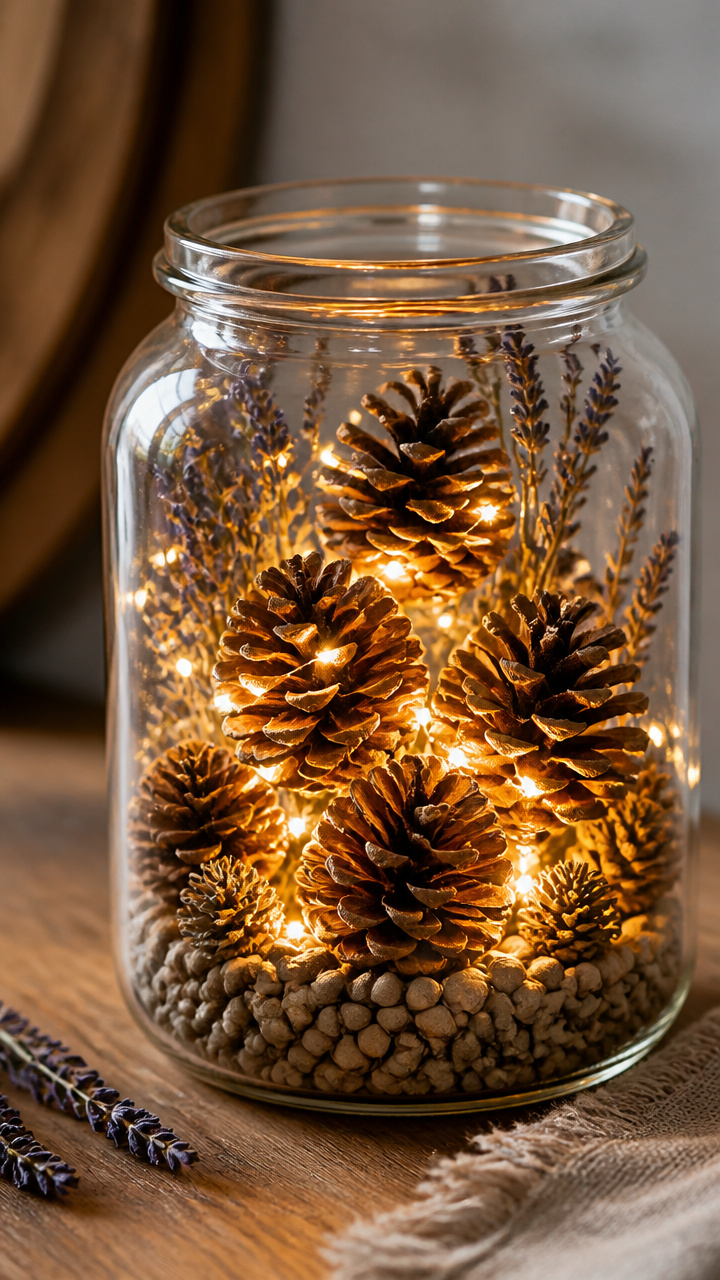
Battery fairy lights nestle into pine cones placed inside glass jars for soft glowing centerpieces.
Materials Needed
- Medium pine cones, 4
- Glass mason jars, 8 oz, 4
- Battery-powered fairy lights, 1 strand
- Dried lavender sprigs, 4
- Pea gravel, 2 cups
How to Make It
- Pour a 1/2 inch layer of pea gravel into each jar.
- Stand one pine cone upright in each jar and tuck a lavender sprig beside it.
- Weave the fairy light strand through the pine cone scales and rest the battery pack behind.
- Turn on the lights and group jars together on a dining table or shelf.


16. Pine Cone Name Place Holders
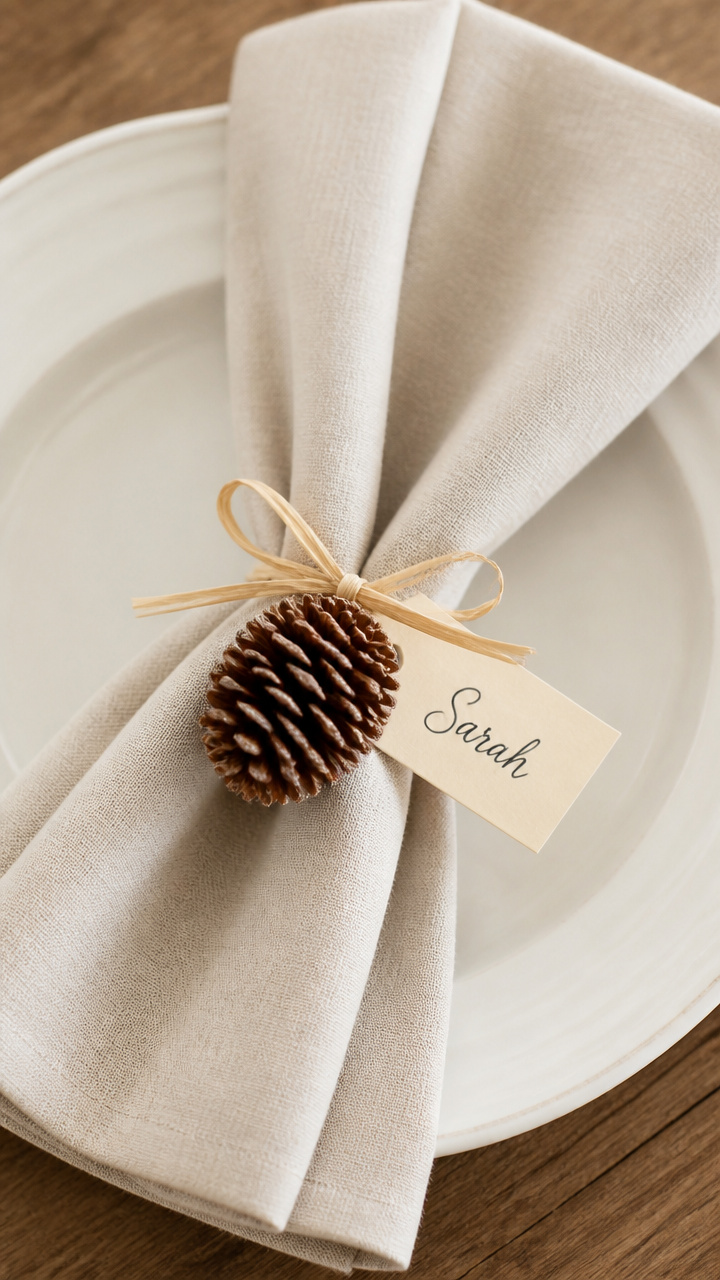
Guest names written on card tags hang from pine cones tucked into napkin folds.
Materials Needed
- Small pine cones, 6
- Cardstock, cream, 6×2 inch strips
- Fine-tip black marker
- Hole punch
- Raffia, 18 inches per cone
- Dinner napkins, linen, 6
How to Make It
- Write each guest's name on a cardstock strip with the marker.
- Punch a hole at one end and thread raffia through, tying a knot.
- Tie the other end of the raffia around the top of a pine cone.
- Tuck the pine cone into the fold of a rolled napkin, name tag visible.


17. Pine Cone Wall Art with Frame
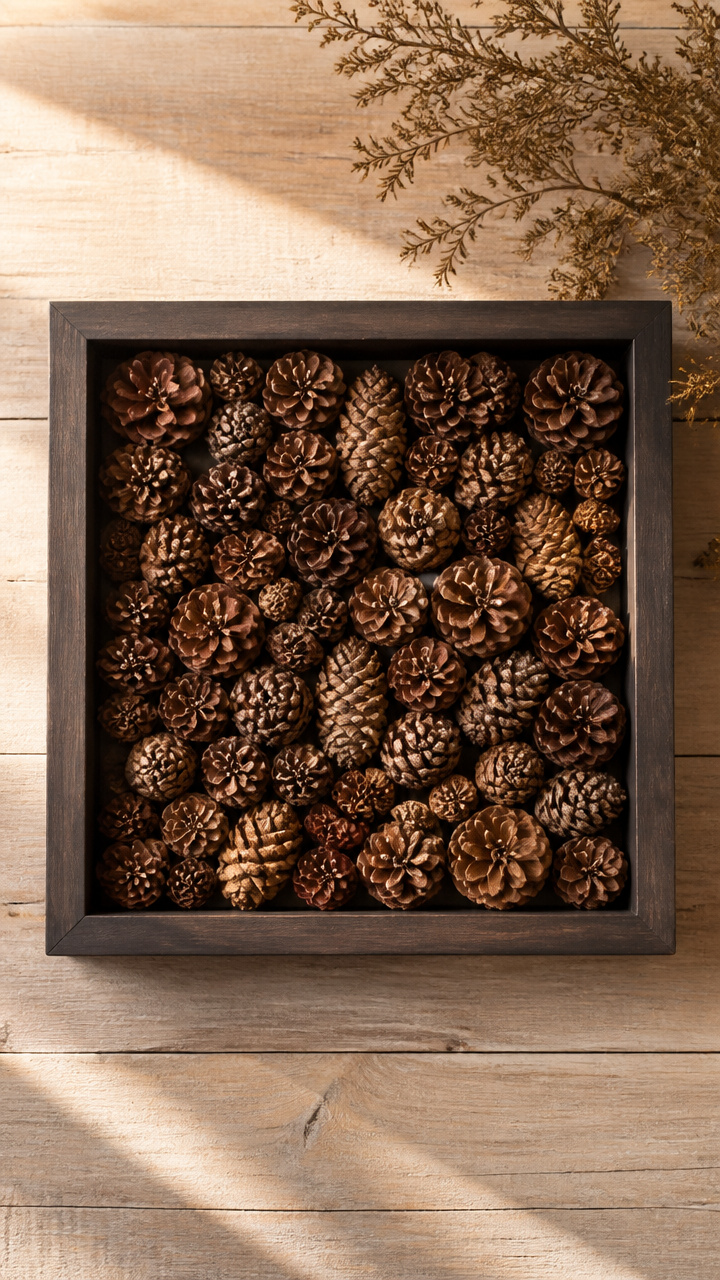
A grid of pine cones in varying sizes creates organic texture within a deep shadow box.
Materials Needed
- Shadow box frame, 12×12 inch
- Pine cones, 16 (mixed sizes)
- Hot glue gun
- Ruler
- Pencil
How to Make It
- Lay the frame face down and measure a 1 inch border around the inner edge.
- Arrange pine cones in four rows of four, pointing outward, within the marked area.
- Glue each cone in place starting from the bottom row, pressing firmly for 10 seconds.
- Let dry for 1 hour before hanging on the wall.

18. Pine Cone Bath Sachets
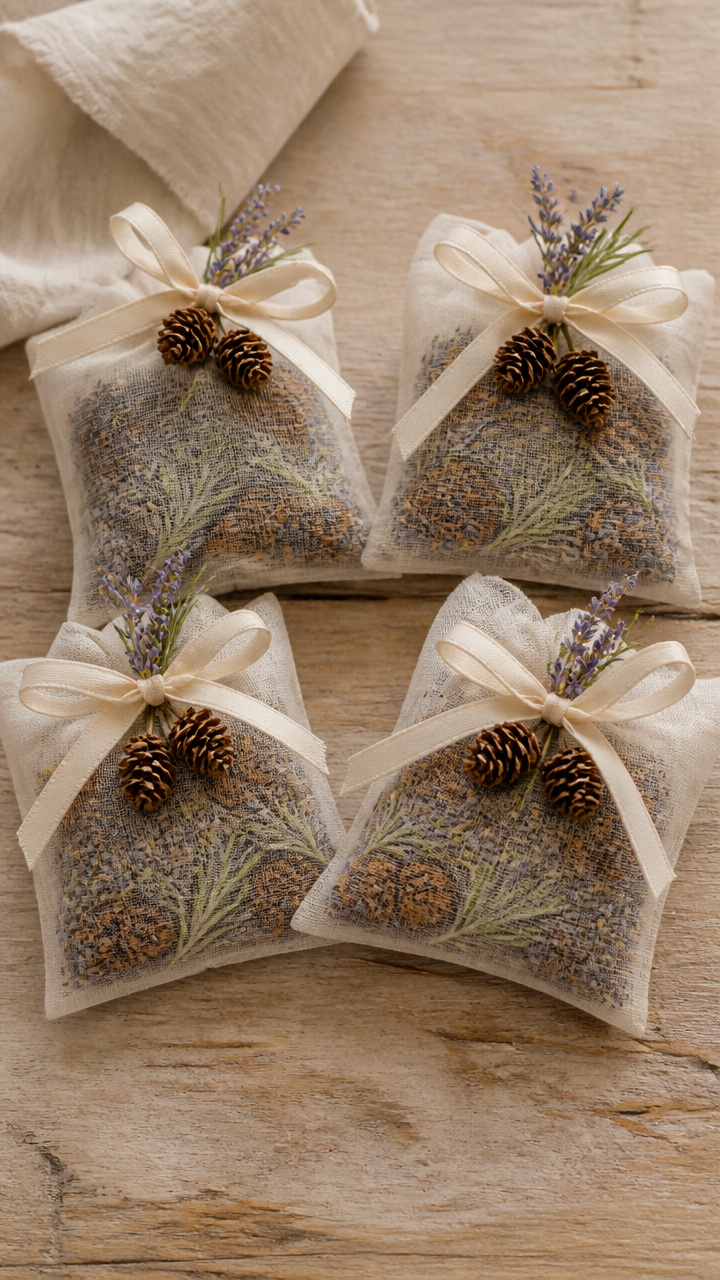
Dried lavender and rosemary tucked into muslin bags with a pine cone scent your bathwater.
Materials Needed
- Muslin sachet bags, 3 inch square, 4
- Dried lavender, 1/4 cup
- Dried rosemary, 1/4 cup
- Small pine cones, 4
- Ribbon, 8 inches per bag
How to Make It
- Place one pine cone into each muslin bag.
- Add equal parts lavender and rosemary around the cone.
- Pull the drawstring tight and tie with ribbon in a bow.
- Drop one sachet into warm bathwater and let steep for 5 minutes before soaking.


19. Pine Cone Paperweight
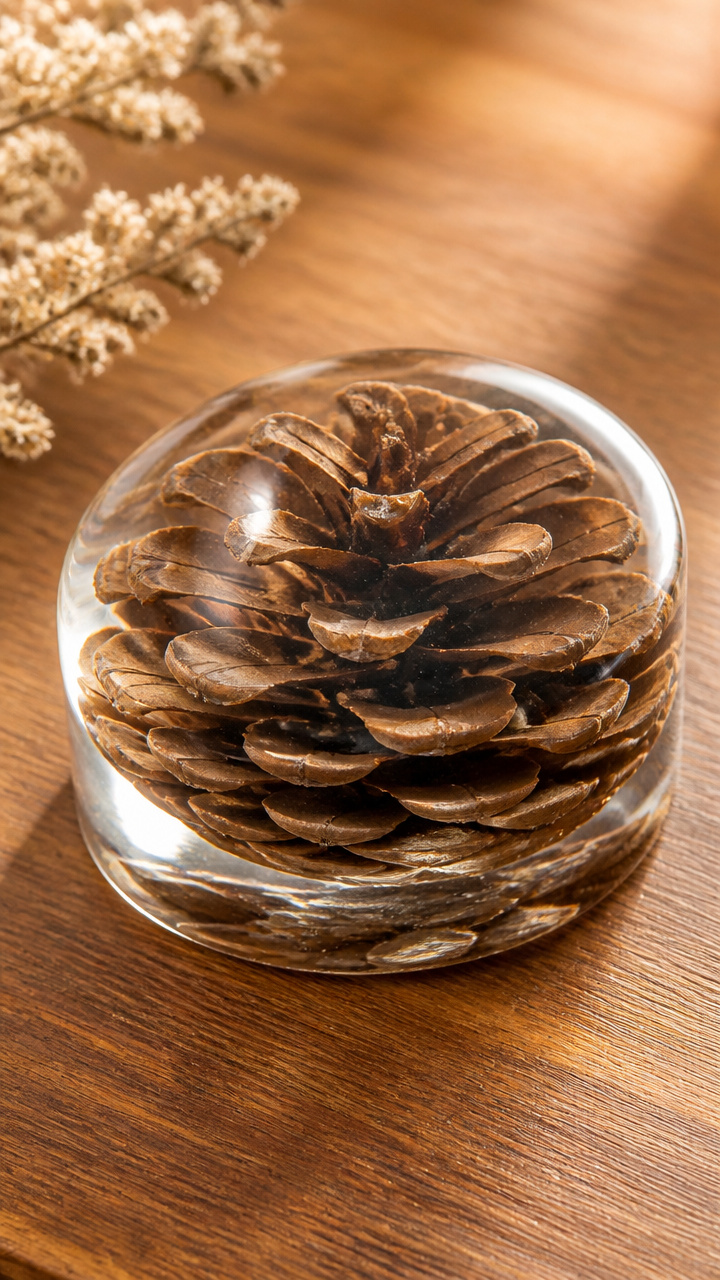
A heavy pine cone encased in clear plaster stands solid on desks and holds letters in place.
Materials Needed
- Large pine cone
- Plaster of Paris, 1 cup
- Water, 1/2 cup
- Mixing bowl
- Disposable container, 6 oz
- Vaseline
How to Make It
- Grease the inside of the container with Vaseline.
- Mix plaster and water in the bowl until smooth, pour a 1 inch layer into the container.
- Set the pine cone upright in the plaster, point down, and let set for 10 minutes.
- Fill around the cone until covered, let cure for 2 hours before unmolding.


20. Pine Cone Holiday Countdown
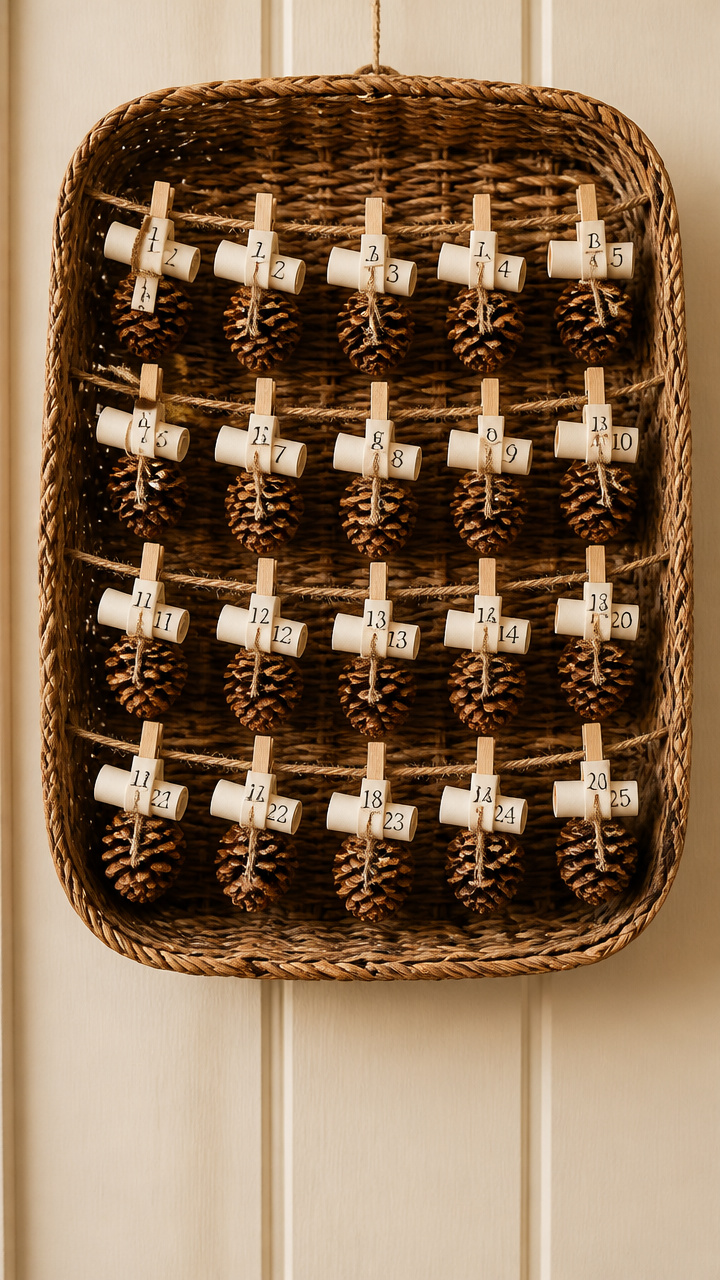
Twenty-five pine cones each hold a tiny scroll with a daily fall activity to build anticipation.
Materials Needed
- Pine cones, 25
- Scroll paper, 1×3 inch, 25
- Black ink pen
- Twine, 6 feet
- Clothespins, mini, 25
- Basket
How to Make It
- Write one fall activity on each paper scroll, like 'bake apple pie' or 'rake leaves'.
- Roll each scroll and slide into the top scales of a pine cone.
- String twine across a wall and clip each pine cone with a mini clothespin.
- Remove one each day and read the surprise activity.


21. Pine Cone Stamp Set
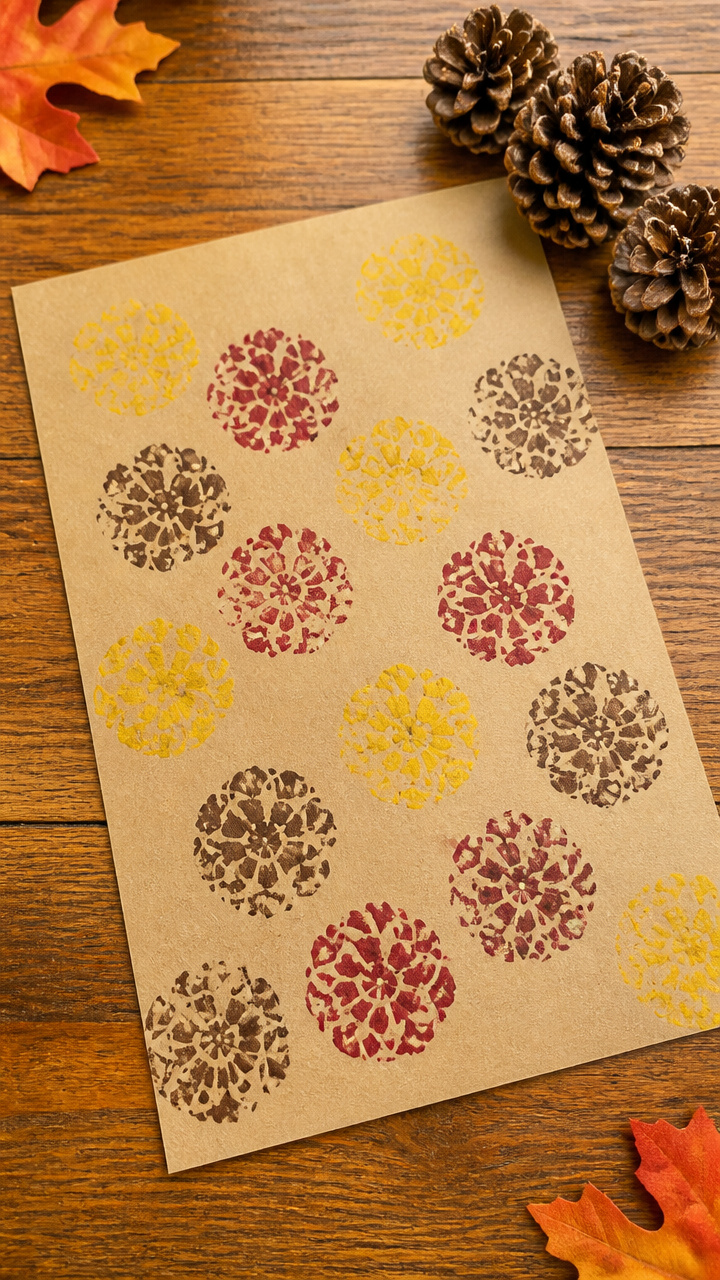
Inked pine cone bases leave perfect circular prints for wrapping paper and gift tags.
Materials Needed
- Small pine cones, 3
- Acrylic paint, red, yellow, brown
- Paint trays, 3 compartments
- Brushes, small
- Paper, kraft, 12×12 inch sheets
- Paper towels
How to Make It
- Pour a dime-sized pool of each paint color into separate tray sections.
- Roll the base of a pine cone in one color, ensuring even coverage.
- Press firmly onto kraft paper and lift straight up to avoid smudging.
- Clean the cone with a paper towel before switching colors, repeat for patterns.


22. Pine Cone Mobile for Kids
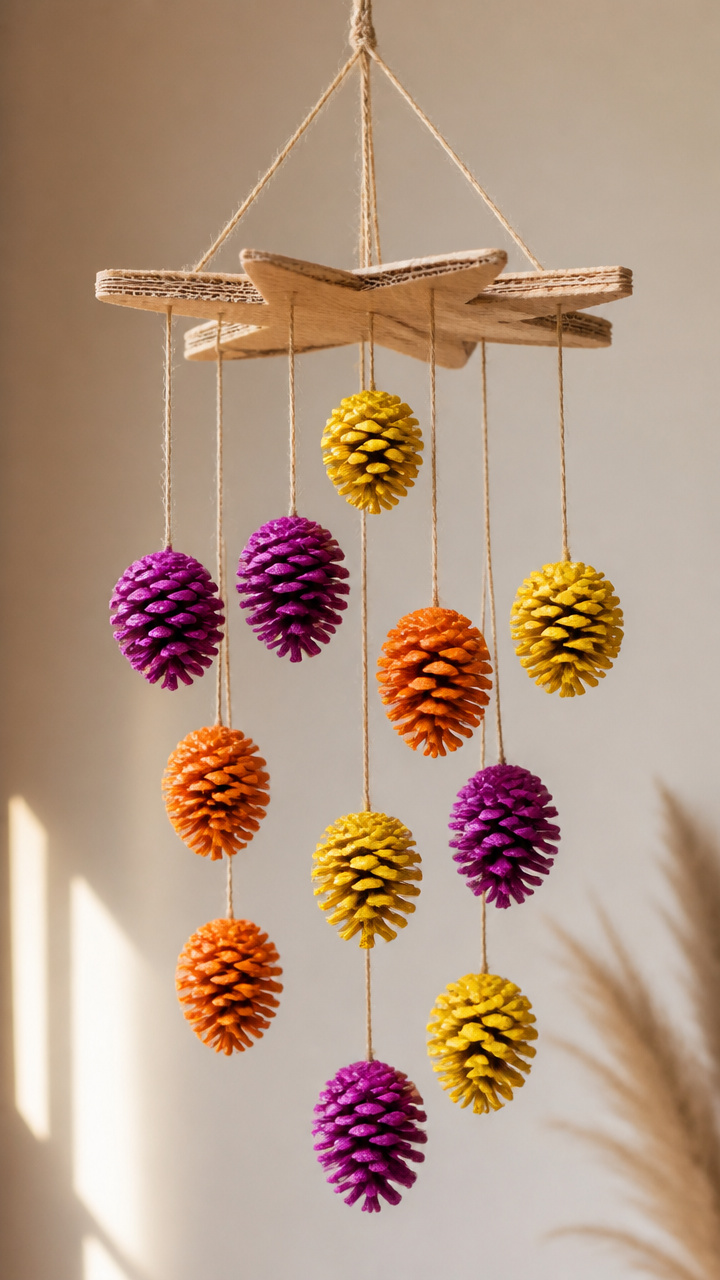
Brightly painted pine cones dangle from a cardboard star and spin above a child’s bed.
Materials Needed
- Cardboard, thick, 1 sheet
- Pencil
- Scissors
- Five pine cones
- Tempera paint, 3 bright colors
- Paintbrushes
- String, 3 feet
- Glitter glue
How to Make It
- Draw a large star on cardboard and cut it out with scissors.
- Paint each pine cone a different bright color and let dry for 30 minutes.
- Paint glitter glue lines across the star points and let dry 1 hour.
- Tie strings of varying lengths to the star tips and knot pine cones to the ends.

23. Pine Cone Bookmarks
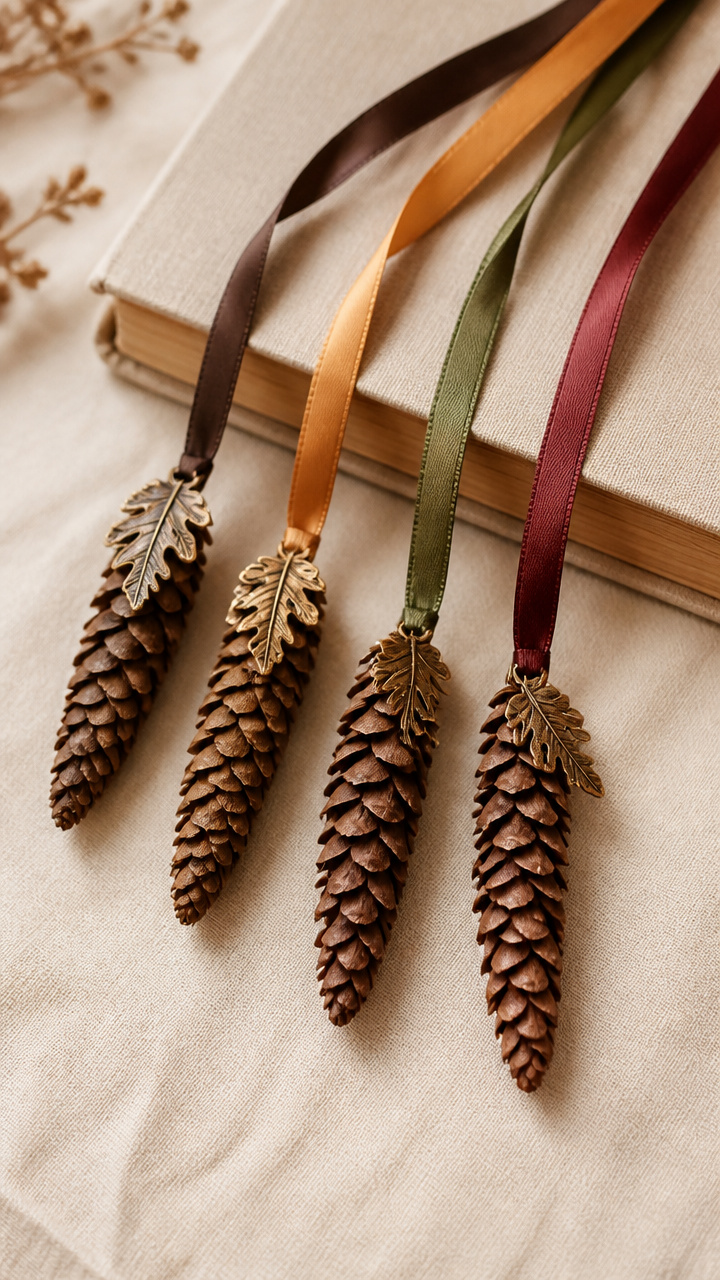
Slim pine cones anchor ribbons that slide between pages without damaging spines.
Materials Needed
- Very small pine cones, 6
- Satin ribbon, 1/4 inch wide, 12 inches per bookmark
- Craft glue
- Hole punch
- Embellishments, small leaves, 6
How to Make It
- Punch a hole through the top of each pine cone.
- Thread one end of the ribbon through the hole and tie a knot to secure.
- Glue a small leaf embellishment near the knot for detail.
- Slide ribbon into a book page with the pine cone resting on top as a stopper.


24. Pine Cone Coasters
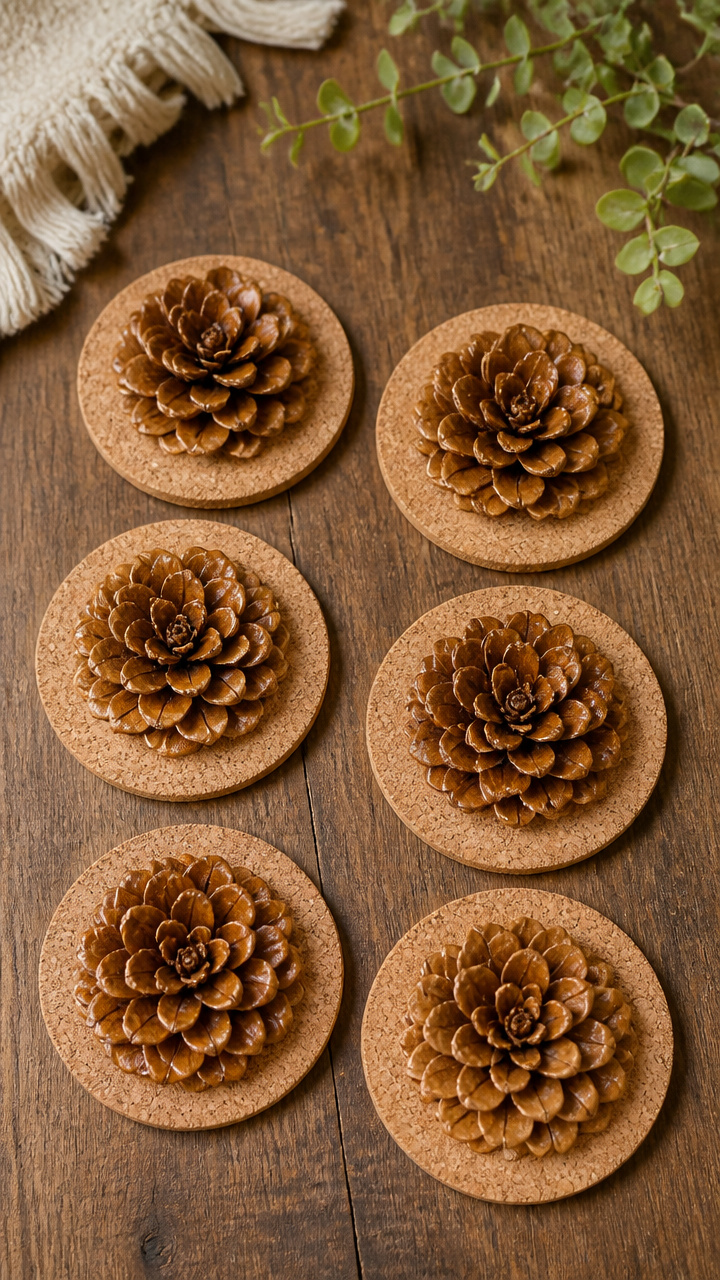
Flat-bottomed pine cones glue to cork rounds and protect tables with natural flair.
Materials Needed
- Flat pine cones, 6
- Cork coasters, 4 inch round, 6
- Waterproof craft glue
- Clamps, 6
- Paper plate
How to Make It
- Lay each cork coaster on a paper plate to protect surfaces.
- Apply a generous dot of waterproof glue to the base of each pine cone.
- Press each cone centered on a coaster and clamp lightly for 10 minutes.
- Let dry fully for 2 hours before use.


25. Pine Cone Memory Tree
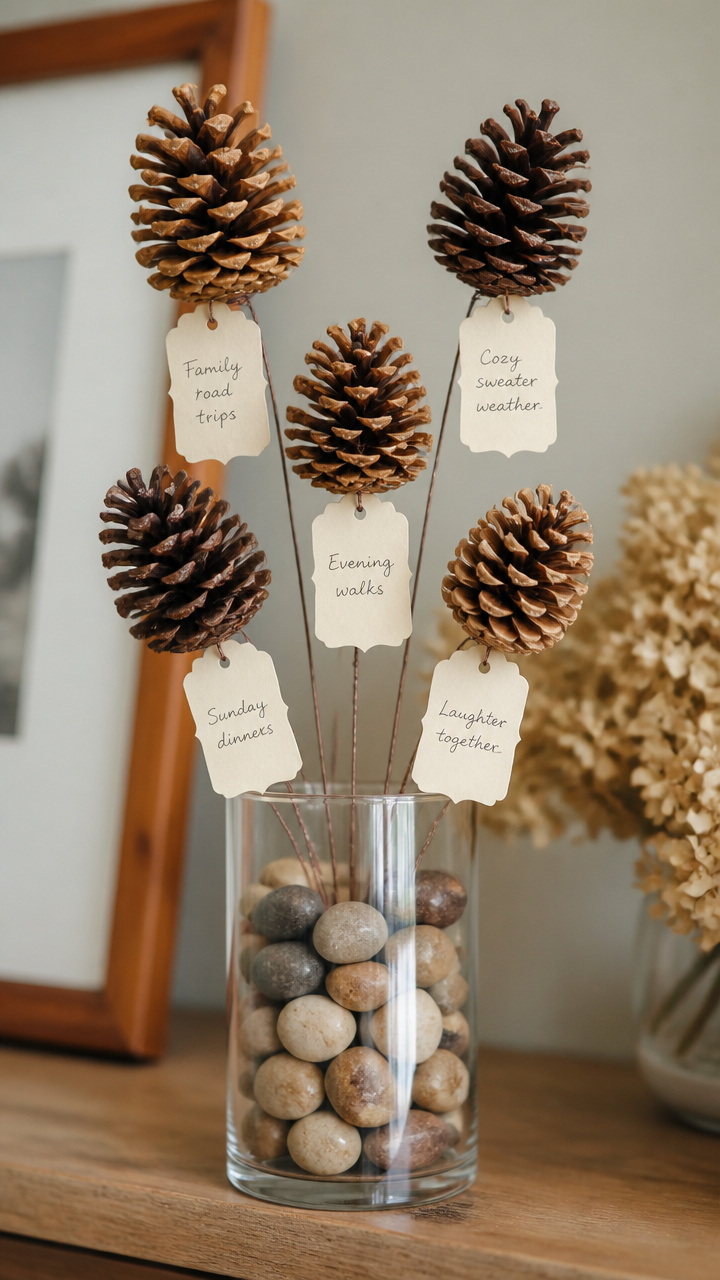
A cluster of pine cones on a vase base holds handwritten notes of favorite seasonal moments.
Materials Needed
- Vase, clear glass, 6 inch tall
- River rocks, 1 cup
- Floral wire, 12 inches
- Pine cones, 5
- Cardstock, 2×3 inch, 10
- Fine pen
- Mini clothespins, 10
How to Make It
- Insert floral wire into the base of each pine cone and twist to secure.
- Place river rocks in the vase and push wire stems into the rocks to anchor.
- Write memories on cardstock pieces, like 'first pumpkin pie'.
- Clip each note to the tree with a mini clothespin.


You’ve got everything you need right outside your door. Let these ideas guide your hands and fill your days with the quiet pleasure of making. Pick up a basket and start collecting, your next creation is waiting.