15 Mosaic Stepping Stone Crafts to Add Color to Your Garden Path

Garden paths often turn dull after seasons of rain and foot traffic. Laying colorful, handcrafted stepping stones brings bright focal points directly into your flowerbeds and walking areas without requiring heavy landscape machinery.
Working with mosaic techniques lets you repurpose broken kitchenware, tumbled beach glass, and hardware store remnants into durable garden art. You can mix and pour your own concrete bases or apply tiles directly onto precast pavers using outdoor-grade adhesives.
1. Broken Vintage China Stone
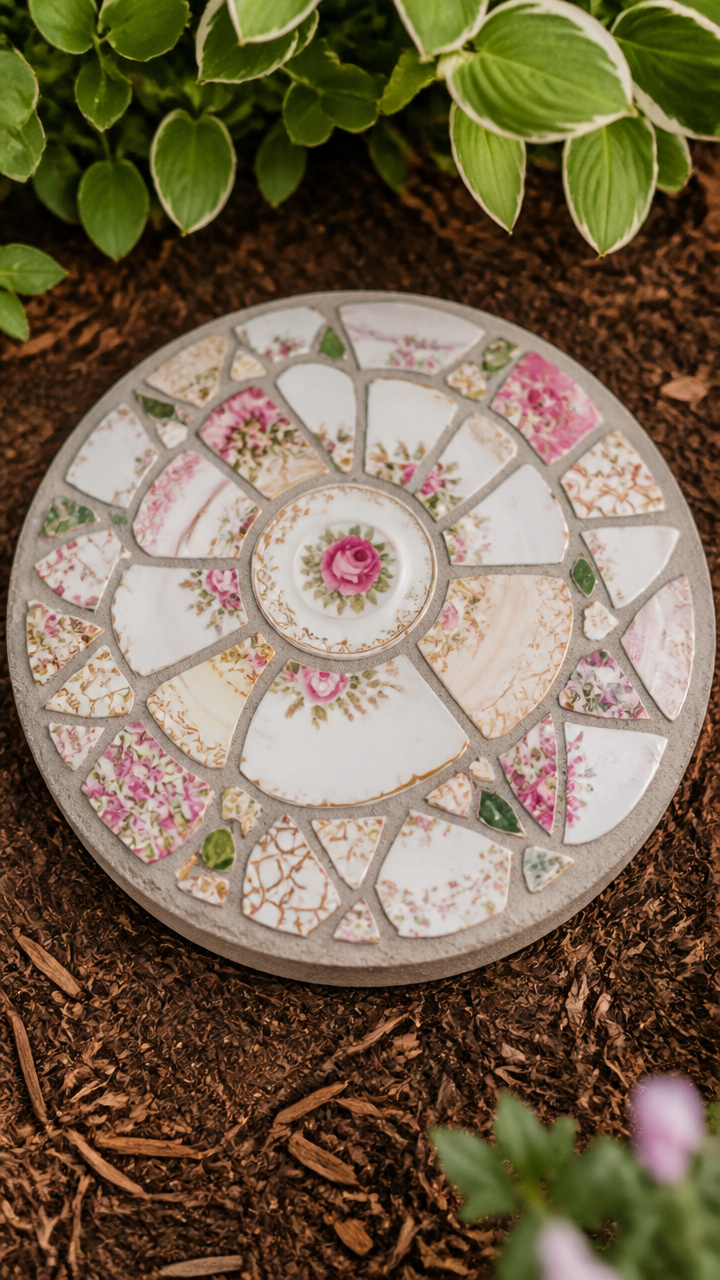
Chipped vintage teacups and floral plates find new life as a charming, cottage-style garden path marker. You will use the indirect contact-paper method to keep all uneven porcelain pieces level along the finished surface.
Materials Needed
- 3 to 4 vintage ceramic or porcelain plates with floral patterns
- 1 roll of clear sticky contact paper
- 1 round 12-inch plastic stepping stone mold
- 1 bottle of petroleum jelly
- 10 pounds of sand-mix concrete
- 1 sheet of fiberglass reinforcing mesh cut to a 10-inch circle
- 1 pair of safety glasses and a standard tile hammer
How to Make It
- Wrap the vintage plates in a thick towel and strike them firmly with your tile hammer to create pieces ranging from 1 to 2 inches across.
- Cut a 12-inch circle of contact paper and place it sticky-side-up inside your work area, then arrange the china pieces face-down on the paper in your desired pattern.
- Coat the inner walls of the plastic stepping stone mold with a thin film of petroleum jelly to prevent sticking.
- Transfer the contact paper with your arranged china face-down into the bottom of the mold.
- Mix 10 pounds of sand-mix concrete with water until it reaches the consistency of thick oatmeal, then scoop half of it into the mold over the china.
- Lay the 10-inch circle of fiberglass mesh on top of the wet concrete, fill the mold to the top with the remaining concrete, and tap the sides firmly for 2 minutes to release air bubbles.
- Let the concrete cure undisturbed for 48 hours, pop the stone out of the mold, peel away the contact paper, and wipe the porcelain faces clean with a damp sponge.


2. Vibrant Stained Glass Dragonfly Stone
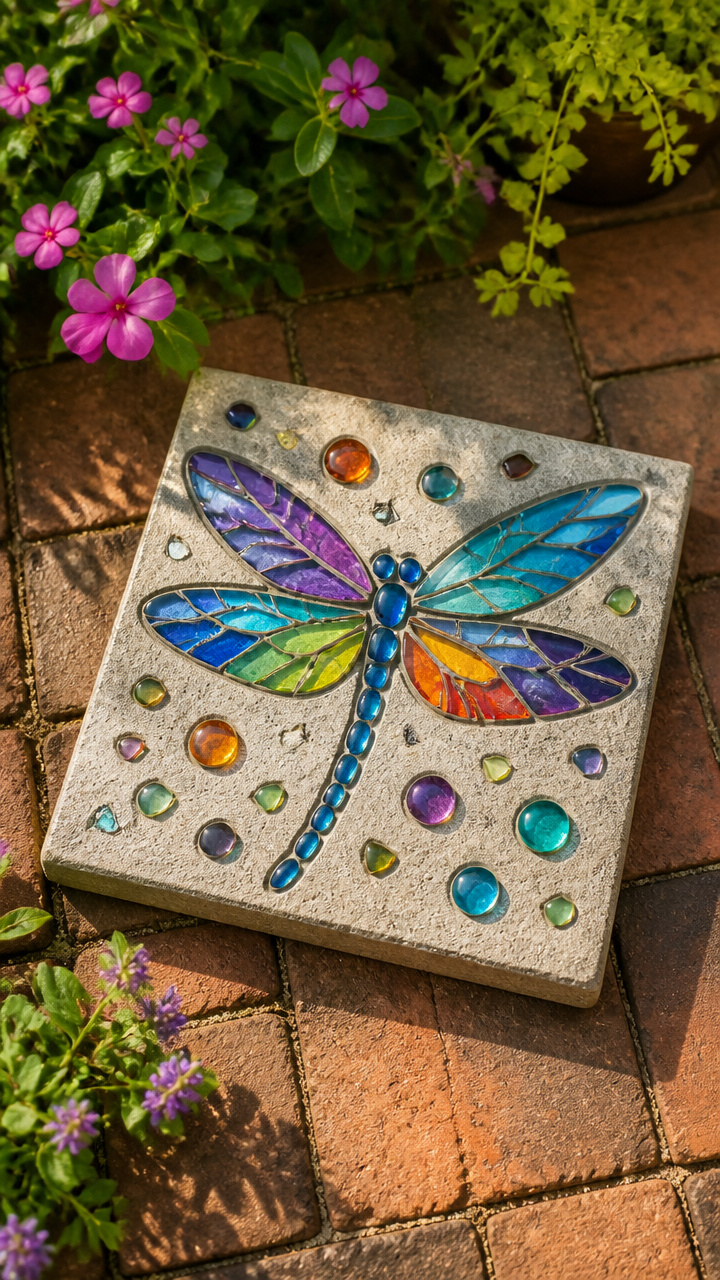
Vivid sheets of stained glass produce deep, jewel-toned colors that catch morning sunlight across your lawn. Wheeled glass nippers allow you to cut curved wings and sharp mosaic segments with precision.
Materials Needed
- 2 sheets of 6×6-inch stained glass (one turquoise, one iridescent purple)
- 1 sheet of 6×6-inch yellow stained glass
- 1 dual-wheeled glass nipper
- 1 square 12×12-inch precast concrete paver
- 1 quart of exterior polymer-modified thinset mortar
- 1 notched adhesive trowel (1/4-inch notches)
- 1 pound of charcoal-colored sanded tile grout
- 1 rubber grout float
How to Make It
- Use your wheeled glass nippers to cut the purple and turquoise glass into long, tapered wing shapes, and cut the yellow glass into small square body segments.
- Clean the surface of the precast concrete paver with a wire brush to remove any loose dust or dirt.
- Spread a 1/4-inch layer of thinset mortar across the center of the paver using your notched trowel.
- Press the cut glass pieces into the mortar to form a dragonfly motif, leaving 1/8-inch gaps between pieces for grout.
- Allow the thinset mortar to cure fully for 24 hours.
- Mix the charcoal sanded grout with water, spread it across the entire stone surface with the rubber float, and pack it firmly into every joint.
- Wait 20 minutes until the grout becomes hazy, then gently wipe away the excess from the glass faces using a damp cellulose sponge.
3. River Pebble Spiral Stone
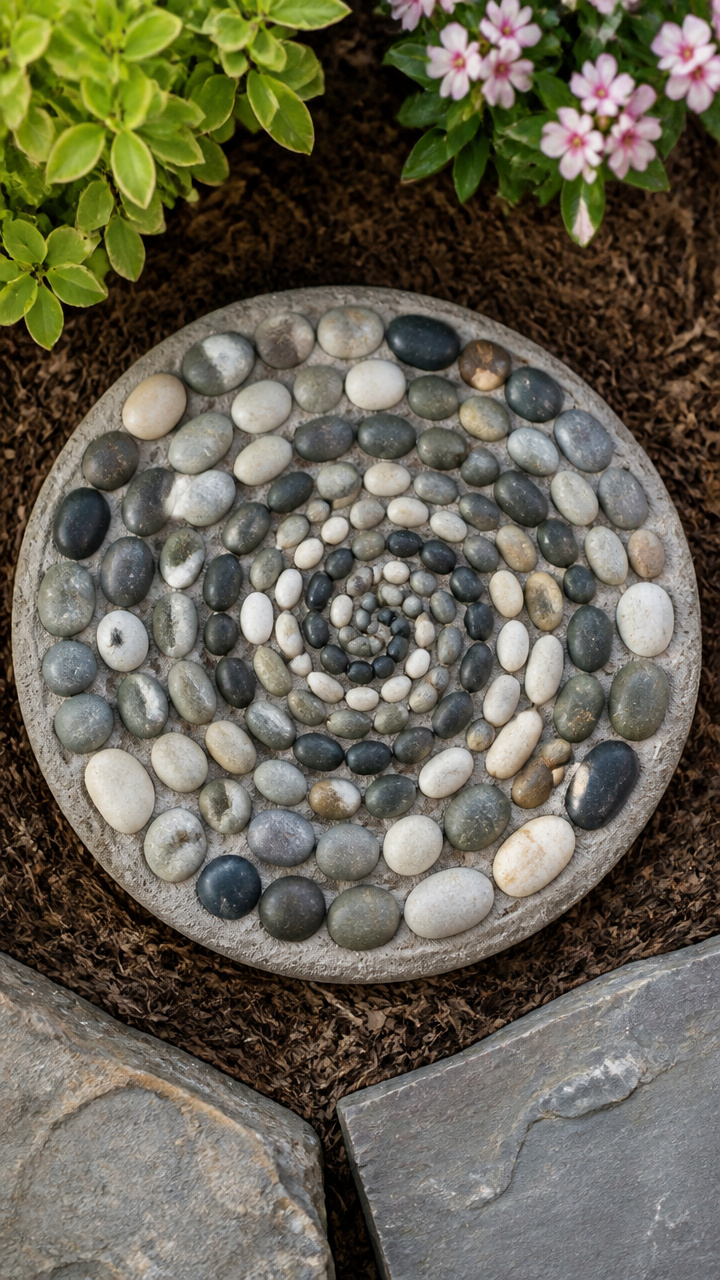
Smooth, water-worn river pebbles set on edge create a tactile walking surface with rich natural texture. Aligning the stones into a tightening spiral offers great slip resistance along wet garden borders.
Materials Needed
- 8 pounds of sorted flat oval river pebbles (black and cream)
- 1 round 14-inch wooden or plastic mold form
- 12 pounds of high-strength concrete mix
- 1 garden trowel
- 1 spray bottle filled with clean water
- 1 stiff nylon scrub brush
How to Make It
- Mix your concrete with water until moldable, then fill your 14-inch mold completely to the top edge and smooth the surface flat with your trowel.
- Start at the dead center of the wet slab by pushing a small cream pebble vertically on its edge into the concrete until only half of the stone shows.
- Work outward in a spiral, alternating between cream and black pebbles set tightly against one another on edge.
- Press a flat piece of wood across the top of the pebbles and tap lightly with your hand to level all stone heights evenly.
- Let the concrete set for 3 to 4 hours until the surface loses its wet sheen and firms up.
- Mist the top lightly with water from your spray bottle and scrub the tops of the pebbles with your nylon brush to expose the stone edges clearly.
- Cover the stone with plastic sheeting and let it cure for 3 full days before unmolding and placing it on your path.
4. Reflective Mirror Tile Geometric Paver
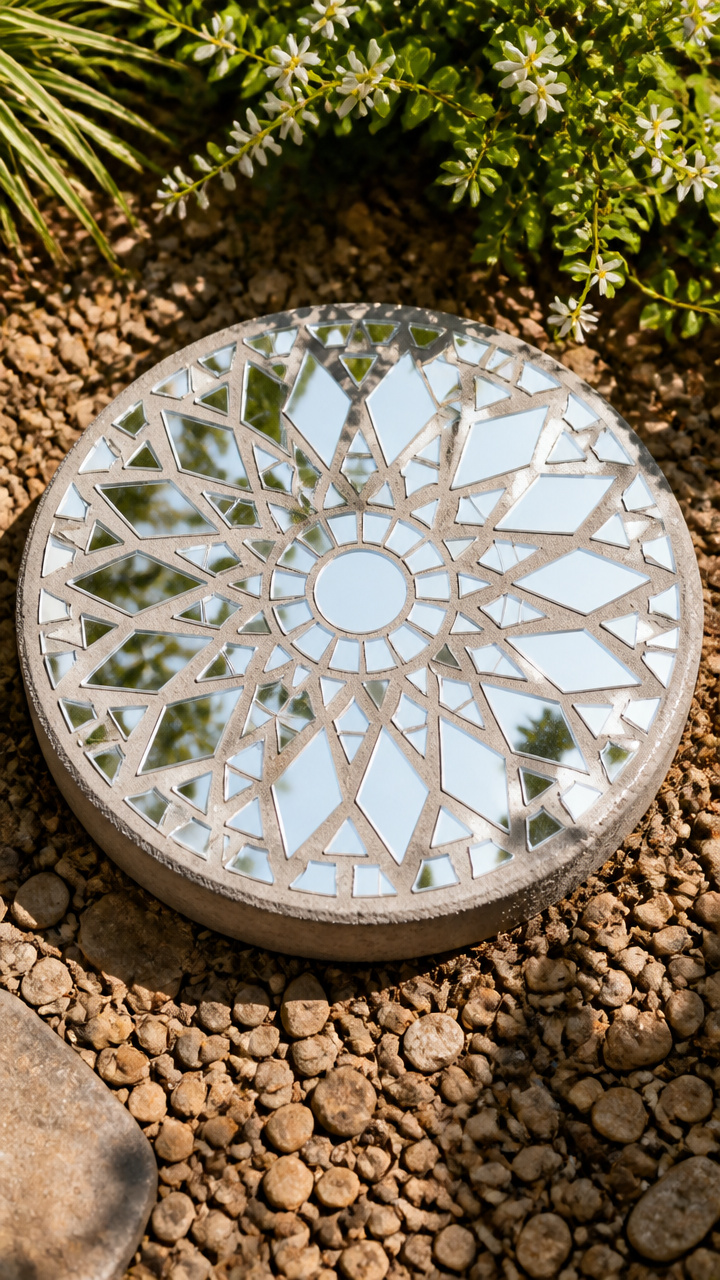
Reflective silver and colored craft mirror tiles bounce natural light into shady corners beneath dense garden canopies. A dark charcoal grout creates sharp contrast and highlights the geometric layout.
Materials Needed
- 150 pieces of 1-inch square silver craft mirror tiles
- 50 pieces of 1-inch square bronze craft mirror tiles
- 1 square 12×12-inch concrete blank paver
- 1 tube of neutral-cure silicone mirror adhesive
- 1 pound of dark gray sanded grout
- 1 bottle of penetrating grout and tile sealer
- 1 microfiber cleaning cloth
How to Make It
- Wipe the concrete blank paver clean and let it dry completely before starting.
- Apply a small pea-sized dot of neutral-cure silicone adhesive to the back of each mirror tile to protect the reflective backing from damage.
- Lay the tiles in concentric diamond patterns across the paver, alternating between bronze and silver rings while maintaining a 1/8-inch grout gap.
- Let the silicone adhesive bond and cure undisturbed for 12 hours.
- Apply the dark gray sanded grout over the paver using a rubber float, pressing the paste deep into all gaps between the mirror squares.
- Wipe the mirror surfaces with a damp sponge after 15 minutes, then buff them to a streak-free shine with your microfiber cloth once dry.
- Apply a coat of penetrating tile sealer over the grout lines after 48 hours to lock out moisture.
5. Sea Glass and Shell Mandala
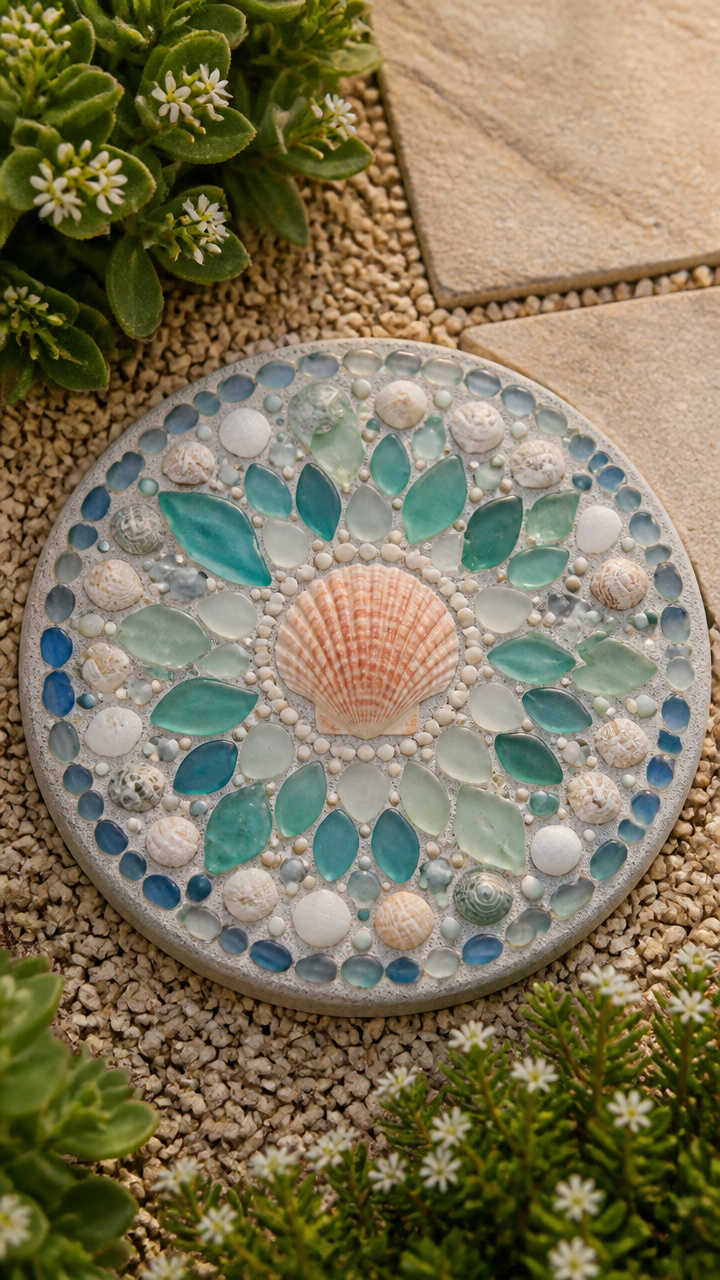
Frosted sea glass nuggets and ocean shells bring a coastal aesthetic directly to your backyard greenery. Setting these translucent elements into white cement produces a bright, clean backdrop that highlights ocean blues and greens.
Materials Needed
- 2 cups of tumbled sea glass (cobalt blue, seafoam green, and white)
- 15 to 20 small, clean bivalve or scallop shells
- 1 round 12-inch silicone stepping stone mold
- 10 pounds of white Portland cement
- 2 pounds of fine white silica sand
- 1 bucket for mixing
- 1 bottle of mineral oil
How to Make It
- Rub a light coating of mineral oil across the inside base and sides of your silicone mold.
- Mix the white Portland cement and silica sand together in your bucket, adding water gradually until you achieve a thick paste.
- Pour the white mortar mix into the silicone mold until it fills the container 2 inches deep, vibrating the mold gently to smooth the top.
- Place a large scallop shell in the exact center, face up, pressing it halfway into the wet mix.
- Create outward concentric rings using alternating rows of seafoam green and cobalt blue sea glass chips, followed by a final outer ring of small white shells.
- Tap the glass pieces lightly with your fingertip to ensure they are seated firmly into the wet mortar.
- Cover the mold with a damp cloth and let it cure for 72 hours before gently popping the flexible silicone mold away from the finished stone.
6. Glass Marble Hexagonal Stepping Stone
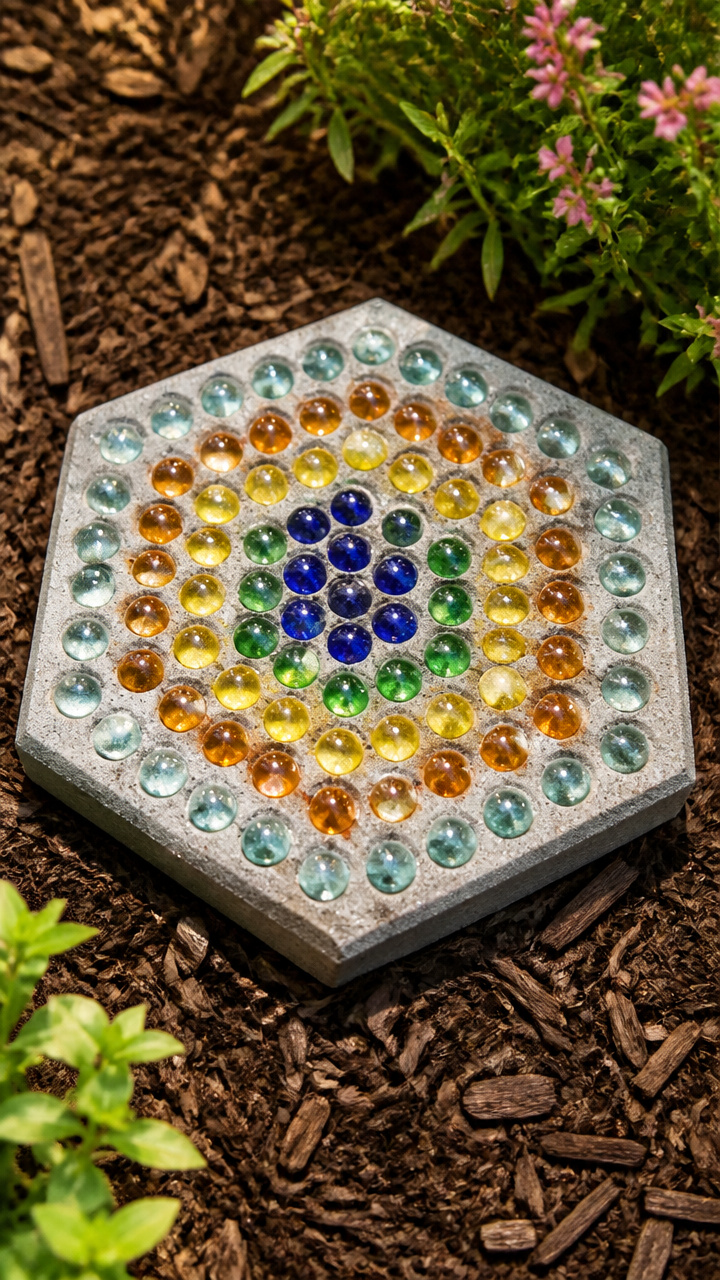
Flat-backed glass floral gems provide smooth, rounded domes that sparkle vividly under outdoor lighting. Fastening them in neat clusters onto a hexagonal base creates a honeycomb pattern.
Materials Needed
- 3 bags (12 oz each) of mixed flat-backed glass gems (amber, emerald, and clear)
- 1 hexagonal 12-inch precast concrete paver
- 1 tube of clear exterior polyurethane construction adhesive
- 1 caulking gun
- 1.5 pounds of black sanded grout
- 1 large sponge
How to Make It
- Lay your hexagonal paver flat on your work surface and dry-fit your glass gems into a tight honeycomb pattern across the surface.
- Load the polyurethane adhesive into your caulking gun and apply small dabs directly onto the paver section by section.
- Press the flat side of each glass gem firmly into the adhesive, keeping the spacing uniform across the entire stone.
- Allow the polyurethane adhesive to cure for a minimum of 18 hours.
- Spread black sanded grout firmly across the entire mosaic with your float, pushing the mixture securely around the rounded edges of each gem.
- Clean the rounded glass tops using circular motions with a well-wrung damp sponge, rinsing your sponge frequently in clean water.
- Buff the cured glass gems with a dry cotton rag after 24 hours to remove any remaining grout haze.
7. Tumbled Ceramic Tile Sunburst Stone
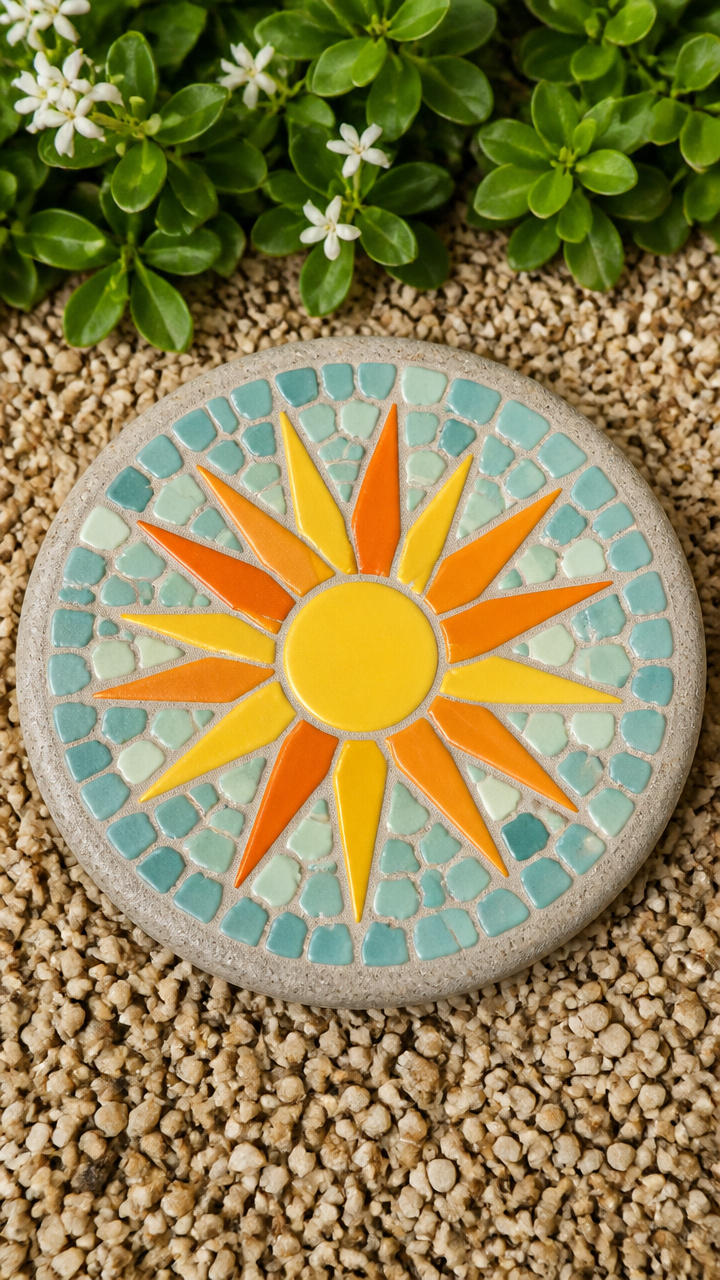
Brightly glazed ceramic wall tiles create high-contrast, graphic designs that remain vibrant through years of direct sun exposure. Nipping tiles into wedge shapes makes building radiant sunburst rays simple.
Materials Needed
- 6 glazed yellow 4×4-inch ceramic wall tiles
- 4 glazed bright orange 4×4-inch ceramic wall tiles
- 1 glazed red 4×4-inch ceramic wall tile
- 1 standard tile nipper
- 1 round 14-inch concrete stepping stone base
- 1 quart of exterior tile mastic or thinset
- 1.5 pounds of terracotta-colored sanded grout
How to Make It
- Cut the red tile into a 3-inch central circle using your tile nipper to bite off small corners progressively.
- Nip the yellow and orange tiles into triangular, elongated rays that measure roughly 3 to 4 inches in length.
- Spread a 3/16-inch layer of exterior thinset over the round concrete base using a notched trowel.
- Seat the red ceramic circle in the center of the base, then lay alternating yellow and orange rays radiating outward toward the edge.
- Press down firmly on all tile pieces so they sit at the same level within the thinset bed.
- Let the thinset dry completely for 24 hours in a warm, dry room.
- Work the terracotta-colored sanded grout into all open channels between the rays, then sponge off the surface cleanly after 25 minutes.
8. Copper Penny Spiral Paver
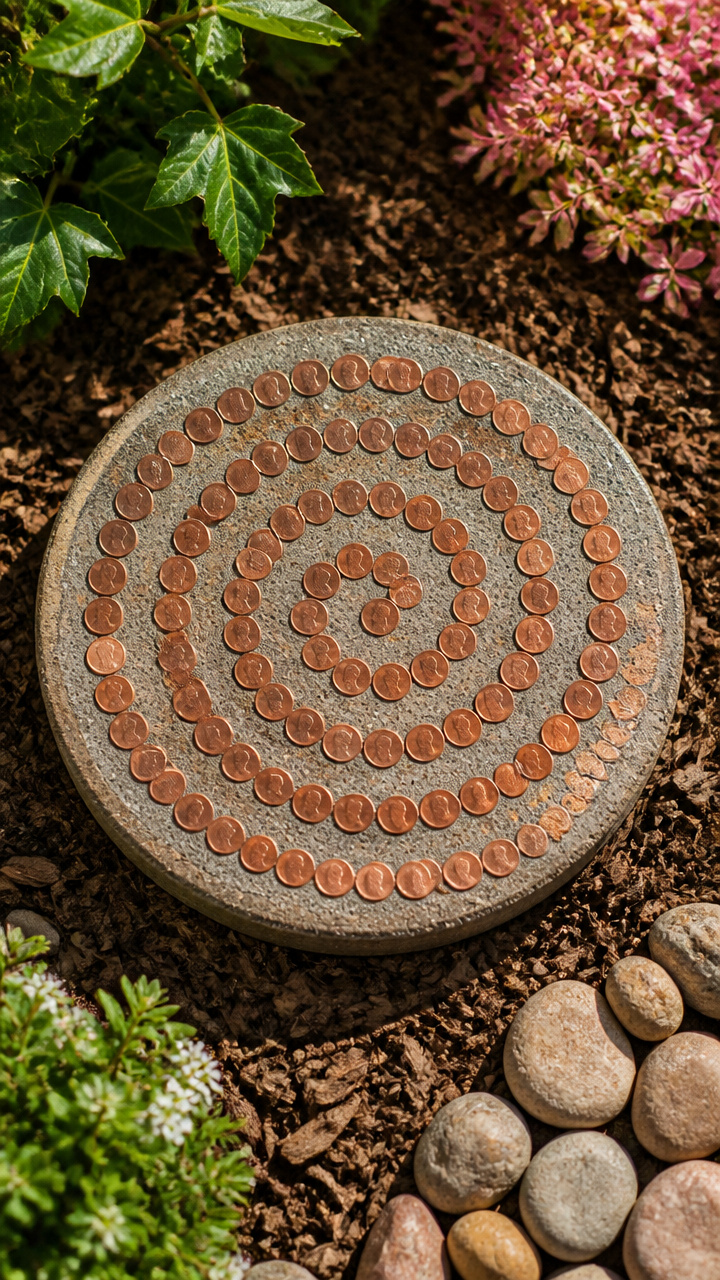
Gleaming copper pennies provide warm metallic tones that naturally develop a rustic patina over time outdoors. Arranging the coins by their minting dates creates a fun gradient from shiny new copper to aged brown metal.
Materials Needed
- 200 to 250 real copper pennies (cleaned and sorted by shade)
- 1 square 12×12-inch concrete paver
- 1 bottle of clear waterproof outdoor epoxy adhesive
- 1 wooden craft stick for spreading epoxy
- 1 pound of dark brown sanded tile grout
- 1 bucket and grout sponge
How to Make It
- Scrub the concrete paver with a wire brush and wipe away all loose dust particles.
- Mix small batches of the two-part waterproof epoxy on a disposable plate using your craft stick.
- Spread epoxy over a 3-inch square area on the paver and immediately press your pennies into place in tight, interlocking rows.
- Continue spreading epoxy and setting coins, placing bright uncirculated pennies in the center and darker, aged pennies near the outer edges.
- Let the epoxy cure fully for 12 hours until the coins cannot shift.
- Pack dark brown sanded grout into the tiny gaps between the round edges of the coins using a rubber float.
- Wipe the faces of the pennies with a damp sponge after 20 minutes to clean off excess grout before it dries hard.
9. Terracotta Pot Shard Stone
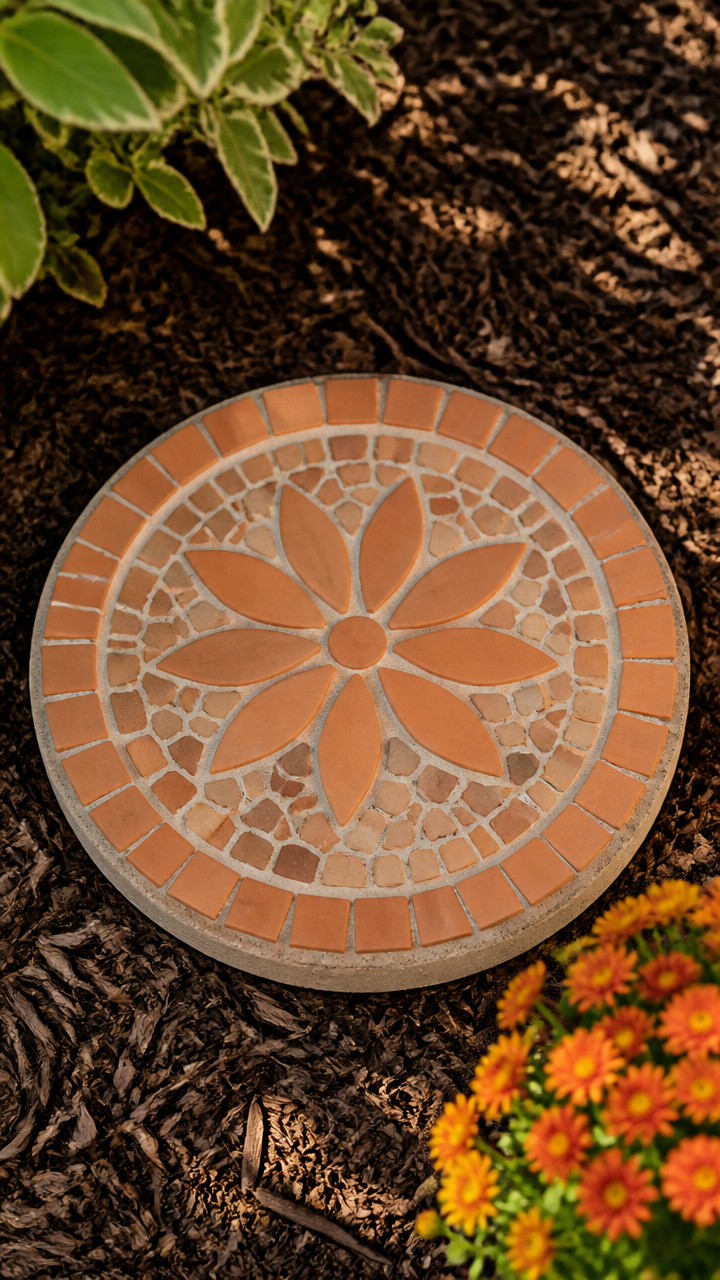
Earthy terracotta pot shards deliver a warm Mediterranean feel while making great use of cracked planters from your shed. Soaking the dry clay pieces in water beforehand prevents them from pulling moisture away from the wet concrete.
Materials Needed
- 5 to 6 broken terracotta flower pots
- 1 tile hammer
- 1 large bucket of water for soaking
- 1 round 12-inch plastic stepping stone mold
- 10 pounds of standard concrete mix
- 1 sheet of 10-inch circular wire mesh
- 1 container of clear matte concrete sealer
How to Make It
- Break the terracotta pots with your tile hammer into flat curved shards roughly 1.5 to 2 inches across.
- Submerge all terracotta pieces in a bucket of clean water for 30 minutes so the porous clay becomes fully saturated.
- Mix the concrete with water to a firm, scoopable consistency.
- Fill the stepping stone mold halfway with wet concrete, drop in the circular wire mesh, and fill the mold to the top edge with concrete.
- Remove the terracotta shards from the water bucket and press them firmly face-up into the top surface of the wet concrete, leaving 1/4-inch concrete joints between them.
- Tap the sides of the mold with a rubber mallet to level the surface and settle the shards.
- Allow the stone to cure for 4 days in the mold, release it, and paint a coat of matte concrete sealer across the terracotta to prevent frost cracking.
10. Glow Stone and Quartz Paver
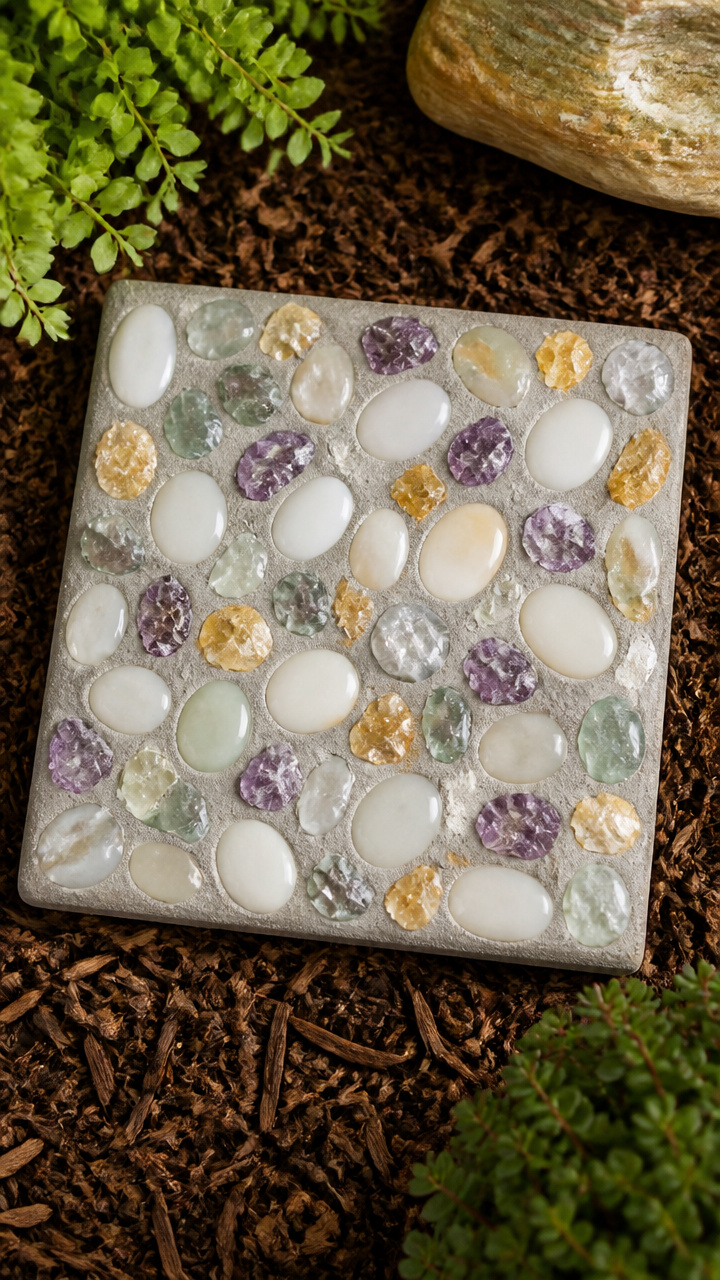
Photoluminescent glow stones and quartz chips absorb natural sunlight all afternoon and cast a soft green light across your garden after dusk. This design keeps walkways visible at night without running electrical cables through the yard.
Materials Needed
- 1 pound of resin-based photoluminescent glow-in-the-dark gravel
- 2 pounds of crushed white landscape quartz chips
- 1 square 12×12-inch plastic mold
- 10 pounds of gray sand-mix concrete
- 1 wire reinforcing grid (10×10 inches)
- 1 spray bottle with water
- 1 stiff bristle scrub brush
How to Make It
- Mix your concrete with water and pour it into the plastic mold until it reaches 3/4 of the way to the rim.
- Lay the wire reinforcing grid flat across the wet concrete, then add another 1/2-inch layer of concrete to bring it level with the mold top.
- Scatter the white quartz chips and glow gravel evenly across the wet surface, pressing them down with a flat board until they sit flush with the concrete.
- Let the concrete harden for 4 hours until the surface feels firm to the touch.
- Spray the top with a fine mist of water and gently scrub the top layer of concrete paste off the rocks using your stiff bristle brush.
- Rinse away the loose cement film to expose the top facets of the glow stones and quartz completely.
- Allow the stone to dry and cure for 72 hours before setting it in a sunlit section of your path.
11. Cobalt Wine Bottle Bottom Stone
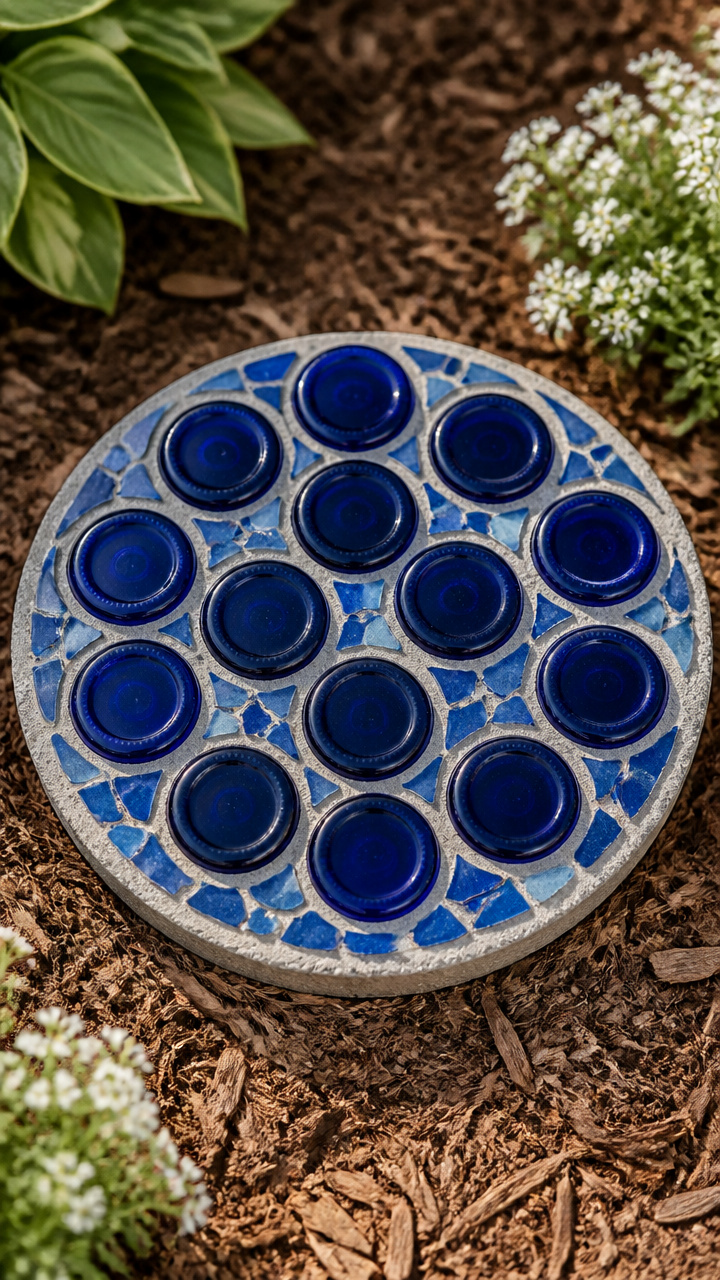
Thick glass bottoms from cobalt wine bottles provide deep blue focal points that can easily bear heavy foot traffic. The heavy, circular lenses create bold patterns when paired with pale mortar.
Materials Needed
- 7 cobalt blue glass wine bottles
- 1 bottle cutting jig or scoring tool
- 1 bucket of ice water and 1 kettle of hot water
- 1 round 14-inch stepping stone mold
- 12 pounds of white concrete countertop mix
- 1 roll of painter's tape
- 1 pair of heavy leather work gloves
How to Make It
- Score a line around each bottle 1.5 inches up from the base using your bottle cutting jig.
- Alternate pouring hot kettle water and ice water over the score line until the heavy glass bottom snaps cleanly away from the bottle neck.
- Wrap painter's tape around the severed top edges of the glass bases to protect your hands while working.
- Mix the white concrete mix with water until smooth and pour it directly into the 14-inch mold until level with the top rim.
- Press one blue bottle bottom into the direct center with the hollow cup facing downward into the concrete.
- Arrange the remaining six glass bottoms in a circle around the center piece, pressing them down until the smooth glass surfaces sit flush with the concrete top.
- Let the concrete cure for 3 days, remove the stone from the mold, and peel the protective tape off any exposed glass edges.
12. Polished Agate Slice Paver
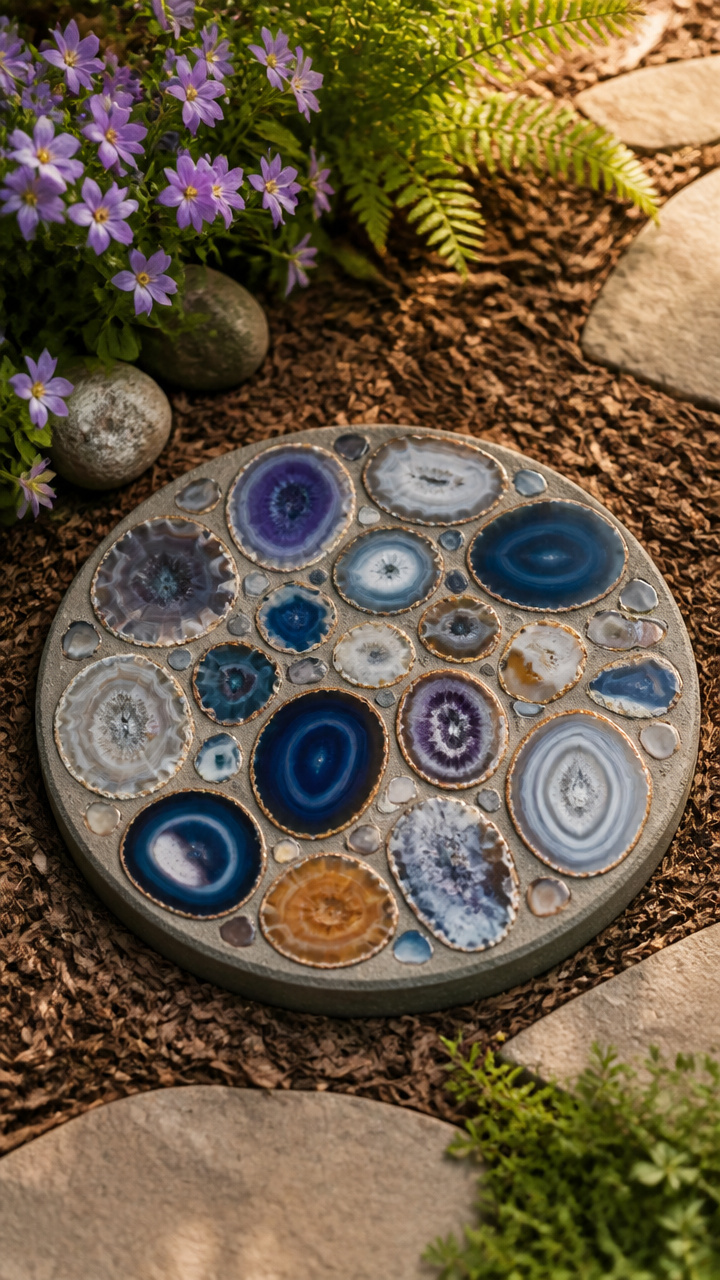
Banded agate slices with crystalline centers add natural mineral patterns and bright colors to low garden borders. Casting them directly into dark concrete mimics natural stone formations found in riverbeds.
Materials Needed
- 5 to 7 polished natural agate slices (dyed teal, magenta, or natural brown, 3 to 4 inches wide)
- 1 square 12×12-inch plastic mold
- 1 roll of clear contact paper
- 10 pounds of charcoal-tinted sand mix concrete
- 1 sheet of fiberglass mesh (10×10 inches)
- 1 spray bottle of vegetable oil
How to Make It
- Cut a 12×12-inch square of contact paper, peel off the backing, and place it sticky-side-up on your table.
- Arrange your polished agate slices onto the sticky paper with their smoothest, most colorful side facing downward.
- Spray the inside of your plastic mold with a fine mist of vegetable oil for easy release.
- Place the contact paper with the agates stuck to it face-down inside the bottom of your mold.
- Mix the charcoal concrete and pour half into the mold, lay the fiberglass mesh over the layer, and top off the mold with the remaining concrete.
- Vibrate the mold by tapping each side firmly with your hands for 2 minutes to eliminate surface air pockets.
- Let the stone cure for 48 hours, unmold the paver, peel away the contact paper, and rinse the polished agate faces clean with water.
13. Millefiori and Vitreous Micro Tile Stone
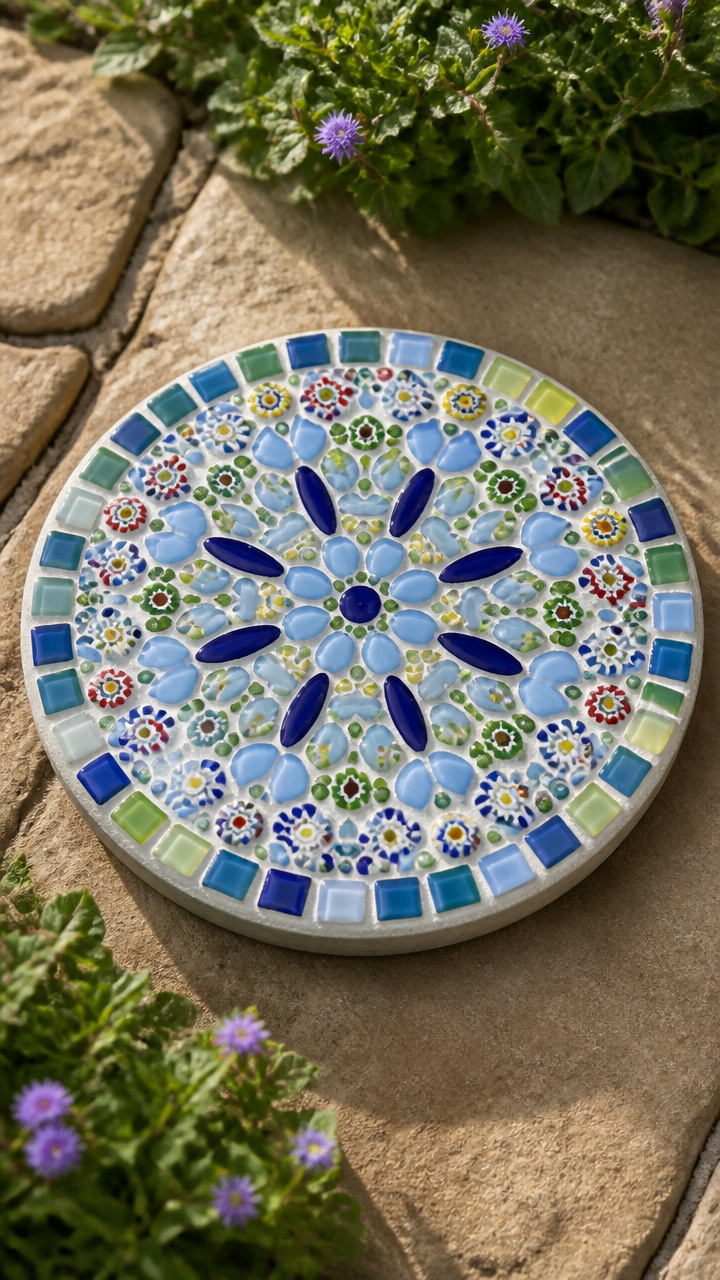
Miniature Italian millefiori glass flowers combined with 10mm vitreous glass tiles allow you to create intricate, mosaic art on a garden slab. The tiny glass elements make detailed leaf and petal patterns easy to construct.
Materials Needed
- 1 bag (100 grams) of assorted Murano millefiori glass slices
- 200 pieces of 10mm vitreous glass mosaic tiles (green and sky blue)
- 1 round 10-inch precast concrete stepping stone
- 1 tub of waterproof exterior mosaic glue (PVA based)
- 1 pound of bright white sanded tile grout
- 1 pair of precision craft tweezers
- 1 soft rubber grout spreader
How to Make It
- Scrub the surface of the precast concrete stone and let it dry completely.
- Plan your design on paper first, sketching flowers made of central millefiori discs surrounded by green vitreous tile stems and leaves.
- Apply a drop of exterior mosaic glue to the back of each piece using tweezers and place it onto the concrete stone.
- Fill the background surrounding the floral designs with sky blue vitreous tiles, maintaining a consistent 1/16-inch space between all pieces.
- Allow the mosaic glue to dry and set firmly for 24 hours.
- Spread bright white sanded grout over the glass with your rubber spreader, pressing firmly to fill the small channels between the micro tiles.
- Wipe the glass faces clean after 15 minutes using a lightly damp microfiber cloth, being careful not to gouge the fresh grout lines.
14. Honed Marble Tile Chevron Paver
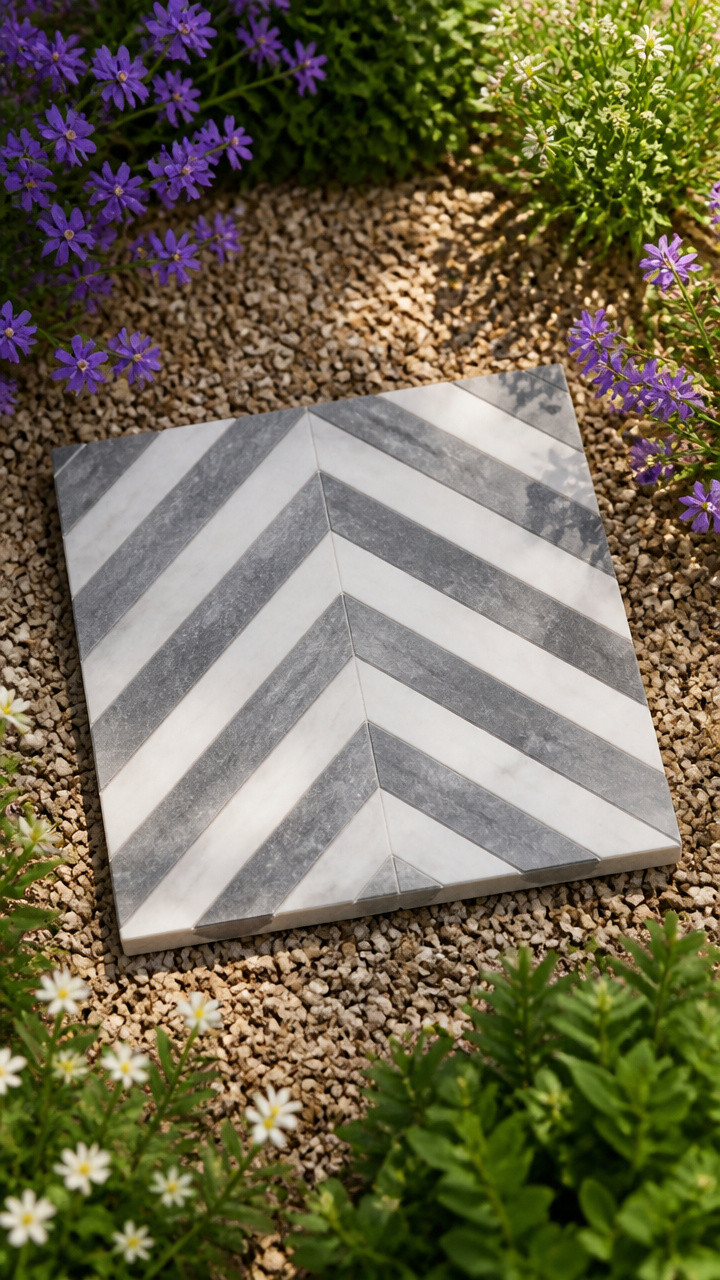
Honed marble tile offcuts bring an elegant architectural element to informal gravel walkways. Cutting the rectangular stone strips into chevrons creates a clean, modern herringbone layout.
Materials Needed
- 12 honed Carrara marble subway tiles (2×4 inches)
- 1 manual tile cutter or wet tile saw
- 1 square 12×12-inch stepping stone mold
- 10 pounds of fast-setting concrete mix
- 1 wire mesh insert (10×10 inches)
- 1 bottle of penetrating natural stone sealer
How to Make It
- Cut the ends of the marble subway tiles at 45-degree angles using your tile cutter to create matching chevron segments.
- Mix the fast-setting concrete with water and fill the 12-inch square mold 2 inches deep, adding the wire mesh insert in the middle of the pour.
- Smooth the top of the wet concrete flat using a straight wooden board drawn across the top edges of the mold.
- Press the cut marble chevron pieces into the concrete in an interlocking herringbone pattern, sinking them until they are level with the mold surface.
- Wipe away any wet concrete that squeezes up between the marble joints using a damp rag.
- Let the slab cure for 24 hours, unmold the paver, and allow it to dry completely in the sun for 6 hours.
- Brush two coats of penetrating stone sealer over the marble and concrete to shield the stone from moisture and garden soil stains.
15. Fossil and Slate Shard Stepping Stone
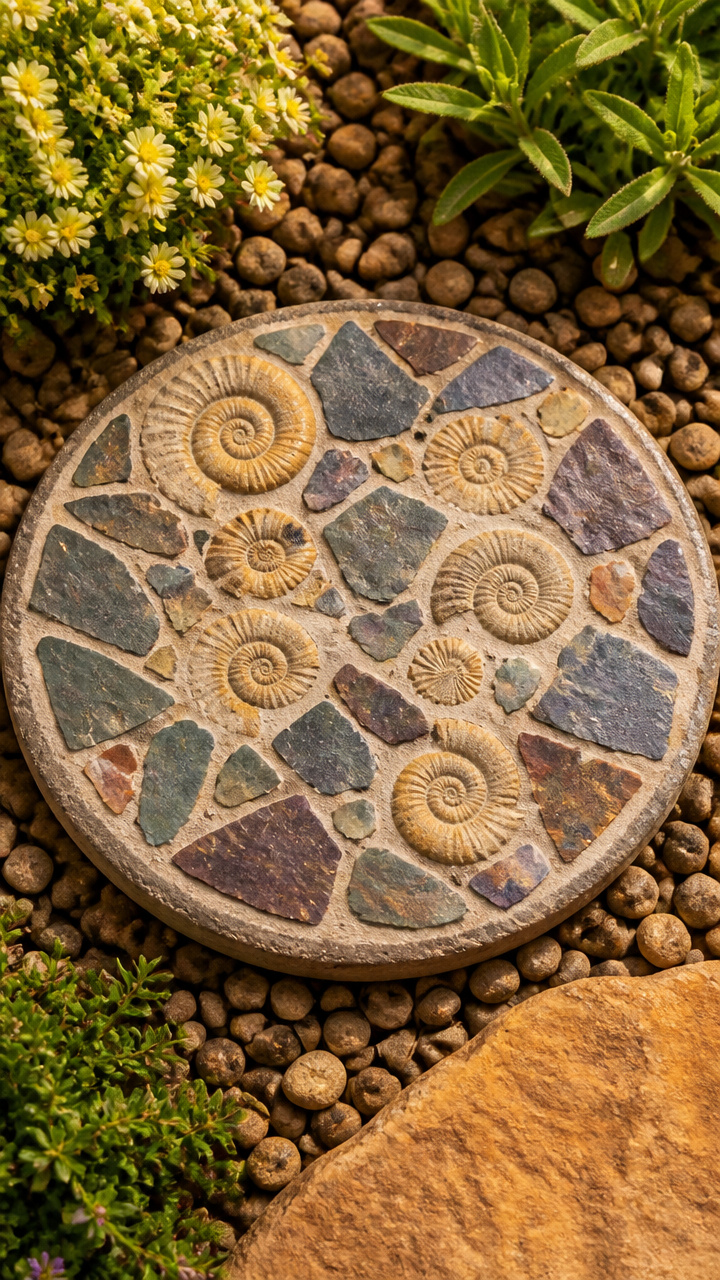
Dark, cleft-faced slate fragments combined with cast resin ammonite fossils create an ancient, geological look along wooded trails. The matte dark slate makes pale fossil details stand out boldly.
Materials Needed
- 4 to 5 flat pieces of natural dark roofing or garden slate
- 2 cast resin or plaster decorative fossil replicas (ammonite or trilobite)
- 1 round 14-inch plastic stepping stone mold
- 12 pounds of high-strength concrete mix
- 1 hammer and 1 cold chisel
- 1 roll of heavy plastic sheeting
How to Make It
- Score and break the slate pieces with your hammer and cold chisel to create jagged geometric fragments between 2 and 4 inches across.
- Mix the concrete mix with water until thick and scoop it into the 14-inch mold, smoothing the surface flat with a trowel.
- Place the decorative fossil replicas off-center into the wet concrete, pressing them down until their flat backs are firmly embedded.
- Surround the fossils with the broken slate shards, arranging the jagged edges like puzzle pieces with 1/4-inch concrete joints between them.
- Press a flat wooden scrap board over the whole arrangement and tap lightly to ensure all slate shards and fossils sit at the same height.
- Cover the mold loosely with plastic sheeting and allow it to cure slowly in a shaded spot for 4 full days.
- Pop the heavy stone out of the mold and set it along your garden walkway over a 1-inch bed of leveling sand.
Building your own mosaic stepping stones lets you customize your landscape with personal colors, textures, and found objects. Gather your tile nippers, pick a weekend with clear weather, and start pouring stones that will brighten your garden path for seasons to come.