15 Wine Cork Garden Crafts You Never Knew You Needed

Saving wine corks gives you one of the most versatile, water-resistant materials for outdoor projects. Natural cork resists rot, floats effortlessly, and cushions delicate plant stems without scratching them.
Grab your collection from the kitchen drawer and put those sturdy cylinders to work across your vegetable beds, containers, and potting bench.
1. Stamped Herb Plant Markers
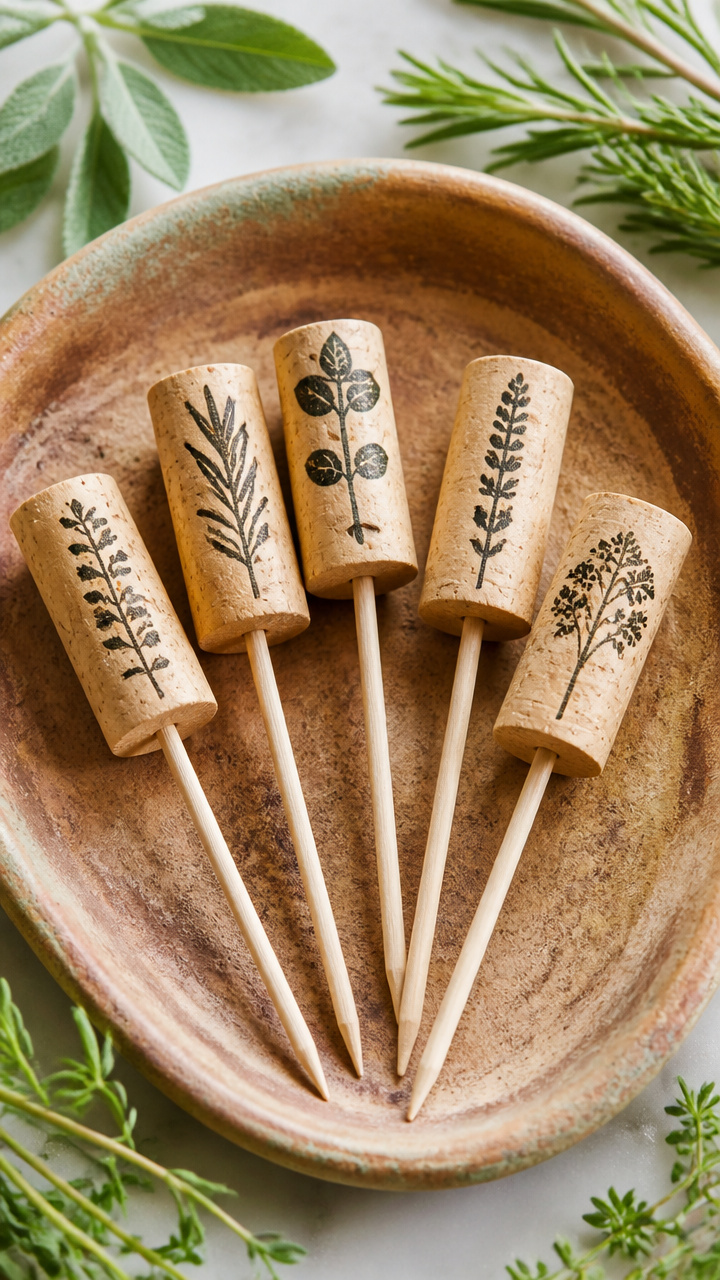
Sturdy wooden skewers topped with letter-stamped corks give your herb garden clean, weatherproof labels. They keep your parsley, basil, and thyme organized without rotting in moist soil.
Materials Needed
- 10 natural wine corks
- 10 bamboo skewers (12-inch, 4mm thick)
- 1 set of 1/4-inch metal alphabet letter stamps
- 1 black archival waterproof ink pad
- 1 cordless drill with 1/8-inch drill bit
How to Make It
- Press the letter stamp into the waterproof ink pad and stamp the plant name lengthwise along the side of the cork using firm, straight downward pressure.
- Allow the ink to dry completely for 10 minutes so it will not smudge during handling.
- Drill a 1/8-inch hole roughly 1 inch deep directly into the center of the bottom base of the cork.
- Push the blunt end of a 12-inch bamboo skewer into the drilled hole until it fits tightly, then push the pointed end into your herb container soil.
2. Floating Wildlife Pond Raft
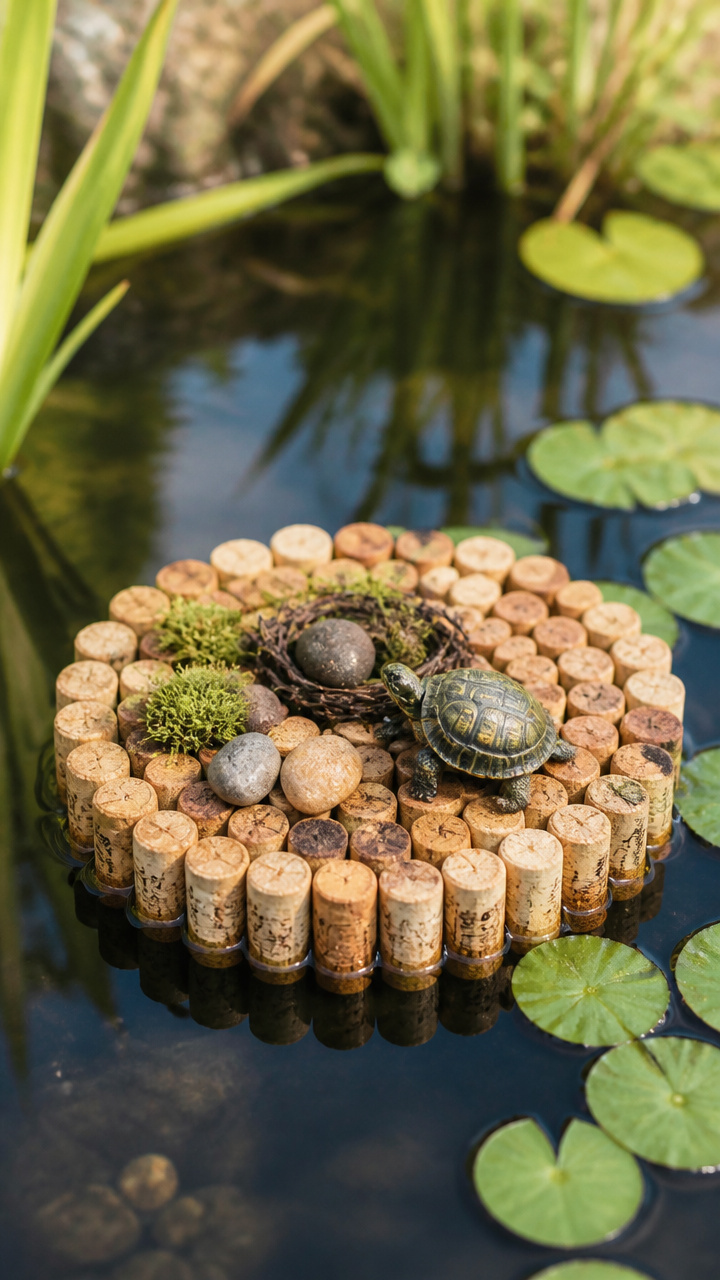
Buoyant natural corks bonded into a mini raft provide safe drinking islands for bees, ladybugs, and small frogs in garden ponds. Giving beneficial insects a dry landing spot keeps them from drowning while they drink.
Materials Needed
- 14 natural wine corks of identical length
- 1 tube of clear aquarium-safe silicone sealant
- 1 spool of 20-pound clear nylon monofilament line
- 1 clean river pebble (about 2 inches wide)
How to Make It
- Arrange seven corks side by side in a flat row, then apply a continuous bead of aquarium silicone along each seam to glue them together.
- Build a second identical seven-cork row, let both cure for 3 hours, and then join the two rows side by side with silicone to form a square raft.
- Tie one end of the nylon monofilament line securely around the center seam of the raft, leaving an 18-inch tail.
- Tie the opposite end of the line around the river pebble and drop the pebble into the pond bottom to anchor your raft in place.
3. Heavy Planter Pot Feet
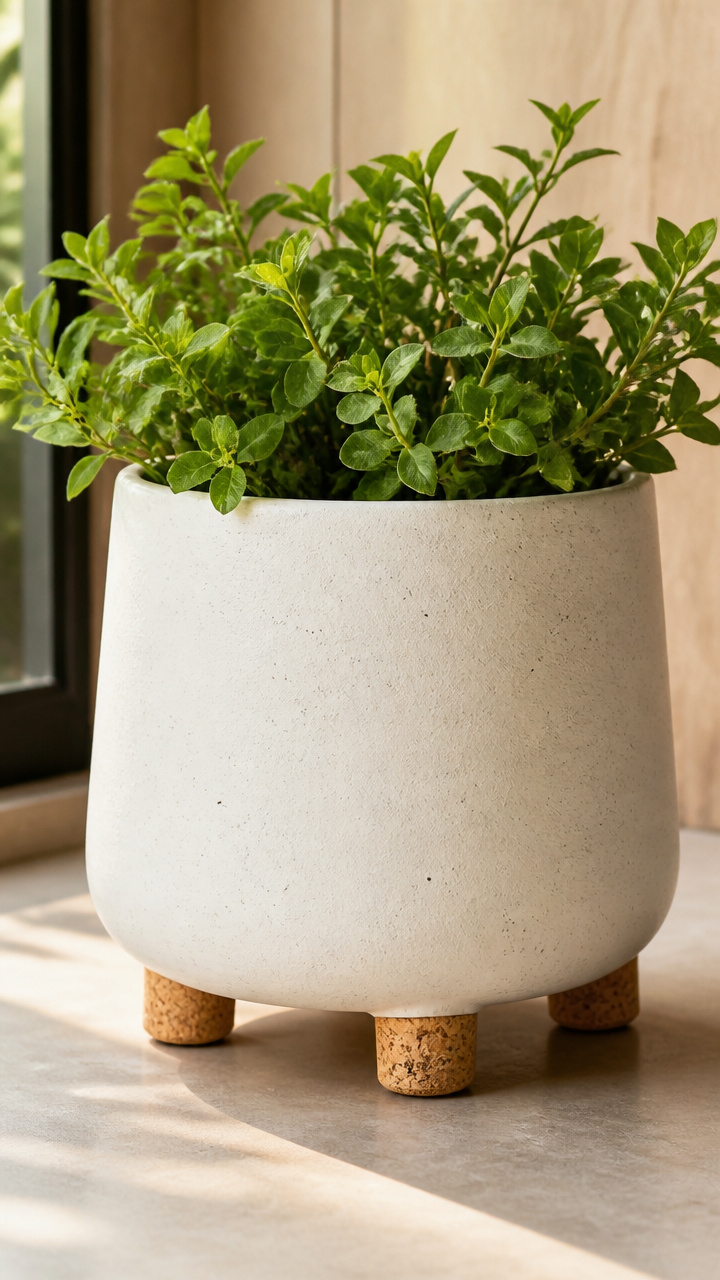
Dense cork triplets glued together create shock-absorbing risers that lift heavy containers off patio stone. Lifting pots off the ground improves bottom drainage and stops moisture rings on your deck.
Materials Needed
- 12 natural wine corks
- 1 bottle of waterproof polyurethane wood glue
- 1 utility knife with a fresh blade
- 1 sheet of 120-grit sandpaper
How to Make It
- Trim 1/16 inch off the ends of all 12 corks using your utility knife to ensure every cork has perfectly flat, parallel top and bottom surfaces.
- Sand the cut edges lightly with 120-grit sandpaper to remove any loose cork dust.
- Glue three corks together side by side in a triangle cluster using waterproof polyurethane glue, repeating the process to create four identical feet.
- Clamp each cluster with a rubber band for 4 hours to cure, then slide one foot under each corner of your planter.
4. Seed Spacing Dibber Bar
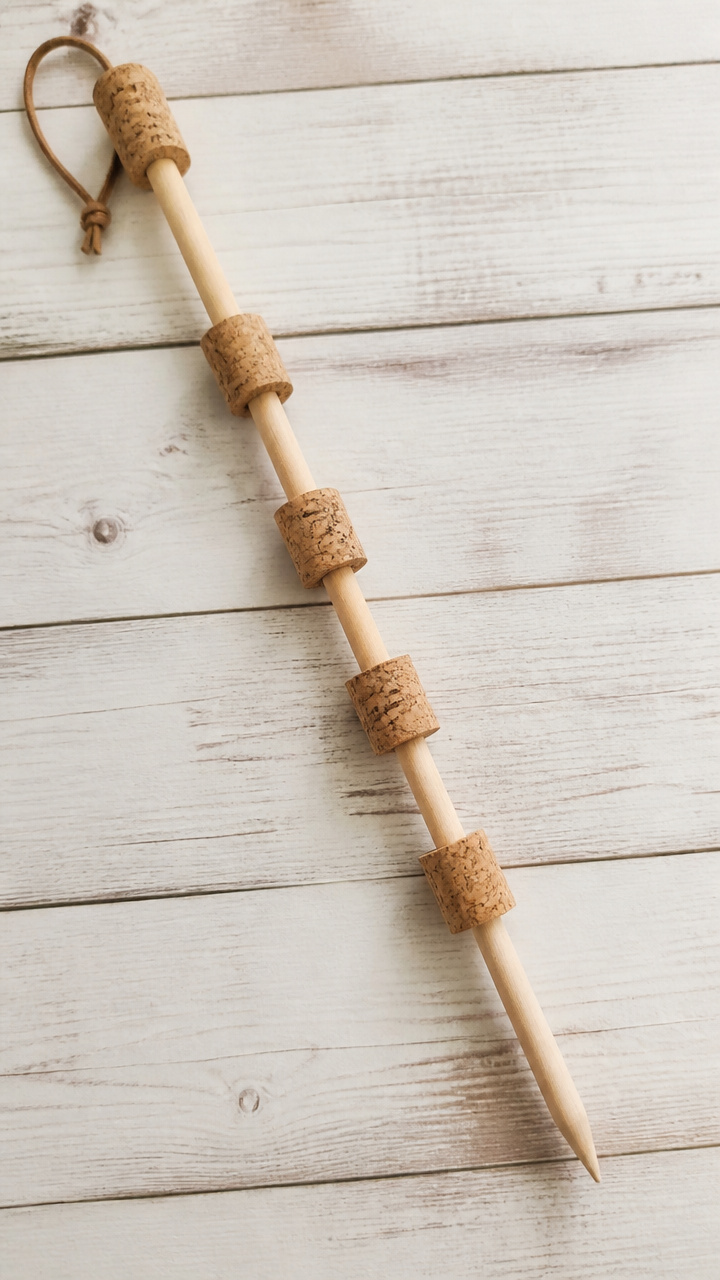
Evenly spaced corks mounted along a wood strip punch uniform seed dimples into fresh compost in a single press. Quick row planting saves your lower back and keeps your carrot lines neat.
Materials Needed
- 6 natural wine corks
- 1 piece of 1×2-inch pine lumber (24 inches long)
- 6 1-1/2-inch wood screws
- 1 measuring tape
- 1 cordless drill with a 1/8-inch drill bit and screwdriver bit
How to Make It
- Measure and mark the center line along your wood board, placing pencil marks every 3 inches starting 4.5 inches in from the edge.
- Drill pilot holes through the wood at each pencil mark using your 1/8-inch bit.
- Hold a cork centered over the pilot hole on the underside of the board and drive a wood screw through the wood into the flat top of the cork until flush.
- Repeat for all six corks, then press the bar firmly into prepared garden soil to create six evenly spaced seed planting dimples.
5. Solitary Bee Nesting Can
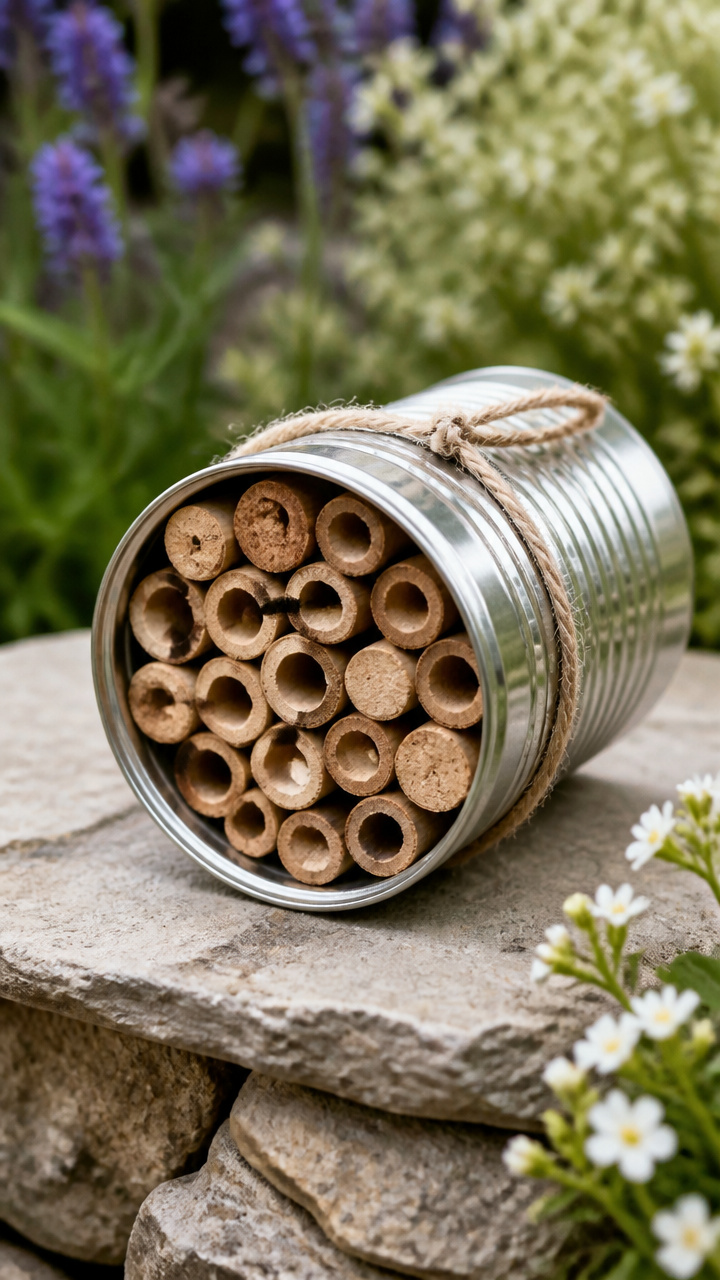
Drilled cork cylinders packed tightly inside a recycled metal can create insulated nesting tunnels for gentle native pollinators. Mason bees fill these warm chambers with pollen and eggs every spring.
Materials Needed
- 25 natural wine corks (straight cylinders, not tapered)
- 1 clean 28-ounce metal food can with label removed
- 1 cordless drill with 5/16-inch extra-long brad point bit
- 1 tube of exterior construction adhesive
- 2 feet of 16-gauge galvanized steel wire
How to Make It
- Drill a 5/16-inch hole lengthwise through the center of 20 corks, stopping 1/4 inch before penetrating the opposite end so the back remains closed.
- Spread a layer of construction adhesive along the bottom interior of the clean metal can.
- Pack the drilled corks tightly into the can with their open ends facing outward, using the 5 undrilled corks as spacers around the bottom edges.
- Wrap the galvanized wire securely around the middle of the can and hang it horizontally on a south-facing wall under an eave.
6. Garden Hose Corner Guide
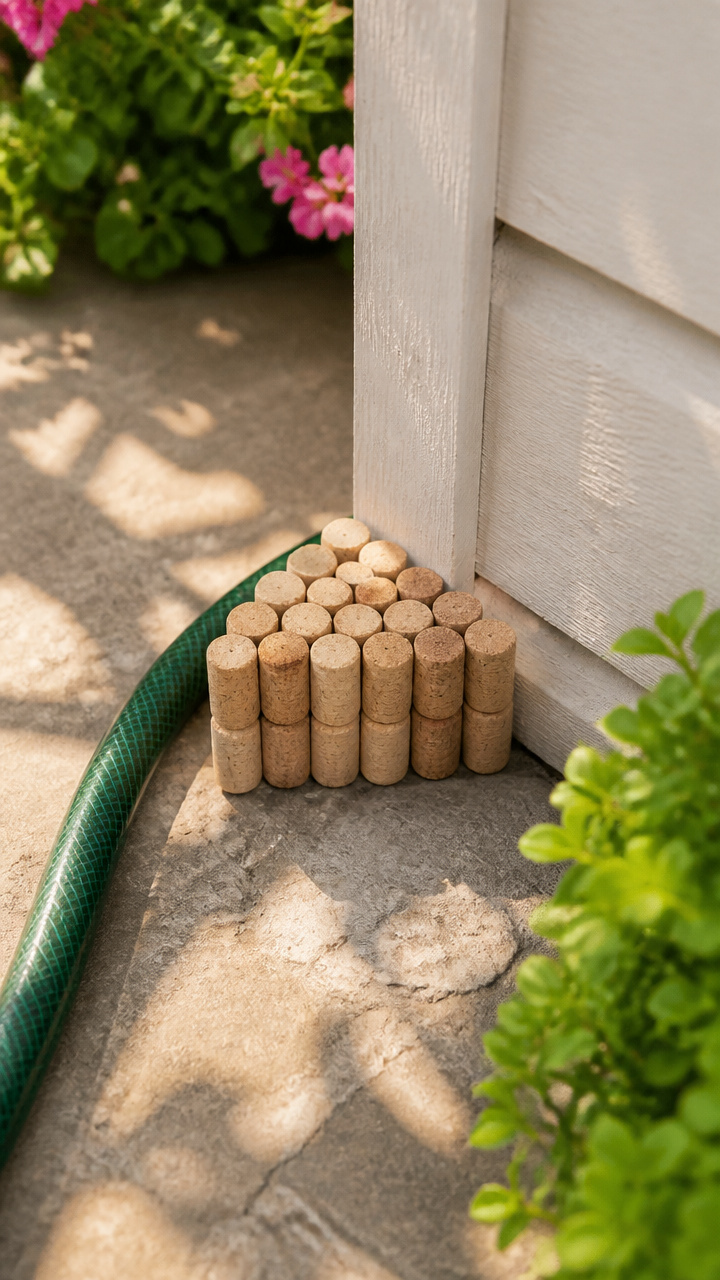
Stacked wine corks mounted on an iron rebar stake prevent dragging garden hoses from crushing your delicate border perennials. The smooth cork surface lets ribbed rubber hoses glide past without catching.
Materials Needed
- 8 synthetic wine corks
- 1 piece of 3/8-inch steel rebar (24 inches long)
- 1 cordless drill with 3/8-inch spade bit
- 1 rubber mallet
How to Make It
- Drill a 3/8-inch hole directly through the center length of each synthetic cork from end to end.
- Slide the eight drilled corks onto the steel rebar, stacking them snugly against one another along the top 12 inches of the rod.
- Position the rebar stake at the corner of your garden bed where the hose tends to cut across the plants.
- Tap the bottom of the rebar 12 inches into the soil with a rubber mallet so the stacked cork roller sits firmly above ground level.
7. Pruning Shear Blade Guard
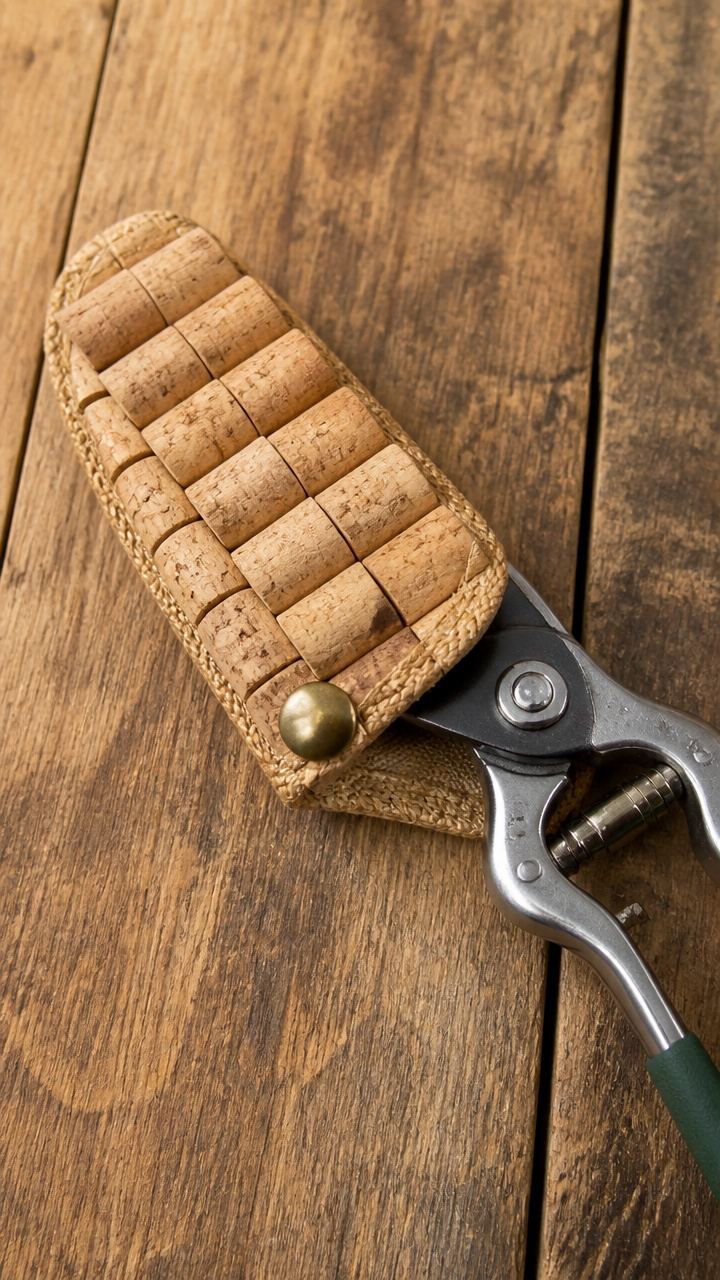
Carved champagne corks slide snugly over pointed bypass pruner tips to protect sharp steel edges and garden bag linings. Pocketing sharp tools becomes much safer when the blades stay covered.
Materials Needed
- 1 wide champagne cork
- 1 utility knife with a fresh blade
- 1 cutting mat
- 1 tablespoon of mineral oil
How to Make It
- Set the wide bulb end of the champagne cork flat on your cutting mat with the narrower stem facing up.
- Use the utility knife to cut a straight 1-1/2-inch deep vertical slot across the narrow top end of the cork.
- Widen the slot slightly by rocking the knife blade back and forth to match the combined thickness of your closed pruner blades.
- Rub a few drops of mineral oil inside the slit to lubricate the cork and protect your steel blades from rust while stored.
8. Butterfly Fruit Feeding Platform
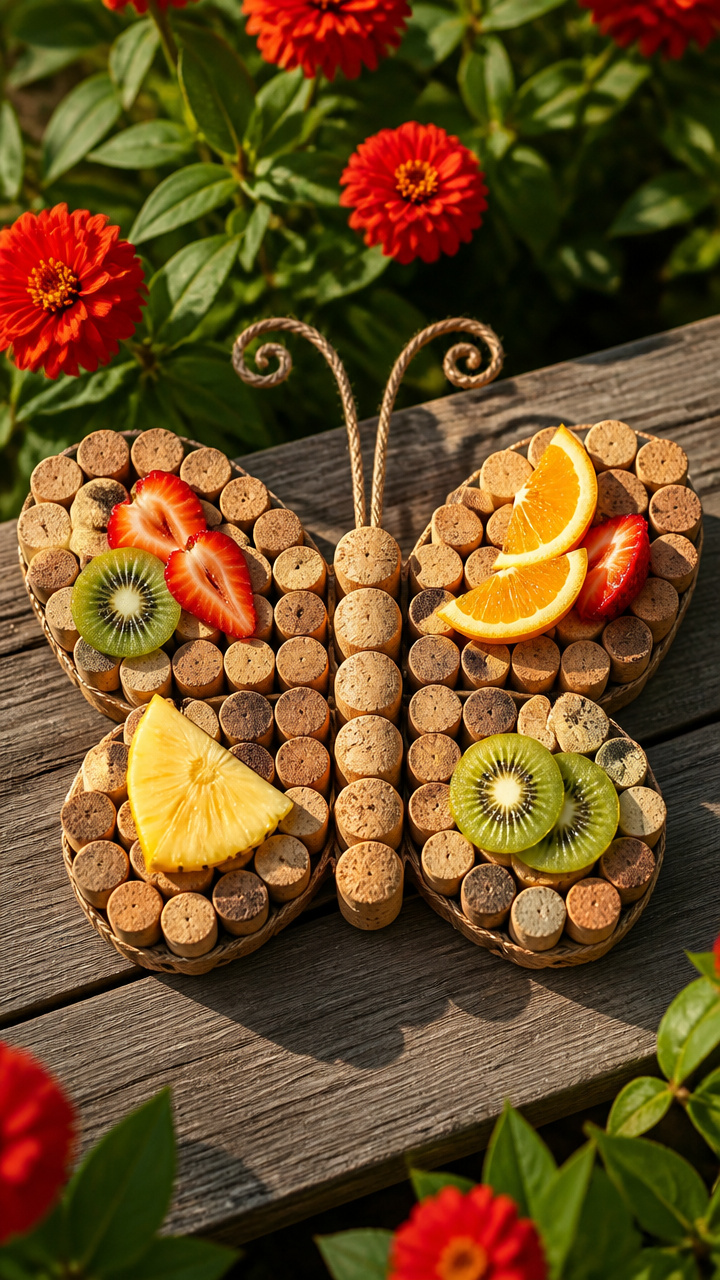
Weather-resistant cork discs lashed together form a suspended tray designed to hold juicy orange slices for passing butterflies. Sweet fruit juices seep slightly into the porous cork, giving insects a textured grip while they feed.
Materials Needed
- 19 natural wine corks
- 1 hot glue gun with all-weather glue sticks
- 3 18-inch lengths of 3mm braided jute cord
- 1 1-1/2-inch metal split ring
How to Make It
- Stand one cork upright in the center and glue six corks vertically around it in a tight hexagon ring using all-weather hot glue.
- Glue the remaining 12 corks upright around the perimeter to expand the platform into a wider hexagonal disc.
- Tie each length of jute cord around one of three evenly spaced outer corks at the edge of the disc.
- Gather the top ends of all three cords, thread them through the metal split ring, knot them securely, and hang the platform from a low tree branch.

9. Copper Slug Barrier Rings
Sliced cork washers threaded onto solid copper wire form a protective collar that keeps hungry slugs away from tender hosta shoots. Slugs avoid crossing copper surfaces, while the cork prevents the wire from cutting into your plant stems.
Materials Needed
- 4 natural wine corks
- 1 spool of 14-gauge bare solid copper wire (about 3 feet)
- 1 utility knife
- 1 pair of wire cutters and needle-nose pliers
How to Make It
- Slice each wine cork crosswise into four 1/4-inch thick rounds using your utility knife.
- Pierce a small hole through the center of each cork round using the tip of the needle-nose pliers.
- Cut an 18-inch piece of copper wire and string eight cork rounds onto it, spacing them roughly 2 inches apart.
- Form the wire into a ring around the base of your young plant, twisting the copper ends together so the corks rest against the soil and the exposed copper faces up.


10. Rain Gauge Floating Level
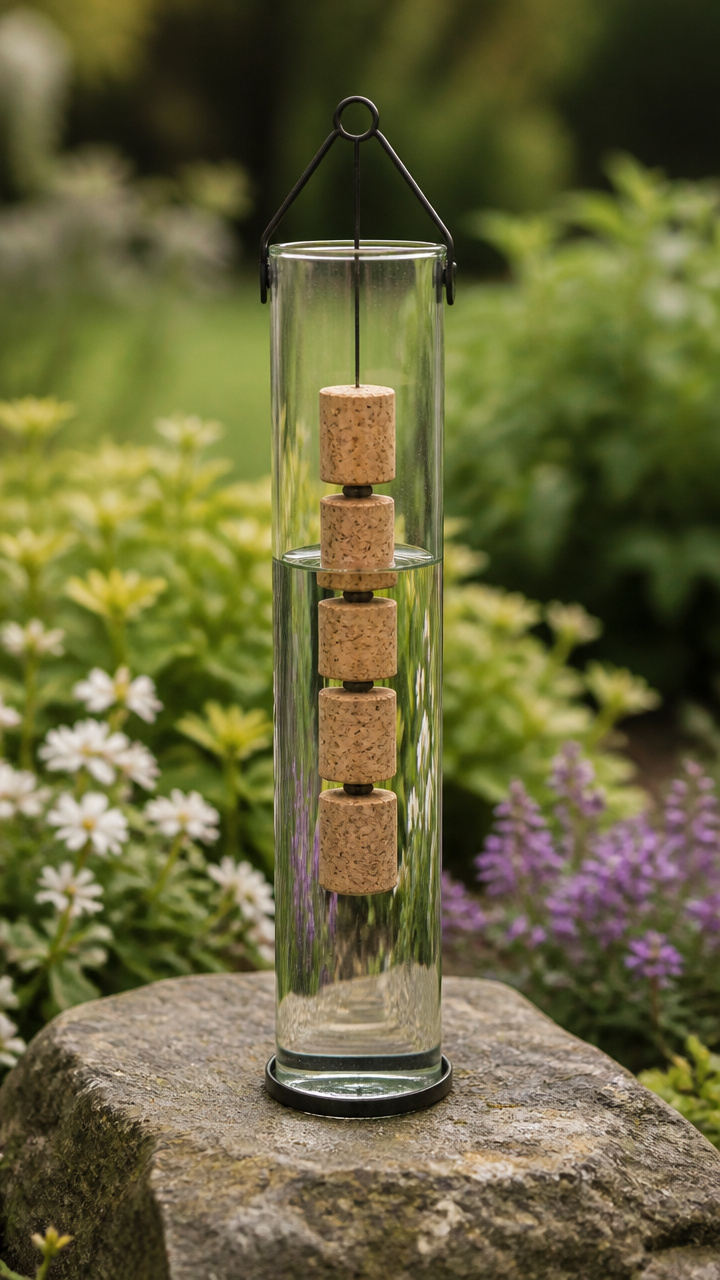
Brightly painted cork floats inside an open plastic rain tube to give you an instant water reading from across the yard. High-visibility markers save you from walking across soggy grass just to check rainfall totals.
Materials Needed
- 1 lightweight natural wine cork
- 1 8-inch thin bamboo skewer
- 1 bottle of neon orange outdoor acrylic craft paint
- 1 small foam paintbrush
- 1 clear cylindrical rain gauge tube (unobstructed top opening)
How to Make It
- Paint the entire surface of the wine cork with two coats of neon orange acrylic paint, letting it dry for 20 minutes between coats.
- Insert the sharp point of the bamboo skewer 1/2 inch into the flat top center of the painted cork.
- Trim the bamboo skewer so it measures 4 inches above the top of the cork.
- Place the assembly inside your empty rain gauge tube so the cork rises immediately as rainwater collects in the bottom.
11. Trellis Stem Cushion Clamps
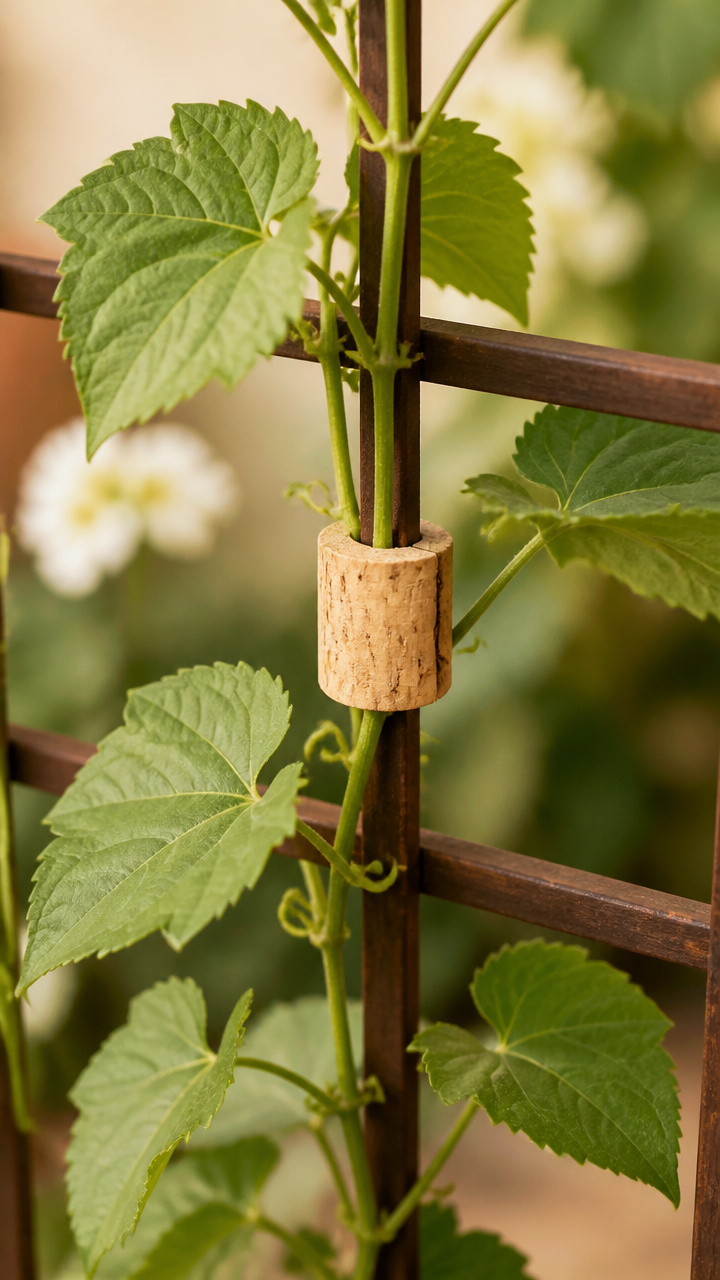
Grooved cork halves wrapped with soft rubber-coated wire protect soft tomato and squash vines from chafing against metal chain-link fencing. Wind moves your heavy vines freely without slicing into their outer skin.
Materials Needed
- 6 natural wine corks
- 1 utility knife
- 1 spool of 3.5mm rubber-coated garden tie wire (cut into six 6-inch pieces)
- 1 half-round needle file
How to Make It
- Slice each cork in half lengthwise using your utility knife on a flat cutting board.
- File a smooth 1/4-inch deep concave channel down the flat sliced side of each cork half using the needle file.
- Position the cork against your trellis wire with the rounded channel cupping the climbing plant stem.
- Wrap a 6-inch piece of rubber-coated wire around the outside of the cork and trellis wire, twisting the ends loosely to hold the stem in place.


12. Outdoor Wind Chime Clapper
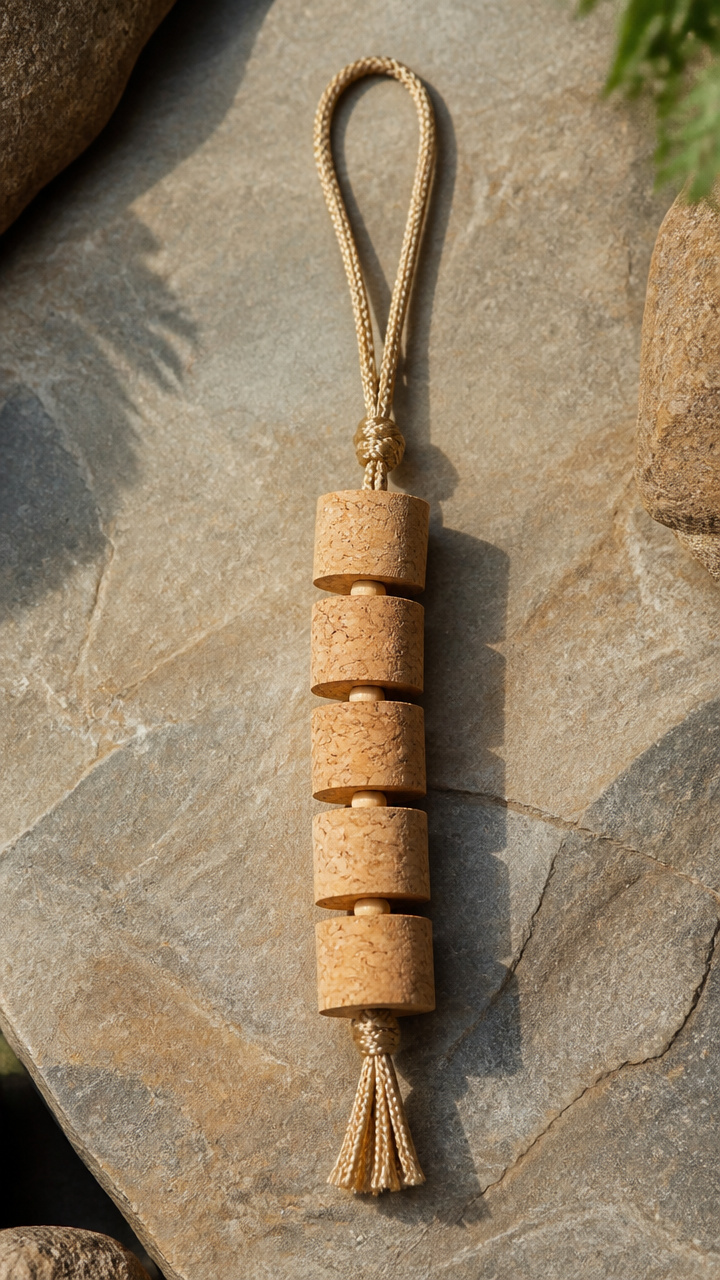
Solid cork spheres suspended on braided nylon cord produce a soft, muted chime tone when striking metal or bamboo tubes during heavy breezes. Replacing hard wood clappers eliminates harsh clattering on windy afternoons.
Materials Needed
- 1 large champagne cork
- 1 24-inch length of #18 braided nylon mason line
- 1 small metal washer (1/2-inch diameter)
- 1 cordless drill with 1/8-inch drill bit
- 1 2-inch wide acrylic wind sail disc
How to Make It
- Drill a straight 1/8-inch hole through the center length of the champagne cork.
- Thread the braided nylon line down through the drilled hole, slide the metal washer onto the line beneath the cork, and tie a tight double knot under the washer.
- Tie the bottom tail of the line to the acrylic wind sail disc 6 inches below the cork base.
- Tie the top of the line to the center hook inside your existing wind chime canopy so the cork hangs directly between the chime pipes.
13. Garden Twine Dispenser Spike
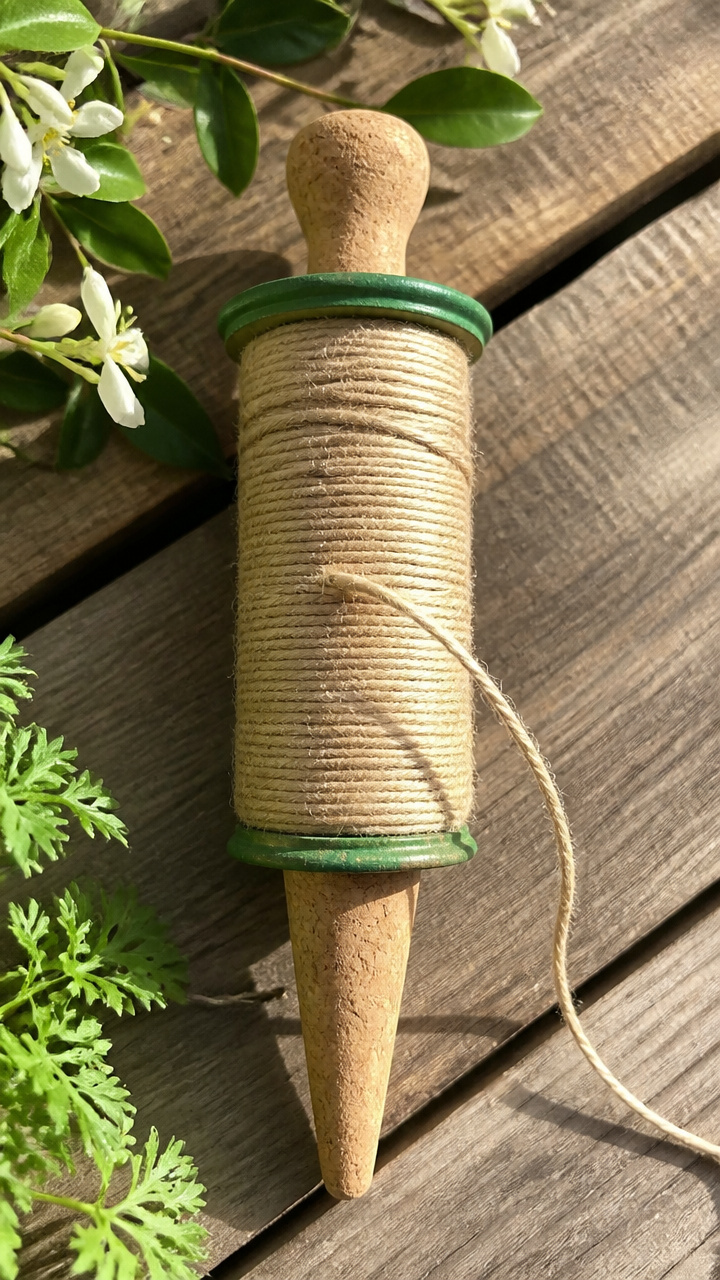
Mounted cork bobbins on a copper ground spike hold bulky jute spools steady as you pull string to tie up plants. Keeping twine off wet soil prevents mildew from weakening natural fibers before use.
Materials Needed
- 2 natural wine corks
- 1 1/2-inch copper pipe (18 inches long)
- 1 roll of 3-ply natural jute garden twine
- 1 utility knife
How to Make It
- Carve the outer edge of one wine cork slightly with your utility knife until it taps snugly into the top opening of the copper pipe.
- Slide your full spool of garden twine over the top of the copper pipe so it rests 6 inches above the base.
- Press the second cork halfway into the top opening of the pipe above the twine roll to act as a retaining cap.
- Push the bottom 6 inches of the copper pipe into the soil next to your garden bed for hands-free twine pulling.
14. Mini Succulent Trellis Magnets
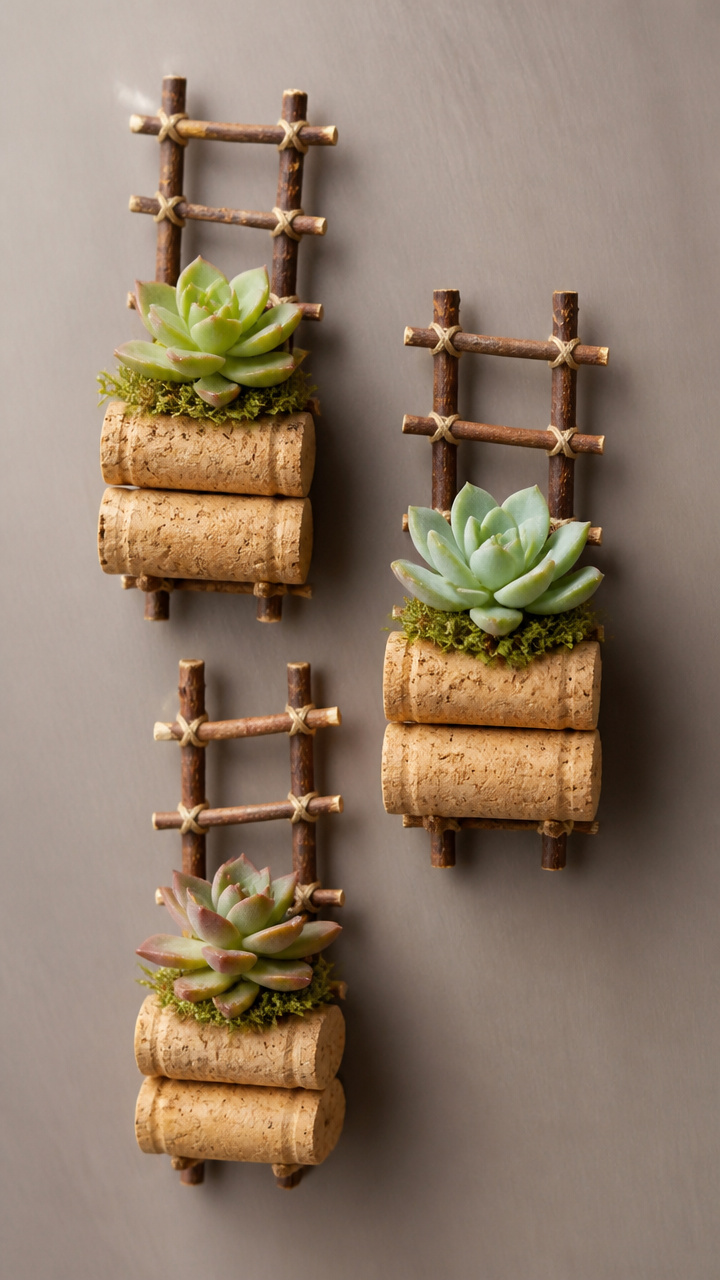
Hollowed cork cups filled with gritty potting mix and tiny sedum cuttings bring vertical green accents to metal garden arches. Lightweight cork holds just enough moisture to keep hardy succulents thriving with minimal watering.
Materials Needed
- 6 wide wine corks
- 1 utility knife or melon baller tool
- 6 neodymium disc magnets (1/2-inch diameter, waterproof coated)
- 1 tube of exterior waterproof epoxy
- 3 tablespoons of cactus potting soil
- 6 small sedum or crassula plant cuttings
How to Make It
- Hollow out the top half of each cork using your utility knife to create a 3/4-inch deep planting pocket.
- Glue one neodymium magnet to the back flat side of each cork using waterproof epoxy, then let it cure for 1 hour.
- Fill each cavity with gritty cactus potting soil, moisten with a few drops of water, and insert one succulent cutting.
- Attach the magnetic corks directly to iron garden trellises, metal tool sheds, or galvanized steel planter boxes.
15. Ergonomic Hand Tool Grip
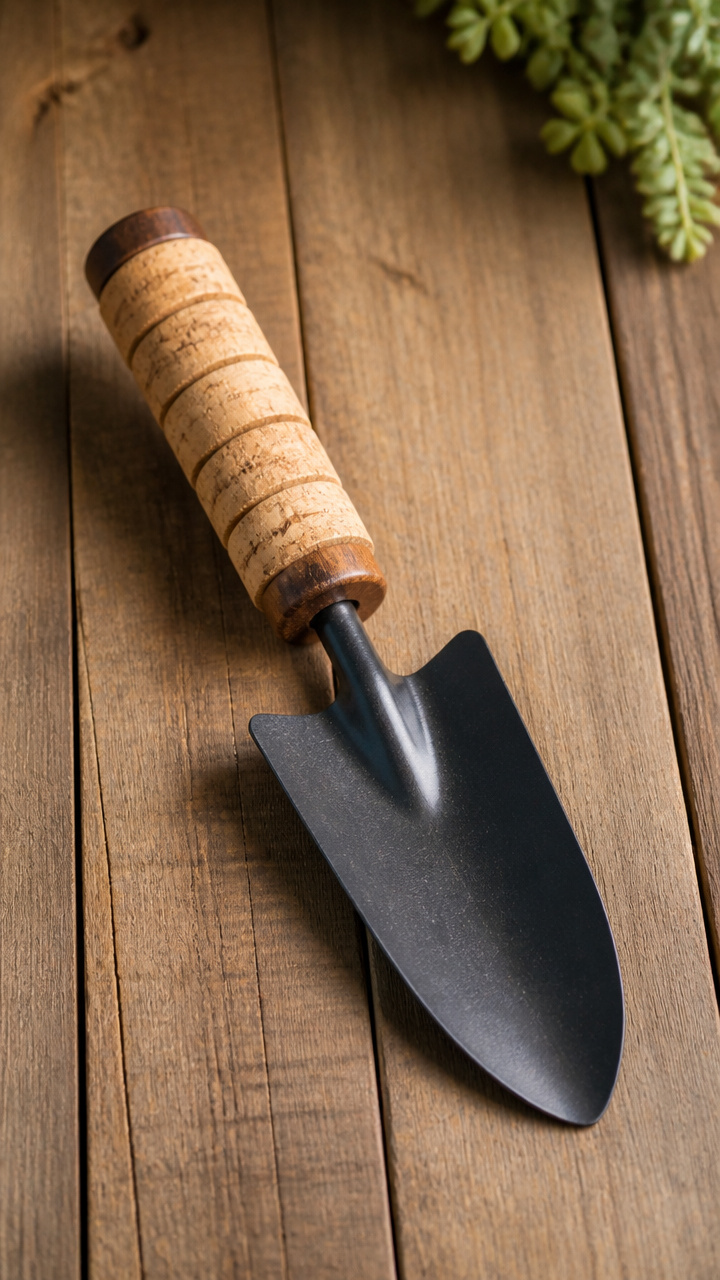
Cylindrical corks slipped over narrow wire weeders build up handle thickness to reduce hand fatigue during long weeding sessions. Padded handles let you maintain a firm grip without straining fingers or developing blisters.
Materials Needed
- 4 synthetic wine corks
- 1 narrow-handled hand weeder or cultivator
- 1 cordless drill with bit matching your tool shaft diameter (typically 1/4-inch)
- 1 tube of waterproof grip adhesive
How to Make It
- Drill a straight hole through the center length of each synthetic cork using the drill bit matched to your tool handle.
- Apply a thin line of waterproof grip adhesive along the steel shaft of your hand tool.
- Slide all four corks onto the shaft in a row, pressing them tightly against one another until the entire metal handle area is covered.
- Wipe away any excess glue with a damp cloth and allow the tool to dry for 24 hours before working in the garden.
Collecting used corks turns everyday kitchen scraps into practical solutions for your yard and potting shed. Pick two or three projects from this list, gather your tools, and enjoy making your garden more productive today.