20 DIY Fall Gnome Ideas

Crisp air, golden leaves, and cozy evenings call for handmade touches that bring warmth to your home. These gnomes blend autumn charm with simple crafting, each one a little guardian of the season’s quiet joy.
You’ll find ideas that use felt, wood, clay, and more, with clear steps and exact supplies so you can start right away.
1. Mini Felt Gnome with Acorn Cap
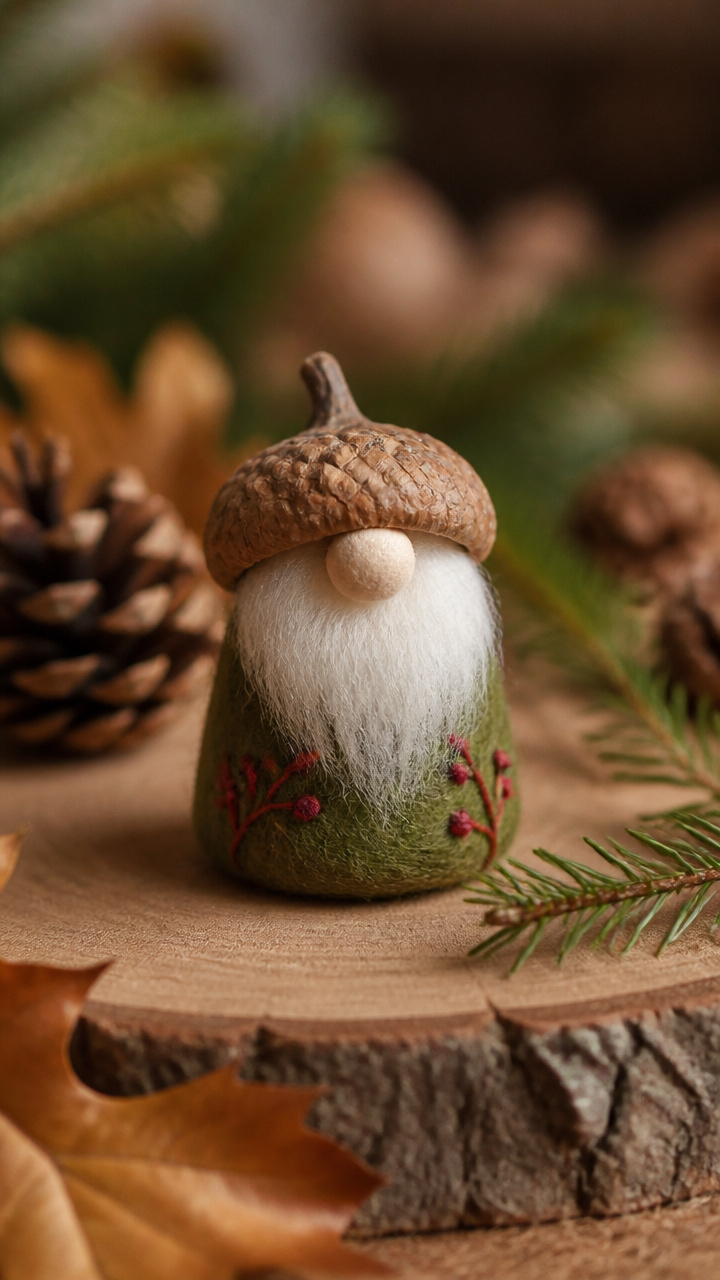
Soft green felt body and a real acorn cap hat make this tiny gnome perfect for nestling in a wreath or centerpiece. It’s quick to stitch and full of woodland charm.
Materials Needed
- 6-inch green felt sheet
- 1 real acorn cap
- White faux fur strip, 2×6 inches
- Red embroidery floss, 1 yard
- Embroidery needle
- Polyester stuffing, 1/4 cup
- Fabric glue
- Scissors
How to Make It
- Cut the green felt into a 3-inch tall cone shape with a 1-inch base. Sew the seam using red embroidery floss with a backstitch.
- Glue the acorn cap to the tip of the cone. Let dry for 10 minutes.
- Roll the faux fur strip into a small ball for the beard and glue it below the cap.
- Stuff the cone lightly with polyester stuffing and secure the open end with a whip stitch.
2. Twine-Wrapped Wood Slice Gnome
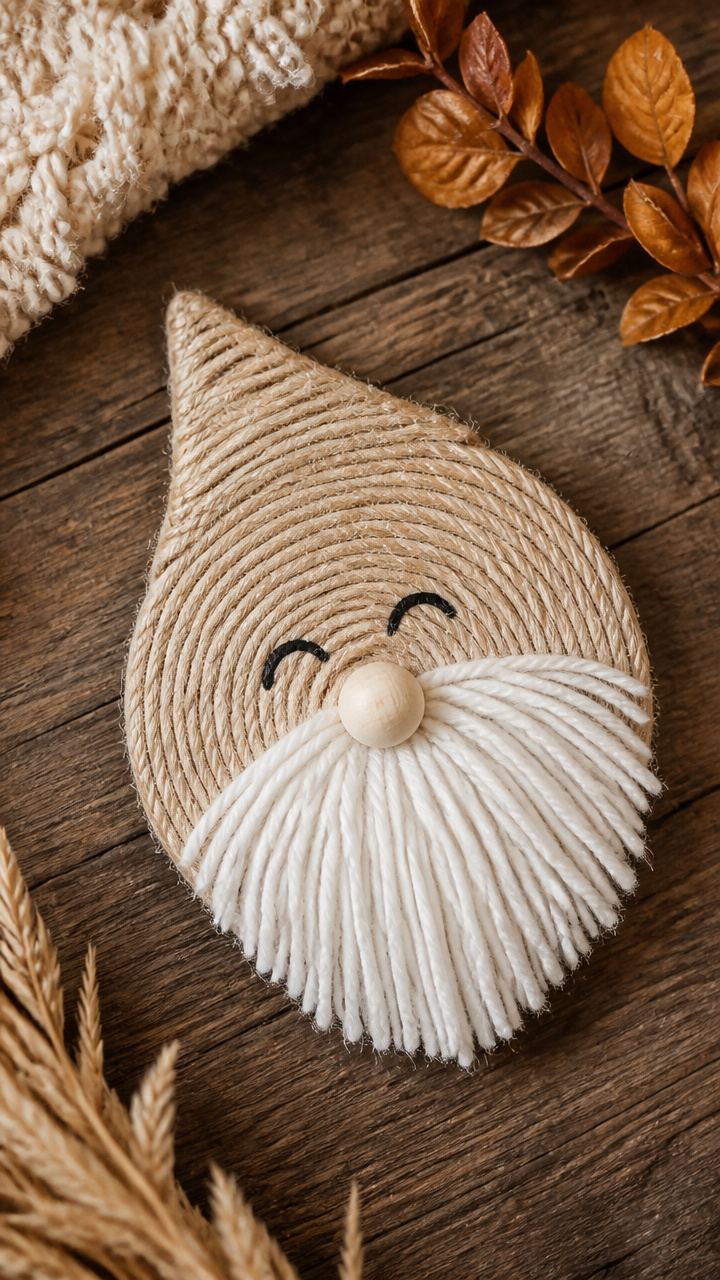
A rustic wood slice base wrapped in natural twine gives this gnome a sturdy, earthy look. It stands proudly on a shelf with a soft yarn beard and painted face.
Materials Needed
- 4-inch wood slice, 1/2 inch thick
- Natural jute twine, 10 yards
- Hot glue gun and glue sticks
- White yarn, 12 inches
- Black acrylic paint
- Small paintbrush
- Wooden bead, 1/2 inch diameter
How to Make It
- Glue the wooden bead to the center top of the wood slice to form the head.
- Wrap the twine tightly around the wood slice from the outer edge toward the center, gluing every few wraps to secure.
- Cut the white yarn into 6-inch strands, bundle 10 together, and tie in the middle to form a beard. Glue under the bead.
- Use the paintbrush to paint a simple face on the bead with two dots for eyes and a small curve for a smile.


3. Clay Pumpkin Hat Gnome
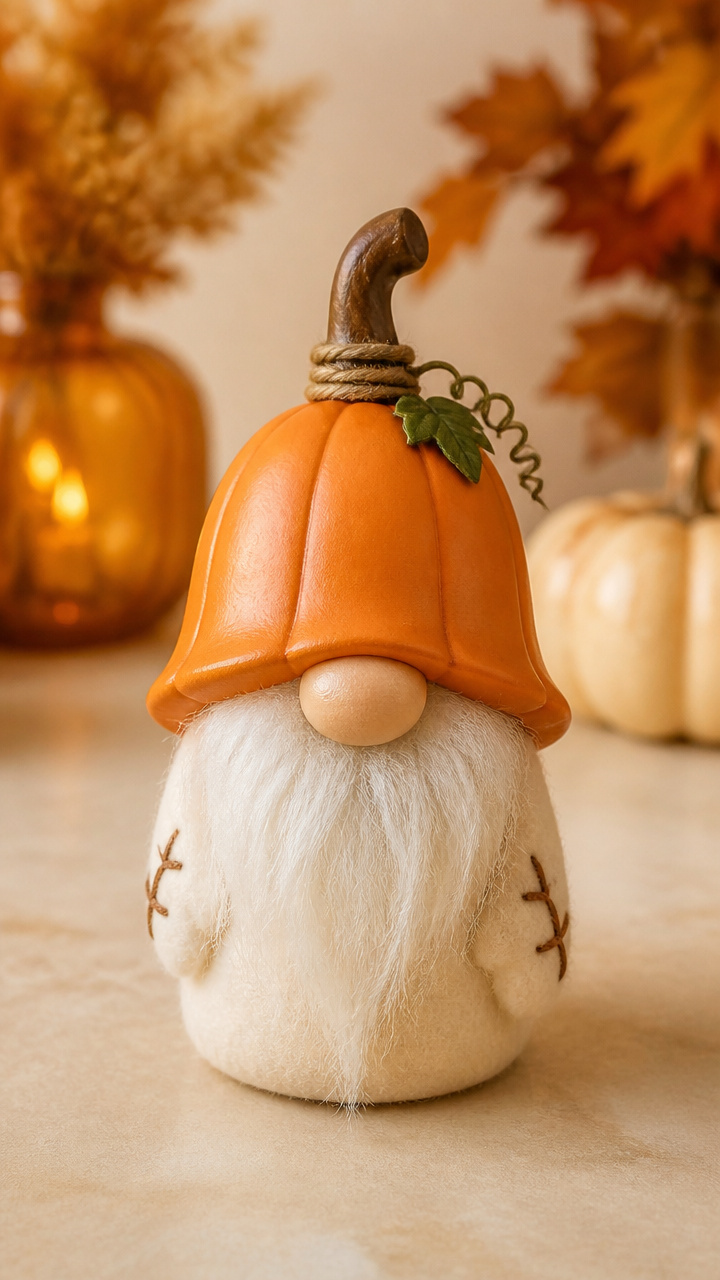
An air-dry clay pumpkin forms the hat, giving this gnome a festive fall twist. The smooth clay contrasts with a fluffy beard and felt body.
Materials Needed
- Orange air-dry clay, 2 ounces
- Green air-dry clay, 1/2 ounce
- White felt sheet, 4×4 inches
- Polyfill stuffing, 1/3 cup
- Brown embroidery thread
- Rolling pin
- Knife tool
- Toothpick
How to Make It
- Roll the orange clay into a ball and flatten slightly. Use the knife tool to press vertical lines for pumpkin ridges.
- Shape the green clay into a stem and attach to the top of the pumpkin. Let dry for 24 hours.
- Cut the white felt into a cone, sew the edge with brown thread, and stuff with polyfill.
- Glue the pumpkin to the top of the cone and attach a small polyfill puff under the chin for the beard.


4. Burlap Bearded Gnome with Button Nose
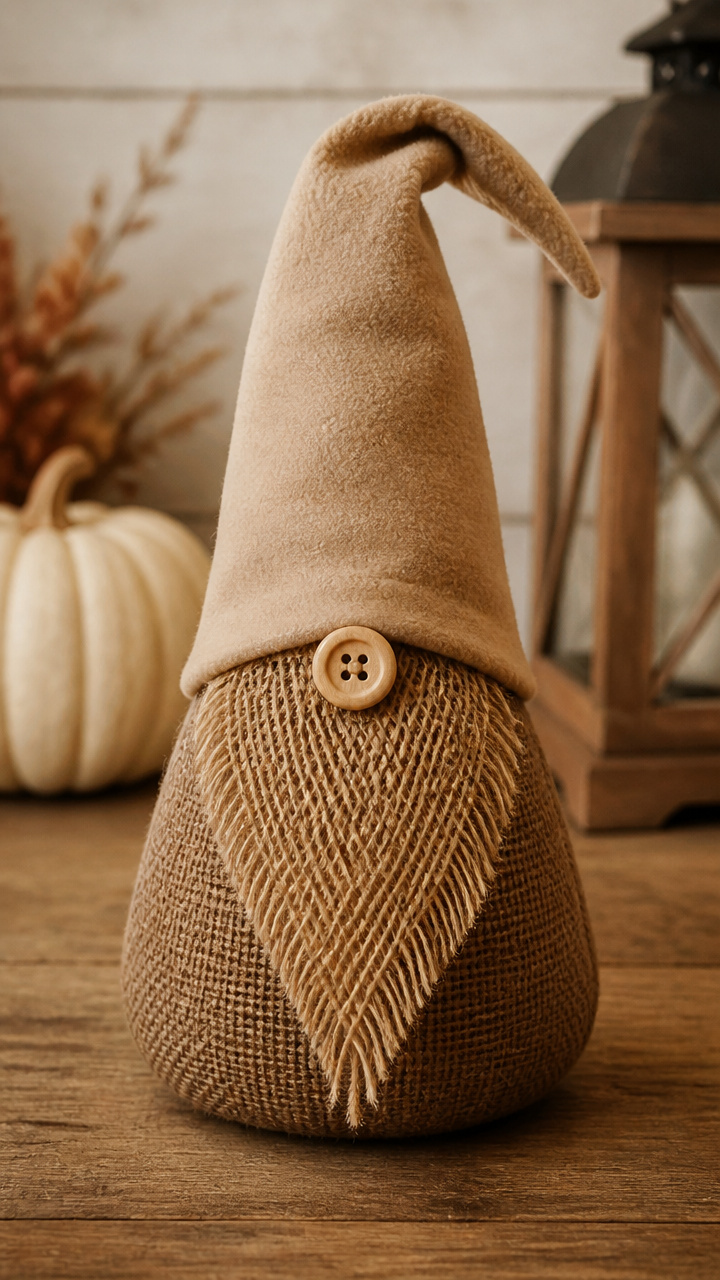
Rough burlap gives texture to the hat and body, softened by a round wooden button nose. This gnome feels like a hug from the harvest season.
Materials Needed
- Burlap fabric, 6×8 inch piece
- Wooden button, 3/4 inch
- Tan fleece scrap, 3×3 inches
- Hot glue gun
- Polyester stuffing, 1/2 cup
- Black marker
- Scissors
- Needle and thread
How to Make It
- Cut the burlap into a cone 5 inches tall with a 2-inch base. Sew the seam with a running stitch.
- Stuff the cone lightly and glue the wooden button 1 inch from the tip.
- Draw two small eyes above the button with the black marker.
- Cut the fleece into a rectangle, fringe the long edges, and roll into a beard. Glue under the button.


5. Pinecone Body Gnome
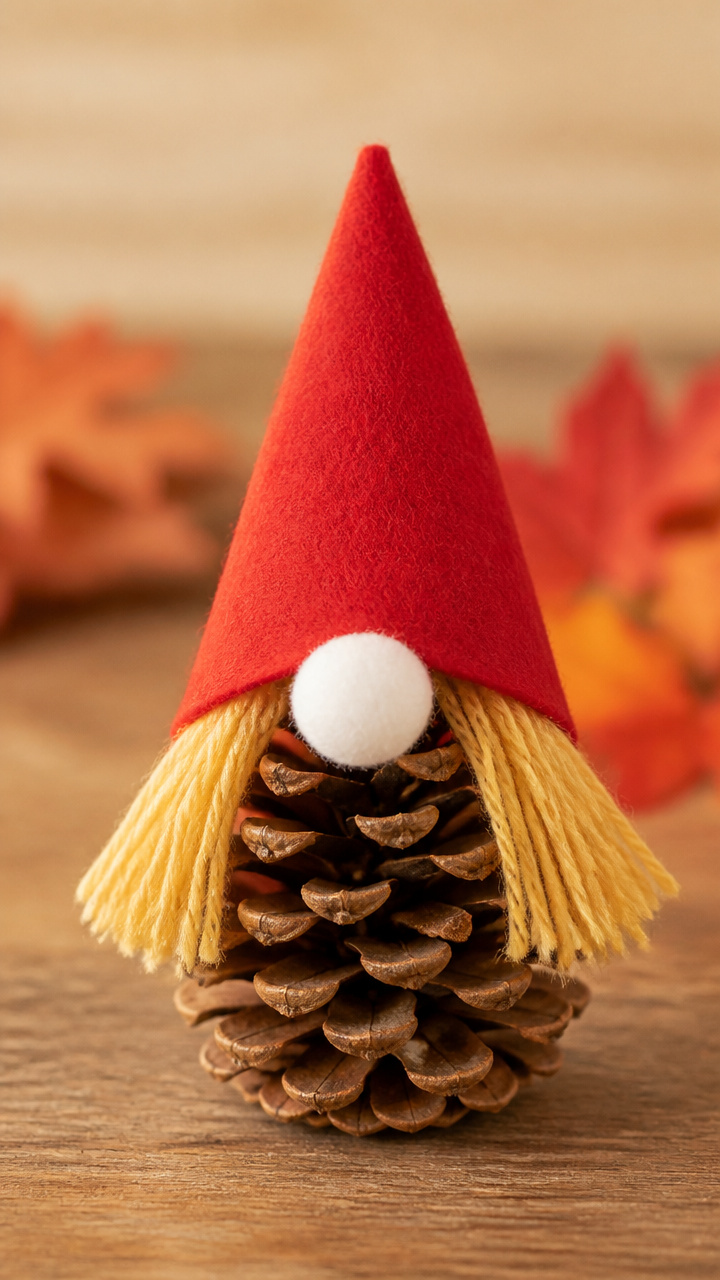
A natural pinecone becomes the body, with a felt hat and yarn hair. This gnome leans into forest textures and needs no glue for the base.
Materials Needed
- Medium pinecone, 4 inches tall
- Red felt sheet, 3×3 inches
- Yellow yarn, 8 inches
- White pom-pom, 1 inch
- Glue gun
- Scissors
- Craft knife
How to Make It
- Cut the red felt into a cone with a 1.5-inch base and 3-inch height. Glue the seam.
- Glue the white pom-pom to the tip of the cone for the hat puff.
- Cut 10 strands of yellow yarn, tie in the center, and attach to the top of the pinecone for hair.
- Slide the cone over the top of the pinecone and secure with a dab of glue if needed.


6. Mini Gnome in a Teacup
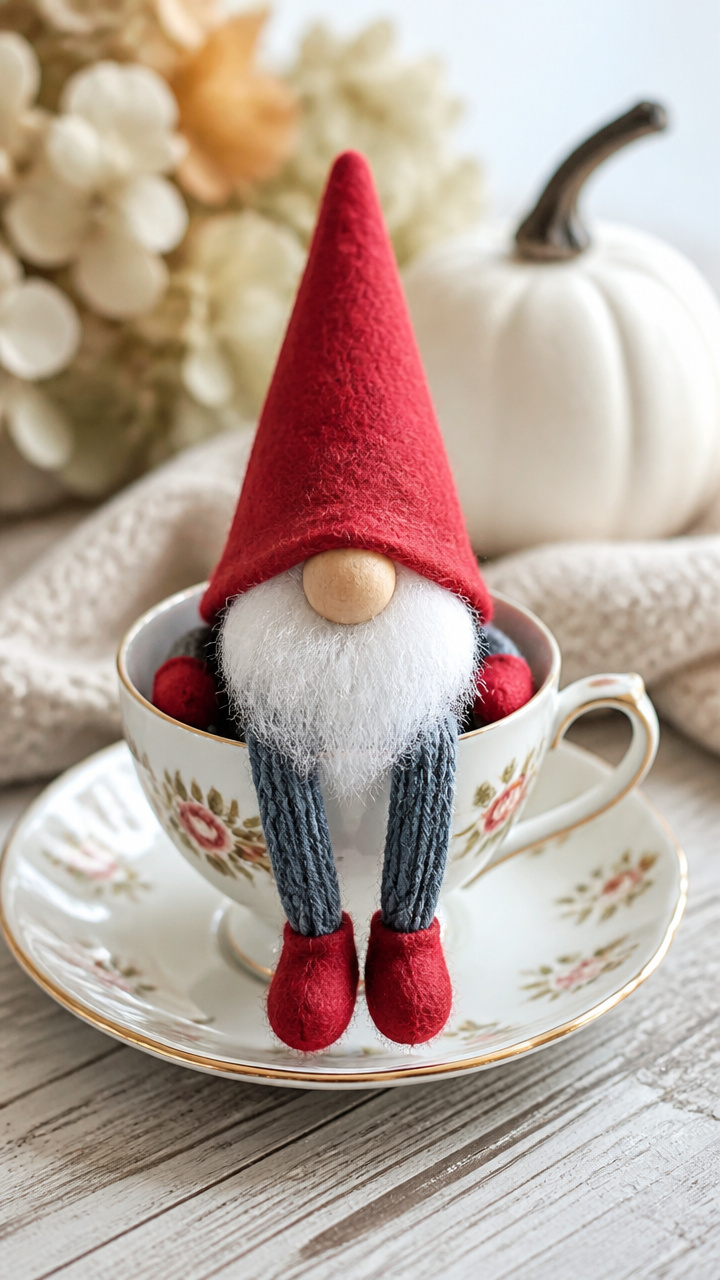
A tiny gnome sits inside a vintage-style teacup, his yarn legs peeking out. This one doubles as a sweet table accent or gift topper.
Materials Needed
- Small ceramic teacup
- Blue yarn, 6 inches
- Felt scraps: white, red
- Polyfill, 1/4 cup
- Hot glue gun
- Black marker
- Scissors
How to Make It
- Cut red felt into a 2-inch cone and glue the seam. Stuff lightly and set aside.
- Roll polyfill into a 1-inch ball for the head and glue to the top of the cone.
- Draw a simple face on the ball with the marker.
- Cut blue yarn into two 6-inch strands, fold in half, and glue the looped ends inside the cup to form legs.


7. Gnome with Maple Leaf Hat
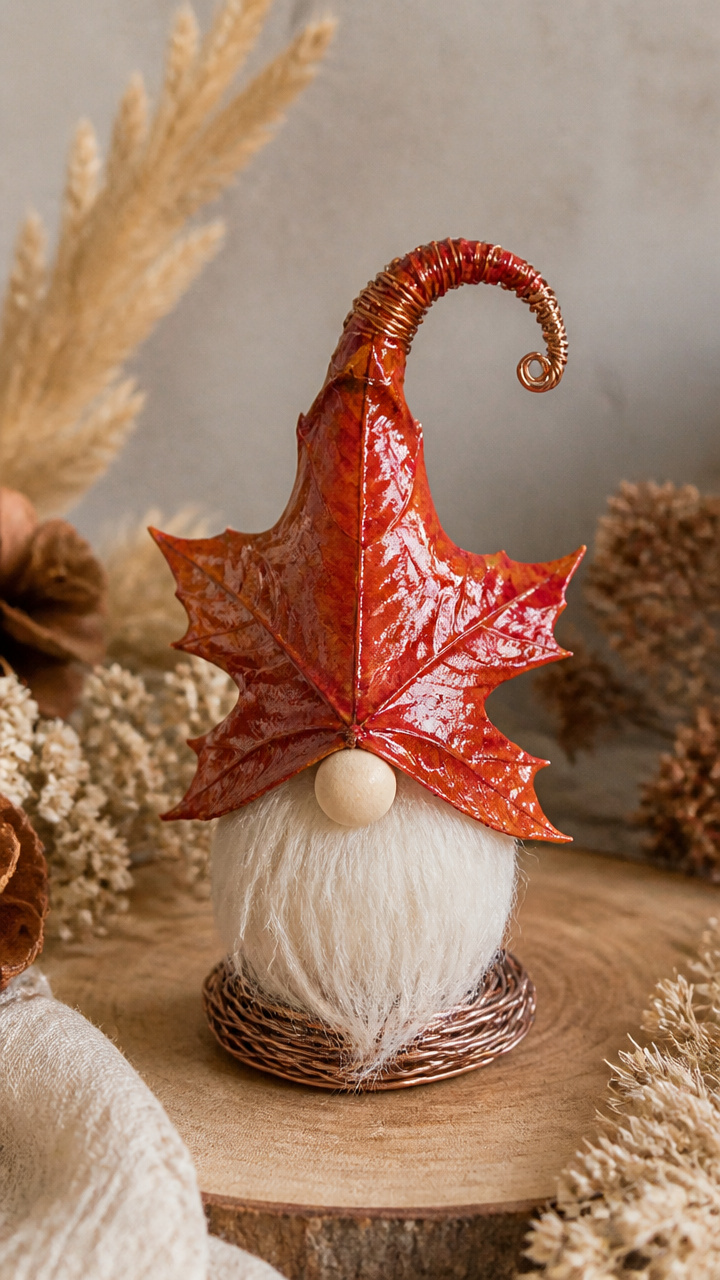
A pressed real maple leaf forms the hat, sealed and wired for shape. This delicate gnome celebrates fall’s fleeting beauty.
Materials Needed
- Pressed red maple leaf
- Clear craft resin, 1 ounce
- Copper wire, 6 inches, 20 gauge
- White cotton ball
- Glue brush
- Tweezers
- Small twig, 2 inches
How to Make It
- Brush both sides of the maple leaf with resin and let dry for 2 hours on wax paper.
- Bend the copper wire into a headband shape and glue it across the stem end of the leaf.
- Pull a small piece of cotton ball for the beard and glue to the front of the twig.
- Glue the twig to the underside of the leaf, behind the wire, so the beard faces forward.
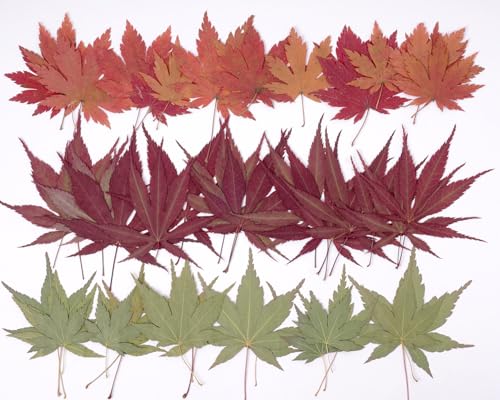


8. Knit Hat Gnome on a Stick
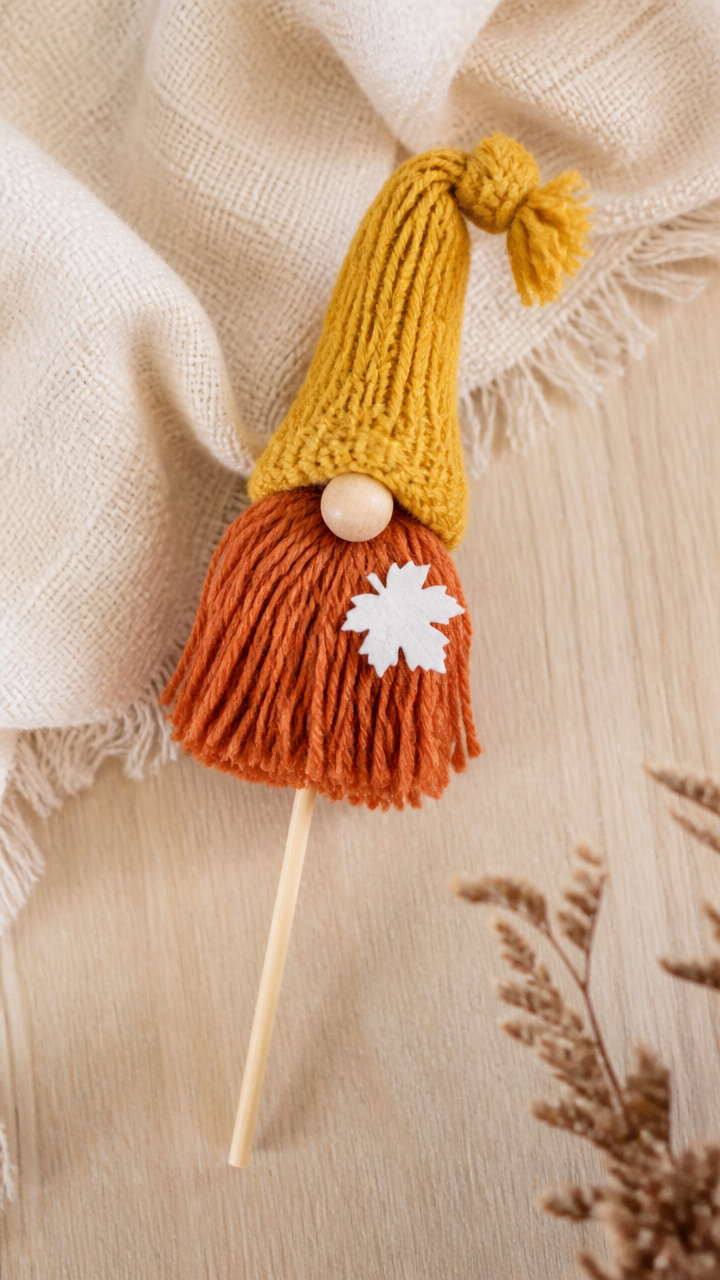
A tiny knit hat slips over a dowel, creating a standing gnome with a whimsical tilt. The yarn body hugs the stick snugly.
Materials Needed
- 1/4 inch wooden dowel, 6 inches long
- Knit hat, 2 inches tall, mustard yellow
- Orange yarn
- Hot glue
- Felt scrap, white
- Scissors
How to Make It
- Slide the knit hat over the top 2 inches of the dowel.
- Wrap orange yarn tightly around the dow 10 times just below the hat to form the beard.
- Cut the loops on one side and tie tightly in the middle with a separate strand.
- Glue a small white felt circle to the front of the beard for the face base and draw features with marker.

9. Gnome with Corn Husk Skirt
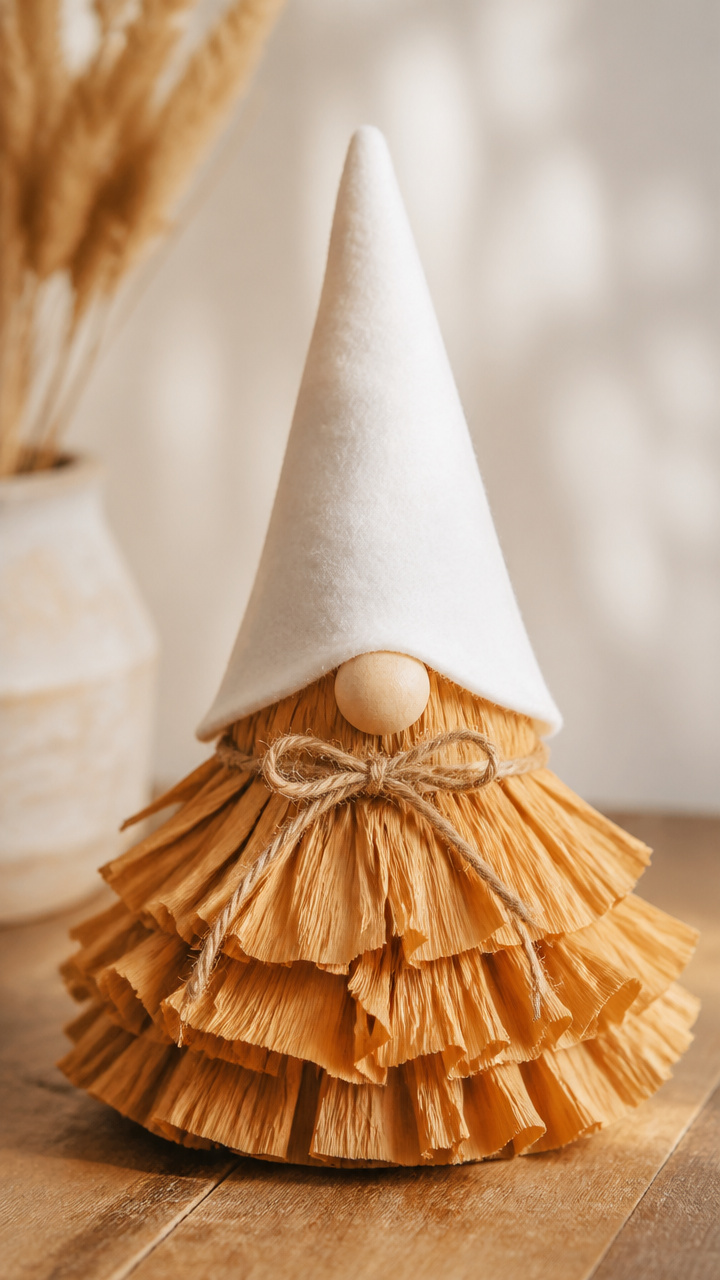
Dried corn husks form a ruffled skirt, dyed golden brown for autumn warmth. The hat is simple felt, letting the texture shine.
Materials Needed
- 2 dried corn husks
- Brown fabric dye, 1/4 cup mixed with 1 cup water
- White felt cone, 4 inches
- Polyfill, 1/3 cup
- Twine, 8 inches
- Bowl, tongs
- Scissors
How to Make It
- Soak the corn husks in the dye solution for 15 minutes using tongs. Lay flat to dry for 2 hours.
- Cut each husk into 1-inch wide strips. Curl them around a pencil for ruffles.
- Stack the strips and tie with twine at one end to form a skirt.
- Stuff the felt cone, attach the skirt just below the tip with glue, and let dry.


10. Cinnamon Stick Gnome
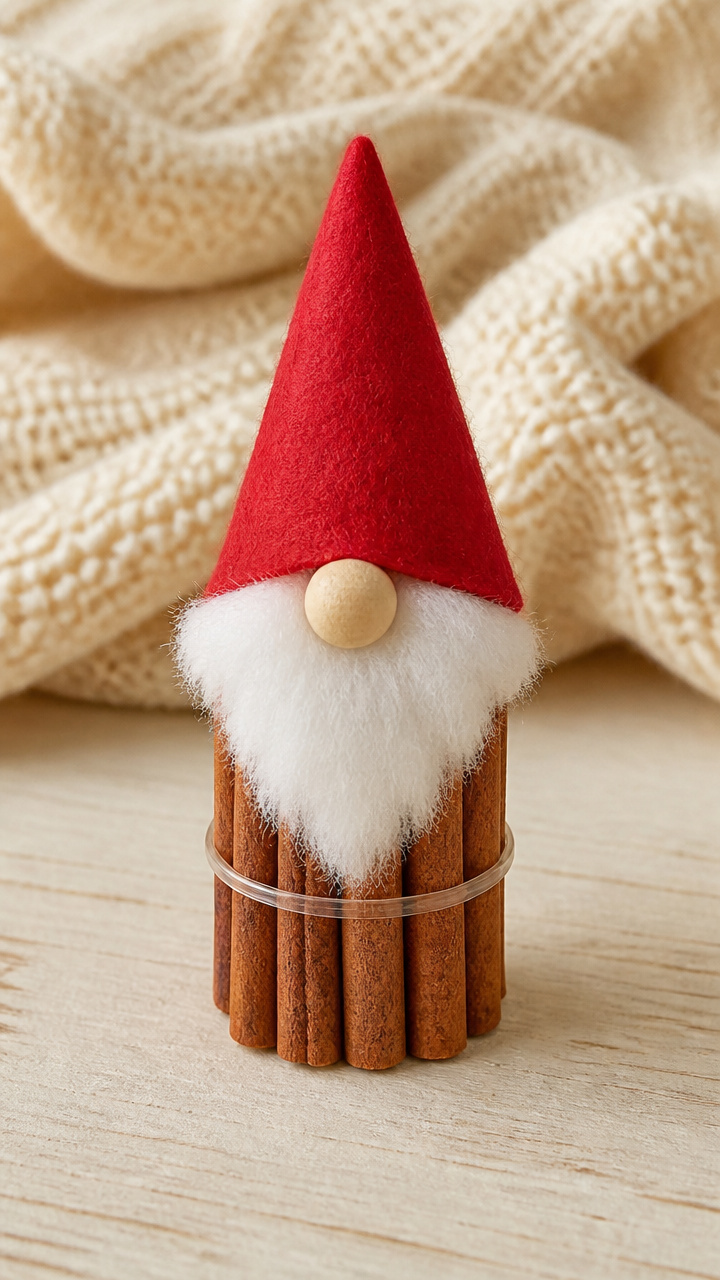
Real cinnamon sticks bundle together to form a spiced body that smells as good as it looks. A felt hat and cotton beard keep it cozy.
Materials Needed
- 8 cinnamon sticks, 3 inches long
- Red felt, 3×3 inch square
- Cotton ball
- Hot glue gun
- Clear elastic band, 1 inch
- Scissors
How to Make It
- Arrange the cinnamon sticks in a bundle and secure the middle with the elastic band.
- Cut the red felt into a cone, glue the seam, and place over the top of the bundle.
- Pull apart a cotton ball to make a small beard and glue under the felt edge.
- Glue the top of the bundle to the inside of the hat base to secure.


11. Mini Gnome in a Walnut Shell
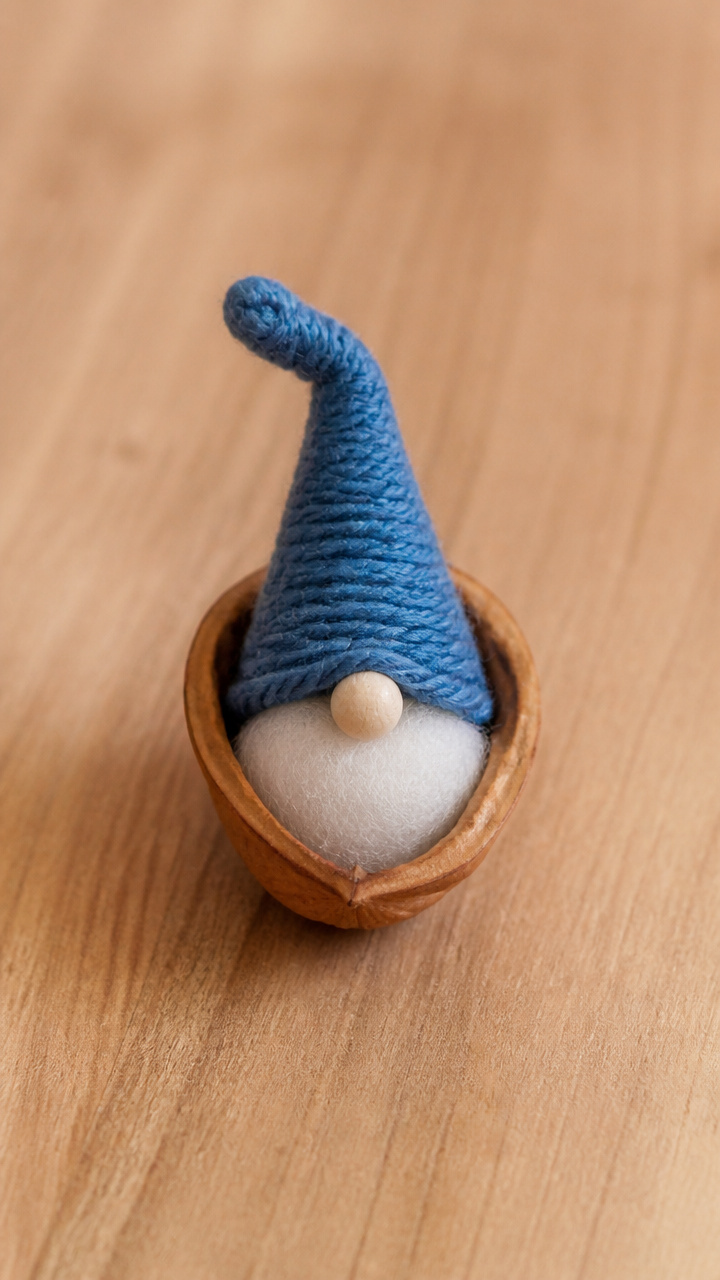
A halved walnut shell cradles a tiny gnome with a yarn hat and felt face. This one fits in the palm of your hand.
Materials Needed
- Walnut shell, halved and cleaned
- Blue yarn, 4 inches
- White felt, 2×2 inches
- Polyfill, 1 tablespoon
- Glue
- Black pen
- Scissors
How to Make It
- Cut a 1-inch circle from white felt and draw a face with the pen.
- Roll a small piece of polyfill into a head and glue the felt circle to the front.
- Cut a 2-inch yarn strand, fold in half, and tie a knot at the loop end to make a hat.
- Glue the head to the back of the shell and place the yarn hat over it.

12. Gnome with Sweater Texture Hat
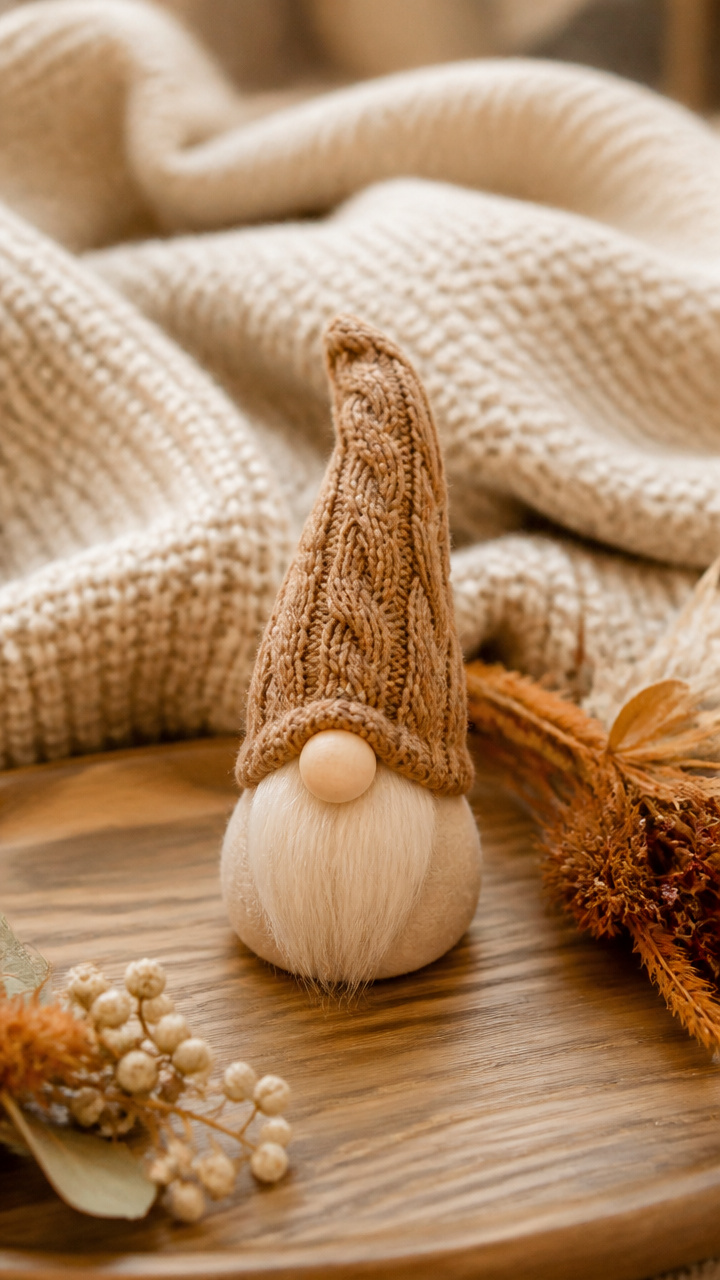
A scrap of cable-knit sweater forms the hat, giving instant cozy energy. The body is simple felt, letting the fabric speak.
Materials Needed
- Cable-knit sweater scrap, 3×3 inches
- Felt, beige, 4×4 inches
- Polyfill, 1/3 cup
- Fabric scissors
- Needle and thread
- Hot glue
How to Make It
- Cut the sweater into a cone shape 3.5 inches tall with a 1.5 inch base. Sew the seam with matching thread.
- Cut the felt into a matching cone, stuff, and sew shut.
- Slip the sweater hat over the felt cone and adjust to fit snugly.
- Glue a small puff of white yarn under the hat edge for the beard.


13. Gnome with Mini Hay Bale Base
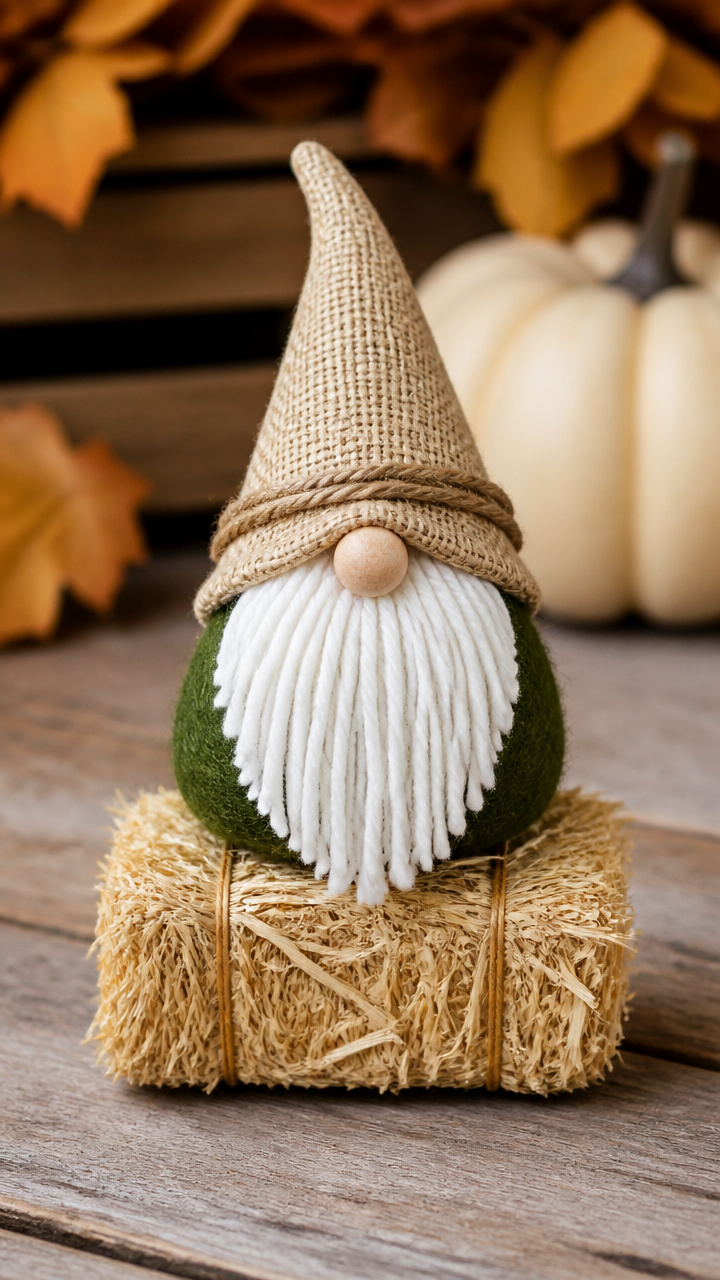
A tiny hay bale supports the gnome, adding farm-fresh charm. The body is felt, and the hat is secured with twine.
Materials Needed
- Mini hay bale, 2 inches long
- Felt, green, 4×4 inches
- White yarn
- Twine, 6 inches
- Glue gun
- Polyfill, 1/4 cup
- Scissors
How to Make It
- Cut the green felt into a cone, sew the edge, and stuff with polyfill.
- Wrap twine around the base of the cone 3 times and tie in front to look like a belt.
- Cut 8 strands of white yarn, tie in the center, and glue under the cone tip for the beard.
- Glue the bottom of the cone to the top center of the hay bale.


14. Gnome with Leather Hat
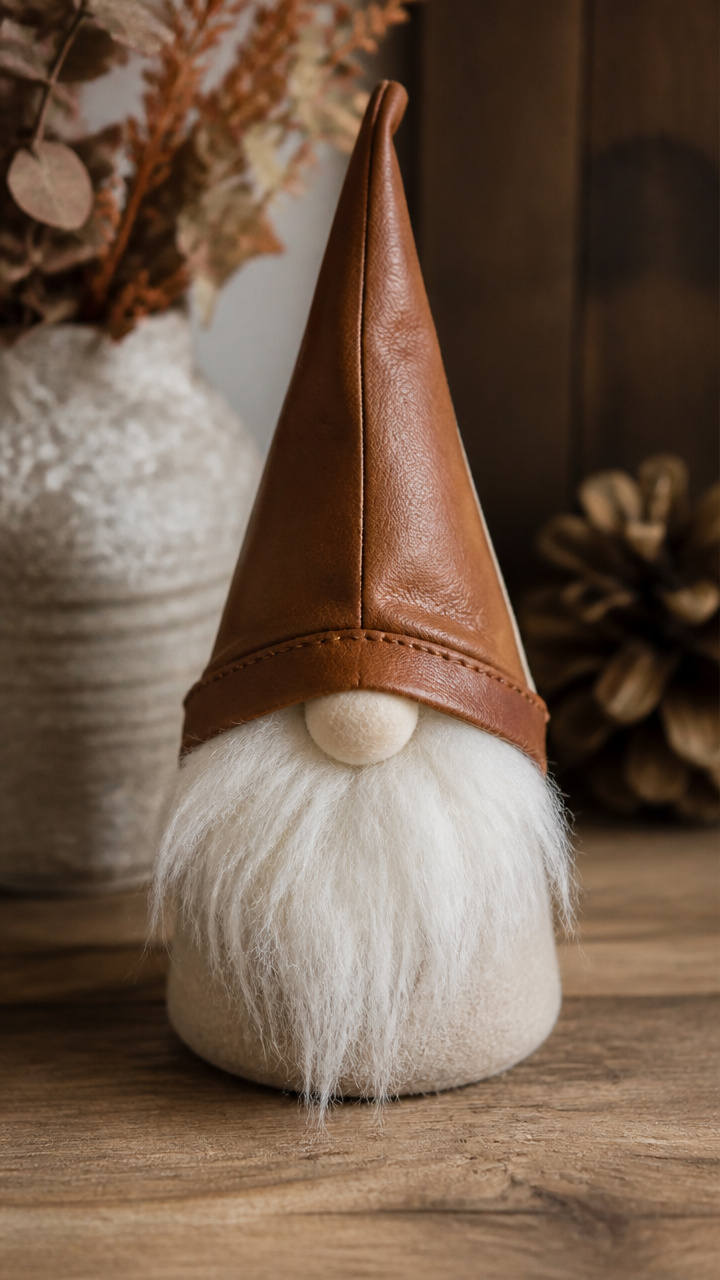
A small piece of brown leather forms a sleek, structured hat. Paired with a wool beard, it has a modern rustic feel.
Materials Needed
- Brown leather scrap, 3×3 inches
- Wool roving, white, 1/2 ounce
- Felt, tan, 4×4 inches
- Needle punch tool
- Polyfill, 1/3 cup
- Craft glue
- Scissors
How to Make It
- Cut the leather into a cone with a 2-inch base and 3-inch height. Glue the seam with craft glue.
- Cut the felt into a matching cone, sew, and stuff with polyfill.
- Place the leather hat over the felt cone and glue the base to secure.
- Use the needle punch tool to felt the wool into a small beard shape and glue under the hat.


15. Gnome with Flannel Shirt Body
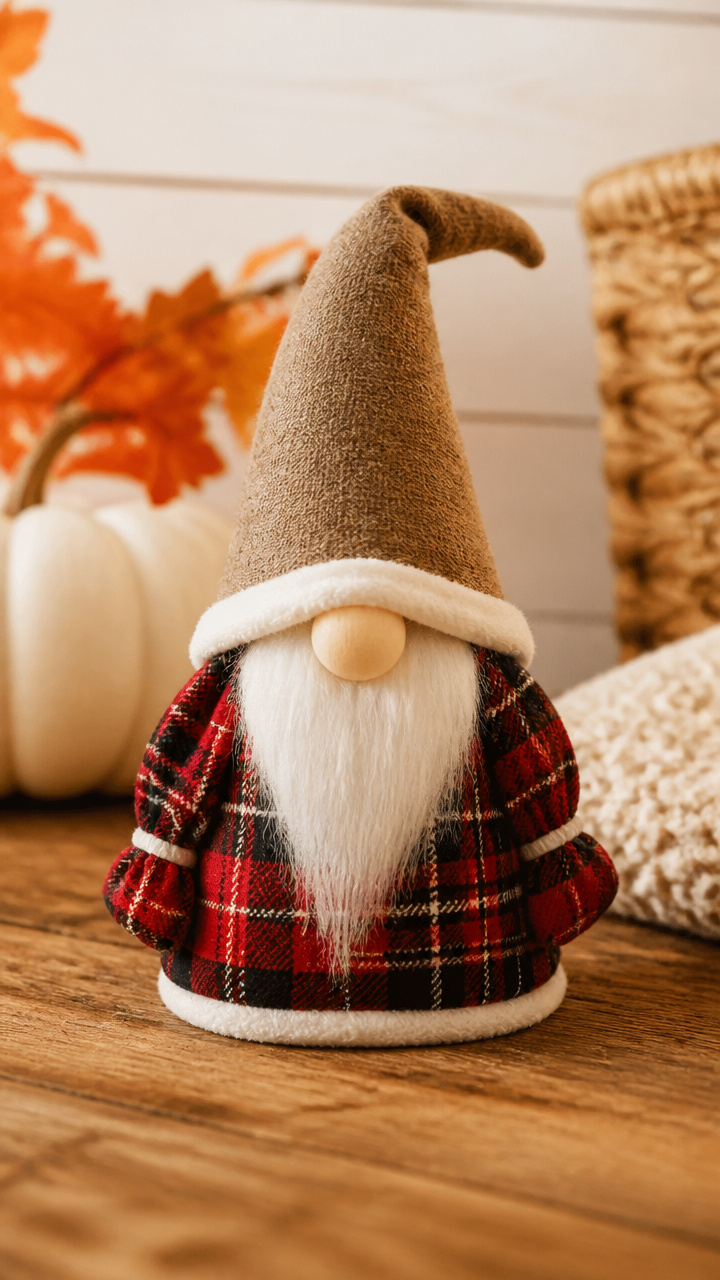
A scrap of red plaid flannel wraps around stuffing to form a shirt body. The gnome looks ready for a fall hike.
Materials Needed
- Red plaid flannel scrap, 5×5 inches
- Polyfill, 1/2 cup
- Felt, white, 2×2 inches
- Elastic thread
- Needle
- Scissors
- Glue
How to Make It
- Place polyfill in the center of the flannel square and gather the edges with elastic thread, tying tightly to form a body.
- Cut a small circle from white felt and glue to the top for the face.
- Draw eyes and a smile with a black marker.
- Cut a 3-inch felt cone, glue to the top for the hat, and add a yarn puff to the tip.


16. Gnome with Cork Base
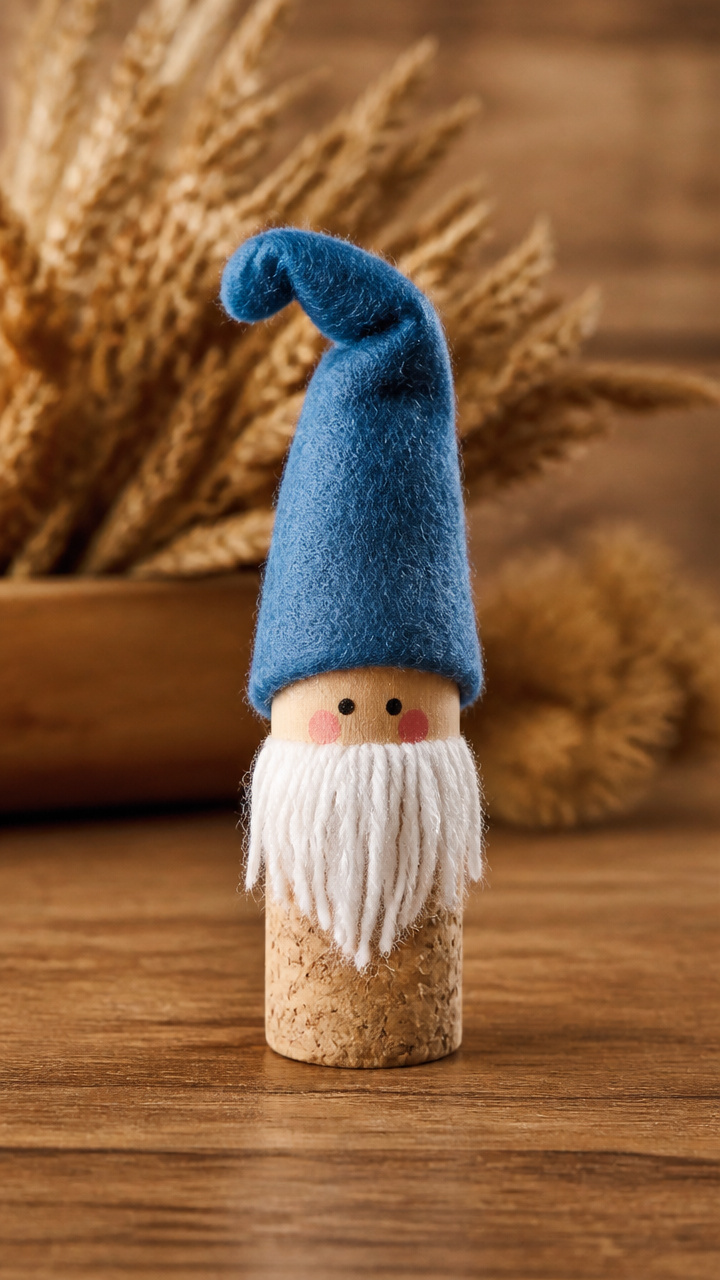
A wine cork stands upright as the body, painted with a rosy face. A felt hat and yarn beard add soft contrast.
Materials Needed
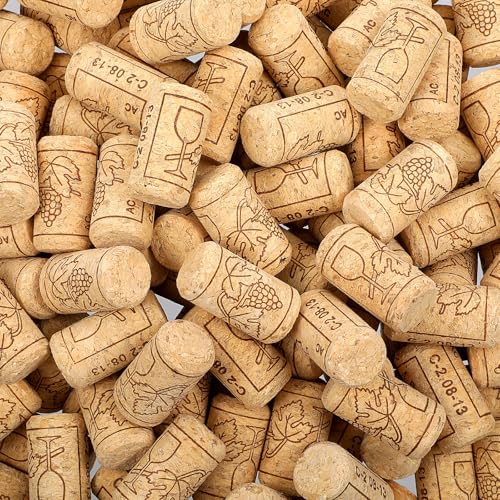
- Wine cork
- Red acrylic paint
- Small brush
- Felt, blue, 2×2 inches
- Yarn, white, 6 inches
- Glue
- Scissors
How to Make It
- Paint the top edge of the cork red for rosy cheeks and let dry for 15 minutes.
- Draw two eyes and a small smile on the cork just below the painted edge.
- Cut a cone from blue felt, glue the seam, and place on top of the cork.
- Cut white yarn into 10 strands, tie in the center, and glue under the hat for the beard.


17. Gnome with Felt Leaf Accents
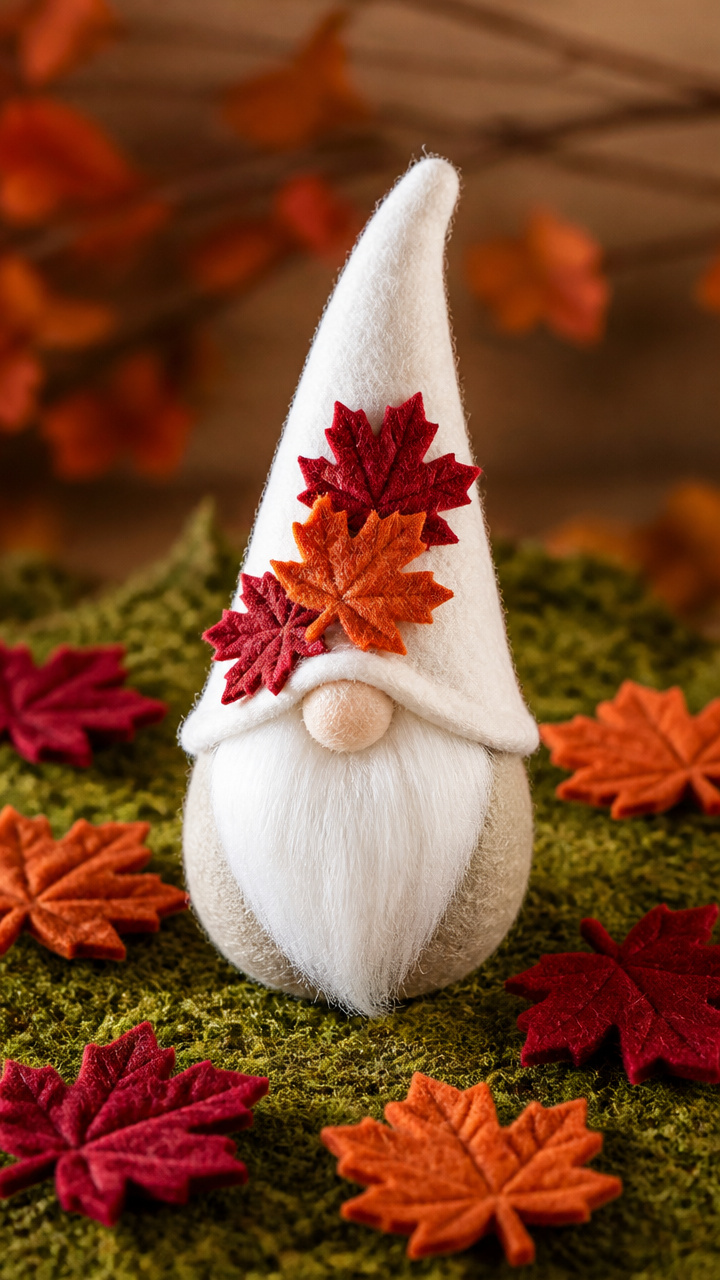
Tiny felt maple leaves in red and orange dot the hat and beard. This gnome bursts with fall color in soft fabric.
Materials Needed
- Felt: red, orange, green, 2×2 inches each
- Felt cone, white, 4 inches
- Polyfill, 1/3 cup
- Fabric glue
- Scissors
- Leaf template (draw freehand)
How to Make It
- Cut 3 small maple leaves from each color felt using a hand-drawn template.
- Glue red and orange leaves around the base of the white felt hat.
- Stuff the cone and secure the open end.
- Glue green leaves into a cluster at the beard base for a vine effect.


18. Gnome with Pom-Pom Hat
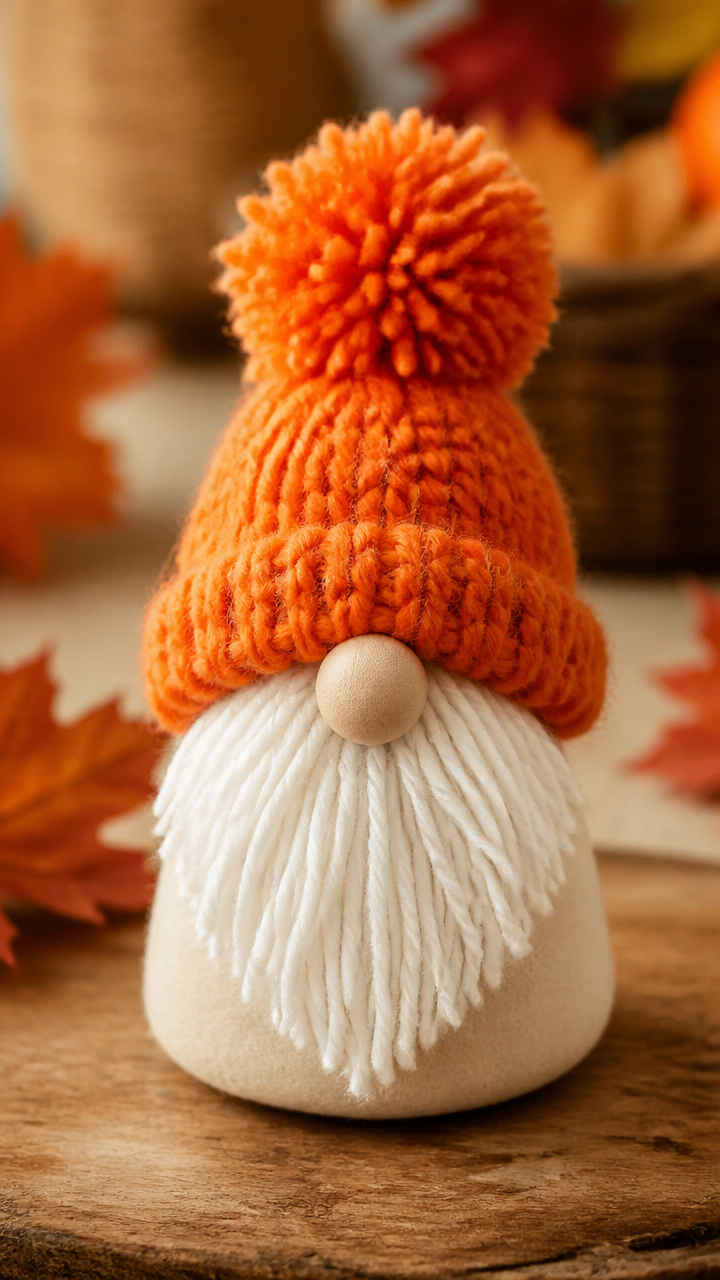
A large orange pom-pom becomes the entire hat, sitting snugly on a felt body. The look is playful and full of bounce.
Materials Needed
- Orange pom-pom, 1.5 inches
- Felt, cream, 4×4 inches
- Polyfill, 1/3 cup
- Yarn, white, 6 inches
- Needle and thread
- Scissors
How to Make It
- Cut the cream felt into a cone, sew the edge with a backstitch, and stuff lightly.
- Thread the needle and stitch through the center of the pom-pom, then attach it firmly to the cone tip.
- Cut 8 strands of white yarn, tie in the center, and glue under the pom-pom for the beard.
- Let the glue dry for 10 minutes before handling.


19. Gnome with Mini Scarf
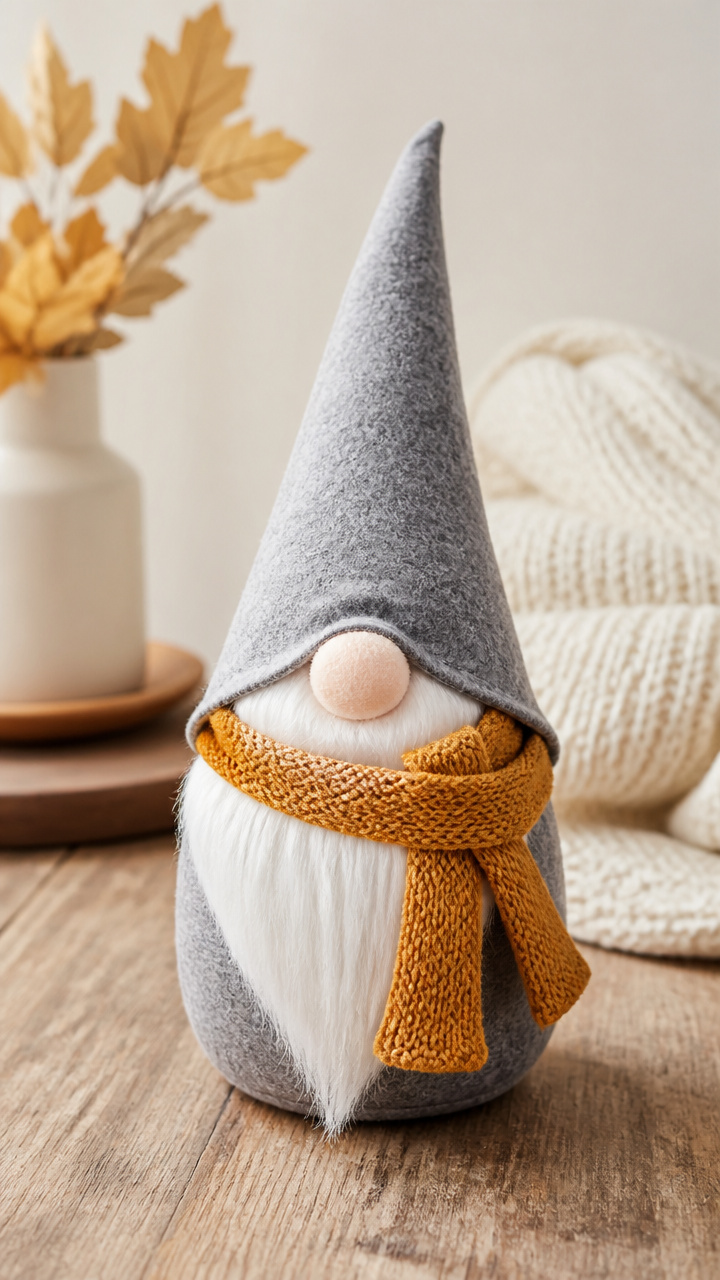
A hand-knitted scarf in mustard yellow wraps around the neck. This gnome feels like a breath of crisp air.
Materials Needed
- Felt cone, 4 inches, gray
- Polyfill, 1/3 cup
- Mustard yellow yarn, 8 inches
- Knitting needle, size 6
- Tapestry needle
- Scissors
How to Make It
- Knit 6 rows of garter stitch on two stitches to make a 2-inch scarf.
- Bind off and weave in ends with the tapestry needle.
- Stuff the gray felt cone and close the base with a whip stitch.
- Loop the scarf around the base of the hat and glue the ends together at the back.


20. Gnome with Twig Arms
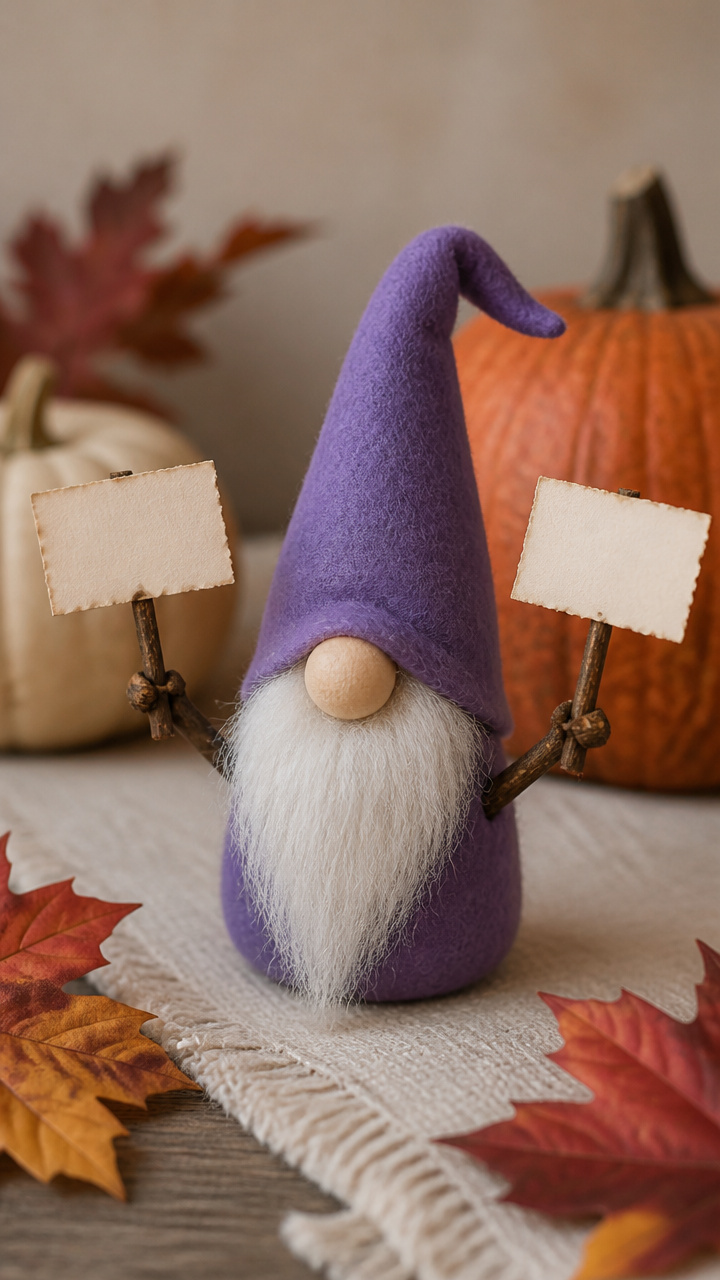
Two tiny twigs become outstretched arms, each holding a miniature sign. This gnome waves a quiet hello.
Materials Needed
- Felt cone, 5 inches, purple
- Polyfill, 1/2 cup
- Twigs, 2 inches long, 2 pieces
- Mini paper flag, 1×2 inches
- Glue gun
- Scissors
- Toothpick
How to Make It
- Stuff the purple felt cone and sew the base closed.
- Glue one twig to each side of the cone just below the tip, angling outward.
- Write 'Hello' on the paper flag with a marker and fold in half.
- Slide the toothpick through the fold and glue it into one twig hand.

Each of these gnomes brings a little magic to your fall days. Pick one that speaks to you and let your hands do the rest.