20 Dollar Tree Fall Wreaths You Can Make for Under $20

Fall brings a quiet shift in the air, and your home can reflect that change with handmade warmth. A wreath on the door welcomes guests with color, texture, and the season’s spirit without needing a big budget.
Every item here uses materials you can find at Dollar Tree, with clear steps so you can create something beautiful even if you’re new to crafting. These aren’t just decorations, they’re little acts of care you make with your own hands.
1. Rustic Burlap Ribbon Wreath
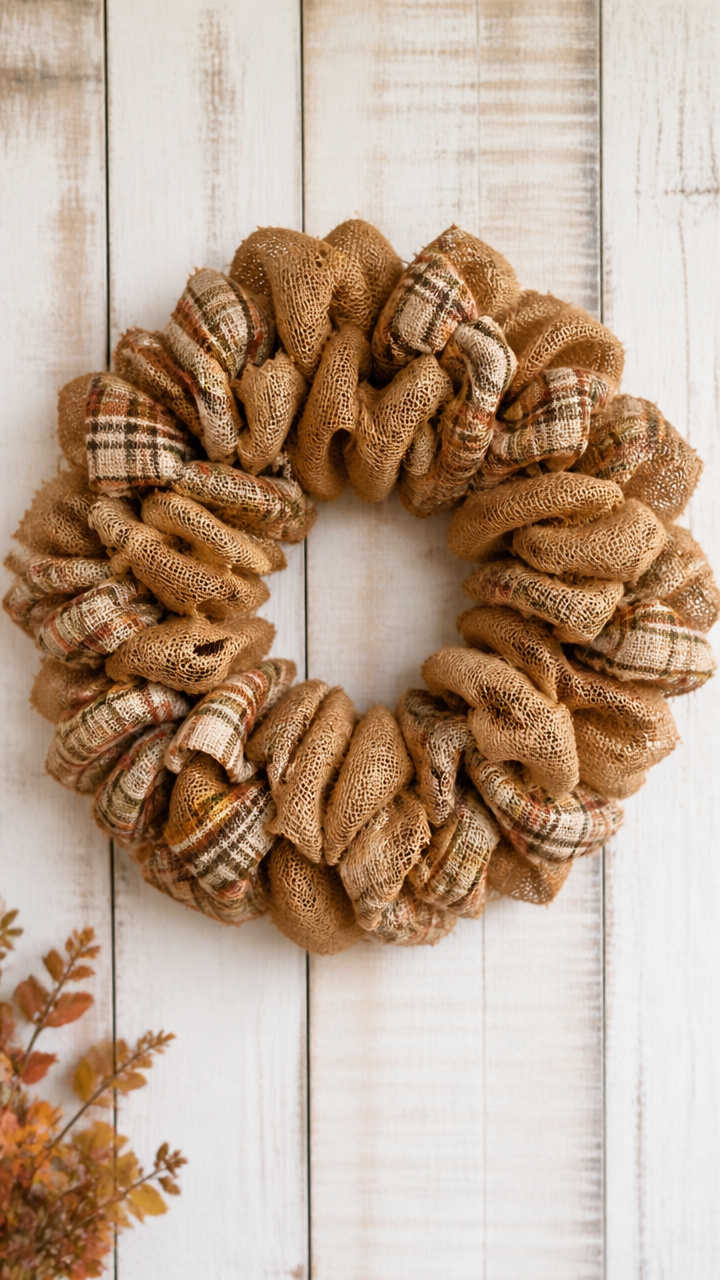
Soft folds of burlap give this wreath a homespun charm perfect for front doors or mantels. The layered ribbons catch light gently and last through the season.
Materials Needed
- 18-inch foam wreath form
- 3 rolls solid brown burlap ribbon, 3 inches wide
- 1 roll plaid burlap ribbon, 2.5 inches wide
- Scissors
- Hot glue gun
- Glue sticks
How to Make It
- Cut the solid burlap ribbon into 12-inch strips. You will need 30 strips.
- Fold each strip in half and use hot glue to attach the folded edge to the foam form. Place them close together all around the ring.
- Cut the plaid ribbon into 10-inch pieces. Layer these between the solid burlap folds, gluing every other section for contrast.
- Trim any uneven ends with scissors to create a full, rounded finish.


2. Mini Pinecone Cluster Wreath
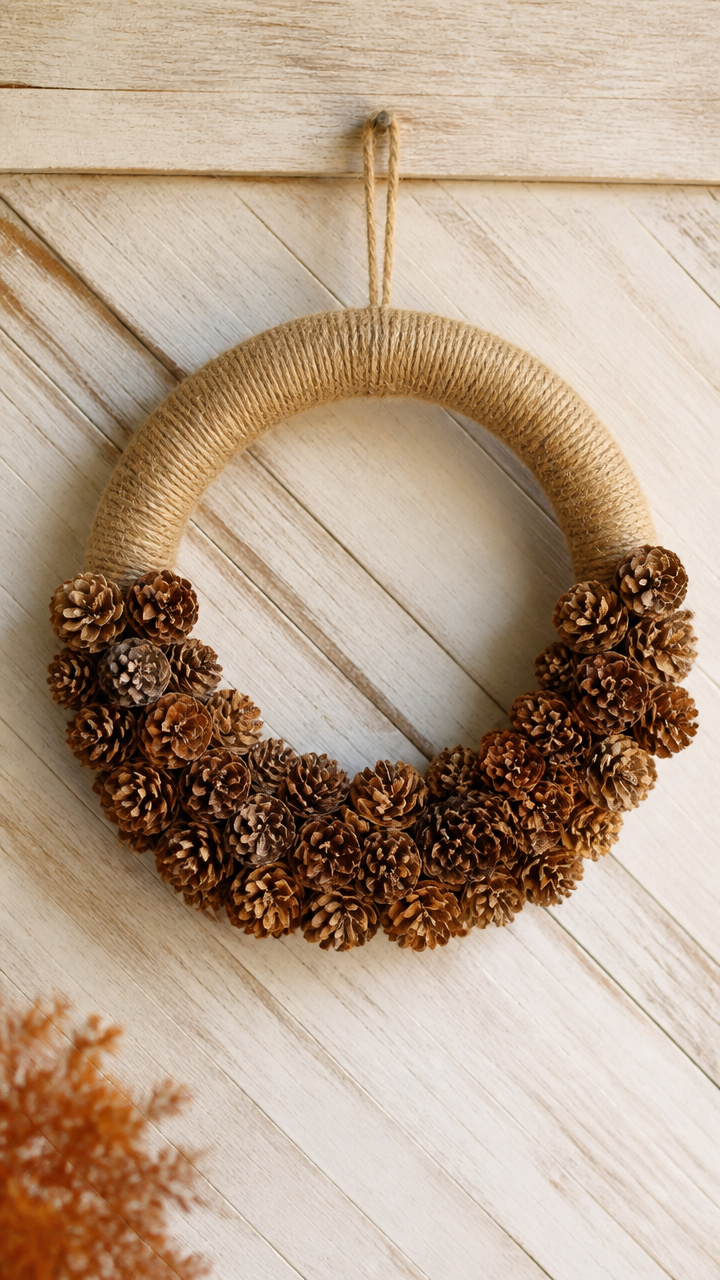
Tiny pinecones pack tightly into a dense, earthy circle that smells faintly woodsy and looks rich on white walls or glass doors.
Materials Needed
- 12-inch wire wreath frame
- 1 bag small pinecones
- Hot glue gun
- Glue sticks
- Scissors
- 1 roll jute twine
How to Make It
- Lay the pinecones on a flat surface and sort out any broken ones. Keep only whole, firm cones.
- Apply hot glue to the base of each pinecone and press it onto the wire frame. Overlap them slightly as you go around.
- Fill in gaps with smaller cones or cut pieces. Work in one direction until the entire ring is covered.
- Tie a loop of jute twine to the top for hanging, securing it with extra glue.


3. Felt Leaf Fan Wreath
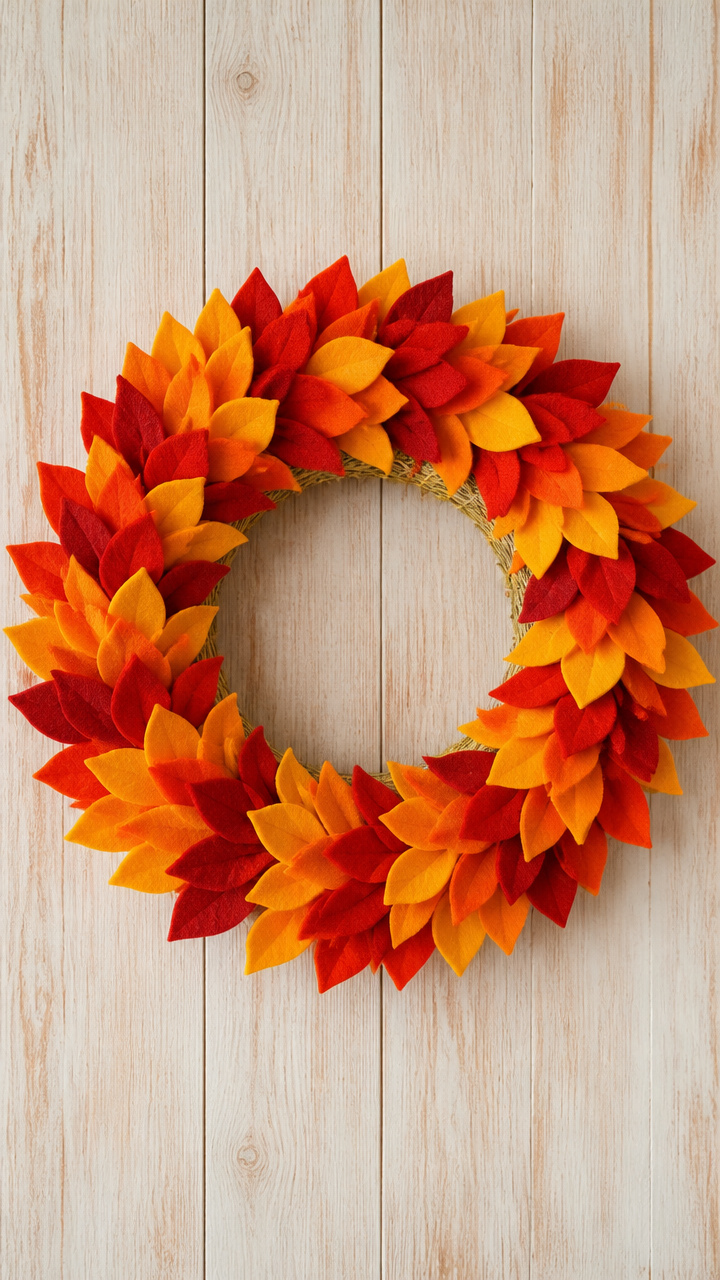
Bright felt leaves fan outward like an autumn explosion, adding bold color that won't fade in sunlight.
Materials Needed
- 14-inch straw wreath base
- 6 sheets orange felt
- 4 sheets yellow felt
- 2 sheets red felt
- Scissors
- Hot glue gun
- Glue sticks
- Leaf template (hand-drawn, 3 inches tall)
How to Make It
- Trace the leaf template onto the felt and cut out 40 leaves total—mix colors as you go.
- Pinch the bottom center of each leaf to create a fold. Glue the folded end to the straw base.
- Start at the bottom of the wreath and work upward, layering leaves so each row covers the stems of the one below.
- Let dry completely before handling. Trim stray threads with scissors.


4. Chalkboard Pumpkin Wreath
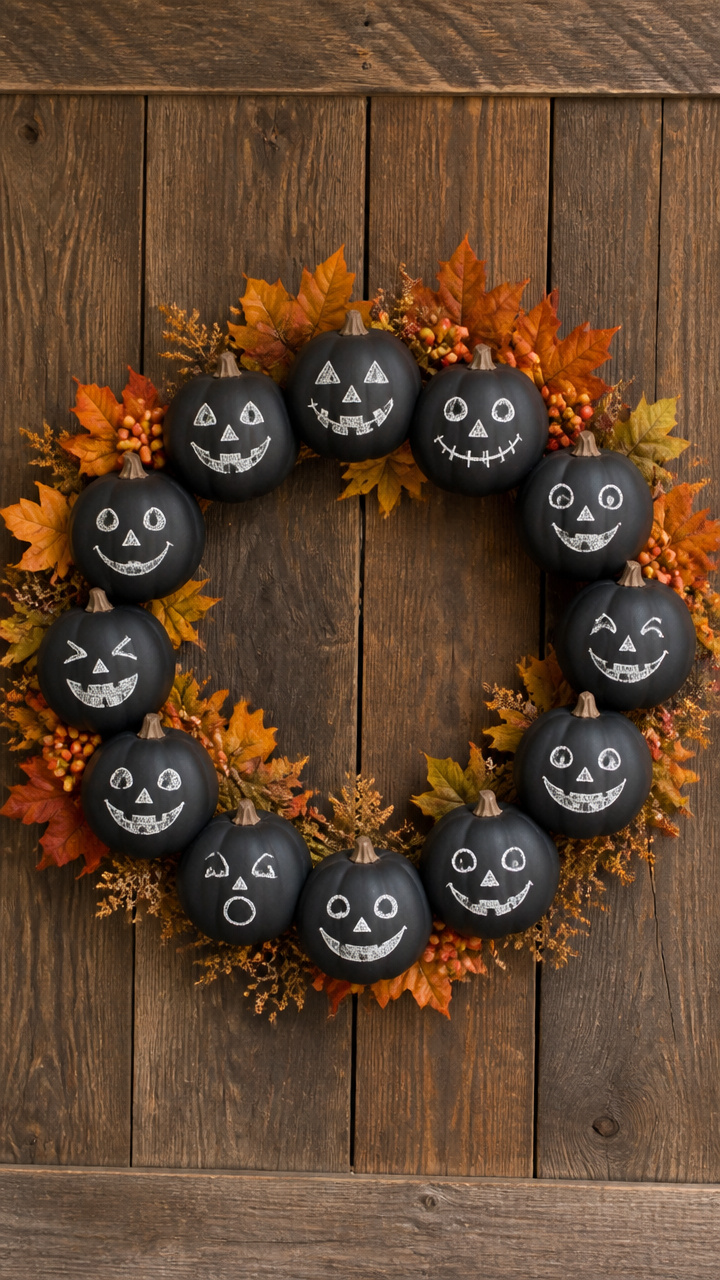
Black pumpkins with hand-drawn faces bring playful charm and a chance to update messages weekly.
Materials Needed
- 18-inch foam wreath form
- 12 plastic mini pumpkins
- Black chalk paint
- Foam brush
- Chalk marker, white
- Hot glue gun
- Glue sticks
- Ribbon, black, 1 inch wide
How to Make It
- Paint each pumpkin with black chalk paint using the foam brush. Let dry 30 minutes.
- Use the white chalk marker to draw simple faces or write words like 'hello' or 'fall'.
- Glue each painted pumpkin to the foam form, spacing them evenly in two concentric circles.
- Attach a ribbon bow to the top with hot glue for hanging.


5. Map Paper Scroll Wreath
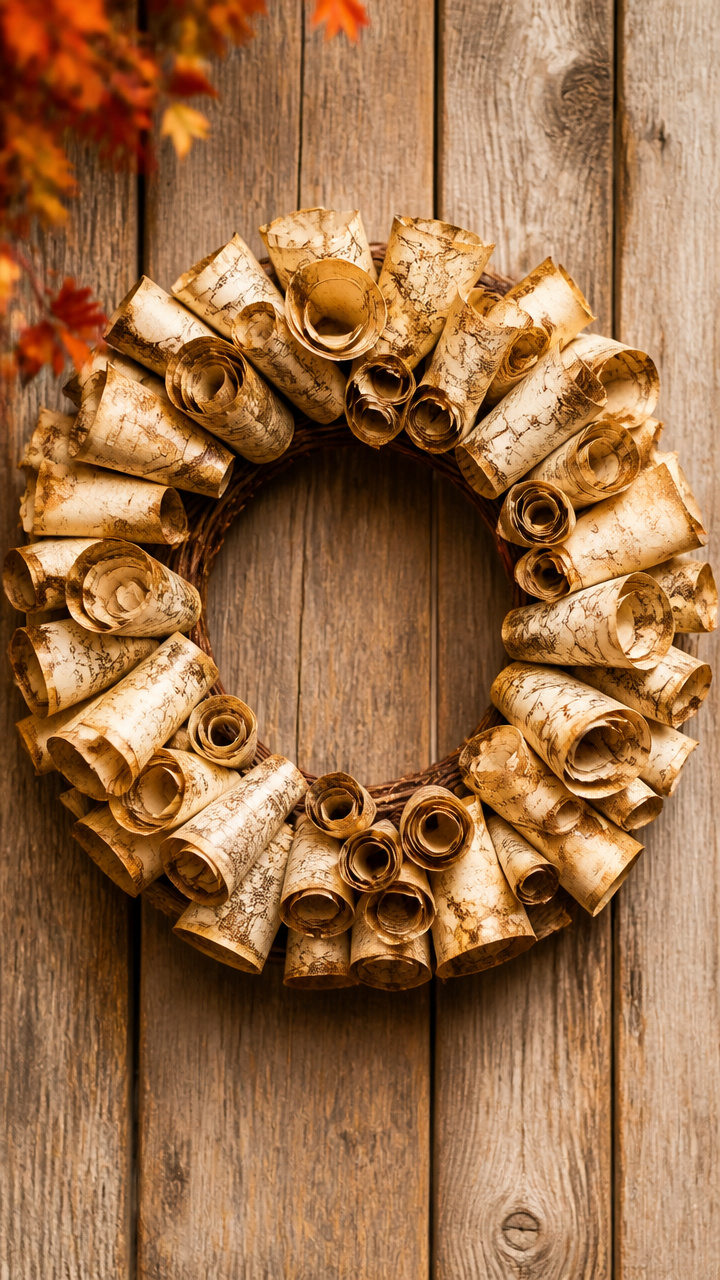
Vintage-style map scrolls curl into soft spirals, evoking fall road trips and cozy destinations.
Materials Needed
- 12-inch grapevine wreath
- 1 pad legal-sized lined paper
- Brown watercolor paint
- Sponge brush
- Scissors
- Ruler
- Hot glue gun
- Glue sticks
How to Make It
- Cut the paper into 2-inch by 8-inch strips. You will need 24 strips.
- Dip one end of each strip into brown paint and drag it halfway up with the sponge brush for a stained look.
- Roll each strip tightly from one end into a scroll. Secure the back with a dot of glue.
- Glue the scrolls side by side around the grapevine wreath, overlapping slightly for fullness.


6. Flannel Shirt Patch Wreath
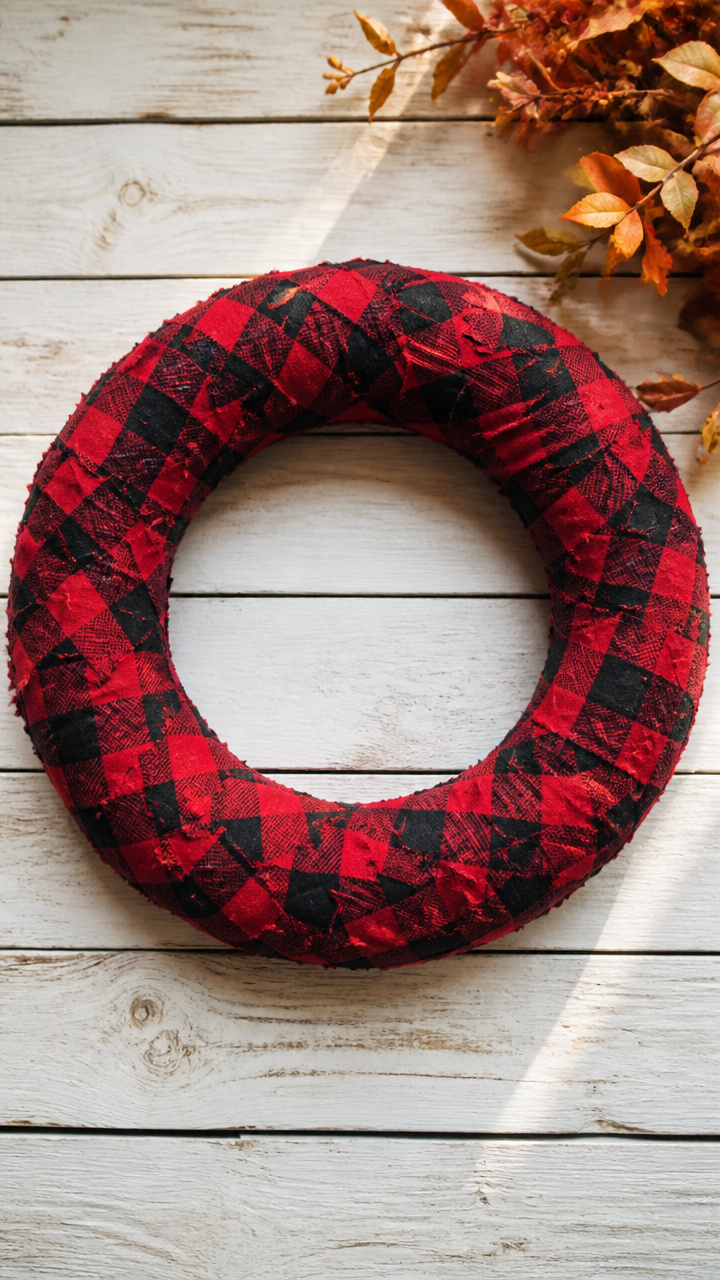
Plaid flannel squares stitched to a base mimic a cozy shirt front, ideal for porches or mudrooms.
Materials Needed
- 16-inch polystyrene wreath
- 1 yard red and black plaid flannel fabric
- Rotary cutter or scissors
- Self-healing cutting mat
- Ruler
- Hot glue gun
- Glue sticks
How to Make It
- Cut the flannel into 3-inch squares. You will need 60 squares.
- Fold each square diagonally and pinch the center to puff it slightly.
- Glue each folded square to the polystyrene base, starting from the outer edge and working inward.
- Overlap each piece slightly so no foam shows. Press firmly to secure.


7. Cinnamon Stick Bundle Wreath
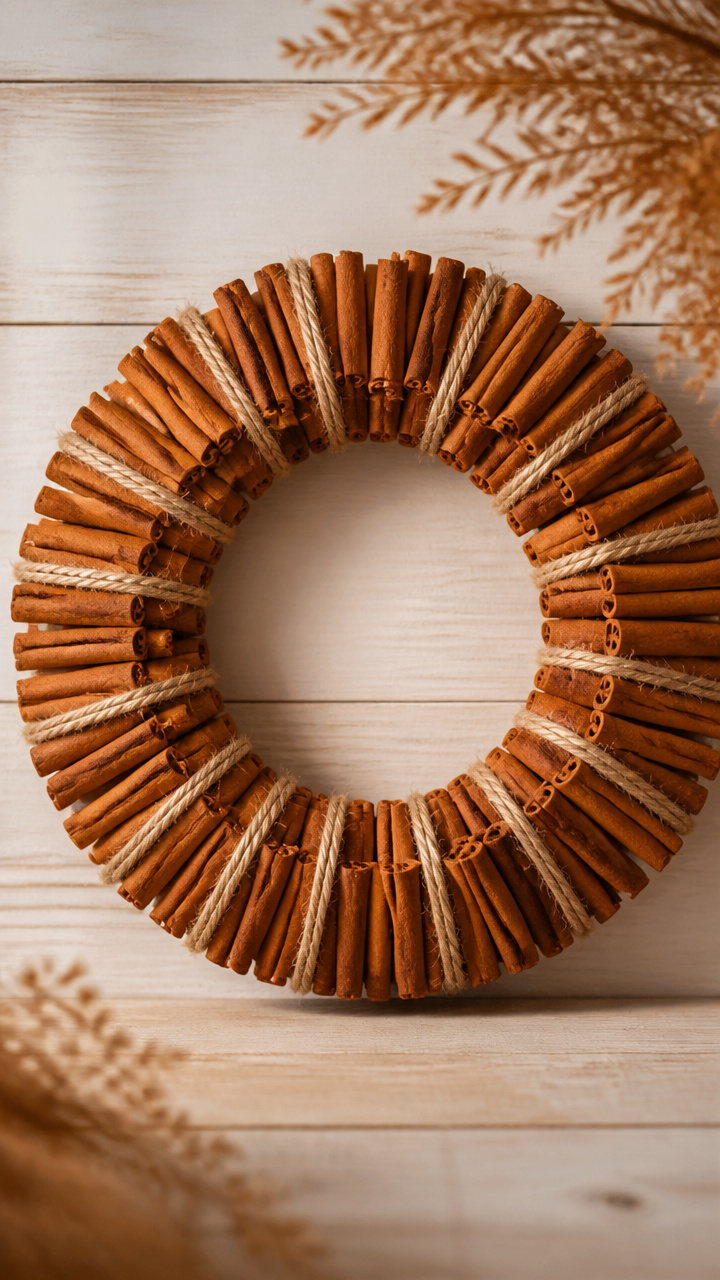
Tight bundles of cinnamon sticks release a warm scent and form a naturally reddish-brown ring.
Materials Needed
- 10-inch foam wreath form
- 2 packs cinnamon sticks
- Jute twine
- Scissors
- Hot glue gun
- Glue sticks
- Craft knife
How to Make It
- Group 5 cinnamon sticks into a bundle and wrap twine around one end. Tie securely.
- Apply hot glue to the tied end and press it onto the foam form. Repeat around the ring.
- Angle each bundle slightly outward so the tips flare like rays.
- Fill gaps with half-length sticks cut with a craft knife and glued in place.

8. Pressed Paper Flower Wreath
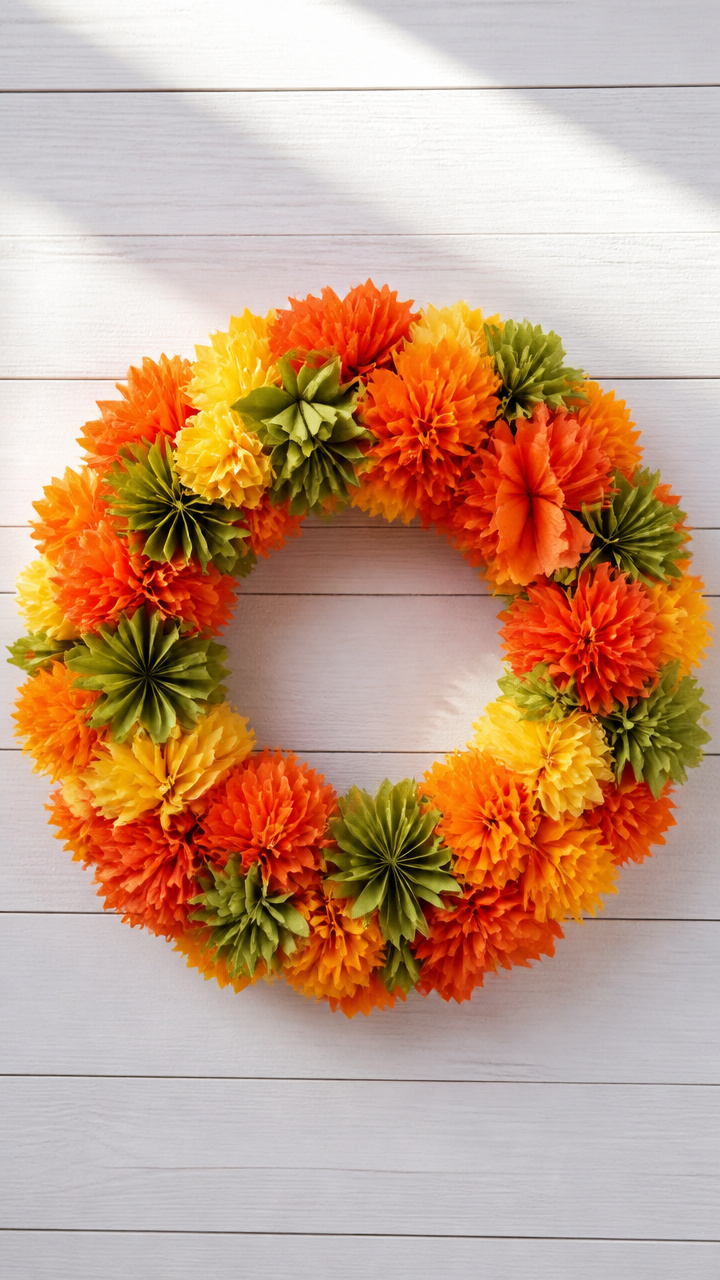
Delicate tissue paper blooms resemble real chrysanthemums and add soft volume to entryways.
Materials Needed
- 14-inch Styrofoam wreath
- 3 sheets orange tissue paper
- 2 sheets yellow tissue paper
- 1 sheet green tissue paper
- Scissors
- Pencil
- Wire, 22-gauge
- Hot glue gun
- Glue sticks
How to Make It
- Stack 5 layers of tissue paper and fold accordion-style into 1-inch pleats. Cut petal shapes on both ends.
- Unfold slightly and pinch the center. Wrap wire around the middle to secure.
- Fluff each layer upward to form a flower. Make 18 flowers total.
- Glue each flower to the wreath, clustering by color and varying heights.


9. Twine and Acorn Cap Wreath
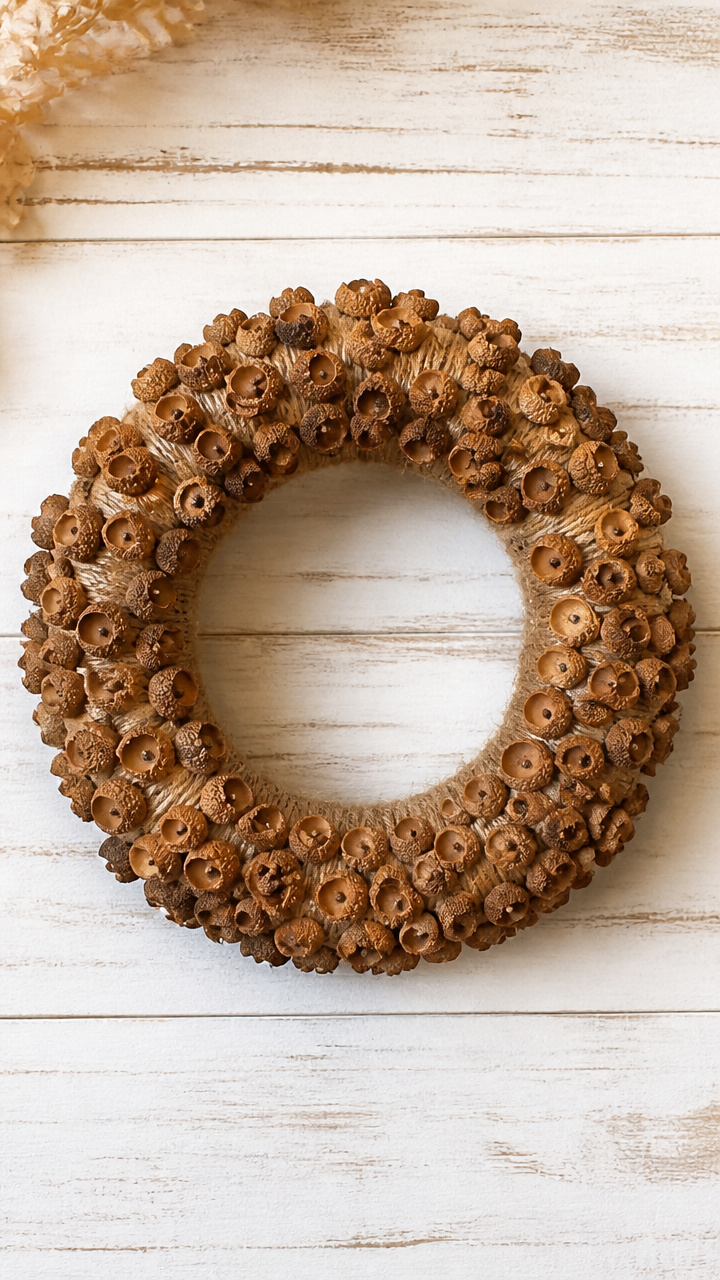
A natural palette of tan and brown emerges from acorn caps glued over wrapped twine.
Materials Needed
- 12-inch wire wreath frame
- 2 balls jute twine
- 1 jar acorn caps
- Hot glue gun
- Glue sticks
- Needle-nose pliers
How to Make It
- Wrap the jute twine tightly around the wire frame, covering it completely. Knot the end and secure with glue.
- Sort the acorn caps by size. Use pliers to help position them if needed.
- Glue caps close together all around the wreath, pointing some up and others down for texture.
- Let sit for 1 hour before hanging to ensure strong adhesion.


10. Autumn Button Medley Wreath
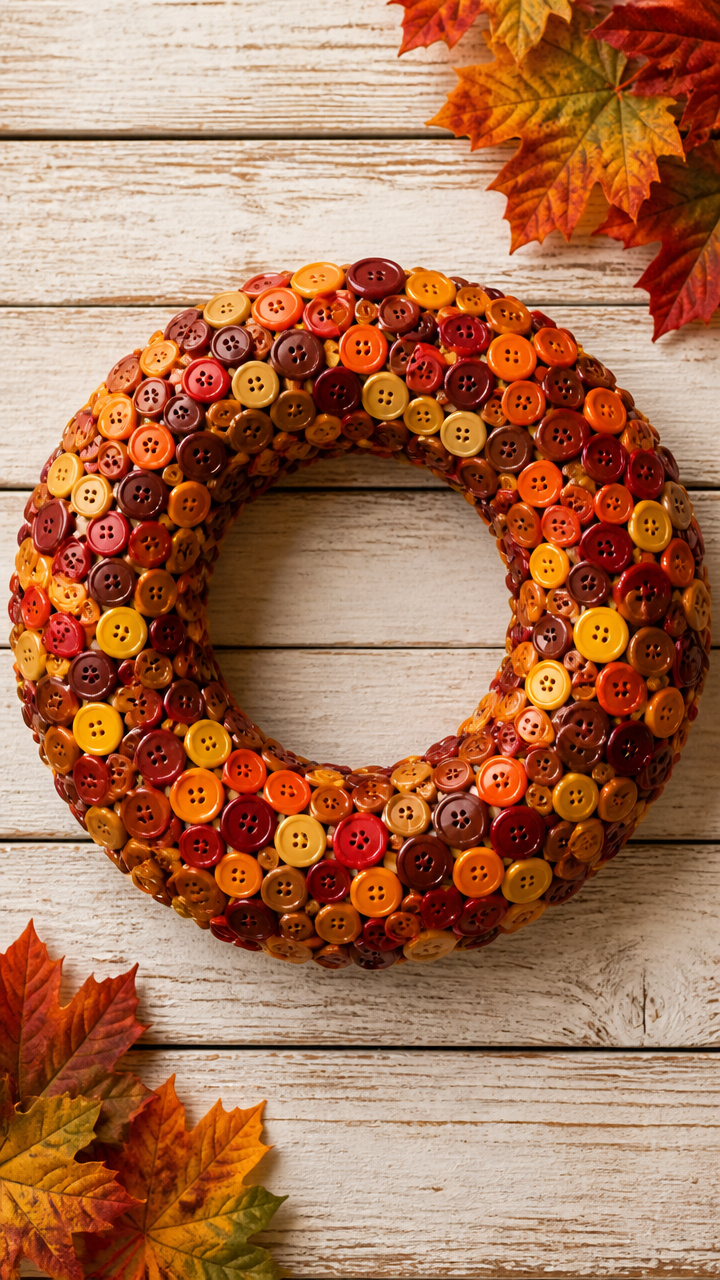
Mismatched buttons in harvest tones create a cheerful, tactile surface that catches afternoon light.
Materials Needed
- 16-inch straw wreath
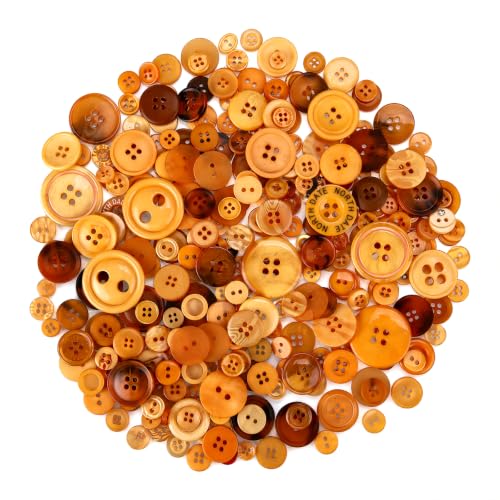
- 1 box assorted fall-colored buttons
- Hot glue gun
- Glue sticks
- Tweezers
How to Make It
- Sort buttons by size and color. Group similar tones together.
- Starting at the bottom, glue large buttons first in clusters of three.
- Fill spaces with medium and small buttons, using tweezers to place tight fits.
- Work in a spiral pattern until the entire surface is covered with no straw showing.


11. Crochet Doily Sunburst Wreath

White doilies layered like sunrays soften a bold orange center for a vintage farmhouse feel.
Materials Needed
- 12-inch foam wreath
- 3 round paper doilies, 10 inches
- 3 round paper doilies, 8 inches
- Orange cardstock
- Scissors
- Hot glue gun
- Glue sticks
- Craft knife
How to Make It
- Cut the orange cardstock into a circle slightly smaller than the foam wreath. Glue it to the center.
- Place the largest doily over the foam ring, aligning edges. Glue at four points.
- Layer the next doily rotated 45 degrees and glue at intervals. Repeat with smallest.
- Trim any overhang with a craft knife for a clean edge.


12. Washi Tape Maple Wreath
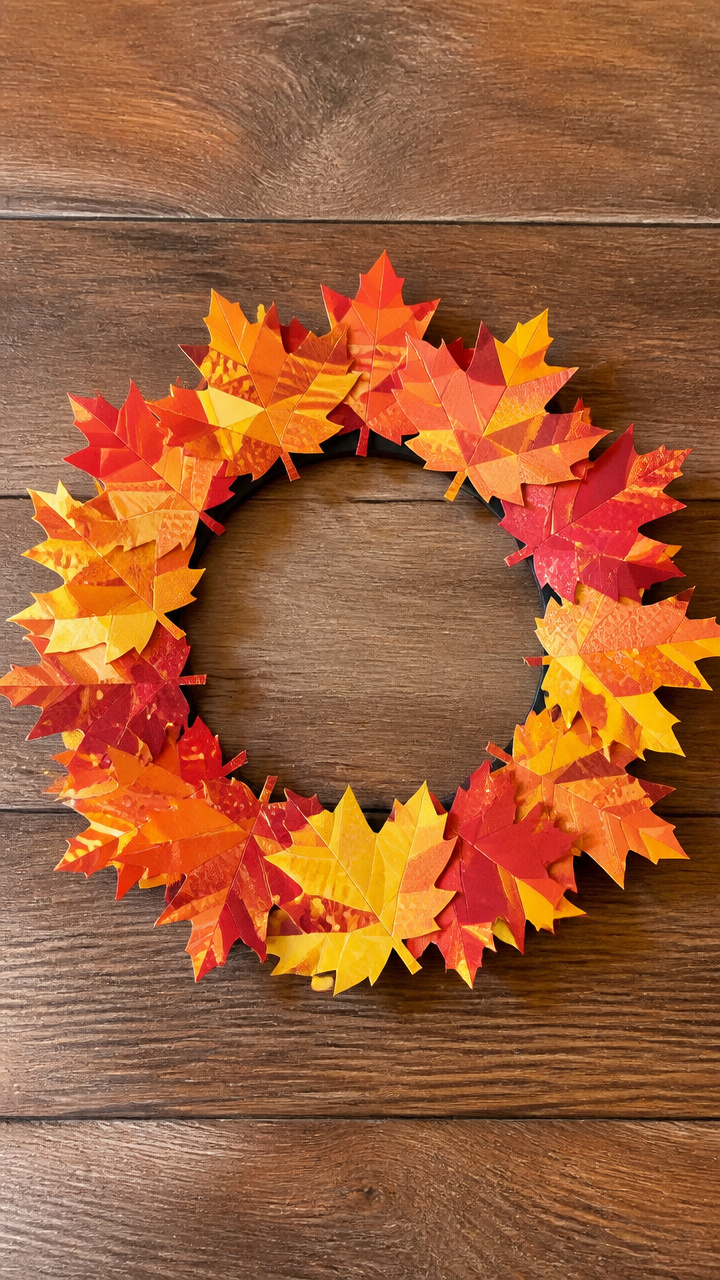
Colorful washi tape forms crisp maple leaves on a dark background for a modern pop.
Materials Needed
- 10-inch black foam plate
- Red washi tape
- Orange washi tape
- Yellow washi tape
- Scissors
- Pencil
- Maple leaf stencil
How to Make It
- Trace the maple leaf stencil onto the foam plate six times around the outer edge.
- Cut along the lines with scissors to remove the centers.
- Apply red washi tape across the back, letting it show through the openings.
- Repeat with orange and yellow tape behind other leaves, layering for depth.


13. Gourd Slice Accent Wreath
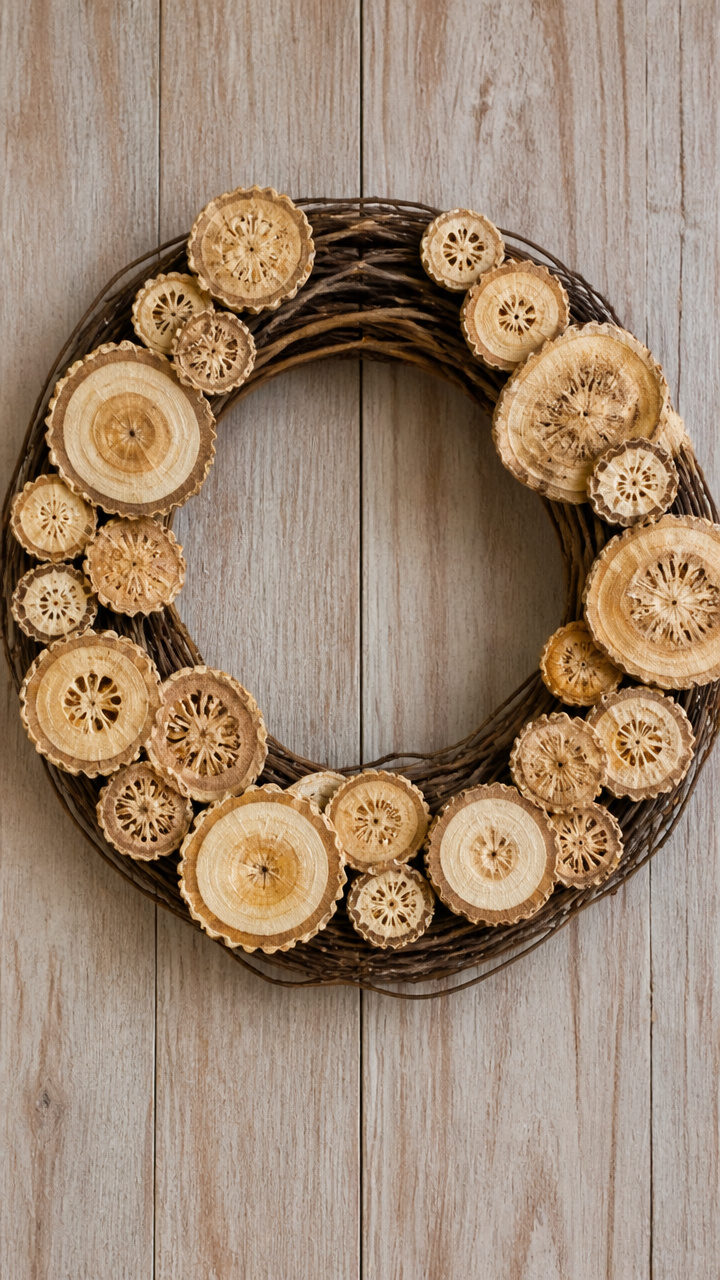
Thin slices of dried gourd add organic rings and subtle texture among neutral tones.
Materials Needed
- 14-inch grapevine wreath
- 1 package dried gourd slices
- Hot glue gun
- Glue sticks
- Sandpaper, fine grit
How to Make It
- Lightly sand rough edges of each gourd slice to prevent splinters.
- Choose 8 flat slices and glue them at even intervals around the wreath.
- Let each piece set for 30 seconds before moving to the next.
- Fill gaps with small vines or leave open for a rustic look.


14. Paper Bag Kettle Corn Wreath
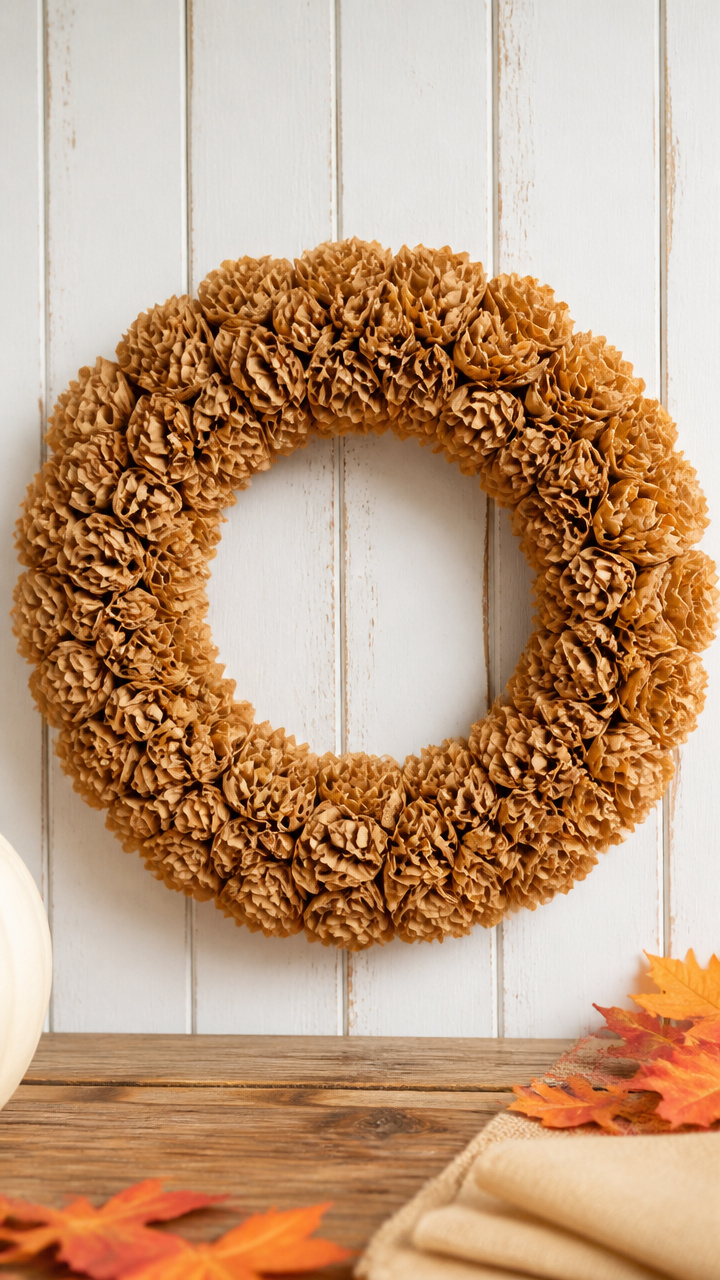
Rolled paper bags mimic kettle corn and bring golden warmth to kitchen doors.
Materials Needed
- 12-inch foam wreath
- 6 brown paper lunch bags
- Scissors
- Ruler
- Hot glue gun
- Glue sticks
- Craft knife
How to Make It
- Cut each bag into 2-inch wide strips lengthwise. You will have about 30 strips.
- Roll each strip tightly from one corner to form a cone shape. Glue the tip.
- Flatten the wide end slightly and glue it to the wreath, forming a ring of popcorn-like shapes.
- Cover the entire form, pressing pieces close together.


15. Clothespin Apple Wreath
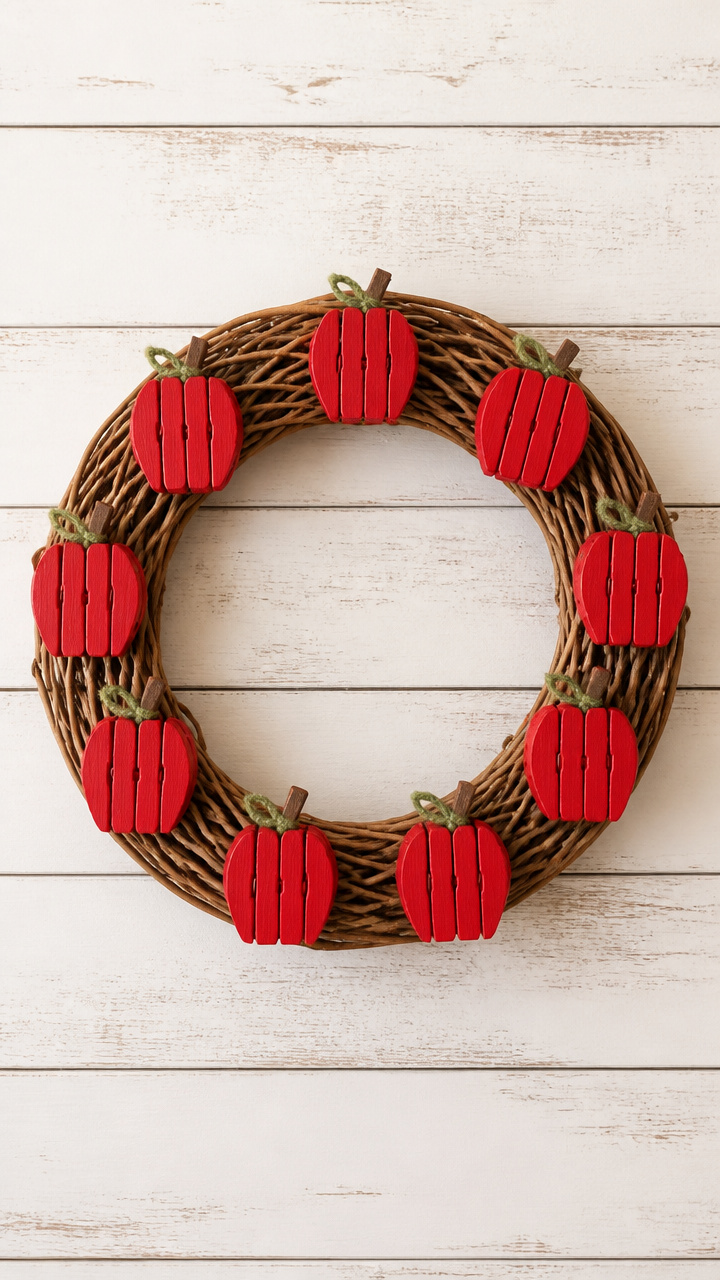
Wooden clothespins painted red become tiny apples dangling from a twig base.
Materials Needed
- 10-inch willow wreath
- 20 wooden clothespins
- Red acrylic paint
- Small paintbrush
- Green embroidery floss
- Hot glue gun
- Glue sticks
How to Make It
- Paint each clothespin red and let dry for 20 minutes.
- Cut 20 short pieces of green floss and tie one around the top of each pin for a stem.
- Open each clothespin and clip it onto the willow wreath, spacing evenly.
- Bend the floss stem upright for a realistic touch.

16. Spice Packet Collage Wreath
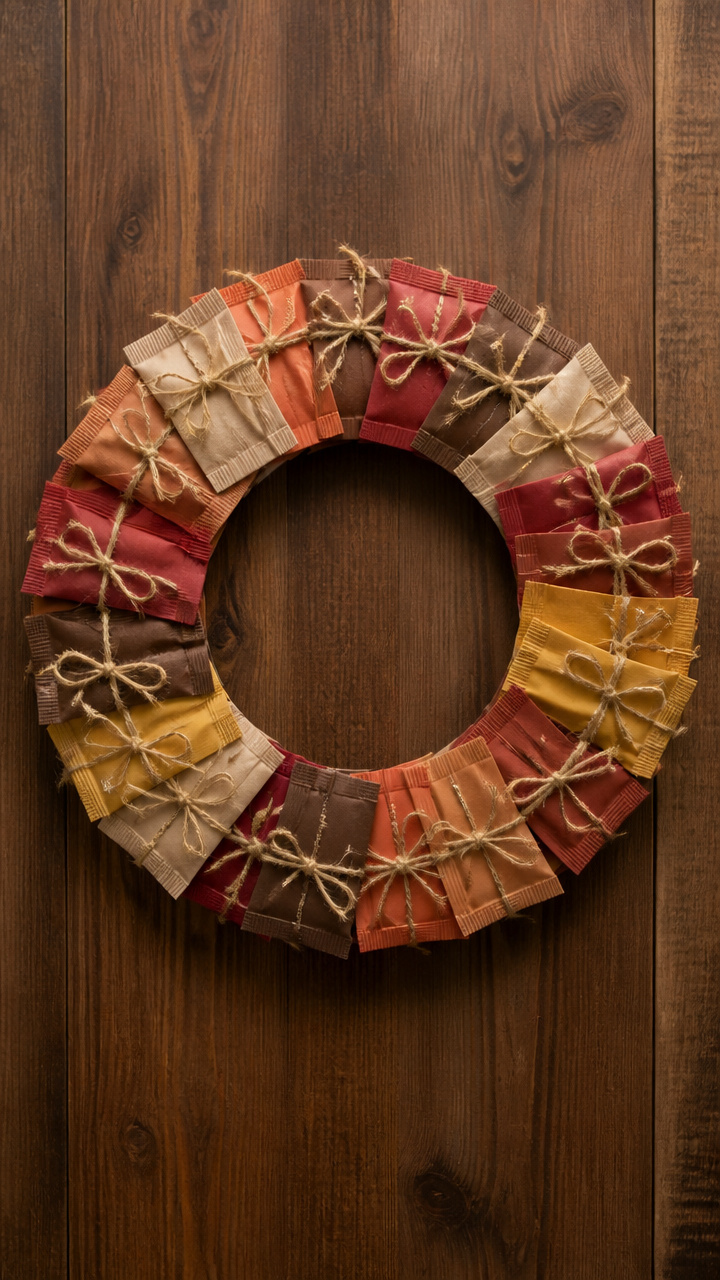
Empty spice packets with warm hues form a collage that celebrates seasonal baking.
Materials Needed
- 14-inch cardboard wreath
- 10 used nutmeg, cinnamon, clove packets
- Mod Podge
- Foam brush
- Scissors
- Twine
How to Make It
- Lay the packets face up and trim off tops and bottoms with scissors.
- Arrange them around the cardboard ring, overlapping edges like shingles.
- Brush Mod Podge under each packet and press firmly. Cover the entire surface.
- Seal the top with another coat and let dry overnight. Tie twine at the top for hanging.


17. Yarn Tassel Vine Wreath
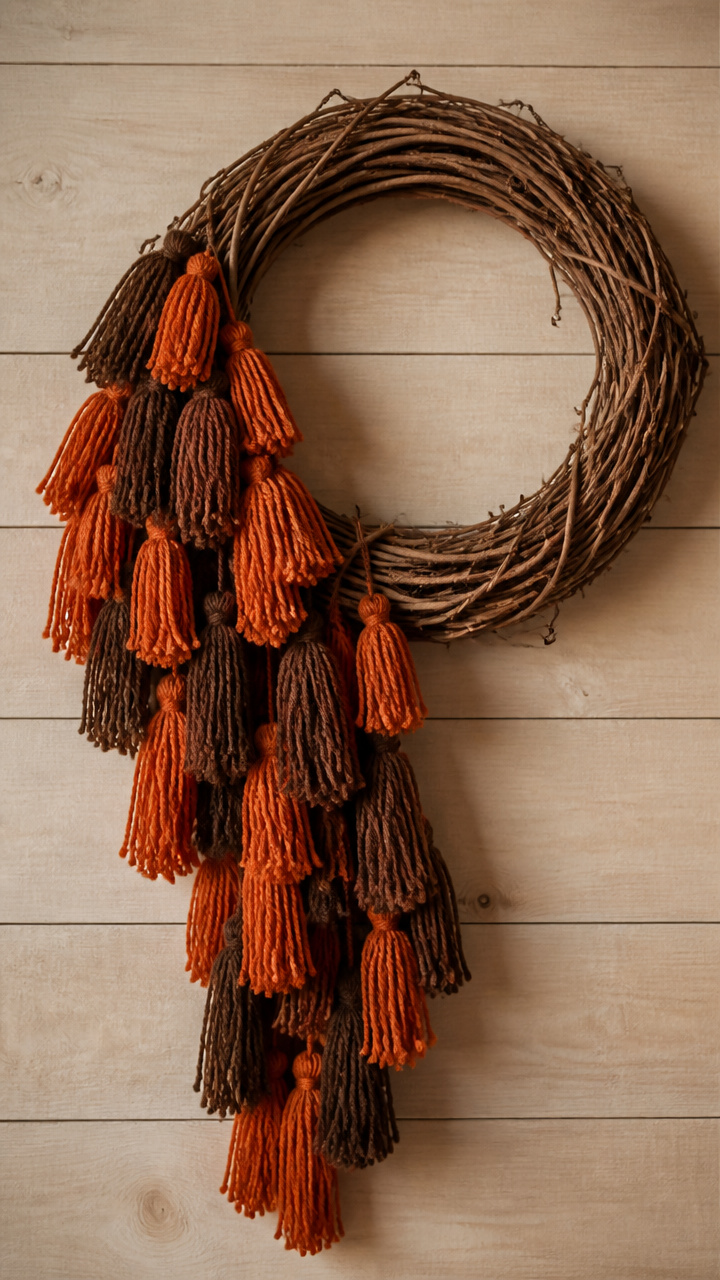
Long orange and brown yarn tassels drape from a grapevine ring like trailing ivy.
Materials Needed
- 12-inch grapevine wreath
- 2 skeins orange yarn
- 1 skein brown yarn
- Cardboard, 3×5 inches
- Scissors
- Hot glue gun
- Glue sticks
How to Make It
- Wrap yarn around the cardboard 20 times. Slide it off carefully.
- Tie a separate piece of yarn around the middle and knot tightly.
- Cut the loops at both ends to form a tassel. Make 12 total.
- Glue each tassel to the bottom half of the wreath, letting them hang freely.


18. Cardstock Fold Leaf Wreath
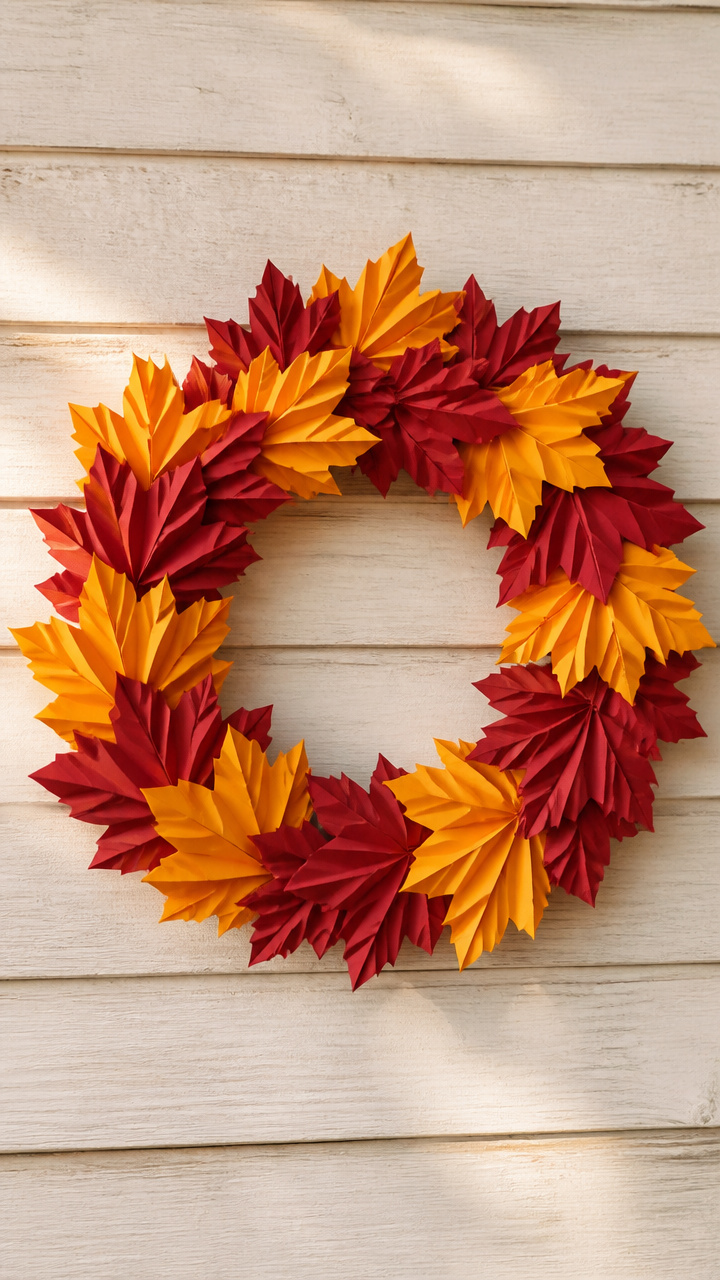
Precisely folded cardstock leaves interlock into a geometric ring with crisp edges.
Materials Needed
- 16-inch foam wreath
- 6 sheets red cardstock
- 4 sheets yellow cardstock
- Ruler
- Bone folder
- Craft knife
- Hot glue gun
- Glue sticks
How to Make It
- Cut cardstock into 3×6 inch rectangles. Score at 1 inch and 5 inches with the bone folder.
- Fold both ends toward the center to form a Z-shape. Make 24 leaves.
- Interlock two leaves by sliding folds together. Continue until you have a chain.
- Glue the chain around the foam wreath, shaping it to fit the curve.


19. Haystack Straw Wreath
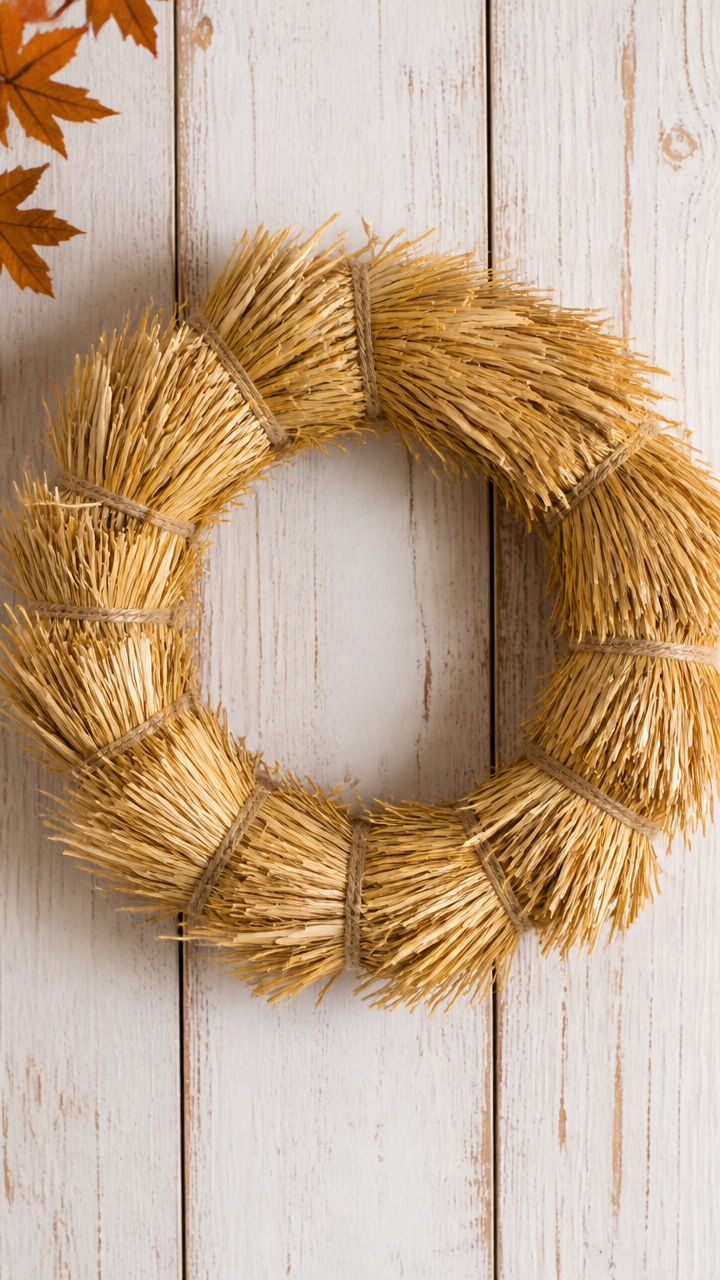
Loose straw bundled and tied mimics a tiny hayfield, perfect for barn doors or garages.
Materials Needed
- 18-inch wire wreath frame
- 1 bag craft straw
- Jute twine
- Scissors
- Rubber bands
- Hot glue gun
How to Make It
- Gather small handfuls of straw and tie each with twine in the middle.
- Place each bundle on the wire frame and secure with rubber bands around the back.
- Continue adding bundles, overlapping them like shingles until the ring is full.
- Add a final twine bow at the top, glued at the knot for stability.


20. Apple Cider Bottle Cap Wreath
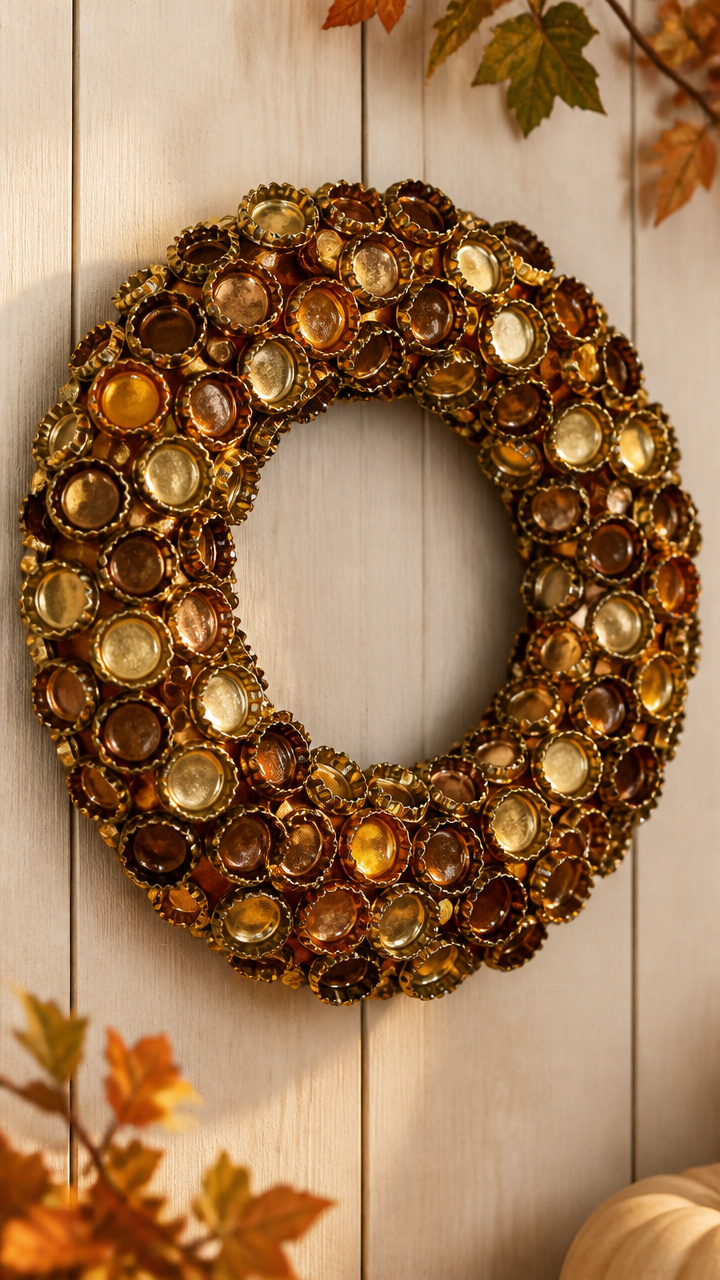
Metal bottle caps from cider bottles cluster into a shiny, reflective circle with autumn drink vibes.
Materials Needed
- 12-inch foam wreath
- 30 apple cider bottle caps
- Hot glue gun
- Glue sticks
- Pliers
- Brown spray paint
How to Make It
- Lay caps on newspaper and spray with brown paint. Let dry 30 minutes.
- Use pliers to slightly bend the edges of each cap outward for dimension.
- Glue caps in concentric circles, starting from the outside edge.
- Overlap each cap by half so no foam shows. Press firmly and let cure 2 hours.


You’ve got everything you need right at Dollar Tree to make your home feel cozier this season. Pick one idea that speaks to you and start today—your hands are ready to create something lovely.