18 Rustic Mason Jar Decor Ideas

Mason jars carry a quiet charm that feels at home in any space. Their simple shape and sturdy glass make them perfect for creative projects that blend warmth and function.
You can turn one into a glowing centerpiece, a sweet gift, or a shelf accent with just a few supplies. These ideas use everyday materials in thoughtful ways, so you can start crafting right away.
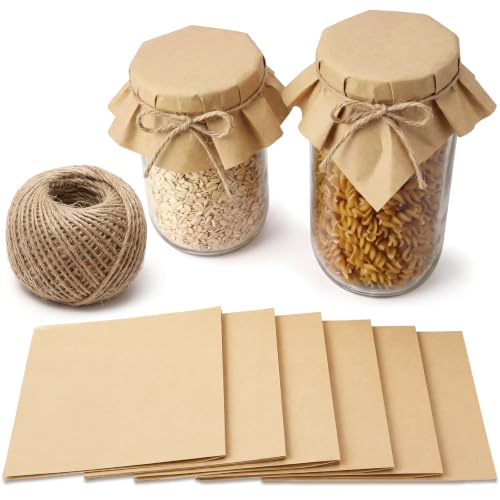
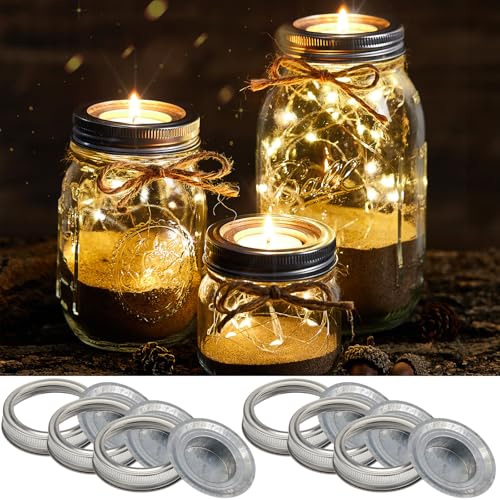
1. Twine-Wrapped Candle Holders
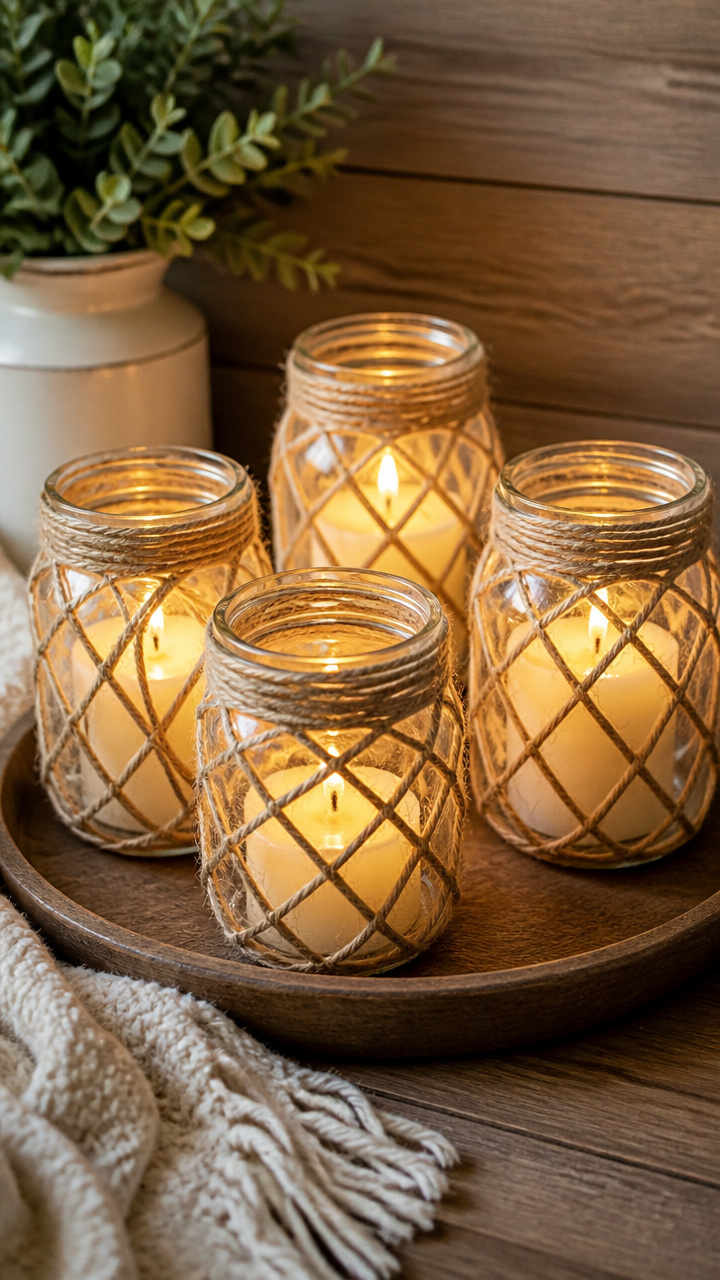
Soft light glows through crisscrossed jute, giving your table a cozy, handmade feel. These holders work as wedding accents or porch mood lighting.
Materials Needed
- 4 wide mouth mason jars, 16 oz each
- Jute twine, 1/8 inch thickness, 100 feet
- Hot glue gun with glue sticks
- 4 small pillar candles, 2 inches diameter
How to Make It
- Apply a dot of hot glue to the outside of the jar near the base and press the end of the twine into it.
- Wrap the twine tightly around the jar, adding a dot of glue every inch to keep layers from shifting.
- Continue wrapping up to the rim, then cut the twine and secure the end with another dab of glue.
- Let the glue cool for two minutes before placing a candle inside.
2. Chalkboard Paint Herb Labels
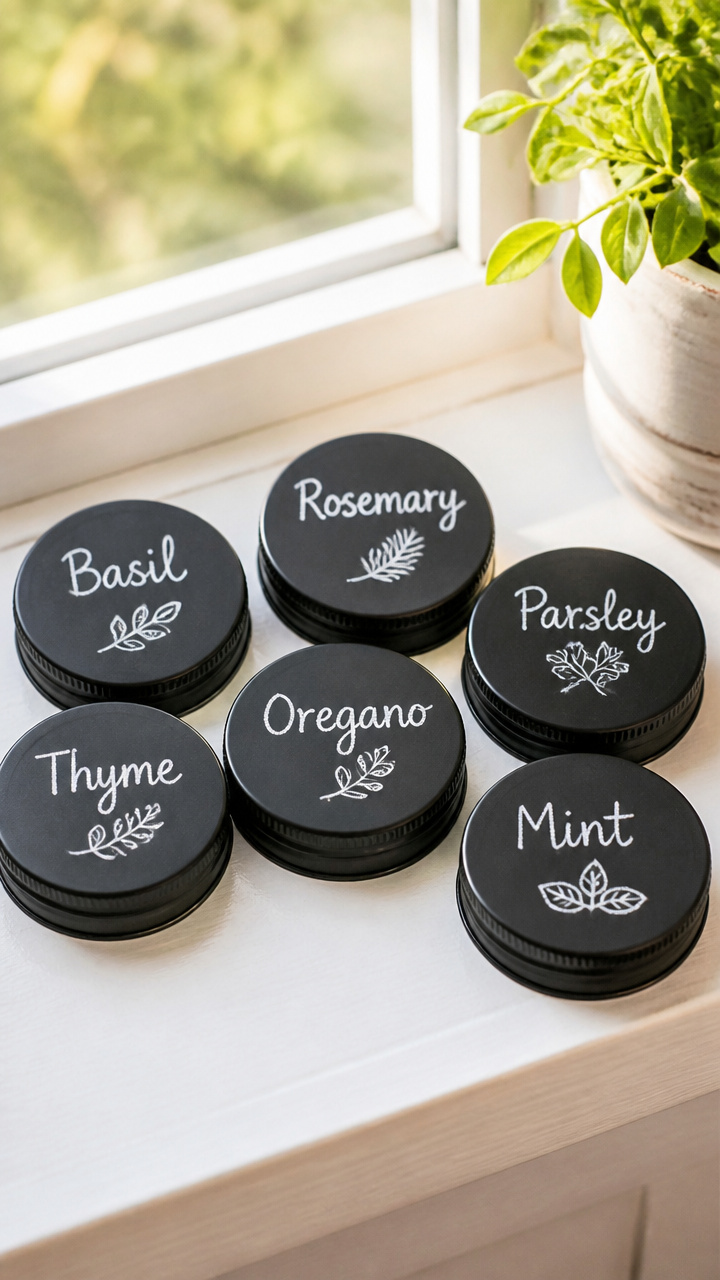
Painted lids let you name your herbs clearly and change labels whenever you need. Ideal for kitchen windowsill gardens.
Materials Needed
- 6 regular mouth mason jar lids
- Black chalkboard spray paint, 1 can
- Small piece of fine-grit sandpaper
- White chalk stick
How to Make It
- Sand the top of each lid lightly to help paint stick, then wipe clean with a dry cloth.
- Spray paint the tops outdoors, holding the can 10 inches away, using two light coats with 15 minutes between coats.
- Wait 24 hours for paint to cure, then write herb names on each lid with chalk.


3. Frosted Glass Snow Globes
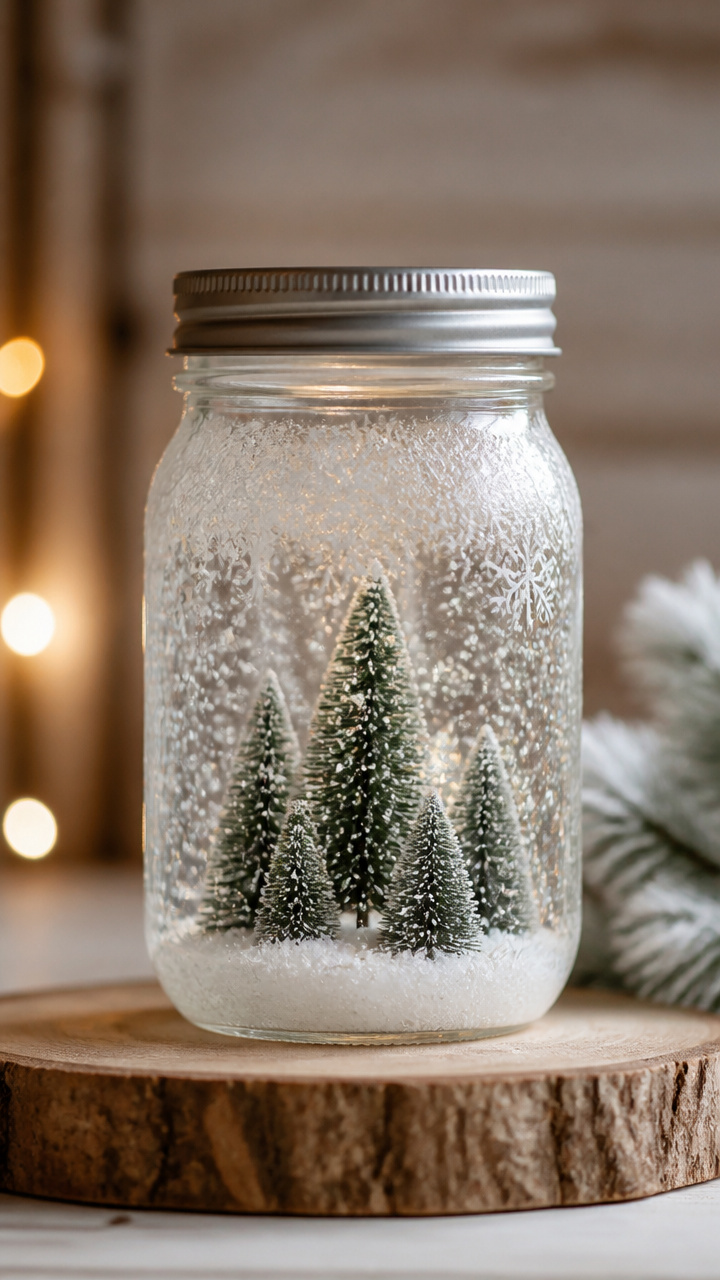
Delicate snow scenes hide inside jars that mimic winter frost. These make gentle nightstand decorations during colder months.
Materials Needed
- 3 quart-sized mason jars with lids
- Frosted glass spray paint, 1 can
- Miniature pine tree figurines, 3 pieces
- Artificial snowflakes, 1 small pack
- Distilled water, 2 cups
- Glycerin, 1 tablespoon
How to Make It
- Spray the outside of each jar with frosted glass paint in a well-ventilated area, using even strokes and letting dry 30 minutes.
- Fill each jar with distilled water, add glycerin, and drop in snowflakes and one figurine.
- Screw the lid on tight, turn upside down, and gently shake to watch the snow swirl.


4. Burlap Flower Vases
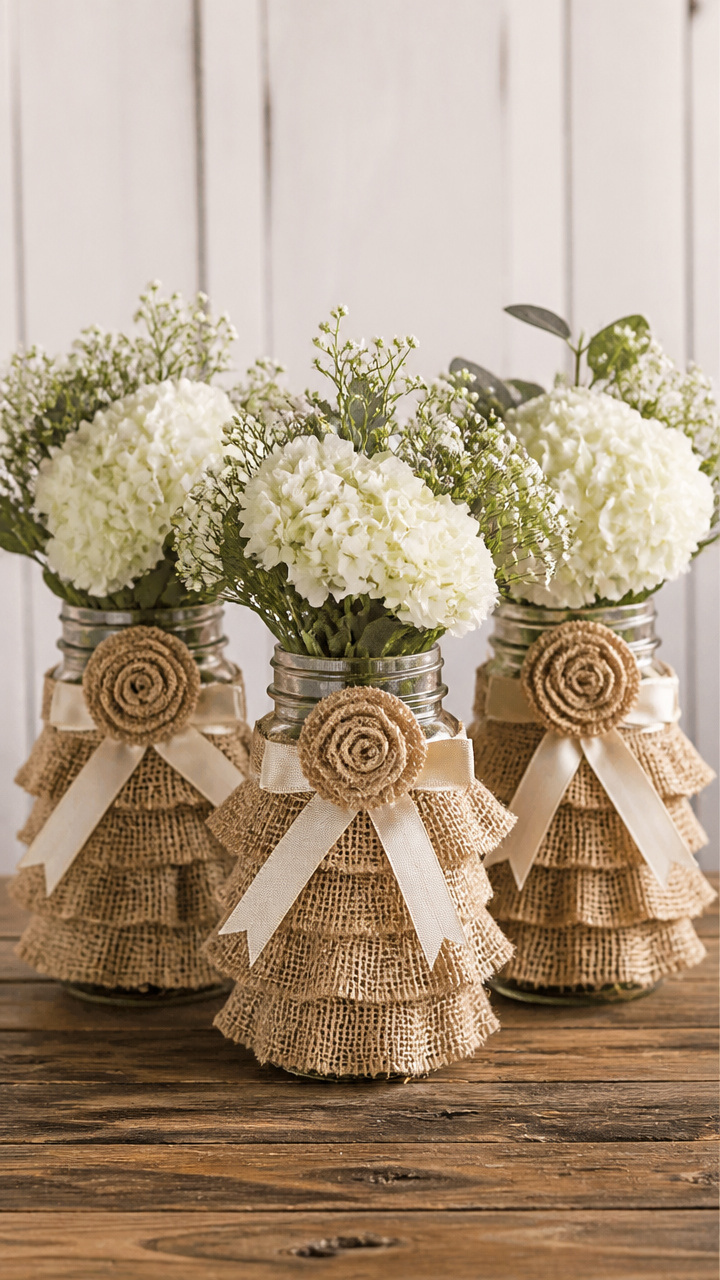
Ruffled burlap blooms around jar necks, turning wildflowers into country-style arrangements. Perfect for farmhouse tables.
Materials Needed
- 5 regular mouth mason jars, 12 oz
- Natural burlap fabric, 1/2 yard
- Scissors
- Hot glue gun with glue sticks
- Ribbon, 1/4 inch wide, 5 yards
How to Make It
- Cut burlap into 5 strips, each 3 inches wide and 12 inches long.
- Fold each strip in half lengthwise and glue the short ends together to form a loop.
- Pinch the loop to create a ruffle, then glue the fold to the underside of the jar's metal ring.
- Slip the ring back onto the jar and tie a ribbon bow around the seam.


5. Layered Sand Terrariums
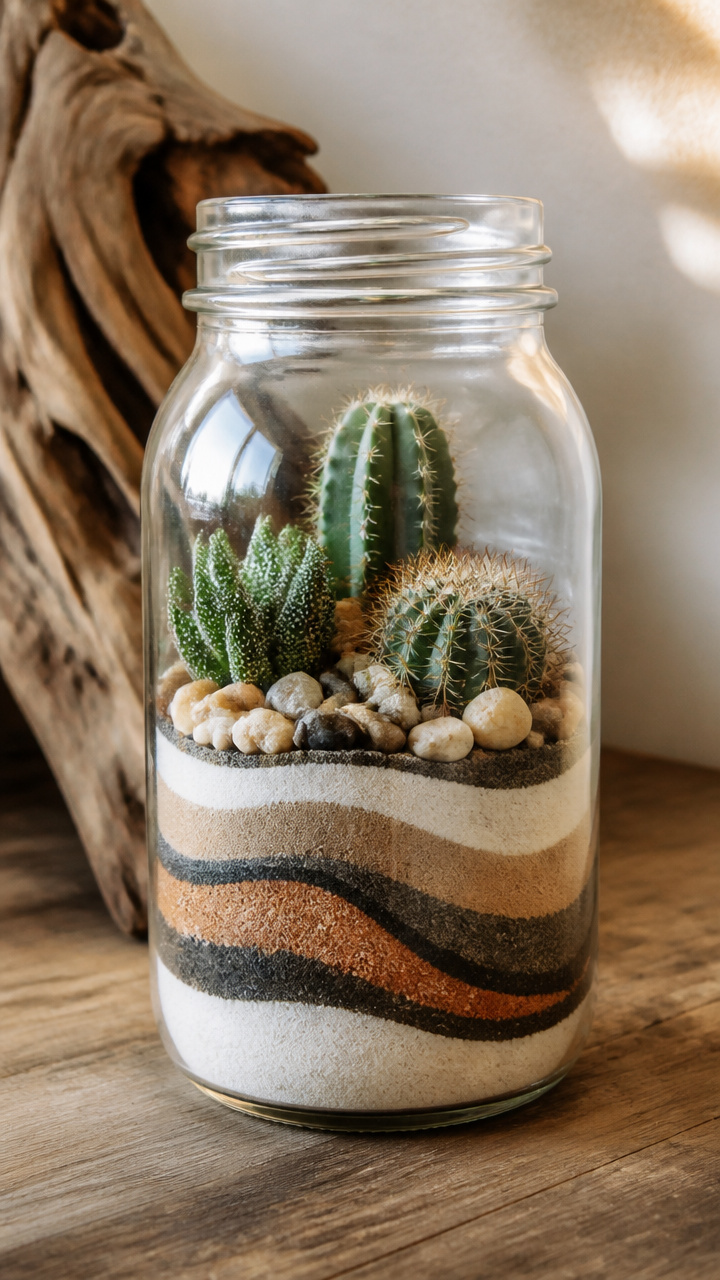
Colored sands build desert landscapes inside clear jars. These double as calming sensory displays for kids' rooms.
Materials Needed
- 4 half-gallon mason jars
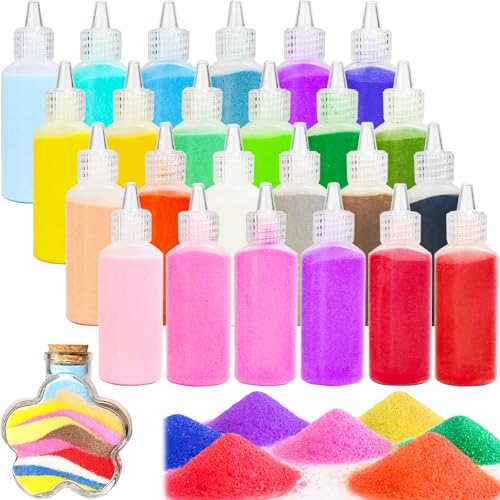
- Fine craft sand, 4 colors (white, rust, tan, charcoal), 1 cup each
- Small desert plants or cactus, 4 starter pots
- Tiny pebbles, 1 cup
- Funnel made from rolled paper
How to Make It
- Pour a 1/2 inch layer of pebbles into each jar using the funnel for control.
- Add 1 inch of white sand, then 1 inch of rust, followed by tan and charcoal in thin, wavy layers.
- Use the funnel to place a small plant in the center and gently pat soil around the roots.
- Water each plant with 1 teaspoon of water and place in indirect sunlight.

6. Lace-Embellished Vanity Jars
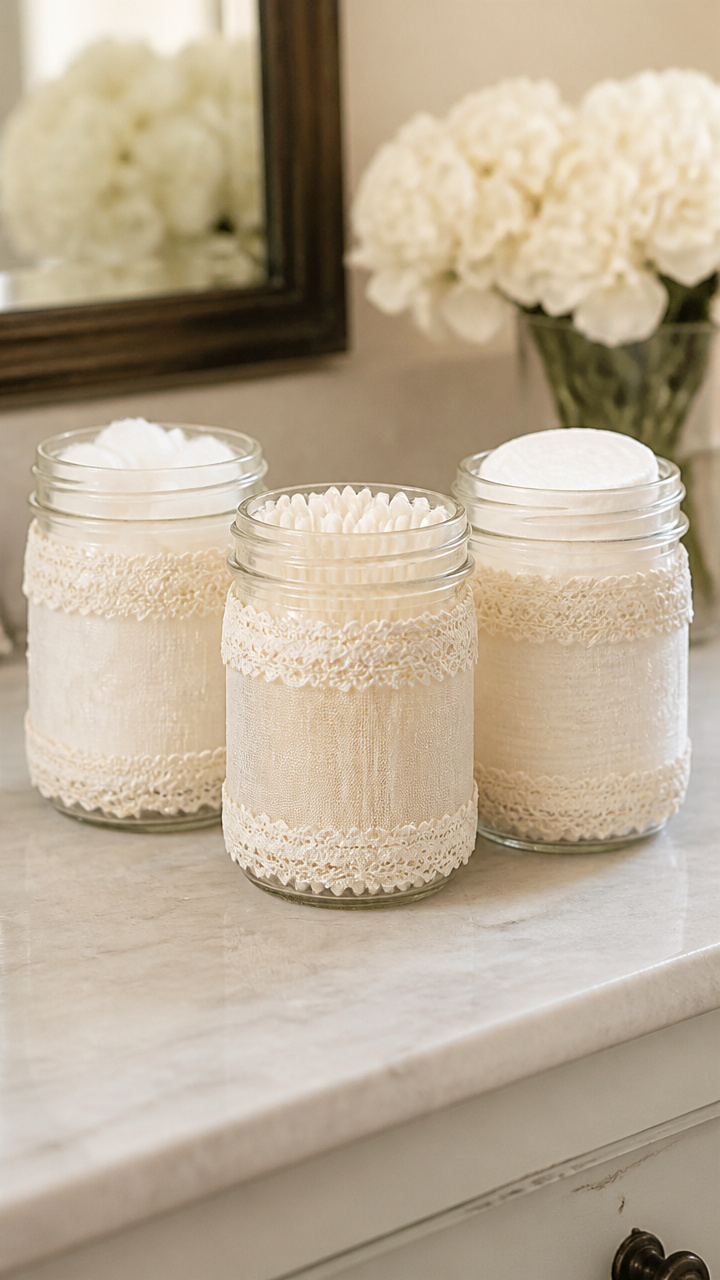
Sheer lace wraps like vintage lingerie around jars holding cotton balls or makeup brushes. They add softness to bathroom counters.
Materials Needed
- 3 regular mouth mason jars, 8 oz
- Cotton lace trim, 1/4 inch wide, 3 feet
- Fabric glue
- Small paintbrush
- Clear sealer spray
How to Make It
- Cut three 8-inch lengths of lace and lay them flat on wax paper.
- Use the brush to coat each lace piece with a thin layer of fabric glue, front and back.
- Wrap the glued lace around the lower third of each jar, pressing gently to adhere.
- Let dry for 2 hours, then spray with clear sealer for durability.


7. Mini Fairy Light Lanterns
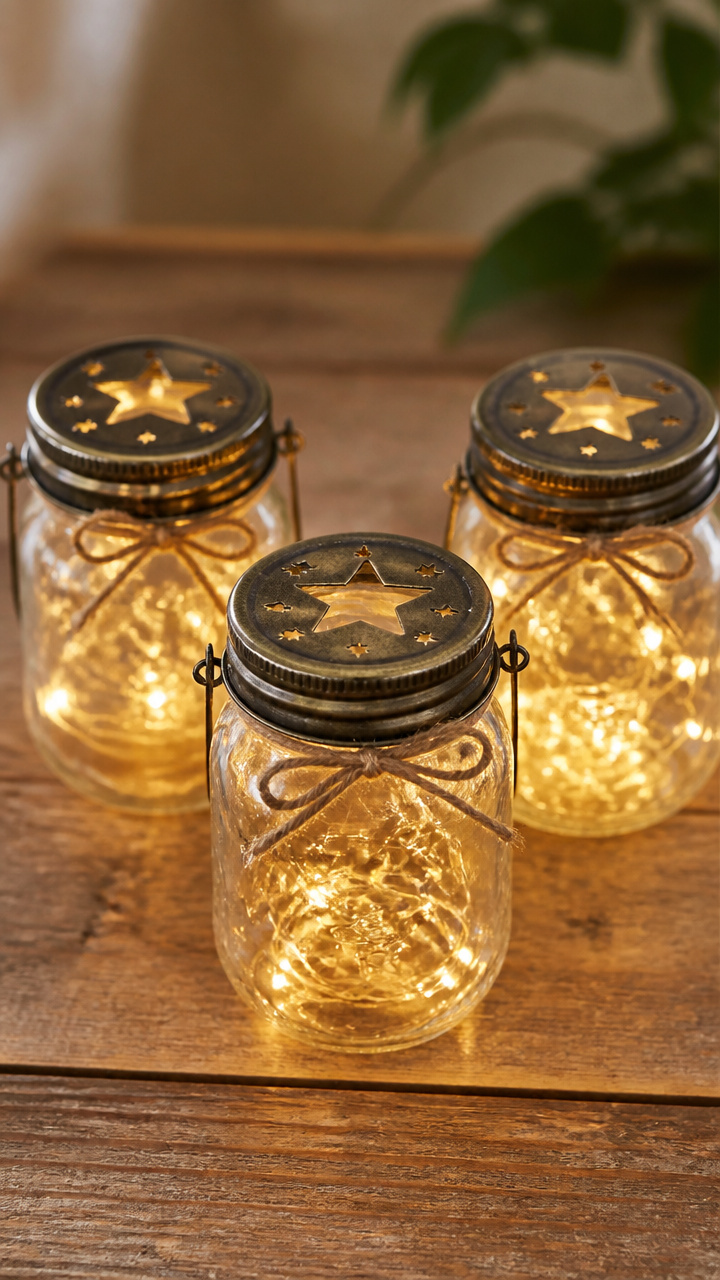
Battery-powered lights twinkle behind punched tin lids, casting starry patterns on walls. Hang them from tree branches or shelves.
Materials Needed
- 6 pint-sized mason jars
- Decorative metal bottle caps with star shapes, 6
- Battery-operated fairy lights, 6 strands with 20 bulbs each
- Needle-nose pliers
How to Make It
- Place a metal cap on a hard surface and use pliers to gently bend the edge flat against the rim.
- Insert one end of the fairy light strand into the jar, feeding the battery pack out through the lid threads.
- Screw the modified cap onto the jar until snug, making sure wires aren’t pinched.
- Turn on the lights and adjust bulb placement for even glow.


8. Pressed Flower Preservers
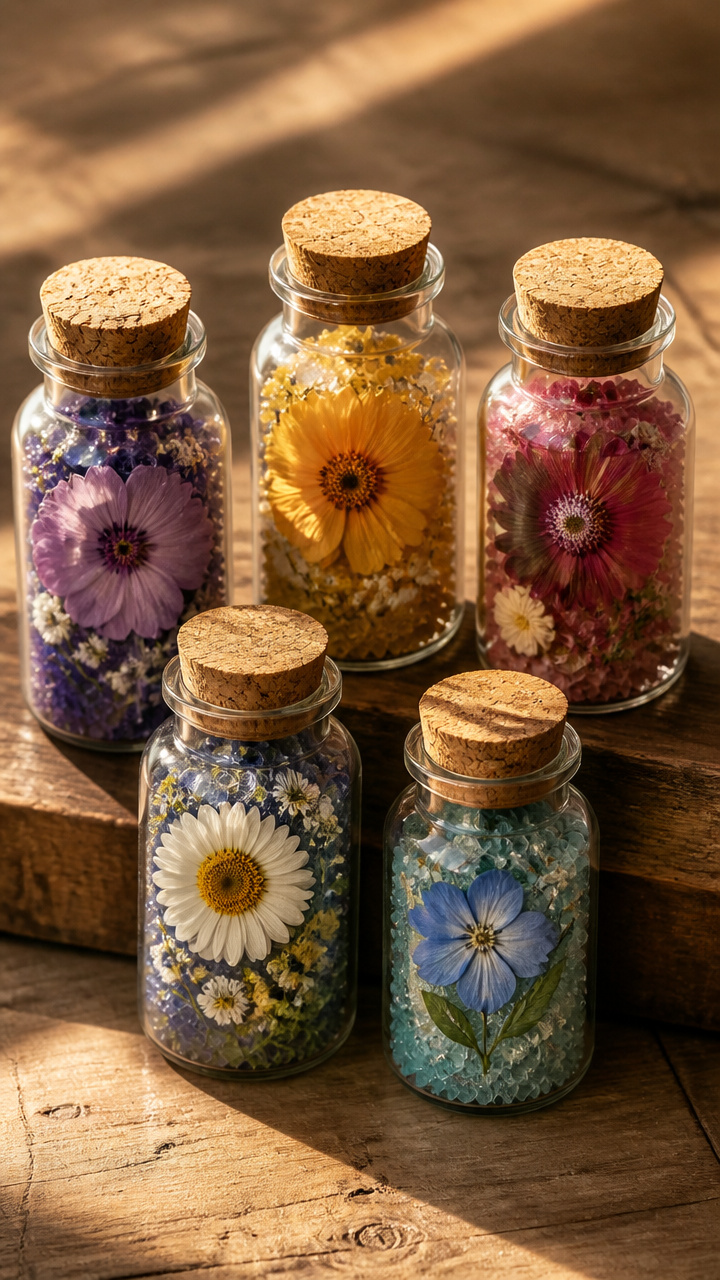
Real flowers stay vibrant between glass and cork, capturing garden moments. These look lovely grouped on a bookshelf.
Materials Needed
- 5 wide mouth mason jars, 8 oz
- Cork stoppers, 2 inch diameter, 5
- Fresh small flowers with flat blooms, 10 stems
- Silica gel drying crystals, 1 cup
- Small paintbrush
How to Make It
- Place flowers face down in a container and cover completely with silica gel for 3 days.
- Remove dried flowers carefully and brush off excess crystals with the paintbrush.
- Arrange one flower face-up in each jar and pour a 1/4 inch layer of clear epoxy resin over it.
- Let resin cure for 24 hours, then insert the cork stopper and press down gently.


9. Wood-Burned Quote Jars
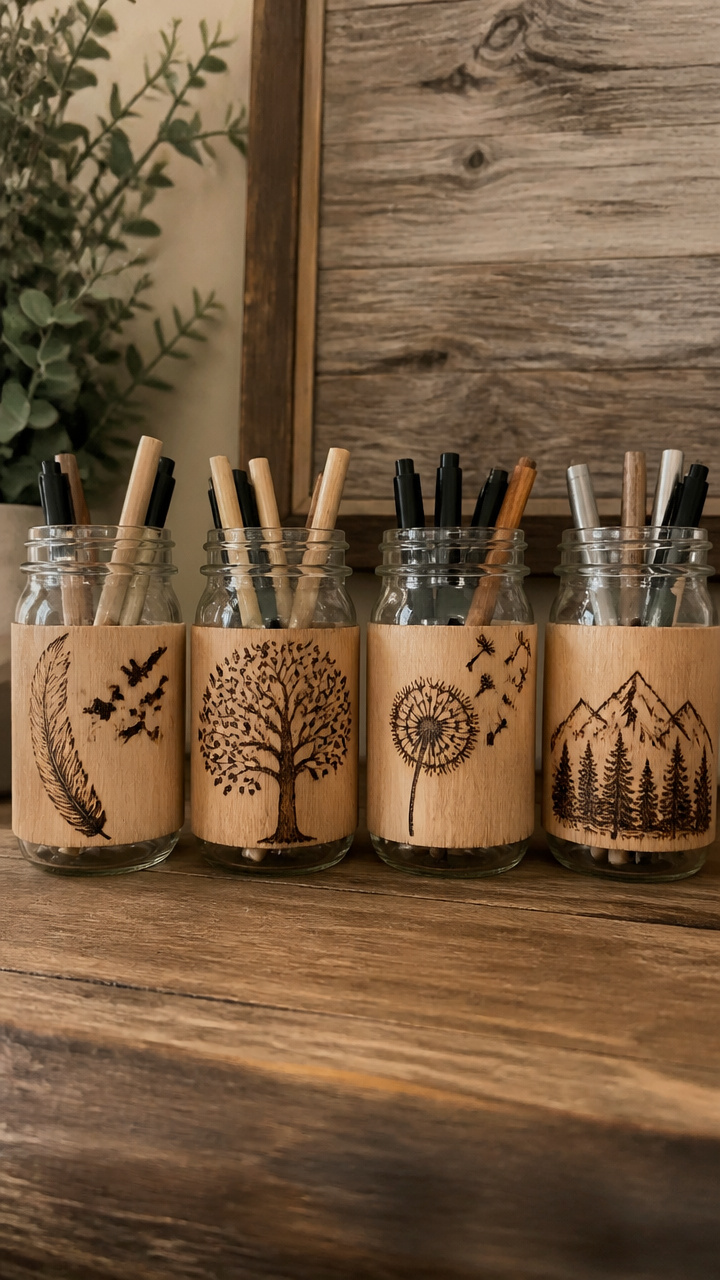
Hand-burned words circle jars that hold pens or utensils. The scent of wood and fire lingers in each mark.
Materials Needed
- 4 regular mouth mason jars, 16 oz
- Wood-burning tool with fine point tip
- Printed quote stencils on tissue paper, 4 different sayings
- Spray adhesive, light hold
How to Make It
- Lightly spray the back of a stencil with adhesive and press it onto the glass jar at eye level.
- Trace each letter slowly with the wood-burning tool, keeping the tip steady and applying medium pressure.
- Peel off the stencil after burning, then repeat for the other jars with new quotes.
- Wipe away residue with a damp cloth and let dry before use.


10. Galvanized Metal Accents
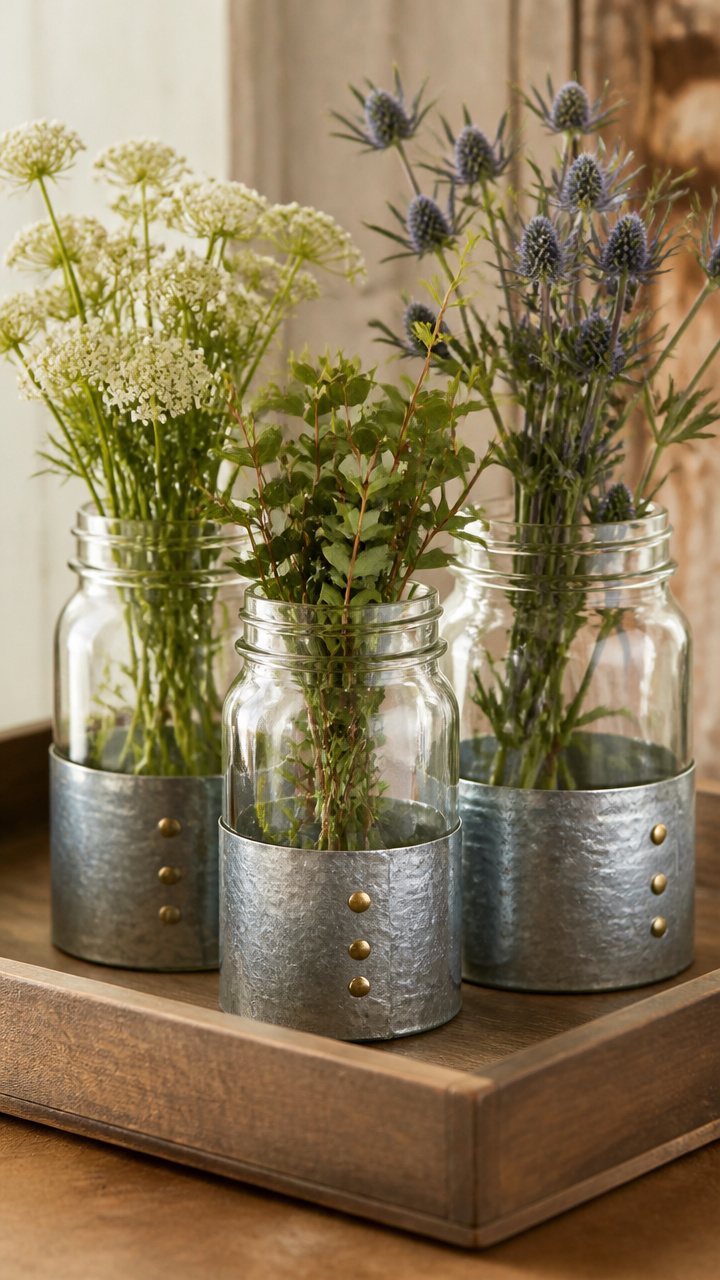
Shiny metal bands hug jar bases like industrial cuffs. Use them to store kitchen tools or display succulents.
Materials Needed
- 3 quart-sized mason jars
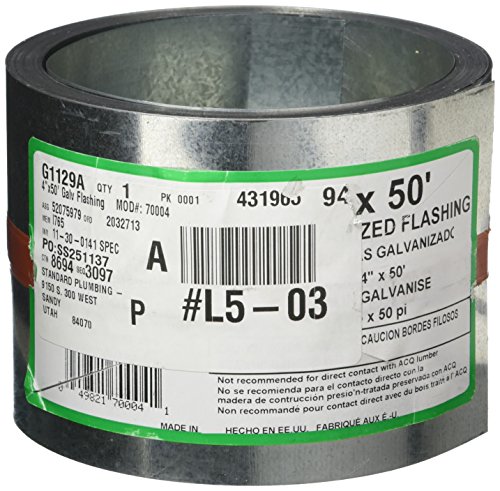
- Galvanized steel flashing, 12×12 inch sheet
- Tin snips
- Measuring tape
- Pop rivet gun with brass rivets
How to Make It
- Measure the circumference of each jar base and cut three strips of flashing 1 inch wide and 1 inch longer than the measurement.
- Wrap each strip around the base and mark where the ends overlap.
- Drill two small holes where the ends meet and fasten with a pop rivet.
- Smooth sharp edges with a metal file and slide the jar back into the cuff.


11. Stenciled Flourish Storage
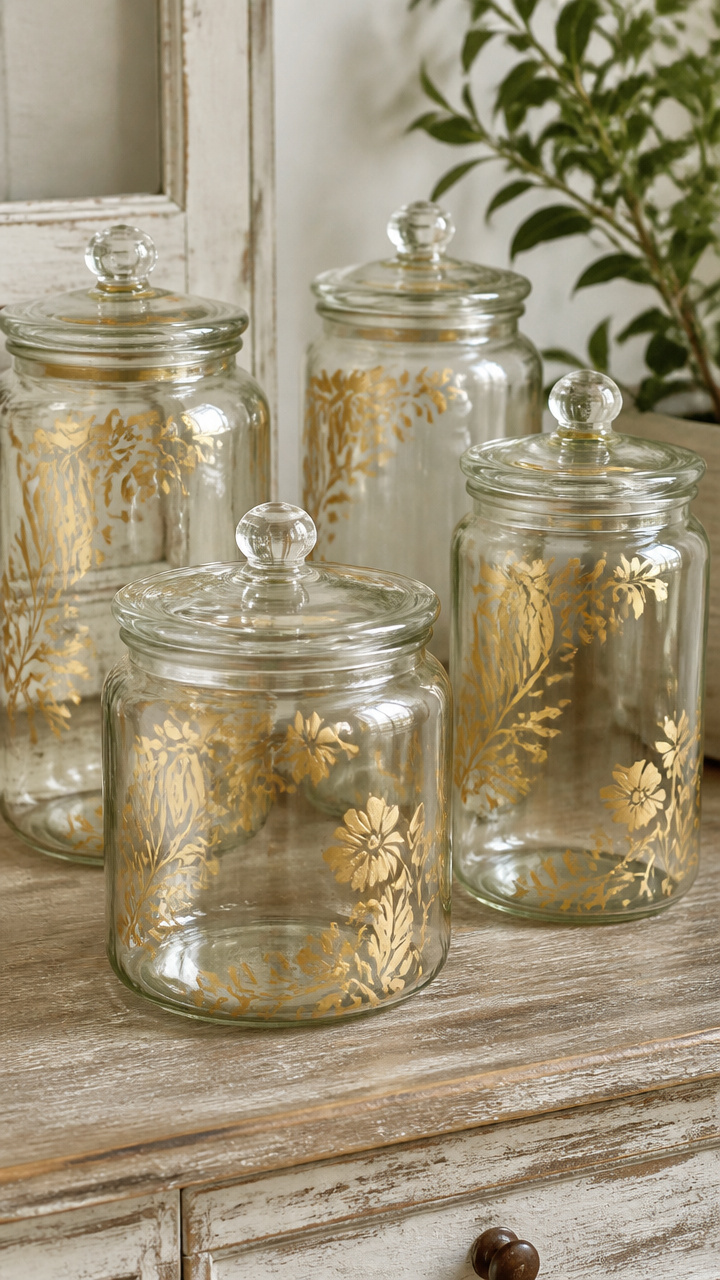
Gold leaf swirls curl around jars holding sugar or pasta. The shimmer catches light without looking flashy.
Materials Needed
- 4 wide mouth mason jars, 32 oz
- Gold leaf sheets, 2
- Stencil with floral corner design, 4 inch size
- Adhesive stencil paste and small brush
- Burnishing tool or spoon
How to Make It
- Position the stencil in one corner of the jar and dab on a thin layer of adhesive paste with the brush.
- Wait 30 seconds until tacky, then lay a gold leaf sheet over the area and press gently with the burnishing tool.
- Lift the leaf carefully and repeat for the other three jars in matching corners.
- Seal the gold with a light spray of acrylic fixative after 1 hour.


12. Moss-Covered Base Planters
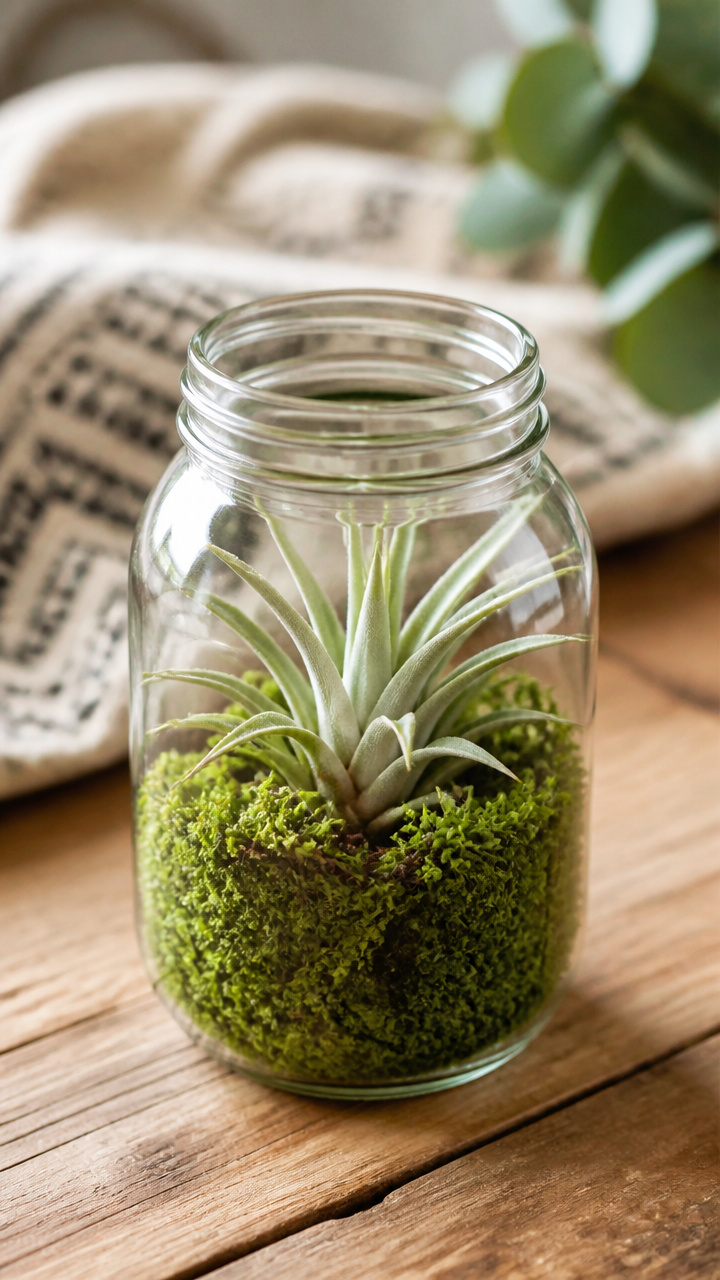
Lush green moss hugs the bottom third of jars holding air plants. These bring forest floor texture indoors.
Materials Needed
- 6 regular mouth mason jars, 6 oz
- Preserved sheet moss, 1/4 square foot
- Craft knife
- PVA glue
- Air plants, 6 Tillandsia ionantha
How to Make It
- Cut moss into patches that wrap around the lower third of each jar.
- Brush a thin layer of PVA glue on the glass where moss will go.
- Press each moss patch firmly into place, overlapping edges slightly for full coverage.
- Let dry for 3 hours, then place one air plant inside each jar without closing the lid.


13. Rustic Rope Handles
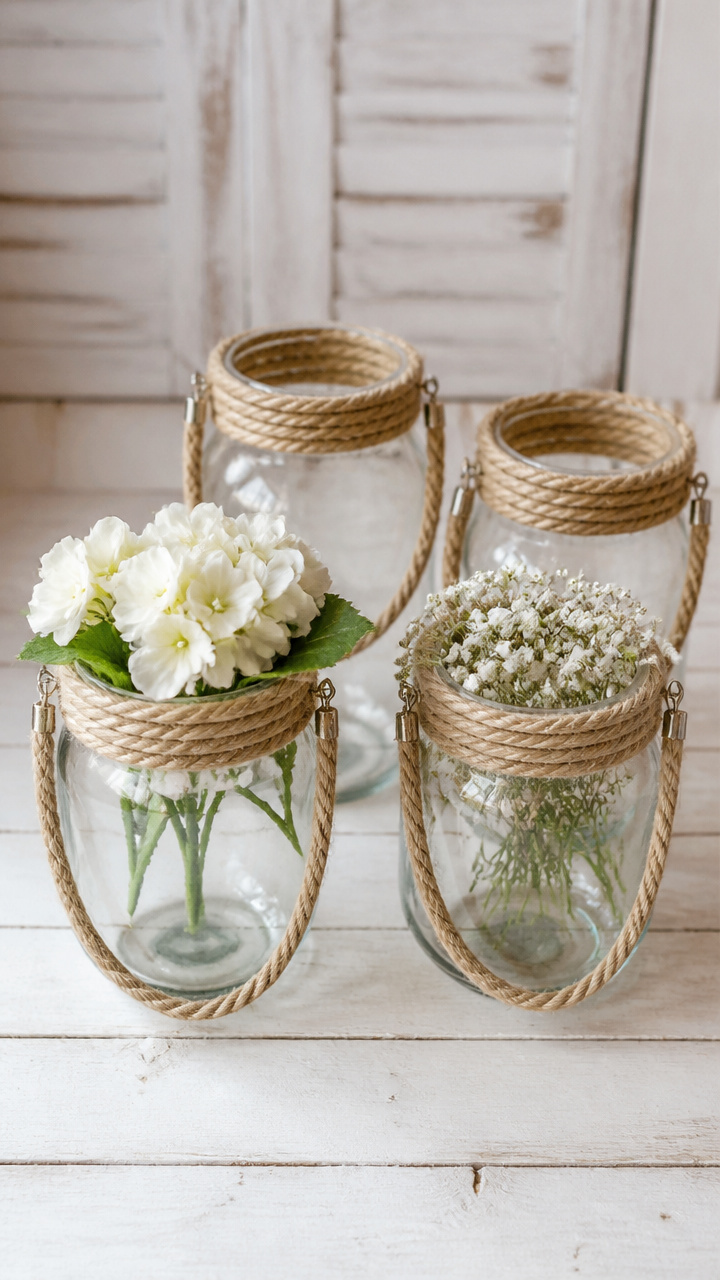
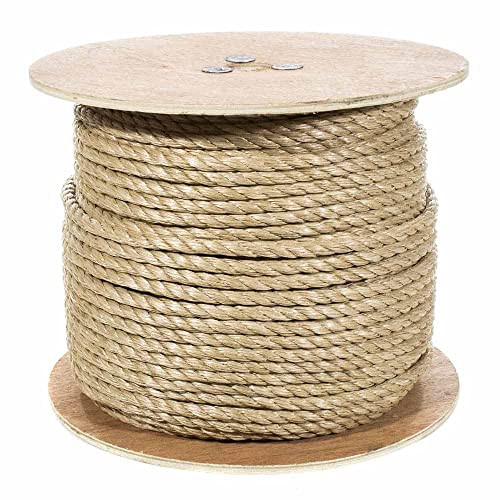
Thick rope loops make jars easy to carry like market pails. Fill them with fruit or napkins for outdoor dining.
Materials Needed
- 4 pint-sized mason jars
- Manila rope, 1/2 inch diameter, 8 feet
- Scissors
- E6000 craft adhesive
How to Make It
- Cut four 20 inch lengths of rope.
- Bend each piece in half and position the loop on opposite sides of the jar’s shoulder.
- Drill two small pilot holes through the metal band at each loop base, then thread rope ends through and knot underneath.
- Secure knots with a dab of E6000 and let set for 4 hours before lifting.


14. Vintage Map Wraps
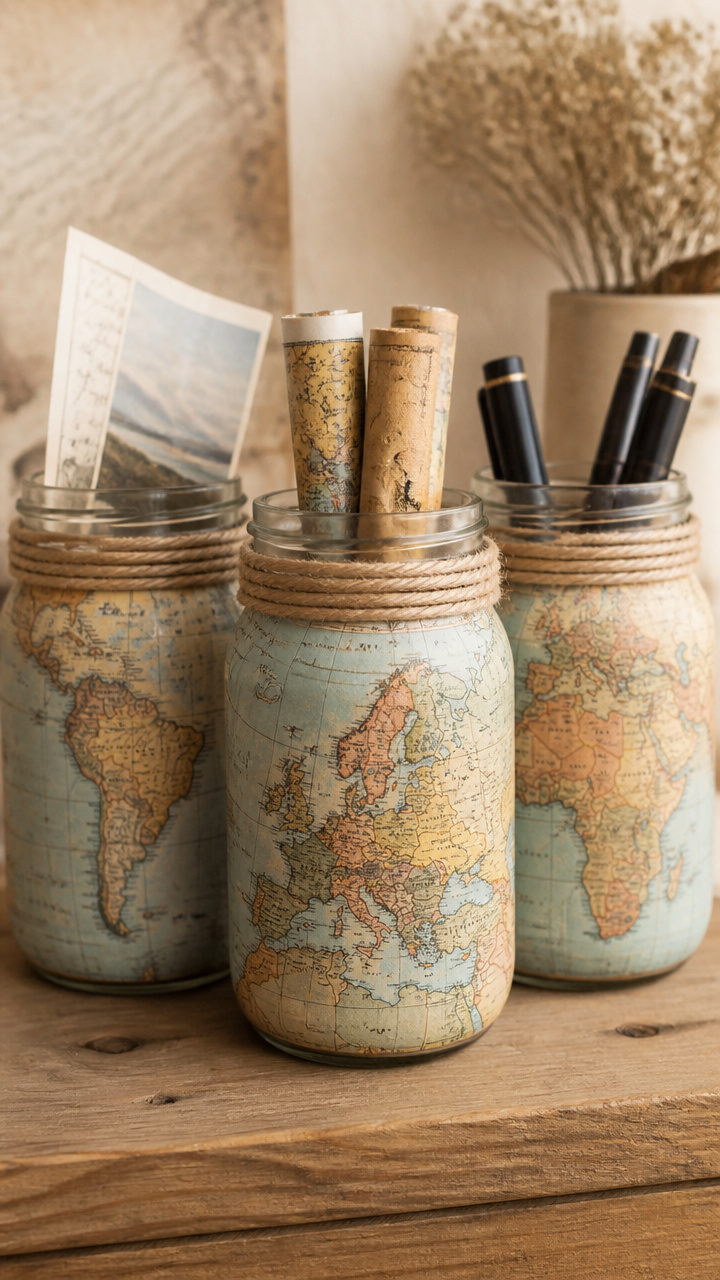
Faded atlas pages spiral around jars that hold travel mementos or pens. Each shows a real place you love.
Materials Needed
- 5 regular mouth mason jars, 12 oz
- Old world atlas pages, 5 different regions
- Mod Podge matte finish, 4 oz
- Foam brush, 1 inch
- Scissors
How to Make It
- Cut each map into a rectangle 3 inches high and long enough to wrap the jar with 1/2 inch overlap.
- Brush a thin layer of Mod Podge on the back of the map and wrap it smoothly around the jar.
- Use the foam brush to smooth bubbles and seal the overlap edge.
- Let dry for 2 hours, then apply a top coat of Mod Podge and dry another 2 hours.


15. Beeswax-Dipped Wick Holders
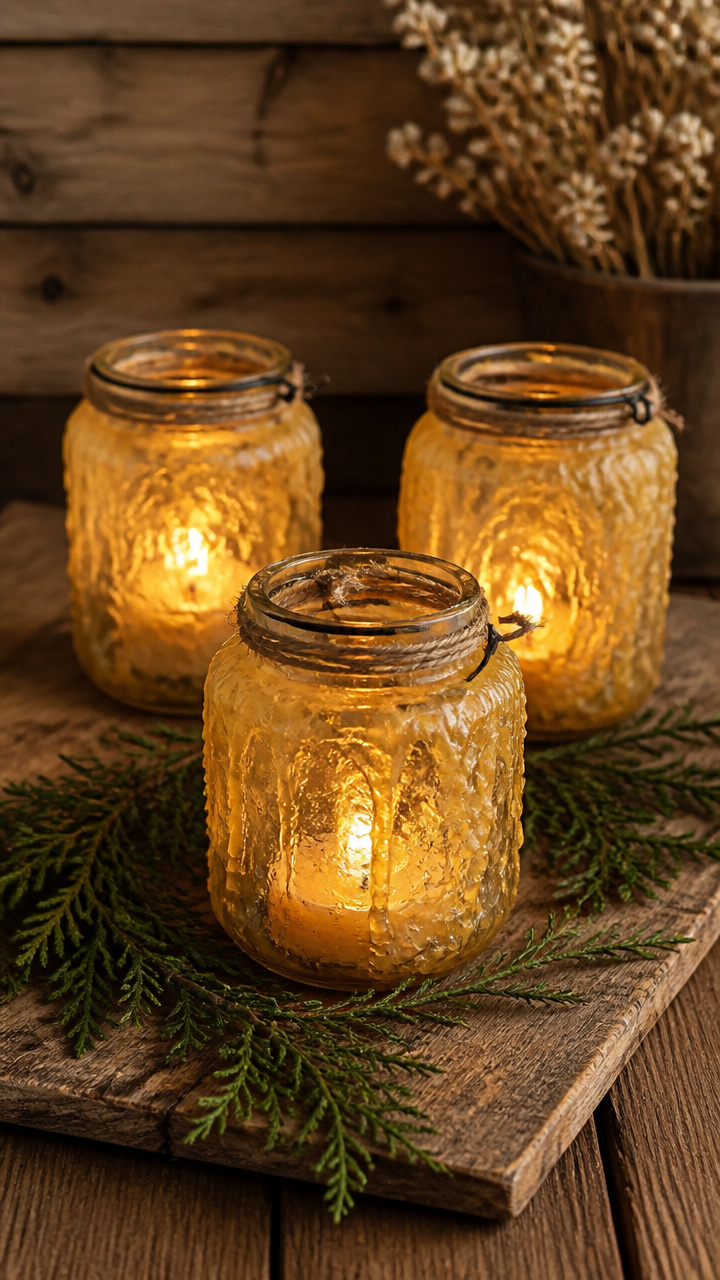
Warm amber wax clings to jars in dripped layers, holding tea lights safely. They smell subtly honeyed when lit.
Materials Needed
- 4 half-pint mason jars
- Refined beeswax blocks, 1 pound
- Double boiler setup
- Tealight candles, 4
- Wooden skewer
How to Make It
- Break wax into chunks and melt in the top of a double boiler over simmering water, stirring occasionally.
- Dip each jar upside down into the wax, submerging the bottom third, then lift slowly to allow dripping.
- Rotate the jar slightly as wax cools to create uneven drips, using the skewer to guide thick drops.
- Let cool for 15 minutes between dips and repeat for a layered effect, then place a tealight inside.


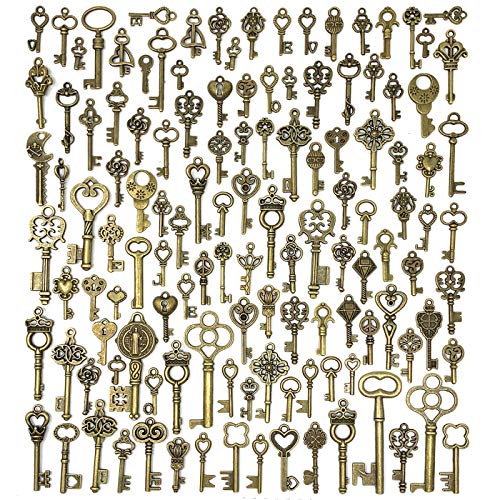
16. Antique Key Charms
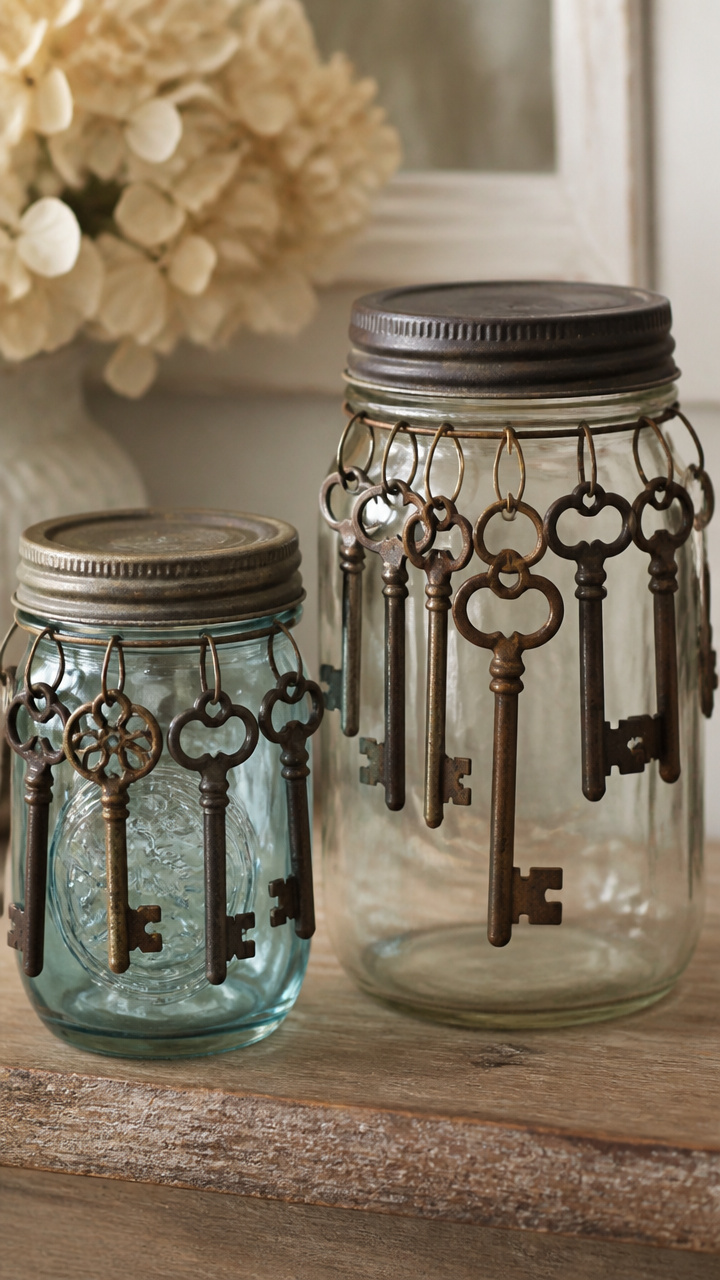
Old keys dangle from lids like secrets waiting to be turned. Hang these above a desk or beside a mirror.
Materials Needed
- 6 regular mouth mason jar lids
- Vintage-style skeleton keys, 2 inch length, 6
- Jump rings, 10 mm, 6
- Pliers
- Clear nail polish
How to Make It
- Open a jump ring with pliers by twisting sideways, not pulling apart.
- Slide one key onto the ring, then attach the ring to the center of the lid’s underside.
- Close the ring securely with pliers, ensuring no gap remains.
- Brush a drop of clear nail polish over the joint to prevent loosening and let dry for 10 minutes.

17. Salt-Dyed Ombre Jars
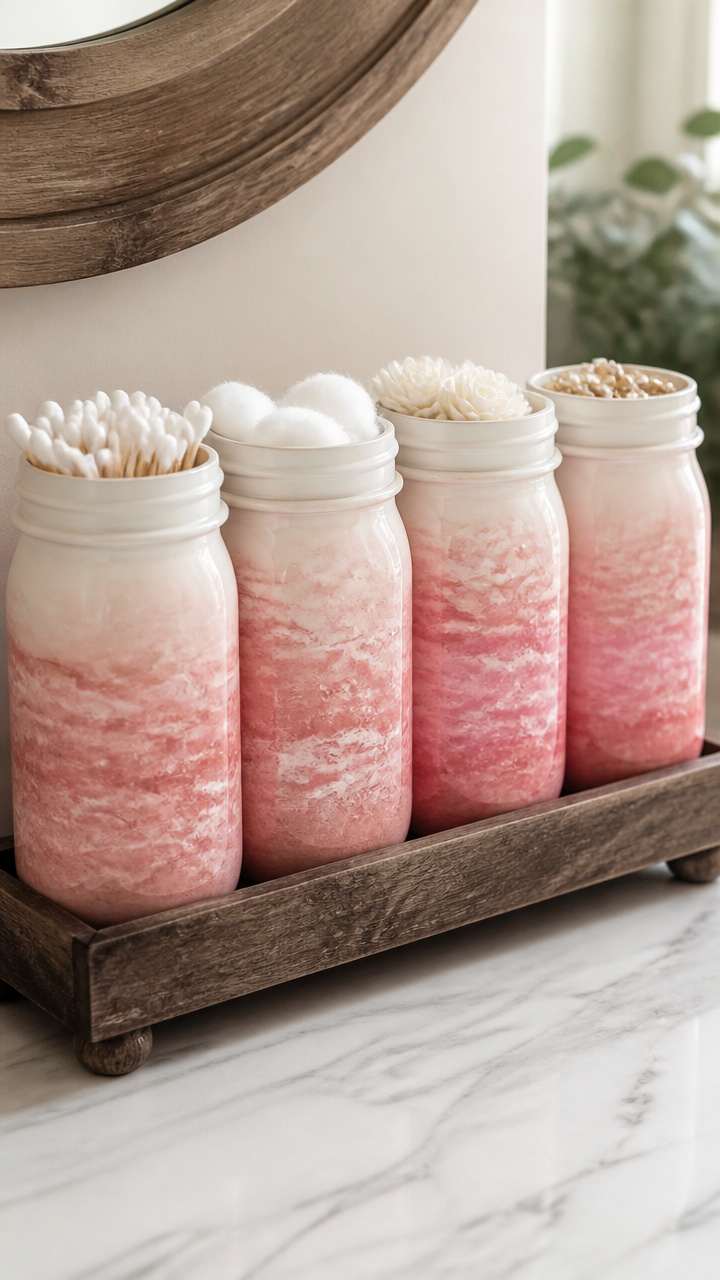
Pink-to-white gradients bloom from salt-infused dye, mimicking desert sunsets. These hold cotton swabs or trinkets.
Materials Needed
- 4 wide mouth mason jars, 8 oz
- Pink fabric dye, powder form, 1 packet
- Table salt, 1 cup
- Plastic gloves
- Mixing bowl
How to Make It
- Mix dye powder with 2 cups warm water in the bowl, then stir in salt until dissolved.
- Submerge the bottom third of each jar into the solution for 30 seconds, then tilt to raise the level slightly for each dip.
- Repeat twice, dipping higher each time to create a fade, waiting 1 minute between dips.
- Let jars dry upright for 4 hours, then rinse under cold water to stop the dye process.


18. Leather Strip Toppers
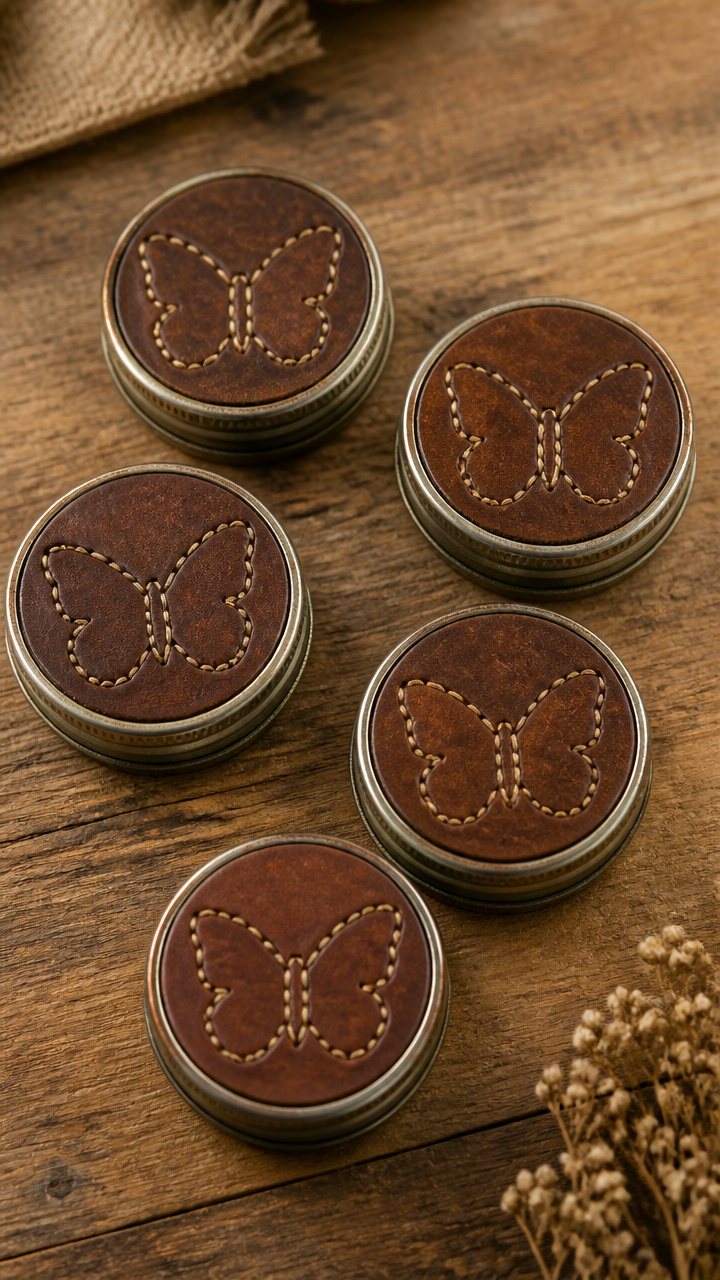
Butterfly-stitched leather seals jars storing coffee or spices. The rich brown ages beautifully with use.
Materials Needed
- 5 regular mouth mason jar lids
- Vegetable-tanned leather strip, 1 inch wide x 6 inches long, 5
- Hole punch for leather
- Waxed linen thread, 10 yards
- Needle for heavy thread
How to Make It
- Punch two holes near each end of the leather strip, 1/2 inch from the edge.
- Center the strip over the lid and pass the threaded needle up through one hole and down through the other.
- Tie a square knot on top and trim ends to 1/2 inch.
- Repeat for all five lids, ensuring each knot is snug but allows room to lift the leather for opening.
Each of these jars tells a story through texture, light, or memory. Grab a few basics and let one idea lead to the next.