15 Leaf Painting Craft Ideas

There’s a quiet magic in pressing leaves and turning them into art. Nature hands you shapes, textures, and stories all at once, and with a little paint, each one becomes something new.
These ideas use real leaves as tools, stamps, templates, and textures. You’ll find projects that work on paper, fabric, wood, and even windows — each with clear steps and exact supplies.
1. Leaf Print Tote Bag
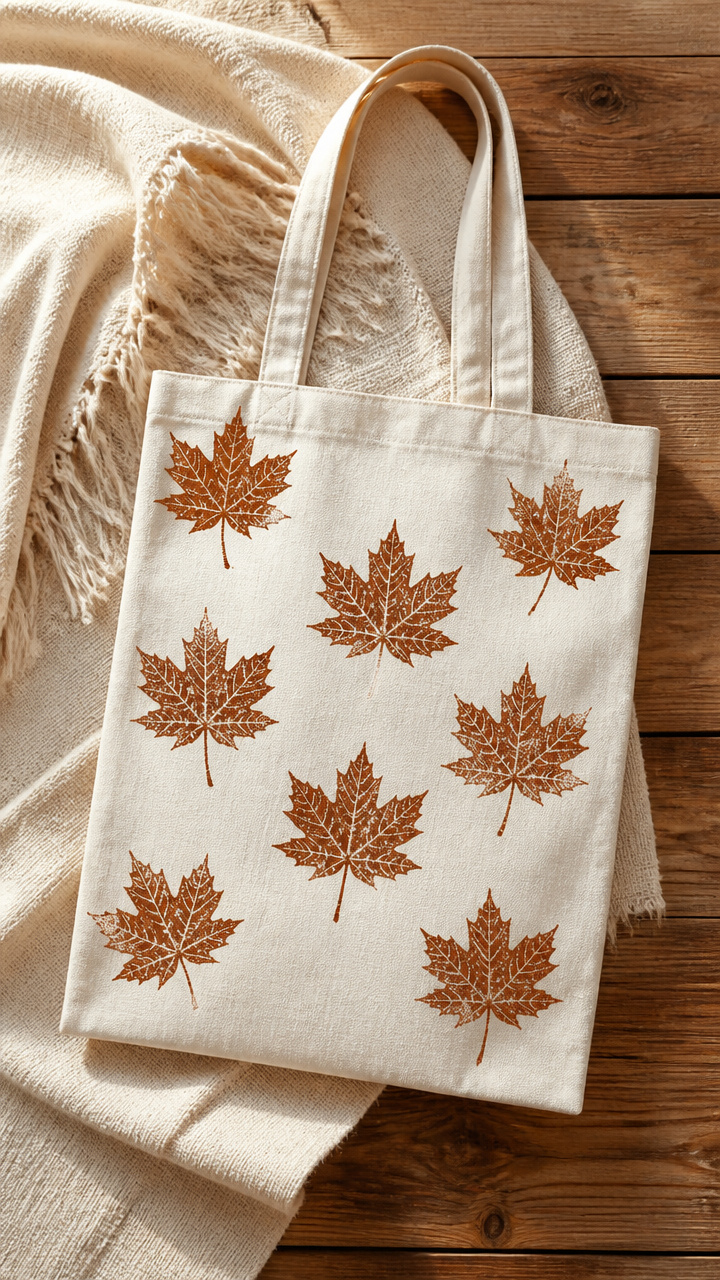
Crisp leaf outlines stamped on cotton give your tote a handmade seasonal look. The paint holds up after washing when sealed properly.
Materials Needed
- 1 natural cotton tote bag
- 3 fresh maple leaves
- 2 tablespoons brown acrylic paint
- 1 small foam brush
- 1 piece of cardboard to insert inside bag
How to Make It
- Wash and dry the tote bag to remove any sizing. Insert the cardboard inside to prevent paint from bleeding through.
- Paint one side of a maple leaf with brown acrylic using the foam brush. Press the painted side firmly onto the tote and lift straight off.
- Repeat with two more leaves, letting each print dry for 10 minutes before adding another. Let the final print dry completely for 1 hour before heat-setting.


2. Watercolor Vein Study
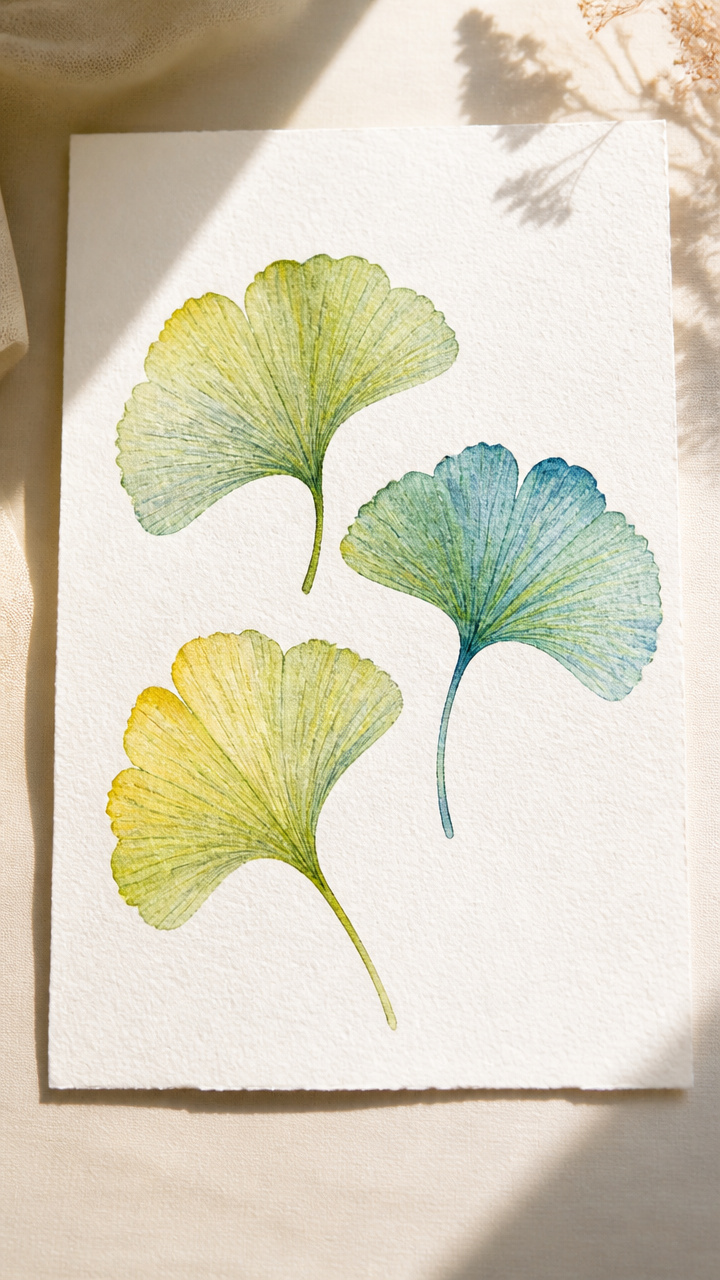
Delicate leaf skeletons become guides for soft watercolor washes. This craft highlights the fine network of veins in transparent color.
Materials Needed
- 3 ginkgo leaves with visible veins
- 1 sheet A4 cold press watercolor paper
- 1 set liquid watercolors (green, yellow, blue)
- 1 fine mist spray bottle
- 1 size 4 round watercolor brush
How to Make It
- Place a ginkgo leaf on the watercolor paper and lightly spritz the area with water from the spray bottle until damp but not pooling.
- Dip the brush in green liquid watercolor and touch it to the base of the leaf’s stem. Watch the color travel along the damp fibers.
- Add drops of yellow and blue to different sections, letting them blend naturally. Remove the leaf after 2 minutes and let the painting air dry flat for 3 hours.


3. Leaf Resist Window Art
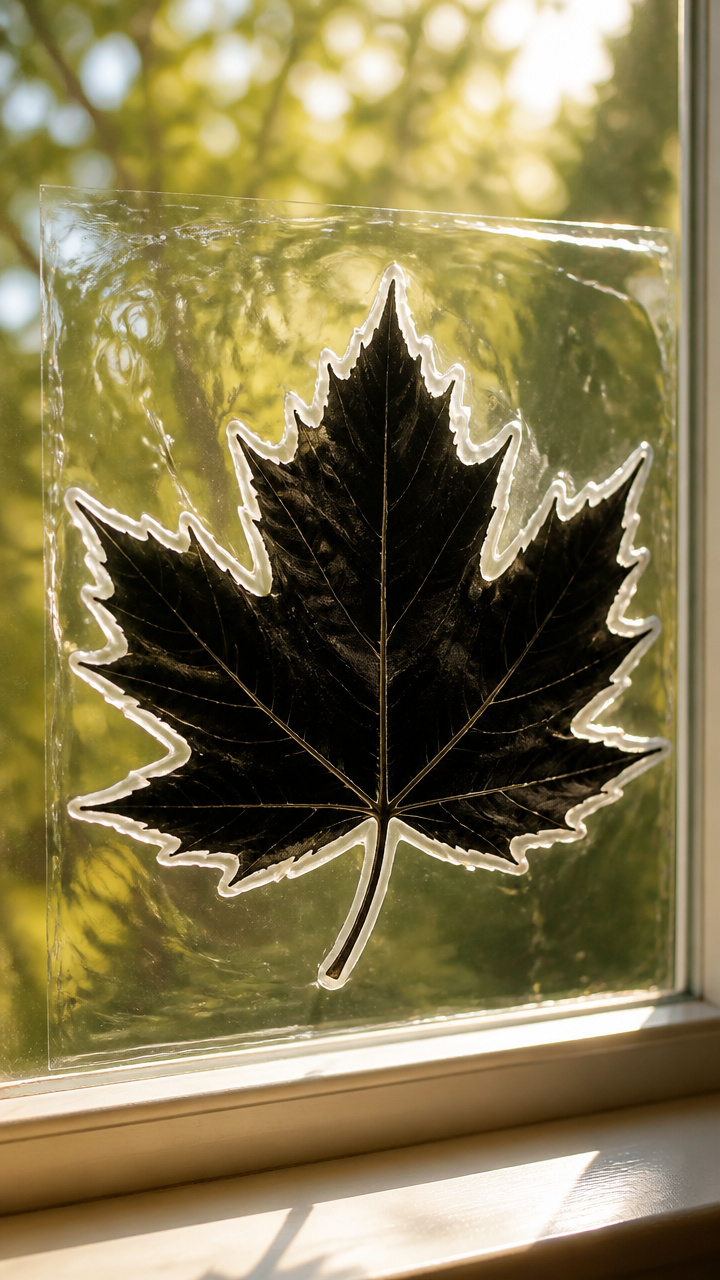
Waxy crayon barriers hold back paint to form crisp leaf silhouettes on glass. Sunlight turns these into glowing panels.
Materials Needed
- 1 large sycamore leaf
- 1 white school glue stick
- 1 black liquid tempera paint
- 1 small sponge applicator
- 1 sheet clear contact paper
How to Make It
- Rub the glue stick over the entire surface of the sycamore leaf. Let it sit for 2 minutes so the wax hardens slightly.
- Press the waxed side of the leaf onto the sticky side of the contact paper. Smooth gently with your palm.
- Dab black tempera over the leaf using the sponge, covering the surface but avoiding heavy buildup. Peel the leaf off after 15 seconds and let the paint dry for 40 minutes.


4. Autumn Palette Wood Slice
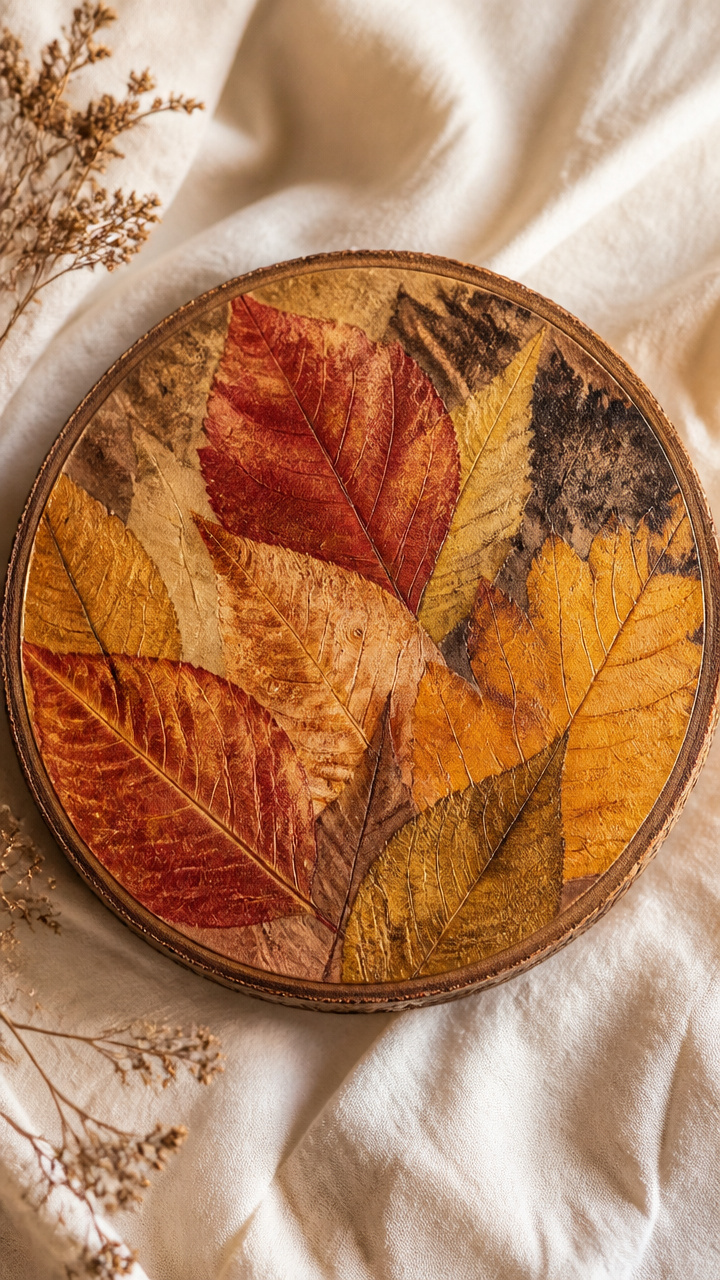
Real leaf pigments bleed directly onto wood to create organic autumn tones. Each slice captures the season’s true colors.
Materials Needed
- 1 round basswood slice, 6 inches diameter
- 2 oak leaves
- 1 tablespoon rubbing alcohol
- 1 mallet
- 1 piece cheesecloth
How to Make It
- Lay an oak leaf vein-side down on the wood slice. Cover it with a 6-inch square of cheesecloth.
- Pour half the rubbing alcohol over the cloth and tap firmly with the mallet for 30 seconds. Flip and repeat with the second oak leaf on a new spot.
- Let the wood dry face-up in a warm room for 5 hours. The alcohol pulls natural tannins from the leaf, leaving russet and gold stains.


5. Salt Texture Landscape
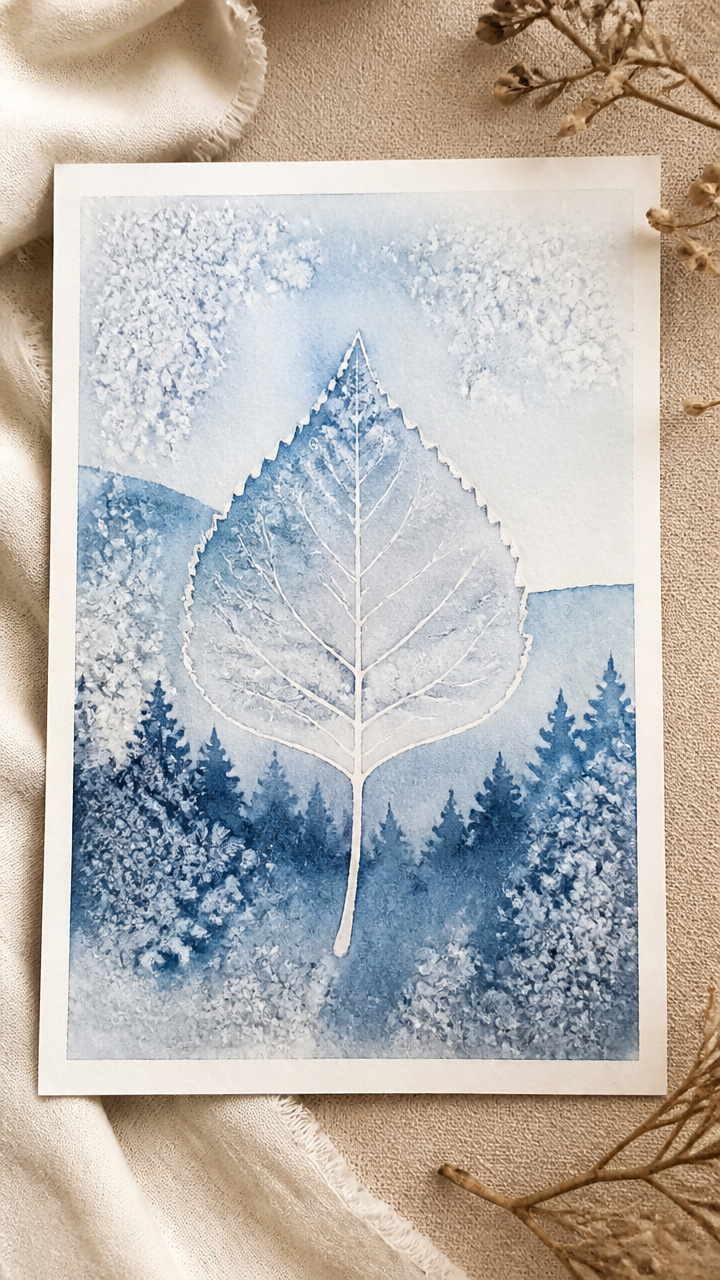
Sprinkled salt grabs wet watercolor to mimic frost on leaf edges. The effect adds dimension to simple painted scenes.
Materials Needed
- 1 sheet A4 smooth drawing paper
- 3 drops blue watercolor
- 1 dropper
- 1 teaspoon table salt
- 1 fresh birch leaf
How to Make It
- Use the dropper to place three blue watercolor drops near the top edge of the paper. Lay the birch leaf below them, aligned horizontally.
- Tilt the paper slightly so the drops run downward like rain, passing over the leaf’s tip. Stop tilting once the color flows past.
- Sprinkle salt over the wet trail immediately. Wait 3 minutes, then shake off the salt and let the paper dry flat for 2 hours.


6. Leaf Stencil Spray Art
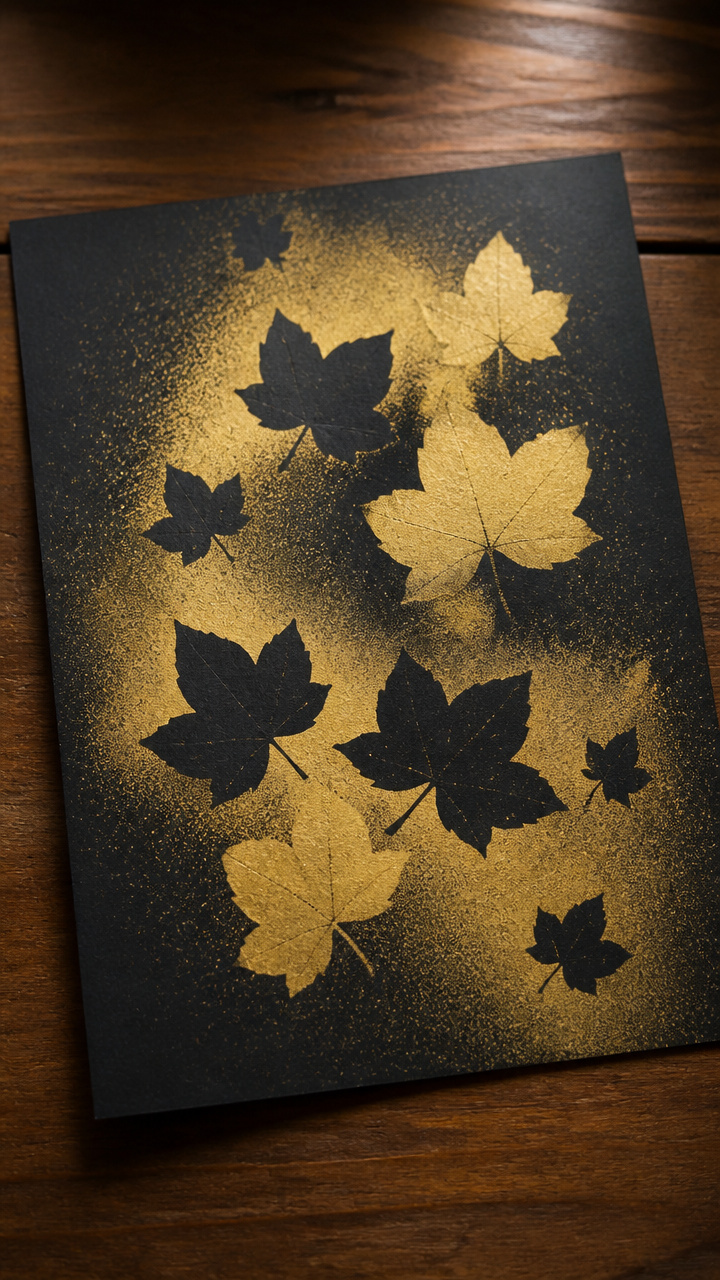
Cardstock cutouts guide a burst of spray paint into sharp leaf forms. Layered sprays build depth without brushes.
Materials Needed
- 1 pre-cut ivy leaf stencil, 4 inches tall
- 1 sheet black construction paper
- 1 can gold spray paint
- 1 roll painter’s tape
- 1 pair safety goggles
How to Make It
- Tape the black paper to a flat surface outdoors. Position the ivy stencil in the center and press the edges down firmly.
- Put on the goggles. Hold the spray can 10 inches away and apply one short burst for 2 seconds. Lift the stencil right after.
- Wait 8 minutes between layers if adding more stencils. Let the final piece dry fully for 20 minutes before touching.


7. Fingerprint Maple Leaves
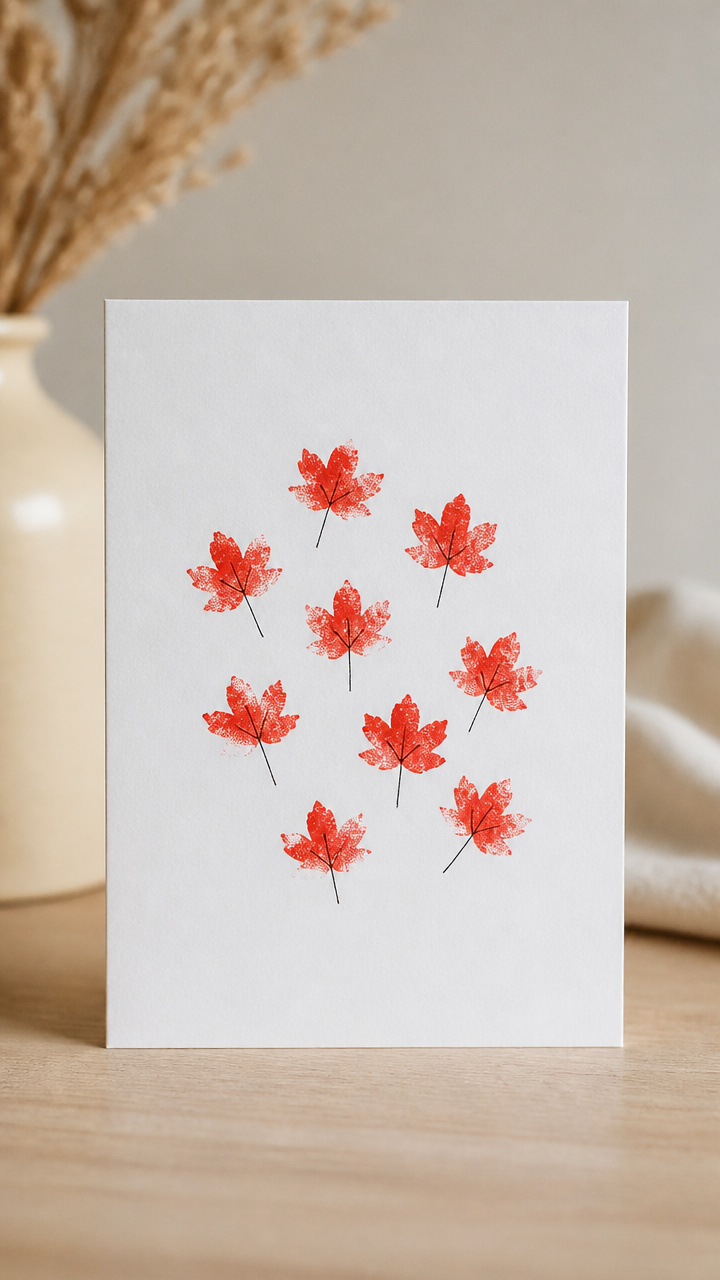
Your fingertip becomes the brush for tiny red maple clusters. These fit perfectly in journal margins or greeting cards.
Materials Needed
- 1 red ink pad
- 1 index card, 3×5 inches
- 1 fine-tip black marker
- 1 damp paper towel
How to Make It
- Press your index fingertip into the red ink pad until fully coated. Roll the finger slightly as you press it onto the top left of the index card.
- Repeat three more times in a loose cluster, angling each fingerprint to suggest leaf spread. Use less pressure on the last one.
- Once the ink dries in 4 minutes, draw thin brown stems connecting each print with the marker. Wipe your finger clean with the paper towel.


8. Chalk Pastel Sycamore
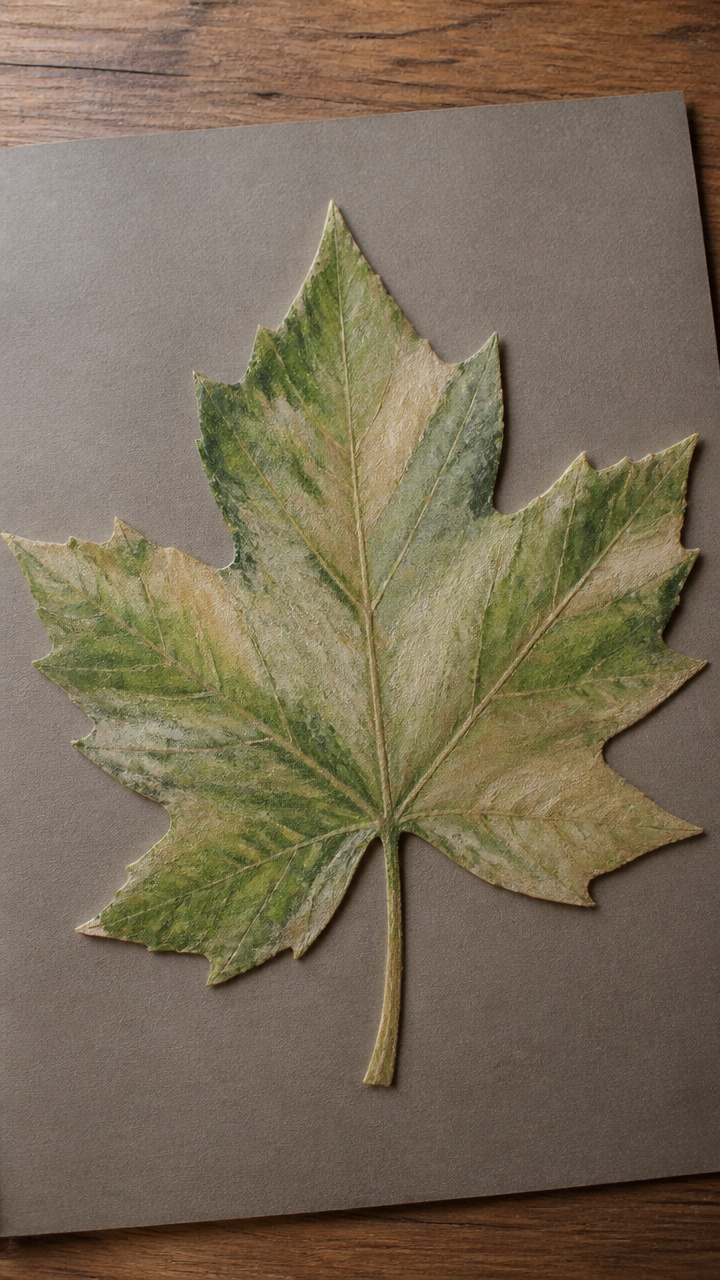
Blended pastel layers mimic the mottled bark and soft underside of a sycamore leaf. The texture feels rich under your fingers.
Materials Needed
- 1 green chalk pastel
- 1 beige chalk pastel
- 1 sheet gray Canson paper
- 1 blending stump
- 1 real sycamore leaf for reference
How to Make It
- Outline a sycamore shape freehand on the gray paper using the beige pastel. Keep the edges uneven and natural.
- Fill the leaf with green pastel using short strokes from base to tip. Press harder along the central vein.
- Use the blending stump to smudge beige into the outer edges and lower section. Rotate the stump as you go to keep it clean.


9. Glue and Glow Panel
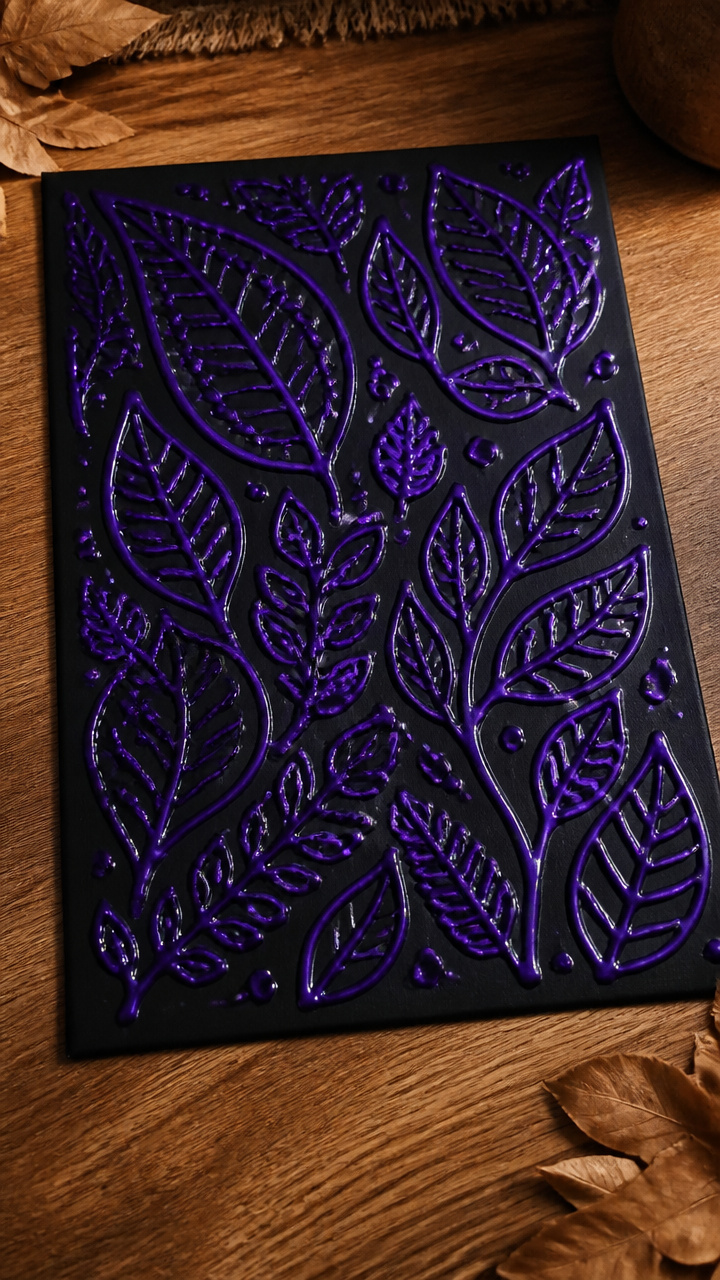
Clear-dried glue traces leaf shapes that shine under UV light. Invisible by day, they glow bright purple at night.
Materials Needed
- 1 PVA glue
- 1 UV-reactive purple pigment powder, 1/4 teaspoon
- 1 stiff paintbrush
- 1 magnolia leaf
- 1 black poster board
How to Make It
- Mix the purple powder into the PVA glue with the brush until no clumps remain. Stir for 30 seconds.
- Place the magnolia leaf on the black board. Trace its outline with the glowing glue, applying a thick, continuous line.
- Carefully lift the leaf and let the glue dry for 4 hours in a dust-free area. Shine a UV flashlight on it to see the glow.


10. Ink Blot Fern Symmetry
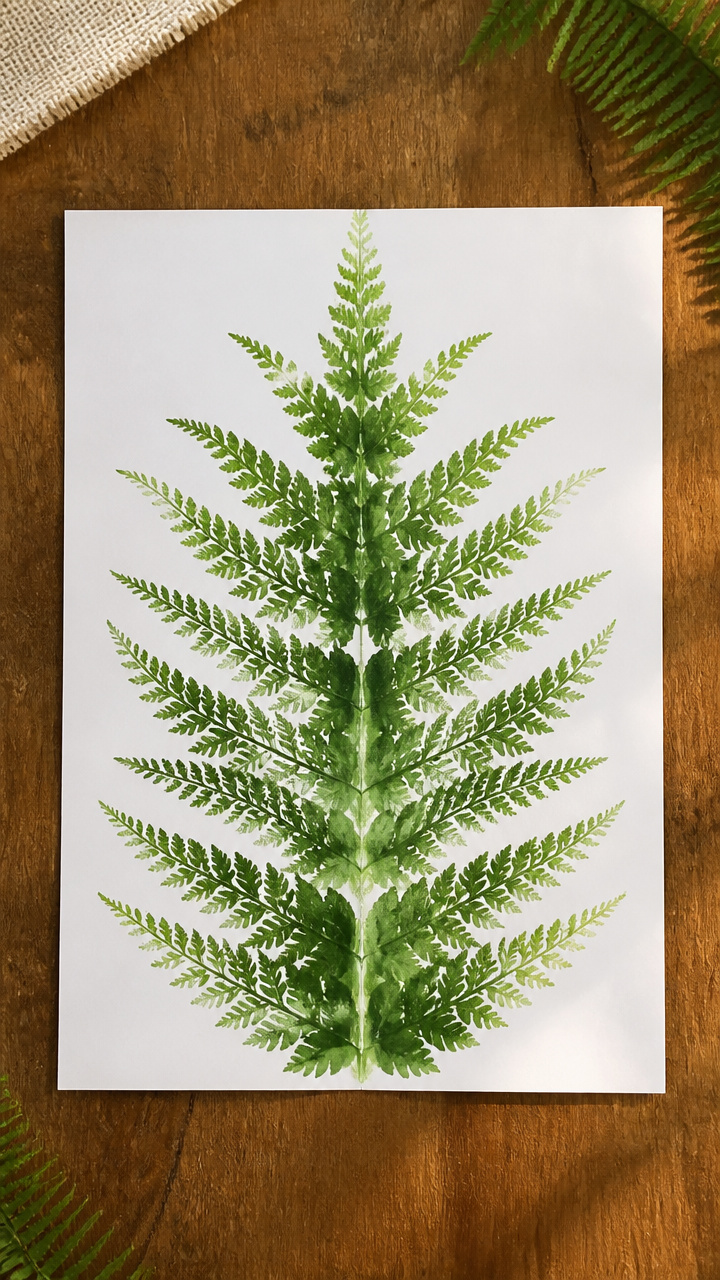
Folded paper captures mirror-image ferns from a single ink drop. The result looks intricate but takes under ten minutes.
Materials Needed
- 1 sheet white drawing paper
- 1 drop green calligraphy ink
- 1 eyedropper
- 1 fresh fern frond
- 1 bone folder
How to Make It
- Fold the paper in half vertically and crease sharply with the bone folder. Open it flat again.
- Use the eyedropper to place one green ink drop along the fold near the center. Lay the fern frond over the drop, perpendicular to the fold.
- Close the paper and press evenly with your palm for 10 seconds. Open slowly to reveal a symmetrical fern print. Let dry 15 minutes.


11. Leaf Mosaic Greeting Card
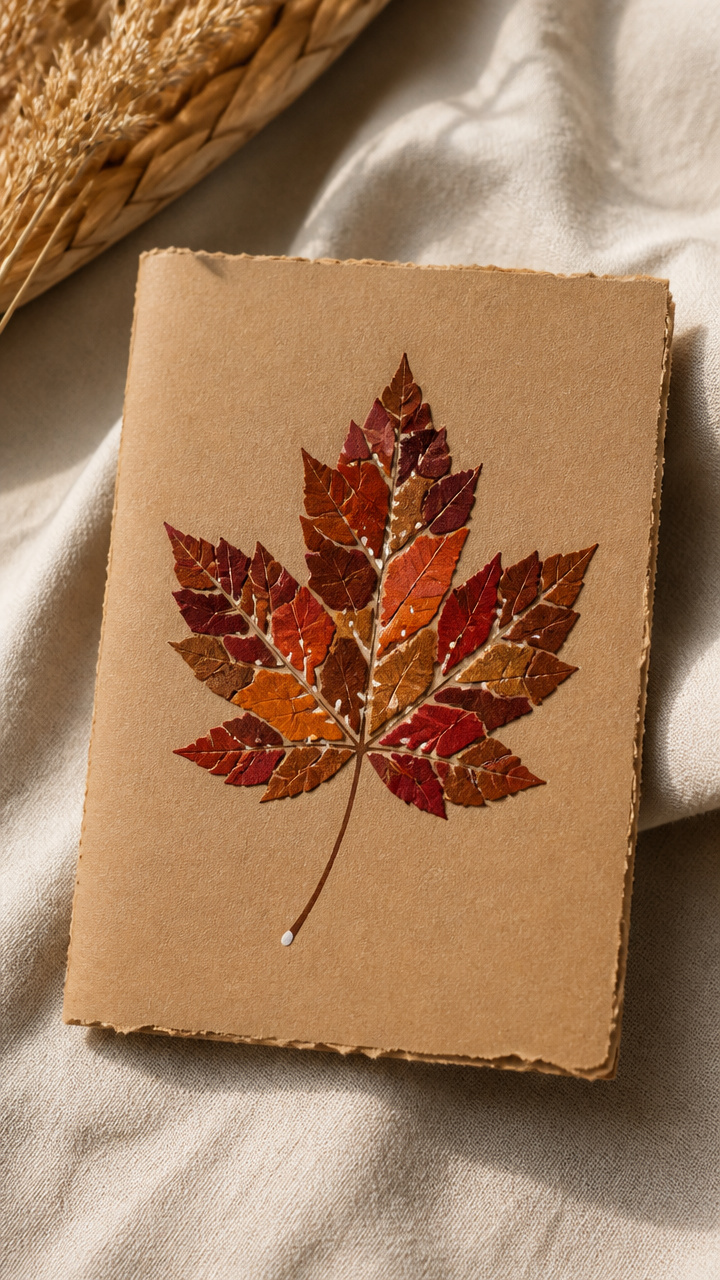
Tiny painted leaf fragments form a larger collaged maple on recycled cardstock. It’s tactile and personal for handwritten notes.
Materials Needed
- 1 sheet recycled kraft cardstock
- 5 dried leaf pieces, each smaller than 1 inch
- 1 bottle white craft glue
- 1 tweezers
- 1 red watercolor pencil
How to Make It
- Cut the kraft cardstock to 5×7 inches and fold in half. Arrange the five leaf pieces into a maple shape on the front using tweezers.
- Dot white glue under each fragment and press down. Leave slight gaps between pieces for contrast.
- Color lightly around the edges with the red watercolor pencil to suggest a border. Let the card dry facedown for 30 minutes.


12. Bubble Wrap Oak Prints
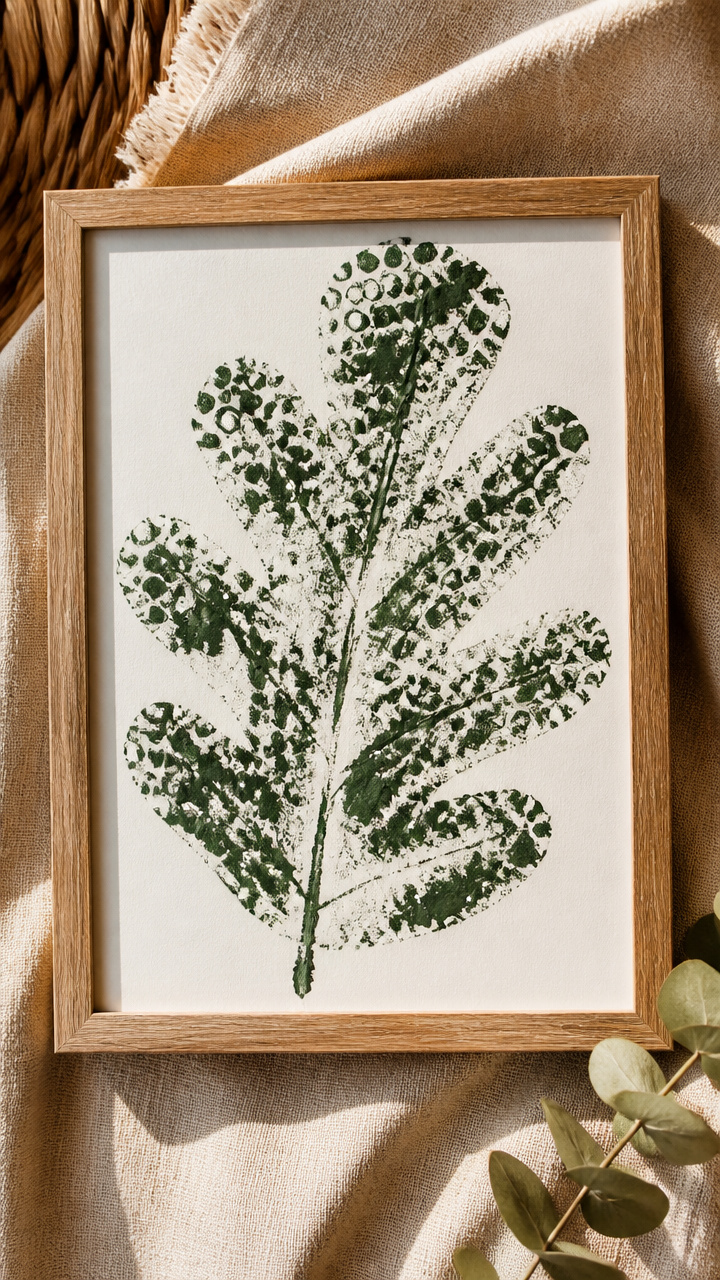
Textured bubble wrap pressed with paint mimics the rough skin of oak leaves. It’s a fun twist when real leaves aren’t handy.
Materials Needed
- 1 sheet dark green poster paint
- 1 piece bubble wrap, 6×6 inches
- 1 foam roller
- 1 sheet white tagboard
- 1 pair scissors
How to Make It
- Cut the bubble wrap into an oak leaf shape using scissors. Make sure the bubbled side is facing up.
- Roll green poster paint evenly over the bubbles with the foam roller. Avoid dripping.
- Press the painted side firmly onto the tagboard and lift straight up. Let the print dry for 45 minutes before display.

13. Double-Sided Leaf Lantern
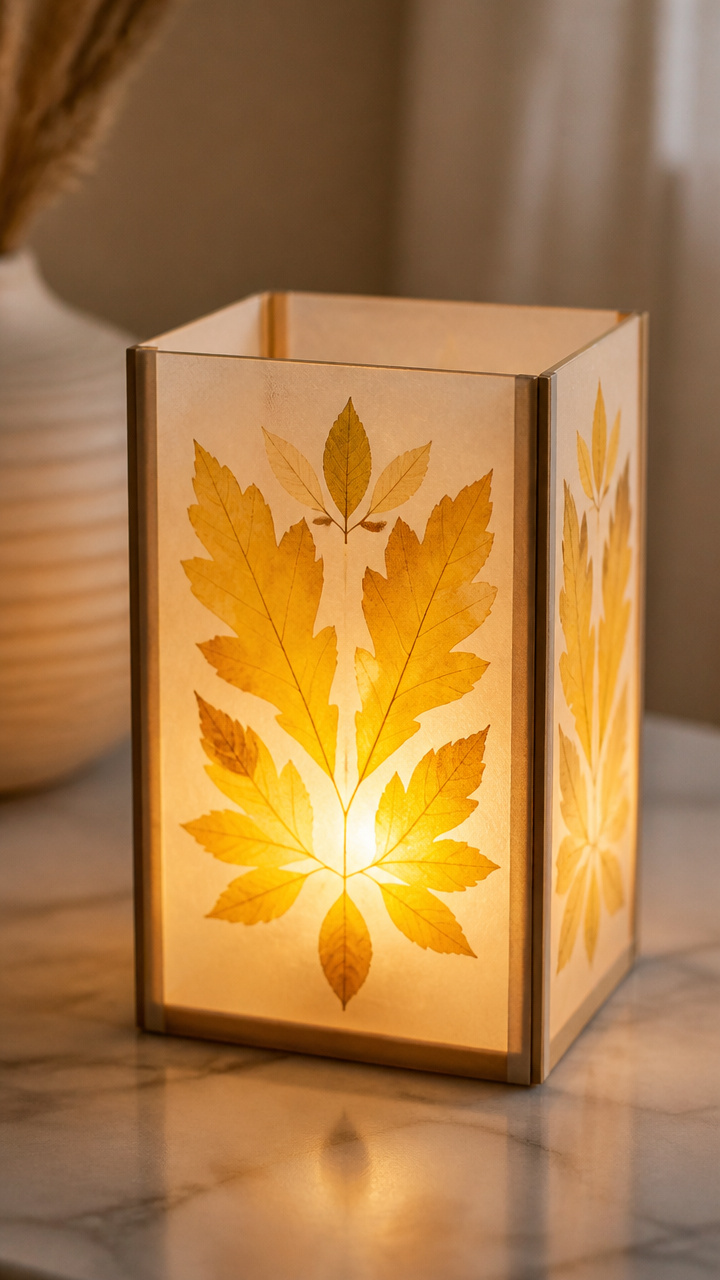
Translucent vellum shows mirrored leaf paintings that glow when lit from within. Perfect for soft evening light.
Materials Needed
- 1 sheet cream vellum, 8×10 inches
- 2 yellow watercolor dots
- 1 dip pen
- 1 tea light LED candle
- 1 stapler
How to Make It
- Fold the vellum in half lengthwise. Use the dip pen to draw a willow leaf on each side, centered across the fold.
- Dip the pen in yellow watercolor and trace each leaf outline. Let the color feather inward slightly.
- Staple both sides shut at the top and bottom. Place the LED candle inside and turn it on to see the glow.


14. Crayon Rubbing Garden
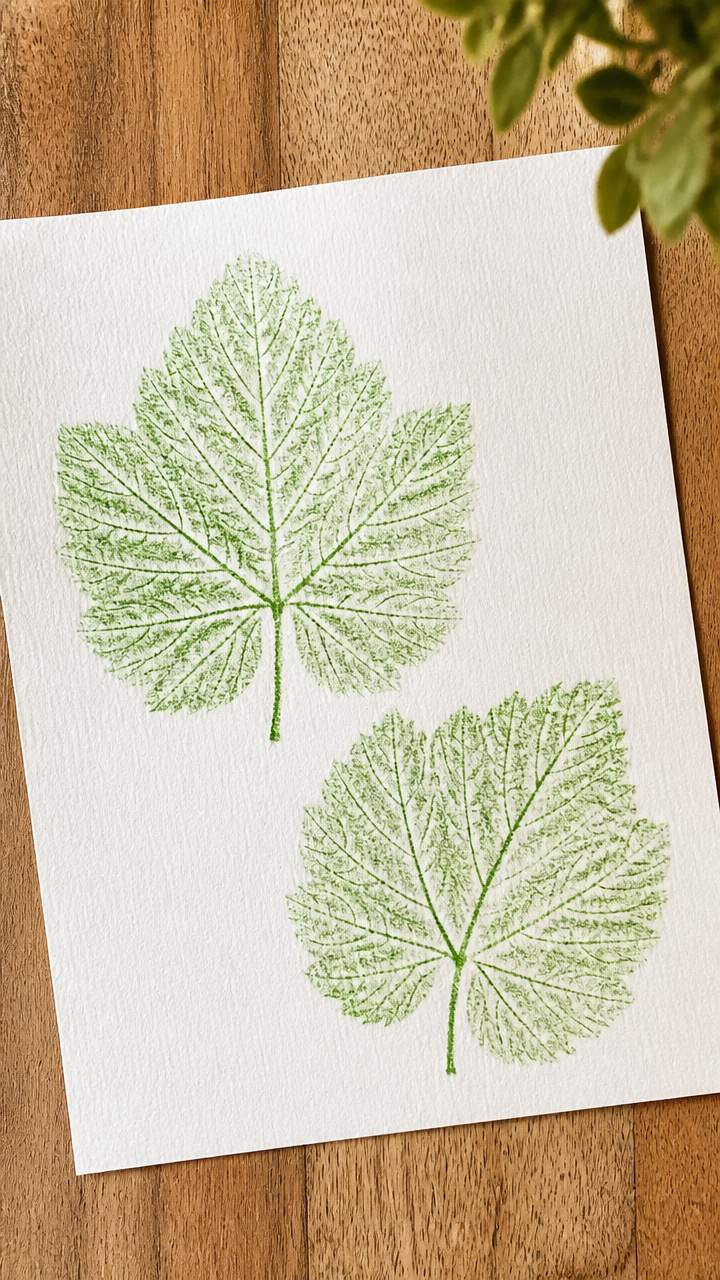
Placed under paper, real leaves reveal their texture when rubbed with crayon. The waxy transfer works best on thick stock.
Materials Needed
- 1 green crayon, paper removed
- 1 sheet heavy watercolor paper
- 2 fresh grape leaves
- 1 clipboard
How to Make It
- Clip the watercolor paper to the clipboard. Slide one grape leaf underneath, centered.
- Hold the green crayon sideways and rub firmly over the leaf area using circular motions. Cover a 3-inch circle.
- Swap the first leaf for the second, overlapping slightly. Rub again with lighter pressure. Let the paper rest flat for 5 minutes.


15. Frozen Paint Cube Prints
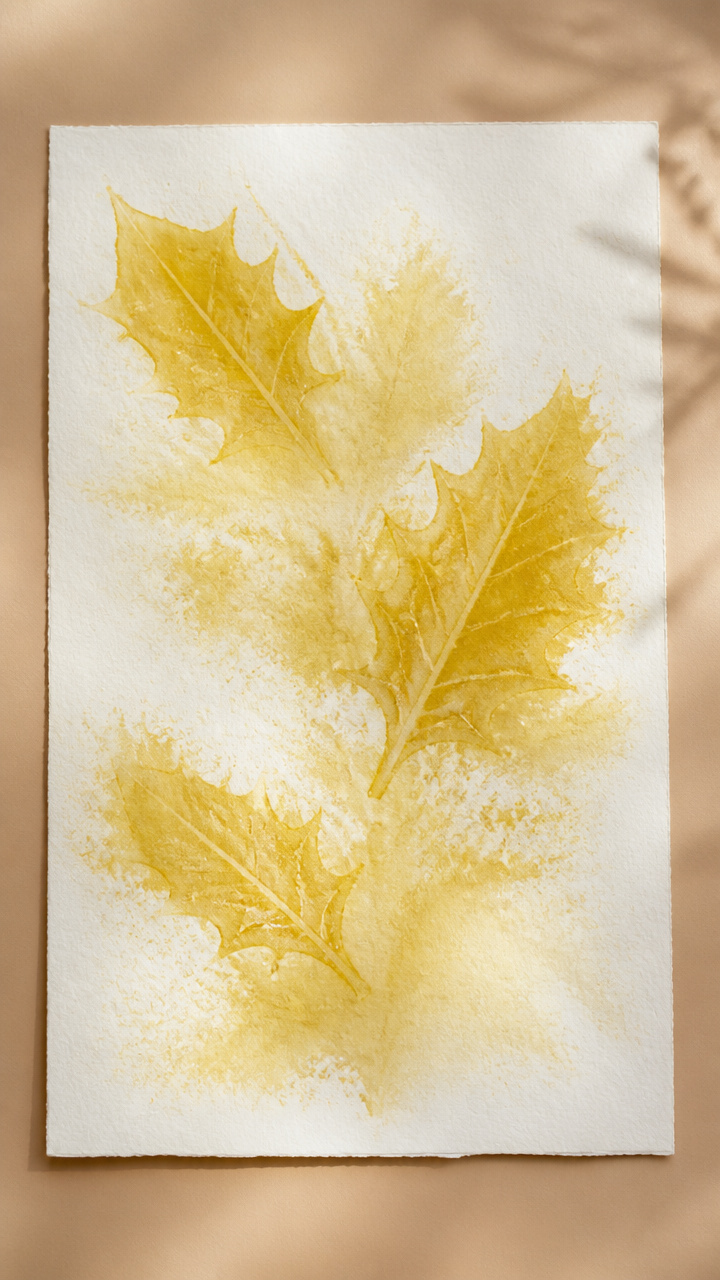
Ice cubes tinted with paint melt slowly on paper to form leaf-shaped stains. The slow release creates soft, blurred edges.
Materials Needed
- 3 ice cube trays
- 1 tablespoon yellow food coloring
- 1 tablespoon cornstarch
- 1 real holly leaf
- 1 sheet absorbent blotting paper
How to Make It
- Mix food coloring and cornstarch into 1 cup of water. Pour into ice trays and freeze for 4 hours.
- Lay the blotting paper on a tray. Place the holly leaf flat on top and set one colored ice cube on its center.
- Wait 12 minutes as the cube melts and spreads. Lift the leaf carefully when the melt pool reaches the paper’s edge. Let dry 2 hours.


You’ve got everything you need to start right now. Gather a few leaves, pick one idea, and let the season show through your hands.