15 New Year Crafts Using Popsicle Sticks

Golden confetti still clings to the floor, and the quiet after midnight hums with fresh promise. These moments call for handmade charm, something tangible to mark the turning year.
Popsicle sticks are humble, yes, but stack them just right and they become stars, clocks, keepsakes. Each craft here turns simple wood into celebration, memory, or a small ritual to carry forward.
1. Mini Fireworks Wall Art
Easy
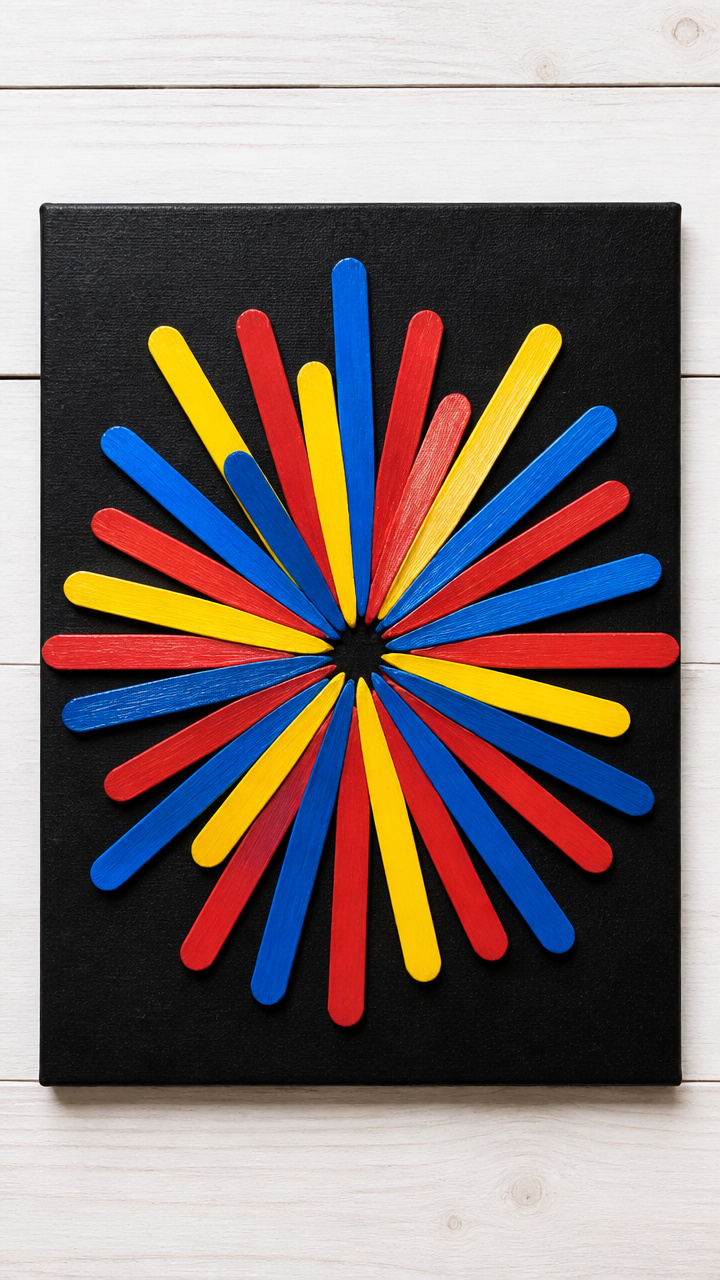
Bright bursts of color radiate from a dark background, capturing the spark of midnight in a frame you can hang year after year.
Materials Needed
- 10 standard popsicle sticks
- 8×10 inch black poster board
- White school glue
- Red acrylic paint
- Yellow acrylic paint
- Blue acrylic paint
- Small paintbrush
- Scissors
How to Make It
- Lay 5 popsicle sticks side by side on a flat surface, leaving a tiny gap between each. Run a line of white school glue down the center of each stick.
- Place the remaining 5 sticks perpendicularly across the first set, fanning them out from the center like rays. Press gently and let dry for 20 minutes.
- Use the small paintbrush to dab red, yellow, and blue acrylic paint at the tips of the sticks and along their edges, creating a splattered effect.
- Trim the black poster board to 7×9 inches using scissors. Glue the dried popsicle starburst centered on the board. Let dry completely before hanging.



2. Number Countdown Garland
Moderate
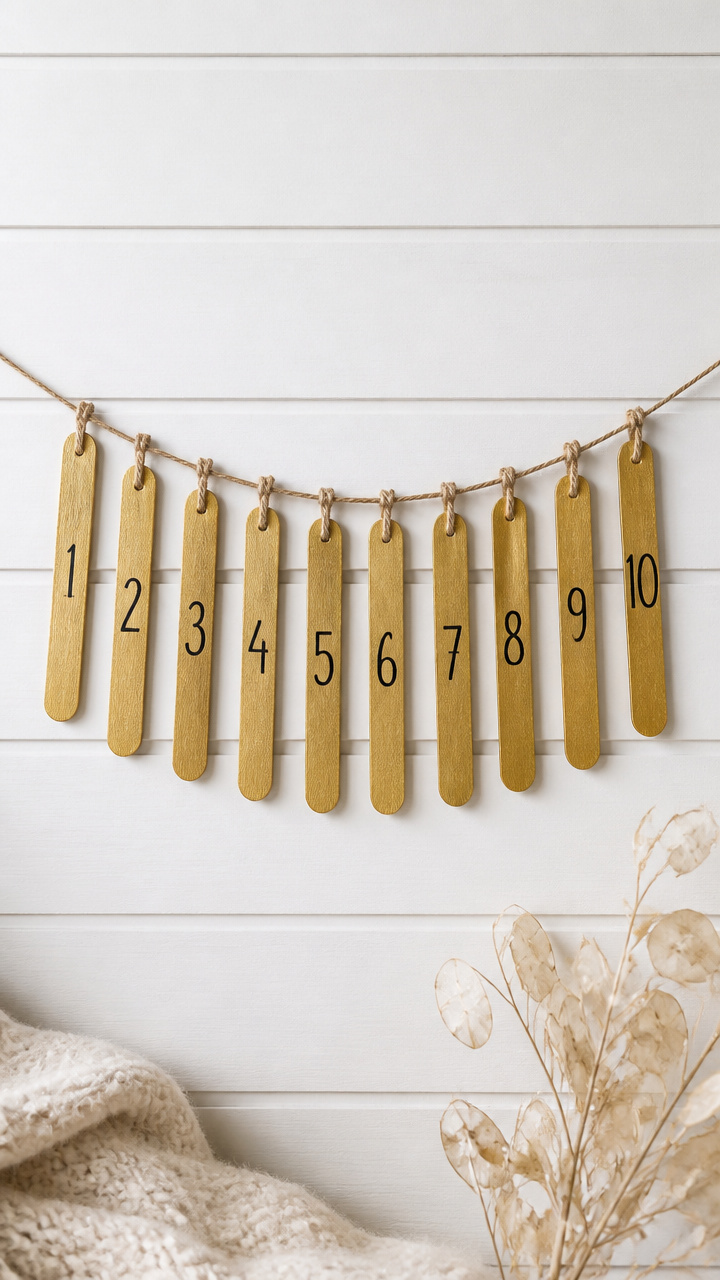
Each wooden number hangs like a pendant, strung together to count down the final days with rustic charm.
Materials Needed
- 10 jumbo popsicle sticks
- Fine-tip black permanent marker
- Gold metallic acrylic paint
- Small foam brush
- Twine, 3 yards
- Hot glue gun
- Hot glue sticks
How to Make It
- Use the fine-tip black permanent marker to write numbers 10 through 1, one number per jumbo popsicle stick.
- Paint the entire surface of each numbered stick with gold metallic acrylic paint using the small foam brush. Let dry for 15 minutes.
- Cut the twine into 10 equal lengths of 10 inches each using scissors.
- Apply a small dot of hot glue to the back of each stick near the top edge. Press one end of a twine piece into the glue and hold for 10 seconds. Repeat for all sticks.
- Tie the free ends of the twine pieces to a longer piece of twine stretched between two hooks or taped to a wall.


3. Sparkling Clock Frame
Moderate
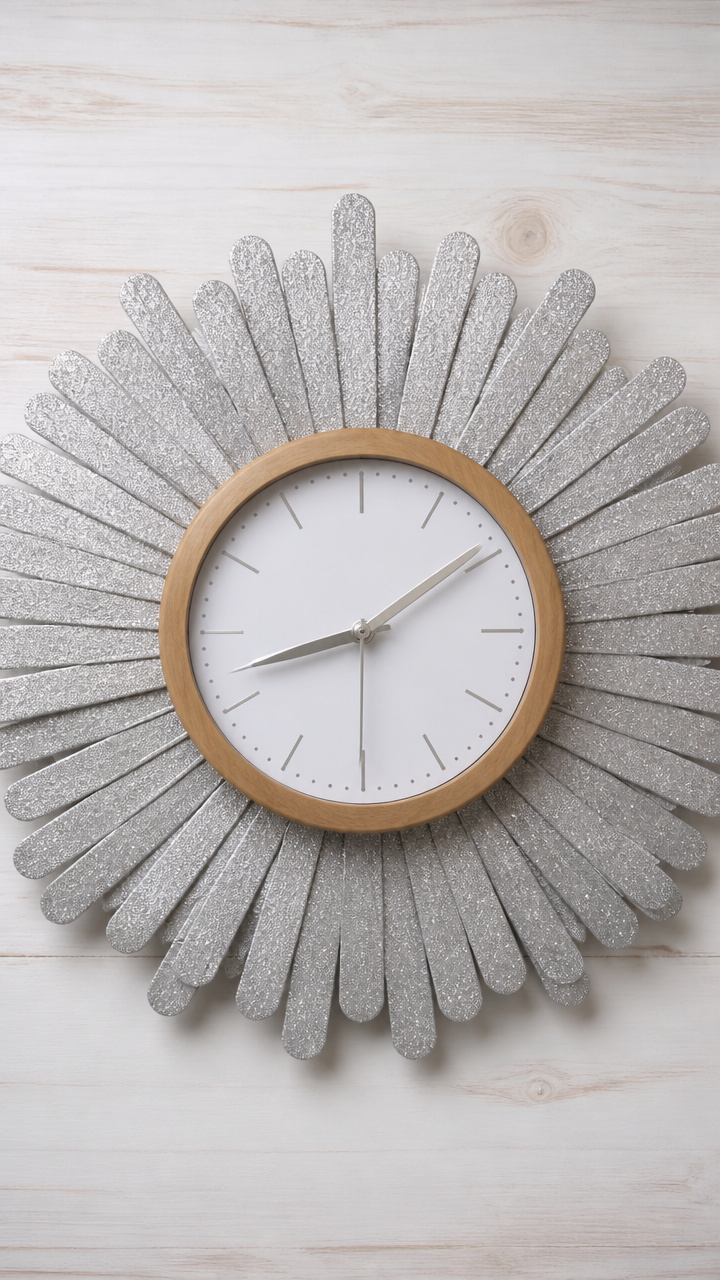
A circular clock face framed in glittering sticks marks time with sparkle, perfect for gifting or placing where you'll see it every morning.
Materials Needed
- 16 standard popsicle sticks
- 6-inch round wooden craft clock kit
- Clear-drying craft glue
- Fine glitter in silver
- Small paintbrush
- Ruler
- Pencil
How to Make It
- Arrange 8 popsicle sticks in a circle on a flat surface, forming a ring with each stick touching end to end. Use the ruler to space them evenly.
- Run a thin line of clear-drying craft glue along the inner edge where each stick meets the next. Let dry for 25 minutes.
- Use the small paintbrush to coat the outer half of each stick with glue, then sprinkle silver glitter over the glued areas. Shake off excess and let dry 20 minutes.
- Glue the clock mechanism centered behind the stick ring according to the kit instructions. Insert hands and battery.


4. Resolution Tree Display
Moderate
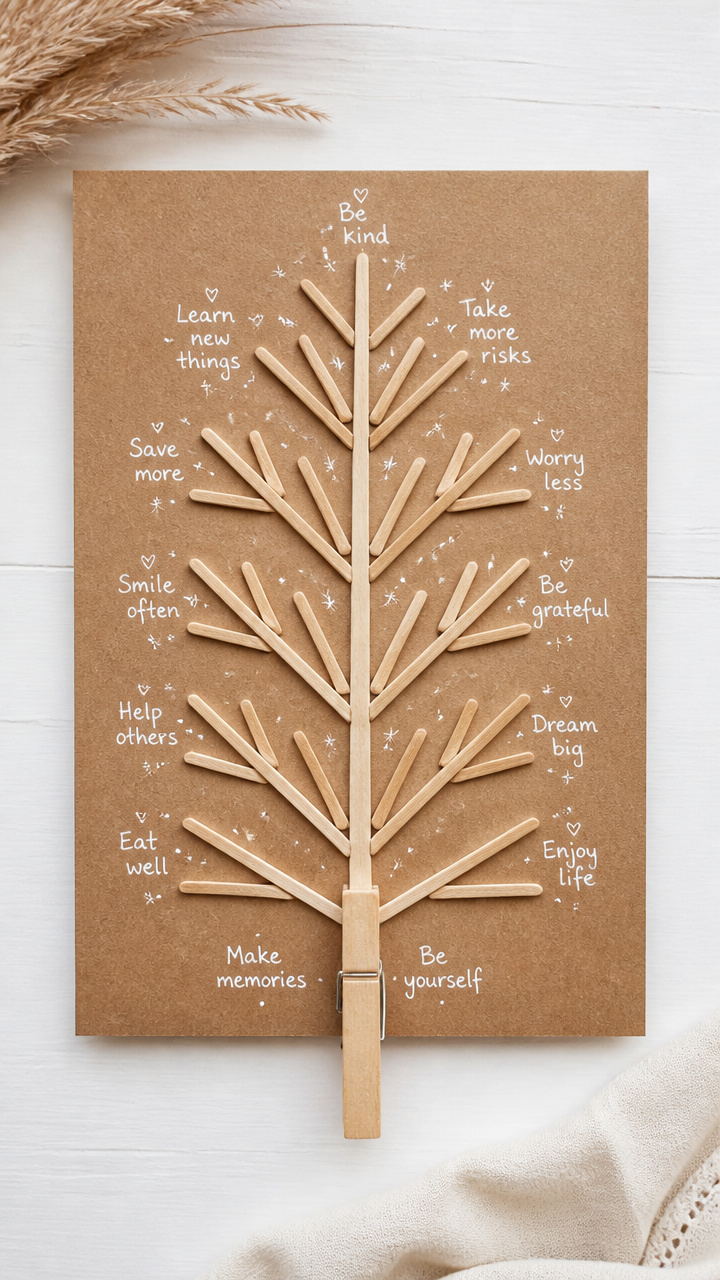
Bare branches hold handwritten wishes, growing fuller as hopes take root in the new year.
Materials Needed
- 20 standard popsicle sticks
- Brown kraft paper, 9×12 inch sheet
- White gel pen
- Wooden clothespin
- Tacky glue
- Small bowl
- Pencil
How to Make It
- Break 4 popsicle sticks in half by hand, snapping carefully over a table edge. Set aside.
- Draw a tree trunk and main branches on the brown kraft paper using pencil. Keep the upper branches sparse.
- Write one resolution or hope per full popsicle stick using the white gel pen. Use all 16 full sticks.
- Glue the full sticks vertically along the drawn branches, letting them represent leaves. Arrange broken halves at the base as roots.
- Fold the kraft paper in half horizontally. Glue the clothespin to the outside fold to clip shut. Let dry.


5. Confetti Pop Stick Poppers
Moderate
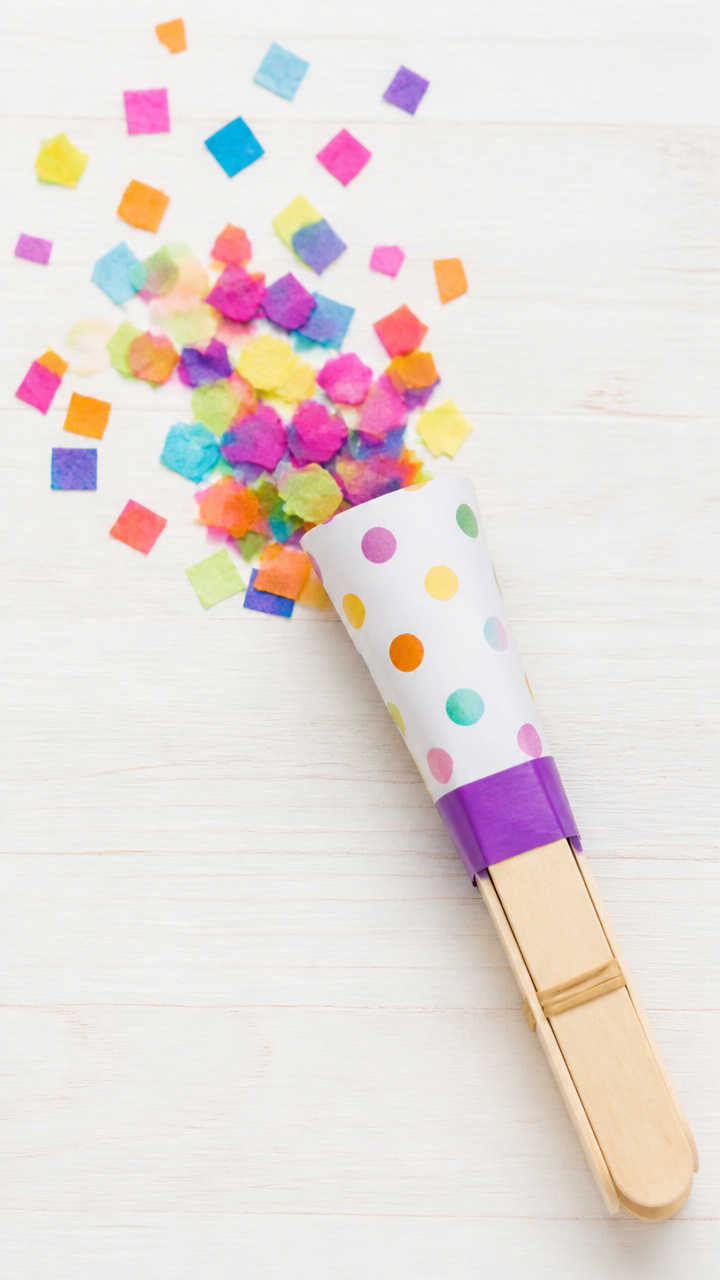
Pull the tab and a burst of color flies out, just like real party poppers but made entirely by hand.
Materials Needed
- 6 jumbo popsicle sticks
- 1/4 cup tissue paper confetti (assorted colors)
- Strong rubber band
- Craft tape
- Cardstock, 5×7 inch sheet
- Double-sided tape
How to Make It
- Roll the cardstock tightly into a tube 5 inches long and secure with double-sided tape. This is the popper body.
- Place 2 tablespoons of tissue paper confetti inside the tube.
- Slide one jumbo popsicle stick through the tube so it sticks out one end by 1 inch.
- Stack 5 more jumbo sticks and bind them tightly at one end with the rubber band. Tape this bundle to the exposed end of the single stick.
- Tape the other end of the bundle to the outside of the tube using craft tape. Pull the stick sharply to launch confetti.
![Confetti Sky [6 Pack] Confetti Poppers Cannon | Multicolor Biodegradable | Confetti Cannon for Wedding Celebration, Birthday Confetti , Pranks, Graduation, Christmas Eve and New Year's Eve Celebration](https://m.media-amazon.com/images/I/51aEr9px9nL._SL500_.jpg)

6. Starburst Napkin Rings
Easy
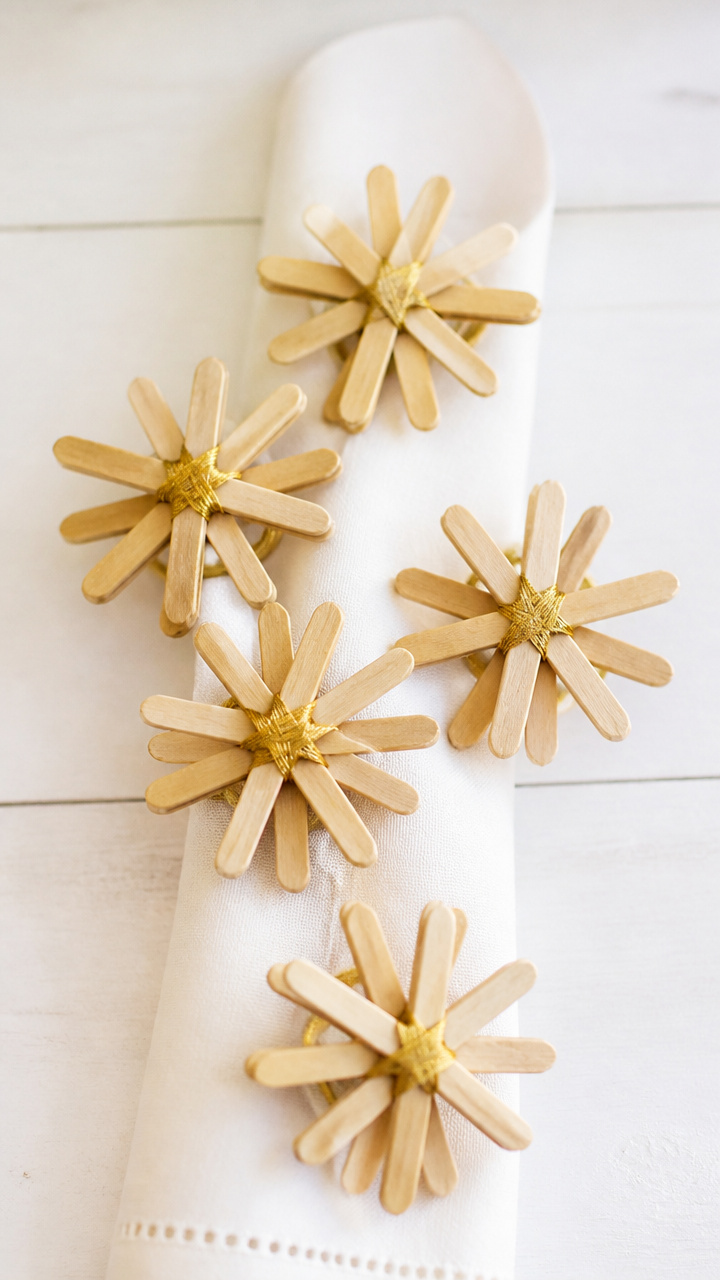
Radiating sticks wrapped in gold cord dress up any dinner table with a festive, handcrafted touch.
Materials Needed
- 4 standard popsicle sticks per ring
- Gold embroidery floss
- Scissors
- Hot glue gun
- Hot glue sticks
- Circular object 2 inches wide
How to Make It
- Form a star shape by crossing 4 popsicle sticks over each other at 45-degree angles, meeting at the center. Use the circular object to guide spacing.
- Apply a dab of hot glue where each stick crosses at the center. Hold for 10 seconds until set.
- Wrap gold embroidery floss tightly around each stick from the center outward, covering the wood. Secure the end with a drop of glue.
- Repeat for additional rings. Let glue cool before slipping over napkins.


7. Wishing Wand
Easy
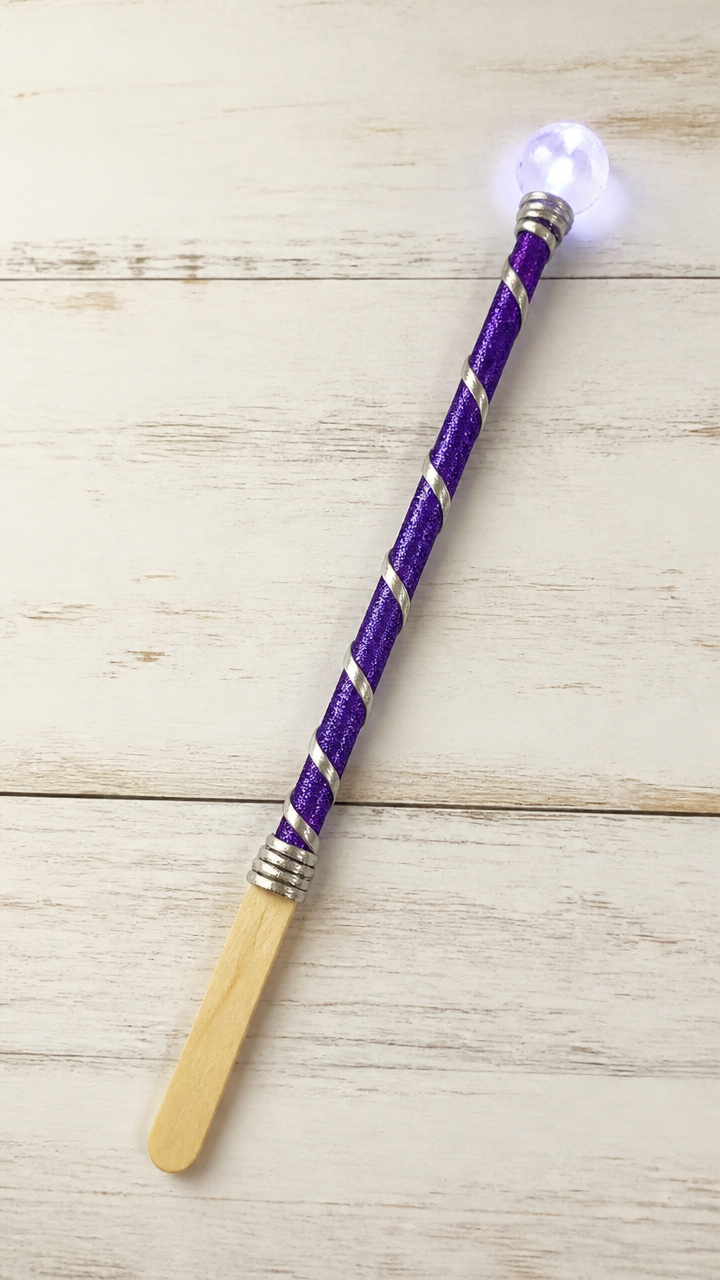
Wave this slender wand with a glowing tip and make your first wish of the year come alive in your hands.
Materials Needed
- 1 jumbo popsicle stick
- LED tea light
- Glitter glue in purple
- Ribbon, 18 inches long
- Hot glue gun
- Hot glue sticks
- Scissors
How to Make It
- Squeeze glitter glue in wavy lines along both sides of the jumbo popsicle stick. Let dry for 20 minutes.
- Use scissors to cut 3 slits at the top end of the stick, about 1/2 inch deep and spaced evenly.
- Thread the ribbon through the slits and tie into a bow to create a tassel.
- Remove the top of the LED tea light and place the bulb end against the bottom of the stick. Secure with hot glue.
8. Photo Ladder Display
Moderate
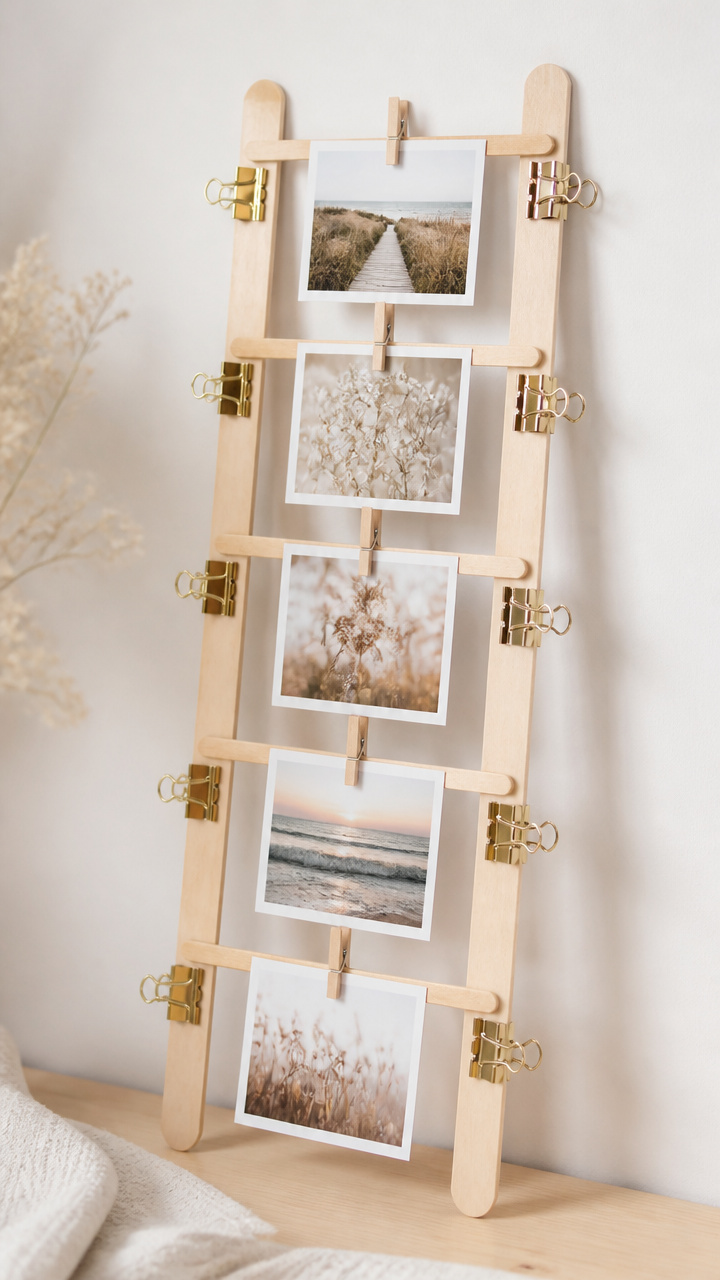
Tiny memories climb upward on a leaning ladder, showing favorite moments from the past year.
Materials Needed
- 10 standard popsicle sticks
- 2-inch binder clips (2)
- Small clothespins (5)
- Miniature photo prints (5), 1.5×1 inch
- Tacky glue
- Ruler
- Pencil
How to Make It
- Lay 2 popsicle sticks parallel to each other, 4 inches apart. Use the ruler to measure.
- Place 4 more sticks perpendicularly across the first two, spaced 1 inch apart, to form ladder rungs. Glue each intersection with tacky glue. Let dry 20 minutes.
- Attach one binder clip to each end of the bottom side stick to act as feet.
- Clip one miniature photo to each of the 5 rungs using the small clothespins.
9. New Year Crown
Easy
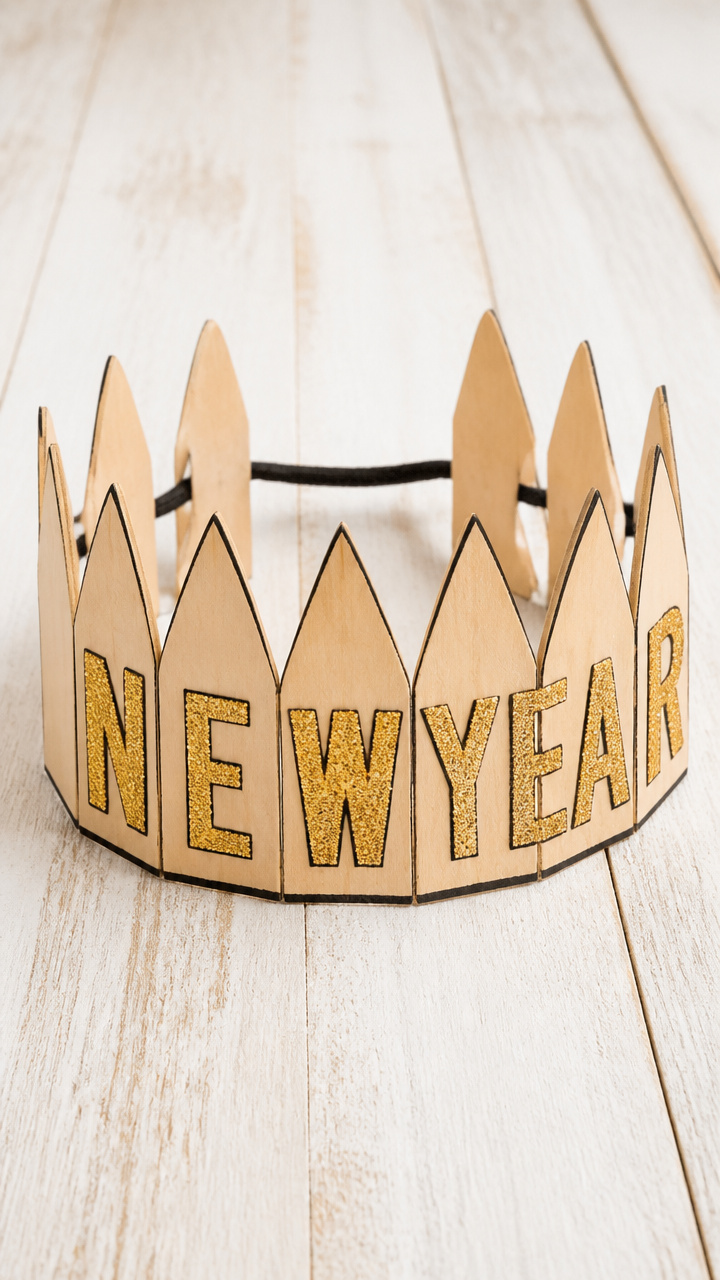
A child’s grin shines under a jagged crown that spells out “NEW YEAR” in bold, glittered letters.
Materials Needed
- 8 jumbo popsicle sticks
- Black permanent marker
- Glitter glue in gold
- Scissors
- Elastic cord, 14 inches
- Hole punch
How to Make It
- Use the black permanent marker to write one letter of “NEW YEAR” on each of 8 jumbo popsicle sticks, leaving a space for the blank.
- Outline each letter with gold glitter glue. Let dry completely for 30 minutes.
- Punch two holes at each end of every stick using the hole punch.
- Thread the elastic cord through the holes of the first stick, tie a knot, then thread the next stick. Repeat until all are connected. Tie ends to fit head.


10. Countdown Candle Holder
Advanced
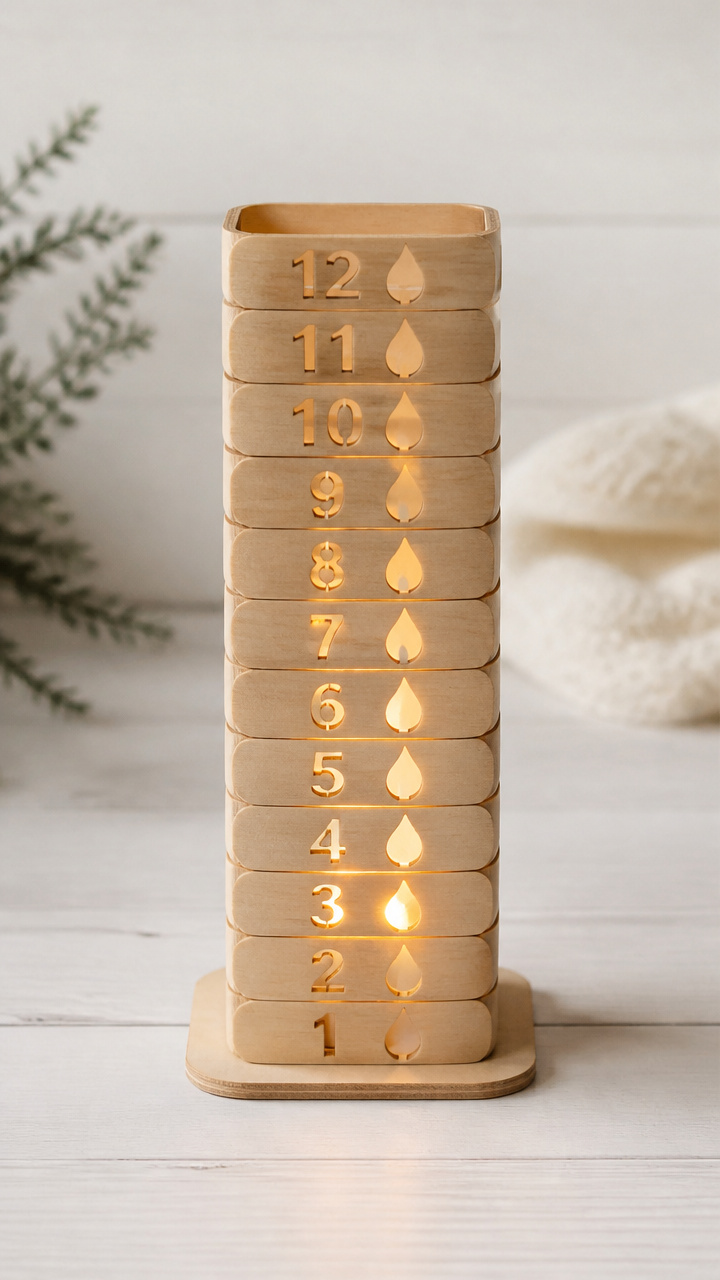
Each night, light a candle behind a numbered panel and watch the flame glow through laser-cut style openings.
Materials Needed
- 12 standard popsicle sticks
- Craft knife
- Cutting mat
- Ruler
- Pencil
- Clear-drying craft glue
- Tealight candle
- Sandpaper (fine grit)
How to Make It
- Use the ruler and pencil to mark a rectangle 1.5 inches high on each of 12 sticks. Inside each, write numbers 1 to 12.
- With the craft knife on the cutting mat, carefully cut out the area inside each number, removing the wood to create an open numeral. Smooth edges with sandpaper.
- Glue 6 sticks vertically in a row, side by side, with 1/8 inch gaps between. Let dry 15 minutes.
- Glue the remaining 6 sticks vertically on the opposite side, aligning them with the first set to form a box. Let dry 30 minutes.
- Place a tealight candle inside and light at dusk each night of a countdown.
11. Pop-It Noise Maker
Easy
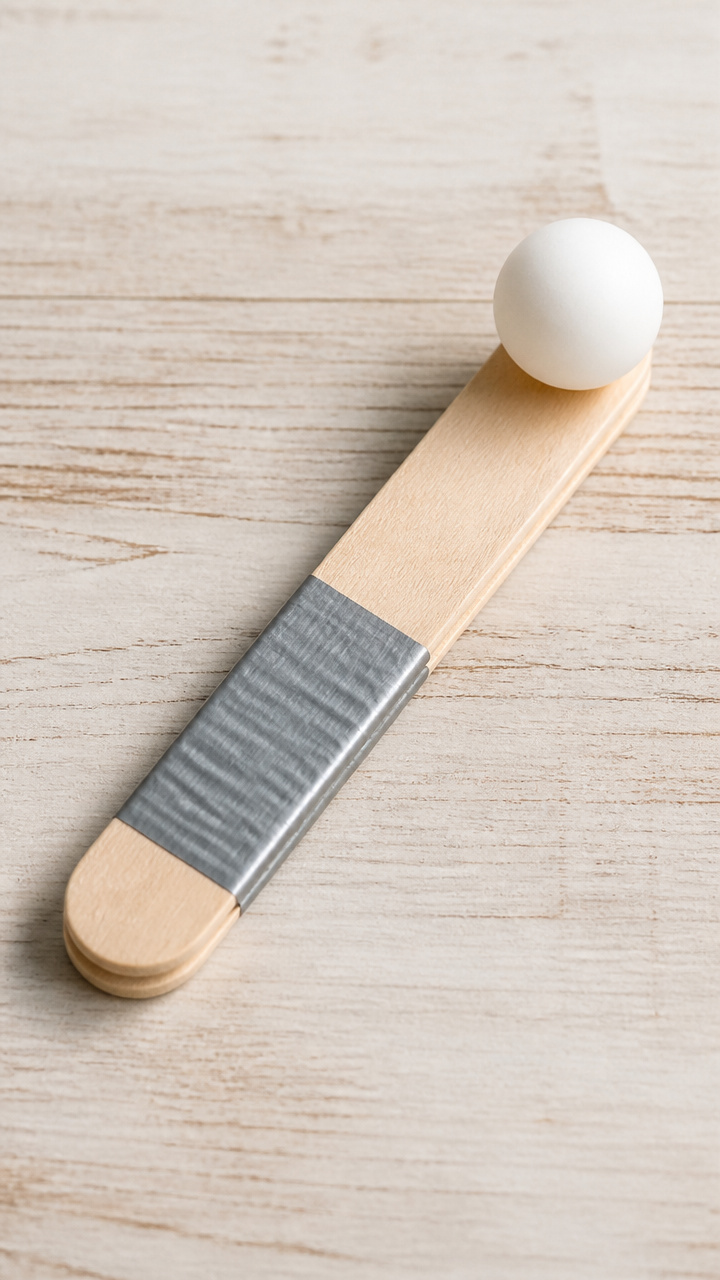
Flick your wrist and hear a sharp pop—this handheld rattle brings instant cheer with every snap.
Materials Needed
- 2 jumbo popsicle sticks
- Duct tape, 12 inches
- Ping pong ball
- Hot glue gun
- Hot glue sticks
How to Make It
- Center the ping pong ball on one end of a jumbo popsicle stick. Secure it with hot glue. Let cool for 1 minute.
- Place the second stick directly on top, aligning perfectly. Wrap duct tape tightly around both sticks just behind the ball to hinge them.
- Hold the taped end in one hand and flick the free ends downward sharply against your palm to make a popping sound.
12. Memory Shadow Box
Advanced
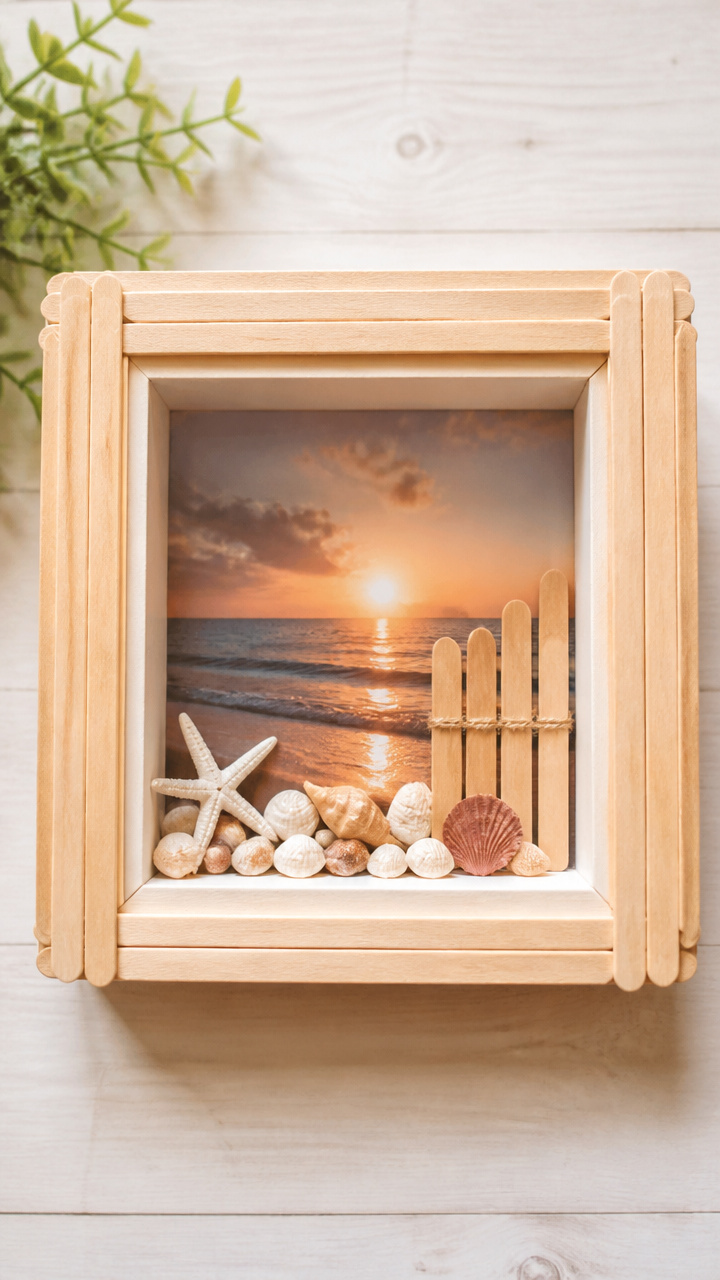
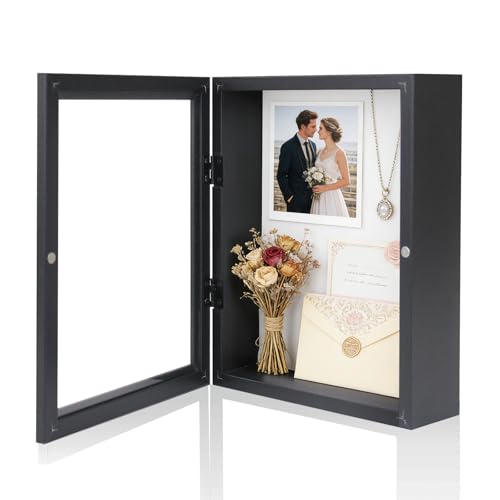
A deep frame holds layered keepsakes—a ticket, a note, a photo—anchored by a popsicle stick base.
Materials Needed
- 8 standard popsicle sticks
- 8×10 inch shadow box frame with depth
- Tacky glue
- Small memorabilia items (ticket stub, photo, pressed flower)
- Craft foam sheet, 6×8 inch
- Utility knife
- Cutting mat
How to Make It
- Lay 4 popsicle sticks side by side. Glue another 4 on top perpendicularly to form a solid square base. Let dry 25 minutes.
- Cut the craft foam sheet to 6×6 inches using the utility knife on the cutting mat. This will be the backing.
- Glue the popsicle base to the center of the foam backing. Let dry 10 minutes.
- Arrange memorabilia on the base and foam around it. Glue each item in place with tacky glue. Let dry overnight.
- Insert the foam backing into the shadow box and close the frame.


13. Time Capsule Tags
Easy
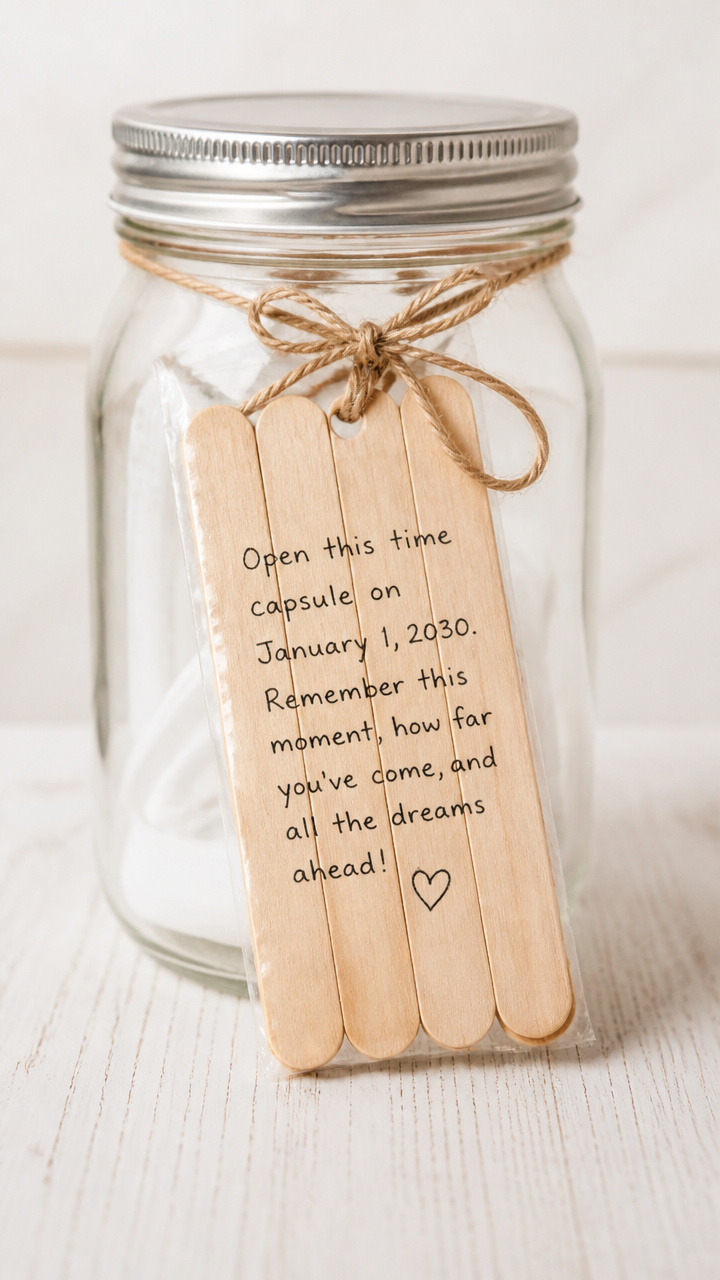
Seal a note inside a sturdy tag tied to a jar, waiting to be opened twelve months from now.
Materials Needed
- 6 standard popsicle sticks
- Waterproof ink pen
- Twine, 6 pieces of 8 inches each
- Clear packing tape
- Scissors
- Small glass jar with lid
How to Make It
- Write a short message or prediction on each popsicle stick using the waterproof ink pen.
- Cut six 2-inch squares of clear packing tape. Cover each written stick completely on both sides with tape, sealing the message.
- Tie one piece of twine to each stick using a double knot at one end.
- Fill the glass jar with notes or small items. Tie the tagged sticks to the jar neck with the free ends of the twine.


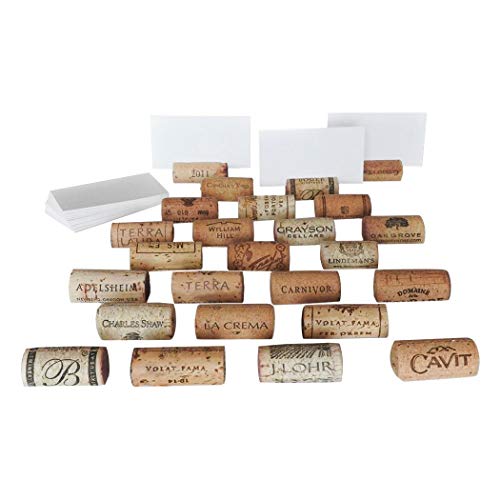
14. Champagne Cork Place Holders
Easy
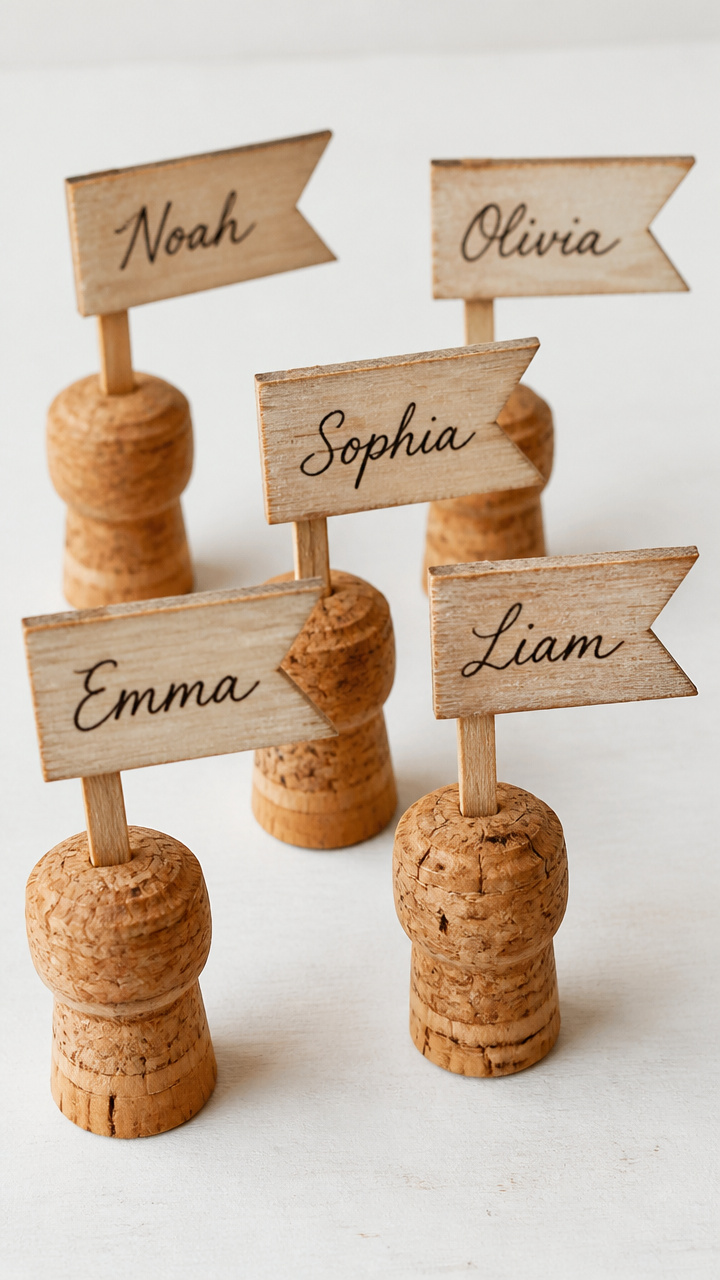
A mini flag on each guest's wine bottle cork announces their name in cheerful, rustic style.
Materials Needed
- 5 standard popsicle sticks
- Calligraphy pen
- Scissors
- Hot glue gun
- Hot glue sticks
- Empty champagne corks (5)
How to Make It
- Cut one popsicle stick in half crosswise using scissors. Set aside.
- On each of the 4 full sticks, write a guest's name with the calligraphy pen.
- Fold each named stick at a 90-degree angle 1 inch from one end to form an L-shape.
- Apply hot glue to the short end of each L-shaped stick and press into the top of a cork. Hold for 10 seconds.
- Glue the half-stick flat across the tops of all five corks to link them as a set.


15. Horoscope Fan Display
Moderate
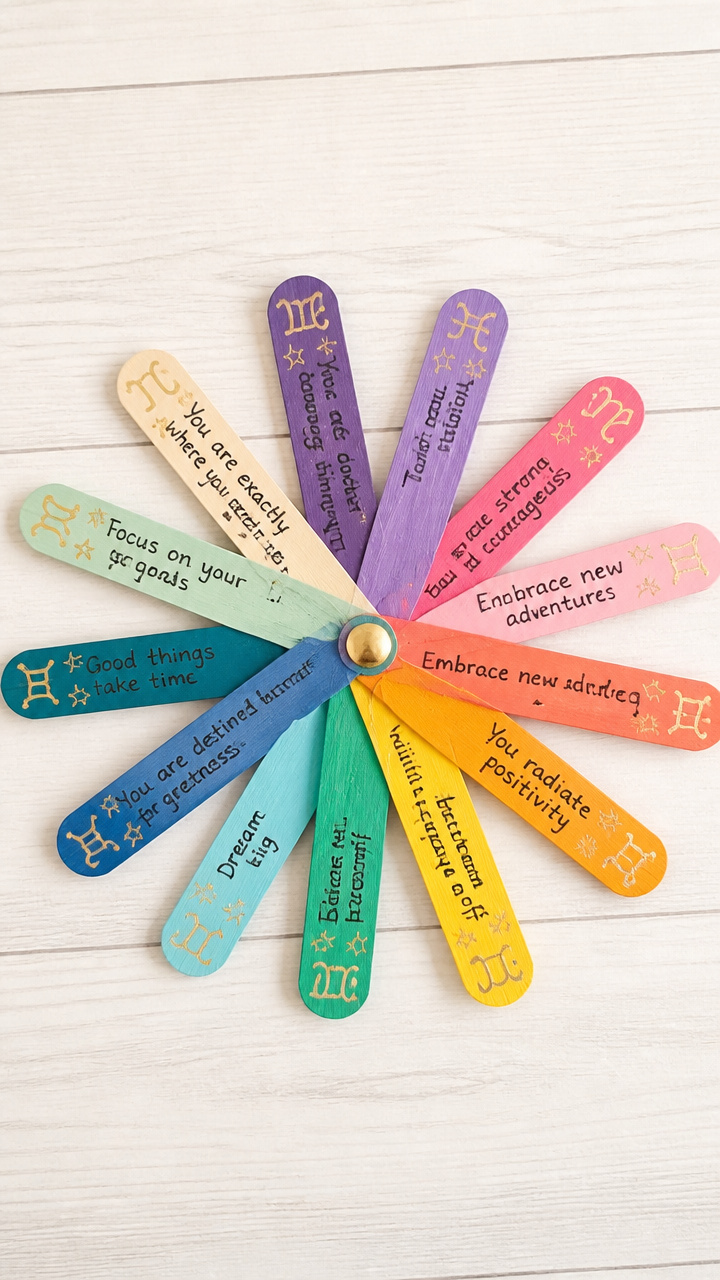
Twelve fortune strips fan out from a central hub, each revealing a month’s playful prediction.
Materials Needed
- 13 standard popsicle sticks
- Fine-tip colored markers (4 colors)
- Brad fastener
- Hole punch
- Ruler
- Pencil
How to Make It
- Use the pencil and ruler to divide each of 12 sticks into three sections. Write a month name at the top and a short horoscope in the middle using colored markers.
- Punch a hole at the bottom end of each stick, 1/4 inch from the edge.
- Align all 12 holes and insert the brad fastener through them. Spread the legs wide on the back to secure.
- Gently fan the sticks outward like a wheel. Stand upright by pressing the brad point into a cork or clay base.

Grab your glue and gather those sticks. One small project at a time, you're building more than decor—you're making moments that matter.