15 Fun New Year Crafts for School

Glitter spills across desks, scissors snip in rhythm, and laughter fills the classroom as kids shape the coming year with their hands. These crafts spark joy, build excitement, and give every student something bright to carry forward.
Each project is designed for real classrooms—affordable materials, clear steps, and results that feel special without needing perfection. You’ll find no two ideas alike, just creativity ready to unfold.
1. Glittered Countdown Glasses
Easy
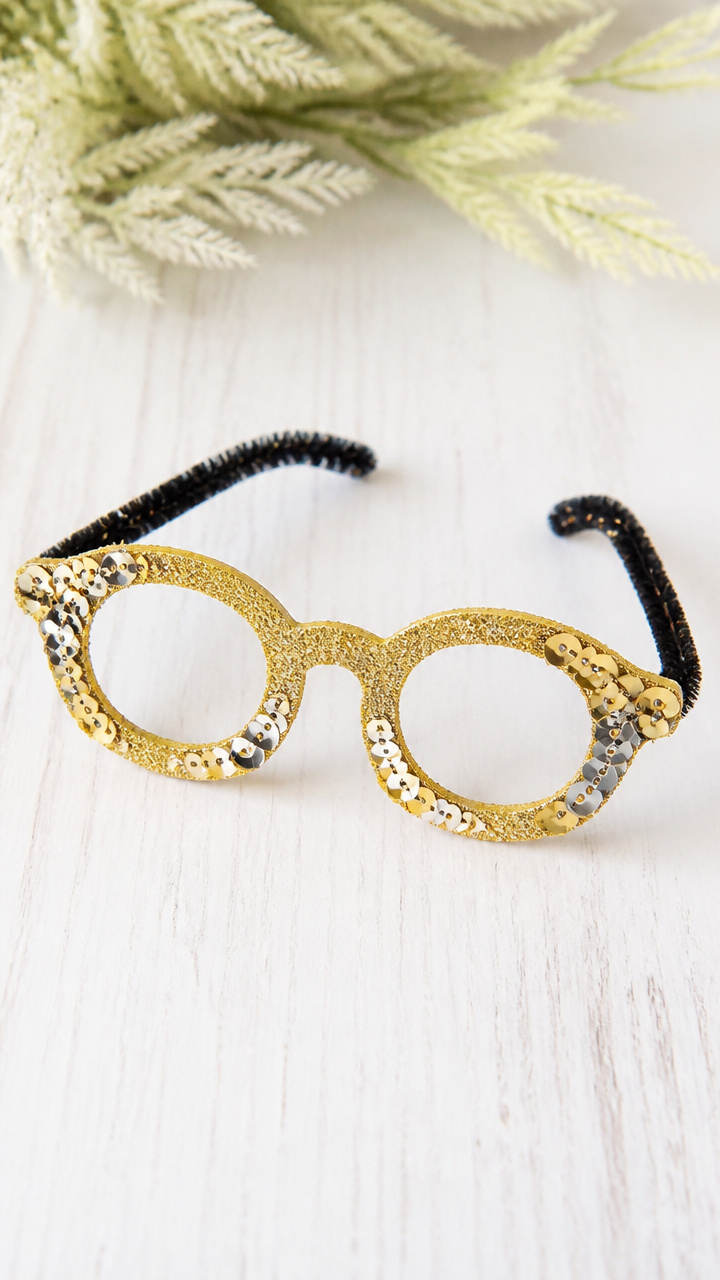
Shiny glasses that turn every child into a celebration star, perfect for a classroom countdown moment. The sparkle catches the light and every smile.
Materials Needed
- 2 black pipe cleaners, 12 inches each
- 1 pair clear plastic safety goggles
- Gold glitter glue
- Sequins, assorted gold and silver, 1/4 cup
- Low-temperature hot glue gun
- Small craft brush
How to Make It
- Squeeze gold glitter glue along the outer frame of the goggles using the craft brush for control.
- Sprinkle sequins over the glued areas and let sit for 2 minutes.
- Press the sequins gently with a fingertip to secure adhesion.
- Let dry completely for 15 minutes on a paper towel.
- Twist one pipe cleaner around each side arm of the goggles to extend the frame, shaping into spiral temples.


2. New Year's Noise Makers
Easy
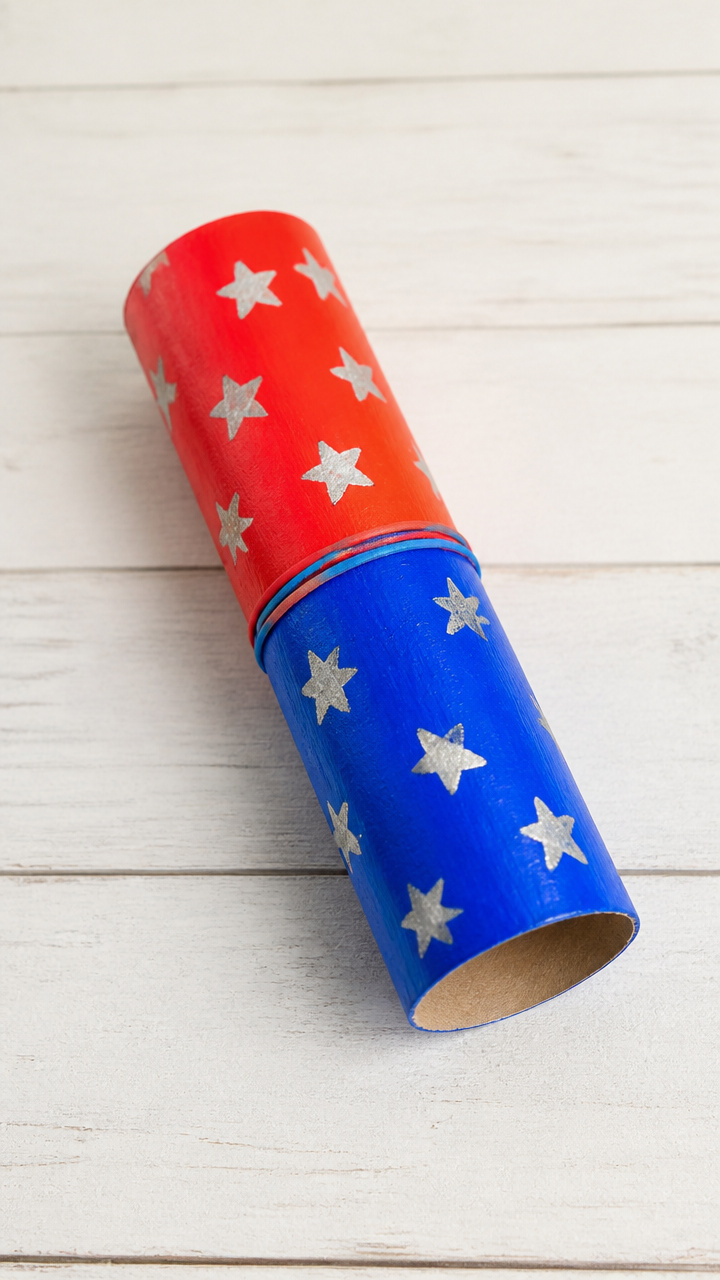
Bright tubes that rattle with joy when shaken, ideal for a group cheer at the bell ring. Kids love the bold colors and loud fun.
Materials Needed
- Cardboard toilet paper rolls, 2 per student
- Acrylic paint: red, silver, and blue, 1 oz each
- Foam paintbrushes, 1/2 inch wide, 2 per student
- Rice, 2 tablespoons
- Plastic sandwich bags, quart size, 1 per student
- Rubber bands, 2 per student
- Googly eyes, 1/2 inch, 2 per student
- Glitter foam stars, 1/2 inch, 5 per student
- White school glue
How to Make It
- Paint each toilet paper roll with red, silver, or blue acrylic paint using the foam brush, covering all sides.
- Set aside to dry for 10 minutes on a flat surface.
- Fill a sandwich bag with 2 tablespoons of rice and seal tightly.
- Place the sealed bag over one end of the roll and secure with a rubber band.
- Glue googly eyes and glitter stars around the covered end to decorate.
- Let glue dry for 5 minutes before shaking.


3. Resolution Trees
Moderate
Mini paper trees holding written hopes, standing proud on desks or shelves. Each tiny branch carries a promise for better days.
Materials Needed
- Brown craft sticks, 6 inches, 1 per student
- Green tissue paper, 10×10 inch squares, 3 per student
- Round wooden beads, 1/2 inch diameter, 1 per student
- Fine-tip black markers
- Mini clothespins, 12 per student
- White cardstock, 4×6 inch, 1 sheet per student
- Scissors
- White school glue
- Glue dots, 1/2 inch, 12 per student
How to Make It
- Cut each tissue paper square into 1-inch wide fringe strips, stopping 1 inch from the edge.
- Fan out the fringes and roll them loosely around the top of the craft stick to form the tree canopy.
- Secure the base of the canopy with a glue dot.
- Write one word resolutions like 'kind' or 'brave' on small rectangles cut from cardstock.
- Clip each resolution to a branch using a mini clothespin.
- Glue the wooden bead to the bottom of the stick to act as a base weight.


4. Confetti Pop Caps
Moderate
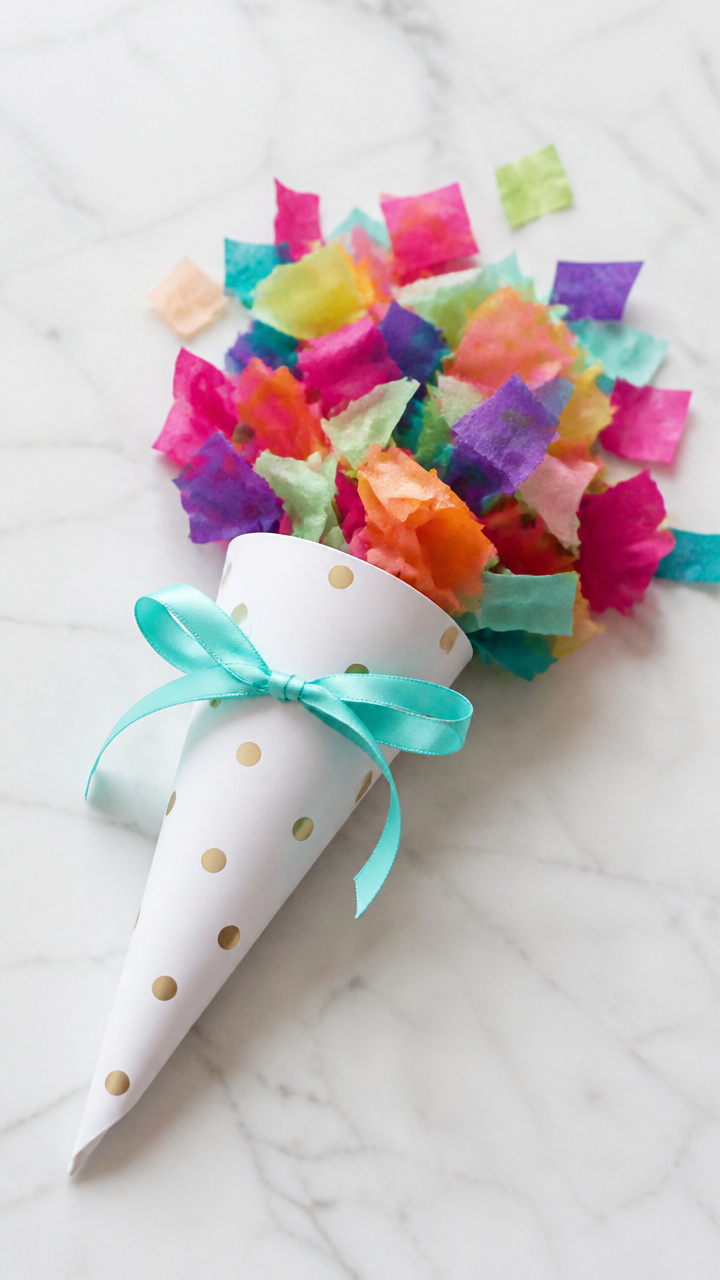
Baseball caps bursting with colorful paper bits when tossed gently in the air. The surprise confetti shower brings instant giggles.
Materials Needed
- White paper party hats, cone style, 1 per student
- Colored tissue paper, 8×8 inch squares, 6 sheets per student
- Scissors
- Double-sided tape, 1/4 inch wide, 1 roll per 5 students
- Ribbon, 1/4 inch wide, 12 inches per student
- Hole punch
- Glitter stickers, star and circle shapes, 5 per student
How to Make It
- Cut each tissue paper square into 1/2 inch confetti circles using scissors.
- Fill the cone of the party hat with confetti, packing lightly.
- Roll the open end of the cone inward by 1 inch to close it partially.
- Seal the rolled edge with double-sided tape.
- Punch two holes on opposite sides of the rolled edge.
- Thread ribbon through the holes and tie into a chin strap.
- Decorate the outside with glitter stickers before wearing.


5. Time Capsule Jars
Moderate
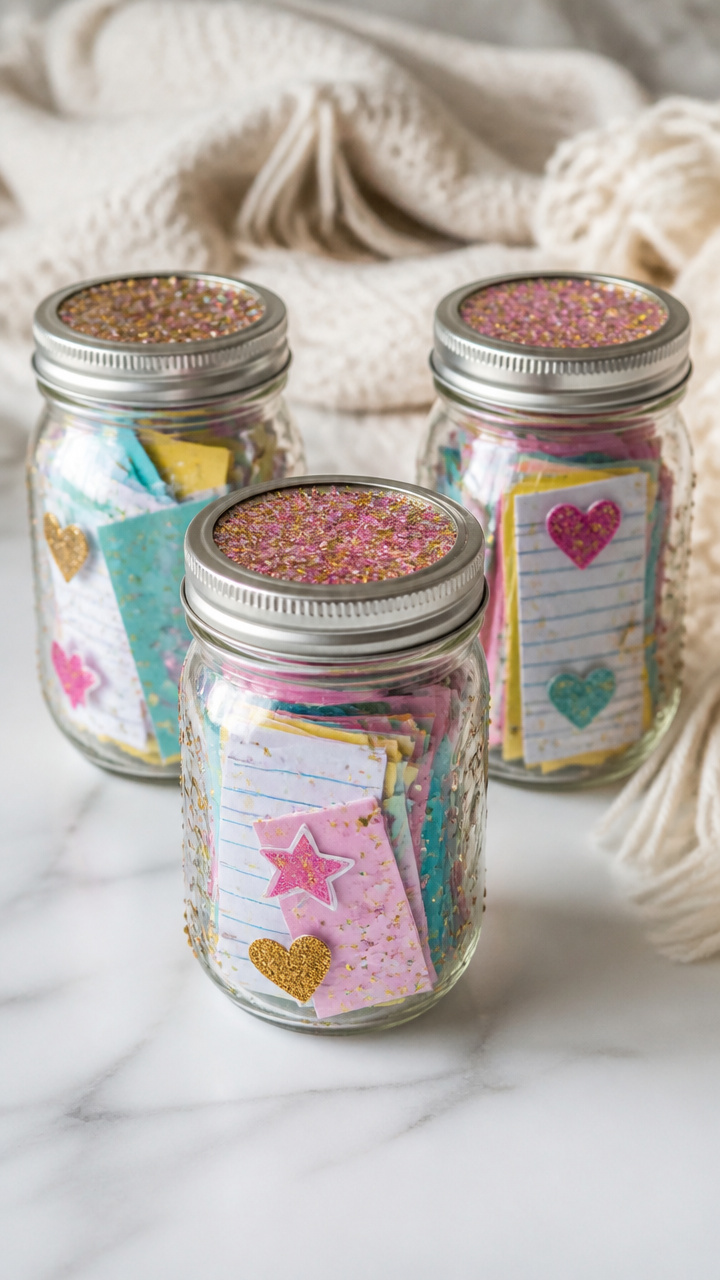
Tiny jars holding notes and trinkets to open months later. The anticipation builds every time someone glances at the shelf.
Materials Needed
- Small glass mason jars with lids, 4 oz, 1 per student
- Acrylic paint: clear glitter medium, 2 oz
- Foam brush, 3/4 inch, 1 per student
- Colored pencils
- Index cards, 3×5 inch, 2 per student
- Mini stickers, assorted, 5 per student
- Mod Podge, 2 oz
- Ribbon, 1/8 inch, 18 inches per student
How to Make It
- Paint the outside of the jar lid with clear glitter medium using the foam brush.
- Set aside to dry for 10 minutes on wax paper.
- Write a short note about current favorites on one index card.
- Draw a self-portrait on the second index card using colored pencils.
- Place both cards and 3 stickers inside the jar.
- Screw the glittered lid on tightly.
- Wrap ribbon around the neck and tie in a bow.


6. Wishing Wands
Easy
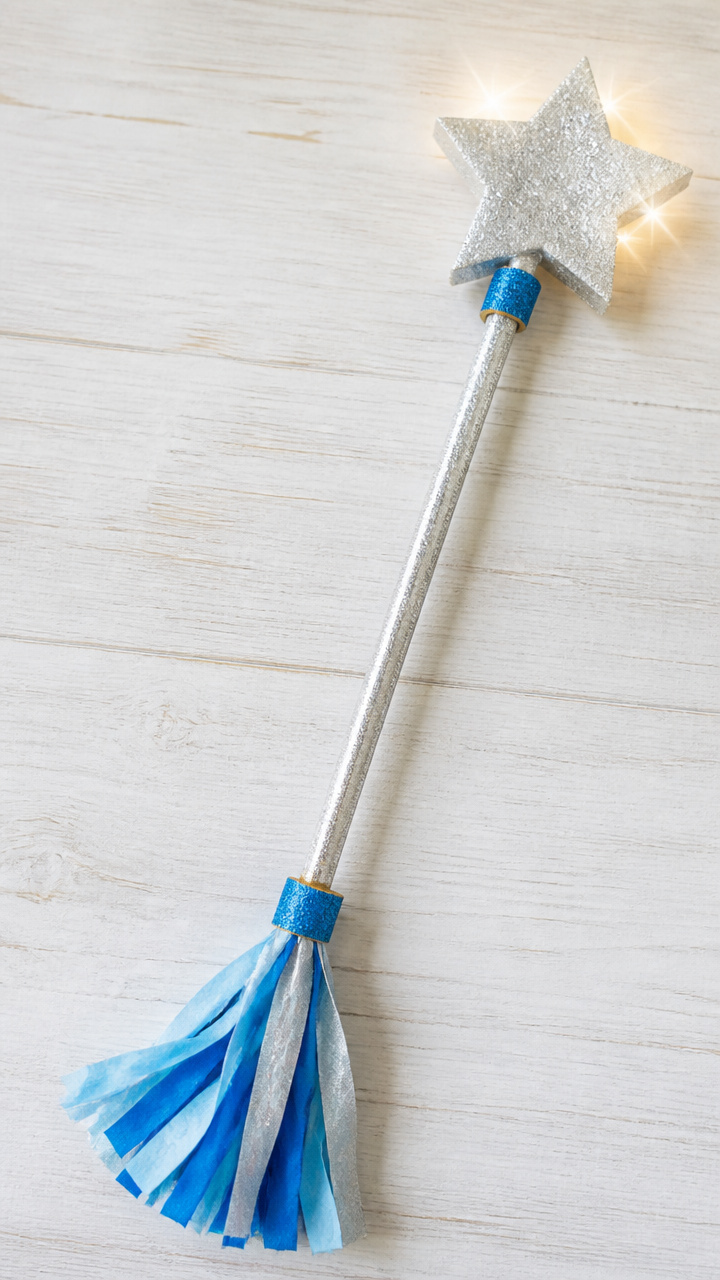
Sparkly wands that point toward dreams, waved during a class wish circle. The star tip catches light like a tiny promise.
Materials Needed
- Wooden dowels, 8 inches long, 1/4 inch diameter, 1 per student
- Star-shaped craft foam stickers, 2 inches, 1 per student
- Glitter glue, silver, 1 bottle per 5 students
- Tissue paper fringe, 6 inch length, 1 strip per student
- Rubber cement
- Glitter, fine blue, 1/4 cup per class
How to Make It
- Apply rubber cement to the flat side of the star foam sticker and let dry for 30 seconds.
- Press the star onto one end of the dowel and hold for 10 seconds.
- Brush silver glitter glue over the star and sprinkle blue glitter over it.
- Shake off excess glitter after 1 minute.
- Glue the tissue paper fringe around the base of the star to form a burst.
- Let dry for 15 minutes before use.


7. Resolution Rocks
Easy
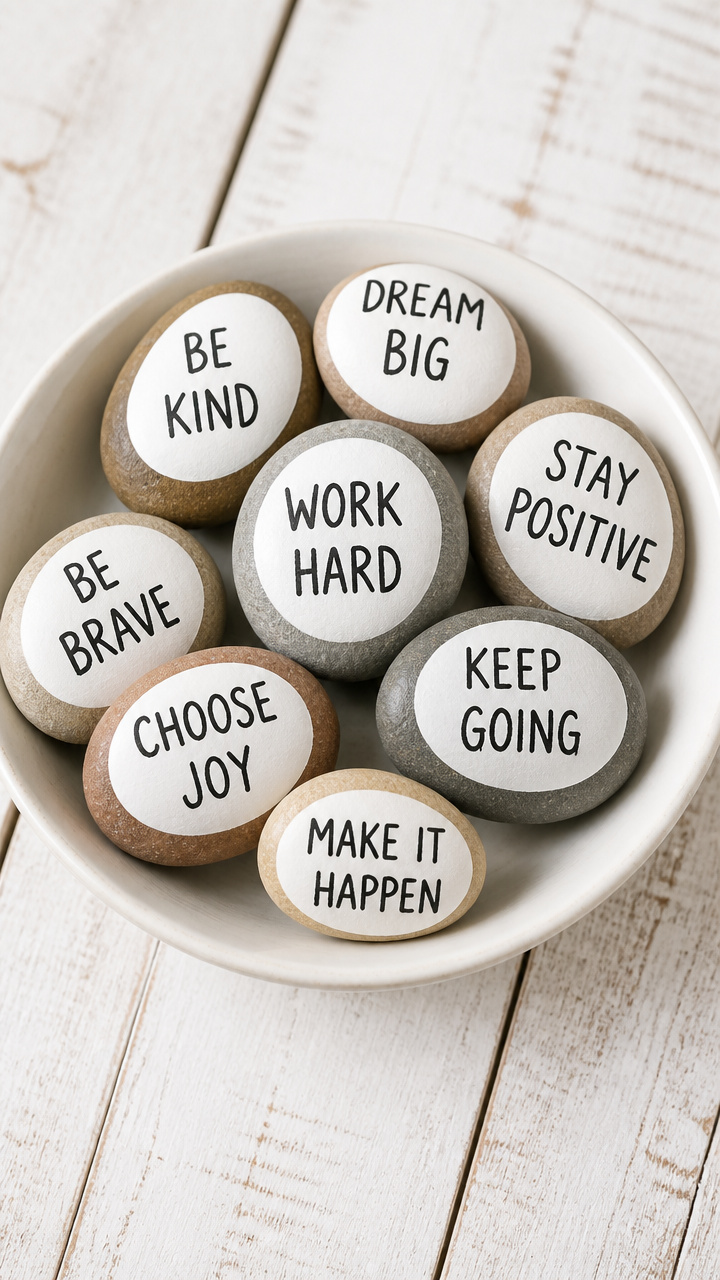
Smooth stones painted with personal goals, sitting quietly on desks as gentle reminders. The matte finish makes each word stand out.
Materials Needed
- River rocks, 2×3 inches, 1 per student
- Acrylic paint: white, 1 oz
- Foam brush, 1/2 inch, 1 per student
- Fine-tip black Sharpie
- Clear acrylic sealer spray, matte finish, 1 can per 10 students
- Paper plate
How to Make It
- Paint the top surface of the rock with white acrylic paint using the foam brush.
- Set on a paper plate to dry for 10 minutes.
- Write one resolution word like 'listen' or 'share' in the center with the Sharpie.
- Hold the rock with tongs or pliers and spray lightly with matte sealer from 10 inches away.
- Let dry for 5 minutes before handling.


8. Pop-Up Fireworks Cards
Moderate
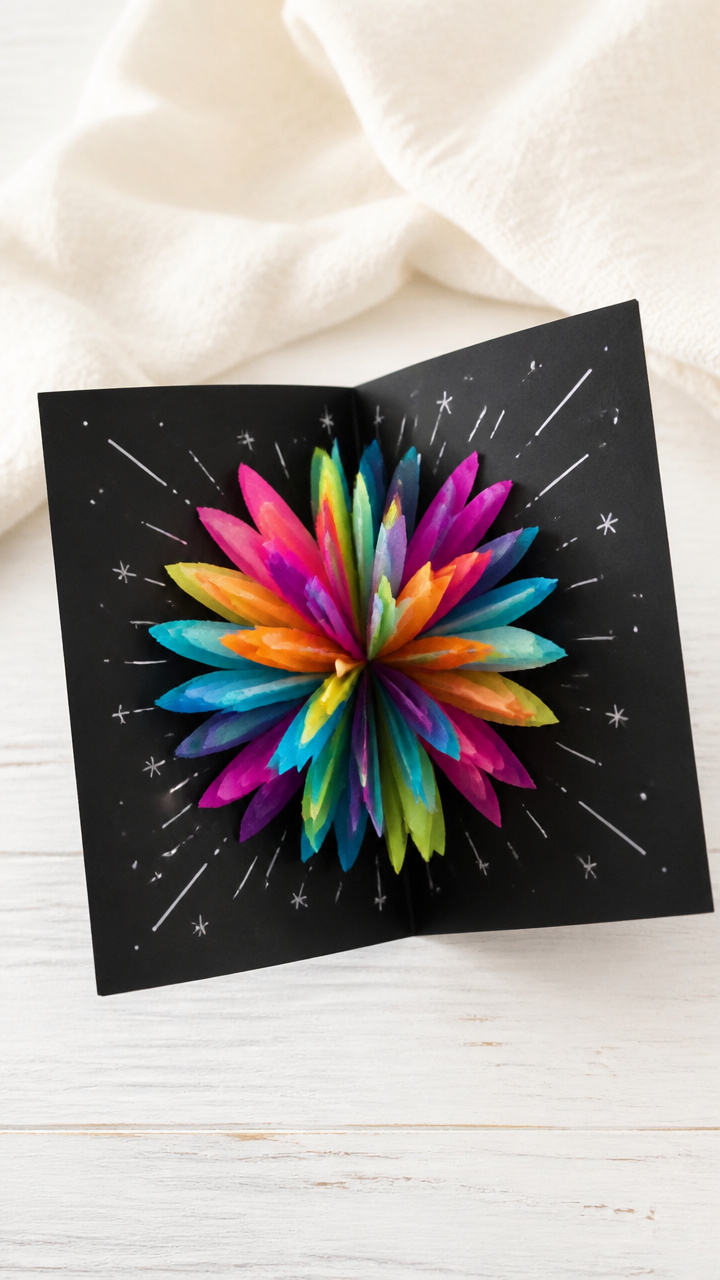
Folded cards that burst open with colorful paper explosions inside. The surprise pop delights every reader.
Materials Needed
- Black construction paper, 8.5×5.5 inch folded in half, 1 per student
- Colored tissue paper, 4×4 inch squares, 4 per student
- Glue stick
- Scissors
- White gel pen
- Ruler
- Pencil
How to Make It
- Measure and cut a 1 inch slit in the center of the card’s folded edge using scissors.
- Fold a 1 inch accordion from the back along the slit so the center pops forward when opened.
- Cut each tissue paper square into fringe strips, stopping 1/2 inch from one edge.
- Glue the unfringed edge of one tissue sheet to the pop tab.
- Repeat with three more colors, layering slightly for fullness.
- Write 'Happy New Year' on the front with the white gel pen.


9. Clock Face Crowns
Moderate
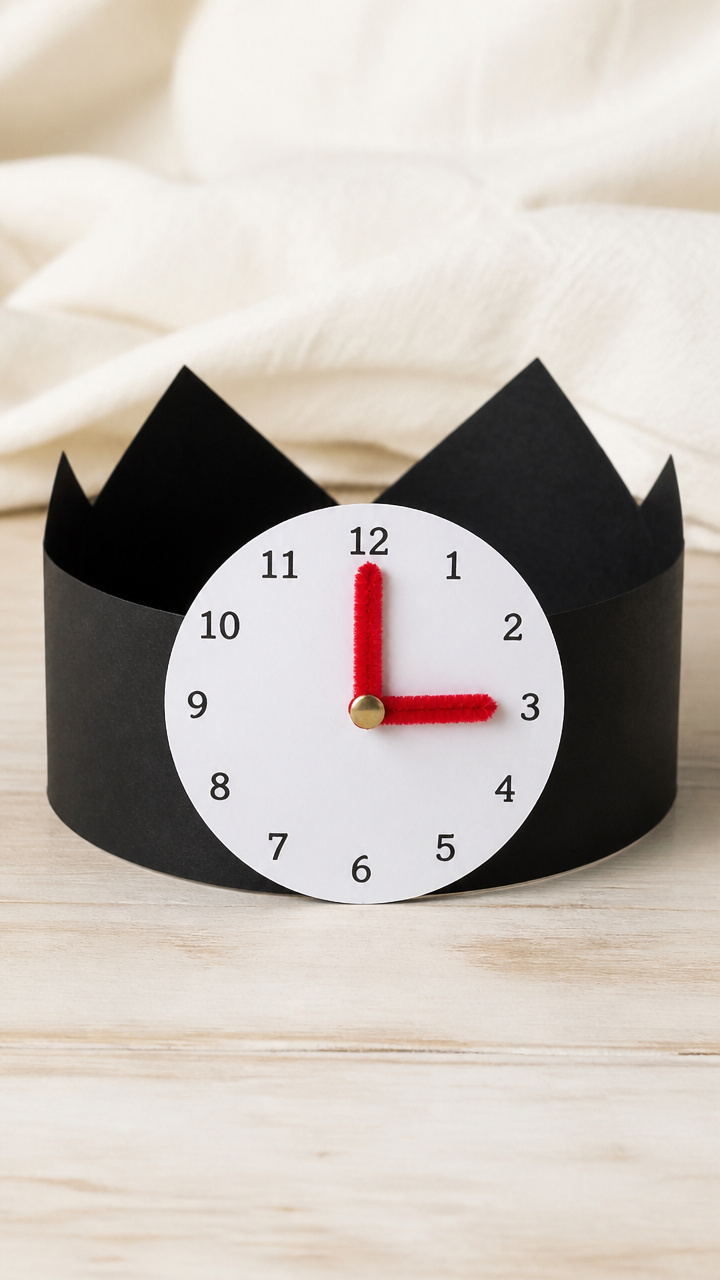
Cardboard crowns shaped like clocks, with numbers circling above each child’s head. The hands spin to mark the countdown.
Materials Needed
- Black cardstock, 3×18 inch strips, 1 per student
- Number stickers 1–12, clock style, 1 set per student
- Brass fastener, 1/2 inch, 1 per student
- Red chenille stem, 6 inches, 1 per student
- White paper circle, 3 inch diameter, 1 per student
- Hole punch
- Scissors
- Glue stick
How to Make It
- Wrap the cardstock strip around the student’s head and staple the ends to fit.
- Glue the white paper circle to the center front of the crown.
- Stick numbers 1–12 around the edge of the circle like a clock face.
- Punch a hole through the center of the circle and crown layer.
- Cut the chenille stem in half and twist one piece into an hour hand, the other into a minute hand.
- Attach both hands with the brass fastener through the center hole so they spin freely.

10. Balloon Drop Banners
Advanced
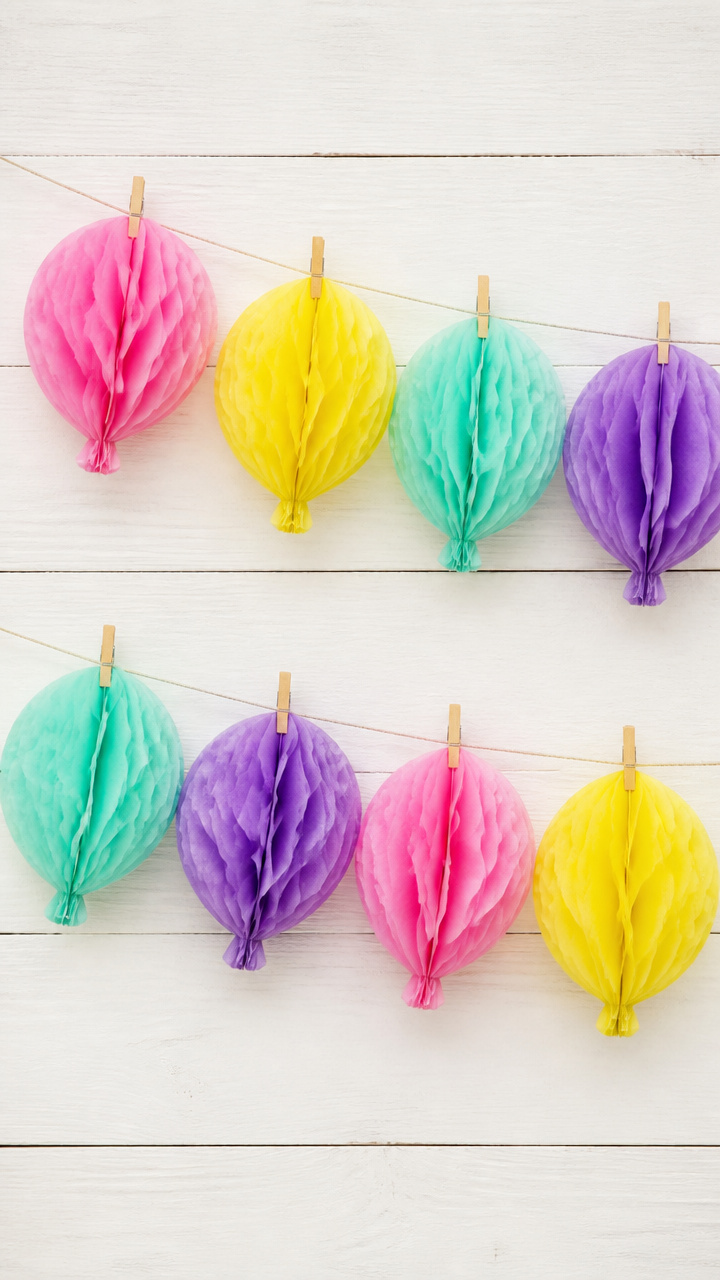
String banners with tiny paper balloons that look ready to float away. The layered tissue creates soft, bouncy shapes.
Materials Needed
- Tissue paper, 4 colors, 10×10 inch squares, 4 per student
- Dental floss, 36 inches, 1 piece per student
- Clothesline clips, 2 per student
- Glue stick
- Scissors
- Pencil
- Ruler
How to Make It
- Stack four tissue squares and fold into 1 inch accordion folds using the ruler and pencil for straight edges.
- Round the ends of the folded stack with scissors to form a teardrop shape.
- Unfold slightly and pinch the center, securing with a glue dot.
- Fan out each layer carefully to form a balloon shape.
- Repeat to make six balloons total.
- Glue each balloon to the dental floss 3 inches apart.
- Attach clothesline clips to both ends of the floss for hanging.


11. Memory Lanterns
Moderate
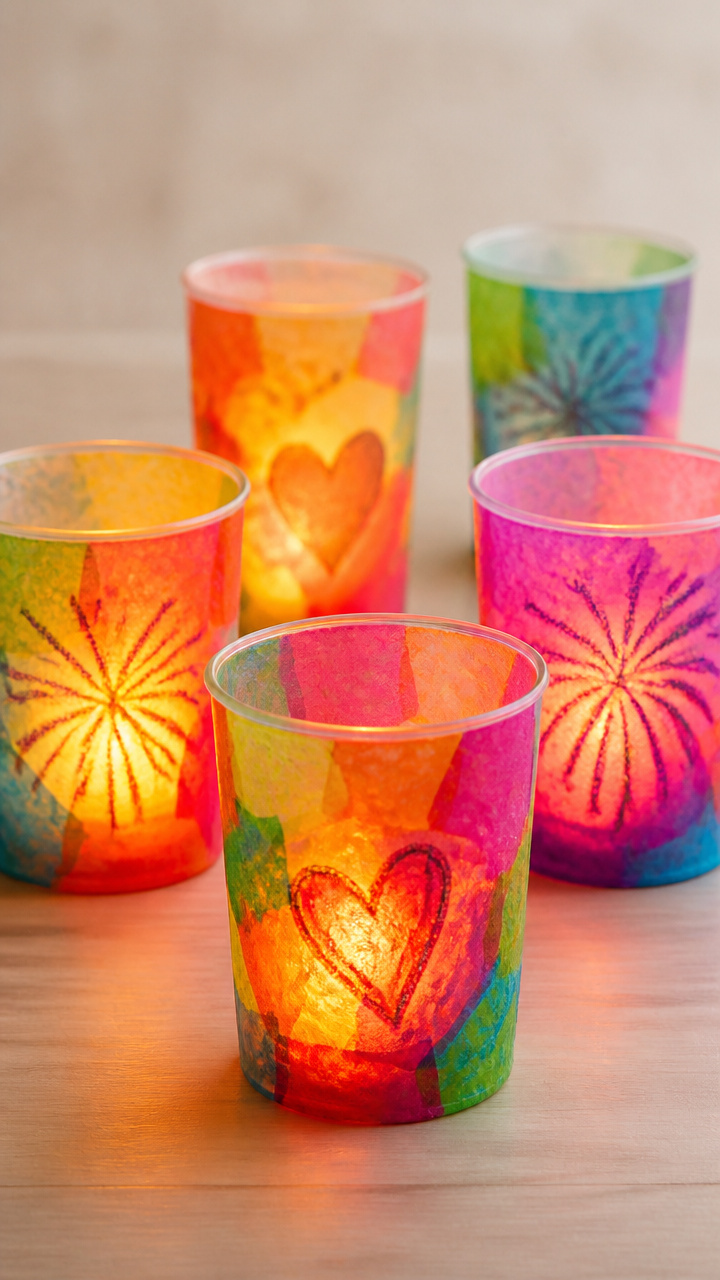
Translucent cups glowing with drawings of favorite moments, casting soft light on the classroom walls. The colored layers blend like stained glass.
Materials Needed
- Clear plastic cups, 9 oz, 1 per student
- Tissue paper, 6×6 inch squares, 6 per student
- Crayons, 8-count, 1 set per student
- White school glue
- Foam brush, 1/2 inch
- LED tea light, battery-operated, 1 per student
- Scissors
How to Make It
- Cut each tissue paper square to fit the outside height of the cup.
- Draw small scenes like birthdays or holidays on each tissue piece with crayons.
- Brush a thin layer of glue on the cup’s outer surface.
- Press one crayon-drawn tissue piece onto the glue and smooth with fingertips.
- Repeat around the cup with overlapping pieces.
- Let dry for 10 minutes, then place the LED tea light inside.


12. New Year's Hat Boxes
Advanced
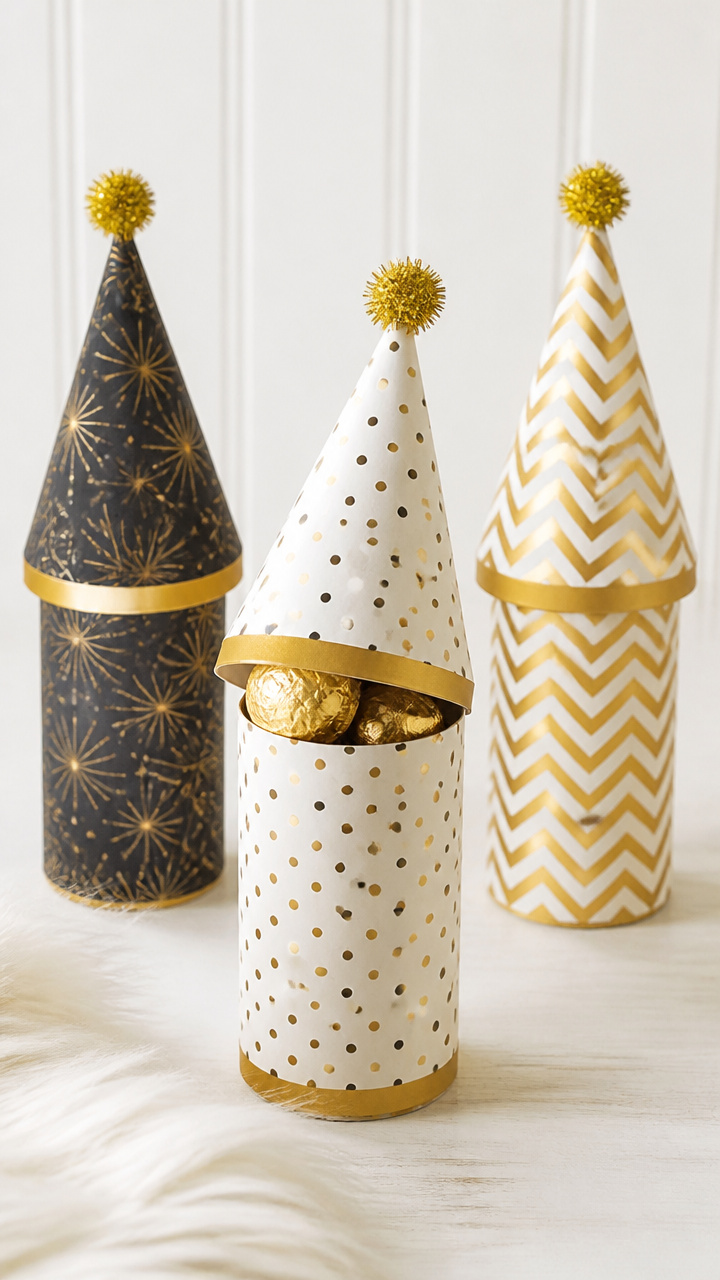
Folded paper boxes shaped like party hats, holding small treats or notes. The cone lid lifts to reveal a surprise inside.
Materials Needed
- Patterned scrapbook paper, 6×6 inch, 2 sheets per student
- Ruler
- Pencil
- Scissors
- White school glue
- Craft glue brush
- Circle punch, 3 inch, or compass
- Bone folder
How to Make It
- Use the circle punch or compass to cut two 6 inch circles from scrapbook paper.
- Cut a straight line from the edge to the center of each circle.
- Roll one circle into a cone shape, overlapping edges by 1/2 inch, and glue with school glue.
- Let dry for 5 minutes under a small book.
- Roll the second circle into a slightly larger cone for the base, glue and dry.
- Use the bone folder to crease a 1/2 inch rim on the base cone’s open edge.
- Place the smaller cone inside the larger one so it lifts out like a lid.


13. Sparkle Streamer Wands
Easy
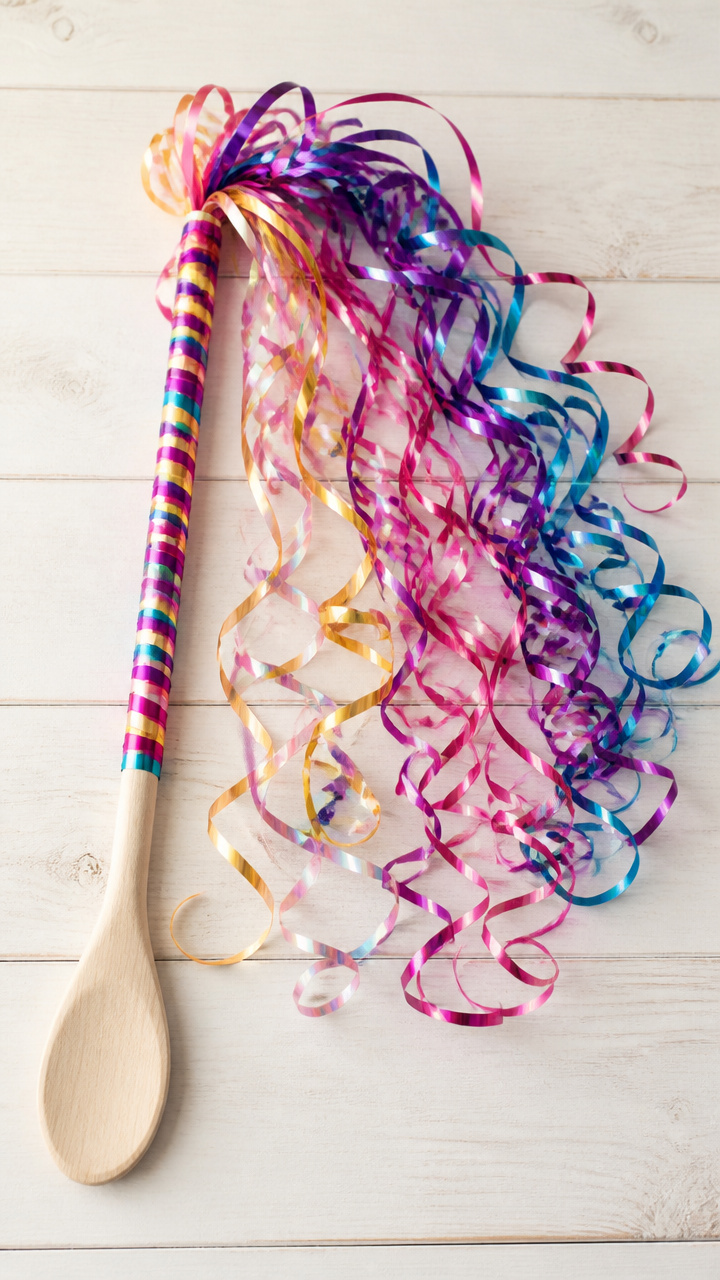
Long sticks wrapped in curling ribbon that trail behind during a parade. The shiny strips catch the air with every step.
Materials Needed
- Wooden spoons, 10 inch handle, 1 per student
- Curling ribbon, 1/8 inch wide, 6 colors, 1 yard each
- Scissors
- Rubber band, 1 per student
How to Make It
- Cut six 12 inch lengths of curling ribbon in different colors.
- Stack the ribbons and tie tightly around the handle of the wooden spoon with a rubber band.
- Fluff the ribbons outward so they fan like a bouquet.
- Use scissors to taper the ends of each ribbon into points.


14. Goal Setting Bracelets
Moderate
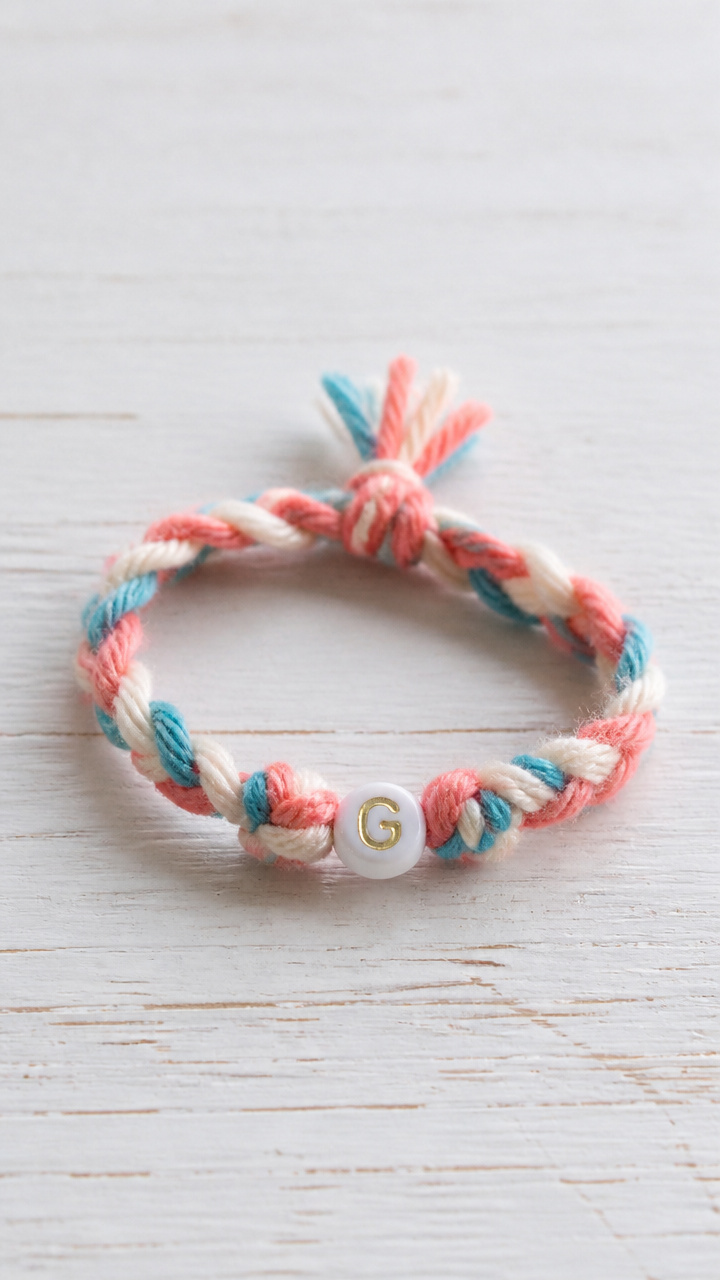
Braided yarn bands tied with a charm that holds a single word of intent. Worn daily, they quietly encourage better choices.
Materials Needed
- Yarn, 3 colors, 18 inches each per student
- Alphabet bead, 1 per student
- Scissors
- Safety pin
How to Make It
- Line up three 18 inch yarn strands and knot at one end.
- Pin the knot to a desk with a safety pin to hold it in place.
- Braid the three strands tightly for 6 inches.
- Slide the alphabet bead onto the braid, spelling one letter of a goal word.
- Braid another 6 inches, then tie a knot at the end.
- Trim the ends at an angle with scissors.


15. Photo Countdown Chains
Easy
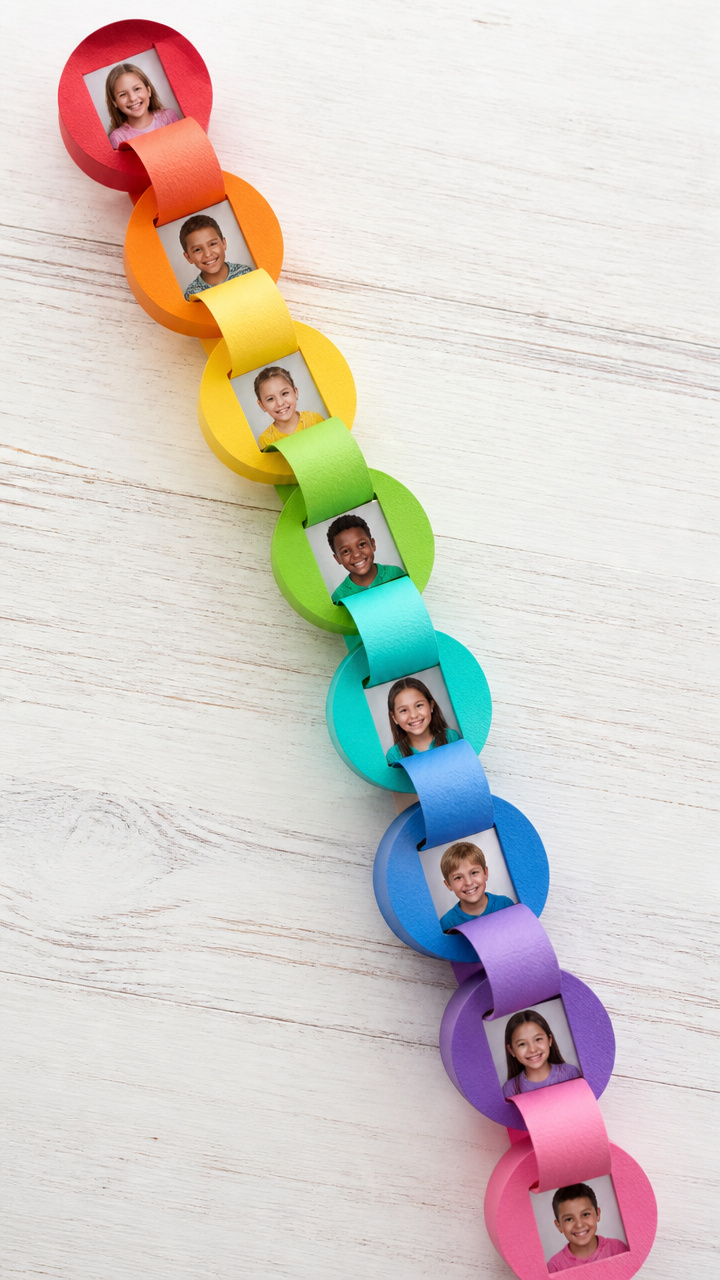
Paper loops connecting daily classroom moments, one removed each day until the holiday. The faces inside beam with growing excitement.
Materials Needed
- Colorful cardstock, 8 colors, 1 sheet each
- Hole punch
- Tape, double-sided, 1/4 inch
- Classroom photos, 2×2 inch, 8 per student
- Scissors
- Glue stick
How to Make It
- Cut each cardstock sheet into 1 inch wide strips, 8 inches long.
- Glue one photo to the center of each strip using the glue stick.
- Form a loop by connecting the ends with double-sided tape.
- Link the next strip through the first loop and seal the ends.
- Repeat to make eight loops per student.
- Hang the chain where it’s easy to remove one loop each day.


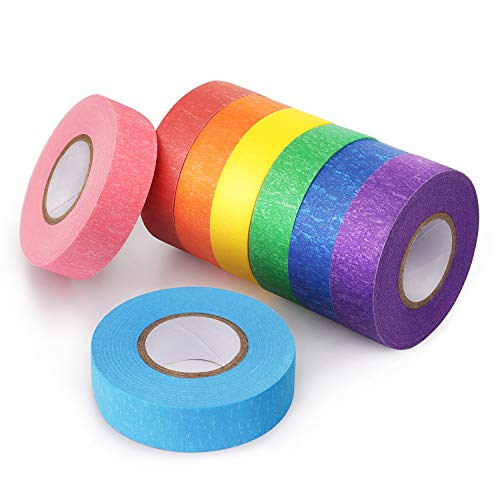
Grab your supplies, clear a table, and let the creativity begin. Each craft holds a little spark of joy ready to light up the room.