15 New Year Crafts Using Paper Plates

Glitter spills across the table, scissors snip in rhythm, and paper plates transform into something joyful. These aren’t just kids’ crafts—they’re keepsakes, decorations, and small celebrations you make with your own hands.
Each one starts with a simple paper plate but ends somewhere surprising. You’ll use paint, glue, and imagination to welcome fresh beginnings, one handmade piece at a time.
1. Sparkling Confetti Blower
Easy
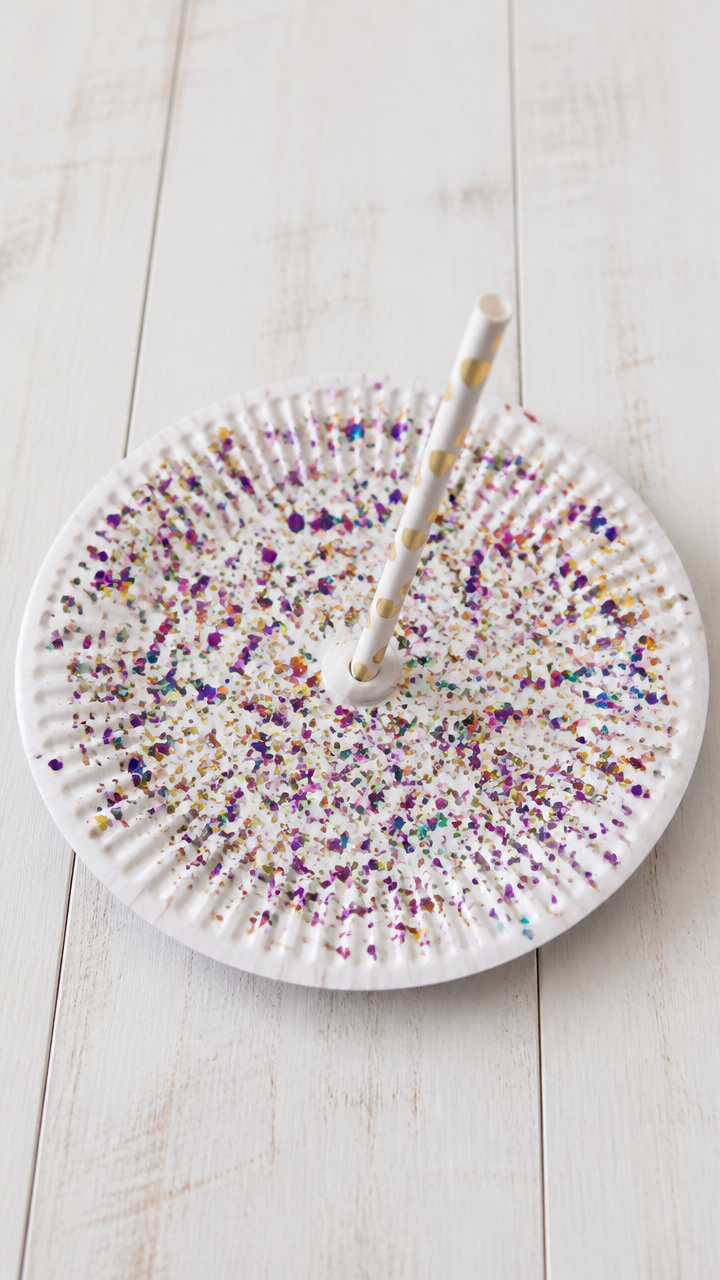
A handheld party noisemaker that bursts with color when you blow through it. Lightweight and loud, it turns any room into a mini celebration zone.
Materials Needed
- 1 white paper plate
- 1 plastic drinking straw
- Glitter confetti (assorted colors), 2 tablespoons
- Clear tape
- Scissors
- Glue stick
How to Make It
- Cut a 1-inch slit near the center of the paper plate’s rim.
- Slide one end of the straw into the slit and secure it with clear tape on both sides.
- Spread glue stick around the outer rim of the plate, avoiding the straw area.
- Sprinkle glitter confetti onto the glued edge and let dry for 10 minutes.
- Curl the plate into a cone shape and tape the overlapping edges together.


2. Layered Fireworks Wall Art
Moderate
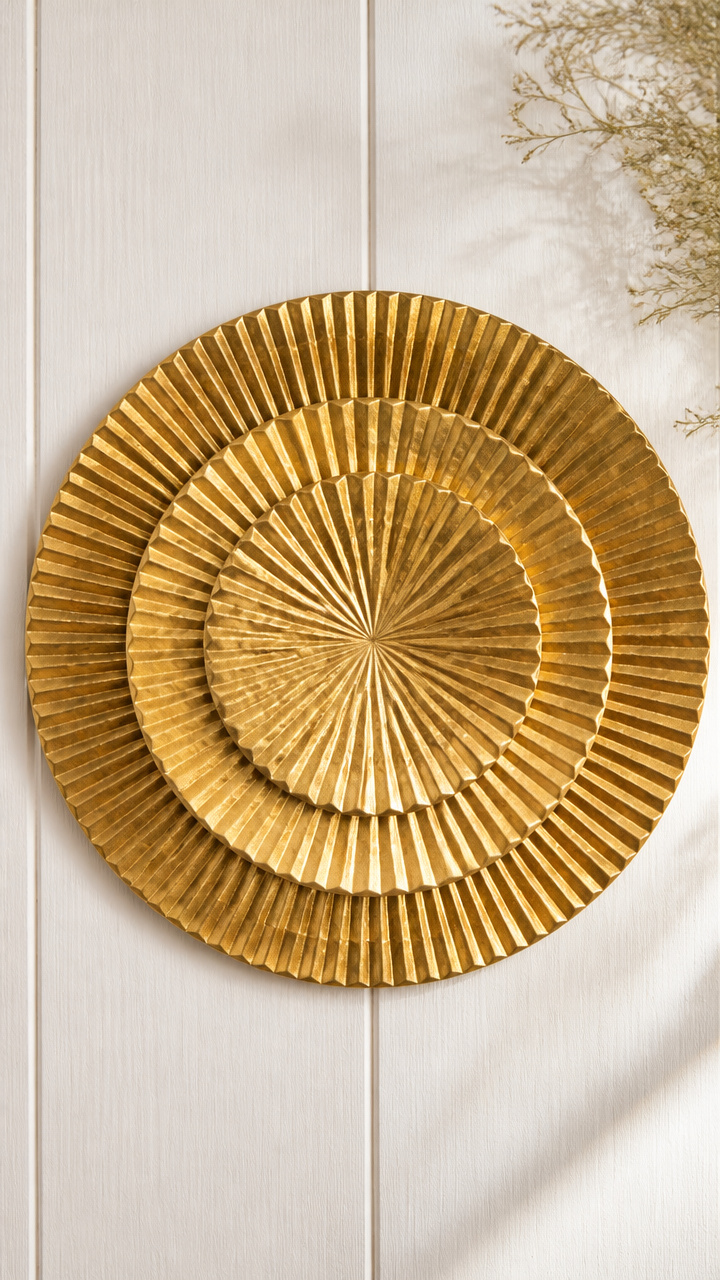
Bold concentric circles burst from the center like silent fireworks. This textured display catches light and adds motion to blank walls.
Materials Needed
- 3 round paper plates (9-inch)
- Gold acrylic paint
- Paintbrush (1-inch flat)
- Ruler
- Craft knife
- Hot glue gun
- Black construction paper (12×18 inches)
How to Make It
- Measure and mark lines every 1 inch from the center outward on each plate using a ruler.
- Use a craft knife to cut along the lines, stopping 1 inch from the rim to keep the outer ring intact.
- Paint each sliced plate with gold acrylic paint and let dry for 20 minutes.
- Stack the three painted plates slightly offset and glue them together at the center with hot glue.
- Glue the layered firework onto the black construction paper background and let set for 5 minutes.


3. Countdown Clock Craft
Moderate
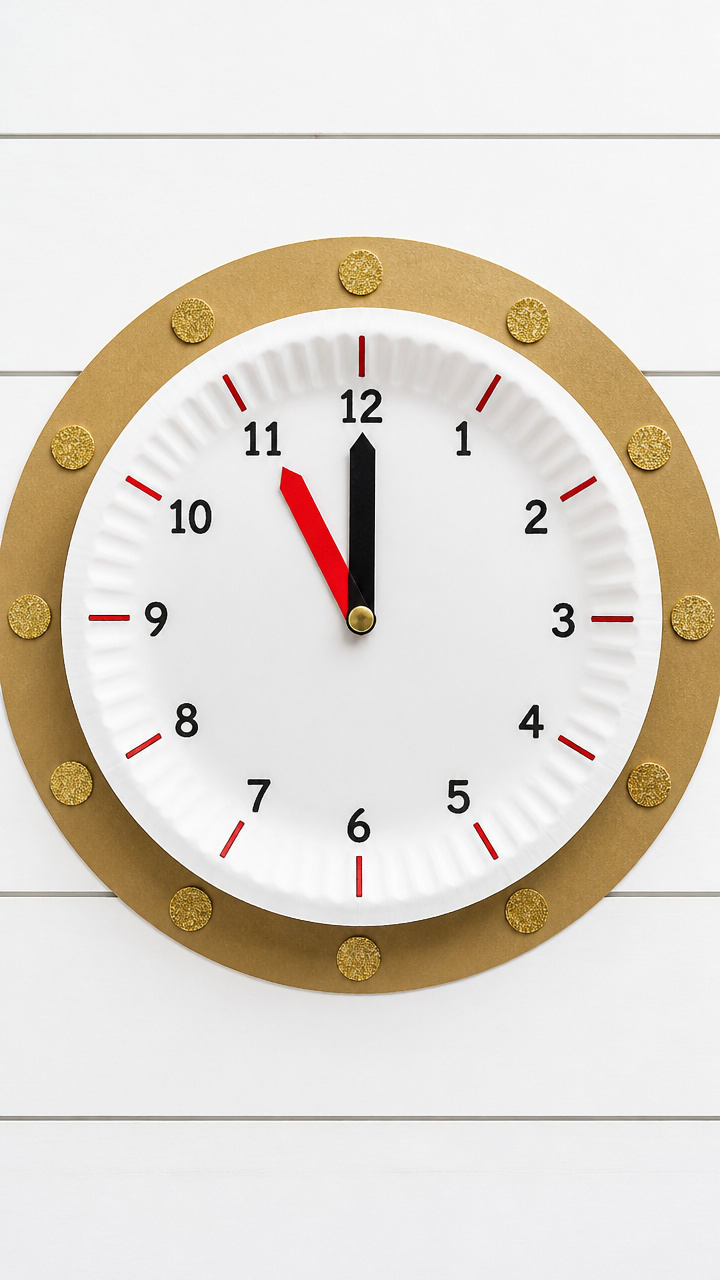
A working paper clock with moving hands helps build excitement as the final hours tick down. Perfect for family gatherings and early-to-bed kids.
Materials Needed
- 1 white paper plate
- Cardboard sheet (6×6 inches)
- Brass fastener (1 inch)
- Markers (black, red)
- Scissors
- Ruler
- Pencil
- Protractor
How to Make It
- Draw numbers 1 to 12 evenly spaced around the rim of the plate using a protractor and pencil.
- Color in the numbers with black marker and let dry for 1 minute.
- Cut two clock hands from cardboard: one short hand (hour), one long hand (minute).
- Color the hour hand black and the minute hand red with markers.
- Poke a hole through the center of the plate and both hands, then attach them with the brass fastener.


4. Glow-in-the-Dark Moon Disc
Easy
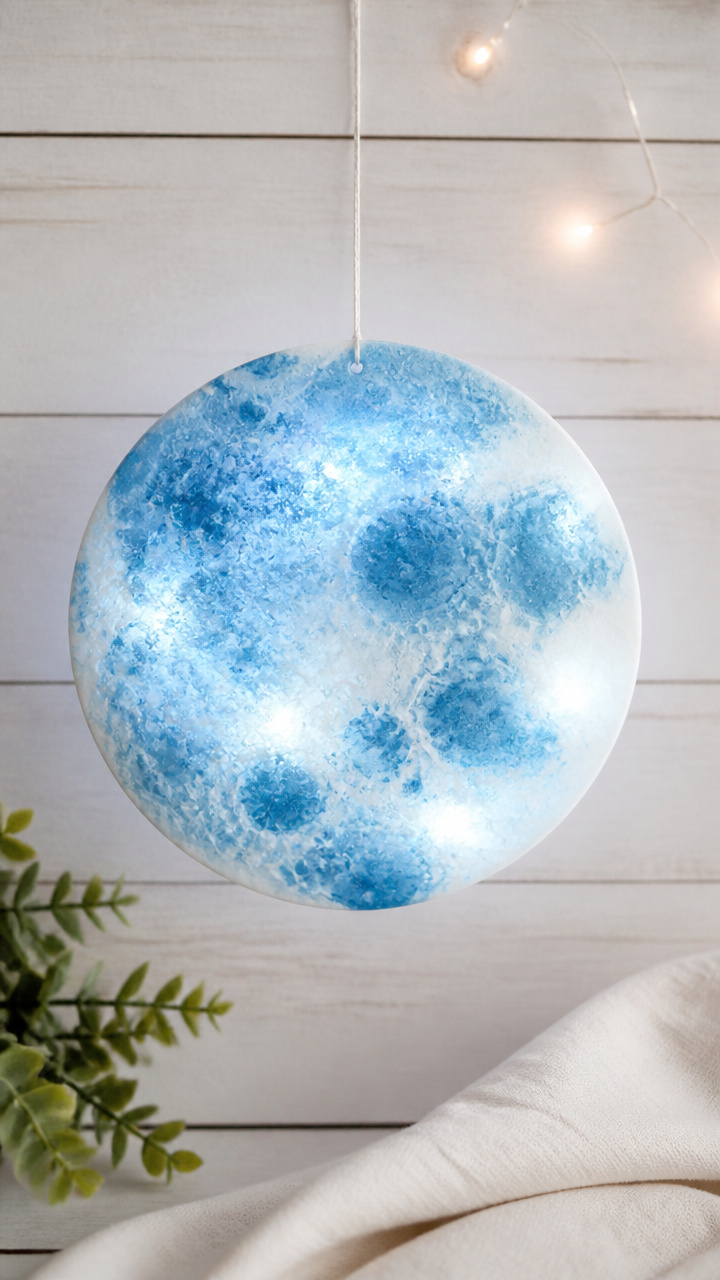
Softly radiant shapes float across a midnight sky. Hang this near a window or bedside for a calming nighttime glow.
Materials Needed
- 1 white paper plate
- Glow-in-the-dark paint (blue and white mix)
- Paintbrush (round, size 4)
- Cotton ball
- String (12 inches)
- Hole punch
How to Make It
- Paint the entire surface of the plate with the glow-in-the-dark paint mixture.
- Dab a cotton ball lightly in undiluted paint and press it gently near the edge to create a cratered moon effect.
- Let dry completely for 25 minutes in a warm, dry spot.
- Punch two holes near the top edge and thread string through to hang.


5. New Year's Resolution Tree
Moderate
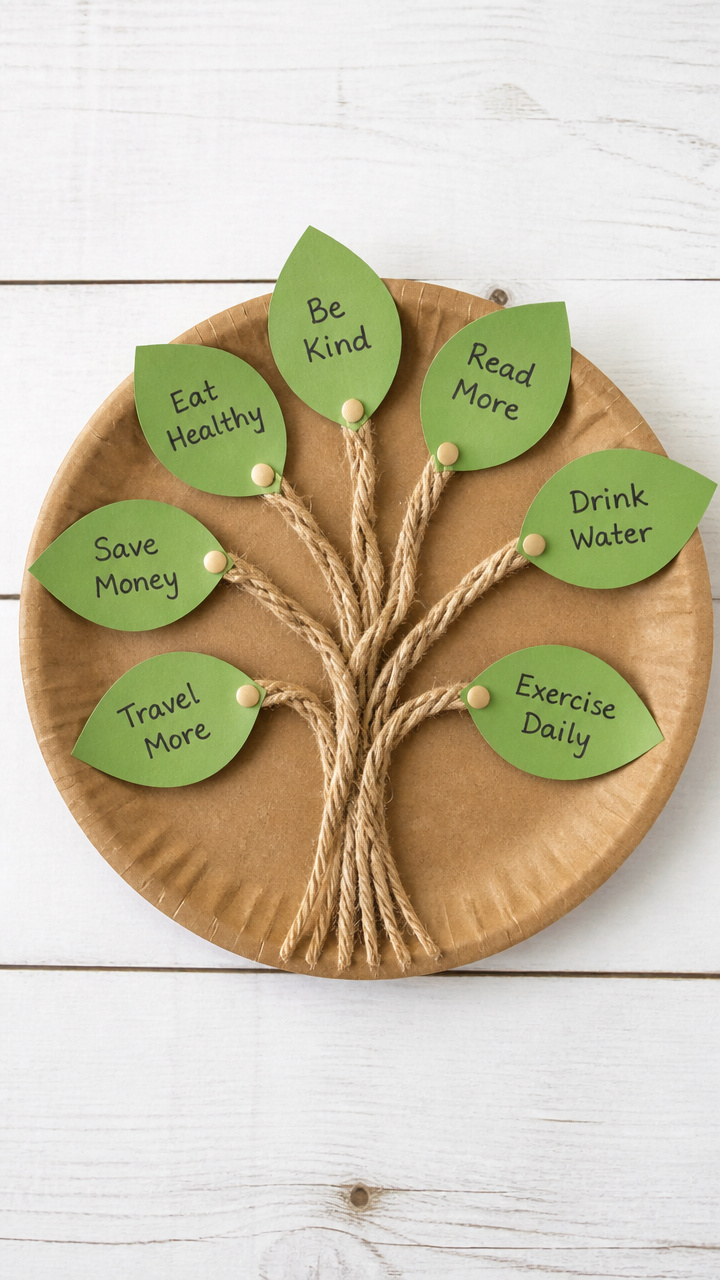
Bare branches hold tiny handwritten hopes for the year ahead. Each leaf-shaped tag flutters with personal promise.
Materials Needed
- 1 brown paper plate
- Green cardstock (8.5×11 inches)
- Fine-tip black pen
- Scissors
- Glue dots (pack of 20)
- Twine (18 inches)
- Small clothespins (6 pieces)
How to Make It
- Cut the rim off the brown paper plate to leave a solid circle base.
- Snip small slits around the edge of the base every 1 inch to act as branch anchors.
- Cut 6 leaf shapes from green cardstock, each 2 inches tall.
- Write one resolution or goal on each leaf with the fine-tip pen.
- Attach each leaf to a clothespin and clip them onto the twine. Drape the garland across the plate’s edge.


6. Chromatic Clock Face Garland
Moderate
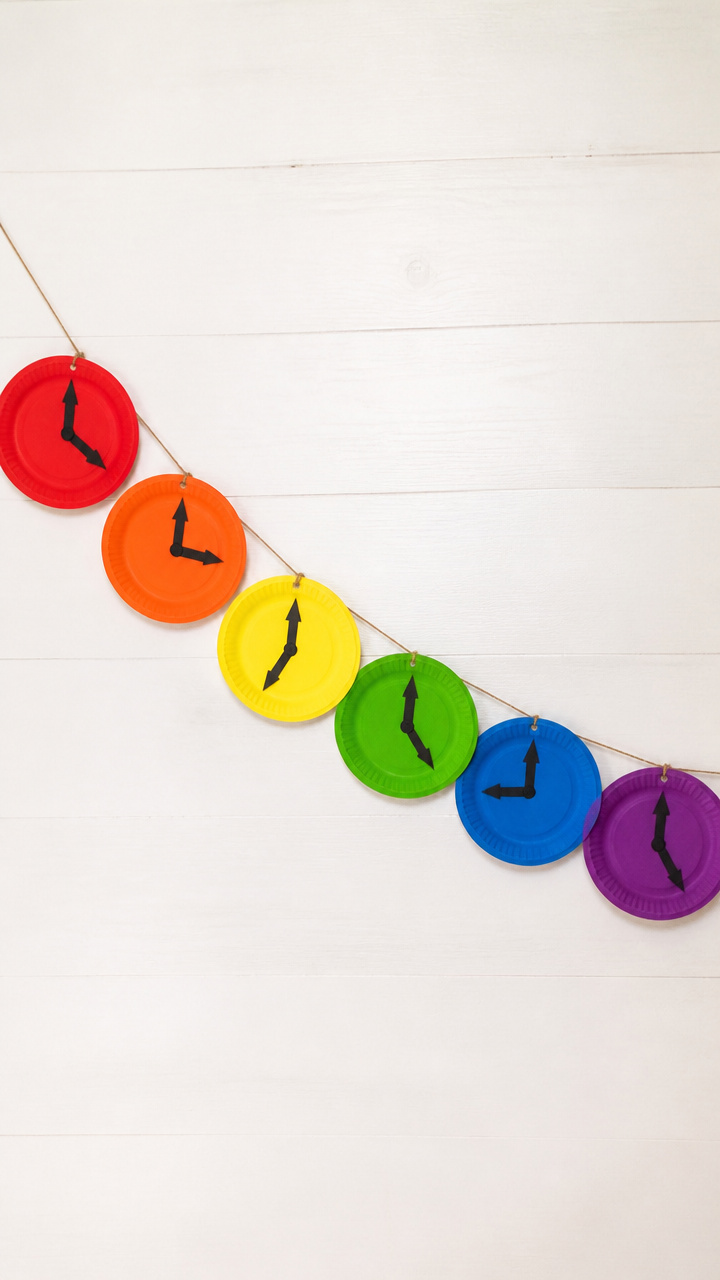
A rainbow of mini clocks dangles from a single string, each showing a different time. Bright, rhythmic, and full of symbolic moments.
Materials Needed
- 6 white paper plates (6-inch)
- Acrylic paints (red, orange, yellow, green, blue, purple), 1 ounce each
- Paintbrush (small round)
- Black permanent marker
- String (3 feet)
- Hole punch
- Ruler
How to Make It
- Paint each small plate a different color using acrylic paint and let dry for 15 minutes.
- Once dry, draw clock numbers 1 to 12 evenly spaced around each plate’s edge with the marker.
- Punch two holes at the top edge of each plate, 1 inch apart.
- Cut six 6-inch lengths of string and tie one to each plate’s holes to form a hanging loop.
- Tie all loops to the main 3-foot string, spacing them 4 inches apart.


7. Pop-Up Noisemaker Card
Advanced
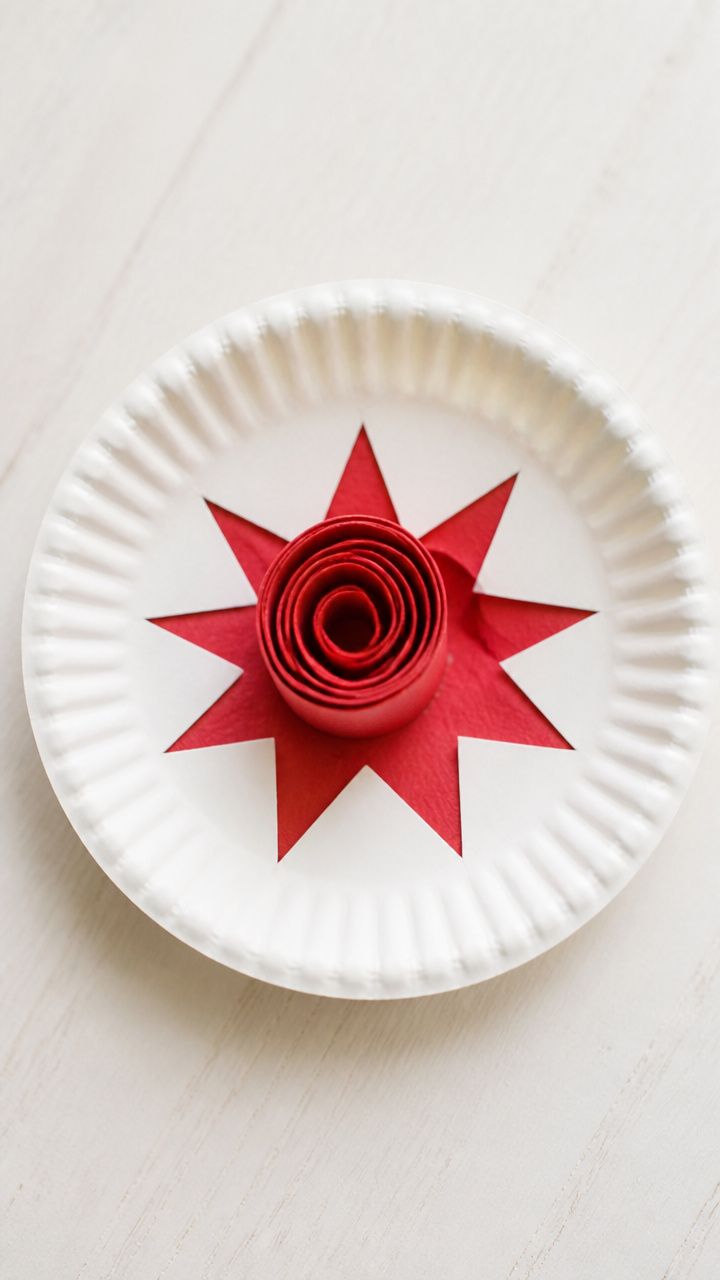
When opened, a coiled horn springs forward with a burst of noise. Slide it into an envelope and surprise someone special.
Materials Needed
- 1 white paper plate
- Red cardstock (5×7 inches)
- Double-sided tape (0.5 inch wide)
- Scissors
- Bone folder
- Ruler
- Craft glue
How to Make It
- Cut a 2-inch wide strip from the outer rim of the paper plate, keeping it curved.
- Score the strip lengthwise every 0.5 inch with the bone folder to create accordion folds.
- Glue one end of the folded strip to the inside of the red cardstock, 1 inch from the bottom edge.
- Fold the cardstock in half so the strip compresses slightly inside.
- Use double-sided tape to secure the other end of the strip to the back cover, creating tension for pop-up action.

8. Reflective Disco Ball
Easy
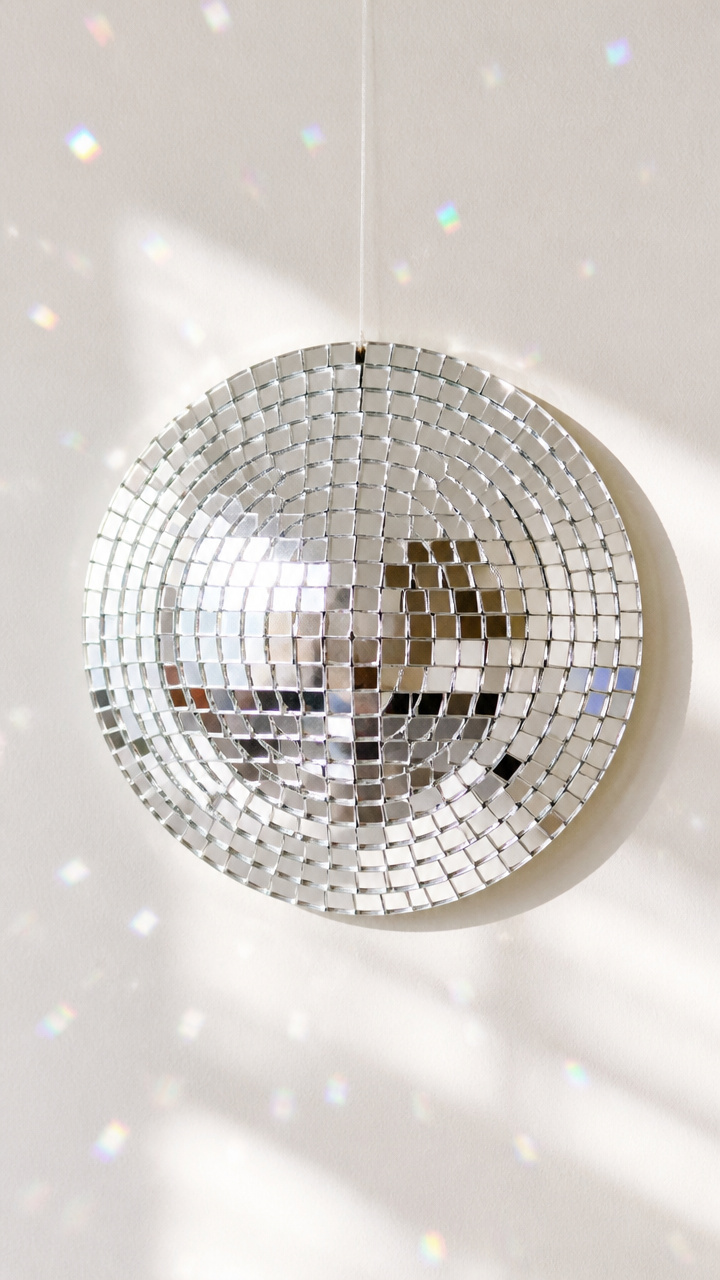
Tiny mirrored squares catch light and scatter rainbows across the ceiling. Spin it above a table and watch the room come alive.
Materials Needed
- 1 white paper plate
- Mirror tile stickers (self-adhesive, 0.75 inch square), 24 pieces
- Scissors
- Fishing line (10 inches)
- Hole punch
How to Make It
- Punch a hole at the top edge of the paper plate.
- Cut the plate into a spiral starting from the outer edge, ending at the center.
- Coil the spiral loosely into a ball shape and overlap the ends.
- Apply mirror sticker squares evenly across the coiled surface, covering all visible areas.
- Thread fishing line through the hole and knot securely for hanging.


9. Time Capsule Plate Puzzle
Advanced
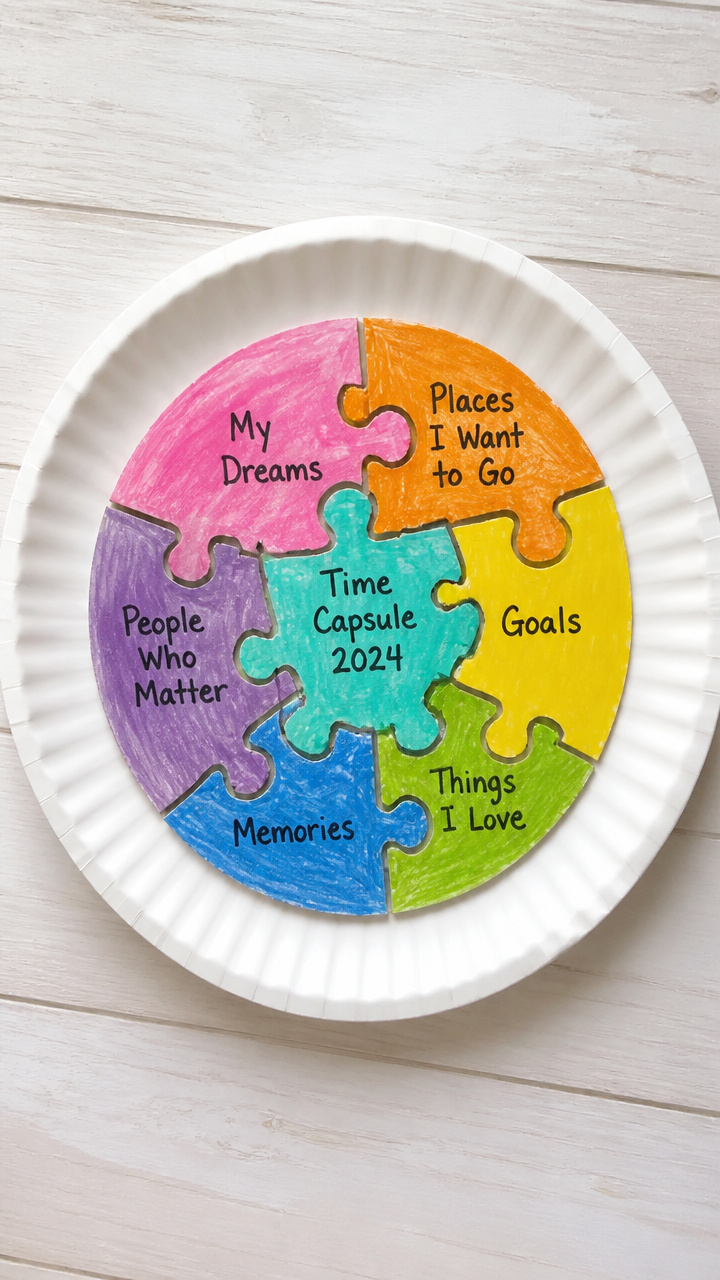
A hidden message hides beneath interlocking pieces only revealed when taken apart. Write a note to your future self and seal it away.
Materials Needed
- 1 white paper plate
- Fine-tip colored markers (set of 6)
- Ruler
- Pencil
- Craft knife
- Cutting mat
- Envelope (6×9 inches)
How to Make It
- Write a short message or draw symbols on the plate’s underside with pencil.
- Turn the plate over and use a ruler to draw 8 straight lines from the center to the rim, dividing it like a pie.
- Carefully cut along each line with a craft knife on a cutting mat.
- Decorate the top side of each slice with colorful patterns using markers.
- Place all pieces into the envelope with the message side down so the puzzle must be solved to read it.


10. Wish Ribbon Wind Spinner
Easy
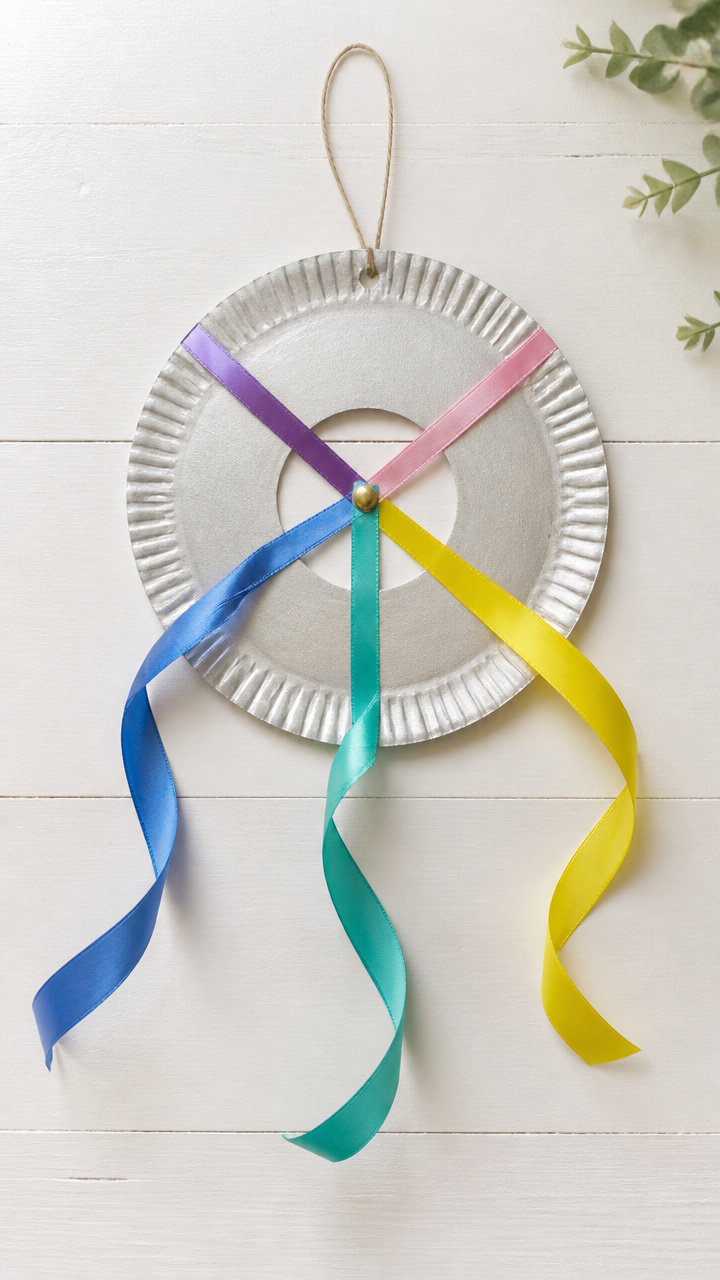
Ribbons stream from a spinning hub etched with wishes. Hang it outside and let the wind carry your hopes forward.
Materials Needed
- 1 white paper plate
- Acrylic paint (silver), 1 ounce
- Paintbrush (flat, 0.5 inch)
- Five satin ribbons (1/4 inch wide x 18 inches, assorted colors)
- Brass brad (1.5 inch)
- Hole punch
How to Make It
- Paint the front of the plate with silver acrylic paint and let dry for 15 minutes.
- Punch a hole in the center of the plate.
- Write one word wish (like 'Joy', 'Peace') on each ribbon end with permanent marker.
- Layer the five ribbons together and insert the ends through the center hole.
- Secure the ribbons with the brass brad, spreading the legs wide on the back side.


11. Number One Trophy
Moderate

Raised golden numerals crown a decorated plate fit for a champion. Hand it to someone who made the year brighter.
Materials Needed
- 1 white paper plate
- Gold puff paint
- Blue tissue paper (one sheet)
- White school glue
- Scissors
- Glitter spray (gold), 2-second burst
How to Make It
- Squeeze gold puff paint in large '1' shape at the center of the plate and let dry for 30 minutes.
- Cut blue tissue paper into 1-inch squares and crumple each slightly.
- Glue tissue squares in a ring around the number using white school glue.
- Hold glitter spray 10 inches away and apply one quick burst over the trophy area.
- Let fully dry for another 10 minutes before displaying.


12. Midnight Sun Suncatcher
Easy
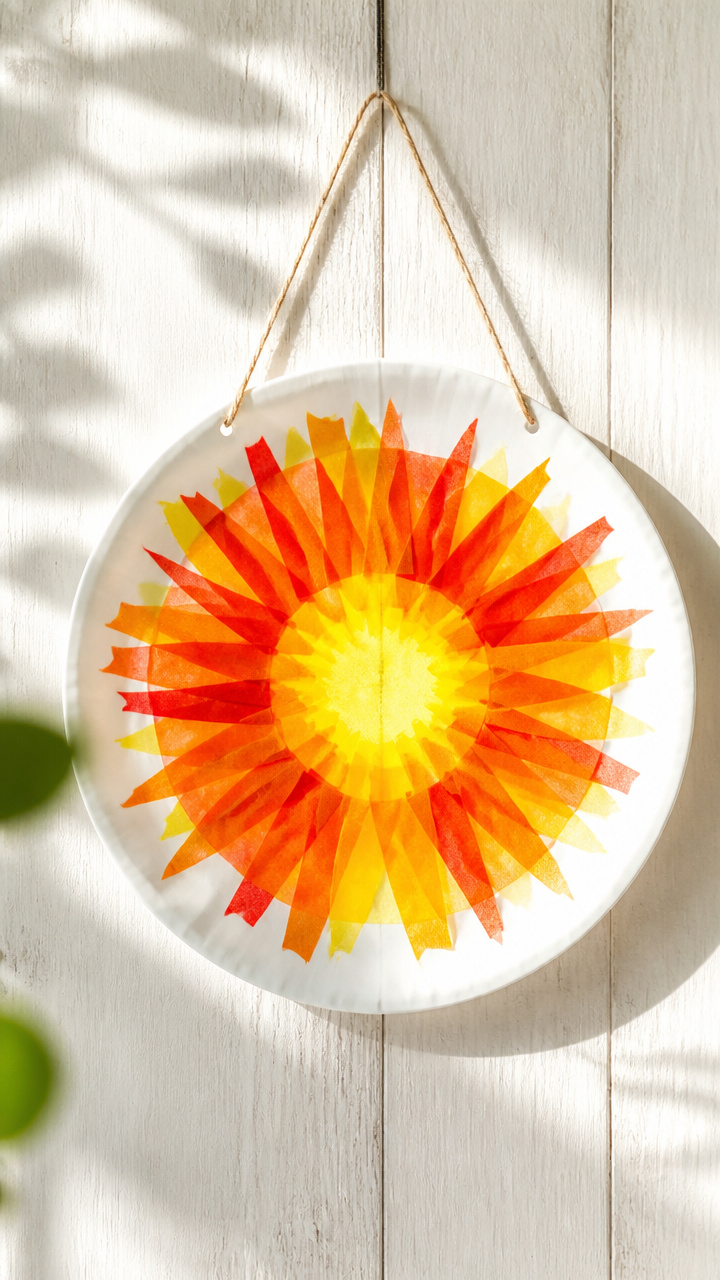
Radiating rays of translucent color catch daylight like a winter sunrise. Clip it to a window and watch light dance indoors.
Materials Needed
- 1 white paper plate
- Tissue paper (red, orange, yellow), 3 sheets
- Elmer's glue
- Paintbrush (1-inch foam)
- String (8 inches)
- Hole punch
How to Make It
- Remove the rim from the paper plate, leaving a solid circle.
- Brush a thin layer of Elmer's glue over one side of the circle.
- Tear tissue paper into small pieces and layer them on the glued surface, blending colors outward.
- Let dry completely for 20 minutes until no shine remains.
- Punch a hole at the top and thread string through for hanging.


13. Ring-the-Bell Celebration Wand
Easy
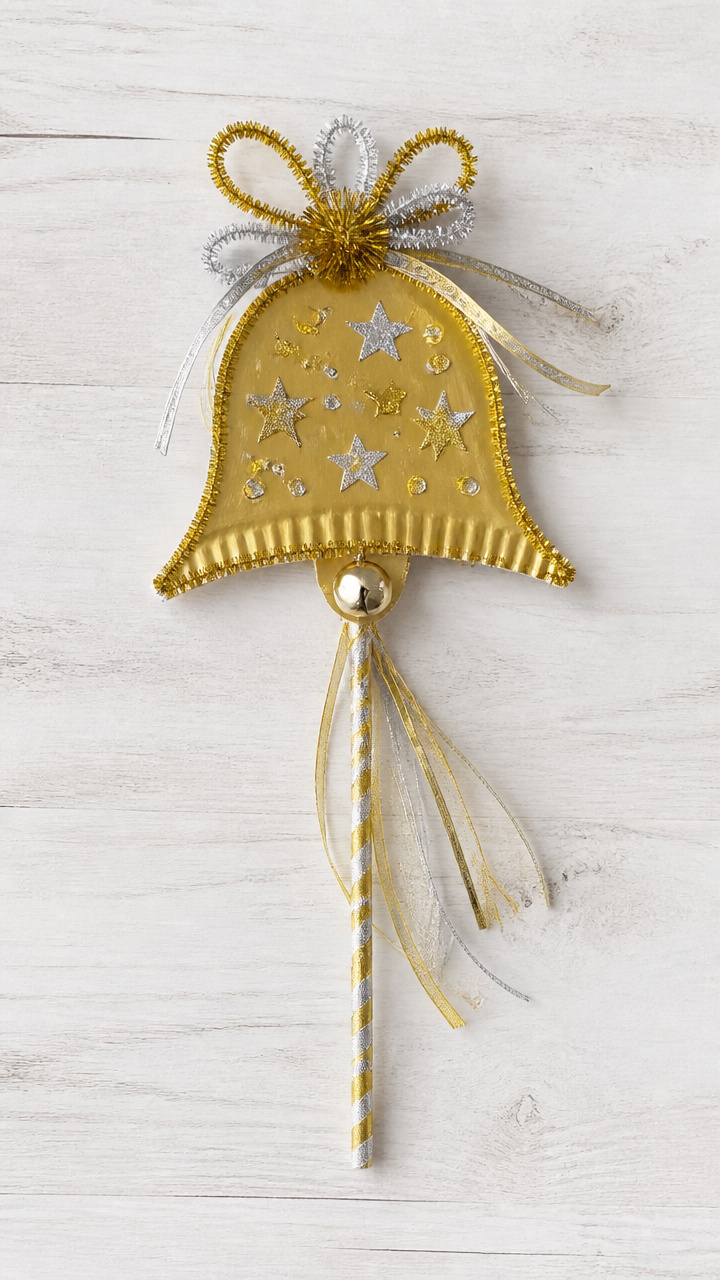
Jingle bells shake with every wave, turning claps into music. Wave it overhead when the clock strikes twelve.
Materials Needed
- 1 white paper plate
- Jingle bells (12 mm diameter), 6 pieces
- Ribbon (1/2 inch wide x 24 inches, gold)
- Hot glue gun
- Scissors
- Wooden dowel (1/4 inch x 12 inches)
How to Make It
- Cut the paper plate into a starburst shape by making 8 even triangular cuts from the rim toward the center.
- Paint the star points with gold ribbon strips using hot glue to wrap each arm.
- Glue one jingle bell to the tip of each star point.
- Glue the ribbon-wrapped base of the star to one end of the wooden dowel.
- Let sit for 5 minutes to ensure a strong bond before waving.


14. Memory Circle Collage
Moderate
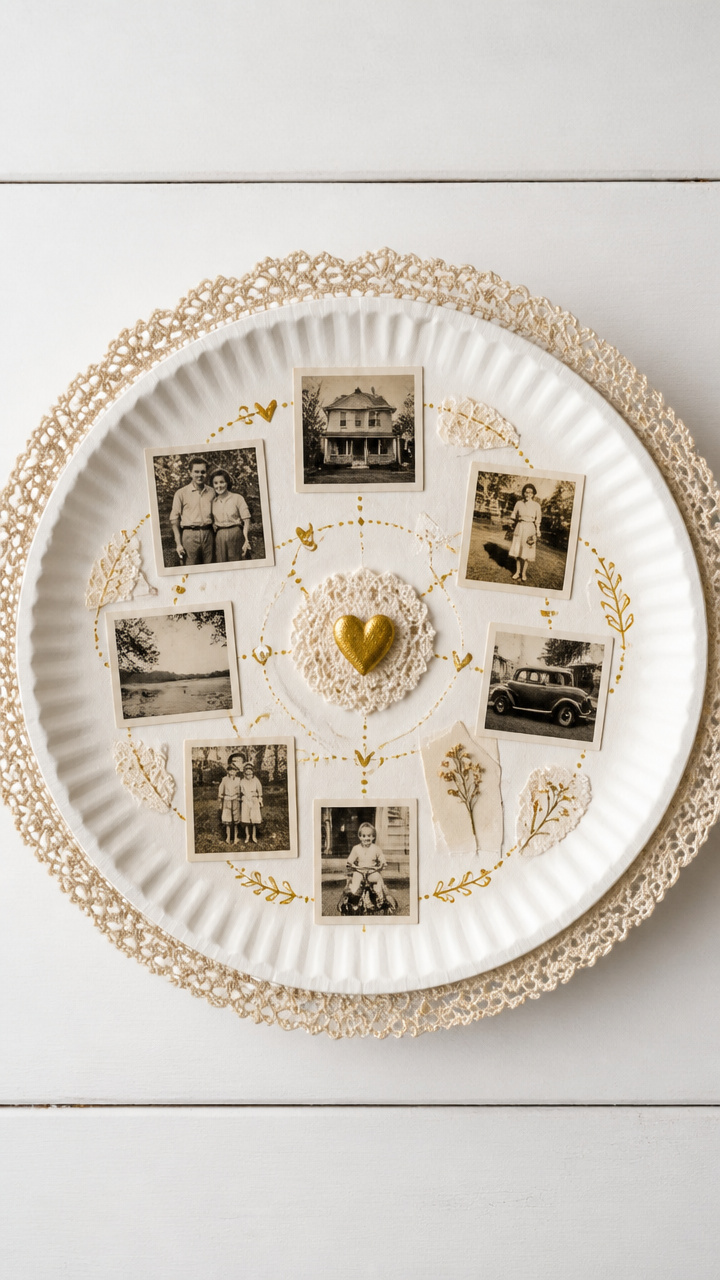
Faded photos and ticket stubs nestle into a circular timeline. Display last year’s highlights in a way that feels complete.
Materials Needed
- 1 white paper plate
- Family photos (2×2 inches), 6 prints
- Glue stick
- Scissors
- Gold gel pen
- Lace trim (12 inches)
How to Make It
- Trim the outer rim off the paper plate to expose the inner circle.
- Cut each photo to fit within a wedge-shaped section of the circle, leaving space between them.
- Use the glue stick to attach each photo evenly spaced around the plate.
- Outline each photo with gold gel pen and write a brief memory beside it.
- Glue lace trim along the outer edge to frame the collage.
![Uni-Ball Signo Broad Point Gel Impact Pen Gold Ink, 1.0mm, 3 pens per Pack (Japan import) [Komainu-Dou Original Package]](https://m.media-amazon.com/images/I/41jYi+Hs6QL._SL500_.jpg)


15. Peekaboo Countdown Wheel
Advanced
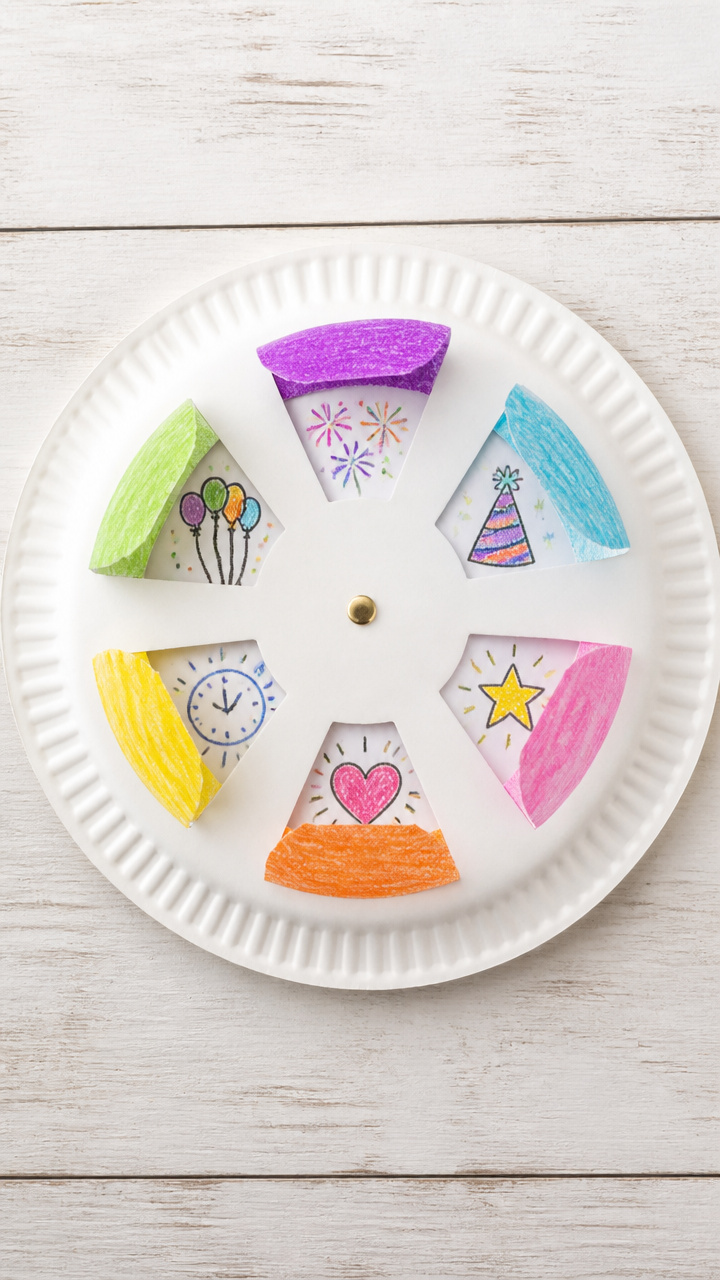
Each day reveals a new surprise behind a rotating flap. Build daily excitement with hidden jokes, quotes, or treats.
Materials Needed
- 2 white paper plates (9-inch)
- Brass fastener (1.5 inch)
- Crayons
- Ruler
- Pencil
- Scissors
- Circular sticker labels (2 inches diameter), 12 pieces
How to Make It
- Place one plate on top of the other and align perfectly.
- Divide the top plate into 12 equal sections using ruler and pencil marks every 30 degrees.
- Cut a straight line from the center to the edge in each section, stopping 2 inches from the rim.
- Write numbers 1 to 12 on each label and stick one over each flap base.
- Insert the brass fastener through both centers and bend the legs to allow smooth rotation.
Grab a stack of paper plates and start creating—each one holds the chance to celebrate, reflect, or surprise. Your next tradition might begin with something this simple.