15 DIY Back to School Crafts Using Supplies You Already Have at Home
The start of a new school year brings fresh energy and the chance to make everyday items feel special. With just a few common household supplies, you can create thoughtful, handmade pieces that add personality to backpacks, desks, and notebooks.
These crafts use things you already own, from old magazines to empty jars, turning clutter into cheerful tools for learning. Each one is simple to complete and made with care, so you can send your student off with something truly their own.
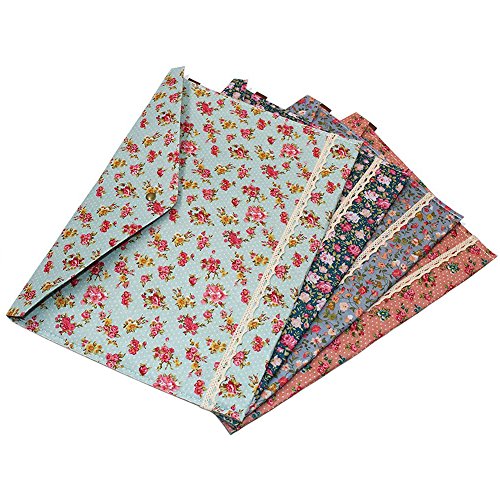
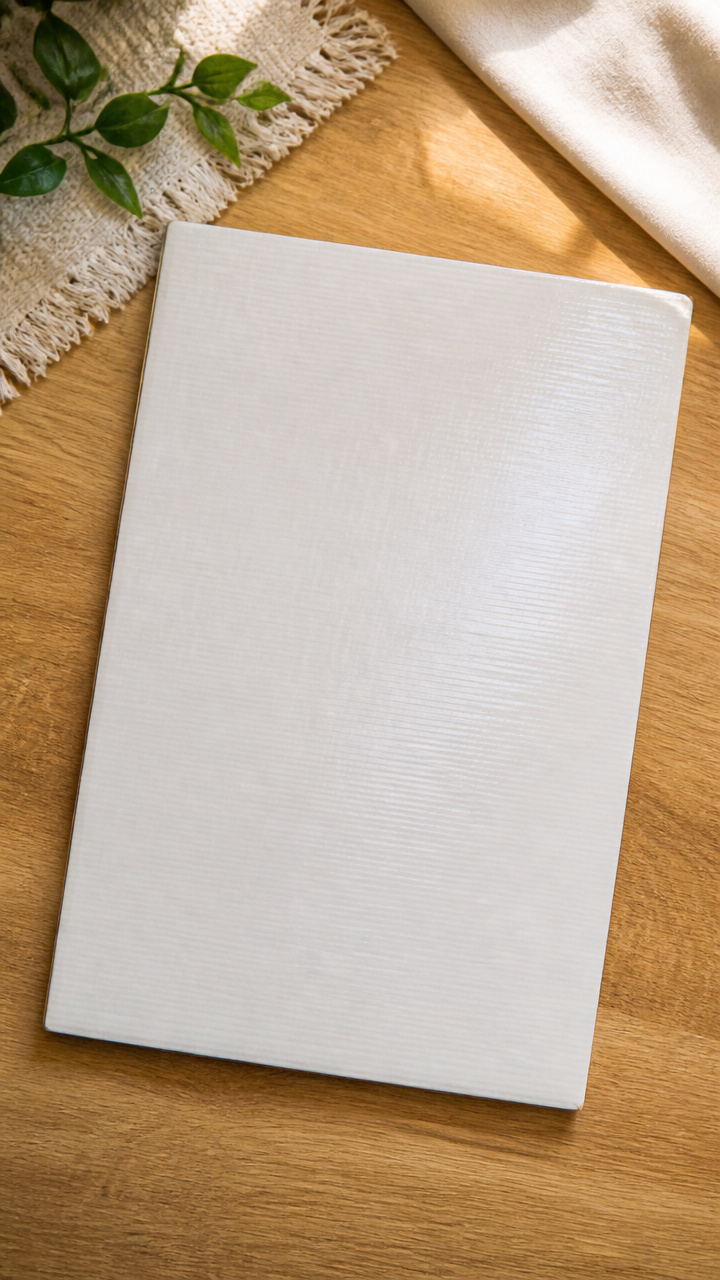
1. Fabric-Covered Notebook
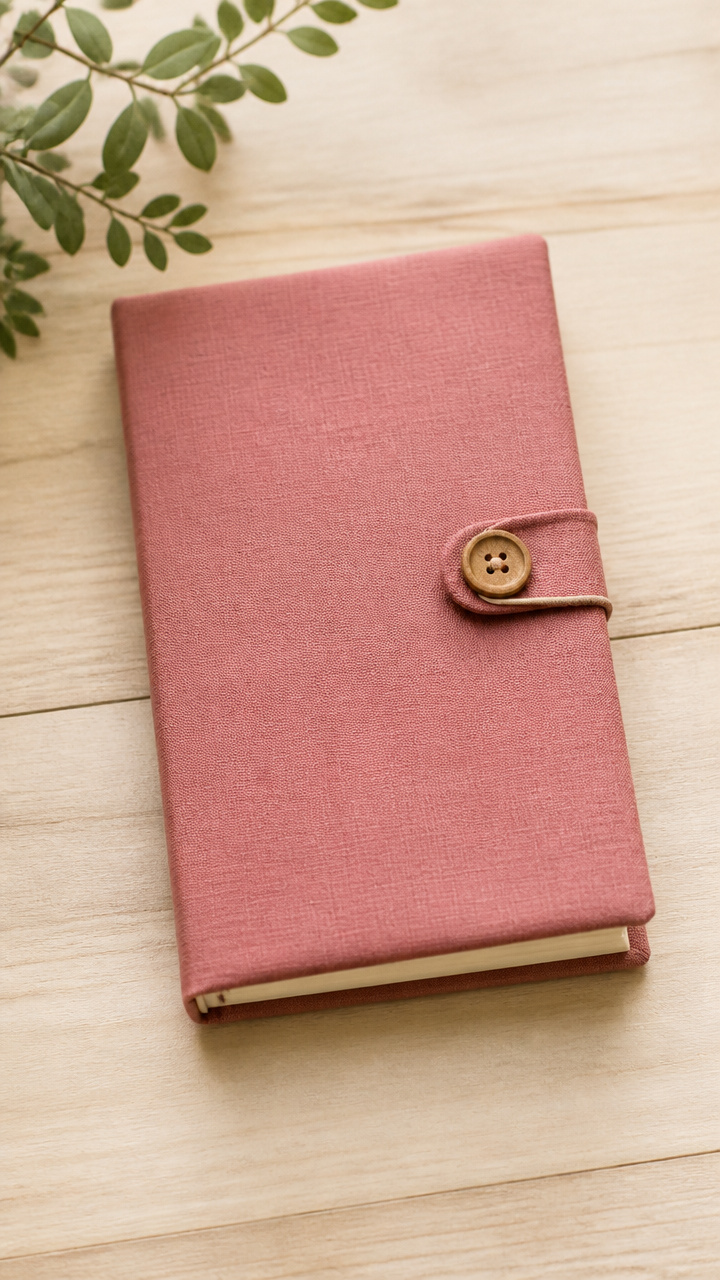
Soft cotton wrap gives plain notebooks a cozy, personalized look that resists wear. This cover stays on with a button closure and fits standard spiral or composition books.
Materials Needed
- One 8.5 x 11 inch piece of cotton fabric
- One 6 x 9 inch piece of fusible interfacing
- One medium-sized safety pin
- One 3/4 inch sew-on button
- Thread to match fabric
- Scissors
- Ruler
- Iron
How to Make It
- Iron the fusible interfacing to the wrong side of the fabric using manufacturer’s heat settings.
- Lay the notebook on the fabric and measure 1 inch around all edges, then cut.
- Fold the edges over the back of the notebook and pin in place with the safety pin.
- Sew the button on the front flap so it fastens snugly over the notebook spine.


2. Pencil Holder from Tin Can
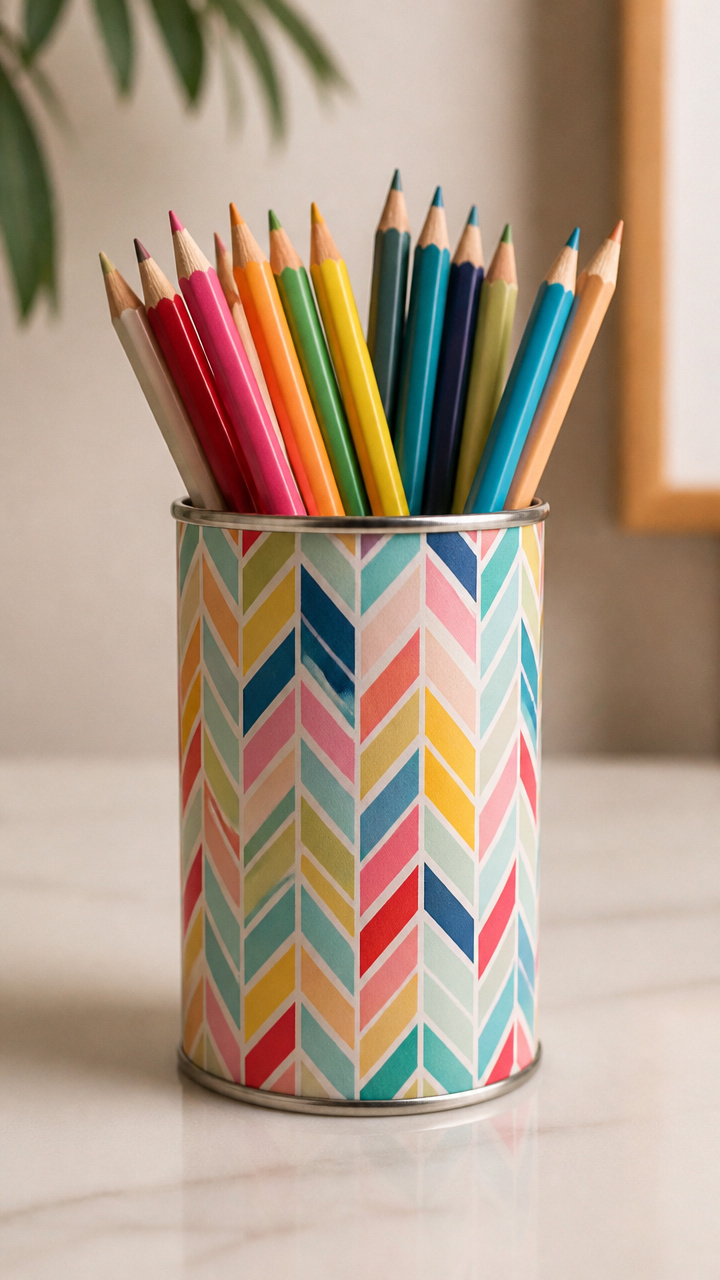
A clean soup can becomes a sturdy container for pens and pencils, wrapped in patterned paper from old gift wrap or magazines. It adds color to any desk without cost.
Materials Needed
- One empty 10.75 oz tin soup can, cleaned and dried
- One 10 x 4 inch strip of decorative paper
- White glue
- Foam brush
- Clear matte sealant spray
- Sandpaper (180 grit)
How to Make It
- Lightly sand the outside of the can to help the glue adhere, then wipe clean.
- Brush a thin layer of white glue onto the can’s surface using the foam brush.
- Wrap the decorative paper around the can, smoothing out air bubbles as you go, and let dry for 30 minutes.
- Spray with two light coats of sealant, waiting 15 minutes between coats.


3. Bookmark with Braided Yarn
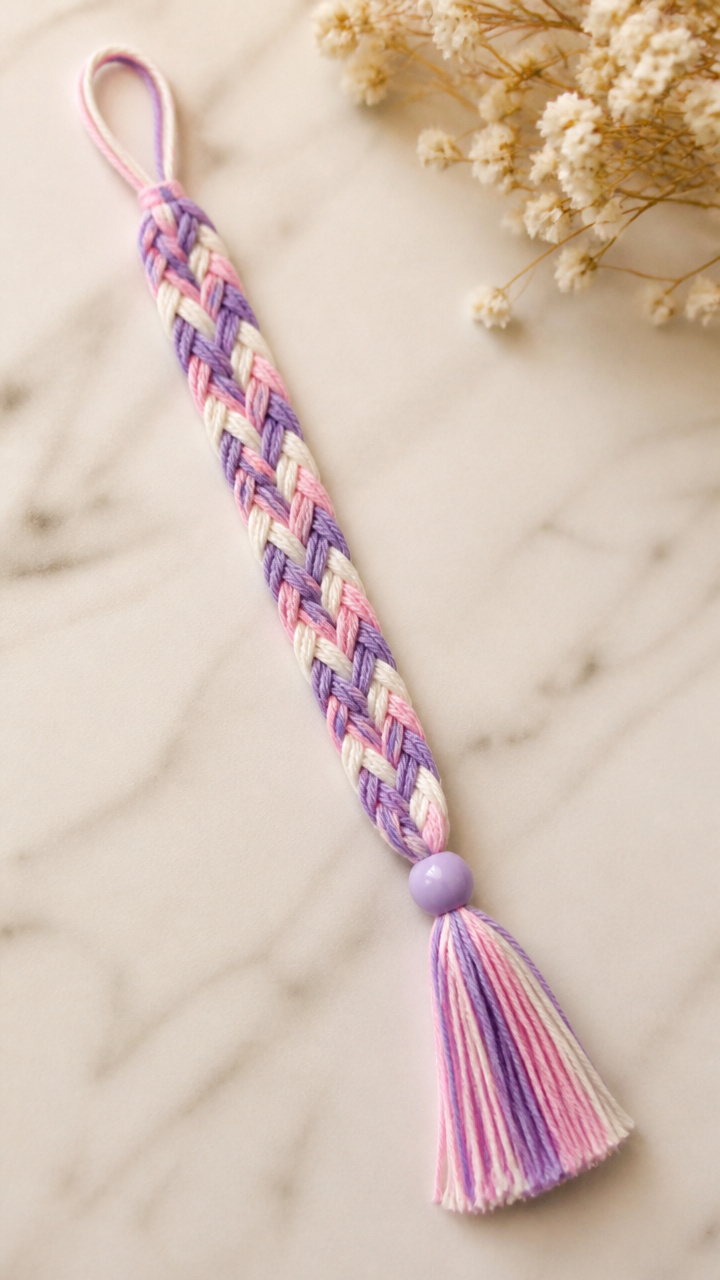
Three strands of yarn are braided into a soft, tasseled bookmark that won’t damage pages. It slips easily between chapters and doubles as a fidget tool.
Materials Needed
- Three 24 inch lengths of embroidery floss in matching colors
- One 1 inch wide craft bead
- Scissors
- Glue stick
How to Make It
- Line up the three strands and tie a knot at one end, leaving a 2 inch tail.
- Braid tightly for 6 inches, then slide the bead onto the ends.
- Tie a knot below the bead to secure it, then trim excess thread to 1 inch.
- Rub the knot lightly with glue to prevent fraying.


4. Crayon Melt Art Jar Lid

Old crayon stubs are melted into colorful resin-like lids that turn plain mason jars into vibrant pencil cups. The waxy finish catches the light beautifully.
Materials Needed
- Eight broken crayons, peeled and chopped into small pieces
- One metal mason jar lid (inner ring removed)
- Aluminum foil
- Oven-safe tray
- Tongs
How to Make It
- Preheat oven to 275°F and line the tray with foil.
- Fill the lid with crayon pieces, packing them in tightly.
- Place the lid on the tray and bake for 12 minutes until fully melted.
- Use tongs to move the lid to a cooling rack and let sit for 30 minutes before handling.


5. Paperclip Binder Clip Organizer
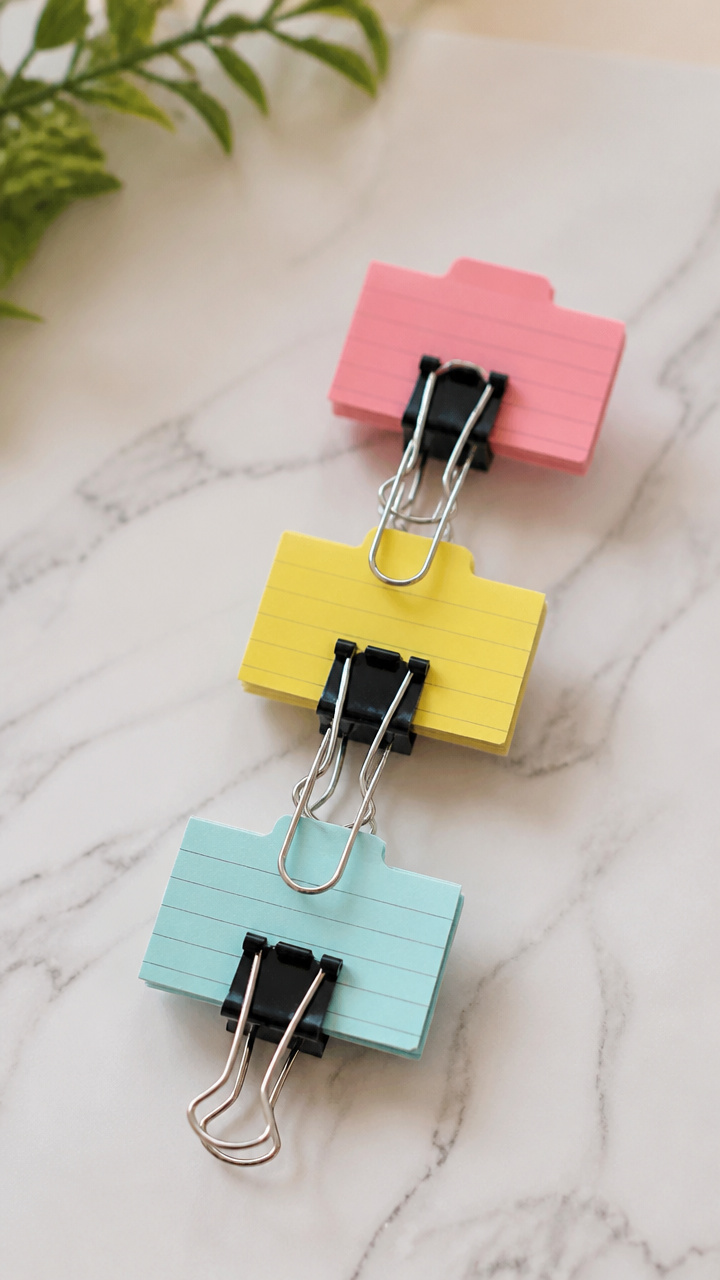
Binder clips hold stacks of loose papers while paperclips act as quick-access tabs labeled with subject names. It keeps handouts sorted on the go.
Materials Needed
- Three large binder clips
- Six jumbo paperclips
- Fine-tip black marker
- Index cards, cut into 1 x 3 inch strips
How to Make It
- Write subject names like Math or Science on each index strip using the marker.
- Slide one strip through each paperclip and fold the ends to secure.
- Clip the binder clips onto the edge of a notebook or folder.
- Hook one labeled paperclip onto each binder clip for instant category tags.


6. Eraser Stamp Alphabet Cards
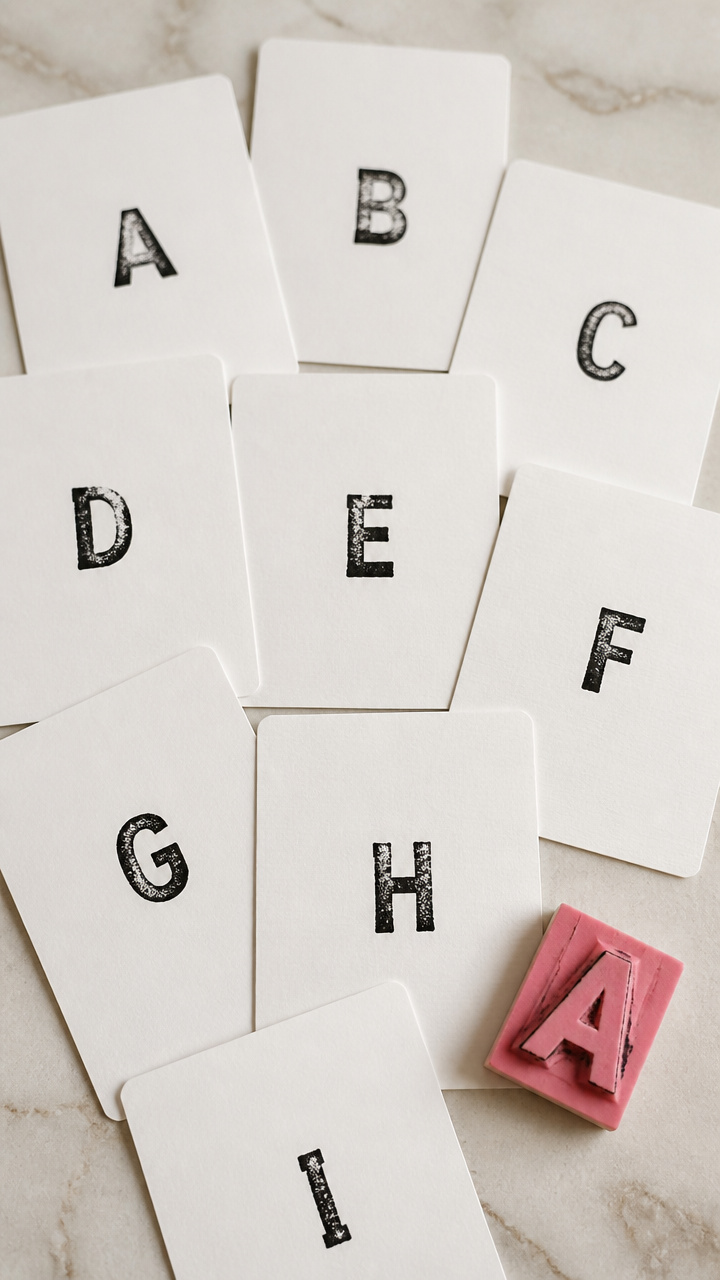
Firm pink erasers are carved into letter stamps and pressed into ink to make custom study cards. They’re perfect for spelling practice or vocabulary games.
Materials Needed
- One pink vinyl eraser
- Linoleum carving tool with fine blade
- Black stamp pad
- Blank index cards
- Pencil
How to Make It
- Draw a backward capital letter on the eraser face using the pencil.
- Carefully carve away the rubber around the letter with the carving tool, leaving the shape raised.
- Press the stamp into the ink pad, then firmly onto an index card.
- Repeat for each letter needed and let dry for 2 minutes.

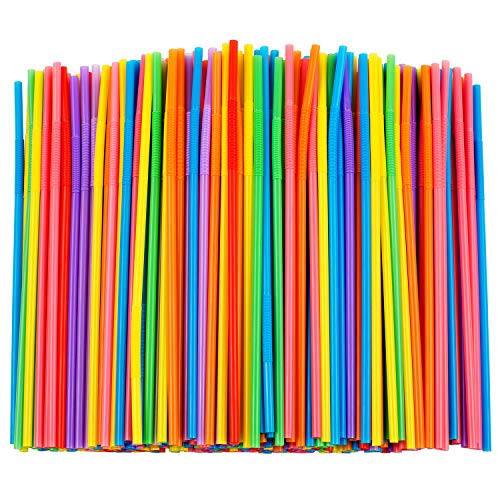
7. Strawphone Water Bottle Tag
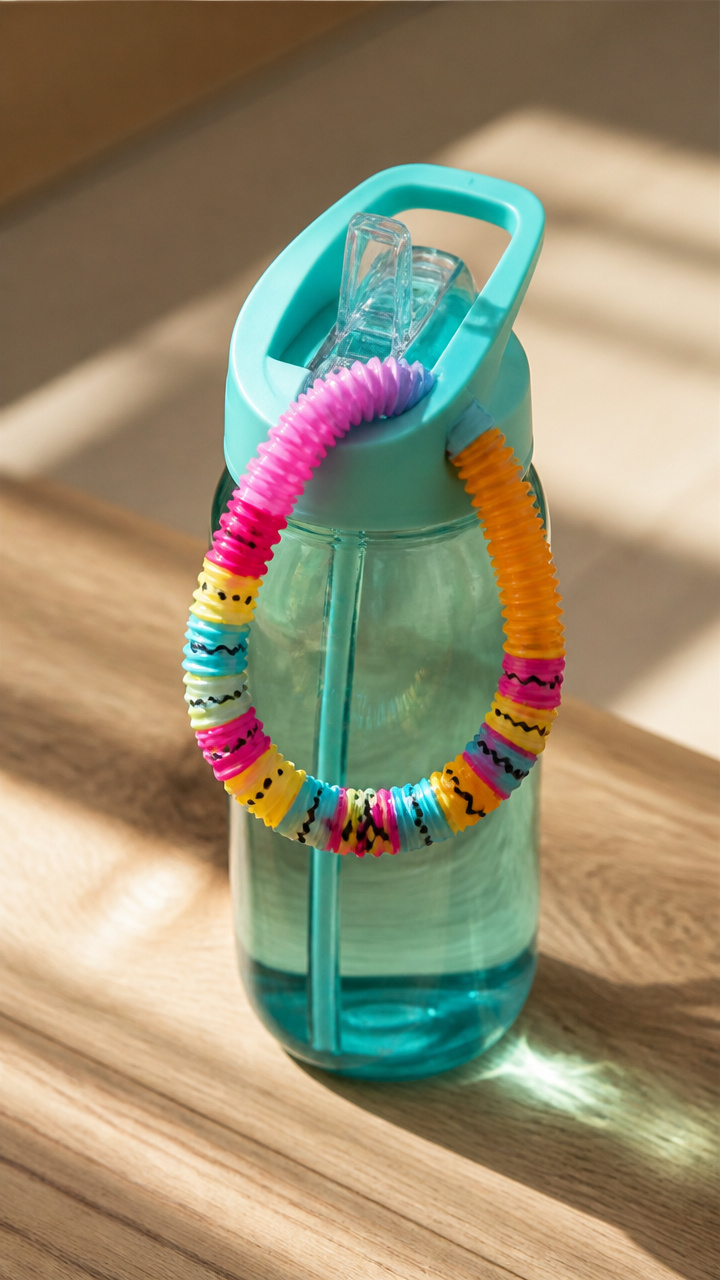
A bendy straw forms a cheerful loop tag that slides onto water bottles and identifies them quickly. No more mix-ups in the lunchroom.
Materials Needed
- One plastic bendy straw
- Fine-tip permanent marker
- Ruler
- Scissors
How to Make It
- Cut the straw 1 inch below the bend using scissors.
- Write your name on the long straight end with the marker.
- Bend the short end into a circle and press it through the bottle handle.
- Slide the long end through the loop to lock it in place.


8. Tissue Paper Desk Drawer Liner
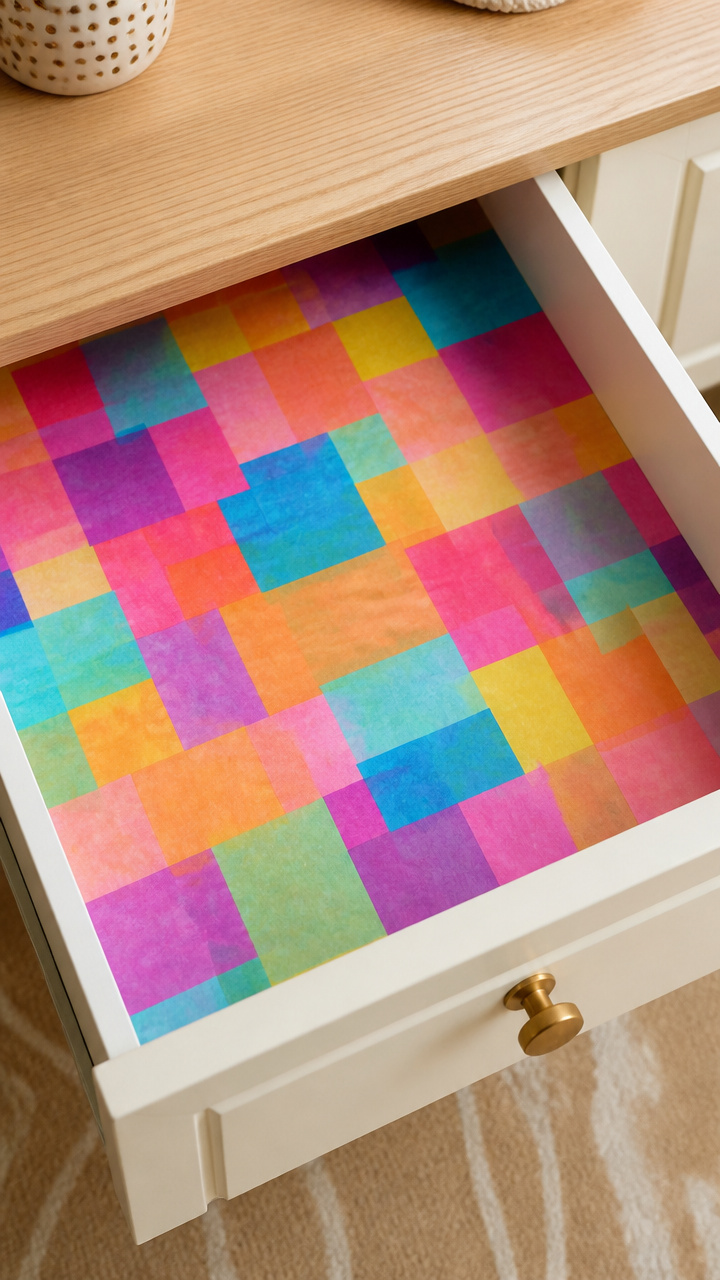
Bright tissue squares are glued into a mosaic pattern to line the bottom of a desk drawer. The result is a cheerful surprise every time it opens.
Materials Needed
- Six sheets of colored tissue paper
- Scissors
- White glue
- Foam brush
- Measuring tape
How to Make It
- Measure the drawer base and cut tissue into 2 inch squares to cover it.
- Spread a thin layer of glue on a 3 x 3 inch area of the drawer using the brush.
- Press tissue squares down side by side, slightly overlapping edges.
- Let dry completely for 1 hour before placing items inside.


9. Toothpick Flag Homework Tracker
A row of toothpicks with tiny paper flags marks completed assignments. It stands in a reused yogurt cup and offers visible motivation.
Materials Needed
- Five flat toothpicks
- One 3 oz empty yogurt cup
- Colored construction paper
- White glue
- Scissors
- Pencil
How to Make It
- Cut five 1.5 inch triangles from construction paper using scissors.
- Fold each triangle in half over a toothpick and glue the edges shut.
- Fill the yogurt cup halfway with dried beans for weight.
- Stick the toothpicks into the beans, one for each assignment to track.
![[100 Pack] Blank Toothpick Flags, Cheese Markers for Charcuterie Board Food Label Cupcake Toppers Pick Cocktail Picks for Appetizers, Party Buffet, Cupcake, Food, Fruit, Party Decoration](https://m.media-amazon.com/images/I/31YoF5dtfnL._SL500_.jpg)


10. Shoebox Lid Chalkboard
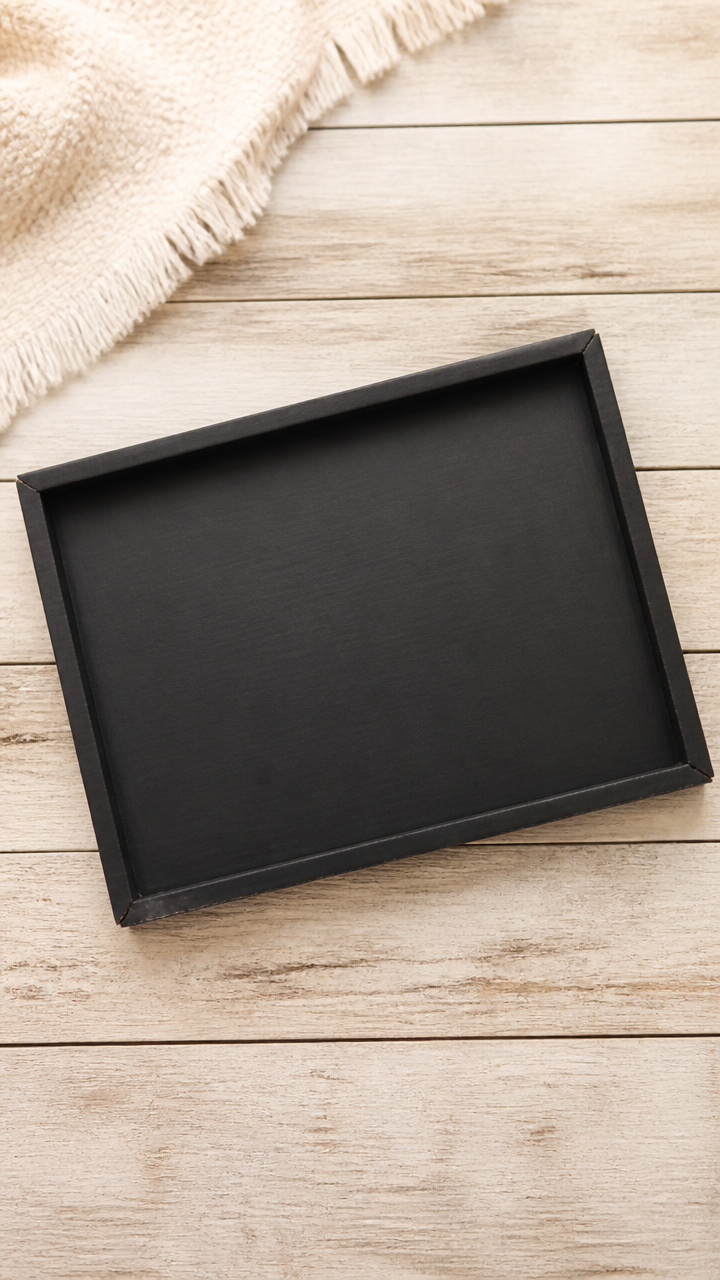
The flat underside of a shoebox lid turns into a mini chalkboard with liquid blackboard paint. Use it for reminders, doodles, or math drills.
Materials Needed
- One cardboard shoebox lid
- Two ounces black acrylic chalkboard paint
- Small foam roller
- Chalk pencil
- Clean cloth
How to Make It
- Stir the chalkboard paint gently and pour a dime-sized amount onto the lid’s center.
- Roll the paint outward in smooth strokes, covering the entire surface evenly.
- Let dry for 2 hours, then apply a second coat and dry overnight.
- Rub a chalk pencil over the surface and wipe with a cloth to season it.


11. Milk Cap Magnets
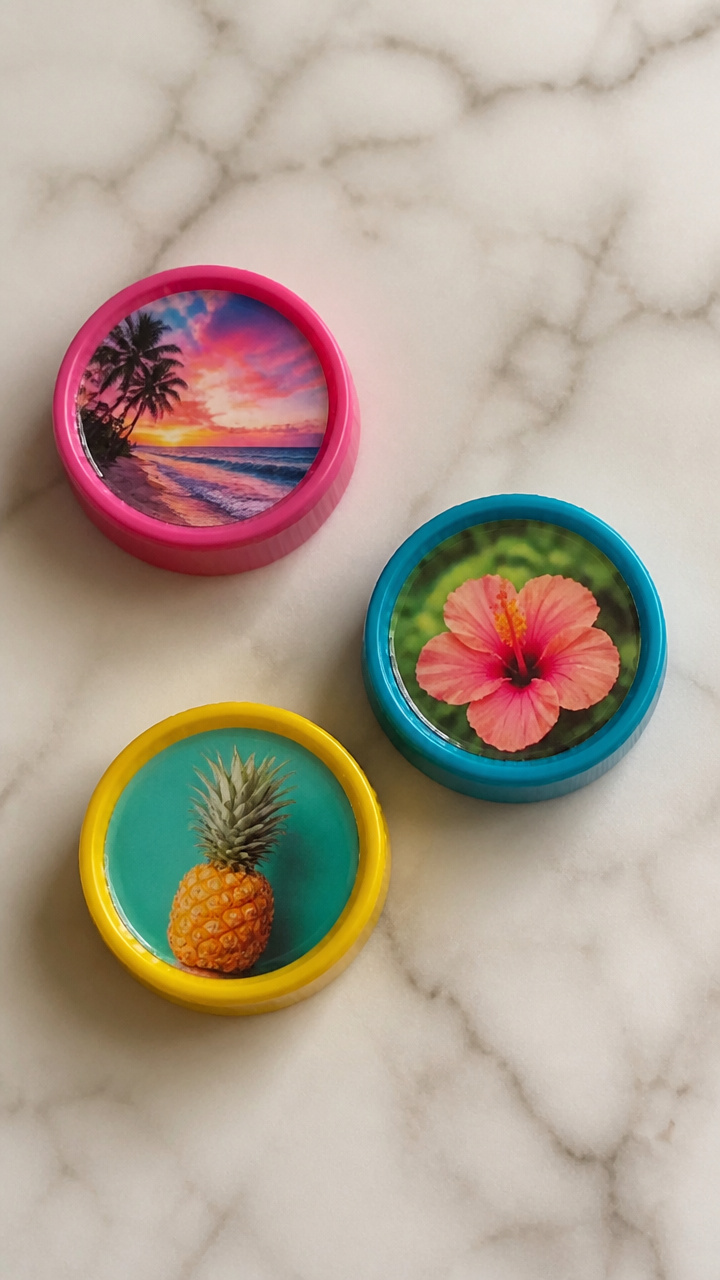
Washed plastic milk caps hold favorite photos and stick to metal lockers or fridges. A strong magnet makes them durable and easy to swap.
Materials Needed
- Three clean 2 inch diameter milk caps
- Round magnets, 1 inch diameter
- Craft glue
- Printed photo circles, 1.75 inch
- Clear packing tape
How to Make It
- Cut the photos into circles slightly smaller than the milk cap opening.
- Place each photo inside the cap, picture side up.
- Cover the opening with a square of packing tape, smoothing out wrinkles.
- Glue the magnet to the back and let dry for 2 hours.


12. Sock Pencil Pouch
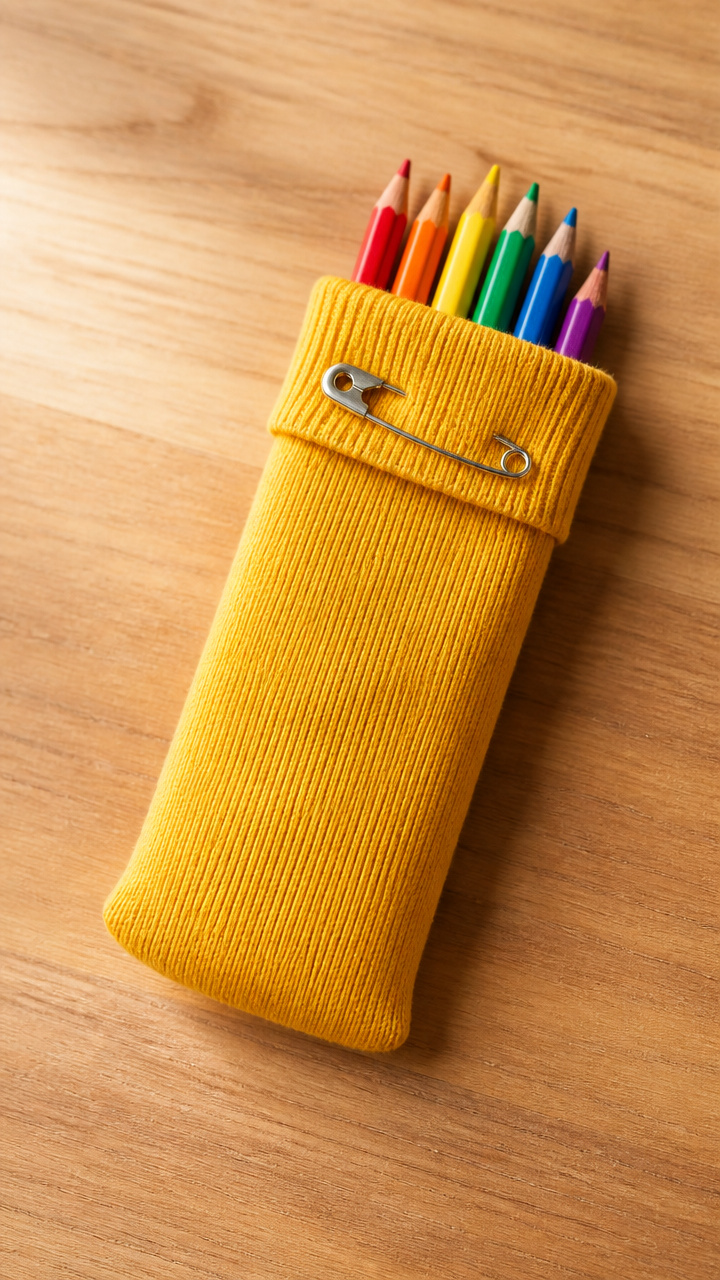
An old crew sock becomes a stretchy pouch that holds pencils and zips closed with a safety pin. It fits in backpacks and protects tips.
Materials Needed
- One clean cotton crew sock
- Six pencils or pens
- One medium safety pin
- Scissors
How to Make It
- Turn the sock inside out and cut off the foot portion just below the cuff.
- Turn the cuff right side out so the cut edge is hidden.
- Slide pencils into the tube and roll the cuff down twice to close.
- Fasten the rolled edge with the safety pin through both layers.


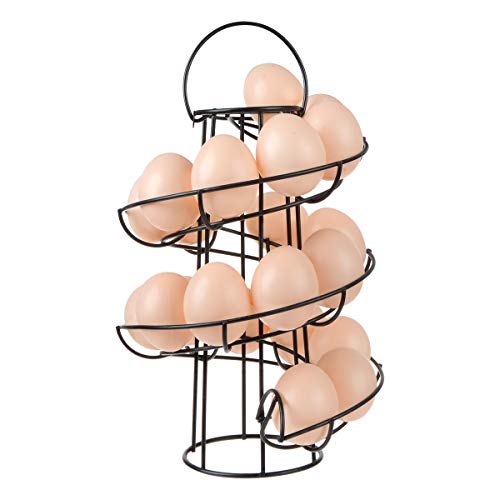
13. Egg Carton Cable Organizer

Individual egg cups cradle tangled cords and keep chargers separated in drawers. The lightweight shape makes it easy to grab what you need.
Materials Needed
- One cardboard 12-cup egg carton
- Scissors
- Label stickers
- Assorted cables
How to Make It
- Cut the lid off the carton and set aside.
- Coil one cable neatly and place it into each cup.
- Label each cup’s edge with the device name using a sticker.
- Store the open carton in a drawer with cords ready to pull out.

14. Button Spelling Flashcards
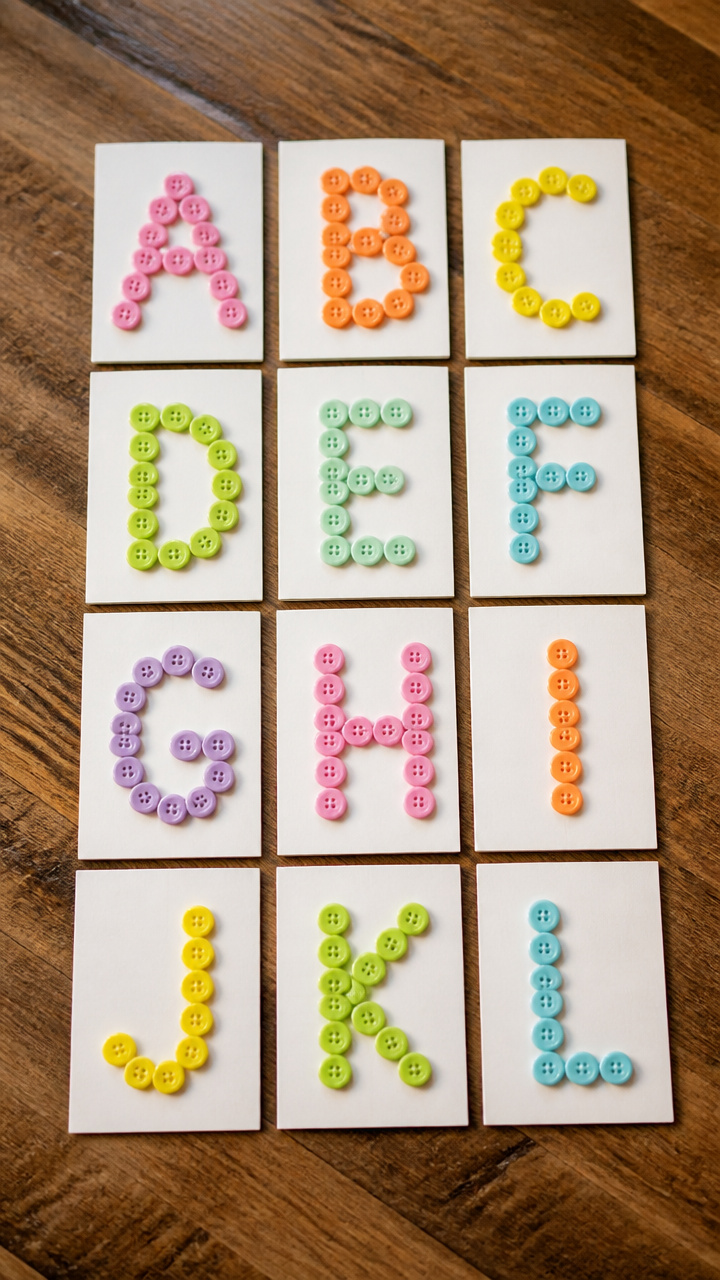
Plastic buttons glued to index cards form tactile letters for spelling practice. The bumpy texture helps memory through touch.
Materials Needed
- Twelve plastic buttons, 1/2 inch diameter
- Three blank index cards
- White glue
- Fine-tip marker
- Ruler
How to Make It
- Write a three-letter word like CAT down the left edge of each card with the marker.
- Arrange four buttons per letter in a block shape, spacing them evenly.
- Glue each button in place and let dry for 1 hour.
- Run your finger over the shapes to trace each letter while saying the word.


15. Cereal Box Dry Erase Board
A rigid cereal box panel coated in clear contact paper becomes a writeable surface. Use dry erase markers and wipe clean daily.
Materials Needed
- One flattened cereal box
- Sheet of clear adhesive contact paper
- Scissors
- Ruler
- Dry erase marker
- Soft cloth
How to Make It
- Cut an 8 x 10 inch rectangle from the thickest part of the box.
- Peel the backing from the contact paper and smooth it over the rectangle, starting at one edge.
- Trim excess paper with scissors and rub out air bubbles with your palm.
- Write reminders with the dry erase marker and wipe clean with the cloth.


You have everything you need to make these small but meaningful school helpers right now. Grab a few supplies and enjoy the quiet joy of making something useful by hand.