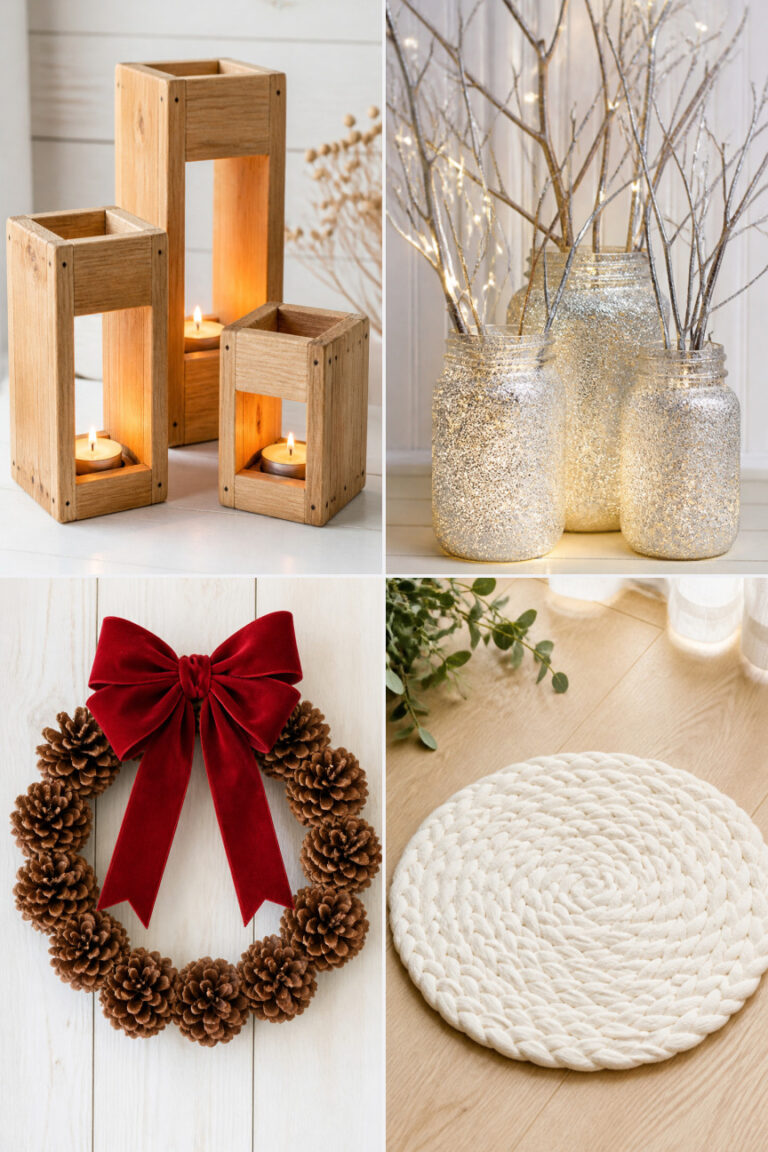
21 Easy Winter Crafts for Seniors with Simple Steps

Soft light glows through frosted windows, and the quiet hum of the season invites stillness and making. With cozy afternoons stretching ahead, crafting becomes a gentle way to stretch your hands and heart into something warm and handmade.
These projects meet you where you are — no complicated tools, no long waits, just simple materials and clear steps. Each one brings a little sparkle, comfort, or usefulness to your days, with plenty of room to enjoy the process.
1. Felt Snowflake Ornaments
Easy
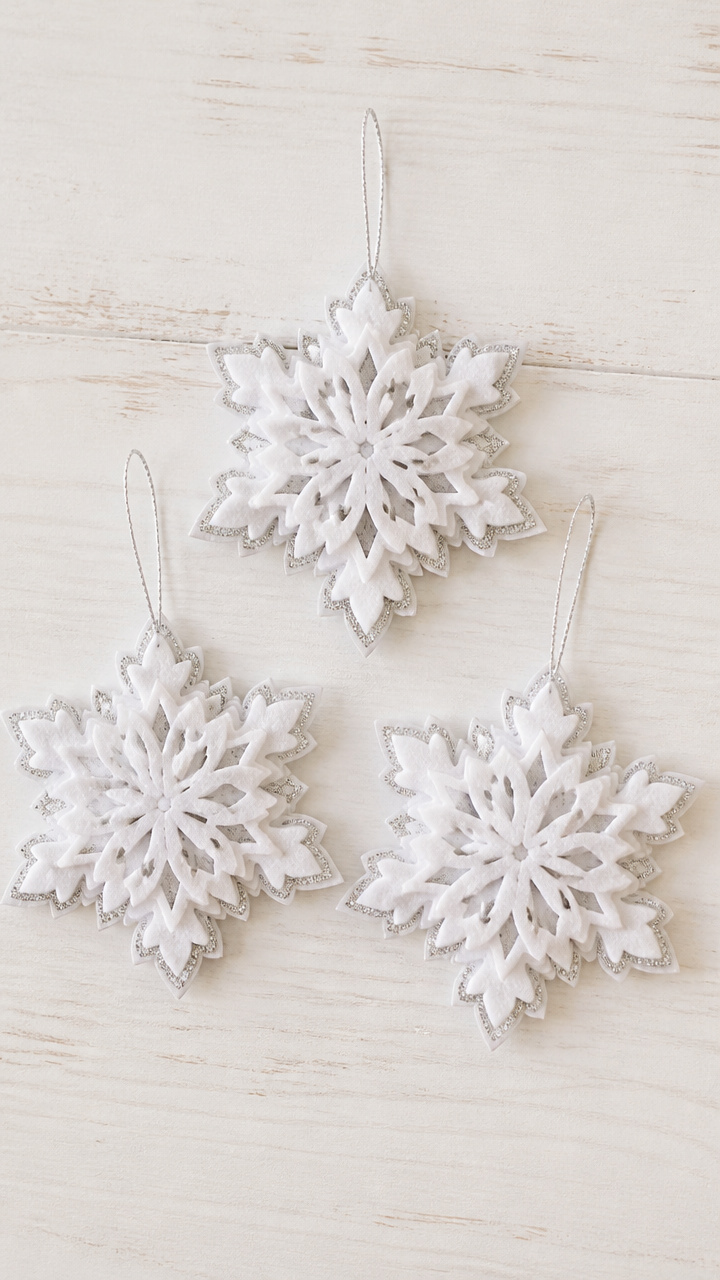
Delicate white snowflakes dangle from pine boughs and windows, catching the winter light with quiet charm. Cut and layer soft felt to make keepsake ornaments that last year after year.
Materials Needed
- 6-inch white craft felt sheets, 3 per snowflake
- 1/8-inch wide silver glitter ribbon, 12 inches
- Fabric scissors
- Fabric glue
- Small hole punch
How to Make It
- Cut three 6-inch white felt circles. Stack them evenly on top of each other.
- Fold the stack in half, then in half again to form a quarter-circle. Cut small shapes along the folded edges to create a lacy pattern.
- Unfold the pieces to reveal your snowflake designs. Layer them together, offsetting the cutouts slightly for depth.
- Apply a small dot of fabric glue between each layer. Press gently and let dry for 10 minutes.
- Punch a hole at the top edge. Thread the silver glitter ribbon through and tie a knot to hang.
2. Knit Button Scarf
Easy
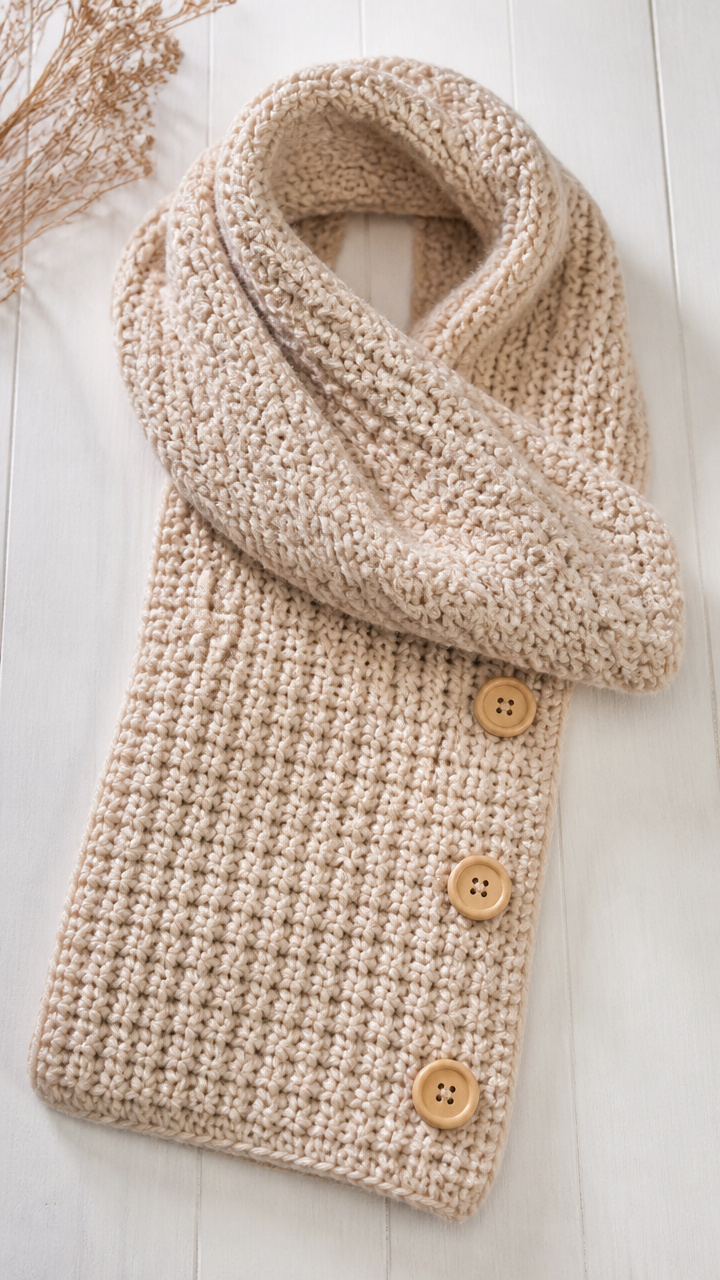
Warmth wraps around your neck with a soft, handmade scarf that takes just a few hours. Big stitches and large buttons make this a satisfying knit even for new crafters.
Materials Needed
- Chunky weight acrylic yarn, 2 skeins (300 yards total), color: oatmeal
- Size 13 (9 mm) knitting needles, 14 inches long
- 4 wooden buttons, 1 inch diameter
- Yarn needle
How to Make It
- Cast on 20 stitches using the long-tail cast-on method. Knit every row in garter stitch.
- Continue knitting until the scarf measures 60 inches from the cast-on edge.
- Bind off all stitches loosely. Weave in the starting and ending tails with the yarn needle.
- Sew one button near each end of the scarf, aligning them so the scarf can button into a loop.
3. Pinecone Bird Feeders
Easy
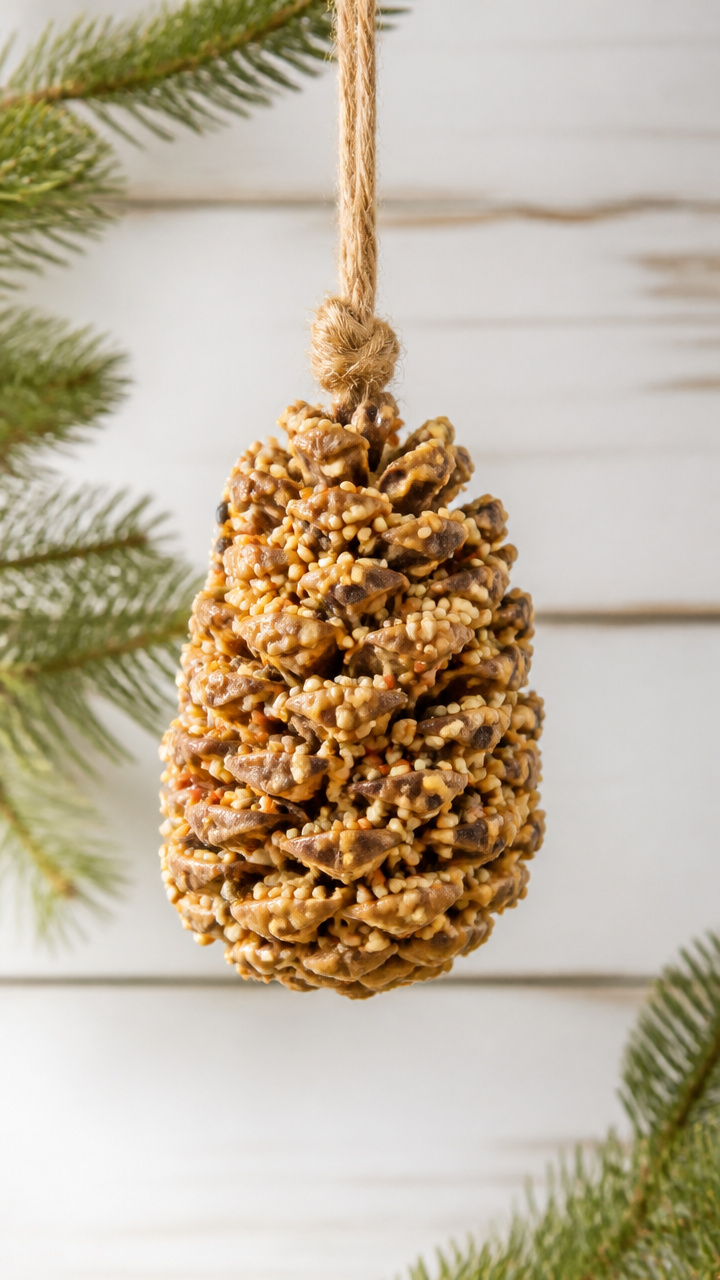
Golden peanut butter glistens as it coats rough pinecones, ready to feed winter birds. Hang these outdoors and watch chickadees and nuthatches come calling.
Materials Needed
- 3 medium pinecones, dry and open
- 1/2 cup creamy peanut butter
- 1 cup mixed birdseed
- 6-inch length of jute twine
- Butter knife
- Small bowl
How to Make It
- Tie the jute twine around the pinecone's top stem to form a hanging loop.
- Spread the peanut butter all over the pinecone using the butter knife, pushing it into the crevices.
- Pour birdseed into the bowl. Roll the coated pinecone in the seed until fully covered.
- Let the feeder sit on wax paper for 15 minutes to set before hanging outside.
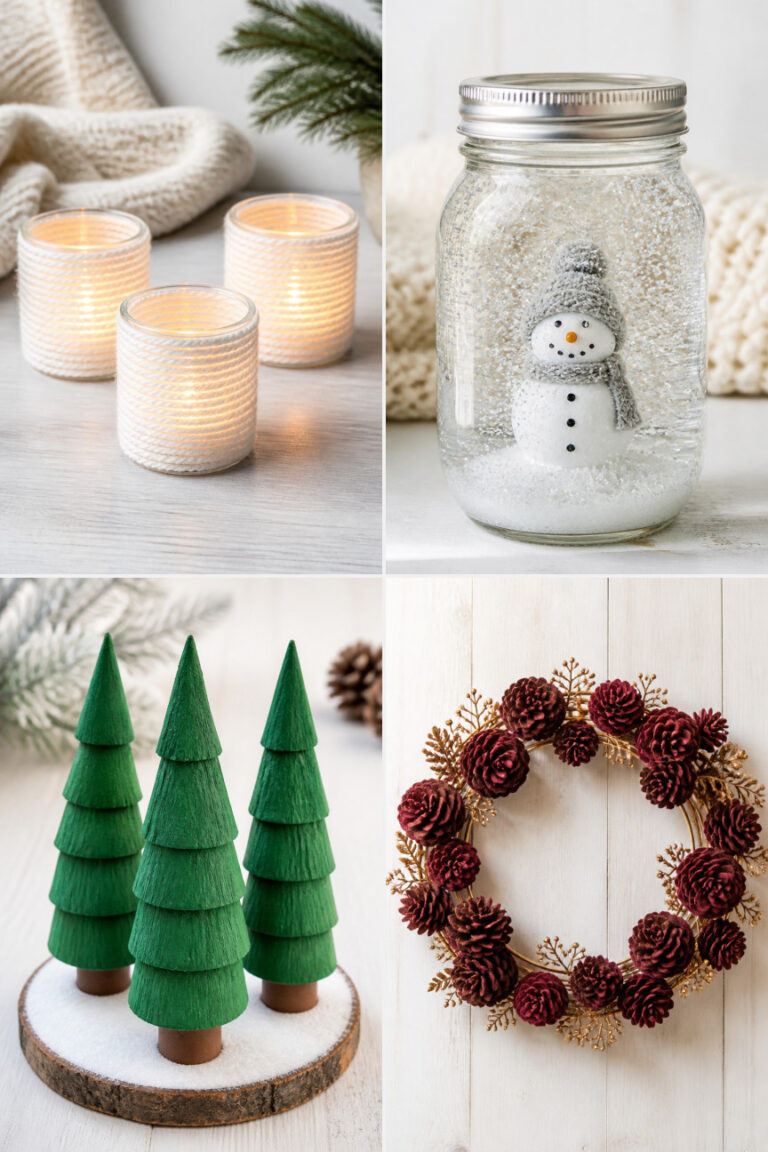
4. Yarn-Wrapped Mason Jars
Easy
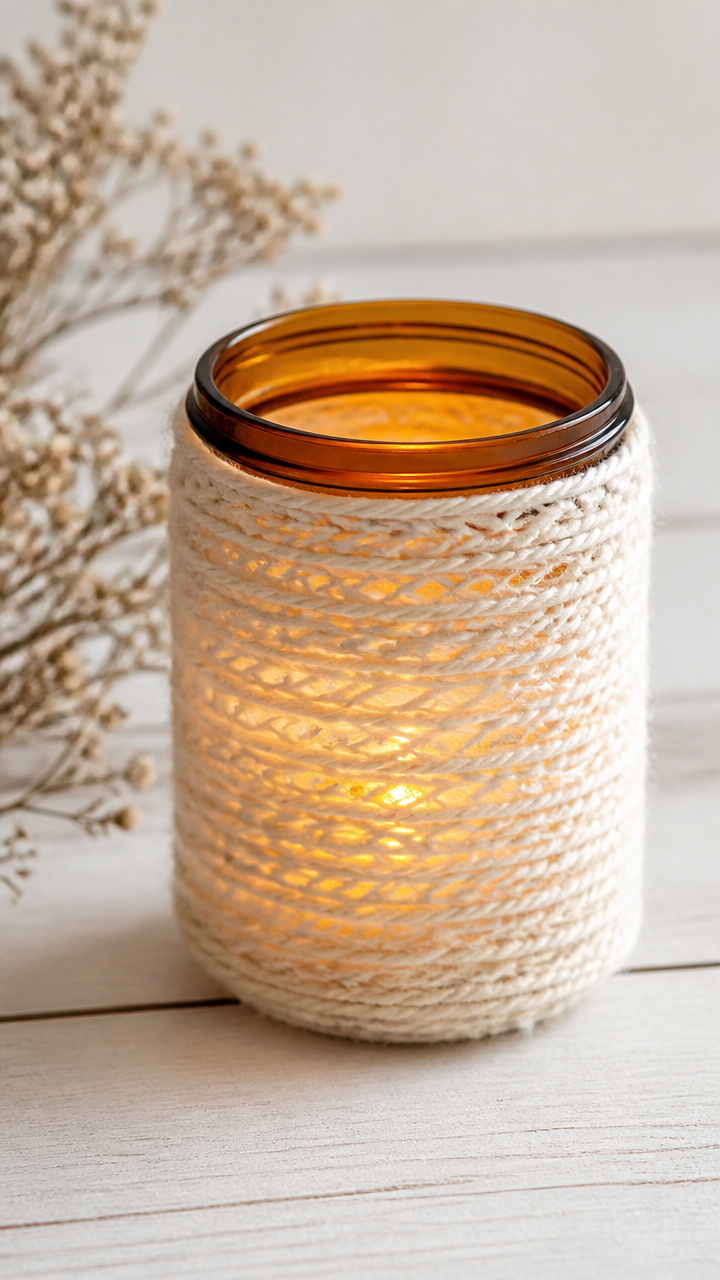
Twilight glows through amber glass wrapped in creamy yarn, casting soft light on your table. These jar lanterns add warmth with just a few materials and minutes.
Materials Needed
- 1 clean 16-oz mason jar
- Cream cotton yarn, 50 yards
- Hot glue gun and 1 glue stick
- Tea light candle, battery-operated
How to Make It
- Apply a small dot of hot glue near the base of the jar. Press the yarn end onto the glue and hold for 10 seconds.
- Wrap the yarn tightly around the jar, overlapping slightly, moving upward in a spiral.
- Add a dot of glue every inch to secure the yarn and prevent slipping.
- When you reach the top, cut the yarn and glue the end. Insert the tea light to complete.
5. Paper Quilled Snowmen
Moderate
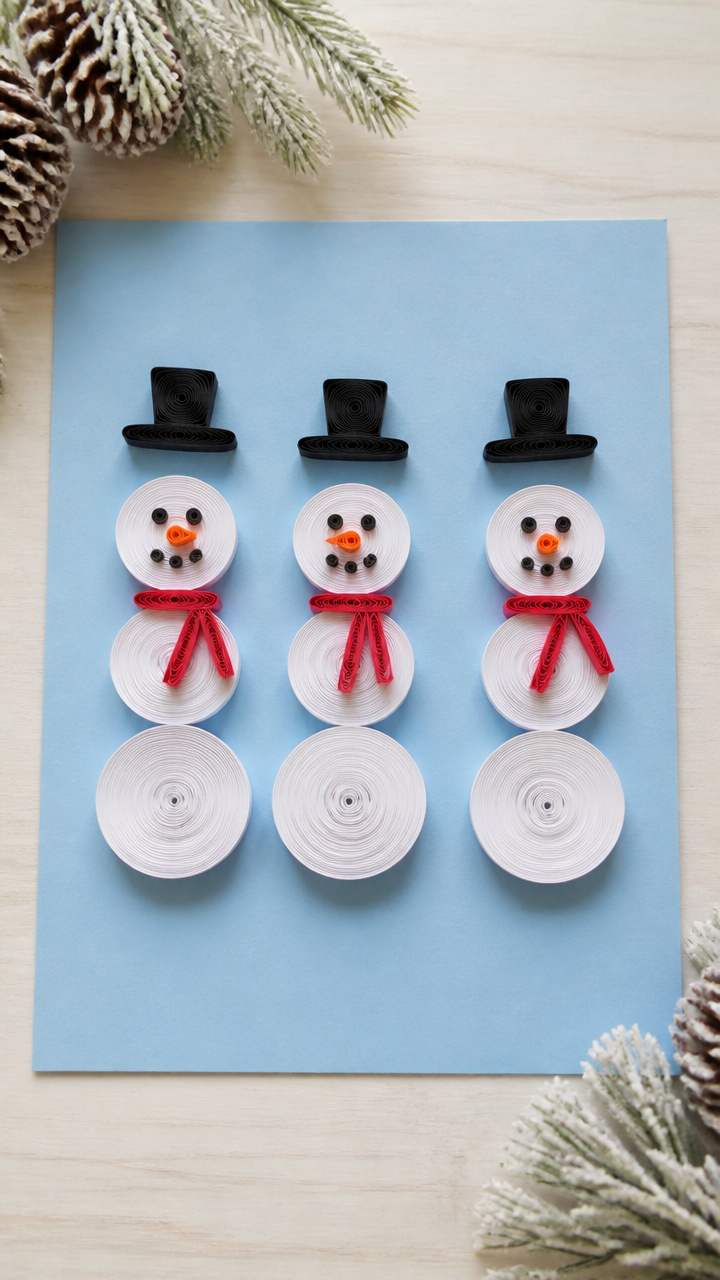
Tiny rolled paper coils stack into cheerful snowmen with carrot noses and top hats. These mini scenes brighten a bulletin board or become handmade cards.
Materials Needed
- Quilling paper strips, 1/4 inch wide: white (6), black (2), orange (1), red (1)
- Quilling tool
- Tacky glue
- Cardstock base, 4×6 inches, light blue
- Fine-tip black marker
How to Make It
- Roll one white strip into a tight coil for the snowman's head. Glue the end and let dry.
- Roll two white strips into loose coils for the body. Pinch each into teardrop shapes.
- Glue the head on top of the larger body piece, and the smaller body piece below to form three tiers.
- Roll one black strip into a small coil for the hat. Flatten slightly and glue on top of the head.
- Shape the orange strip into a small cone for the nose. Glue it near the center of the head.
- Make two tiny black coils for eyes. Add a short red 'smile' with the marker. Glue all parts to the cardstock.
6. Fleece Tie Blanket
Easy
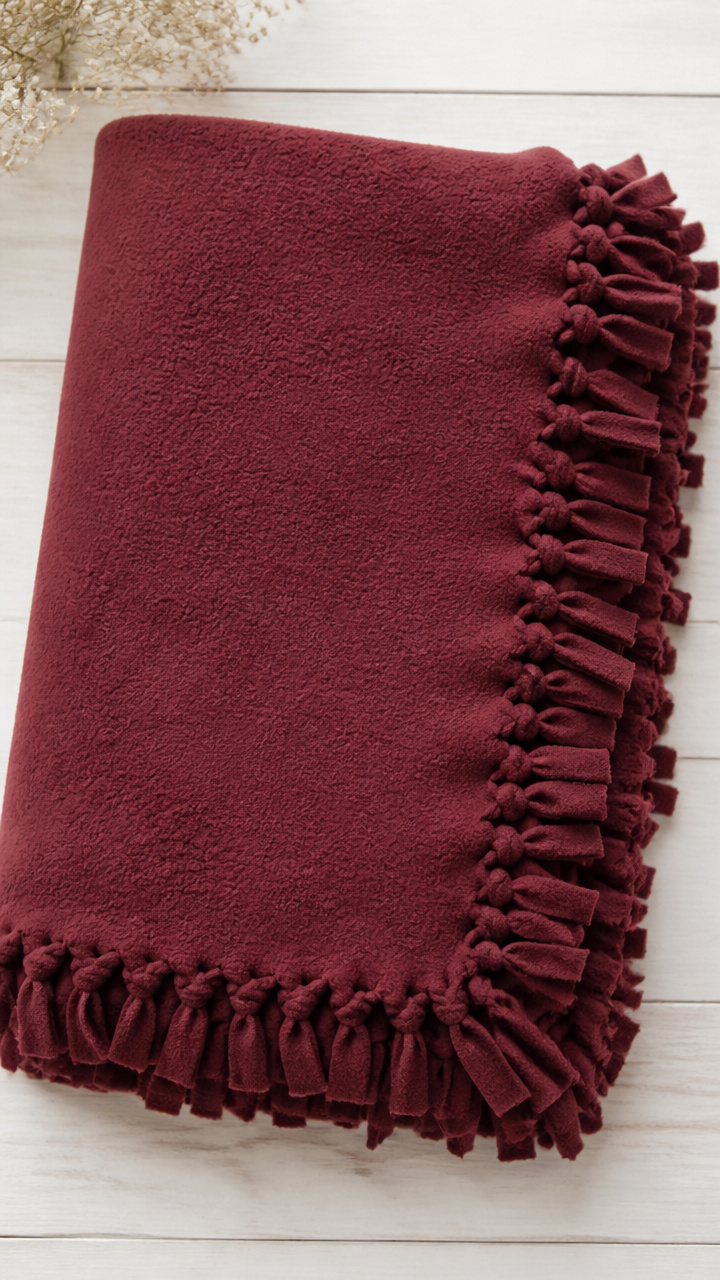
Cozy corners call for a soft, no-sew blanket in plaid or solid fleece. Fringe the edges and tie them for a snug finish that won't unravel.
Materials Needed
- 2 yards of 60-inch wide fleece fabric, color: burgundy
- Fabric scissors
- Ruler
- Chalk marker, light color
How to Make It
- Lay one fleece piece flat. Place the second piece directly on top, aligning all edges.
- Use the ruler and chalk marker to draw a 4-inch square at each corner. Cut out the squares.
- Along all four sides, mark 4-inch by 1-inch strips every 4 inches using the ruler and chalk.
- Cut along the lines to create fringe. Cut the same strips on both layers together.
- Tie each top and bottom strip pair in a double knot. Continue around all sides until complete.
7. Salt Dough Ornaments
Easy
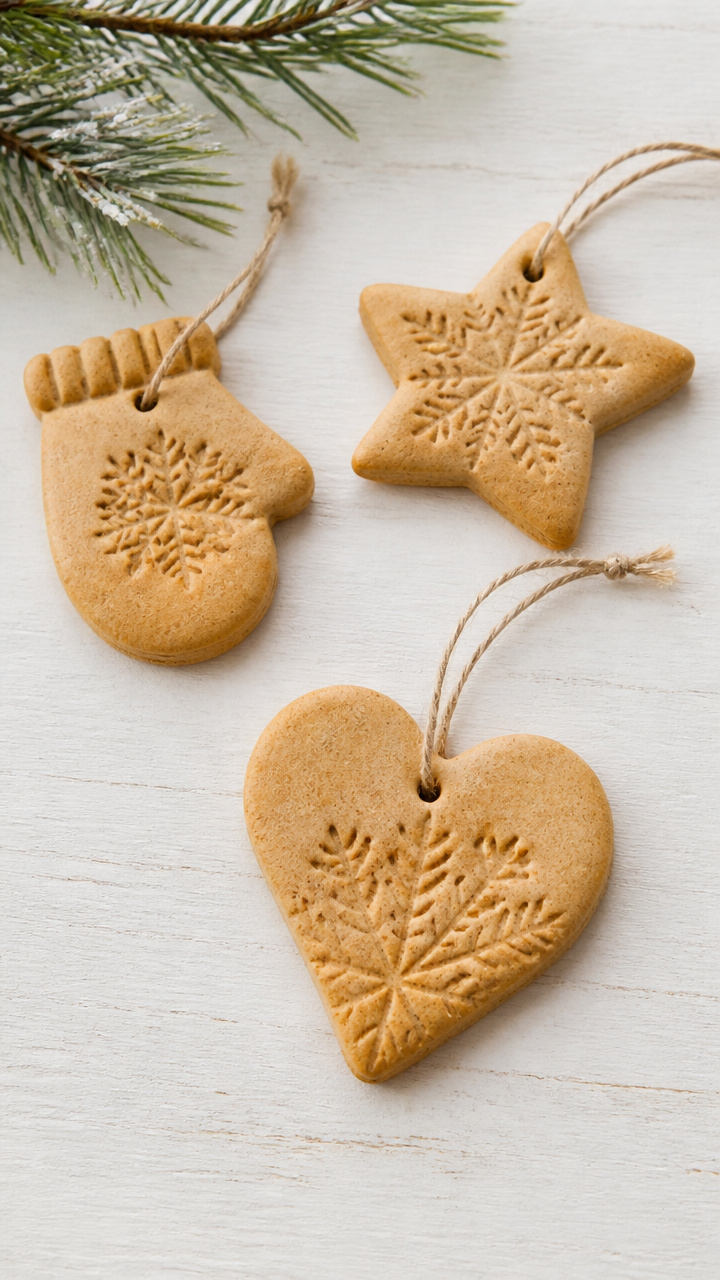
The kitchen fills with the scent of baking dough as simple shapes emerge golden and smooth. Press mittens, stars, or hearts into keepsake ornaments you can paint and hang.
Materials Needed
- 1 cup all-purpose flour
- 1/2 cup table salt
- 1/2 cup warm water
- Cookie cutters: 3 winter shapes
- Parchment paper
- Baking sheet
- Pencil
- Acrylic paint set, 6 colors
- Clear varnish spray
- Red yarn, 6 inches per ornament
How to Make It
- Mix flour, salt, and warm water in a bowl until a smooth dough forms. Knead for 2 minutes.
- Roll the dough to 1/4 inch thick on a floured surface. Press shapes out with cookie cut grinding gently.
- Use a pencil to poke a small hole near the top edge of each ornament.
- Place ornaments on a parchment-lined baking sheet. Bake at 200°F for 3 hours until hard.
- Let cool. Paint designs with acrylics and let dry 1 hour. Spray with varnish. Thread yarn through holes to hang.
8. Crocheted Coasters
Easy
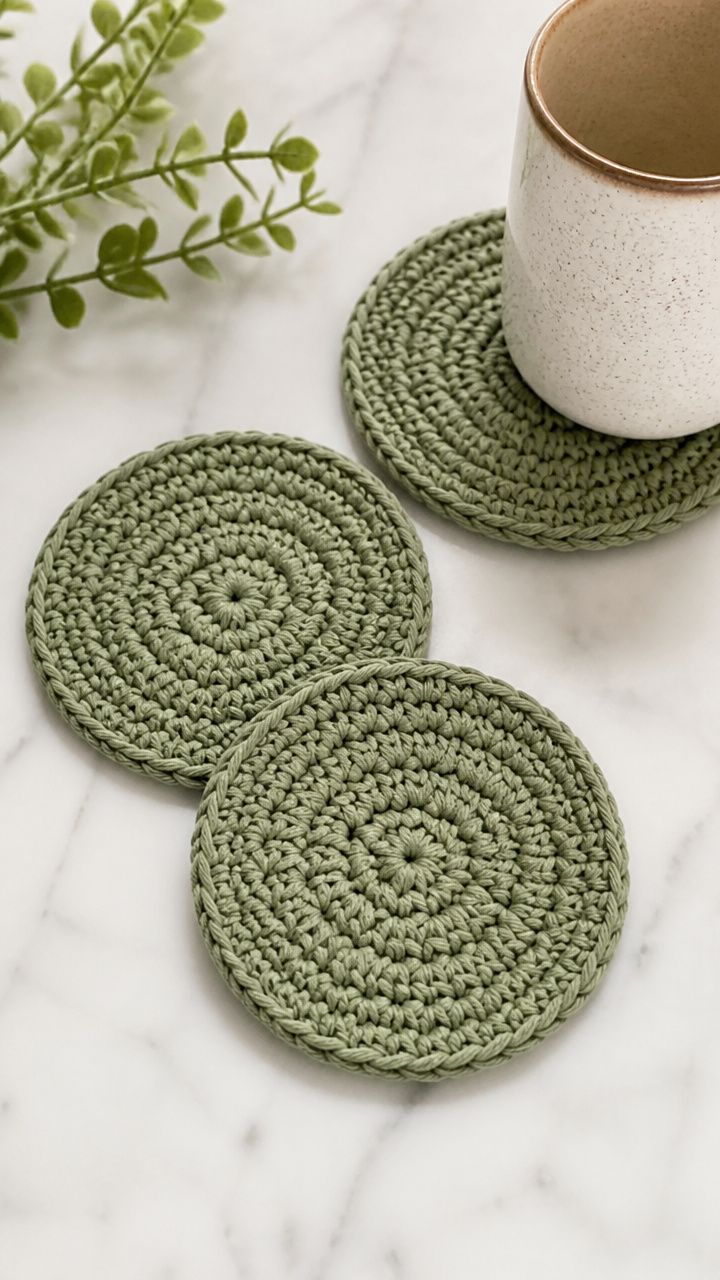
Tiny rounds of yarn spiral into sturdy drink coasters in soothing colors. A basic single crochet stitch builds texture and function in under an hour.
Materials Needed
- Worsted weight cotton yarn, 1 skein, color: sage green
- Size H (5 mm) crochet hook
- Scissors
How to Make It
- Make a slip knot and chain 4. Join with a slip stitch to form a ring.
- Chain 1, then work 12 single crochet stitches into the ring. Join with a slip stitch to the first stitch.
- Chain 1, turn. Work 2 single crochet in each stitch around. Join with slip stitch (24 stitches).
- Chain 1, turn. *1 single crochet in next stitch, 2 single crochet in next stitch*; repeat around. Join (36 stitches).
- Fasten off and weave in the end with the yarn tail. Make 3 more for a set.
9. Glitter Mason Jar Candles
Easy
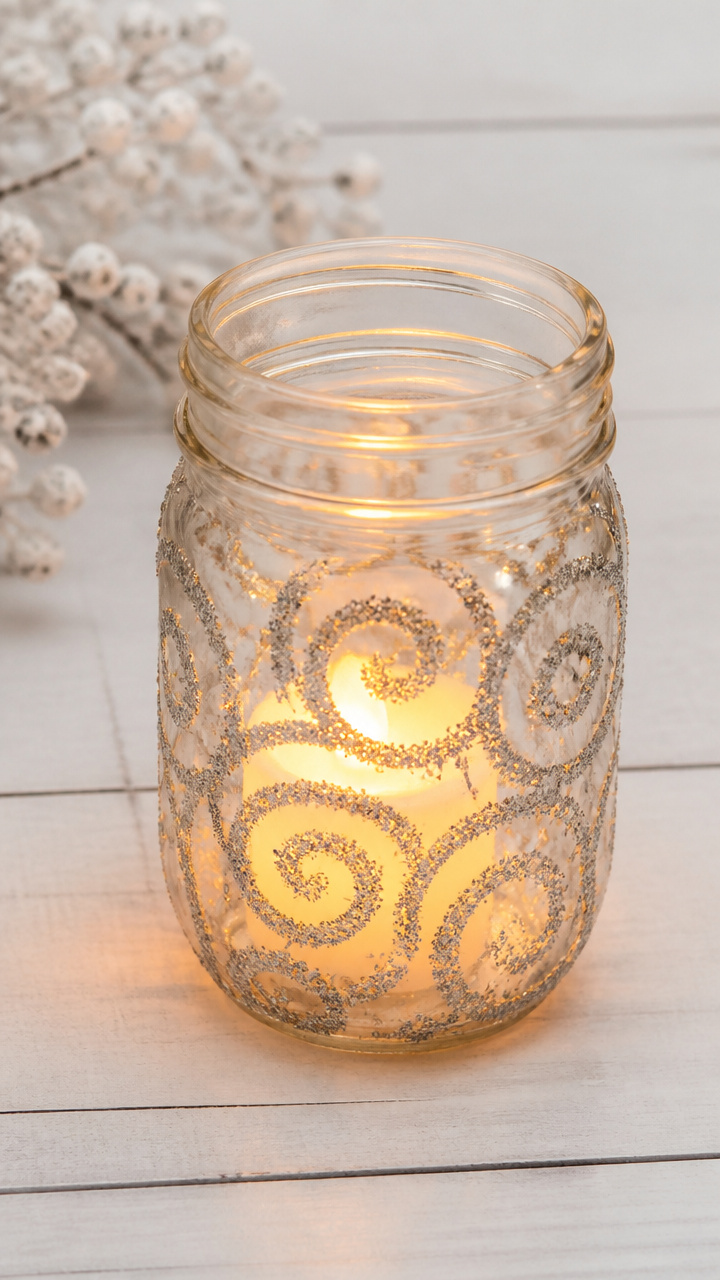
Silver glitter clings to glass in swirling patterns, glowing when lit from within. These jars make serene centerpieces or thoughtful gifts.
Materials Needed
- 1 clean 8-oz mason jar
- White craft glue, 2 tablespoons
- Fine silver glitter, 1/4 cup
- Paintbrush, 1/2 inch wide
- Battery-operated pillar candle, 3 inches tall
How to Make It
- Apply glue to the jar in swirling lines using the paintbrush. Vary the thickness for visual interest.
- Pour glitter over the glued areas, rotating the jar to cover completely.
- Shake off excess glitter into a tray for reuse. Let the jar dry for 20 minutes.
- Place the pillar candle inside. Turn on to enjoy the shimmering glow.
10. Pom-Pom Wreath
Easy
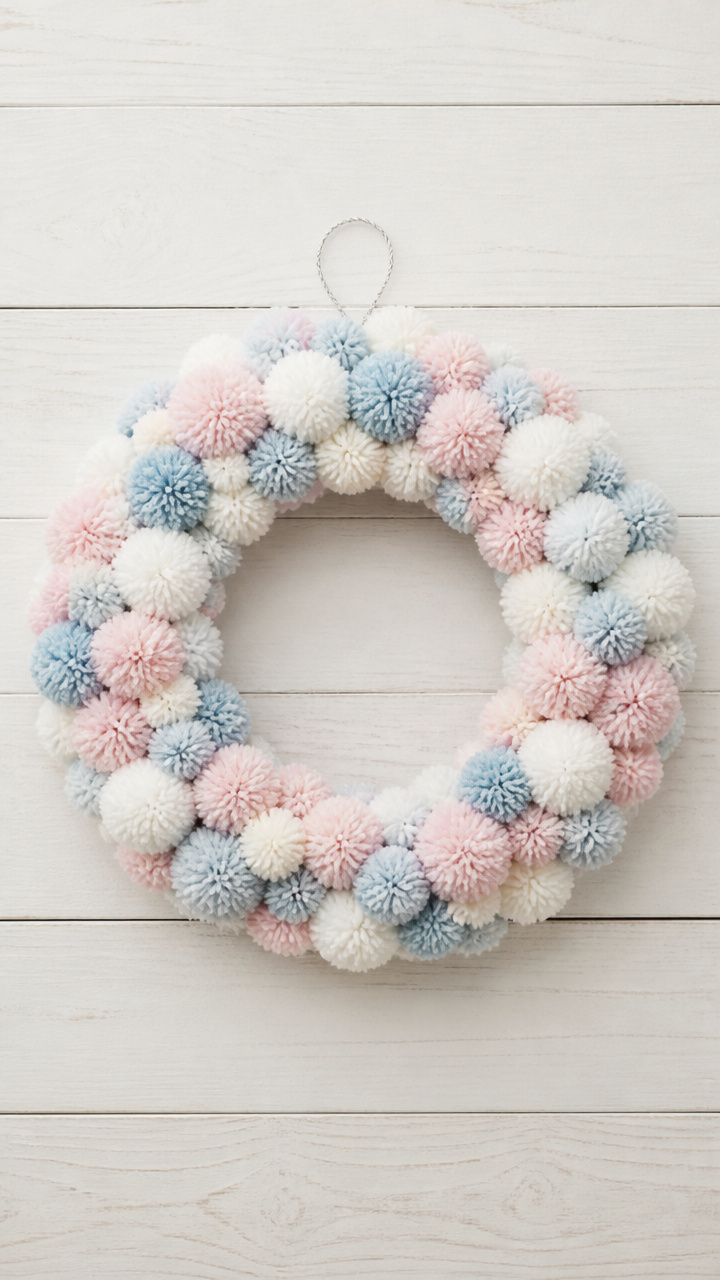
A cloud of pastel pom-poms clusters into a soft wreath that brightens a bare wall. No needles, no mess — just fluff and glue.
Materials Needed
- Styrofoam wreath base, 10 inches
- 12 pastel-colored yarn pom-poms, 1.5 inches each
- Hot glue gun and 1 glue stick
- Floral wire, 6 inches, for hanging
How to Make It
- Apply a dab of hot glue to the flat side of a pom-pom. Press it onto the wreath base near the outer edge.
- Continue gluing pom-poms side by side, covering the entire front and outer rim.
- Overlap slightly to hide the foam. Let dry 10 minutes.
- Twist the floral wire into a loop and glue it to the back for hanging.
11. Knit Dishcloths
Easy
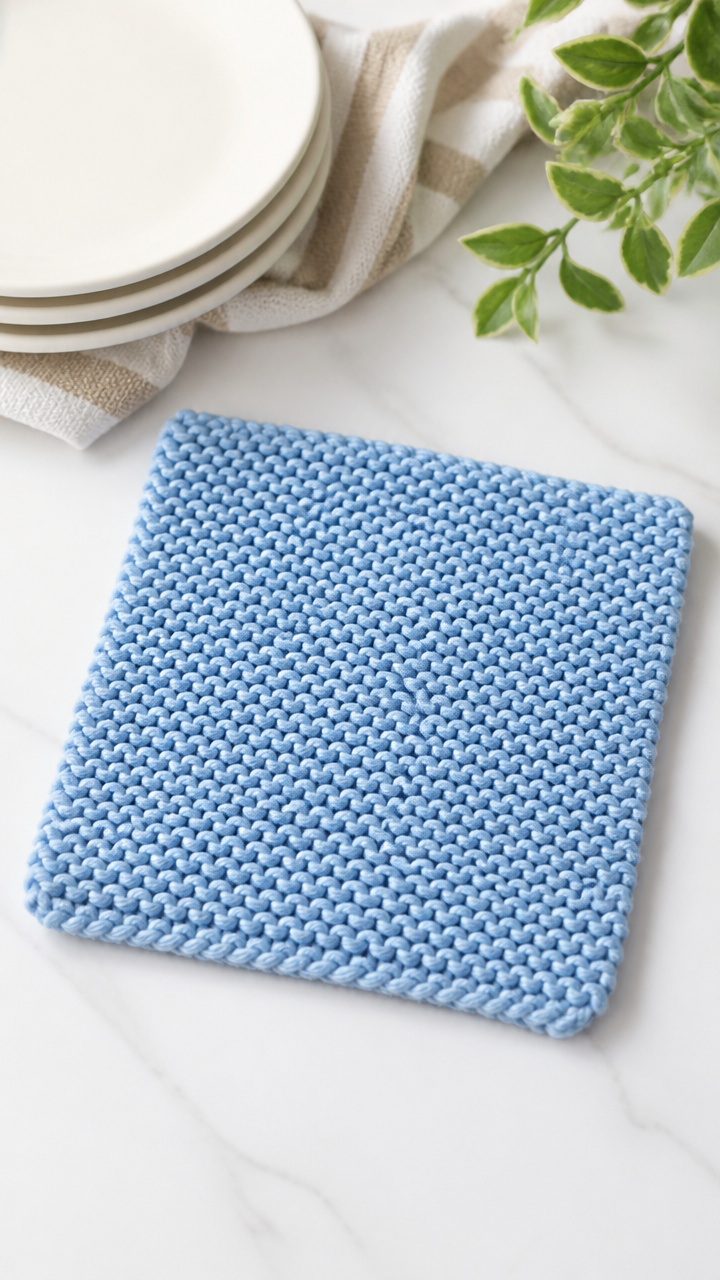
Practical and pretty, cotton dishcloths scrub gently and dry fast. Garter stitch gives them texture and durability with every row.
Materials Needed
- 100% cotton yarn, 1 skein, color: sky blue
- Size 7 (4.5 mm) knitting needles, 10 inches long
- Scissors
How to Make It
- Cast on 30 stitches using the knit cast-on method.
- Knit every row in garter stitch until the cloth measures 8 inches from the cast-on edge.
- Bind off all stitches loosely. Cut the yarn, leaving a 6-inch tail. Pull through the last loop.
- Weave in the ends with your fingers. Rinse and dry before use.
12. Fabric Scrap Garland
Easy
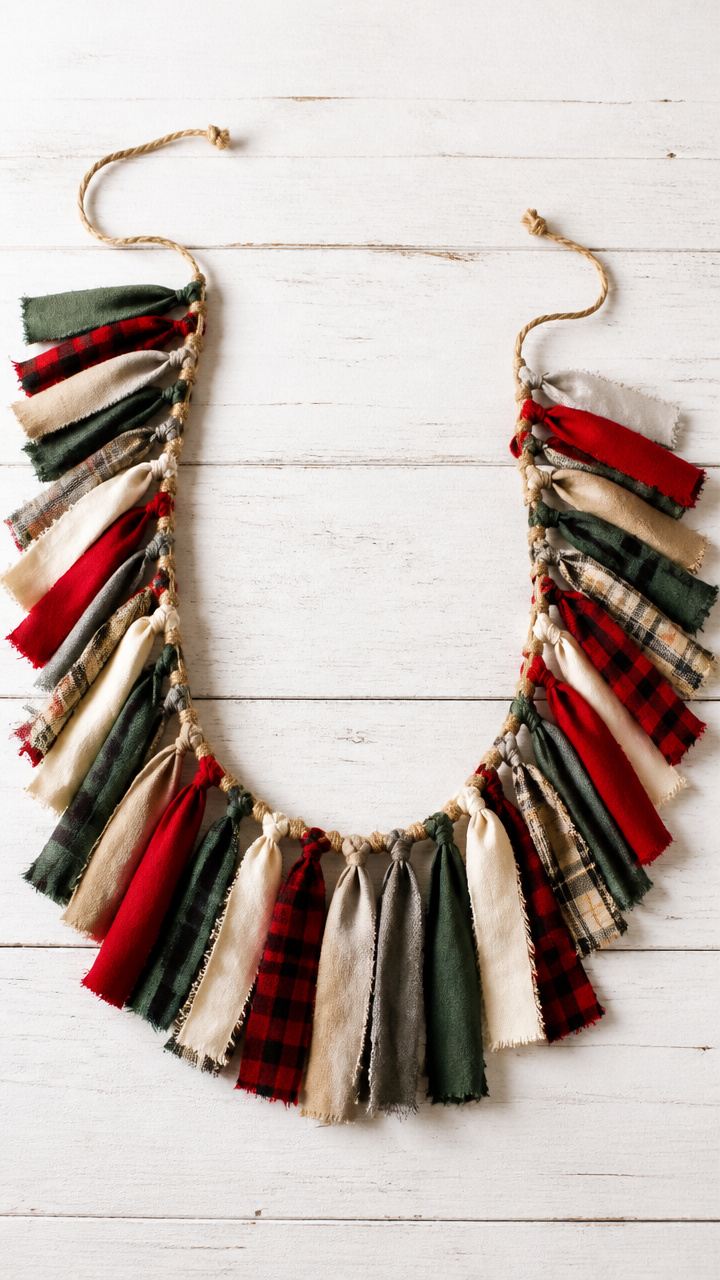
Bits of plaid and flannel bloom into a cozy garland strung across the mantel. Simple knots and no sewing make this a joyful scrap project.
Materials Needed
- 5 fabric scraps, 6×12 inches each, flannel or cotton
- Scissors
- Clothesline rope, 6 feet long
How to Make It
- Cut each fabric scrap into 6 strips, 1 inch wide by 12 inches long.
- Take one strip and tie it around the rope with a double knot, leaving a 2-inch tail.
- Continue tying strips every 3 inches along the rope, mixing colors and patterns.
- Leave 6 inches of rope free at each end for hanging.
13. Pressed Flower Suncatchers
Easy
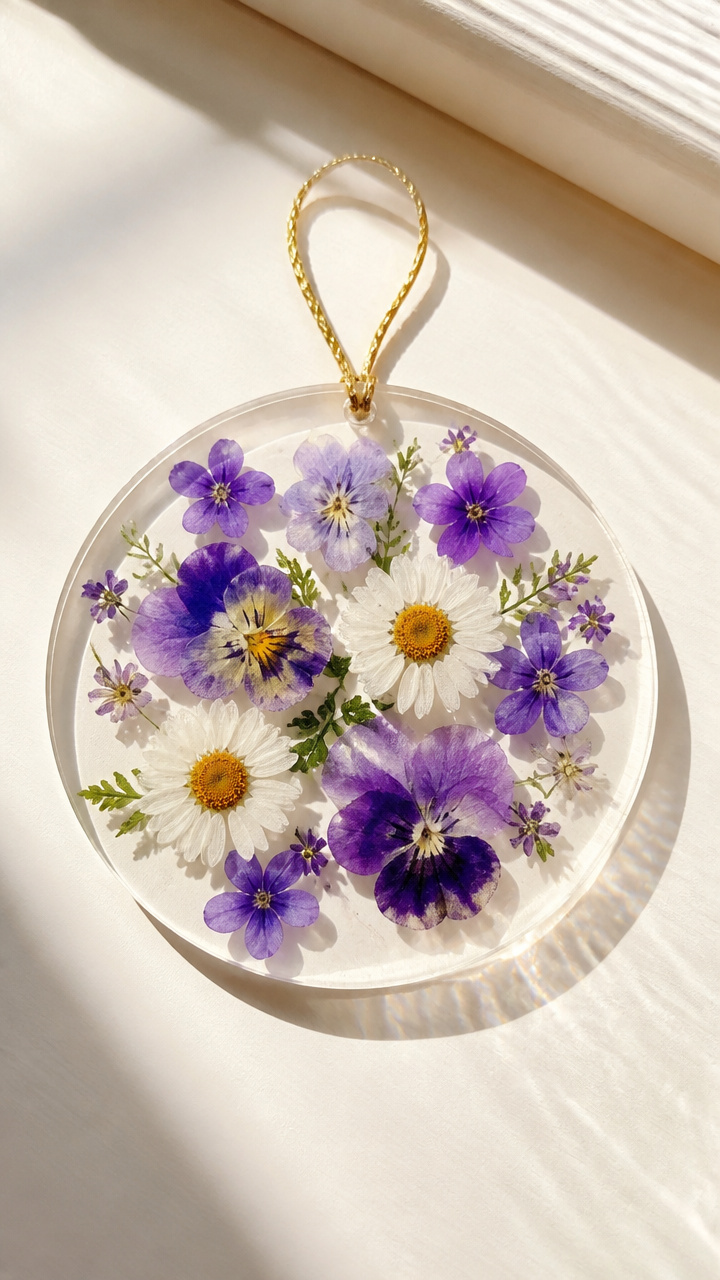
Fragile violets and tiny daisies glow in clear contact paper, suspended in a window. Preserve summer's memory in a sunlit winter display.
Materials Needed
- 12 pressed flowers, flat and dry
- 1 roll clear adhesive contact paper
- Scissors
- Yarn, 8 inches, gold color
- Hole punch
How to Make It
- Unroll contact paper and cut a 6-inch circle. Peel the backing halfway.
- Place flowers on the sticky side, arranging them in a cluster near the center.
- Peel the rest of the backing and fold the top half over to seal the flowers inside.
- Trim around the circle. Punch a hole at the top and thread the gold yarn through to hang.
14. Crocheted Ear Warmer
Moderate
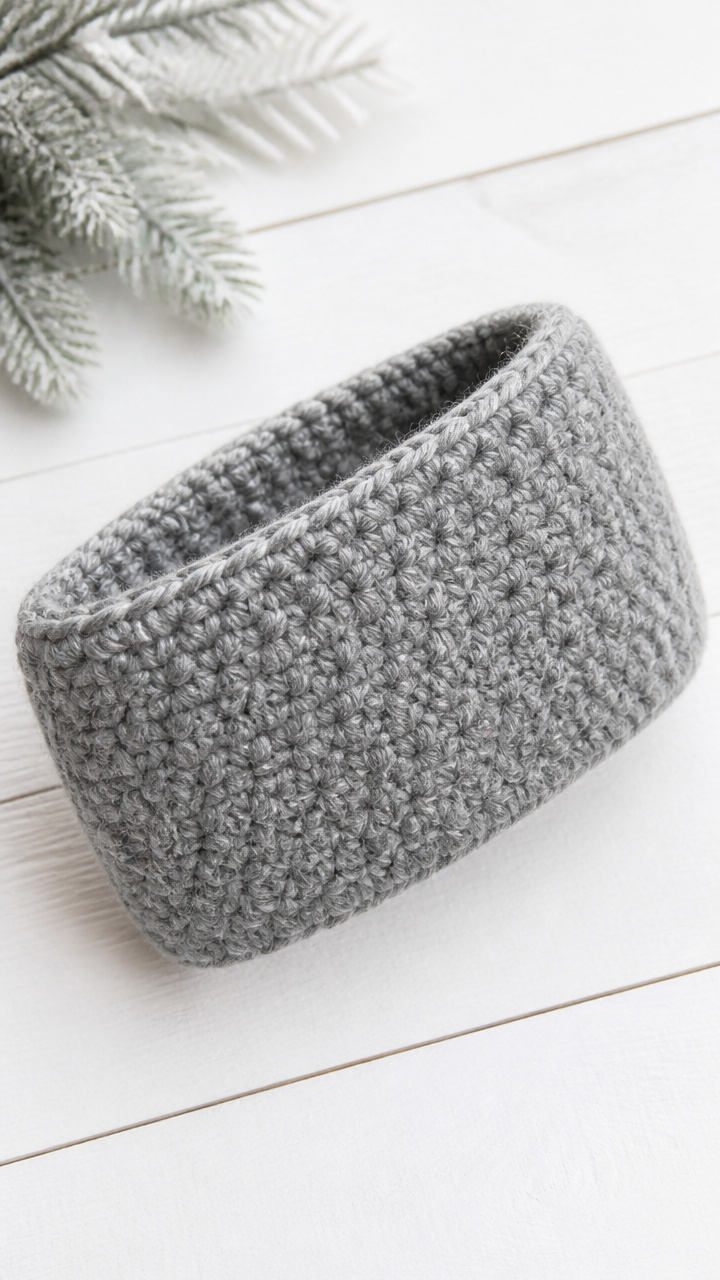
A stretchy band of soft yarn hugs your ears without flattening your hair. This one-piece project finishes in under two hours with simple stitches.
Materials Needed
- Bulky weight acrylic yarn, 1 skein, color: heather gray
- Size K (6.5 mm) crochet hook
- Stitch marker
- Yarn needle
How to Make It
- Chain 6. Join with a slip stitch to form a ring.
- Chain 2 (counts as first double crochet). Work 11 double crochet into the ring. Place stitch marker in the last stitch.
- Chain 2, turn. Work 2 double crochet in each stitch around. Join with slip stitch to top of chain-2 (24 stitches).
- Chain 2, turn. *1 double crochet in next stitch, 2 double crochet in next stitch*; repeat around. Join (36 stitches).
- Continue increasing in this pattern for 2 more rounds (final count: 54 stitches).
- Work even rounds of 1 double crochet per stitch for 4 inches. Fasten off and weave in ends with yarn needle.
15. Pinecone Candles
Easy
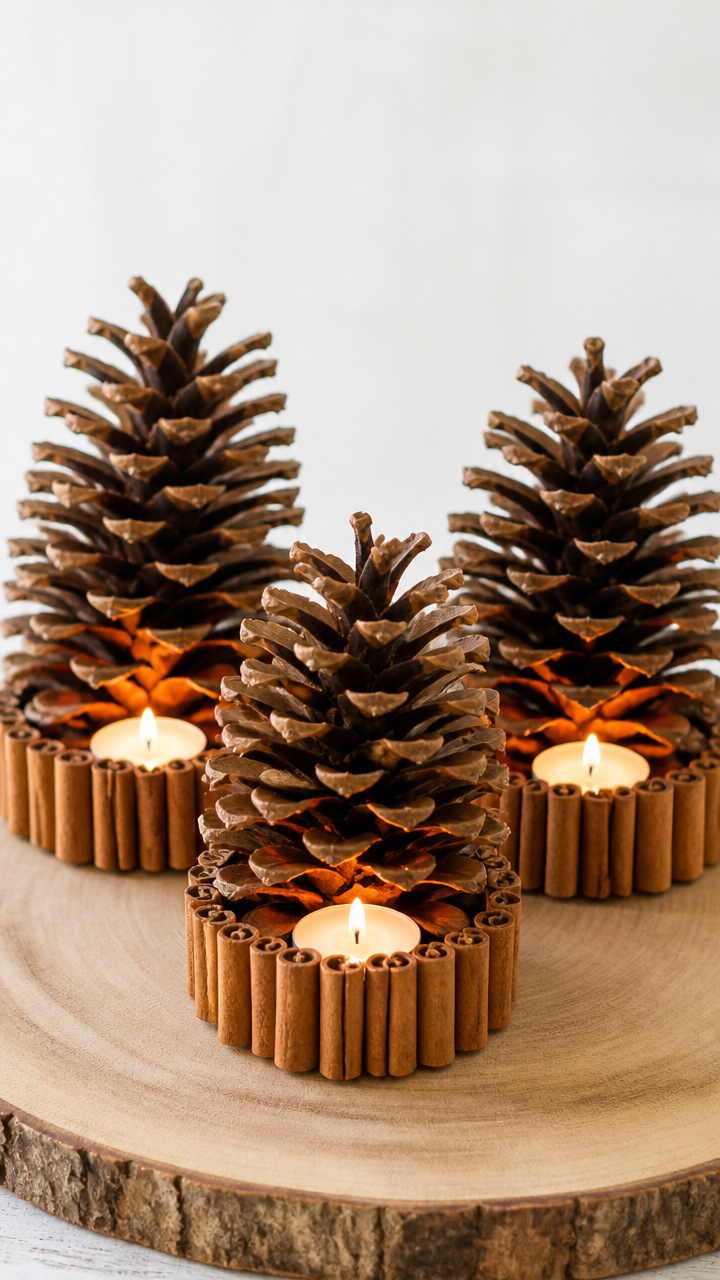
Rough pinecones stand like tiny trees with tea lights nestled at their base. These natural centerpieces bring forest charm to any table.
Materials Needed
- 3 large dry pinecones
- 3 battery-operated tea lights
- Hot glue gun and 1 glue stick
- Cinnamon sticks, 3, 4 inches long
How to Make It
- Place a tea light on a flat surface. Position a pinecone beside it, leaning slightly inward.
- Apply hot glue to the pinecone's base and press it next to the tea light. Hold 15 seconds.
- Glue a cinnamon stick on the opposite side of the tea light to balance the look.
- Repeat for the other two sets. Let dry completely before turning on.
16. Button Snowman Magnet
Easy
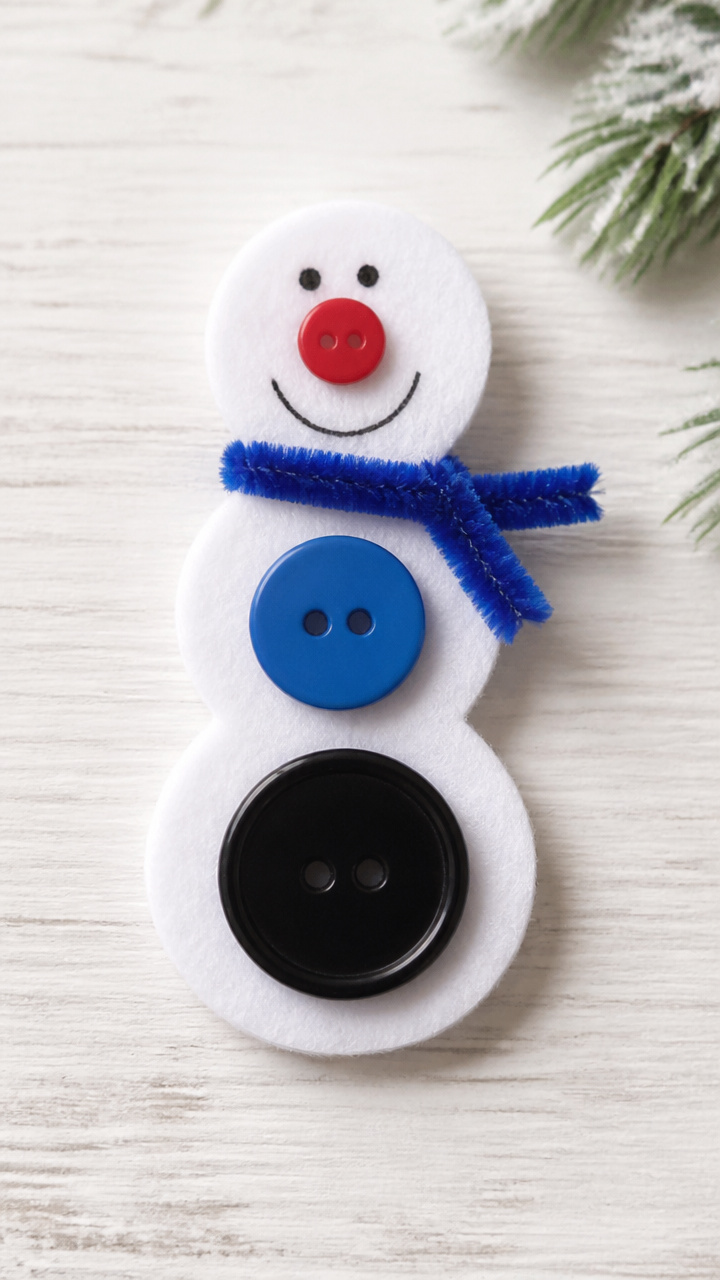
Three mismatched buttons stack into a smiling snowman with a pipe-cleaner scarf. Fridge art that brings daily cheer with zero mess.
Materials Needed
- 3 round buttons: 1 inch (black), 3/4 inch (blue), 1/2 inch (red)
- White felt sheet, 4×4 inches
- Fabric glue
- Black marker
- Magnet strip, 1×0.5 inch
- Scissors
- Green pipe cleaner, 6 inches
How to Make It
- Cut a small top hat shape from the felt. Glue it over the top button seam.
- Draw two eyes and a smiling mouth on the middle button with the marker.
- Cut a 2-inch scarf shape from the pipe cleaner. Loop it around the bottom button and glue in place.
- Glue the magnet to the back. Let dry 10 minutes before placing on the fridge.
17. Knit Headband
Easy
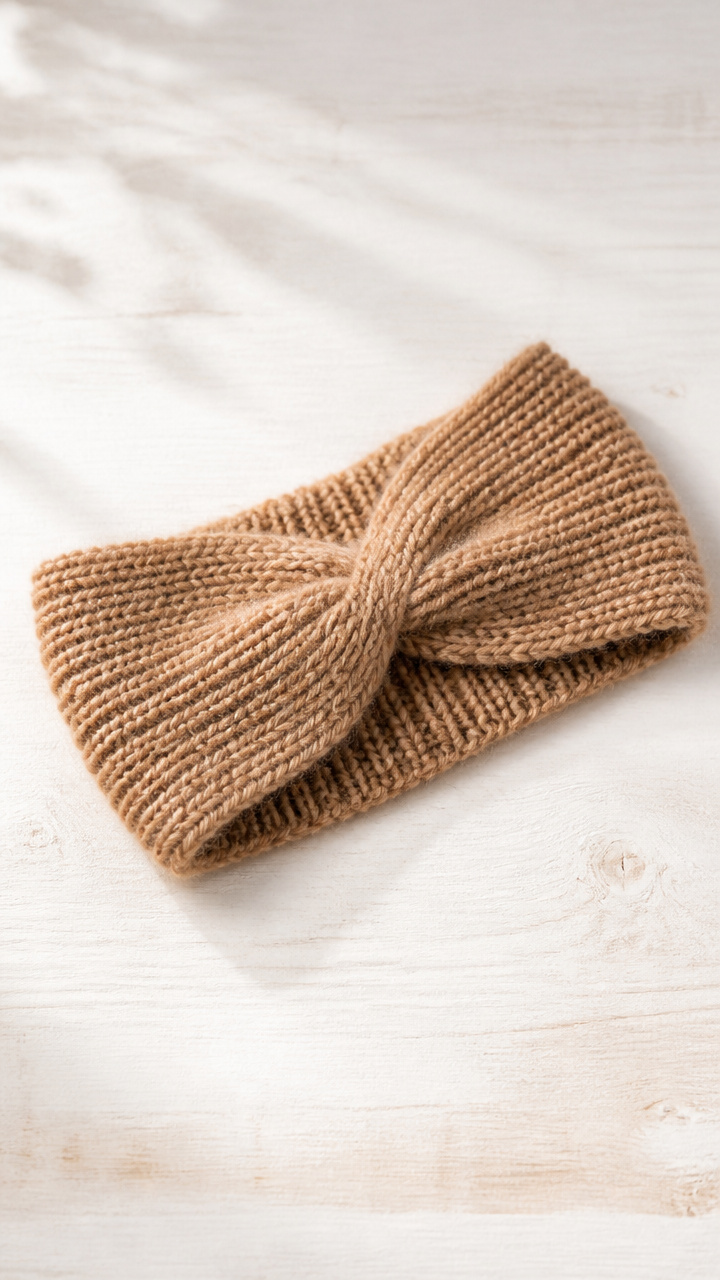
Warmth meets style with a ribbed headband that stays put without pinching. Stretchy stitches hug your ears and keep hair in place.
Materials Needed
- Medium weight wool-blend yarn, 1 skein, color: camel
- Size 8 (5 mm) knitting needles, 10 inches long
- Yarn needle
How to Make It
- Cast on 12 stitches using the cable cast-on method.
- Knit 2, purl 2 for every row until the band measures 18 inches from the cast-on edge.
- Bind off in pattern. Weave in the ends with the yarn needle.
- Overlap the ends by 1 inch and sew together with a whipstitch.
18. Paper Chain Garlands
Easy

Bright strips of construction paper link into cheerful loops that sway above your table. Kids and adults alike can join in this classic craft.
Materials Needed
- 6 sheets construction paper, 9×12 inches, assorted winter colors
- Scissors
- White glue
- Ruler
- Pencil
How to Make It
- Cut each sheet into 1-inch wide strips, 12 inches long. You'll need 30 strips total.
- Take one strip and form a loop. Glue the ends together. Let dry 2 minutes.
- Thread a second strip through the first loop before gluing its ends to form a chain.
- Continue linking strips until the garland reaches 6 feet. Hang with tape or pins.
19. Scented Sachets
Easy
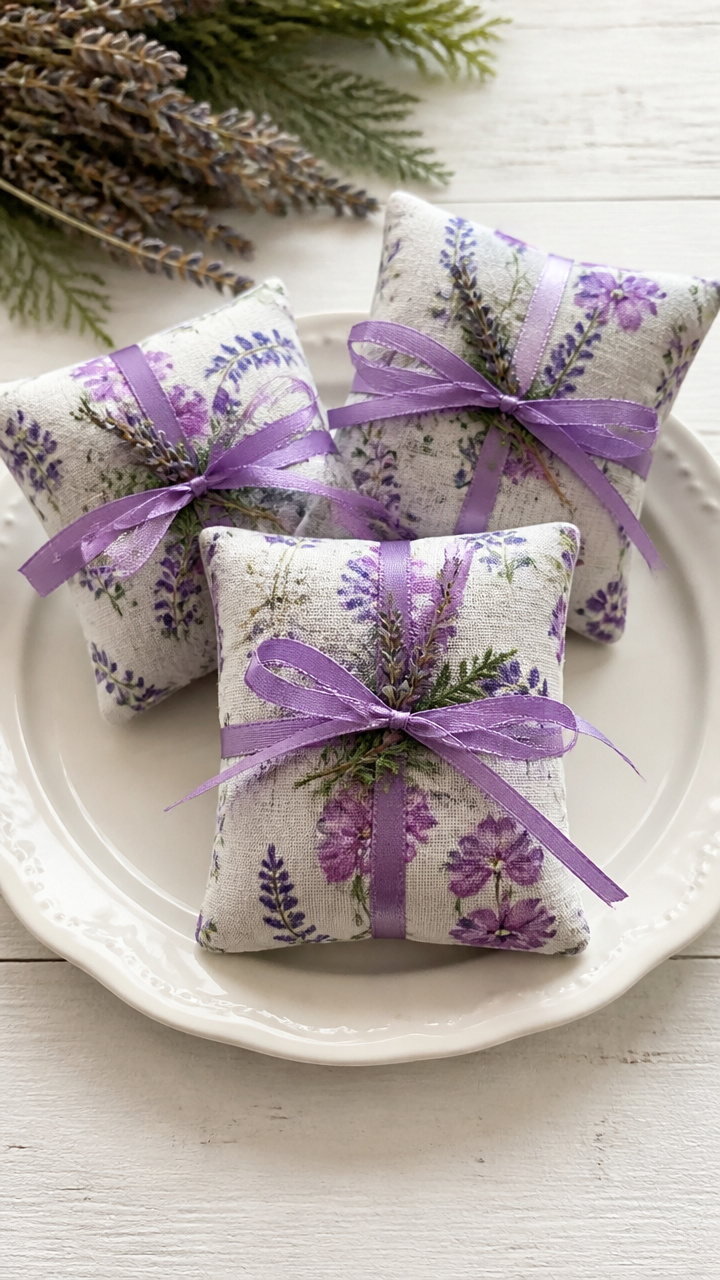
Lavender and cedar shavings nestle inside tiny fabric pouches that freshen drawers. Sew or glue these to tuck into linens or coat pockets.
Materials Needed
- 100% cotton fabric, 6×6 inches, floral print
- Dried lavender buds, 1/4 cup
- Cedar shavings, 2 tablespoons
- Scissors
- Fabric glue
- Ribbon, 8 inches, purple
How to Make It
- Cut the fabric into two 4×4 inch squares.
- Place the squares together, patterned sides facing in. Apply fabric glue along three edges.
- Press the edges together and let dry 10 minutes.
- Turn the pouch right side out. Fill with lavender and cedar mix.
- Fold the open edge inward 1/2 inch and glue closed. Thread the ribbon through the top to seal.
20. Cinnamon Stick Bundles
Easy
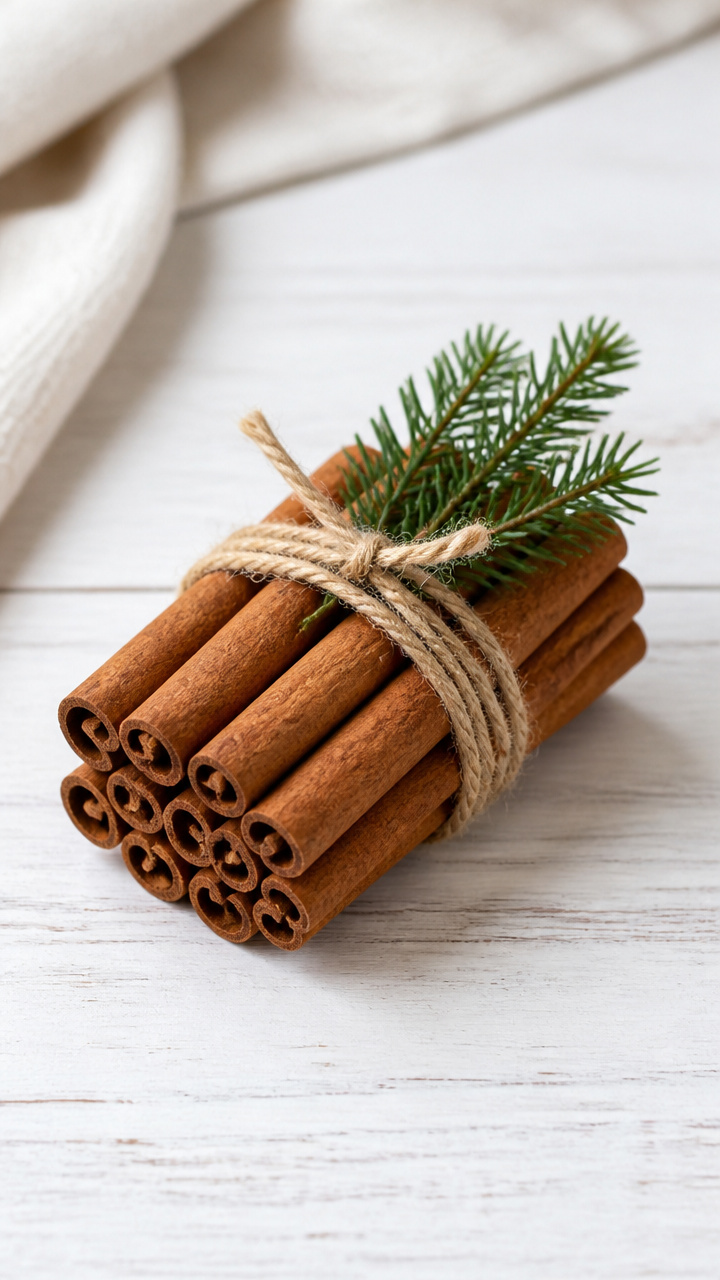
Spicy-sweet bundles tied with twine release warmth with every brush. These mini bouquets scent a shelf or make a fragrant gift.
Materials Needed
- 12 cinnamon sticks, 3 inches long
- Jute twine, 12 inches
- Small pine sprig, 2 inches
- Glue dot
How to Make It
- Arrange 6 cinnamon sticks in a bundle. Wrap twine around the center and tie a tight knot.
- Place the pine sprig over the knot. Secure with a glue dot.
- Wrap the twine around the sprig and knot again to hold. Trim the ends at an angle.
21. Photo Frame Magnets
Easy
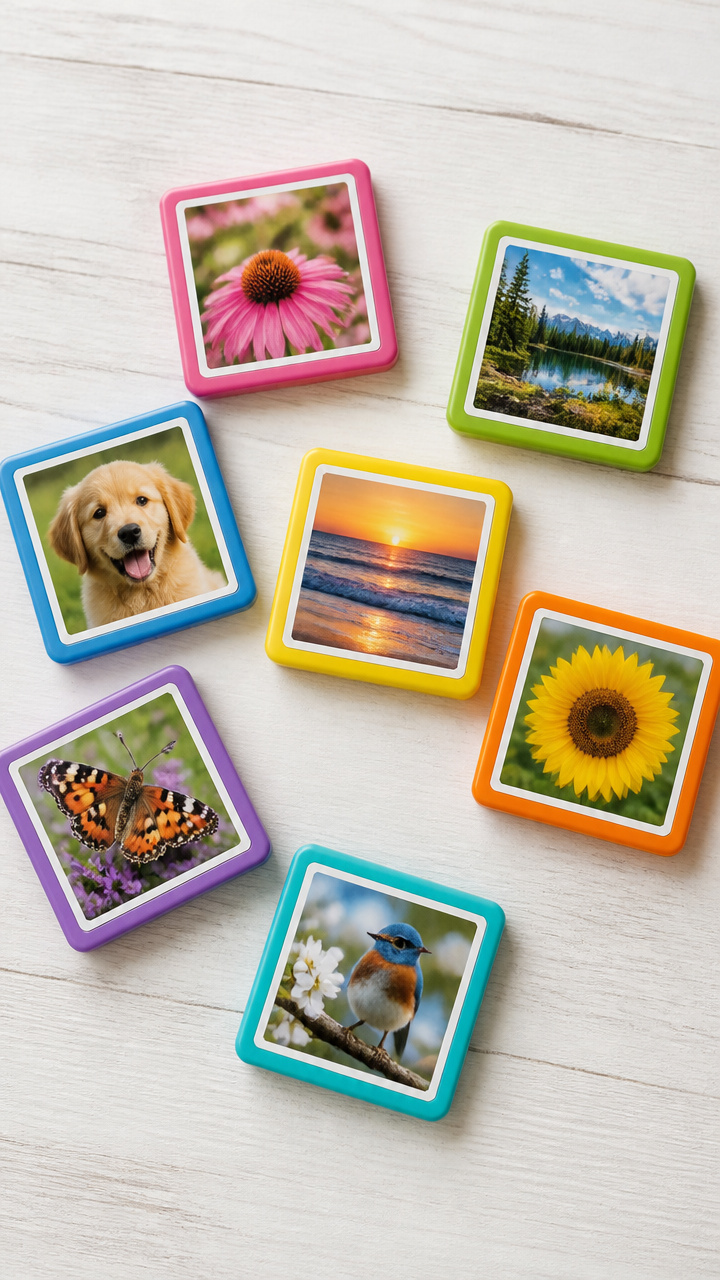
Mini memories stand front and center on the fridge with magnetic backs. Turn treasured prints into functional keepsakes in minutes.
Materials Needed
- 4 wallet-size photo prints
- 1-inch square craft magnets, 4
- Double-sided tape squares, 8
- Scissors
How to Make It
- Cut two double-sided tape squares and place them on the back corners of a photo.
- Press a magnet firmly onto the tape. Repeat for all four photos.
- Place the photos on the fridge with the image facing out.
You’ve got everything you need right where you are to begin — a quiet moment, a few simple supplies, and hands ready to create. Pick one, gather what’s near, and let the making begin.