15 DIY Bird Bath and Feeder Crafts for a Wildlife-Friendly Garden

Inviting songbirds into your garden brings lively color, soothing songs, and natural pest control to your outdoor space. Handcrafted feeders and watering stations let you offer food and clean water in ways that cater directly to the birds native to your area.
Building these projects yourself gives you full control over materials, safety, and placement. You can build every single piece on this list using simple tools, basic hardware, and natural or repurposed supplies.
1. Terracotta Saucer Stack Bird Bath
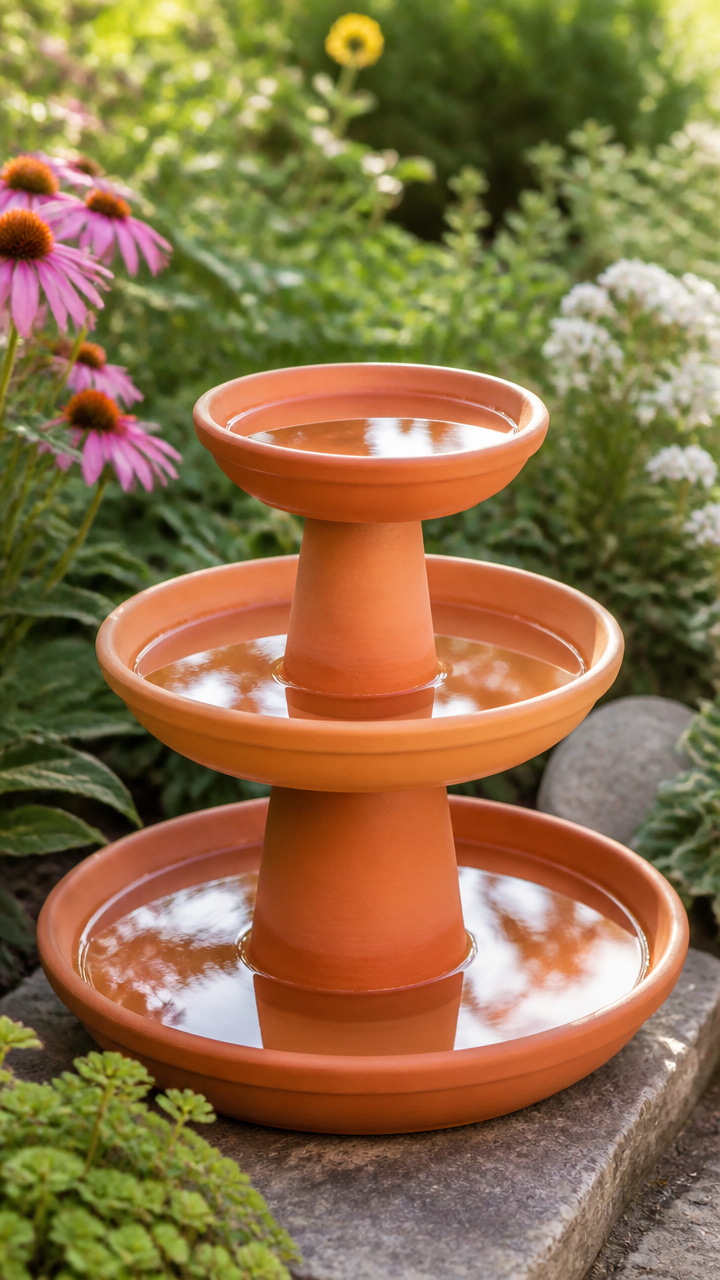
Tiered clay pots create a sturdy, multi-level water station that stands firm during windy weather. You get a classic garden centerpiece while giving smaller birds a safe, shallow place to drink and preen.
Materials Needed
- One 12-inch unglazed terracotta saucer
- Three terracotta pots (one 8-inch, one 6-inch, one 4-inch)
- Waterproof exterior silicone sealant
- 1 lb smooth river stones
How to Make It
- Clean and dry all pots thoroughly to ensure the adhesive bonds securely.
- Turn the 8-inch pot upside down on a flat surface, apply a bead of silicone around the base rim, and center the inverted 6-inch pot on top.
- Glue the 4-inch pot upside down onto the 6-inch pot, then attach the 12-inch saucer right-side up onto the very top to form the basin.
- Allow the silicone to cure for 24 hours, fill the saucer with 1 to 2 inches of fresh water, and arrange smooth river stones inside for perching.


2. Pinecone Peanut Butter Feeder
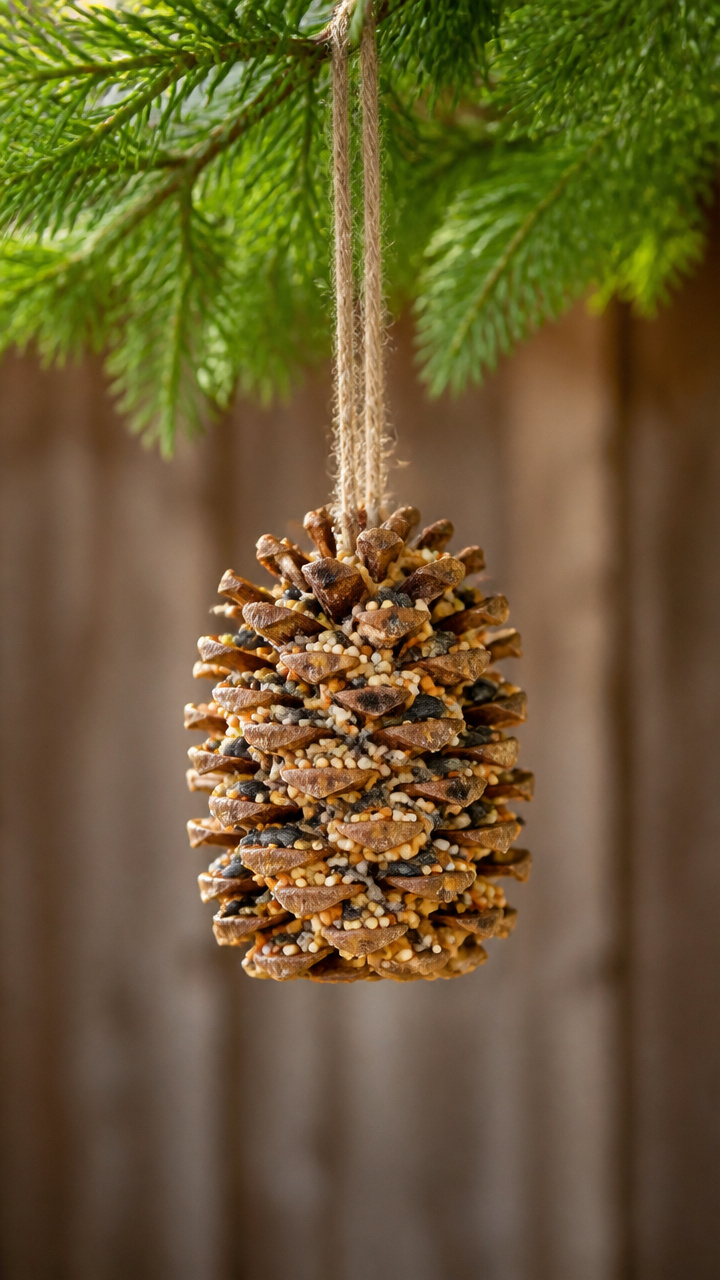
Woodland pinecones make textured, natural dispensers for nutrient-dense seed paste. Chickadees and nuthatches can cling easily to the scales while feeding during chilly mornings.
Materials Needed
- Two large open pinecones (such as sugar pine or ponderosa)
- 1 cup unsalted peanut butter
- 2 cups mixed wild bird seed
- 4 feet of natural jute twine
- Butter knife
- Shallow baking pan
How to Make It
- Tie a two-foot piece of jute twine securely around the top scales of each pinecone, leaving a long loop at the end for hanging.
- Spread your bird seed evenly across the bottom of a shallow baking pan.
- Use a butter knife to press peanut butter deep into every open crevice under the pinecone scales.
- Roll the coated pinecones in the seed tray while pressing firmly, then chill them in the refrigerator for 30 minutes before hanging them outside.
3. Vintage Ceramic Teacup Feeder
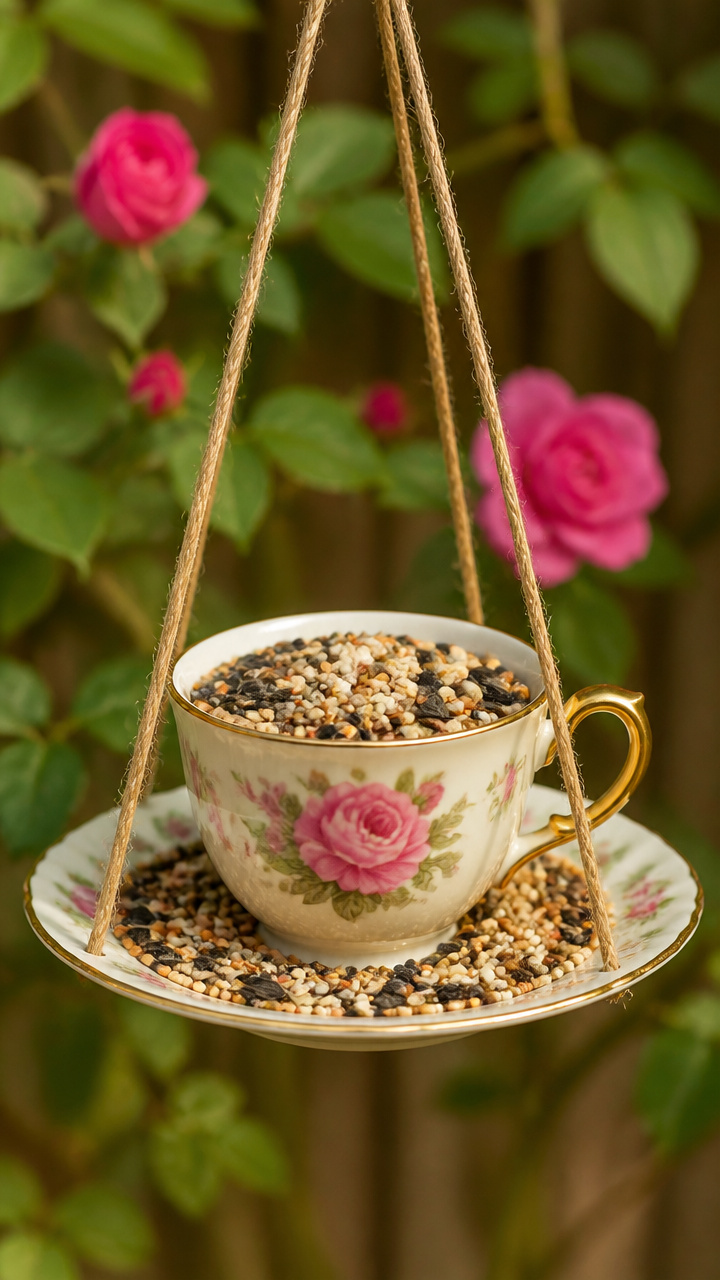
Thrifted porcelain sets turn into charming hanging stations that keep bird food sheltered from rain. Tipping the cup on its side lets small songbirds step right in to grab seeds.
Materials Needed
- One ceramic teacup and matching saucer
- Two-part clear waterproof epoxy adhesive
- 3 feet of light metal chain or copper wire
- 1 cup black oil sunflower seeds
How to Make It
- Clean both ceramic pieces with rubbing alcohol to remove dust, grease, and residue.
- Mix the two-part epoxy and apply it along the side of the teacup, then place the cup on its side on the saucer with the rim facing outward.
- Hold the cup steady for five minutes until the adhesive grips, then leave it undisturbed for 24 hours to cure completely.
- Thread your hanging chain through the teacup handle, mount the feeder on an exterior hook, and fill the saucer and lower cup with sunflower seeds.


4. Carved Citrus Rind Feeder
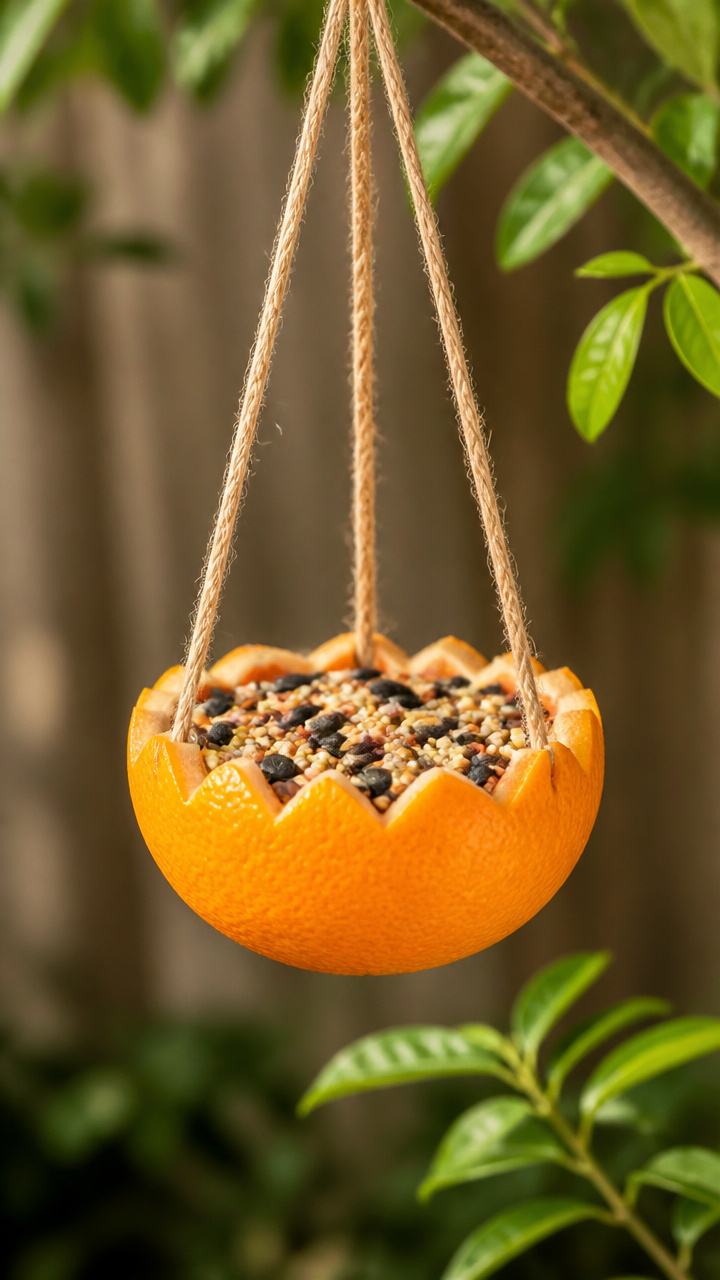
Thick orange rinds make biodegradable seed cups that attract finches and orioles with their natural citrus aroma. You can assemble them in minutes using everyday kitchen supplies.
Materials Needed
- One large thick-skinned naval orange
- Two 8-inch wooden bamboo skewers
- 4 feet of natural hemp cord
- 1 cup mixed millet and sunflower seeds
How to Make It
- Slice the orange in half across the middle and scoop out the fruit pulp with a spoon, leaving clean half-rinds.
- Push one bamboo skewer through the rind from side to side about 1/2 inch below the top edge, then push the second skewer through at a right angle to form a cross.
- Tie four 12-inch pieces of hemp cord to the four exposed skewer ends and knot them together at the top.
- Fill the hollow orange cup with mixed birdseed and hang it from a low tree branch.
5. Hanging Glass Bottle Waterer
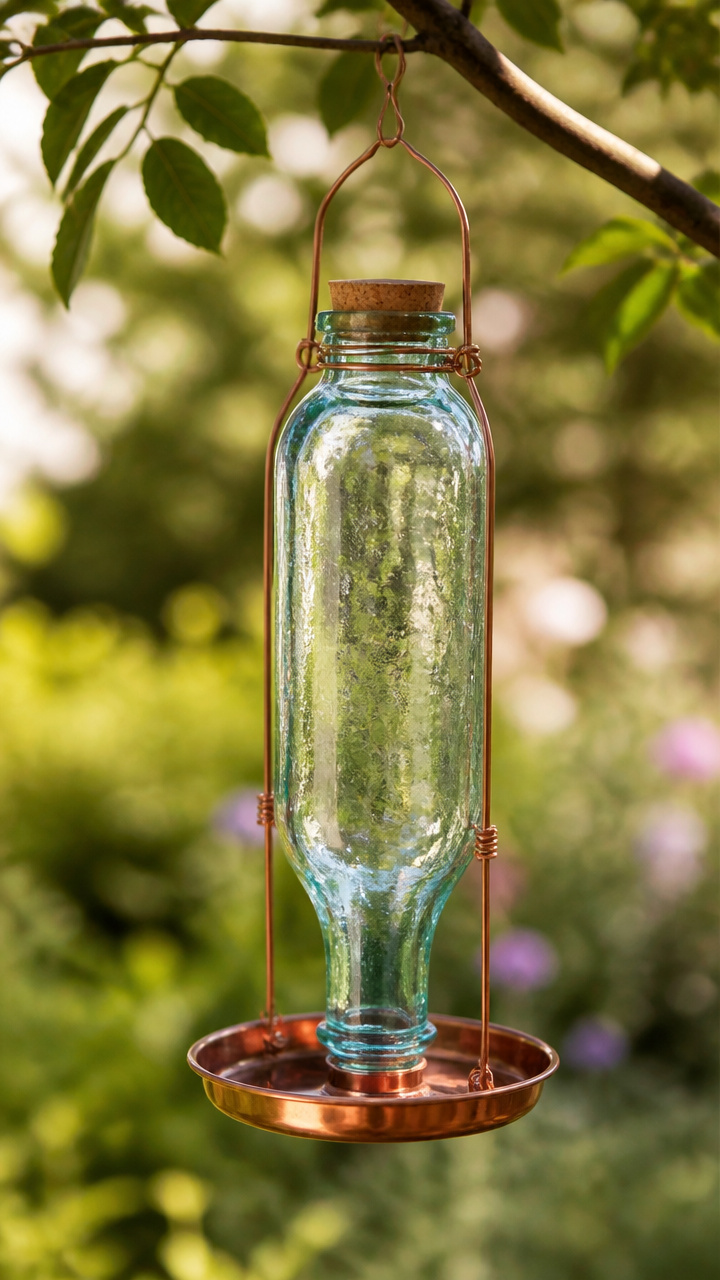
Inverted bottle dispensers keep shallow drinking pans continuously supplied with clean water all day. As birds drink from the saucer, gravity automatically releases more water from the reservoir.
Materials Needed
- One clean 750ml glass wine bottle
- 6 feet of 16-gauge galvanized steel wire
- One 6-inch glazed ceramic shallow dish
- Wire cutters
- Needle-nose pliers
How to Make It
- Wrap galvanized wire tightly around the bottle body to create a snug cage, leaving an integrated hanging loop at the bottom base of the bottle.
- Extend wire down past the neck to cradle the shallow ceramic dish, positioning the bottle mouth 1/2 inch above the bottom of the dish.
- Fill the bottle with cool water, place the dish firmly against the opening, and quickly invert the entire unit so the vacuum seal forms.
- Hang the assembly from a shady tree limb or porch bracket and check that the dish fills without overflowing.
6. Driftwood Mason Jar Feeder
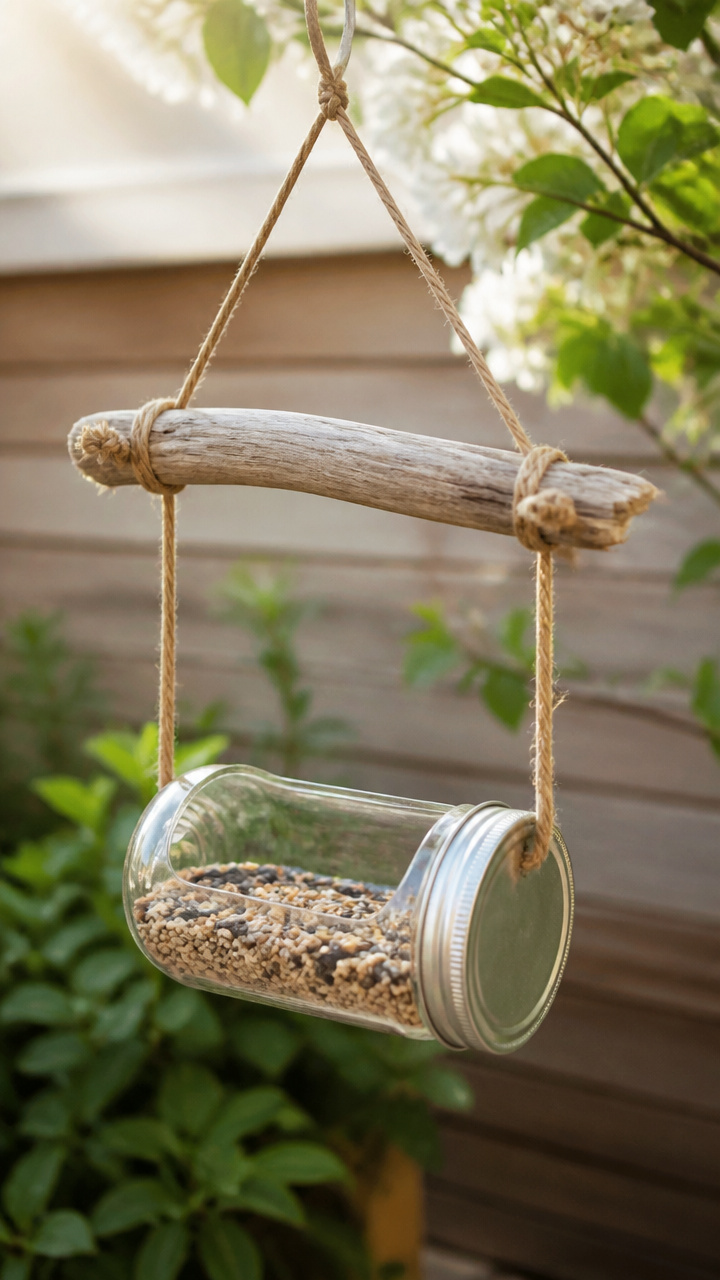
Rustic timber mounts combined with metal poultry bases create sturdy, weather-resistant feeding stations. The clear glass lets you monitor food levels from your window with a quick glance.
Materials Needed
- One 32-ounce wide-mouth glass mason jar
- One galvanized screw-on chick feeder base
- One 18-inch flat cedar board or piece of driftwood
- One 3-inch stainless steel hose clamp
- Two 1-inch exterior wood screws
- Screwdriver
How to Make It
- Drive one wood screw through the band of the hose clamp to attach it halfway down your cedar board.
- Fill the mason jar with wild birdseed, screw the chick feeder base tightly onto the jar, and flip the jar upside down.
- Slide the glass jar into the open hose clamp on the board and tighten the adjustment screw with a screwdriver until snug.
- Secure the cedar board onto a garden fence post or wall using the remaining screw.
7. Concrete Leaf Cast Bird Bath
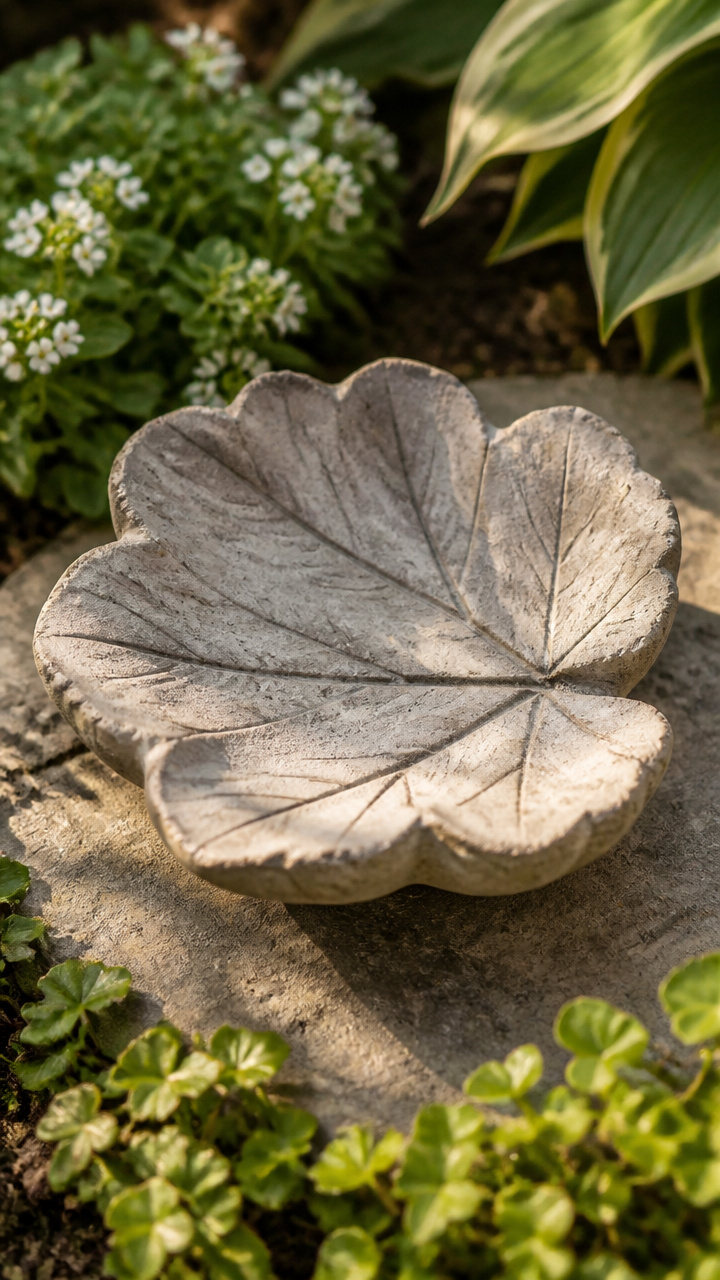
Sand-cast mortar formed over large garden leaves produces an organic basin that blends naturally into flower beds. The textured leaf veins give small birds secure footing as they wade in.
Materials Needed
- One fresh rhubarb or hosta leaf (at least 14 inches wide)
- 10 lbs quick-setting concrete mix
- One bag of play sand
- Non-toxic clear concrete sealer
- Plastic drop cloth
- Rubber gloves
How to Make It
- Mound damp play sand on a plastic drop cloth to create a gentle hill that matches your desired bowl depth.
- Place the fresh leaf vein-side up directly over the sand mound, smoothing it down across the slope.
- Mix the concrete to a thick paste and pat it over the leaf to a thickness of 3/4 inch, building the center slightly thicker for stability.
- Let the concrete cure for 48 hours, peel away the leaf matter, and brush on two coats of non-toxic sealer before filling the dish with water.
8. Fresh Fruit Balloon Whisk Feeder
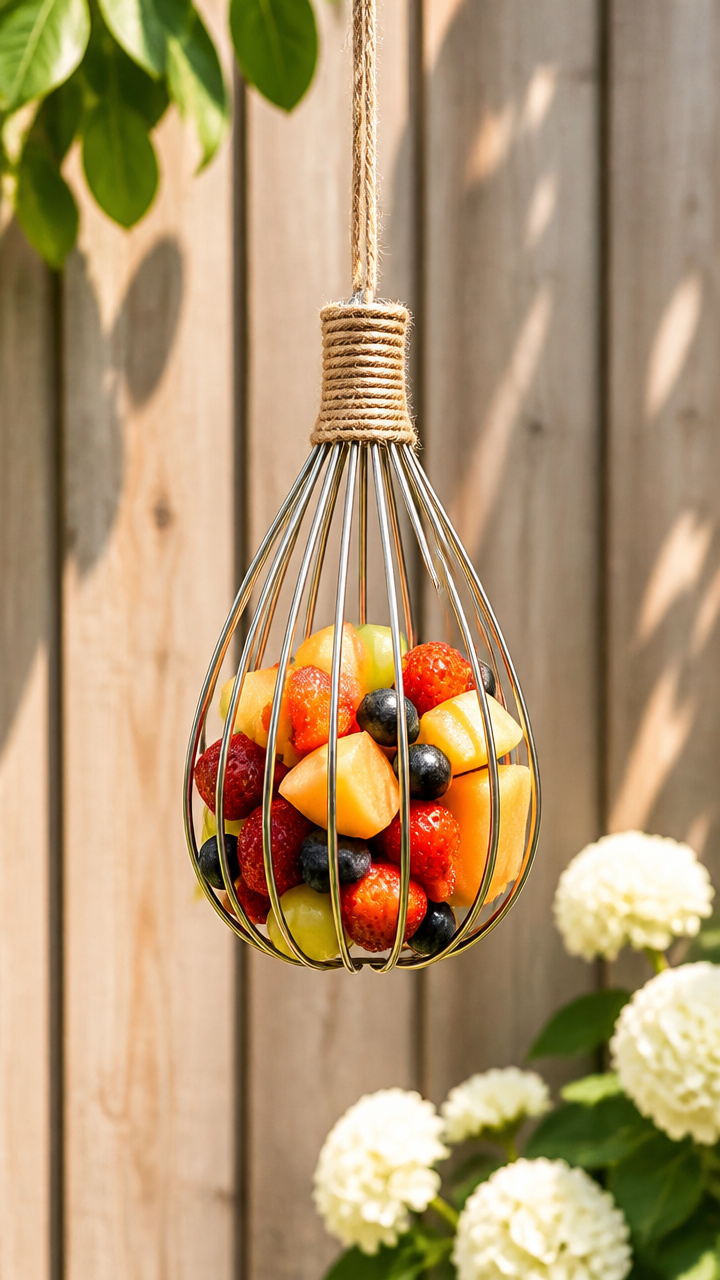
Flexible kitchen whisks hold fresh apple or orange slices firmly in place for fruit-eating species like orioles and mockingbirds. The stainless steel loops provide open perches while keeping food off the ground.
Materials Needed
- One 10-inch stainless steel wire balloon whisk
- One whole crisp apple (halved)
- 1 foot of 18-gauge floral wire
- One metal S-hook
How to Make It
- Gently pull open the flexible wire loops of the whisk cage with your fingers.
- Insert the apple halves into the center cavity, positioning the cut flesh outward toward the wires.
- Release the loops so the wire springs back tightly against the fruit to hold it secure.
- Wrap floral wire through the handle loop, attach your S-hook, and suspend the feeder from a shady garden branch.
9. Birch Branch Suet Feeder
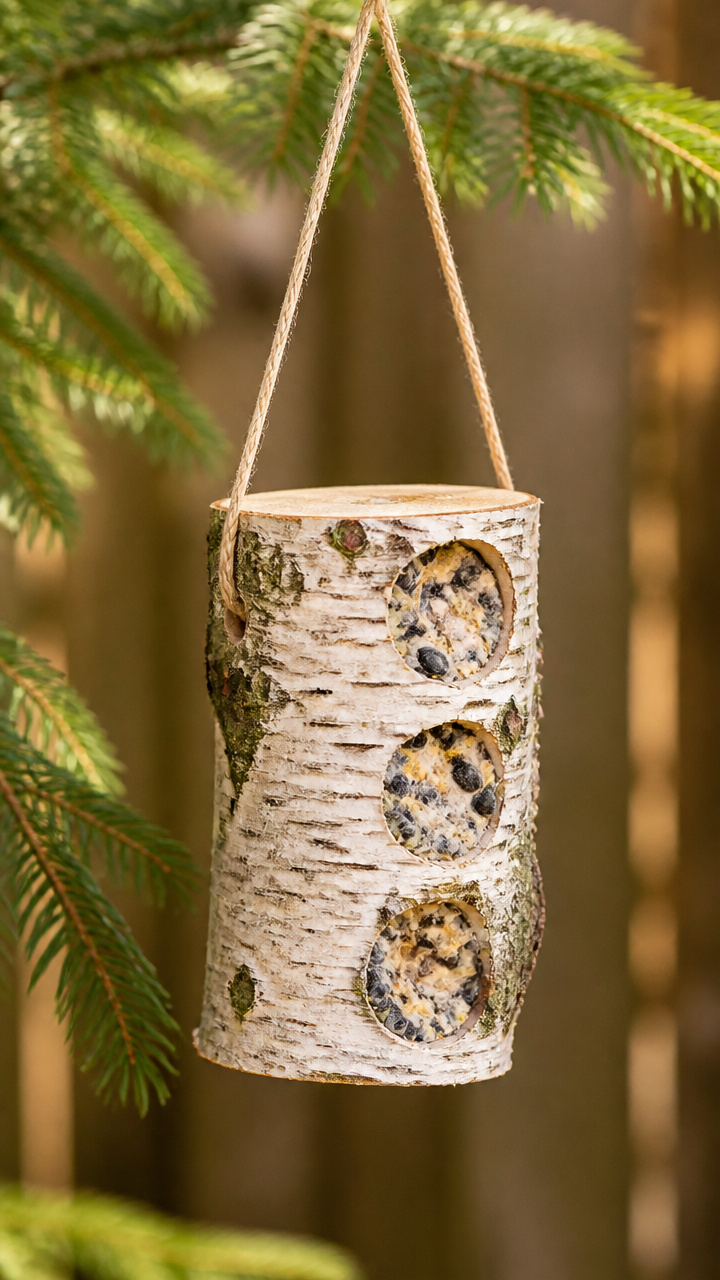
Fallen hardwood logs with drilled cavities mimic the natural tree trunks that woodpeckers and creepers search for insects. You can pack the wells with rich suet to help birds maintain body heat in cold weather.
Materials Needed
- One 14-inch fallen birch or oak branch (3 to 4 inches thick)
- 1-inch spade drill bit and power drill
- One 2-inch metal eye screw
- 1 block prepared suet or seed cake
How to Make It
- Drill four to six 1-inch deep holes along the sides of the branch using your spade bit.
- Screw the metal eye screw directly into the center of the top end of the log.
- Press room-temperature suet firmly into every drilled hole using a spoon until the filling sits flush with the bark.
- Attach a short piece of rope to the eye screw and hang the log vertically from a sturdy tree branch.


10. Fluted Bundt Pan Feeder
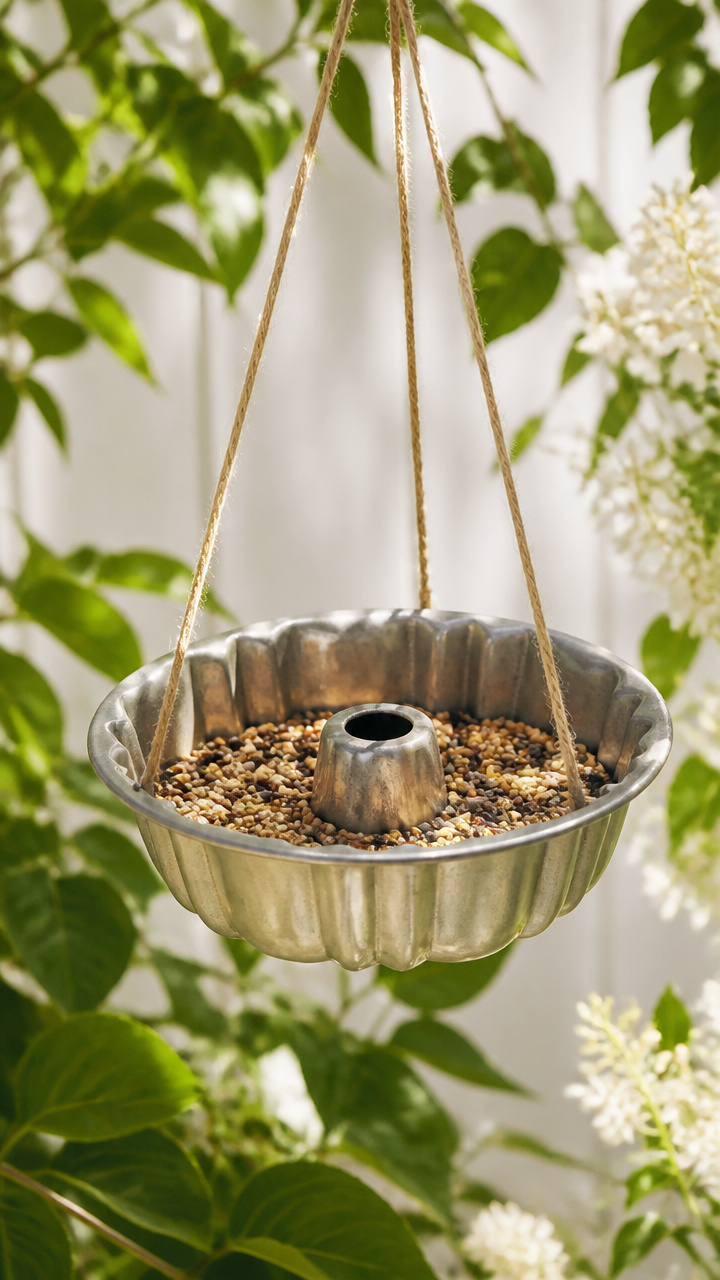
Metal cake pans offer a circular feeding trough with an open center hole designed for easy rope suspension. The wide layout allows multiple songbirds to feed at the same time without crowding each other.
Materials Needed
- One 9-inch metal or enamel bundt cake pan
- 6 feet of 1/4-inch braided nylon rope
- One 2-inch heavy metal washer
- 3 cups mixed black oil sunflower seeds and cracked corn
How to Make It
- Pass the braided rope through the metal washer and tie a large double knot at the bottom end so the washer cannot slip through.
- Thread the top end of the rope up through the center cone of the bundt pan until the washer rests flat against the bottom opening.
- Tie a hanging loop at the top of the rope to establish your desired hanging height.
- Pour your seed mixture into the circular outer channel and hang the feeder from a shepherd hook.
11. Mosaic Glass Pedestal Bath
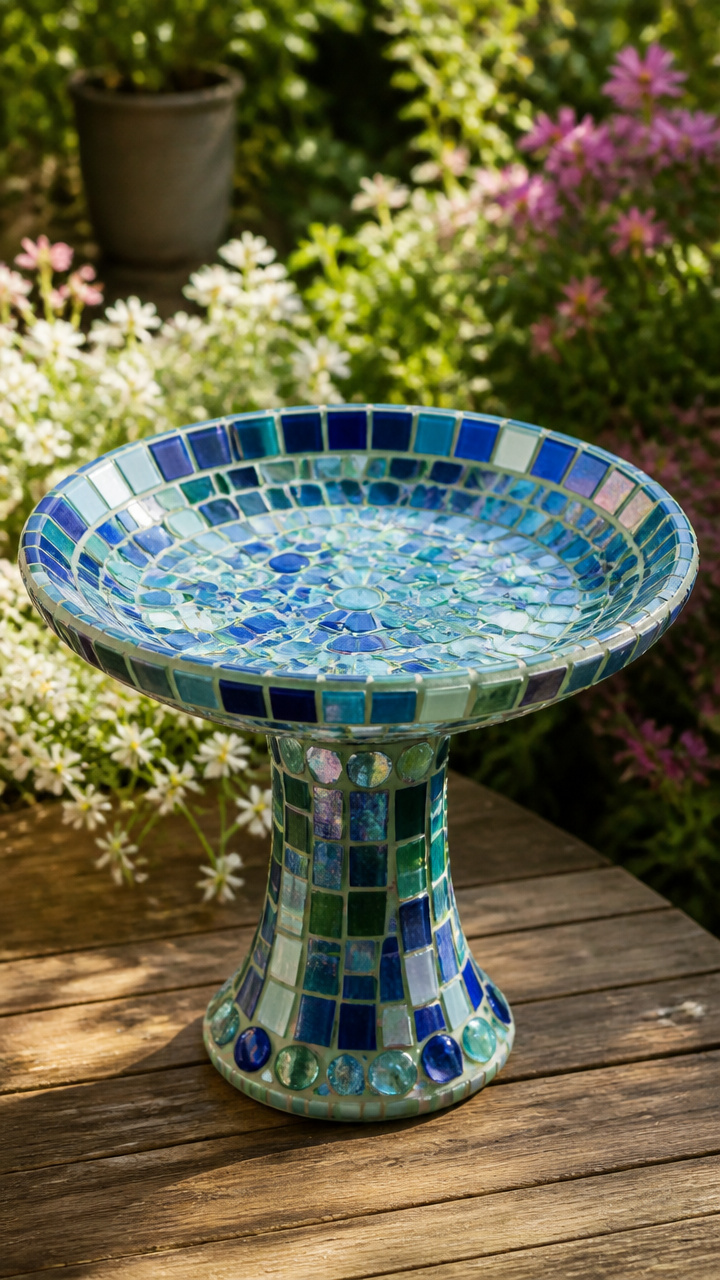
Tumbled glass pieces set into a concrete base create a reflective water bowl that catches sunlight and attracts passing birds. The smooth grout surface makes weekly scrub-downs fast and easy.
Materials Needed
- One 12-inch round concrete stepping stone
- 1 package tumbled glass mosaic tiles
- 1 cup waterproof thin-set mortar
- 1 cup sanded waterproof grout
- Rubber grout float and sponge
How to Make It
- Spread a 1/4-inch layer of waterproof mortar over the top of the concrete stepping stone using a notched trowel.
- Press your glass tiles into the mortar in concentric rings, leaving 1/8-inch gaps between each tile.
- Let the mortar set for 24 hours, then work sanded grout firmly into the joints using a rubber grout float.
- Wipe away grout haze with a damp sponge after 30 minutes, allow it to dry for two days, and set the stone on an overturned planter base.


12. Craft Stick Hexagon Hopper
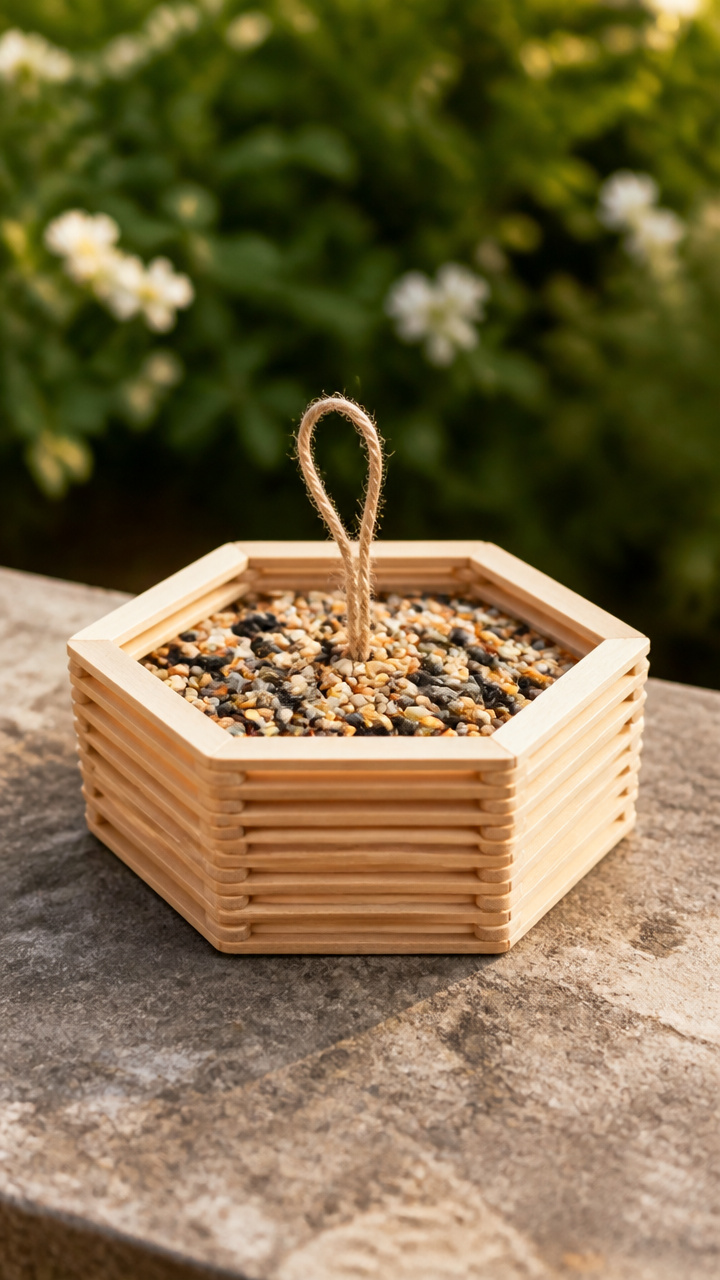
Layered wooden sticks form a geometric tray that allows airflow while keeping seeds dry during damp weather. The open framework gives small garden birds dozens of easy places to land.
Materials Needed
- 100 wooden craft sticks (4.5-inch)
- Waterproof non-toxic exterior wood glue
- 4 feet of jute string
- 2 cups nyjer or millet seed
How to Make It
- Glue six craft sticks together at the overlapping ends to form a flat hexagon frame on your work table.
- Glue craft sticks side-by-side across the interior of the hexagon frame to create a solid wooden floor.
- Stack and glue sticks on each corner point in alternating layers until the surrounding walls reach 2 inches in height.
- Tie four lengths of jute string under the bottom corners, join them at the top in an overhand knot, and fill the tray with seed.
13. Natural Coconut Shell Bowl
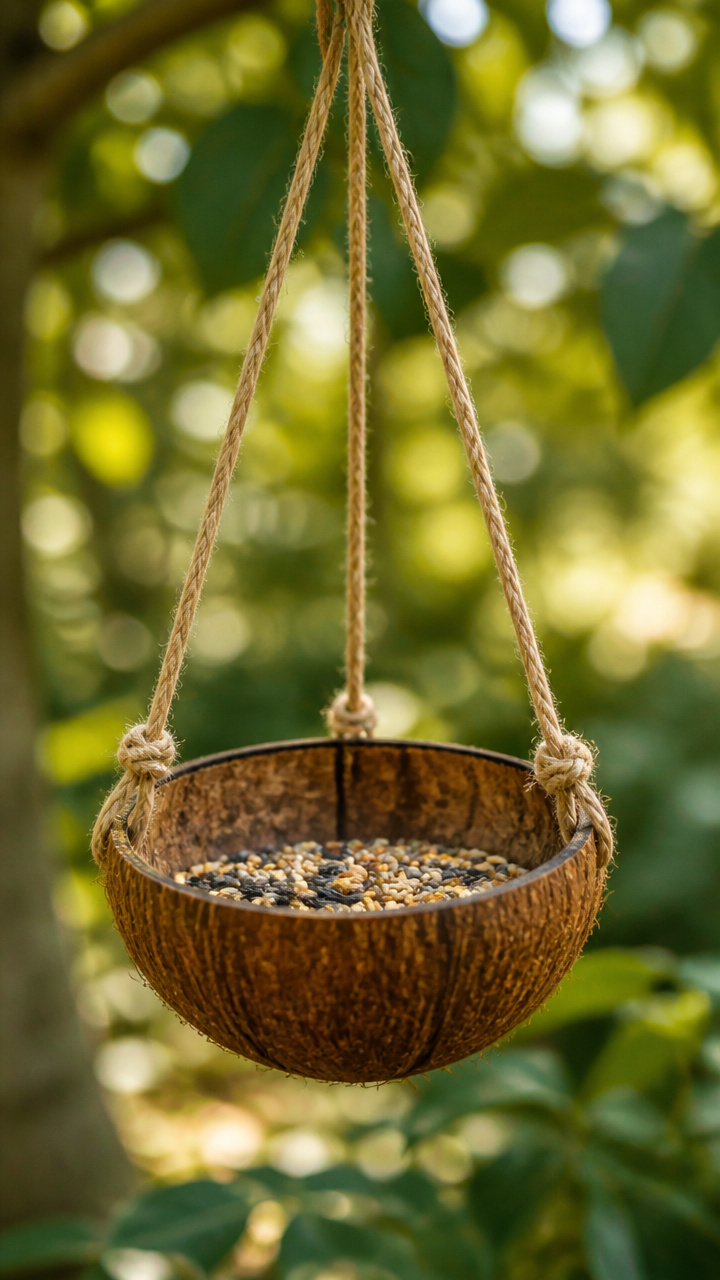
Durable coconut halves provide biodegradable, weather-resistant bowls with a grippy outer texture that small birds love. These compact seed cups fit neatly onto small balconies and garden trellises.
Materials Needed
- One cleaned coconut shell half
- Power drill with 1/4-inch drill bit
- 3 feet of sisal rope
- 1.5 cups safflower seed
How to Make It
- Drill three evenly spaced 1/4-inch holes approximately 1/2 inch below the rim of the coconut half.
- Cut your sisal rope into three 12-inch sections, thread one end through each hole, and tie a secure knot inside the shell.
- Pull the ropes upright, adjust them until the coconut hangs level, and knot all three strands together at the top.
- Fill the clean shell with safflower seeds and hang it from a garden bracket or pergola.
14. Repurposed Glass Lampshade Bath
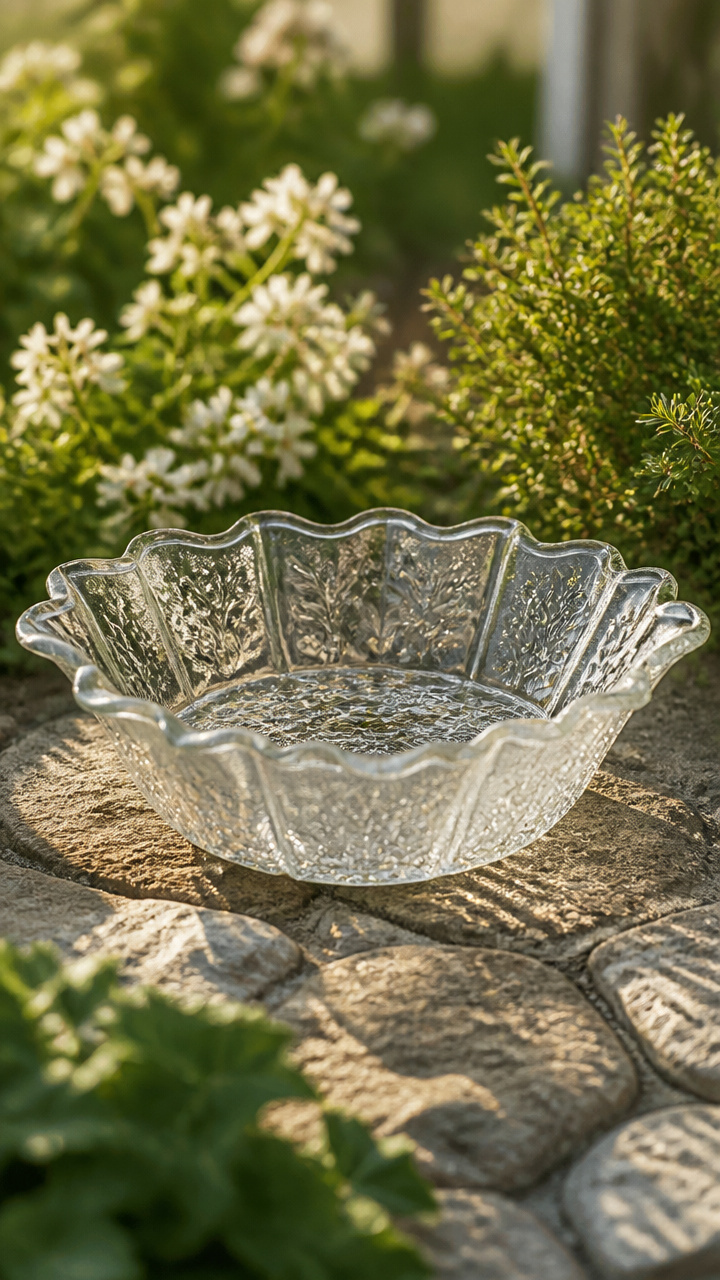
Vintage glass light covers make rust-proof water basins that clean up easily and stay clear in direct sun. Mounted on a copper stake, this bath keeps drinking birds safe from ground predators.
Materials Needed
- One 8-to-10-inch fluted glass ceiling shade (with center opening)
- One 4-foot copper plumbing pipe (1/2-inch diameter)
- One 1/2-inch copper pipe cap
- 100% waterproof silicone sealant
How to Make It
- Clean the glass shade and copper cap thoroughly with warm water and dish soap to remove surface oils.
- Apply a heavy bead of silicone sealant around the center hole of the shade, then press the copper cap over the hole to seal it watertight.
- Let the silicone cure for 24 hours so the joint forms an impenetrable seal.
- Drive the copper pipe 12 inches into your garden soil, seat the capped shade onto the top of the pipe, and fill it with fresh water.
15. Woven Willow Peanut Wreath
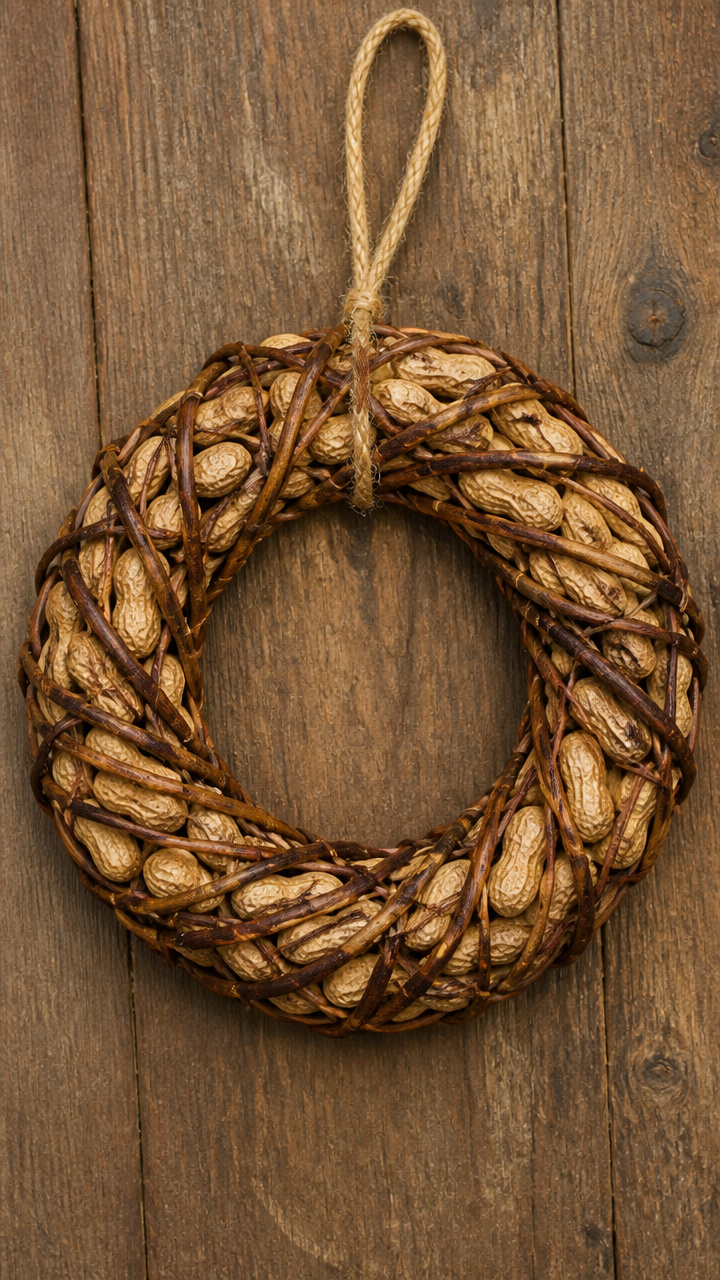
Supple fresh branches twisted into a circular ring hold whole unshelled peanuts without the need for wire mesh or glue. Blue jays and woodpeckers love the challenge of pulling nuts from the woven vines.
Materials Needed
- 10 to 12 long fresh willow or grapevine whips
- Natural raffia cord
- 2 cups whole raw unshelled peanuts
How to Make It
- Bend three thick willow whips into a 10-inch ring, wrapping the ends around each other and tying them with raffia.
- Wind the remaining whips through and around the ring to create a thick, springy woven wreath.
- Slide whole unshelled peanuts between the overlapping willow strands around the entire wreath until packed tightly.
- Tie a loop of raffia to the top of the wreath and hang it against a wooden fence post or sturdy tree trunk.
Gather your materials, choose a quiet corner of your yard, and start building your first feeder or bath today. Your backyard visitors will reward your efforts with daily activity and birdsong all season long.