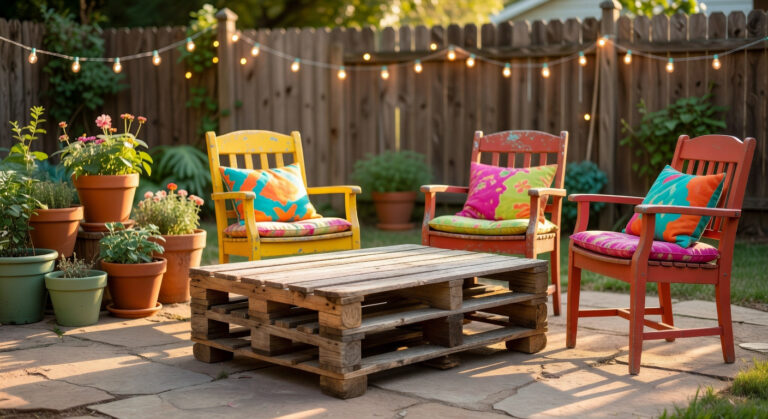
15 Repurposed Furniture Garden Crafts for a Cottagecore Backyard

Old furniture carries a soft, weathered history that blends naturally into flower beds and stone pathways. Giving tired wooden dressers, chairs, and tables a second life outdoors adds instant storybook character to your backyard without spending a fortune at commercial garden centers.
You can craft these projects over a weekend using standard hand tools and salvage pieces from thrift shops or your own attic. Each project below pairs durable outdoor construction methods with classic, romantic garden style so your handmade pieces withstand rain and sunshine for seasons to come.
1. Weathered Chair Moss Planter
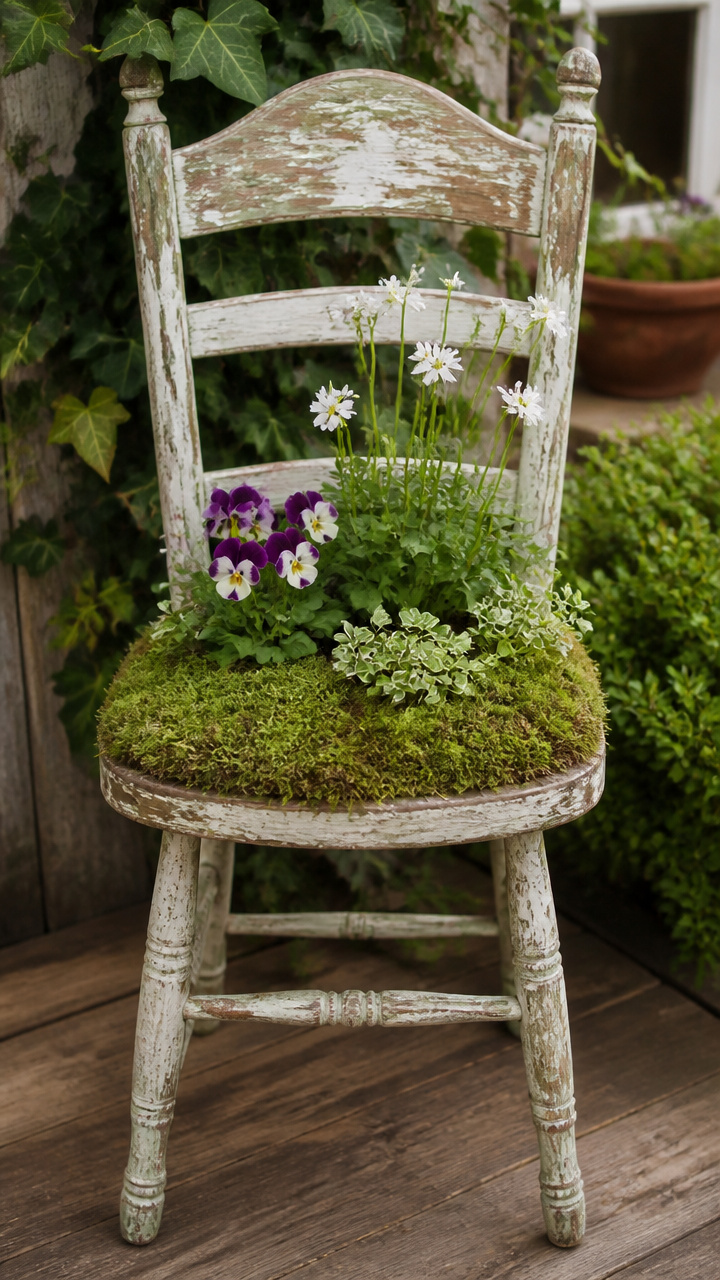
Weathered wooden chairs make wonderful perches for trailing greenery, giving neglected seating a lush new purpose in your flower beds.
Materials Needed
- 1 solid wood dining chair with a removable or broken seat
- 1 roll of 1/2-inch galvanized chicken wire (24 inches wide)
- 1 bag of long-fiber sheet moss (100 cubic inches)
- 1 heavy-duty staple gun with 3/8-inch rust-resistant staples
- 1 wire cutter
- 1 cubic foot of organic potting soil
- 3 four-inch pots of trailing English ivy and creeping jenny
- 1 can of clear satin exterior spar urethane spray
How to Make It
- Knock out any remaining plywood seat insert using a hammer, leaving the open structural frame intact.
- Spray the entire wooden chair with two coats of clear exterior spar urethane, waiting two hours between coats to shield the wood against rain.
- Cut a 20-by-20-inch square of chicken wire using wire cutters, and press it down into the seat opening to form a 6-inch-deep bowl.
- Staple the wire edges securely to the inner seat frame every 2 inches, then trim away any sharp excess wire with your cutters.
- Line the wire bowl with a 1-inch-thick layer of damp sheet moss, facing the green side outward so it shows through the bottom.
- Fill the moss pocket with potting soil, plant your trailing ivy and creeping jenny, and water thoroughly until water drips freely from the moss.
2. Tiered Dresser Flower Cascade
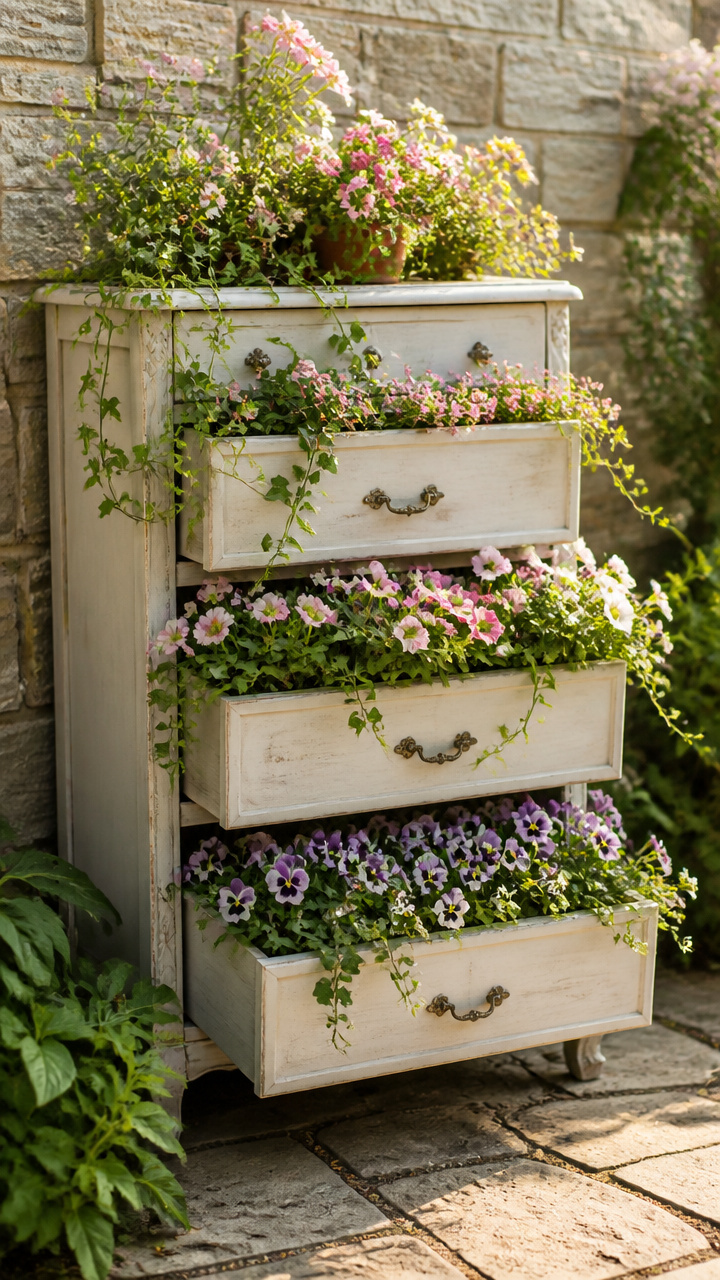
Staggered wooden drawers offer distinct planting levels, turning an old chest of drawers into a multi-tiered cascade of colorful cottage blossoms.
Materials Needed
- 1 three-drawer solid wood dresser
- 1 roll of heavy-duty non-woven landscape fabric (3 feet by 50 feet)
- 1 cordless drill with a 1/2-inch spade bit
- 1 box of 1-1/4-inch exterior wood screws
- 2 cubic feet of lightweight potting mix
- 1 quart of exterior chalk-style paint in sage green
- 1 medium synthetic paint brush
- 8 four-inch pots of mixed petunias, sweet alyssum, and lobelia
How to Make It
- Paint the outer dresser and drawer fronts with two coats of exterior chalk paint, allowing four hours of drying time after each coat.
- Drill five 1/2-inch drainage holes through the bottom panel of each drawer, spacing the holes evenly across the base.
- Slide the bottom drawer out almost fully, the middle drawer out halfway, and the top drawer out slightly to create a cascading stair pattern.
- Drive two 1-1/4-inch wood screws from the inside of each drawer through the back wall into the dresser frame to lock them permanently open.
- Line the inside of each drawer with landscape fabric, staple the edges below the rim, and fill the cavities with potting mix.
- Plant the petunias and lobelia along the front edges so they spill forward over the painted drawer fronts as they grow.
3. Spindle Headboard Sweet Pea Trellis
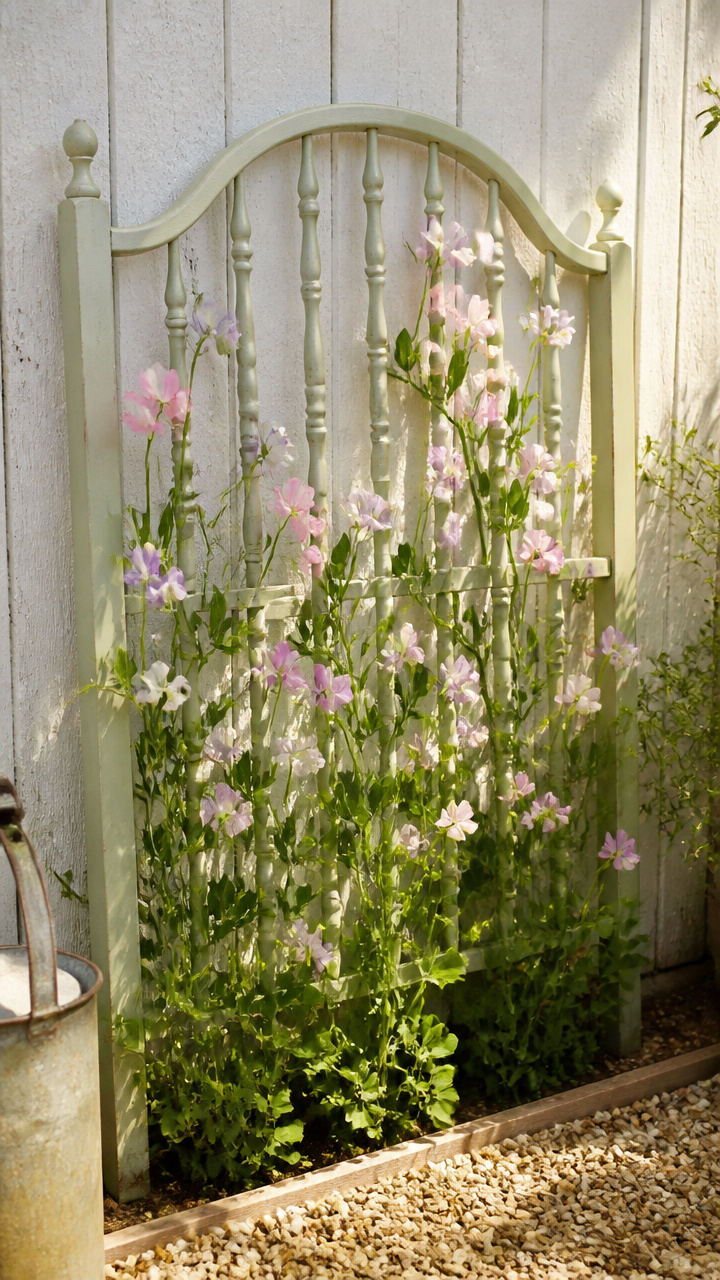
Carved wooden spindles create instant architectural support for climbing flowering vines while framing the back of your garden border.
Materials Needed
- 1 vintage twin-sized wooden spindle headboard
- 2 heavy-duty steel U-posts (4 feet tall)
- 1 post pounder or mallet
- 1 box of 2-inch galvanized pipe straps with matching screws
- 1 cordless drill with Phillips driver bit
- 1 quart of exterior semi-transparent wood stain in walnut
- 1 packet of heirloom sweet pea seeds
- 1 bag of organic compost (1 cubic foot)
How to Make It
- Brush one coat of exterior wood stain over the entire headboard to protect the carvings and bring out the natural grain.
- Pound two steel U-posts 18 inches deep into the soil using a mallet, spacing them exactly as wide as the headboard legs.
- Position the headboard legs against the flat side of the steel posts, raising the bottom frame 3 inches above the soil line to prevent rotting.
- Fasten the wooden legs to the steel posts using galvanized pipe straps and exterior screws driven firmly into the backside.
- Dig a 4-inch furrow along the base of the headboard, mix in the compost, and sow sweet pea seeds 1 inch deep and 3 inches apart.
- Train the young vine shoots around the lower wooden spindles as soon as they reach 6 inches tall.
4. Nightstand Porch Potting Bench
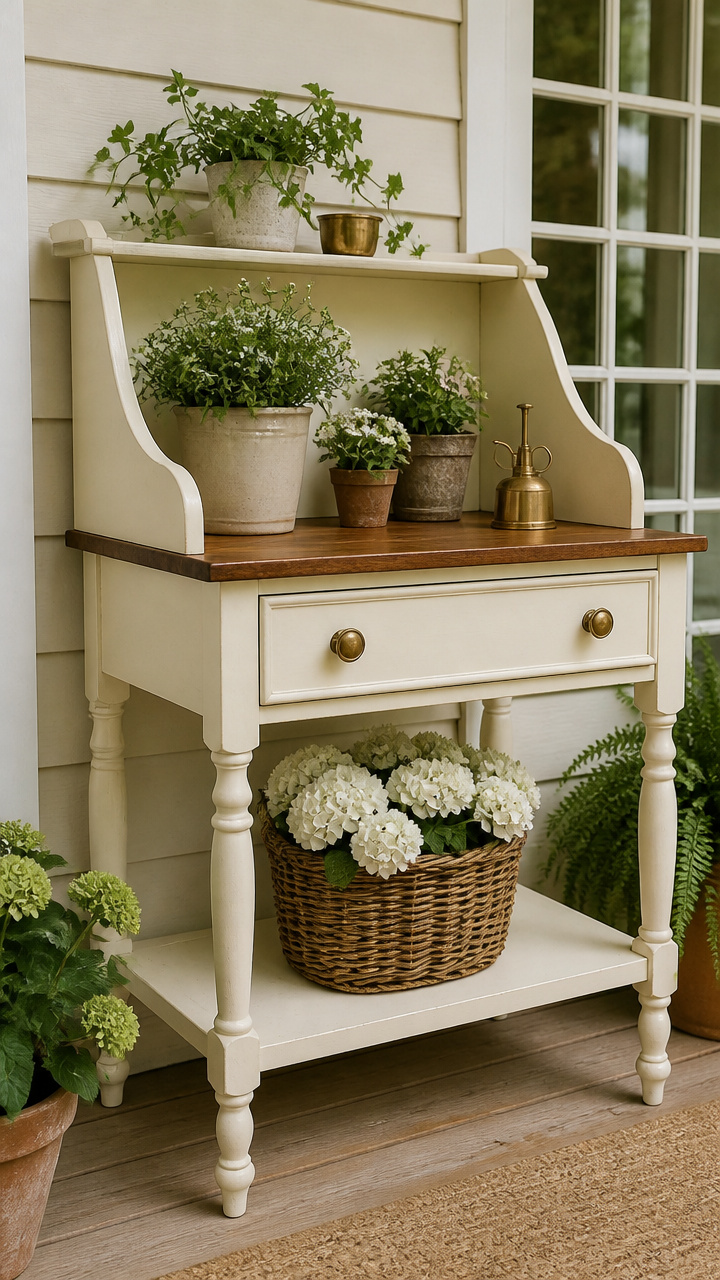
Compact bedside tables provide the ideal height and storage for everyday gardening tasks in tight porch corners.
Materials Needed
- 1 wooden nightstand with a single drawer and open lower shelf
- 4 ceramic vintage 6-inch wall tiles
- 1 tube of waterproof construction adhesive (10 oz)
- 4 solid brass cup hooks
- 1 hand screwdriver
- 1 sanding sponge (120-grit)
- 1 quart of exterior latex enamel paint in butter yellow
- 1 standard paint tray and 2-inch angled trim brush
How to Make It
- Scuff-sand all glossy surfaces of the nightstand with your sanding sponge, then wipe away the fine dust with a damp rag.
- Apply two thin coats of butter yellow exterior latex enamel to the body, drawer, and legs, allowing two hours between coats.
- Run generous beads of waterproof construction adhesive along the backside of the four ceramic tiles and set them flush across the top surface to create a soil-safe work pad.
- Press the tiles firmly into the adhesive and let the bond cure undisturbed for 24 hours.
- Pre-drill small pilot holes and screw two brass cup hooks into each side of the nightstand frame to hold your hand trowels, pruners, and twine.
- Stock the drawer with seed packets and plant labels, using the bottom shelf to hold your watering can and seedling trays.
5. Dining Table Sunken Herb Station
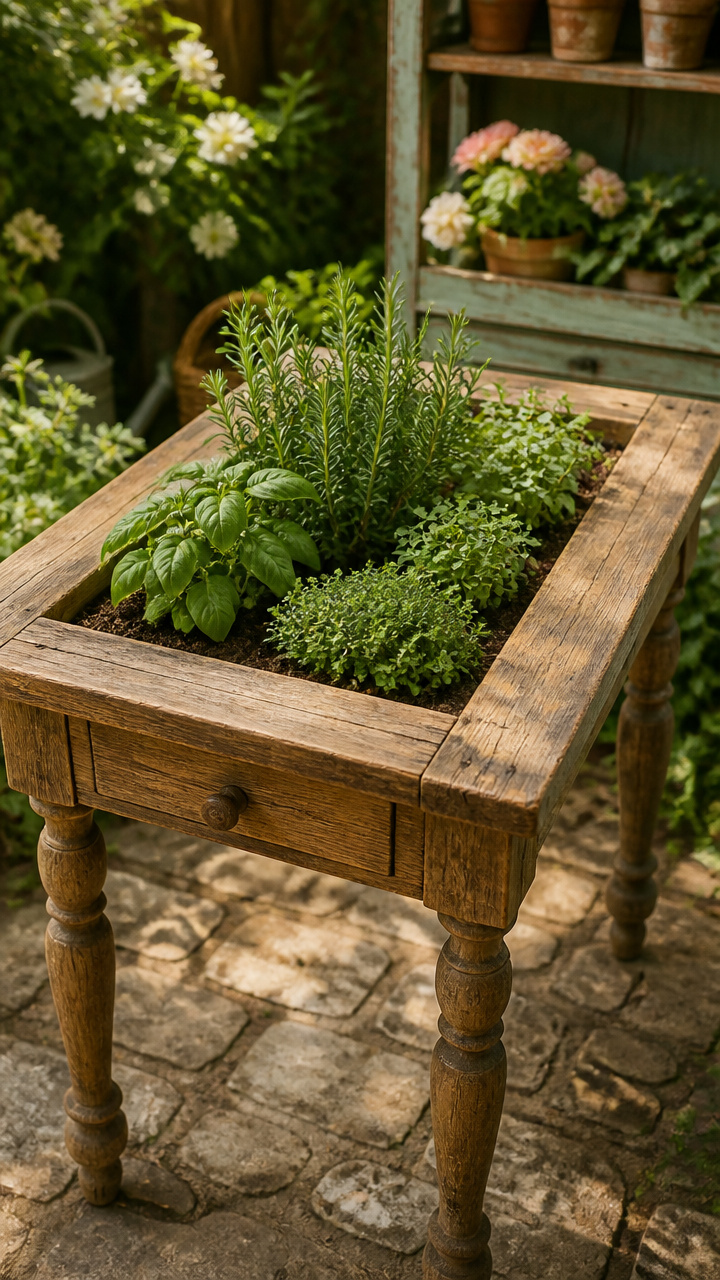
Wide wooden tabletops hold sunken metal basins perfectly, creating an accessible culinary herb station right outside your kitchen.
Materials Needed
- 1 sturdy four-legged wooden dining table
- 1 round galvanized steel wash tub (16-inch diameter, 10 inches deep)
- 1 jigsaw with a fine-tooth wood blade
- 1 pencil and length of string (for tracing circle)
- 1 cordless drill with a 3/8-inch drill bit
- 1 tube of clear 100% silicone sealant
- 1 bag of coarse pea gravel (0.5 cubic feet)
- 1.5 cubic feet of organic herb potting soil
- 5 assorted culinary herb plants (rosemary, thyme, sage, oregano, chives)
How to Make It
- Place your galvanized tub upside down on the center of the tabletop and trace the outer rim with a pencil.
- Draw a second circle 1/2 inch inside your traced line so the rolled lip of the tub will catch on the wood edge without falling through.
- Drill a 3/8-inch starter hole just inside your inner circle line to insert the jigsaw blade.
- Cut along the inner circle with your jigsaw, taking your time around the curve, and remove the cutout wooden disc.
- Drill six 3/8-inch drainage holes through the bottom of the galvanized tub.
- Apply a bead of silicone sealant under the tub’s rolled top lip, drop the tub into the cut opening, and let the silicone cure for four hours.
- Add a 1-inch layer of pea gravel to the bottom of the tub, fill with herb soil, and plant your culinary herbs.
6. Upright Bookshelf Living Wall
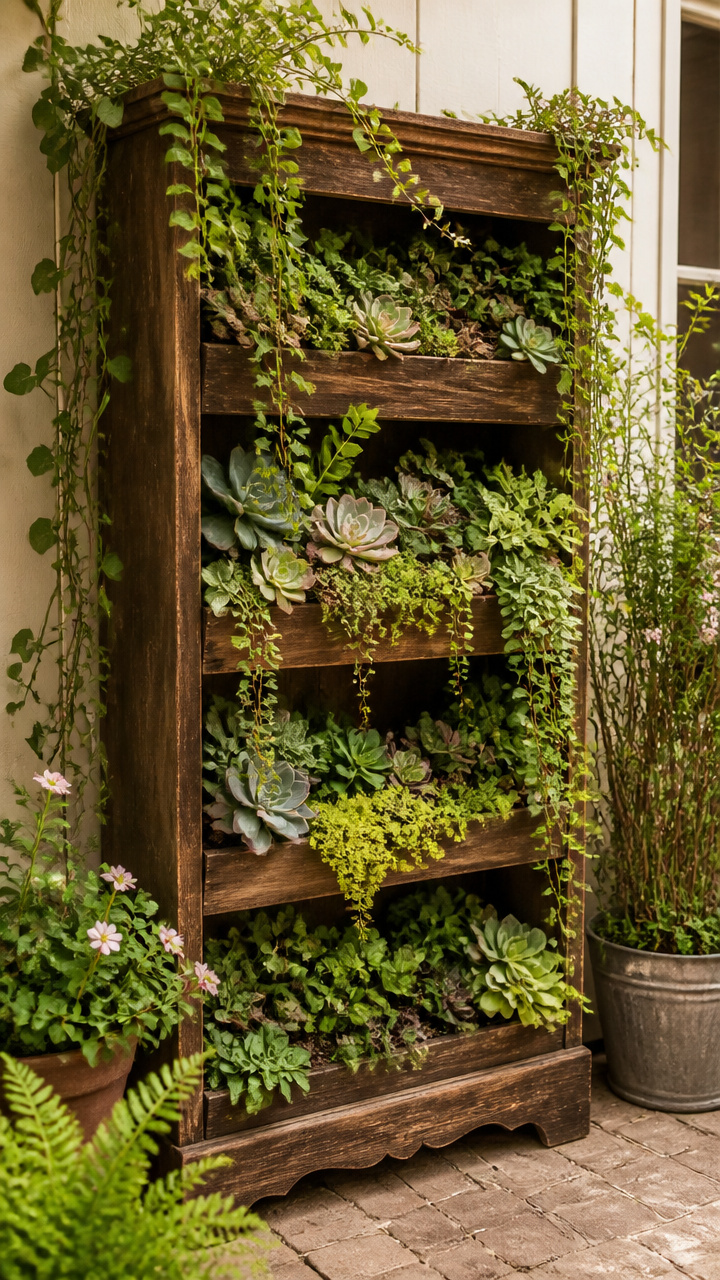
Vertical shelving units save precious ground area by stacking your favorite potted greens upward along a sunny wall.
Materials Needed
- 1 solid wood open-back bookshelf (3 to 4 shelves)
- 3 unfinished cedar planter trough boxes (sized to match shelf width)
- 1 box of 2-inch galvanized decking screws
- 1 cordless drill with driver and pilot bits
- 1 quart of exterior penetrating oil finish in natural cedar
- 1 natural bristle paintbrush
- 3 plastic drip trays matching the planter box sizes
- 9 four-inch plants (wild strawberries, nasturtiums, and curly parsley)
How to Make It
- Brush penetrating oil finish across all sides of the bookshelf and cedar planter boxes to repel outdoor moisture.
- Set one cedar planter box onto each shelf, centering it against the shelf frame.
- Drive two 2-inch decking screws upward through the underside of each shelf directly into the bottoms of the planter boxes to anchor them securely.
- Place plastic drip trays inside the wooden planter boxes to catch runoff and prevent water from pooling against the wood joints.
- Fill each planter box with good potting soil and arrange your strawberries and nasturtiums so the vines tumble forward off the shelves.
- Secure the top back edge of the bookshelf to your exterior wall or fence using two heavy L-brackets to prevent tipping in wind.
7. Crib Spring Herb Drying Grid
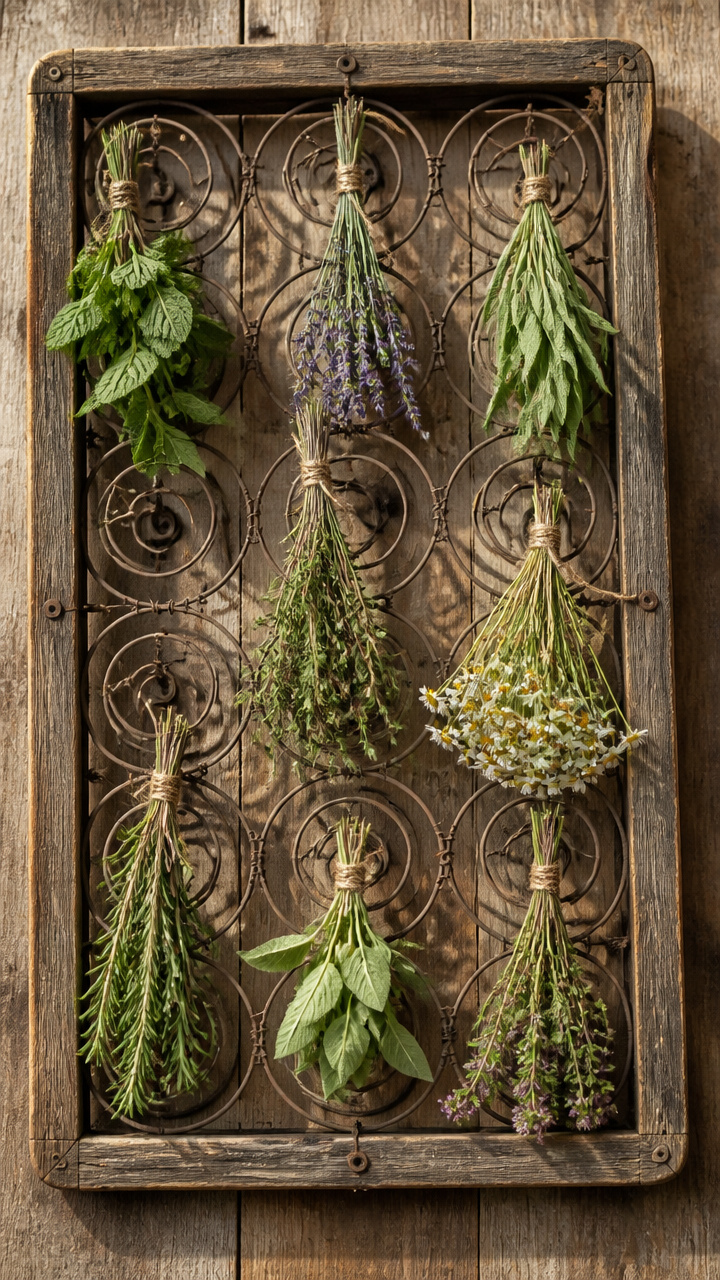
Coiled wire mattress springs suspended beneath a porch roof provide dozens of sturdy hook points for drying fresh botanical cuttings.
Materials Needed
- 1 metal vintage crib spring or daybed spring frame
- 4 heavy-duty ceiling screw hooks (3-inch, rust-proof)
- 4 lengths of 1/8-inch galvanized steel jack chain (3 feet each)
- 1 pair of slip-joint pliers
- 1 roll of natural jute twine (200 feet)
- 20 natural wooden clothespins
- 1 pair of garden snips
- Fresh bundles of lavender, chamomile, and mint
How to Make It
- Clean the metal spring frame with warm soapy water and a stiff scrub brush to remove dust, then let it dry completely in the sun.
- Screw four heavy ceiling hooks into the sturdy rafters of a covered porch or garden shed, matching the four corners of the spring frame.
- Attach one length of jack chain to each ceiling hook, adjusting the links with pliers so the chains hang at equal heights.
- Hook the lower end of each chain securely to the four outer corner loops of the metal spring frame.
- Cut fresh stems of lavender, chamomile, and mint in 8-inch lengths, bundling five to six stems together with jute twine.
- Use wooden clothespins or looped twine to clip the herb bundles upside down to the metal grid coils where warm air can circulate freely.
8. Cast Iron Treadle Birdbath
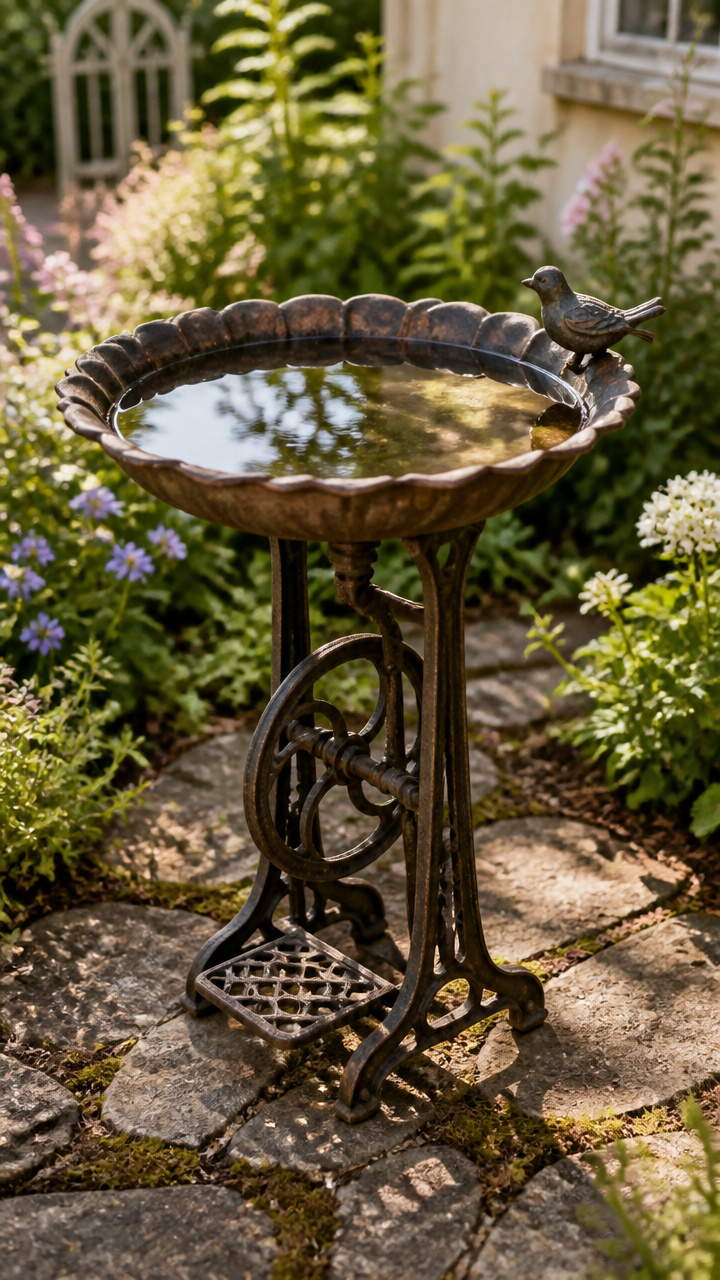
Cast iron sewing machine bases offer heavy, ornate stability to hold a shallow watering basin for visiting backyard songbirds.
Materials Needed
- 1 vintage cast iron sewing machine treadle base
- 1 glazed ceramic plant saucer (16 to 18 inches in diameter, 2 inches deep)
- 1 wire hand brush
- 1 can of rust-inhibiting exterior spray enamel in satin black
- 1 tube of exterior polyurethane construction adhesive (10 oz)
- 1 tube caulk gun
- 3 smooth river stones (2 to 3 inches wide)
How to Make It
- Scrub away loose surface rust and dirt from the cast iron treadle base using a stiff wire hand brush.
- Spray the entire metal base with two thorough coats of rust-inhibiting black enamel, letting it dry for three hours.
- Apply a generous, continuous 1/2-inch ring of polyurethane construction adhesive onto the top flat mounting plates of the iron frame.
- Center the glazed ceramic saucer face-up on top of the adhesive, pressing down with firm, steady pressure.
- Allow the adhesive to cure completely for 48 hours without moving the stand.
- Set the finished birdbath in a level, shaded garden spot, place smooth river stones in the center for bird perches, and fill with 1 inch of fresh water.
9. Stepladder Crate Display Stand
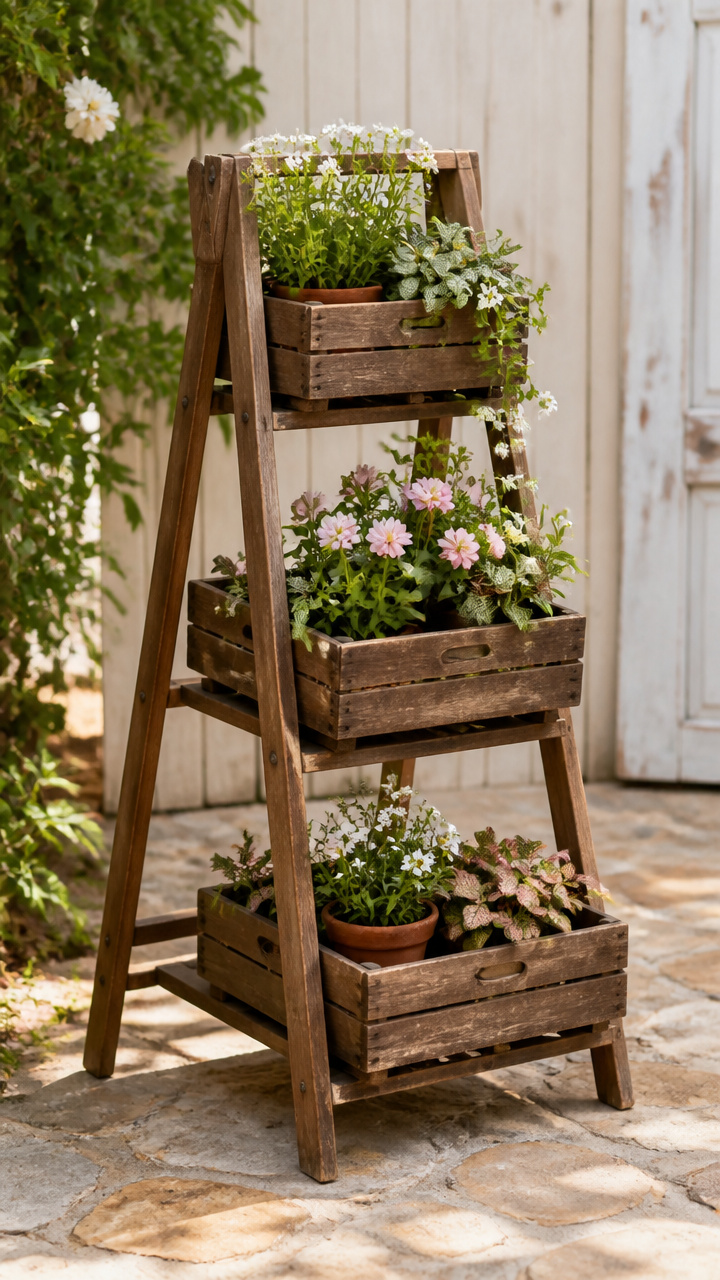
Fold-out wooden stepladders create sturdy, tiered platforms that display potted perennials and vintage watering cans without wobbling.
Materials Needed
- 1 vintage four-step wooden folding ladder
- 3 wooden apple or bushel crates
- 1 box of 1-1/2-inch exterior wood screws
- 1 cordless drill with screw bit
- 1 container of clear exterior matte deck sealer (1 quart)
- 1 wide foam brush
- Assorted potted violas, sweet peas, and miniature roses in terracotta pots
How to Make It
- Open the wooden stepladder fully on level ground and lock the metal side spreaders into their straight, rigid position.
- Coat the ladder and all wooden crates with clear matte deck sealer using a foam brush to protect them against ground moisture and rot.
- Set one wooden crate horizontally across each of the bottom three ladder steps, centering them so they balance evenly.
- Drive two 1-1/2-inch screws through the inside bottom slats of each crate into the ladder steps below to fasten them securely.
- Arrange your potted violas and miniature roses inside the crate cubbies and across the top platform, mixing different pot heights for visual balance.
10. Cabinet Door Seedling Cold Frame
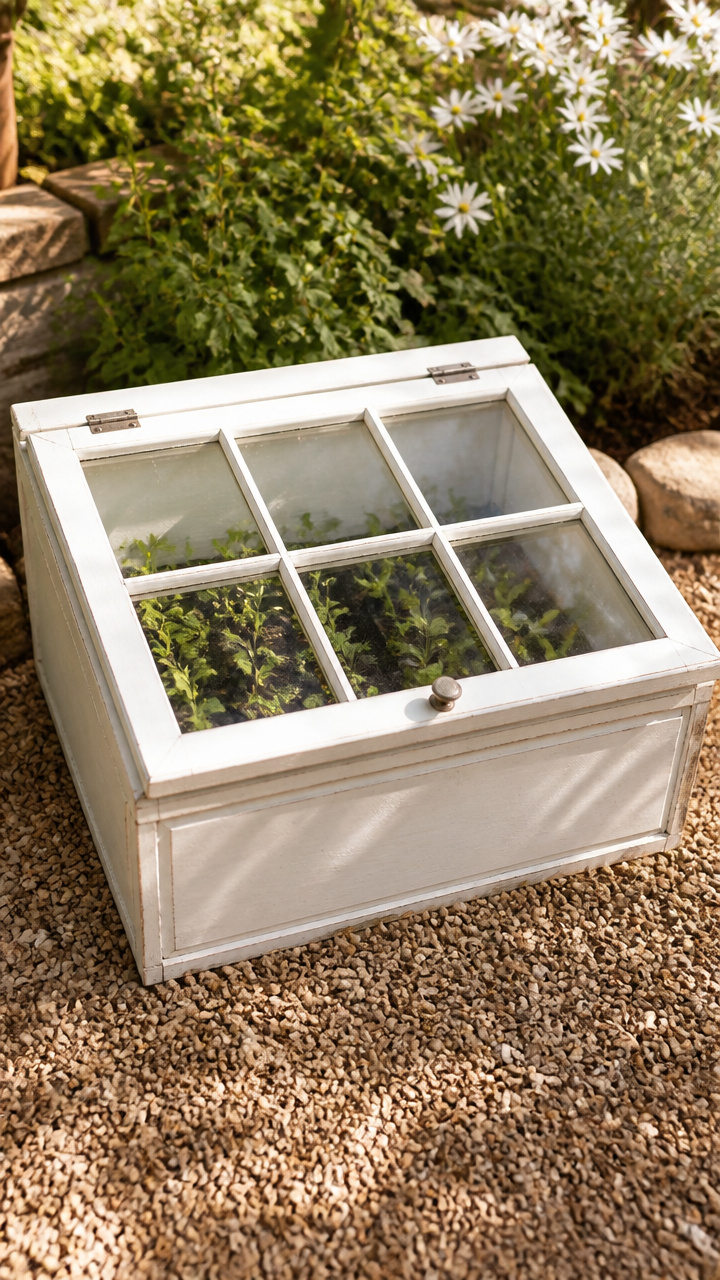
Salvaged glass cabinet doors trap solar heat efficiently, creating a snug microclimate to protect tender spring seedlings from late frosts.
Materials Needed
- 1 salvaged solid wood cabinet door with clear glass panes
- 2 cedar boards (1-inch by 8-inch by 8-foot)
- 1 box of 2-inch exterior ceramic-coated screws
- 2 heavy-duty 3-inch exterior butt hinges with screws
- 1 wooden sash pull handle
- 1 wooden dowel (1/2-inch diameter, 18 inches long, for prop stick)
- 1 hand saw or miter saw
- 1 cordless drill with bit set
How to Make It
- Measure the length and width of your glass cabinet door to determine the footprint dimensions of your bottom wooden box.
- Cut your cedar boards into four walls, making the back wall 14 inches tall and the front wall 8 inches tall, with the side walls cut at an angle to create a sloping roof.
- Screw the four cedar walls together at the corners using 2-inch exterior screws to form a sturdy, open-bottom box frame.
- Attach the glass cabinet door to the tall back wall of the cedar frame using two exterior butt hinges.
- Screw a sash pull handle onto the lower center edge of the door for easy lifting.
- Set the cold frame over a prepared garden bed facing south, using the wooden dowel to prop the glass open on sunny afternoons.
11. Glass Coffee Table Succulent Terrarium
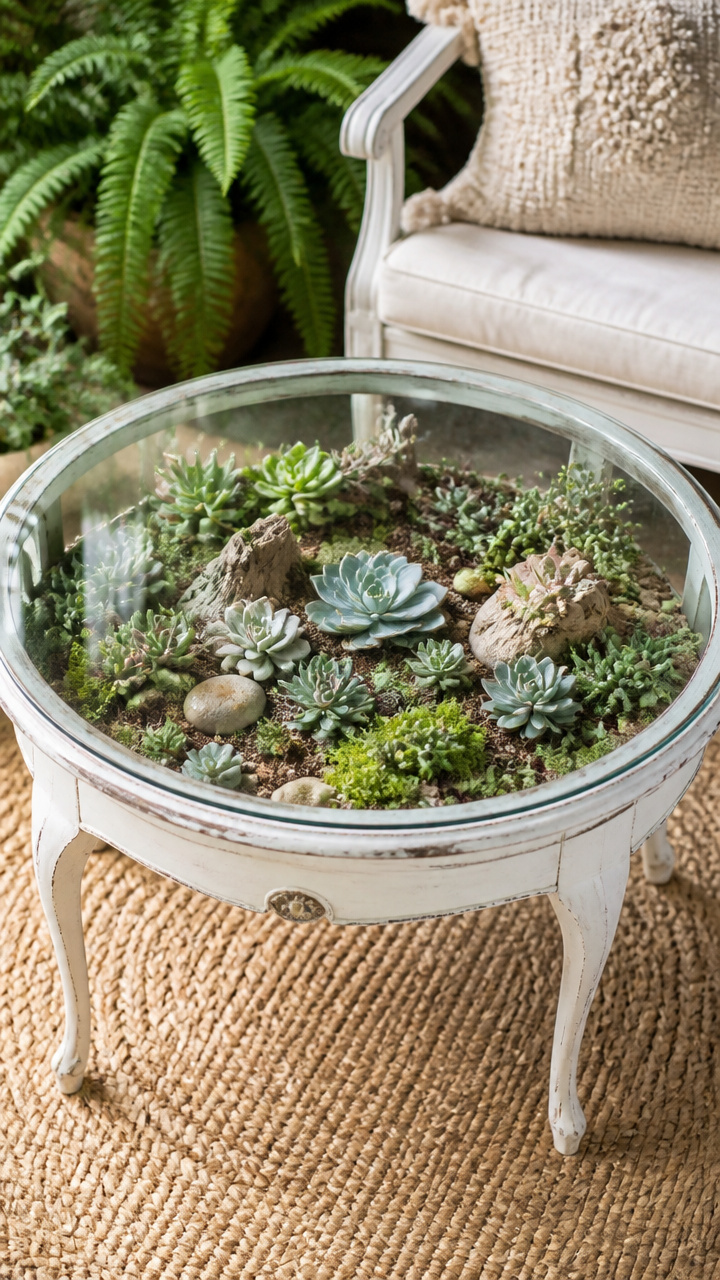
Glass-topped coffee tables with deep inset trays let you view intricate succulent arrangements from above while keeping plants sheltered.
Materials Needed
- 1 vintage wooden coffee table with a recessed top and removable glass insert
- 1 roll of 6-mil clear poly sheeting (cut to fit table recess)
- 1 small bag of horticultural charcoal (1 quart)
- 1 bag of succulent and cactus potting soil (8 quarts)
- 1 bag of decorative white pea pebbles (5 lbs)
- 8 assorted small succulents (echeveria, sedum, and jade)
- 1 staple gun with 1/4-inch staples
How to Make It
- Lift and set aside the glass top panel, then clean the interior wooden well thoroughly with a dry cloth.
- Line the inside of the recessed well with heavy poly sheeting, folding neat corners and stapling the plastic 1/2 inch below the upper glass lip.
- Spread an even 1/2-inch layer of horticultural charcoal across the bottom of the plastic liner to keep the soil fresh without drainage holes.
- Pour in 2 to 3 inches of succulent potting soil, smoothing it flat with your fingers.
- Plant the succulents in clusters, leaving 2 inches between plants, and cover the remaining soil surface with a thin layer of white pea pebbles.
- Mist the root areas lightly with water and set the glass pane back into place over the plants.
12. Armoire Garden Tool Shed
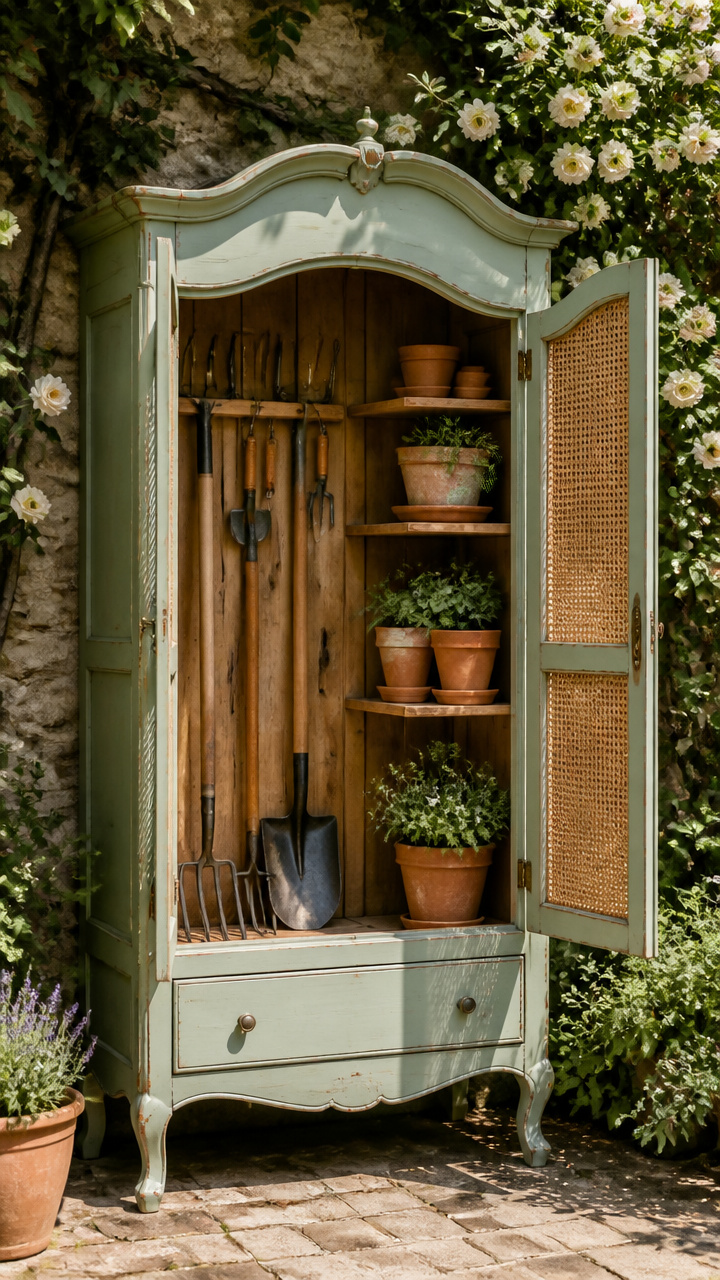
Tall wooden wardrobes offer deep, weatherproof storage that keeps rakes, pots, and soil bags organized behind closed doors.
Materials Needed
- 1 solid wood two-door armoire or wardrobe
- 1 roll of self-adhesive asphalt roll roofing (10 square feet)
- 1 box of 1-inch roofing nails
- 4 heavy-duty zinc-plated tool hanging hooks
- 1 sheet of 1/4-inch pegboard (cut to fit inside armoire back)
- 1 box of 3/4-inch wood screws
- 1 quart of exterior oil-based wood primer
- 1 quart of exterior porch and floor paint in slate gray
How to Make It
- Prime all interior and exterior surfaces of the armoire with oil-based primer, then apply two coats of durable slate gray porch paint.
- Cut the asphalt roll roofing to fit the top surface with a 2-inch overhang on all sides, then fasten it flat using roofing nails every 4 inches along the edges.
- Screw the pre-cut pegboard directly against the inside back wall of the armoire using 3/4-inch screws driven every 8 inches.
- Install heavy tool hanging hooks into the upper interior side walls to suspend long-handled tools like shovels and hoes.
- Place the armoire on four concrete paver bricks in your garden so the bottom wooden frame stays elevated away from wet dirt.
- Hang hand pruners, trowels, and seed caddies from the internal pegboard hooks and store soil bags on the lower shelf.
13. Antique Door Garden Arbor
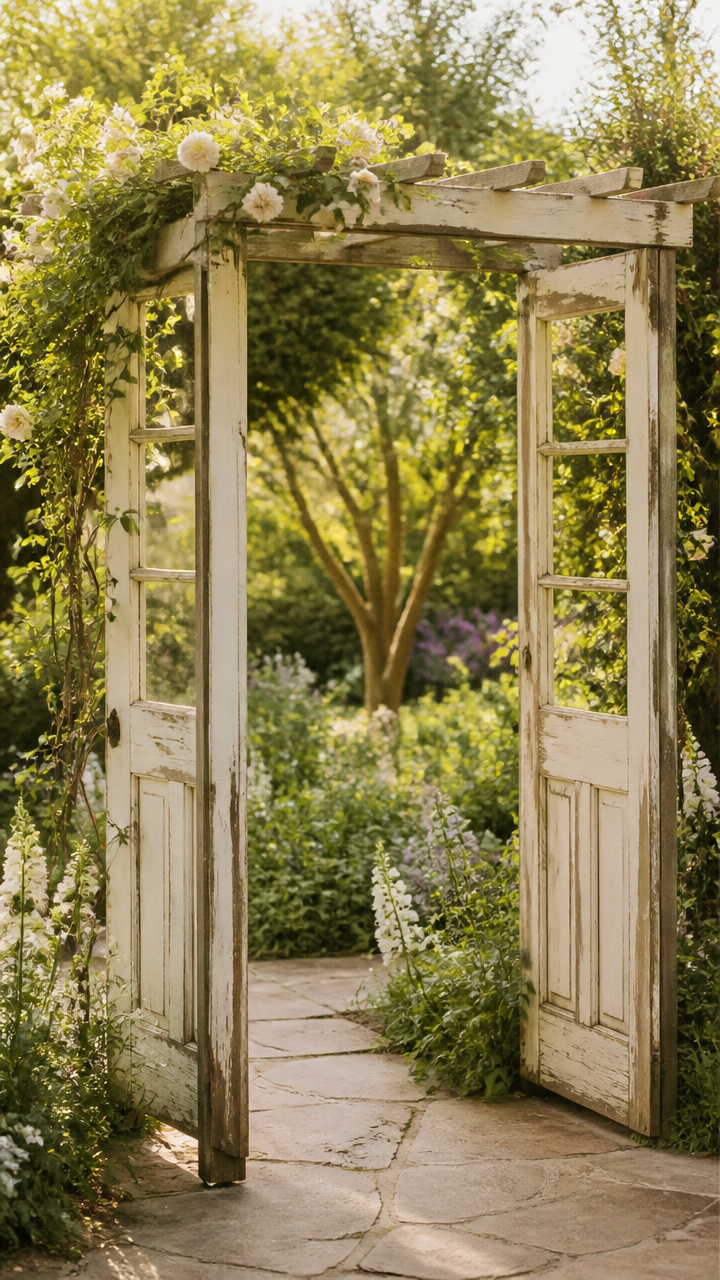
Solid paneled interior doors create an inviting entryway that defines garden rooms and supports vigorous climbing roses.
Materials Needed
- 2 matching antique solid wood five-panel doors
- 4 pressure-treated 2-inch by 4-inch by 8-foot lumber boards
- 1 box of 3-inch exterior structural screws
- 4 steel post anchors (for 4×4 or door bases) with ground spikes
- 1 sledgehammer
- 1 cordless drill with magnetic screw bit
- 1 container of exterior wood preservative (1 quart)
- 2 climbing rose bushes (such as New Dawn or Eden)
How to Make It
- Treat all surfaces and cut edges of the doors and 2×4 boards with a heavy coat of clear exterior wood preservative.
- Drive four steel ground anchors into the soil using a sledgehammer, creating a rectangular base 36 inches wide by 30 inches deep.
- Slot the bottom edge of each door into two ground anchors and secure them through the pre-drilled anchor holes with exterior screws.
- Cut your 2×4 lumber into five 42-inch crossbeams and notch the ends slightly with a hand saw for a classic pergola look.
- Lay the crossbeams across the top rails of the two upright doors, spacing them 6 inches apart, and drive two 3-inch screws through each junction point.
- Plant a climbing rose bush at the outer base of each door, weaving the main canes through the panel mouldings as they grow upward.
14. Coat Stand Hose Reel Station
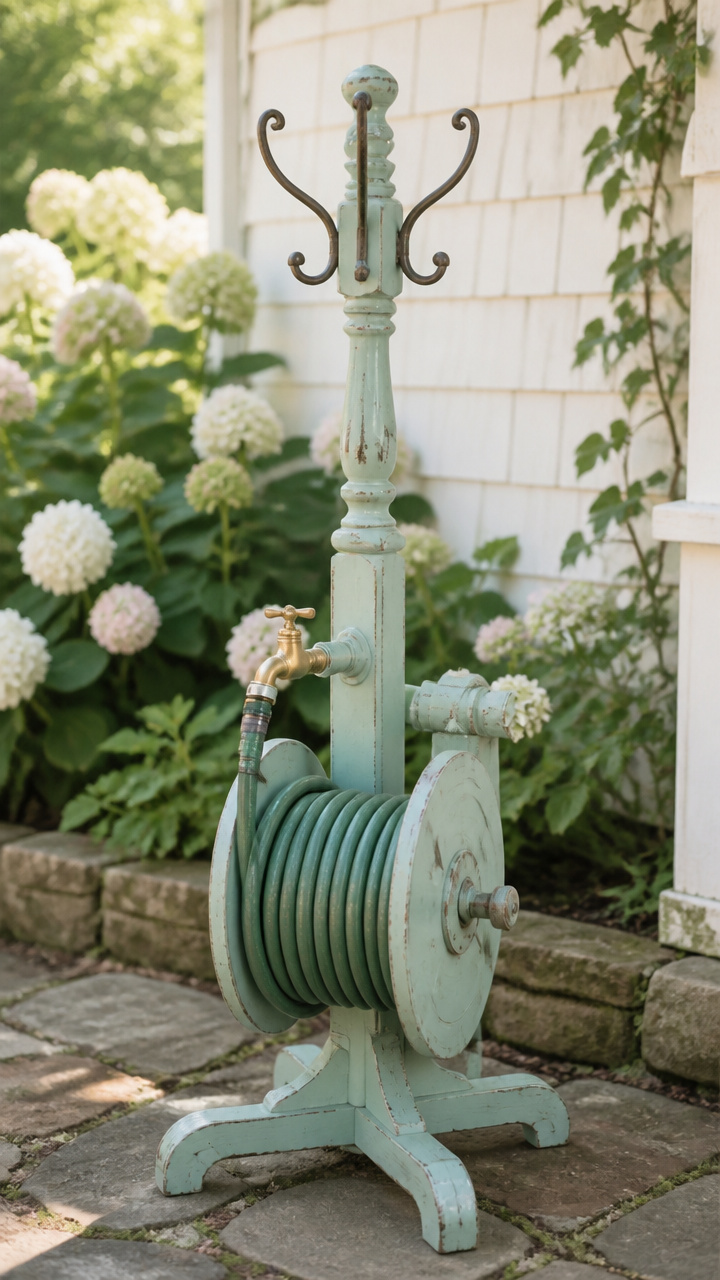
Freestanding wooden coat racks provide a tidy, upright spooling post that keeps heavy rubber garden hoses off your lawn.
Materials Needed
- 1 solid wood standing coat rack with a sturdy, heavy base
- 2 heavy-duty 8-inch galvanized boat dock cleats
- 4 stainless steel 2-inch lag screws with washers
- 1 socket wrench set
- 1 can of waterproof exterior marine varnish (1 quart)
- 1 natural bristle brush
- 1 standard 50-foot rubber garden hose
How to Make It
- Sand away any flaking varnish from the coat rack, then brush on two heavy coats of marine varnish to seal the wood against constant water spray.
- Mark two mounting locations on one side of the central post, placing the top mark 30 inches from the ground and the bottom mark 14 inches from the ground.
- Pre-drill pilot holes at both marks using a drill bit sized slightly smaller than your lag screws.
- Fasten the two galvanized dock cleats vertically into the center post using your socket wrench and the 2-inch lag screws with washers.
- Loop your 50-foot garden hose in wide figure-eight coils around the two cleats to store it smoothly without kinks.
- Use the top wooden coat pegs to hang your brass spray nozzles, quick-connect fittings, and damp garden gloves to dry.
15. Dressing Table Solar Fountain
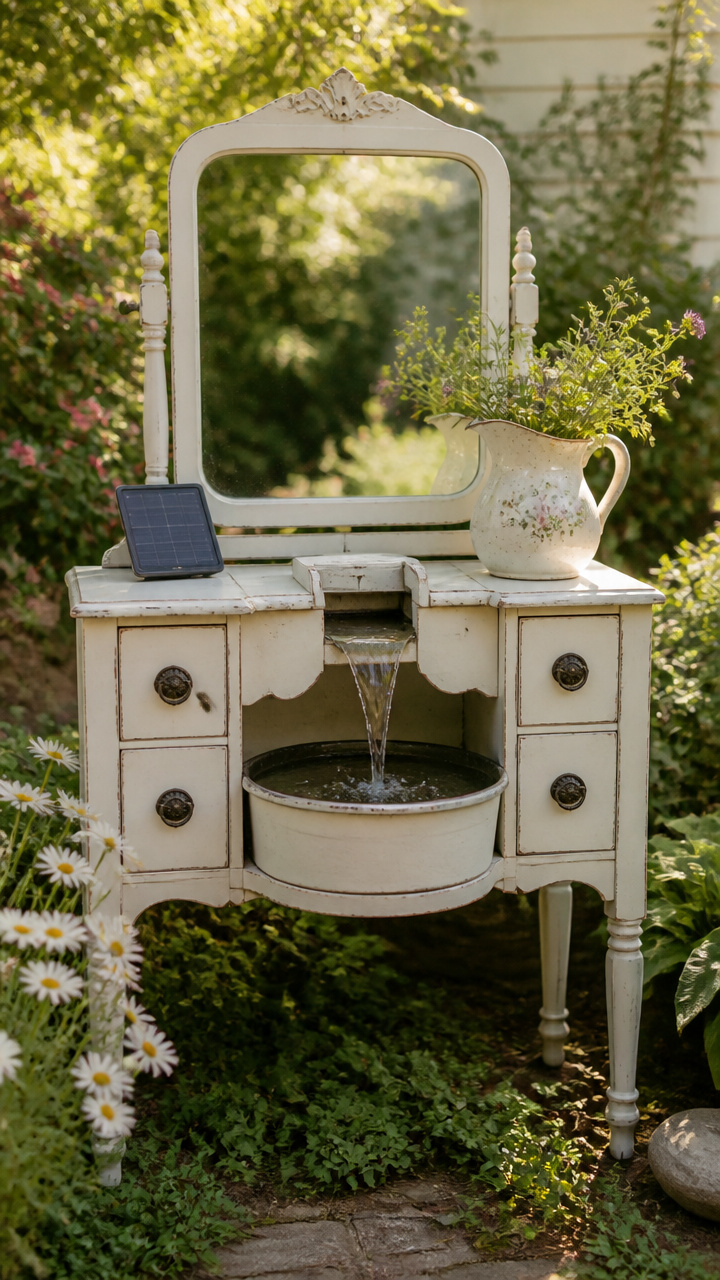
Curved dressing tables fitted with an enameled wash basin create a soothing, trickling water feature that attracts butterflies.
Materials Needed
- 1 vintage wooden vanity or dressing table (mirror removed)
- 1 large vintage enamelware wash basin (14 to 16 inches diameter)
- 1 small submersible solar fountain pump kit with nozzle heads
- 1 jigsaw with fine-cut wood blade
- 1 tube of clear waterproof silicone caulk
- 1 quart of exterior satin paint in duck egg blue
- 1 medium paintbrush
- 1 bag of decorative river pebbles (5 lbs)
How to Make It
- Paint the entire dressing table body, drawers, and turned legs with two coats of duck egg blue exterior paint, letting it dry for 24 hours.
- Trace the bottom base circumference of your enamel basin onto the center of the vanity tabletop.
- Cut out the marked circle using your jigsaw so the basin drops down securely into the hole while resting on its flared upper rim.
- Run a generous bead of silicone caulk beneath the rim of the basin, press it firmly into the cutout opening, and wipe away squeeze-out with a damp rag.
- Spread a layer of clean river pebbles across the bottom of the basin to weight down the small solar pump and hide its wiring.
- Fill the basin with 2 gallons of fresh water, position the floating solar pump in the center under direct sunlight, and enjoy the trickling fountain spray.
Repurposing vintage furniture is one of the most rewarding ways to bring timeless personality and cozy comfort to your backyard. Gather your tools, scout out a forgotten piece from your garage or local flea market, and start crafting your own one-of-a-kind garden retreat today.