15 Solar Light Garden Crafts to Illuminate Your Outdoor Space

As dusk settles over your garden, soft points of glowing light create an inviting atmosphere for evening relaxation. Solar lights give you cordless freedom to illuminate flowerbeds, seating areas, and pathways without worrying about extension cords or electric bills.
Custom outdoor lighting lets you bring personal style to standard store-bought fixtures. Building your own garden fixtures lets you repurpose everyday items and turn functional solar cells into charming focal points.
1. Glass Gem Wire Chandelier
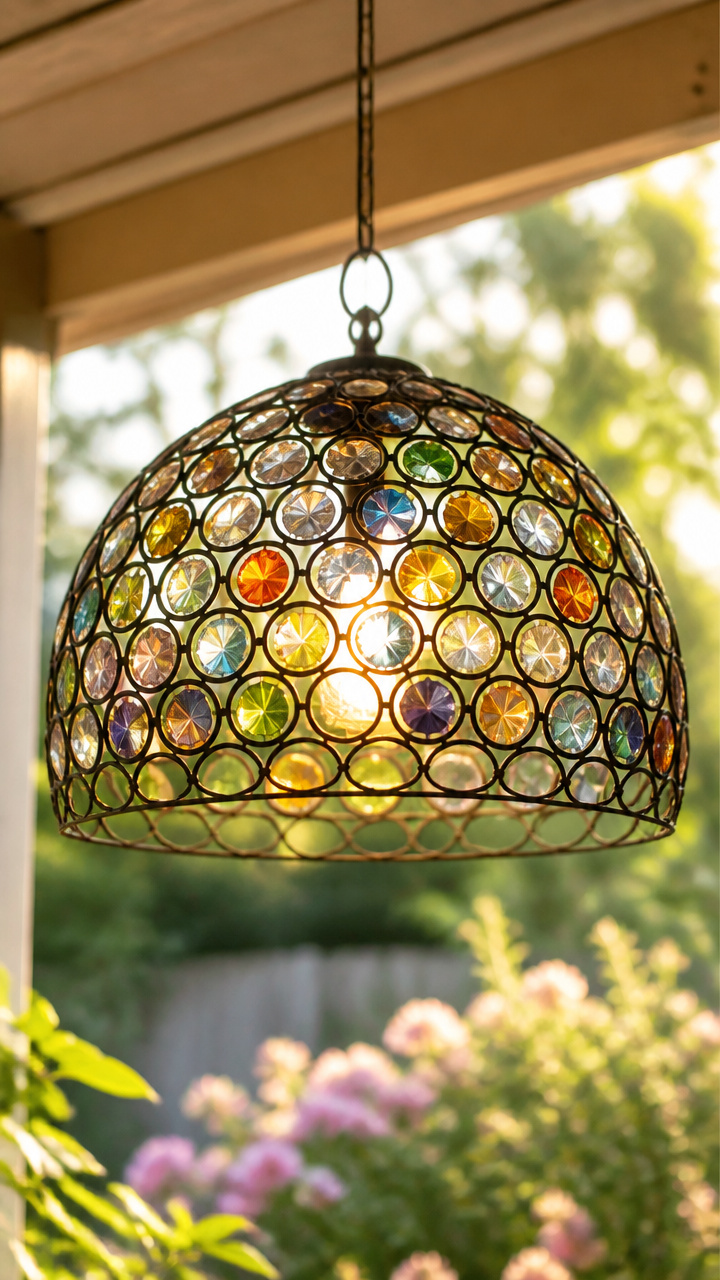
Sparkling glass stones catch the fading evening sun before casting a gentle downward glow over your patio table. This hanging fixture turns basic hardware into an eye-catching outdoor centerpiece.
Materials Needed
- 1 10-inch wire hanging planter basket
- 3 12-ounce bags clear flat-backed glass floral gems
- 1 2-ounce tube E6000 outdoor craft adhesive
- 1 round solar puck light (4-inch diameter)
- 1 heavy-duty metal S-hook
How to Make It
- Wipe down the metal wire basket with rubbing alcohol to remove any grease or dust from the metal surface.
- Apply a pea-sized dab of E6000 adhesive to the flat back of each glass gem, then press the gem firmly against the outer wire ribs.
- Work in horizontal rings from the bottom of the basket up to the top rim, letting each row set for 15 minutes before starting the next.
- Center the solar puck light face-up inside the bottom basket ring, securing its perimeter with a continuous bead of adhesive.
- Hang the basket from your patio pergola or tree branch using the S-hook in full sunlight for 24 hours before turning on the power switch.
2. Terracotta Clay Pot Lighthouse
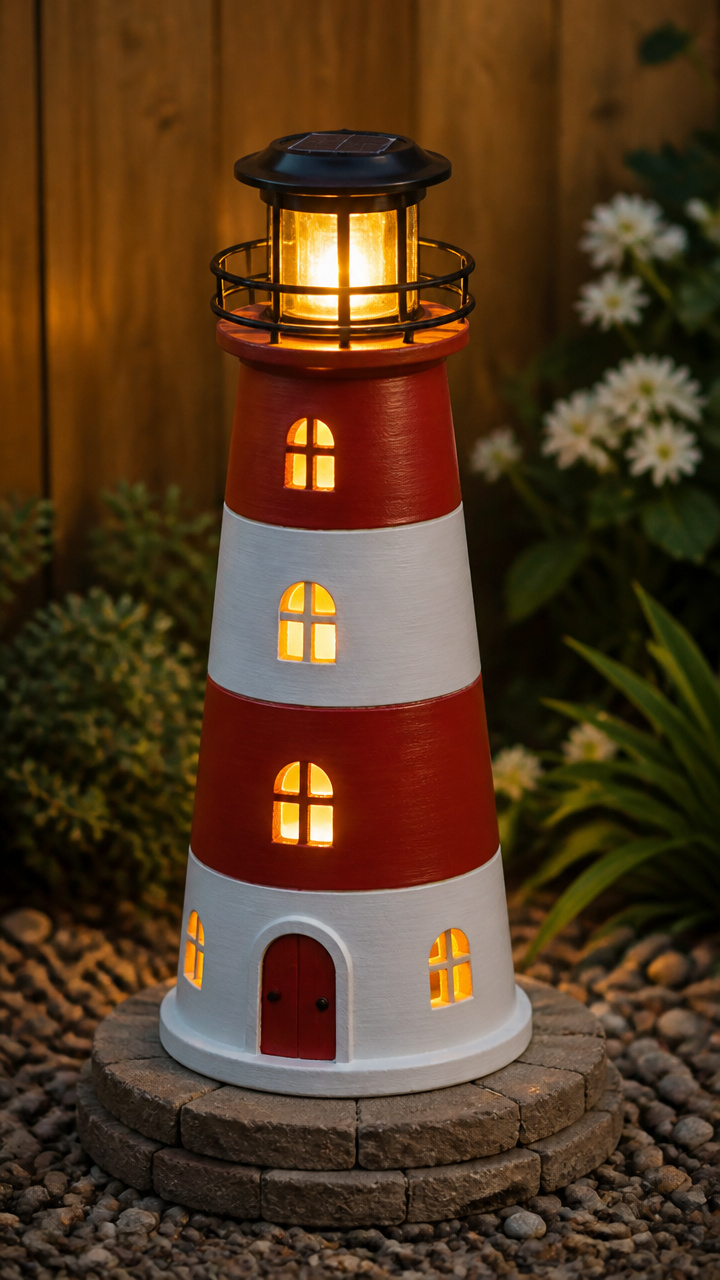
Classic garden pottery stacks together to form a sturdy seaside-inspired tower that shines across your garden beds at night. You get a durable lawn sculpture that withstands rain and wind.
Materials Needed
- 3 standard terracotta pots (8-inch, 6-inch, and 4-inch)
- 1 4-inch terracotta saucer
- 1 2-ounce bottle white outdoor patio acrylic paint
- 1 2-ounce bottle navy blue outdoor patio acrylic paint
- 1 1-inch foam paintbrush
- 1 standard solar pathway stake light
- 1 3-ounce tube clear silicone sealant
How to Make It
- Paint the exterior of all three terracotta pots with two coats of white outdoor paint, allowing one hour of drying time between coats.
- Add navy blue horizontal stripes and small rectangular window outlines along the pot sides using a narrow brush.
- Run a thick bead of silicone sealant along the top rim of the largest pot, then set the medium pot upside down directly on top of it.
- Repeat the adhesive step to attach the smallest pot upside down on top of the medium pot, forming a tapered tower.
- Glue the terracotta saucer right-side up on the top pot, remove the stake from your solar light, and glue the solar light unit directly into the center of the saucer.
3. Frosted Sea Glass Mason Jar
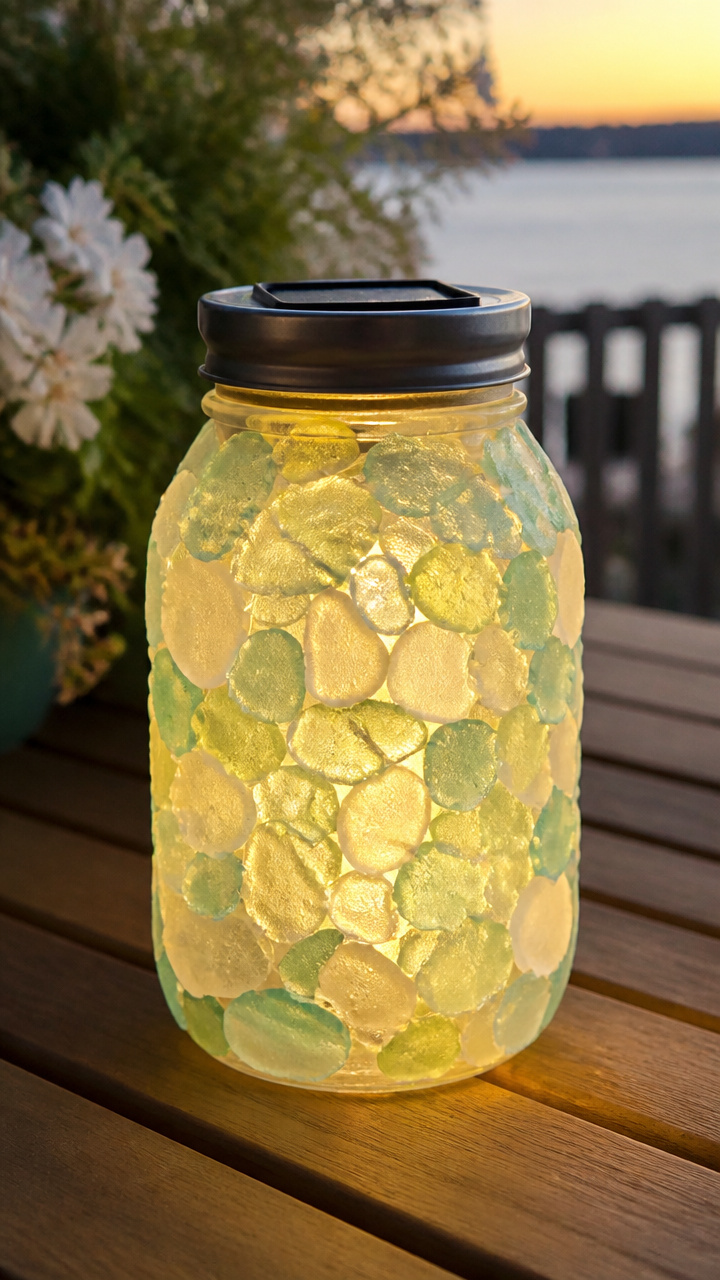
Coastal tones soften bright solar LEDs into a dreamy, ocean-inspired glow that suits any porch railing or outdoor picnic table. The frosted finish diffuses the harsh glare of raw diodes.
Materials Needed
- 1 32-ounce smooth glass mason jar
- 1 11-ounce can semi-translucent frosted glass spray paint
- 1 4-ounce jar Mod Podge Outdoor formula
- 1 cup crushed tumbled sea glass pieces (aqua and cobalt)
- 1 solar mason jar lid insert with LED string attached
- 1 small craft sponge
How to Make It
- Spray the outside of the clean mason jar with two light coats of frosted glass spray, holding the can 10 inches away.
- Dab outdoor Mod Podge around the bottom third of the jar using a craft sponge while the frost layer cures.
- Press sea glass pieces directly into the wet glue in a tight mosaic pattern, holding each piece for five seconds until tacky.
- Brush a second protective layer of outdoor Mod Podge over the sea glass to seal it against rain and humidity.
- Unpack the solar lid insert, switch the battery mechanism to active mode, and screw the lid ring firmly onto the jar mouth.
4. Driftwood Branch Wall Sconce
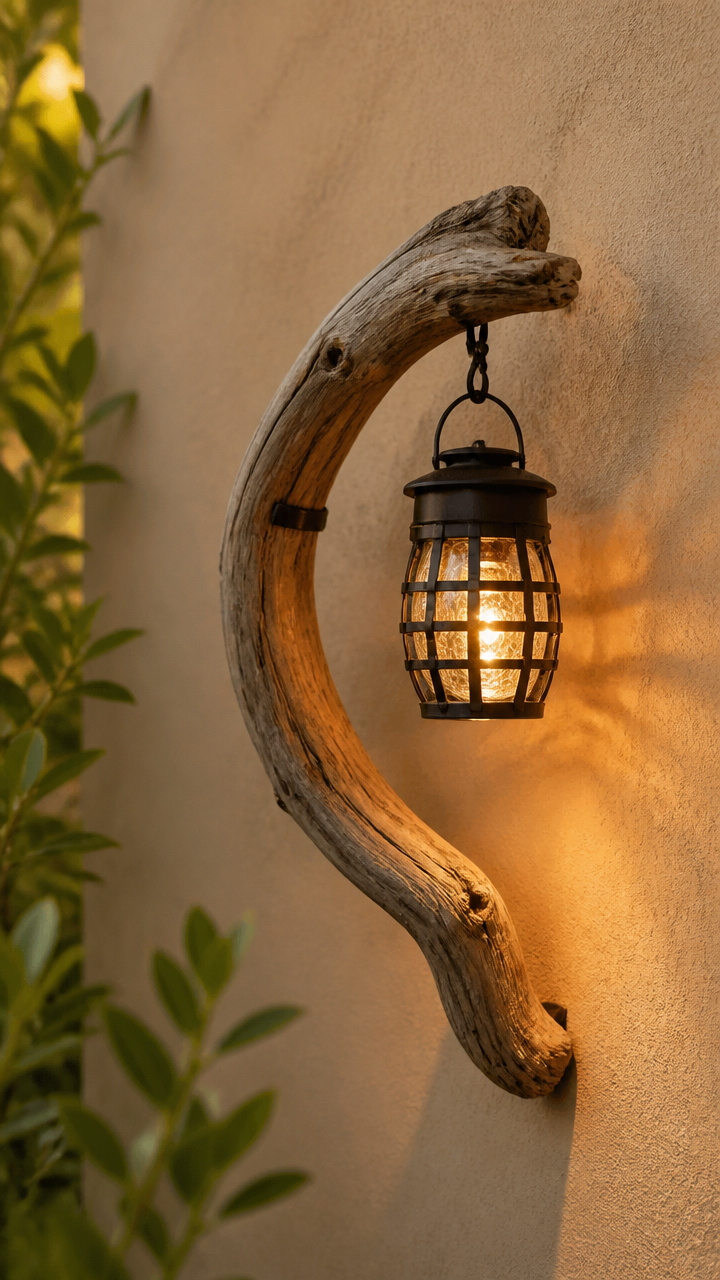
Weathered beach wood mounted on a fence post turns a hanging solar lantern into rustic natural wall art. It adds dimensional interest to flat wooden fences without hardwiring.
Materials Needed
- 1 piece of curved driftwood (18 to 24 inches long)
- 2 1-inch copper pipe two-hole straps
- 4 1.5-inch stainless steel wood screws
- 1 hanging metal solar lantern with handle
- 3 feet natural jute twine (3mm thickness)
- 1 cordless drill with driver bit
How to Make It
- Drill two pilot holes through the flattest section of the driftwood where it will rest against your garden fence or wall.
- Fasten the driftwood securely to your vertical surface using the copper pipe straps and stainless steel screws.
- Wrap jute twine tightly around the naturally protruding branch tip five times, knotting it securely on the underside.
- Loop the remaining twine through the top handle of your solar lantern and knot it tightly at your desired hanging height.
- Trim excess rope ends with scissors, making sure the top solar panel on the lantern faces unobstructed sky.
5. Vintage Colander Table Lantern
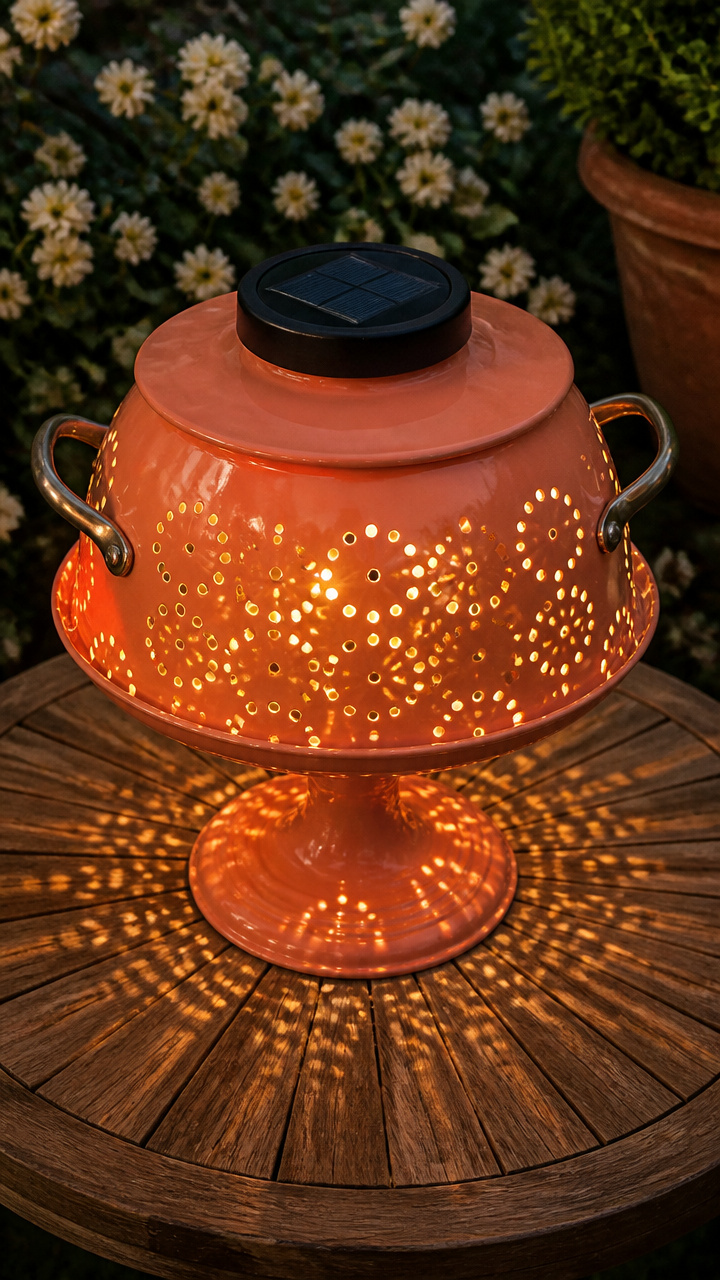
Tiny perforated holes across vintage kitchenware scatter bright, starry points of light across your outdoor dining table. The wide metal base provides stability against strong evening gusts.
Materials Needed
- 1 vintage metal footed colander with handles
- 1 12-ounce can satin outdoor spray paint (coral or mint)
- 1 round solar disc ground light (4.5-inch diameter)
- 1 sheet 220-grit sandpaper
- 1 clean microfiber cloth
How to Make It
- Lightly sand the entire outer surface of the metal colander to remove surface oxidation and ensure paint adhesion.
- Wipe away sanding dust with a microfiber cloth and apply two thin coats of outdoor spray paint inside and out.
- Turn the dry colander upside down on a flat surface so the pedestal foot faces upward.
- Press the solar disc light into the recessed circular foot of the colander with its solar cell facing upward.
- Position the finished piece in the center of your patio table where it receives direct daylight for evening illumination.
6. Concrete Stepping Stone Beacon
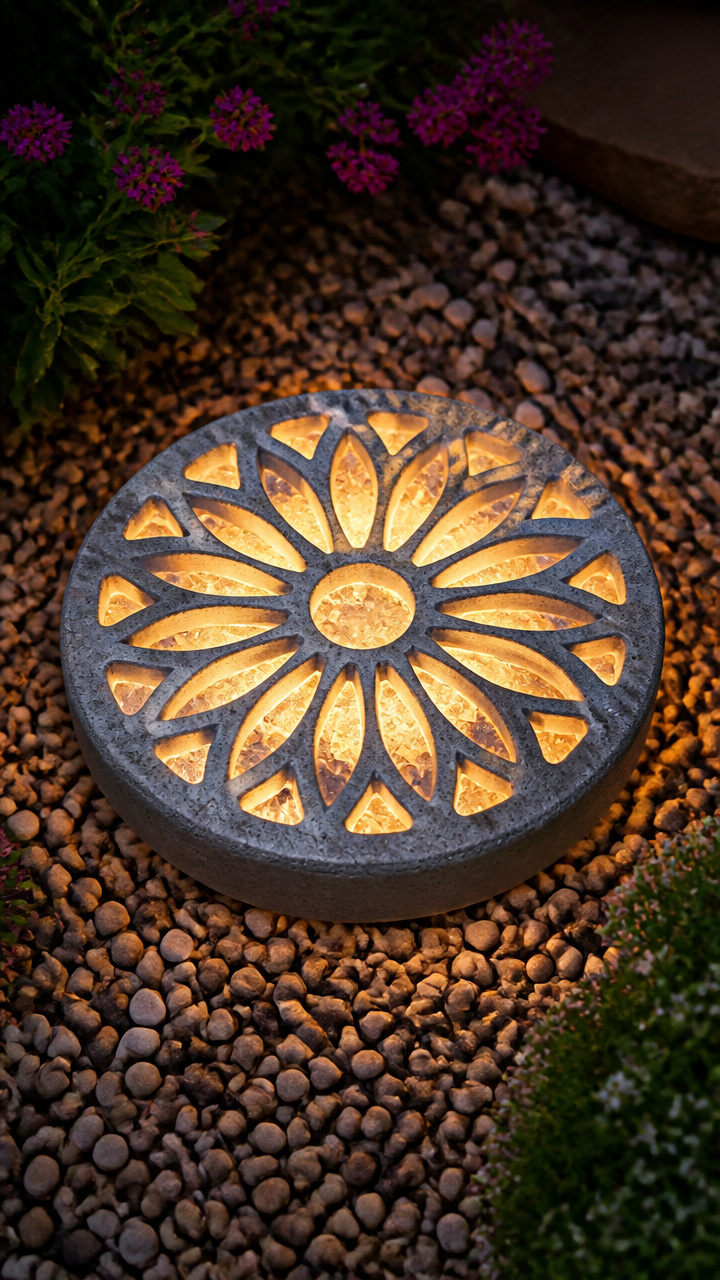
Heavyweight cast concrete embedded with a flush solar paver creates a seamless, modern pathway marker that handles all weather. You achieve a clean, architectural finish along garden walkways.
Materials Needed
- 1 10-pound bag quick-setting concrete mix
- 1 square silicone baking mold (9×9 inches)
- 1 square solar glass brick paver light (4×4 inches)
- 1 5-gallon mixing bucket
- 1 steel margin trowel
- 1 can non-stick cooking spray
How to Make It
- Coat the interior of the silicone mold lightly with cooking spray to act as an effective mold release agent.
- Mix the quick-setting concrete with water in your bucket until it reaches the consistency of thick oatmeal.
- Pour the concrete into the silicone mold until it fills two-thirds of the mold depth, tapping the sides to release air bubbles.
- Center the solar glass brick paver face-up into the wet concrete, pressing down until the top glass sits flush with the concrete surface.
- Smooth the concrete borders around the paver with your trowel and allow the slab to cure for 48 hours before demolding.
7. Beaded Globe Plant Stake
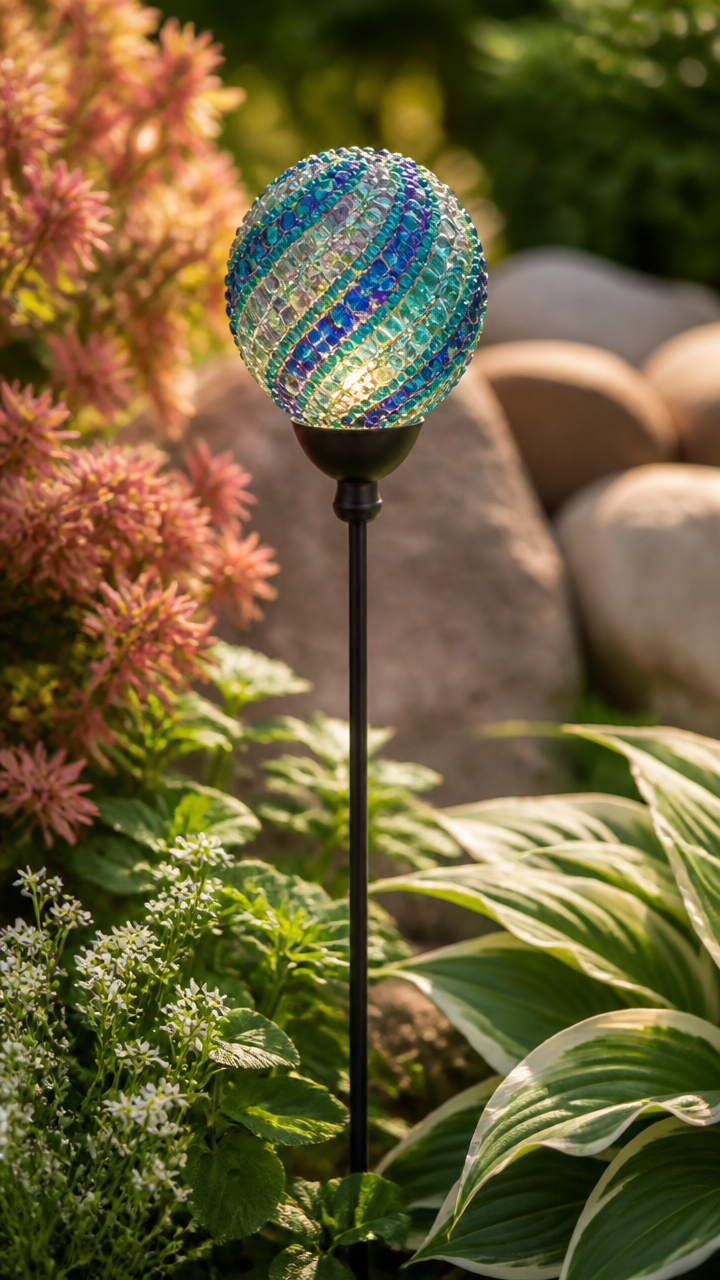
Translucent floral marbles wrapped around a sphere glow like vibrant illuminated fruit tucked among leafy green shrubs. It introduces rich color to shaded garden corners during the day and night.
Materials Needed
- 1 4-inch clear plastic fillable craft ornament globe
- 50 flat-backed purple glass marbles
- 1 2-ounce tube clear silicone craft adhesive
- 1 standard solar pathway stake light
- 1 10-foot roll 20-gauge copper craft wire
How to Make It
- Glue the two halves of the plastic craft globe together along the seam using a thin line of silicone adhesive.
- Glue purple glass marbles across the entire outer surface of the plastic sphere, keeping the marbles touching tightly.
- Disassemble the pathway light by removing its clear lower lens, keeping the top solar cap and LED stem intact.
- Cut a one-inch opening in the bottom of the beaded globe using a craft knife and slide the LED stem inside.
- Wrap copper wire tightly around the connection point to lock the solar head securely onto the globe base before pushing the stake into the soil.
8. Upcycled Wine Bottle Torches
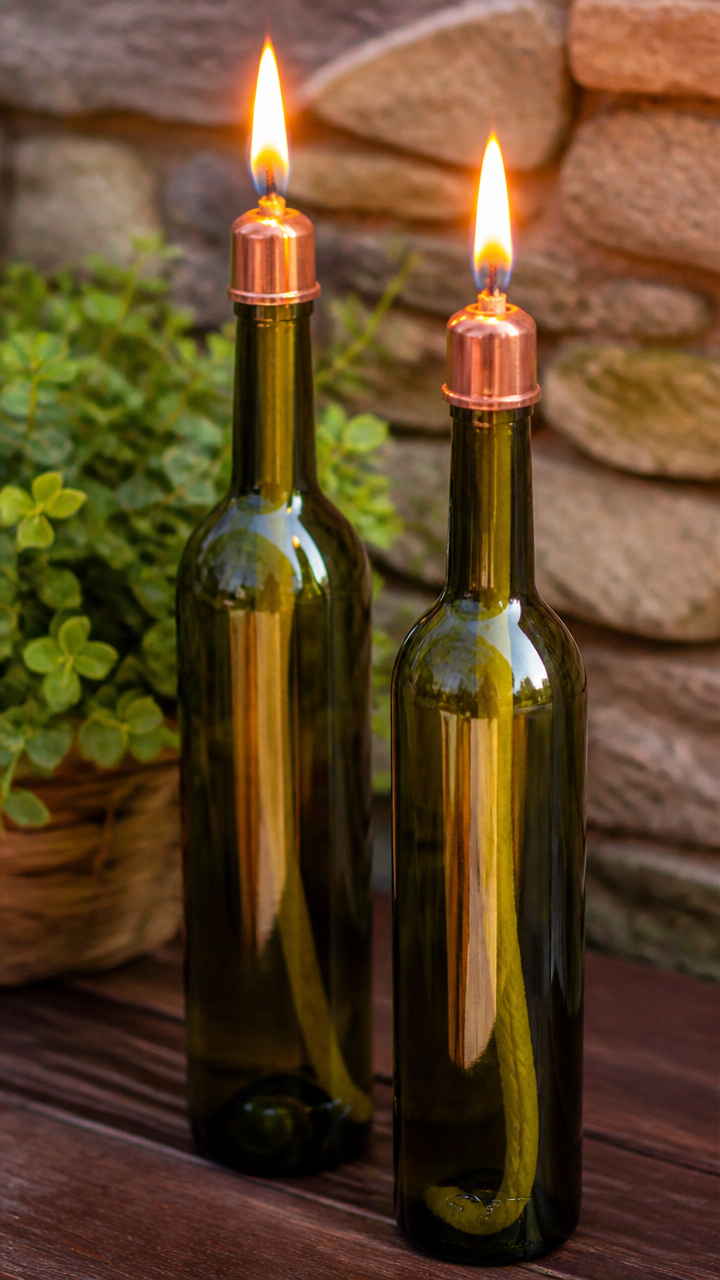
Colored glass bottles mounted to fence posts offer a clean, modern alternative to messy fuel-burning garden torches. The deep green glass casts a rich, emerald-tinted light.
Materials Needed
- 2 empty 750ml dark green wine bottles
- 2 solar-powered cork micro-LED wire lights
- 2 top-mount split ring pipe hangers (1-inch size)
- 2 3-inch threaded rod connectors
- 4 1.5-inch exterior mounting screws
How to Make It
- Wash the wine bottles thoroughly with hot soapy water, peel away all labels, and let the interiors dry completely.
- Uncoil the solar cork wire lights and feed the tiny LED copper strands down inside the neck of each bottle.
- Press the cork solar cap snugly into the bottle opening with the small panel facing toward the sky.
- Screw the pipe hanger brackets into your wooden fence posts at your chosen mounting height using a drill.
- Clamp the neck of each wine bottle inside the split ring bracket, tightening the side bolts until the bottle sits firmly vertical.
9. Tin Can Constellation Lantern
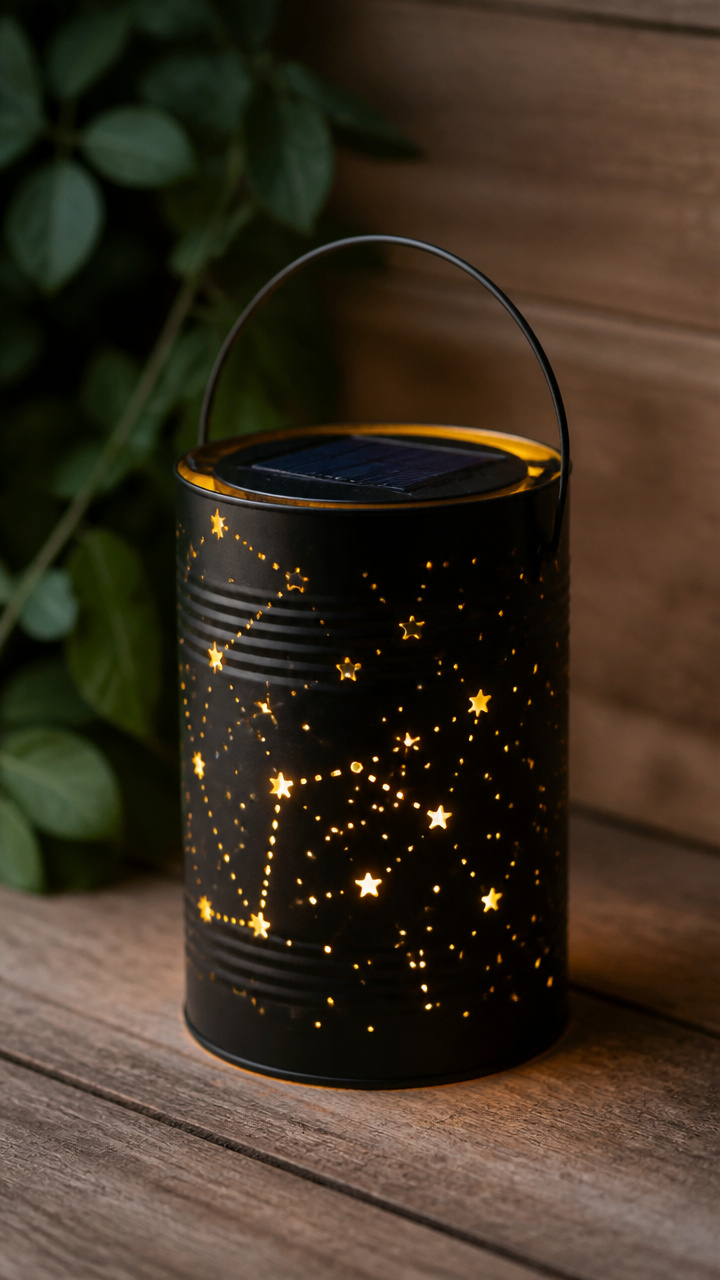
Perforated steel cans cast glowing star charts onto nearby walls and stone patios when dusk falls. This budget-friendly craft turns discarded pantry staples into charming lighting.
Materials Needed
- 2 clean 28-ounce steel food cans with labels removed
- 1 standard claw hammer
- 1 2-inch steel framing nail
- 1 printed star map paper template
- 1 roll masking tape
- 1 12-ounce can flat black rust-preventative spray paint
- 2 round solar post cap lights
How to Make It
- Fill the steel cans with water and freeze them solid overnight to prevent the metal walls from denting when hammered.
- Tape your printed star pattern template tightly around the exterior of each frozen can using masking tape.
- Tap the nail with your hammer through each marked dot on the paper template, piercing clean holes through the can wall.
- Melt the interior ice under warm tap water, dry the cans thoroughly, and spray them with two coats of black rust paint.
- Rest a solar post cap light directly on top of the open can rim, sealing the seam with outdoor silicone glue.


10. Faux Stained Glass Lantern
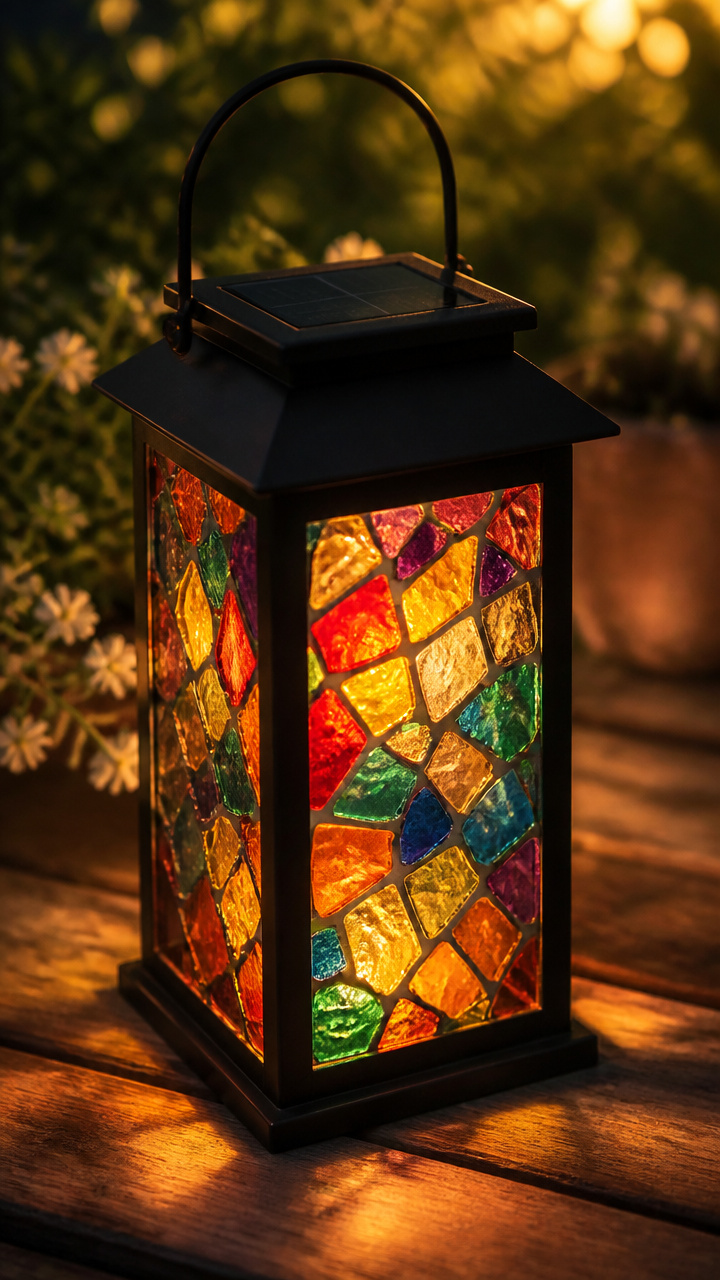
Brilliant jewel tones mimic centuries-old cathedral glass while directing warm, color-tinted solar light across patio floorboards. The raised black outlines give the glass an authentic leaded appearance.
Materials Needed
- 1 clear straight-sided glass cylinder vase (8 inches tall)
- 1 2-ounce bottle black liquid leading paint
- 3 2-ounce bottles peelable glass gallery paint (ruby, amber, sapphire)
- 1 solar deck post cap (4×4 inch base)
- 1 sheet patterned tracing paper
How to Make It
- Slide the patterned paper template inside the glass cylinder and tape it in place to guide your design lines.
- Trace the design onto the outside of the glass cylinder using the black liquid leading bottle, keeping lines uniform and unbroken.
- Allow the black leading outlines to dry completely for eight hours until the raised lines feel firm and rubbery.
- Fill the open spaces between black lines with thick pools of amber, sapphire, and ruby glass paints using the nozzle tip.
- Let the colored paint cure for 24 hours until translucent, then place the solar post cap securely over the open top rim.
11. Macrame Hanging Plant Pod
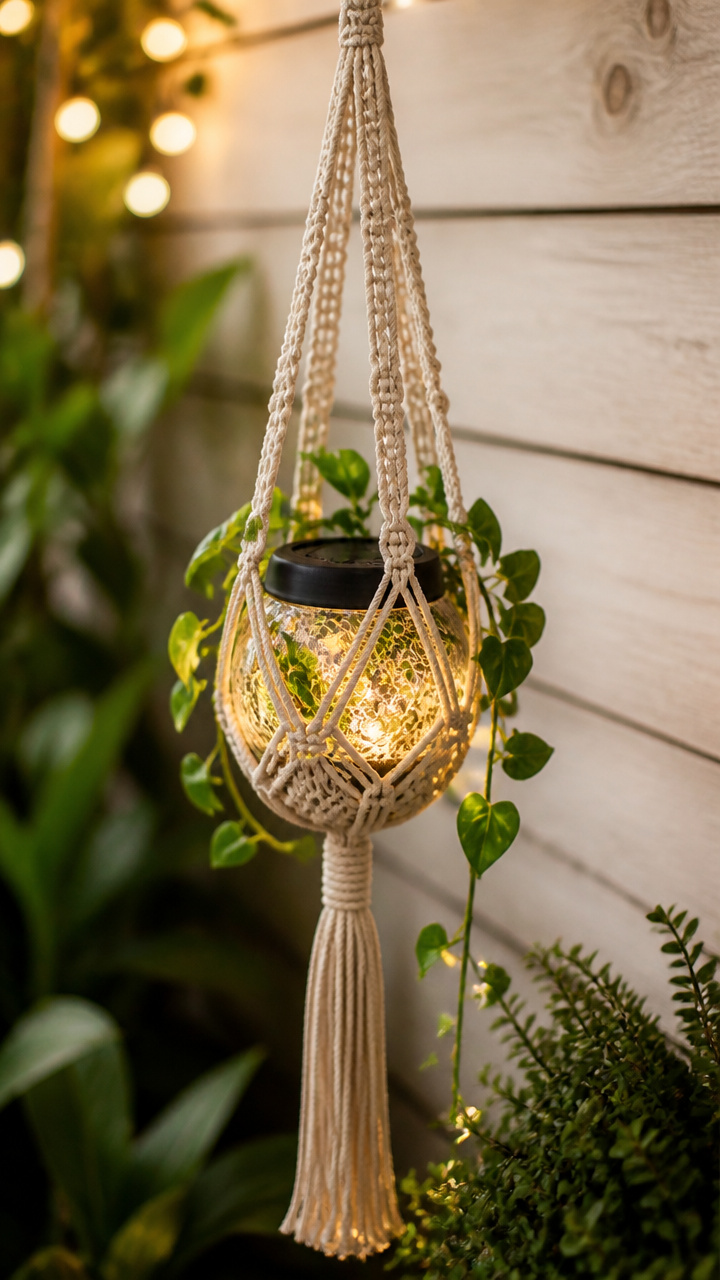
Knotted natural cotton cord suspends a soft glowing orb beneath tree branches or covered porch beams for a relaxed bohemian touch. The textured knots cast soft geometric shadows.
Materials Needed
- 60 yards 4mm natural cotton macrame cord
- 1 2-inch unfinished solid wooden ring
- 1 6-inch round glass terrarium orb with top loop
- 1 waterproof solar LED tealight
- 1 pair heavy-duty craft scissors
How to Make It
- Cut eight 7-yard lengths of macrame cord, fold them in half, and loop them through the wooden ring using lark's head knots.
- Tie four square knots directly beneath the wooden ring to anchor the cords into four working pairs.
- Continue knotting alternating square knots down the cords every three inches to create an open diamond net basket pattern.
- Gather all cords together five inches below the last diamond row and tie a thick gathering knot to form the base pouch.
- Place the solar tealight inside the glass orb, slide the orb into the macrame net, and hang the unit by the wooden ring in a sunny spot.
12. Wire Whisk Garden Stake
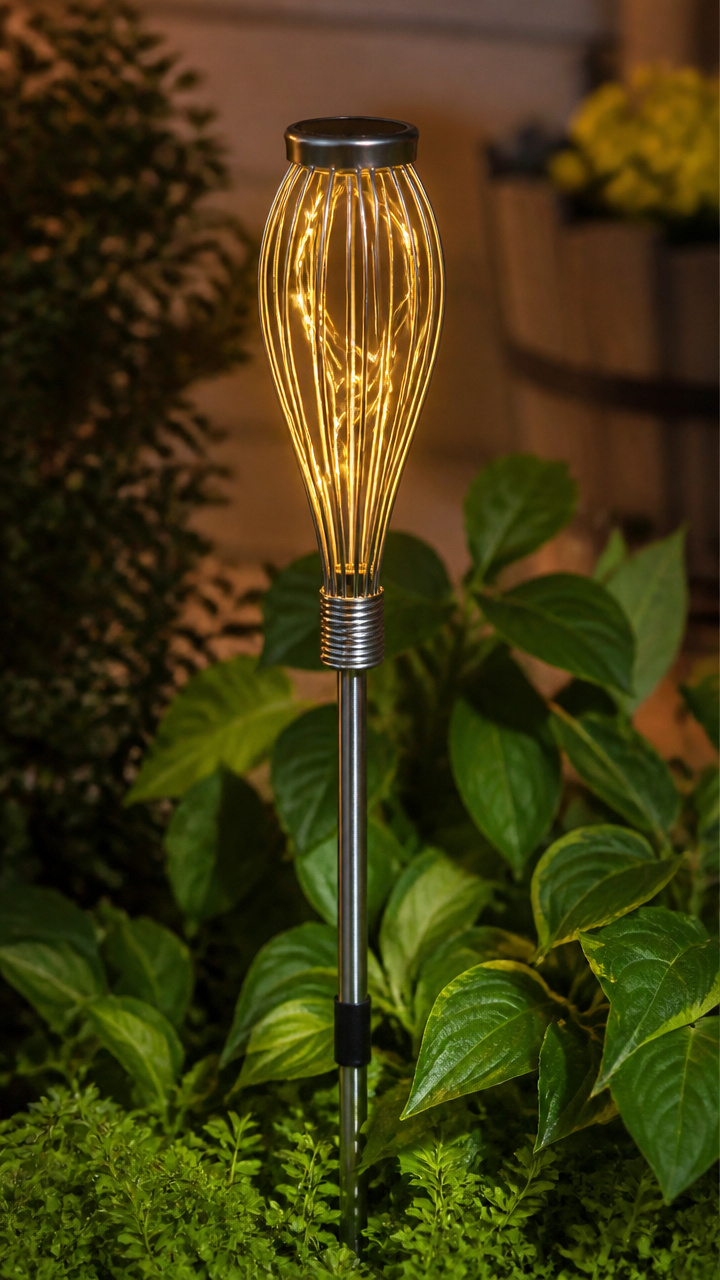
Repurposed kitchen tools hold colorful reflective marbles around a warm solar glow, creating an unexpected sculptural accent in tall perennial beds. It adds a quirky, reflective element at flower height.
Materials Needed
- 1 12-inch stainless steel kitchen balloon whisk
- 15 assorted clear and cobalt blue glass floral marbles
- 1 solar micro-wire stake light (with 20 LEDs)
- 1 36-inch sturdy bamboo garden stake
- 1 10-foot roll 22-gauge green floral wire
How to Make It
- Gently bend apart the flexible wire loops of the kitchen whisk just wide enough to insert the glass marbles inside.
- Weave the thin copper wire string of the solar light around the marbles inside the whisk cage, keeping the solar stake component free outside.
- Press the whisk wires back into their rounded shape to lock the marbles and micro lights firmly inside the basket.
- Lash the metal handle of the whisk to the top five inches of the bamboo garden stake using tight wraps of floral wire.
- Push the bamboo stake 8 inches deep into your garden soil, angling the attached solar stake panel toward the sun.
13. Mosaic Birdbath Night Fountain
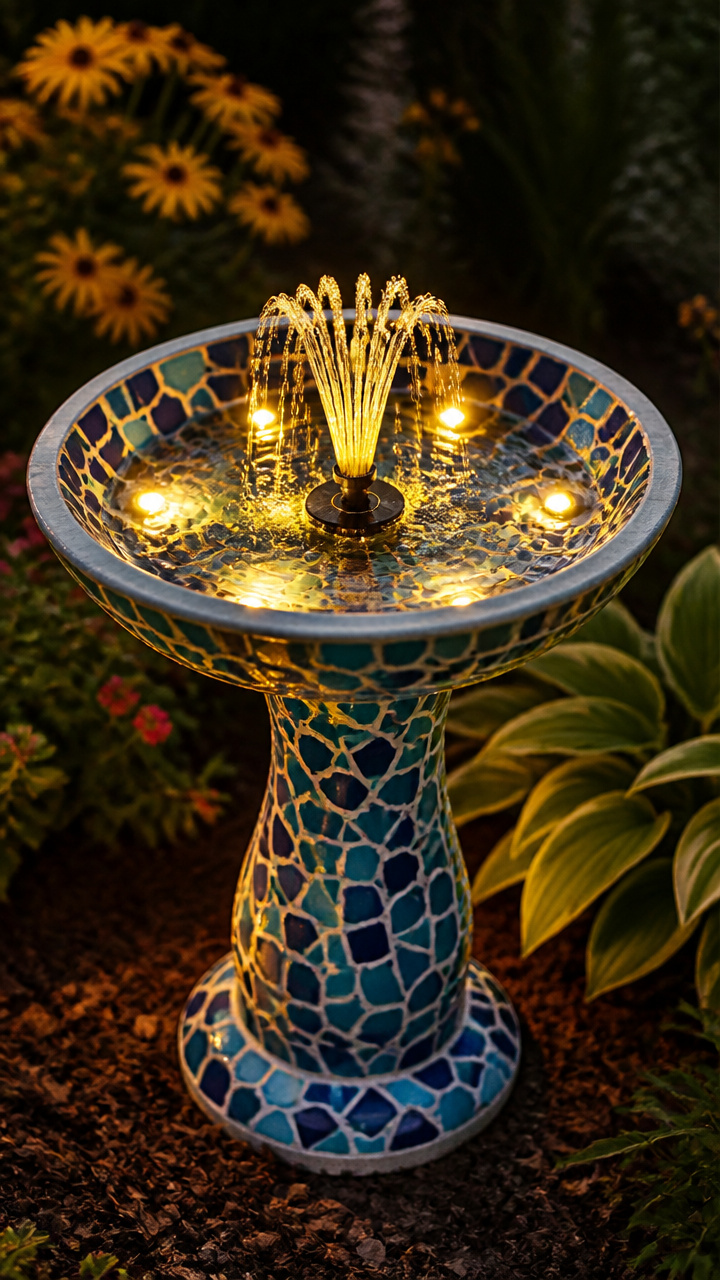
Shimmering broken ceramic pieces line a shallow water basin to catch the dancing reflections of a floating solar centerpiece. It doubles as a daytime bird watering station and an evening water feature.
Materials Needed
- 1 shallow concrete or resin birdbath bowl
- 1 2-pound bag mixed glazed ceramic mosaic tiles
- 1 1-quart tub premixed waterproof tile adhesive
- 1 1-quart container sanded waterproof grout (charcoal color)
- 1 floating solar fountain disc with integrated LED lights
- 1 rubber grout float
How to Make It
- Spread a 1/8-inch layer of waterproof tile adhesive across the clean, dry interior basin of the birdbath bowl with a trowel.
- Arrange ceramic mosaic tiles in concentric circles over the adhesive bed, leaving 1/8-inch gaps between tiles for grout.
- Allow the adhesive to cure for 24 hours, then spread sanded grout firmly across the tiles with the rubber grout float.
- Wipe the tile faces clean with a damp sponge after 30 minutes, buffing away remaining haze once dry.
- Fill the tiled basin with fresh water and place the floating solar fountain disc directly in the center to charge and spray.
14. Copper Pipe Pathway Guide
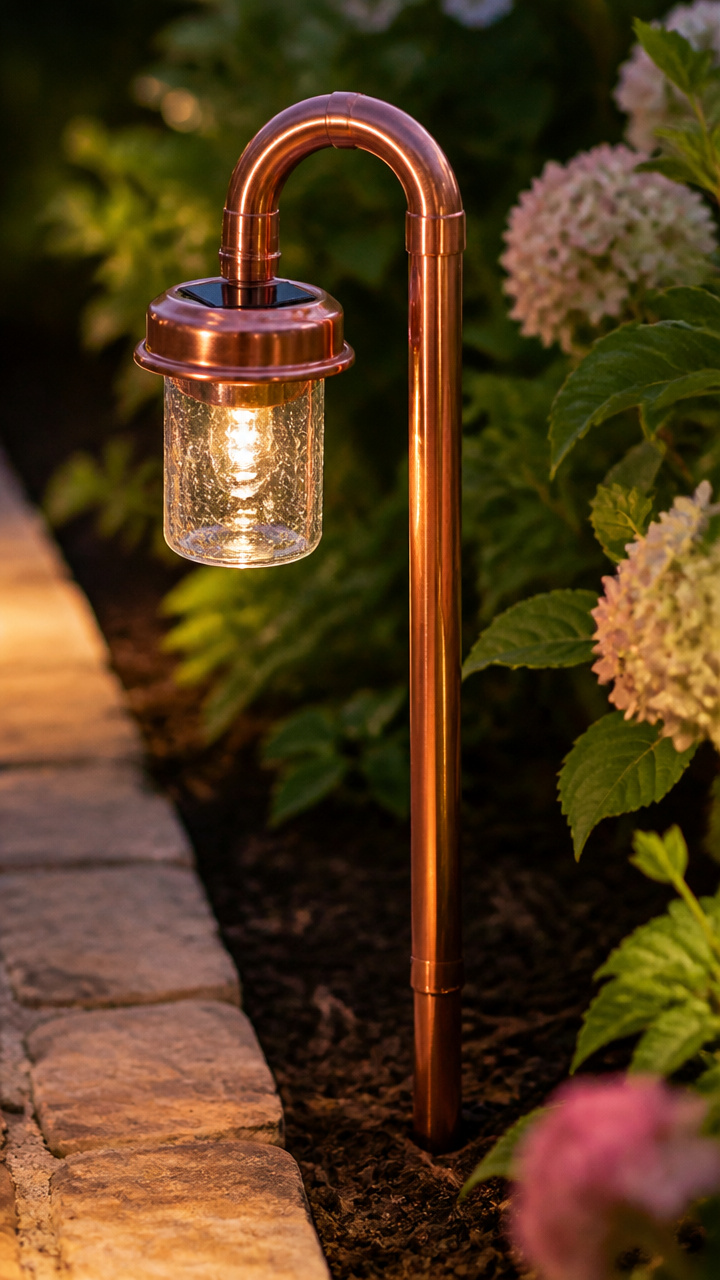
Industrial plumbing pipes polish up into gleaming metallic path markers that develop a beautiful weathered patina over time. They elevate standard plastic stake lights with clean, polished metal lines.
Materials Needed
- 3 24-inch lengths of 1/2-inch rigid copper pipe
- 3 1/2-inch copper tee fittings
- 3 standard solar pathway stake lights with detachable heads
- 1 1-ounce tube quick-cure metal epoxy
- 1 sheet fine grade 0000 steel wool
How to Make It
- Buff the outer surface of each copper pipe with fine steel wool to remove manufacturing stamps and reveal a bright copper shine.
- Push a copper tee fitting onto one end of each copper pipe, securing the connection with a drop of metal epoxy.
- Detach the solar light head assemblies from their original plastic ground stakes and wipe the base connectors clean.
- Apply metal epoxy inside the top vertical opening of each copper tee and press the solar light head into place.
- Drive the bottom ends of the copper pipes 6 inches deep into the soil alongside your pathway, spacing them four feet apart.
15. Woven Willow Twig Sphere

Intertwined natural willow branches house a round glowing core that looks like a fallen moon resting among your garden mulch. The organic wood texture blends seamlessly into landscaped beds.
Materials Needed
- 20 flexible fresh willow branches (4 feet long)
- 1 6-inch round solar globe stake light
- 1 20-foot roll green paddle florist wire
- 1 pair bypass garden pruners
How to Make It
- Bend two willow branches into circles of identical diameter and wire them together at right angles to create a spherical frame.
- Weave additional willow twigs around the frame horizontally and diagonally, tucking branch ends under existing loops to secure them.
- Remove the ground spike from the solar globe light so only the round illuminated sphere and top solar panel remain.
- Slide the solar globe light through a slightly wider gap in the branch weave until it sits securely in the center of the sphere.
- Place the finished woven sphere in a sunny perennial border where daylight can pass through the twigs to charge the globe.
Gather your favorite materials and select a sunny spot in your yard to begin your next project. Building custom outdoor lighting brings lasting charm and practical brightness to every corner of your landscape. Step outside, enjoy the crafting process, and watch your garden glow tonight.