15 Upcycled Garden Crafts to Repurpose Old Tin Cans and Jars

Empty pasta sauce jars and soup cans pile up in recycling bins every week. Giving these everyday containers a second life outdoors saves money, reduces household waste, and adds handmade character to your yard.
Metal and glass hold up remarkably well against outdoor elements when prepared with basic protective steps. You can build functional tools, pollinator habitats, and ambient lighting using simple supplies you already have at home.
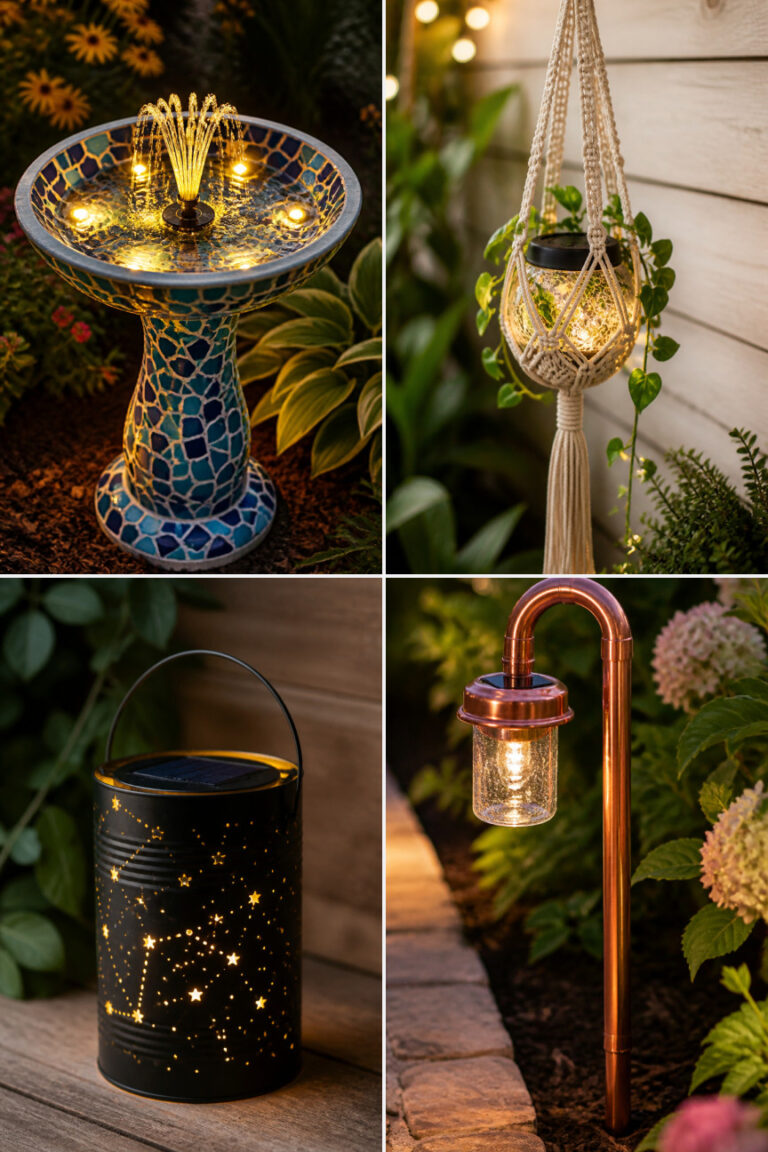
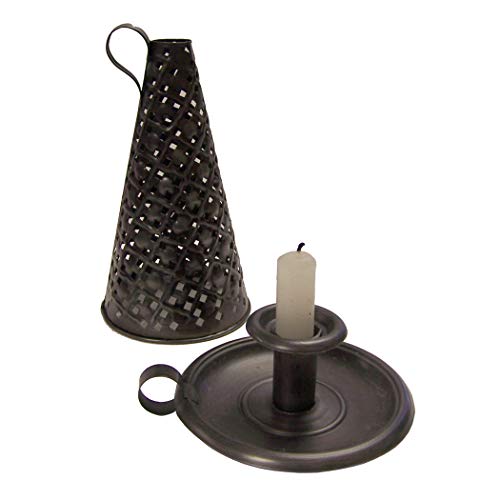
1. Punched Tin Can Lantern

Glowing patterned light filters through perforated metal to brighten dark garden pathways and patios. You only need a hammer and nail to create intricate pierced designs.
Materials Needed
- 1 clean 15-ounce soup can
- Water for freezing
- 1 sturdy 2-inch finishing nail
- 1 claw hammer
- 12 inches of 16-gauge galvanized steel wire
- 1 standard tea light candle
- 1 hand towel
How to Make It
- Fill the clean tin can to the brim with tap water and place it in your freezer overnight until solid ice forms inside to prevent the metal from denting under hammer strikes.
- Lay the frozen can horizontally on a folded hand towel to keep it steady while you work.
- Position your nail against the metal surface and tap firmly with the hammer to punch holes in your chosen geometric pattern across the sides.
- Punch two opposite holes near the top rim of the can to create anchor points for your wire handle.
- Let the ice melt completely, dry the interior thoroughly, and thread the steel wire through the top holes, bending the ends upward with pliers to secure the hanger.
- Place a tea light candle at the bottom of the can and light it for an evening glow along your patio border.


2. Hanging Glass Herb Planter

Fresh culinary herbs grow neatly at eye level when suspended in clear glass containers near your outdoor kitchen. Natural jute rope provides sturdy support while keeping the root system visible so you can monitor moisture levels.
Materials Needed
- 1 16-ounce wide-mouth mason jar
- 24 feet of 3-ply natural jute twine
- 1/2 cup of horticultural pea gravel
- 1 cup of moisture-control potting soil
- 1 small sweet basil seedling
- Scissors
How to Make It
- Cut eight equal lengths of jute twine, each measuring 36 inches long, and tie them together in a single overhand knot at one end, leaving a 2-inch decorative tassel.
- Spread the cords into four pairs on a flat table and tie adjacent pairs together using simple overhand knots 1.5 inches above the base knot.
- Continue tying alternating pairs together at 1.5-inch intervals to create an open diamond netting basket.
- Slide the glass jar into the center of the netting and gather all eight cords at the top, tying them securely into a hanging loop 10 inches above the rim.
- Pour the pea gravel into the base of the jar to create a 1-inch drainage reservoir for excess moisture.
- Add potting soil, plant your basil seedling gently around the roots, and water lightly before hanging in partial sun.
3. Solitary Bee Nesting Hotel

Native mason bees and leafcutter bees thrive in dry, tubular nesting cavities sheltered from wind and heavy rain. Solid metal housing shields delicate nesting tubes from woodpeckers and moisture throughout the season.
Materials Needed
- 1 clean 28-ounce crushed tomato can
- 45 hollow bamboo reeds cut to 5-inch lengths (diameters between 4mm and 8mm)
- 1 tube of waterproof silicone adhesive
- 18 inches of natural sisal rope
- 1 sheet of 120-grit sandpaper
How to Make It
- Sand the interior and exterior rim of the tin can to smooth away any sharp metal burrs left by the can opener.
- Apply a 1/2-inch layer of waterproof silicone adhesive across the interior base of the tin can.
- Bundle the cut bamboo reeds tightly together with their smooth, open ends facing outward toward the front.
- Push the bamboo bundle firmly into the can until the closed rear nodes press securely into the adhesive layer at the bottom.
- Pack extra individual bamboo stems into any remaining gaps so the reeds fit snugly and cannot shift or slide out.
- Wrap sisal rope securely around the can cylinder and mount it horizontally against a south-facing garden post at least four feet off the ground.
4. Frosted Solar Path Marker

Soft diffuse illumination marks walkway borders without the need for exterior wiring or trenching. Frosted glass disperses bright solar LED beams into a warm ambient glow across your flower beds.
Materials Needed
- 1 smooth-sided 32-ounce glass pickle jar
- 1 can of semi-translucent frosted glass spray paint
- 1 solar mason jar lid insert with LED string
- 1 wooden garden stake (18 inches long)
- 2 adjustable 3.5-inch metal hose clamps
- 1 flathead screwdriver
How to Make It
- Wipe the glass jar clean with rubbing alcohol to remove oils and allow it to air-dry completely.
- Spray the exterior of the jar with two light coats of frosted glass spray paint, waiting 10 minutes between applications.
- Screw the solar lid insert tightly onto the mouth of the jar, ensuring the rubber waterproof gasket sits flush against the rim.
- Position the painted jar against the top flat section of the wooden garden stake.
- Fasten the two metal hose clamps around both the stake and the jar body, tightening the screws firmly with a flathead screwdriver.
- Drive the wooden stake 6 inches into the soil along your garden path where the solar panel receives direct daytime sunlight.
5. Mosaic Tile Plant Saucer Stand

Colorful glass tesserae turn shallow fish cans into durable, decorative footings for ceramic flowerpots. Sturdy grout protects the underlying metal from rust while raising potted plants to prevent deck water stains.
Materials Needed
- 1 clean 5-ounce tuna can
- 1 bag of mixed 1/2-inch vitreous glass tiles
- 2 ounces of waterproof tile mastic adhesive
- 4 ounces of pre-mixed sanded acrylic grout
- 1 rubber grout float
- 1 damp cellulose sponge
How to Make It
- Spread a 1/8-inch layer of tile mastic over the bottom and outer sides of the clean tuna can using a small craft stick.
- Press individual glass tiles into the mastic in your desired color pattern, leaving 1/16-inch gaps between tiles for grout lines.
- Allow the adhesive to cure undisturbed for 24 hours until the tiles feel completely solid and immovable.
- Spread sanded grout across the tiled surface with a rubber float, pressing the paste firmly into all crevices between tiles.
- Wipe away excess grout using a damp sponge after 20 minutes, rinsing the sponge frequently until the tile faces are clear.
- Let the grout dry for 48 hours before placing your ceramic plant pots on top of the finished stand.
6. Herbal Citronella Garden Candle

Natural soy wax infused with pure citronella and fresh garden sprigs repels mosquitoes while creating warm patio ambiance. Glass containers shield the flame from light evening breezes.
Materials Needed
- 1 12-ounce straight-sided glass jam jar
- 8 ounces of soy wax flakes
- 1 pre-tabbed 6-inch braided cotton wick
- 15 drops of pure citronella essential oil
- 2 fresh sprigs of rosemary
- 1 wooden wick centering stick
- 1 hot glue gun
How to Make It
- Glue the metal base of the cotton wick to the center bottom of the jar with hot glue, then stabilize the wick upright with a centering stick across the rim.
- Melt the soy wax flakes in a heat-safe pouring pitcher placed inside a simmering water bath until the wax turns clear and reaches 160 degrees Fahrenheit.
- Remove the wax from heat, stir in 15 drops of citronella essential oil, and let it cool slightly to 140 degrees Fahrenheit.
- Press fresh rosemary sprigs against the inside walls of the glass jar where they will stay trapped as the wax sets.
- Pour the melted wax slowly into the jar, leaving a 1/2-inch space below the rim.
- Trim the wick to 1/4 inch above the wax surface once the candle cures to a solid white finish after 24 hours.
7. Stamped Metal Lid Plant Markers

Permanent, weatherproof plant identification tags withstand heavy rain, ultraviolet rays, and sprinkler spray without fading. Crisp stamped lettering provides a clean vintage look throughout your vegetable rows.
Materials Needed
- 6 flat metal canning jar lids
- 1 36-piece 1/8-inch steel letter and number punch set
- 1 steel bench block
- 1 ball-peen hammer
- 1 1/16-inch metal hole punch tool
- 6 12-inch copper plant stakes (10-gauge wire)
How to Make It
- Lay one flat metal canning lid onto the steel bench block with the bare silver side facing upward.
- Hold your chosen letter punch perpendicular against the metal and strike the top firmly once with the ball-peen hammer to stamp each letter of your plant name.
- Punch a small 1/16-inch hole near the top edge of the stamped metal disc using the metal hole punch tool.
- Bend the top 2 inches of a copper wire stake into an open hook shape using needle-nose pliers.
- Slide the stamped lid onto the copper hook and pinch the loop closed to lock the tag in place.
- Push the copper stake 4 inches into the soil directly next to your corresponding garden crop.
8. Tiered Succulent Tower

Vertical planting tiers maximize limited porch space by stacking graduated food containers into an upright succulent display. Central hardware locks the structure securely so it stays steady in windy conditions.
Materials Needed
- 3 clean tin cans (28-ounce, 15-ounce, and 8-ounce sizes)
- 1 12-inch length of 1/4-inch threaded steel rod
- 6 1/4-inch steel nuts
- 6 1/4-inch steel washers
- 1 power drill with 5/16-inch metal drill bit
- 2 cups of gritty succulent potting soil
- 5 small sempervivum or echeveria plants
How to Make It
- Drill a 5/16-inch hole directly through the bottom center of all three clean tin cans, plus four smaller 1/8-inch drainage holes around each base.
- Thread a nut and washer 2 inches from the bottom of the threaded rod, slide the largest can onto the rod, and secure it with another washer and nut underneath.
- Position the middle can 4 inches above the base can using a nut and washer beneath it, then tighten a top nut inside to anchor it in place.
- Mount the smallest can at the top of the rod following the exact same nut and washer setup.
- Fill each tiered level with gritty succulent potting mix, firming the soil around the central metal rod.
- Plant small rosette succulents into each tier and moisten the soil lightly with a spray mister.
9. Glass Butterfly Nectar Feeder

Pollinators flock to bright colors and easily accessible nectar sources during hot summer afternoons. Clear glass allows you to check nectar levels instantly so feeding stations never run dry.
Materials Needed
- 1 small 8-ounce glass jelly jar with metal lid
- 1 bright yellow kitchen sponge
- 1/4 cup of granulated white cane sugar
- 1 cup of boiling water
- 1 claw hammer and 1 1/4-inch nail
- 18 inches of macrame twine
How to Make It
- Punch a clean 1/4-inch hole through the center of the metal jar lid using a hammer and nail over a scrap block of wood.
- Dissolve the white cane sugar into the boiling water, then allow the mixture to cool completely to room temperature.
- Cut a 1-inch thick strip of yellow sponge and pull it halfway through the hole in the lid, leaving a 1/2-inch tuft exposed outside.
- Pour the cooled sugar nectar into the glass jar and screw the modified sponge lid on tightly.
- Invert the jar so the sponge absorbs the liquid nectar, creating a steady wick without dripping.
- Tie macrame twine around the neck of the inverted jar and hang it from a shady tree branch near your flower beds.
10. Sisal-Wrapped Bird Feeding Station

Wild songbirds easily grip natural cordage while feeding on seeds from an open-sided feeder. Sturdy metal construction protects bird food from squirrels and wet conditions.
Materials Needed
- 1 15-ounce soup can open at both ends
- 50 feet of 1/4-inch natural sisal rope
- 1 6-inch wooden dowel (3/8-inch diameter)
- 1 hot glue gun with glue sticks
- 1 cup of black oil sunflower seeds
- 24 inches of heavy jute cord
How to Make It
- Glue one end of the sisal rope to the outside rim of the metal can and wrap the rope tightly around the cylinder, applying hot glue every two turns until fully covered.
- Apply hot glue to the bottom interior of the can and press the wooden dowel across the lower ledge so that 3 inches extends out one side as a landing perch.
- Cut a circular piece of stiff cardboard to fit inside the can halfway back, creating a solid rear backing wall, and glue it firmly in place.
- Wrap heavy jute cord around the center of the cylinder, tying a secure double knot at the top to form a 12-inch suspension loop.
- Hang the feeder horizontally from a sturdy tree branch or shepherd hook.
- Fill the bottom trough of the cylinder with black oil sunflower seeds for visiting garden birds.
11. Self-Watering Seed Starting Jar

Consistent moisture levels accelerate seed germination without the danger of soil damping-off or overwatering. A simple cotton wick draws the perfect amount of water directly to tender seedling roots.
Materials Needed
- 1 32-ounce wide-mouth glass mason jar
- 1 3-inch plastic net pot
- 12 inches of 1/4-inch braided cotton wicking cord
- 1 cup of organic seed starting soil mix
- 4 heirloom tomato seeds
How to Make It
- Thread the cotton wicking cord through the bottom slit of the plastic net pot, leaving 4 inches trailing out below the base.
- Fill the net pot with moist seed starting mix, coiling the upper portion of the cotton wick through the center of the soil.
- Fill the glass mason jar with 2 cups of clean, room-temperature water.
- Rest the net pot inside the mouth of the mason jar so its rim catches on the jar lip and the bottom cotton cord dangles into the water.
- Press two tomato seeds 1/4 inch deep into the soil surface and gently mist the top with water.
- Place the setup on a warm, sunny windowsill and refill the bottom glass reservoir whenever water drops below 1 inch.
12. Tuned Outdoor Wind Chime

Gentle melodic chimes ring through your backyard as breezy weather moves lightweight metal cylinders. Weather-resistant outdoor paints protect the metal while creating a bright focal point.
Materials Needed
- 5 clean tin cans of varying heights (6-ounce to 28-ounce)
- 1 6-inch wooden embroidery hoop inner ring
- 1 2-inch wooden craft ball
- 3 bottles of outdoor acrylic paint in blue, yellow, and green
- 1 spool of 20-pound braided nylon line
- 1 hammer and 1 small finishing nail
How to Make It
- Paint each tin can with two coats of outdoor acrylic paint in alternating colors and let dry for 2 hours.
- Punch a single hole through the dead center of each can bottom using a hammer and finishing nail.
- Drill five evenly spaced holes around the circumference of the wooden embroidery hoop.
- Cut five lengths of nylon line at staggered lengths between 10 and 18 inches, thread one line through each can hole, and tie a large knot inside the can to hold it.
- Tie the opposite ends of the lines through the holes in the wooden hoop so the cans hang at varying heights, striking each other when swayed by wind.
- Thread a central line through the wooden craft ball to act as a clapper, suspend it in the middle of the cans, and hang the entire chime from a porch hook.
13. Closed Pickle Jar Terrarium

Self-contained miniature ecosystems recycle their own moisture through continuous evaporation and condensation cycles. Clear gallon jars offer full panoramic views of lush green foliage and natural rock strata.
Materials Needed
- 1 1-gallon glass pickle jar with lid
- 2 cups of small river pebbles
- 1/2 cup of horticultural activated charcoal
- 3 cups of tropical potting soil
- 1 miniature fittonia plant
- 1 small button fern
- 1 piece of live sheet moss
How to Make It
- Clean the interior of the glass pickle jar with hot water and dish soap, rinsing thoroughly to remove all pickle brine residue.
- Pour the river pebbles into the base of the jar to form a 1-inch drainage layer.
- Scatter a 1/4-inch layer of activated charcoal over the pebbles to filter impurities and prevent bacterial odors.
- Add the tropical potting soil, creating slight mounds and valleys to add visual depth to your landscape.
- Dig small pockets in the soil, plant the fittonia and button fern, and tuck green sheet moss around the bare soil patches.
- Mist the foliage lightly with 4 to 5 sprays of distilled water, seal the lid tightly, and place in bright, indirect light.
14. Gilded Outdoor Tool Caddy

Storing hand trowels and pruning shears in a sturdy metal container keeps essential garden gear organized and rust-free. Genuine metallic leafing adds a polished look that patinas naturally over time.
Materials Needed
- 1 30-ounce metal coffee tin
- 1 can of gray metal spray primer
- 2 ounces of water-based metal leaf adhesive size
- 5 sheets of genuine copper leaf
- 1 soft goat hair mop brush
- 1 can of clear exterior polyurethane spray
- 4 cups of dry play sand
- 2 tablespoons of mineral oil
How to Make It
- Spray the outside of the clean metal coffee tin with a uniform coat of gray metal primer and let it dry for 1 hour.
- Brush a thin, even coat of adhesive size across the entire primed surface and wait 15 minutes until it turns clear and tacky.
- Lay sheets of copper leaf onto the tacky surface, smoothing them gently with clean, dry fingertips.
- Buff the entire surface with a soft goat hair mop brush to remove excess flakes and burnish the metal leaf flat.
- Apply two coats of clear exterior polyurethane spray to seal the copper from tarnishing and moisture damage.
- Mix the dry play sand with mineral oil, pour it into the caddy, and slide your metal hand tools blade-down into the sand to prevent rust.
15. Vintage Decoupage Pouring Can

Gentle water flow from a custom pouring vessel helps hydrate delicate seedlings and small potted houseplants without disturbing soil beds. Vintage botanical paper prints give plain metal containers an antique cottage garden feel.
Materials Needed
- 1 tall 28-ounce tomato can
- 1 8-inch piece of 1/2-inch flexible copper tubing
- 1 tube of waterproof two-part epoxy putty
- 2 decorative floral paper napkins
- 1 bottle of outdoor Mod Podge
- 1 1-inch foam brush
- 1 power drill with 1/2-inch metal drill bit
How to Make It
- Drill a 1/2-inch hole into the side of the tin can, 1/2 inch above the bottom rim.
- Insert one end of the copper tubing 1/2 inch into the hole, bending the outer pipe upward at a 45-degree angle to create a pouring spout.
- Mold waterproof epoxy putty firmly around the pipe joint on both the inside and outside of the can, allowing it to cure solid for 2 hours.
- Paint a layer of outdoor Mod Podge over the exterior metal and press the printed napkin ply smoothly over the surface, smoothing out air bubbles from the center outward.
- Seal the entire paper layer with two generous coats of outdoor Mod Podge, allowing 1 hour of drying time between applications.
- Fill with water and pour gently around the base of potted herbs and flower seedlings.
Saving common kitchen jars and cans turns everyday waste into useful, durable assets for your garden beds and patio.
Gather a few containers from your recycling bin, pick your favorite project from the list, and build something beautiful for your outdoor space this weekend.