15 Pallet Wood Garden Craft Ideas for a Rustic Farmhouse Look

Weathered wood brings an authentic, timeworn charm to your backyard that store-bought items simply cannot replicate. Pallet boards carry natural wood grain, saw marks, and nail holes that blend right into a cottage garden setting.
Building your own garden pieces lets you customize sizes, save money, and keep usable lumber out of landfills. With basic hand tools, safety gear, and a stack of clean, heat-treated pallet planks, you can craft functional accents that handle the outdoor elements with style.
1. Freestanding Herb Trough Planter
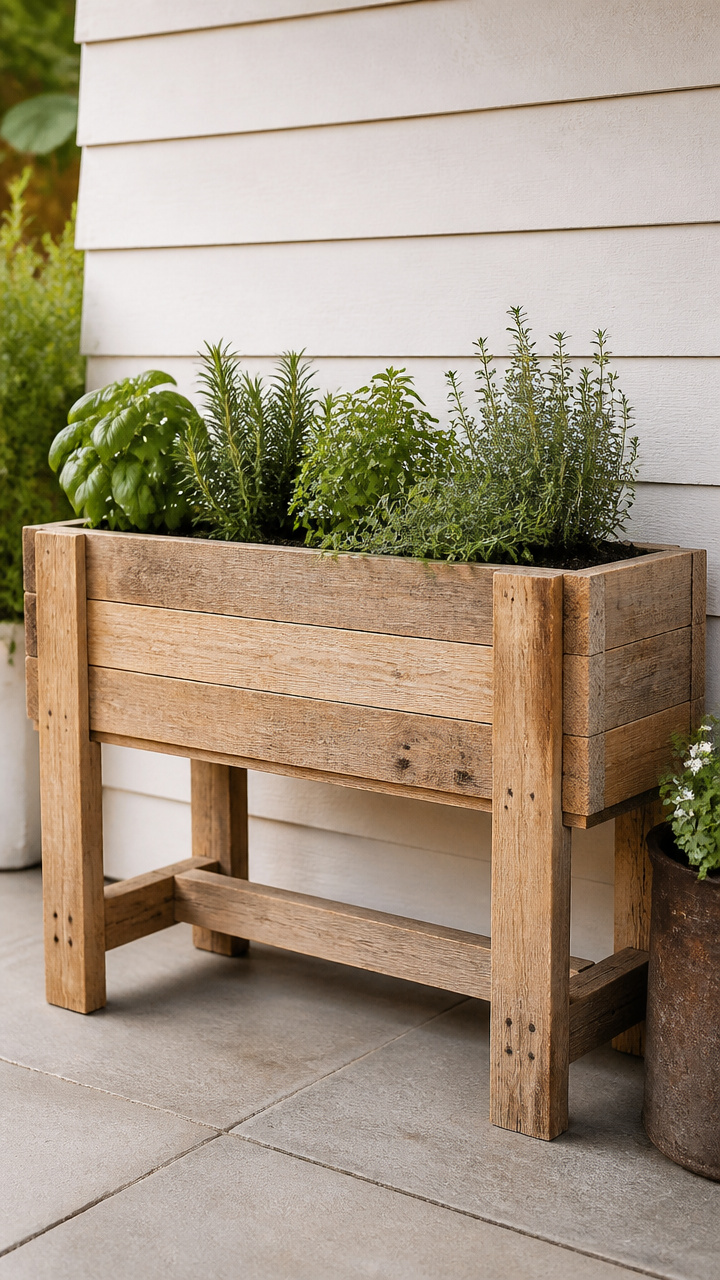
Fresh kitchen herbs grow conveniently at waist height in this deep, compartmentalized planting box. Sturdy pallet slats form a rustic trough that keeps rosemary, basil, and thyme organized in your outdoor space.
Materials Needed
- 6 pallet boards (40 inches long each)
- 2 square pallet blocks (4×4 inches)
- 1 roll of heavy-duty landscape fabric
- 1 staple gun with 3/8-inch staples
- 24 exterior wood screws (1-5/8 inch)
- 1 small pot of black chalkboard paint
- 1 roll of painter's tape
- 1 piece of chalk
How to Make It
- Cut four pallet boards to 36 inches for the side walls, and cut two boards into four 8-inch pieces for the end caps and base supports.
- Align two 36-inch boards edge to edge, place an 8-inch end cap across each short end, and drive two 1-5/8 inch screws through each joint to assemble an open-topped trough.
- Screw two 36-inch boards across the bottom to form the floor, leaving a 1/4-inch gap between them for water drainage.
- Fasten the two 4×4-inch pallet blocks underneath the base using two long screws per block to lift the planter off the soil.
- Line the inside of the trough with landscape fabric and secure it along the top inside rim using your staple gun every 2 inches.
- Tape off three 3×5-inch rectangles along the front plank, apply two coats of chalkboard paint, let it dry for four hours, and write your herb labels in chalk.


2. Vertical Living Succulent Frame
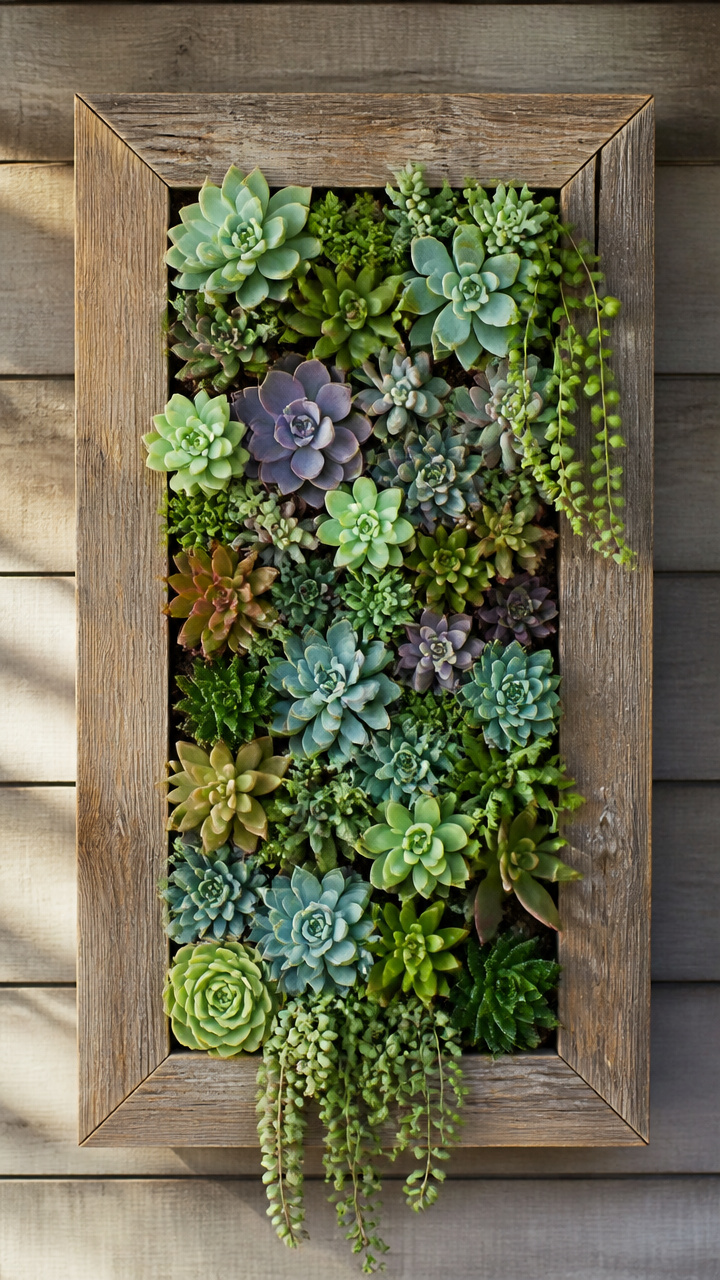
Lush succulents thrive in shallow root environments, making them ideal for a vertical wall display. Hanging this slatted pallet frame turns a blank exterior wall into a living green tapestry.
Materials Needed
- 1 shallow half-pallet (roughly 20×24 inches)
- 1 roll of 1/2-inch galvanized chicken wire
- 1 roll of heavy weed barrier fabric
- 1 box of 1/2-inch galvanized fence staples
- 1 bag of sphagnum sheet moss
- 1 bag of cactus and succulent potting mix
- 15 assorted succulent cuttings
- 2 heavy-duty D-ring picture hangers with screws
How to Make It
- Sand down any rough splinters on the front face of the pallet using 80-grit sandpaper.
- Cut chicken wire to match the rear dimensions of the pallet, pull it tight across the back, and secure it to the frame with galvanized fence staples every 3 inches.
- Lay a generous layer of damp sphagnum moss directly against the front slats, pressing it against the wire to keep the soil from spilling forward.
- Pour succulent potting mix through the back openings until the internal cavities are completely packed.
- Cover the back with weed barrier fabric and staple it firmly along every outer edge to seal the soil inside.
- Turn the pallet face up, poke holes through the moss between slats with a pencil, insert your succulent cuttings, and keep the frame flat for three weeks before mounting it on your wall with D-rings.
3. Wall-Mounted Tool Organizer Rack
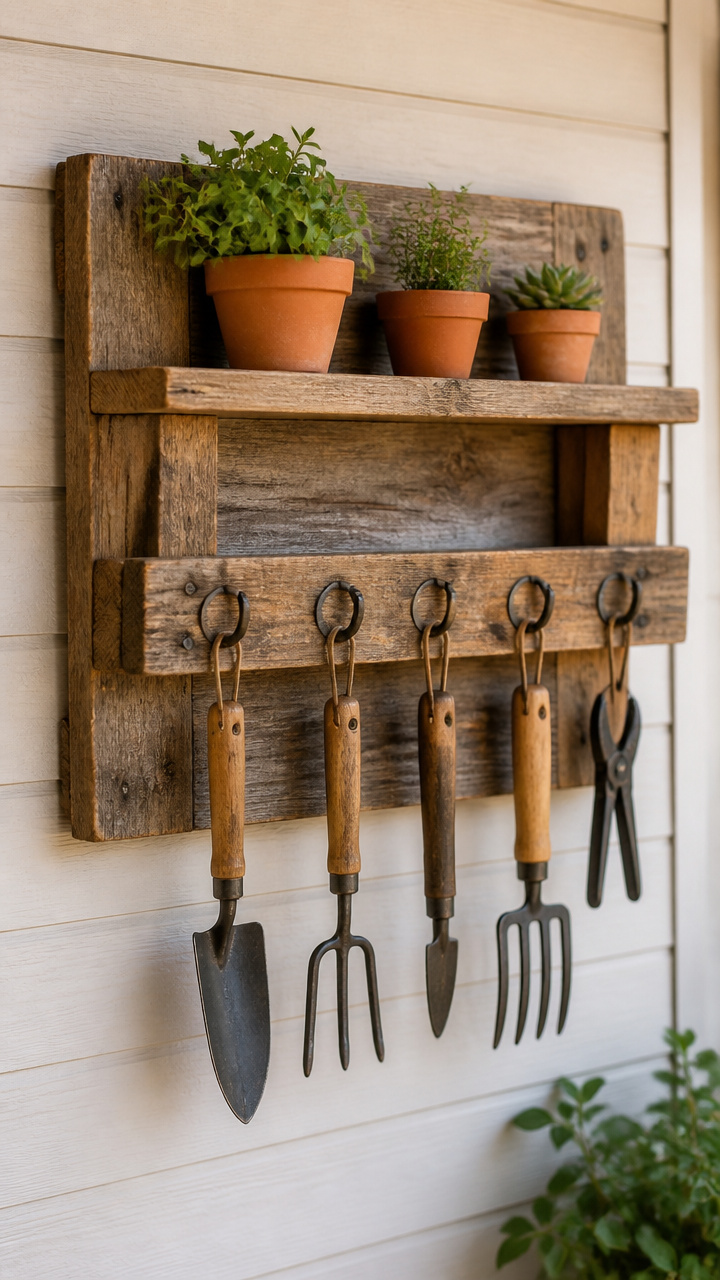
Cluttered spade handles and trowels find a dedicated, visible home on this wall organizer. Repurposed pallet slats provide a rugged backing for hanging hand tools right next to your potting area.
Materials Needed
- 4 pallet slats (30 inches long)
- 2 narrow pallet support runners (18 inches long)
- 4 vintage brass coat hooks
- 16 wood screws (1-1/4 inch)
- 1 spade drill bit (1-inch diameter)
- 1 clear outdoor matte sealer with brush
- 1 cordless drill
How to Make It
- Lay two 18-inch runners parallel on your work surface, spaced 24 inches apart.
- Place the four 30-inch slats horizontally across the runners, leaving a 1/2-inch gap between boards, and secure each slat to the runners with two 1-1/4 inch screws per joint.
- Mark three holes along the bottom horizontal slat, spaced 6 inches apart, and drill through the board using the 1-inch spade drill bit to create holders for long-handled tools.
- Apply one coat of clear matte sealer across the entire wood surface and let it dry for two hours.
- Screw four vintage brass coat hooks evenly across the top horizontal slat to hold hand trowels, shears, and garden twine.
4. Fold-Down Wall Potting Bench
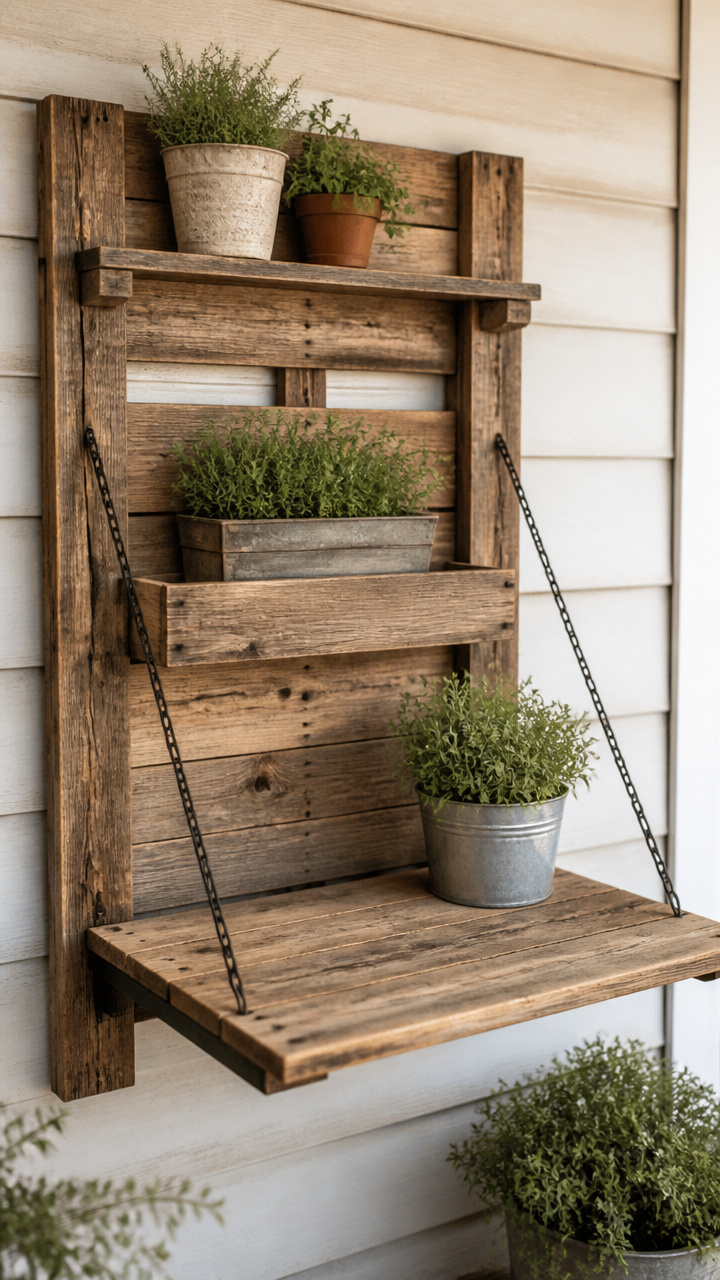
Small garden spaces gain instant work area with a fold-away prep table. Solid pallet timber forms a sturdy hinged surface that drops down flat when you finish potting your plants.
Materials Needed
- 8 thick pallet deck boards (36 inches long)
- 2 heavy-duty 4-inch zinc T-hinges with screws
- 2 lengths of welded steel chain (30 inches each)
- 4 heavy screw eye hooks
- 1 barrel slide bolt latch
- 1 box of 1-5/8 inch wood screws
How to Make It
- Join five 36-inch boards side by side by screwing two cross-battens underneath, forming a solid tabletop measuring roughly 36×20 inches.
- Attach one half of each T-hinge to the rear edge of the tabletop, spacing them 6 inches in from each side.
- Mount the remaining three pallet boards horizontally against an outdoor wall or shed frame to serve as the mounting backboard.
- Screw the other half of the T-hinges into the lower wall board so the table swings upward into a level horizontal position.
- Install two eye hooks on the wall and two on the front edges of the tabletop, then connect the steel chains between them to support the open table.
- Mount the barrel bolt latch at the top edge of the assembly to lock the table securely upright against the wall when closed.
5. Slatted Garden Walkway Paver
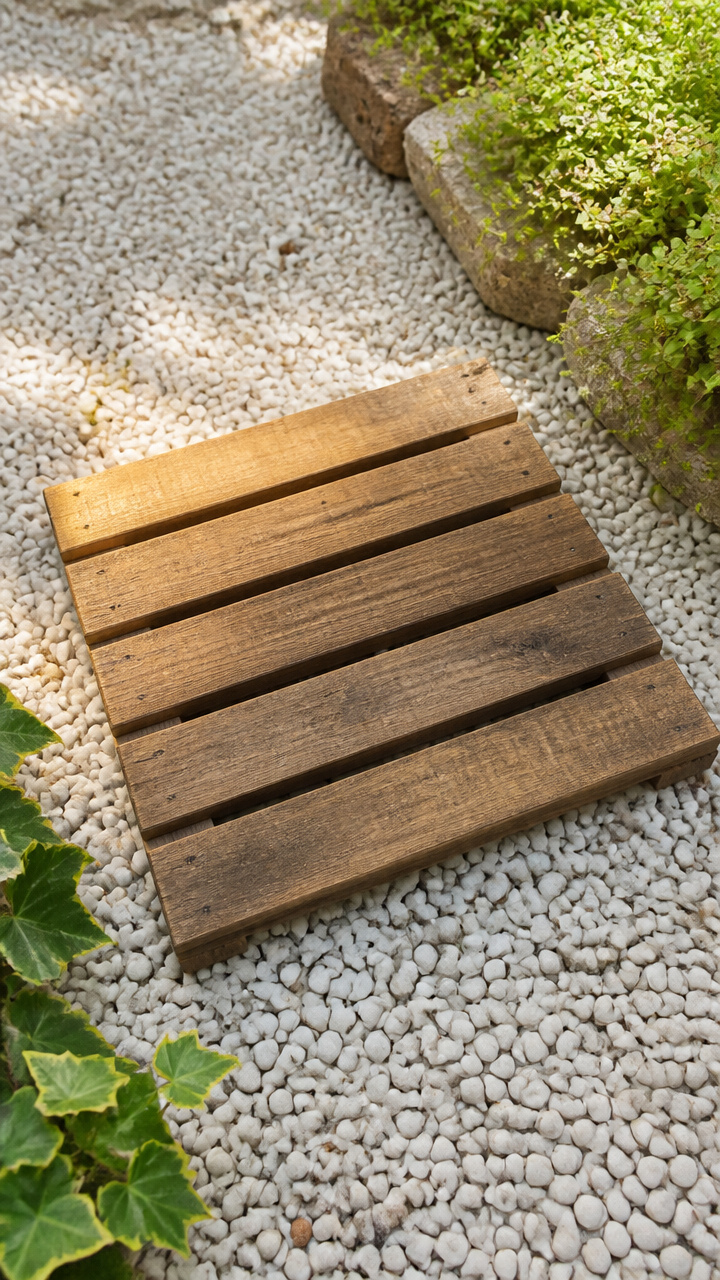
Muddy garden paths stay clean and dry beneath these rustic, flexible timber slats. Linked together, the durable pallet runners create an authentic boardwalk feel between your garden beds.
Materials Needed
- 12 wide pallet slats (20 inches long each)
- 1 roll of 3/8-inch thick natural sisal rope (25 feet)
- 1 roll of masking tape
- 1 drill with 1/2-inch wood drill bit
- 1 can of exterior spar urethane
- 1 natural bristle paintbrush
How to Make It
- Trim 12 pallet slats so they are all exactly 20 inches long and sand the edges smooth.
- Drill two 1/2-inch holes through each board, placing each hole 2 inches in from the short ends and centered on the board width.
- Apply two liberal coats of spar urethane to all sides of each board, allowing four hours of drying time between coats.
- Wrap the ends of the sisal rope with masking tape to prevent fraying, then thread one rope through each side hole across all 12 boards.
- Tie an overhand knot in the rope between each wood slat, maintaining a 2-inch spacing along the entire runner.
- Knot the rope tightly at both ends of the path, trim the excess rope, and lay your rolling boardwalk over level garden soil.
6. Mason Jar Solar Lantern Sconce
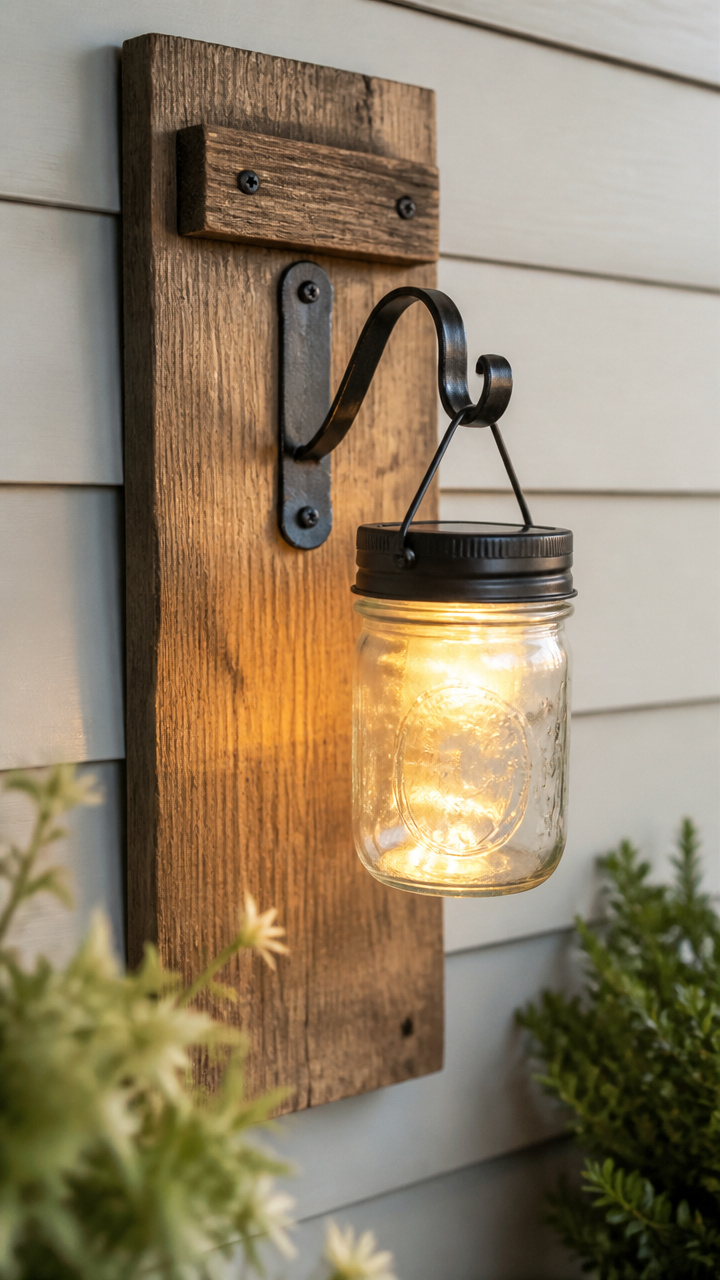
Soft evening lighting makes garden paths feel welcoming after the sun sets. Mounting glass canning jars with solar inserts onto pallet backplates gives your outdoor space a warm, country glow.
Materials Needed
- 2 thick pallet slats (14 inches long)
- 2 standard mouth quart mason jars
- 2 solar light lid inserts with built-in LEDs
- 2 stainless steel hose clamps (3-inch diameter)
- 2 round-head wood screws (3/4-inch)
- 2 sawtooth picture hangers
- 1 flathead screwdriver
How to Make It
- Sand the front and edges of the 14-inch pallet slats using 120-grit sandpaper to highlight the natural wood texture.
- Punch a small hole through the center band of each stainless steel hose clamp using a hammer and a metal nail.
- Drive a 3/4-inch round-head screw through the clamp hole into the center of each wooden slat, securing the clamp flat against the wood.
- Attach a sawtooth picture hanger to the top back edge of each slat.
- Slide a quart mason jar into each clamp opening and tighten the clamp screw firmly with a flathead screwdriver.
- Screw the solar lid inserts onto the mason jars and mount the completed sconces on fence posts that receive direct daytime sunlight.
7. Chevron Climbing Sweet Pea Trellis
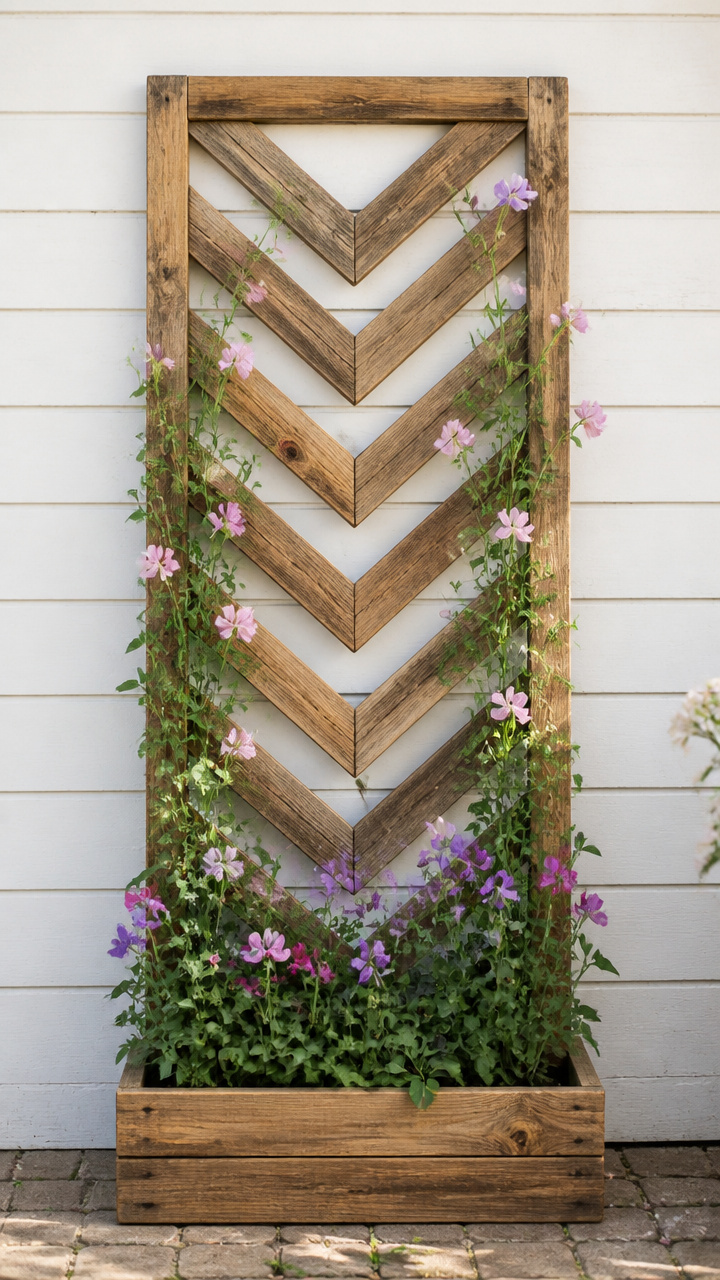
Climbing vines like sweet peas and pole beans need sturdy, open scaffolding to climb properly. Building an angled chevron grid from pallet strips creates a striking architectural piece in your flower borders.
Materials Needed
- 2 long pallet stringers (48 inches long)
- 10 thin pallet slats cut into 14-inch diagonal strips
- 1 bottle of waterproof exterior wood glue
- 1 pneumatic brad nailer with 1-1/4 inch galvanized brad nails
- 1 pint of walnut exterior wood stain
- 1 cotton staining rag
How to Make It
- Lay two 48-inch stringers flat on your work table, spacing them 18 inches apart at the bottom and tapering inward to 12 inches at the top.
- Miter the ends of the 14-inch slat strips at a 45-degree angle using a hand saw or miter box.
- Apply exterior wood glue to the ends of the angled slats and set them across the frame in an upward pointing chevron pattern spaced 4 inches apart.
- Secure each joint with two 1-1/4 inch galvanized brad nails driven through the slat into the stringer beneath.
- Wipe the entire trellis with walnut wood stain using a cotton rag, let it dry for 12 hours, and push the base legs 6 inches into your garden soil.


8. Rustic Garden Hose Holder Station
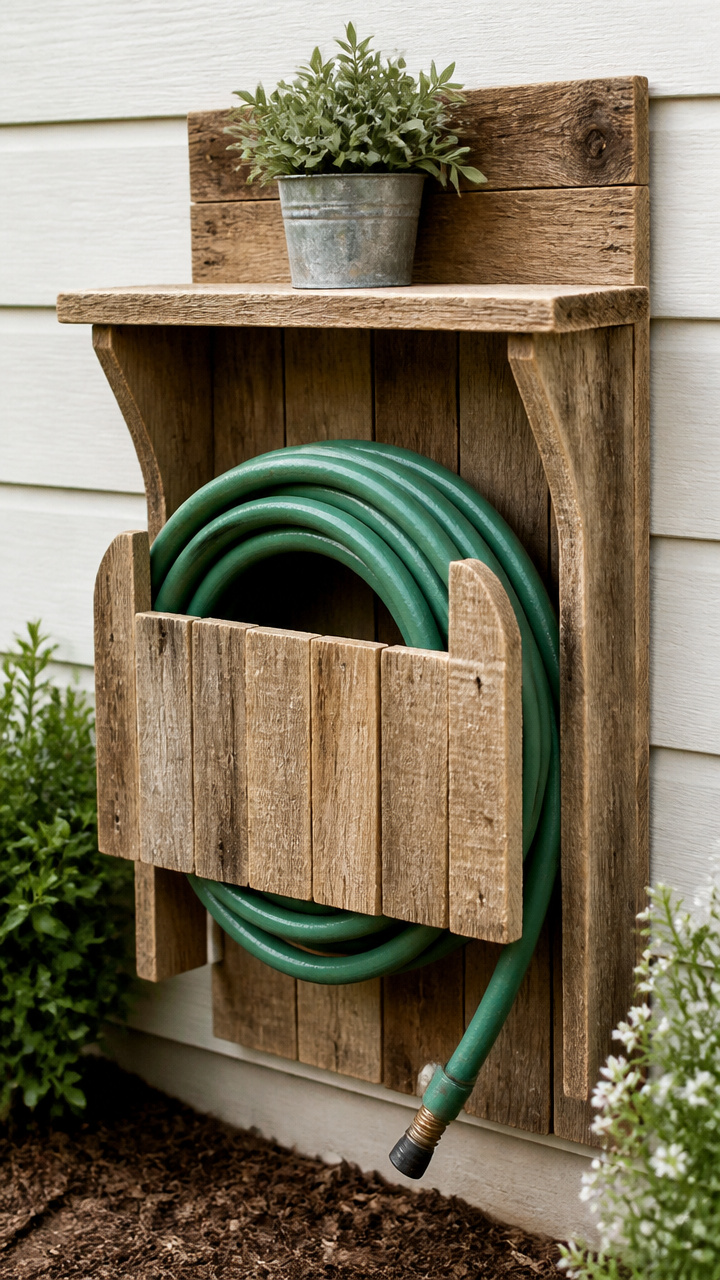
Tangled garden hoses look untidy and quickly damage tender border plants. Assembling this sturdy wall-mounted storage box keeps 50 feet of hose neatly coiled on a decorative wooden cleat.
Materials Needed
- 5 pallet slats (22 inches long)
- 2 pallet side blocks (cut to 6-inch lengths)
- 1 vintage cast iron spigot handle
- 1 curved wood support block (cut into a 6-inch semi-circle)
- 18 exterior wood screws (1-5/8 inch)
- 1 tube of exterior construction adhesive
How to Make It
- Join three 22-inch slats edge-to-edge by gluing and screwing two side blocks to the back, creating a solid 22×12-inch backboard.
- Screw the curved semi-circle wood block directly onto the center face of the backboard to serve as the curved hose saddle.
- Affix the remaining two pallet slats across the top edge as a small 4-inch deep display shelf for brass spray nozzles.
- Screw the decorative cast iron spigot handle directly beneath the hose saddle using a 1-inch screw.
- Mount the assembled station firmly to your exterior wall studs using four 2-1/2 inch exterior screws, then loop your garden hose around the wooden saddle.


9. Tiered Strawberry Pyramid Box
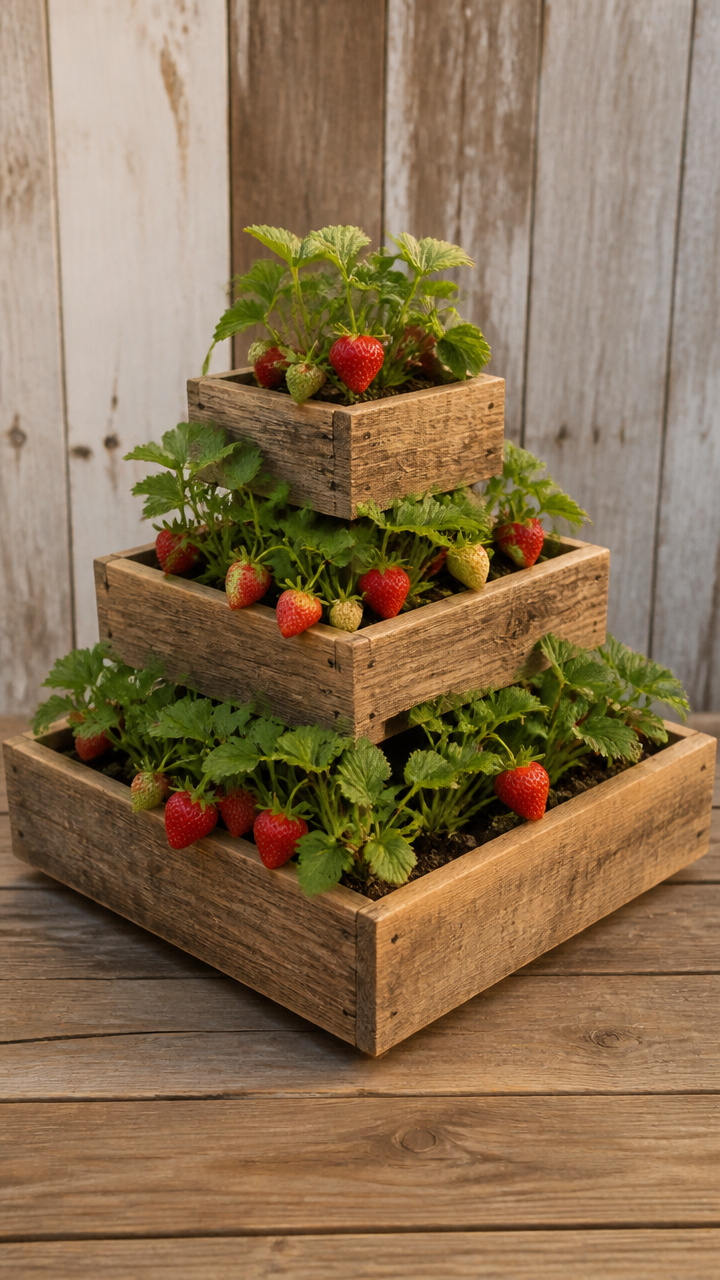
Juicy red berries stay clean and get maximum sunlight when planted in upward-stacked boxes. Building three tiered square frames from pallet wood maximizes fruit yield in a compact three-foot footprint.
Materials Needed
- 12 pallet deck boards (cut into four 36-inch, four 24-inch, and four 12-inch pieces)
- 12 metal corner braces with 3/4-inch screws
- 1 roll of heavy-duty landscape weed barrier
- 1 staple gun with staples
- 4 bags of organic vegetable garden soil
How to Make It
- Fasten the four 36-inch boards into a square base frame using four metal corner braces screwed inside each corner.
- Assemble the four 24-inch boards and the four 12-inch boards into medium and small squares using the remaining corner braces.
- Level a 40×40-inch section of garden ground, lay down weed barrier, and set the large 36-inch frame flat on top.
- Fill the bottom frame with garden soil up to the top rim and tamp it down lightly.
- Center the 24-inch frame on top of the soil, fill it with soil, and repeat the process with the 12-inch top frame to complete your three-tier pyramid.
- Plant strawberry crowns every 8 inches along the exposed ledges of each level and water thoroughly.


10. Hanging Pollinator Watering Station
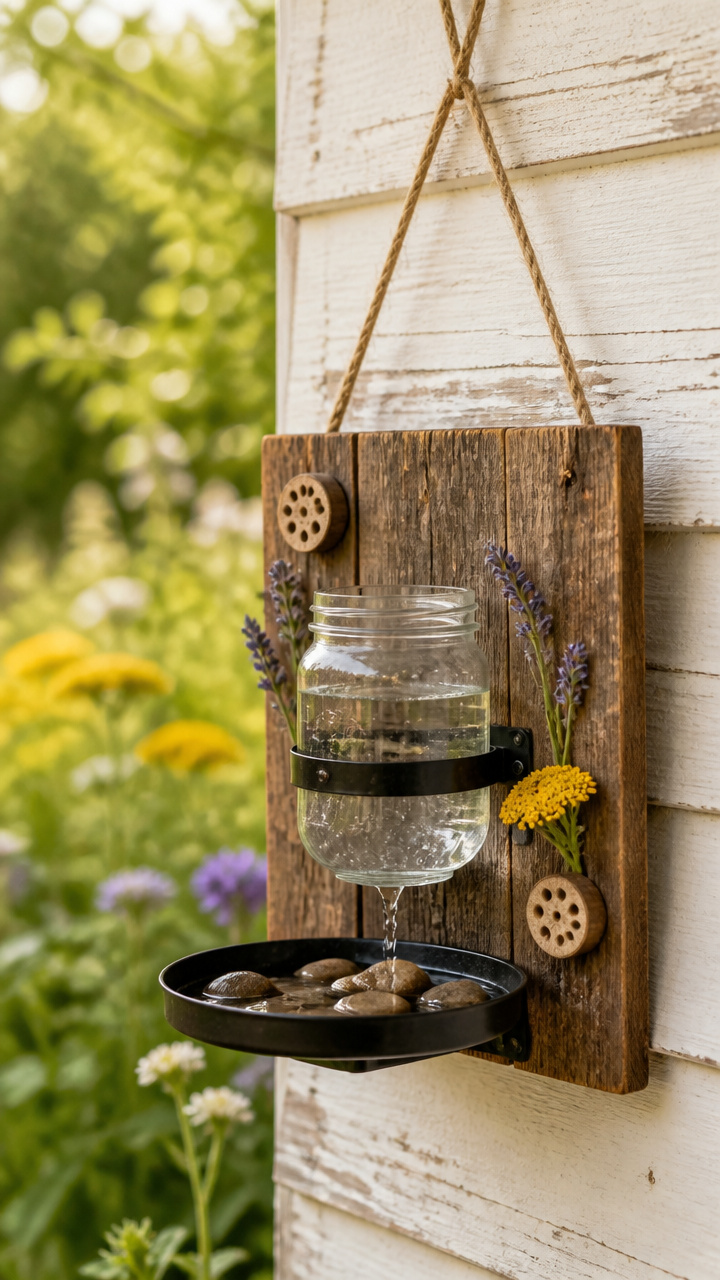
Thirsty honeybees and butterflies need shallow, safe water spots to hydrate without drowning. Suspending a simple pallet platform fitted with a ceramic dish and smooth pebbles provides essential garden wildlife support.
Materials Needed
- 3 pallet slats (12 inches long)
- 2 support cleats (10 inches long)
- 1 shallow glazed terracotta plant saucer (8-inch diameter)
- 1 bag of smooth, colorful river pebbles
- 4 eye bolts with matching nuts (1/4-inch)
- 16 feet of twisted jute twine (split into four 4-foot lengths)
- 12 wood screws (1-1/4 inch)
How to Make It
- Align three 12-inch slats side by side and secure the two support cleats across the underside using 1-1/4 inch screws to make a 12×10-inch platform.
- Drill a 1/4-inch hole in each of the four outer corners of the platform, 1 inch in from the edges.
- Insert an eye bolt through each corner hole and tighten the nuts firmly underneath using pliers.
- Thread a 4-foot piece of jute twine through each eye bolt, tie a secure double knot below each loop, and gather all four ropes at the top into a single overhead knot.
- Place the terracotta saucer in the center of the wooden platform, fill it with a single layer of river pebbles, and add clean water so the pebbles sit half-submerged.
- Hang the station from a shady tree branch near your flowering perennials.


11. Slatted Muddy Boot Scraper Deck
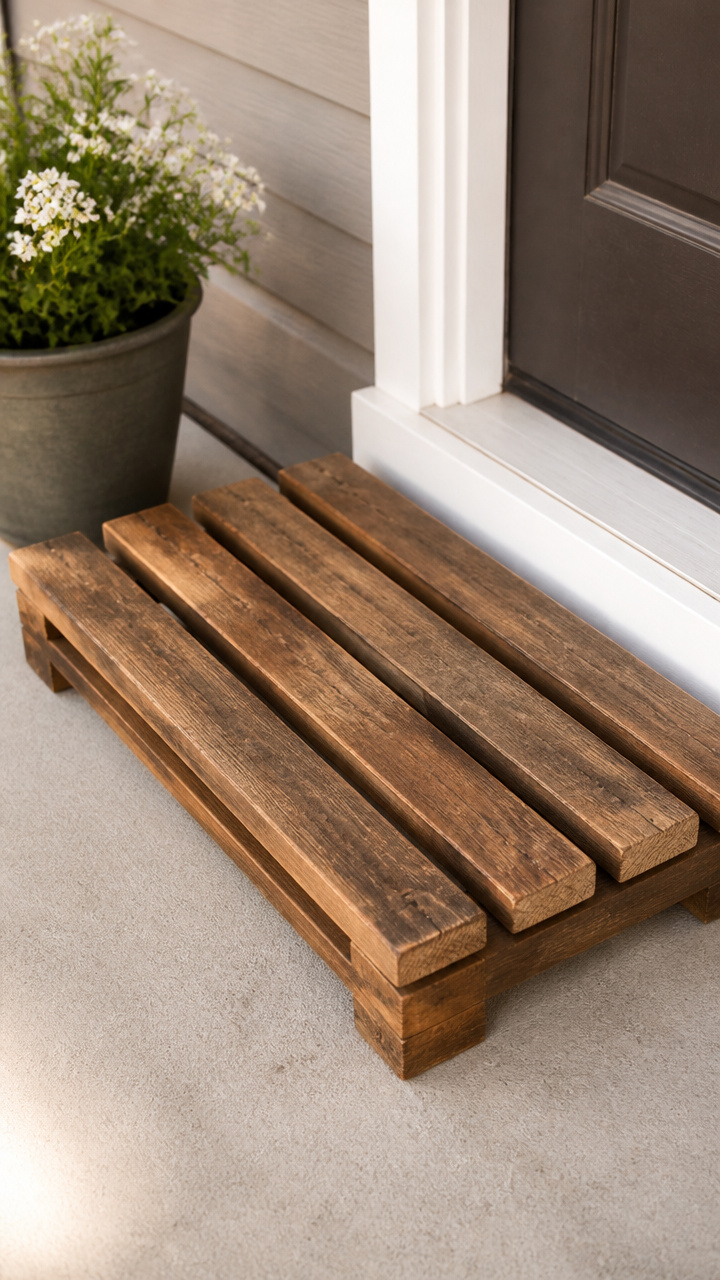
Caked garden mud stays outside where it belongs with this rugged entry deck. Heavy pallet lumber combined with a stiff scrubbing brush cleans heavy work boots in seconds.
Materials Needed
- 6 thick pallet boards (18 inches long)
- 2 heavy pallet 2×4 stringers (14 inches long)
- 1 commercial stiff-bristle deck scrub brush head
- 18 zinc-coated outdoor wood screws (2-inch)
- 1 tube of waterproof polyurethane adhesive
How to Make It
- Place the two 14-inch stringers on edge, parallel to each other and 14 inches apart.
- Screw four 18-inch slats across the top of the stringers, leaving 3/4-inch gaps between boards so dislodged dirt drops through to the ground.
- Leave an open 4-inch space on the front half of the platform for the scrub brush.
- Apply polyurethane adhesive to the wooden base of the scrub brush head, set it bristle-side up in the open gap, and secure it through the bottom with two 2-inch screws.
- Fasten the final two slats around the brush base to lock it flush into the frame, and place the scraper directly outside your greenhouse or shed door.


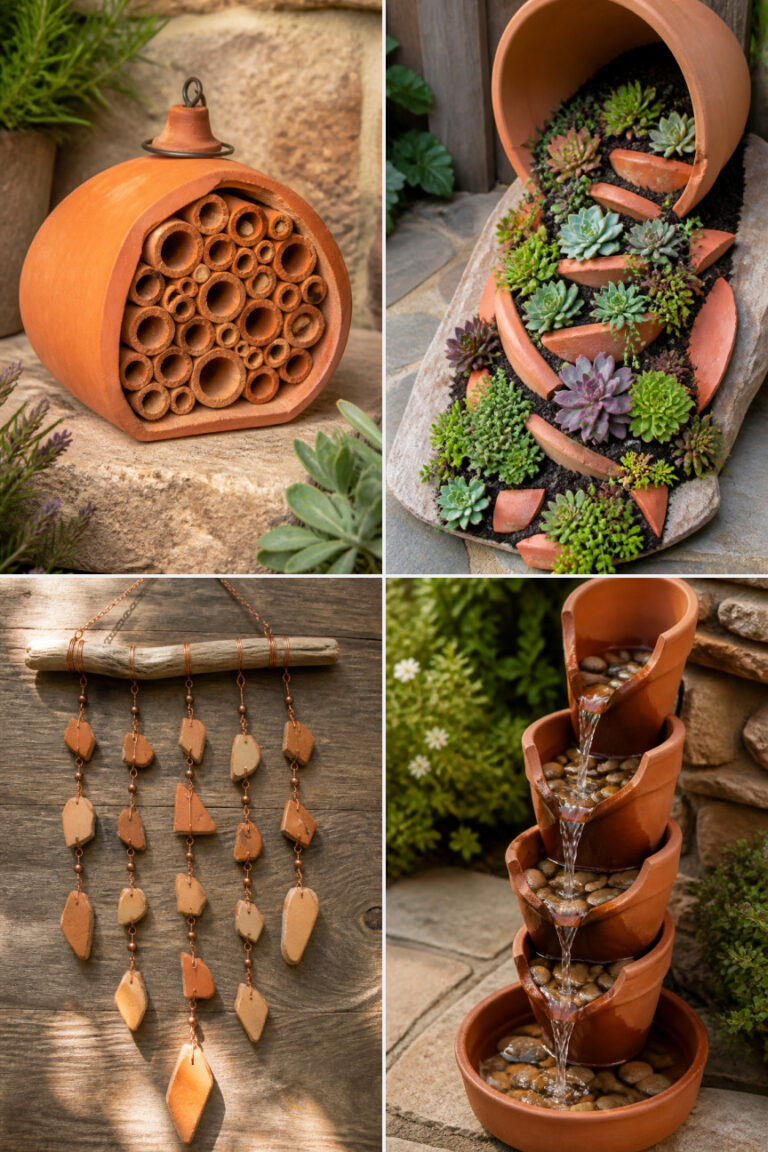
12. Terracotta Pot Wind Chime Frame
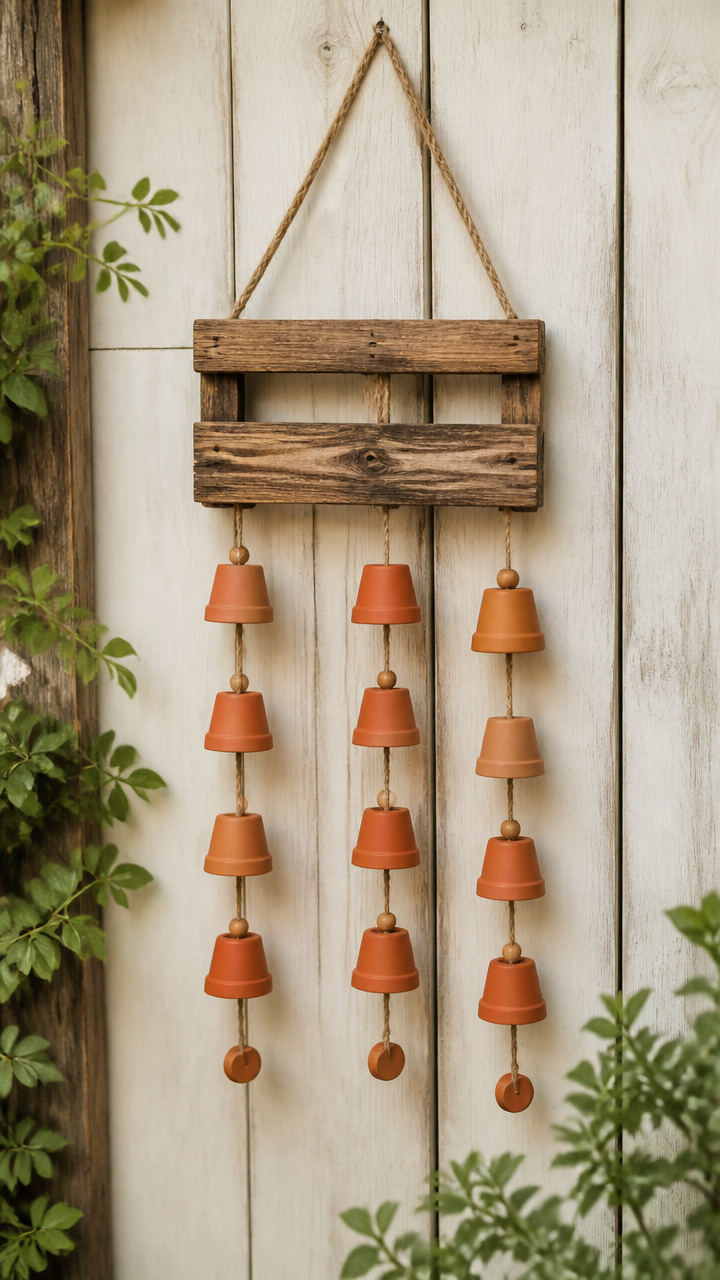
Gentle breezes create soothing acoustic tones when miniature clay pots tap against one another. A weathered pallet wood crossbar provides an ideal, rustic anchor for hanging clay bell chimes.
Materials Needed
- 1 sturdy pallet slat (16 inches long)
- 5 miniature terracotta pots (2-inch diameter)
- 5 natural unfinished wooden beads (3/4-inch diameter)
- 1 roll of heavy braided hemp cord
- 1 drill with 3/16-inch drill bit
- 5 small metal washers
- 1 bottle of clear craft glue
How to Make It
- Drill five 3/16-inch holes along the center of the pallet slat, spacing them 2-1/2 inches apart.
- Cut five pieces of hemp cord in graduated lengths ranging from 14 to 22 inches.
- Tie a metal washer and a wooden bead to the end of each cord, leaving a small 1-inch tail.
- Thread the bare end of each cord up through the drainage hole of a miniature terracotta pot so the wooden bead hangs freely inside as a clapper.
- Pass each cord through a drilled hole in the wood slat and tie a secure knot on the top side, securing the knot with a drop of clear craft glue.
- Attach a 12-inch loop of cord to both ends of the slat and suspend the chime from your porch eave or garden arbor.
13. Painted Farmhouse Directional Garden Signpost

Charming directional markers guide visitors to your greenhouse, berry patch, or chicken coop. Pointed pallet slats painted with vintage milk paint deliver instant storybook character to your path.
Materials Needed
- 1 thick pallet runner post (48 inches long, roughly 2×3 inches)
- 4 pallet slats (16 inches long)
- 1 jar of off-white exterior milk paint
- 1 small jar of charcoal gray exterior craft paint
- 1 small angled artist detail brush
- 1 hand saw
- 8 galvanized wood screws (1-5/8 inch)
How to Make It
- Cut one end of each 16-inch slat at two 45-degree angles to create pointed arrow tips.
- Brush two thin coats of off-white milk paint over the arrow boards, allowing the dark wood grain to show through slightly for a distressed finish.
- Letter your favorite garden words like 'Vegetables', 'Orchard', and 'Cut Flowers' across the boards using charcoal craft paint and your artist brush.
- Cut the bottom of the 48-inch post into a sharp point so it drives easily into the earth.
- Attach the painted arrows to the post at staggered heights and pointing in different directions using two 1-5/8 inch screws per sign.
- Drive the post 10 inches deep into the soil at a prominent garden crossroad using a rubber mallet.


14. Aerated Slat Compost Holding Bin
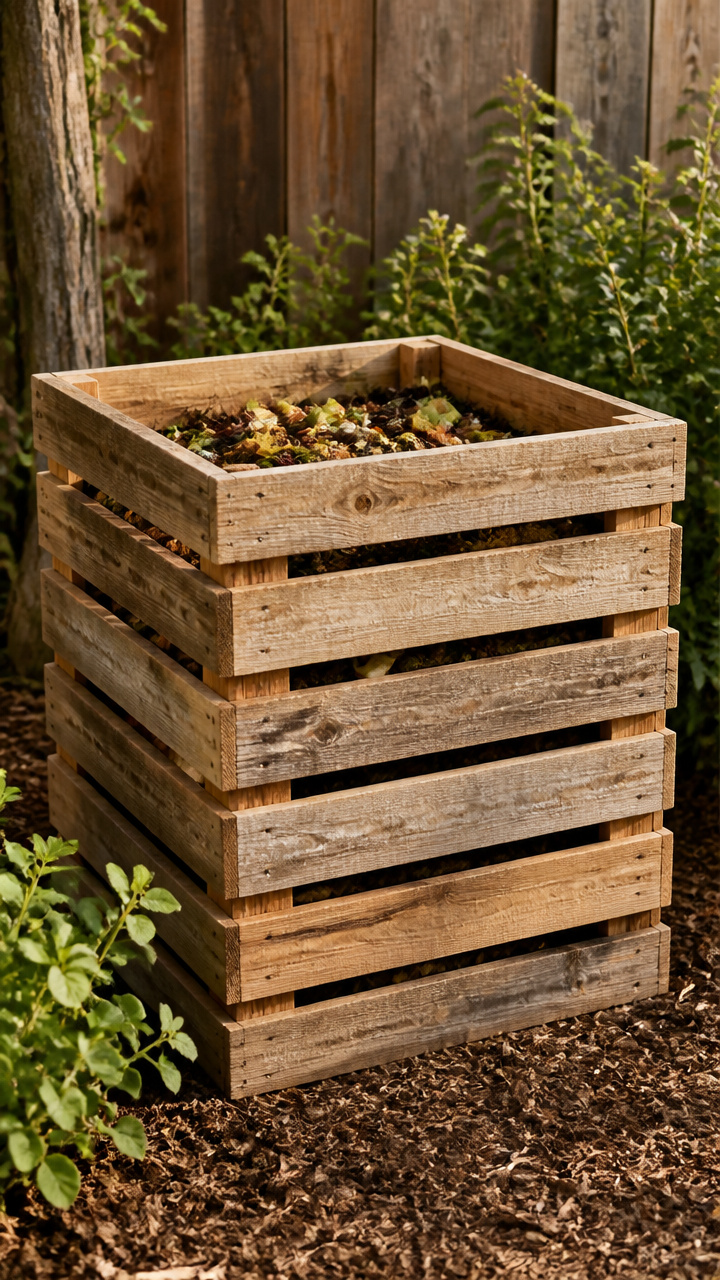
Rich organic compost forms faster when vegetable scraps and dry leaves receive constant airflow. Building a four-sided slatted pallet enclosure keeps your compost pile tidy while promoting healthy decomposition.
Materials Needed
- 4 complete matching wood pallets (40×48 inches)
- 1 roll of 16-gauge galvanized tie wire
- 1 pair of heavy wire cutters
- 8 heavy-duty zip ties
- 4 wooden garden stakes (36 inches long)
- 1 hammer
How to Make It
- Stand two pallets on edge at a 90-degree angle to form the back and left side of the bin.
- Wrap 16-gauge galvanized wire tightly around the top, middle, and bottom corner blocks, twisting the wire ends with pliers to lock the joint.
- Position the third pallet as the right side wall and wire it securely to the back panel in the same manner.
- Drive a 36-inch wooden garden stake into the ground against each outer corner to anchor the entire structure against wind and heavy loads.
- Fasten the fourth pallet on the front using four heavy-duty zip ties on one side only to act as a swinging door for easy pile turning.
- Fill the bin with alternating layers of green garden clippings and brown dried leaves.
15. Salvaged Window Seedling Cold Frame
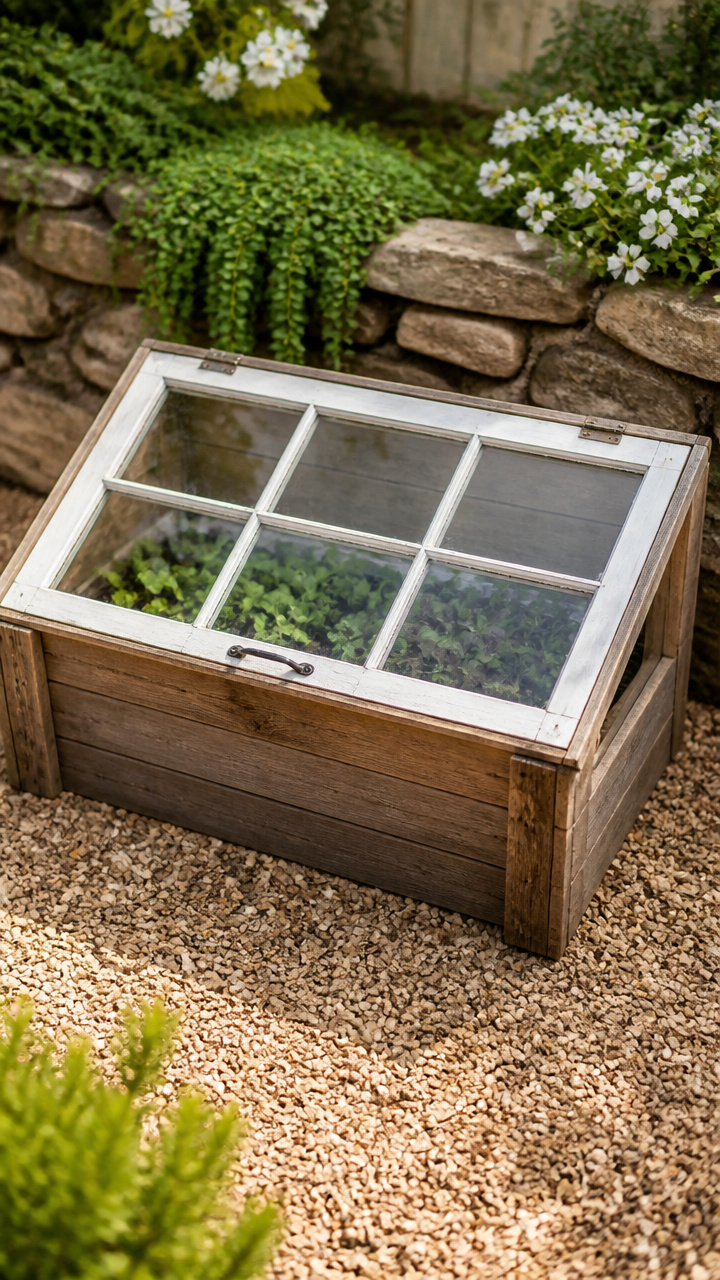
Fragile spring seedlings gain vital protection from unexpected frost inside a low-profile glass nursery box. Combining a reclaimed pallet base with a vintage multi-pane window sash traps solar warmth efficiently.
Materials Needed
- 4 thick pallet deck boards (36 inches long)
- 4 pallet deck boards (24 inches long)
- 1 salvaged glass window sash (roughly 36×24 inches)
- 2 outdoor utility butt hinges with screws
- 1 wooden support stick (18 inches long)
- 16 exterior wood screws (2-inch)
How to Make It
- Cut two of the 24-inch side boards diagonally from corner to corner to create two sloped side panels that slant from 10 inches tall in the rear down to 5 inches in the front.
- Screw the sloped side boards between the 36-inch front and back boards using 2-inch screws to form an angled rectangular box.
- Lay the vintage window sash flat on top of the sloped frame, checking that it covers the opening completely.
- Screw one leaf of each butt hinge to the top back rail of the window sash and the other leaf into the high back wall of the wooden box.
- Sand the bottom edge of your 18-inch wooden stick to prop the window open on warm sunny afternoons.
- Place the cold frame in a south-facing spot, fill it with your seed trays, and close the lid on frosty nights to maintain ambient warmth.
Repurposing pallet wood is one of the most rewarding ways to add handcrafted, rustic style to your outdoor space. Grab a pry bar, pull a few clean pallets apart, and start building your favorite garden project this weekend.