15 Rustic Garden Crafts Using Broken Pots and Terra Cotta Pieces

Dropping a favorite clay planter on the patio usually brings an immediate sinking feeling. Before you sweep those jagged fragments into the trash bin, take a second look at the earthy colors, weathered curves, and rugged textures sitting in front of you.
Gardeners have saved broken clay pieces, traditionally called crocks, for centuries. With a bit of creative thinking and a few workshop tools, those cracked rims and shattered bases can become practical, charming additions to your flower beds and patio spaces.
Here are fifteen hands-on projects designed to give your broken terra cotta a second life in your garden.
1. Tiered Fairy Garden Tower
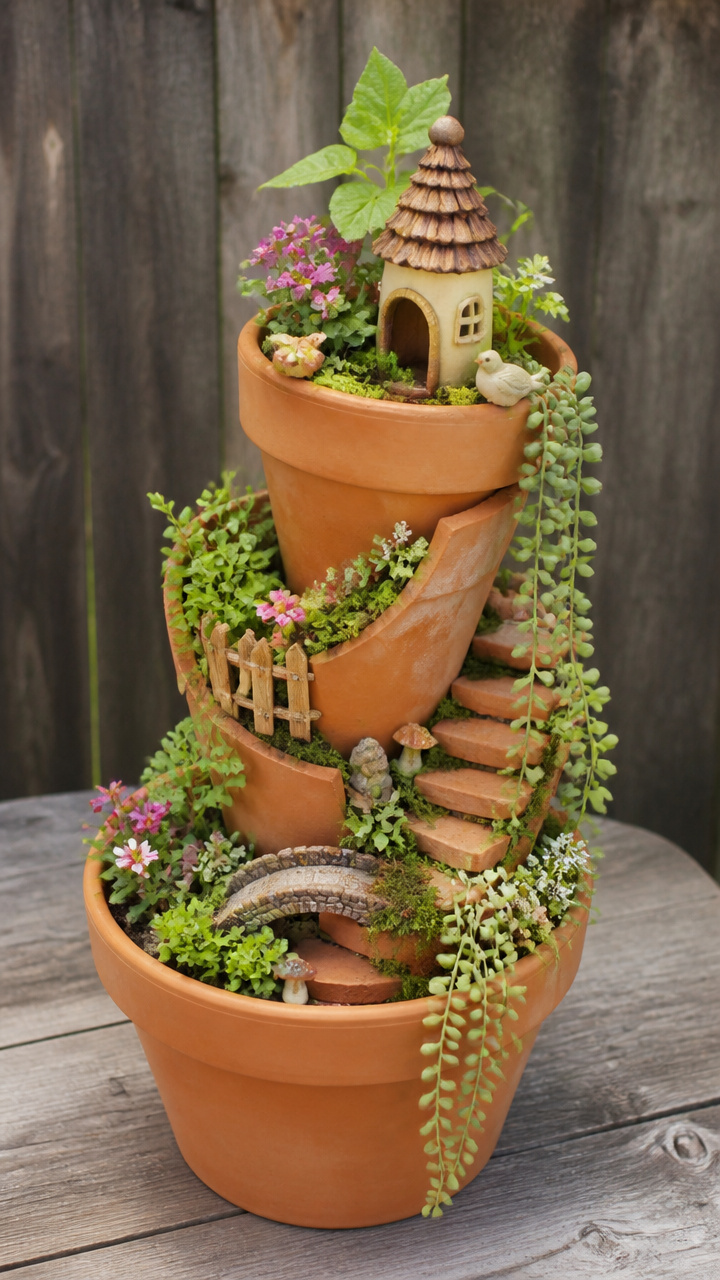
Cracked planters with one sheared side offer the perfect foundation for a multi-level miniature landscape. Building stepped layers lets you display tiny alpine succulents and creeping greenery in vertical pockets.
Materials Needed
- 1 large broken terra cotta pot (12 to 14 inches wide) with a cracked side
- 5 to 7 medium curved terra cotta shards
- 8 quarts well-draining potting soil
- 3 miniature succulent plugs
- 2 small creeping thyme plants
- 1 miniature garden figurine
How to Make It
- Fill the base of the broken planter with 3 to 4 inches of potting soil, pressing it down firmly to create a stable base.
- Wedge your largest curved shard vertically into the soil at the open broken side to act as a retaining wall for the next layer.
- Add more soil behind the shard, then layer smaller shards in a spiral pattern to create mini planting shelves and staircase steps.
- Plant miniature succulents and creeping thyme into each tiered pocket, packing potting mix around their roots.
- Water gently using a fine-mist spray bottle and place your miniature figurine on the top ledge.


2. Hand-Lettered Herb Garden Markers
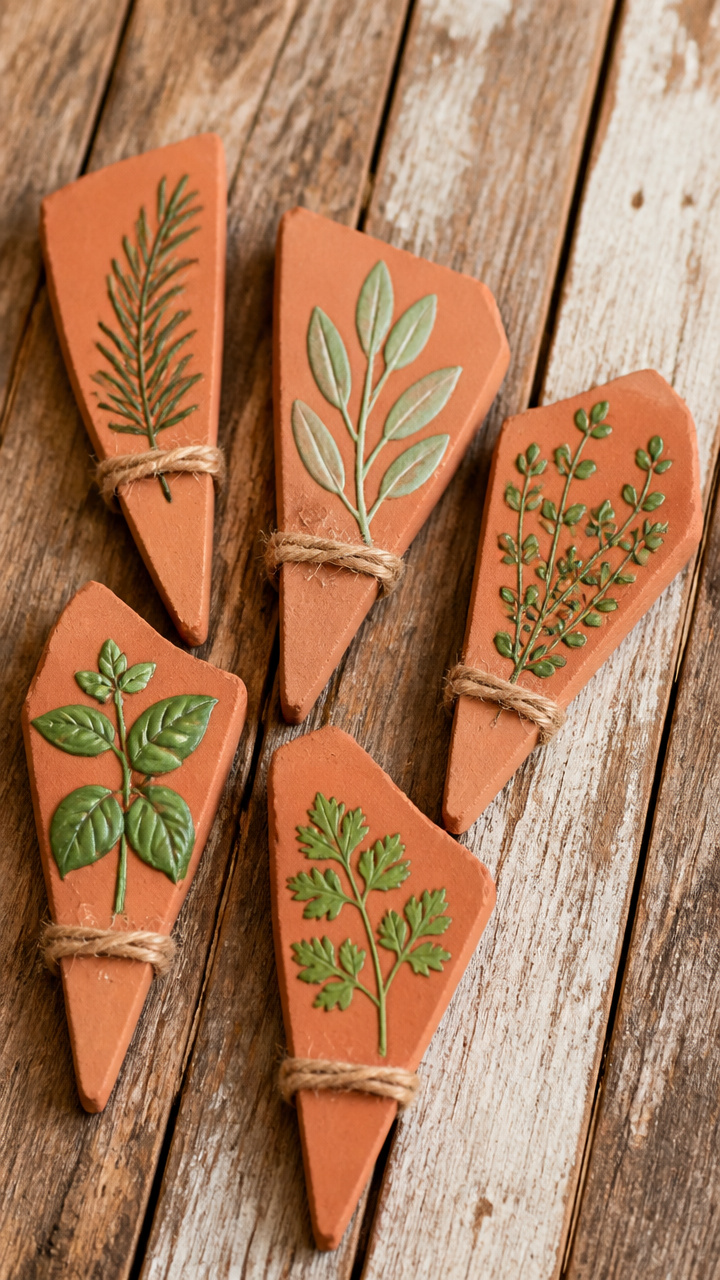
Jagged shards with flat faces make durable, weather-resistant plant labels for vegetable beds and herb planters. The porous surface takes paint cleanly and blends naturally into the soil.
Materials Needed
- 6 to 8 pointed terra cotta shards (4 to 6 inches long)
- 1 medium-tip black oil-based paint pen
- 1 medium-tip white oil-based paint pen
- 1 sheet 120-grit sandpaper
- 1 can clear matte outdoor acrylic sealant spray
How to Make It
- Rub the rough fracture lines of each shard with 120-grit sandpaper to remove sharp edges and powdery dust.
- Wipe each piece clean with a damp rag and let the clay dry completely for 15 minutes.
- Write the names of your herbs across the widest flat portion of each shard using the oil-based paint pens.
- Let the paint dry for 2 hours, then spray a light coat of clear matte outdoor sealant over the lettering.
- Push the narrow, pointed end of each labeled shard 2 inches deep into the soil next to your herb plants.
3. Mosaic Garden Stepping Stone
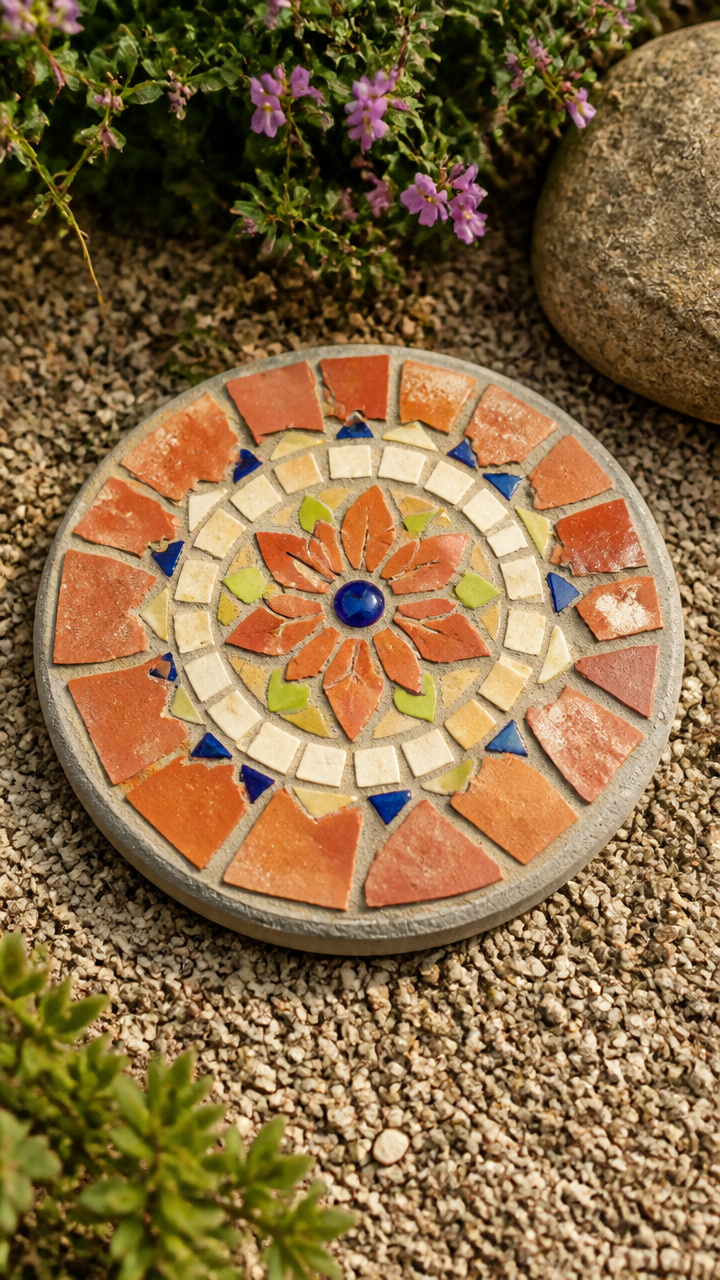
Smooth, flat pieces of broken clay form durable mosaic surfaces when set into concrete paver molds. The contrast between grey concrete and warm red clay adds instant character to garden pathways.
Materials Needed
- 1 round plastic stepping stone mold (12-inch diameter)
- 15 to 20 flat terra cotta shards
- 1 tile nipper tool
- 10 pounds quick-setting concrete mix
- 2 quarts water
- 1 small bucket
- 1 small bottle petroleum jelly
How to Make It
- Coat the interior of the plastic mold with a thin film of petroleum jelly to keep the concrete from sticking.
- Trim your terra cotta shards into rough 1-inch to 2-inch geometric shapes using tile nippers while wearing safety glasses.
- Mix 10 pounds of quick-setting concrete with water in a bucket until it reaches the consistency of thick brownie batter.
- Pour the concrete into the mold until it is 2 inches deep, tapping the sides to release trapped air bubbles.
- Press the terra cotta shards flat-side down into the wet concrete, leaving 1/4-inch gaps between each piece, and let cure for 48 hours before demolding.
4. Shaded Toad Abode Shelter
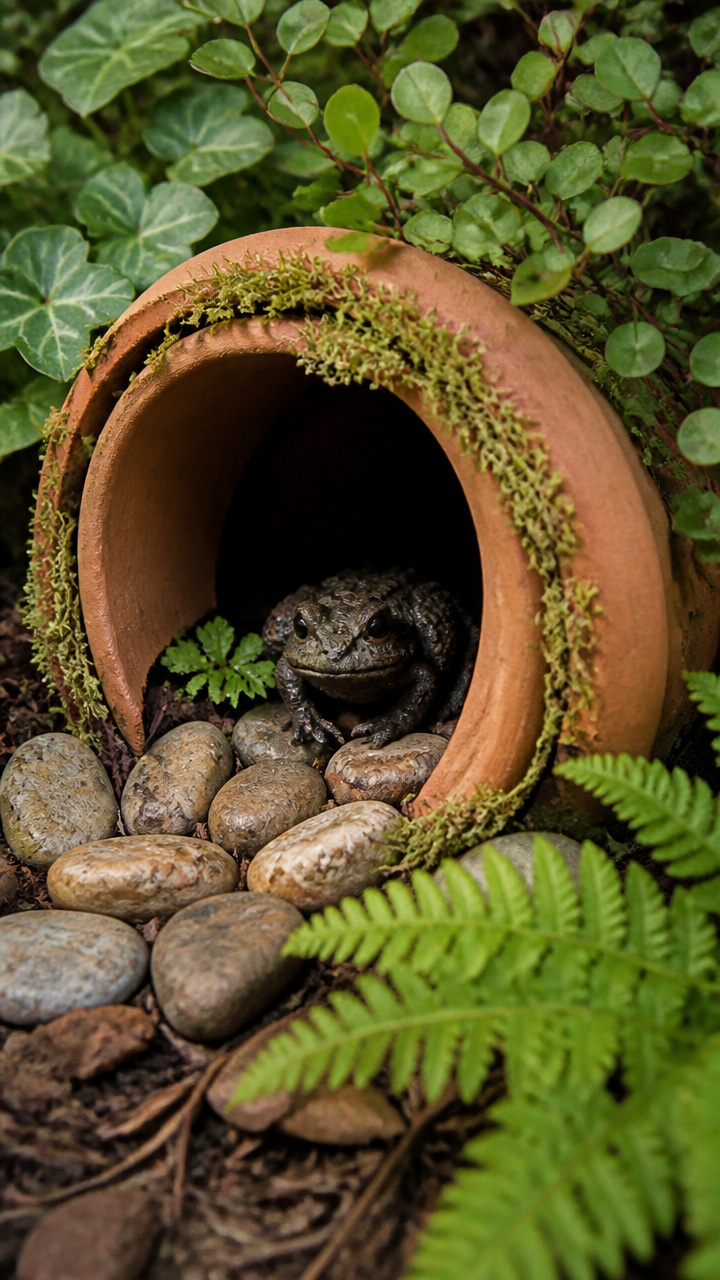
Cool, damp clay provides ideal daytime shelter for beneficial garden toads that eat insect pests. Positioning a half-broken pot rim into moist soil creates an instant cave that stays cool in summer heat.
Materials Needed
- 1 half-broken terra cotta pot (6 to 8 inches wide)
- 6 rounded river stones (2 inches each)
- 1 handful live sheet moss
- 1 small spray bottle filled with water
How to Make It
- Choose a quiet, shaded spot in your garden near leafy perennials where moisture collects naturally.
- Press the broken rim of the half-pot directly into the damp garden soil with the cracked open side facing north.
- Stack three river stones on each side of the opening to stabilize the shelter and create a safe entryway.
- Pack live sheet moss across the outer dome of the pot to help keep the interior cool and humid.
- Mist the moss and the surrounding ground with water twice a week during hot spells.



5. Drilled Terra Cotta Wind Chime
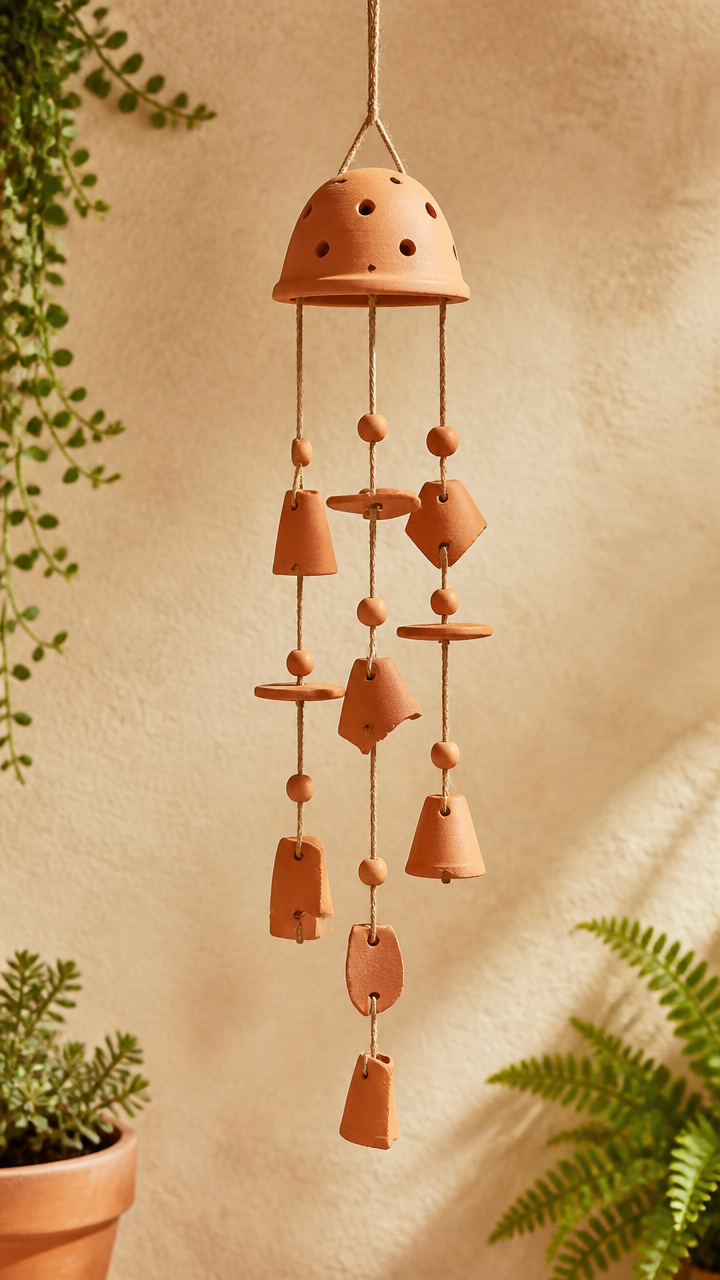
Curved rim segments ring with a warm, soft clinking sound when pushed together by garden breezes. Drilling small holes through thin shards allows you to suspend them in musical clusters.
Materials Needed
- 7 curved terra cotta rim shards (3 to 5 inches long)
- 1 masonry drill bit (1/8-inch)
- 1 electric drill
- 1 roll 2mm braided jute twine
- 1 wooden embroidery hoop (5-inch diameter)
- 8 raw wooden craft beads (1/2-inch)
How to Make It
- Submerge your shards in a bowl of cool water for 30 minutes to reduce friction and prevent cracking during drilling.
- Drill a 1/8-inch hole through the top end of each soaked shard using light pressure and a steady drill speed.
- Cut seven 18-inch lengths of jute twine, thread each piece through a shard hole, and secure it with a double knot.
- Thread a wooden craft bead onto each string to rest right above the knot, adding weight and rustic contrast.
- Tie the loose string ends evenly around the wooden hoop at 2-inch intervals and gather the top strings into a single hanging loop.


6. Spilling Succulent Ground Planter
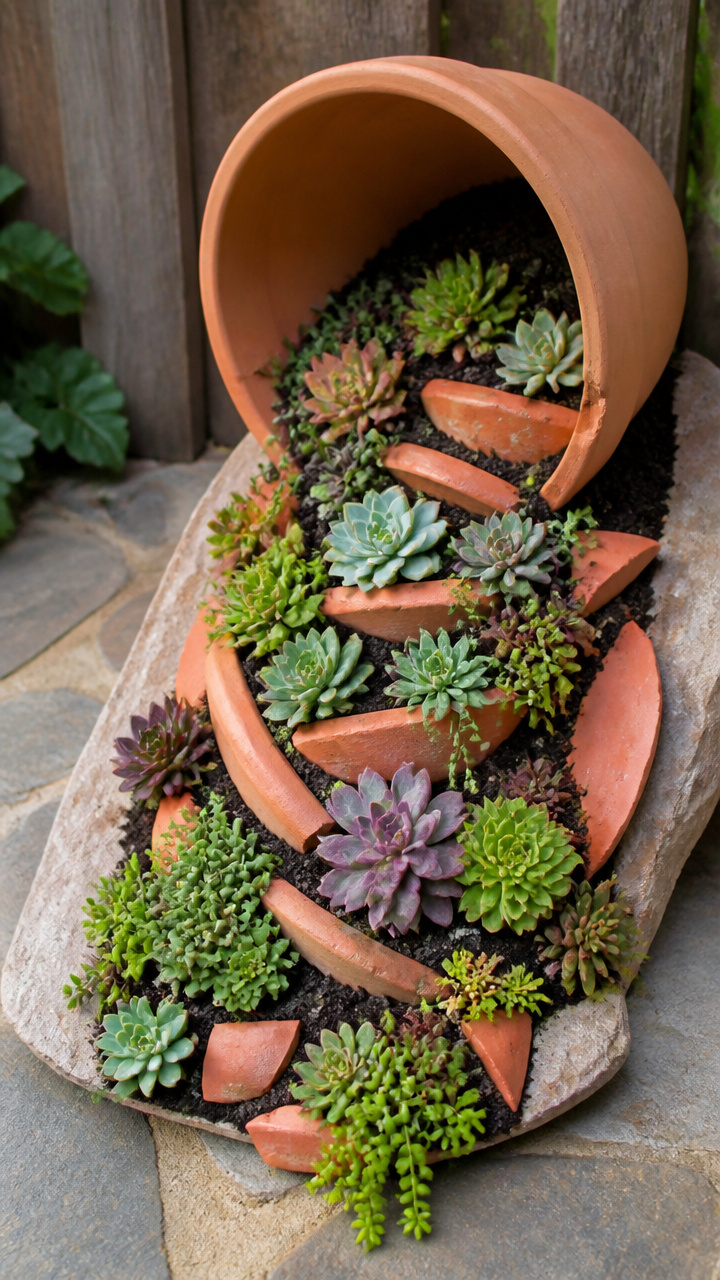
Horizontally positioned cracked pots create the illusion of plants pouring out directly onto the garden soil. This layout solves the problem of pots with sheared side walls that can no longer stand upright.
Materials Needed
- 1 large terra cotta pot with a cracked side or broken rim (10 to 12 inches)
- 1 bag (10 quarts) cactus and succulent soil mix
- 6 assorted trailing sedum plugs
- 8 flat terra cotta shards
- 1 small garden trowel
How to Make It
- Dig a shallow trench 3 inches deep in a sunny garden bed and seat the pot horizontally on its side with the broken rim angled downward.
- Fill the bottom half of the tipped pot with succulent soil, extending the soil outward onto the garden bed in a sweeping fan shape.
- Tuck trailing sedum plugs inside the mouth of the pot and along the spilled soil path outside.
- Arrange flat terra cotta shards along the edges of the soil fan to act as retaining curbs that stop rain runoff.
- Water the soil lightly around the roots and let the sedum spread naturally over the rim.
7. Mosaic Birdbath Basin
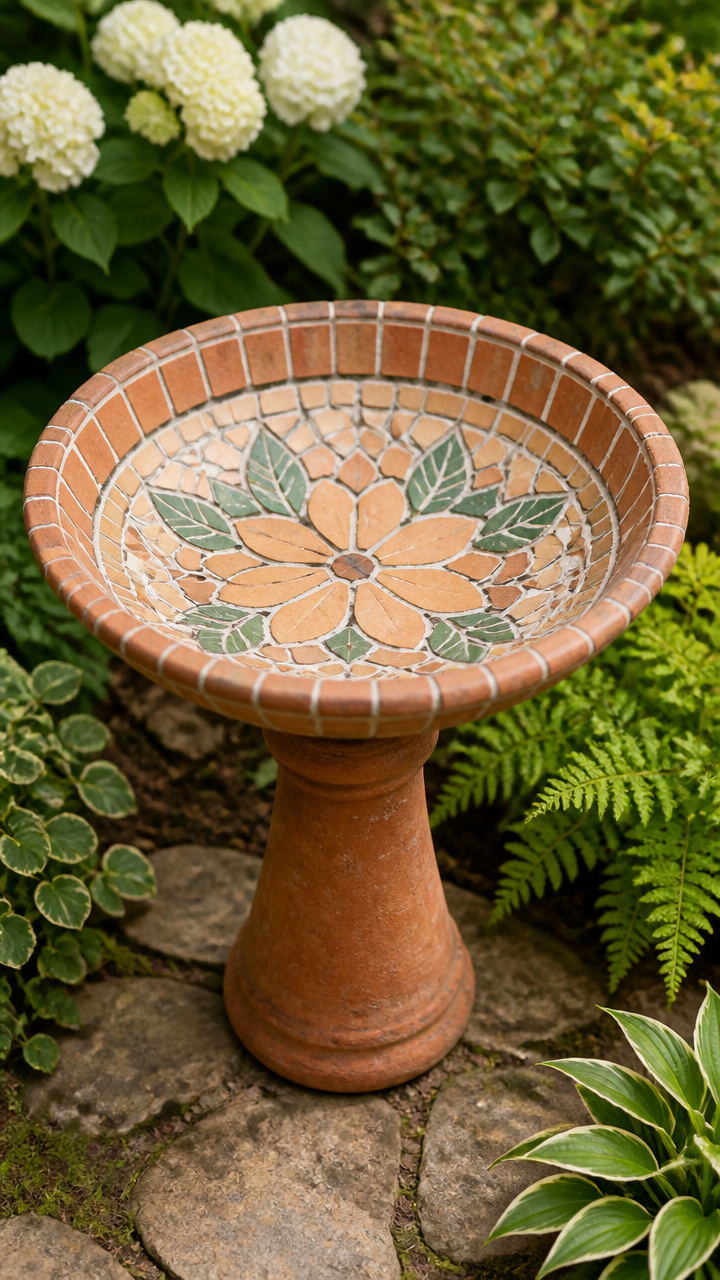
Shallow clay saucers lined with broken pot mosaics provide birds with a textured, non-slip footing while bathing. Sanded waterproof grout locks the pieces into a flat, watertight surface.
Materials Needed
- 1 shallow 14-inch terra cotta plant saucer
- 20 to 30 small flat terra cotta shards (assorted shades)
- 1 tube (10 oz) exterior silicone adhesive
- 2 pounds sanded waterproof tile grout
- 1 grout sponge
- 1 small rubber squeegee
How to Make It
- Apply a nickel-sized dab of silicone adhesive to the back of each flat shard and press them across the inside floor of the saucer in a concentric circle pattern.
- Allow the adhesive to cure for 24 hours so the shards will not shift during grouting.
- Mix the sanded waterproof grout according to package instructions and spread it over the shards using a rubber squeegee to fill all the cracks.
- Wipe away excess grout with a damp sponge after 20 minutes, rinsing your sponge frequently until the clay faces are clean.
- Let the grout dry for 72 hours, rinse the bowl thoroughly with fresh water, and fill it with 1 inch of water for garden birds.
8. Scalloped Garden Bed Edging
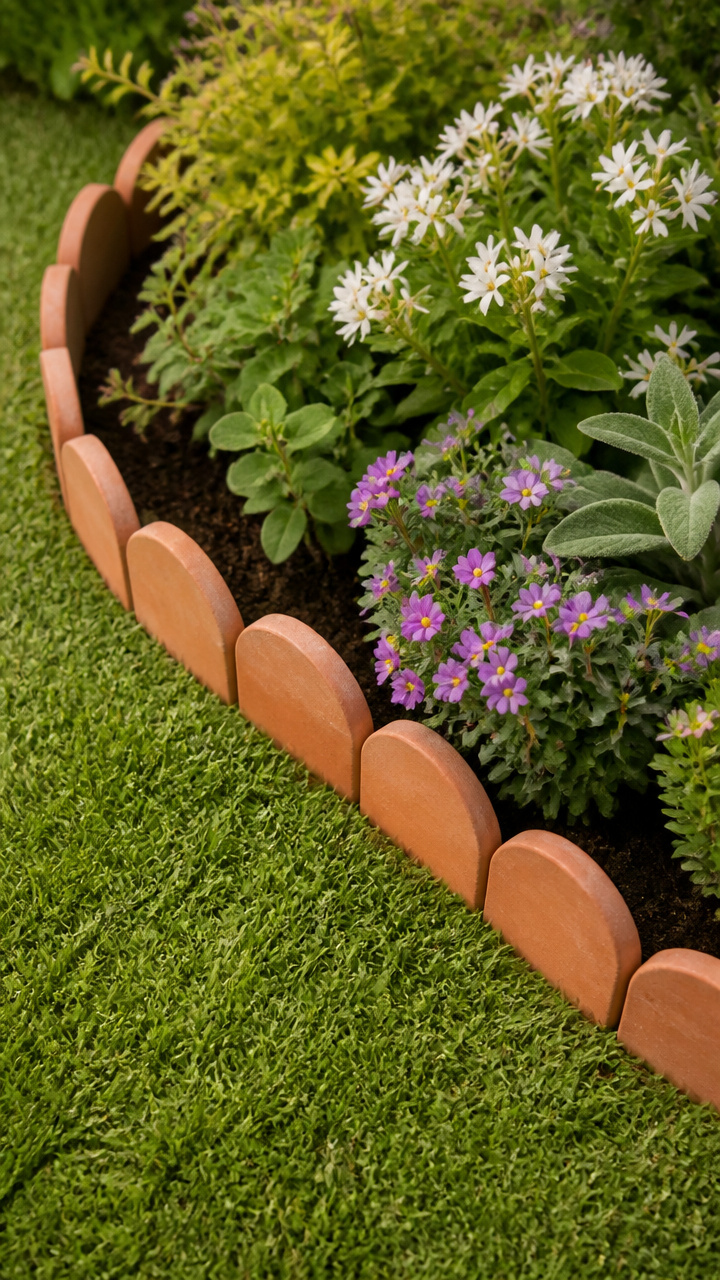
Uniformly broken pot rims create an attractive scallop pattern when set upright into the soil along a path edge. The dense clay blocks creeping turf roots and keeps mulch contained within the flower bed.
Materials Needed
- 20 to 30 curved terra cotta rim pieces (4 to 6 inches tall)
- 1 flat-edge garden spade
- 1 rubber mallet
- 1 bag (1 cubic foot) pea gravel
How to Make It
- Cut a straight 4-inch-deep trench along the perimeter of your flower bed using the flat-edge spade.
- Line the trench with 1 inch of pea gravel to promote quick water drainage and prevent winter frost heaving.
- Place the curved rim shards upright in the trench side by side, overlapping the rounded edges slightly to create a continuous scalloped border.
- Backfill soil firmly around both sides of the shards, tapping the surrounding earth with a rubber mallet to secure them in place.


9. Mounted Reclaimed Wood Wall Planter
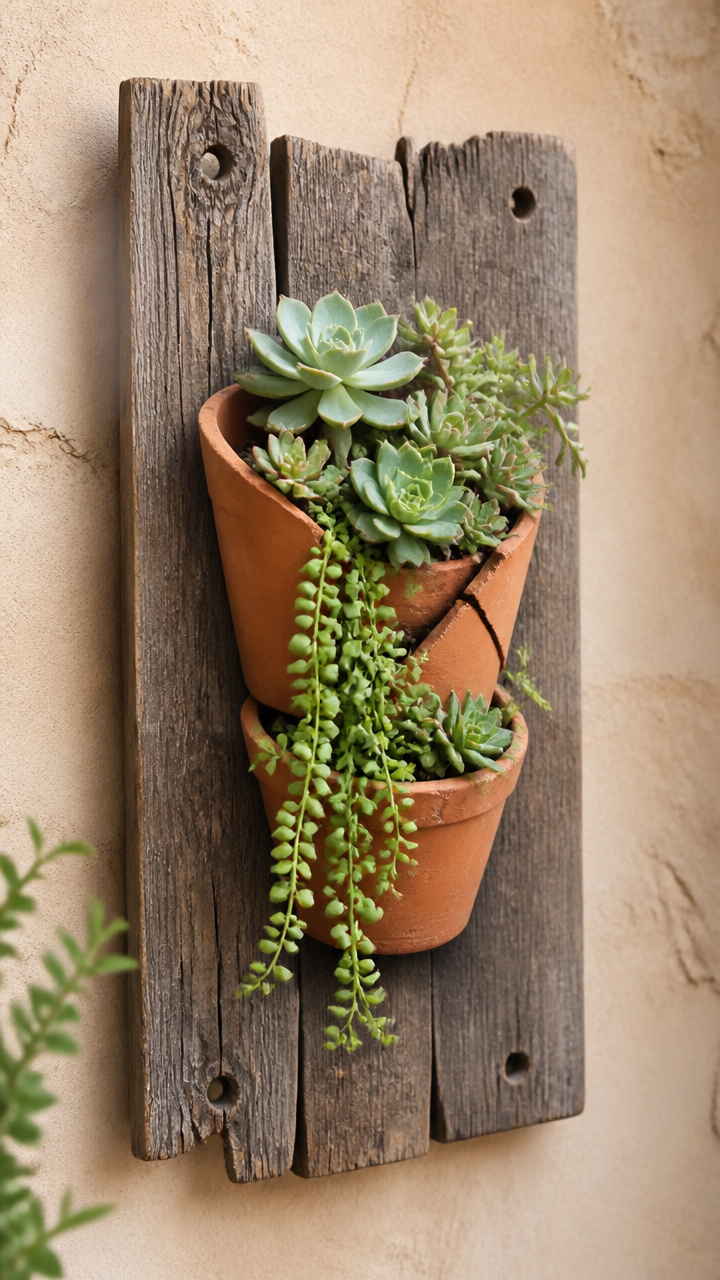
Vertical garden spaces gain warmth when you mount half-pots directly to weathered wood backings. The flat break allows the pot to sit flush against the timber, creating a secure pocket for trailing plants.
Materials Needed
- 1 clean half-pot with intact drainage hole
- 1 reclaimed cedar board (12×8 inches, 1 inch thick)
- 2 heavy-duty 1.5-inch exterior wood screws
- 1 tube exterior construction adhesive
- 1 sawtooth picture hanger
- 1 small fern or trailing pothos plant
- 2 cups potting mix
How to Make It
- Attach a heavy-duty sawtooth picture hanger to the top back edge of your cedar board using short screws.
- Apply a thick bead of exterior construction adhesive along the broken rear rim of the half-pot and press it firmly against the lower front of the board.
- Drive two wood screws through the adhesive bead from the back of the board into the thicker top lip of the pot for extra strength.
- Let the adhesive cure undisturbed for 48 hours to form a permanent bond.
- Fill the mounted pocket with potting soil, plant your fern, and hang the finished board on a shaded fence or porch wall.
10. Copper-Wrapped Shard Garden Mobile
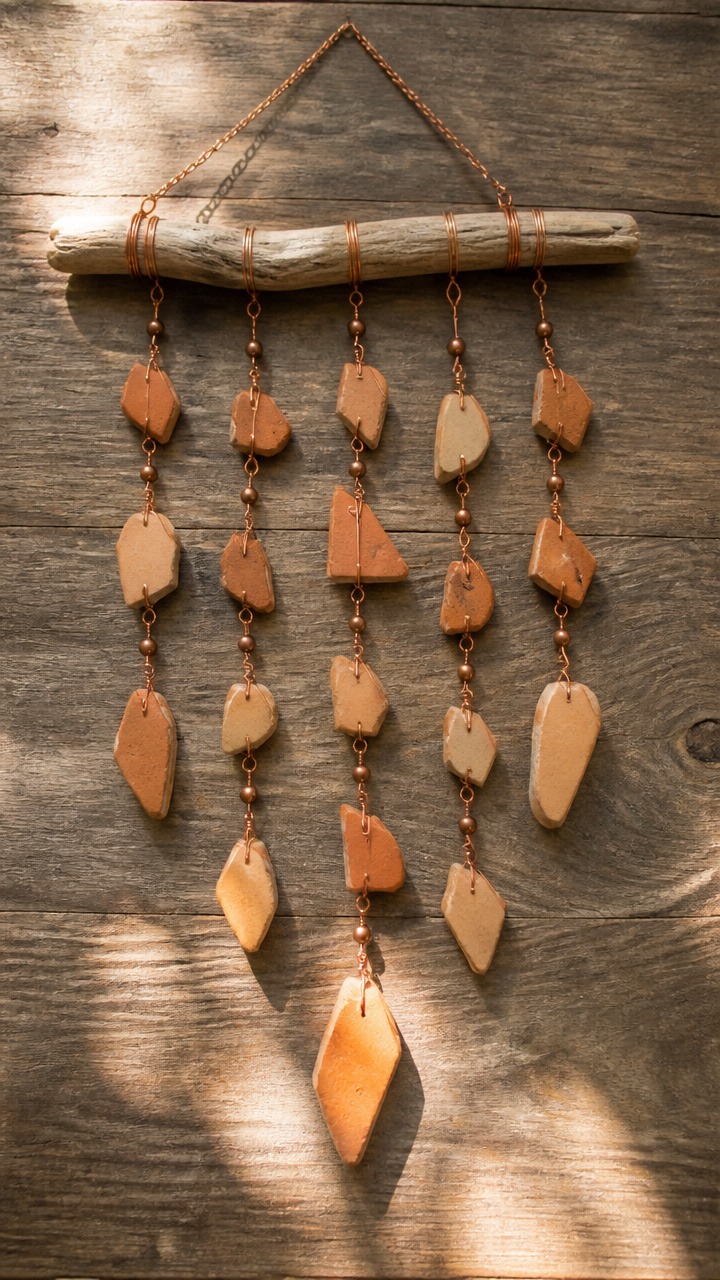
Weathered pottery fragments catch sunlight and bring warm color when suspended from sturdy branches. Wrapping the edges in raw copper wire adds metallic gleam that ages into a soft green patina outdoors.
Materials Needed
- 5 smooth-edged terra cotta shards
- 1 spool 18-gauge solid copper craft wire
- 1 wire cutter
- 1 pair round-nose craft pliers
- 1 piece of weathered driftwood (10 inches long)
- 2 eye hooks
How to Make It
- Wrap 18-gauge copper wire securely around each shard three times, twisting the wire tightly on the back with round-nose pliers to hold the clay firmly.
- Form a 1/2-inch wire loop at the top of each wrapped shard for hanging.
- Screw two small eye hooks into the underside of your driftwood piece and cut five varying lengths of copper wire between 6 and 14 inches.
- Attach the top loops of your shards to the driftwood with the wire lengths, balancing the weight across the stick.
- Fasten a copper suspension loop to the center top of the driftwood and hang the mobile from a tree branch or patio beam.



11. Solitary Bee Clay Hotel
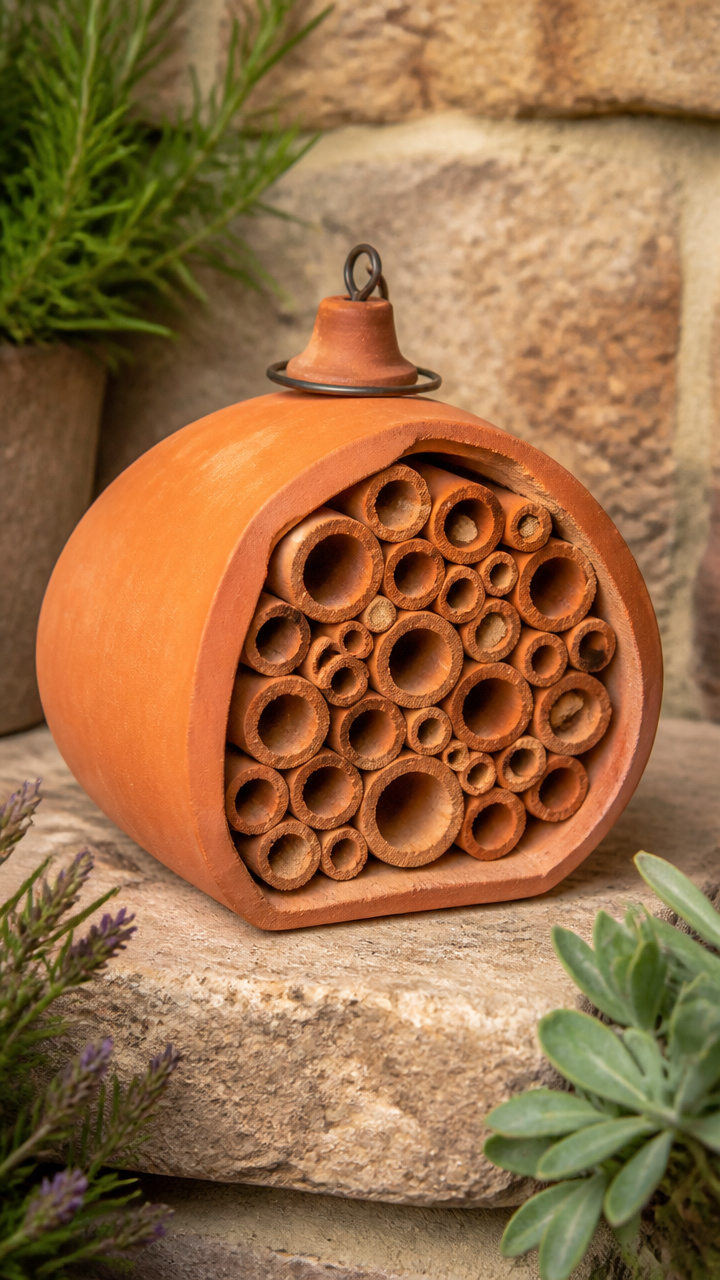
Hollow pot cavities packed with natural nesting reeds give solitary native bees a dry shelter for egg-laying. Terra cotta insulates against sudden temperature swings better than thin plastic or sheet metal.
Materials Needed
- 1 large broken pot base with intact bottom and back (6 to 8 inches deep)
- 40 to 50 hollow bamboo cane sections (6 inches long, varied diameters)
- 4 flat terra cotta shards
- 1 tube exterior silicone sealant
- 1 wire picture hanger
How to Make It
- Lay the broken pot on its side on your workbench and secure the bottom to an exterior post or wall using silicone adhesive and a picture hanger.
- Insert your bamboo cane sections into the pot cavity horizontally, packing them tightly together with the hollow ends facing outward.
- Slide flat shards between groups of bamboo stalks to create sturdy internal partitions and keep the tubes firmly wedged.
- Check that all bamboo pieces sit flush inside the rim so rain rolls off the top clay lip instead of soaking the nesting tubes.
- Position the finished habitat on a south-facing wall at least 4 feet off the ground in full morning sun.
12. Tiled Patio Tabletop Mosaic
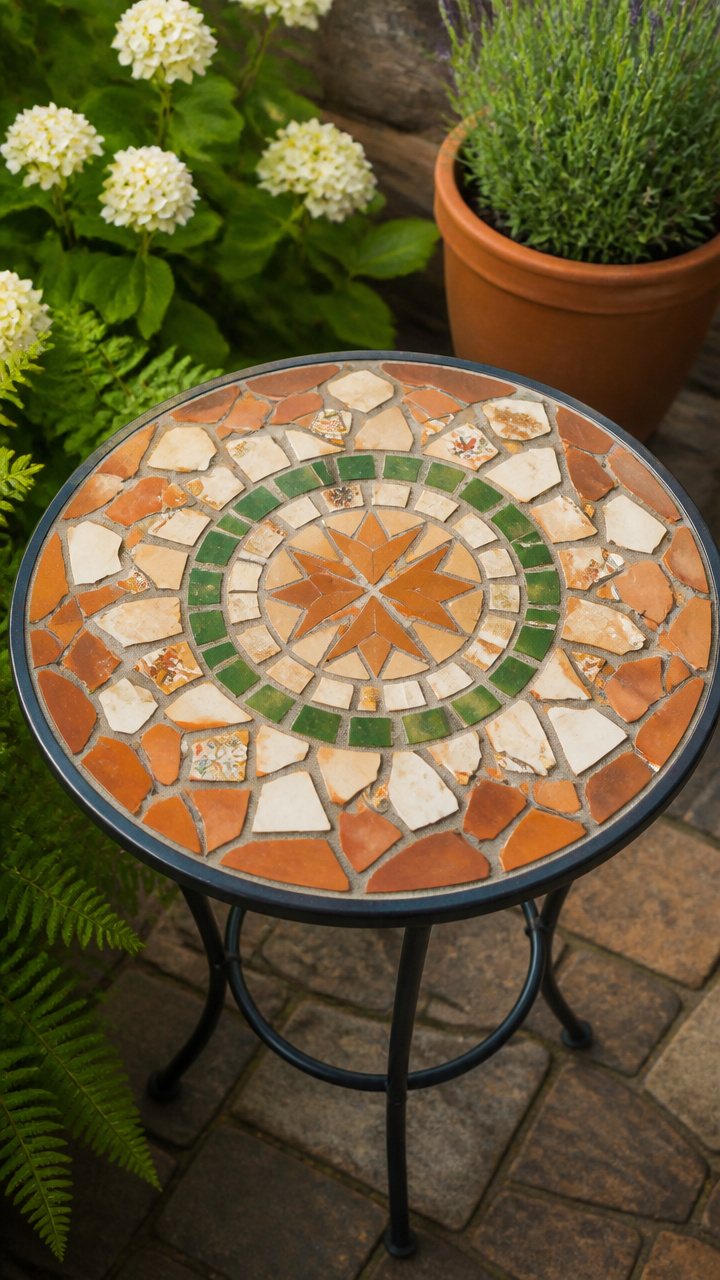
Drab outdoor tables gain durable, weather-resistant surfaces when covered in broken terra cotta tile patterns. Dark grout lines highlight the geometric fractures while sealing out rain and dirt.
Materials Needed
- 1 small metal or wooden side table (16 to 18 inch top)
- 40 to 50 small flat terra cotta shards
- 1 tube exterior tile adhesive
- 3 pounds outdoor charcoal-tinted tile grout
- 1 grout sponge
- 1 rubber float tool
How to Make It
- Sand the tabletop surface with 80-grit sandpaper to create texture for the adhesive to grip.
- Lay out your shards in a dry pattern across the table surface, spacing them roughly 1/4 inch apart.
- Spread tile adhesive across the tabletop in small sections using a notched trowel and press each shard firmly into the glue bed.
- Let the adhesive dry for 24 hours, then apply charcoal-tinted grout with a rubber float, pressing the paste into every seam.
- Wipe the table clean with a damp sponge after 30 minutes, buff off the dried haze with a soft microfiber cloth, and allow the tabletop to cure for 3 days before use.
13. Tiered Water Spillway Fountain
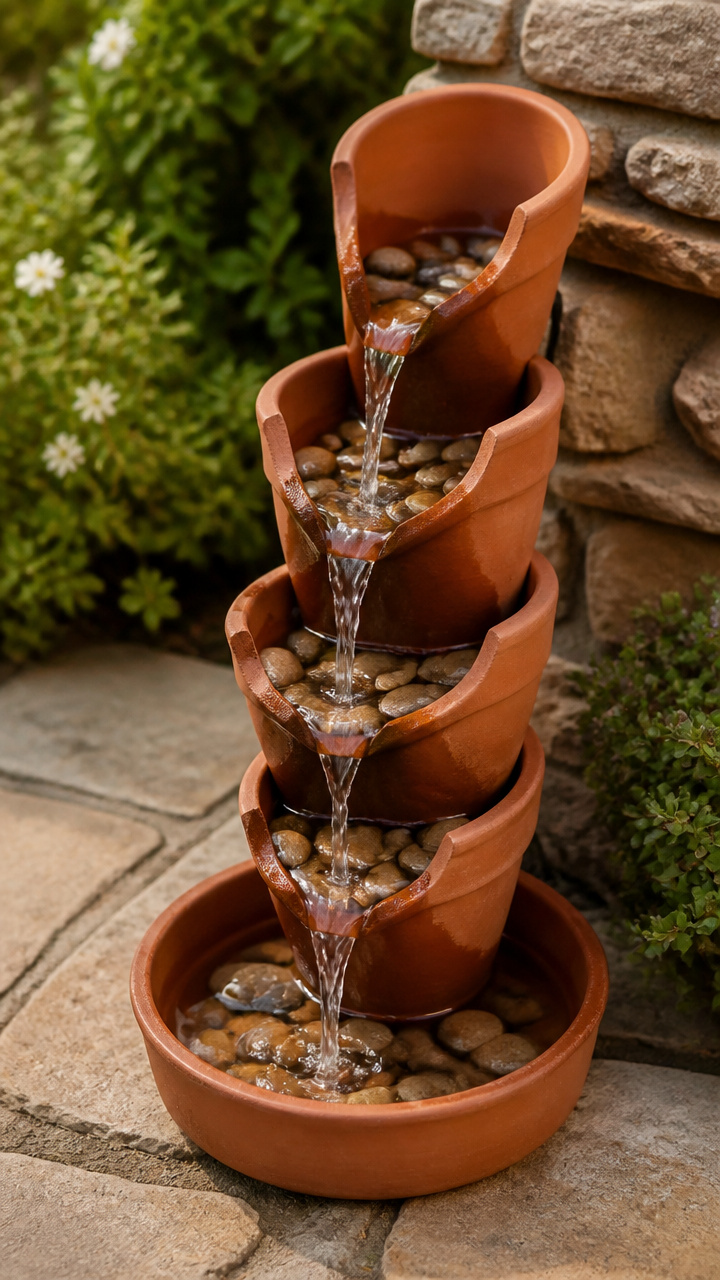
Layered pottery curves channel running water through a calming backyard fountain. Stacking broken rims in descending sizes creates crisp mini waterfalls that aerate the water for garden birds.
Materials Needed
- 3 deeply curved terra cotta rim shards of decreasing sizes (6-inch, 4-inch, and 3-inch)
- 1 wide glazed ceramic bowl (12 inches)
- 1 small submersible water pump (80 GPH) with 1/2-inch tubing
- 1 tube waterproof silicone sealant
- 5 pounds smooth river pebbles
How to Make It
- Place the water pump in the bottom center of the wide glazed bowl and run the power cord out the back.
- Stack the three curved shards along one side of the bowl in a tiered staircase, adhering the contact points with waterproof silicone sealant so water flows from the smallest shard down to the largest.
- Attach the pump tubing to the underside of the top shard with silicone so water pumps directly onto the upper curve.
- Fill the base bowl with smooth river pebbles to anchor the pump and conceal the mechanics.
- Fill the bowl with clean water until the pump is fully submerged and plug in the power cord to start the waterfall.
14. Wire-Mesh Succulent Pocket Frame
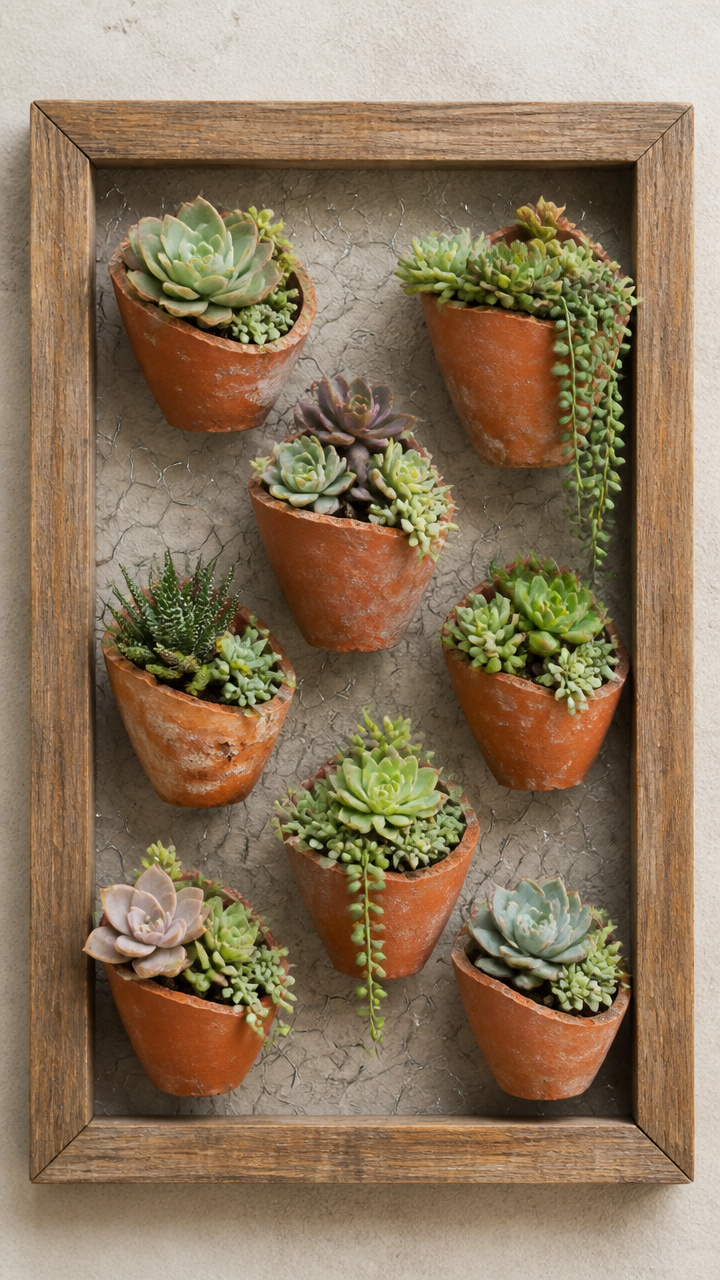
Rustic wire netting paired with curved shards produces vertical planting pockets for shallow-rooting sedums. The open framework drains excess water immediately, preventing root rot on outdoor walls.
Materials Needed
- 1 reclaimed wooden picture frame (8×10 inches)
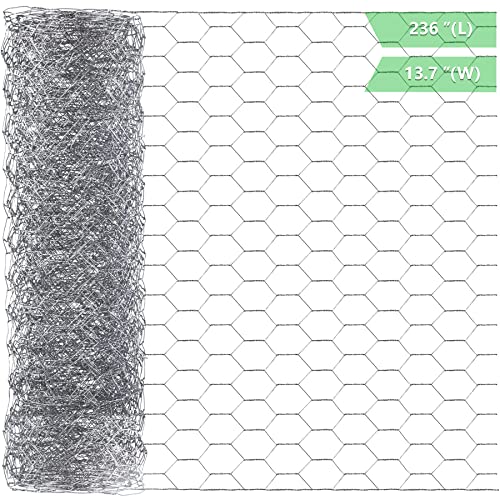
- 1 sheet 1/2-inch galvanized hardware cloth (10×12 inches)
- 1 staple gun with heavy-duty staples
- 4 wide, cup-shaped terra cotta shards
- 1 spool 20-gauge floral wire
- 2 cups damp sphagnum moss
- 4 small succulent cuttings
How to Make It
- Staple galvanized hardware cloth across the back of the empty picture frame, trimming any excess wire along the edges.
- Pack a 1-inch layer of damp sphagnum moss against the front face of the wire mesh inside the frame opening.
- Place each cup-shaped shard over the moss to form open planting pockets, securing each shard by looping floral wire over its edge and through the back mesh.
- Tuck succulent cuttings into the moss behind each clay pocket, adding extra moss to hold the roots tight.
- Lay the frame flat for two weeks while roots establish, then hang it on a sunny garden fence.


15. Painted Terra Cotta Pot Feet
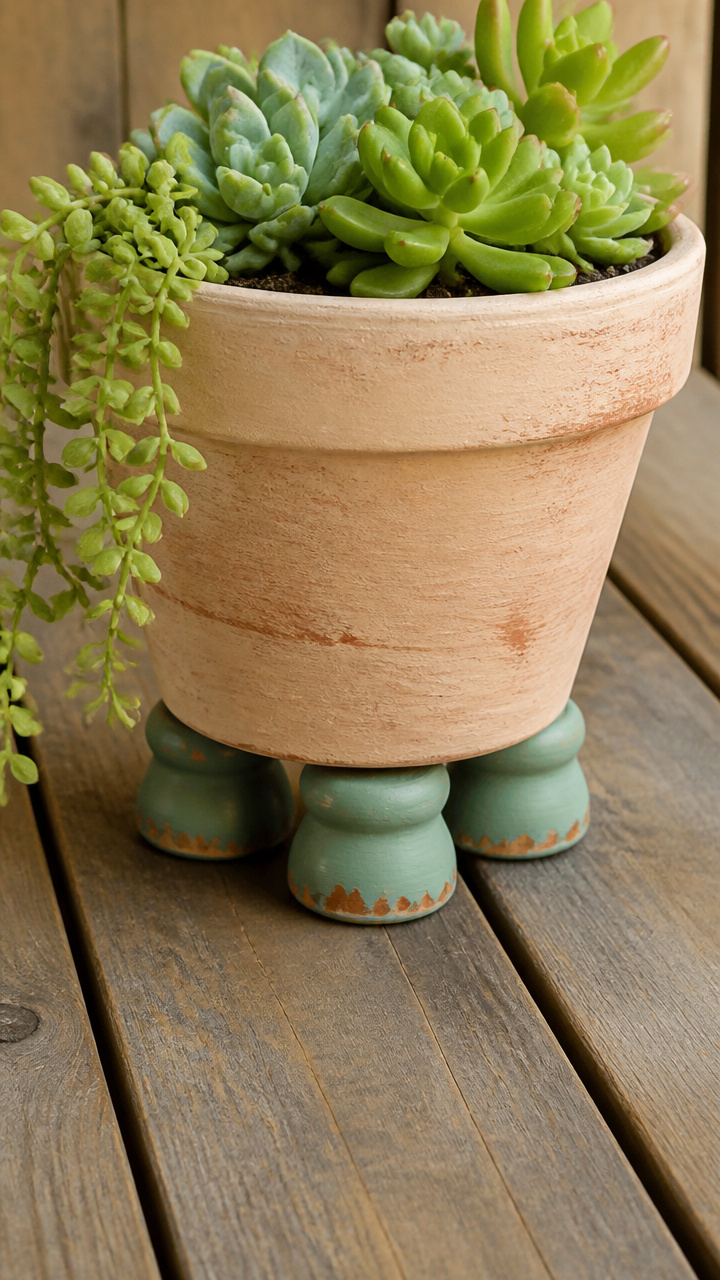
Sturdy base fragments lift heavy planters off concrete slabs to promote healthy drainage and stop water stains. Adding painted details gives these functional risers a neat, decorative finish.
Materials Needed
- 12 thick, flat base shards of roughly equal size (2 to 3 inches square)
- 1 bottle outdoor patio acrylic paint (terracotta or turquoise)
- 1 medium flat craft paintbrush
- 1 sheet 80-grit sandpaper
- 1 bottle outdoor clear gloss sealer
How to Make It
- Sand all sharp edges on the 12 base shards with 80-grit sandpaper until the perimeters are smooth and rounded.
- Paint two coats of outdoor patio acrylic paint over the top and sides of each piece, letting the paint dry for 1 hour between coats.
- Brush a coat of outdoor clear gloss sealer over the painted surfaces and allow them to cure overnight.
- Group the shards into sets of three matching pieces for each planter you want to lift.
- Slide three shards evenly under the bottom rim of a potted plant to lift the container off the patio surface and allow water to drain freely.
Broken pottery is an inevitable part of gardening, but it never has to go to waste. Grab your safety glasses, pick out your favorite pieces from the scrap pile, and start building your next rustic garden feature today.