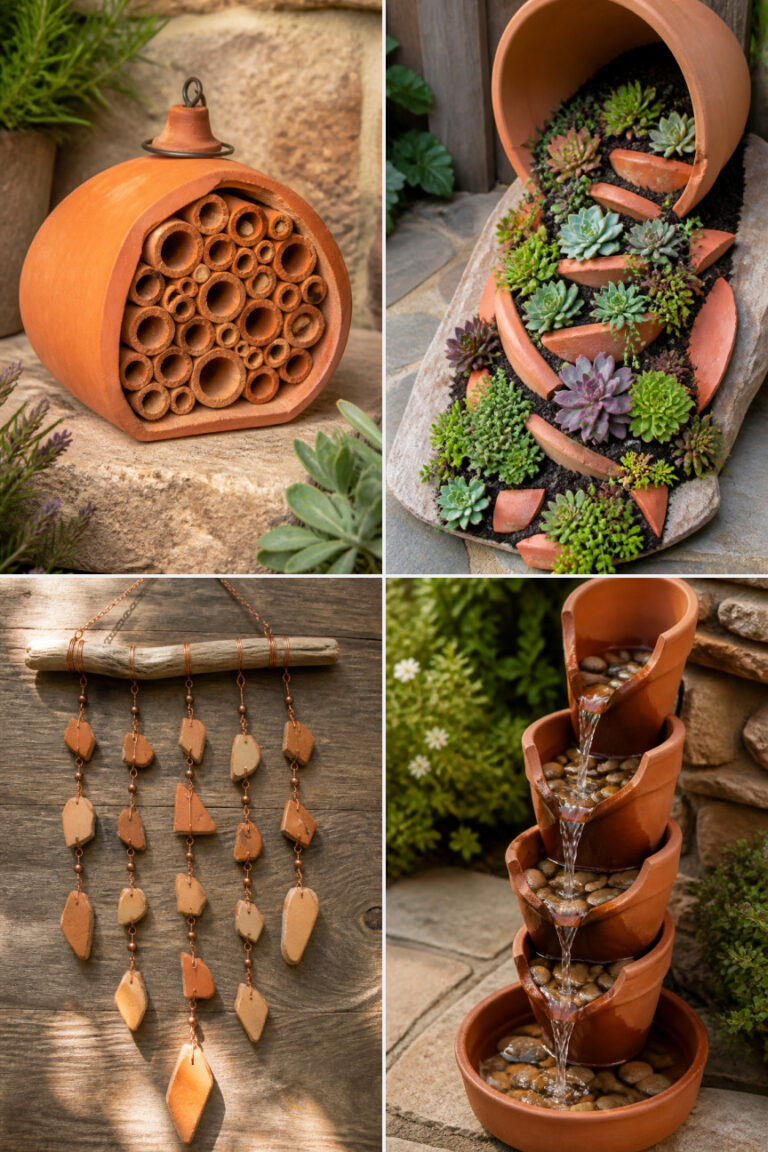
15 Garden Marker and Plant Label Crafts Made From Spoons and Rocks

Keeping track of fresh seedlings and young herbs gives your garden structure and charm. Everyday objects like mismatched kitchen spoons and smooth backyard rocks make durable, weather-resistant markers that look right at home among green leaves.
Finding useful materials already sitting in your kitchen drawers or garden beds saves money while adding personality to every row. You can customize each piece to match your style, creating lasting labels that withstand rain, sun, and dirt all season long.
1. Stamped Vintage Silverware Markers
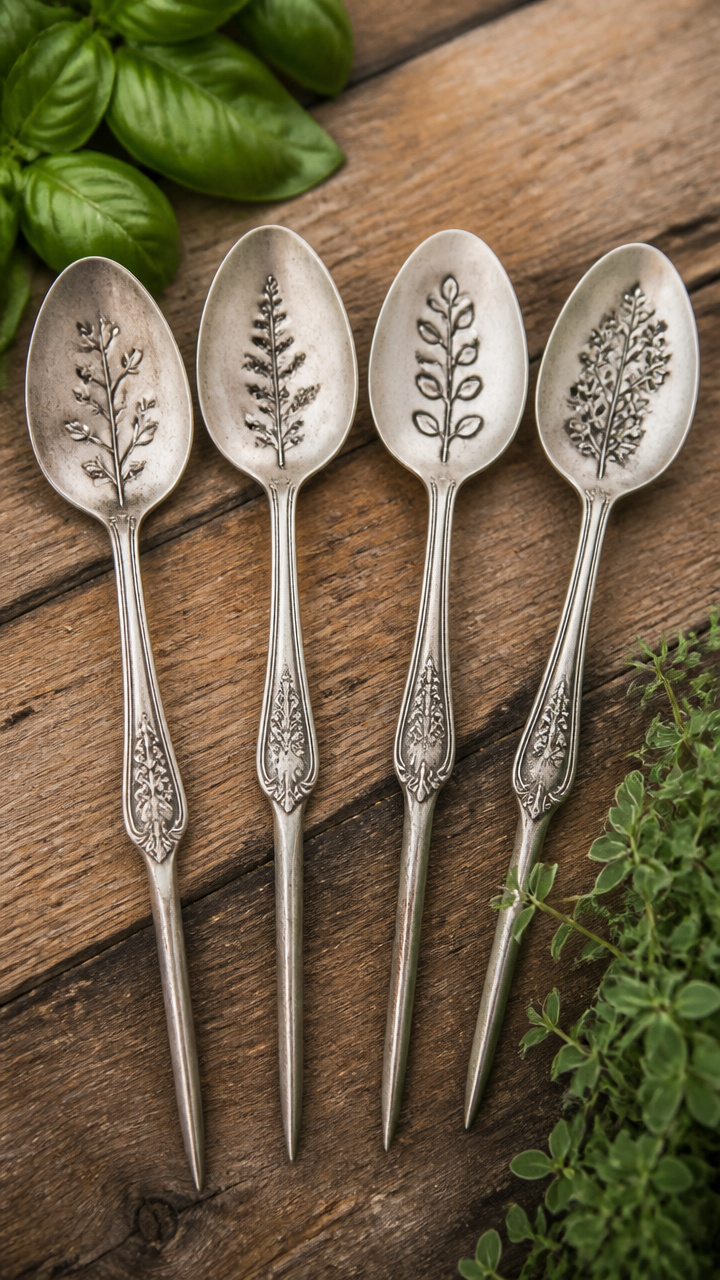
Flattened antique spoons display crisp, deep impressions that will never wash away in the rain. Hand-stamped metal gives your herb patch a classic, heirloom look.
Materials Needed
- 4 vintage silverplate tablespoons
- 1 steel bench block
- 1 16-ounce ball-peen hammer
- 1 3mm uppercase metal letter stamp set
- 1 black permanent marker
- 1 fine-grit sanding sponge
How to Make It
- Place the bowl of a silverplate spoon face down on the steel bench block and strike the rounded curve firmly with the flat face of your ball-peen hammer until completely flat.
- Position each letter stamp upright against the flattened bowl, holding it steady, and strike the top once with firm, even pressure to form each letter of your plant name.
- Color directly over the stamped letters with your black permanent marker, allowing the pigment to settle deep into the grooves for one minute.
- Rub the flat metal surface with a fine-grit sanding sponge to remove excess ink from the raised areas while leaving the stamped letters dark and legible.
2. Decoupaged Botanical River Stones
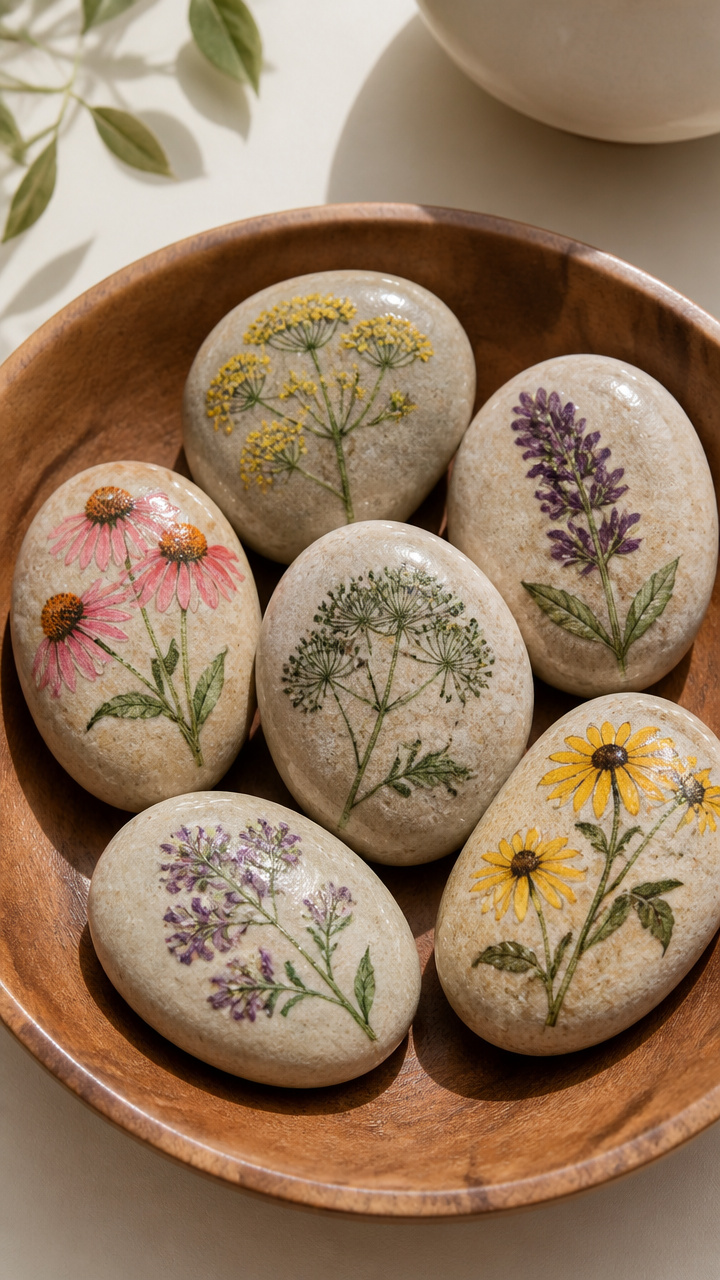
Smooth river stones decorated with paper napkins bring delicate floral illustrations right into your seedling pots. Outdoor sealing glue protects the paper fibers from garden moisture.
Materials Needed
- 6 smooth, flat river rocks (3 to 4 inches wide)
- 3 decorative paper napkins with herb or vegetable prints
- 1 bottle outdoor matte Mod Podge (8 oz)
- 1 soft flat craft brush (1 inch wide)
- 1 pair precision detail scissors
How to Make It
- Wash the river rocks with warm, soapy water to remove dirt and let them dry completely in the sun.
- Separate the printed top ply of your paper napkins from the plain white backing layers and cut out your botanical designs using detail scissors.
- Brush a thin, even coat of outdoor Mod Podge over the top face of a rock, position the napkin cutout on top, and gently smooth out air bubbles using your fingertips.
- Apply two additional coats of outdoor Mod Podge over the entire top and sides of the stone, waiting twenty minutes between coats to build a water-resistant barrier.
3. Alcohol Ink Polished Pebble Markers
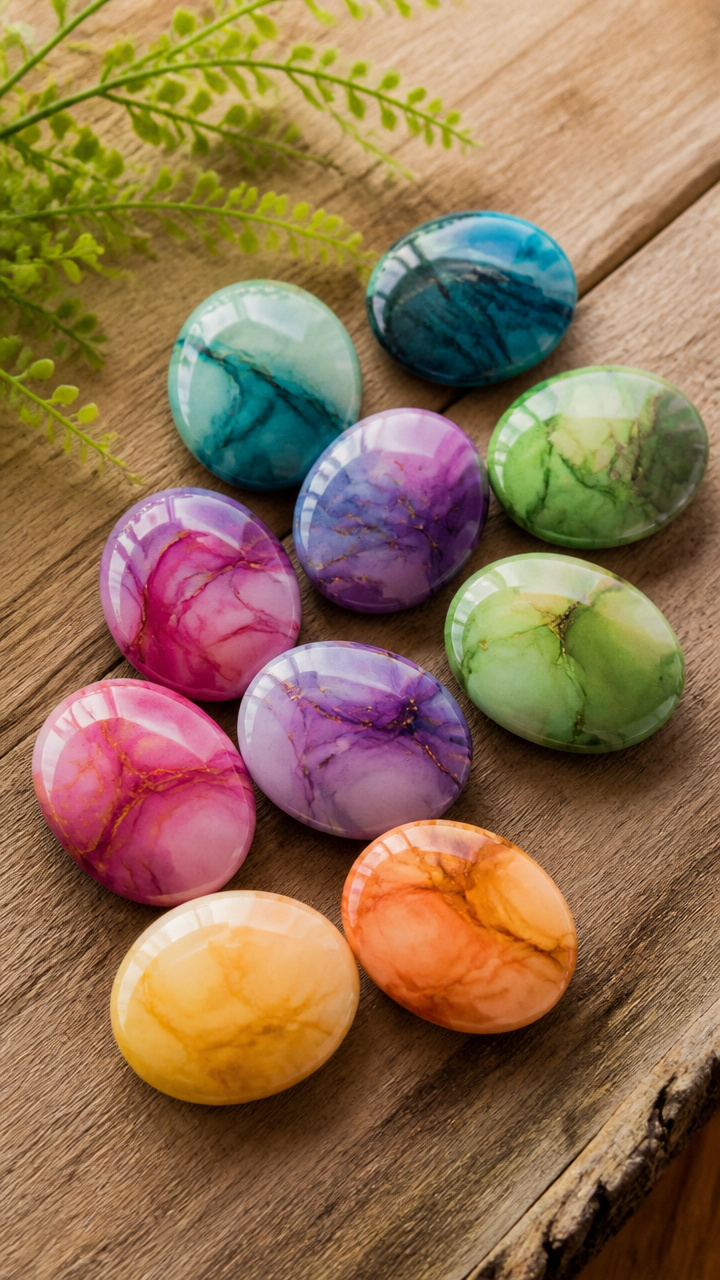
Vibrant swirls of concentrated ink produce brilliant marbling across smooth white rocks. Fine paint pen lettering on top ensures your plant varieties remain easy to read.
Materials Needed
- 5 smooth white tumbled garden stones (2 to 3 inches wide)
- 3 bottles alcohol ink in greens, blues, and yellows (0.5 oz each)
- 1 bottle 91 percent isopropyl alcohol in a small spray bottle
- 1 fine-tip black oil-based paint pen (0.7mm)
- 1 can clear UV-resistant gloss acrylic sealer spray
How to Make It
- Drip two to three drops of different colored alcohol inks directly onto the surface of a clean white stone, then mist lightly with isopropyl alcohol to blend the colors.
- Tilt the rock gently in different directions to let the pigments flow together, then allow the stone to dry for ten minutes until the surface is tack-free.
- Write the plant name across the center of the marbled pattern using a fine-tip black oil-based paint pen and let the paint dry for thirty minutes.
- Spray the entire stone with two light coats of clear UV-resistant gloss sealer outdoors, allowing twenty minutes of drying time between applications.
4. Pyrography Bamboo Spoon Markers
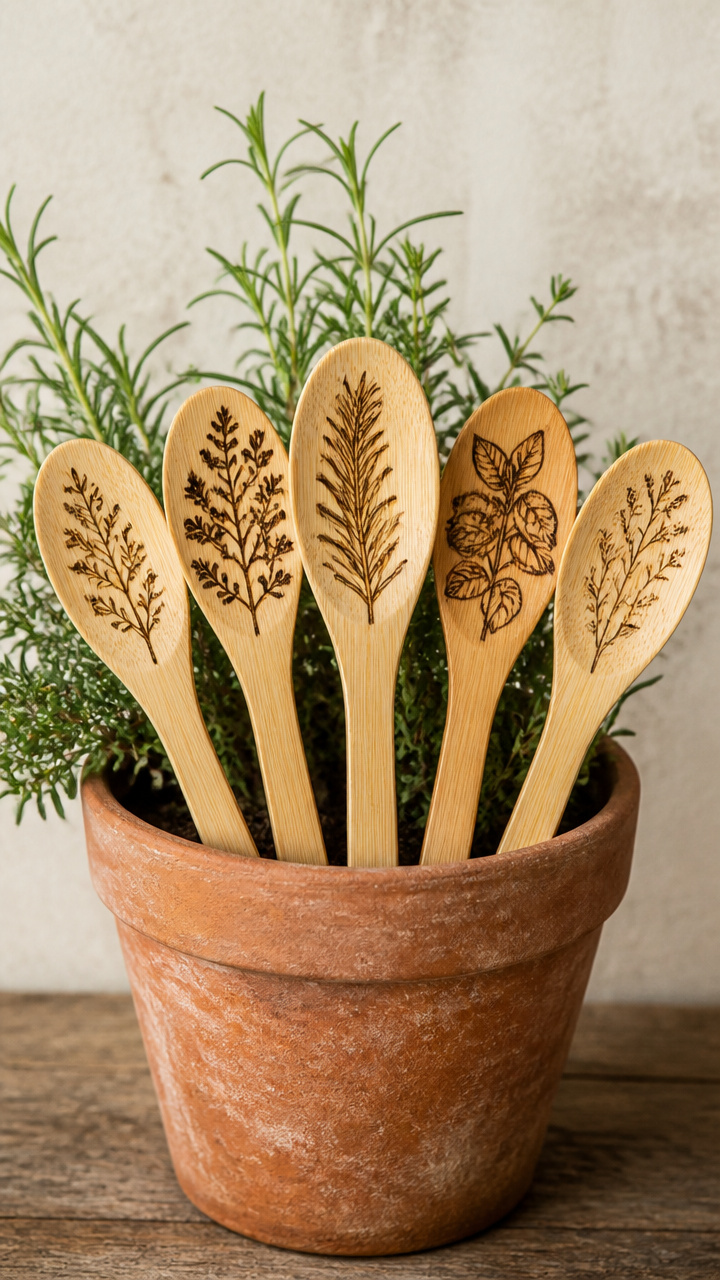
Wood-burned bamboo spoons offer a rustic, earth-toned marker that naturally blends into vegetable patches. The burned grooves stay dark and legible without fading under direct sunlight.
Materials Needed
- 6 bamboo cooking spoons (10 to 12 inches long)
- 1 dual-temp pyrography pen with universal shading and fine writing tips
- 1 medium-lead pencil
- 1 roll 220-grit sandpaper
- 1 bottle pure tung oil (4 oz)
- 1 cotton rag
How to Make It
- Sand the front bowl and upper handle of each bamboo spoon with 220-grit sandpaper until completely smooth, then wipe away all wood dust.
- Sketch your plant names and simple leaf accents lightly onto the spoon bowls using your pencil.
- Attach the fine writing tip to your pyrography pen, heat it to medium-high, and trace steadily over your pencil lines with light, consistent pressure.
- Wipe pure tung oil across the finished spoons using a clean cotton rag to seal the bamboo against soil moisture and outdoor humidity.
5. Chalkboard Painted Slate Rock Markers
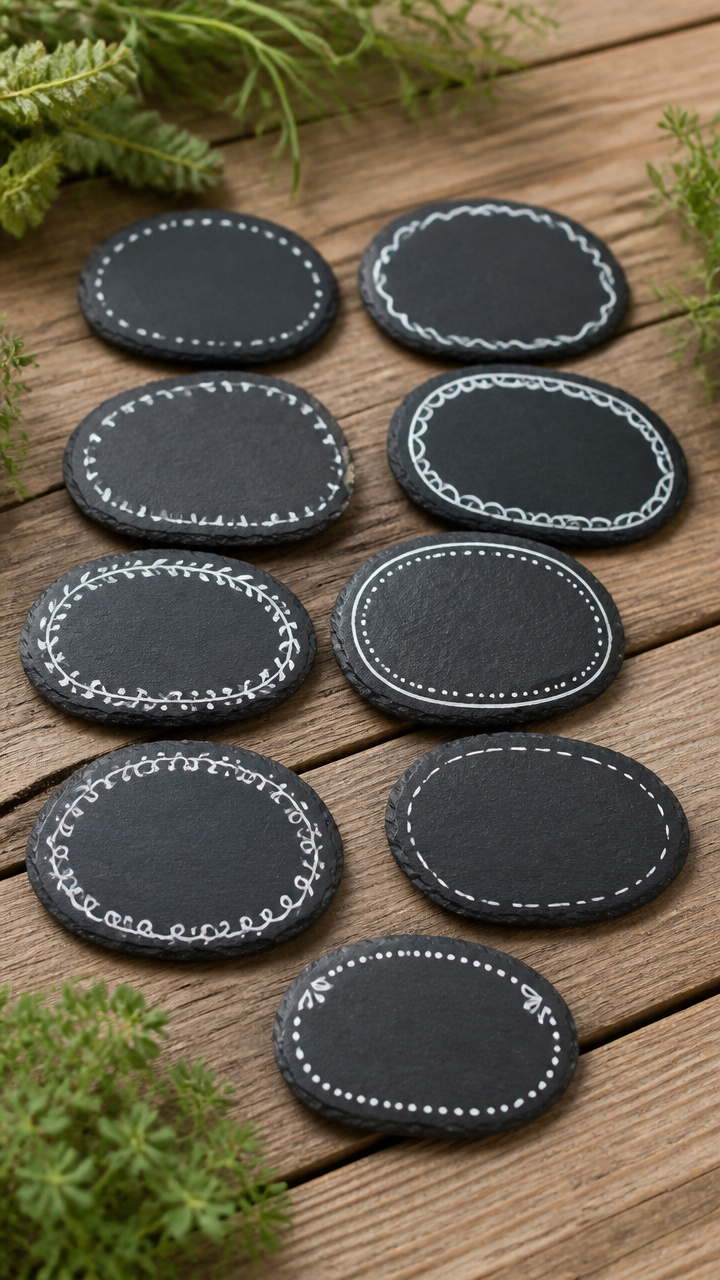
Dark slate stones coated in durable chalkboard finish create reusable labels you can update each planting season. Bright chalk markers create crisp lines that stand out against dark garden soil.
Materials Needed
- 6 flat pieces of natural garden slate (4 to 5 inches across)
- 1 jar exterior chalkboard paint (8 oz)
- 1 medium foam brush (2 inches wide)
- 1 waterproof white liquid chalk marker
- 1 small piece of regular white classroom chalk
How to Make It
- Rinse and dry the slate pieces thoroughly to ensure paint adheres properly to the porous stone texture.
- Apply two coats of exterior chalkboard paint across the top surface using your foam brush, waiting two hours between coats.
- Rub the side of a regular piece of chalk flat across the cured paint to prime the surface, then wipe off the excess dust with a dry cloth.
- Write your plant names neatly using a waterproof liquid chalk marker, letting the pigment dry for five minutes before placing the slate beside your plants.
6. Porcelain Enamel Painted Silver Spoons
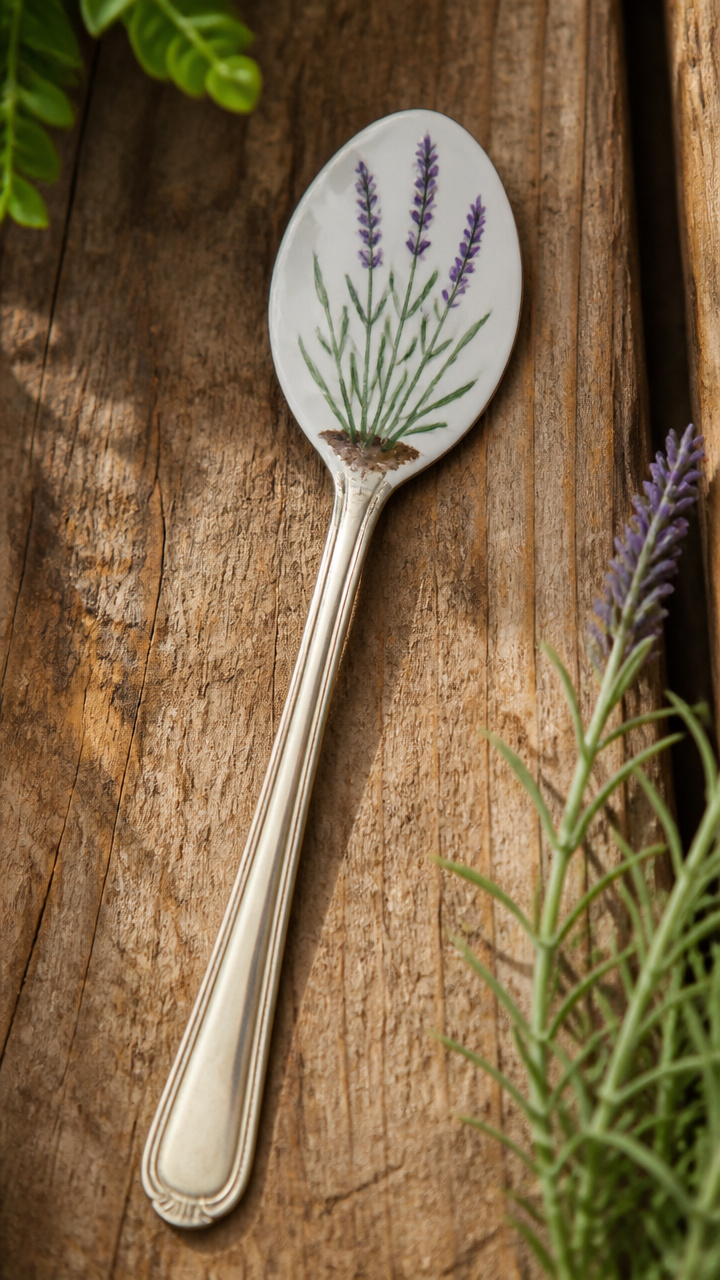
Glossy baked enamel paint turns ordinary thrift store spoons into bright, permanent garden stakes. Curing the paint in your home oven makes the lettering completely waterproof.
Materials Needed
- 6 mismatched stainless steel or silverplate teaspoons
- 1 bottle Pebeo Porcelaine 150 paint in white (45 ml)
- 1 fine round detail paintbrush (size 0)
- 1 bottle rubbing alcohol
- 1 baking sheet lined with aluminum foil
How to Make It
- Wipe the bowl of each metal spoon thoroughly with rubbing alcohol to remove grease and fingerprints.
- Paint your plant names and small border dots inside the concave bowl of the spoons using Porcelaine 150 paint and your fine detail brush.
- Let the painted spoons dry at room temperature for twenty-four hours to cure the paint base.
- Place the spoons on an aluminum-lined baking sheet in a cold oven, heat to 300 degrees Fahrenheit for thirty-five minutes, then turn off the heat and allow the spoons to cool inside the oven completely.

7. Wire-Wrapped Beach Stone Stakes
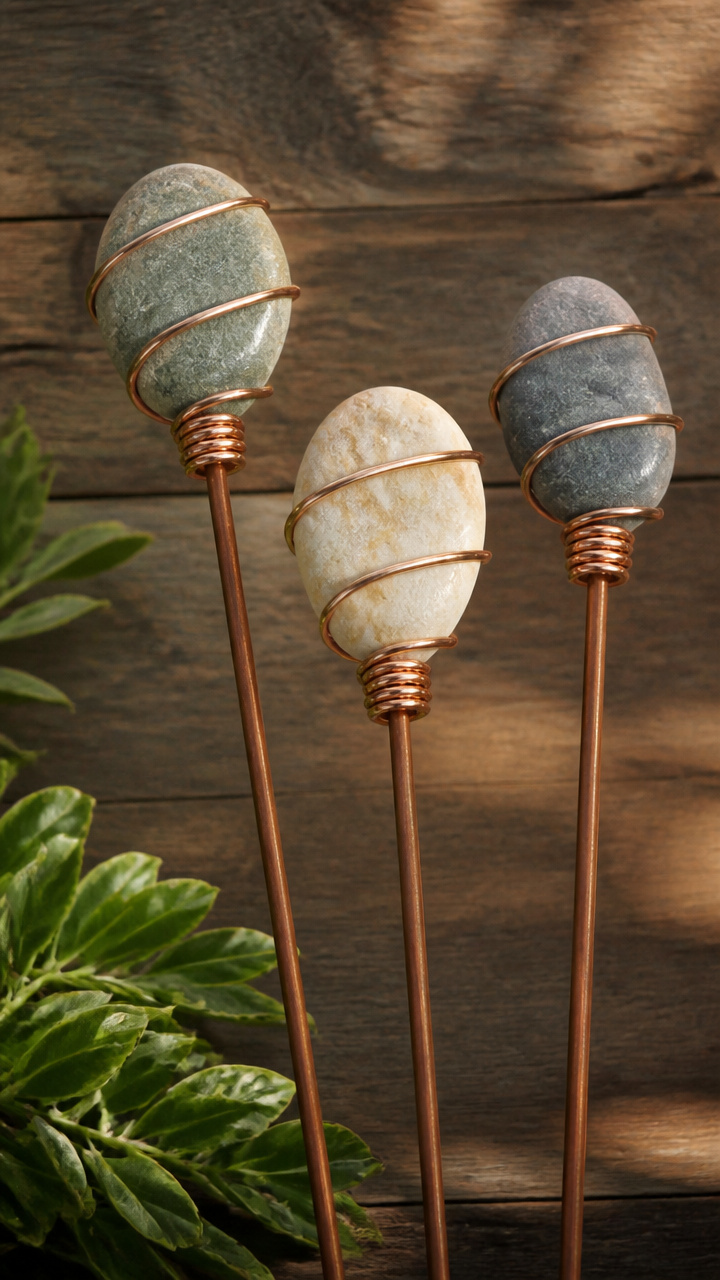
Smooth beach stones secured in bright copper cages make sculptural ground markers that never blow away in high winds. Sturdy wire stems push deep into soil beds to stay upright.
Materials Needed
- 4 oval beach stones (2 to 3 inches long)
- 1 roll 16-gauge bare copper wire (20 feet)
- 1 roll 20-gauge bare copper wire (15 feet)
- 1 pair round-nose jewelry pliers
- 1 pair wire cutters
- 1 fine-tip black permanent marker
How to Make It
- Write the plant name legibly along the length of the dry stone using your fine-tip permanent marker.
- Cut a 16-inch piece of 16-gauge copper wire, bend it in half, and twist the bottom 10 inches together tightly to form a rigid garden stake.
- Form the remaining top loose wires into an open cradle that grips the bottom and sides of your stone without covering the written lettering.
- Wrap 20-gauge copper wire three times around the stone and the cradle arms to lock the stone securely in place, trimming any sharp ends with wire cutters.
8. Resin-Poured Pressed Flower Stones
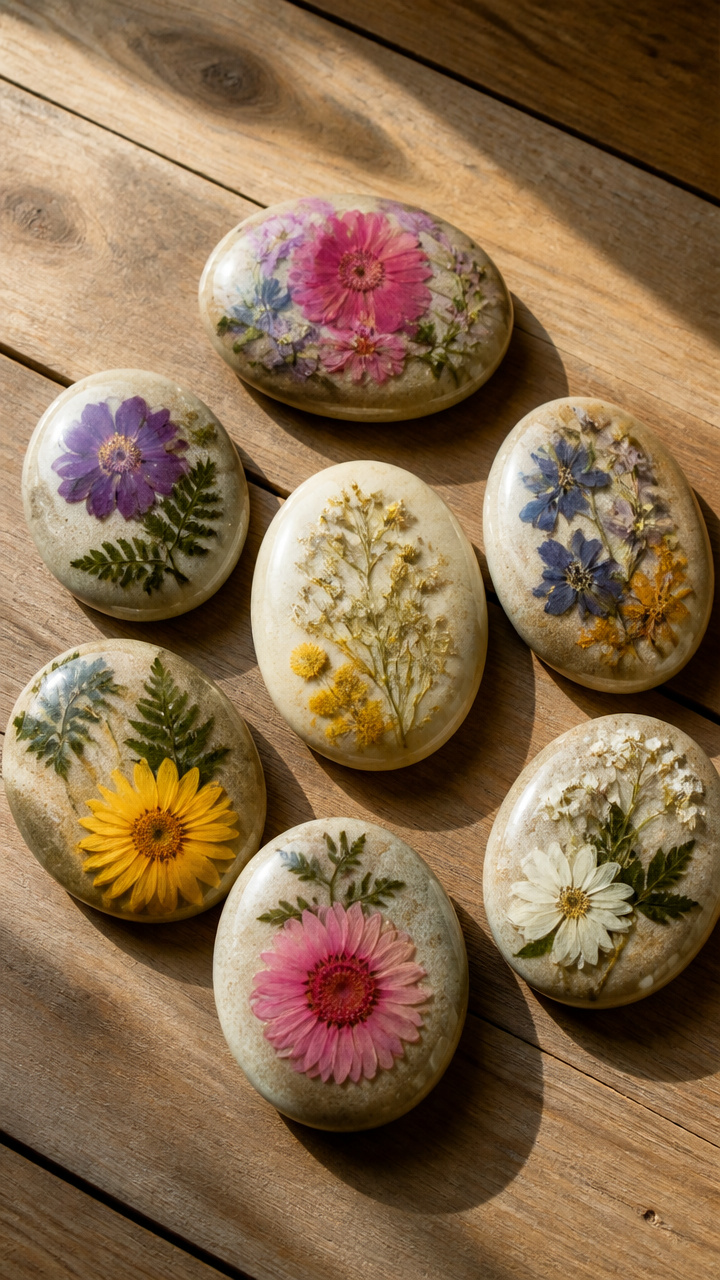
Dried garden blossoms cast under crystal-clear resin highlight the exact herbs and flowers growing below them. A glossy resin dome protects delicate botanical specimens from rain and wind.
Materials Needed
- 4 flat granite stones (3 inches wide)
- 1 packet assorted pressed dried herbs and edible flowers
- 1 bottle two-part clear epoxy resin kit (4 oz resin, 4 oz hardener)
- 2 plastic mixing cups with graduated measurements
- 2 wooden craft stir sticks
- 1 fine black paint pen
How to Make It
- Write the plant name along the bottom edge of a clean granite stone using the fine black paint pen and let it dry for ten minutes.
- Mix equal parts resin and hardener in a plastic cup, stirring slowly for three full minutes with a wooden stick to minimize air bubbles.
- Apply a tiny drop of mixed resin to the back of your pressed botanicals and press them flat against the stone face to prevent floating.
- Pour a thick puddle of mixed resin over the center of the stone, guiding it to the edges with your stir stick, and let it cure undisturbed under a dust cover for twenty-four hours.


9. Glow-in-the-Dark Cobblestone Markers
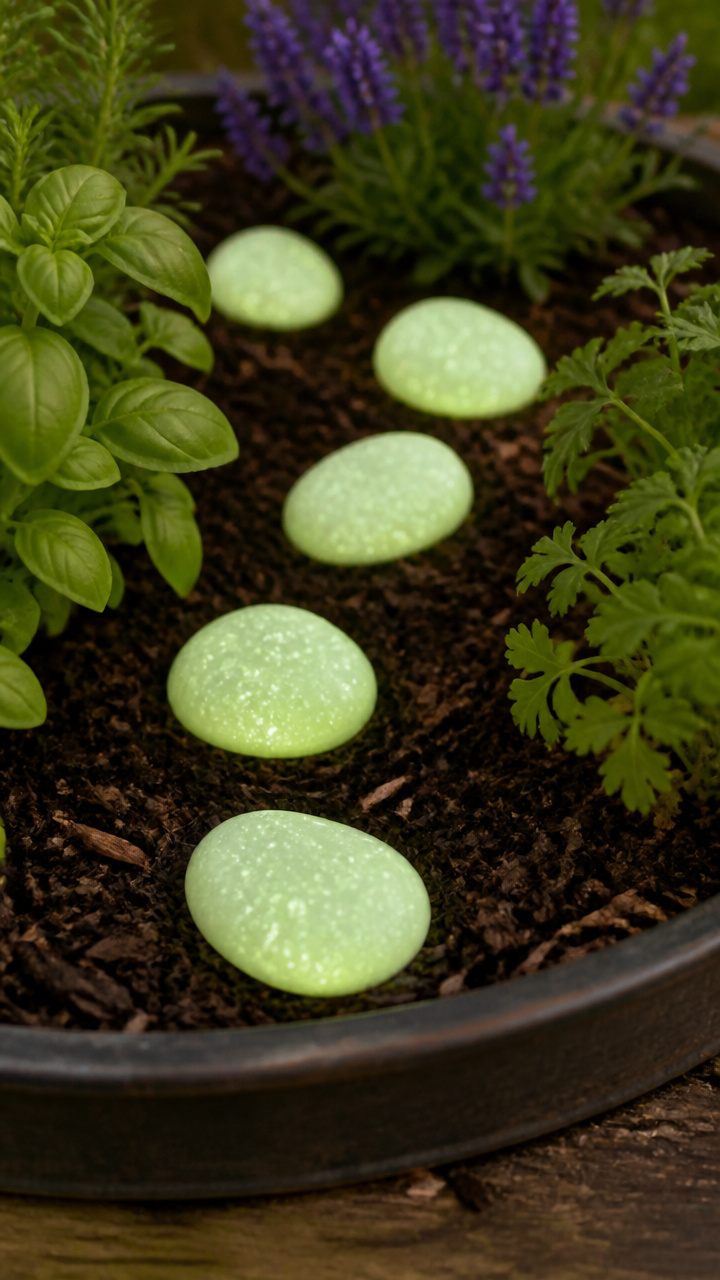
Luminescent acrylic paint charges under daylight and emits a gentle green glow along your garden pathways at night. Thick acrylic lettering remains bold and legible in both daylight and dark.
Materials Needed
- 6 rounded garden cobblestones (3 to 4 inches across)
- 1 jar phosphorescent glow-in-the-dark acrylic paint (4 oz)
- 1 bottle outdoor black acrylic craft paint (2 oz)
- 1 flat synthetic paintbrush (0.5 inch wide)
- 1 fine detail liner brush (size 1)
- 1 bottle exterior satin clear coat (8 oz)
How to Make It
- Paint a solid oval background on the top of each stone using your flat brush and outdoor black acrylic paint, then let it dry for thirty minutes.
- Paint your plant names across the dark oval using your fine detail liner brush and glow-in-the-dark acrylic paint, applying three thin coats for maximum brightness.
- Allow the luminous paint to dry completely for four hours.
- Brush two thick coats of exterior satin clear coat over the entire stone, letting the first coat dry for one hour before applying the second.
10. Mosaic Tiled Sandstone Markers
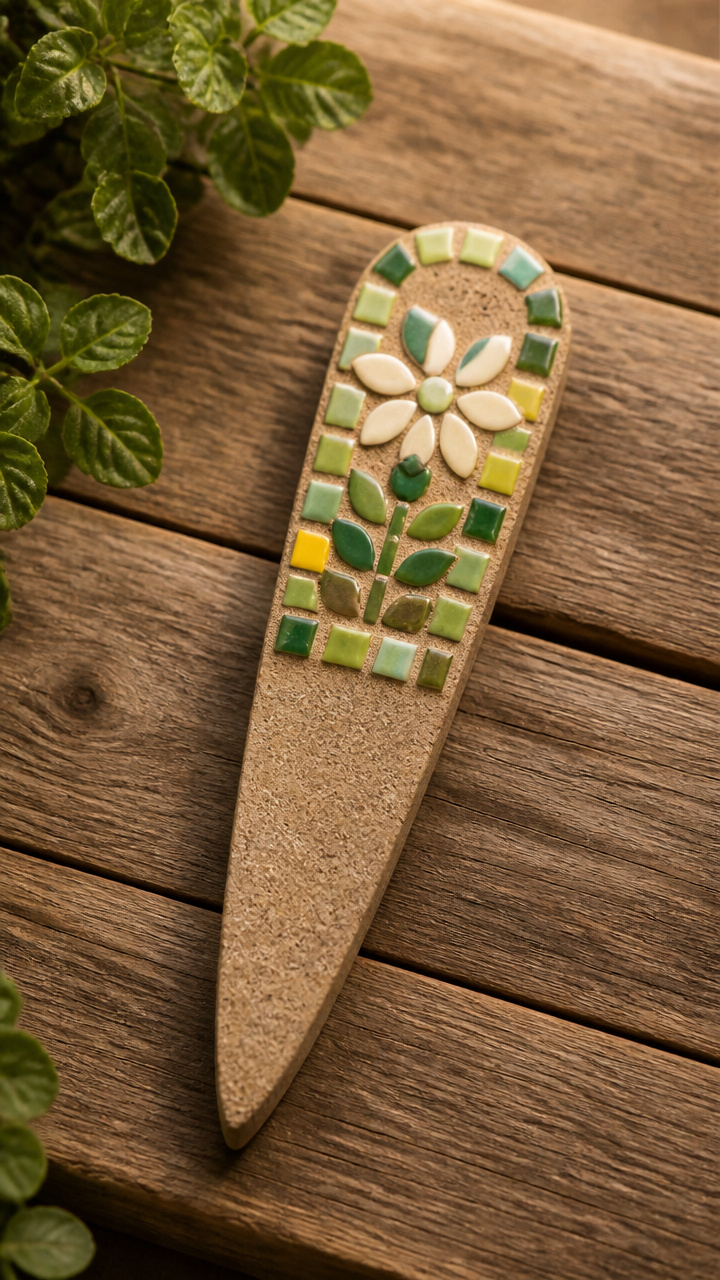
Colorful stained glass tesserae set into sandstone create heavy, permanent garden labels with rich Mediterranean flair. Waterproof sanded grout keeps the glass pieces locked in place through harsh weather.
Materials Needed
- 4 thick, flat sandstone chunks (4 to 5 inches square)
- 1 bag mixed stained glass mosaic tesserae tiles (0.5 inch squares)
- 1 bottle silicone mosaic adhesive (2 oz)
- 1 cup exterior waterproof sanded grout in charcoal
- 1 small rubber grout float
- 1 fine-point ceramic marker
How to Make It
- Write your plant name across the center of the sandstone chunk with the ceramic marker to establish the middle reading area.
- Glue stained glass mosaic tiles around the written name in a decorative border using small dabs of silicone adhesive, leaving a small gap between each tile.
- Let the adhesive set for twelve hours, then mix your sanded grout with water to a thick paste and press it firmly into the tile gaps with the rubber float.
- Wipe the excess grout off the tile surfaces with a damp sponge after twenty minutes, then let the grout cure fully for two days before placing the stone outside.


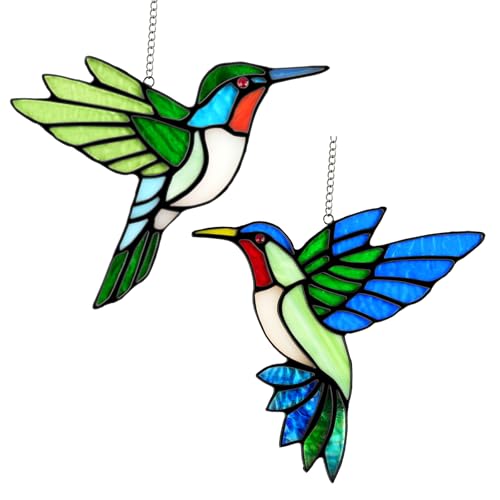
11. Beaded Teaspoon Handle Stakes
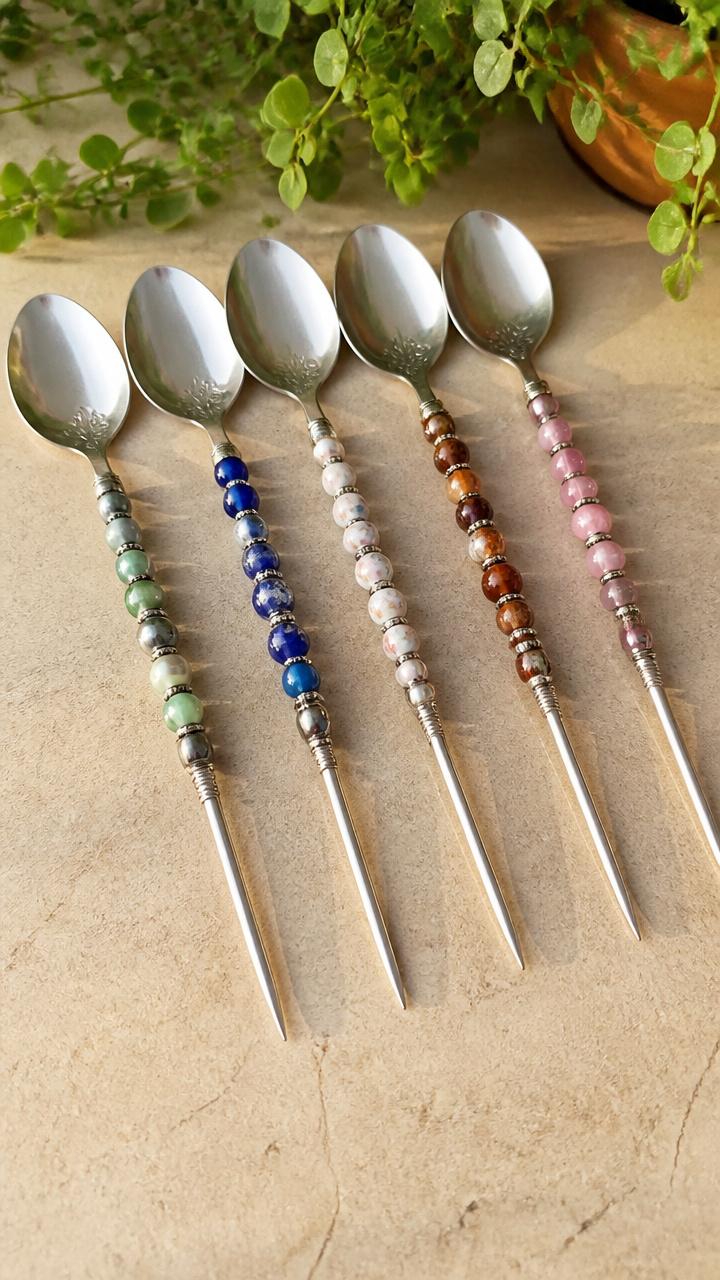
Drilled metal teaspoons strung with glass pony beads add sparkling color and vertical height to container gardens. Hanging metal tags swing freely to display plant varieties.
Materials Needed
- 4 vintage silver teaspoons
- 1 power drill fitted with a 1/8-inch cobalt drill bit
- 1 spool 20-gauge stainless steel craft wire
- 24 assorted 6mm colored glass pony beads
- 4 blank 1-inch aluminum stamping tags
- 1 set metal alphabet stamps with hammer
How to Make It
- Clamp each teaspoon handle securely on a scrap board and drill a 1/8-inch hole through the tip of the handle.
- Stamp your plant name onto an aluminum tag using metal letter stamps on a steel block, striking each letter firmly once.
- Cut an 8-inch piece of craft wire, pass it through the drilled spoon hole, and thread glass pony beads along both wire tails.
- Attach the stamped aluminum tag to the end of the beaded wire, twist the wire ends securely using pliers, and trim any excess length.
12. Gold Leaf Calligraphy Basalt Stones
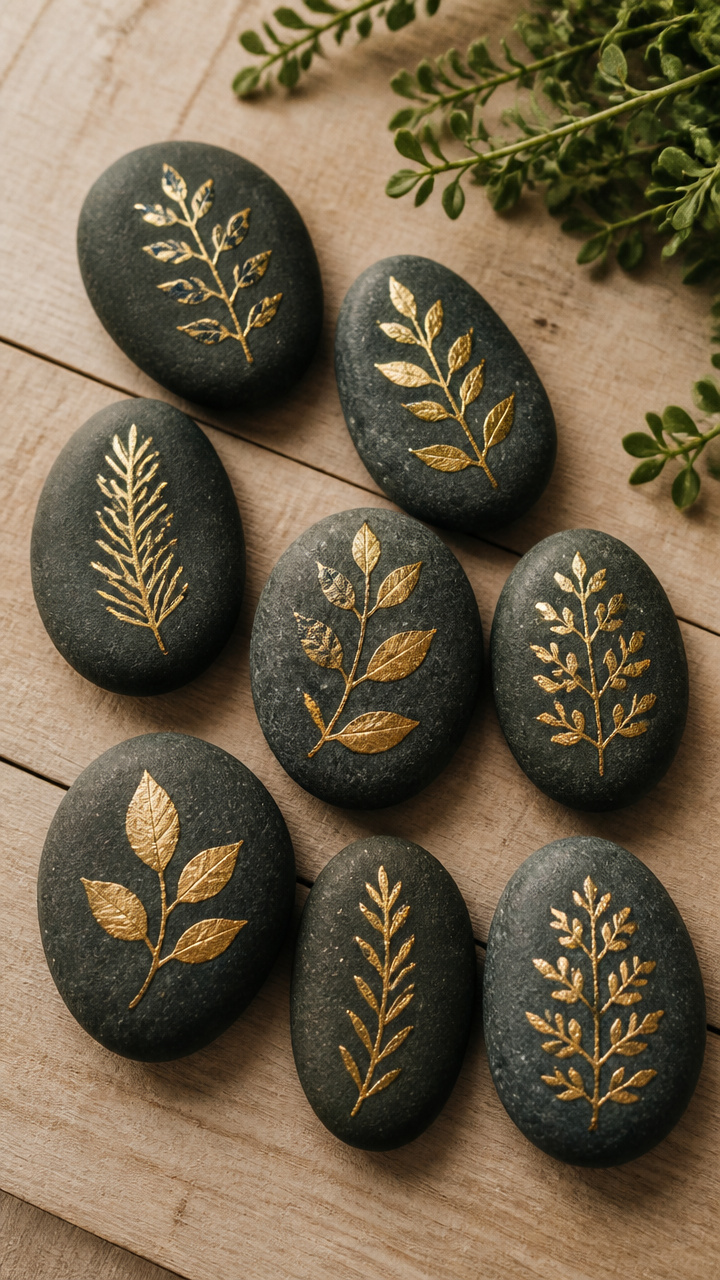
Gleaming imitation gold leaf lettering stands out with sharp contrast against dark, matte basalt river stones. Quick-drying adhesive sizing ensures clean, sharp letter edges.
Materials Needed
- 5 dark grey or black basalt river stones (3 to 4 inches wide)
- 1 pack imitation gold leaf sheets (5.5 x 5.5 inches)
- 1 bottle water-based gold leaf adhesive size (2 oz)
- 1 small pointed script brush (size 2)
- 1 dry, ultra-soft mop brush
- 1 bottle clear exterior polyurethane sealer (4 oz)
How to Make It
- Paint your plant names directly onto clean, dry basalt stones using the pointed script brush dipped into adhesive size.
- Wait fifteen minutes until the adhesive size turns clear and feels sticky or tacky to a light touch.
- Lay a sheet of gold leaf directly over the tacky letters, pressing it down gently with clean, dry fingertips.
- Buff away excess loose gold foil using the soft mop brush in small circular motions, then seal the stone with two thin coats of exterior polyurethane.
13. Polymer Clay Inlaid Wooden Spoons
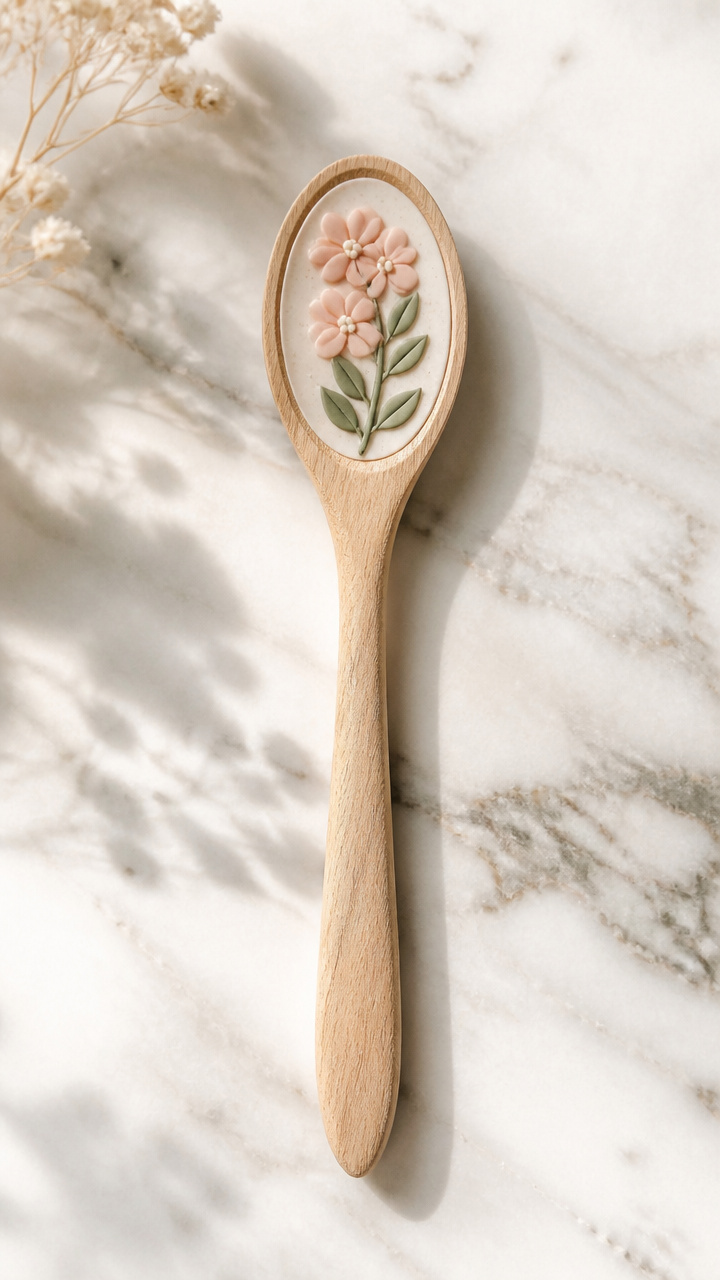
Recessed wooden cooking spoons filled with colored polymer clay make cheerful markers with sculptural dimension. Baking bonds the clay into the bowl without warping the sturdy wood.
Materials Needed
- 4 shallow wooden soup spoons (8 inches long)
- 1 craft knife with sharp #11 blade
- 2 blocks oven-bake polymer clay in contrasting colors (2 oz each)
- 1 rolling acrylic clay roller
- 1 bottle matte outdoor clay varnish (2 oz)
How to Make It
- Carve shallow 1/16-inch deep letters into the wooden spoon bowl using the craft knife to create an outline for your inlay.
- Roll out thin ropes of polymer clay, press them firmly into the carved letters, and slice off the excess flush with the wood surface.
- Bake the prepared wooden spoons on a baking sheet in your oven at 275 degrees Fahrenheit for thirty minutes to cure the clay completely.
- Brush two light coats of matte outdoor clay varnish over the inlaid bowl to seal the bond between clay and wood.
14. Trompe L'Oeil Painted Rock Markers
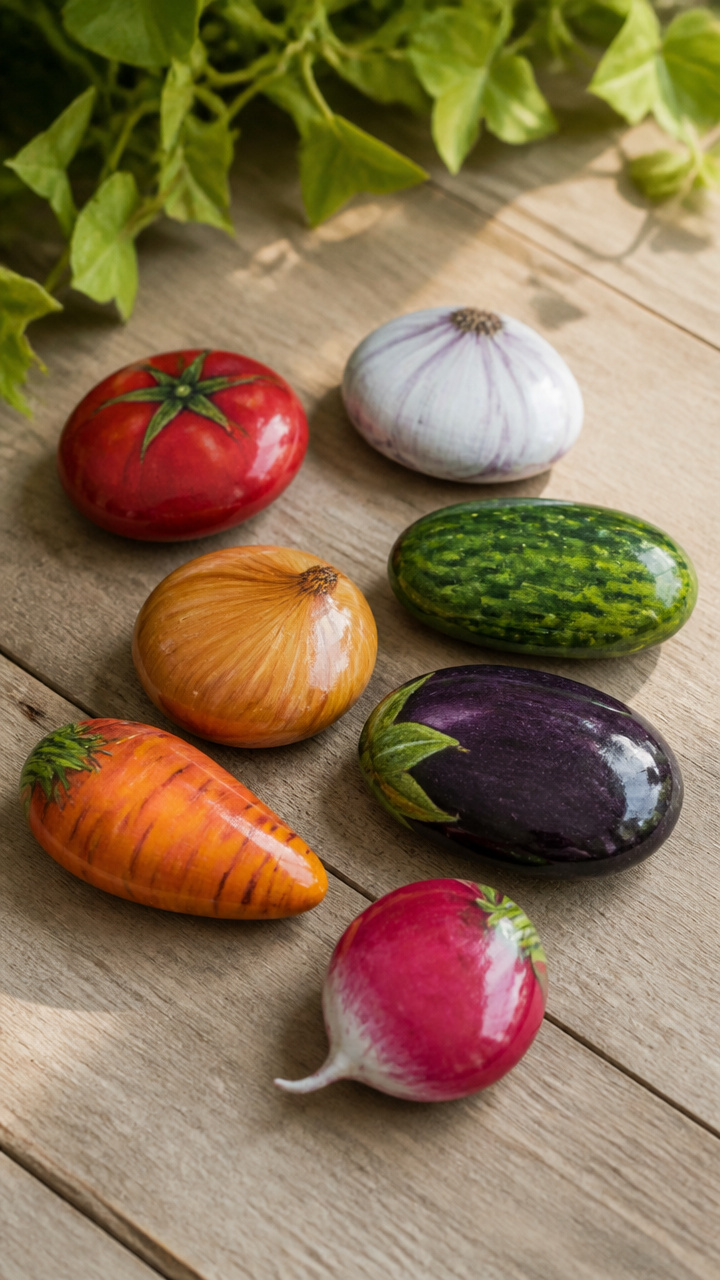
Realistic rock paintings shaped like strawberries, tomatoes, and carrots show exactly what grows beneath the soil. Heavy acrylic layers create a smooth, weather-resistant finish.
Materials Needed
- 6 rounded, egg-shaped river pebbles (2 to 3 inches long)
- 1 set multi-surface outdoor acrylic paints (red, green, orange, yellow, white)
- 1 small flat blending brush (1/4 inch wide)
- 1 fine liner brush (size 00)
- 1 bottle exterior gloss varnish (4 oz)
How to Make It
- Select rocks matching the natural silhouette of your vegetables, then basecoat each stone in its solid primary color using the flat brush.
- Paint realistic highlights, shadows, and leaf crowns over the basecoat using your fine liner brush with lighter and darker tones.
- Write the specific plant variety name along the bottom edge of the stone using white or black outdoor acrylic paint.
- Seal the entire painted rock in two coats of exterior gloss varnish, giving it twenty-four hours to cure before tucking it into your garden soil.


15. Dipped Enamel Soup Spoon Stakes
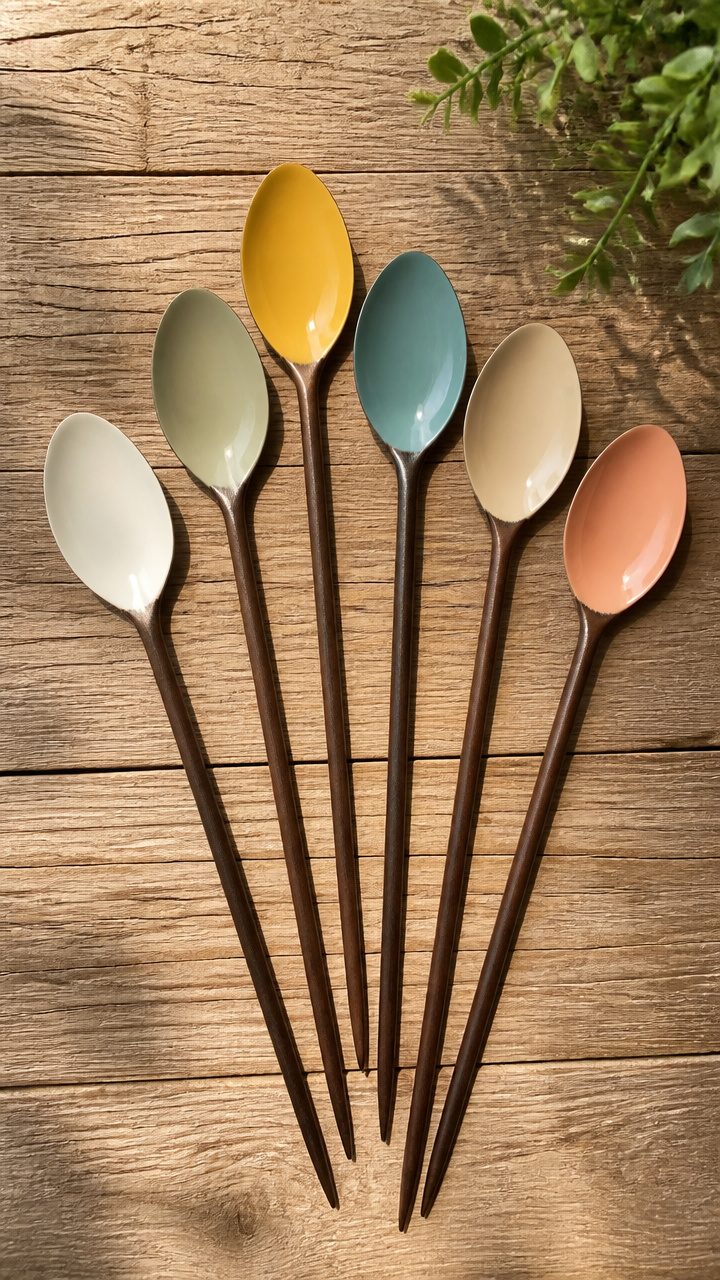
Heavy metal soup spoons dipped directly into colorful enamel create clean, graphic color blocks that catch the eye from across the yard. Crisp paint pen writing adds clear plant identification.
Materials Needed
- 6 stainless steel oval soup spoons
- 1 can oil-based exterior gloss enamel paint in bright yellow or teal (half-pint)
- 1 roll blue painter's tape (1 inch wide)
- 1 fine-point white oil-based paint pen
- 1 piece floral foam block for drying
How to Make It
- Wrap blue painter's tape tightly around the neck of each spoon handle, leaving the bowl exposed for dipping.
- Dip the spoon bowl completely into the can of enamel paint, lift it slowly, and let excess paint drip back into the can for thirty seconds.
- Push the clean metal handles into a floral foam block to hold the spoons upright while the dipped bowls dry undisturbed for twenty-four hours.
- Peel away the painter's tape and write your plant name across the dry enamel bowl using the white oil-based paint pen.


Creating your own plant labels brings order, color, and creativity to every corner of your garden. Gather a few spoons from your kitchen or pick up smooth stones from your yard to get started on your favorites today.