15 Easy Concrete Garden Crafts Perfect for Beginners

Working with concrete is one of the most rewarding ways to build custom, weather-resistant features for your outdoor space. You do not need expensive masonry equipment or years of building experience to get professional results on your first try.
Simple household items like plastic containers, leaves, and old towels make fantastic molds for casting stone decor. With a bag of mix and a free afternoon, you can craft beautiful accents that stand up to rain, frost, and sun for years.
1. Large Rhubarb Leaf Stepping Stone
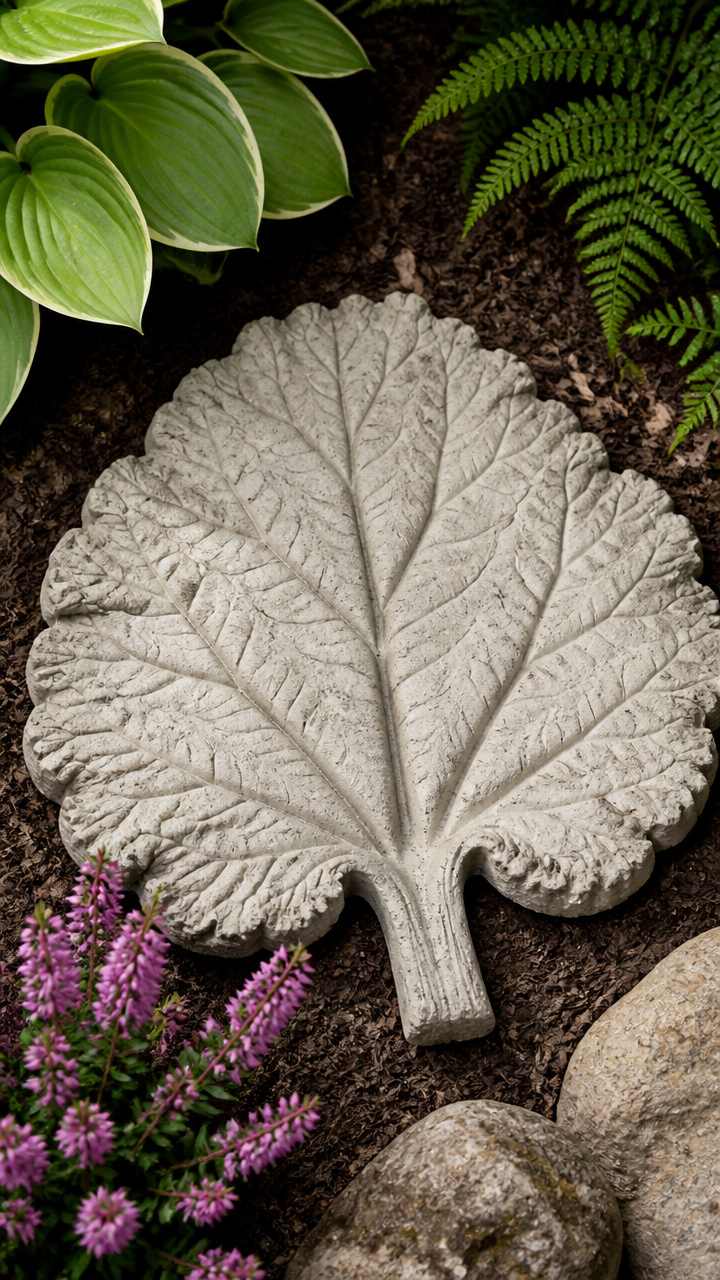
Massive natural foliage leaves a deep, sculpted texture in sand-cast concrete that withstands outdoor weather for years. You get a completely unique walkway stone that highlights the intricate vein network of real plants.
Materials Needed
- 10 lbs Quikrete Sand/Topping Mix
- 1 fresh large rhubarb or gunnera leaf (approx. 18 inches wide)
- 1 bucket of damp play sand
- 1 spray bottle of vegetable cooking oil
- 1 trowel
- 1 heavy-duty plastic drop cloth
- Pair of heavy-duty rubber gloves
How to Make It
- Mound the damp play sand on top of your plastic drop cloth to create a gentle dome shape matching the size of your leaf.
- Lay your leaf face down on the sand mound so the raised, thick veins face upward toward you, then lightly mist the leaf surface with cooking oil.
- Mix 10 lbs of Sand/Topping mix with clean water in a bucket until it reaches the consistency of thick peanut butter.
- Pat the concrete mixture over the leaf starting from the center and working outward, maintaining a consistent thickness of about 1.5 inches across the entire shape.
- Cover the project loosely with plastic wrap and let it cure for 48 hours before flipping the stone over and peeling away the leaf.
- Rinse the leaf residue with a garden hose and allow the concrete to dry fully for 7 days before walking on it.
2. Draped Towel Planter Pot
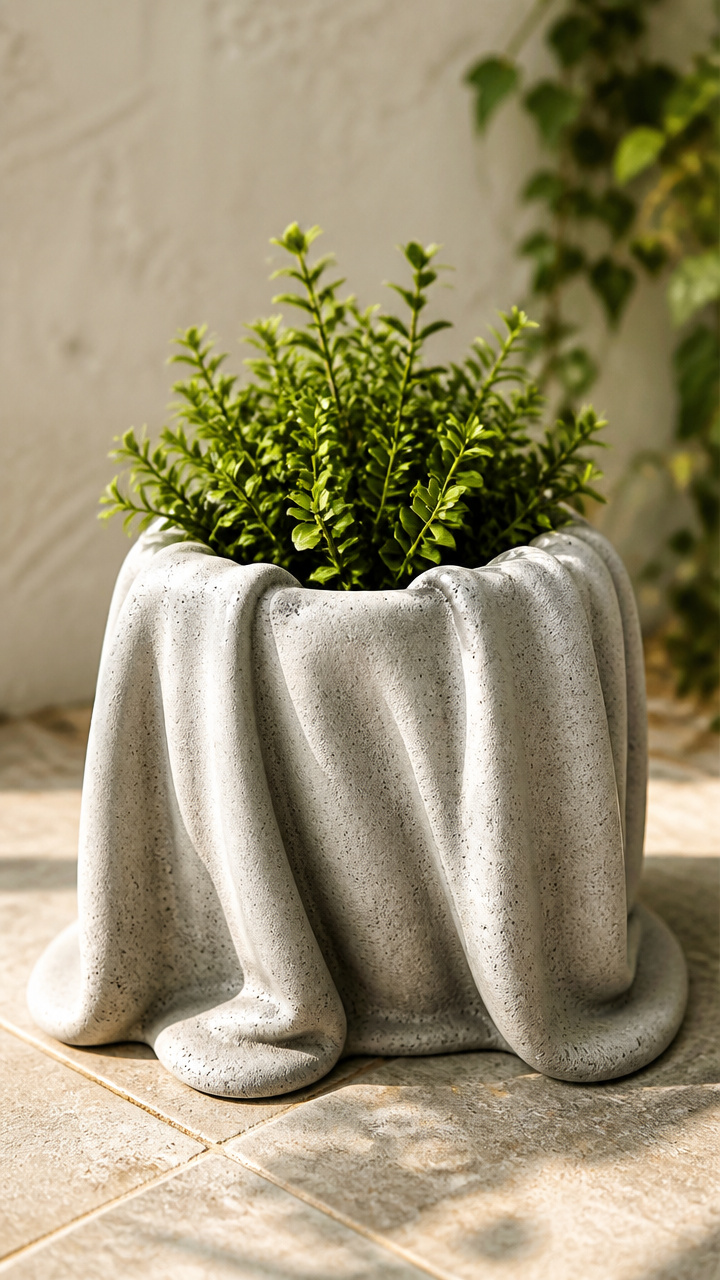
Discarded cotton bath towels absorb wet cement mix to form flowing, fabric-like planters with rugged stone durability. The resulting pot has soft, ruffled folds that look like sculpted stone drapery.
Materials Needed
- 1 old 100% cotton hand towel (approx. 16×28 inches)
- 8 lbs Portland cement
- 1 clean 2-gallon plastic bucket (mold base)
- 1 tall outdoor stand or plant pedestal
- 1 roll plastic cling wrap
- Pair of heavy-duty rubber gloves
How to Make It
- Cover your 2-gallon bucket completely with plastic cling wrap and place it upside down on an elevated pedestal outdoors.
- Mix 8 lbs of Portland cement with clean water in a separate bucket until you create a runny, soup-like slurry with no dry lumps.
- Submerge your dry towel into the wet cement, squeezing and kneading the fabric until every fiber is thoroughly saturated with the mixture.
- Drape the wet towel evenly over the bottom of your upside-down bucket, arranging the hanging corners into soft, balanced folds.
- Allow the cement towel to cure undisturbed in a shaded area for 48 hours until it feels hard and rigid to the touch.
- Lift the hardened planter off the plastic-wrapped bucket and drill a 1/2-inch drainage hole in the bottom center with a masonry bit.
3. Spherical Balloon Votive Holders
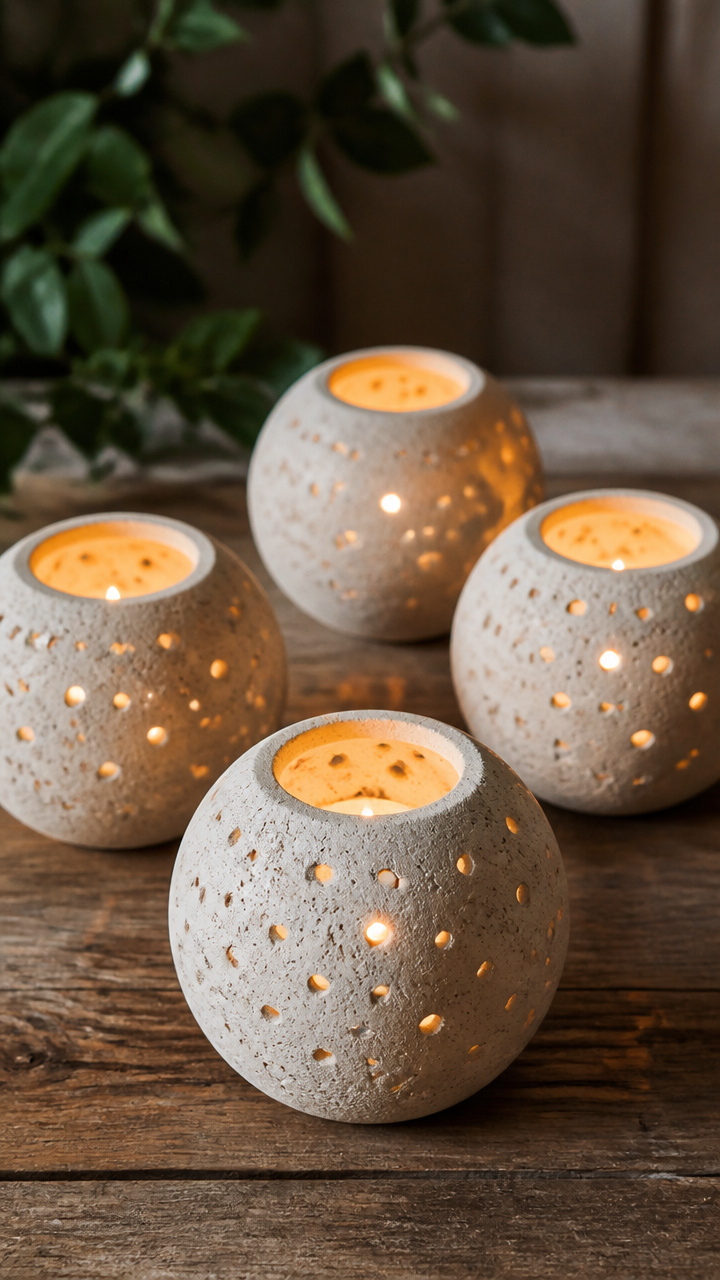
Hollow concrete spheres cast around party balloons cradle standard tea lights to bring gentle, windproof illumination to patio tables. The rough interior texture casts warm shadows across outdoor seating areas.
Materials Needed
- 5 lbs Rapid Set Cement All
- 3 standard 9-inch latex party balloons
- 3 standard metal tealight cups
- 1 roll masking tape
- 1 mixing stick
- Pair of rubber gloves
How to Make It
- Inflate three party balloons until they are roughly the size of grapefruits, tying the necks tightly with a knot.
- Set each balloon knot-side down inside an empty roll of tape so they remain upright and stable on your work table.
- Mix 5 lbs of Rapid Set cement with water to a thick paste consistency, adding water in small increments.
- Spread a 1/2-inch layer of cement over the top two-thirds of each balloon, leaving the bottom third open.
- Press a metal tealight cup into the wet concrete at the very top of each sphere to create a flat, level candle recess.
- Let the concrete harden for 2 hours, pop the balloons with a pin, and pull the latex fragments away from the inside.
4. Copper Pipe Hose Guide
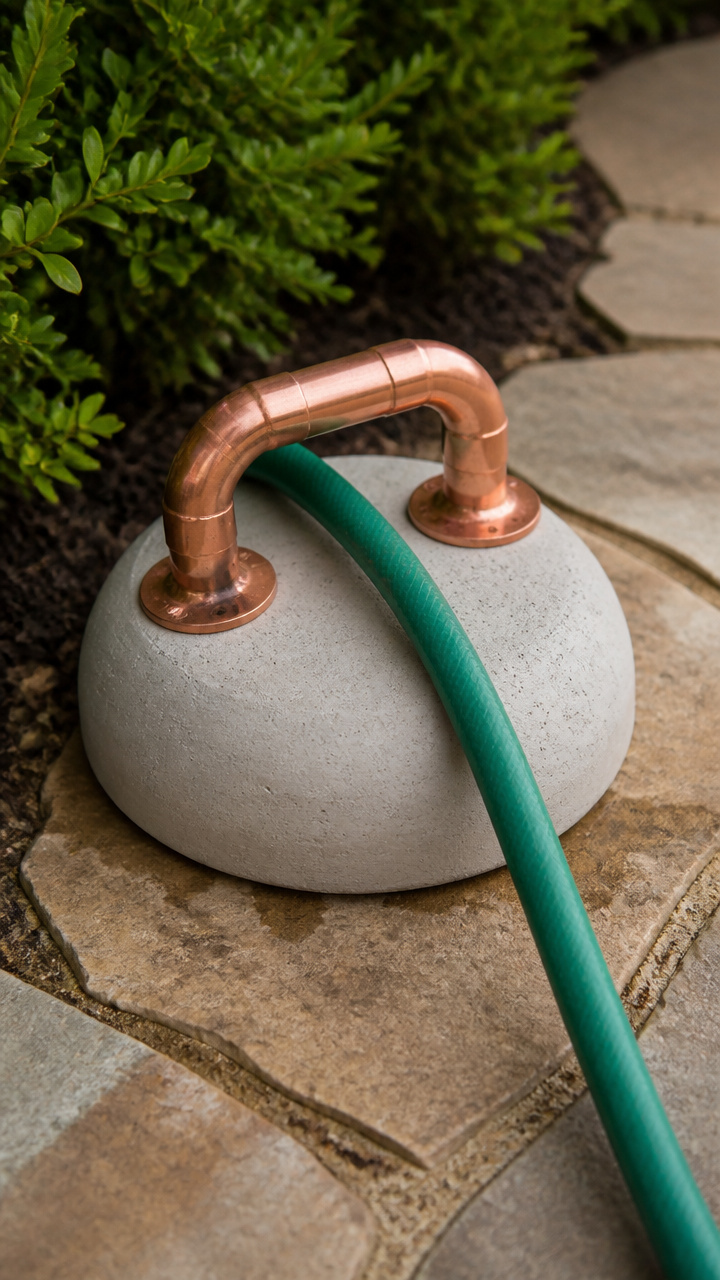
Ground-level garden hose guides prevent tangled hoses from crushing your delicate flowerbeds during watering sessions. Adding a copper top creates a classic garden ornament that develops a natural patina over time.
Materials Needed
- 6 lbs fast-setting concrete mix
- 1 plastic 3-inch diameter PVC pipe coupling (4 inches tall)
- 1 piece 1/2-inch rigid copper pipe cut to 18 inches
- 1 copper pipe end cap (1/2-inch)
- 1 roll duct tape
- Vegetable oil
How to Make It
- Seal one end of your PVC coupling with multiple overlapping layers of duct tape and wipe the inside walls with vegetable oil.
- Mix 6 lbs of concrete with water until moldable, then pack it firmly into the PVC coupling, tapping the sides to release air bubbles.
- Push the un-capped end of the 18-inch copper pipe directly through the center of the wet concrete until it hits the taped bottom.
- Keep the pipe perfectly vertical while the concrete cures for 24 hours.
- Peel away the duct tape, slide the concrete cylinder out of the PVC coupling, and glue the copper cap onto the exposed top pipe end.
- Push the protruding 14 inches of copper pipe into your garden bed soil at the corner of a planting area.
5. Angled Milk Carton Succulent Planters
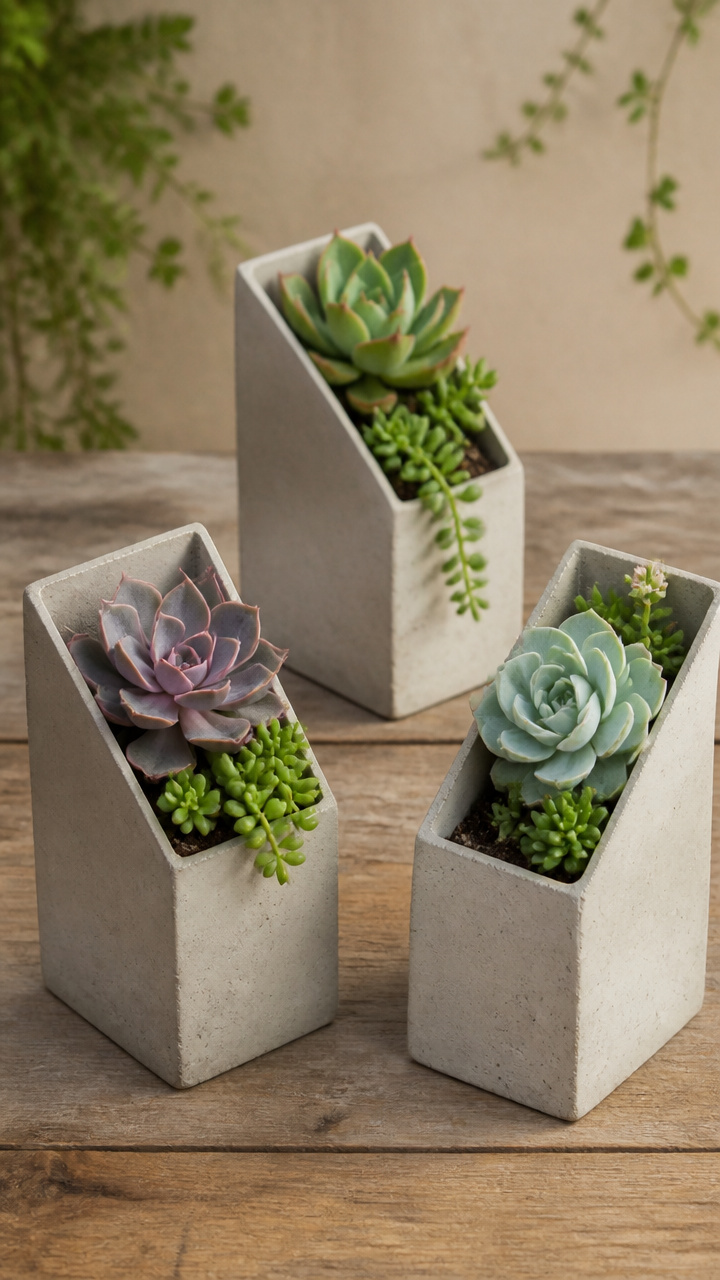
Recycled cardboard drink cartons create crisp, modern geometric planters with pre-formed drainage holes for miniature cacti. The sharp corners give a clean architectural look that suits indoor windowsills or patio tables.
Materials Needed
- 4 lbs fine concrete patch mix
- 2 empty 1-quart cardboard milk cartons
- 2 plastic 2-ounce shot glasses
- 2 wooden craft sticks
- Utility knife
- Cooking spray
- Masking tape
How to Make It
- Cut the top pour spouts off both milk cartons with your utility knife, trimming them to a height of 5 inches.
- Coat the inside of the milk cartons and the outside of the plastic shot glasses with a light layer of cooking spray.
- Mix 4 lbs of fine concrete patch mix with water to a smooth, pourable pancake batter consistency.
- Fill each carton halfway with concrete, then tap the base against the table to settle the mixture.
- Press a shot glass into the center of each carton until the rim sits level with the concrete, taping a craft stick across the top to hold it down.
- Allow the concrete to set for 24 hours, pull out the inner plastic shot glass, and peel away the cardboard carton.
6. Hexagonal Garden Border Pavers
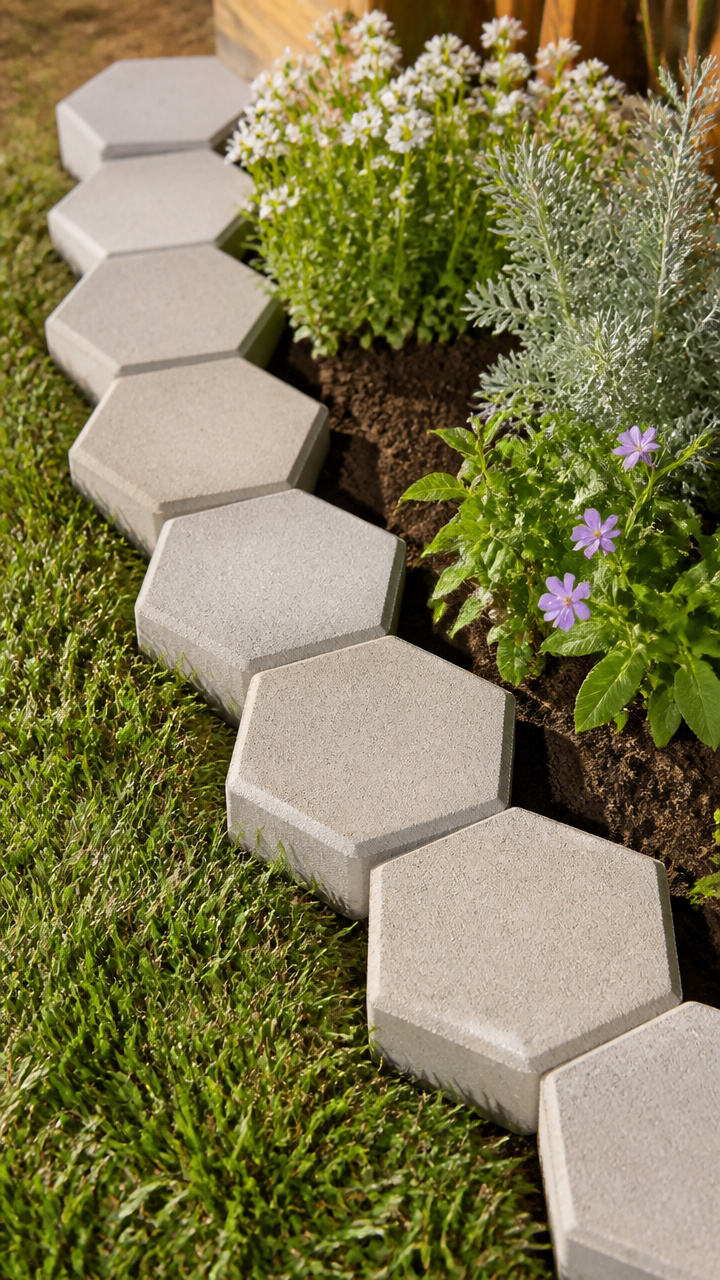
Custom modular pavers lock together along pathway edges to keep mulch neatly separated from lawn grass. Casting your own blocks lets you create perfectly uniform borders for a fraction of store-bought prices.
Materials Needed
- 12 lbs standard concrete mix
- 1 silicone hexagonal baking mold (8 inches wide, 2 inches deep)
- 1 sheet 120-grit sandpaper
- 1 plastic bucket
- Rubber gloves
How to Make It
- Place your silicone hexagonal mold on a flat, level board so you can easily move it after filling.
- Mix 12 lbs of concrete mix with clean water in your bucket until it holds its shape when squeezed in your hand.
- Spoon the concrete into the silicone mold, filling it completely to the top rim.
- Vibrate the mold by tapping the sides rapidly with a wooden stick for 60 seconds to bring air bubbles to the surface.
- Smooth the top flush with the mold edge using the flat side of a trowel or ruler.
- Let the paver dry for 36 hours, pop it out of the silicone mold, and lightly sand any sharp outer edges with 120-grit sandpaper.
7. Sea Glass Inlay Birdbath Top
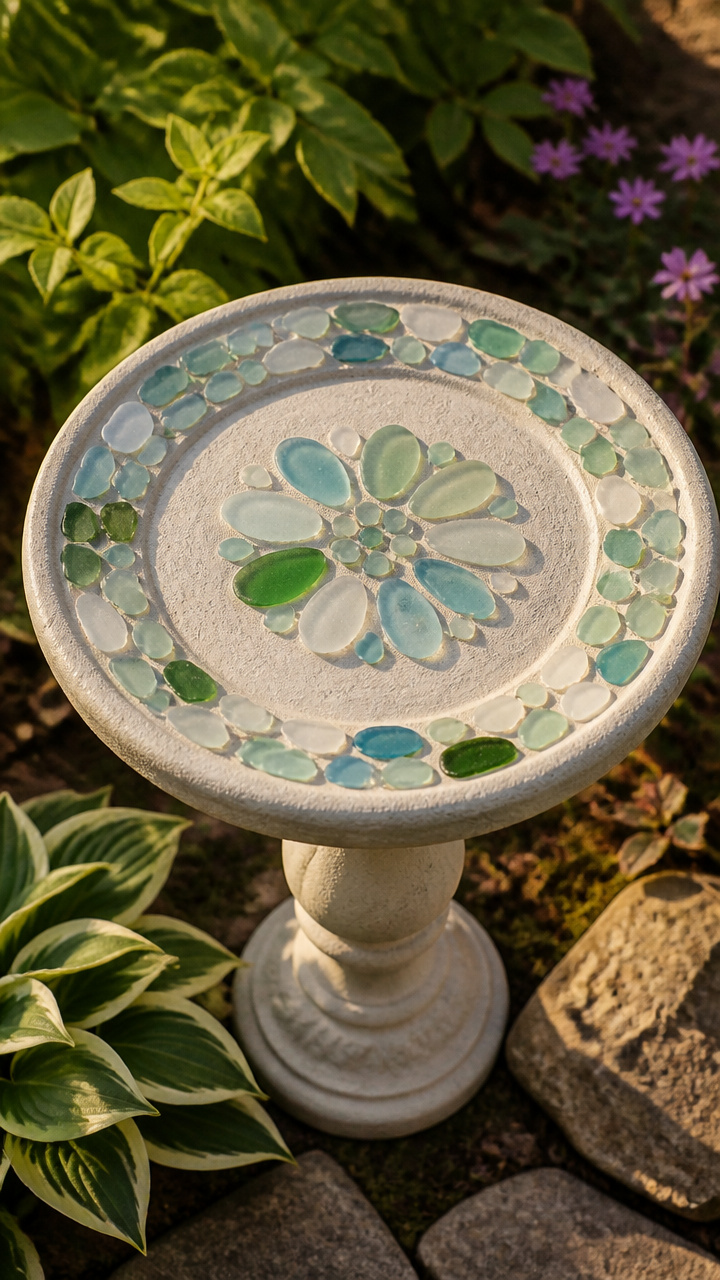
Shimmering frosted craft glass embedded in a smooth concrete basin gives backyard birds a sturdy, shallow spot to splash. The glass creates a non-slip floor for birds while catching the sunlight.
Materials Needed
- 15 lbs Sand/Topping concrete mix
- 1 round plastic trash can lid (approx. 16 inches diameter)
- 1 plastic saucer (12 inches diameter)
- 1 bag tumbled blue sea glass (1 lb)
- Petroleum jelly
- Wire mesh circle (10 inches diameter)
How to Make It
- Smear a thin layer of petroleum jelly across the inside of the trash can lid and the outside base of the smaller plastic saucer.
- Mix 15 lbs of Sand/Topping mix with water to a firm, workable mortar consistency.
- Spread a 1-inch layer of concrete into the center of the trash can lid and lay the wire mesh circle on top for reinforcement.
- Add another 1-inch layer of concrete over the mesh, pressing the 12-inch saucer into the center to form the shallow bath basin.
- Press pieces of sea glass firmly into the exposed outer rim and shallow center area, keeping them flush with the concrete surface.
- Let the birdbath cure for 48 hours, remove the inner saucer, and invert the main lid to release your birdbath basin.
8. Yard Art Concrete Mushrooms
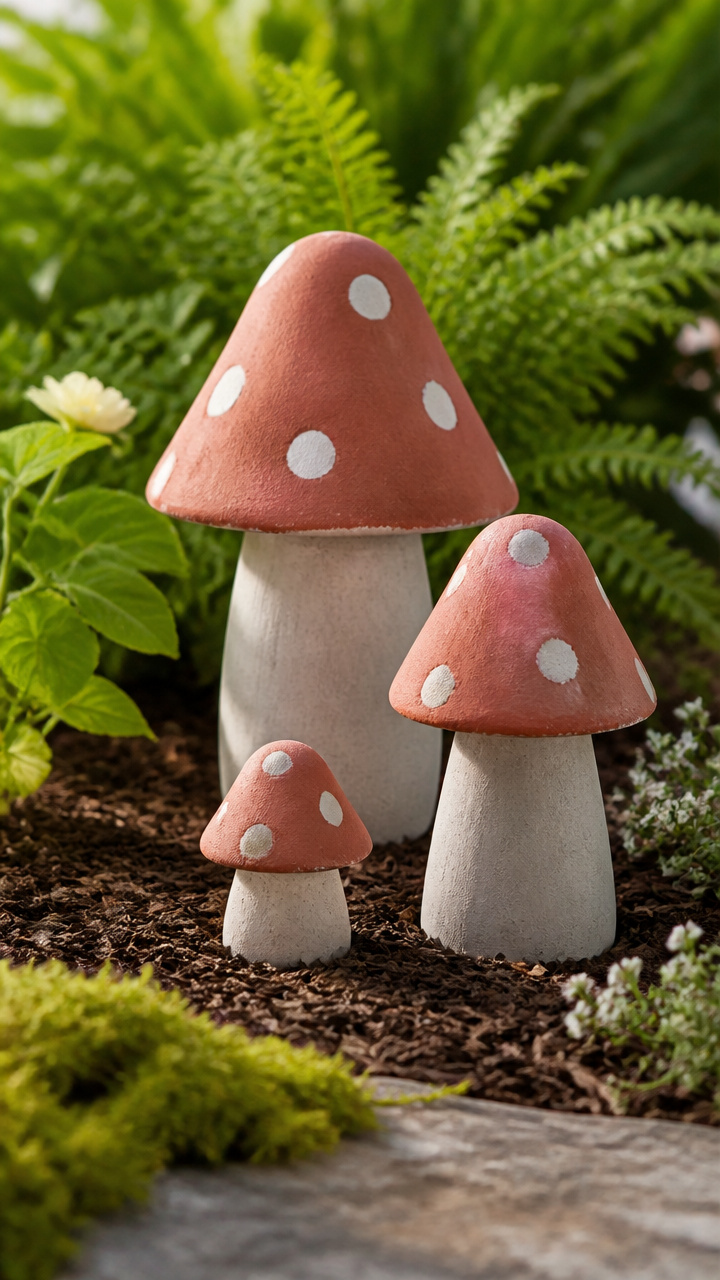
Whimsical garden toadstools made from simple kitchen items bring playful height to shaded garden nooks. The smooth rounded caps nestle naturally among hostas, ferns, and mossy ground cover.
Materials Needed
- 6 lbs fine concrete mix
- 1 pair sheer nylon stockings
- 1 plastic funnel (6 inches wide)
- 1 empty cardboard paper towel roll
- Cooking spray
- Twist ties
- Rubber gloves
How to Make It
- Coat the inside of the funnel and paper towel roll with cooking spray to act as mold release.
- Mix 6 lbs of fine concrete with water until it reaches a thick, moldable dough texture.
- Pour concrete into the funnel to form the mushroom cap, smoothing the wide bottom flat.
- Fill the cardboard tube with concrete to create the stem, tapping it firmly on the counter to pack the mix tightly.
- Cut a 6-inch foot section from a nylon stocking, pack a fist-sized ball of concrete inside, and tie it shut with a twist tie to make an organic cap alternative.
- Let all components cure for 24 hours, unwrap the molds, and attach stems to caps using a dollop of construction adhesive.
9. Numbered House Address Plaque
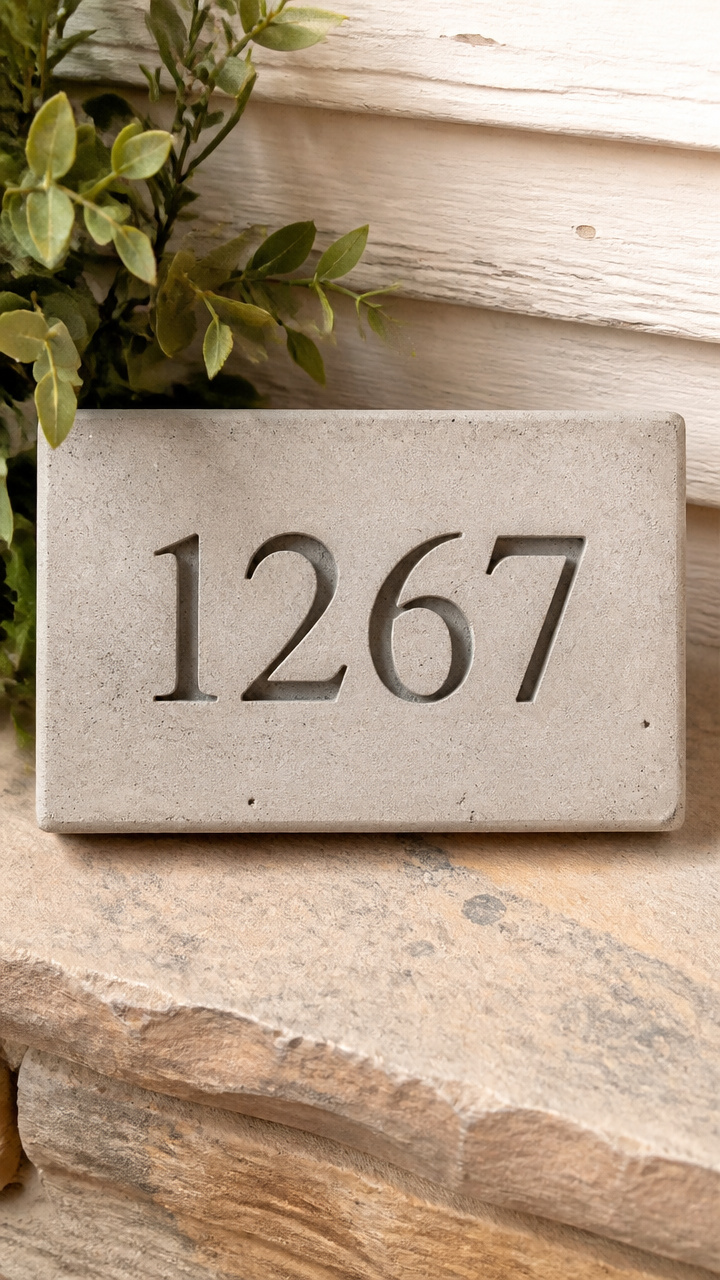
Cast stone address markers display house numbers clearly while blending smoothly into garden borders or stone walls. The raised numbers remain sharp and legible through severe rain and direct sun.
Materials Needed
- 8 lbs concrete mix
- 1 silicone loaf pan (approx. 9×5 inches)
- 4-inch adhesive plastic house numbers
- Vegetable oil
- 2 galvanized 2-inch wood screws
- Trowel
How to Make It
- Stick your adhesive numbers face-down onto the bottom inside floor of the silicone loaf pan, spelling your address in reverse order.
- Wipe a light coating of vegetable oil over the inside walls and around the stuck numbers.
- Mix 8 lbs of concrete with water until smooth and pourable, then fill the silicone pan to a depth of 2 inches.
- Insert the heads of two galvanized screws 1 inch into the wet concrete back, leaving the threaded ends sticking out to act as wall anchors.
- Tap the sides of the pan for 2 minutes to eliminate surface air pockets around the number edges.
- Cure for 48 hours, peel the silicone away from the block, and pry the plastic numbers out of the recessed cavities.
10. Stamped Garden Herb Markers
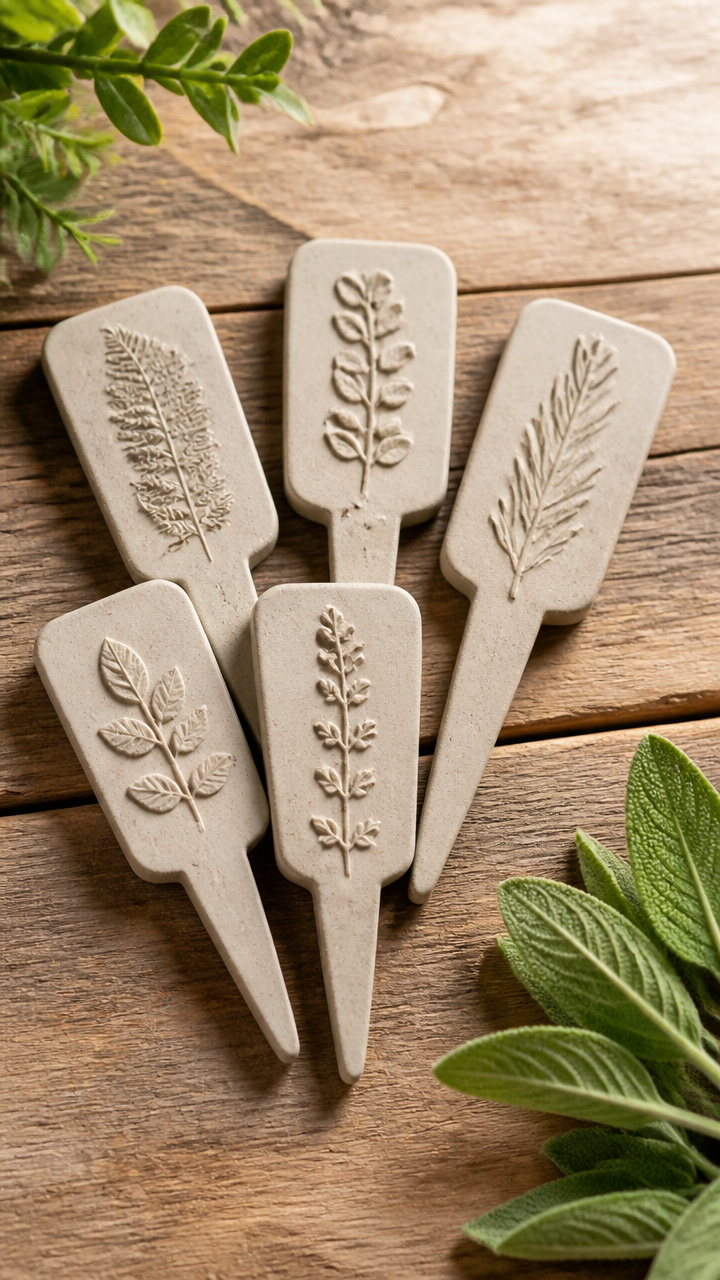
Permanent botanical plant markers keep rows of parsley, mint, and rosemary labeled throughout rainy seasons without fading. The natural stone texture looks right at home nestled in potting soil.
Materials Needed
- 3 lbs Rapid Set cement
- 6 paper 8-ounce hot drink cups
- 1 set metal alphabet letter stamps
- Cooking oil
- 6 wooden craft stirrers
- Utility knife
How to Make It
- Cut the bottom 2 inches off each paper cup using a utility knife to create small round molds.
- Lightly coat the inside base of each paper cup piece with cooking oil.
- Mix 3 lbs of cement with water to a spreadable, putty-like consistency.
- Fill each cup base with 1 inch of cement and insert a wooden stirrer into one edge to act as a soil stake.
- Wait 10 minutes for the surface sheen to turn matte, then firmly press your metal letter stamps into the concrete to spell your herb names.
- Let the markers harden for 2 hours, peel off the paper rings, and place them directly into your herb pots.
11. Hanging Concrete Bird Feeder
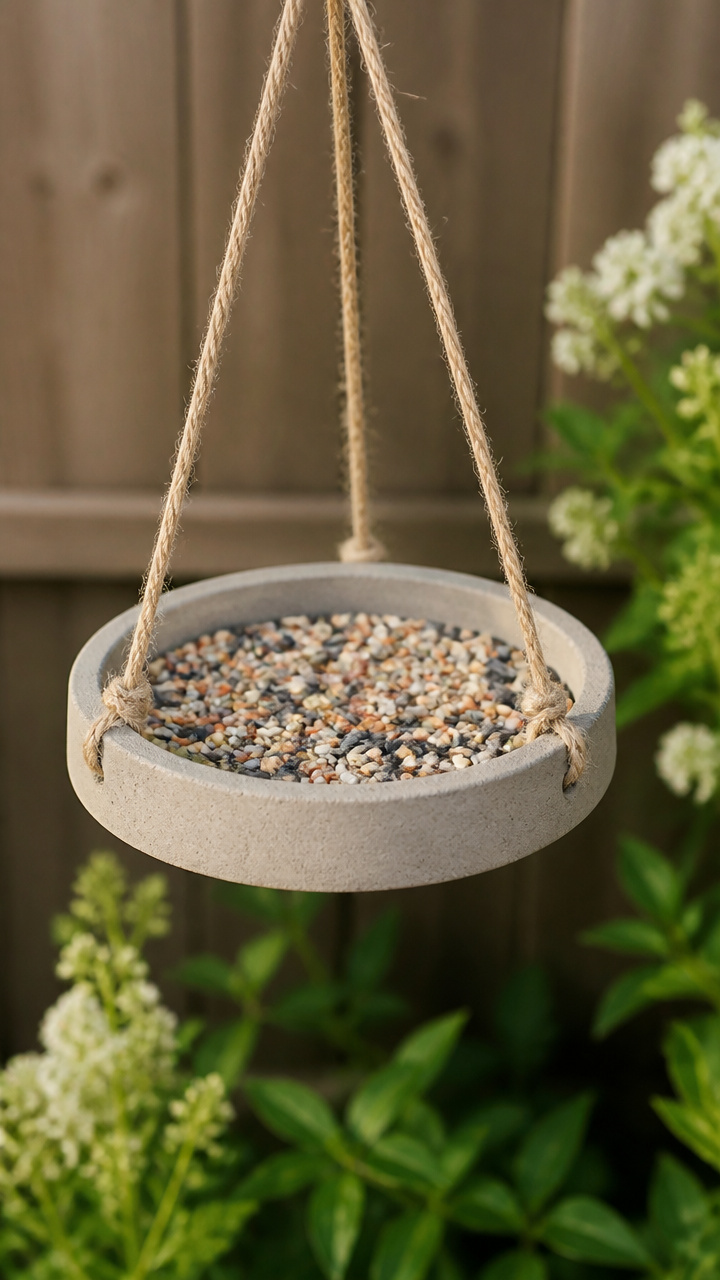
Suspended seed trays cast in shallow plastic dishes stay firmly in place even during strong afternoon winds. The heavy base prevents seeds from tipping out when birds land on the rim.
Materials Needed
- 7 lbs concrete mix
- 1 plastic 10-inch plant saucer
- 1 plastic 8-inch plant saucer
- 3 galvanized 1/4-inch eye bolts with nuts and washers
- 6 feet weather-resistant hanging rope
- Cooking spray
How to Make It
- Coat the inside of the 10-inch saucer and the outside bottom of the 8-inch saucer with cooking spray.
- Mix 7 lbs of concrete with water until completely blended, then spread an even 1.5-inch layer into the larger saucer.
- Press the 8-inch saucer down into the center of the wet concrete to create a recessed tray for birdseed.
- Insert three eye bolts upside down around the outer rim of the wet concrete, spacing them evenly in a triangle.
- Let the feeder cure for 48 hours before removing the plastic saucers.
- Tie three equal lengths of rope to the eye bolts, gather the ends together at the top with a knot, and hang the tray from a tree branch.
12. Textured Lawn Finial Orbs
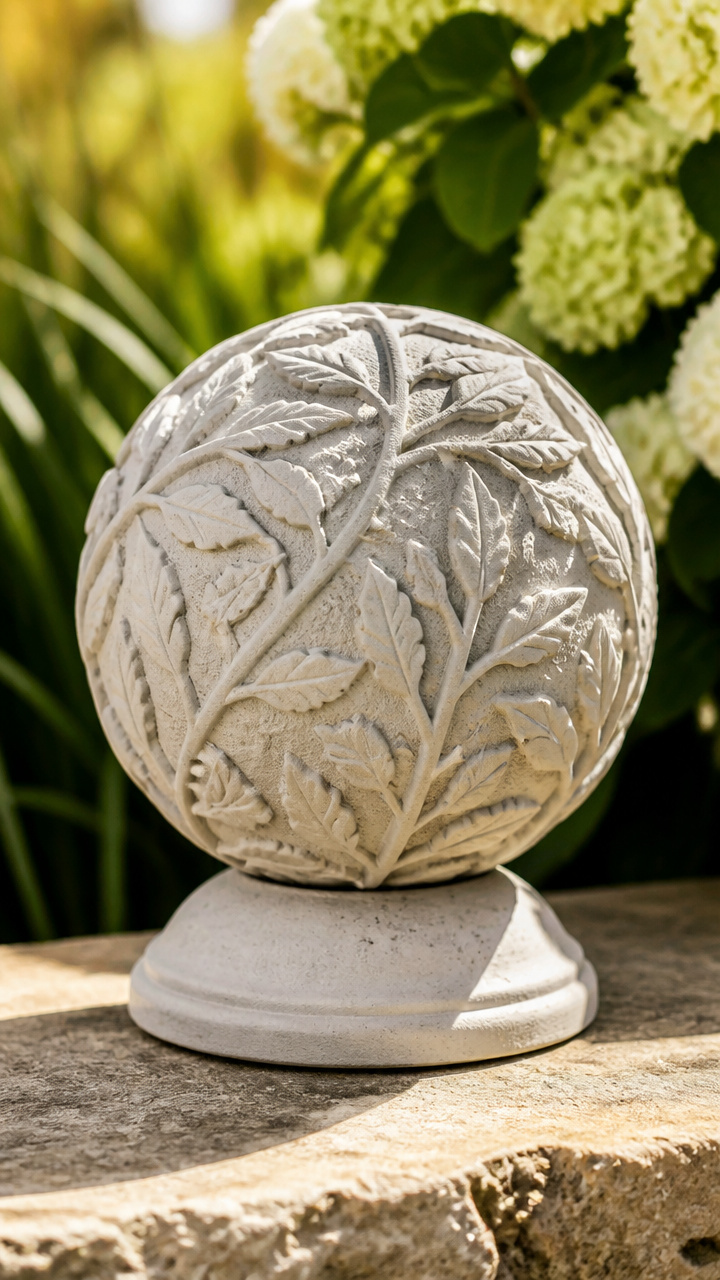
Heavy concrete garden spheres add timeless sculptural focal points when nestled directly inside perennial flowerbeds. You can roll them into different arrangements throughout the seasons.
Materials Needed
- 18 lbs concrete mix
- 1 hollow 8-inch rubber play ball
- 1 plastic funnel
- Utility knife
- Duct tape
- Can of silicone lubricant spray
How to Make It
- Cut a 2-inch circular hole around the air valve of the rubber play ball using your utility knife.
- Spray silicone lubricant through the hole to coat the entire inner rubber surface.
- Mix 18 lbs of concrete with water in a bucket until it reaches a fluid, easily pourable slurry consistency.
- Insert your funnel into the hole and slowly pour the wet concrete inside, shaking the ball periodically to settle the material.
- Fill the ball to the very top rim, tape the hole closed with duct tape, and let the ball rest in an empty pot so it stays round.
- Wait 72 hours, slice the rubber ball open with a craft blade, and peel the skin away to reveal the smooth concrete sphere.
13. Tabletop Patio Fire Bowl
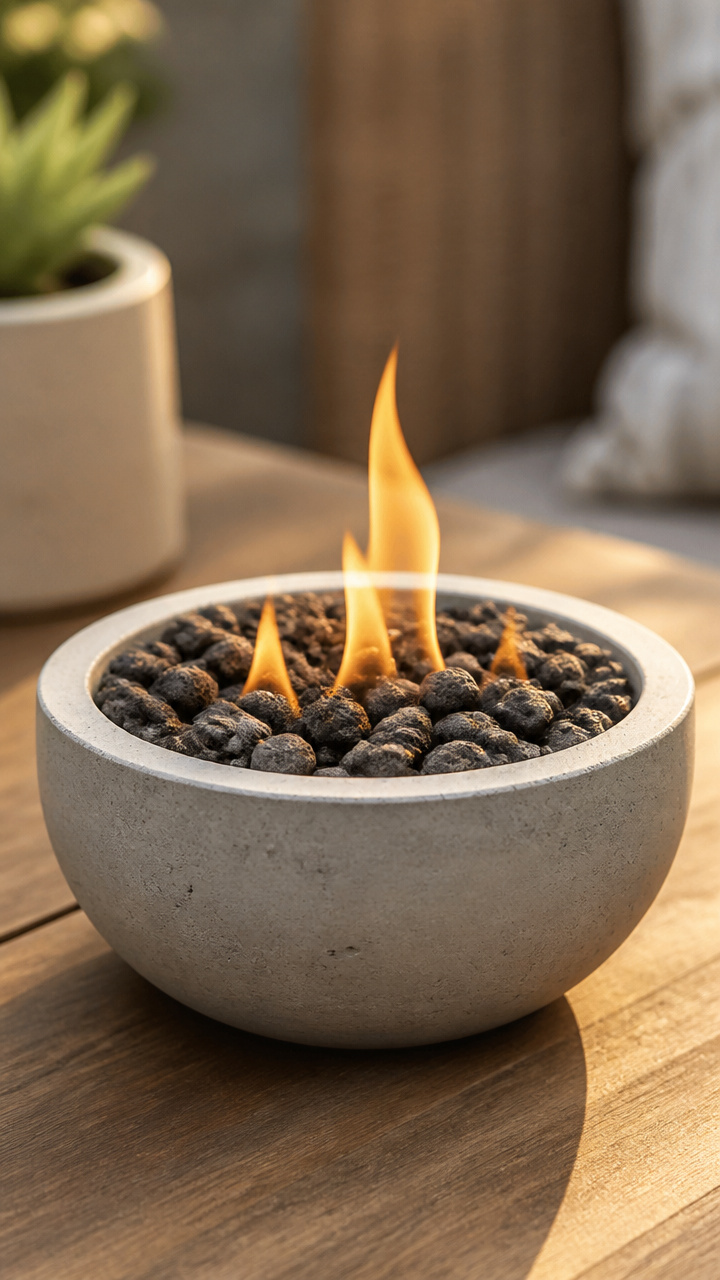
Compact concrete fire pits produce a clean, smoke-free flame that warms outdoor seating areas on chilly evenings. The thick stone walls stay safely insulated while providing steady ambient heat.
Materials Needed
- 10 lbs concrete mix
- 1 large plastic mixing bowl (10 inches wide)
- 1 smaller plastic mixing bowl (7 inches wide)
- 1 empty 13-ounce gel fuel canister
- Cooking spray
- 3 lbs black lava rock pebbles
How to Make It
- Coat the interior of the large bowl and the exterior of the small bowl with cooking spray.
- Mix 10 lbs of concrete with water to a thick batter consistency and fill the large bowl halfway.
- Press the smaller bowl into the center of the wet concrete, weighing it down with a heavy brick so it sinks 3 inches deep.
- Tap the outside walls of the large bowl for 2 minutes to force trapped air bubbles up to the top surface.
- Allow the concrete to set for 48 hours, remove both bowls, and place an open gel fuel canister in the center recess.
- Surround the metal canister with black lava rock pebbles, keeping the central burner opening clear for lighting.
14. Heavyweight Boot Scraper Block
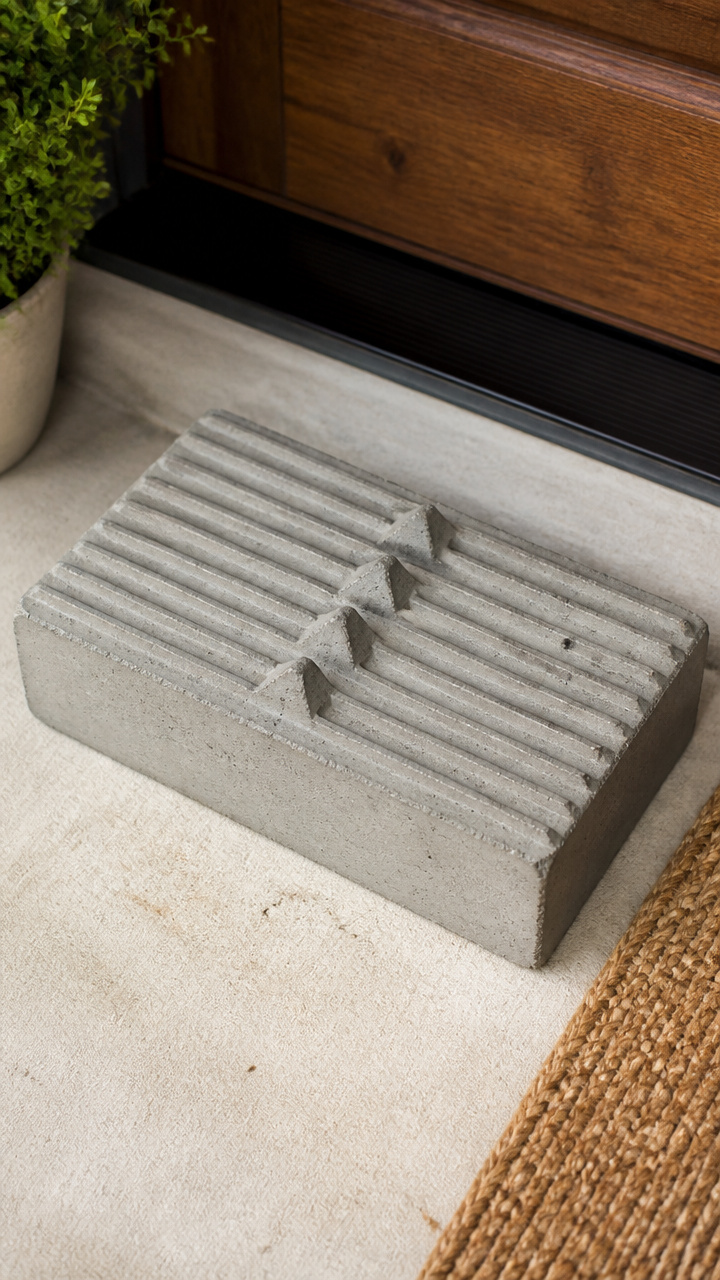
Stiff bristles mounted into a solid stone base let you clean muddy garden boots before stepping onto the porch. The heavy concrete anchor prevents the scraper from shifting while you brush your shoes.
Materials Needed
- 12 lbs concrete mix
- 1 sturdy rectangular cardboard box (approx. 10x6x4 inches)
- 1 wooden-backed natural coir scrub brush
- Duct tape
- Cooking spray
- Trowel
How to Make It
- Reinforce the outer corners of your cardboard box with duct tape, then spray the inside lightly with cooking spray.
- Mix 12 lbs of concrete with water until it reaches a firm, packable consistency with no dry pockets.
- Fill the cardboard box with concrete up to 1/2 inch below the top rim, leveling the surface with your trowel.
- Press the wooden base of your coir scrub brush directly into the wet concrete until the wood is submerged, leaving only the stiff bristles exposed.
- Allow the block to cure in a dry spot for 48 hours so the concrete locks firmly around the wooden brush frame.
- Tear away the cardboard box mold and position the heavy boot scraper right next to your garden gate or back door.
15. Minimalist Rain Chain Basin
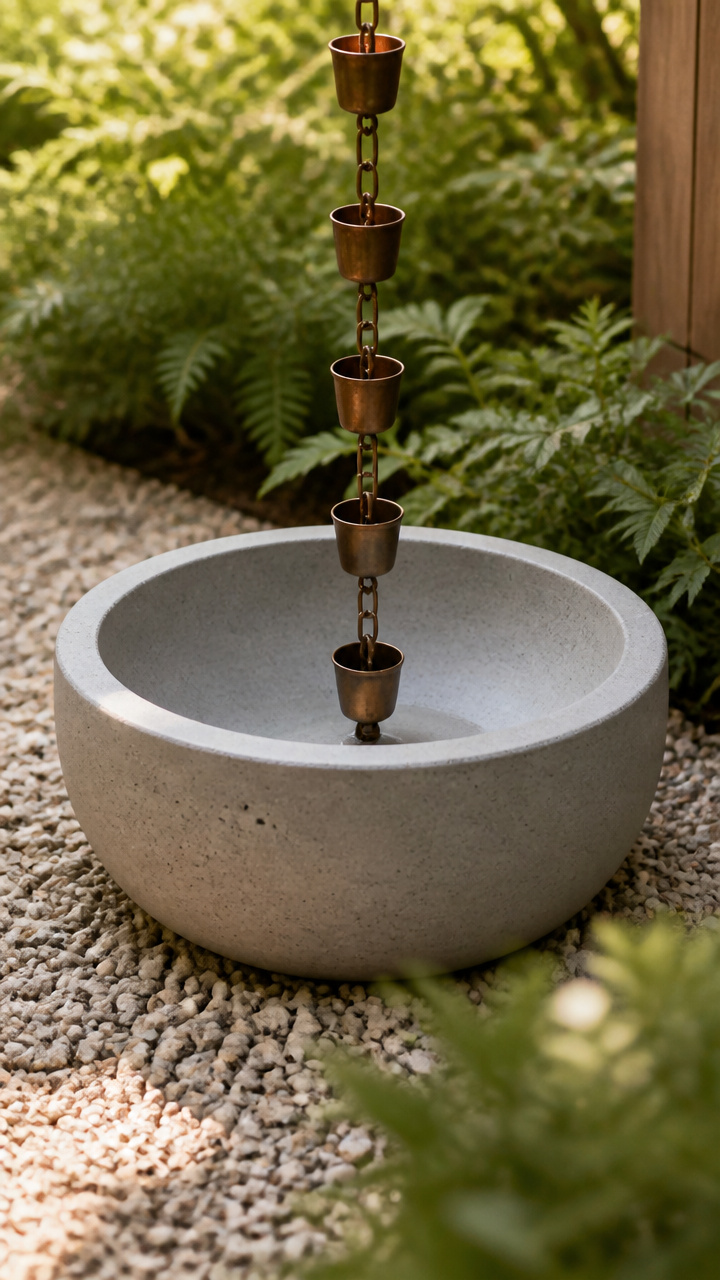
Ground-level drainage bowls catch water rushing down gutter chains and disperse it gently into surrounding flower beds. The heavy basin keeps the rain chain anchored securely during heavy downpours.
Materials Needed
- 14 lbs concrete mix
- 1 wide plastic wash basin (14 inches wide, 4 inches deep)
- 1 round plastic food container (6 inches wide)
- 1 brass 2-inch eye bolt with nut
- Cooking spray
- 2 lbs polished river pebbles
How to Make It
- Spray the inside of your wash basin and the outside of the smaller food container with cooking spray.
- Mix 14 lbs of concrete with water until thick and even, then pour it into the wash basin to a depth of 3 inches.
- Press the food container into the center to create a recessed inner bowl, placing a stone inside the container to hold it down.
- Sink the threaded end of your brass eye bolt into the exact center of the inner bowl until only the ring sits above the concrete.
- Let the project cure for 48 hours, slide the concrete out of the molds, and attach the bottom link of your rain chain to the eye bolt.
- Scatter polished river pebbles around the inner recess to soften the splash of falling rainwater.
Starting your first concrete project is as simple as mixing a batch and pouring it into a mold you already own. Grab a bag of cement mix, pick your favorite garden accent from this list, and enjoy creating durable stone decor for your yard.