15 Reversible Fall-to-Christmas Wood Crafts to Make This Season

The shift from autumn’s warm harvest hues to the crisp sparkle of Christmas offers a sweet window to create something lasting. These wood crafts move with the season, each designed to flip, swap, or adapt from fall into holiday cheer.
You’ll work with solid pine, birch, and poplar, using simple tools and thoughtful details that make every piece feel handmade and meaningful. No two projects repeat a technique or material list, so each one stands on its own as a fresh idea worth making.
1. Two-Sided Maple Leaf Ornament
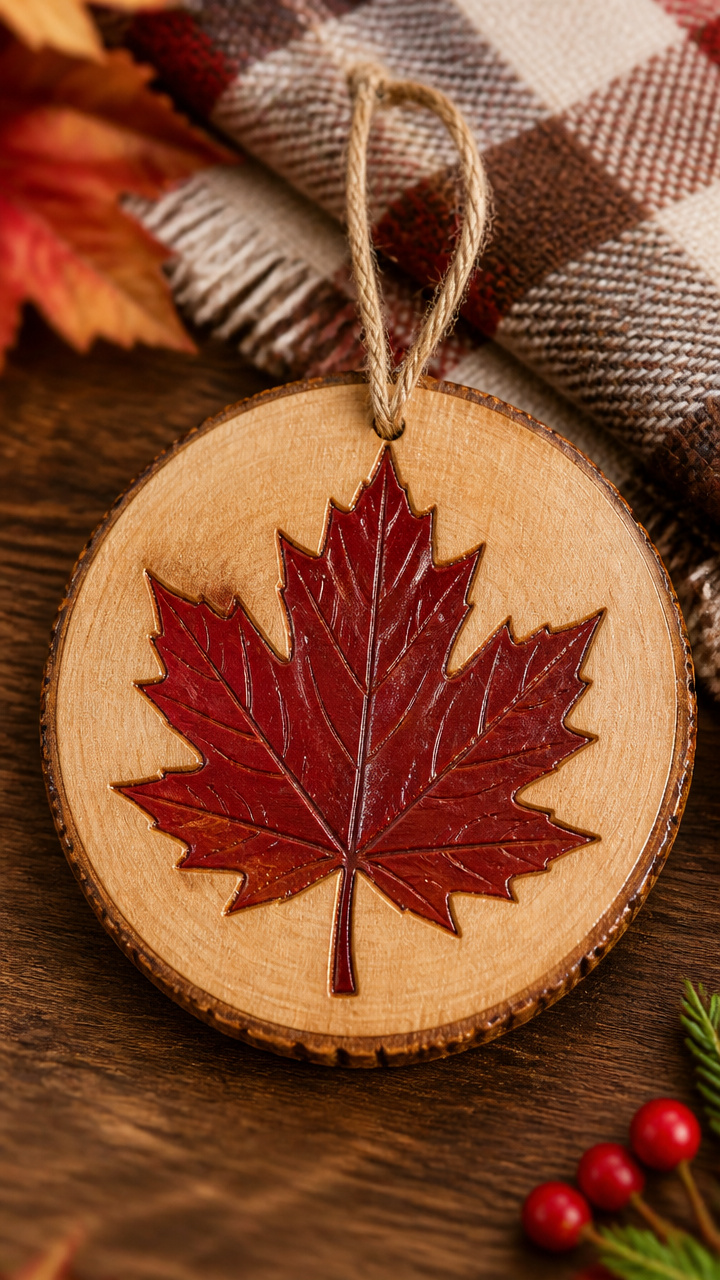
Smooth maple burl wood cut into leaf shapes holds both cinnamon-dusted fall texture and polished red gloss for Christmas. Sand one side natural, paint the reverse in deep cranberry lacquer.
Materials Needed
- 1 piece 6-inch round maple burl slice, 1/4 inch thick
- Fine-grit sandpaper (220 grit)
- Cinnamon powder, 1 tablespoon
- White craft glue, 2 ounces
- Red acrylic paint, 1 ounce
- Small foam brush
- Clear matte sealer spray
- Jute cord, 8 inches
How to Make It
- Sand the front of the maple slice until smooth, then wipe clean with a dry cloth.
- Mix cinnamon powder with white craft glue into a thick paste, then spread it evenly over the sanded side using your fingertip.
- Let the cinnamon side dry flat for 3 hours, then seal with two light coats of matte spray, waiting 15 minutes between coats.
- Paint the back side with red acrylic using the foam brush, let dry 1 hour, then add a second coat.
- Once fully dry, tie jute cord through a small drilled hole at the top for hanging.


2. Pinecone & Holly Reversible Plaque
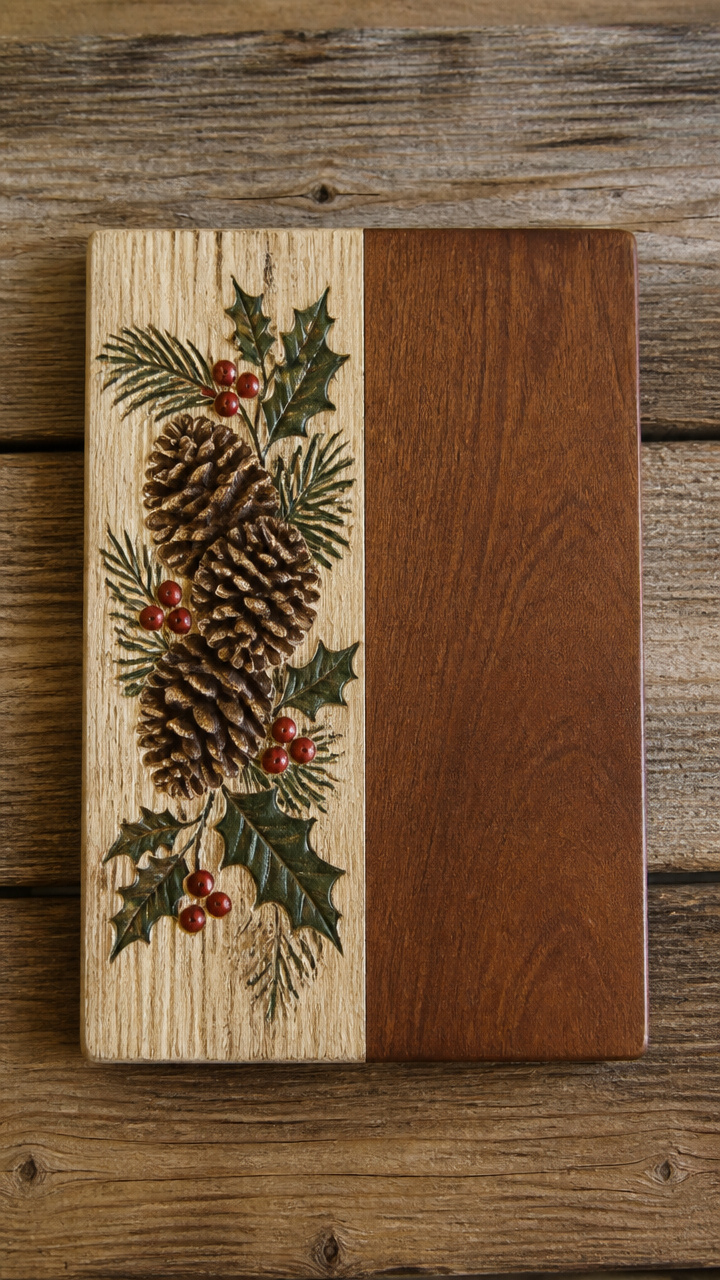
A rectangular basswood plaque displays a glued pinecone cluster on one face and laser-cut holly silhouettes on the other. Natural bark meets festive contrast with zero overlap in materials.
Materials Needed
- 1 piece 8×6 inch basswood board, 1/2 inch thick
- 3 medium dried pinecones
- Hot glue gun with 11mm glue sticks
- Black acrylic paint
- Holly-shaped stencil, 4×3 inches
- Stencil brush
- Natural raffia, 12 inches
- Drill with 1/8 inch bit
How to Make It
- Lay the pinecones on the front of the board in a staggered triangle and glue each base with hot glue, holding 20 seconds per cone.
- Let the glue set 10 minutes, then drill two small holes at the top corners for hanging.
- Thread raffia through the holes and knot securely at the back.
- On the reverse, position the holly stencil in the center and dab black paint inside using the stencil brush.
- Remove the stencil carefully, let dry 1 hour, then hang with the raffia loop.
3. Flippable Acorn & Snowman Peg Board
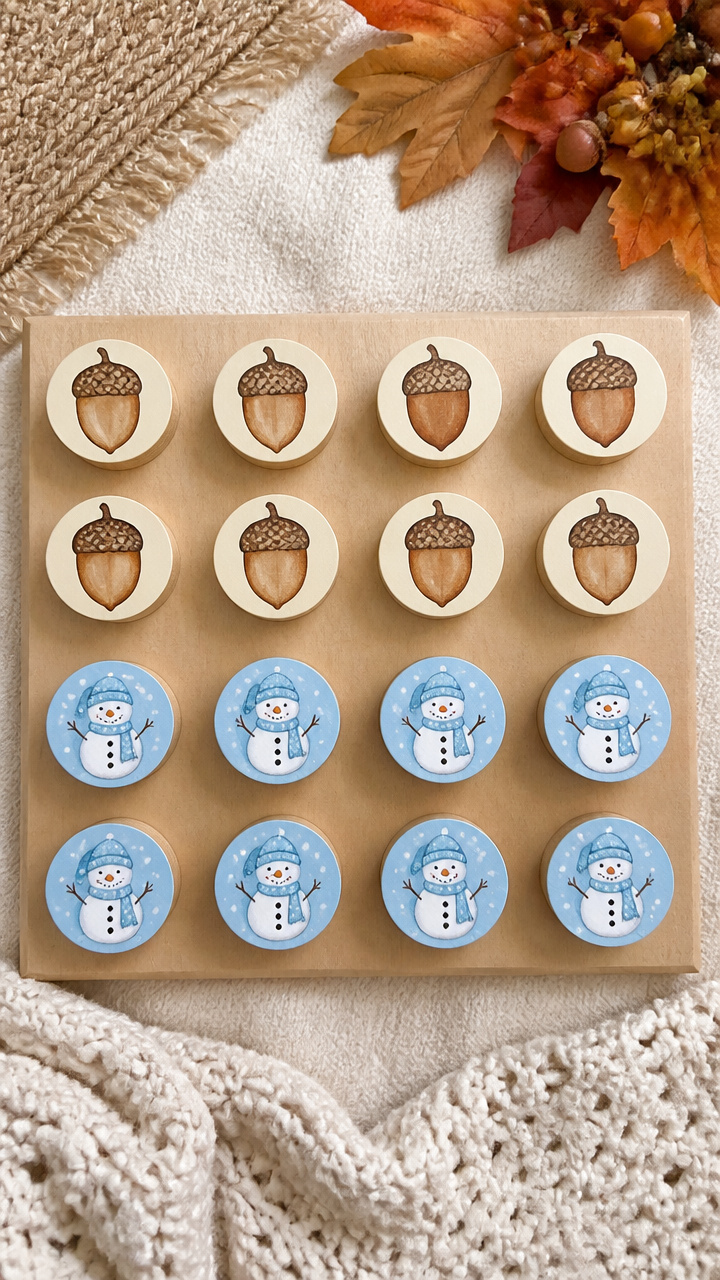
Sixteen dowel pegs spin in drilled holes, showing either hand-painted acorns or snowmen. Turn each peg to match the season using sealed watercolor details.
Materials Needed
- 1 piece 9×9 inch poplar square, 3/8 inch thick
- 16 wooden dowels, 1 inch long, 1/4 inch diameter
- Wood burner with fine tip
- Brown watercolor paint
- Blue watercolor paint
- White gouache paint
- Small pointed paintbrush
- Ruler
- Drill with 1/4 inch bit
- Clear wax finish
How to Make It
- Use the ruler to mark a grid of 16 evenly spaced dots, 1 inch apart, across the board.
- Drill shallow 1/4 inch holes at each dot, 1/2 inch deep.
- Burn a tiny cap line near one end of each dowel to mark the top.
- Paint one half of each dowel with brown watercolor for acorns, let dry 30 minutes, then add caps with gouache.
- Paint the opposite half with blue bodies and white heads for snowmen, let dry 1 hour.
- Insert each dowel into a hole, then rub clear wax over the entire board surface.

4. Dual-Face Birch Slice Coasters
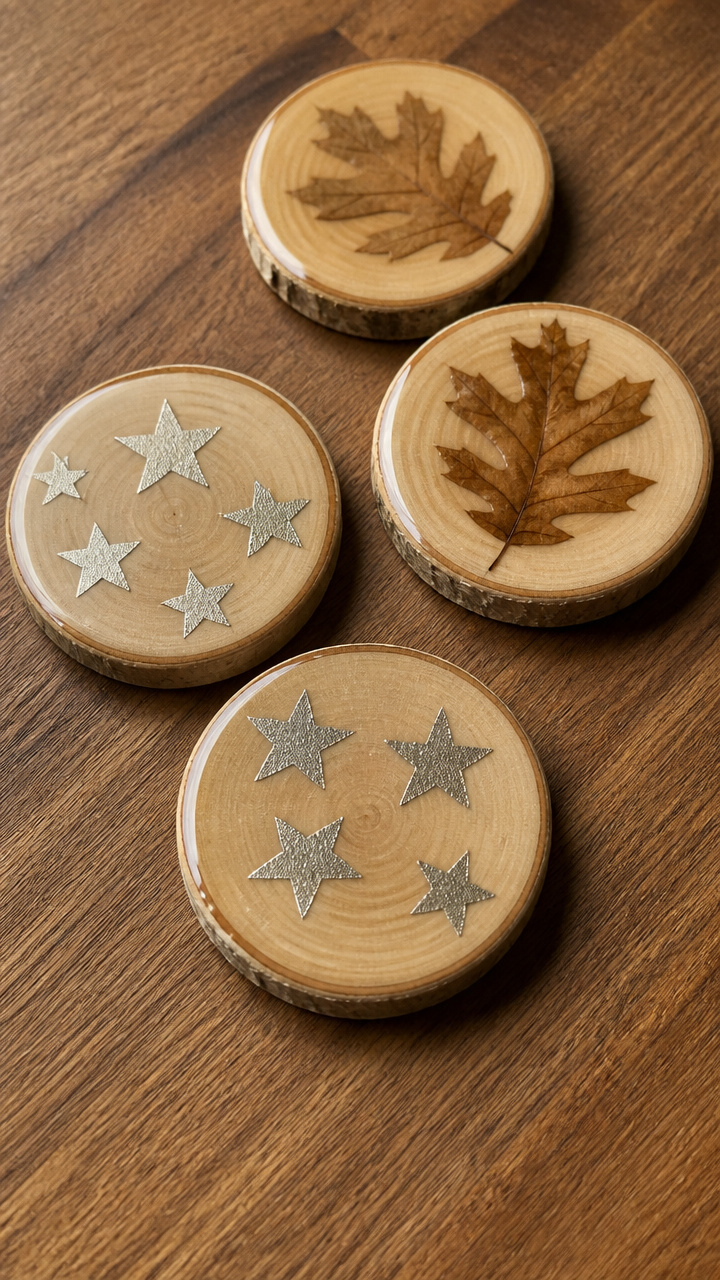
Four birch rounds wear pressed oak leaves on one side and embossed silver stars on the other. Each is sealed with food-safe resin for use all season.
Materials Needed
- 4 birch slices, 4 inches diameter, 1/2 inch thick
- 4 real oak leaves, undamaged
- Mod Podge Outdoor formula, 4 ounces
- Foiled star stickers, 1 inch, silver, 4 count
- Epoxy resin kit for coasters
- Disposable gloves
- Craft stick
- Level drying rack
How to Make It
- Place one oak leaf on the top face of each coaster, vein side down, and secure edges with Mod Podge using the craft stick.
- Coat the entire leaf and surrounding wood with a thin layer of Mod Podge, then let dry 2 hours.
- Peel off the leaf paper gently, leaving the foiled impression behind.
- On the reverse, press one silver star sticker firmly into the center.
- Mix epoxy resin according to kit instructions, pour evenly over both sides separately, letting each cure 24 hours on a level rack.


5. Rotating Pumpkin & Angel Block
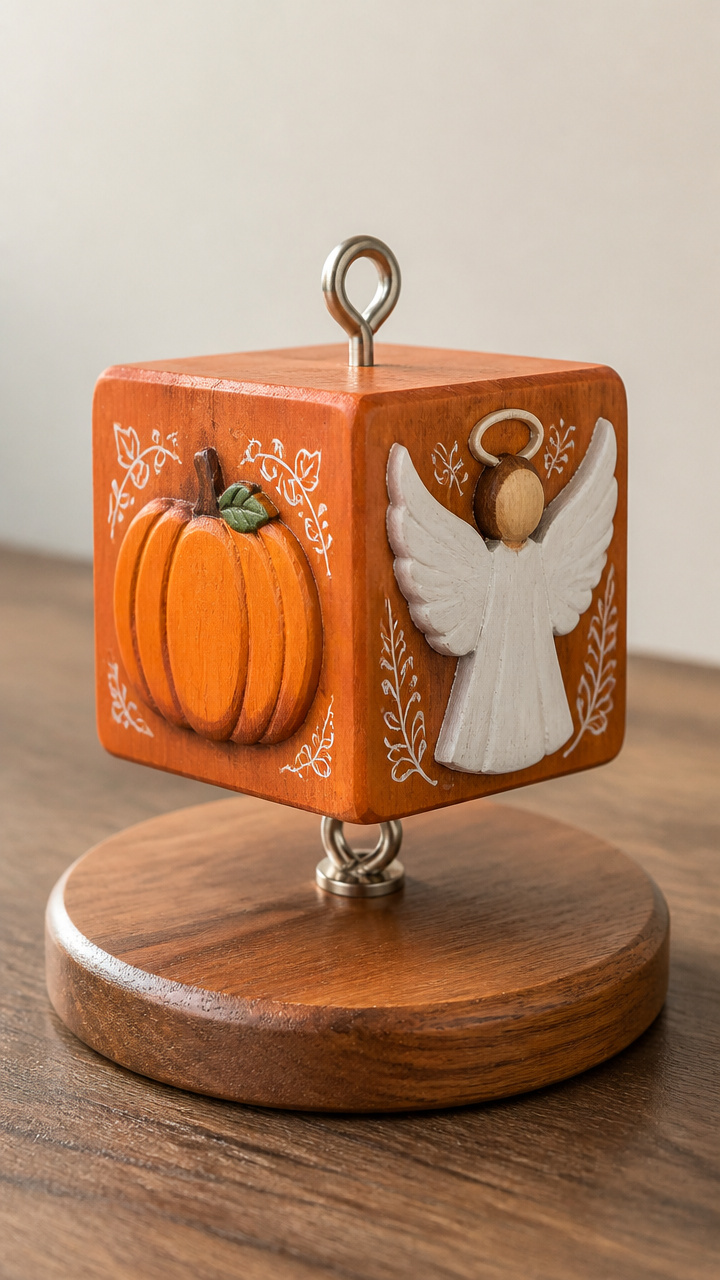
A cube of alder wood rotates on a metal rod, showing hand-carved pumpkin and angel faces. One tool carves both, but the themes oppose perfectly.
Materials Needed
- 1 alder wood cube, 3 inches per side
- Carving knife with fine blade
- Metal eye screw, 1 inch
- Hand drill with 3/16 inch bit
- Orange oil stain
- White acrylic paint
- Soft cotton cloth
How to Make It
- Drill a horizontal hole through the center of the cube, front to back, using the 3/16 inch bit.
- Screw the eye screw halfway into the center of one edge so the loop sticks out.
- Carve a jack-o-lantern face on one side using short controlled cuts, then stain with orange oil, wiping excess with cloth.
- On the opposite side, carve an angel face with soft curves, then paint details with white acrylic using the knife tip.
- Let stain and paint dry 2 hours, then rotate the block on the screw for display.

6. Reversible Walnut Barn Star
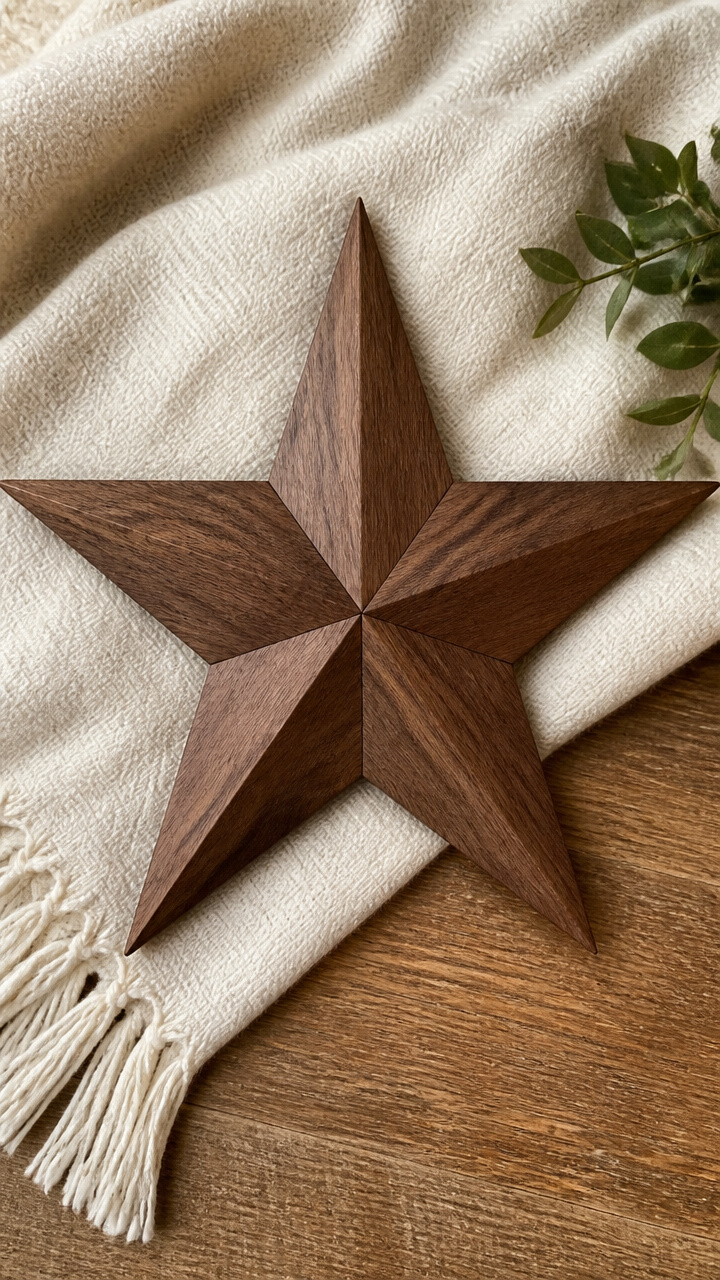
Five-pointed star made from walnut strips flips to show raw wood grain or stained crimson. Mitered joints lock without nails.
Materials Needed
- 5 walnut strips, 1/2 x 1/2 x 10 inches
- Miter box and backsaw
- Wood glue for hardwoods
- Clamps, 4 count
- Crimson gel stain
- Foam applicator pad
- Steel ruler
How to Make It
- Set the miter box to 36 degrees and cut both ends of each strip to form five star points.
- Dry-fit the pieces into a star shape, ensuring tight corners.
- Apply wood glue to each mitered end, assemble the star, and clamp at each joint for 2 hours.
- Once dry, leave one side bare and wipe crimson stain evenly on the reverse with the foam pad.
- Let stain sit 5 minutes, wipe off excess, and cure 12 hours before displaying.
7. Flip-Top Apple & Bell Box
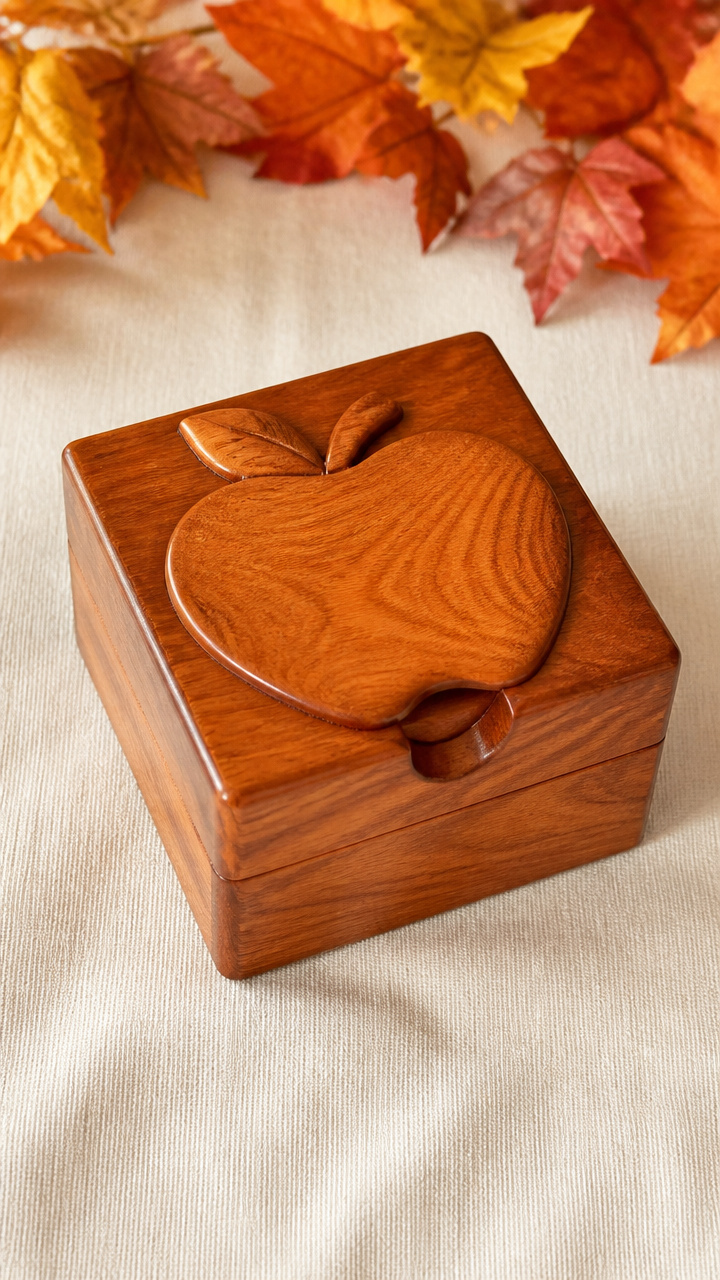
A lidded cherry box holds spices in fall and ornaments in winter. The lid turns over to reveal carved fruit or chime symbols.
Materials Needed
- 1 cherry wood box with removable lid, 5x3x2 inches
- Liner brush
- Apple carving template, 2 inches tall
- Bell carving template, 2 inches tall
- Wood carving gouge, #3, 1/8 inch
- Amber shellac
- Lint-free cloth
How to Make It
- Trace the apple template onto one side of the lid and carve gently along the lines with the gouge.
- Turn the lid over and trace the bell template, then carve with the same tool.
- Brush amber shellac over both sides, let dry 30 minutes, then apply a second coat.
- Buff lightly with lint-free cloth after 1 hour.
- Store cinnamon sticks inside during fall, switch to tiny glass balls in winter.


8. Double-Sided Sassafras Wreath Base
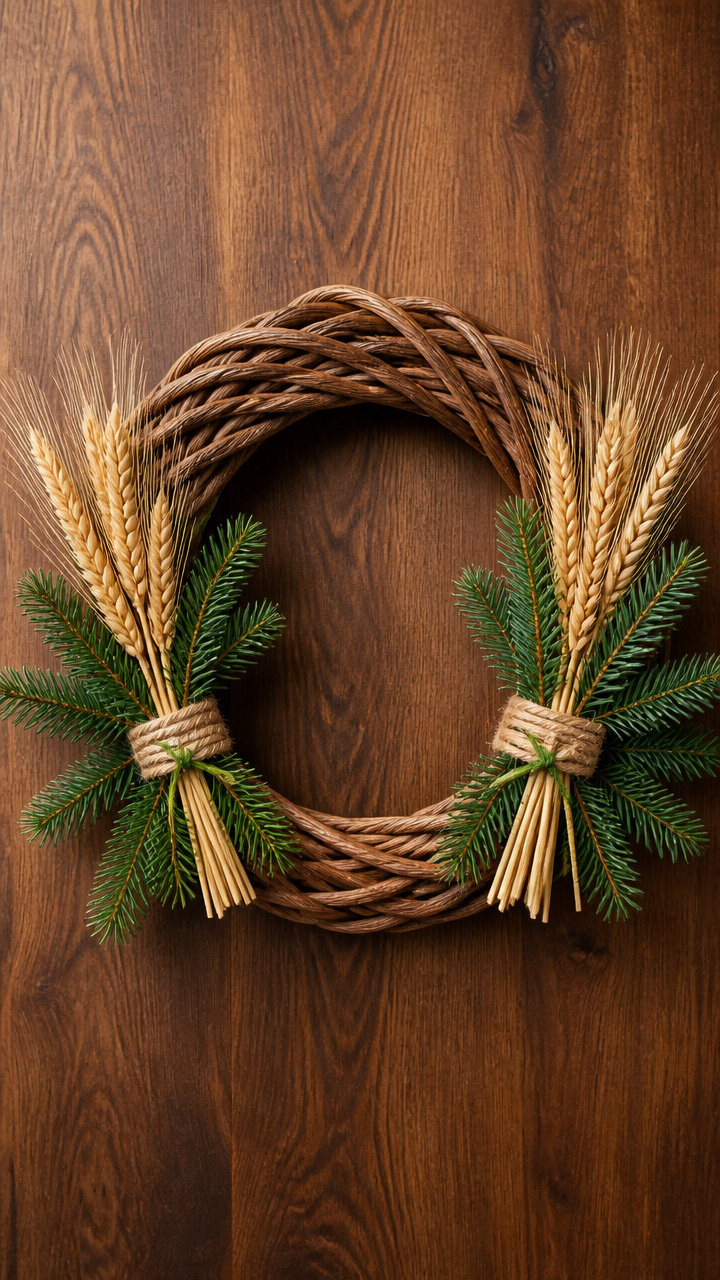
Woven sassafras roots form a ring that holds either dried wheat bundles or faux evergreen sprigs. Attachments change with the season.
Materials Needed
- 1 sassafras wreath base, 10 inches diameter
- Dried wheat stalks, 8 count
- Green pipe cleaners, 4 count
- Faux evergreen sprigs, 4 stems
- Wire cutter
- Natural twine, 24 inches
How to Make It
- Bundle four wheat stalks together and tie at the base with a pipe cleaner.
- Attach three more bundles around the wreath, spacing evenly, securing each with a pipe cleaner twisted at the back.
- For winter, clip off wheat with wire cutter and insert evergreen sprigs into the weave, pushing deep for hold.
- Tie twine into a loop at the top for hanging, adjusting length as needed.


9. Seasonal Message Chalkboard Slab
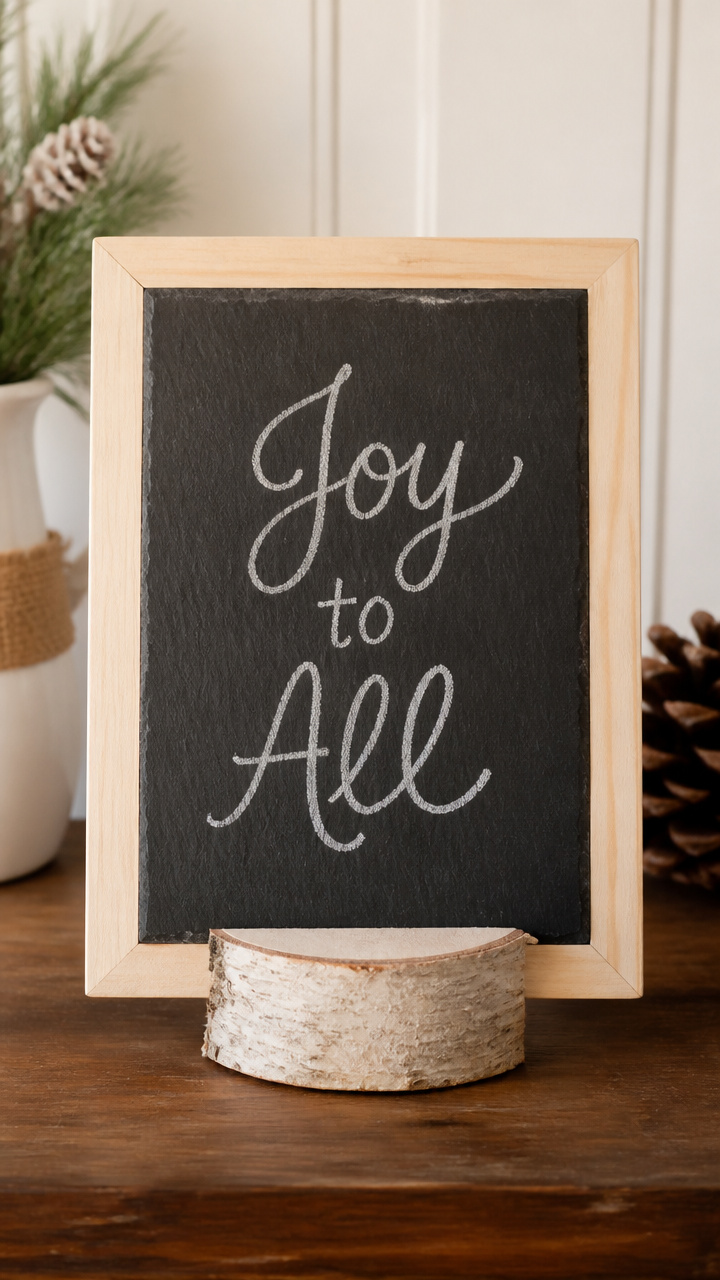
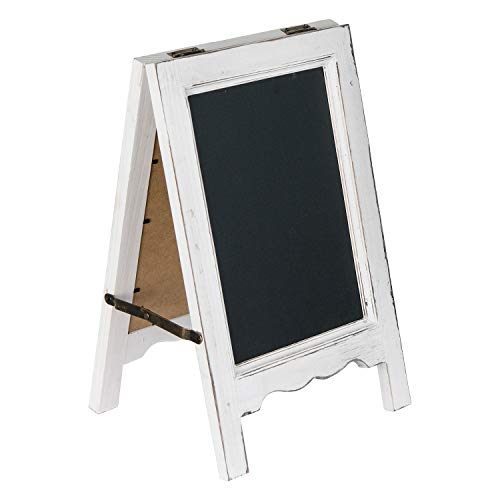
A framed slate board leans on a birch stand, swapping “Harvest Blessings” for “Joy to All” with chalk. Frame stays neutral.
Materials Needed
- Rectangular slate tile, 6×8 inches
- Chalk marker, white
- Birch log stand, 3 inches tall, flat top
- Frame made of unfinished pine, outer size 7×9 inches
- Silicone adhesive
- Erasing cloth
How to Make It
- Place the slate into the pine frame and secure the back corners with pea-sized dabs of silicone adhesive.
- Let the adhesive cure 4 hours.
- Rest the framed slate upright on the birch stand.
- Write 'Harvest Blessings' in cursive with the chalk marker for fall.
- Wipe clean with the cloth and rewrite 'Joy to All' for winter.


10. Turned Walnut Button Ornaments
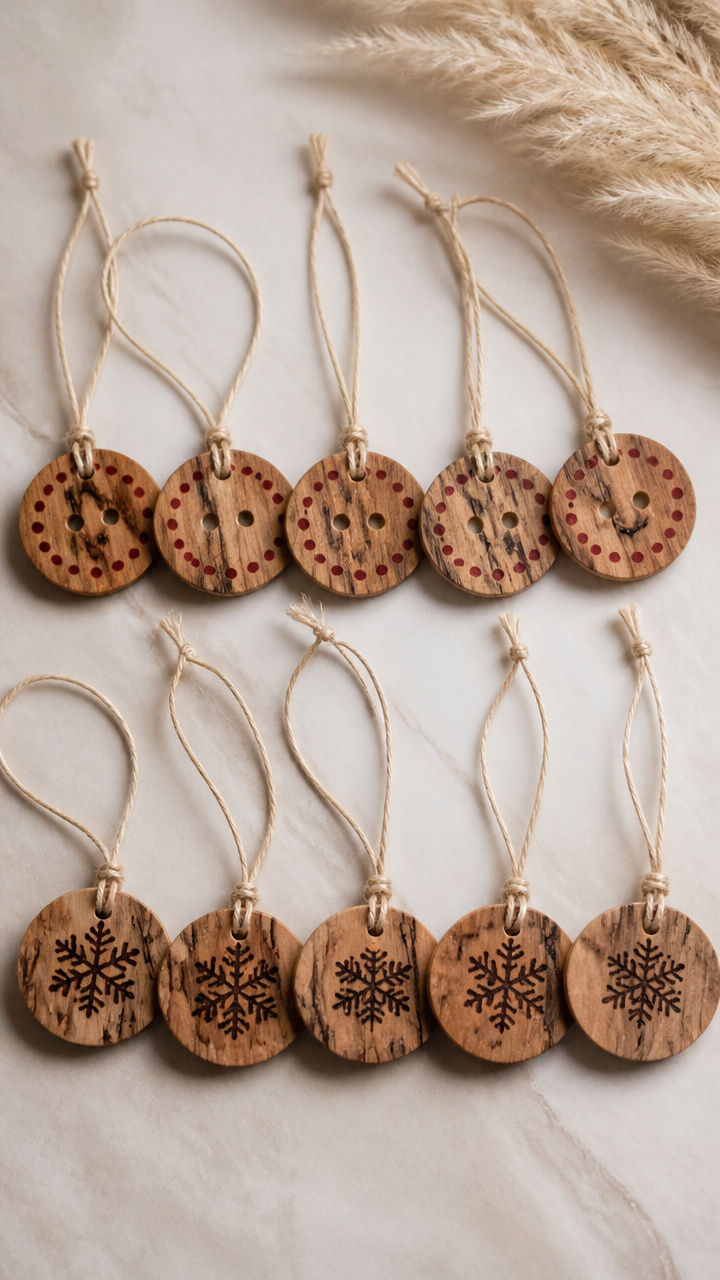
Ten spalted walnut buttons strung on linen thread flip from burnt-sienna ink dots to stamped snowflakes. Each is lathe-turned and double-sided.
Materials Needed
- 10 spalted walnut blanks, 1.5 inch diameter, 3/8 inch thick
- Wood lathe
- Parting tool
- Burnt sienna ink pad
- Snowflake rubber stamp
- Linen thread, 5 feet
- Needle for heavy thread
How to Make It
- Mount each blank on the lathe and turn flat on both sides using the parting tool, sanding to 220 grit when done.
- Press one face of each button into the ink pad to create a fall dot pattern.
- Stamp the reverse side with the snowflake design using firm even pressure.
- Let ink dry 1 hour.
- Thread all buttons onto the linen strand using the needle, knotting between each to space evenly.


11. Hinged Harvest Moon Sign
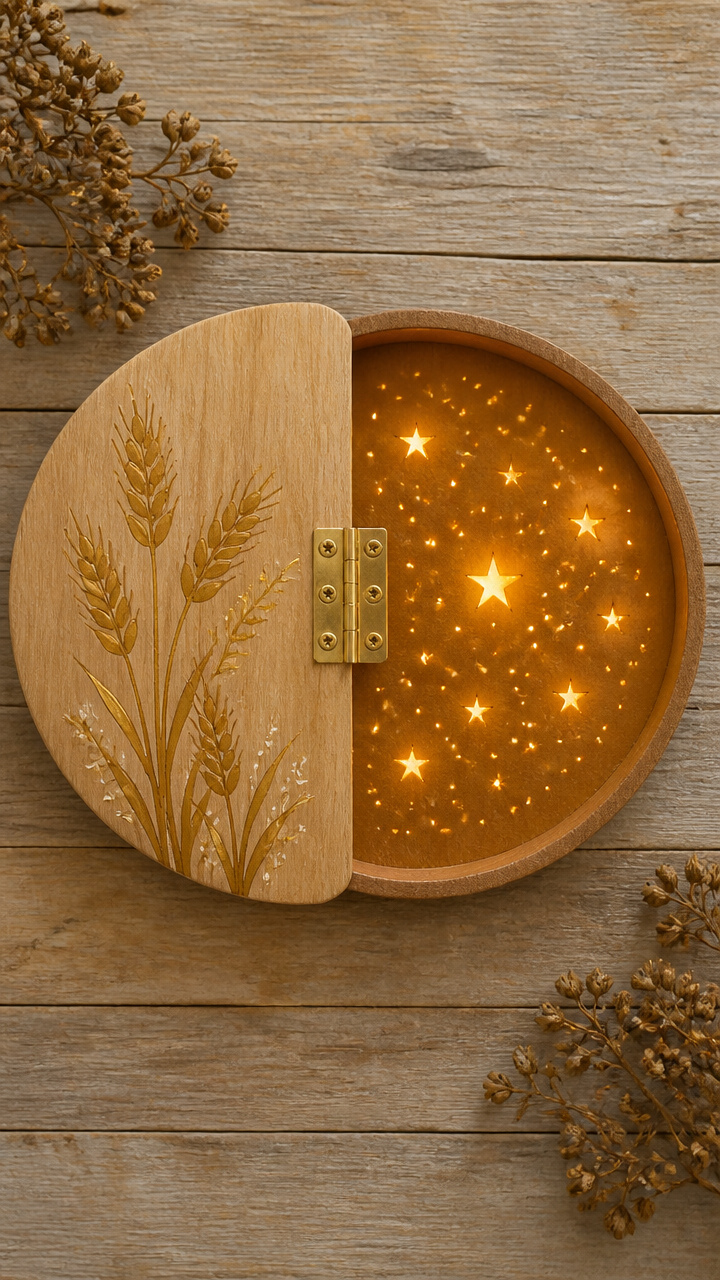
A circular poplar sign swings open on brass hinges to reveal either a painted harvest moon or a glowing starfield. Light shines through punched holes.
Materials Needed
- 1 poplar circle, 7 inches diameter, 1/2 inch thick
- Brass bookbinding hinge, 2 inches
- Screwdriver and tiny screws
- Gold acrylic paint
- Star punch tool
- LED tea light
- Black chalk paint
How to Make It
- Paint one face with gold acrylic to resemble a harvest moon, let dry 1 hour.
- On the second board, apply black chalk paint and let cure 2 hours.
- Use the star punch to make five holes in the black side, arranging in a constellation.
- Align the two circles edge to edge and attach the hinge to the top with screws.
- Place the LED tea light behind the black side so light glows through the stars when closed.


12. Sliding Barn Door Trivet
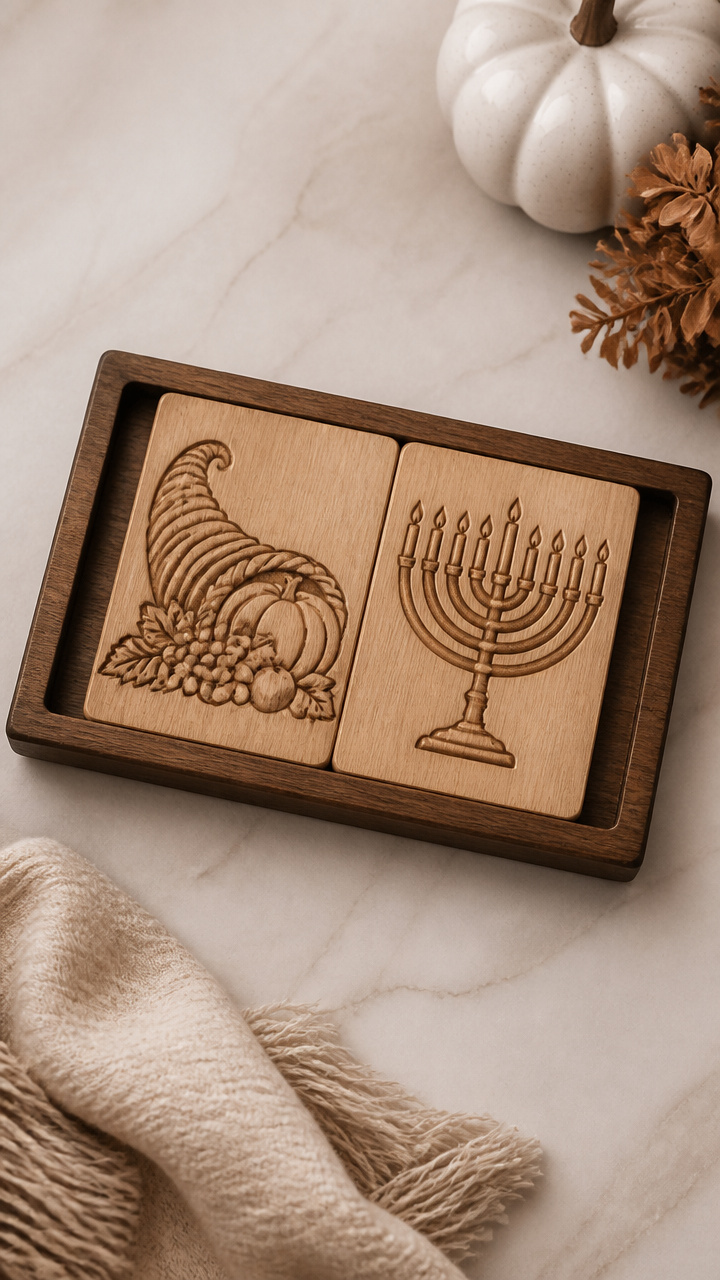
Two pine panels slide past each other on a groove track, combining to show a cornucopia or a menorah. Fully reversible imagery.
Materials Needed
- 2 pine boards, 6×4 inches each, 1/2 inch thick
- Router with 1/4 inch straight bit
- Grooved wooden track, 7 inches long
- Wood glue
- Cornucopia stencil
- Menorah stencil
- Burnt umber paint
- Candlestick yellow paint
- Foam brushes, 2 count
How to Make It
- Use the router to cut a centered vertical groove along the length of each board, 1/4 inch deep.
- Glue the grooved track to the base so both boards can slide left and right within it.
- Let glue dry 2 hours.
- Stencils: paint the cornucopia on one panel with burnt umber, let dry 1 hour.
- Paint the menorah on the other with candlestick yellow, let dry 1 hour.
- Slide panels to align images seasonally.


13. Stacked Log Candle Holder
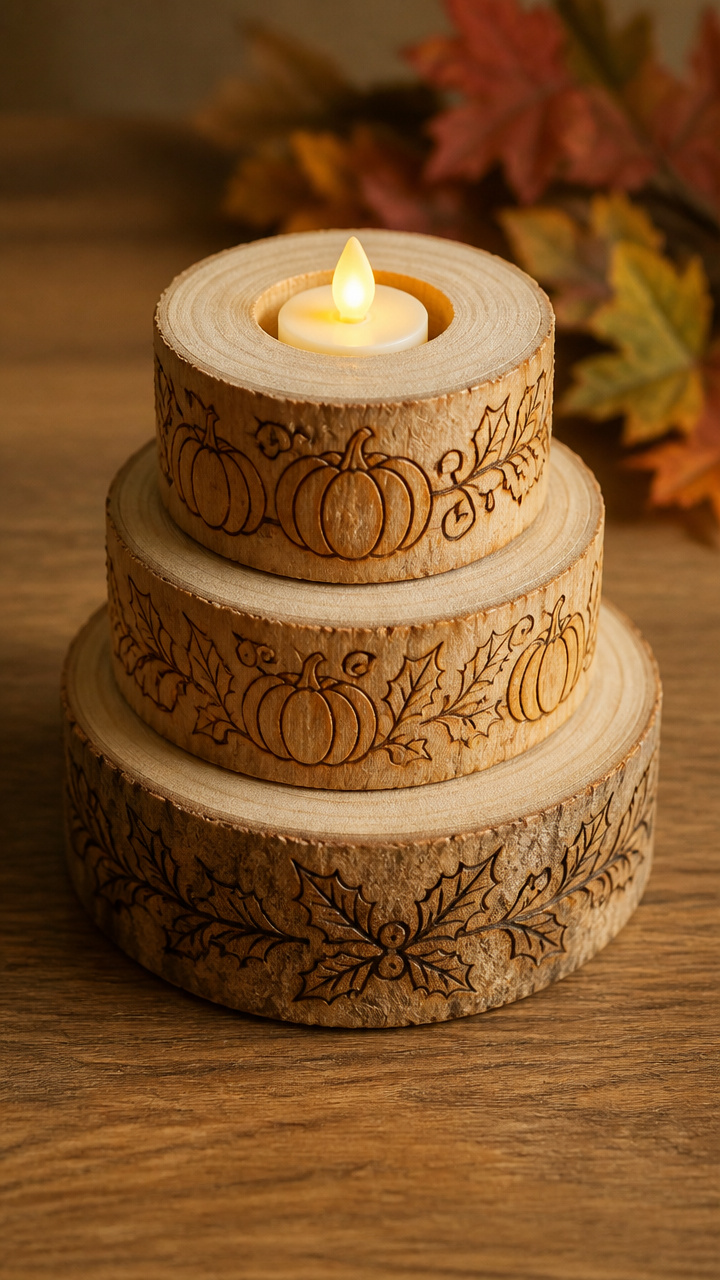
Three hollowed maple logs nest around a pillar candle, each ring engraved with pumpkins or holly. Flame flickers through seasonal scenes.
Materials Needed
- 3 maple log slices, 2 inches thick, varying diameters
- Hollowing chisel, 1 inch wide
- Mallet
- Pumpkin engraving bit
- Holly engraving bit
- Tealight candle, flameless
- Mineral oil
How to Make It
- Use the hollowing chisel and mallet to scoop out a 1.5 inch deep well in the center of each log, large enough to fit the candle.
- Engrave pumpkins around the edge of the smallest log using the pumpkin bit with a rotary tool.
- Engrave holly leaves on the largest log with the holly bit.
- Leave the middle log plain for transition.
- Rub mineral oil over all surfaces, let soak 10 minutes, wipe excess.
- Stack logs largest to smallest and place the tealight inside.


14. Swivel Twig Tree Topper
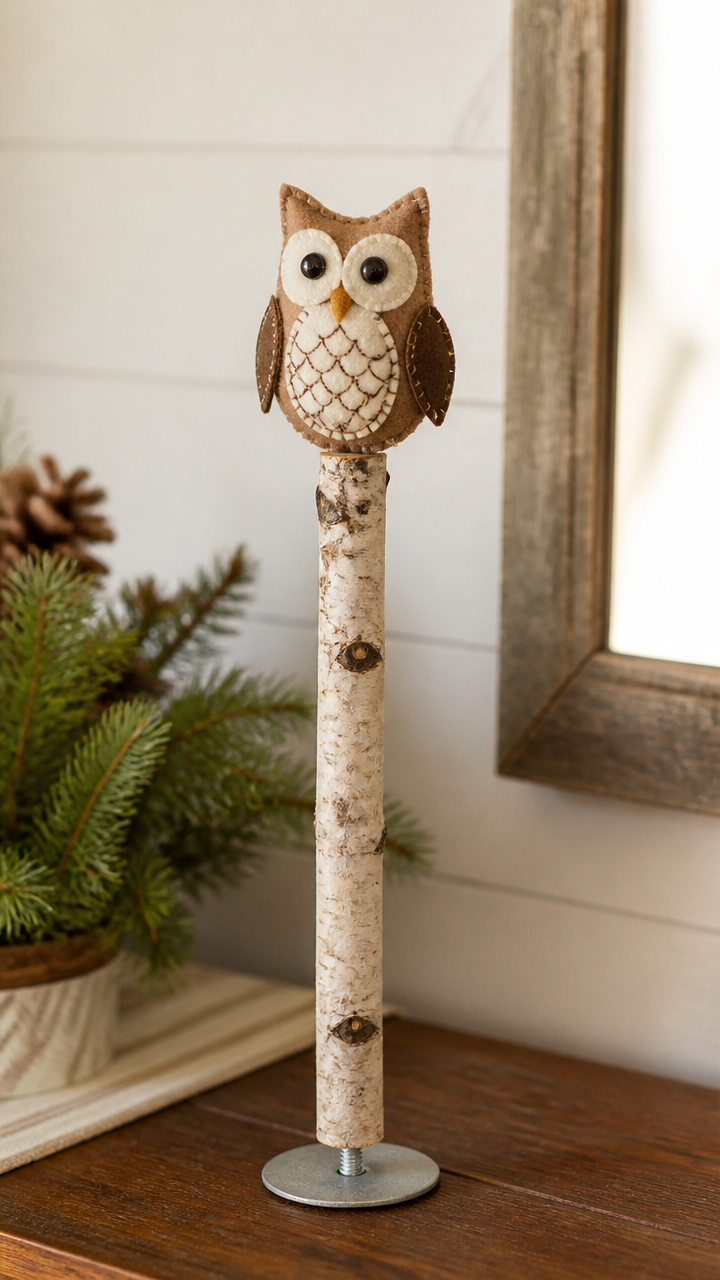
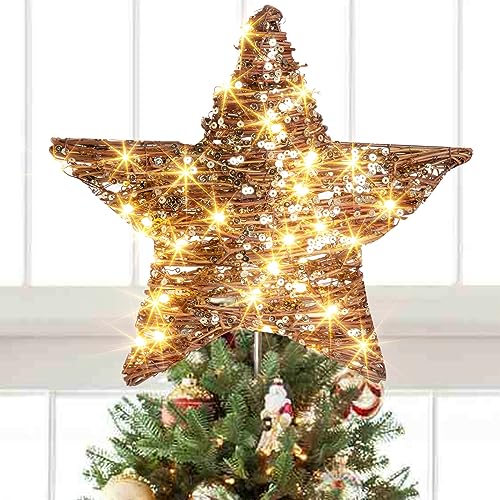
A slender birch branch spins on a threaded bolt, capped with either a felt owl or a glittered star. Lightweight and stable.
Materials Needed
- 1 straight birch branch, 12 inches long, 3/4 inch diameter
- 1 wooden star, 3 inches, unfinished
- Felt owl ornament, 3 inches tall
- Flat washer, 3/4 inch
- Wing nut, 3/4 inch
- Drill with 3/4 inch spade bit
- Glitter glue, gold
- Hot glue gun
How to Make It
- Drill a 3/4 inch hole through the center of the wooden star just deep enough to fit the branch end.
- Coat the star with glitter glue, let dry 2 hours.
- Hot glue the felt owl to the opposite end of the branch.
- Insert the star end into the hole in your tree topper base.
- Slide the washer over the exposed branch end, then secure with the wing nut, allowing rotation.


15. Reversible Nutcracker Name Tags
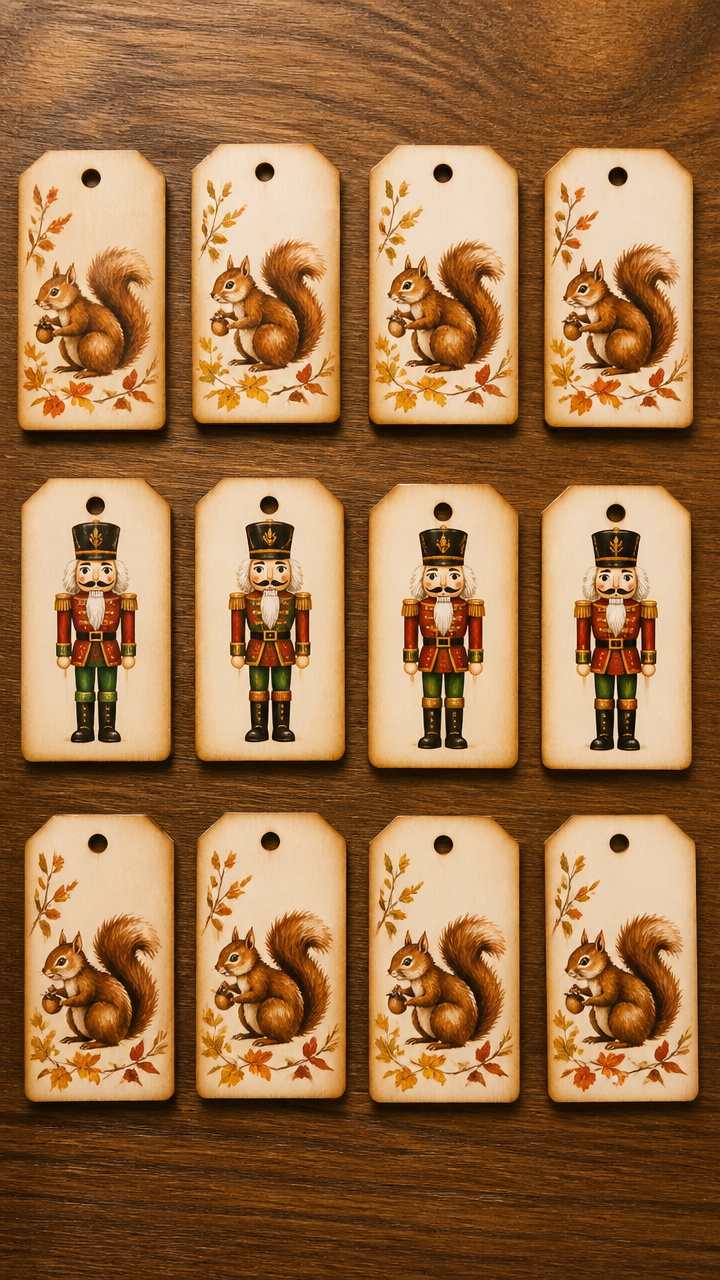
Twelve poplar tags hang place settings, each showing a squirrel on one side and a toy soldier on the other. Edges are beveled and inked.
Materials Needed
- 12 poplar blanks, 2×3 inches, 1/8 inch thick
- Bevel jig for sander
- Orbital sander with 150 grit
- Squirrel rubber stamp
- Toy soldier rubber stamp
- Brown archival ink pad
- Red archival ink pad
- Hole punch, 1/8 inch
- Copper wire, 24 gauge, 12 feet
How to Make It
- Set up the bevel jig and sand a 45-degree edge around each blank using the orbital sander.
- Stamp one side of each tag with the squirrel using brown ink, pressing evenly.
- Stamp the reverse with the toy soldier using red ink.
- Let ink dry 30 minutes.
- Punch a hole at the top of each tag and thread a 6-inch piece of copper wire through for hanging.


Each of these crafts carries the quiet joy of changing seasons without demanding a full redo. Pick one that matches your mood today and let the wood tell the rest of the story.