23 Easy Winter Themed Crafts for the Classroom

Frost gathers on the windowpanes, mittens hang by the radiator, and the classroom hums with quiet excitement. These winter crafts bring that same cozy energy to your students’ hands and desks.
Each one fits neatly into a lesson, a morning warm-up, or a creative break. They’re made with simple supplies, clear steps, and just enough sparkle to make the season feel special.
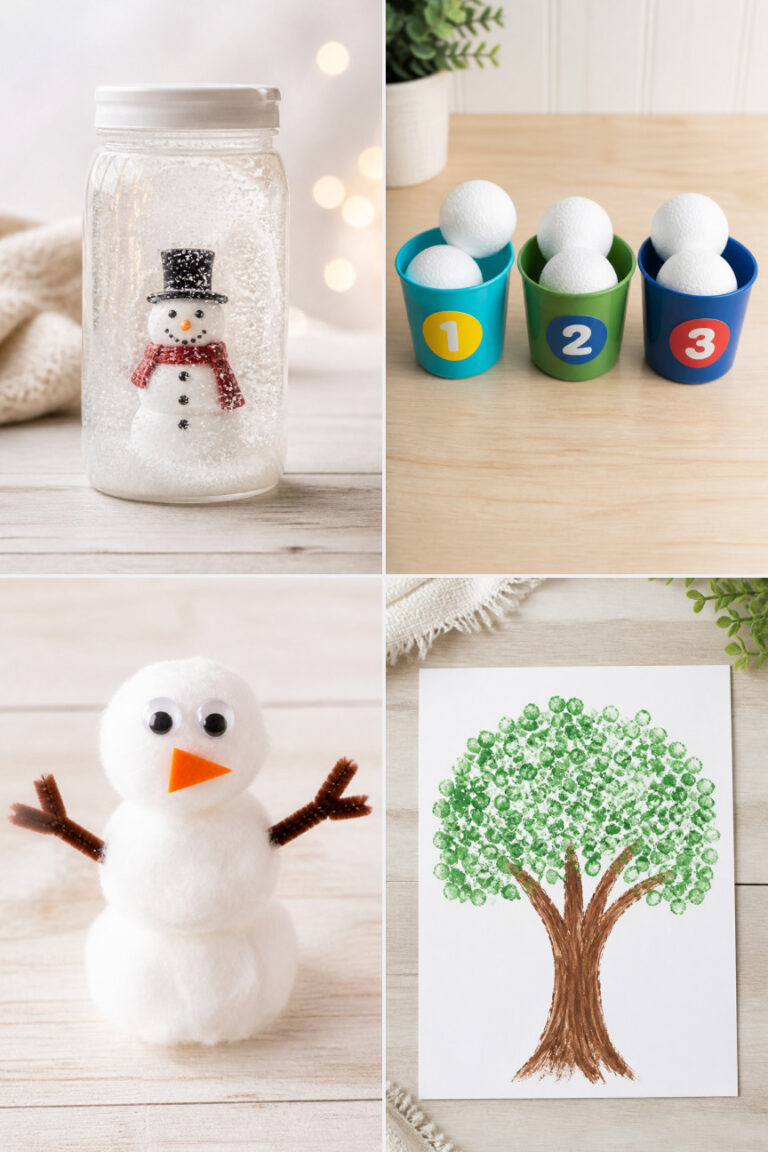
1. Cotton Ball Snowmen
Easy
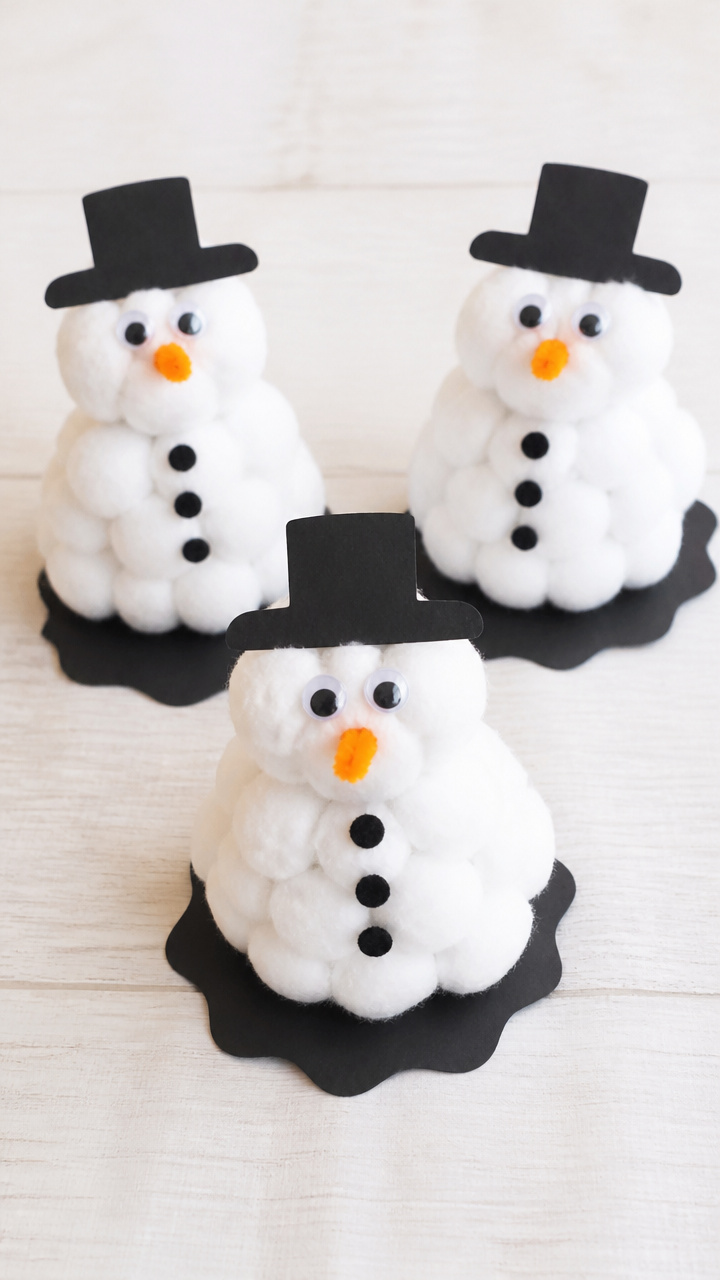
Plump little snowmen with soft bodies and tiny hat silhouettes stand proudly on desks. These are perfect for younger students who love tactile building and quick results.
Materials Needed
- White cotton balls, 10 per student
- Black construction paper, 8.5 x 11 inches, 1 sheet per student
- Orange pipe cleaners, 1 per student
- Googly eyes, 2 per student
- Glue sticks, 1 per student
- Scissors, 1 pair per student
How to Make It
- Cut the black construction paper in half to create two tall ovals for hats.
- Glue three large cotton balls in a vertical stack to form the snowman’s body.
- Glue the black paper oval on top as the hat.
- Snip a 1-inch piece from the orange pipe cleaner and glue it as a carrot nose.
- Add googly eyes above the nose using a dab of glue.
2. Salt Painting Snowflakes
Easy
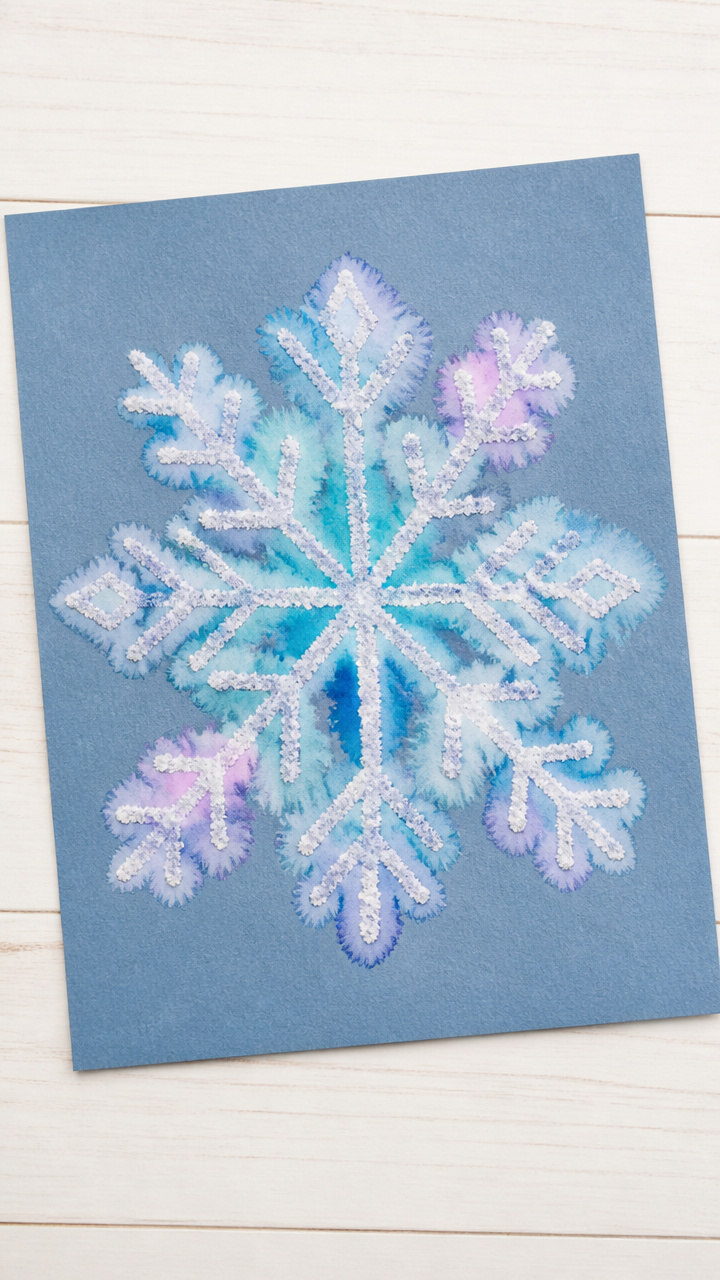
Delicate lines of salt catch watery paint in radiant bursts, creating icy designs that shimmer under classroom lights. This process blends science and art in one quiet activity.
Materials Needed
- White cardstock, 8.5 x 11 inches, 1 sheet per student
- Pencil, 1 per student
- White school glue, 1 bottle per student
- Table salt, 1 cup total
- Small bowls, 1 per student
- Paintbrushes, 1 per student
- Liquid watercolors or food coloring, 3 colors per tray
How to Make It
- Draw a snowflake design lightly in pencil on the cardstock.
- Trace over the lines with white school glue, pressing down firmly on the nozzle.
- Sprinkle salt evenly over the glued lines, covering every part.
- Shake off excess salt into the bowl and let the glue dry for 5 minutes.
- Dip the brush in colored water and gently touch it to the salt lines to watch the color spread.
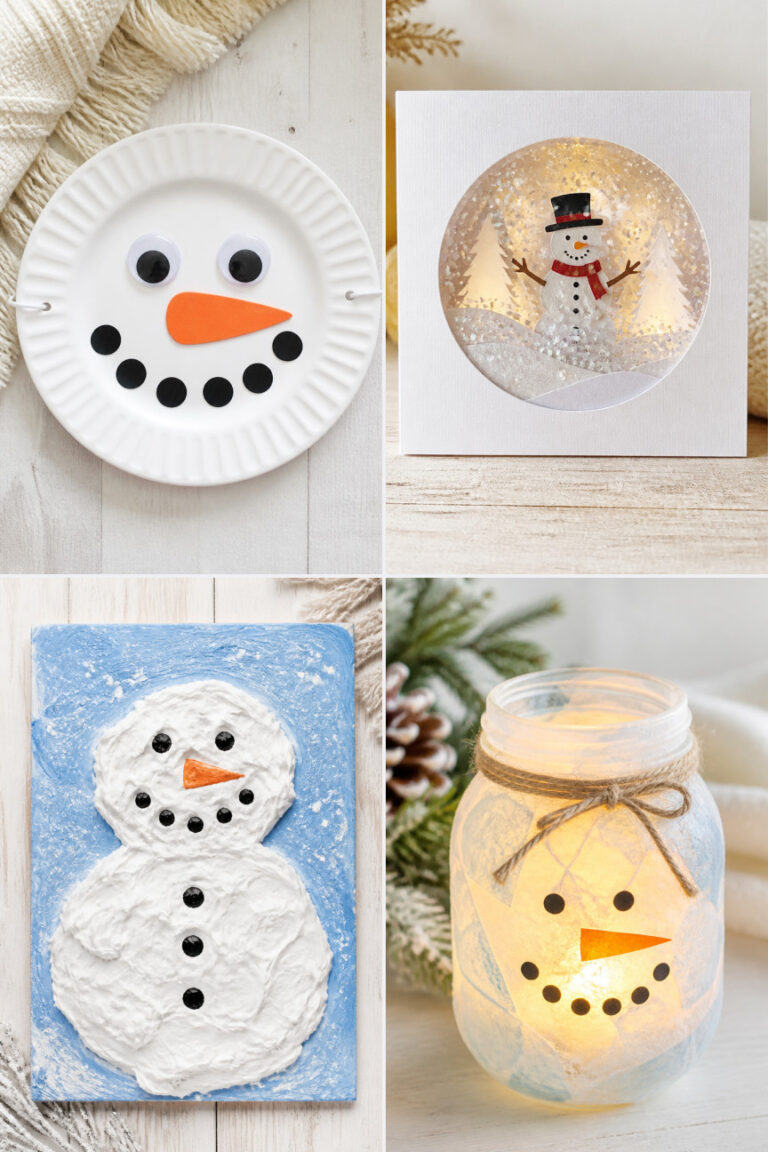
3. Paper Plate Snow Globes
Easy
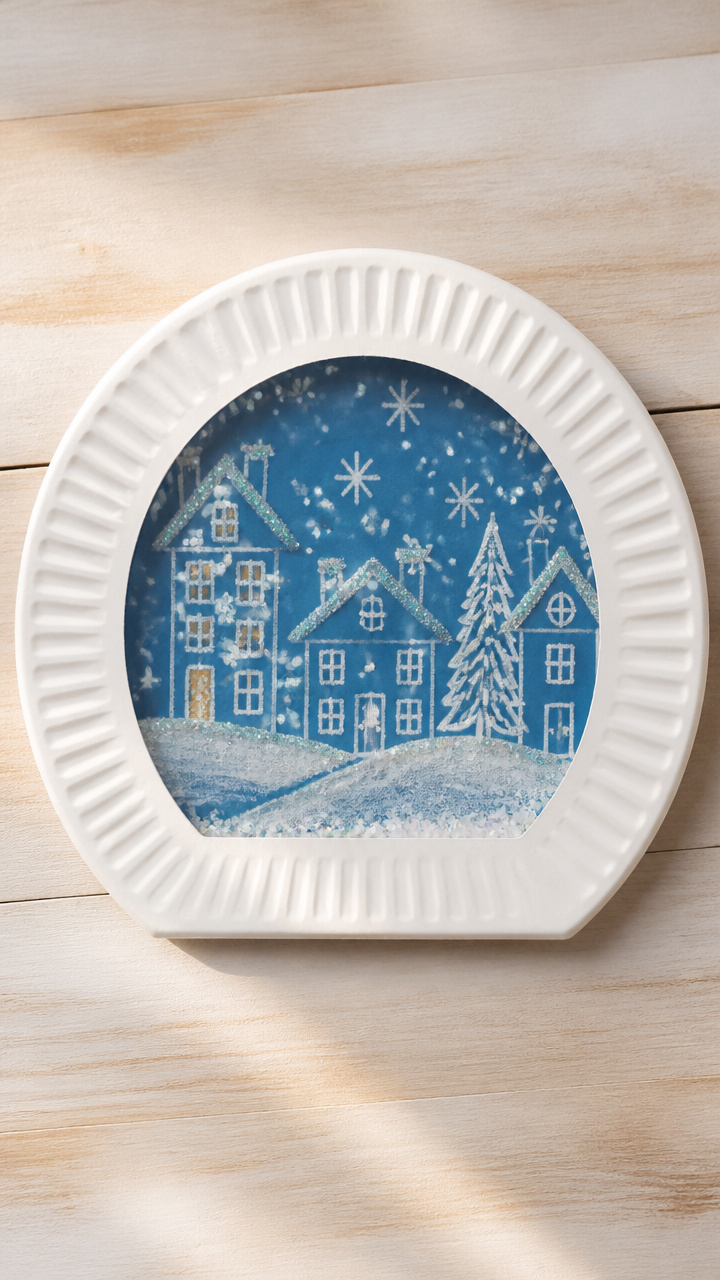
A curved window reveals a snowy village scene behind glassy cellophane. These handheld globes double as storytelling prompts or holiday cards.
Materials Needed
- White paper plates, 1 per student
- Clear plastic report covers, cut into 3-inch circles, 1 per student
- Blue construction paper, 1 sheet per student
- White crayon, 1 per student
- Glitter glue, 1 bottle per student
- Scotch tape, 1 roll per table
- Markers, assorted colors
How to Make It
- Cut out the center of the paper plate, leaving a circular frame.
- Draw a small winter house or tree on blue paper using a white crayon.
- Color around the drawing with markers to create a night sky background.
- Tape the drawing to the back of the plate frame.
- Apply glitter glue around the inner edge of the frame, then press the plastic circle on top to seal it.
4. Popsicle Stick Ice Skates
Easy
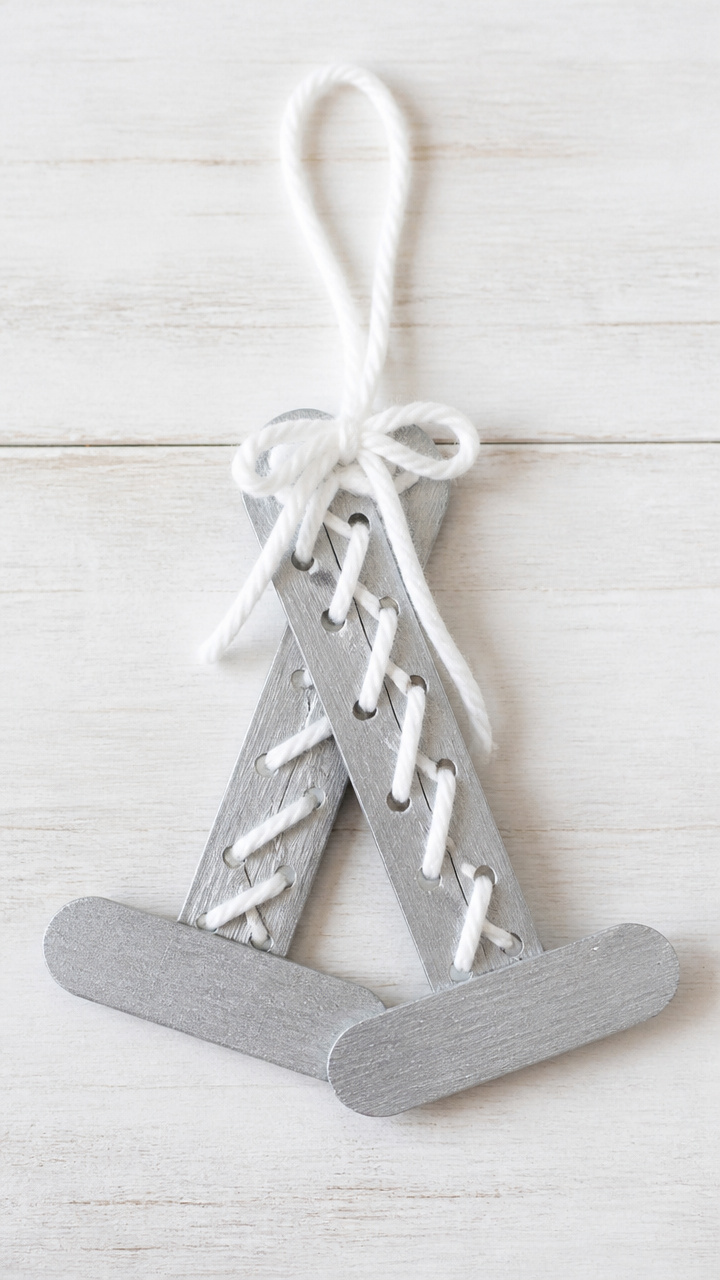
Tiny wooden skates dangle from ribbons, their blades gleaming with silver paint. These make sweet ornaments or name tags for a winter bulletin board.
Materials Needed
- Jumbo popsicle sticks, 2 per student
- Silver acrylic paint, 1 bottle per table
- Paintbrushes, 1 per student
- White yarn, 12 inches per student
- Hot glue gun and glue sticks
- Ruler, 1 per table
How to Make It
- Lay one popsicle stick flat and place the second one perpendicular across its middle to form a T-shape.
- Use hot glue to attach the sticks at the crossing point.
- Paint the horizontal stick silver to mimic a skate blade and let it dry for 10 minutes.
- Cut a 12-inch piece of yarn and tie the ends together to make a loop.
- Glue the loop to the top end of the vertical stick for hanging.
5. Q-Tip Frost Trees
Easy
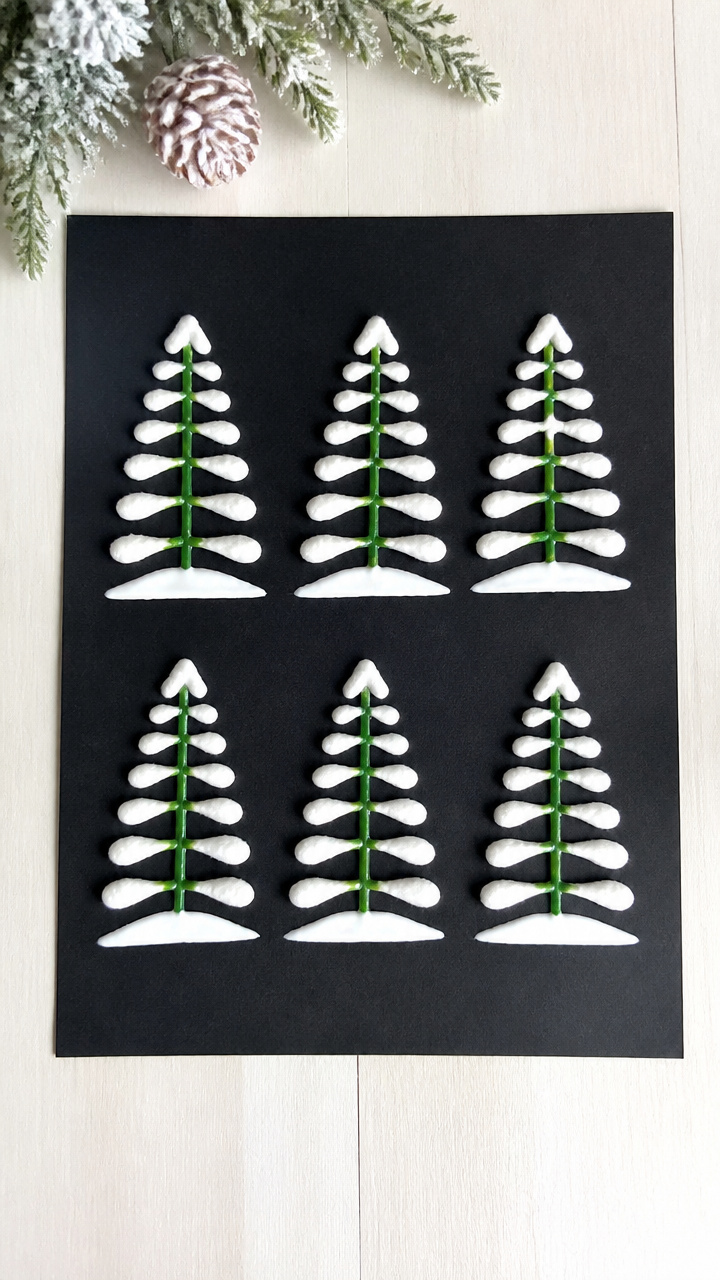
Rows of evergreens appear like breath on glass, built from cotton swabs and dark paper. The clean geometry teaches symmetry while feeling magical.
Materials Needed
- Black construction paper, 8.5 x 11 inches, 1 sheet per student
- White glue, 1 bottle per student
- Q-Tips, 6 per student
- Ruler, 1 per table
- Pencil, 1 per student
How to Make It
- Lay the Q-Tips horizontally on a desk and snap each in half at the cotton end.
- Draw a straight trunk line 2 inches tall with pencil near the bottom of the paper.
- Glue one full Q-Tip vertically over the pencil line to form the trunk.
- Angle four half Q-Tips upward from the top of the trunk to form layered branches.
- Glue a final half Q-Tip across the top as a cap, creating a triangular tree shape.
6. Clothespin Penguin Families
Easy
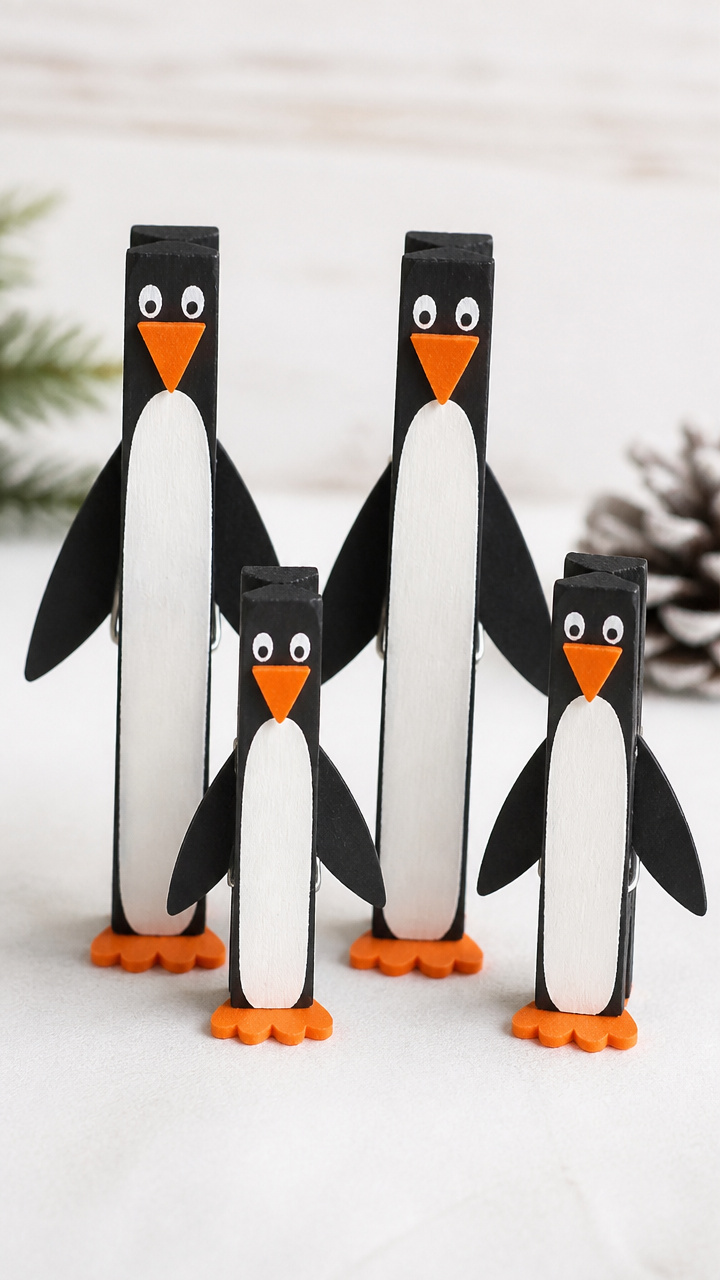
Wooden clothespins waddle upright with painted faces and paper wings. These charming characters spark imaginative play during indoor recess.
Materials Needed
- Wooden clothespins, 1 per student
- Black and white acrylic paint, 1 bottle each per table
- Paintbrushes, 1 per student
- Orange craft foam, 1 sheet total
- Scissors, 1 pair per student
- Glue dots, 3 per student
How to Make It
- Paint the entire clothespin white and let it dry for 15 minutes on scrap paper.
- Paint the top half black to form the penguin’s back and head.
- Cut small triangle beaks from orange craft foam.
- Cut two small wing shapes from the foam and round the edges.
- Press a glue dot on each side of the body and attach the wings, then add the beak below the eyes.
7. Pipe Cleaner Snowflakes
Easy
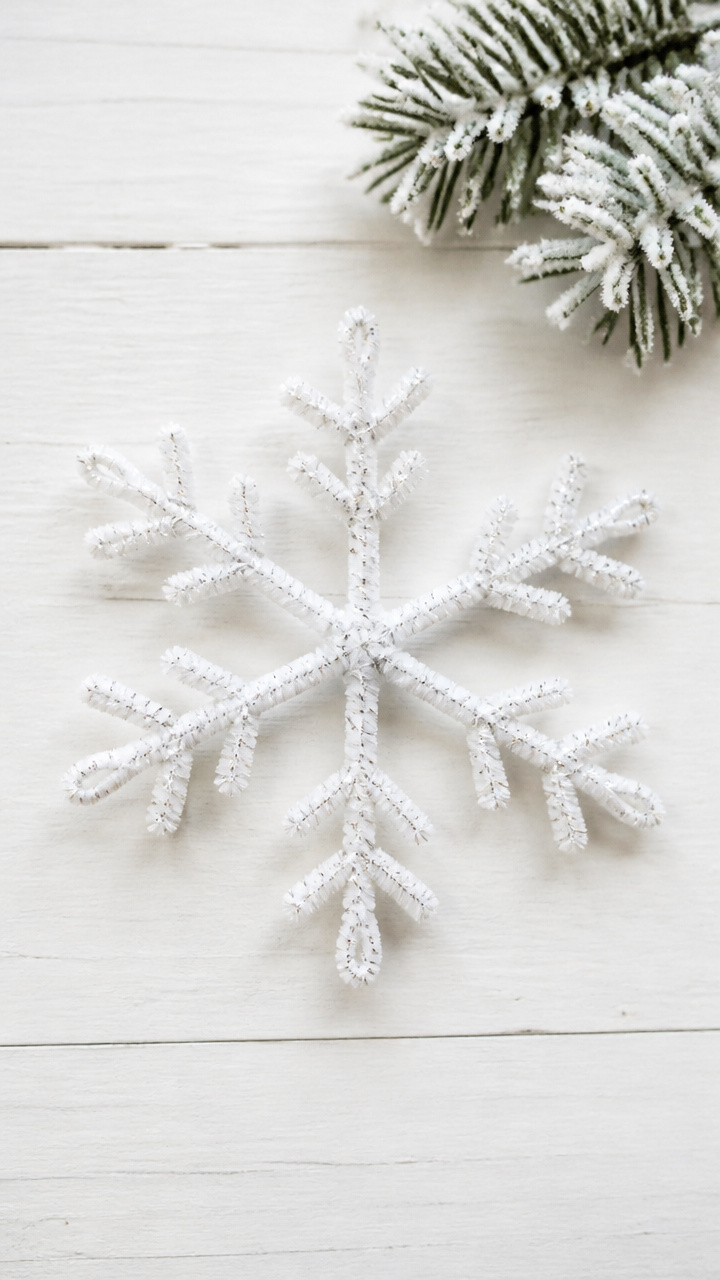
Twisted wire arms branch into six-sided crystals that catch light when hung near windows. These teach pattern-making with satisfying bend-and-click rhythm.
Materials Needed
- White pipe cleaners, 3 per student
- Ruler, 1 per table
- Scissors, 1 pair per student
- Glitter spray, optional, 1 can per room
How to Make It
- Lay one pipe cleaner flat and bend it into a zigzag with three equal arms at 60-degree angles.
- Thread the second pipe cleaner through the center and twist it to secure.
- Repeat with the third pipe cleaner, spacing arms between the first set.
- Twist all loose ends at the center to lock the shape.
- Hold 10 inches away and lightly mist with glitter spray if desired, then air dry for 10 minutes.
8. Mitten Paper Chains
Easy

Bright mittens link together in looping garlands that stretch across bulletin boards. Each child adds their own pair to the growing display.
Materials Needed
- Colored copy paper, red, blue, green, yellow, 5 sheets of each
- Scissors, 1 pair per student
- Glue sticks, 1 per student
- Pencil, 1 per student
- Mitten template, printed 1 per student
How to Make It
- Place the mitten template on colored paper and trace around it twice.
- Cut out both mittens carefully along the lines.
- Line up the mittens side by side and staple them together at the wrist edge.
- Fold the top of the first mitten backward and glue it to the bottom of the next pair.
- Continue adding pairs to build a chain long enough to cross a chalkboard.
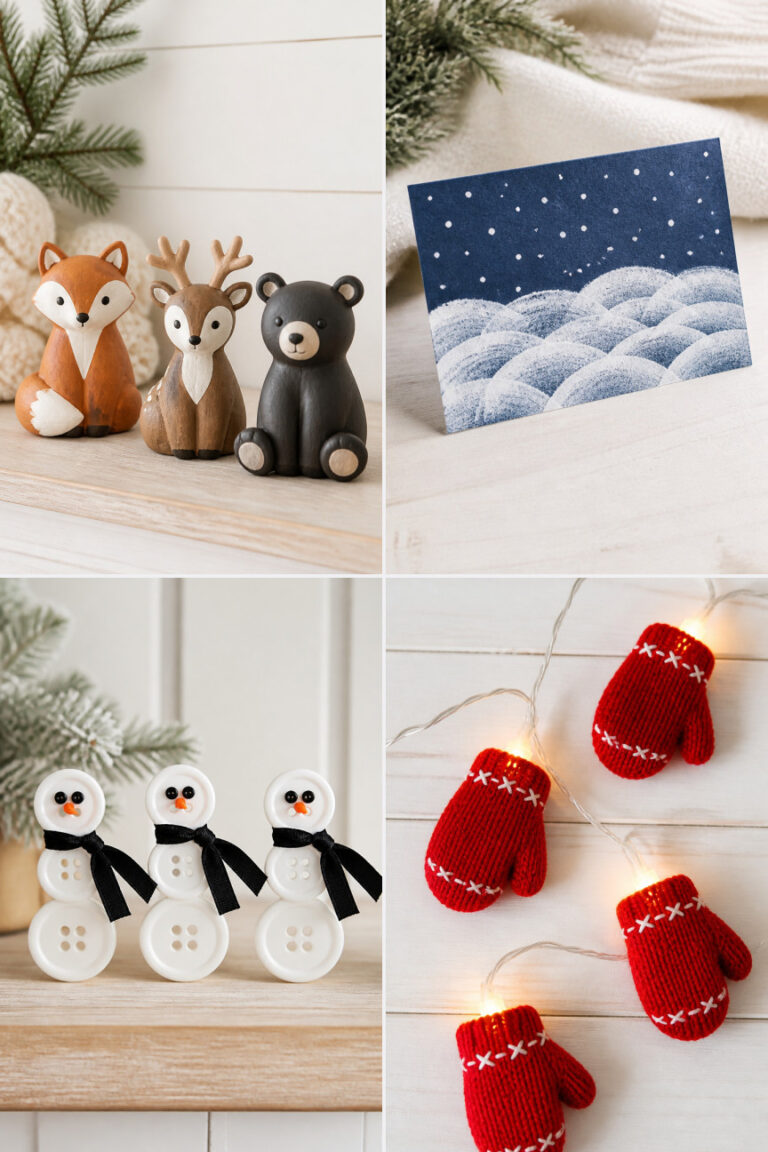
9. Button Snowpeople
Easy
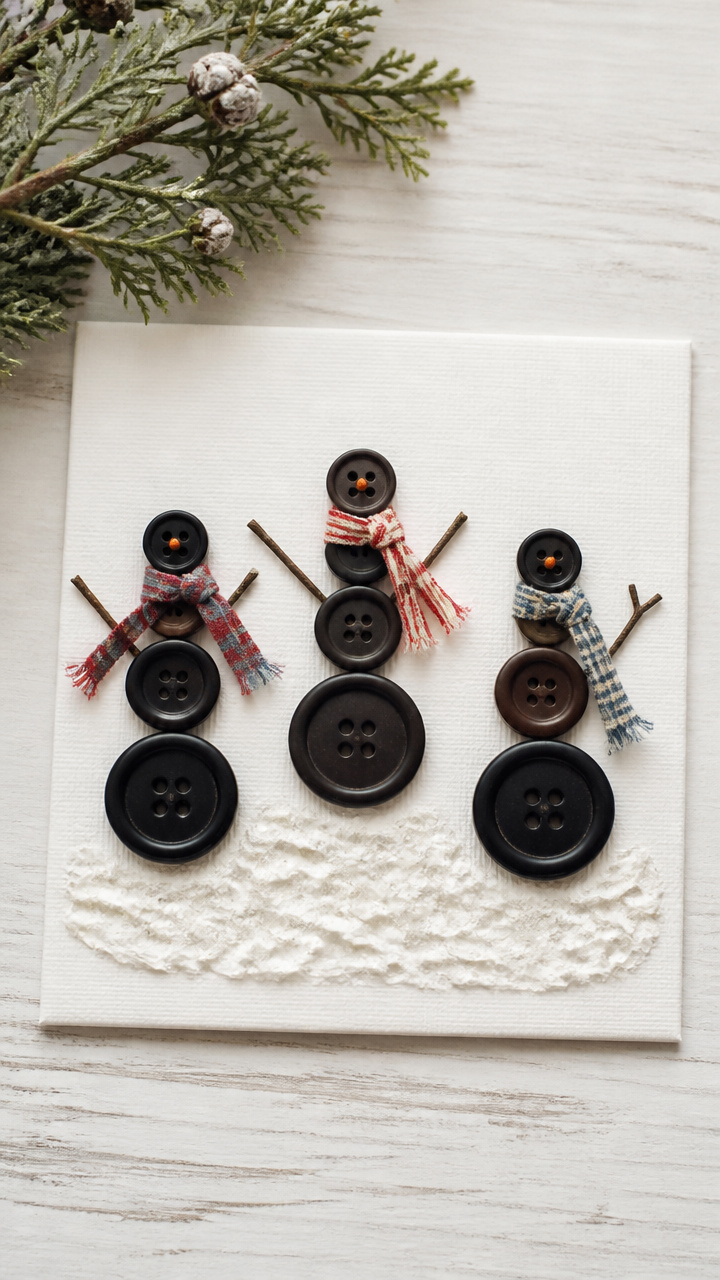
Mismatched buttons pile into cheerful snow stacks with twig arms and fabric scarves. These celebrate texture and reuse materials with flair.
Materials Needed
- Assorted buttons, 5 per student (various sizes, black and brown)
- Brown craft sticks, 2 per student
- Fabric scraps, 2×2 inch pieces, 1 per student
- White cardstock, 5×7 inch, 1 per student
- Glue dots, 5 per student
How to Make It
- Choose three buttons: largest for base, medium for body, smallest for head.
- Stick the largest button to the bottom of the cardstock with a glue dot.
- Stack the medium button on top, then the small one at the top.
- Break each craft stick in half and press one piece into each side of the middle button for arms.
- Wrap a fabric scrap around the neck area and tuck the ends behind the head button.
10. Tissue Paper Windows
Easy
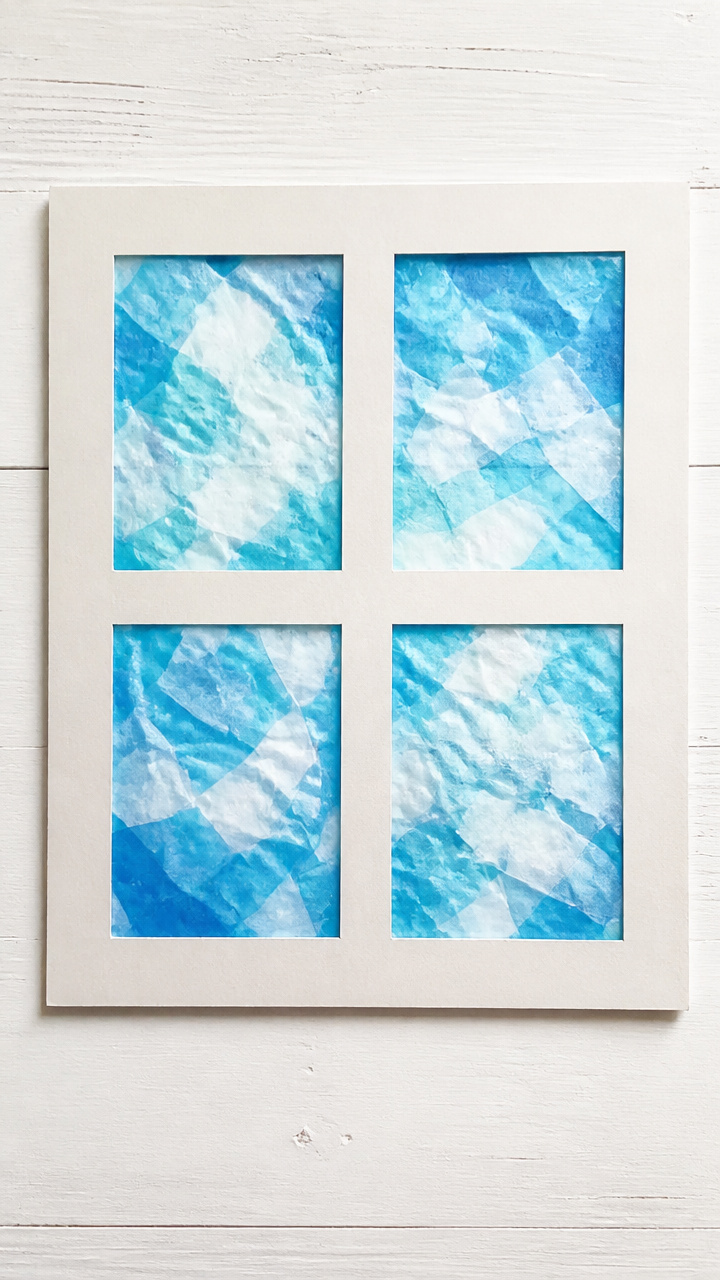
Translucent panes glow with icy patterns when taped to classroom windows. The crinkled layers mimic frost in a way flat drawings never can.
Materials Needed
- Blue and white tissue paper, 1 sheet each per student
- Scissors, 1 pair per student
- Glue sticks, 1 per student
- Contact paper, 12×12 inch sheets, sticky side up, 1 per student
- Cardboard backing, 12×12 inch, 1 per student
How to Make It
- Cut tissue paper into 2-inch squares in both colors.
- Randomly glue the squares onto the sticky side of the contact paper.
- Cover the entire surface with overlapping pieces.
- Peel the backing off and smooth the contact paper onto the cardboard.
- Hang finished panels on classroom windows with tape.
11. Yarn-Wrapped Snowflakes
Easy
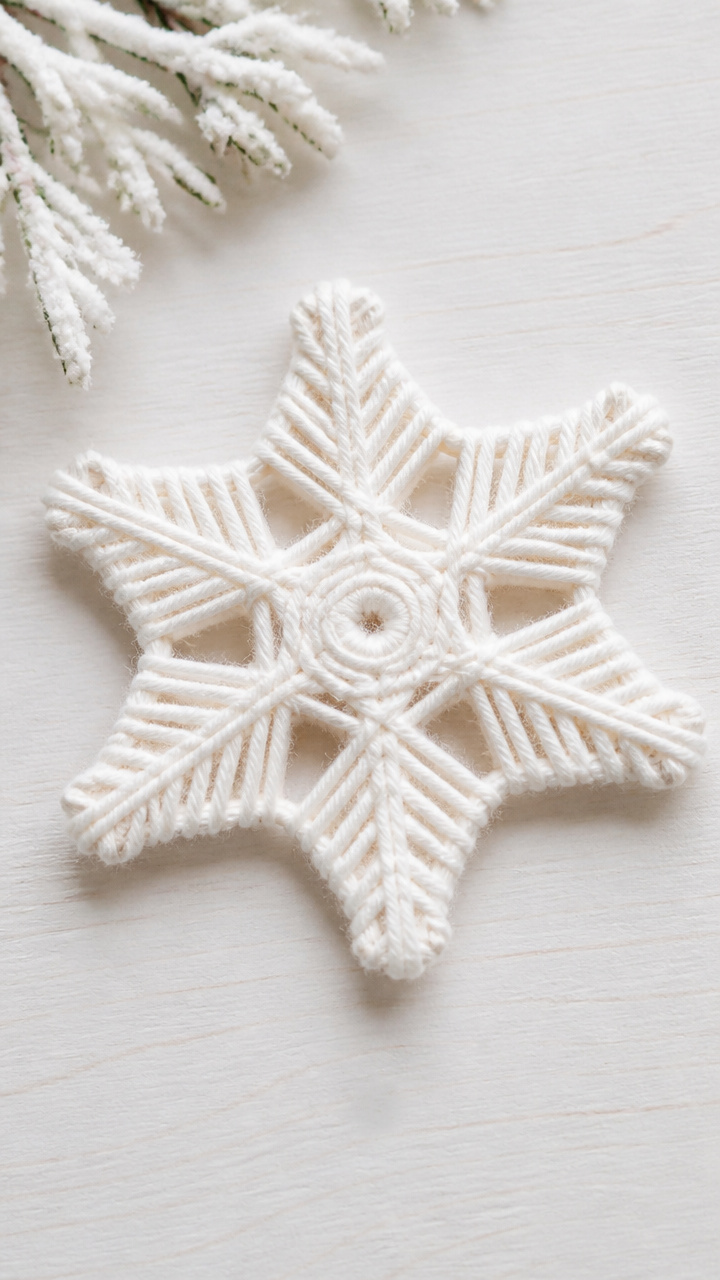
Stiff cardboard cores disappear beneath tight spirals of white yarn. These take minutes to make but look intricate enough for a gallery wall.
Materials Needed
- Cardboard, 4×4 inch squares, 1 per student
- White yarn, 3 feet per student
- School glue, 1 bottle per student
- Scissors, 1 pair per student
- Pencil, 1 per student
How to Make It
- Draw an X across the cardboard square with pencil, dividing it into four sections.
- Make small notches at the ends of each arm of the X.
- Put a drop of glue at one notch and press the yarn end to it.
- Wrap the yarn tightly around the arms, moving clockwise and covering the cardboard completely.
- When 2 inches remain, add a dot of glue and press the end down to secure.
12. Pinecone Owls
Moderate
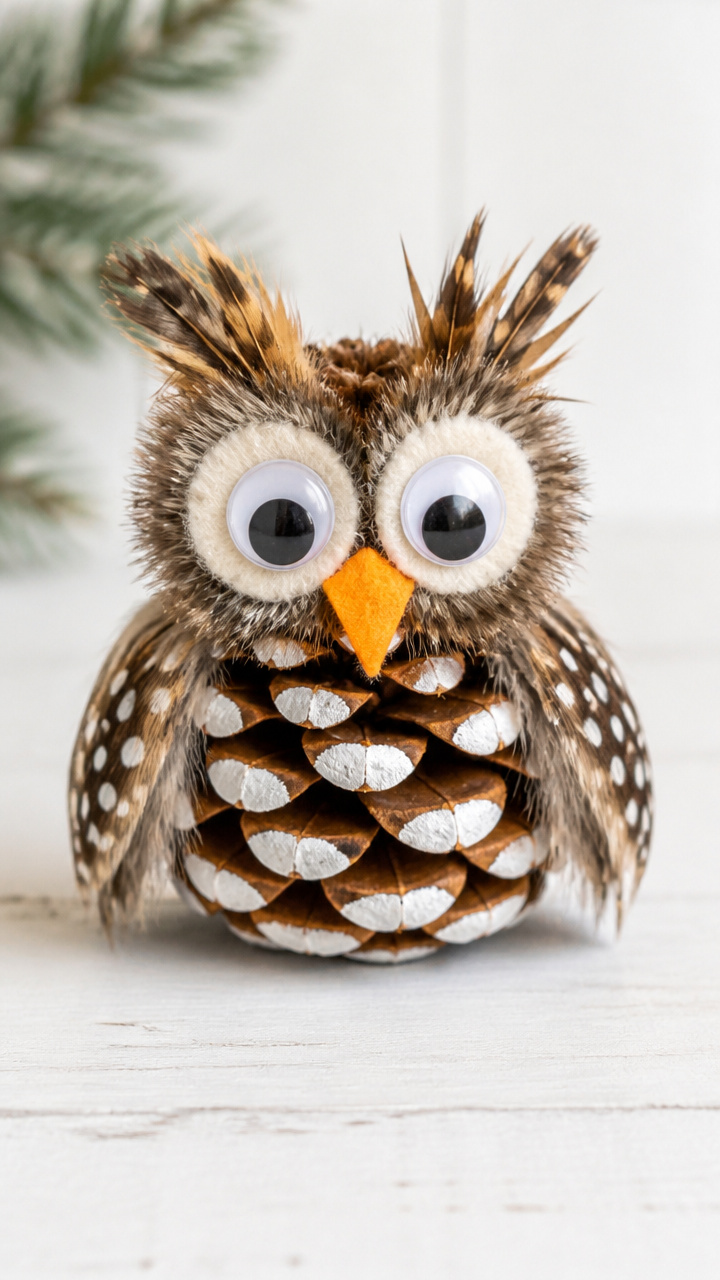
Fluffy brown cones grow wide eyes and feathery tufts, turning into wise little forest watchers. These use natural shapes to inspire character design.
Materials Needed
- Pinecones, 1 per student
- Acrylic paint in brown, white, and black, 1 bottle each per table
- Paintbrushes, 1 per student
- Googly eyes, 2 per student
- Orange craft foam, 1 sheet
- Glue gun and glue sticks
- Feathers, 2 small per student
How to Make It
- Paint the pinecone tip white and let it dry for 15 minutes on wax paper.
- Paint two ear tufts on the sides near the top using brown paint.
- Glue googly eyes just below the white tip.
- Cut a small triangle beak from orange foam and glue it between the eyes.
- Glue one feather on each side above the eyes to complete the owl’s look.
13. Wax Resist Window Panes
Easy
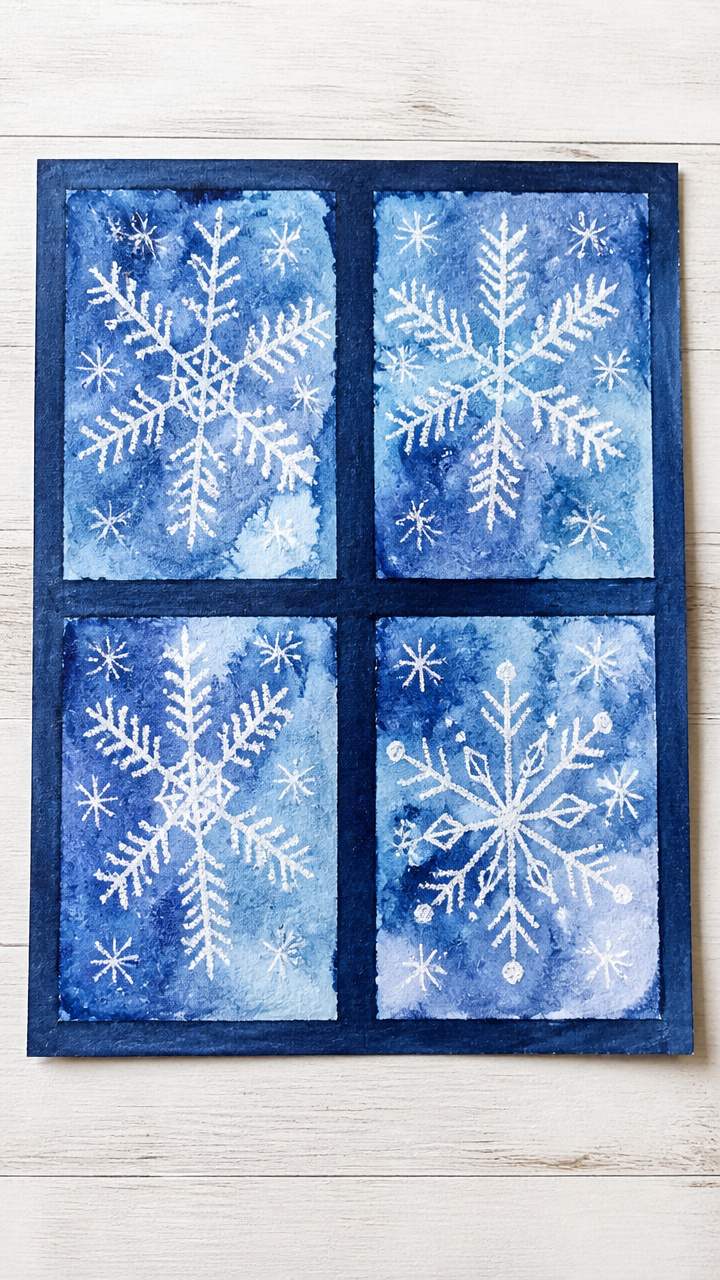
Crayon-drawn snowflakes resist blue washes, standing out like real frost on glass. This technique feels like discovery every time.
Materials Needed
- Dark blue construction paper, 8.5 x 11 inches, 1 sheet per student
- White crayon, 1 per student
- Watercolor paints, blue and white, 1 set per table
- Paintbrushes, 1 per student
- Cups of water, 1 per student
- Paper towels, 1 per student
How to Make It
- Draw 5–7 snowflakes across the paper using the white crayon, pressing hard.
- Mix blue watercolor with water to a light wash consistency.
- Use the brush to cover the entire page with the blue paint.
- Blot excess water with a paper towel.
- Let dry flat for 20 minutes to reveal crisp white snowflakes against the dark sky.
14. Pom-Pom Igloos
Easy
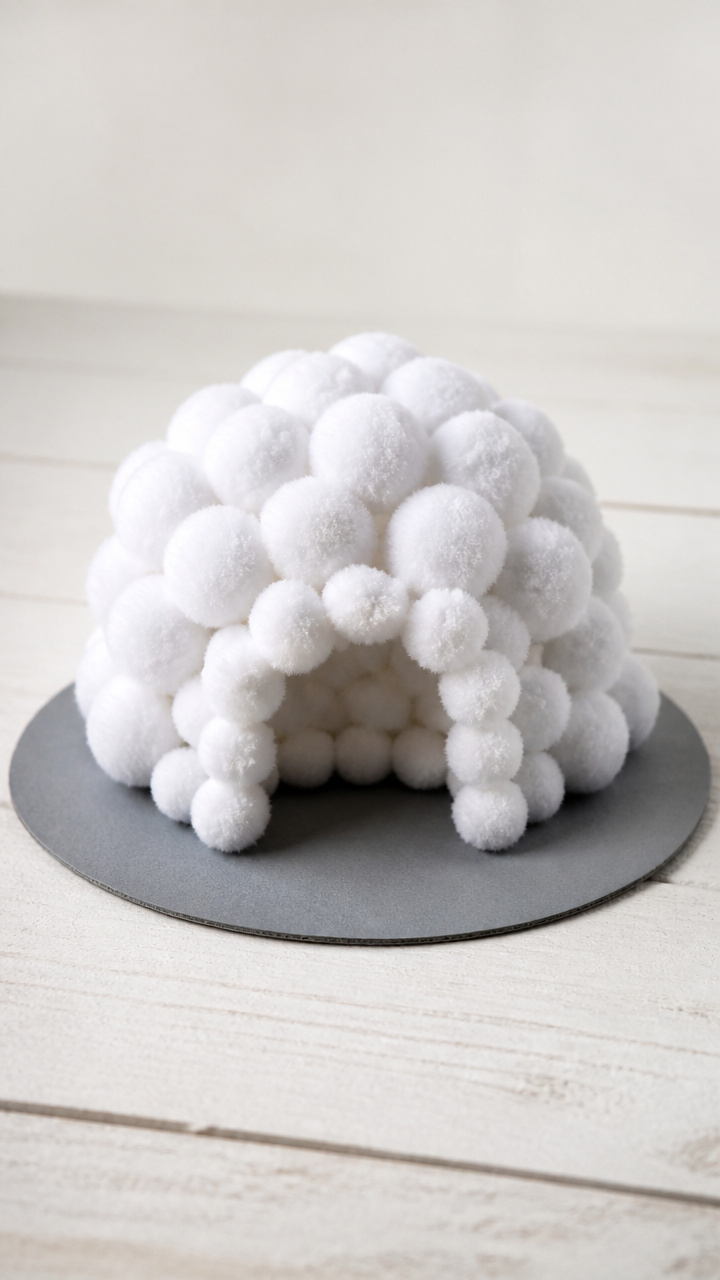
Soft domes rise from stacked pom-poms, held together with glue and imagination. These invite storytelling about arctic homes and animal friends.
Materials Needed
- White pom-poms, 15 per student (three sizes: small, medium, large)
- Glue sticks, 1 per student
- Gray cardstock, 5×7 inch, 1 per student
- Scissors, 1 pair per student
How to Make It
- Sort pom-poms by size and lay them out on the desk.
- Glue the largest pom-poms in a circle on the cardstock to form the base.
- Layer medium pom-poms on top, fitting them into gaps.
- Place smaller pom-poms in the center of the upper ring to close the dome.
- Add one tiny pom-pom on top as a chimney or flag.
15. Fingerprint Reindeer
Easy
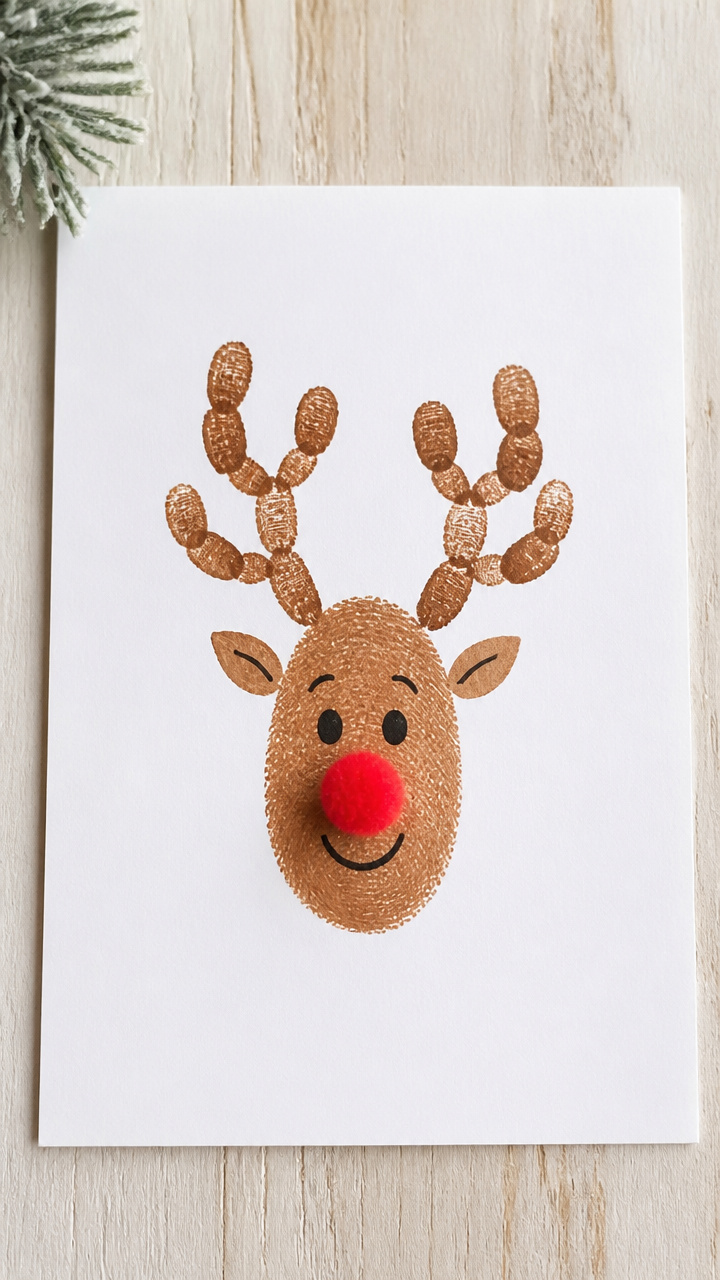
Inky thumbprints curl into antlers with drawn details added in marker. These personal prints become keepsake cards or desk decorations.
Materials Needed
- Brown washable ink pad, 1 per table
- White cardstock, 4×6 inch, 1 per student
- Black fine-tip marker, 1 per student
- Red pom-pom, 1 per student
- Glue dots, 1 per student
How to Make It
- Press your thumb firmly onto the ink pad and roll it slightly to coat the sides.
- Press the thumbprint diagonally on the cardstock to form the reindeer head.
- Let the ink dry for 2 minutes.
- Draw two curved antler lines upward from the top of the print.
- Add eyes, snout, and legs with the marker, then attach a red pom-pom nose with a glue dot.
16. Glitter Slime Snow Globes
Moderate
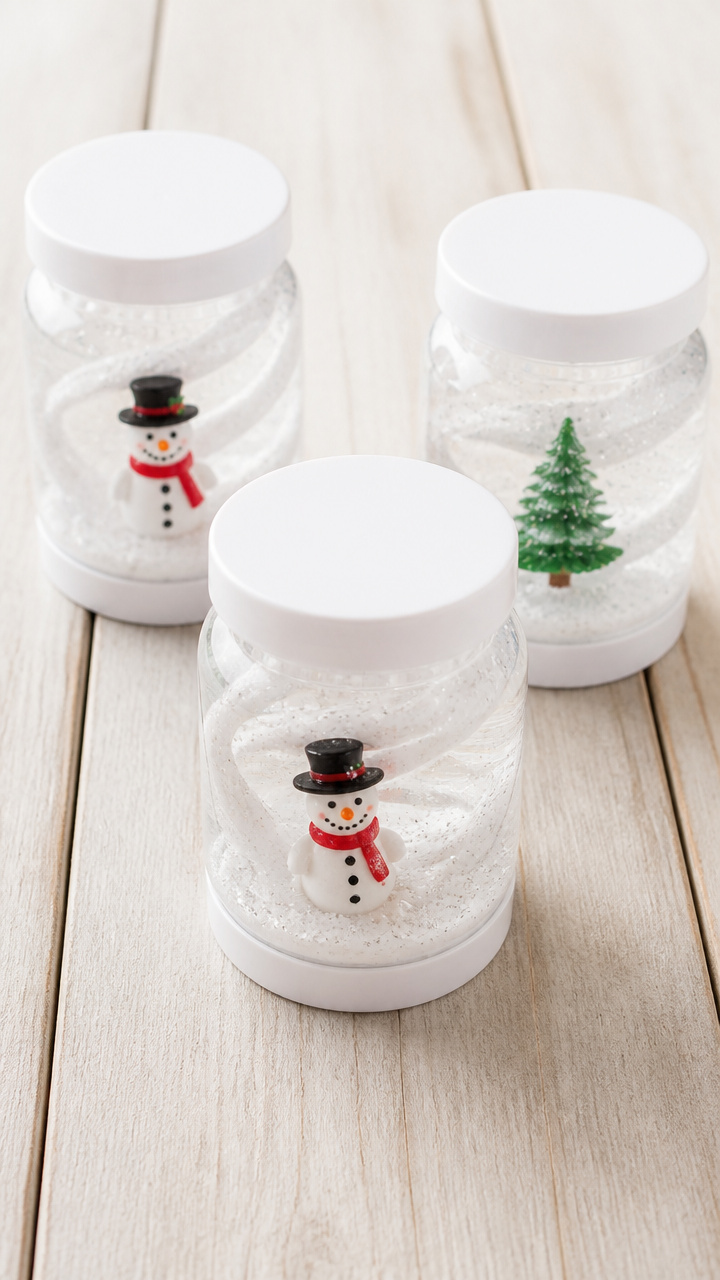
Stretchy slime swirls with glitter inside sealed jars, mimicking swirling storms. These sensory bottles calm and captivate during transition times.
Materials Needed
- Clear plastic jars with lids, 4 oz, 1 per student
- White school glue, 4 oz per student
- Liquid starch, 1 oz per student
- Fine white glitter, 1 teaspoon per student
- Mini plastic snowman or tree, 1 per student
- Measuring spoons, 1 set per table
How to Make It
- Pour 4 ounces of glue into the jar and add 1 teaspoon of glitter.
- Stir gently with a craft stick until glitter is mixed in.
- Add 1 ounce of liquid starch and stir slowly until the mixture begins to pull away from the jar sides.
- Knead the slime inside the jar with clean fingers through the plastic.
- Press the mini figure into the center and screw the lid on tightly.
17. Cardboard Tube Penguins
Easy
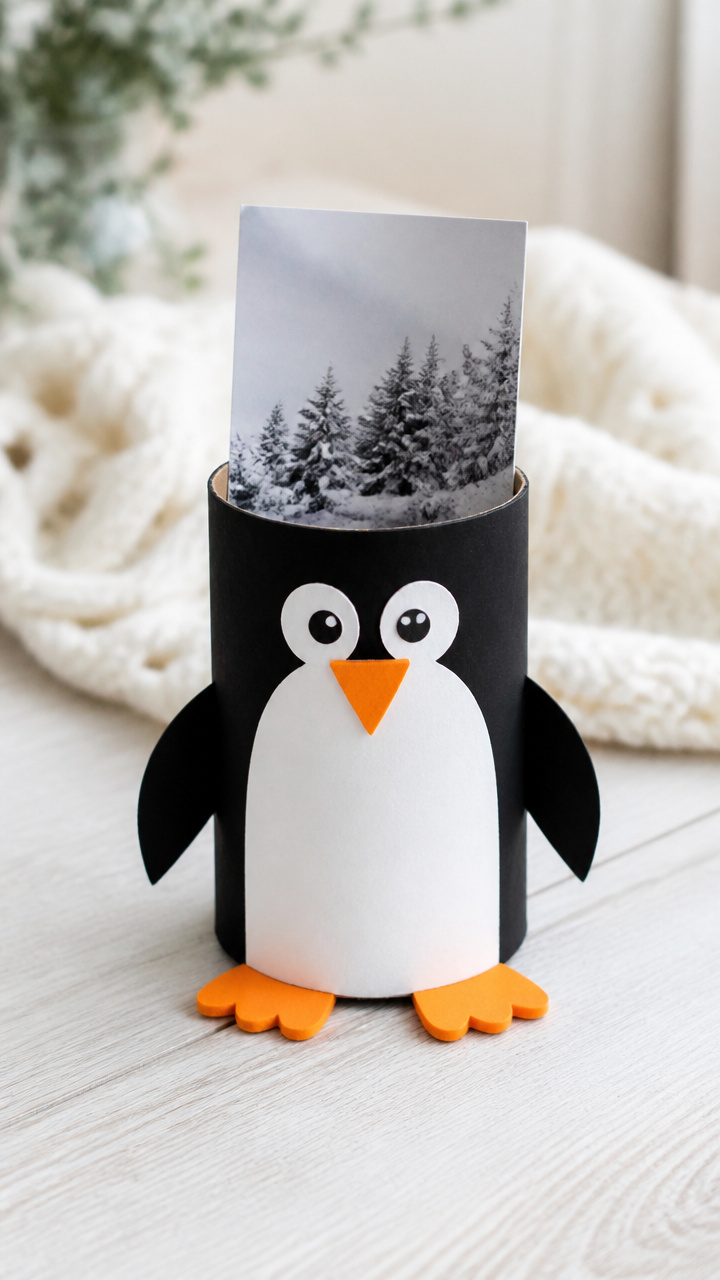
Toilet paper rolls stand upright with painted coats and wobbly feet. These sturdy characters hold notes or photos on shelves.
Materials Needed
- Toilet paper tubes, 1 per student
- Black and white paint, 1 bottle each per table
- Paintbrushes, 1 per student
- Orange craft foam, 1 sheet
- Scissors, 1 pair per student
- Glue dots, 3 per student
- Feet template, printed
How to Make It
- Paint the entire tube white and let it dry for 10 minutes.
- Paint the top third black to form the head and back.
- Cut two foot shapes from the template using orange foam.
- Fold the bottom quarter of each foot inward to make a tab.
- Attach the feet to the bottom of the tube with glue dots, tabs tucked inside.
18. Snowy Mason Jar Lids
Easy
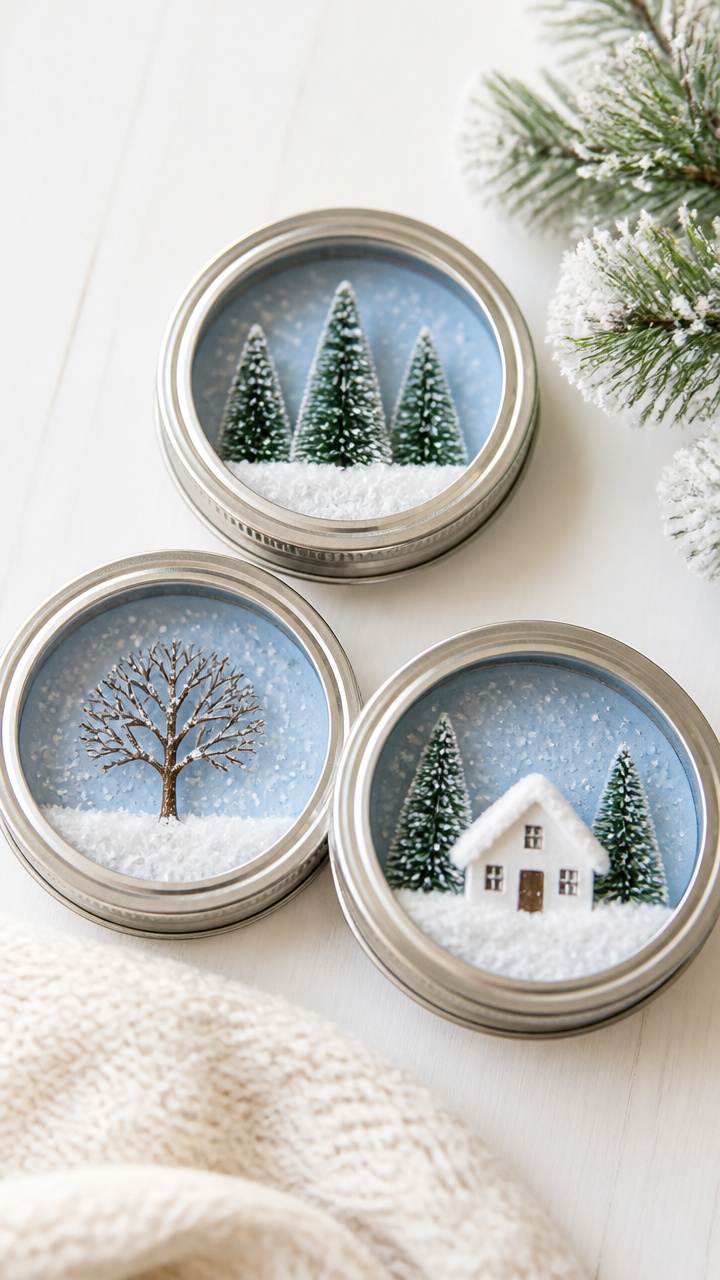
Metal lids wear fluffy crowns of cotton and tiny trees, turning into mini winter scenes. These make thoughtful gifts with a handmade note inside.
Materials Needed
- Mason jar lids, 3-inch, 1 per student
- White glue, 1 bottle per student
- Cotton balls, 3 per student
- Mini pine trees, 1 per student
- Glitter, silver, 1 shaker per table
- Craft stick, 1 per student
How to Make It
- Spread a thick layer of white glue across the inside of the lid with the craft stick.
- Pull apart cotton balls and press them into the glue to resemble snow drifts.
- Place the mini tree on one side of the snowy base.
- Sprinkle a pinch of silver glitter over the cotton for frost.
- Let dry face-up for 30 minutes before handling.
19. Winter Tree Silhouettes
Easy
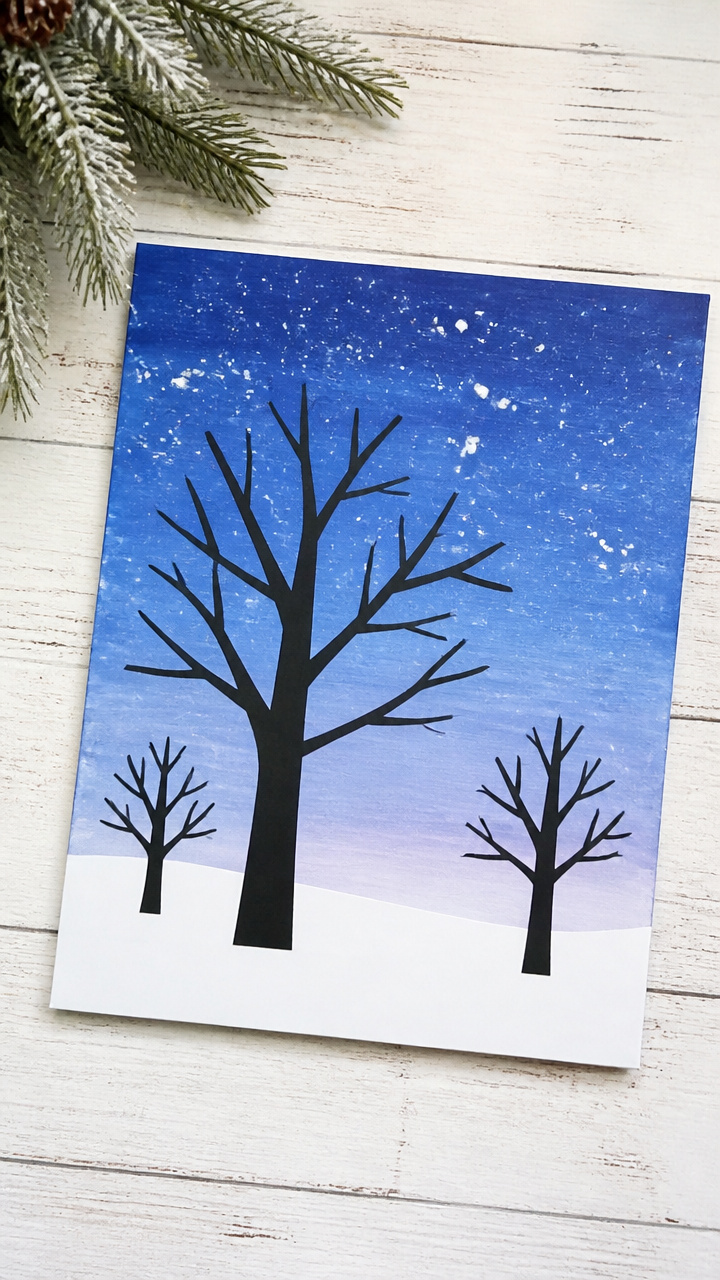
Black branches reach upward against a gradient sky, created with sponge-dipped layers. These teach color blending in a forgiving, expressive way.
Materials Needed
- White cardstock, 9×12 inch, 1 per student
- Sponges, cut into 2-inch squares, 1 per student
- Acrylic paint in light blue, dark blue, and white, 1 bottle each per table
- Paint trays, 1 per student
- Black liquid watercolor or India ink, 1 bottle per table
- Brush, 1 per student
How to Make It
- Pour small amounts of light blue, dark blue, and white paint into the tray.
- Dab the sponge into dark blue and stamp near the bottom of the paper.
- Clean the sponge and repeat with lighter shades moving upward to fade the sky.
- Let the background dry for 10 minutes.
- Use the brush and black paint to draw a bare tree with spreading branches in the center.
20. Edible Snow Dough
Easy
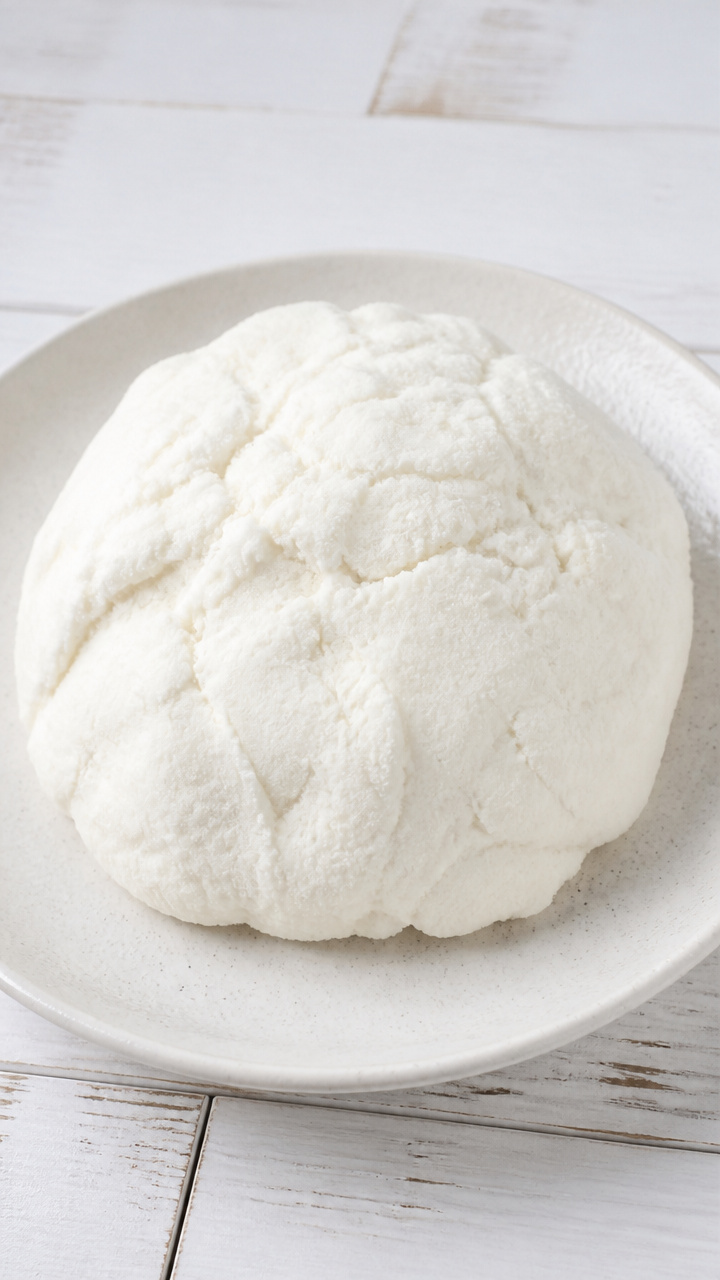
Powdery dough molds like real snow but smells of vanilla and cornstarch. This safe, no-bake mix keeps little hands busy during indoor play.
Materials Needed
- Cornstarch, 2 cups per batch
- Conditioner, white, 1 cup per batch
- Vanilla extract, 1 teaspoon per batch
- Mixing bowl, 1 per group
- Spatula, 1 per bowl
- Ziplock bags, gallon size, 1 per student
How to Make It
- Combine 2 cups cornstarch and 1 cup conditioner in the bowl.
- Add 1 teaspoon vanilla extract and stir with the spatula.
- Mix until the dough pulls away from the bowl and feels like damp snow.
- Knead briefly with hands until smooth.
- Store in a Ziplock bag to prevent drying.
21. Frozen Bubbled Art
Moderate
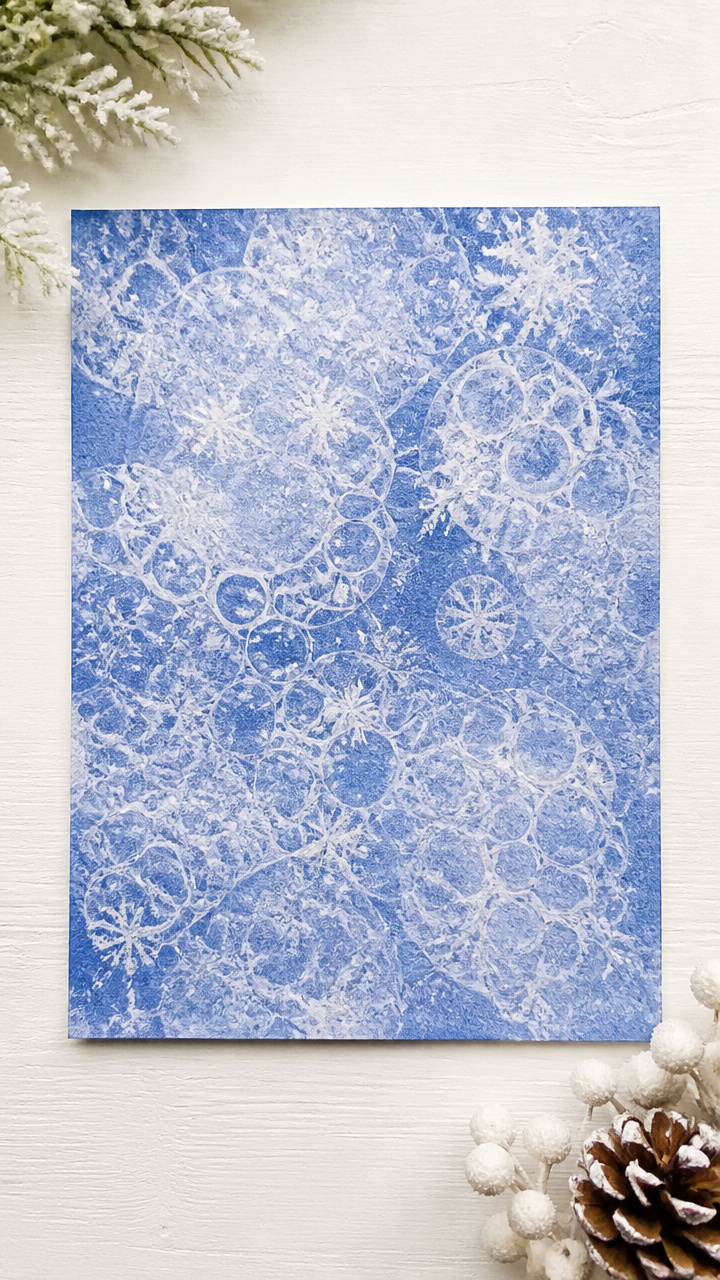
Bubbles burst and freeze into lacy patterns on chilled paper. This outdoor extension turns cold weather into a painting tool.
Materials Needed
- Shallow trays, 1 per student
- Water, 1 cup per tray
- Dish soap, 2 tablespoons per tray
- Tempera paint, white, 1 tablespoon per tray
- Pipettes, 1 per student
- Cardstock, 8.5 x 11 inches, pre-chilled in freezer for 10 minutes, 1 per student
How to Make It
- Mix water, dish soap, and white tempera paint in the tray.
- Use the pipette to blow bubbles until they rise above the tray edge.
- Lay the frozen cardstock on top of the bubbles to pop them and transfer the pattern.
- Peel the paper off gently and let it sit outside for 5 minutes to set.
- Bring inside and let thaw completely before displaying.
22. Beaded Icicles
Easy
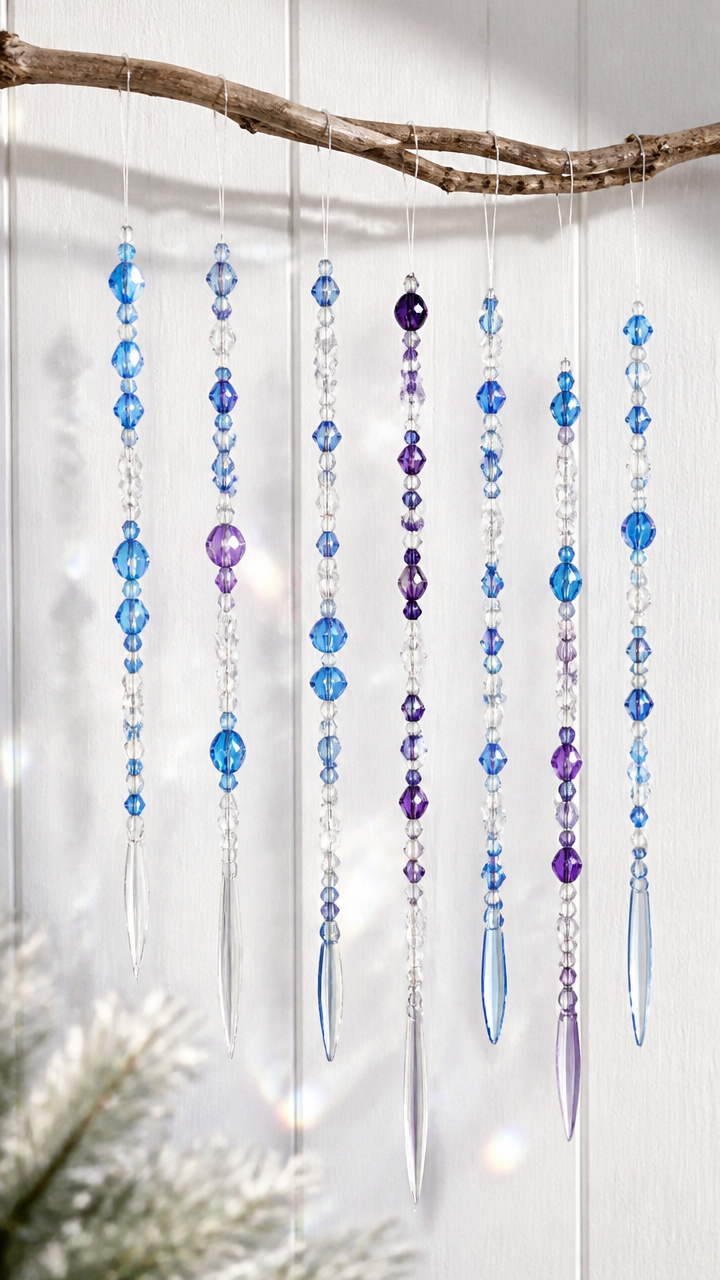
Long strands of glossy beads hang in cool blues and purples, catching light like real ice. These add instant winter mood to any ceiling corner.
Materials Needed
- Clear nylon fishing line, 18 inches per student
- Plastic beads in blue, clear, and purple, 15 per student
- Scissors, 1 pair per student
- Tape, clear, 1 roll per table
- Drill with small bit, 1 per room
How to Make It
- Thread beads onto the fishing line in random order, leaving 3 inches free at the top.
- Tie a knot at the bottom to keep beads from falling off.
- Tape the top end securely to a high corner or beam.
- Use the drill to make a small hole if attaching to wood.
- Let strands hang at varying lengths for a natural drip effect.
23. Handprint Evergreens
Easy
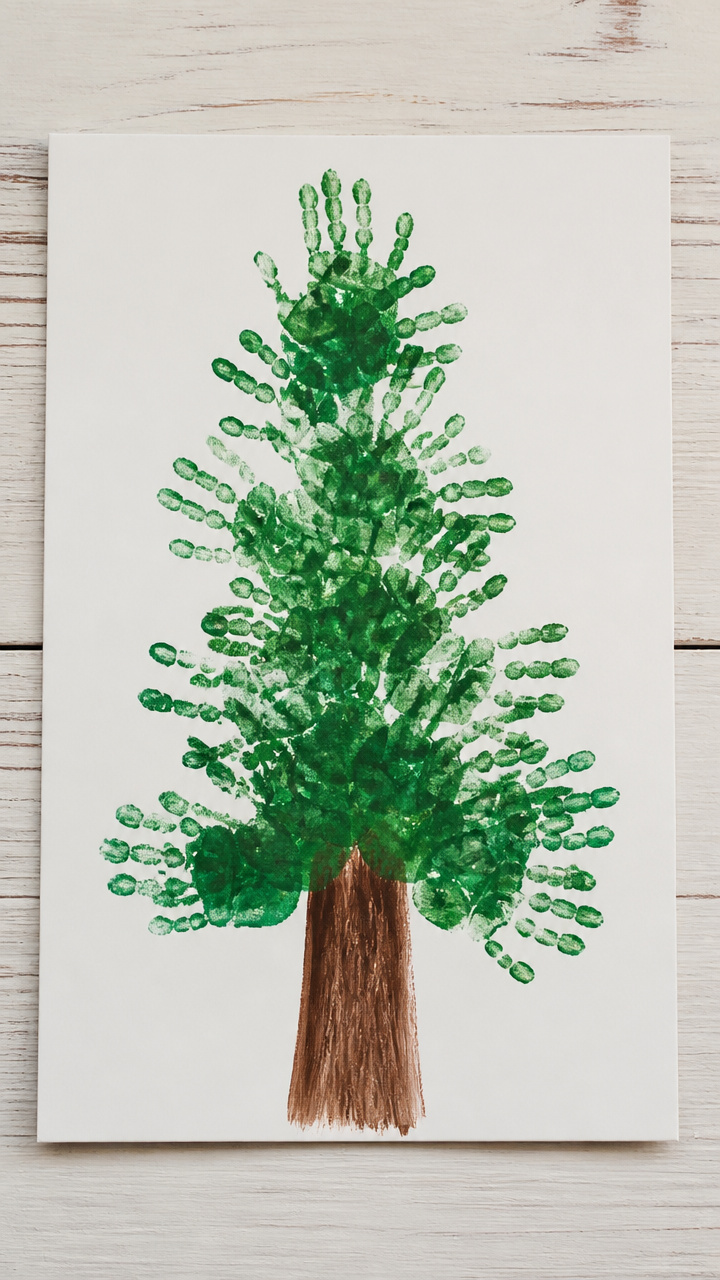
Green handprints fan outward from a brown trunk, forming full conifers that grow taller with each added print. These track seasonal change on walls.
Materials Needed
- Green washable paint, 1 tray per table
- Brown paint, 1 small cup per student
- Paintbrush, 1 per student
- White butcher paper, 18×24 inch, 1 sheet per student
- Smock, 1 per student
How to Make It
- Press your hand into the green paint, spreading fingers wide.
- Stamp the handprint near the top of the paper, palm down, fingers pointing outward.
- Repeat below with overlapping prints to form a tree shape.
- Use the brush and brown paint to draw a trunk from the bottom upward.
- Let dry flat for 20 minutes before posting on the wall.
Grab a few supplies and start with one craft that catches your eye. The joy on your students’ faces will carry you through the rest.