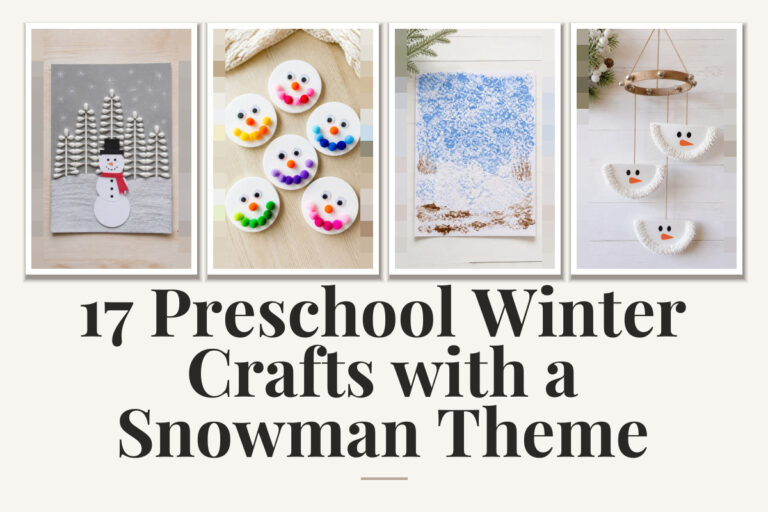
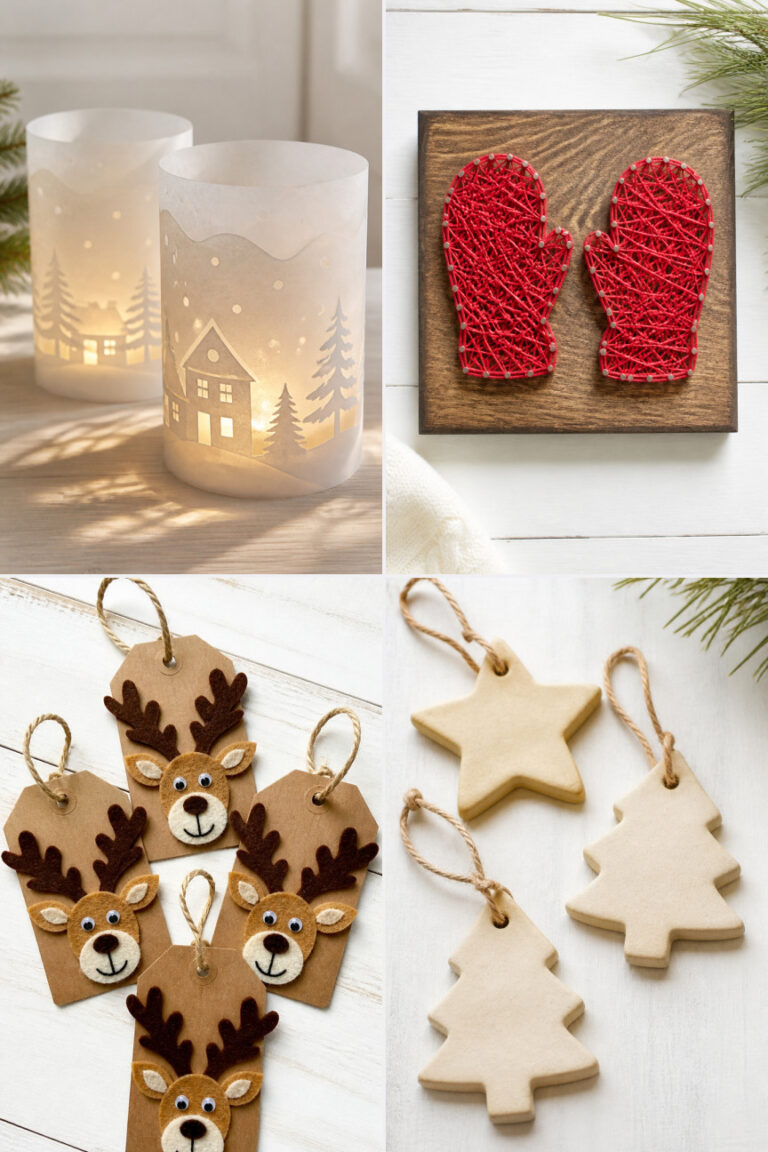
23 Arctic Animal Crafts for Preschool Winter Units

Soft cotton snowballs stuck to penguin bellies, glittering seal eyes that catch the light, tiny mittens glued to polar bear paws — these small handmade details spark big joy in little hands. Winter lessons come alive when children shape, paint, and assemble animals that call the icy north home.
Each craft here supports fine motor growth, color recognition, and storytelling, all while keeping materials simple and cleanup easy. These are classroom-tested ideas that work in real preschool settings, with exact supplies and steps so you can start right away.
1. Cotton Ball Polar Bear
Easy
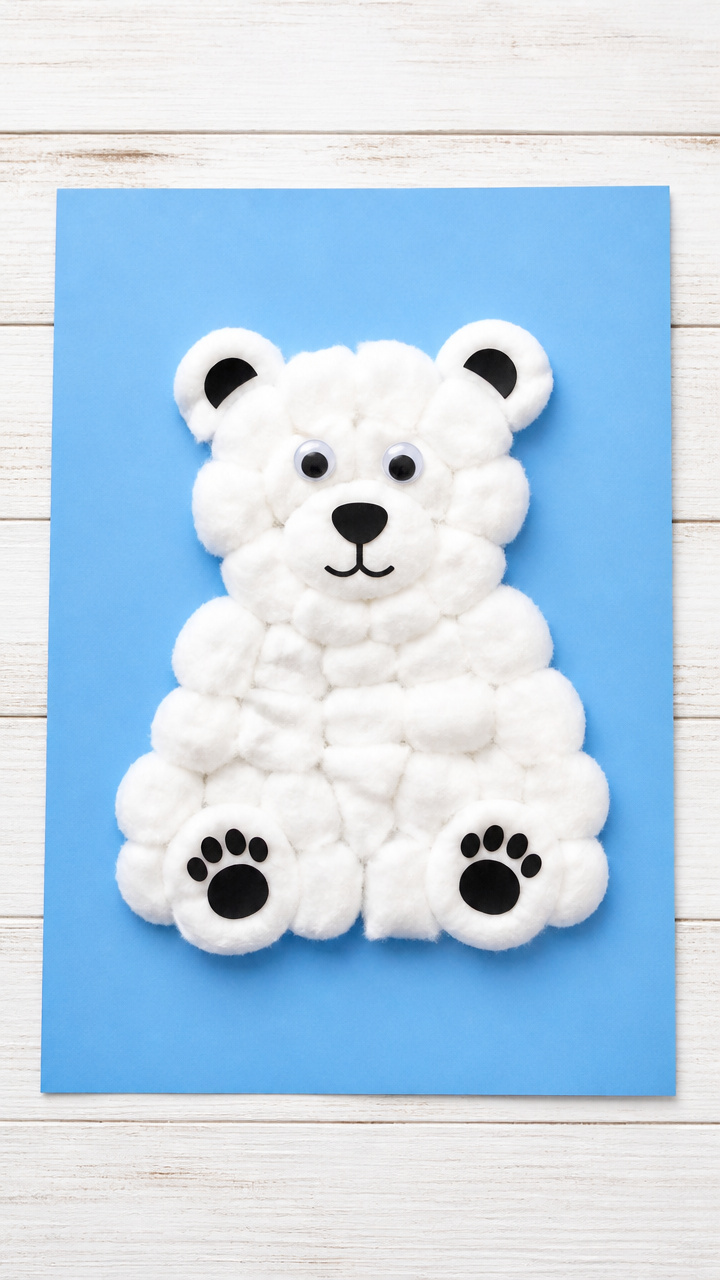
A fluffy white bear with black button eyes stands out against a blue paper sky, perfect for tiny fingers learning to glue and layer. This tactile craft builds coordination while introducing Arctic habitats.
Materials Needed
- A4 blue construction paper
- White cotton balls, 20 per child
- Black craft foam sheet
- White school glue
- Googly eyes, 12mm, 2 per child
- Black marker
How to Make It
- Place a sheet of blue construction paper horizontally on the table.
- Squeeze a small dot of white school glue in the center of the paper for the bear's body.
- Press 15 cotton balls into the glue to form a rounded bear shape.
- Cut two small ears and four paw shapes from black craft foam.
- Glue the foam pieces onto the cotton ball body.
- Stick on two googly eyes and draw a small nose with the black marker.
2. Pom-Pom Reindeer Ornaments
Easy
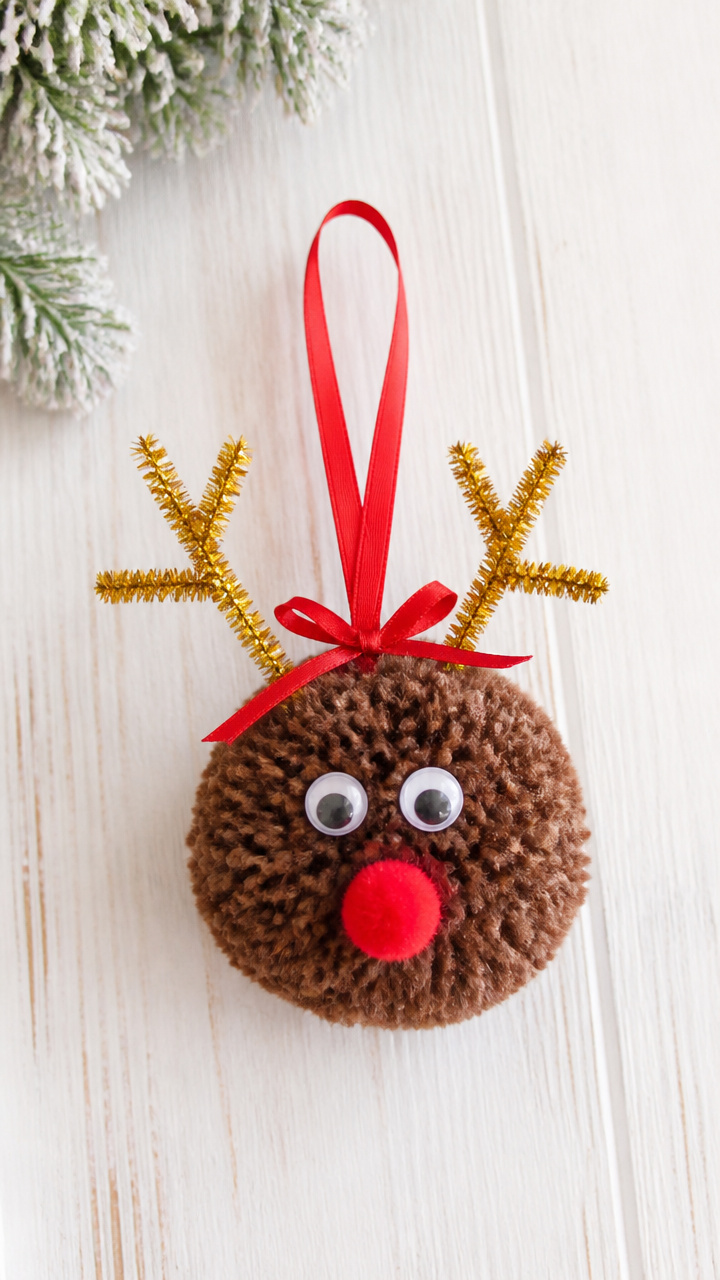
Bright red noses and curly pipe cleaner antlers turn colorful pom-poms into cheerful reindeer that hang from classroom windows. These make sweet student gifts or tree decorations.
Materials Needed
- Brown pom-poms, 1 inch, 1 per child
- Red pom-poms, 0.5 inch, 1 per child
- Gold pipe cleaners, 12 inch, 1 per child
- Googly eyes, 6mm, 2 per child
- White school glue
- Red ribbon, 6 inch, 1 per child
How to Make It
- Glue the small red pom-pom to the front of the brown pom-pom for the nose.
- Press two googly eyes above the red pom-pom.
- Cut the gold pipe cleaner in half and bend each piece into a 'Y' shape for antlers.
- Push the bottom ends of each 'Y' into the top of the brown pom-pom.
- Tie a piece of red ribbon to the base of the brown pom-pom for hanging.
3. Walrus with Toothpaste Tube
Moderate
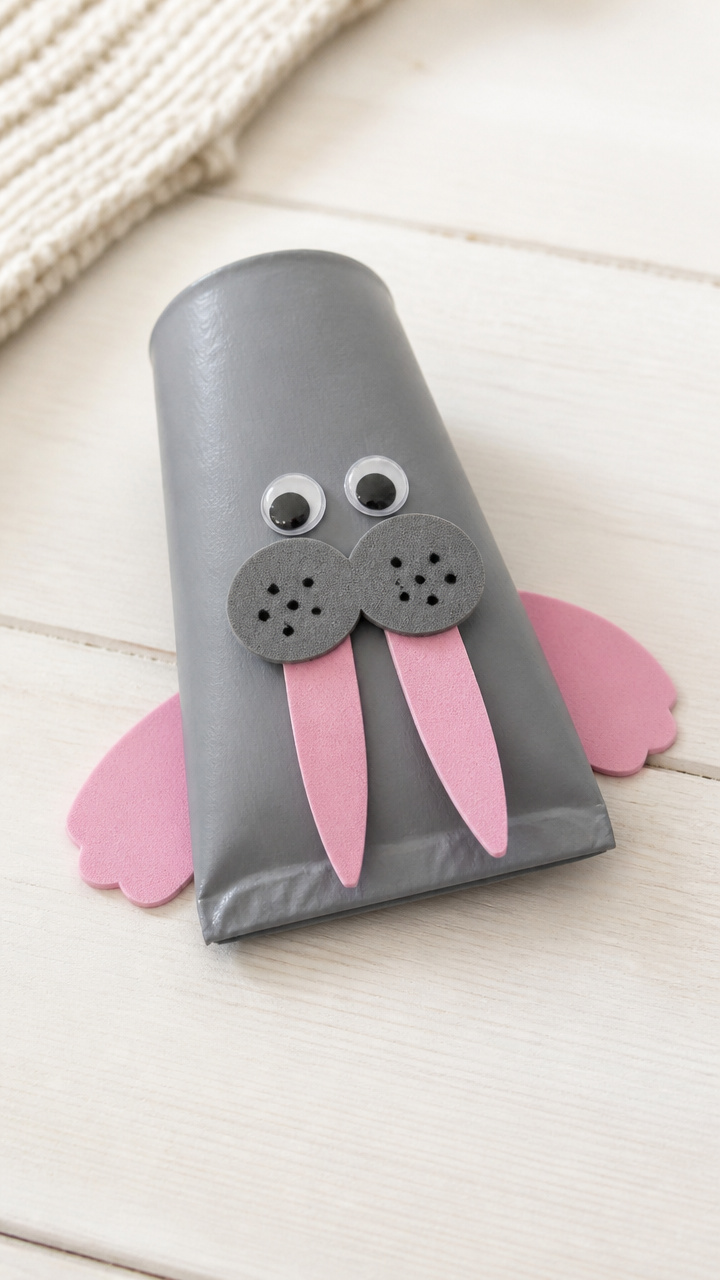
A sturdy cardboard tube becomes a plump walrus body, painted gray and dressed with hand-cut tusks and flippers. This upcycled craft teaches recycling and animal features together.
Materials Needed
- Empty toothpaste tube, cleaned and dried, 1 per child
- Gray acrylic paint
- Paintbrush, size 6
- Pink craft foam sheet
- White school glue
- Googly eyes, 10mm, 2 per child
- Black marker
How to Make It
- Paint the entire toothpaste tube with gray acrylic paint and let dry for 20 minutes.
- Cut two long, slightly curved tusk shapes from white craft foam.
- Cut four flipper shapes from pink craft foam.
- Glue the tusks below the cap end of the tube for the face.
- Glue two flippers to each side of the tube near the base.
- Stick on googly eyes and draw nostrils with the black marker.
4. Arctic Fox Fingerprint Art
Easy
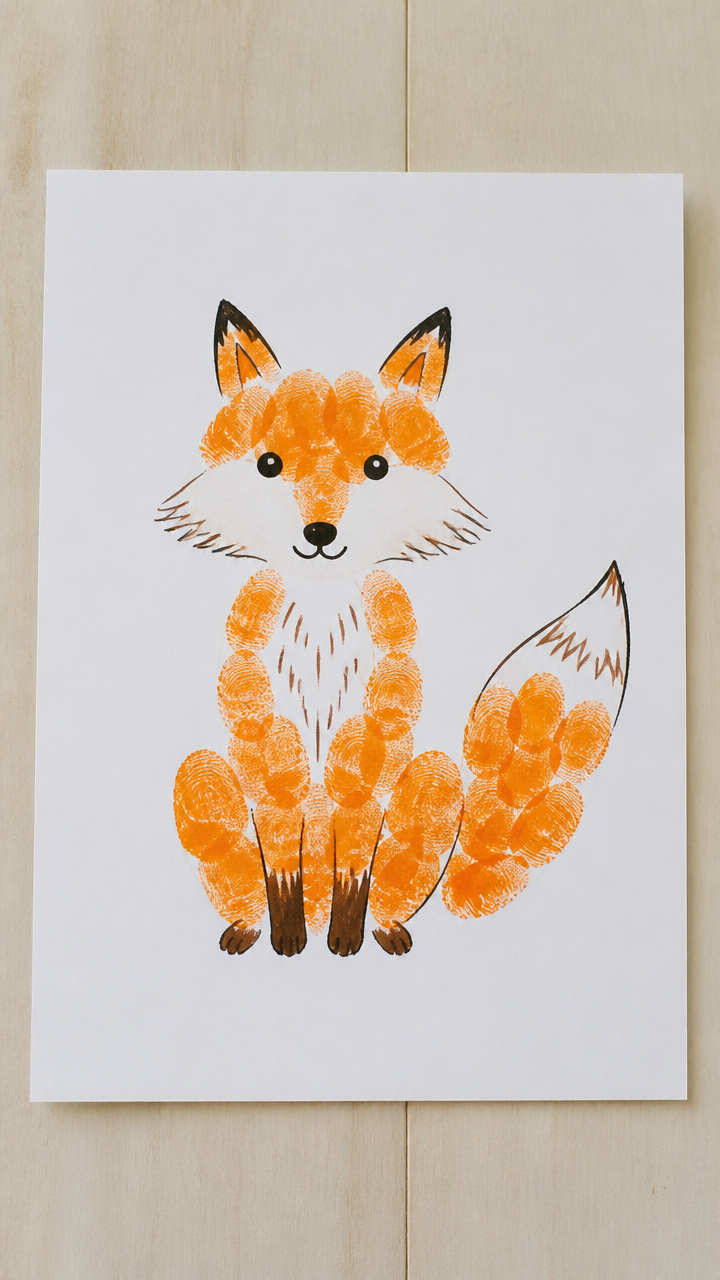
A child's inked thumbprint transforms into a crouching fox with a bushy tail and sharp ears, drawn in fine detail around the smudge. This keepsake grows more special with every glance.
Materials Needed
- Orange ink pad
- White drawing paper, 9×12 inch
- Black fine-tip marker
- Orange colored pencil
- Brown crayon
How to Make It
- Press your thumb firmly onto the orange ink pad.
- Press the inked thumb onto the lower third of the paper, curved side down, to form the fox body.
- Use the black marker to draw two pointed ears on top of the thumbprint.
- Draw a long, curved tail sweeping from the side of the print.
- Add legs, face details, and ground texture with the orange pencil and brown crayon.
5. Penguin Egg Nest Craft
Moderate
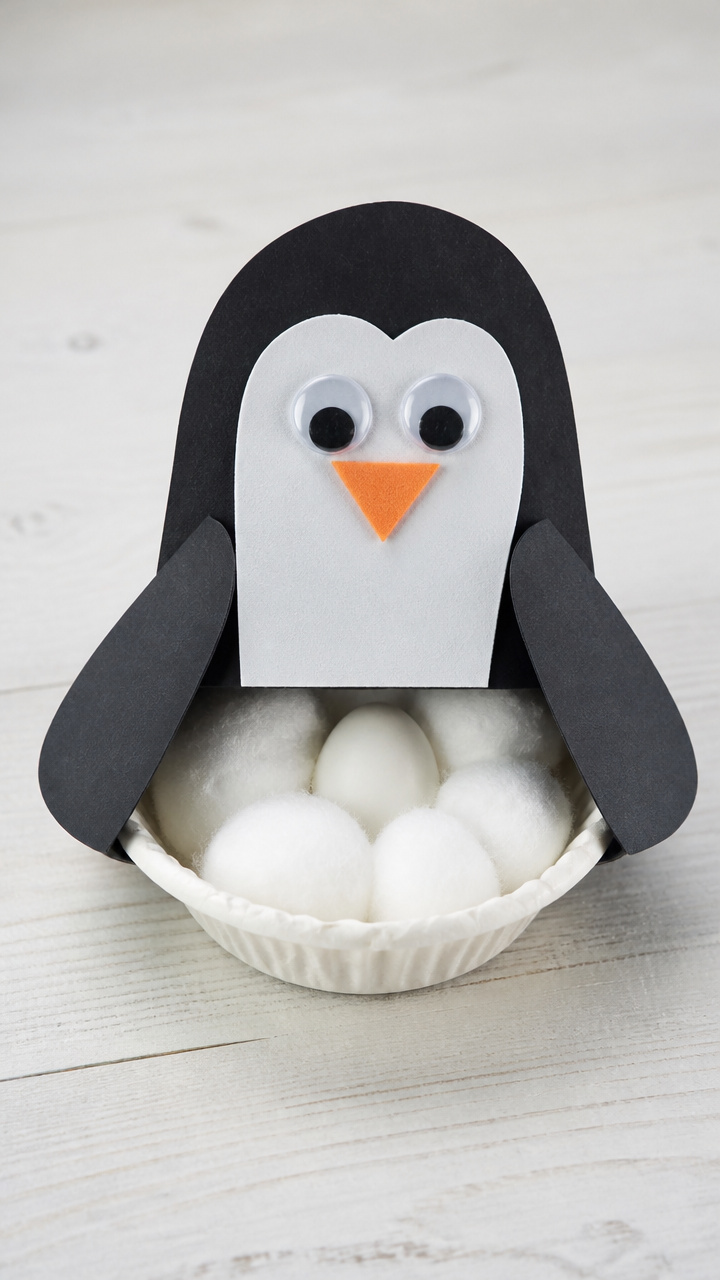
A cup of crumpled paper holds a soft cotton egg guarded by a black and white penguin parent. This diorama teaches animal care and nesting habits.
Materials Needed
- Small paper cup, 3 oz, 1 per child
- Black construction paper
- White craft foam sheet
- Cotton balls, 5 per child
- White school glue
- Googly eyes, 8mm, 2 per child
- Scissors
- Black marker
How to Make It
- Crumple three sheets of newspaper into a ball and place it inside the paper cup.
- Cut a penguin body shape from black construction paper: oval body with wings and head.
- Cut a white belly shape from craft foam and glue it to the front of the penguin.
- Glue the penguin to the front edge of the cup so it leans over the nest.
- Place five cotton balls in the cup as eggs.
- Glue on googly eyes and draw a small orange beak with the marker.
6. Seal Paper Plate Craft
Easy
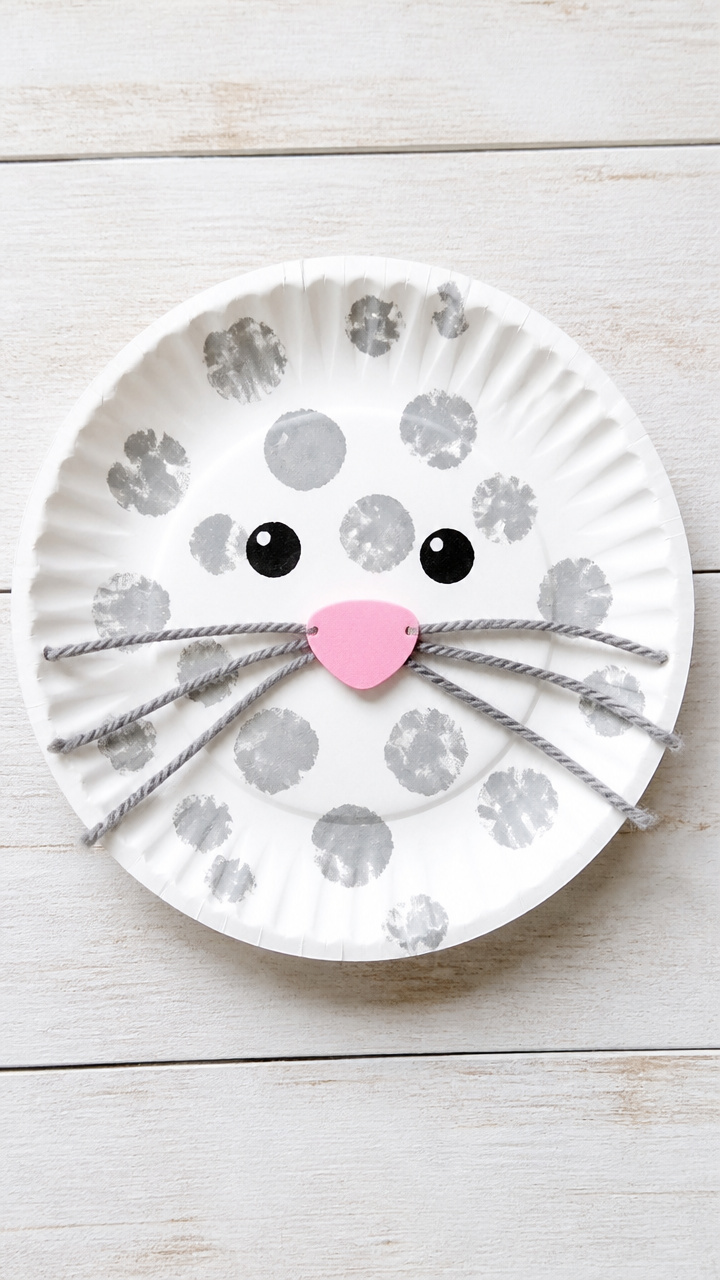
A white paper plate becomes a round seal face with gray painted spots and yarn whiskers that wiggle when touched. This sensory craft invites gentle play and exploration.
Materials Needed
- White paper plate, 7 inch, 1 per child
- Gray acrylic paint
- Paintbrush, size 4
- White school glue
- Gray yarn, 6 inch strands, 6 per child
- Pink craft foam
- Googly eyes, 12mm, 2 per child
How to Make It
- Paint the entire paper plate with gray acrylic paint and let dry for 15 minutes.
- Dip the end of the paintbrush in gray paint and dot random spots across the plate.
- Cut two small flippers from pink craft foam and glue them below the plate.
- Glue two googly eyes near the top center.
- Tie three strands of gray yarn together at one end and glue the knot to each side of the face for whiskers.
7. Narwhal Toilet Paper Roll
Moderate
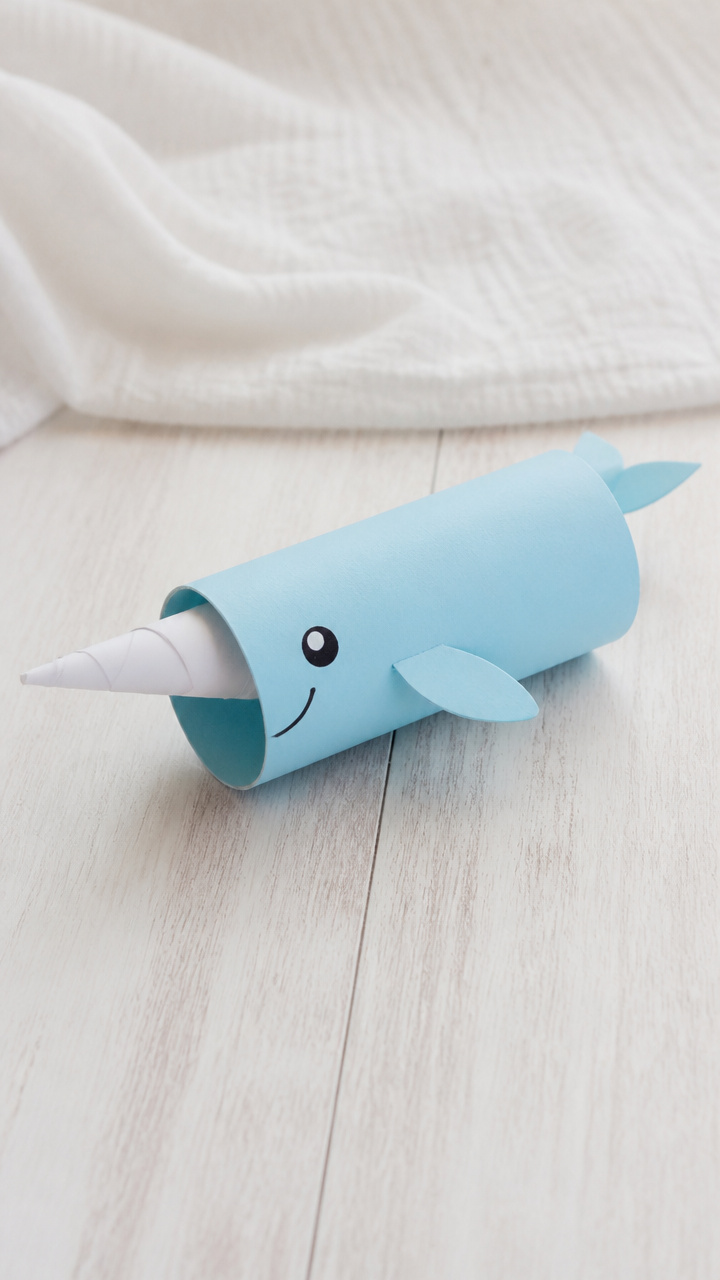
A spiraled horn twists from a blue-painted roll, turning ordinary cardboard into a magical sea unicorn. Kids love the whimsy and the spinning motion.
Materials Needed
- Empty toilet paper roll, 1 per child
- Light blue acrylic paint
- Paintbrush, size 5
- White cardstock
- Gray marker
- White school glue
- Googly eyes, 8mm, 2 per child
- Ruler
- Pencil
- Scissors
How to Make It
- Paint the toilet paper roll with light blue acrylic paint and let dry for 15 minutes.
- Cut a 2×6 inch rectangle from white cardstock.
- Draw a spiral line from one corner to the center using the pencil and ruler.
- Cut along the spiral line to create a long curling strip.
- Roll the strip from the outer end and glue the base to the top center of the roll.
- Glue on googly eyes and draw small dots with the gray marker for skin texture.
8. Arctic Hare Snow Pocket
Moderate
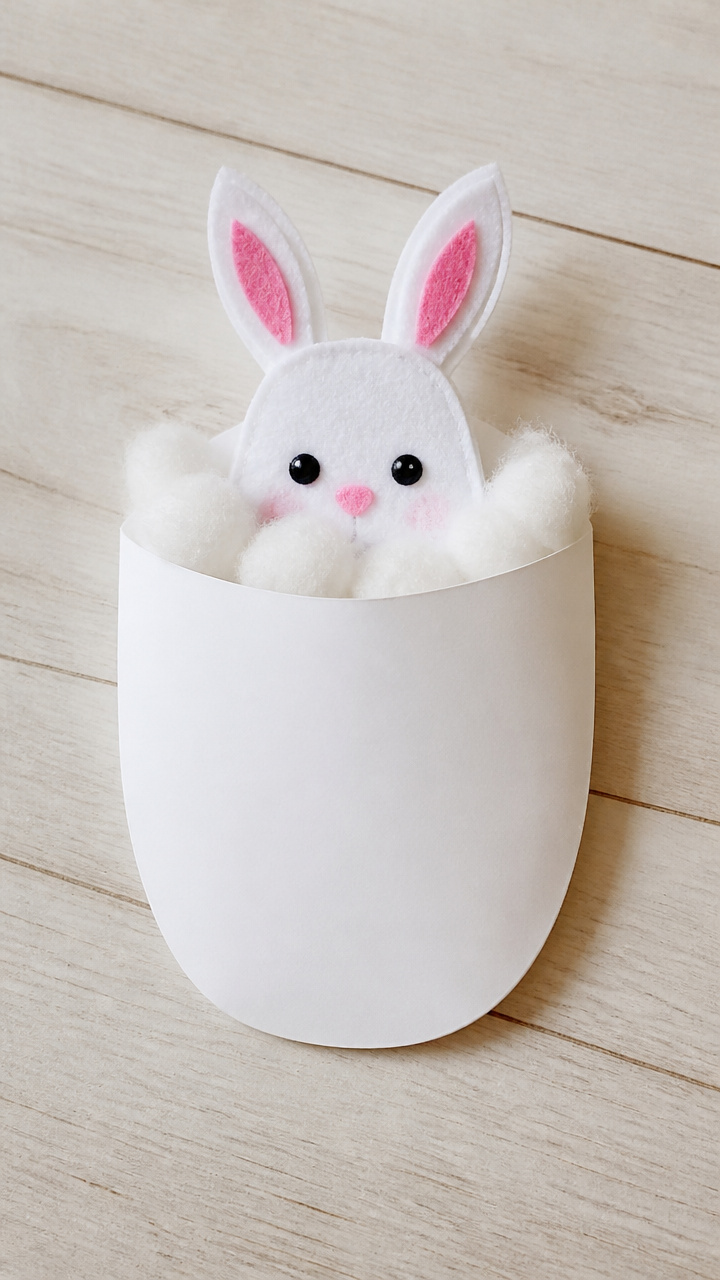
A cotton-stuffed paper pocket holds a hidden baby hare made from felt, teaching camouflage and animal families. The soft peek-a-boo element delights toddlers.
Materials Needed
- A4 white cardstock
- White felt sheet
- Cotton batting, 1/4 cup per child
- Pink craft foam
- White school glue
- Scissors
- Googly eyes, 6mm, 2 per child
How to Make It
- Cut a large hare body shape from white cardstock: oval with long ears.
- Cut a smaller hare shape from white felt for the baby.
- Glue cotton batting to the center of the cardstock shape to form a pouch.
- Cut two pink inner ears from craft foam and glue them to the cardstock ears.
- Place the felt baby hare inside the cotton pouch.
- Glue googly eyes on the parent hare’s face.
9. Beluga Whale Handprint
Easy
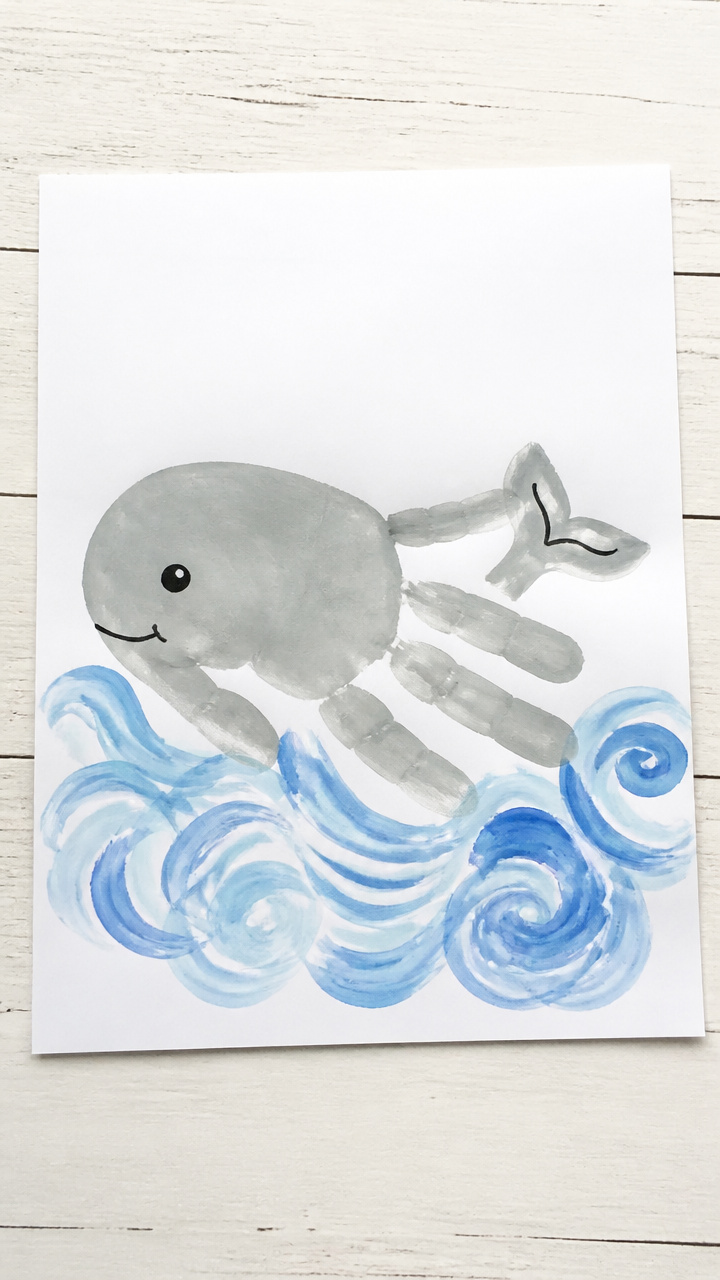
A child’s handprint in gray paint becomes a smiling whale with a round head and tail fluke. This personal art piece grows more precious with time.
Materials Needed
- Gray paint, washable
- Paint tray
- White drawing paper, 9×12 inch
- Black fine-tip marker
- Blue crayon
How to Make It
- Press your hand into the gray paint, covering the palm and fingers.
- Press your hand onto the paper with the wrist end down and fingers pointing up.
- Use the black marker to draw a rounded forehead above the wrist line.
- Draw a tail fluke at the bottom and add a small eye near the thumb.
- Add water lines with the blue crayon around the whale.
10. Snowy Owl Feather Craft
Easy
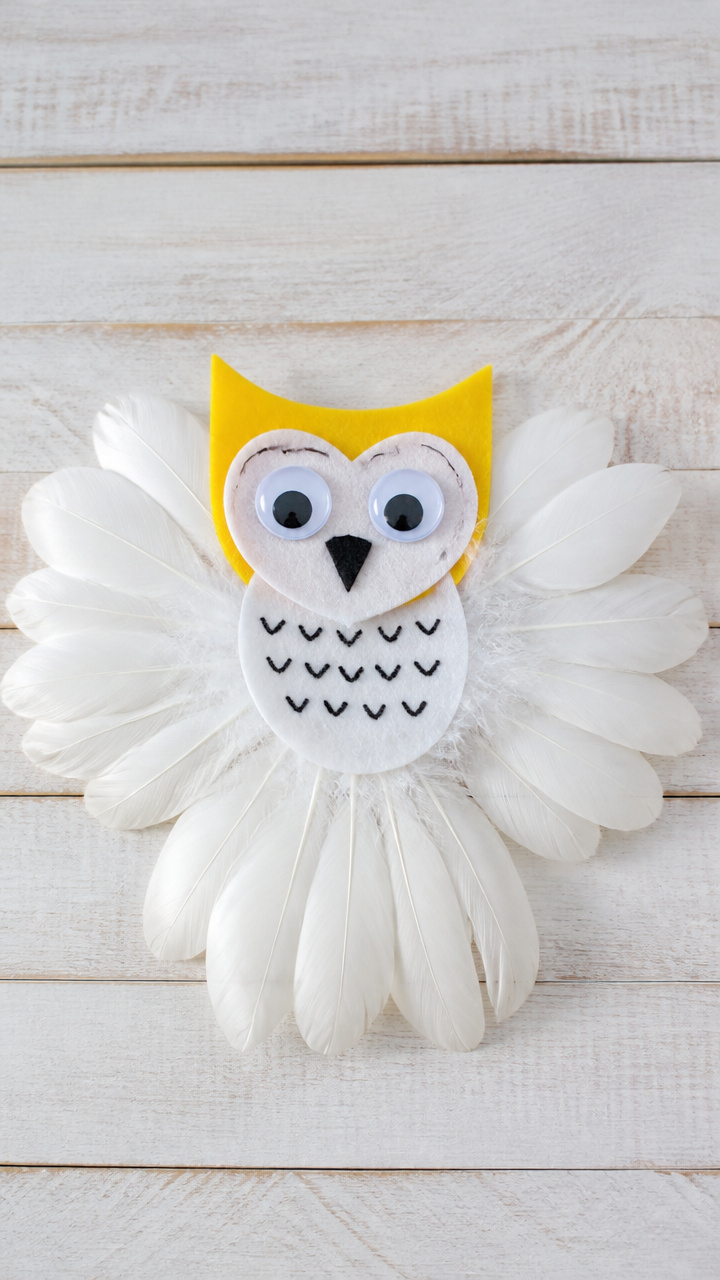
Real craft feathers form wings and a fan tail behind a googly-eyed owl face cut from felt. The texture invites touching and storytelling.
Materials Needed
- White craft feathers, 4 per child
- Yellow felt sheet
- White felt sheet
- White school glue
- Googly eyes, 10mm, 2 per child
- Black marker
- Scissors
How to Make It
- Cut an owl face shape from white felt: round with two flat top points for ears.
- Cut two small circles from yellow felt for eyes.
- Glue the yellow circles to the white face and add black pupils with the marker.
- Glue googly eyes on top of the yellow circles.
- Arrange four feathers behind the face and glue them in place for wings and tail.
11. Arctic Fox Mask
Moderate
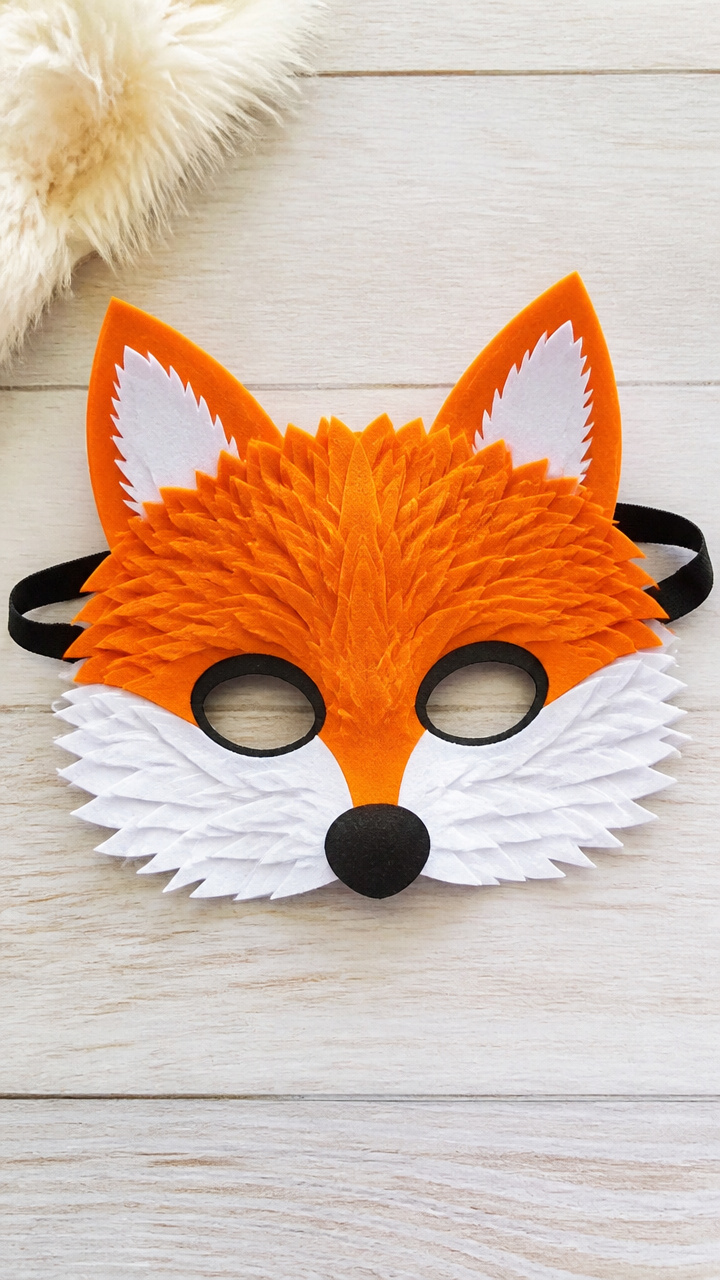
Orange and white paper strips form a bushy fox face that fits over the child’s head with an elastic strap. Perfect for winter animal parades or storytelling time.
Materials Needed
- Orange construction paper
- White construction paper
- Black craft foam
- Elastic string, 12 inch, 1 per child
- Hole punch
- White school glue
- Scissors
- Googly eyes, 15mm, 2 per child
How to Make It
- Cut a fox face shape from orange paper large enough to cover from chin to forehead.
- Cut a white belly shape and glue it to the lower center of the face.
- Cut two black nose and mouth pieces from craft foam and glue them in place.
- Glue on googly eyes above the nose.
- Punch one hole on each side of the mask and thread the elastic through, tying knots to secure.
12. Polar Bear Paw Prints
Easy
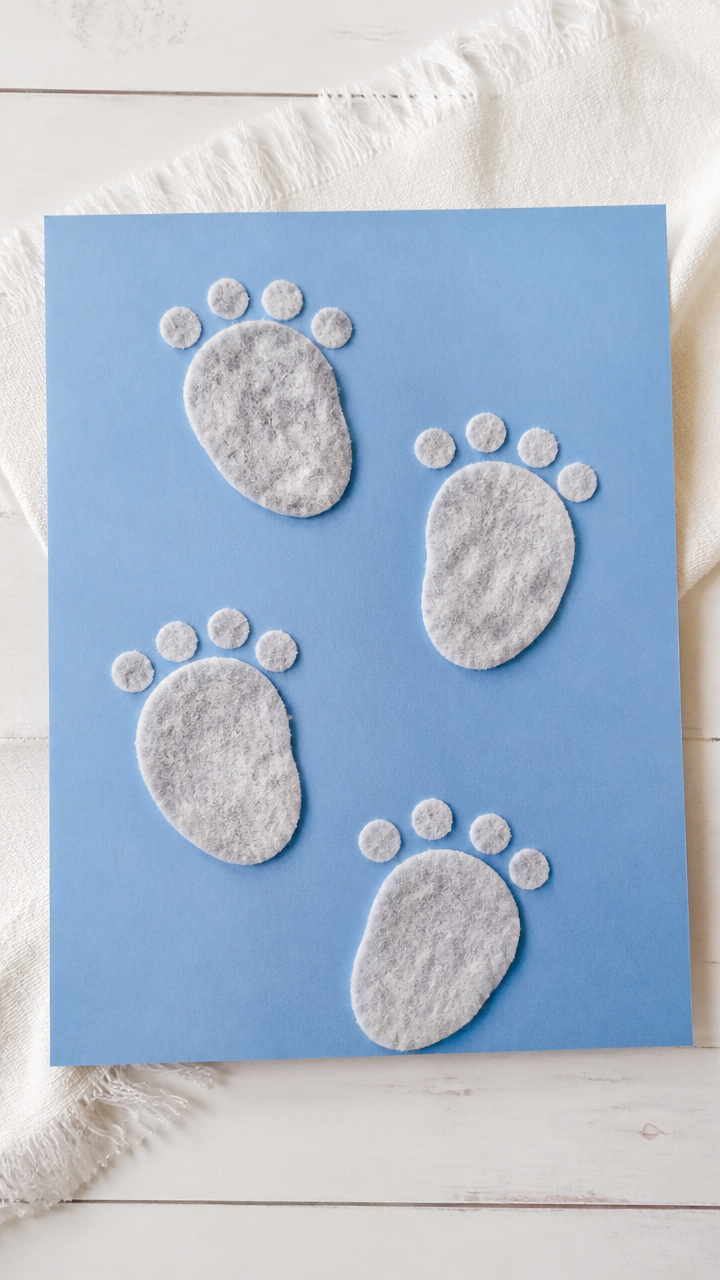
Five cotton pads dipped in gray paint form a realistic paw print on blue paper, mimicking tracks in snow. This science-linked craft teaches animal movement.
Materials Needed
- Gray washable paint
- Cotton pads, 5 per child
- A4 blue construction paper
- Paint tray
- Black marker
How to Make It
- Pour a small amount of gray paint onto the paint tray.
- Dip one cotton pad into the paint for the heel pad.
- Press it near the bottom center of the blue paper.
- Dip four more cotton pads and press them in a semi-circle above the heel for toes.
- Let dry for 10 minutes, then label with 'Polar Bear Track' using the black marker.
13. Caribou Hand Roll Craft
Moderate
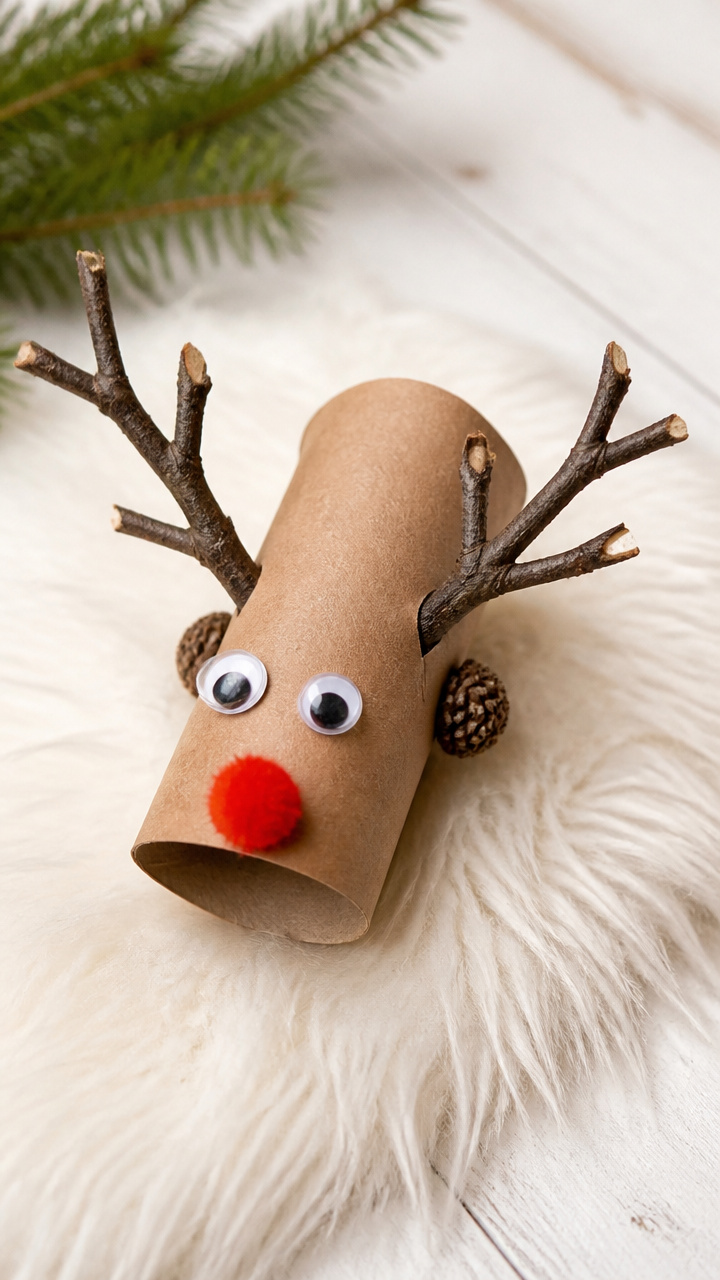
A rolled paper tube becomes a caribou body with antlers made from bent twigs and a red pom-pom nose. Natural materials bring forest energy indoors.
Materials Needed
- Brown kraft paper, 6×12 inch sheet per child
- White school glue
- Small twigs, 2 per child, about 3 inch long
- Red pom-pom, 0.5 inch, 1 per child
- Googly eyes, 8mm, 2 per child
- Hole punch
- Scissors
How to Make It
- Roll the kraft paper into a tube and glue the edge to secure.
- Punch two small holes near the top of the tube.
- Insert each twig into a hole to form antlers.
- Glue the red pom-pom to the front of the tube for the nose.
- Glue on googly eyes just above the pom-pom.
14. Arctic Tern Paper Cutout
Moderate
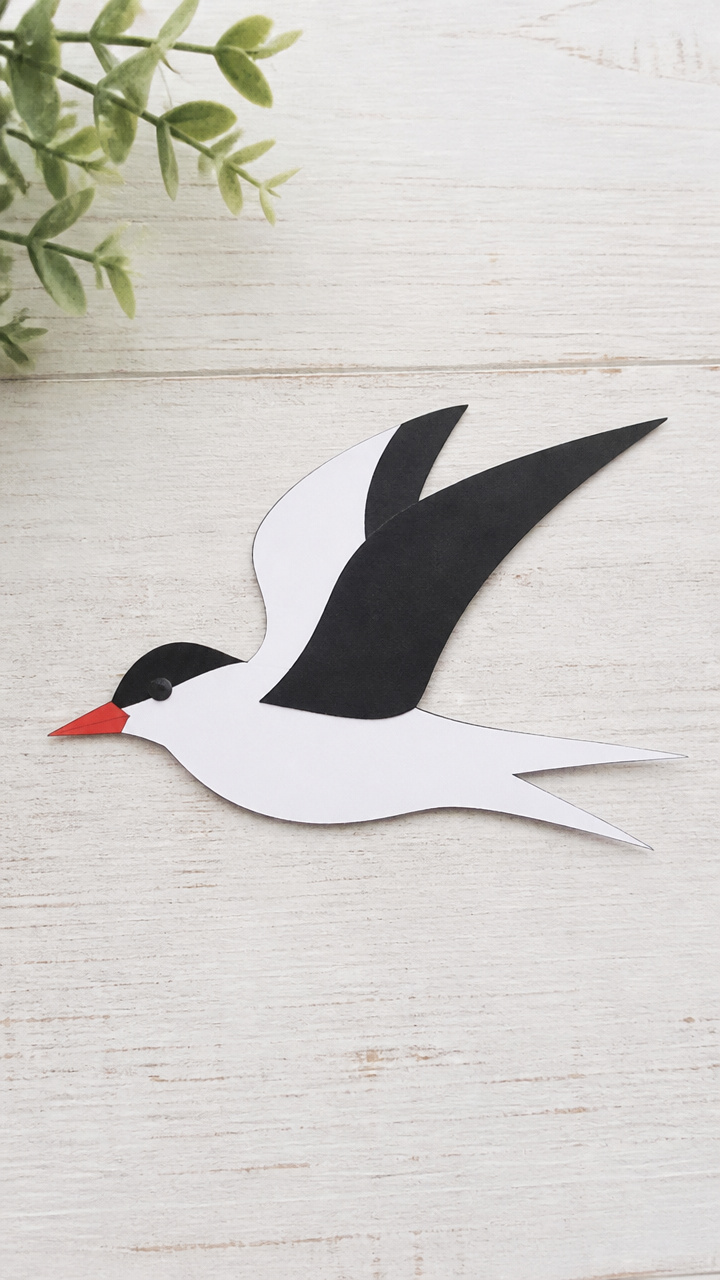
Sharp black wings and a red beak stand out on a white body cut from cardstock, capturing the bird’s bold contrast. This craft sharpens scissor skills.
Materials Needed
- White cardstock
- Black construction paper
- Red craft foam
- White school glue
- Scissors
- Pencil
- Ruler
How to Make It
- Draw a tern body shape on white cardstock: long wings, forked tail, slender neck.
- Cut out the shape with scissors.
- Cut two long, pointed wings from black paper and glue them to the sides.
- Cut a small triangle from red craft foam and glue it to the head for the beak.
- Use a pencil dot to mark the eye location.
15. Snow Goose Window Hanging
Easy
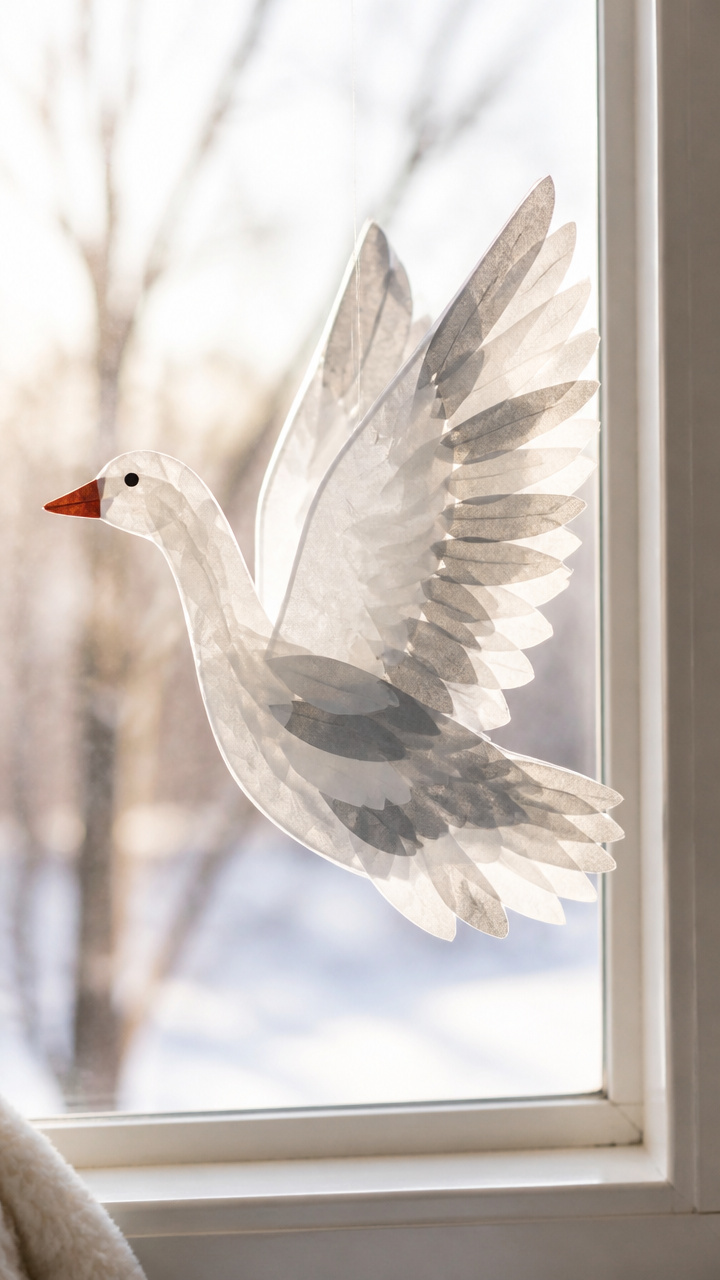
Overlapping tissue paper squares create a stained-glass effect as light shines through the goose’s wings. This adds beauty to any classroom window.
Materials Needed
- White tissue paper, 6×6 inch square per child
- Gray tissue paper, 6×6 inch square per child
- Clear contact paper, 8×10 inch sheet per child
- Scissors
- Pencil
- Black marker
- Hole punch
- Ribbon, 8 inch, 1 per child
How to Make It
- Cut a snow goose shape from white cardstock: long neck, wings, body.
- Place the shape on the sticky side of the contact paper.
- Tear small pieces of white and gray tissue paper and layer them inside the outline.
- Cover with the second side of contact paper and press smooth.
- Cut out the shape, punch a hole at the top, and tie ribbon for hanging.
16. Muskox from Yarn
Moderate
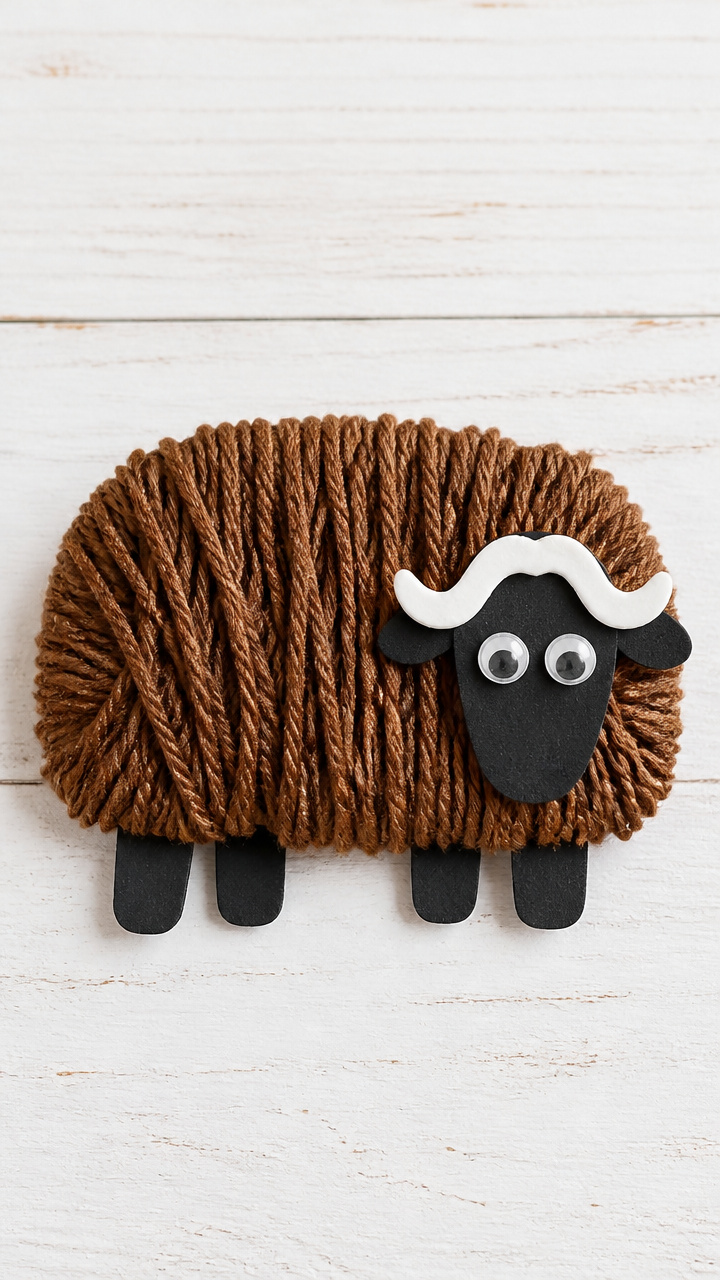
Thick brown yarn wrapped around a paper base forms a shaggy muskox body that feels like real fur. This tactile build supports sensory learning.
Materials Needed
- Brown yarn, medium thickness
- Cardboard, 3×5 inch rectangle per child
- White school glue
- Black craft foam
- Scissors
- Googly eyes, 6mm, 2 per child
How to Make It
- Cut a muskox body shape from cardboard: low hump, short legs, wide head.
- Apply a thin line of glue along the outer edge of the shape.
- Wrap the brown yarn tightly around the shape, covering all cardboard.
- Cut two curved horns and a small nose from black craft foam.
- Glue the foam pieces to the head and add googly eyes.
17. Arctic Fox Ice Cube Art
Easy
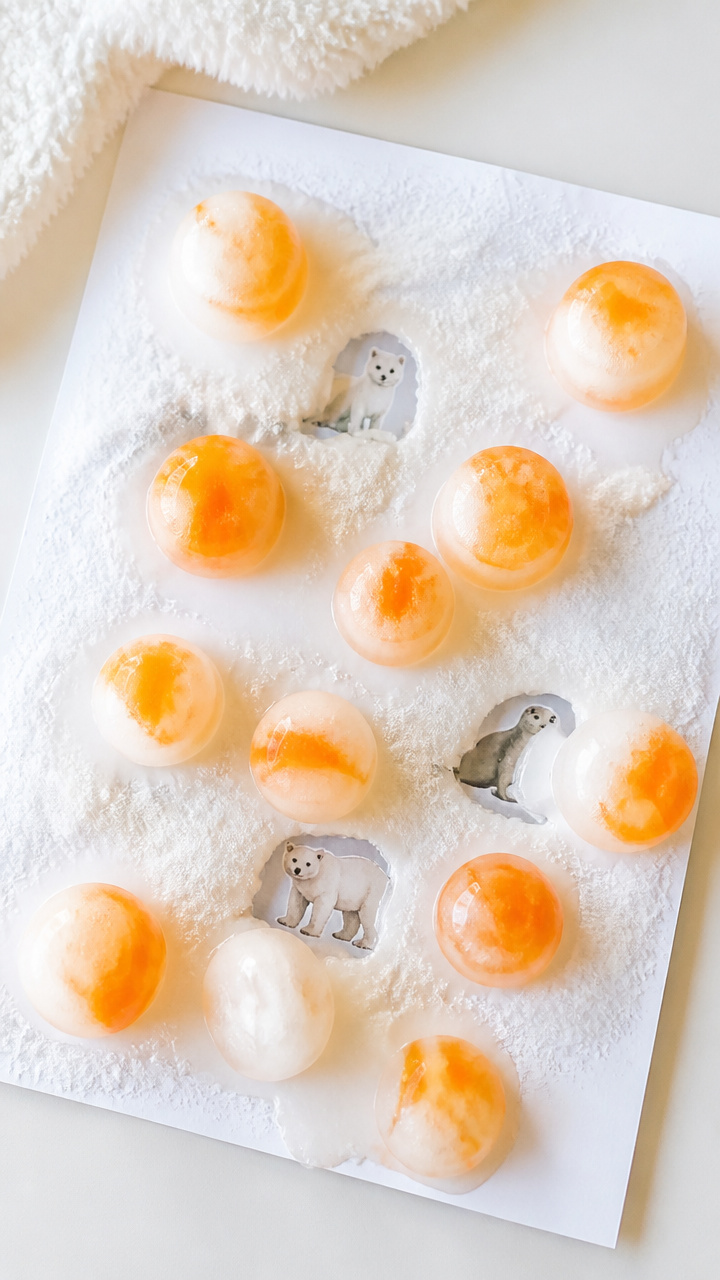
Colored ice cubes made with fox-colored dyes melt into snowy paper landscapes, revealing hidden animal stickers below. This combines science and art.
Materials Needed
- Ice cube tray
- Orange and white food coloring
- Water
- Freezer
- White drawing paper
- Arctic animal stickers
- Tray or bin
How to Make It
- Fill an ice cube tray with water and add a drop of orange or white food coloring to each section.
- Freeze for at least 4 hours.
- Place animal stickers on white drawing paper and lay it in a tray.
- Place colored ice cubes on top of the paper.
- Let sit for 15 minutes as the ice melts and colors spread around the stickers.
18. Penguin Rock Painting
Moderate
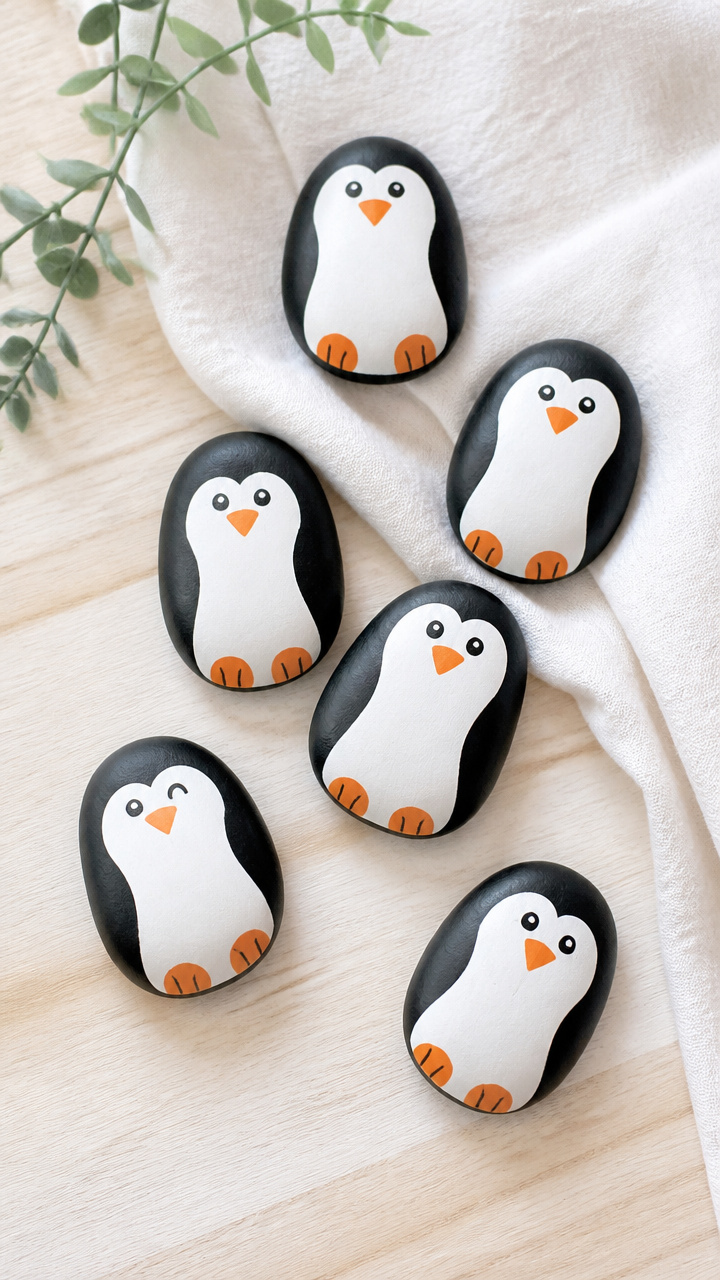
Smooth river rocks become waddling penguins with painted black backs and white fronts. These durable figures work well in sensory bins or story corners.
Materials Needed
- Small river rocks, 2-3 inch, 1 per child
- Black acrylic paint
- White acrylic paint
- Paintbrush, size 3
- Orange acrylic paint
- Fine-tip black marker
How to Make It
- Paint the top and back of the rock with black acrylic paint and let dry for 15 minutes.
- Paint the front and bottom with white acrylic paint and let dry for 15 minutes.
- Use orange paint to add a small triangle beak and two feet on the front.
- Draw eyes and feather lines with the fine-tip black marker.
19. Leaping Arctic Hare
Easy
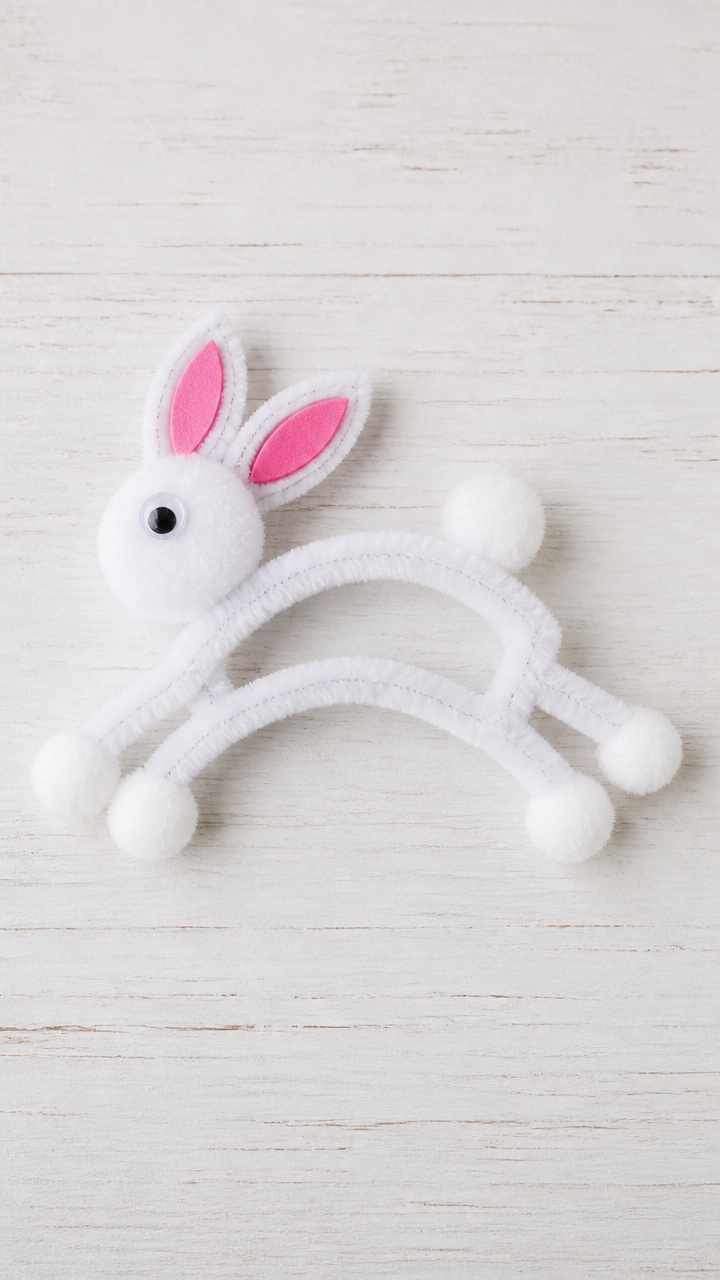
A pipe cleaner body bends into a jumping pose, held upright by cotton ball feet. This dynamic craft captures motion in a simple form.
Materials Needed
- White pipe cleaner, 12 inch, 1 per child
- White cotton balls, 3 per child
- Pink craft foam
- White school glue
- Googly eyes, 4mm, 2 per child
- Scissors
How to Make It
- Bend the pipe cleaner into a zigzag shape for legs, body, and head.
- Glue three cotton balls together and attach the bottom of the pipe cleaner to form feet.
- Cut two long ears and a small tail from pink craft foam.
- Glue the ears to the head end and the tail to the back.
- Glue on googly eyes near the top of the head.
20. Walrus Blubber Bag
Easy
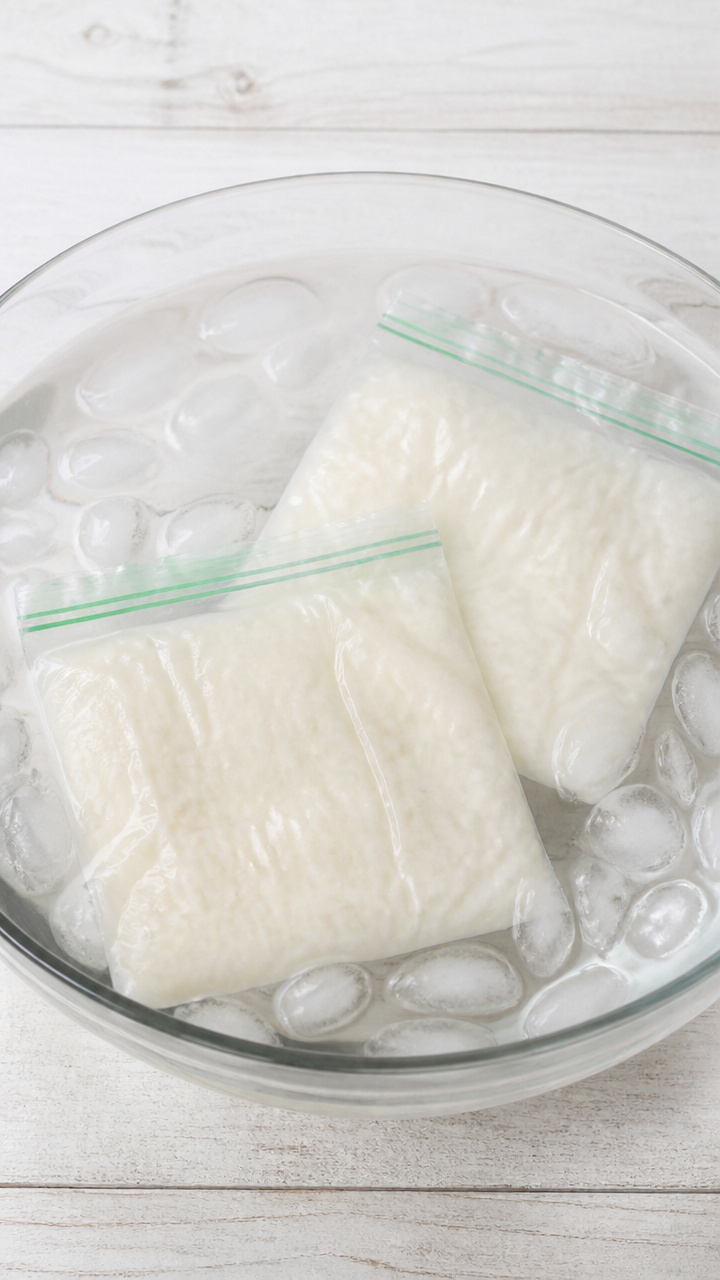
Two zip-top bags filled with shortening demonstrate how blubber keeps animals warm in icy water. This hands-on science craft sparks real discovery.
Materials Needed
- Two sandwich-sized zip-top plastic bags per child
- Vegetable shortening, 1/4 cup per child
- Ice water
- Large bowl
- Tape
How to Make It
- Scoop 1/4 cup of vegetable shortening into one zip-top bag.
- Press the second bag inside the first, leaving the top open.
- Push the shortening down to form a thick layer at the bottom.
- Seal both bags and tape the top edges together.
- Let the child place one hand in the blubber bag and one directly in ice water to compare temperatures.
21. Polar Bear Den Diarama
Advanced
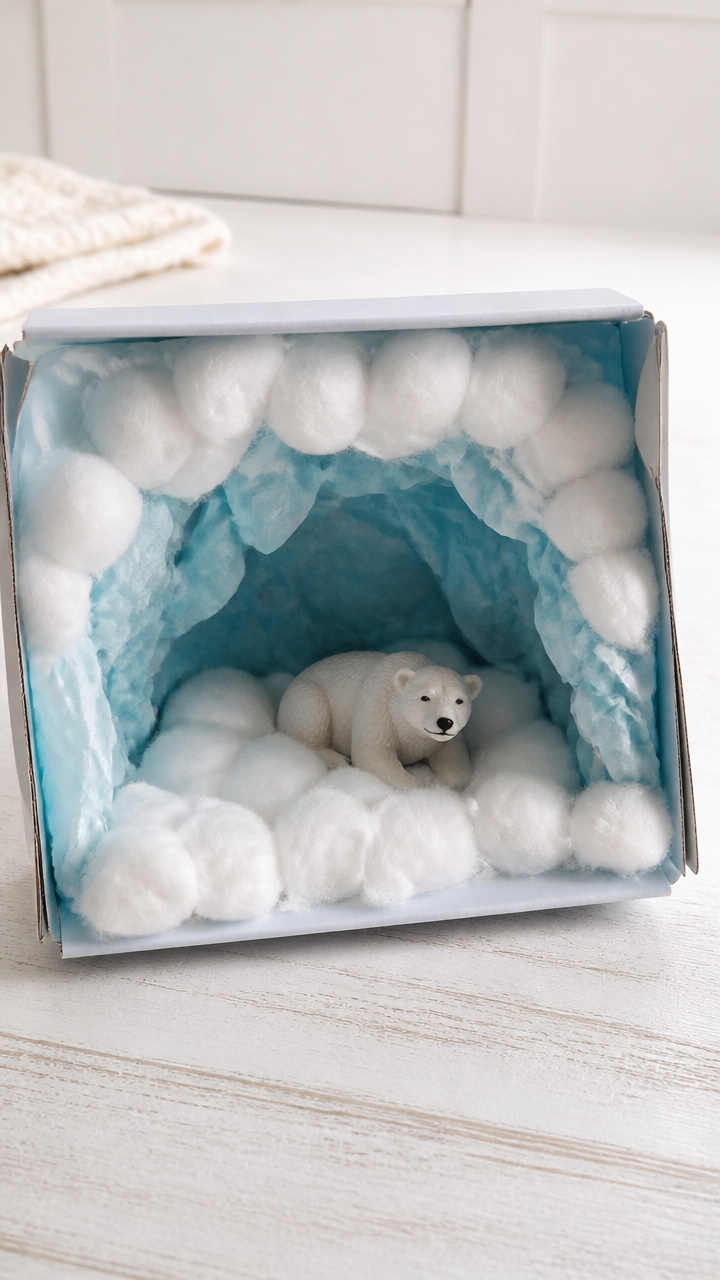
A shoebox opens to reveal a snow den with a cotton-stuffed bear and icy walls. This immersive scene supports imaginative play and habitat lessons.
Materials Needed
- Empty shoebox with lid
- White cotton balls
- Blue tissue paper
- White school glue
- Polar bear toy, 1.5 inch, 1 per child
- Scissors
- Craft knife (for adult use)
How to Make It
- Cut the front panel of the shoebox out with a craft knife to create an open face.
- Glue blue tissue paper to the inside back and sides to represent ice.
- Cover the floor and walls with cotton balls to form snow.
- Place the polar bear toy inside the den.
- Let children add snowballs or tiny animal friends with extra cotton.
22. Seal Balloon Sculpture
Advanced
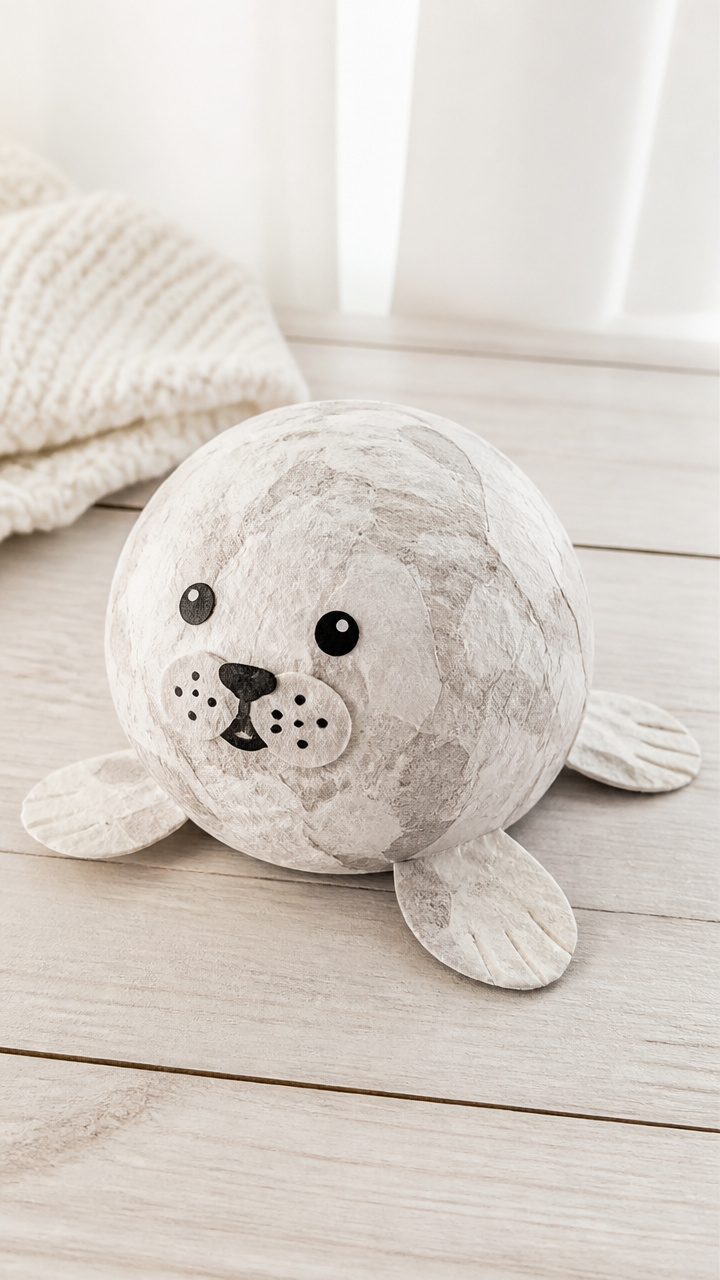
A blown-up balloon covered in paper strips and paste becomes a round seal body, lightweight and fun to hang. This introduces papier-mâché in a preschool-friendly way.
Materials Needed
- Small round balloon, 6 inch, 1 per child
- Newspaper strips, 1×3 inch, 20 per child
- Flour, 1/2 cup
- Water, 1/2 cup
- Mixing bowl
- White school glue
- Gray paint
- Paintbrush
- String, 12 inch, 1 per child
How to Make It
- Blow up the balloon and tie it closed.
- Mix flour and water in a bowl to make paste.
- Dip newspaper strips into the paste and layer them over the balloon, leaving the knot uncovered.
- Let dry for 24 hours.
- Pop and remove the balloon, then paint the sphere gray.
- Glue on googly eyes and cut flippers from black paper, then attach with glue.
- Tie string to the top for hanging.
23. Arctic Animal Sorting Tray
Moderate
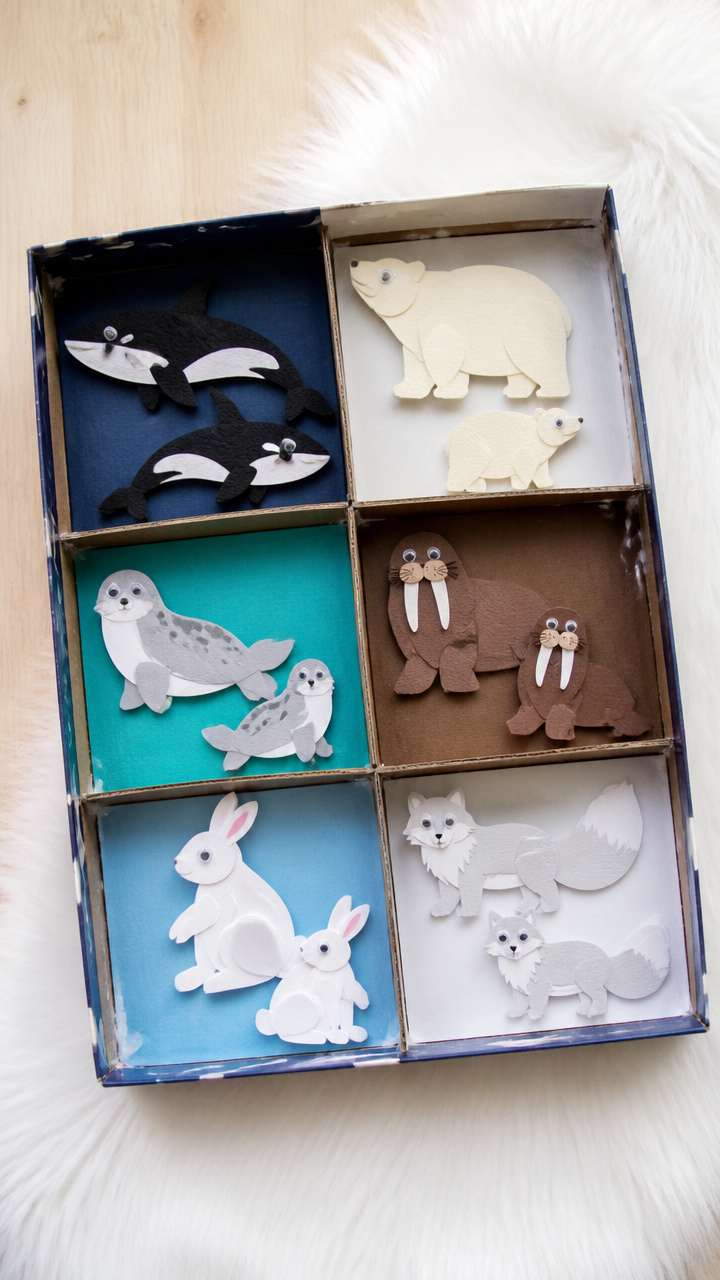
A divided tray holds handmade animal figures sorted by habitat, food, or movement. This craft doubles as a learning tool for classification skills.
Materials Needed
- Shoebox lid
- Cardboard dividers, 3 pieces, 3×6 inch
- White school glue
- Markers
- Handmade Arctic animal crafts from previous projects, 6 per child
How to Make It
- Glue three cardboard dividers across the shoebox lid to create four sections.
- Label each section with a category: 'Lives on Ice', 'Swims', 'Eats Fish', 'Has Fur'.
- Let dry for 10 minutes.
- Place the handmade animal crafts into the correct sections based on their traits.
You’ve got everything you need to bring the Arctic into your classroom, one soft paw, shiny eye, and snowy hill at a time. Grab your glue and let the little explorers begin.