15 Leaf Suncatcher Crafts

Sunlight dances differently when it passes through color and shape. A leaf suncatcher catches that light and turns it into something quiet and lovely, a small moment of calm in your window.
Each of these crafts uses real leaves or leaf shapes to create something delicate and glowing. You’ll find ideas for every skill level, using materials you might already have or can pick up easily.
1. Pressed Fern Resin Pendants
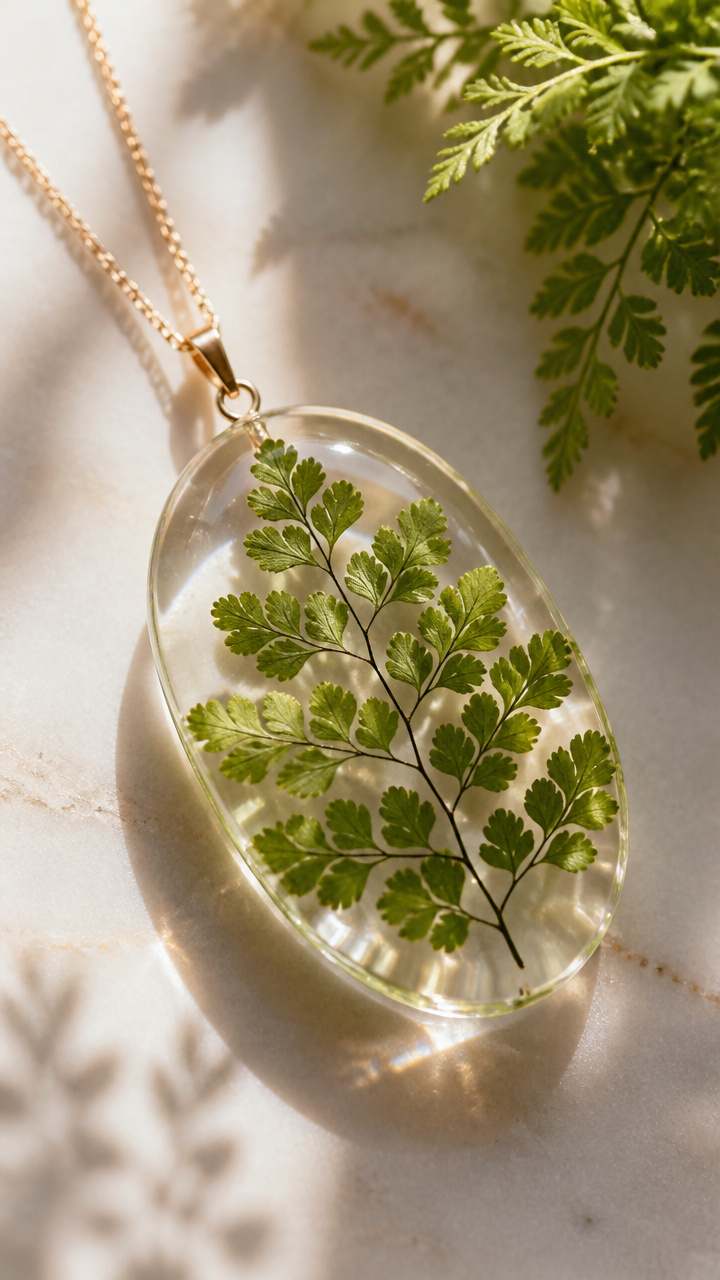
Tiny fern fronds suspended in clear resin become wearable suncatchers that glow when held to the light. The fine details of each leaf stay sharp and permanent.
Materials Needed
- 3 fresh maidenhair fern fronds
- Epoxy resin kit (30ml)
- 5 round silicone pendant molds (25mm)
- Toothpicks
- Small mixing cup
- Disposable gloves
- Jewelry findings: 5 silver bail settings, 5 jump rings
How to Make It
- Mix the epoxy resin according to the kit instructions in the small cup, stirring slowly for two minutes.
- Pour a thin layer of resin into each silicone mold and let sit for one minute to reduce bubbles.
- Use tweezers to place one fern frond into each mold, gently pressing it flat with a toothpick.
- Fill each mold to the top with more resin, popping any visible bubbles with the toothpick tip.
- Let cure undisturbed for 24 hours on a level surface away from dust.
- Pop the cured pendants out of the molds and attach each to a bail setting using a jump ring.


2. Crayon Rubbing Window Art
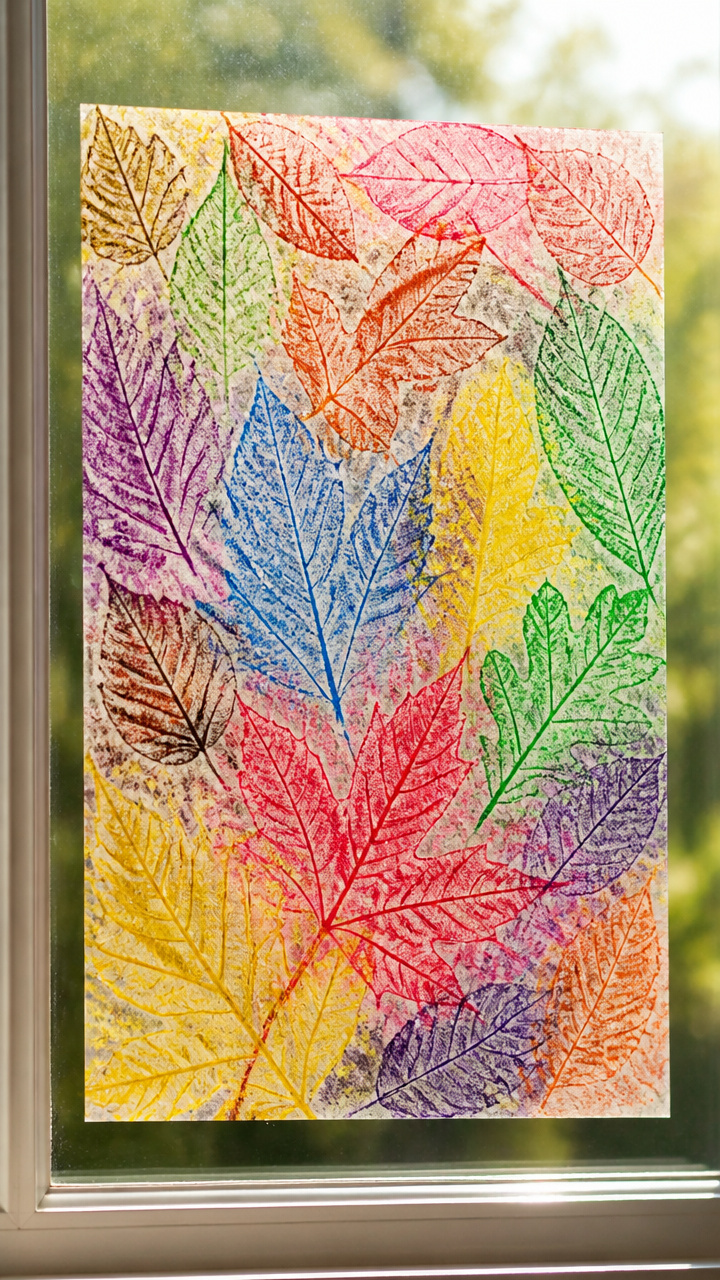
Waxy leaf impressions layered on contact paper create a stained-glass effect when taped to a sunny pane. The colors blur softly where they overlap.
Materials Needed
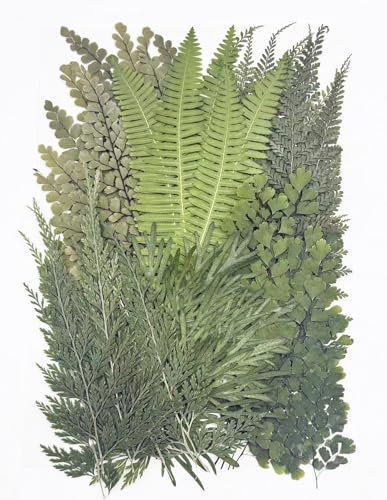
- 6 large smooth leaves (like magnolia or hosta)
- White printer paper (8.5 x 11 inches)
- 5 peel-and-stick clear contact paper sheets (12 x 18 inches)
- 8 crayons with no paper wrappers (red, yellow, blue, green, orange, purple, brown, black)
- Scissors
- Roll of clear tape
How to Make It
- Place a leaf vein-side down under a sheet of printer paper and rub firmly with the side of a crayon until the texture shows clearly.
- Repeat with all leaves and crayons, creating at least one rubbing per color.
- Cut out each rubbing just outside the leaf shape.
- Peel the backing off a contact paper sheet and arrange the rubbings sticky-side down, leaving space between them.
- Cover with a second sheet of contact paper, smoothing out air bubbles with your palm.
- Trim the edges and tape the panel directly to a window using clear tape on all four corners.


3. Tissue Paper Mason Jar Shade
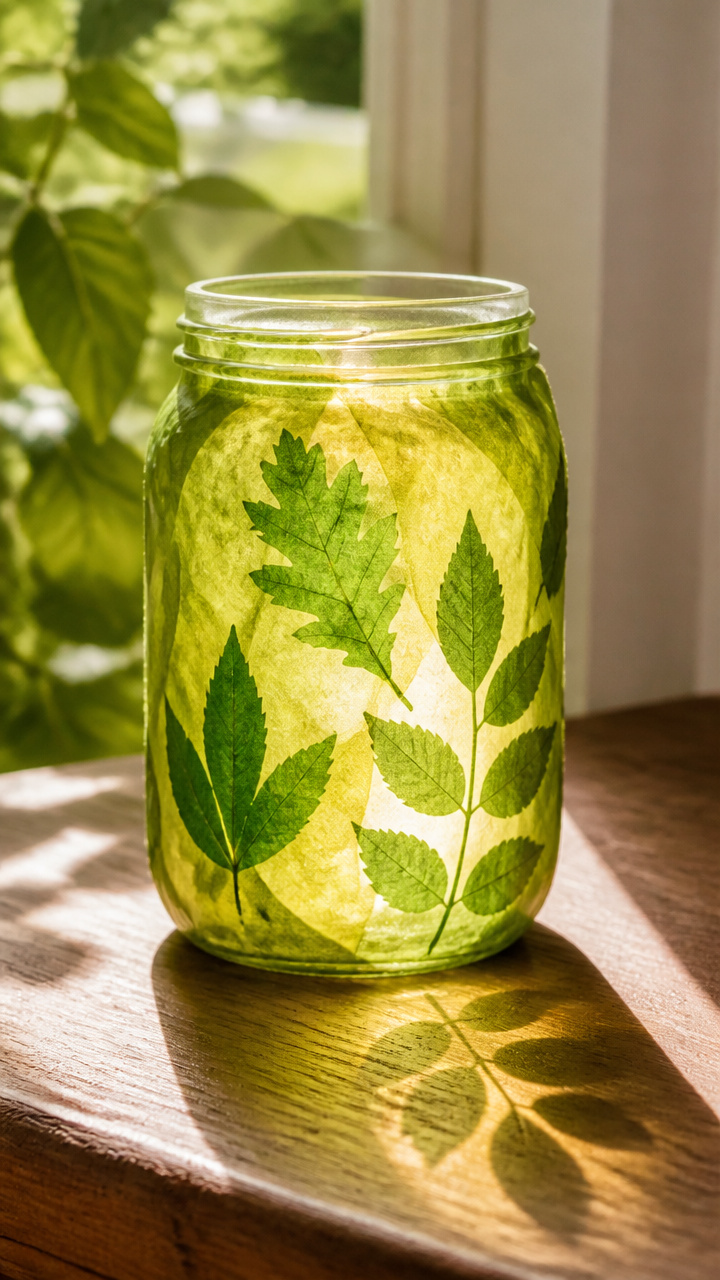
A glass jar wrapped in colorful tissue becomes a soft lantern when sunlight filters through. The leaf cutouts cast faint shadows on nearby walls.
Materials Needed
- 1 clean wide-mouth mason jar (16 oz)
- 7 sheets colored tissue paper (8 x 10 inches each, assorted greens and yellows)
- Decoupage glue (4 oz)
- Foam brush (1 inch wide)
- Craft knife
- Leaf stencil (3 inch oak shape)
- Ruler
- Parchment paper
How to Make It
- Cut each tissue sheet into 2-inch strips using scissors.
- Brush a thin layer of decoupage glue onto the outside of the jar.
- Lay tissue strips vertically around the jar, slightly overlapping, and smooth with the foam brush.
- Seal with another layer of decoupage glue and let dry for 30 minutes.
- Place the stencil on the front and trace lightly with pencil, then cut out the shape with the craft knife.
- Cover the jar with parchment paper and press gently with a warm iron for 10 seconds to seal.


4. Felt Leaf Mobile
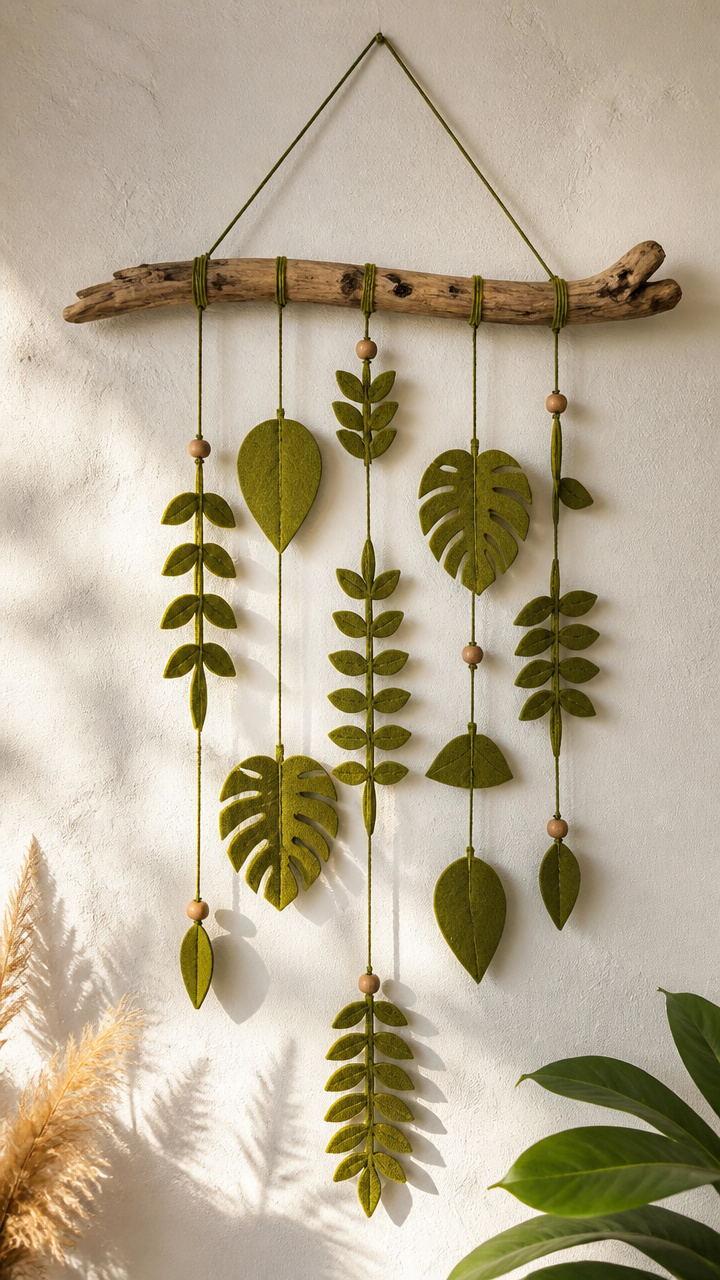
Soft green felt leaves dangle at different heights from a driftwood branch, swaying gently in sunlit breezes. The stitching adds subtle texture.
Materials Needed
- Olive green felt sheet (9 x 12 inches)
- Driftwood branch (12 inches long)
- Embroidery floss (green, 6 yards)
- Size 7 embroidery needle
- Scissors
- 3 lengths of nylon thread (8 inches each)
- Hot glue gun and 1 glue stick
How to Make It
- Draw five leaf shapes freehand on the felt and cut them out with sharp scissors.
- Thread the embroidery needle and backstitch along the edge of each leaf, about 1/8 inch from the border.
- Knot the floss securely at both ends of each stitch line.
- Glue one end of each nylon thread to the top of a leaf using the hot glue gun.
- Tie the other end of each thread to the driftwood branch at varying lengths.
- Hang the mobile near a window using a loop of floss tied across the ends of the branch.


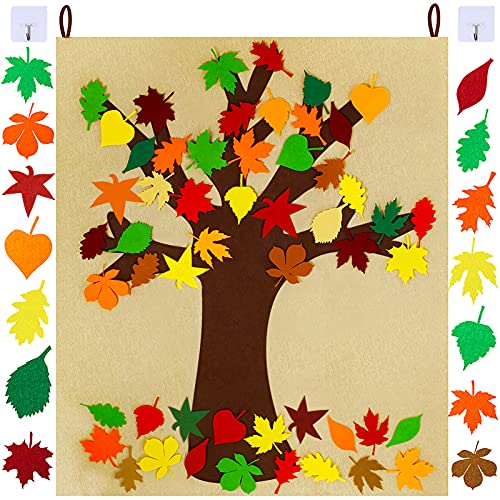
5. Salt Dough Impressions
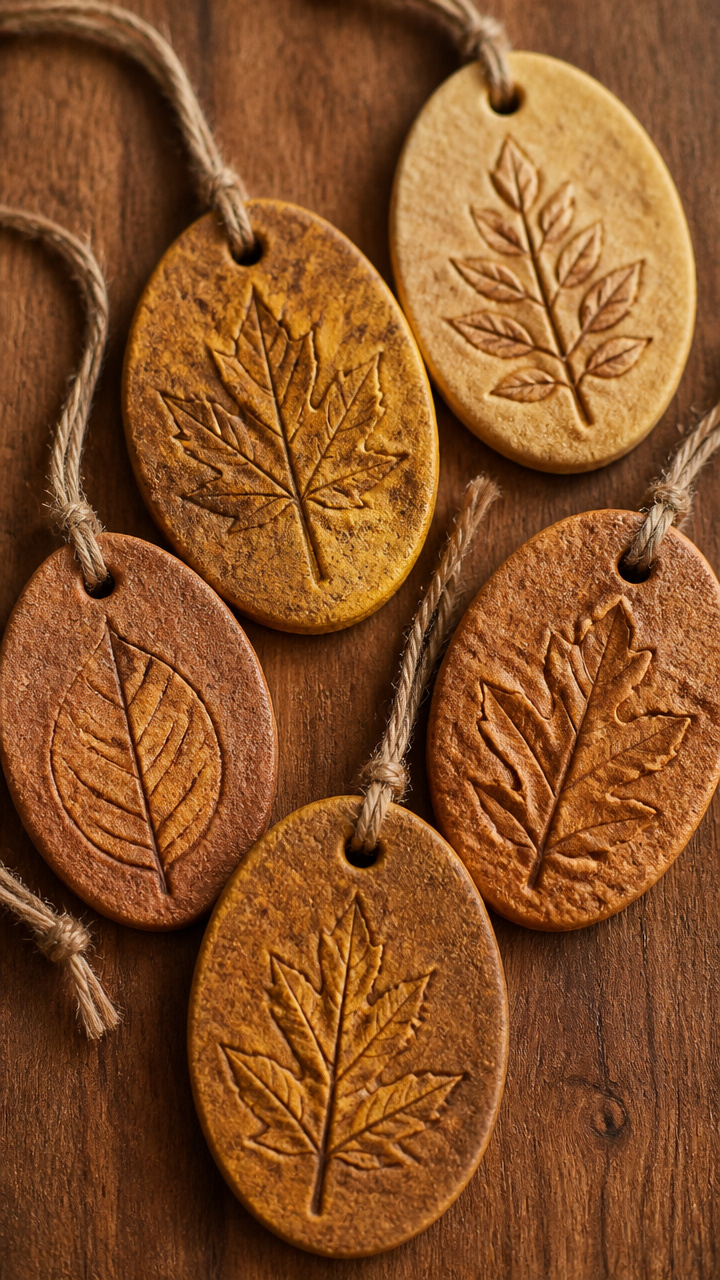
Leaves pressed into homemade dough create detailed ornaments that hold light when painted and glazed. The ridges catch color beautifully.
Materials Needed
- 2 cups all-purpose flour
- 1 cup table salt
- 3/4 cup warm water
- Rolling pin
- 3 large maple leaves
- Baking sheet
- Parchment paper
- Acrylic paint set (green, gold, copper)
- Clear acrylic sealer spray
- Oven
How to Make It
- Mix flour, salt, and water in a bowl until a smooth dough forms, kneading for two minutes.
- Roll the dough to 1/4 inch thickness on a floured surface.
- Press the veined side of each leaf firmly into the dough, then lift carefully to leave an impression.
- Cut around each imprint with a butter knife and place on the parchment-lined baking sheet.
- Bake at 200°F for three hours until hard and dry.
- Paint each ornament with acrylics, let dry, then spray with sealer and hang with twine.


6. Stained Glass Contact Paper Panel
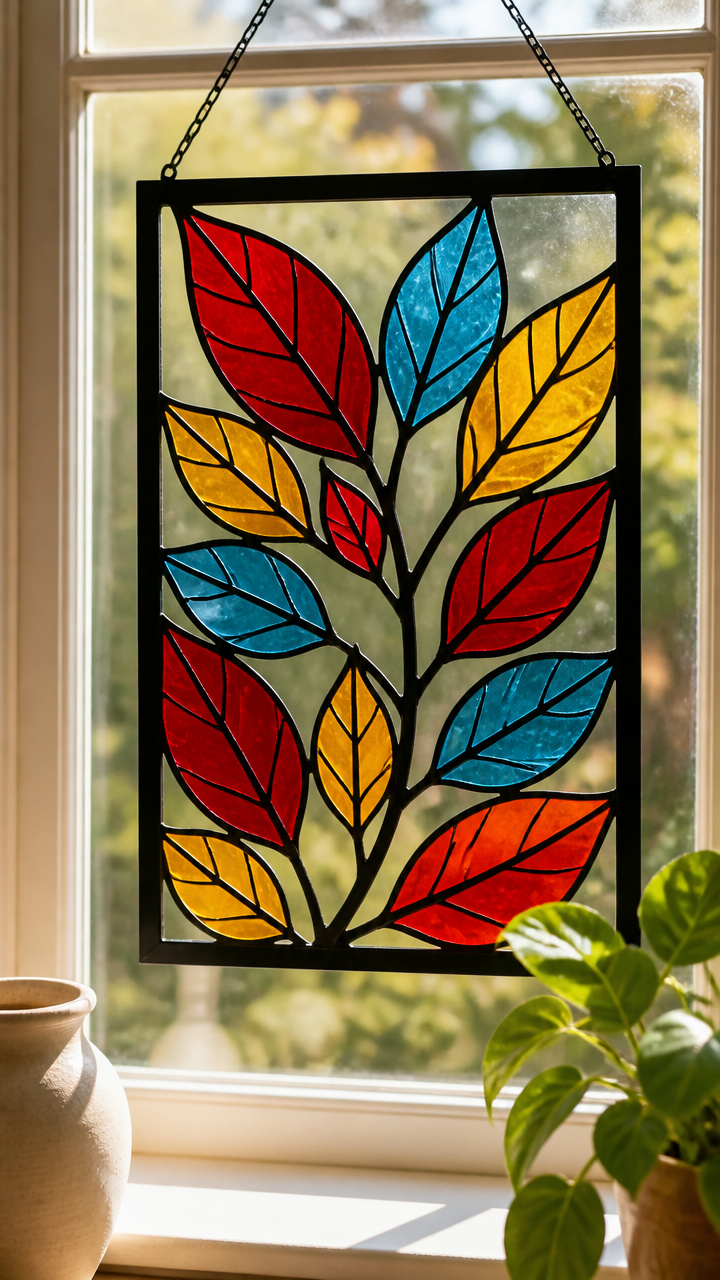
Precise leaf silhouettes in bold colors stick to windows like real stained glass. The black outlines make the colors pop in direct sun.
Materials Needed
- 1 roll black contact paper (12 x 72 inches)
- 1 roll clear contact paper (12 x 72 inches)
- Red, yellow, and blue translucent vinyl sheets (8 x 10 inches each)
- Craft knife
- Cutting mat
- Pencil
- Squeegee tool
How to Make It
- Draw three different leaf shapes on the paper side of the black contact paper and cut them out with the craft knife.
- Peel the backing off the clear contact paper and lay it sticky-side up on the cutting mat.
- Cut pieces of colored vinyl to fit inside each leaf shape and place them on the clear sheet.
- Position the black silhouette pieces over the colored areas, pressing down gently.
- Smooth with the squeegee to remove wrinkles and secure adhesion.
- Trim the final panel and apply directly to a clean window, sticky side down.


7. Wire Frame Leaf Sculptures
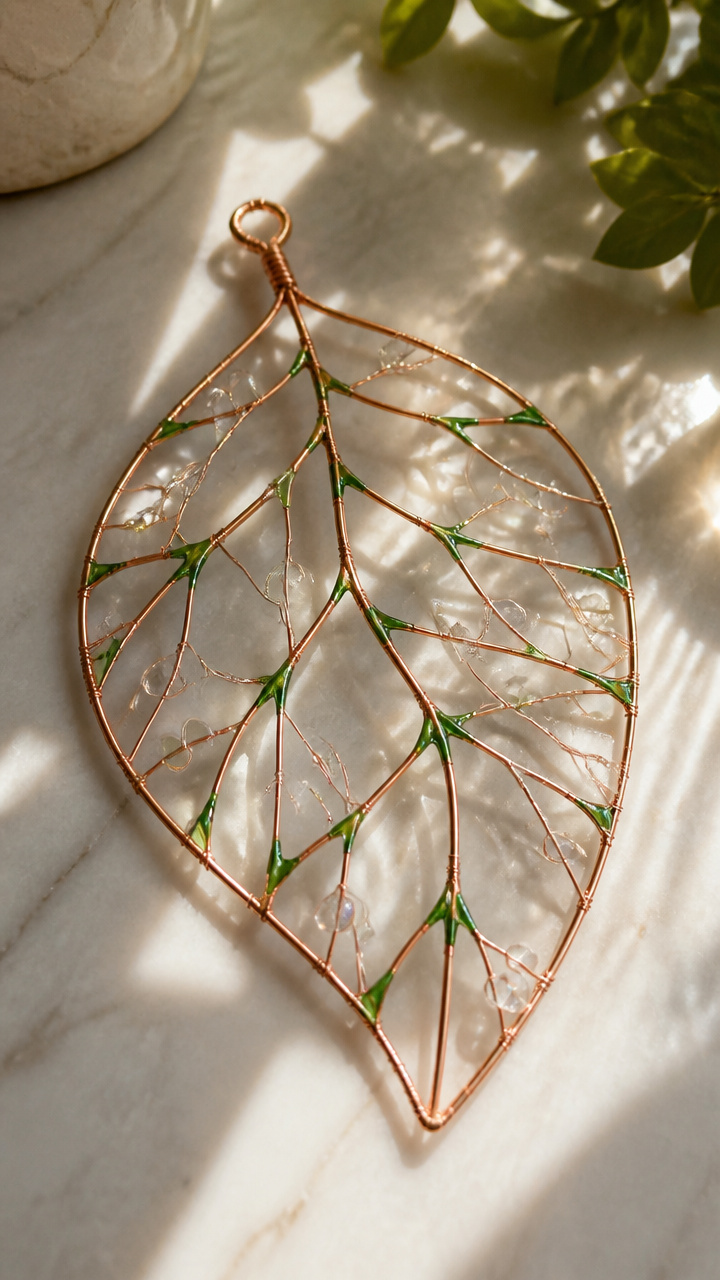
Copper wire shaped into leaf veins holds beads at each junction, catching light with tiny sparkles. Each bend follows the natural curve of a real leaf.
Materials Needed
- 15 feet of 20-gauge copper wire
- Round-nose pliers
- Chain-nose pliers
- 5 crystal beads (4mm)
- Green enamel paint pen
- Wire cutters
How to Make It
- Cut five 30-inch lengths of copper wire using the wire cutters.
- Use the round-nose pliers to curl one end of each wire into a small loop.
- Shape each wire into a leaf vein pattern by bending gently with chain-nose pliers.
- Slide a crystal bead onto the end of each main vein and crimp the wire just past it.
- Paint the wire lightly with the green enamel pen to add depth, letting it dry for 15 minutes.
- Hang each sculpture individually from a suction cup hook near a sunny window.


8. Watercolor Leaf Transparencies
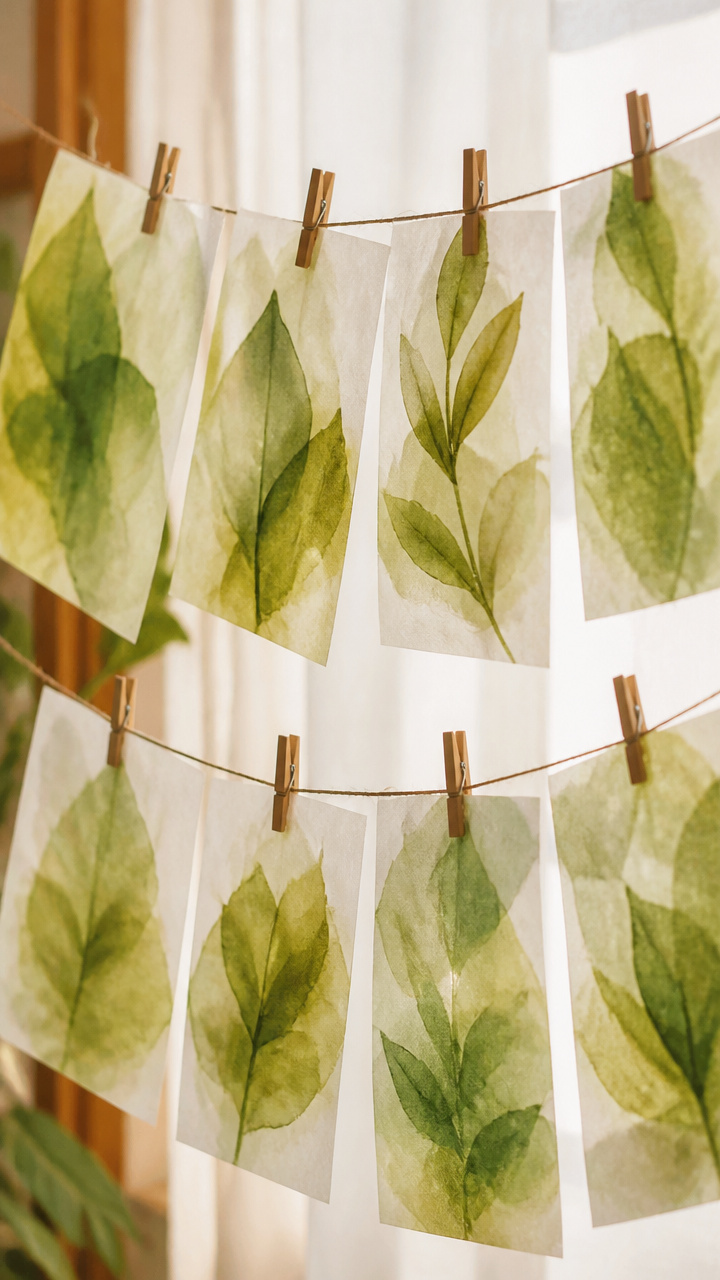
Delicate washes of pigment on tracing paper mimic the translucence of real leaves. When layered, the colors blend like morning light.
Materials Needed
- 5 sheets white tracing paper (8.5 x 11 inches)
- Watercolor set (pan style, warm green tones)
- Round watercolor brush (size 6)
- Spray bottle with water
- Clothespins
- String
- Pencil
How to Make It
- Sketch a different leaf shape lightly on each sheet of tracing paper.
- Wet the brush and apply pale green watercolor inside one leaf, letting it bleed slightly beyond the lines.
- Spritz lightly with the spray bottle to create soft blooms in the paint.
- Let dry completely for 20 minutes on a flat surface.
- Punch a hole at the top of each leaf and hang from a taut string using clothespins.
- Adjust spacing so leaves overlap slightly when the wind moves them.


9. Pinecone and Leaf Wind Chime
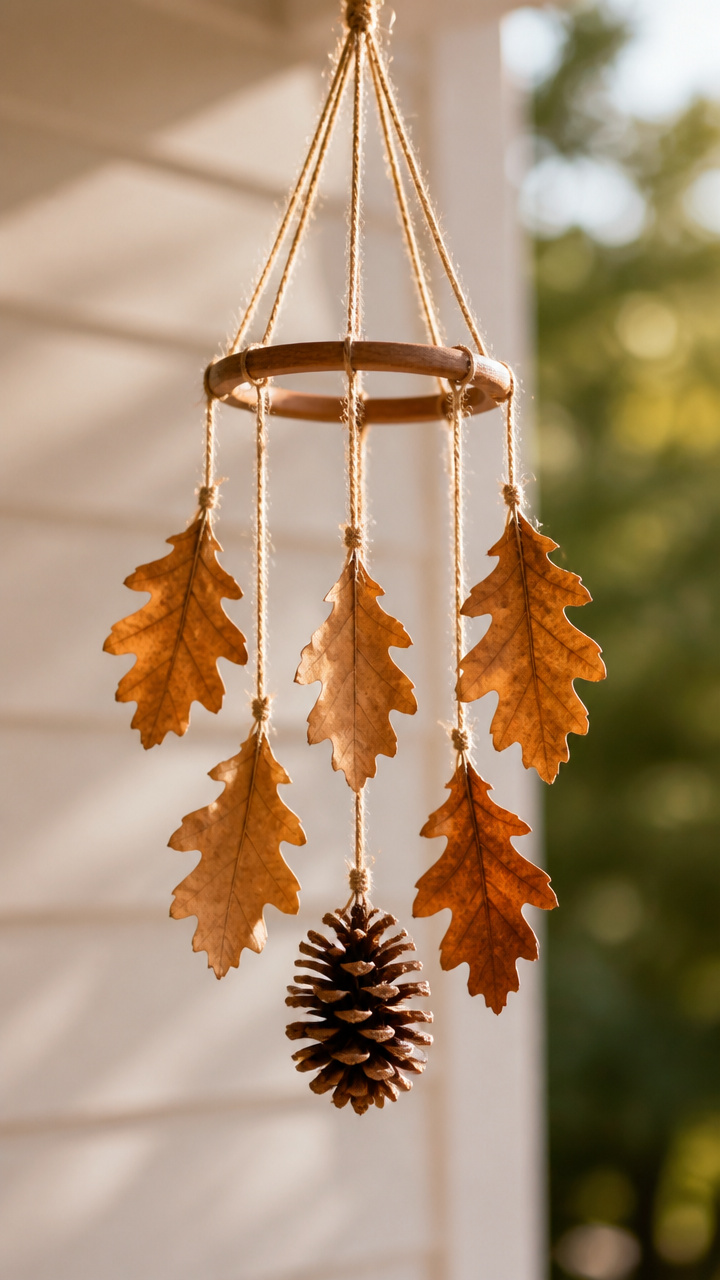
Dried leaves tied to pinecone scales rustle quietly when the breeze lifts them. Sunlight glows through the thin edges as they turn.
Materials Needed
- 1 medium pinecone
- 5 dried oak leaves
- Natural jute cord (12 feet)
- Scissors
- Small wooden ring (2 inches diameter)
- Drill with 1/16 inch bit
How to Make It
- Drill a small hole through the top of the pinecone and thread 6 inches of jute through it, knotting to secure.
- Tie the pinecone to the bottom of the wooden ring with the excess cord.
- Cut five 18-inch lengths of jute and tie one to the base of each oak leaf.
- Attach the loose end of each leaf cord to the wooden ring, spacing evenly.
- Add a 10-inch hanger cord to the top of the ring with a double knot.
- Hang in a bright window where airflow lets the leaves sway freely.


10. Beeswax Leaf Candles
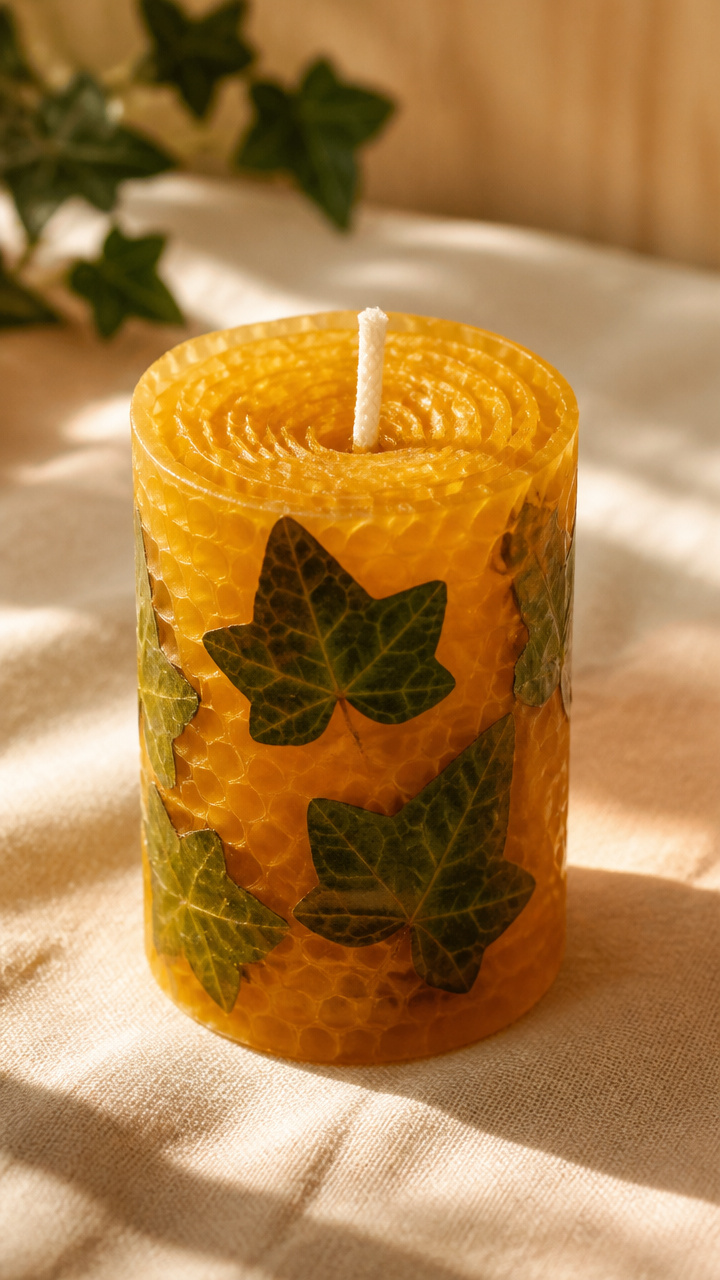
Real leaves embedded in thin beeswax sheets burn slowly, releasing a honeyed scent while casting leaf-shaped shadows. The wax holds each detail perfectly.
Materials Needed
- 1 sheet golden beeswax (8 x 12 inches, 1/16 inch thick)
- 5 small ivy leaves
- Double boiler setup
- Parchment paper
- Wooden rolling pin
- Cotton wick (pre-waxed, 6 inches)
- Clothespin
How to Make It
- Warm the beeswax sheet in the double boiler for 90 seconds until pliable but not melted.
- Lay the wax on parchment paper and roll gently with the pin to smooth.
- Press one ivy leaf into the center of the wax, vein side up.
- Fold the wax over the leaf like a taco, enclosing it completely.
- Insert the wick vertically between the layers at the open end and pinch closed.
- Clip the top with a clothespin and stand upright on a heat-safe dish to burn.


11. Glass Tile Mosaic Leaves
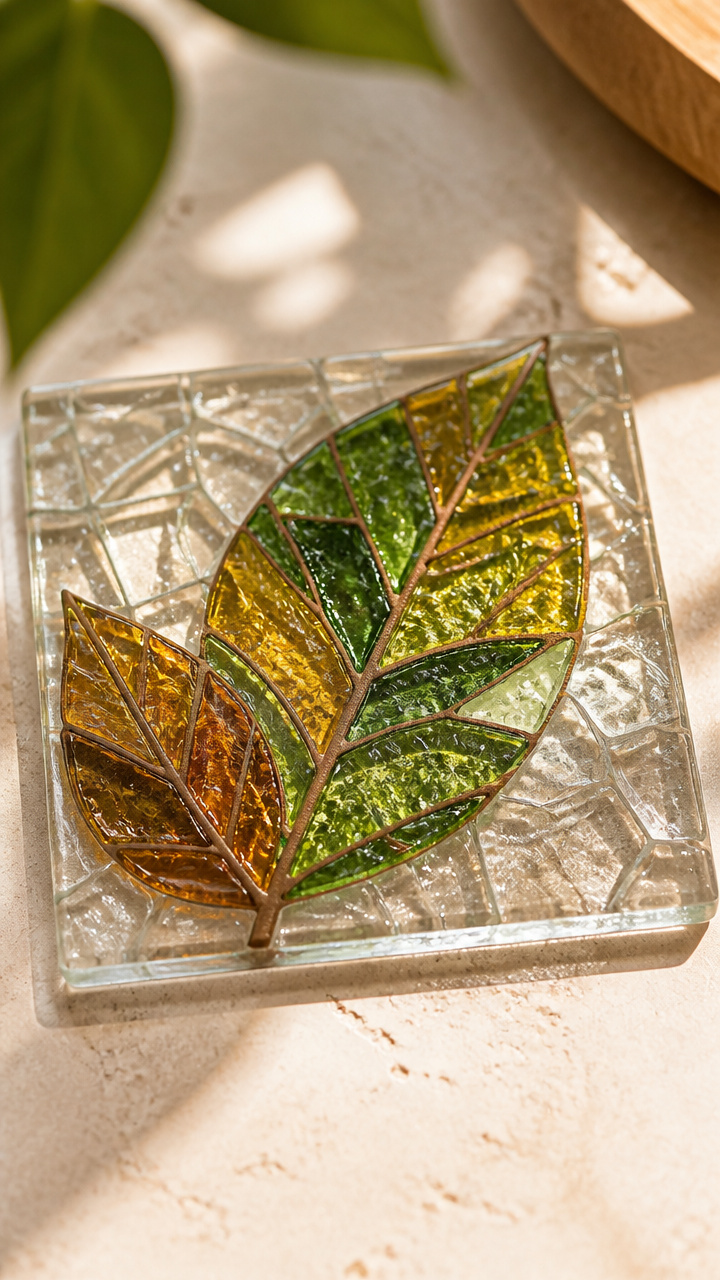
Broken stained glass pieces form shimmering leaf shapes on clear tiles. The grout lines mimic natural veins when dry.
Materials Needed
- 1 square foot of green and amber stained glass scraps
- Tile cutter or glass nippers
- 1 clear glass tile (4 x 4 inches)
- Latex gloves
- White mosaic adhesive
- Squeeze bottle
- Grout (off-white, 4 oz)
- Sponge
How to Make It
- Wear gloves and use glass nippers to break stained glass into small irregular pieces.
- Apply adhesive to the glass tile using the squeeze bottle in dime-sized dots.
- Press glass pieces onto the tile in a leaf shape, leaving 1/8 inch gaps between them.
- Let the adhesive cure for 24 hours in a dry place.
- Spread grout over the surface with your finger, pressing it into the gaps.
- Wipe excess with a damp sponge after 15 minutes and let dry for another 12 hours.


12. Leaf Print Fabric Squares
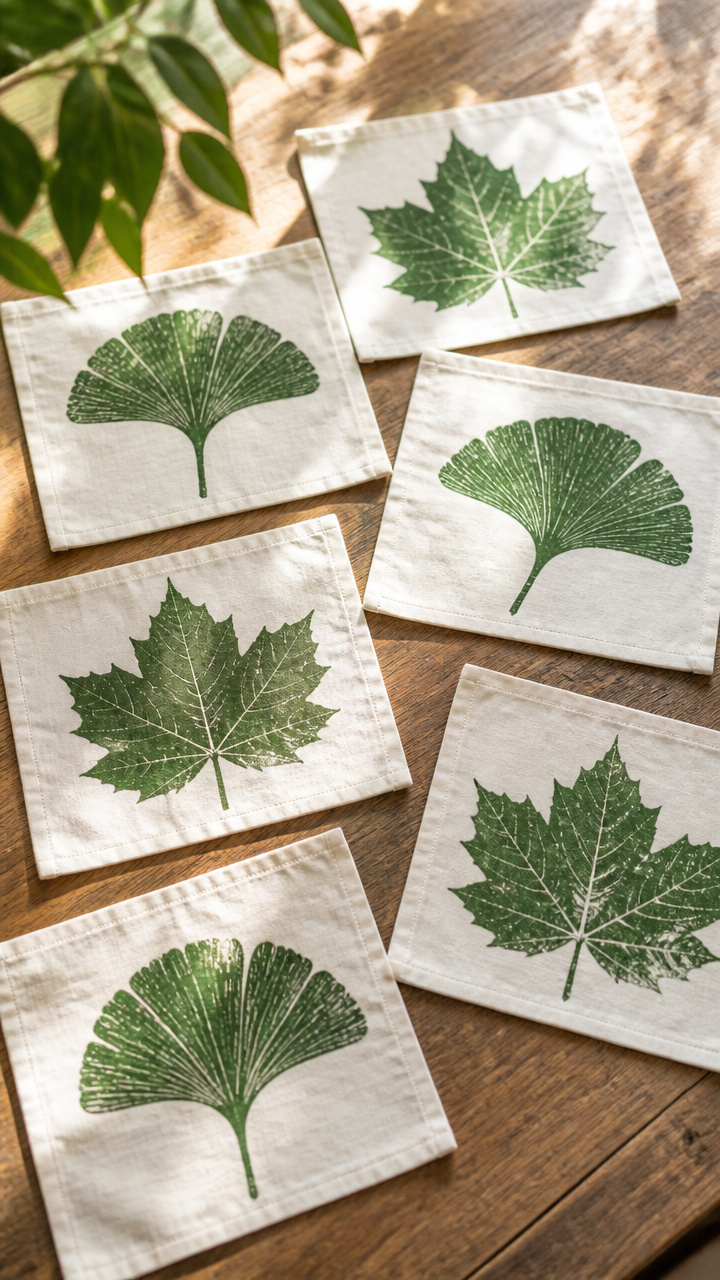
Fresh leaves stamped with fabric paint transfer their shape onto cotton squares. When hung together, they flutter like a garden in motion.
Materials Needed
- 5 cotton fabric squares (6 x 6 inches)
- Fabric paint (forest green, 2 oz bottle)
- 3 different leaf types (sycamore, birch, ginkgo)
- Brayer roller
- Paper plate
- Clothespins
- String
How to Make It
- Pour a puddle of fabric paint onto the paper plate and roll the brayer through it to coat evenly.
- Roll the brayer over the veined side of a leaf to cover it with paint.
- Press the leaf firmly onto a fabric square and lift straight up.
- Repeat with different leaves and squares, using fresh paint each time.
- Let prints dry for one hour, then heat-set with an iron on cotton setting for 30 seconds.
- Hang the squares on a string with clothespins, spacing two inches apart.


13. Clay Slab Leaf Plaques
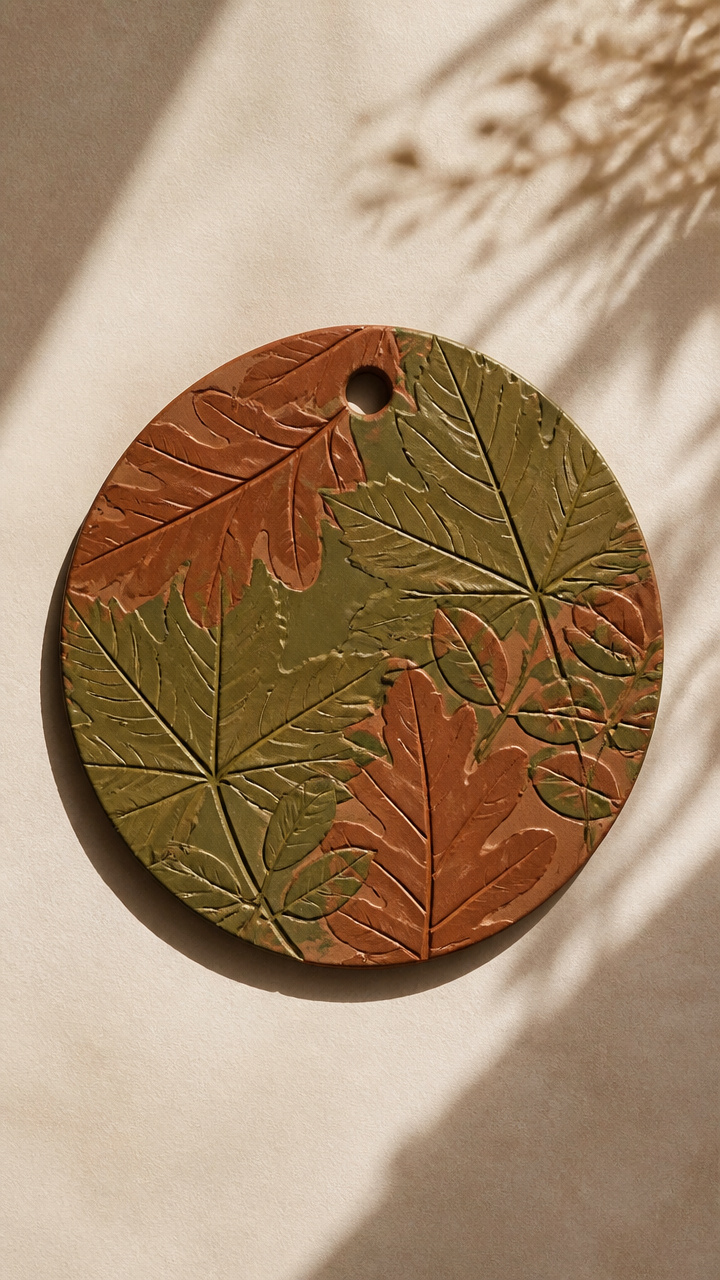
Flat slabs of air-dry clay take deep impressions from real leaves and become sturdy wall pieces when painted and varnished. Light hits the raised edges first.
Materials Needed
- Air-dry clay block (1 pound)
- Rolling pin
- Cornstarch (for dusting)
- 3 large fig leaves
- Acrylic paint (burnt sienna, olive green)
- Paintbrush (flat, 1/2 inch)
- Clear matte varnish
- Jute cord (12 inches)
How to Make It
- Dust your work surface with cornstarch and roll the clay to 1/4 inch thickness.
- Press a fig leaf vein-side down into the clay and press evenly with your palm.
- Lift the leaf carefully and repeat with two more leaves on the same slab.
- Cut around each impression with a butter knife and poke a small hole at the top of each.
- Let dry for 48 hours until hard.
- Paint each plaque with acrylics, let dry, then brush on varnish and thread jute through the hole.


14. Yarn-Wrapped Twig Orbs
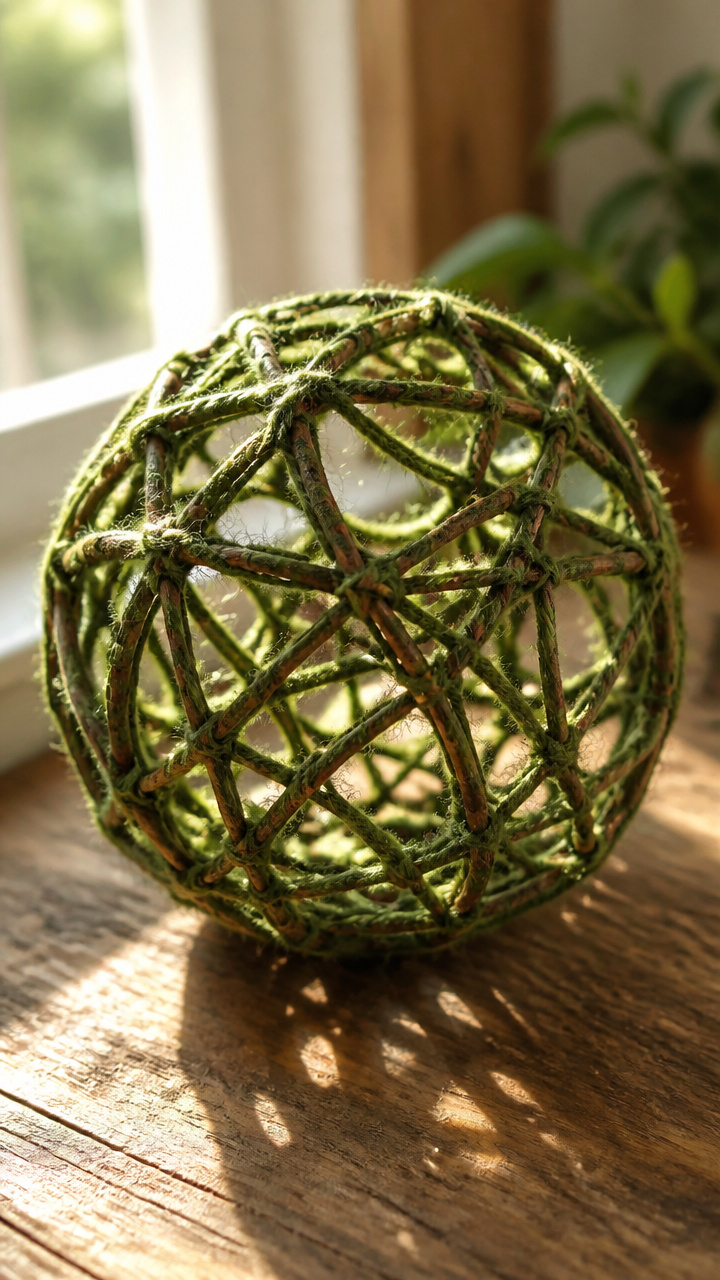
Thin twigs bent into circles and wrapped with green yarn form hollow leaf frames. Light passes through the open center and woven strands.
Materials Needed
- 6 flexible green twigs (12 inches long)
- Green wool yarn (80 yards)
- Scissors
- Floral wire (18 gauge, 12 inches)
- Pliers
How to Make It
- Bend each twig into a circle and twist the ends together with floral wire to secure.
- Wrap yarn tightly around one twig ring, starting at the base and covering completely.
- Continue wrapping until the ring is thickly covered, then knot and trim the end.
- Repeat for all six rings.
- Link three rings together at right angles using short pieces of floral wire twisted with pliers.
- Hang from a single wire loop attached to the top ring.


15. Transparency Marker Panels
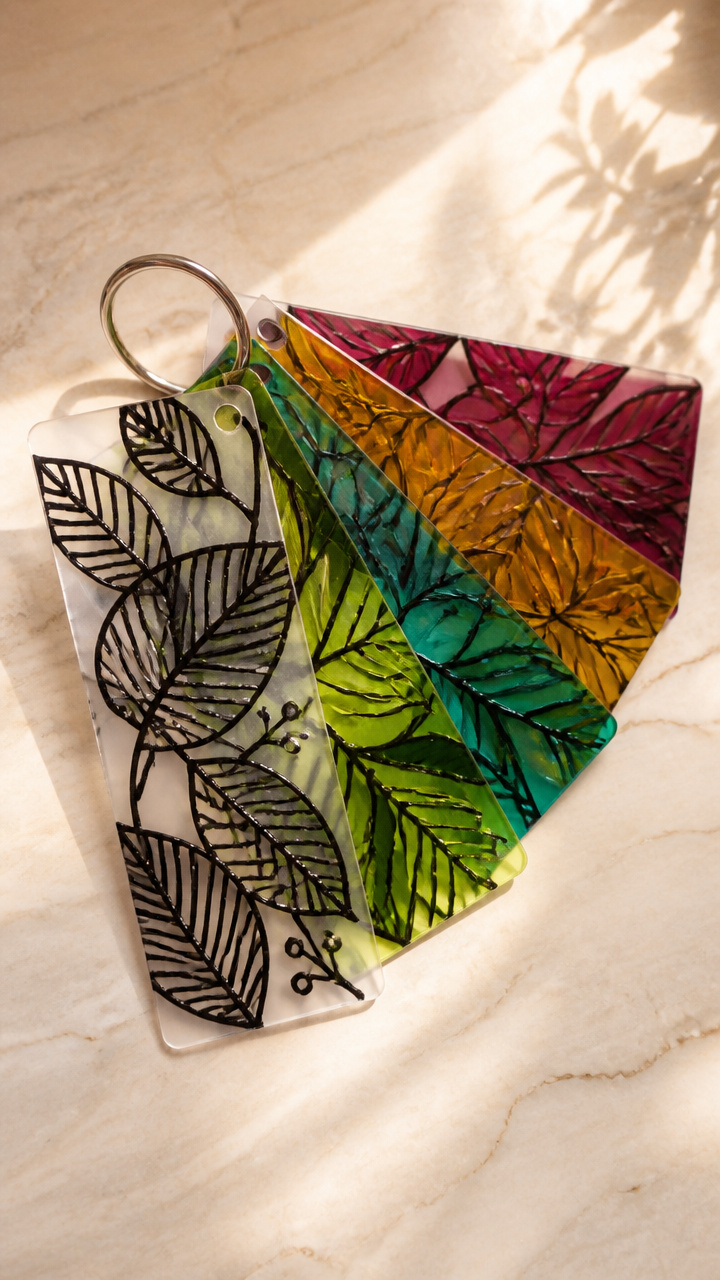
Bold leaf drawings made with permanent markers on acetate shine brightly when clipped to a window. The ink stays vivid for months.
Materials Needed
- 5 acetate sheets (8.5 x 11 inches)
- Fine-tip permanent markers (black, lime, teal, gold, maroon)
- Pencil
- Ruler
- Hole punch
- Binder ring (1 inch)
- Clothespins
How to Make It
- Use pencil and ruler to lightly sketch a leaf shape in the center of each acetate sheet.
- Trace over the sketch with black marker, then fill sections with colored markers.
- Add veins and texture with fine black lines, letting ink dry for one minute.
- Punch a hole in the top corner of each sheet.
- Stack the sheets and secure with the binder ring.
- Clip the ring to a curtain rod with clothespins so light shines through all layers.


Each of these suncatchers brings a little more stillness into your days. Pick one that calls to you and let the light do the rest.