15 Easy Thanksgiving Crafts for Kids to Make Before Dinner

The afternoon before dinner is full of warmth, chatter, and just enough waiting to fill with simple joy. These crafts keep little hands busy and hearts happy, turning everyday supplies into keepsakes that belong on the table or the fridge.
Each one is made for short attention spans and eager minds, using materials you likely already have. They’re not just decorations, they’re moments captured in glue, paint, and paper.
1. Handprint Turkey Placemats
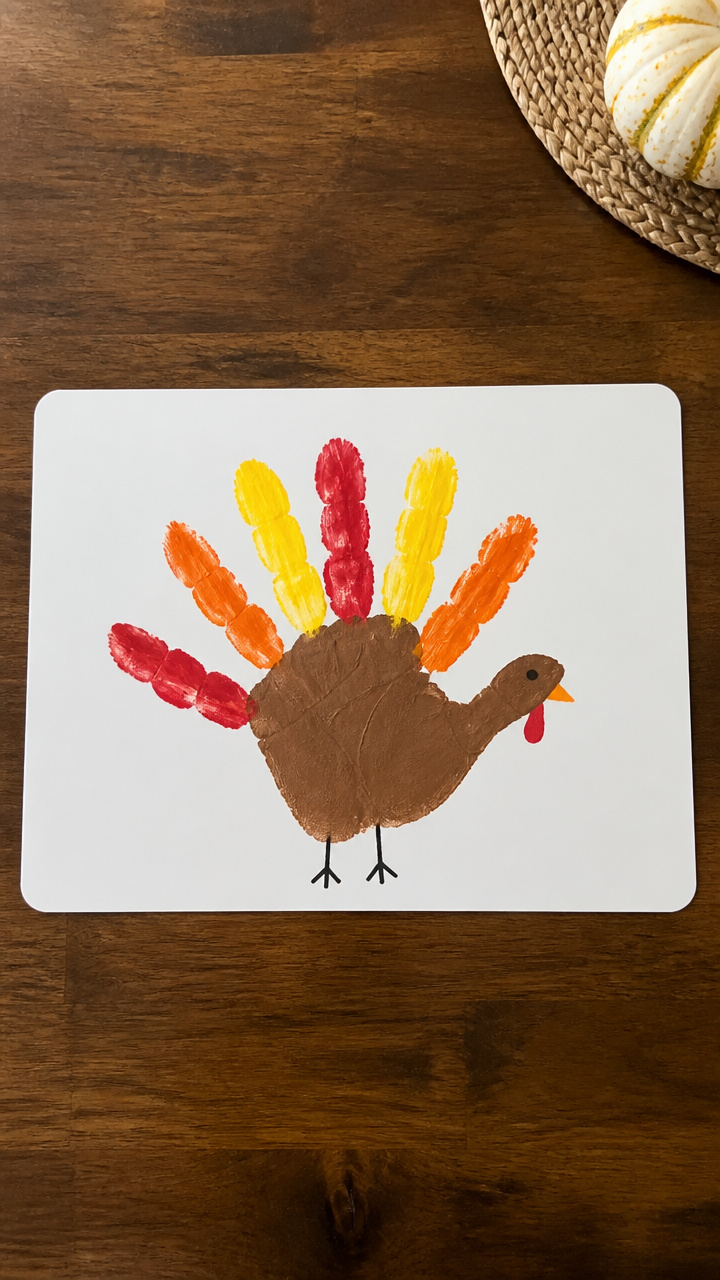
Bright handprint turkeys double as personalized placemats that welcome every guest with a child’s proud artwork. Washable and reusable with lamination.
Materials Needed
- A4 white cardstock, 1 sheet per child
- Washable brown, red, yellow, and orange finger paints
- Paintbrush (1/2 inch flat)
- Black fine-tip marker
- Clear contact paper, 18-inch roll
- Scissors
How to Make It
- Press the child’s palm and fingers into brown paint, then firmly stamp onto the cardstock to create the turkey body and tail feathers.
- Use the brush to paint a small red wattle and yellow beak near the base of the handprint, letting fingers form the feathers.
- Once dry, outline the hand with a black marker to define the shape and add eyes and a beak detail.
- Cut a piece of contact paper slightly larger than the cardstock and press it sticky-side down over the front to laminate.
- Trim the edges and set aside to use at the table.


2. Pinecone Feeder Ornaments
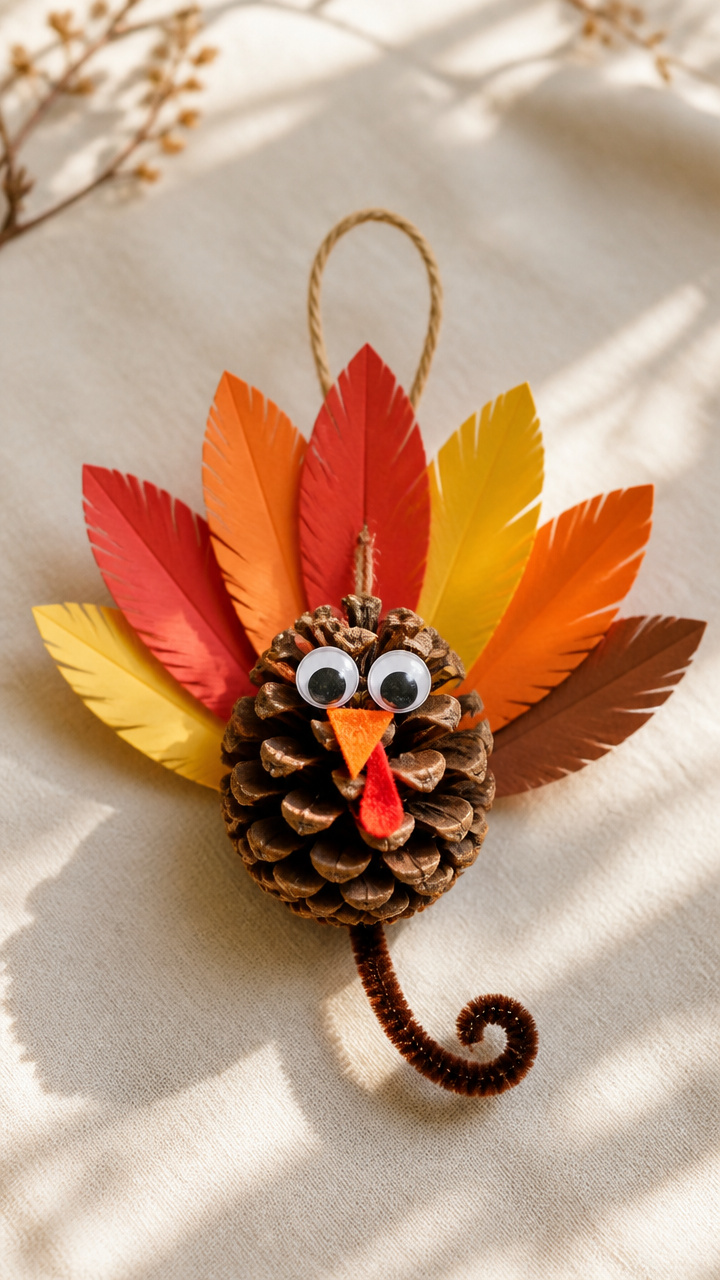
Mini pinecone birds with paper feathers make sweet hanging decorations that flutter near windows or the centerpiece. Lightweight and nature-inspired.
Materials Needed
- Small pinecones, 1 per child
- Colored construction paper (red, orange, yellow, brown), 4×4 inch squares
- White school glue
- Googly eyes, 12mm, 1 pair per craft
- Brown chenille stems, 6 inches long, 1 per craft
- Scissors
- Hole punch
- Red yarn, 12 inches per craft
How to Make It
- Cut feather shapes from the construction paper, about 3 inches long with tapered ends, 5 per bird.
- Glue the feathers in a fan shape at the bottom of the pinecone to form the tail.
- Glue on googly eyes near the top and a small triangle beak cut from orange paper.
- Bend the chenille stem into a zigzag and glue it below the eyes for legs.
- Punch a hole at the top, thread yarn through, and tie a knot to hang.


3. Crayon-Resist Leaf Cards
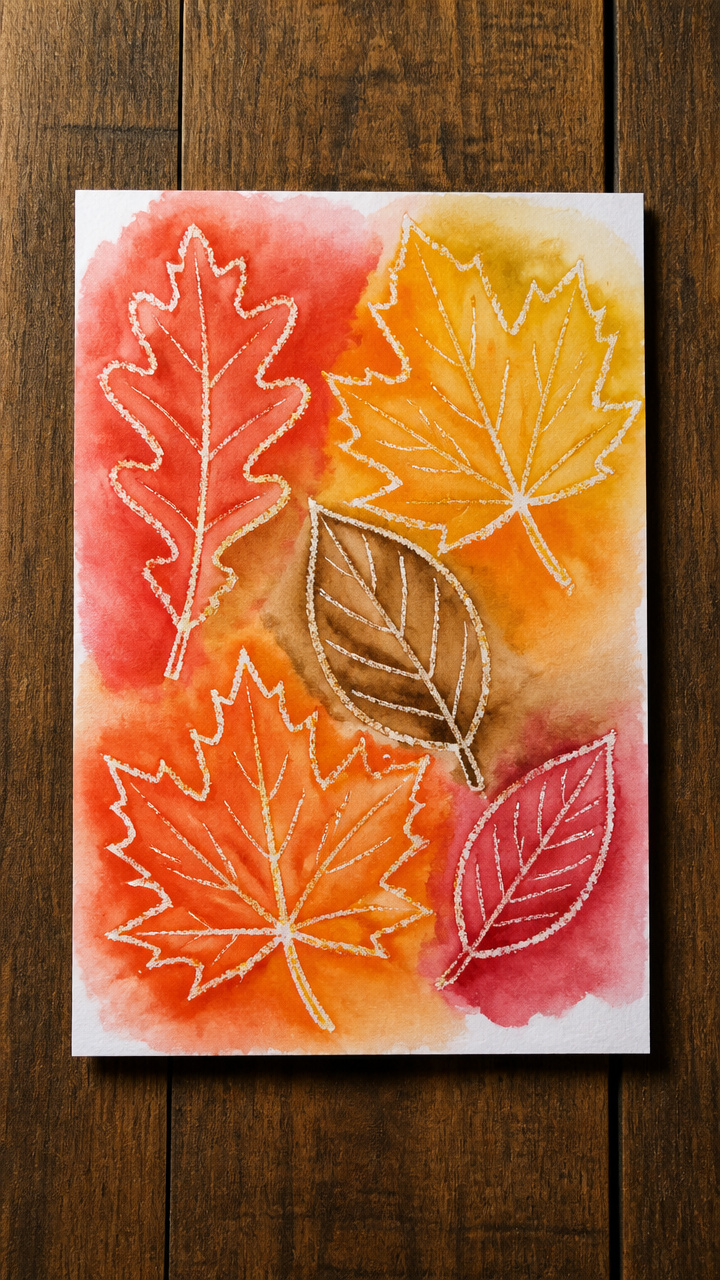
Waxy leaf outlines bloom into watercolor masterpieces, creating heartfelt thank-you cards for relatives. The surprise of color delights every child.
Materials Needed
- A5 white drawing paper, 1 sheet per child
- Autumn-colored crayons (red, orange, yellow, brown)
- Watercolor paint set
- Small watercolor brush (size 4 round)
- Cup of water
- Paper towel
How to Make It
- Draw 3–4 large leaf shapes on the paper using the crayons, pressing firmly to lay down thick wax.
- Dip the brush in water, then in one paint color, and wash it over the entire leaf and surrounding area.
- Let the paint glide over the crayon lines, watching the leaves resist the color and stand out clearly.
- Rinse the brush and repeat with other colors, blotting excess water on the paper towel.
- Set aside to dry completely before writing a message inside.


4. Popsicle Stick Corn Holders
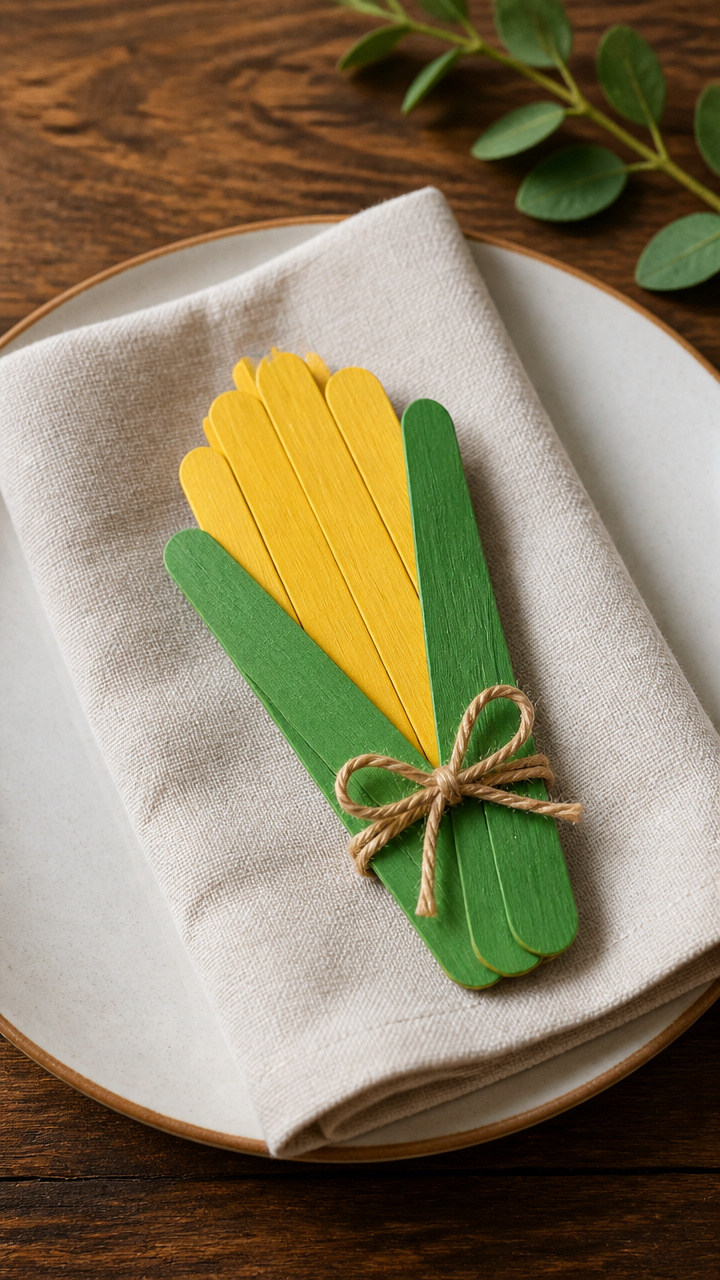
Colorful stick bundles shaped like corn on the cob double as napkin rings or utensil holders. Sturdy and festive for the kids’ table.
Materials Needed
- 5 flat wooden craft sticks per child
- Yellow acrylic paint
- Green acrylic paint
- Paintbrush (1/2 inch flat)
- White school glue
- Ruler
- Rubber band
- Pencil
How to Make It
- Lay 4 sticks side by side and use the ruler to mark 1 inch from each end on the top and bottom sticks.
- Glue the fifth stick vertically across the bundle at the marks to form a rectangle frame.
- Hold in place with a rubber band for 5 minutes until the glue sets.
- Paint the inside sticks yellow to look like corn kernels, leaving the outer frame unpainted.
- Paint the outer frame green to resemble husk, and let dry for 20 minutes before removing the rubber band.


5. Paper Plate Wreaths
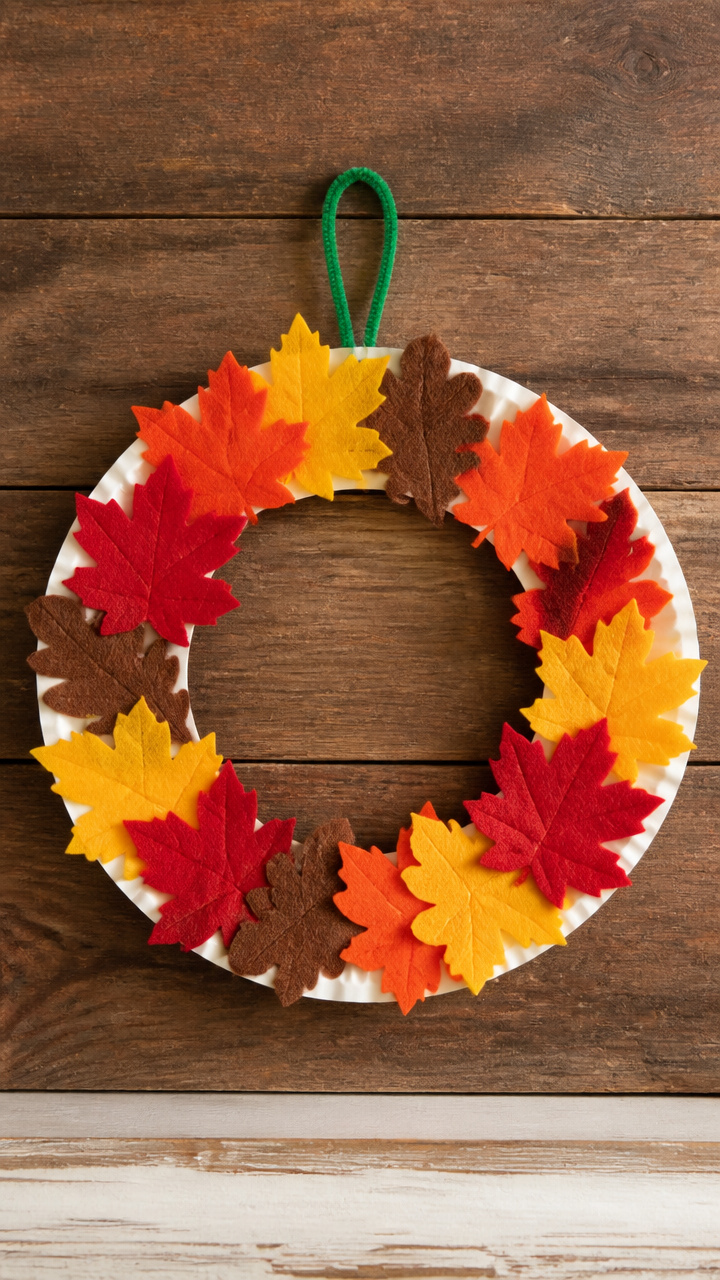
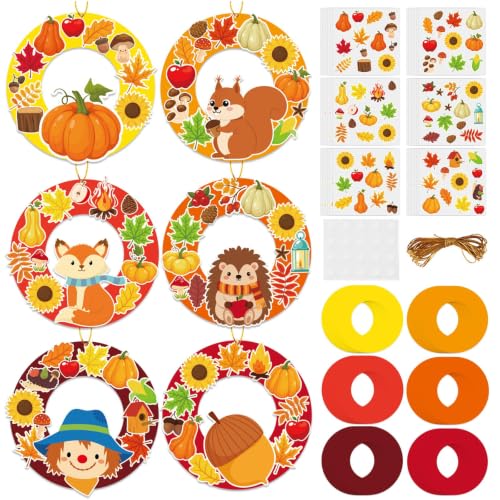
Simple paper plate bases become autumn wreaths with hand-cut felt leaves. Soft texture and bold colors brighten any chair back.
Materials Needed
- White paper plates, 1 per child
- Felt sheets in red, orange, yellow, and brown, 6×6 inch squares
- Scissors
- Hot glue gun with low-temp glue sticks
- Green pipe cleaner, 12 inches long
- Pencil
How to Make It
- Cut a 2-inch circle from the center of the paper plate to create a wreath base.
- Draw leaf shapes on the felt with a pencil and cut them out, making 6–8 leaves per wreath.
- Use the hot glue gun to attach the leaves around the outer edge of the plate, overlapping slightly.
- Twist the ends of the pipe cleaner together to form a loop and glue it to the back for hanging.
- Let the glue cool completely before hanging.


6. Salt Dough Ornaments
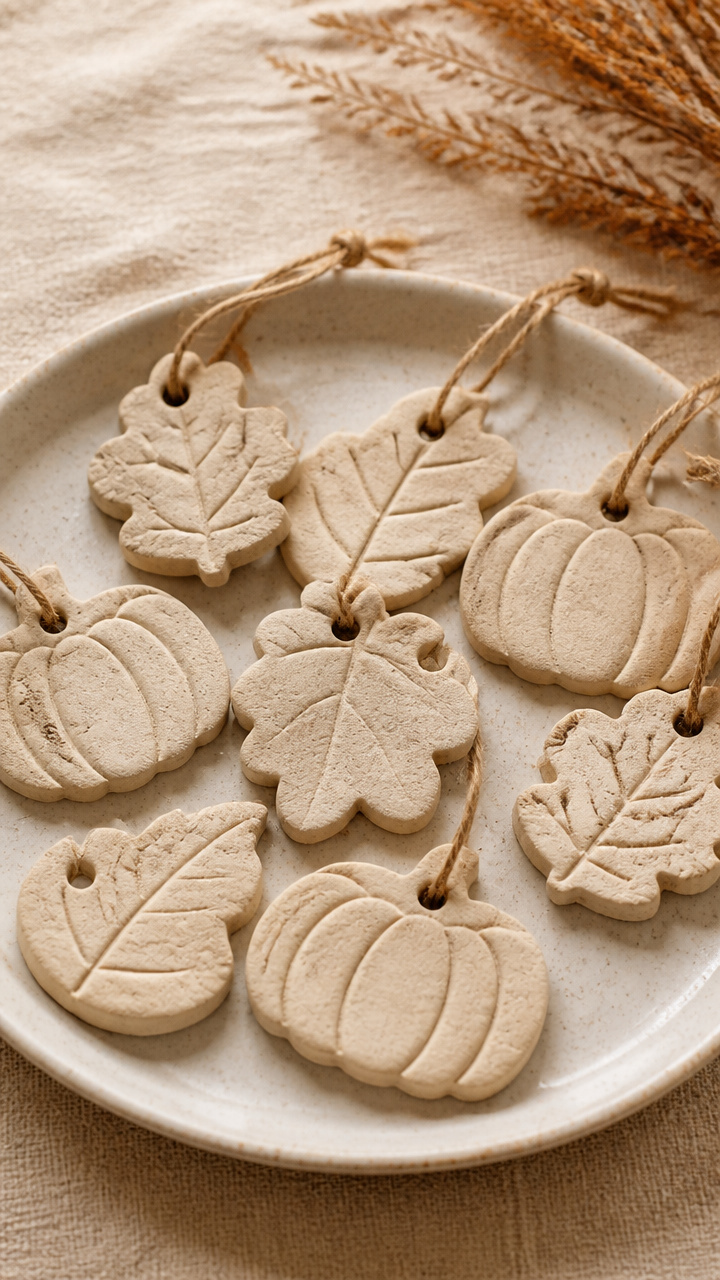
Scented dough shaped into leaves and pumpkins bakes into keepsakes that last for years. Kids love rolling and stamping their designs.
Materials Needed
- 2 cups all-purpose flour
- 1 cup table salt
- 3/4 cup warm water
- Mixing bowl
- Rolling pin
- Leaf-shaped cookie cutters
- Straw
- Baking sheet
- Parchment paper
- Acrylic paint (brown, orange, gold)
- Paintbrush
- Red yarn, 8 inches per ornament
How to Make It
- Mix flour, salt, and water in a bowl until a smooth dough forms, kneading by hand for 2 minutes.
- Roll the dough to 1/4 inch thick on a floured surface and press out shapes with cookie cutters.
- Use a straw to poke a hole near the top edge of each shape for hanging.
- Place on a parchment-lined baking sheet and bake at 250°F for 2 hours until hard.
- Let cool, then paint with autumn colors and thread yarn through the hole after drying.


7. Cork Turkey Napkin Rings
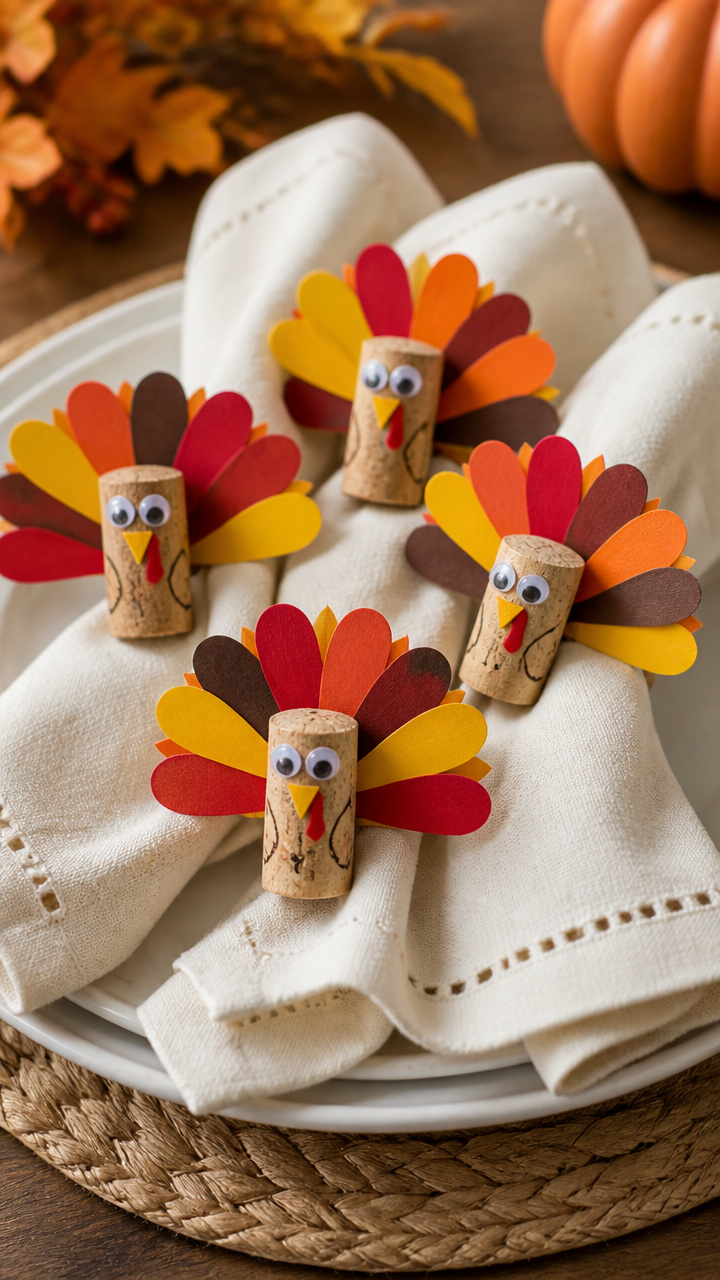
Wine corks turn into tiny turkeys with feathered paper collars. Perfect for dressing up napkins with a woodland touch.
Materials Needed
- Wine corks, 1 per child
- Colored cardstock (red, orange, yellow, brown), 2×6 inch strips
- White school glue
- Googly eyes, 6mm, 1 pair per craft
- Black fine-tip marker
- Scissors
- Hole punch
How to Make It
- Cut 5 feather strips from the cardstock, each 1 inch wide and 4 inches long, tapering the ends.
- Glue the feathers in a fan shape to the back of the cork.
- Glue googly eyes near the top front and add a small orange triangle beak with the marker.
- Cut a 1-inch red wattle from cardstock and glue it under the beak.
- Punch a hole in the center of a 2-inch paper circle and slide it over the cork base to form a ring.


8. Tissue Paper Windows
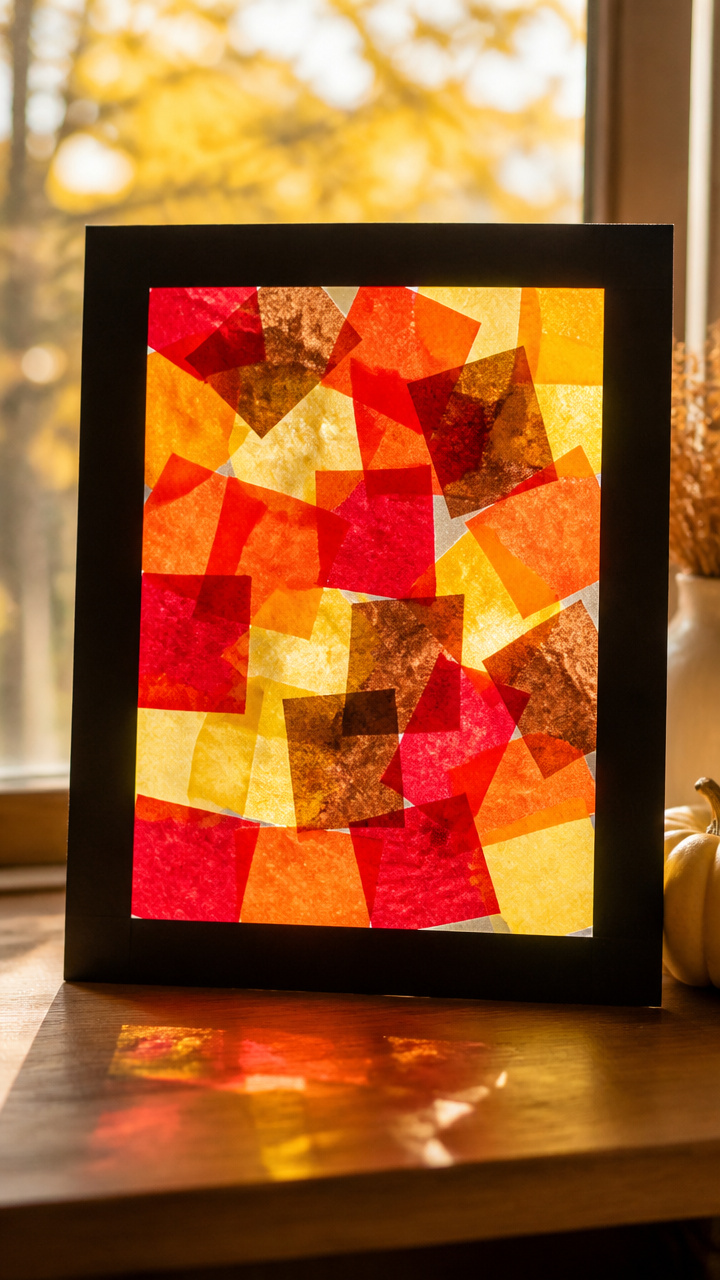
Bright tissue squares layered on contact paper glow like stained glass when hung in sunny windows. No mess, no water, just color.
Materials Needed
- Clear contact paper, 12×12 inch sheet
- Autumn tissue paper (red, orange, yellow, brown), cut into 1-inch squares
- Scissors
- Roll of tape
- Black construction paper, 12×12 inch sheet
How to Make It
- Peel the backing off the contact paper and lay it sticky-side up on a flat surface.
- Place tissue paper squares close together on the sticky surface to fill the sheet, overlapping slightly.
- Once full, carefully place the second contact paper sheet on top to seal, if double-sided, or use black paper as backing.
- Trim the edges with scissors and tape the corners to a window with clear tape.
- Let the light shine through to show the vibrant colors.


9. Pumpkin Name Tags
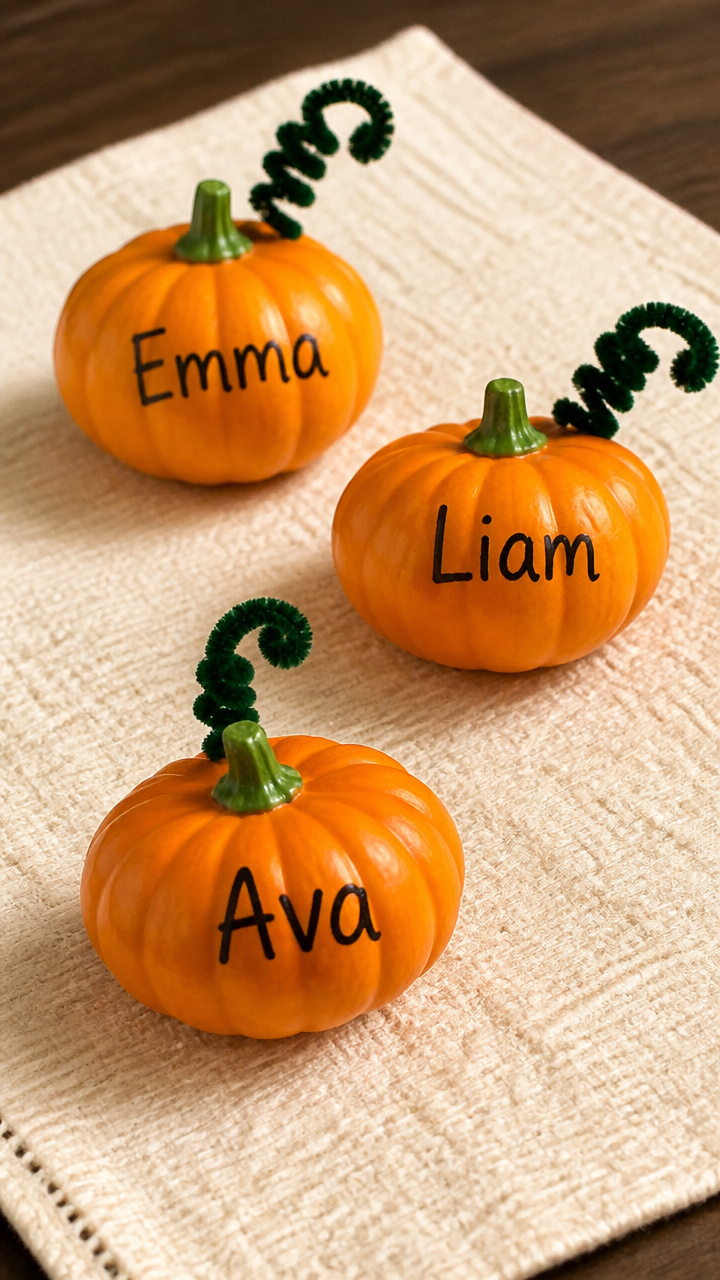
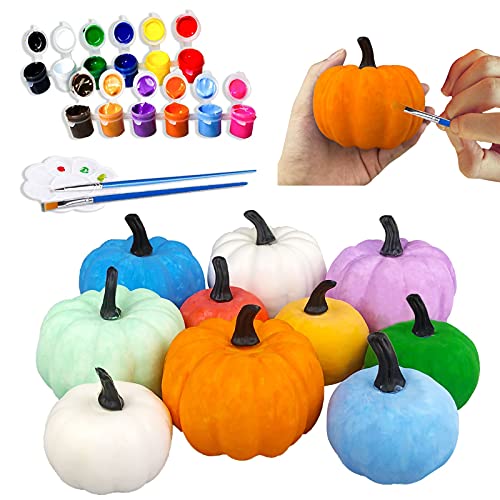
Mini painted pumpkins with handwritten names guide guests to their seats. Real mini gourds add rustic charm to the table.
Materials Needed
- Mini pumpkins, 1 per child
- Acrylic paint (orange, green, brown)
- Paintbrush (size 2 round)
- Fine-tip black marker
- Green chenille stem, 4 inches long
- Paper towel
- Cup of water
How to Make It
- Paint each pumpkin orange with the brush, covering all sides, and let dry for 15 minutes.
- Paint a small green stem at the top and add a brown vine twist with the chenille stem pressed into the paint.
- Once dry, write a guest’s name in bold letters with the black marker.
- Rinse the brush between colors and wipe the cup water into the paper towel as needed.
- Set each tag beside a plate before dinner.


10. Fingerprint Corn Art
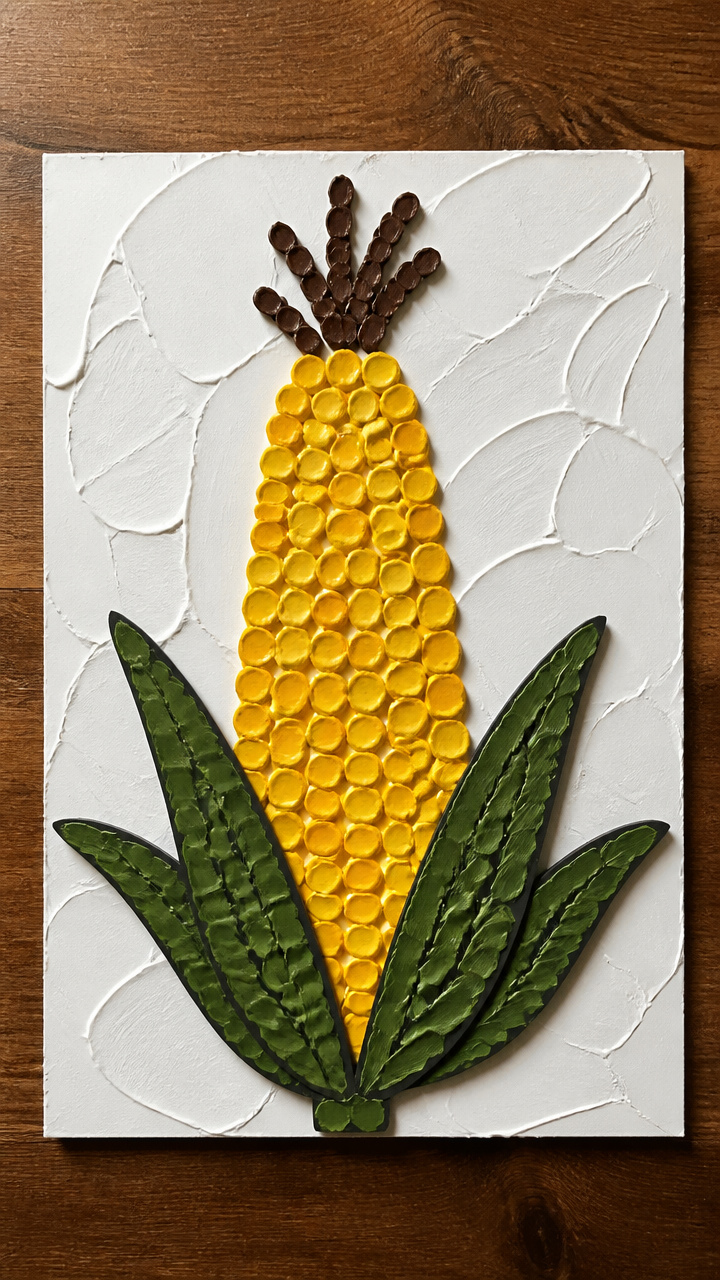
Rows of golden fingerprints form kernels on black paper stalks, creating bold wall art. Quick to stamp, long to admire.
Materials Needed
- Black construction paper, 8×10 inch sheet
- Yellow washable ink pad
- Green washable ink pad
- Cotton swabs
- White school glue
- Brown crayon
How to Make It
- Use the yellow ink pad to press fingerprints in staggered rows on the black paper to form corn kernels.
- Let the ink dry for 2 minutes, then use the green ink pad to stamp two curved leaves at the top of the ear.
- Dip a cotton swab in white glue and draw thin vertical lines through the center of the kernel rows to form the cob.
- Rub a brown crayon along the edge of the cob lines to add shadow and depth.
- Set aside to dry flat for 10 minutes before displaying.


11. Yarn-Wrapped Gratitude Jars
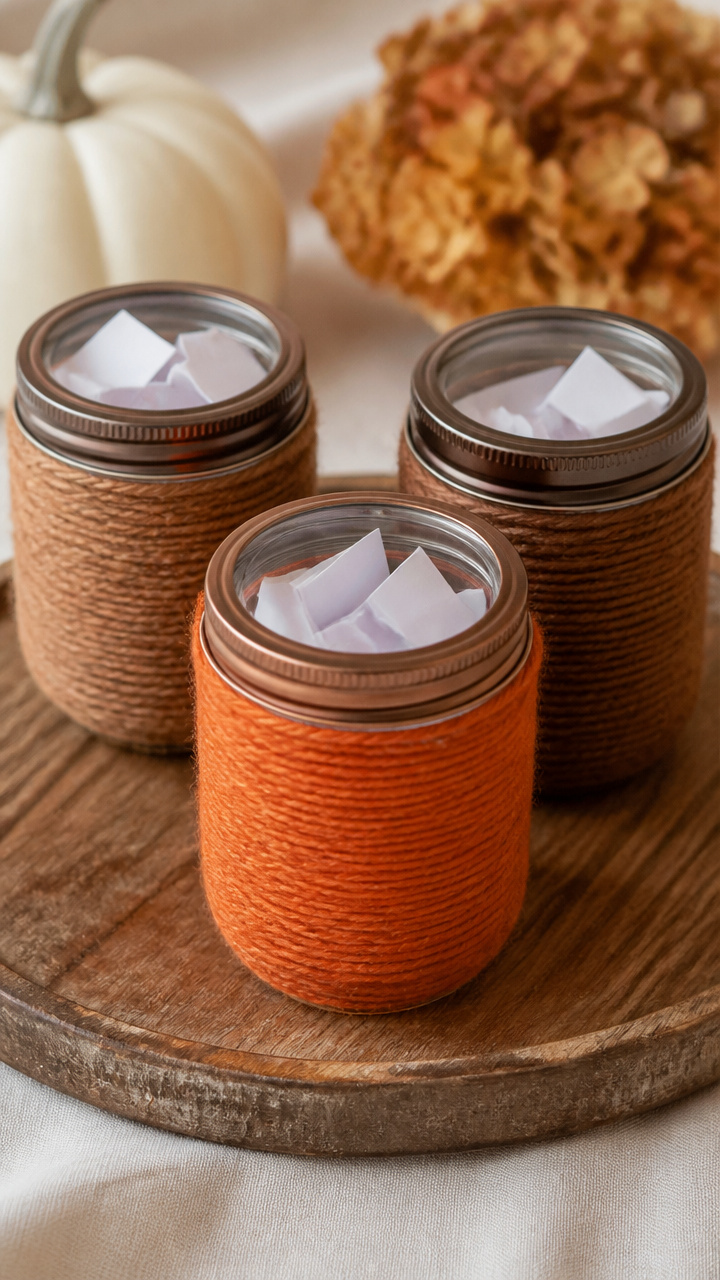
Glass jars wrapped in warm yarn hold folded notes of thanks. Soft texture and personal messages make them meaningful centerpieces.
Materials Needed
- Small glass jars with lids, 1 per child
- Orange or brown yarn, 20 yards per jar
- White school glue
- Paintbrush (1/2 inch flat)
- Small slips of white paper
- Pencil
How to Make It
- Brush a thin layer of glue onto the lower third of the jar and begin wrapping the yarn tightly around it.
- Continue wrapping, adding more glue every inch to keep the yarn in place, overlapping slightly.
- Stop when you reach the top of the glued section and cut the yarn, securing the end with a dab of glue.
- Let the glue dry for 15 minutes, then fill the jar with handwritten notes of things you’re thankful for.
- Screw the lid on and place it on the table for guests to read.
12. Leaf Rubbing Frames
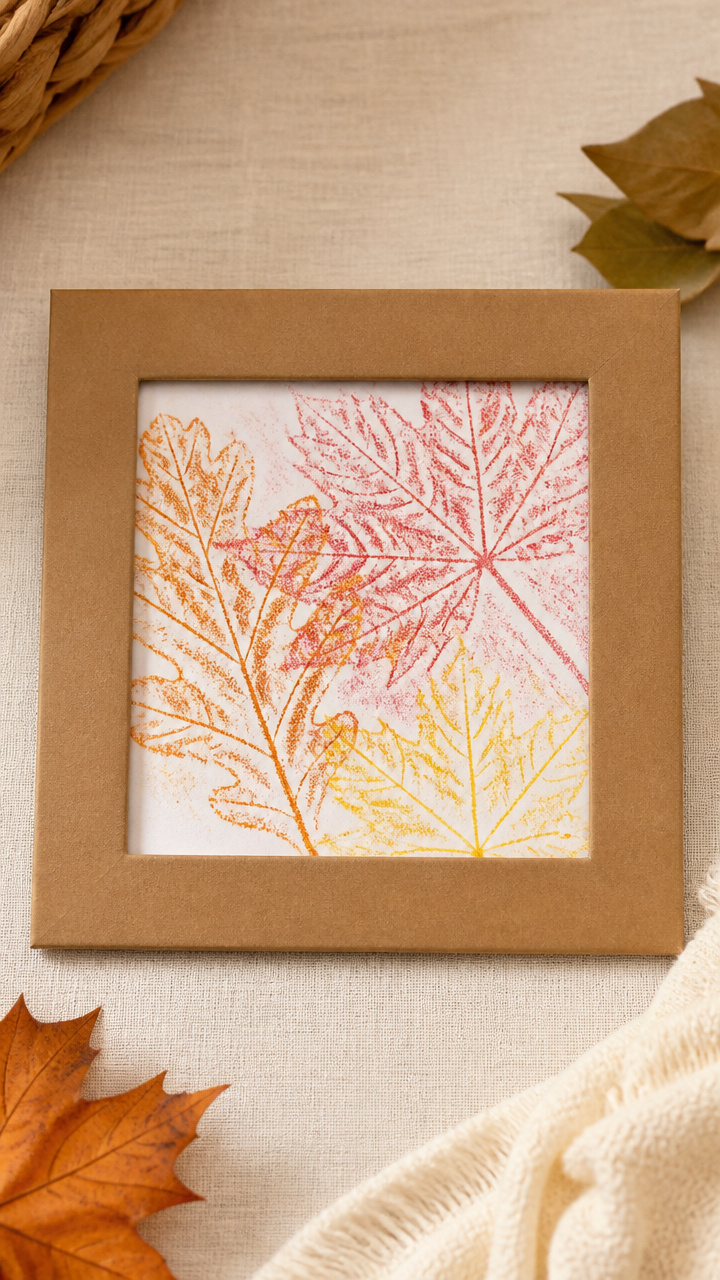
Crayon rubbings of real leaves become framed art under cardboard mats. A quiet craft that celebrates outdoor textures.
Materials Needed
- Sturdy cardboard, 6×6 inch squares
- Real fallen leaves, 1 per child
- White drawing paper, 5×5 inch
- Brown, red, and yellow crayons (peeled)
- Scissors
- Glue stick
- Clipboard or flat board
How to Make It
- Place a leaf under the drawing paper on the clipboard and hold it still with one hand.
- Use the side of a peeled crayon to rub gently over the paper until the leaf veins and shape appear.
- Repeat with 2–3 colors to layer texture, using a fresh paper for each rubbing.
- Cut a 1-inch frame from the cardboard by removing a 3×3 inch center square.
- Glue the rubbing to the back of the frame and set aside to dry.
13. Cereal Chain Garlands
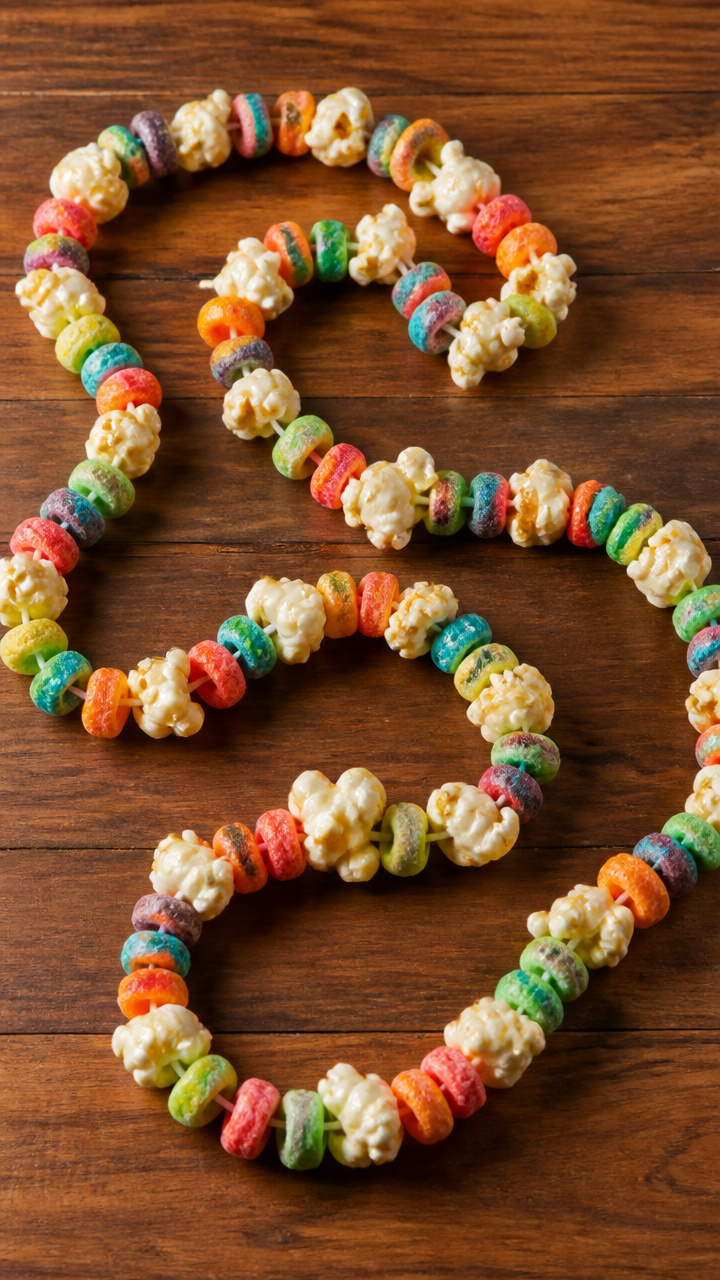
Buttered popcorn and fruit loops strung into bright chains drape over doorways or mantels. Crunchy, cheerful, and fun to make.
Materials Needed
- Plain popped popcorn, 2 cups
- Rainbow fruit loops cereal, 1 cup
- Butter, 2 tablespoons, melted
- Large needle
- White yarn, 3 feet per child
- Bowl
- Paintbrush
How to Make It
- Toss popcorn and fruit loops in melted butter using the bowl, coating lightly with the brush.
- Thread the yarn through the needle and knot one end.
- String cereal and popcorn pieces alternately onto the yarn, pushing them close together.
- Tie the ends together when full, or leave open to hang with tape.
- Let dry for 1 hour before draping in place.


14. Cardboard Tube Turkeys
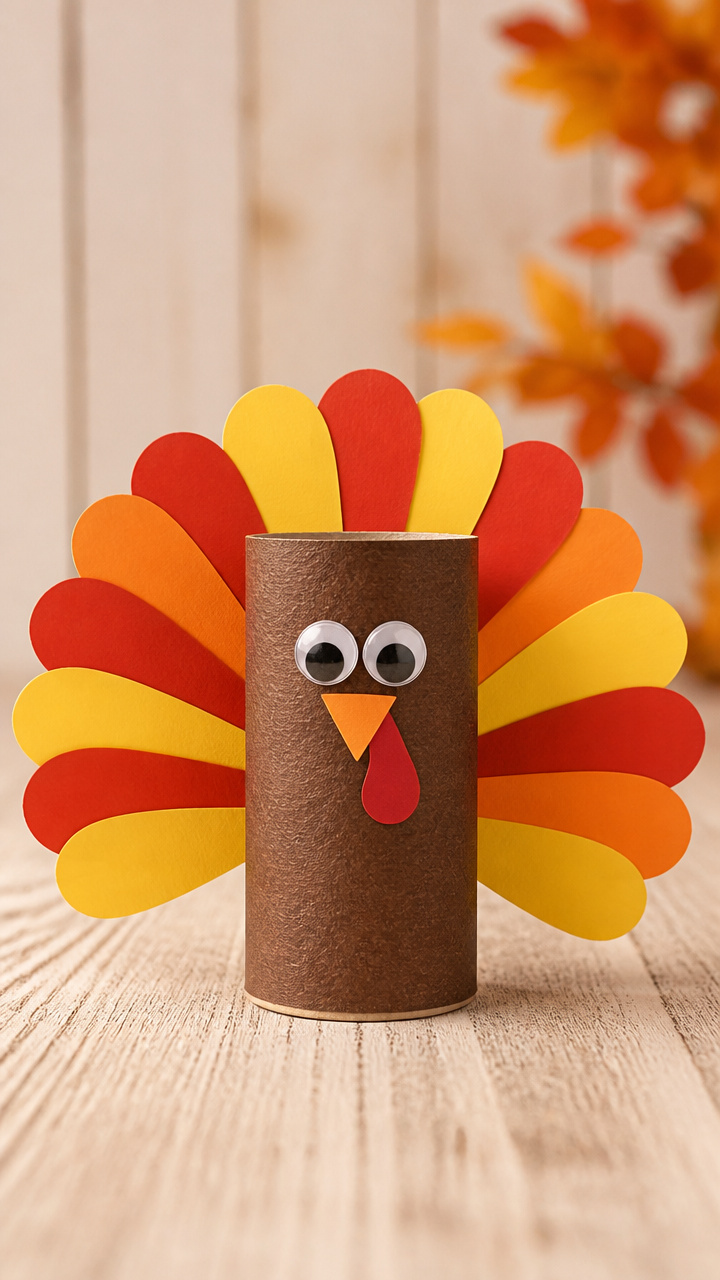
Toilet paper rolls become plump turkeys with feather fans and wobbly eyes. Stand them on the sideboard for a parade of birds.
Materials Needed
- Toilet paper rolls, 1 per child
- Colored construction paper (brown, red, orange, yellow), 6×6 inch squares
- Googly eyes, 10mm, 1 pair per craft
- White school glue
- Scissors
- Pencil
- Glue stick
How to Make It
- Cut feather shapes from the colored paper, 5 per turkey, and arrange them in a fan.
- Glue the feather base to the back of the tube using the glue stick.
- Cut a small circle from brown paper and glue it to the front of the tube for the head.
- Add googly eyes and a triangle beak cut from orange paper with the pencil.
- Cut a red wattle from paper and glue it under the beak, letting it hang down.


15. Apple Stamp Centerpieces
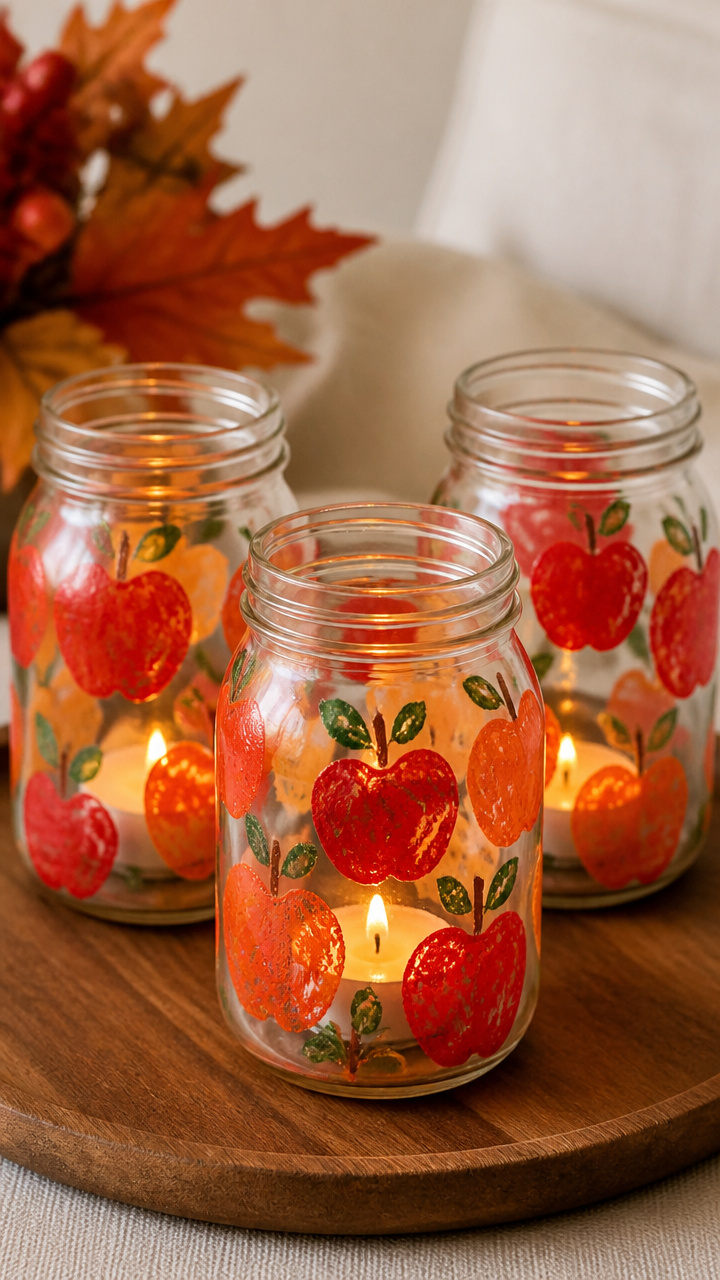
Halved apples dipped in paint make rosy prints on mason jars, turning them into candle holders. Juicy scent and bold shapes delight.
Materials Needed
- Red apples, 1 per child
- Green acrylic paint
- Orange acrylic paint
- Small foam brushes
- Mason jars, 8 oz, 1 per child
- Tea light candles
- Paper plate
- Paper towel
How to Make It
- Cut the apple in half crosswise and place the cut side on the paper plate.
- Use the foam brush to paint the cut surface with orange paint, covering evenly.
- Press the apple firmly onto the jar and lift straight up to leave a print.
- Dip the stem end in green paint and stamp a small dot above the print for a leaf.
- Let dry for 10 minutes, then place a tea light inside and light before dinner.


These crafts aren’t just about passing time, they’re about making memories with glue-sticky fingers and proud grins. Pick one or try them all, and let the table tell a story of hands that helped.