18 January Craft Ideas for Kids Using Paper Plates

Paper plates are more than just dinnerware. With a little paint, glue, and imagination, they become puppets, animals, masks, and galaxies that spark joy long after the meal is done.
You don’t need fancy supplies or a studio to start crafting. Just gather a few paper plates and common household items, and let your kids turn simple circles into creations full of color and character.
1. Owl Paper Plate Mask
Easy
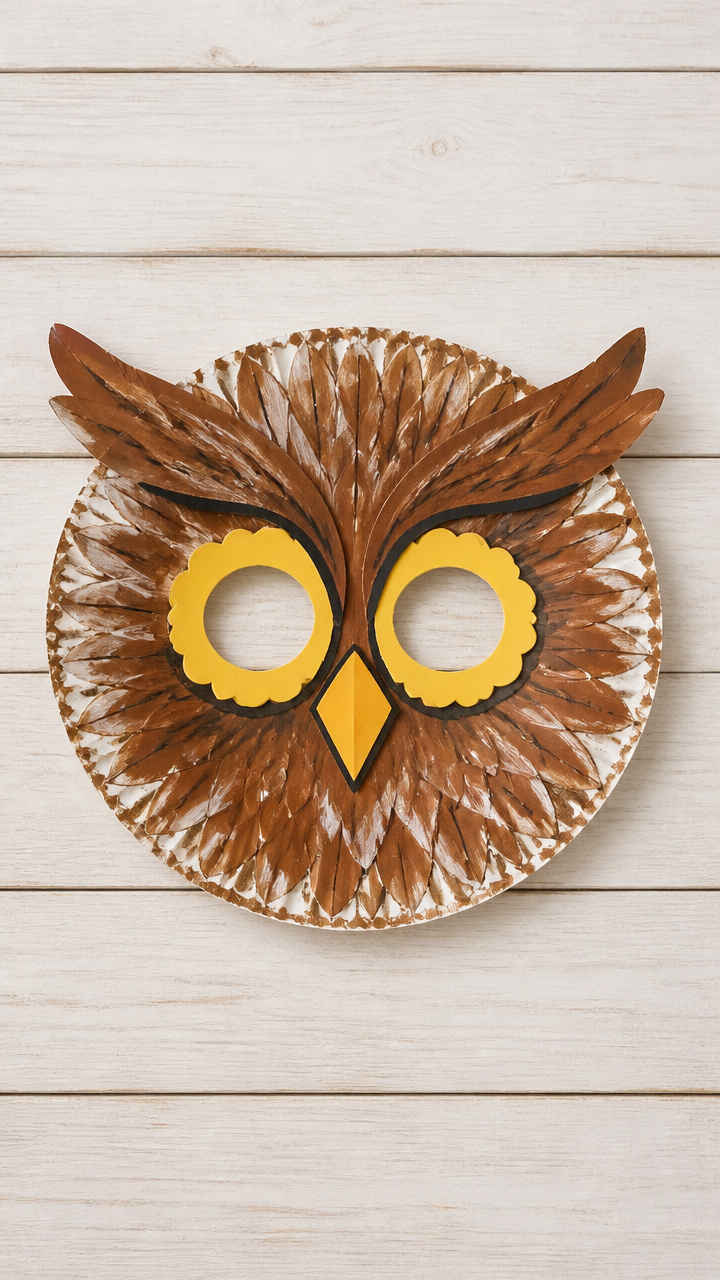
Big round eyes and fluffy feathers make this mask a favorite for pretend play adventures in the backyard forest.
Materials Needed
- 1 white paper plate
- brown acrylic paint
- yellow craft foam sheet
- black marker
- 1 pair child-safe scissors
- white glue
- elastic string (30 cm)
- paintbrush
How to Make It
- Paint the entire front of the paper plate brown using a paintbrush and let it dry completely for 15 minutes.
- Cut two large circles from yellow craft foam for eyes and one triangle beak, then draw pupils with the black marker.
- Glue the eyes and beak in the center of the dried plate, slightly above middle.
- Punch one hole on each side of the plate near the edge, thread the elastic through, and tie knots to fit over the head.


2. Rainbow Paper Plate Suncatcher
Easy
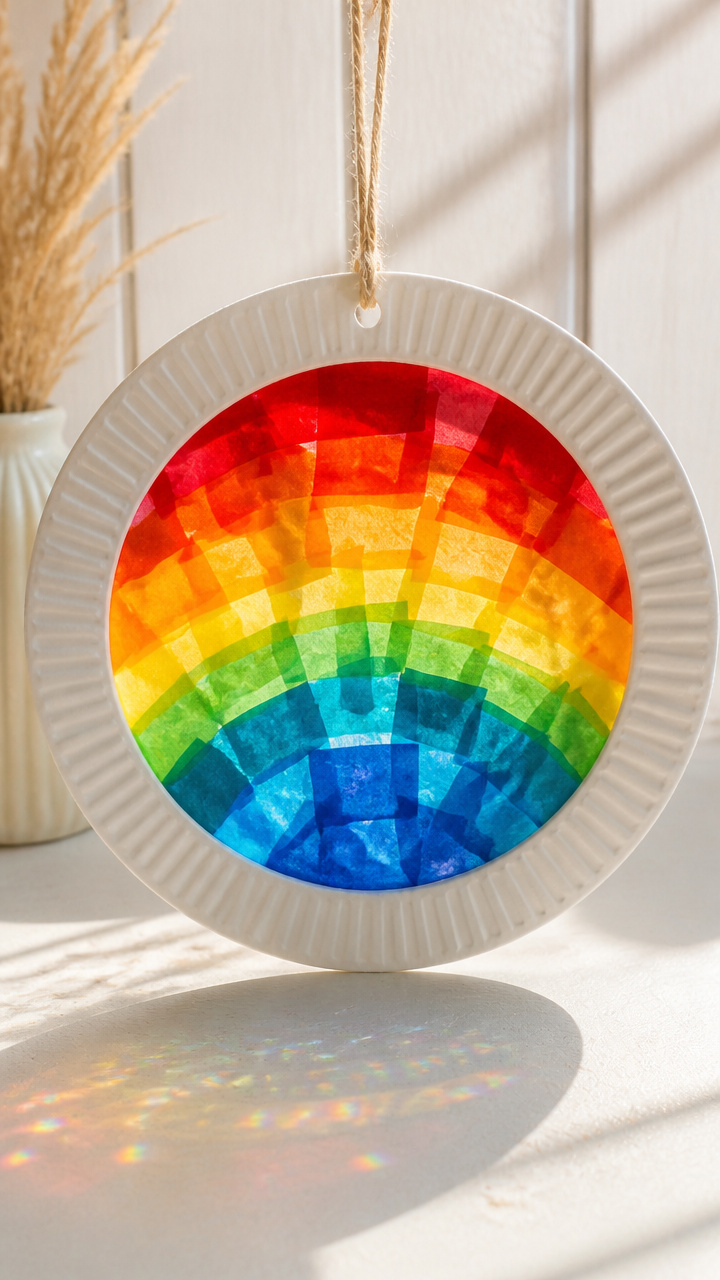
Sunlight dances through translucent strips of colored tissue paper layered on a plate frame.
Materials Needed
- 1 white paper plate
- red tissue paper sheet
- orange tissue paper sheet
- yellow tissue paper sheet
- green tissue paper sheet
- blue tissue paper sheet
- purple tissue paper sheet
- scissors
- white glue
- paintbrush
- clear plastic wrap (15×15 cm)
- hole punch
- ribbon (20 cm)
How to Make It
- Cut the center out of the paper plate, leaving a ring about 4 cm wide.
- Tear small pieces of each color tissue paper and arrange them to cover the open center area.
- Brush a thin layer of white glue over the tissue paper pieces and press clear plastic wrap over top to seal.
- Let dry flat for 20 minutes, punch a hole at the top, and attach ribbon for hanging.


3. Paper Plate Wind Spinner
Moderate
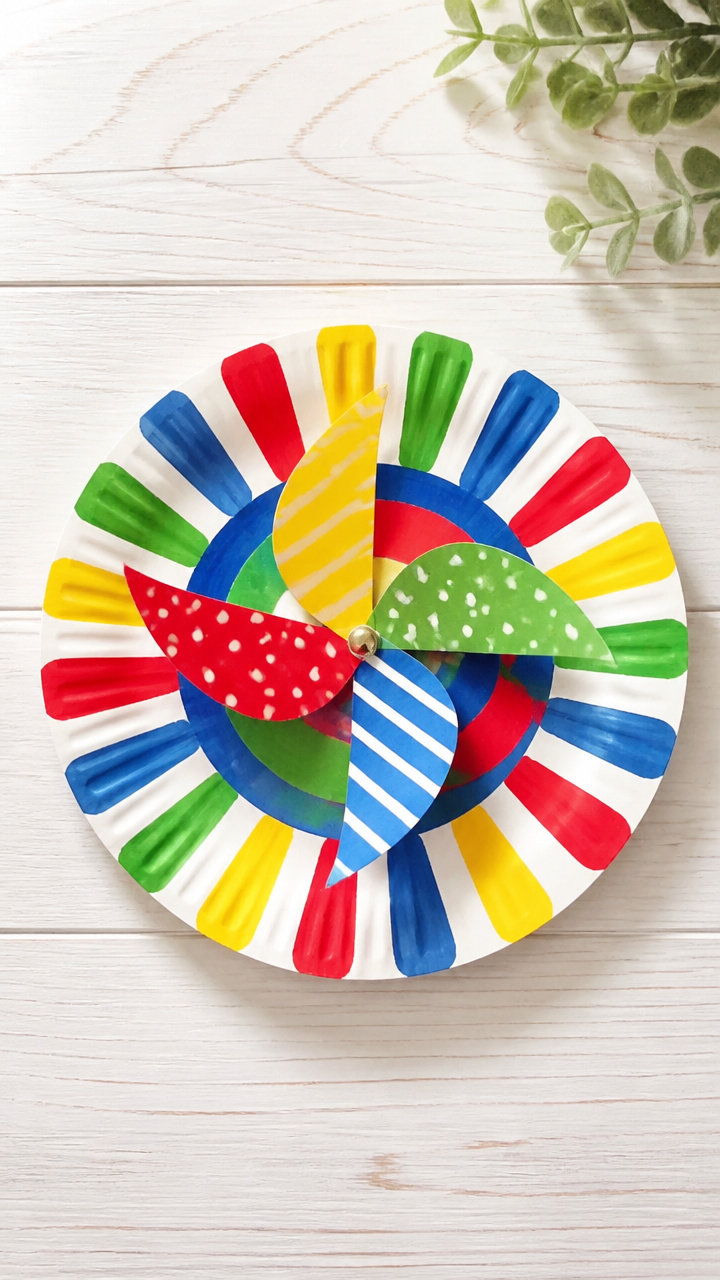
Spinning arms catch the breeze and flash bright colors when hung outside on a sunny day.
Materials Needed
- 1 sturdy paper plate
- crayons (red, blue, yellow, green)
- ruler
- pencil
- scissors
- brad fastener (2 inch)
- pushpin
- straw (15 cm)
- glue
How to Make It
- Draw lines from the center to the edge every 45 degrees to divide the plate into eight equal sections.
- Color alternating sections with crayons in red, blue, yellow, and green, pressing firmly.
- Cut along each line up to 2 cm from the center point to create spinning flaps.
- Push a brad through the center of the plate and attach a short piece of straw behind it to stabilize on a stick.


4. Paper Plate Octopus Puppet
Easy
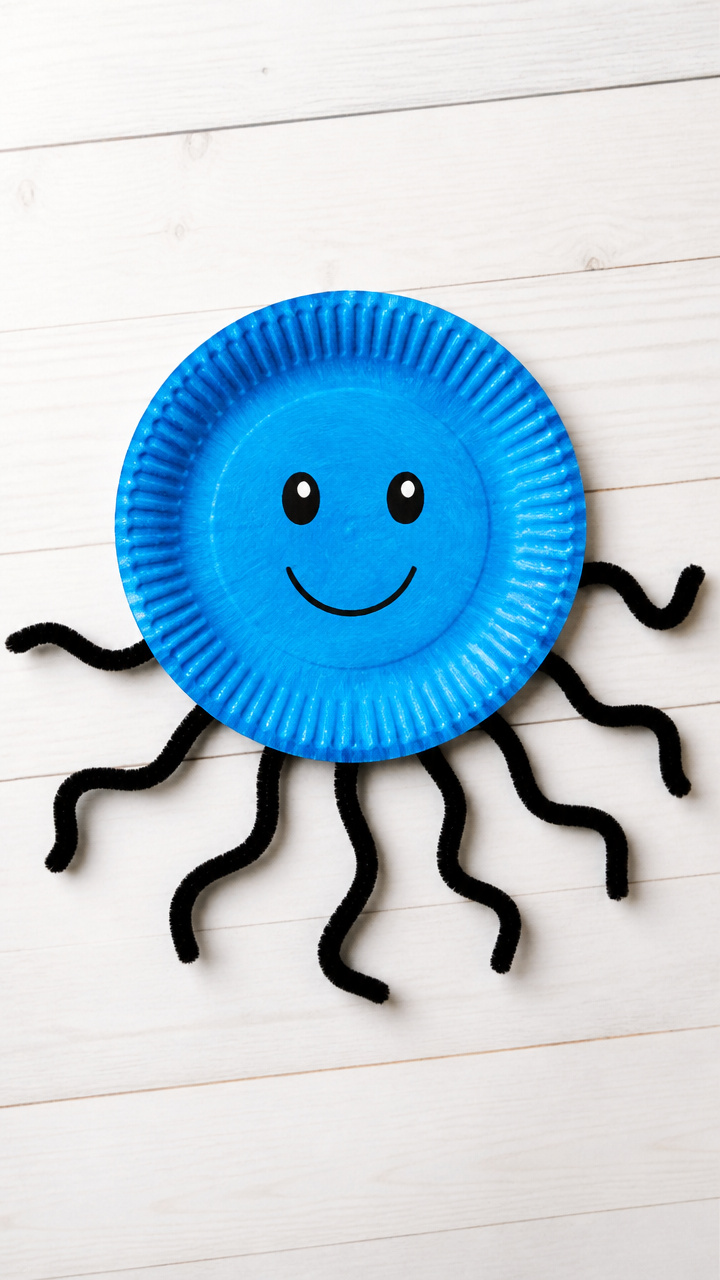
Wiggly tentacles and a smiling face bring this undersea friend to life in your hand.
Materials Needed
- 1 white paper plate
- blue acrylic paint
- paintbrush
- black marker
- glue
- 8 pipe cleaners
- googly eyes (2, 1 inch)
- child-safe scissors
How to Make It
- Paint the back of the paper plate blue and let it dry for 10 minutes.
- Turn the plate over so the painted side is now the body, and draw a smiling face near the top.
- Glue two googly eyes just above the mouth.
- Push eight pipe cleaners through the edge of the plate underside to form wriggling tentacles.


5. Snowman Paper Plate Ornament
Moderate
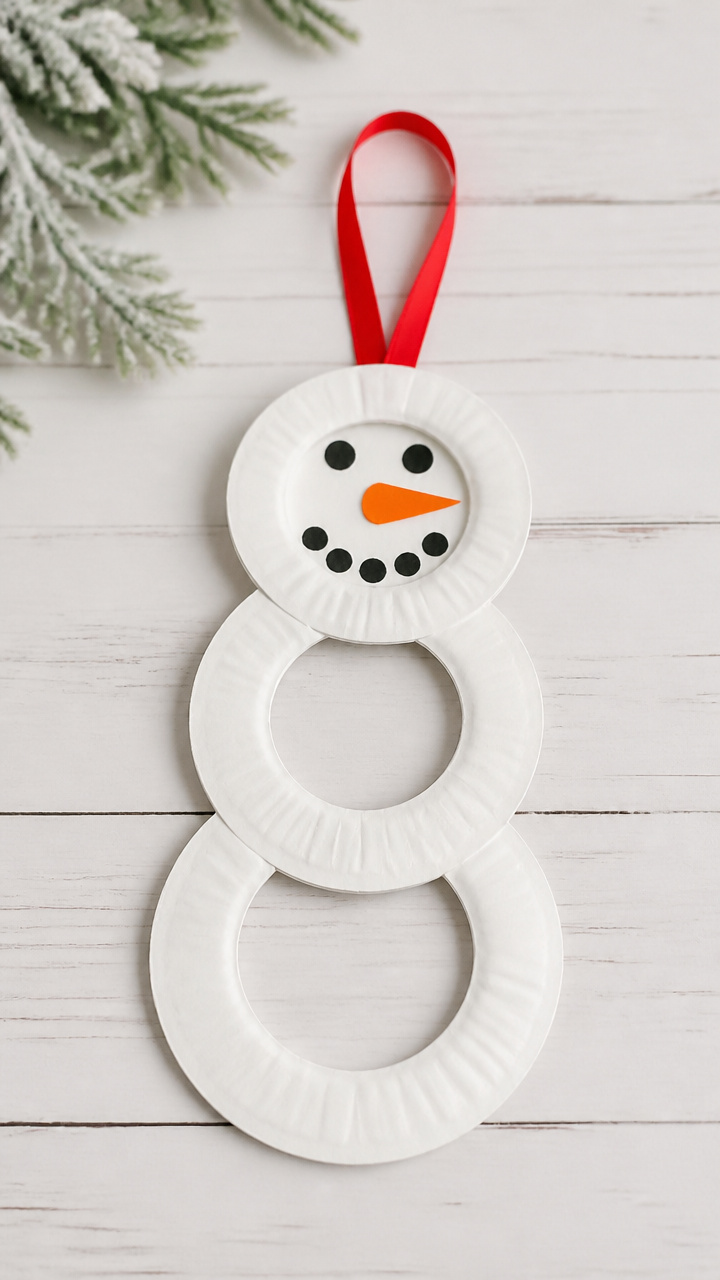
Three stacked paper plate rings become a frosty friend perfect for holiday tree decorating.
Materials Needed
- 3 white paper plates
- black acrylic paint
- orange craft foam
- glue
- paintbrush
- ribbon (15 cm)
- hole punch
- button (1 inch, black)
How to Make It
- Cut out the centers of all three plates to leave rings, each about 3 cm wide.
- Stack the rings largest to smallest to form a snowman shape and glue them together.
- Paint two eyes and a mouth on the top ring with black paint and glue a button below for buttons.
- Cut a carrot-shaped nose from orange craft foam and glue it to the middle ring, then punch a hole and add ribbon.


6. Butterfly Paper Plate Wings
Easy
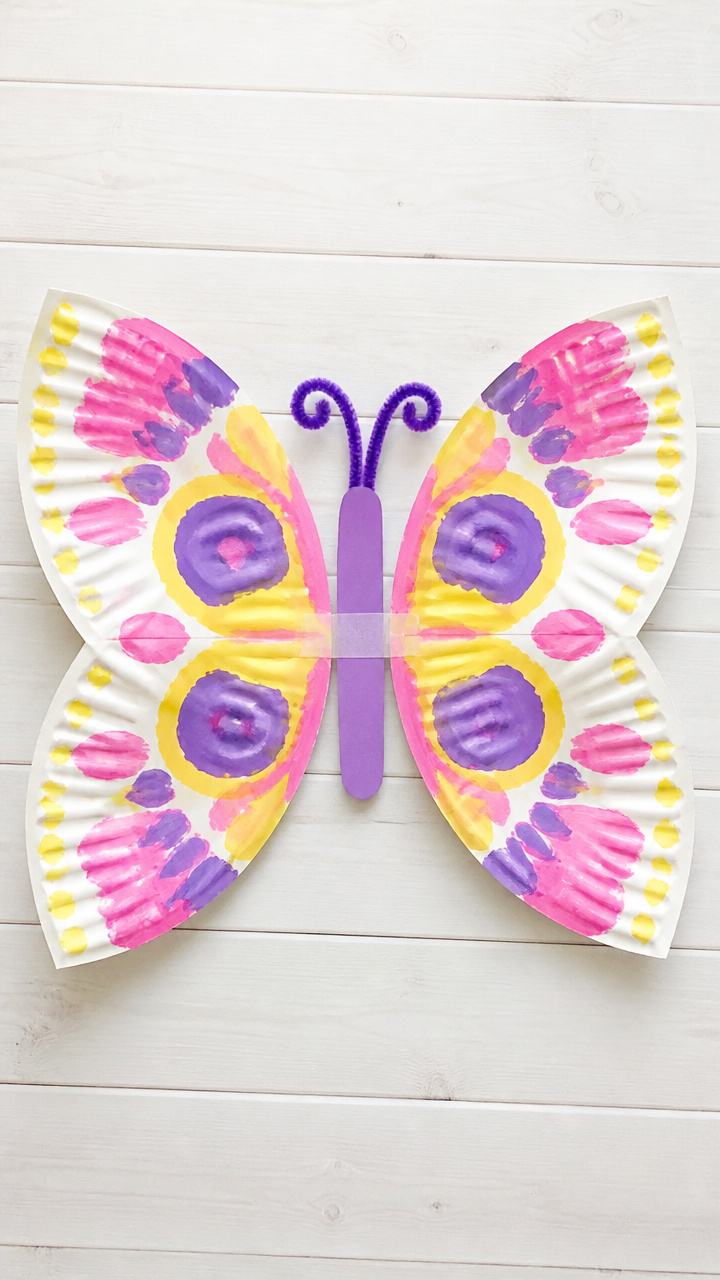
Symmetrical wings made from folded paint patterns give kids a wearable art project.
Materials Needed
- 1 white paper plate
- tempera paints (purple, pink, yellow)
- paintbrushes (3)
- water cup
- paper towel
- masking tape
- elastic string (40 cm)
How to Make It
- Fold the paper plate in half and use one side to paint a wing design with purple, pink, and yellow paint.
- Press the wet paint side onto the other half and carefully unfold to reveal a mirrored pattern.
- Let dry completely for 15 minutes on a flat surface.
- Tape one end of elastic to each side of the plate back and adjust length to fit across the chest.
7. Paper Plate Clock Craft
Moderate
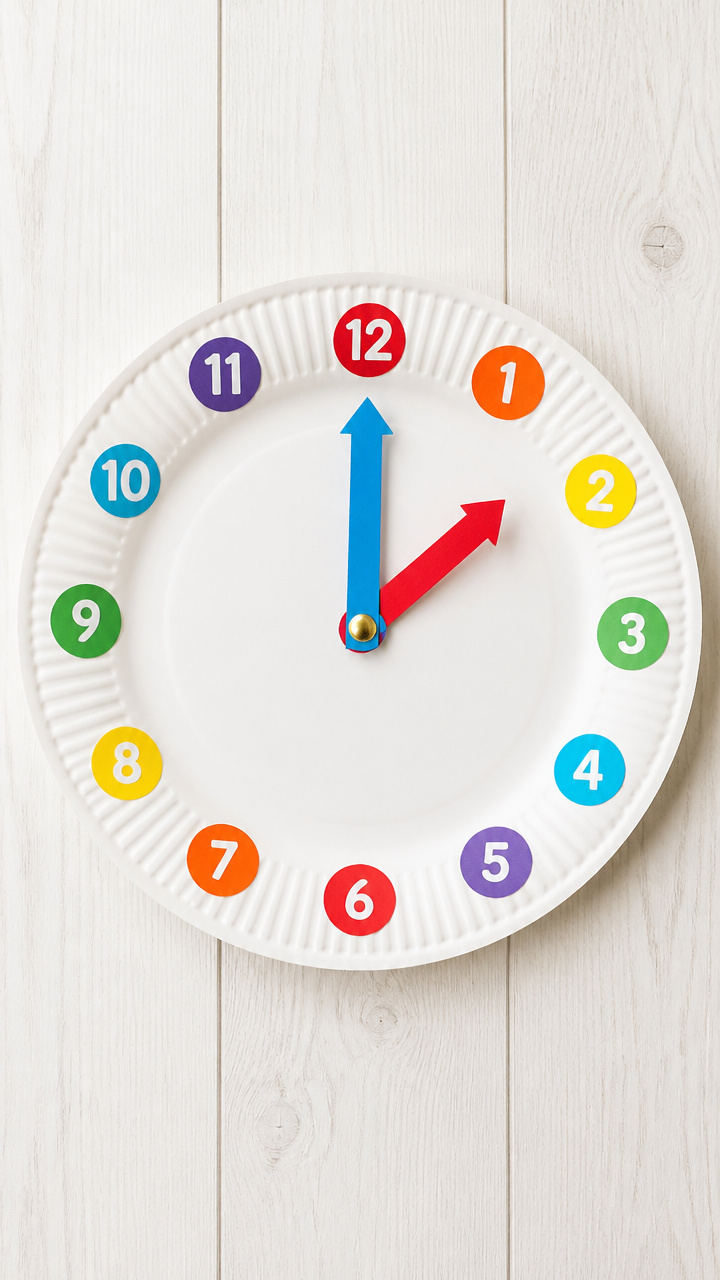
A working clock with moveable hands teaches time while doubling as colorful wall decor.
Materials Needed
- 1 white paper plate
- number stickers (1–12)
- brad fastener (2 inch)
- cardstock (red, blue, yellow)
- scissors
- pencil
- ruler
- hole punch
How to Make It
- Place number stickers evenly around the edge of the plate to form a clock face.
- Cut two clock hands from cardstock: one short blue hour hand, one long red minute hand.
- Punch a hole through the center of the plate and both hands, stack hands with brad, and secure at center.
- Use the pencil tip to ensure hands rotate smoothly before tightening brad fully.
8. Paper Plate Flower Wreath
Moderate
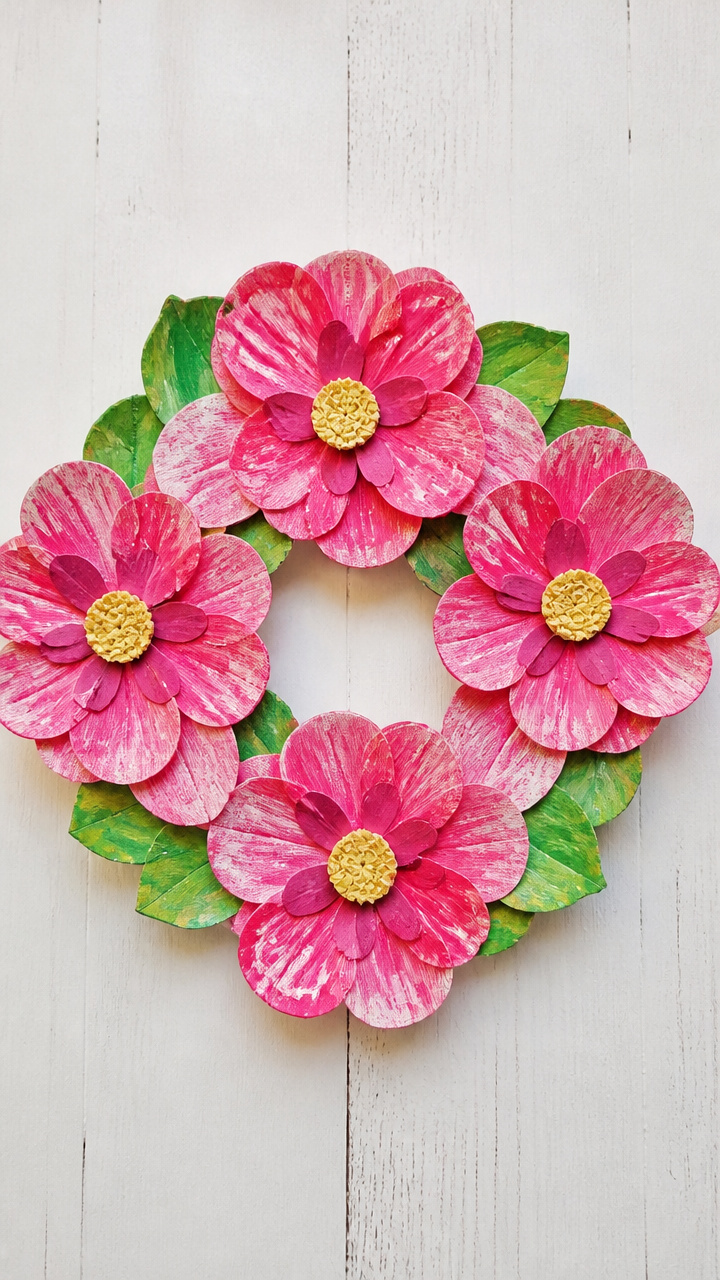
Bright overlapping petals form a bold wreath ideal for spring door decorations.
Materials Needed
- 5 white paper plates
- green acrylic paint
- pink acrylic paint
- paintbrush
- scissors
- hot glue gun and glue sticks
- green construction paper (full sheet)
How to Make It
- Paint one plate green and let dry; this is the base.
- Paint four plates pink and let dry completely.
- Cut each pink plate into eight petal shapes by making cuts from edge toward center, stopping 3 cm short.
- Curl petal edges with fingers, then hot glue them overlapping onto the green base plate to form a wreath.



9. Paper Plate Frog Puppet
Easy
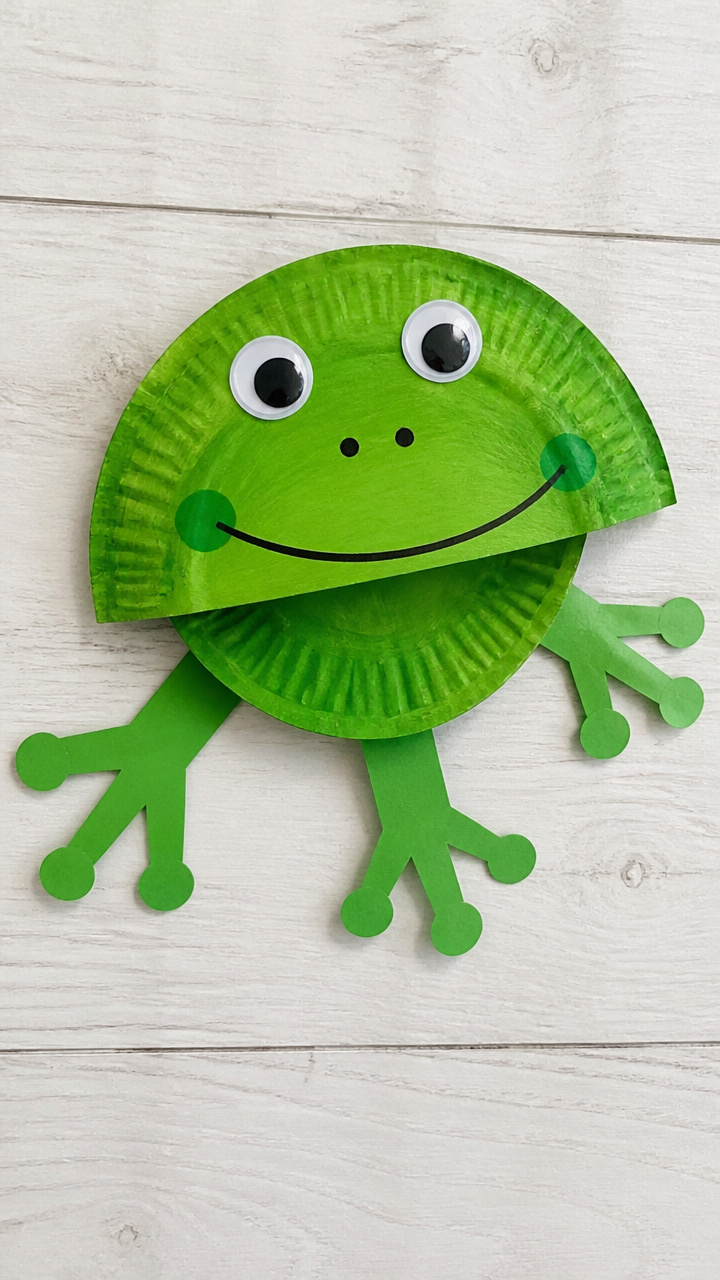
Green legs and bulging eyes hop to life when tucked inside this hand-sized puppet.
Materials Needed
- 1 white paper plate
- green acrylic paint
- paintbrush
- googly eyes (2, 1 inch)
- white glue
- green construction paper
- scissors
How to Make It
- Paint the entire plate green and let dry for 10 minutes.
- Glue two googly eyes near the top edge of the plate.
- Cut two frog legs from green construction paper and glue them to the bottom edge.
- Turn the plate over and slide your hand underneath to use as a puppet.


10. Paper Plate Dreamcatcher
Moderate
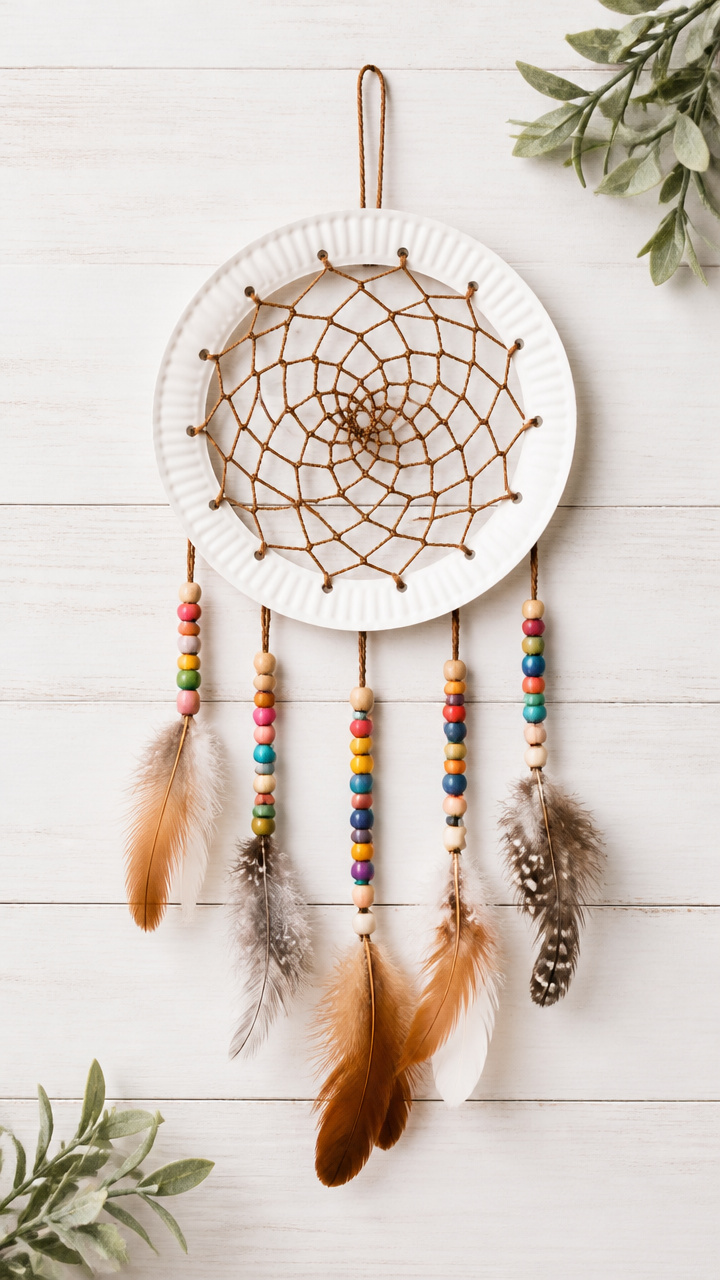
Yarn webs and dangling beads mimic traditional designs in a kid-friendly version.
Materials Needed
- 1 white paper plate
- brown yarn (2 meters)
- beads (assorted, 10 pieces)
- feathers (3)
- white glue
- scissors
- hole punch
How to Make It
- Punch four holes evenly spaced around the outer edge of the plate.
- Thread yarn through one hole and tie a knot, then weave across to opposite side to form an 'X'.
- Continue tying yarn from each point to form a web, leaving space in center.
- Glue beads and feathers to strings and attach to bottom of plate with punched hole.


11. Paper Plate Firework Art
Easy
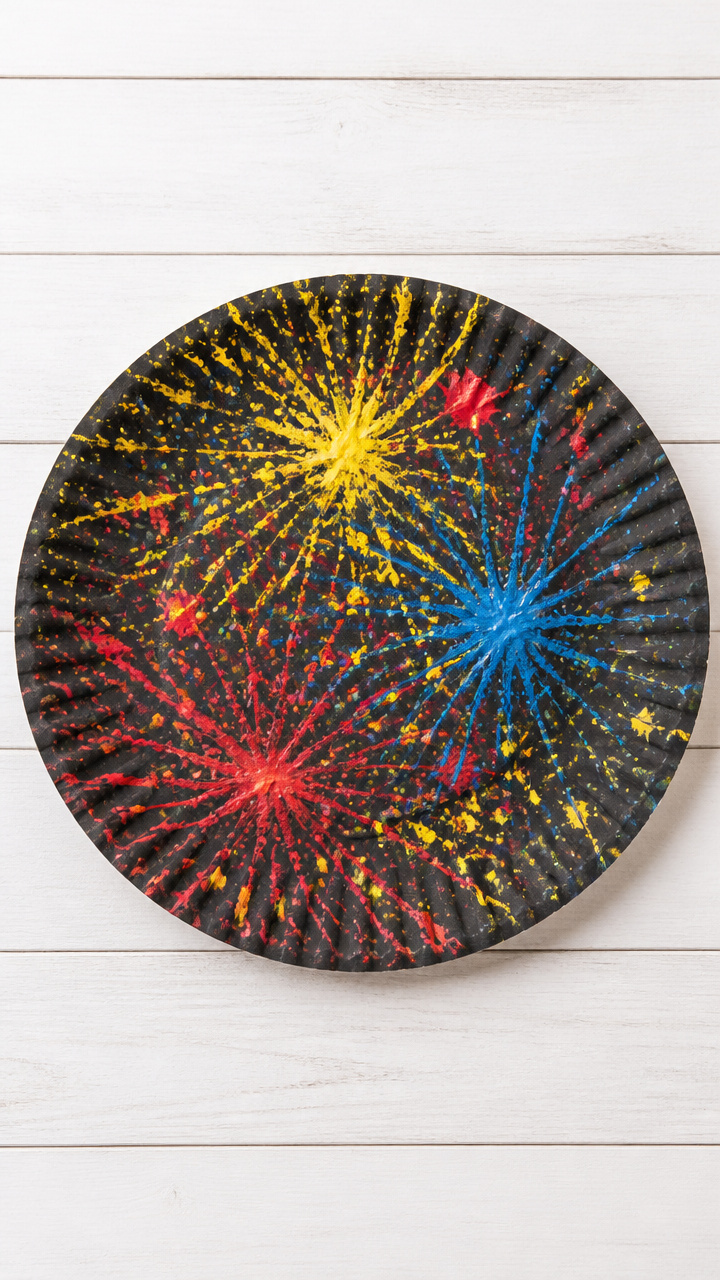
Splattered paint mimics fireworks bursting across a night sky background.
Materials Needed
- 1 white paper plate
- black cardstock (A4)
- red tempera paint
- yellow tempera paint
- blue tempera paint
- toothbrush (old, clean)
- tape
How to Make It
- Tape the paper plate to the center of the black cardstock.
- Dip toothbrush into red paint and run thumb over bristles to splatter stars outward.
- Repeat with yellow and blue paint in different areas to fill the sky.
- Remove plate carefully after drying to reveal a negative space explosion.


12. Paper Plate Ladybug
Easy
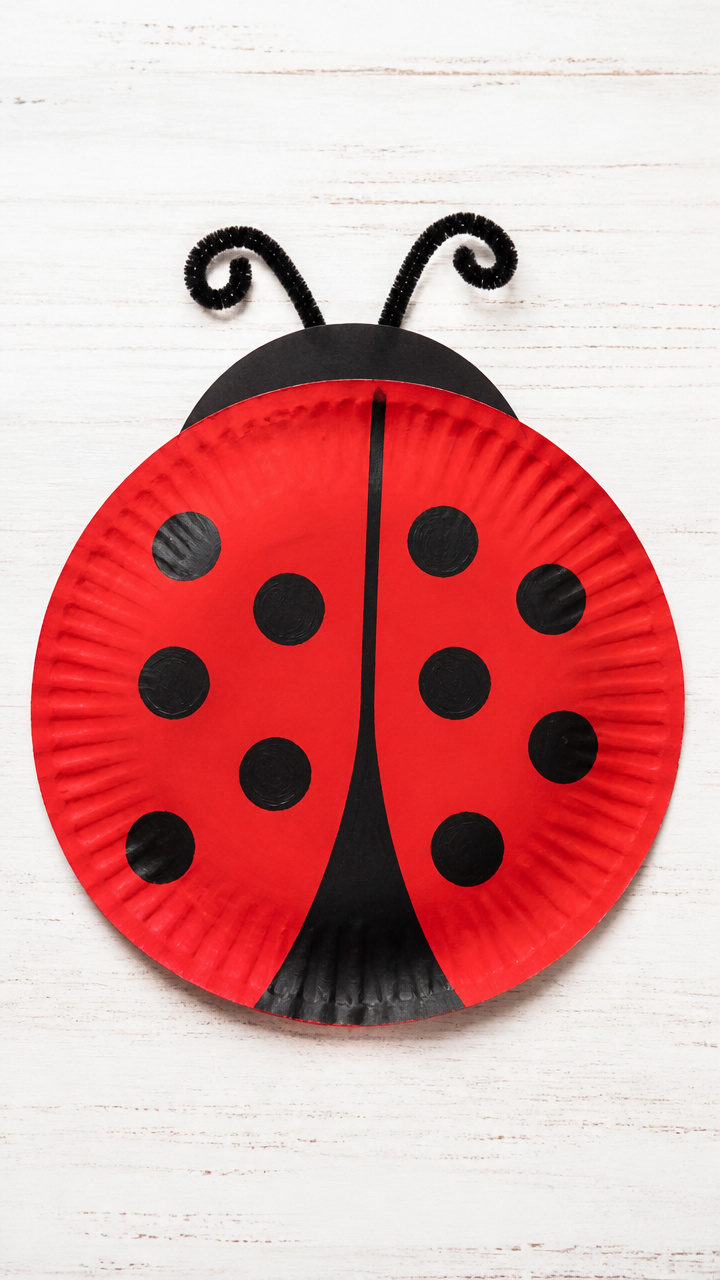
Red body, black spots, and wiggling antennae make this bug garden-ready.
Materials Needed
- 1 white paper plate
- red acrylic paint
- black acrylic paint
- paintbrush
- black pipe cleaners (2)
- white glue
- googly eyes (2, 0.5 inch)
- scissors
How to Make It
- Paint the entire plate red and let dry for 10 minutes.
- Draw a vertical line down the center with black paint to split wings.
- Glue six black spots on each side and attach two small googly eyes near the top edge.
- Bend one end of each pipe cleaner and glue them as antennae above the eyes.
13. Paper Plate Sun Mobile
Moderate
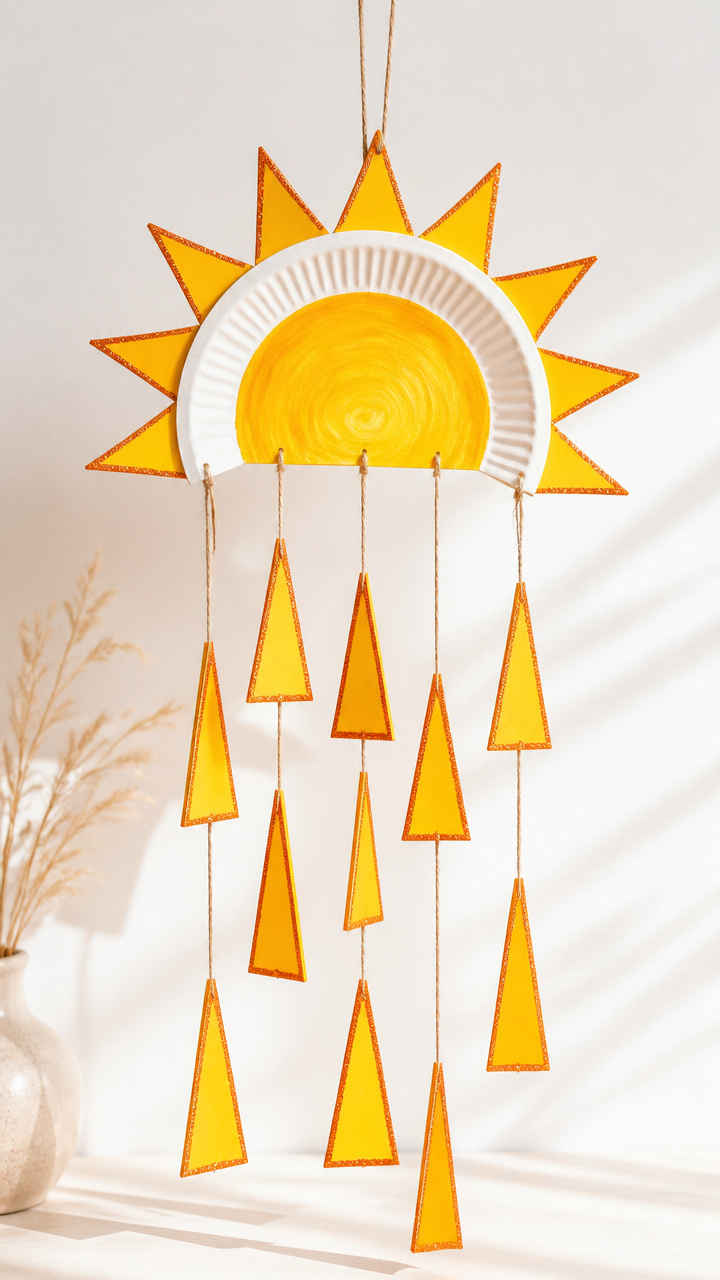
Golden rays hang at different lengths to create a cheerful ceiling decoration.
Materials Needed
- 1 white paper plate
- yellow acrylic paint
- orange glitter
- glue
- paintbrush
- hole punch
- three fishing lines (30 cm each)
- ceiling hook
How to Make It
- Paint the entire plate yellow and sprinkle orange glitter on one half before it dries.
- Let dry completely for 15 minutes on a flat surface.
- Punch three evenly spaced holes around the edge.
- Tie fishing lines to each hole, gather ends, and attach to ceiling hook.

14. Paper Plate Turtle
Moderate
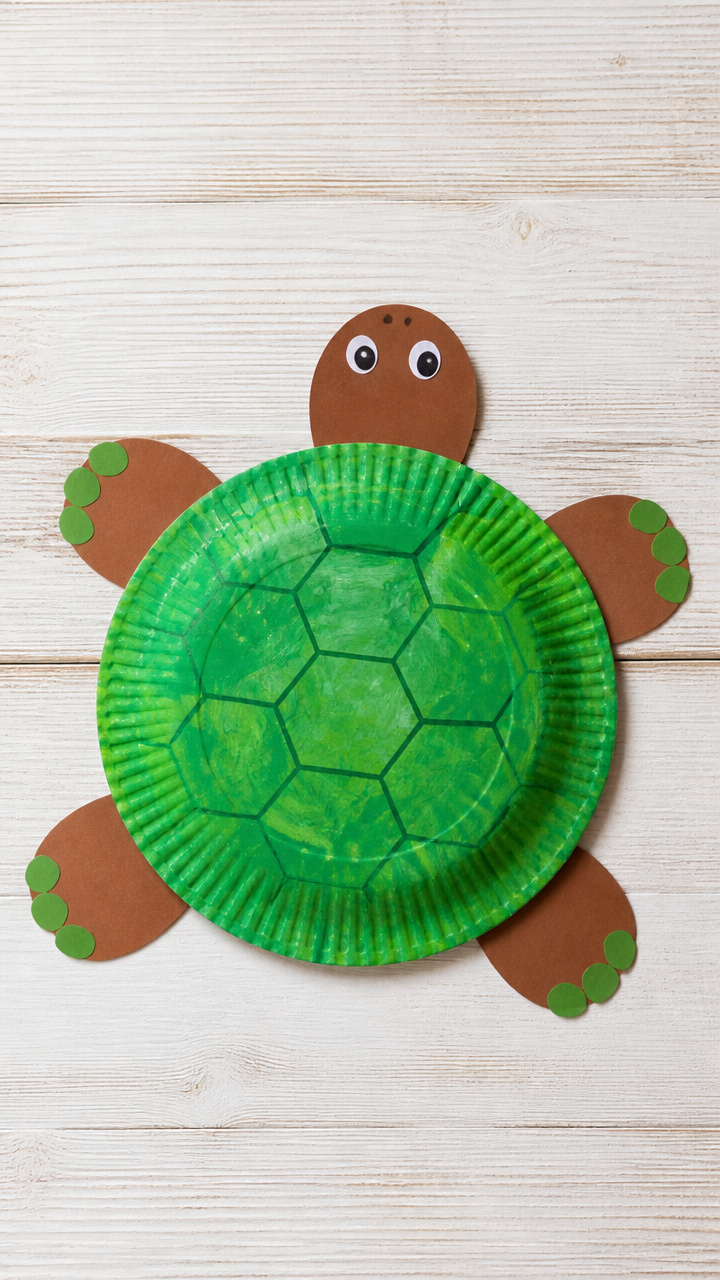
A slow-moving reptile with a patterned shell and stumpy legs crawls right off the table.
Materials Needed
- 1 white paper plate
- green acrylic paint
- brown acrylic paint
- paintbrush
- green construction paper
- scissors
- glue
- black marker
How to Make It
- Paint the plate green and let dry for 10 minutes.
- Use brown paint to dab hexagon shapes across the back for a shell pattern.
- Cut four short legs and a head from green construction paper and glue them around the edge.
- Draw eyes and a smile on the head with black marker.
15. Paper Plate Pirate Hat
Moderate
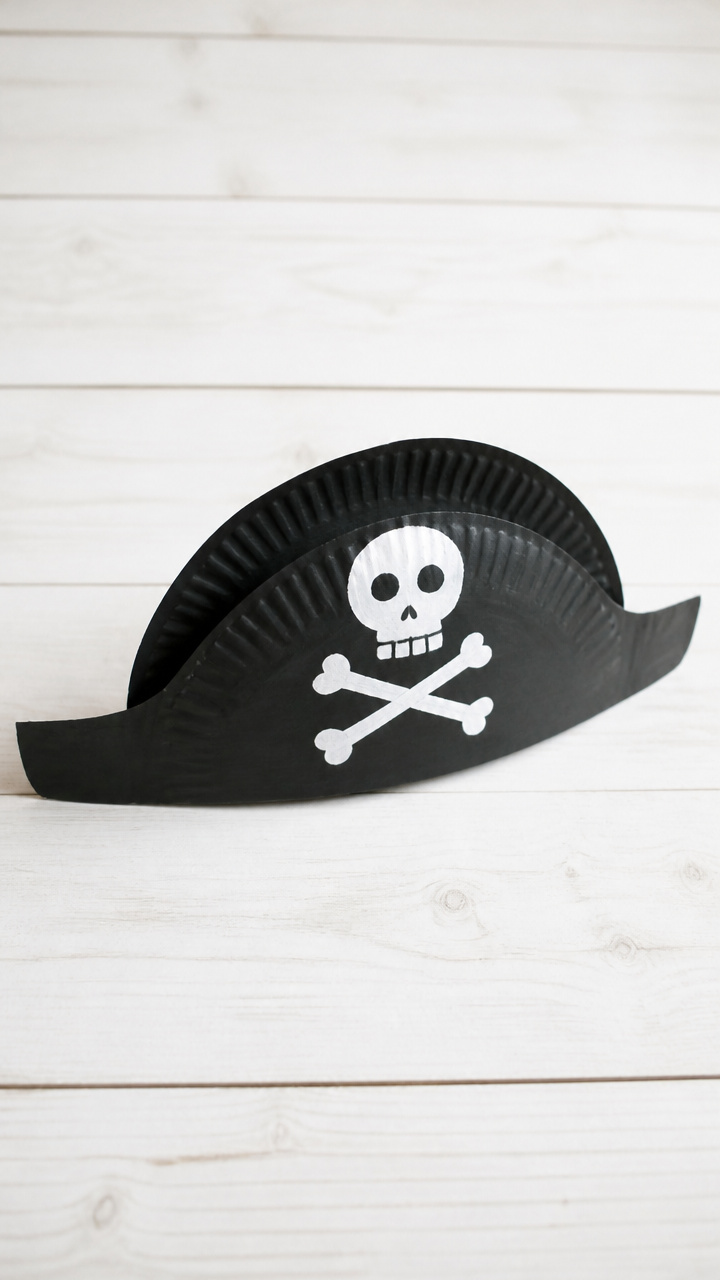
A bandana-style hat with skull and crossbones lets kids set sail for imaginary treasure hunts.
Materials Needed
- 2 white paper plates
- black acrylic paint
- white acrylic paint
- paintbrush
- scissors
- measuring tape
- glue
How to Make It
- Measure the child's head and cut one plate into a curved band to fit around it.
- Cut the center out of the second plate to form a wide brim and glue it to the band at a slight angle.
- Paint a skull and crossbones on the front of the band with black and white paint.
- Let dry for 15 minutes before wearing.
16. Paper Plate Jellyfish
Easy
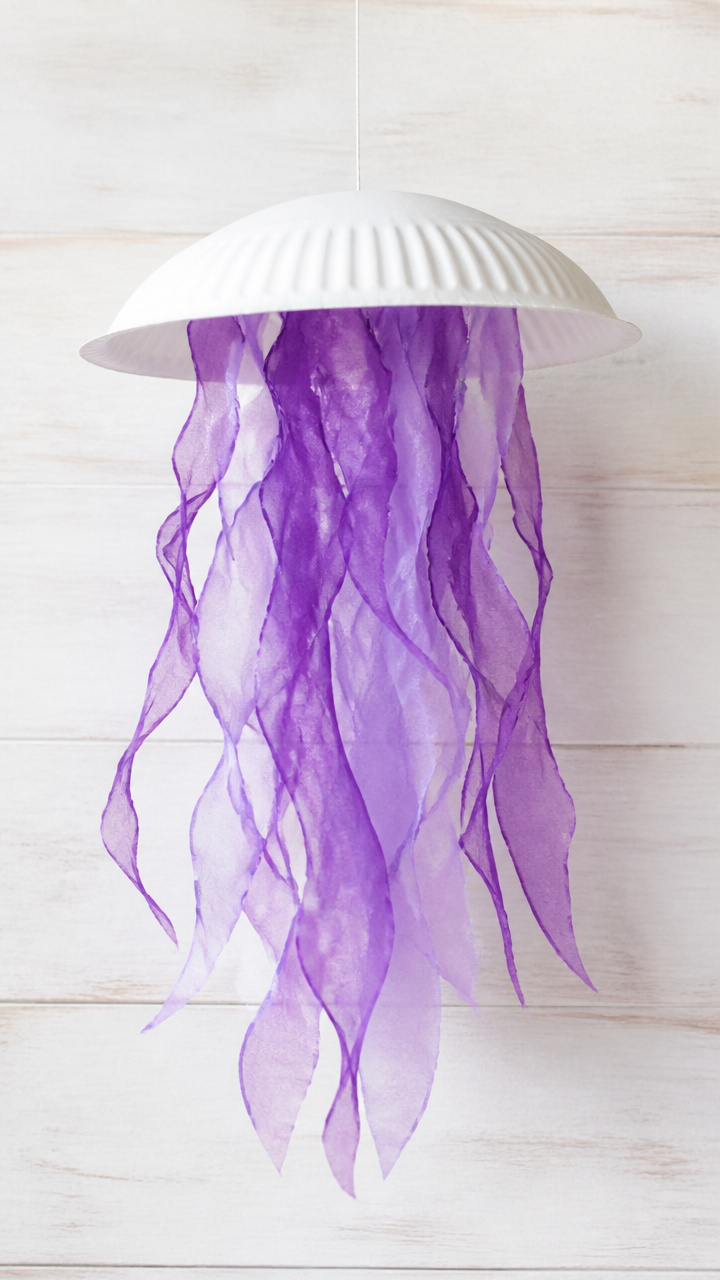
Floating tendrils sway gently when this sea creature hangs from a window or ceiling.
Materials Needed
- 1 white paper plate
- purple tissue paper
- glue
- scissors
- fishing line (25 cm)
- hole punch
- googly eyes (2, 0.5 inch)
How to Make It
- Cut fringe strips around the edge of the plate, stopping 3 cm from the rim.
- Crumple purple tissue paper and glue it inside the dome of the plate.
- Glue two small googly eyes just below the rim on the outside.
- Punch a hole at the top, thread fishing line through, and tie a knot.
17. Paper Plate Caterpillar
Moderate
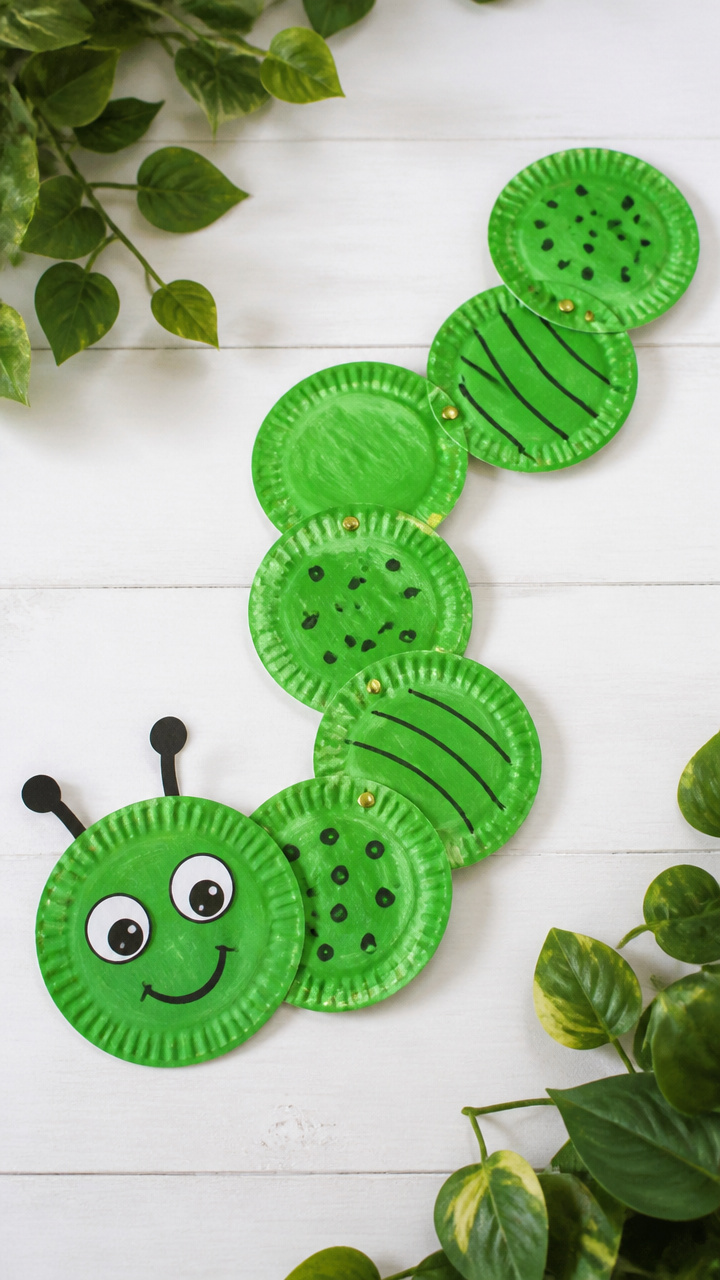
Connected segments wiggle along a leafy path, perfect for counting and storytelling.
Materials Needed
- 6 white paper plates
- green acrylic paint
- paintbrush
- black marker
- glue
- brad fasteners (5)
- googly eyes (2, 0.5 inch)
How to Make It
- Paint all six plates green and let dry for 10 minutes.
- Draw a face with black marker and glue googly eyes on the first plate.
- Punch two holes near the edge on opposite sides of each plate.
- Connect plates with brad fasteners through aligned holes to form a wiggly chain.
18. Paper Plate Rocket Ship
Advanced
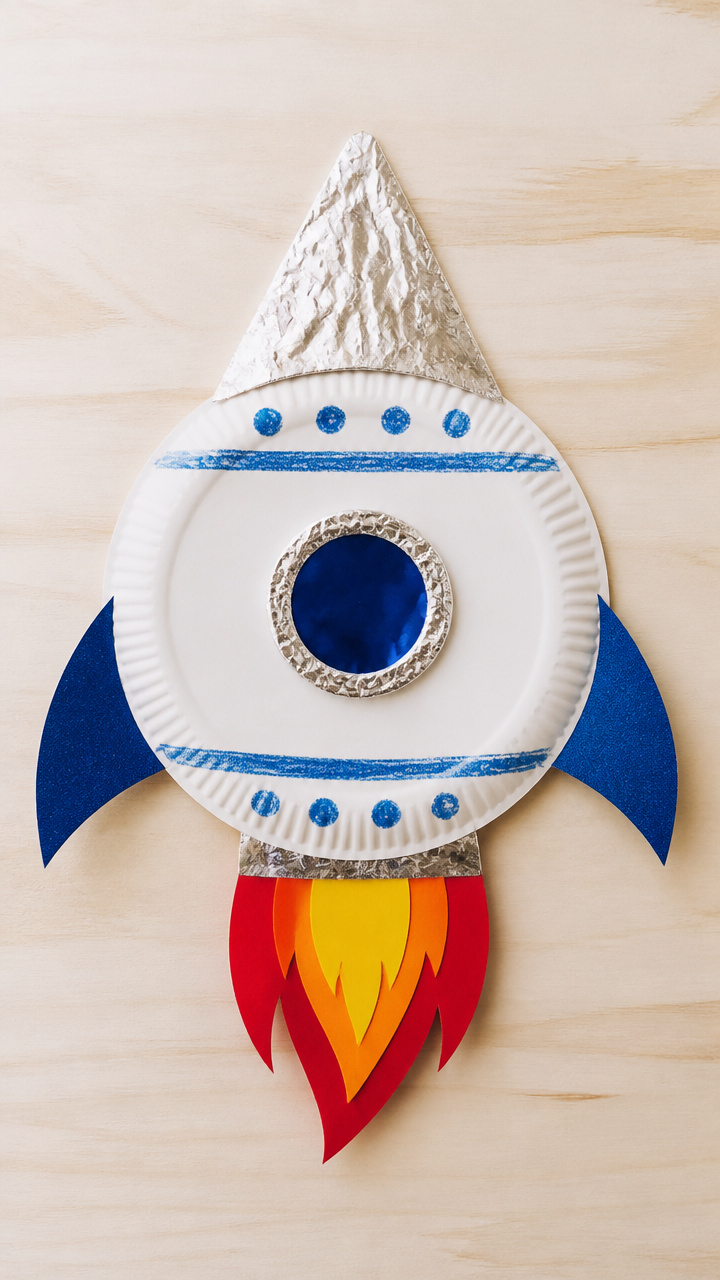
Red flames trail behind a spaceship ready to launch from the living room floor.
Materials Needed
- 1 white paper plate
- red cardstock
- blue crayon
- silver foil paper
- glue
- scissors
- tape
- paper towel tube
- stapler
How to Make It
- Cut the plate in half and curl one half into a cone shape, securing with tape.
- Color blue flames on red cardstock and cut into jagged strips.
- Attach silver foil to the paper towel tube using glue to form the body.
- Staple the cone to the top of the tube and glue flame strips to the bottom edge.
Grab your paper plates and let the creativity lift off. Each one holds the promise of something bright, bold, and uniquely yours.