20 Easy Paper Crafts for Kids
Paper crafts invite creativity in the simplest, most joyful way. With just a few supplies, you can create something that sparks imagination and brings smiles.
These projects use everyday materials and clear steps so you can jump right in. Each one is designed to be fun, doable, and full of little surprises.
1. Paper Plate Lion
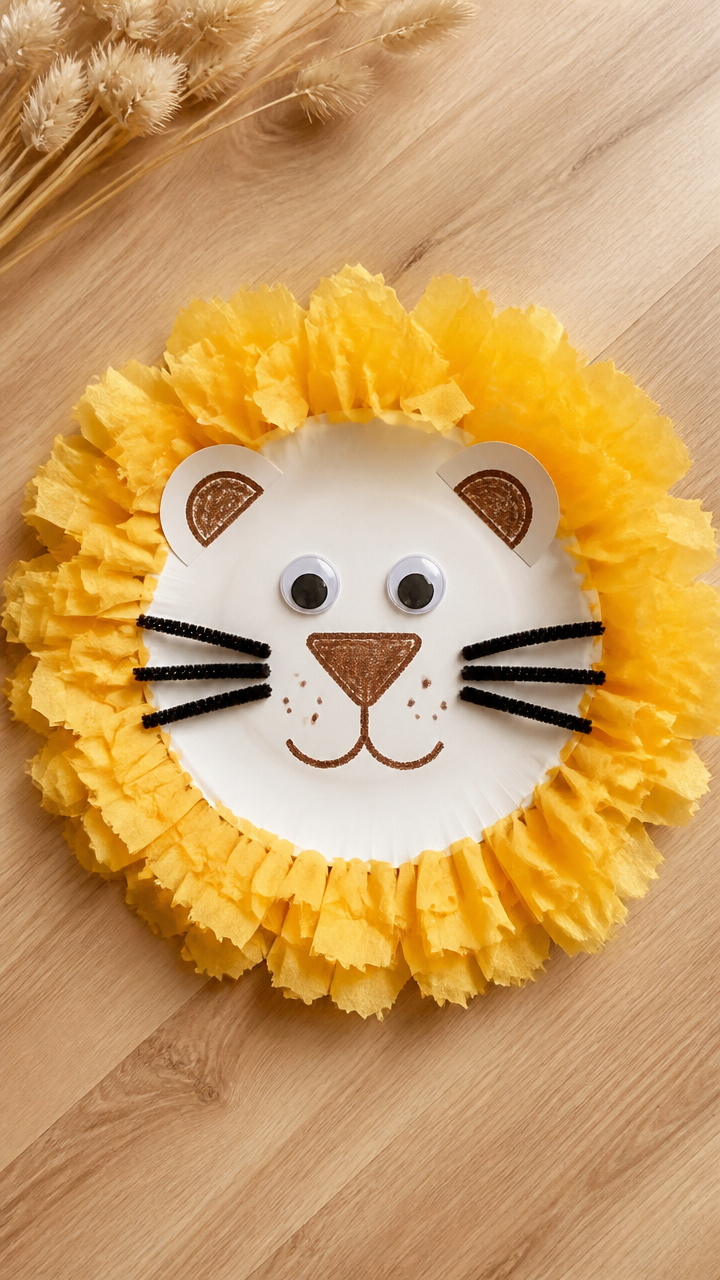
Fuzzy golden mane made from tissue paper strips gives this lion its bold look. Your child will love bringing this friendly jungle face to life.
Materials Needed
- 1 white paper plate
- 1 sheet yellow tissue paper, cut into 1-inch strips
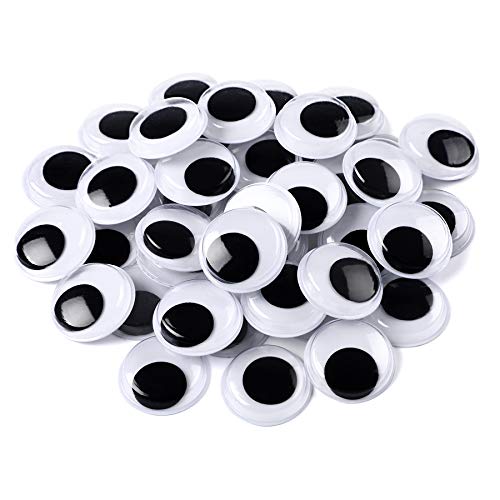
- 1 pair plastic wiggly eyes, 1 inch
- 1 black pipe cleaner, 12 inches
- white school glue
- brown crayon
How to Make It
- Lay the paper plate flat and color the rim with the brown crayon to make a face outline.
- Glue the yellow tissue paper strips around the back edge of the plate to form a circle of mane.
- Attach the wiggly eyes near the top center of the plate face.
- Cut the pipe cleaner in half and curl each end with scissors. Glue one curled half on each side for whiskers.


2. Tissue Paper Stained Glass
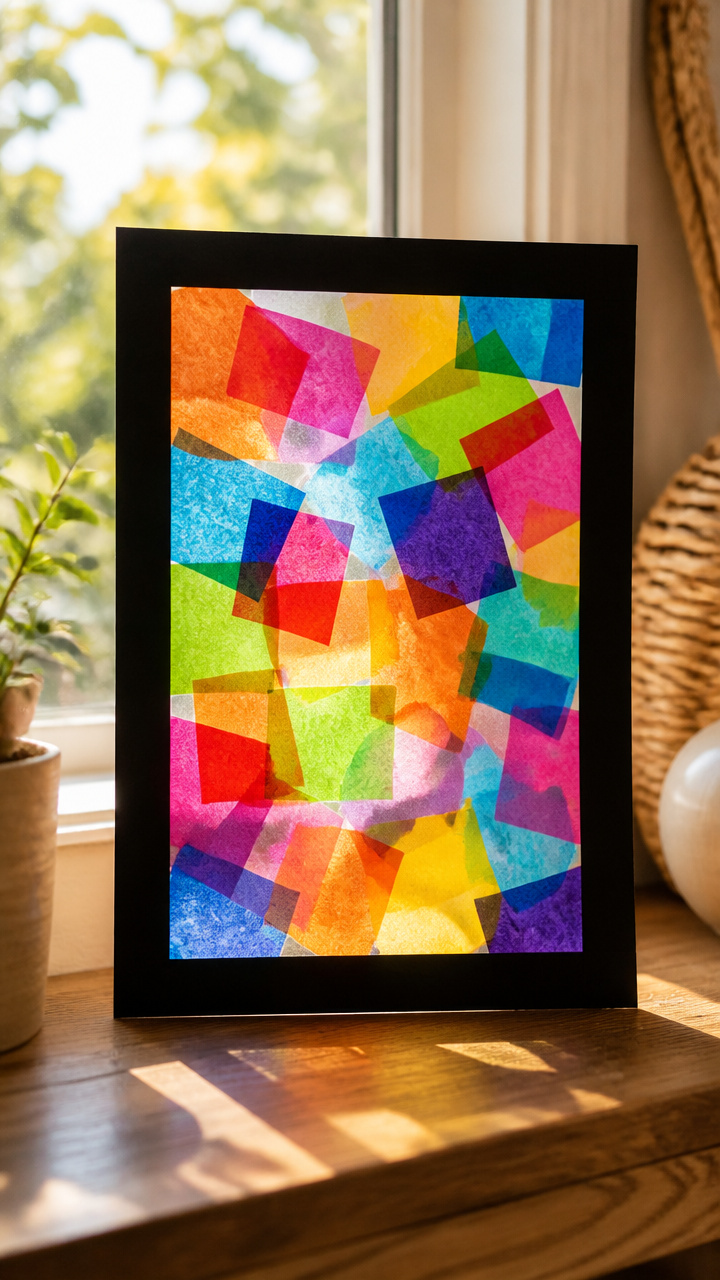
Bright overlapping squares of colored tissue create a sun-catching window decoration. This craft teaches color layering and looks magical in natural light.
Materials Needed
- 1 sheet black construction paper, 9×12 inches
- Scissors
- Clear school glue
- 4 colors of tissue paper, each cut into 1-inch squares (50 total)
- Clear contact paper, 10×13 inches
How to Make It
- Cut a 7×7 inch square window in the center of the black construction paper.
- Brush a thin layer of glue inside the window frame.
- Press tissue paper squares into the glued area, overlapping colors to fill the space completely.
- Let dry for 30 minutes, then place the contact paper sticky side down over the front. Trim edges even with the paper.


3. Paper Chain Caterpillar
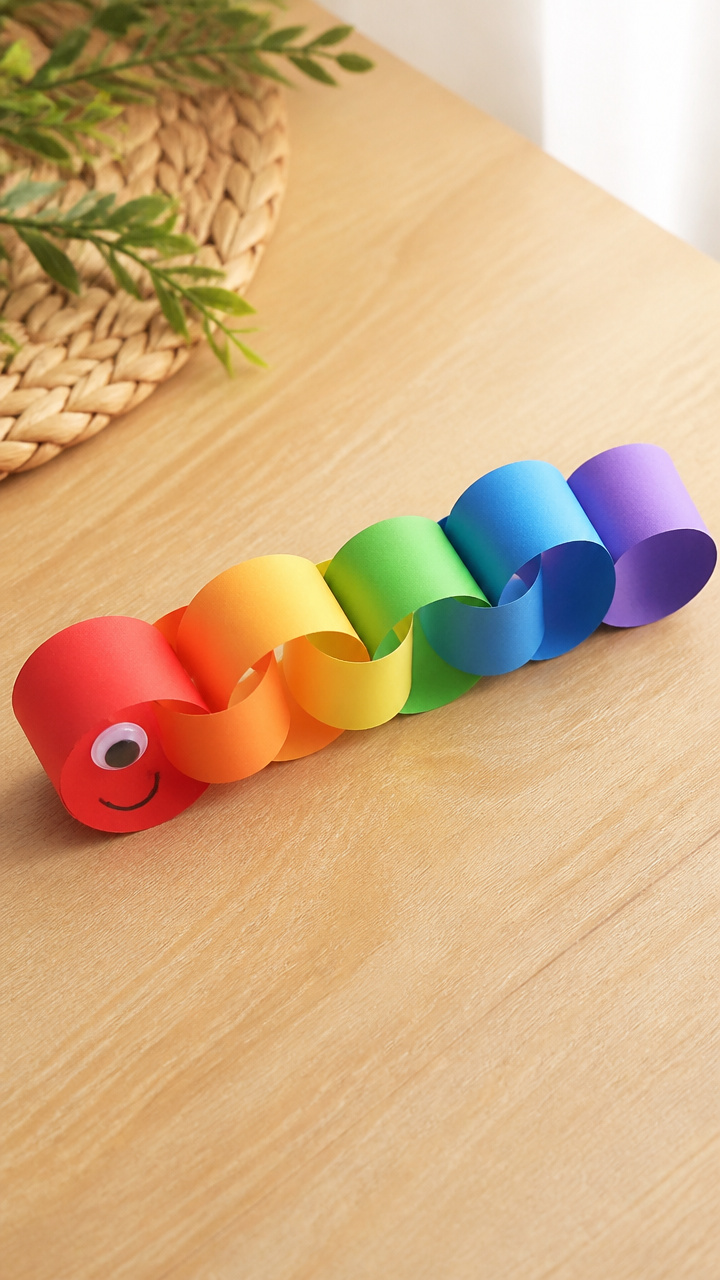
Rainbow loops linked together wiggle like a real caterpillar. This motor skills activity builds focus and color recognition.
Materials Needed
- 6 strips of colored construction paper, each 1×8 inches (red, orange, yellow, green, blue, purple)
- White school glue
- 1 googly eye, 0.5 inch
- Black marker
How to Make It
- Take the red strip and form a loop, gluing the ends together.
- Thread the orange strip through the red loop before sealing it into its own loop.
- Repeat with all remaining colors to create a chain of six connected rings.
- Draw a small mouth under the googly eye and glue it to the front of the red loop.


4. Handprint Flower Garden

Five handprints fan out into colorful petals, forming a blooming garden. This keepsake grows more special with every glance.
Materials Needed
- 1 sheet white drawing paper, 12×18 inches
- Red, pink, yellow, purple, and orange washable paint
- Paintbrush
- Green crayon
- Black crayon
How to Make It
- Press your child’s hand into red paint and stamp it near the bottom of the page with fingers up.
- Repeat with pink, yellow, purple, and orange paints, placing each handprint close but not overlapping.
- Use the paintbrush to draw a thin green stem up from each palm to the base of the fingers.
- Draw grass and ladybugs with the black crayon to complete the garden scene.


5. Paper Cup Butterflies
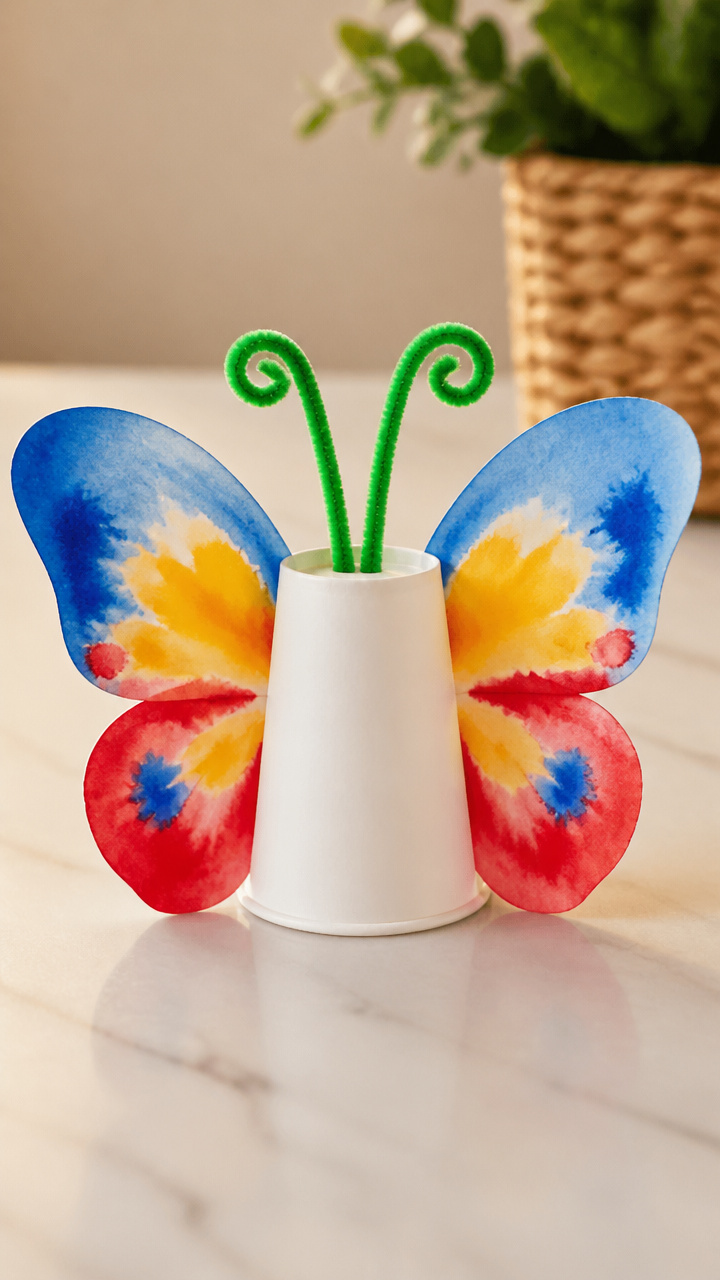
A simple cup becomes a fluttering butterfly with symmetrical wings. Painting and folding build early art skills.
Materials Needed
- 1 white paper cup
- Watercolor paints: blue, yellow, red
- Paintbrush
- 12-inch green pipe cleaner
- Hole punch
- White school glue
How to Make It
- Paint both sides of the cup with watercolors and let dry for 20 minutes.
- Flatten the cup slightly and fold it in half lengthwise to crease the center.
- Punch two holes at the folded rim and thread the pipe cleaner through to form antennae.
- Pinch the cup base to hold the fold and secure with a dot of glue.


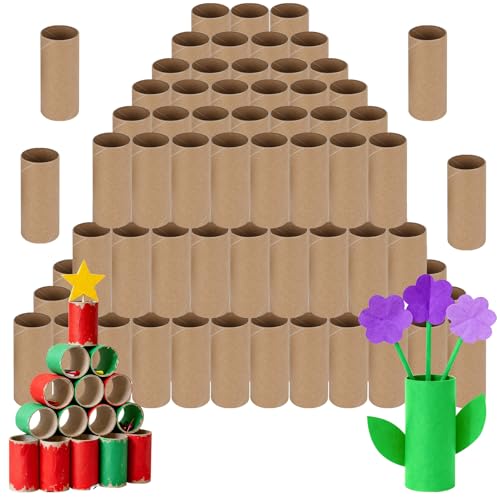
6. Toilet Paper Roll Binoculars
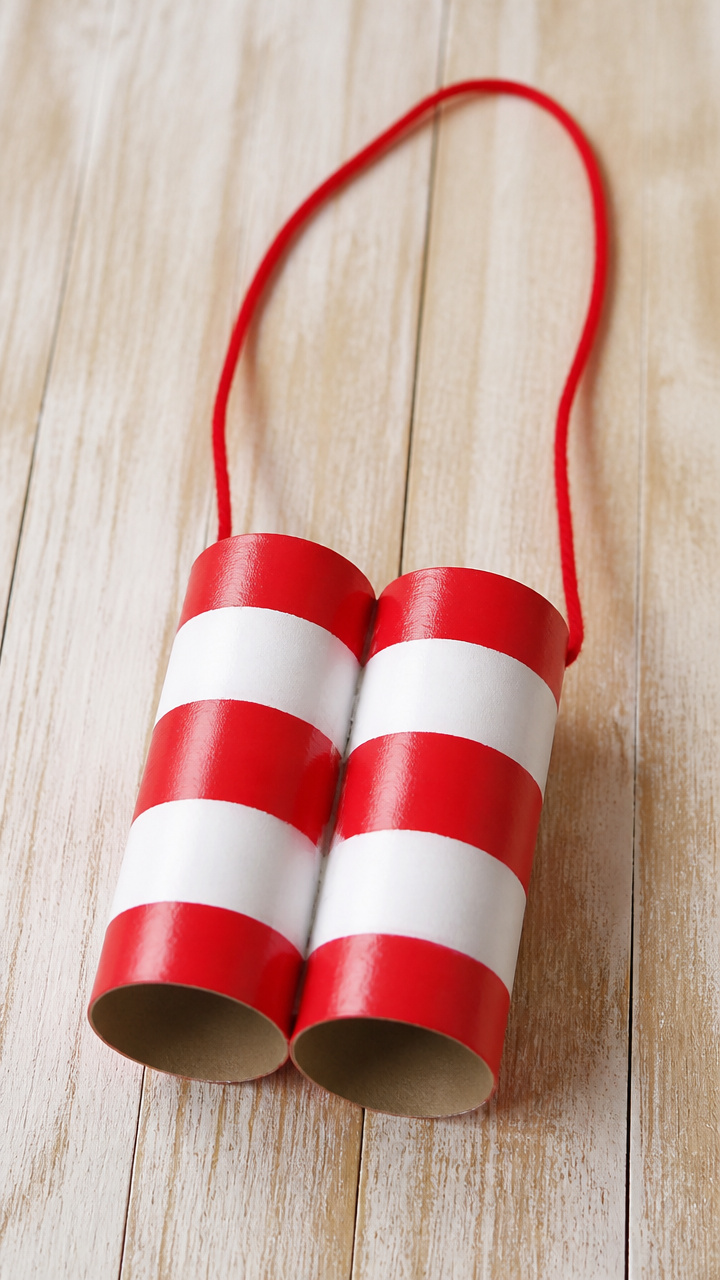
Two rolls taped side by side turn into adventure gear for backyard explorers. Pretend play gets a boost with every peek.
Materials Needed
- 2 empty toilet paper rolls
- Clear tape
- Yarn, 18 inches
- Red and white acrylic paint
- Paintbrush
How to Make It
- Place the two rolls side by side and tape them together along the long edge with clear tape.
- Paint the outside with red acrylic paint and let dry for 15 minutes.
- Paint white polka dots over the red and let dry another 15 minutes.
- Punch one hole on each side of the outer roll and thread yarn through for a neck strap.

7. Paper Fan Fish
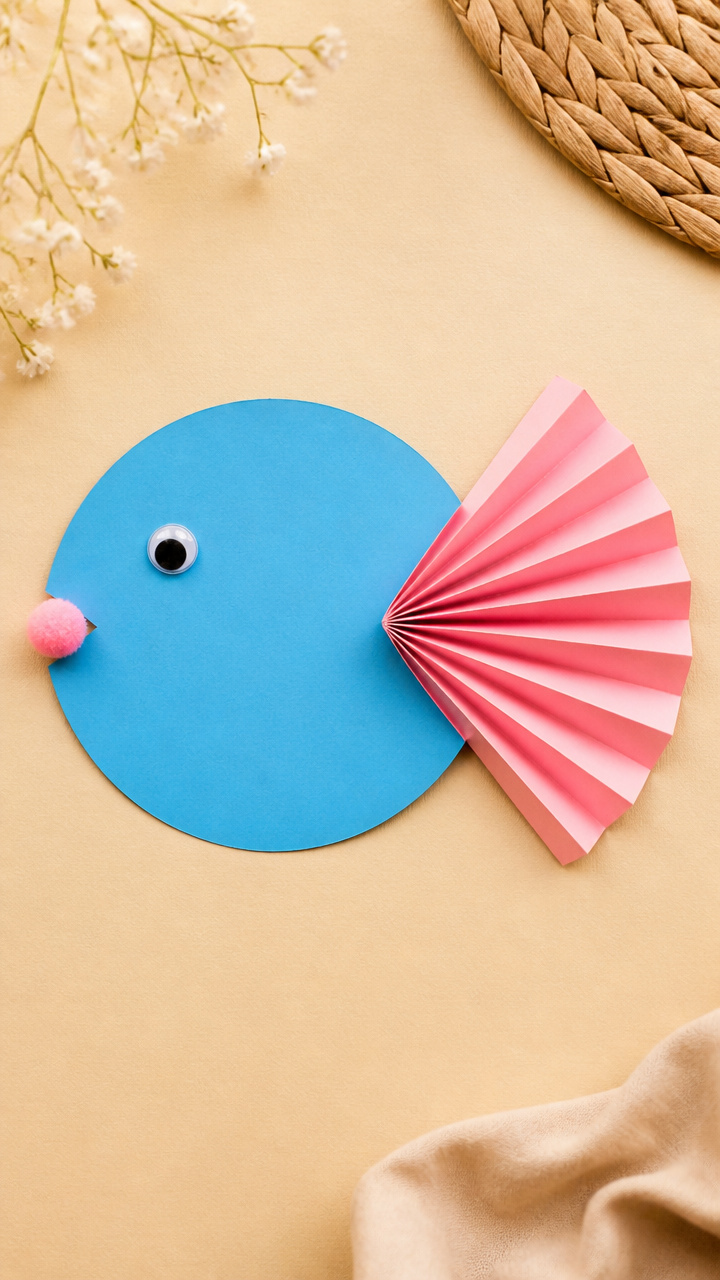
A folded fan tail adds motion to a round fish body. This tactile project introduces pleating in a playful way.
Materials Needed
- 1 sheet blue construction paper
- Round plastic lid, 3 inches diameter
- Scissors
- White school glue
- Pink pom-pom, 0.5 inch
- Wiggly eye, 0.5 inch
How to Make It
- Trace and cut a circle from the blue paper using the lid as a guide.
- Fold a 3×6 inch strip of blue paper in half lengthwise, then make accordion folds every 0.5 inch to create a fan.
- Glue one end of the fan to the back edge of the circle for the tail.
- Glue the pom-pom near the front for a nose and add the wiggly eye above it.


8. Cotton Ball Sheep
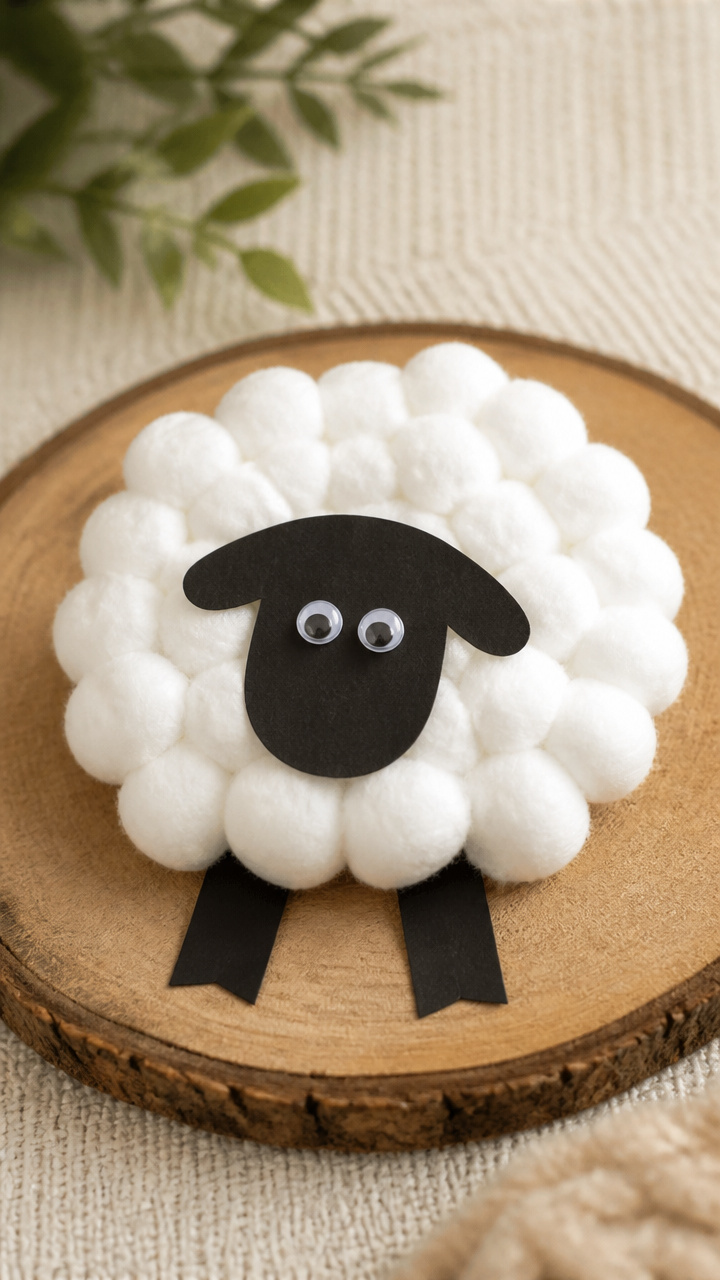
Fluffy cotton balls cover a paper body to mimic wool. This sensory craft encourages gentle pressing and placement.
Materials Needed
- 1 sheet white drawing paper
- Black construction paper
- Scissors
- White school glue
- Cotton balls, 20
- 2 wiggly eyes, 0.5 inch
How to Make It
- Cut a sheep body shape from black paper: a large oval with a smaller oval head connected.
- Glue cotton balls tightly together over the entire black body shape.
- Leave the head oval uncovered except for two small ear circles cut from black paper and glued on top.
- Glue the wiggly eyes just above the ears and let the glue dry for 20 minutes.


9. Straw Blown Spiderwebs
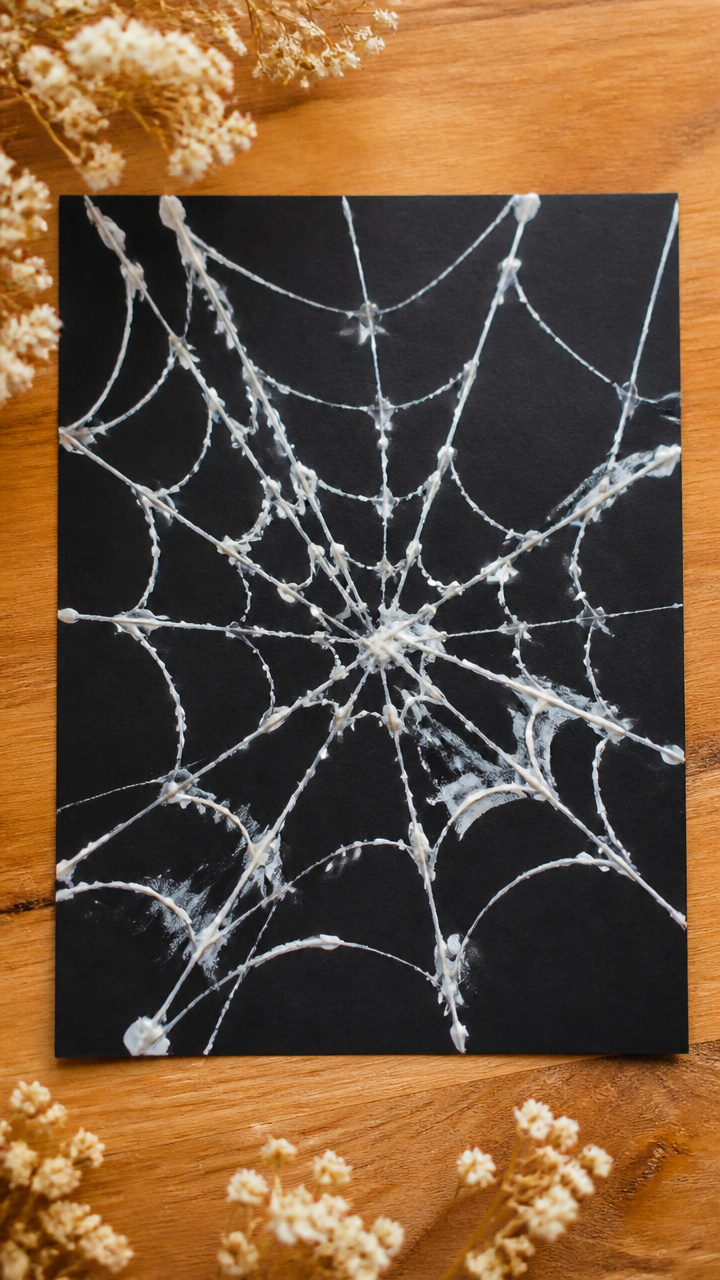
Lines of ink blown through a straw form wispy webs. This science-meets-art craft delights with surprise patterns.
Materials Needed
- 1 sheet black drawing paper
- White liquid tempera paint
- Drinking straw
- Cotton swab
How to Make It
- Place one drop of white paint in the center of the black paper.
- Hold the straw just above the paint and blow hard to spread the paint into web-like lines.
- Repeat with three more drops around the first, blowing each in a different direction.
- Dip the cotton swab in paint and press near one line end to make a spider body.


10. Paper Bag Puppet
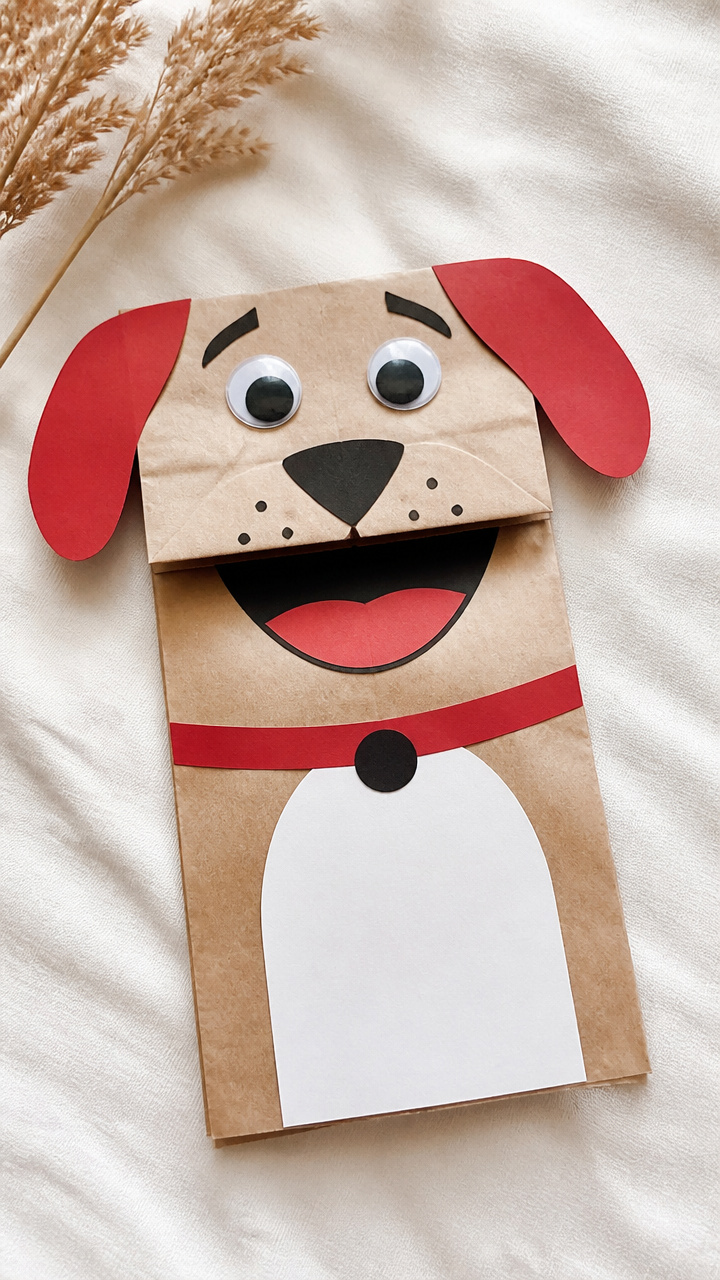
A lunch bag turns into a grinning character with paper features. Storytelling comes alive with hands inside.
Materials Needed
- 1 brown paper lunch bag
- Construction paper in red, white, and black
- Scissors
- White school glue
- Crayons
How to Make It
- Turn the bag so the flap is at the bottom and the open end is up.
- Cut a wide red arc for a mouth and glue it below the flap.
- Cut two white circles and a smaller black circle for each eye and glue them in place.
- Draw hair with crayons on top of the bag and let it dry before playing.


11. Salt Dough Ornament
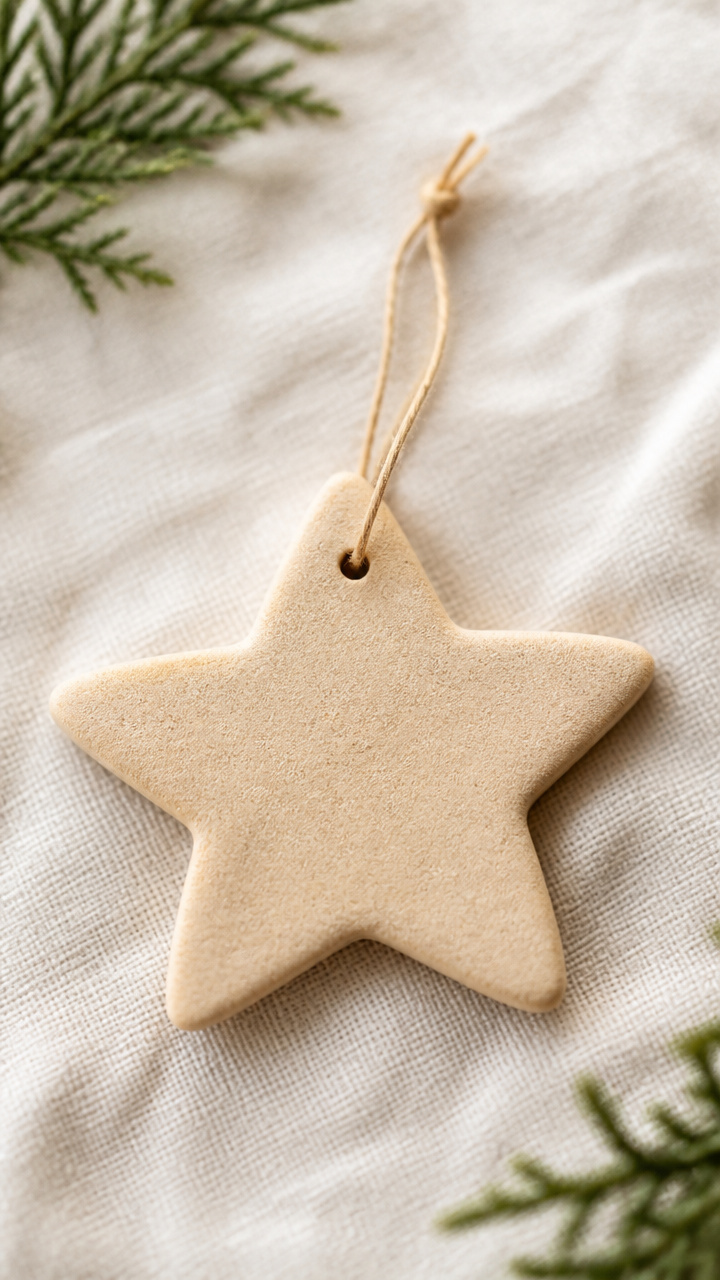
Homemade dough shaped with cookie cutters bakes into keepsakes. This craft doubles as a scent-rich sensory experience.
Materials Needed
- 1 cup flour
- 1/2 cup salt
- 1/2 cup water
- Mixing bowl
- Cookie cutter, star shape
- Bamboo skewer
- Ribbon, 6 inches
How to Make It
- Mix flour, salt, and water in a bowl until a smooth dough forms, about 2 minutes.
- Roll the dough to 1/4 inch thick and press the star cutter into it.
- Remove excess dough and poke a hole at the top with the skewer.
- Bake at 200°F for 3 hours, cool, then thread ribbon through the hole.


12. Paper Plate Sun
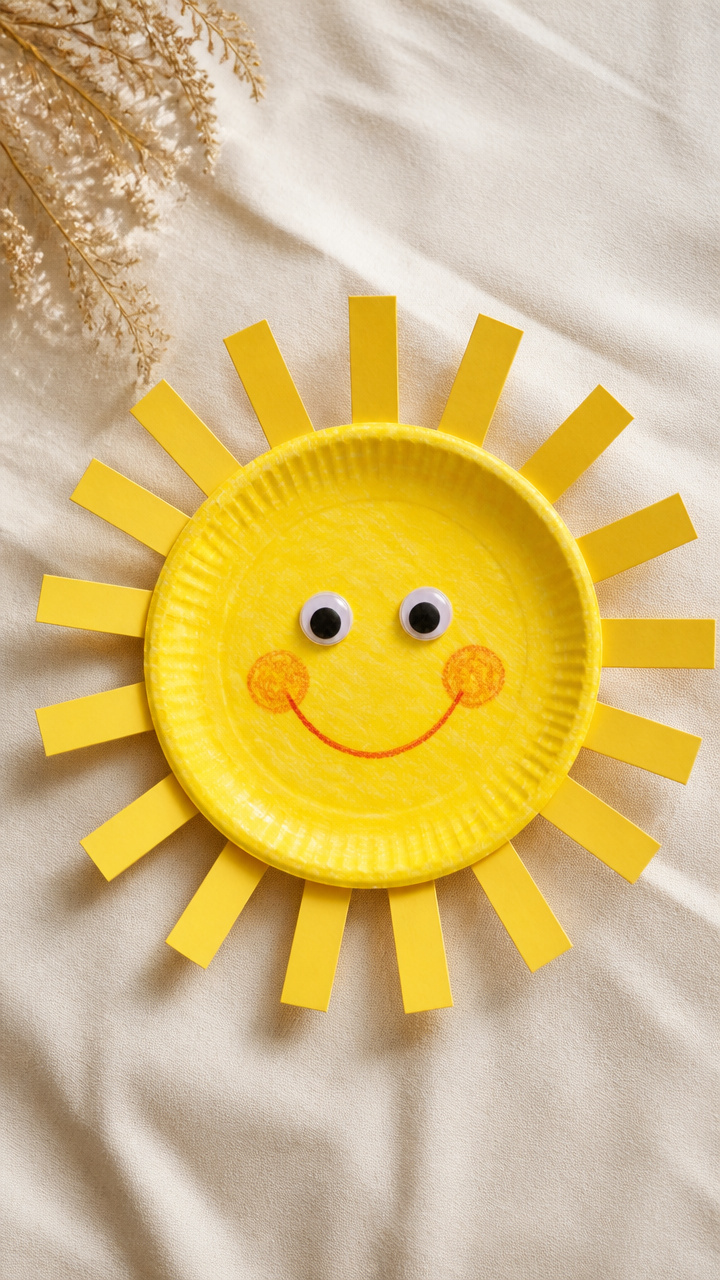
Yellow strips radiate from a smiling face on a paper plate. This cheerful piece works well as a gift or room decor.
Materials Needed
- 1 paper plate
- Yellow construction paper
- Scissors
- White school glue
- Orange crayon
- Googly eyes, 2, 0.5 inch
How to Make It
- Cut the yellow paper into 1-inch wide strips, each 6 inches long. Make 12 strips.
- Glue one end of each strip to the back edge of the plate, spacing evenly.
- Flip the plate and draw a smile with the orange crayon. Add cheeks with light pressure.
- Glue the googly eyes above the smile and let dry for 15 minutes.


13. Tissue Paper Kites
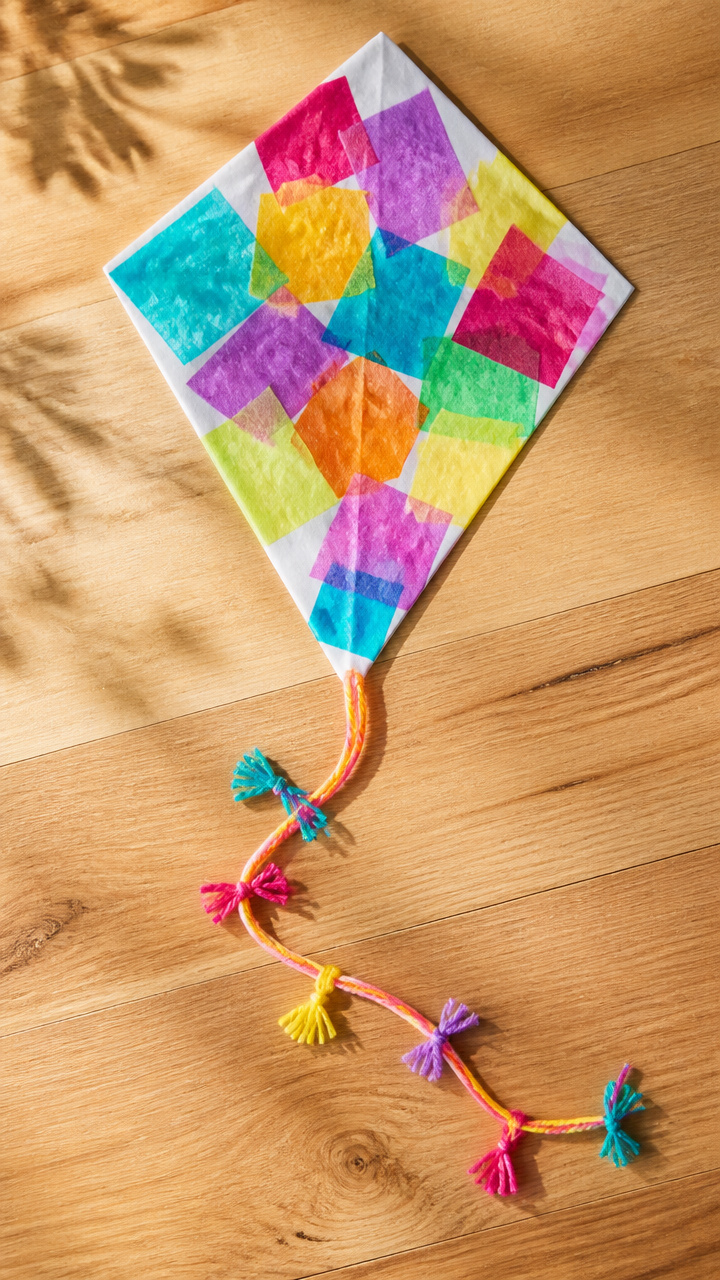
Diagonal folds create a diamond kite shape dressed in colorful tissue. A yarn tail completes the breezy look.
Materials Needed
- 1 sheet white printer paper
- Tissue paper scraps, assorted colors
- White school glue
- Yarn, 12 inches
- Crayon
How to Make It
- Fold the printer paper diagonally to form a triangle, then cut off the excess strip.
- Unfold and refold the opposite diagonal to create an X crease. Lay flat.
- Glue tissue paper pieces over one side of the kite, covering the surface.
- Draw a face with the crayon on the front and glue the yarn vertically down the back as a tail.


14. Cardboard Tube Trees
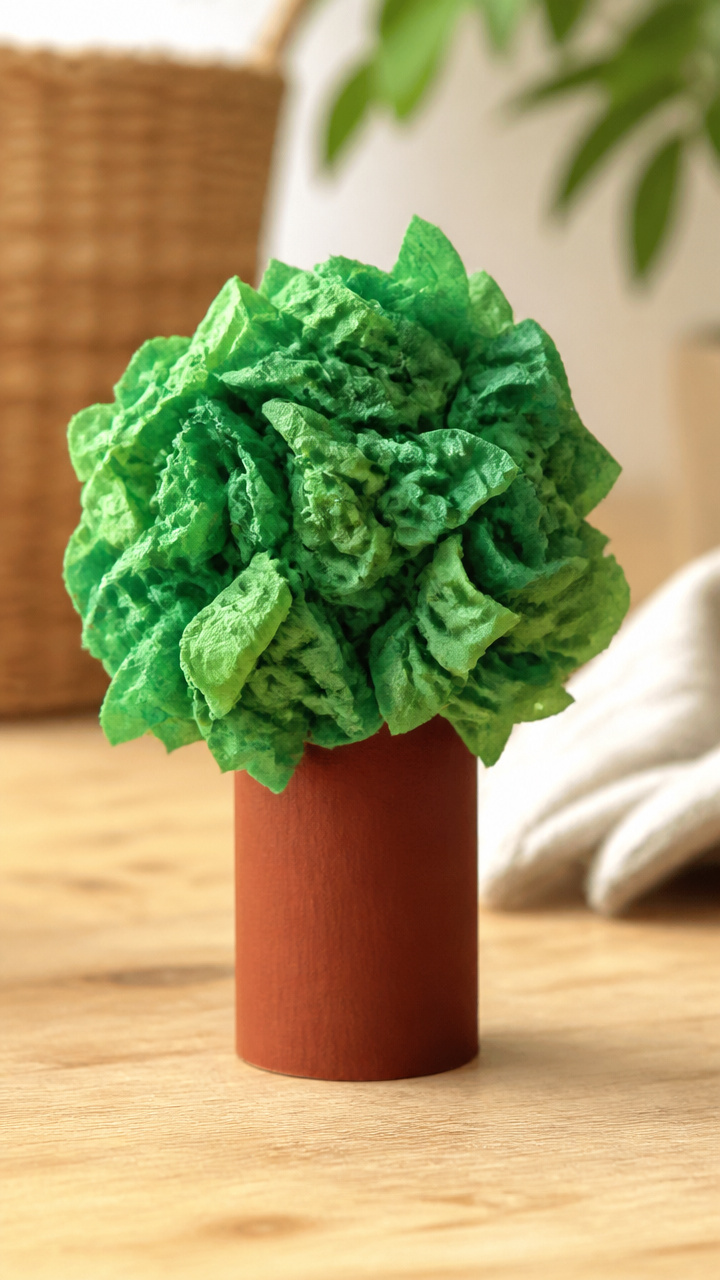
Toilet paper rolls stand tall with leafy tops made from crumpled paper. These mini trees fit in any imaginary forest.
Materials Needed
- 1 empty toilet paper roll
- Green tissue paper
- Brown paint
- Paintbrush
- White school glue
- Small tray
How to Make It
- Paint the roll with brown paint and let dry for 20 minutes on a tray.
- Crumple green tissue paper into a loose ball slightly wider than the roll.
- Spread glue around the top rim of the roll and press the tissue ball into it.
- Gently pull apart the outer layers of tissue to reveal fluffy leaves.


15. Paper Plate Frog
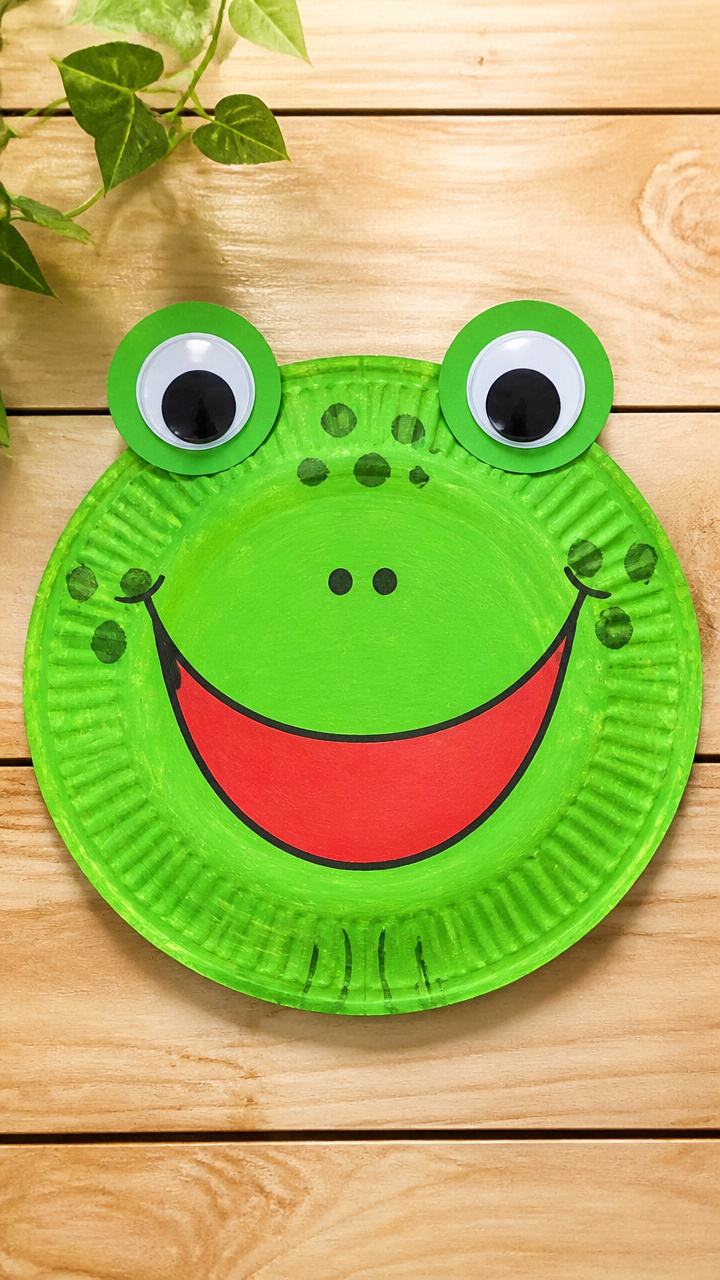
Big bulging eyes and a wide green grin make this frog hop off the table. The circular base gives it sturdy balance.
Materials Needed
- 1 green paper plate
- 2 wiggly eyes, 1 inch
- Red construction paper
- White school glue
- Black marker
How to Make It
- Turn the plate upside down so the rim forms a circle base.
- Glue the wiggly eyes near the front edge of the rim.
- Cut a red half-circle from construction paper and glue it under the eyes for an open mouth.
- Draw pupils with the black marker and add nostrils with two small dots.

16. Newspaper Hats
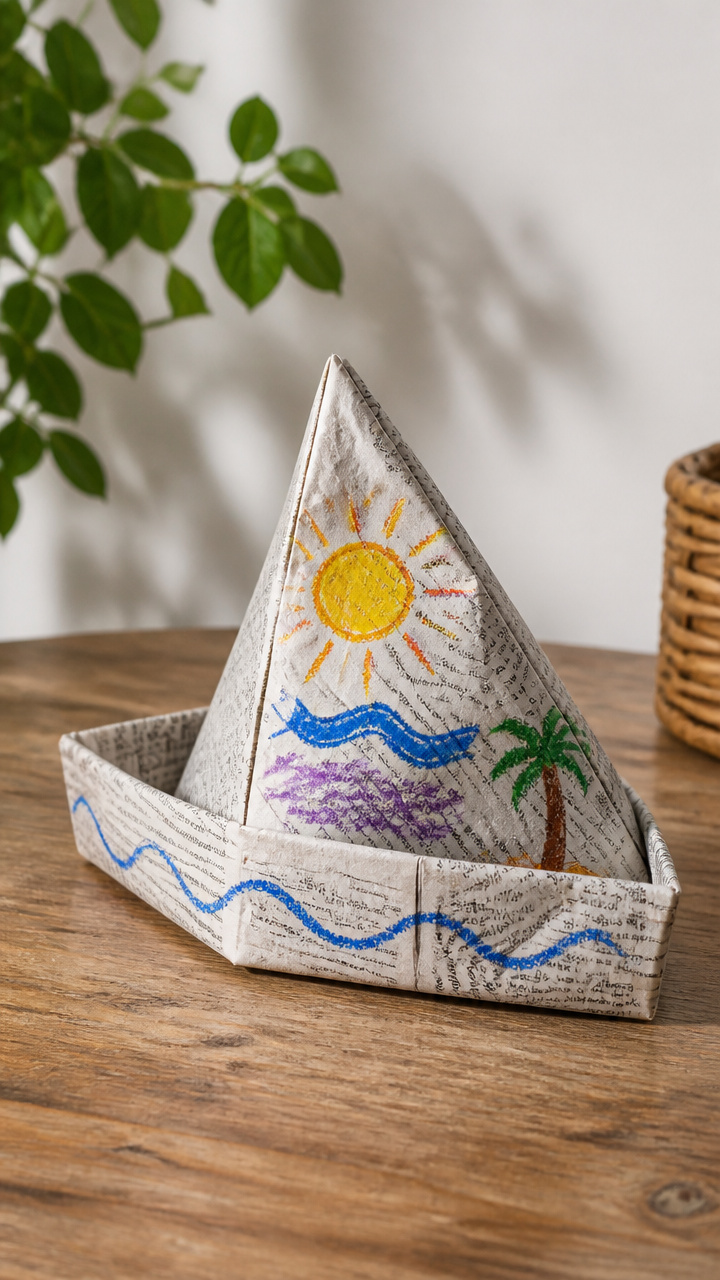
Triangular folds turn newspaper into wearable explorer hats. Custom names add a personal touch for dress-up fun.
Materials Needed
- 1 sheet newspaper
- Ruler
- Pencil
- Tape
- Crayons
How to Make It
- Fold the newspaper in half lengthwise, then fold each corner down to meet the center crease to form a triangle.
- Overlap the two triangle flaps and tape them together at the tip.
- Wrap the base around the child’s head and tape the ends to fit.
- Write the child’s name on the front with crayon.

17. Egg Carton Flowers
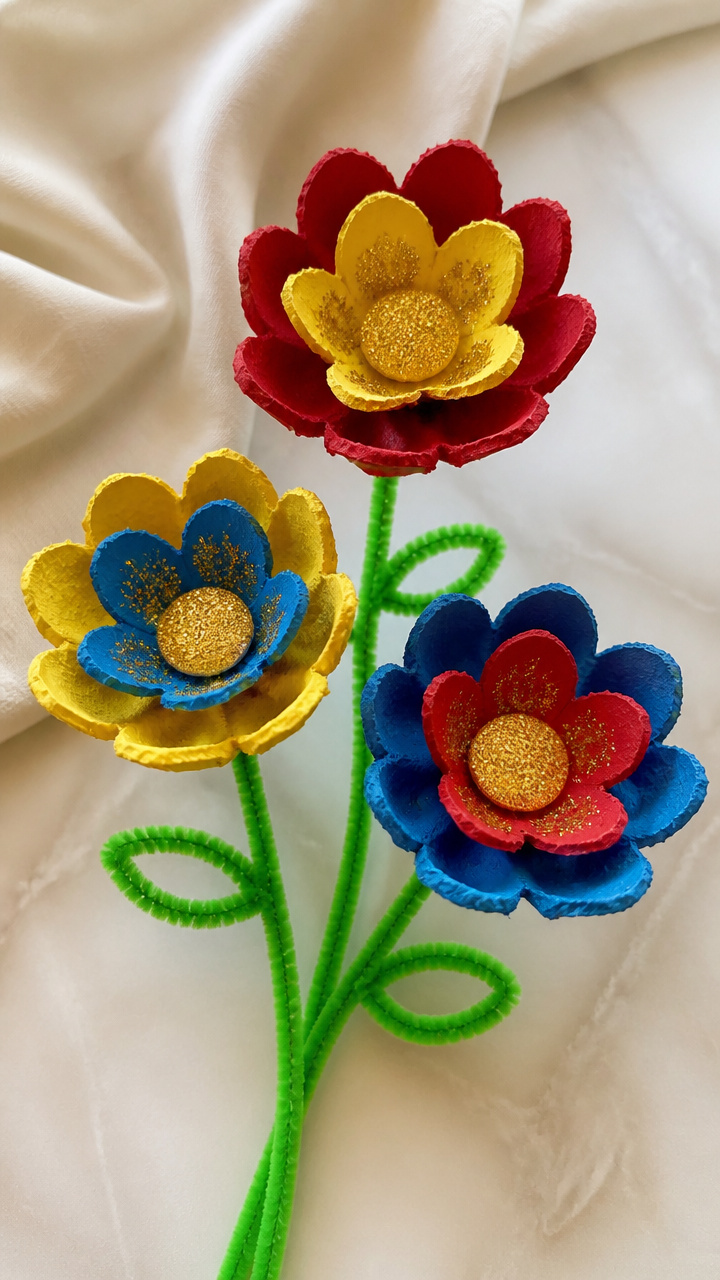
Individual cups from egg cartons bloom into multi-petal flowers. Cutting and painting build fine motor control.
Materials Needed
- 1 cardboard egg carton
- Scissors
- Green pipe cleaner, 12 inches
- Acrylic paint: red, yellow, blue
- Paintbrush
- Glitter, yellow
How to Make It
- Cut out three individual egg cups and trim the edges to make rounded petals.
- Paint each cup with a different color and let dry for 25 minutes.
- Paint the inside center with glue and sprinkle yellow glitter.
- Slide the pipe cleaner through the bottom of one cup and twist to form a stem.


18. Paper Link Bracelets
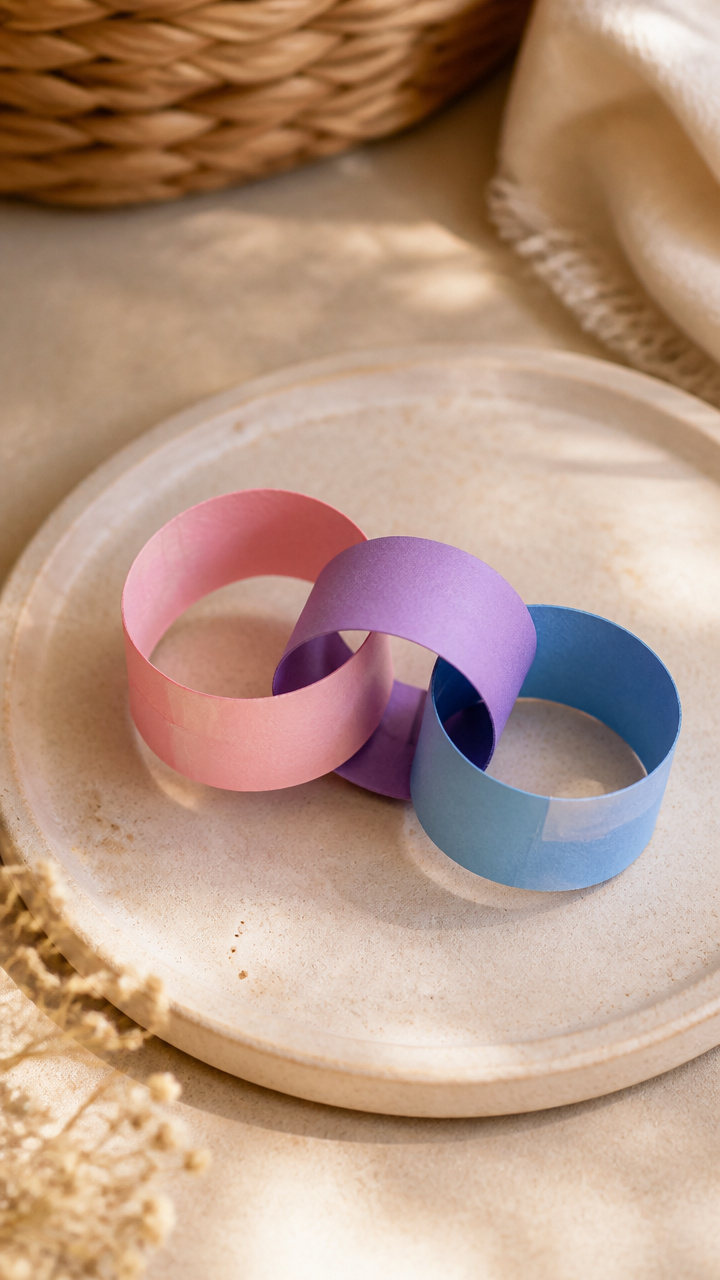
Interlocking loops of colored paper wrap around tiny wrists. This no-glue design stays together through clever threading.
Materials Needed
- 3 strips of construction paper, each 1×8 inches (pink, purple, blue)
- Scissors
- Tape
How to Make It
- Take the pink strip and form a loop, taping the ends together.
- Thread the purple strip through the pink loop before taping it into its own loop.
- Thread the blue strip through the purple loop and seal it closed.
- Continue adding loops until the bracelet fits snugly around the wrist.


19. Shaving Cream Marbled Paper

Swirled shaving cream and food coloring create dreamy patterns on paper. The texture play makes cleanup part of the fun.
Materials Needed
- Disposable tray
- Shaving cream, 1 cup
- Food coloring: blue, green, yellow
- Spoon
- White cardstock, 8×10 inches
- Craft stick
How to Make It
- Spread shaving cream evenly in the tray to a 1/2 inch thickness.
- Drop 3 dots each of blue, green, and yellow food coloring onto the surface.
- Drag the craft stick through the colors to create swirls without mixing completely.
- Lay the cardstock on top, press gently, lift, and scrape off excess cream with a spoon.


20. Paper Pinwheels
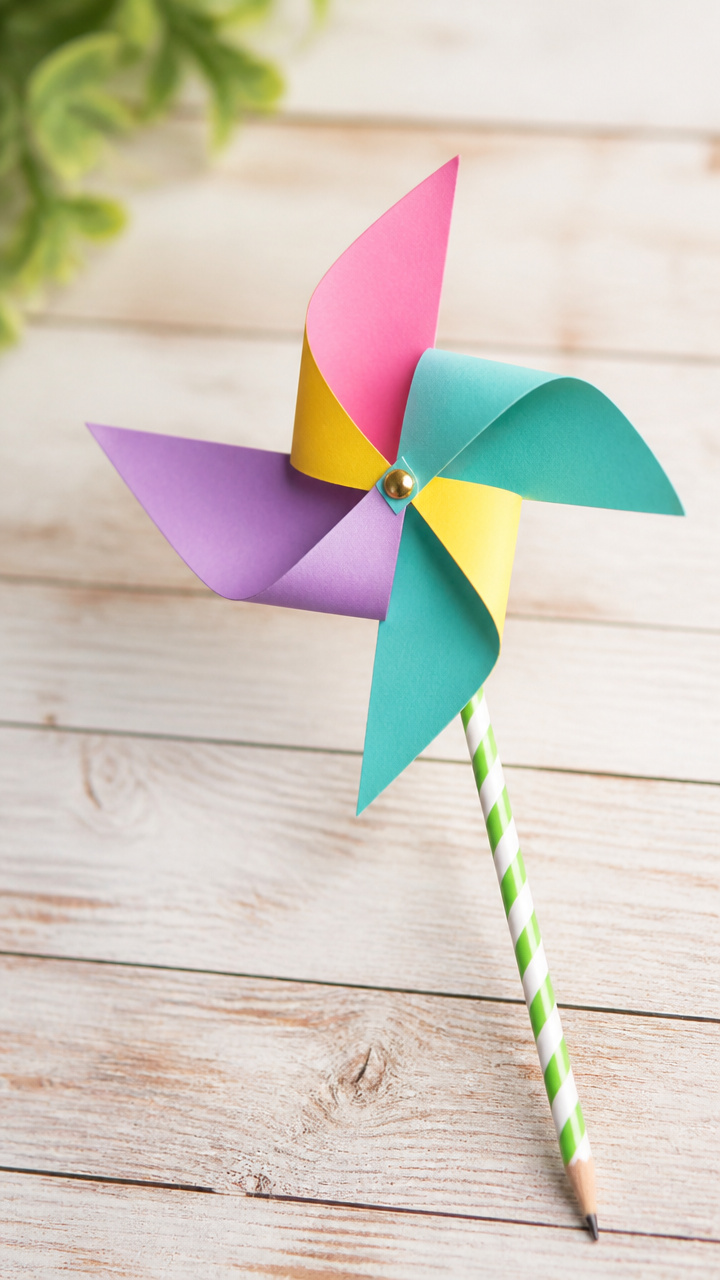
Diagonally cut corners joined at the center spin in the breeze. A pushpin and pencil bring this outdoor favorite to life.
Materials Needed
- 1 sheet colored construction paper, 8×8 inches
- Pencil with eraser
- Pushpin
- Ruler
- Scissors
How to Make It
- Draw diagonal lines from each corner to within 1.5 inches of the center.
- Cut along each line and fold every other corner toward the center.
- Align the folded tips and push the pin through all layers and into the pencil eraser.
- Blow on the folds or take outside to watch it spin.


You’ve got everything you need to start crafting right now. Grab some paper, gather the kids, and let the making begin.