17 Winter Crafts with Pine Cones, Twigs, and Dried Orange Slices

The quiet crunch of pine needles underfoot, the earthy scent of twigs bundled in your coat pocket, the bright citrus glow of dried orange slices on a string—these are the small treasures winter offers with open hands. Gathered from a crisp walk through the woods or prepped slowly in your own oven, these natural materials carry the season’s spirit into your home.
With just glue, scissors, and a little patience, you can turn them into heartfelt decor and thoughtful handmade gifts. Each piece holds the warmth of your effort and the stillness of winter’s beauty.
1. Mini Pine Cone Wreath
Easy
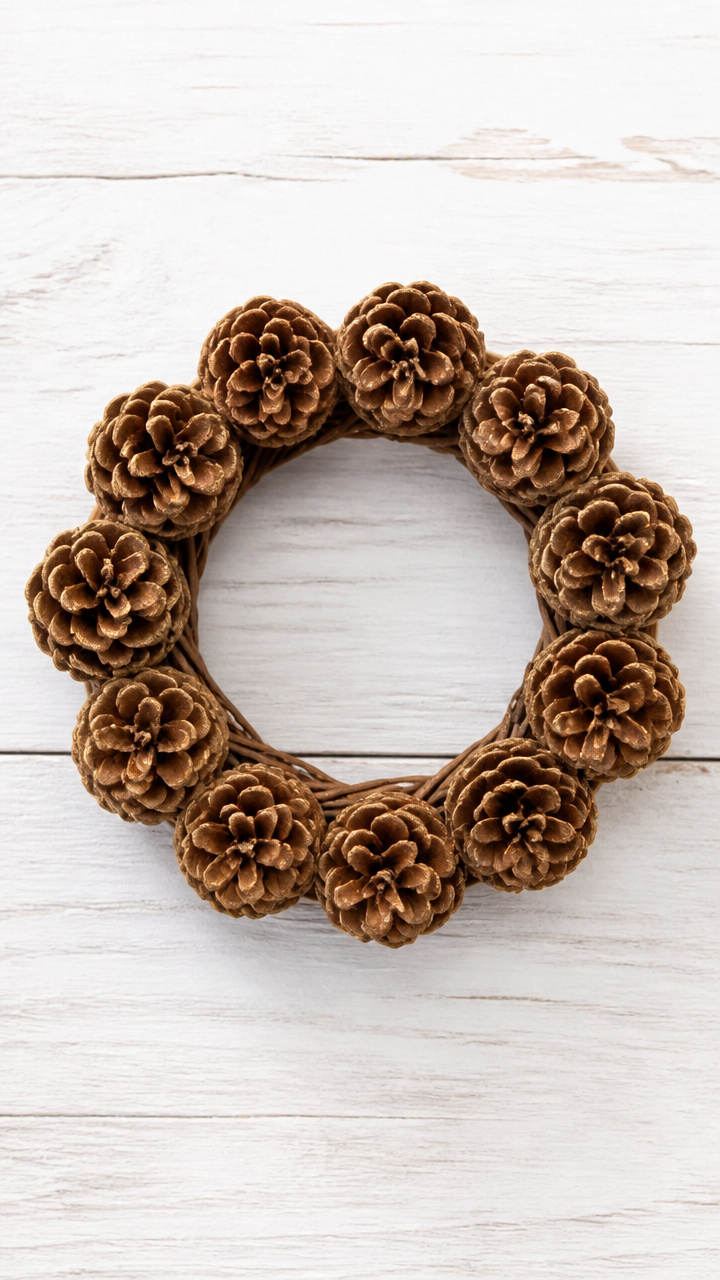
A tight ring of small pine cones forms a rustic holiday wreath perfect for apartment doors or kitchen windows. Its compact size fits snug spaces where larger decor won’t.
Materials Needed
- 12 small closed pine cones (about 1 inch long)
- 6-inch grapevine wreath base
- hot glue gun
- hot glue sticks
- gold metallic spray paint (optional)
How to Make It
- Spray-paint the pine cones with gold metallic paint if desired. Let dry completely on a sheet of newspaper for at least 30 minutes.
- Plug in the hot glue gun and let it heat up. Apply a dime-sized dab of glue to the base of each pine cone.
- Press each pine cone onto the grapevine wreath, placing them close together with bases facing outward. Continue until the entire ring is covered.
2. Twig Picture Frame
Moderate
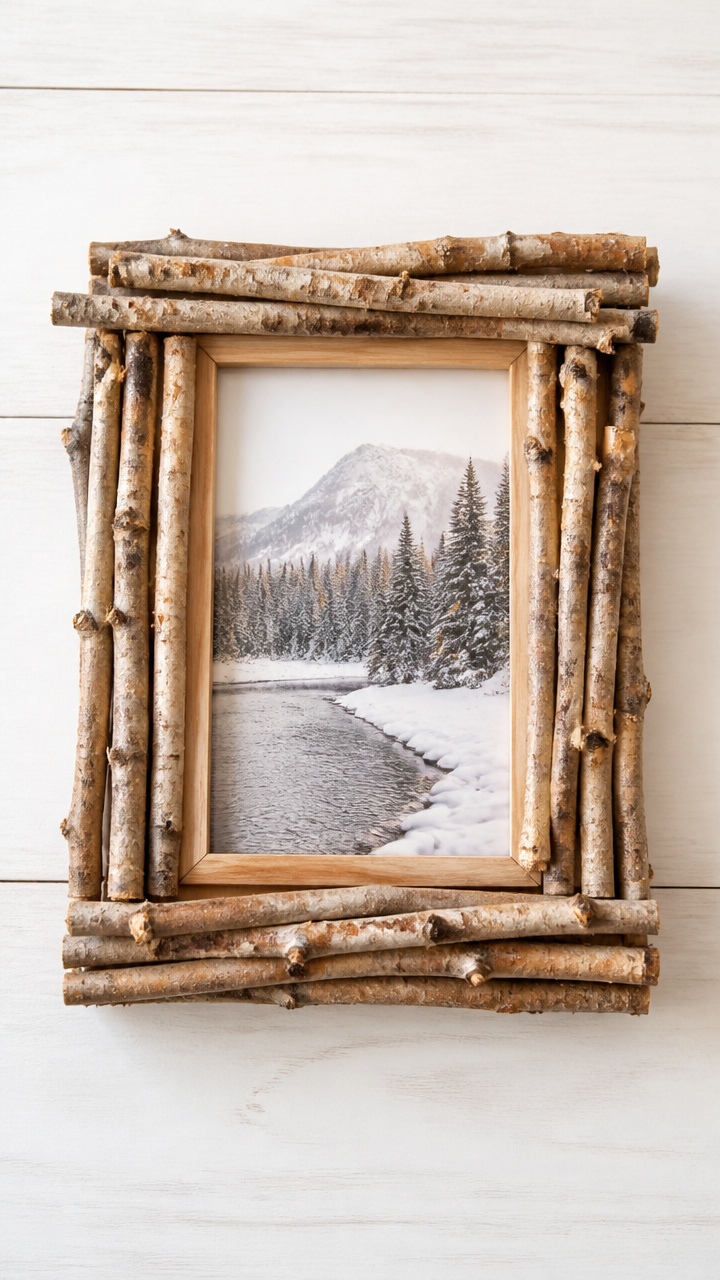
Rough-hewn birch twigs wrap around a simple photo frame, turning a plain print into a woodland keepsake. Ideal for gifting or displaying winter memories.
Materials Needed
- 8 thin birch twigs (each 6 inches long and pencil-thick)
- 4-inch x 6-inch plain wood picture frame
- craft knife
- wood glue
- small clothespins
- sandpaper (180 grit)
How to Make It
- Use sandpaper to lightly smooth any rough bark edges on the twigs. Cut each twig to exactly 4 inches using the craft knife.
- Apply a thin line of wood glue along one outer edge of the picture frame. Press four twigs vertically along each side, aligning ends flush.
- Clip each twig in place with a clothespin and let dry for 2 hours. Repeat on the back edge of the frame for full coverage.
3. Dried Citrus Garland
Easy
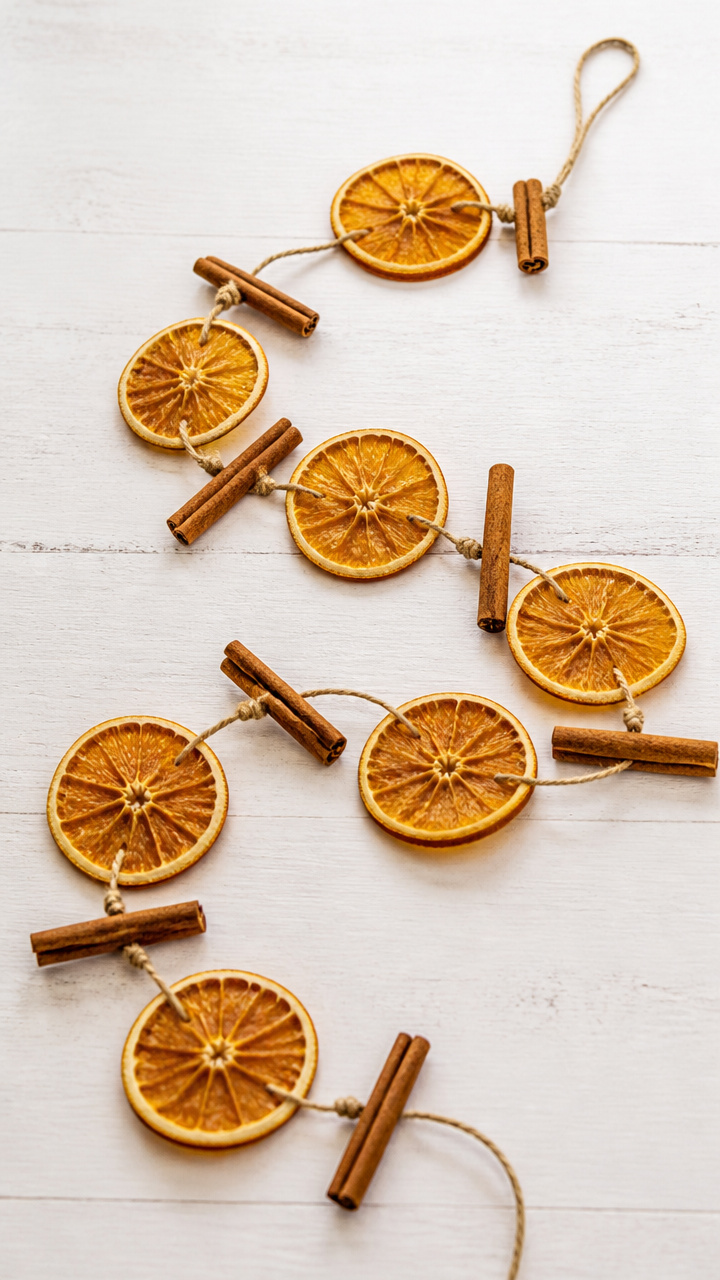
Slices of dried orange strung with cinnamon sticks create a fragrant garland that drapes over mantels or wraps around stair railings. The warm spice scent lingers for weeks.
Materials Needed
- 10 dried orange slices (1/4 inch thick)
- 5 cinnamon sticks (3 inches long)
- waxed linen cord (5 feet)
- large-eye needle
- scissors
How to Make It
- Thread the waxed linen cord through the large-eye needle. Tie a knot at one end to prevent slipping.
- Slide one dried orange slice onto the cord, followed by one cinnamon stick. Repeat the pattern until all pieces are strung.
- Tie a loop at each end of the cord using a double knot. Trim excess with scissors.
4. Pine Cone Fire Starters
Moderate
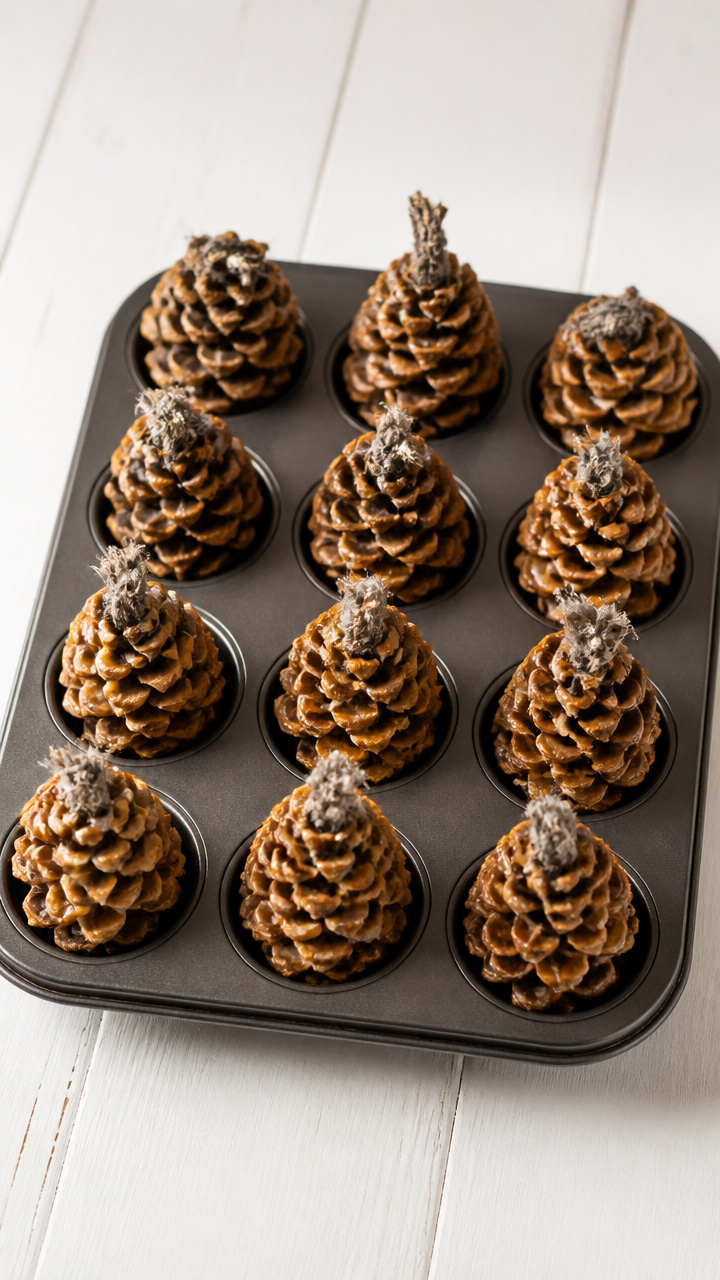
Coated in beeswax and nestled with dryer lint, these pine cones light quickly and burn steadily in fireplaces or camp stoves. They make practical gifts for cabin owners or outdoor lovers.
Materials Needed
- 10 medium pine cones (2 inches tall)
- 1 cup beeswax pellets
- 1/2 cup used dryer lint
- double boiler
- silicone muffin tray
- tongs
How to Make It
- Place beeswax pellets in the top of a double boiler. Heat over medium until fully melted, about 10 minutes.
- Stuff each pine cone with a pinch of dryer lint pushed deep between the scales. Place upright in the silicone muffin tray.
- Use tongs to lift each pine cone and dip into the melted beeswax for 5 seconds. Set back in the tray and let cool for 20 minutes.
5. Twig Candle Holders
Easy
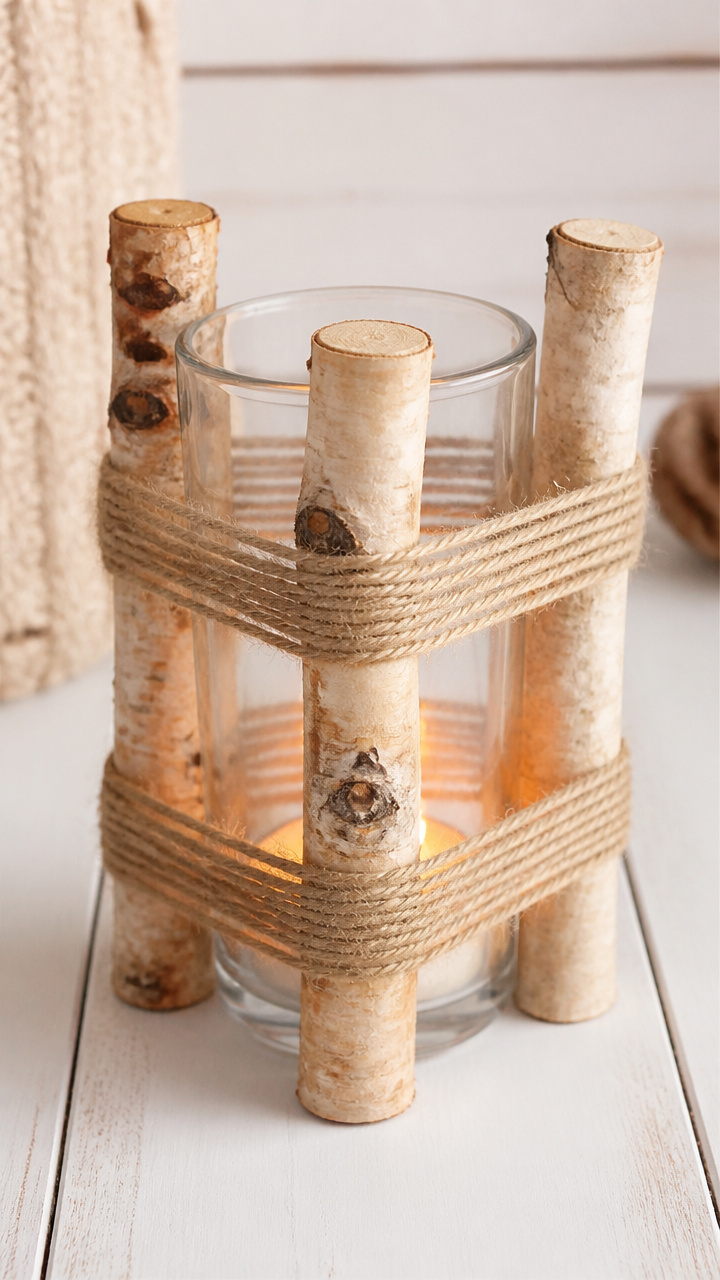
Three straight twigs bound tightly around a glass votive create a forest-inspired candle holder. Group several on a dining table for soft ambient light.
Materials Needed
- 3 straight birch twigs (8 inches long and 1/4 inch diameter)
- glass votive holder (3 inches tall)
- jute twine (24 inches)
- wood glue
- scissors
How to Make It
- Lay the three twigs side by side around the votive holder, spacing them evenly. Wrap jute twine around the top third and tie a square knot.
- Apply a small dot of wood glue under each twine wrap. Continue wrapping and gluing at the middle and bottom thirds.
- Let the glue dry for 30 minutes. Trim the twine ends with scissors at a diagonal.
6. Orange Slice Ornaments
Easy

Thin rounds of dried orange dangle from ribbon with tiny sprigs of rosemary tucked beside them. These ornaments bring color and subtle fragrance to bare branches.
Materials Needed
- 8 dried orange slices (1/8 inch thick, 2 inches wide)
- red satin ribbon (1/4 inch wide, 40 inches)
- fresh rosemary sprigs (8, each 2 inches long)
- hole punch
- scissors
How to Make It
- Use the hole punch to make one hole near the edge of each orange slice. Cut the ribbon into eight 5-inch lengths.
- Cut each rosemary sprig to 2 inches. Slide one sprig and one ribbon piece through the hole in an orange slice.
- Tie the ribbon into a loop above the slice. Repeat for all eight ornaments.
7. Pine Cone Birds
Easy
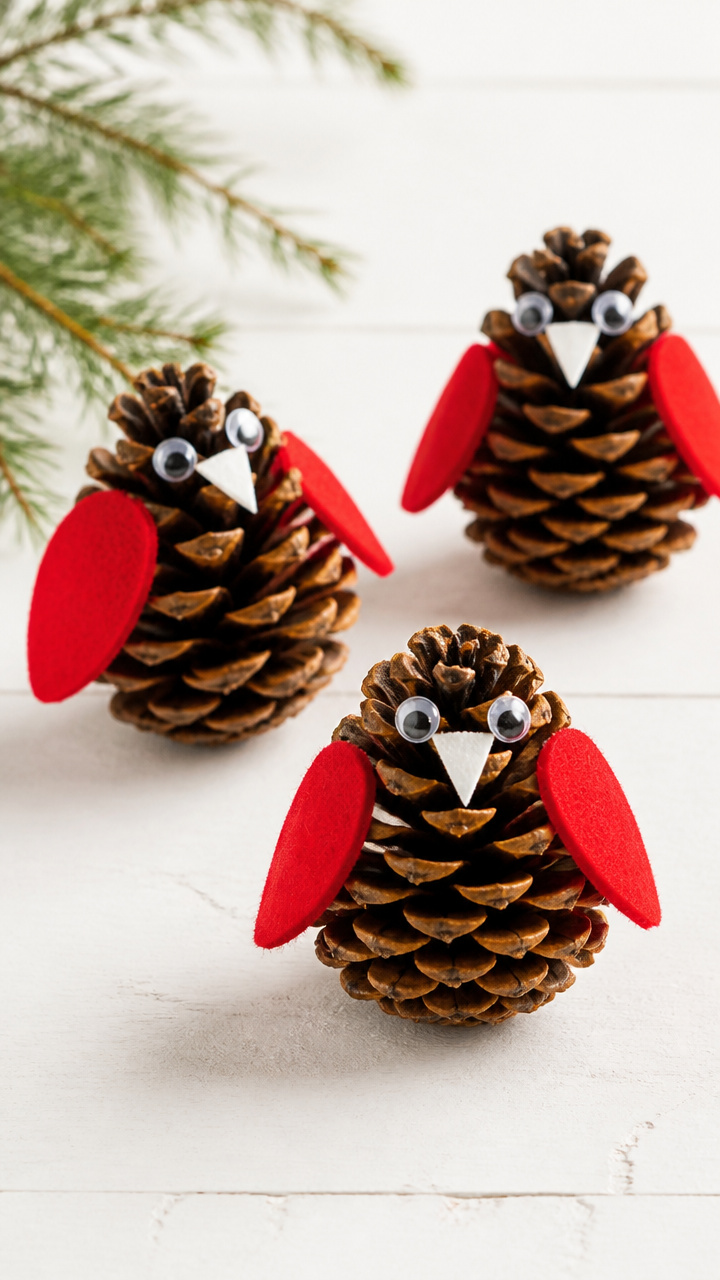
Pointed pine cones become feathered bodies when tipped with felt wings and googly eyes. These whimsical birds perch on shelves or gift tags.
Materials Needed
- 6 medium pine cones (open scales)
- 12 red felt circles (1 inch diameter)
- 12 black googly eyes (1/4 inch)
- white school glue
- fine-tip black marker
- scissors
How to Make It
- Cut two wing shapes from each red felt circle using scissors. Fold each wing slightly down the center.
- Glue one folded wing to each side of a pine cone near the top. Press gently and let dry for 15 minutes.
- Glue two googly eyes below the wings. Use the black marker to draw a tiny beak on the pine cone tip.
8. Twig and Orange Mobile
Advanced
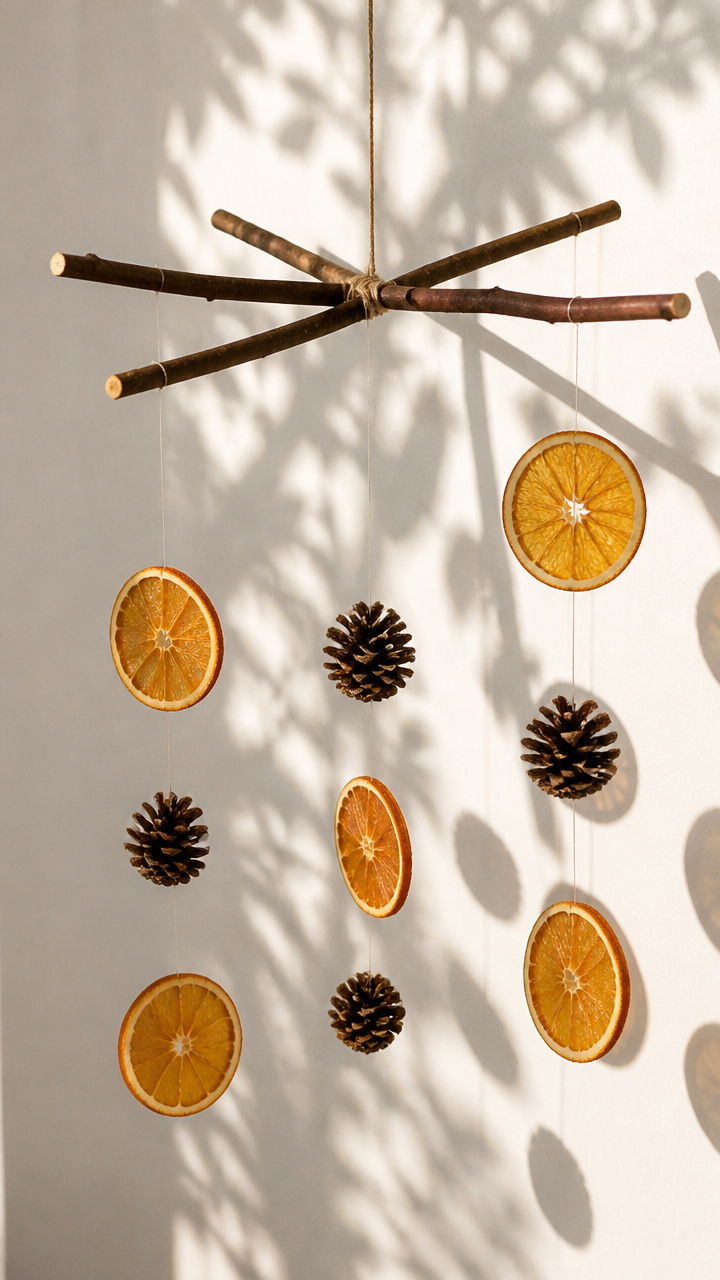
Balanced crossbeams of twigs suspend dangling orange slices and pine cones in slow rotation near a sunny window. It casts delicate leaf-like shadows on the wall.
Materials Needed
- 4 straight twigs (6 inches long, uniform thickness)
- 4 dried orange slices (1/4 inch thick)
- 4 small pine cones
- clear fishing line (12 feet)
- wood drill with 1/16 inch bit
- measuring tape
- scissors
How to Make It
- Lay two twigs perpendicular to form a cross. Measure and mark the center. Drill a small hole where they intersect.
- Drill a hole near each end of the four twigs. Thread fishing line through opposite holes to bind the cross, tying secure knots.
- Cut four 12-inch fishing lines. Tie one end to an orange slice, thread the other through a pine cone, and knot above. Attach each strand to a twig end with a knot.
9. Pine Cone Salt Scrub
Easy
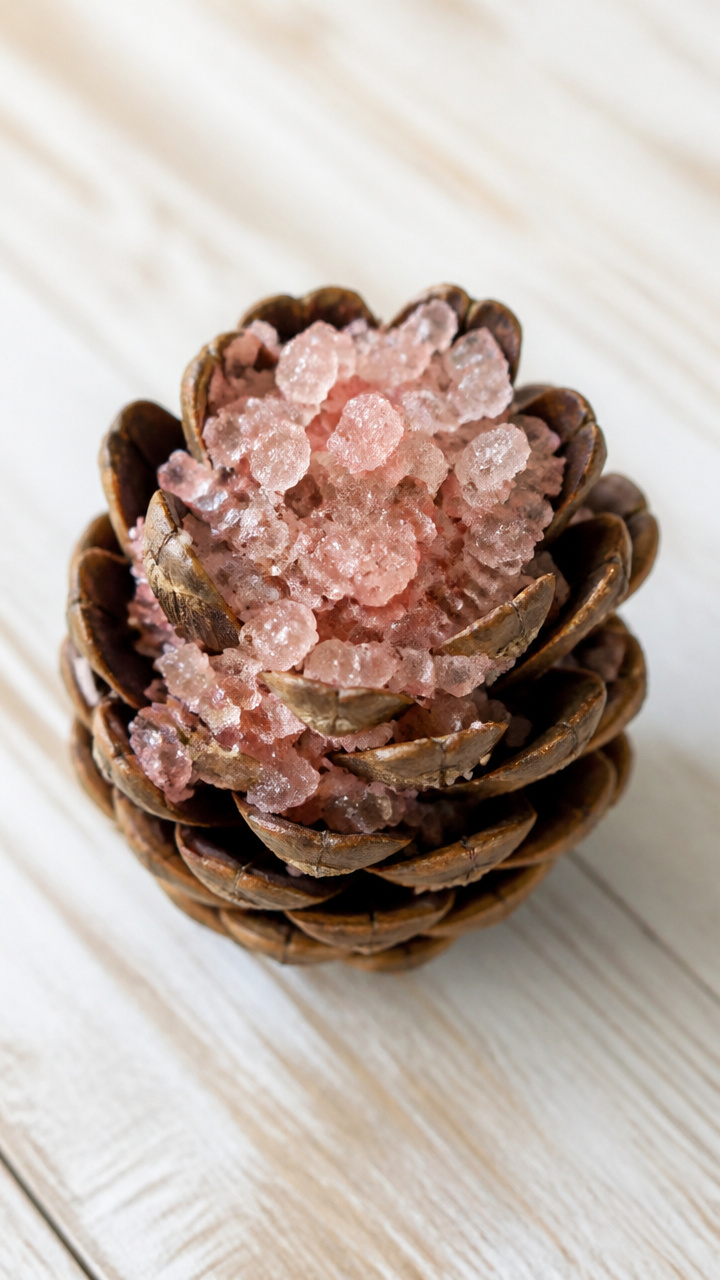
Crushed pine cone scales mix with sea salt and almond oil to form a gritty, aromatic exfoliant. Store in a jar for a nature-inspired self-care gift.
Materials Needed
- 1 large open pine cone
- 1 cup fine Himalayan pink salt
- 1/4 cup sweet almond oil
- 10 drops cedarwood essential oil
- mixing bowl
- spoon
- 8-ounce mason jar
How to Make It
- Break apart the pine cone with your hands. Crush the scales in the mixing bowl using the back of a spoon until mostly fine.
- Add the pink salt, sweet almond oil, and cedarwood essential oil to the bowl. Stir for 1 minute until fully blended.
- Spoon the scrub into the mason jar. Seal with the lid and label if gifting.
10. Frosted Twig Centerpiece
Moderate
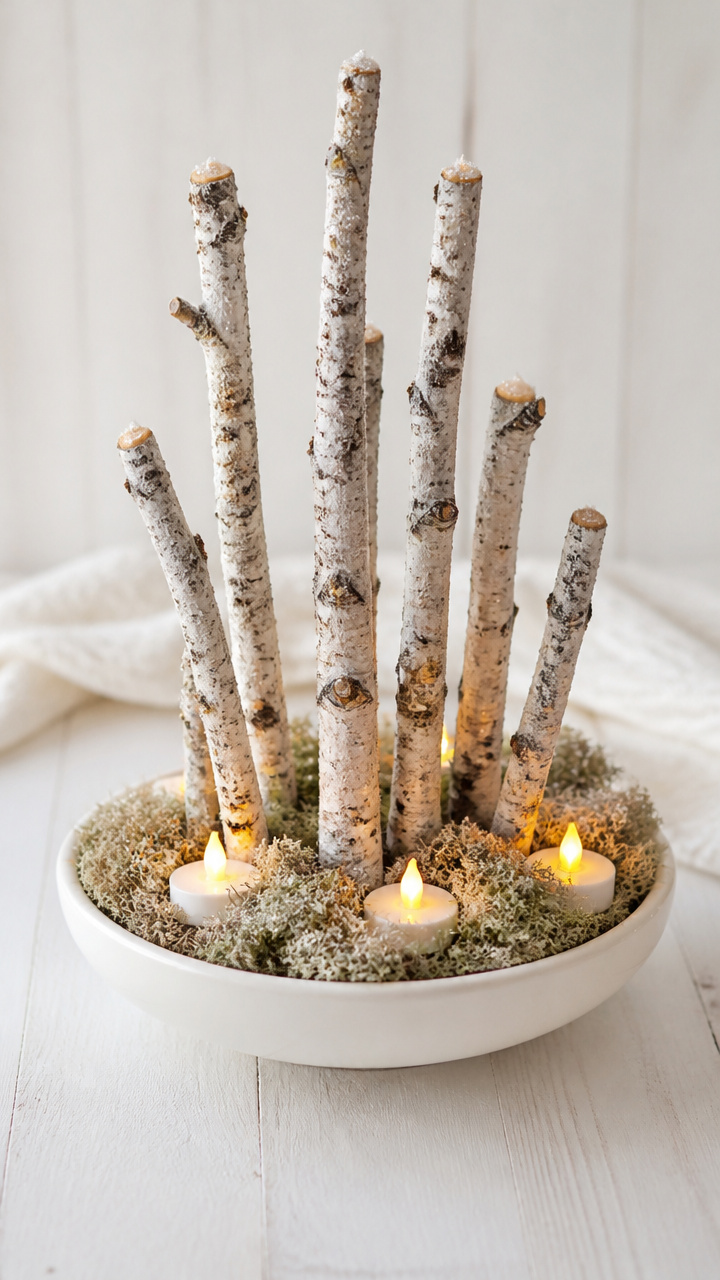
Twigs dipped in white glue and glitter rise from a low bowl like a frost-kissed thicket. Add tea lights at the base for a glowing winter scene.
Materials Needed
- 7 birch twigs (10 inches long)
- white craft glue
- fine white glitter
- shallow ceramic bowl (6 inches wide)
- dried moss (1/2 cup)
- 3 LED tea lights
- paper plate
How to Make It
- Pour glue onto the paper plate. Dip the lower 2 inches of each twig into the glue, then roll in glitter. Lay flat to dry for 1 hour.
- Spread dried moss across the bottom of the ceramic bowl. Insert the dried twigs upright, spacing evenly.
- Place three LED tea lights among the twigs. Turn on for soft illumination.
11. Orange Slice Coasters
Moderate

Stacked rings of dried orange form sturdy, citrus-scented coasters sealed against moisture. They protect tables while adding a pop of warm color.
Materials Needed
- 12 dried orange slices (1/4 inch thick, 2 inches wide)
- clear resin kit (8 ounces)
- resin mixing cups (2)
- stir sticks (2)
- silicone coaster mold (4 cavities)
- gloves
- hairdryer
How to Make It
- Wear gloves. Mix resin according to package directions in a mixing cup. Stir slowly for 2 minutes to avoid bubbles.
- Place three orange slices in each mold cavity, overlapping slightly. Pour resin over until level with the mold top.
- Pass a hairdryer on low over the surface to pop any bubbles. Let cure for 24 hours before unmolding.
12. Pine Cone Napkin Rings
Easy
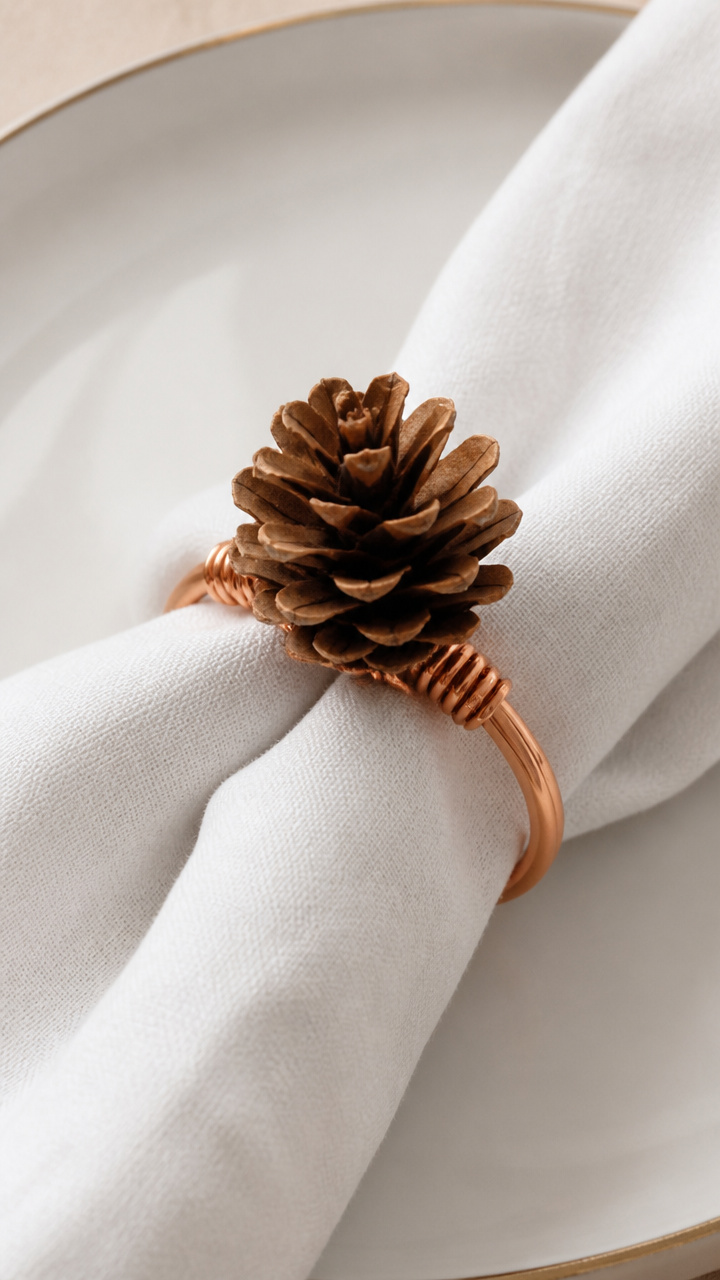
Small pine cones wired to copper rings hold cloth napkins with a touch of forest charm. Perfect for holiday dinners or rustic brunches.
Materials Needed
- 4 small pine cones (1 inch tall)
- 4 copper wire rings (2 inches diameter)
- copper craft wire (24 gauge, 8 inches per ring)
- wire cutters
- pliers
How to Make It
- Cut eight 8-inch lengths of copper wire using the wire cutters. Wrap one length around the base of a pine cone and the copper ring.
- Twist the wire ends tightly at the back with pliers to secure. Clip excess wire close to the twist.
- Repeat for the remaining three napkin rings.
13. Twig Bookmarks
Easy
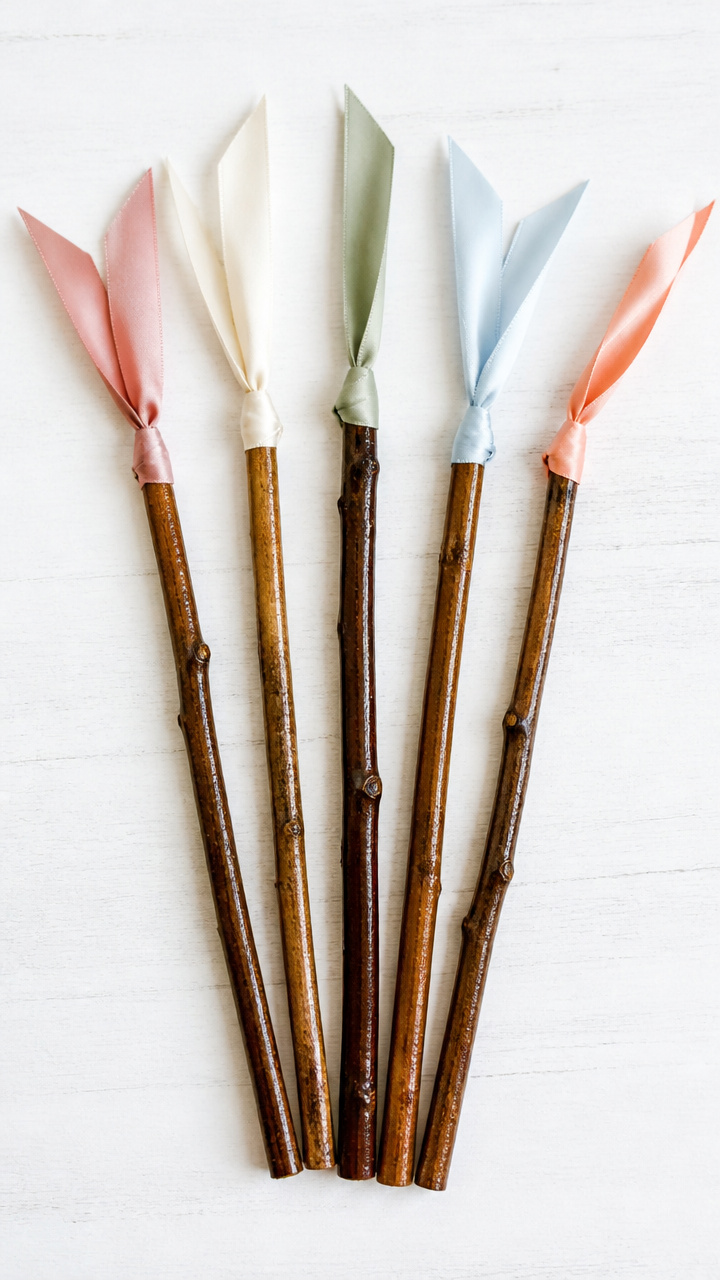
A single slender twig topped with a knotted ribbon marks your page with quiet elegance. These take five minutes and suit readers of all ages.
Materials Needed
- 4 straight twigs (7 inches long, 1/8 inch thick)
- silk ribbon (1/4 inch wide, 12 inches per bookmark)
- clear nail polish
- scissors
How to Make It
- Trim each twig to 7 inches using scissors. Brush the top inch with clear nail polish to seal the wood. Let dry for 10 minutes.
- Cut the ribbon into four 12-inch lengths. Tie one end around the top of a twig in a double knot.
- Trim the ribbon ends at a diagonal. Let the polish cure fully before use.
14. Citrus and Cone Wind Chime
Moderate
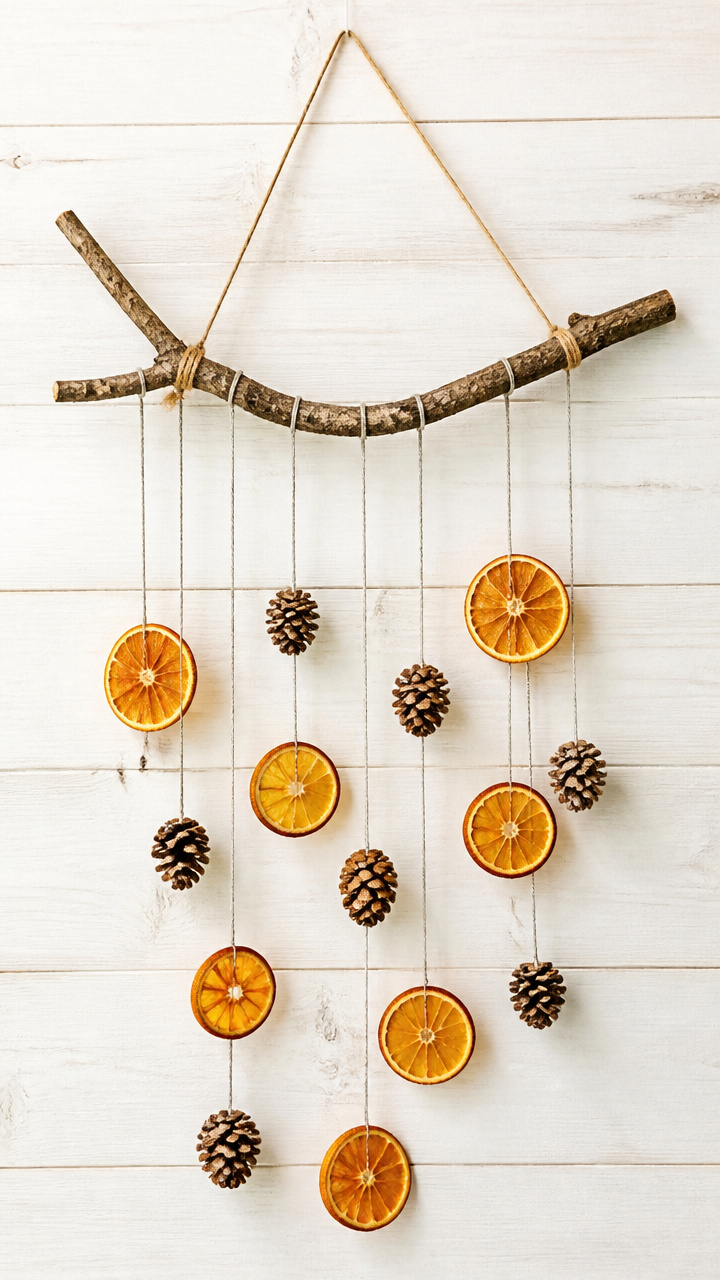
Dried orange slices and pine cones hang at different lengths from a foraged branch, clinking softly in winter breezes. Hang it by a back door or porch.
Materials Needed
- 1 forked tree branch (12 inches long)
- 6 dried orange slices
- 3 small pine cones
- silver embroidery floss (3 colors, 3 feet each)
- drill with 1/8 inch bit
- scissors
How to Make It
- Drill a hole near the edge of each orange slice and through the base of each pine cone.
- Cut six 18-inch lengths of embroidery floss. Tie one end through a slice or cone, knotting securely.
- Tie the free ends at varying points along the branch, spacing elements unevenly. Trim floss tails with scissors.
15. Pine Cone Holiday Tree
Easy
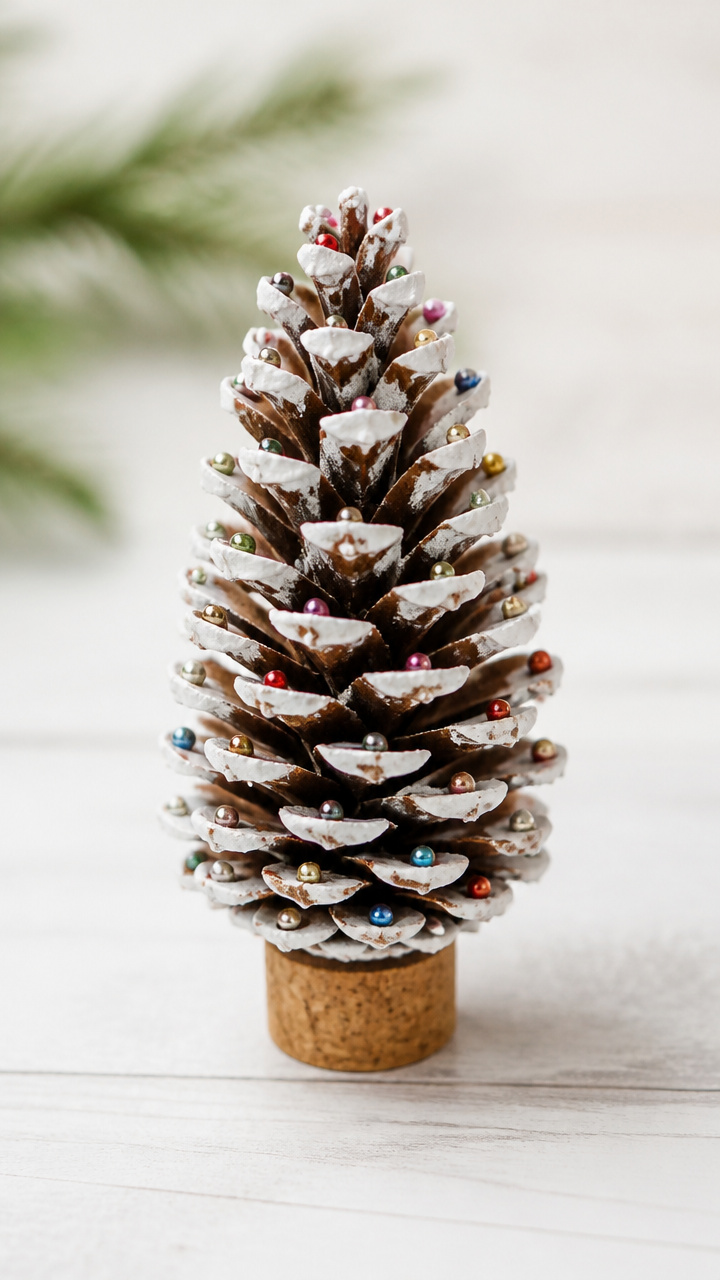
A single pine cone stands upright on a cork base, dusted with snow-like powder and decorated with micro beads. It fits in the palm of your hand.
Materials Needed
- 1 large closed pine cone
- wine cork
- white puffy fabric paint
- multicolored seed beads (size 6/0)
- tacky glue
- toothpick
- scissors
How to Make It
- Slice the wine cork in half widthwise using scissors. Glue the flat side of the pine cone to one cork half with tacky glue. Let dry 20 minutes.
- Squeeze white puffy paint onto the upper scales to mimic snow. Let dry completely for 1 hour.
- Use the toothpick to apply tiny dabs of tacky glue. Press one seed bead onto each glue dot as decoration.
16. Dried Orange Wall Art
Moderate
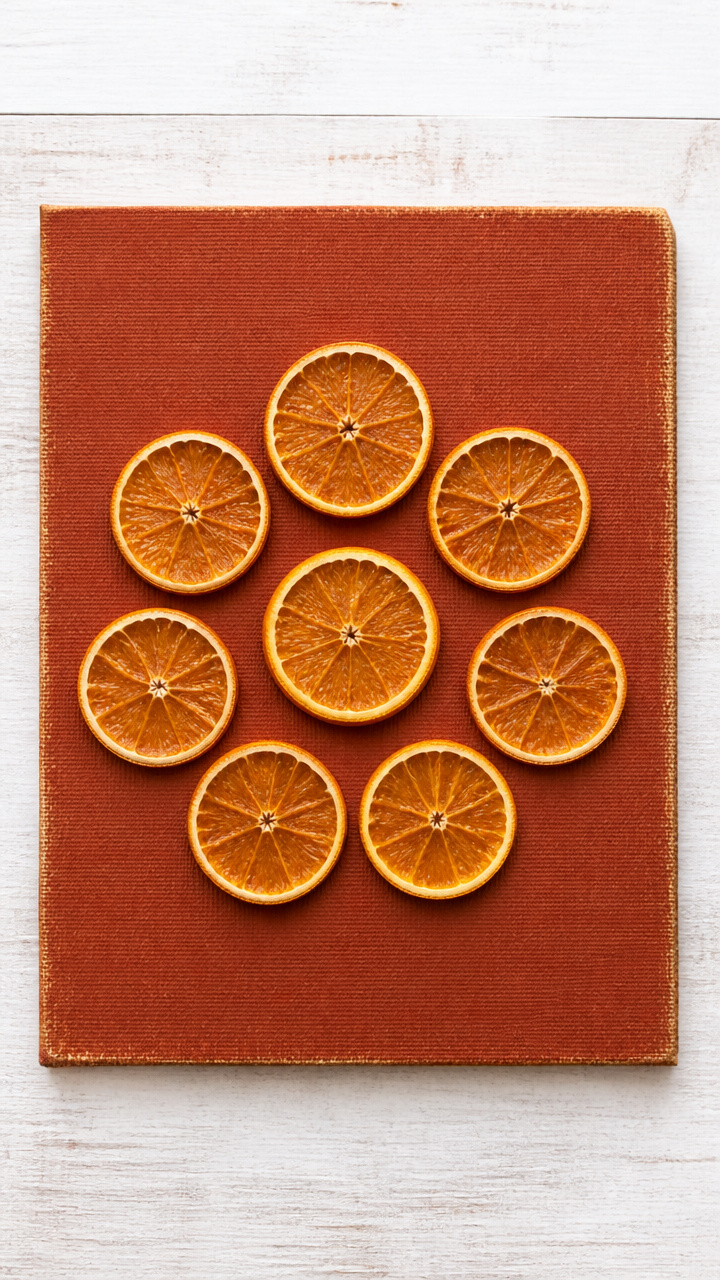
A geometric layout of orange slices adheres to a painted board, forming a sunburst pattern that brightens dim corners. No frame needed.
Materials Needed
- 9 dried orange slices (uniform 2-inch diameter)
- 8×10-inch canvas board
- acrylic paint (burnt sienna, 2 oz)
- paintbrush (1 inch flat)
- strong craft glue
- ruler
- pencil
How to Make It
- Paint the canvas board with burnt sienna acrylic paint using the flat brush. Let dry for 30 minutes.
- Arrange one orange slice in the center. Place four around it in a diamond shape, then four more at the corners. Lightly mark positions with pencil.
- Glue each slice to its marked spot using strong craft glue. Press down firmly and let dry 2 hours face-up.
17. Twig Photo Display
Advanced
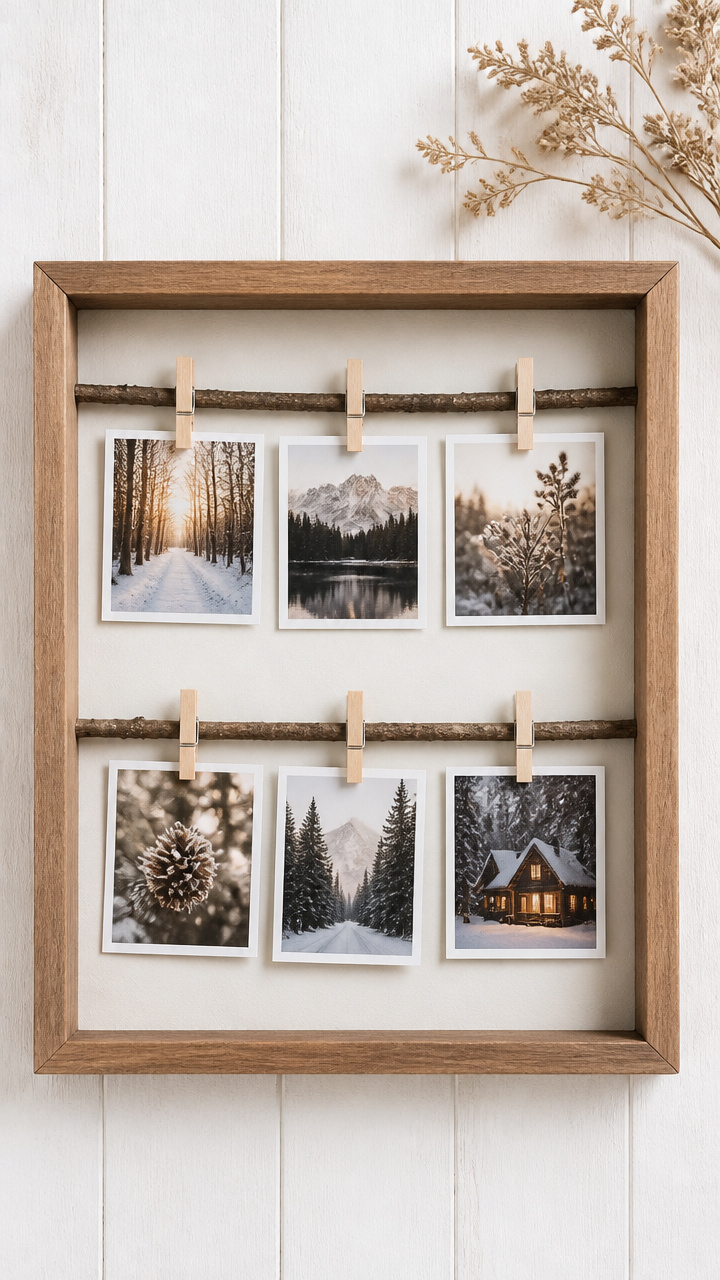
Parallel twigs stretched across a shadow box hold photos with miniature clothespins. This display turns family moments into a gallery-style arrangement.
Materials Needed
- 2 straight twigs (9 inches long)
- 9×12-inch shadow box frame with glass
- mini wooden clothespins (6)
- wood glue
- level
- measuring tape
- scissors
How to Make It
- Measure 2 inches down from the top inside edge of the shadow box. Mark both sides. Repeat 2 inches up from the bottom.
- Apply a pea-sized dab of wood glue to each end of a twig. Press into the top marks. Use the level to ensure straightness. Let dry 1 hour.
- Repeat with the second twig at the bottom marks. Once dry, clip photos to the twigs using mini clothespins.
Each of these crafts carries the hush of a snowy morning and the warmth of time spent creating. Pick one, gather your bits from the backyard, and let the season flow through your hands.